Transcripts
1. Materials and Reference Photo: Hello, friends. Welcome
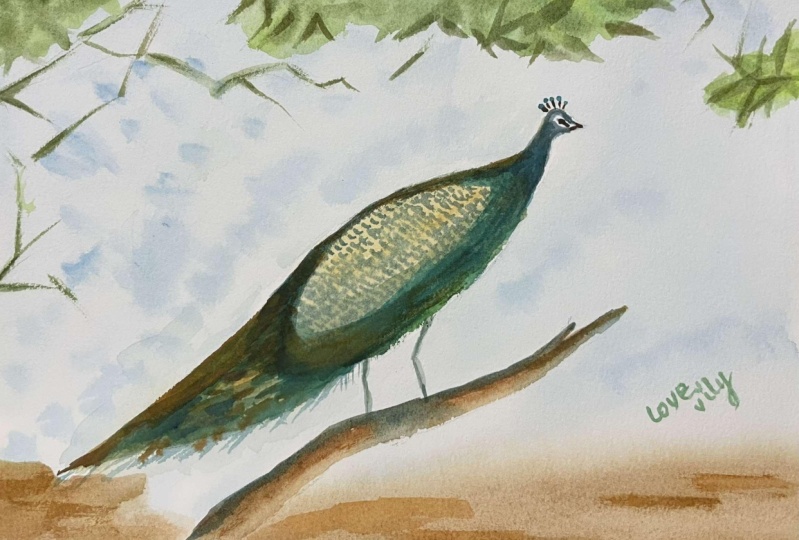
to another tutorial. Today, we're going to paint
this majestic peacock. For this session, these are the things that
we'll be using. We're going to use a 100% cotton 300 GSM cold pressed
watercolor paper. This is seven by 10
". It's a block. Now, for the watercolors, I'm going to show you each color that we're going to use later. Of course, we're going to
need a mixing palette. This is a ceramic palette,
which I recommend. And then this is a leaf blade for separating the
paper later on. Okay? Again, I'm using a block, and there's a small portion there where you can
insert the blade, so you can separate the paper
from the rest of the block. Here's a pencil that I'm using. I'm using a two B pencil, but you can use any regular
pencil that you have, have a blunt tip, if you can, because that will ensure that you don't
scratch your paper. For the brushes, this
is a 1 " flat brush. This is good for
wetting your paper. Now if you don't
have a flat brush, that's fine as long as you
have a round brush with you. So we're also going to use a round brush
for this session. This is a size 12
synthetic round brush. Get one that's springy
and has a nice fine tip. I also recommend that
you have an angle brush. This is a size
eight angle brush. Now, if you don't have one, you can use a size
eight round brush. Okay? Next, of course, a clean bottle of
water for rinsing your brush some tissue
paper, and that's it. Now, before we begin,
let me just show you the reference photo that
I used for this artwork. Now instead of a portrait mode, we'll paint on a
landscape format.
2. Drawing the Outline Sketch: Now, let's start with
the outline sketch. So grab your pencil. Now, with the way that the
peacock is positioned, we want it to be
front and center. So first, I'd like to make a mark on the left side where the tip of
the tail would be. And then we are going to do another marker on
the opposite side, just so that we know
the range of where the focal point should
be positioned, okay? So this would be the
tip of the head, okay? Now, we're going to
start this sketch. So here I'm just looking at
the reference photo and then trying to see the basic
forms that I can observe. Now, the form of the peacock is not as
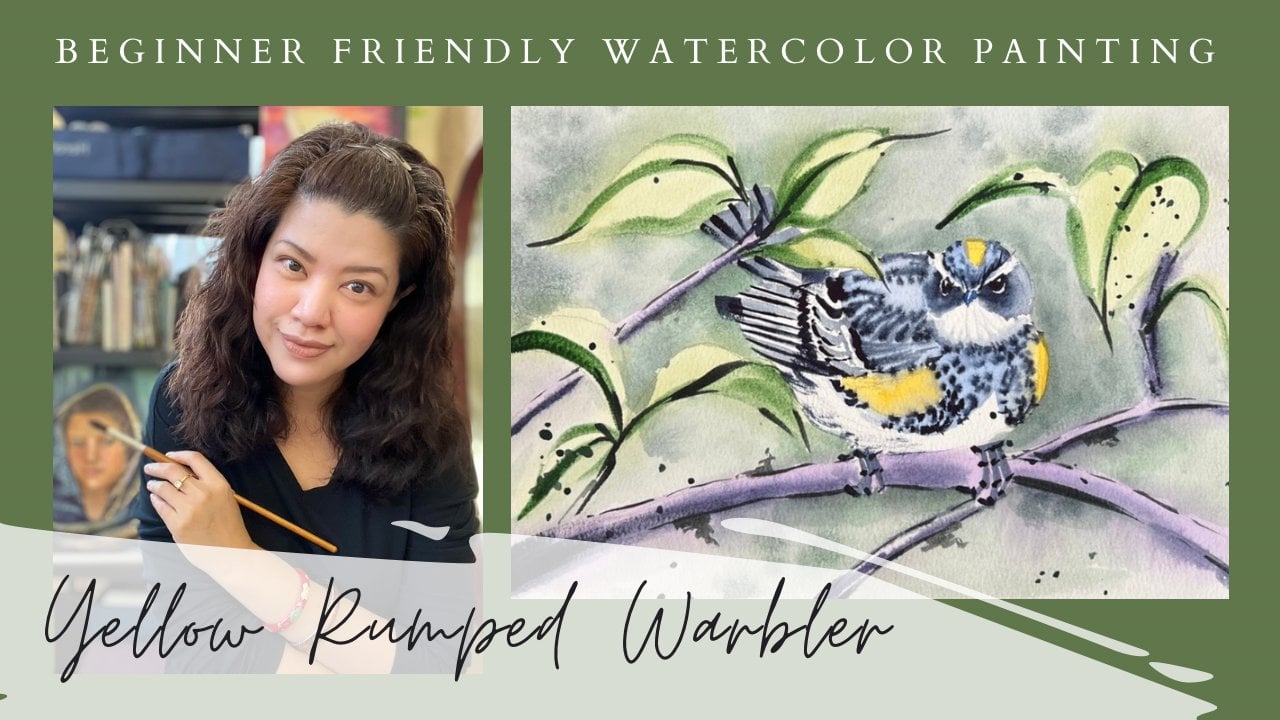
straightforward as the other birds. It's not like the previous
class that we've just had, wherein the bird, the warbler actually is comprised of
a lot of circles, okay? So the peacock here,
even the neck, even the neck, how it is formed. And well, the main body
is more like a box, as I see it, and
then the rest of the tail would be in
the form of a leaf. But I can't say that it's easy to sketch this type
of bird personally. So here, it would really take a lot
of practice for you to be able to gauge the positioning and the length of the neck in proportion to
the body and the tail. Okay? So here I'm just, you know, just trying to
be as accurate as I can. And you can see how slowly I'm doing this
because I really want to make minimal mistakes as possible so that we won't
have to do a lot of erasers. But then again, the eraser
can be your friend. And I really encourage that you take the time to
practice sketching. If you're not, if you haven't
been sketching birds, and this is your first time, I would encourage
you to just pick up some scratch paper and do do some practice before you actually sketch on
your watercolor paper. Okay, Let's finish
the main body. Now, like what I said earlier, the central part of the peacock actually
looks like a box. So here, it's more like a
square with rounded corners, okay, as I see it. Now let's do the
crown real quick. Just a few lines stemming
from the tip of the head, k? And then let me just
do some adjustments on the head. Just like that. Okay, so at this point, I'm actually happy with how the whole formation is looking, and so we can go ahead
and add the tail. So I said earlier that the tail actually
looks like a leaf. So let's sketch something that looks a little
bit like a leaf. Now let's add the legs. Now compared to the warbler, the peacock seems to have a less complicated anatomy
when it comes to legs. So again, I'm just sketching based
on the reference photo. Okay? I have never studied the anatomy of the peacock
or any bird for that matter. So basically, we're just relying everything on the sketch. Okay? So there's your peacock. I'm happy with that. Okay. Now, let's just quickly draw the branch that the
peacock is resting on. Now, let's add the
branches above. Based on the reference photo, there's a very branches and a few stemming from
some of the branches. We'll just do a quick
outline of that. Now at this point, I'm already
happy with the branches. Let's just add a few more over
here, I think that's good. Now, I just think that the tail could be a bit
longer. That a bit. Okay. I think that
looks a lot better. A longer tail makes the
peacock look more graceful, doesn't it? All right. So let's just do a quick horizontal line for
that in the background. And we can now start
preparing the colors.
3. Color Mixing: Okay, so grab your
ceramic palette, and with your brown brush. The first color that will be adding to our palette
is burnt sienna. Now, let's add a little
bit of water to that, so it's going to be
about 50% color and 50% water. There you go. And then the next
color that we'll be using would be Tail blue. Now, this is a very
vibrant color, so we're going to add a
lot of water to this. Other brands will actually have this kind of shade
under peacock blue. So the next would be sap green. This is a nice, earthy
color that I like a lot. It's like a moss green color. If you don't have
this particular color in your water color set, you can just mix brown with green to achieve
something like this. And then next we're going to mix cadmium yellow light with
yellow with to blue. Now, Cadmium yellow light,
if you would notice, is a bit cooler compared
to cadmium yellow medium. Okay? So just pick a cool yellow from your palette if you don't
have this particular color. So we have a nice
peacock green shade here because of that mix. And the next, let's
add Burnt Sienna with Tail blue to create a really deep brown
color close to black. Usually, it's better
if you're mixing some colors to create something close to black
instead of using black itself. Now, the last color that
we're using is indigo. Again, this is a very
overpowering color, so we're going to add a
lot of water to this.
4. Let’s Start Painting: Background and Tail: Now that we're done,
we can actually start wetting the
background area, including the tail because we would want the
tail to look soft. So, we're just going to wet everything
except for the head, the neck, and the
body of the peacock. Now, if you've been on
my previous tutorials, you'd always hear me say this, but I'll say it
again in case you haven't heard it from me. Okay. So every time you're
wetting your paper, make sure that the paper
is adequately wet, okay? So It really depends
on how fluid, you want the colors to
blend on your paper. But for this particular artwork, we just want the background
to be adequately wet, okay? No dripping wet,
but wet enough that even when you're spending like 10 minutes adding colors to it, the paper will not get dry, k. So if you need to, go back to the previous
areas that you've wet, just to be sure that they
will remain wet while you're painting because
especially for the background, we want to add colors in a way that we are not
creating any hard edges. Now, let's start
adding in some colors. We'll start with Taylor blue. This would be the sky. Now, notice how I'm
holding the brush. Okay. So whenever you're painting and doing
broader strokes, it would be better if you
hold the brush close to the opposite end so that
it's easier for you to move the brush and sway
it from side to side. Now here, I accidentally added some color to the ground part, and that's fine
because later on, when we add the burn
scena to this part, it's going to create
a nice green color. Now, at this point, let's dab the brush onto certain portions of
the sky to add texture. Next, let's color the
ground with burnt sienna. Just make sure that
at this point, your paper is still wet so that we're not creating
any hard edges. You can also just go and paint that portion
for the branch. That's fine because later on, we're going to do
somewhat technique, and that would actually just add color on top
of this softer color. That's not going
to be a problem. Now, let's grab
some burnt sienna straight from our palette. So this is going to be
a much thicker mixture. So I just have a damp brush. When I rinsed my brush, I tapped off the excess water and took a lot of
pigment in so that we could have this darker tone
onto the background area. Now at this point, we're
going to paint the tail. So the mix that we
did a while ago of Cadmium yellow light
and tail blue. So we're going to use that
color to paint the tail. Now, at this point, I'm looking at the
reference photo, and definitely we are not going to paint the entire
tail with this color. We're going to leave some of the areas for another
color to add later on. Now, you'll see that just above that portion where we've
already painted the tail. The green color actually blended
with the sky, it's fine. Just leave it as
is. You don't need to lift that color, okay? Now, I just realized
that we needed some yellow ochre on
this part of the tail. So I don't have
that on my palette, so we're going to just mix cadmium yellow medium
with some burned Ciena. Next, let's dab
some burnt sienna on random parts of the tail. This is going to be the
third and last color that we'll be adding onto
the first layer of the tail. Okay, that's just
it for the tail. Now, we're going to move on
and add the leaves up here. For this one, we're
going to use green? Now, I just switch to
my size 12 round brush. For this one, we're
just going to color the entire portion of the leaves like a solid
block, just like that. We're not going to paint
the leaves individually. So earlier, we actually outlined the
leaves for this artwork. So that's just about it. We're not going to add any details for the
leaves just yet. And then we're going
to add the branches. Now, as you can see, we're not creating any hard
lines at this point. So that means that this portion of the paper
is still a bit damp, and that's how we want it. Now, in case your paper
is no longer damp, don't try to brush
over this area. Instead, you can get a water spray and just
lightly spray over it, okay? Now, at this point, I'm going to take sap green from my palette. I didn't load my brush
with more water, so this is a very
concentrated brush. So we're just going to add a darker tone onto the
leaves at this point. As you can see, I'm just creating random strokes in different directions
for the leaves. Again, we're not going to
paint the leaves individually, but we're going to create an
impression of the leaves. And then we're going
to do the same for the stems, So here, you'll see that I'm just lightly swaying my brush
from side to side, putting pressure first, and then just lifting the
brush as I go along. And I'm not going over
the entire stems, just on portions of it, mostly on the joints, where the stems fold or
where the stems originate. Now, let's paint the branch where the peacock is resting on. So as you can see, I've taken off the excess
water from my brush. Now I'm getting burnt sienna
straight from my palette. Again, this is going to be
a very concentrated brush. So layer brush flat on
the paper and glide it. Let's add some shadows onto this branch while
it's still wet. So we're just going to
grab some indigo and add it onto the topmost
part of the branch, and certain other random parts, just to add dimension to it. Okay, I'm already happy with
how the branch is looking. So we're going to let
the paper dry a bit. So I'm going to pause
this recording for a few minutes and
we'll go back to this once the paper
is completely dry. Okay. Now the paper
has completely dried. We're ready to do the
second layer of the tw. So this time we're
going to do wet on dry. I'm using my size
eight round brush, but you can go ahead and use a size eight angle brush
if you have one, okay? Basically, I'm going to use our mix of cadmium yellow
light and tail blue for this. We're going to paint majority of the tail with this color, but we're going to leave some spots so that the
previous layer can be shown. Okay? So these are just random
spots that I'm creating. But you'll see here that
I'm more or less doing an alternate type of um, thing. And you don't really have to have the same
intensity all throughout. Okay? So you'll see
here that some of the parts are darker, green color, and then the
others are lighter as I continue to do the
brushtrokes, okay? Um, what's important is
we do those random spots. We leave those random spots over there in an alternate
manner ideally. They don't have to
be perfect shapes. We're actually leaving
these so that we can create an illusion of the eyes of the tail
of the peacock. Now, we can already
start with creating those hair like
features on the tail. So here I'm just doing some
random curved strokes, very short and very
light strokes. You press and then you lift
as you do the strokes, okay? And then you can gauge. Like, when the brush is not
not very pigmented anymore. You can actually do lighter
and longer strokes, okay? So it really depends. You have to sort of have a sense of when it can be the right
time to create those very, very thin and delicate lines. Now, let's add a darker
tone to the tail. Let's use the burnt
sienna and tail blue mixture that we
created a while ago. So this is actually a
very thick mixture, about 30% water and 70% color. And I'm only going to add
this to the tip of the tail. Okay? And you can see
that I'm just making, very light and quick strokes. Then we're also going to
add this at the bottom of the eyes to accentuate them
or make them pop more. Now, you'll see that not actually reloading
my brush often. And I'm going to wait
until my brush is almost to create those
hair like strokes. Okay? And once I sense that my brush really
has no pigment left, that's when I go back
and reload my brush. Now, at this point, let's
grab some tail blue. I'm just going to show you
how thick the color is. I'm taking it straight
from the palette. And we're going to add this to the rest of the tail to make the tail look more majestic. So I really love this color. It's a very rich, vibrant color. It's perfect for
the peacock's tail. We're going to do the same thing as we did with the
previous color. We're going to just do
very quick strokes, making sure that
the previous layer of green is still being seen. Then waiting for my brush
to be almost dry to create these fine
hair like strokes. I'm quite happy with how
this looks at this point. Now, we're going to go back
and get some tailor blue and add the details
for the eyes, but it's going to be a bit
more diluted this time. We're just going to add very
small ovals to the eyes. And we're not going to draw the full oval because the
tail is in a folded state. So just half of those ovals will do just make sure that
all of the eyes are covered. Now, there needs to be a darker
blue inside those ovals, but we will have
to wait for them to dry before we
add that detail.
5. Painting the Head and Body of the Peacock: So for now, we're going to
jump to the head and the neck, and we're going to
use the same color. Tail blue for that. Let me just zoom in to
show you the line that goes downward through
the eye of the peacock. Be careful as you add this. You don't want this
to be too thick. Then after that,
let's get green. And we're actually
going to add this to the neck and some
parts of the head. Now, let's add an even
darker tone using indigo. So I'm going to take the color
straight from my palette. So as you can see,
it's very thick, and we're just going to
add it onto the head and the neck to dark contrast. Now, let's wait for
this to dry before we add any details to the face. For now, let's move
on to the body, and we're going to
start with S green. I. L et's leave this
tiny spot bear, and then let's grab
some burnt sienna. We're going to add a tiny
tiny strip just at the front. Then we're going to use a little thalo blue at
the top, just like so. Now, next, we're going to add the Ty blue and
burnt sienna mix. This is the one that will
pull all the colors together. That's it for the breast part. Now we can move on
and paint the wing. For this one, we're going to have yellow ochre
as our base color. Now let's leave this to dry, and we can now move back to painting the
details on the face. This is going to be
a very small detail, so make sure that your brush is not loaded with so much water. We're just going to use burn
sienna for the and the eye. Then let's draw the crown. So these are just quick downward strokes
towards the head. Now, rinse your brush,
and then let's add some tail blue onto the tips of these
lines on the crown. Again, your brush should not
be loaded with too water. A. Okay, so now
grab some indigo, and we're going to add those
tiny details onto the eyes. So keep them only to the right portion of each
of those tail blue ovals. Now with the same color, let's also add some tiny
contrast onto the crown, just to the bottom parts
of those tiny dots. And then just a tiny
tiny dot for the eye. Next, let's add
details to the wing. So we're going to
use indigo as well, and we're just going to add these diagonal
lines in sections. Okay? So when I was looking
at the reference photo, I noticed that these diagonal
lines actually appeared to be in a linear form in sections. So we're going to
do that as well as we paint the details
on this wing. Okay, we're almost done. But let's add a few more
shadows to complete the bird. First here, let's add some
shadow underneath the wing. And then also here at
the top of the head, where the neck is
separated from the face. And then let's add a few more dark tones over
to the tip of the tail. Oh. I'm happy with how
the bird is looking, so now we can move on
to paint the legs. For this one, we're just
going to use burn sia, just going to the legs and
the lines for the feet. Now, rinse your brush and
grab some tissue paper. We're going to lift some of the parts of these legs to make them appear
more realistic. Now, let's get some
indigo and just add a few shadows onto the
claws and the legs. Assuming that the light
source is on the right, then will be on the left side
of the legs and the claws.
6. Adding Details : Now, let's also add some
darker tones to the branch. So I'm mixing Burnt
Sienna with some indigo. Now, similar to what we
have been doing earlier, every time we apply
the darker tones, we try to get as little water to the brush as possible
so that we could a the highest amount of intensity that we can from
the water colors, ok? So here I'm just adding the
des tones to the left side of the branch and also to the bottom part and the
tip of the branch as well. And I'm not reloading unless
I sense that the brush is really very dry
or without pigment. Now, you'll see here how I've maintained a narrow
tip for the branch, even though the
colors have actually spread a bit too much
to the background. You can still do that. Since the co, the initial color has a very diluted
and fluid effect. See? So that's one of
the perks of not having hard edges as you are doing the initial layers
of your artwork. All right. Now, I see here that this part of the tail,
I'm not so happy. It needs to be a bit
more curved like this. So let's just add
that and to mask. Okay. Let's add a
darker tone to it. Okay. And there you go. That looks much better.
7. The Fun Part - Splatters!: We still have a lot of colors
on our mixing palette. So why don't we have a
bit of fun with it, okay? So what you can do is add more water to the darker
mixes like these. And then we can do
some splatters. Okay? So, I actually like the very sharp spots that I'm creating using
this size of brush. They're not too big.
They're not too wild. They don't go in a
lot of directions. They just go directly
below the brush. Okay. So yeah, this is the perfect brush to
do this kind of splatter. Because the hairs
are very limited, and and the belly is not
very absorbent of water. So it's just the right amount of water that's in the brush. So that's it. This is
your majestic peacock. I hope that you enjoyed painting along with me until
our next class.
 Michelle Gonzalez, Water Color Painting Made Easy