Transcripts
1. Intro: Hi, my name's Elizabeth, and welcome to my colored
pencil Skillshare class. In this class we'll be exploring basic color pencil techniques. We've worked with
learning how to control our pencil pressure to
develop value scales, layer additional hues of color, as well as layering
different colors to create new rich colors in any sort of color pencil artwork
you wish to explore. Color pencil is one of my
favorite art mediums ever. I really loved the
fact that I can come and go with the piece and really spend either
a lots of time on something or kinda get something
quick down on paper too, as you build up rich color
and value in your artworks. So let's get to it.
2. Materials: Supplies you're going to
need for this project are a pencil to draw out your
design, your colored pencils. There's a lot of different
brands out there. I love Prismacolor. I really loved the bulldozer. They create the
quality of blacks. But you can pretty much use
any code country you want. You will notice that quality differs from colored pencil brand to colored pencil branch. So if you have Prisma colors, I think you're
really going to love working with them and they come in so many
different size sets. I have pretty much everything has height
set that they come in. And then the more that
the bigger the set, obviously the more colors
you have if you're looking to invest in
some colored pencils, start with this MOSFET
and then you can kind of build up and you can
also buy individually. So some of your colors you're going to go through
faster than others, like, you know, like your
rods and your blues. Some of the core colors will
burn through pretty fast, but you can always buy them individually to
restock your CEC, which I really,
really love about this brand in particular. So colored pencils, I'm
using PRISMA color. I've got my pencil. We're gonna be using
a lot of colored pencil for this project. So a good pencil sharpener, A's always great to have on hand something to put your
pencil shavings in. So I like to use the top chain of my Prismacolor set for that. And I can just carry it
to the garbage and dump it out on paper. The kind of paper you use
is totally up to you. This was just in a small
sketchbook that I had. It was more about
the size that I wanted more than the quality
of the paper is pretty thin. I do like working on
thicker papers as well. So you can work
all the way up to a Bristol board or
illustration board, as long as it doesn't have a big tooth or too
much of a sheen, like a glossy sheen to it as Schubert,
great for your drawing.
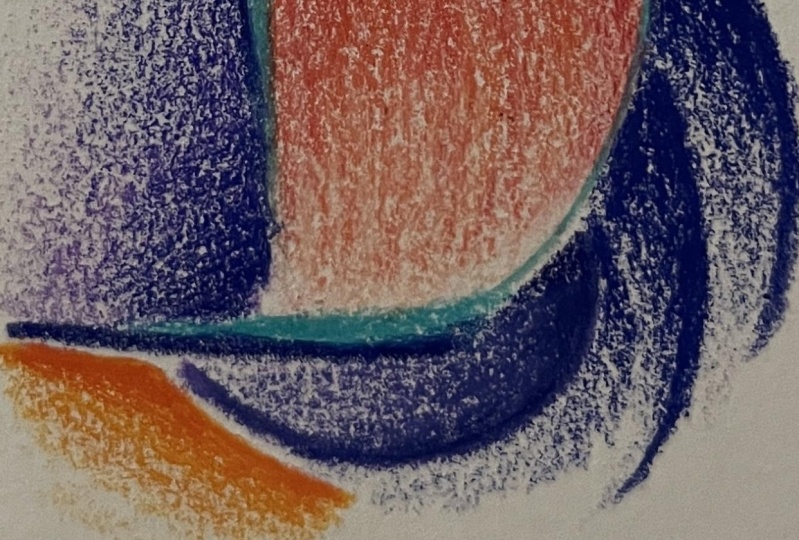
3. Colored Pencil Technique: So here is what I've started. I've chosen the color
just at random, whatever, whatever I felt
like working with today happened to
be peacock blue. And I wanted to show you some of the different
effects that you can get when you really push your colored pencils to
their full richness. So in the square on the left, we just have a value scale going from dark to light
with just peacock. Nothing else is added. Remembering that the
harder you push, the darker the value you create, and the lighter you push later, the value creating all the way out to the
white of the paper. When you really get
some control over how much pressure you are applying to your pencil and
the pencil to the paper. I really love rich colors and really bold
statements in my artwork. So it's harder for me to control my lights and I can
go dark pretty fast. So knowing that
that's my tendency, I always start dark to light. You can start light to dark
and it might be easier to go with whatever your
natural tendency as I'm heavy handed
with the pencil. So I start with my
darks and then I gradually fade it
out to my lights. And you go back and
forth working your way between the
values on the scale. Because you really
want to do it subtly. It's very easy to go
too heavy, too fast. Colored pencil takes a long time when you're doing it this way. But you're really
going to develop some great shading skills as well as colored
pencil application, peacock, just by itself, dark fading out to light. Then I wanted to start
seeing what colors I can mix together with Peacock to
get some different effects. So I started with peacock, I set it up the same way. I did a dark to
light value scale. Then I chose to go in with some aquamarine
and blend that in. I did the same value scale. So peacock went dark
to light moving down, then aquamarine went dark
to light moving down. Then I wanted to push
my darks even further. So I got out indigo blue, which is a really pretty dark blue on the Navy side of things. And use that to pop
the darks even darker. Because I wanted a bigger
range in my value scale. So I've got some indigo
blue up here fading out. I didn't feed it all the way down because I didn't
want to darken my lights that I
decided to play around with the lightening it
in a different way. So this lateness over here is just the pencil fading
out with the pressure. But you can build up
a different sort of lightness by putting
in some white on top. And that almost is a
reverse value scale. Even though we're
pushing pretty hard with the white at the brightest point and then you kind of faded
up toward your darks. We push down with the
white, really heavy. We got a really
bold lightweight. And I'm always
working on creating a subtle shift and not having it go to
extreme where you've got, I got the blacks,
where they've got, we've got here's your dark
and here's your light. I really want it to go smoothly. So you just keep going
back and forth until you achieve that effect. It's different because we have different kinds of blues in here as well as different
values of blue. And then we popped the white
on top 20 and it gives it kind of our cloudy lightness. It actually is darker in
value then over here. But you could control this even further and
start out with your white and really build the light values in
more if you wanted to. Then in the next square, I went back to my peacock and I did the same thing
as here on the far left. I started dark and I
fade it, it light. And then without
any other blues, I went in with my
white and I pushed very heavy to ganache, a bold white and faded
that up into the peacock. So that gives you a
different sort of light to dark value range than
just the pencil alone. There's no wrong
way or right way. It's just depending
on the look that you're going for
in your picture. You can also use a
colorless blender. This is just the wax
of the colored pencil. There's no, no pigment at all. And that'll give you
a different effect. That'll kinda, I'll do it
a little bit over here. But I always wanna
make sure that your tip of your
colorless blender is clean because it is going
to pick up the pigment that you put layered on top of. It's basically like the
idea of a blending stump. If you've used that
with your graphite or your Turkle soft pastels, it gives that waxy look
that the white does without adding any of the white pigment. But you will kind of lose
this grain to your picture. Show it just depends
on what you want. This also helps to kind of
take your colors even further. And just like layers on
another level of wax to really bring the
color pigments together. But it does change the
color a little bits. Because again, it's
that waxy surface versus just the light pencil. So if I go in over all of it, you get kind of see
how the right side, it brightens it up a bit, which is a very cool
effect to have. But if you're really going
for a subtle fade out, probably avoid the
colorless blender. It's a great tool to have on
hand in those situations. In the last square, I wanted to take
my peacock again. And then I wanted to go beyond the blues and really show you the variety
that you can get. Because really, I mean, there's the basic color
theory of what colors you can layer together and
how they'll blend. But I love experimenting
and really pushing beyond the general rules of color to see what else I can
get colored to do. So I'm going to
start very subtle. You want to go slow
because your paper can only hold so much
of the pigment. It will kind of
max out and get so glossy that it
can't take anymore. And I don't want that
to happen before. I'm done layering and my colors. When you're shading in general, you can go one direction. And then it's kinda
nice to kinda go in opposite direction to help fill in your areas. Kind of get a full color effect. Now, this is also really helpful
when you're shading with any other dry medium,
HIV or pencil, go in different directions, then you don't end up
with that streaky effect. Can be cool if you want it. I'll art roles are meant to be broken depending on the
effect you're going for. But I don't want that
effect right now. I'm gonna kinda keep
going diagonally across my horizontal marks. And then also going
circles tool. But I feel like I don't have
enough control that way. So I tend to go more angular
and linear in my shading. So before I get too much starker and want to kind of let that be. And I'm gonna make
this one brighter. So I'm gonna go in
with what's this guy? This is spring green,
pretty fun color. And just kinda see what happens when I layer some of that in. Changes it up a bit. Green kinda takes over the blue. But by having that
peacock blue down first, I've changed the essence
of the spring green. That's become something new. So let's go even brighter. Let's pop some chartreuse. Helps them chartreuse
over there. I love a nice lime green. When you're doing your exercises with your color blending, I want you to work on controlling
your pencil pressure. It's really important
to get that down. It takes practice. Don't be frustrated
with yourself. Just know that in time that
will get easier for you. But it's also kind of
like riding a bike. If you haven't shaded in a
while, you can still do it. But you might need a little
bit of a warm-up to kind of remind your hand-eye
coordination that who's in charge
of the situation? All right, so now we're
getting that's pretty, pretty. I want to go even brighter. So I'm going to take
my business guy. Lemon yellow ocher,
kind of fade that guy up into the chartreuse. And it's all just a bunch of layered value scales with
each different pencil color. But as you go, you're
going to see some really, really beautiful color passages happen is you're blending
those colors together. I'll start wanna do,
I'm gonna go in, what is a Sky pier at Green? Certain remind me
of a parrot, fish. My kids love activates. We know a lot about the
creatures of the sea. And now I haven't
really done a ton with different brightnesses
of the hues themselves with the colors. But, but because of how I am, because of the pressure,
I'm still getting some sort of value there. There's a little bit, I mean, he's her dream blue and green, which are both
darker than yellow, but they're not too far
off from each other. I want to go a little crazy
and I'm going to take, see what happens
when we do this. This is process rad. Now, I've gotta be
careful because when I layer, because riding green, being compliments look really great together in an artwork, but they blend together
to make Brown, which isn't necessarily bad
because that could give me a more natural
shaded appearance. But I don't want to
go to too murky. I'm going to keep
this one kinda break. And if things start to
get a little muddled, you can always keep layering into this and
change that color. That's a little less, a little more pink than I was
kind of working out here. So I'm going to layer over
that with some ultramarine. It's one of my favorite blues. And change it and
kinda pull that, that, that pinky purple more to the blue violet side.
Now it's gone back. So easy. There are points of no
return with colored pencil. But generally if you go slow, you can kind of catch yourself before
things get too crazy. And I do, for some reason, I still really want
some purple there. They can't find
the exact purple. I want to run off the top
of my colored pencil box. I am going to just go
for it and go in with some crimson lake and use this plus that ultramarine
to push that purple in. That that I've just really
want for some reason. I biggest rule of
thumb with color is just trust your guy. Does. It'll all be great. And if it's not, you learned
something along the way. But generally, if
your instincts kind of direct you towards
one color over another, it's going to work out fine. And actually I'm
going to go back, I want to go back to
my peacock and use that color to deepen
this even further. It's always great to go back
and forth with your colors. So now that one, very different
appearance, very bold. There is still
some value between the dark on the top left, going down to the bottom right. I can take it even further if I wanted to show well, for fine. You're white also
picks up your payment. So I've got some blue
on there from doing these earlier ones and we've just rub your finger over it, kinda picks it up there
because if I was shooting with blue in one area of my artwork, and then I went to say a yellow, that blue pigments going to
carry over on the pencil. And that blue is going to
turn a yellow section green. You can turn it into
a happy accident. But if you're really
not going for green in your yellow area, you could be a
little disheartened, especially after the amount
of time one can put in on a colored pencil drawing is going to pop just a little
EDB to be white down there. Just to kind of broaden it. This, I'm really excited
about this color combination. And I could
definitely see myself using this in a future project.
4. Tips and Tricks: As you get started on your
colored pencil project, here are some tips
and tricks and reminders as you begin working with this
amazing art media. Let's actually is very
inspiring because doing these little color studies is a great way to kind of one
plan out your artwork, but also to experiment
and see what happens when you layer
different colors with each other before you're
committed to your drawing. But they can also prove
his great inspiration. So forever like I
want to create art, but I just don't know
what I want to draw, but I know I want to
use colored pencil. Sometimes I'll just get my
pencils out and start doing stuff like this and
then document it. What colors did I use? And normally I write
them down as I go and I didn't do
that this time. So I'll have to dig back through my boxes and kind of
remember my colors. But this, I'm really
excited about this color combination
and I could definitely see myself using
this in a future project. Practice way, pencil pressure practice with the
effects of adding in white versus a colorless blender
because they're different. In then practicing what you
can do as far as broadening your values both with the
different monochromatic colors, you know, darks,
mediums and lights. And then also try playing
around with combining different colors and
don't be afraid to try ones that you're
not sure going to work. Because when I look
at this up-close, I really I really, really like what I
see and I'm not sure that in my head I would have imagined it turning out like this if I tried to pre-plan it, it's going to have a game plan
and color scheme in mind. What kind of direction
do you want to go? Especially when I'm
working abstractly and pieces like this. When I just, I just kinda have a general mindset of
what we're kind of vibe. I want to go for it with my
colors and then I kind of latch the colored pencils and the project direct me as I go, work very intuitively, kind of see what am
I instincts say. And that's how you see
I started this one. I started with the very
similar to down here. I've got some very bright greens and yellows and then
I kind of layered that deep with
some darker greens and then it just
needed something else. And that's when this kind
of turquoise color Kamen. And then the very last part
was putting in the black. Because black is a really, it's kind of a crazy
thing and it'll definitely try to kind of
sneak into other parts. So controlling the black areas, fading into color ones. And especially if
you don't like, there's no black here
in this green section. And that was very intentional, but I had to be very mindful of controlling my pencil and fading it out before I started
getting this part too dark. And then see him on
TV with this one. The black was the very
last thing to go in. And I tend to work in sections when I do pieces like this. So I might build up a section to its fullness
or I might get partway and then kind of jump around
and then just kinda go back in and keep building up more values and more richness with
the pencils as I go, you know, and then I kinda
start noticing like who's getting a little dark.
So then I start. When I get to some of
these other areas, I started really
focusing on bringing back a brightness
and have so that I had a nice contrast between the dark passages and
these later ones. But then I also wanted to
play with the coolness of this value scale versus the
warmth that happened here. Taking time to step
back from it and really kinda think
about where you want the piece to go is
very important as you begin exploring this art
medium are rediscovering it. Colored pencil is something
he worked with before. Just remember that
it's all about the process and the
artistic exploration. Code pencil, be
forgiving to a point, but there are some
challenges with this medium. So just give
yourself some grace, have some fun, and
see what happens.
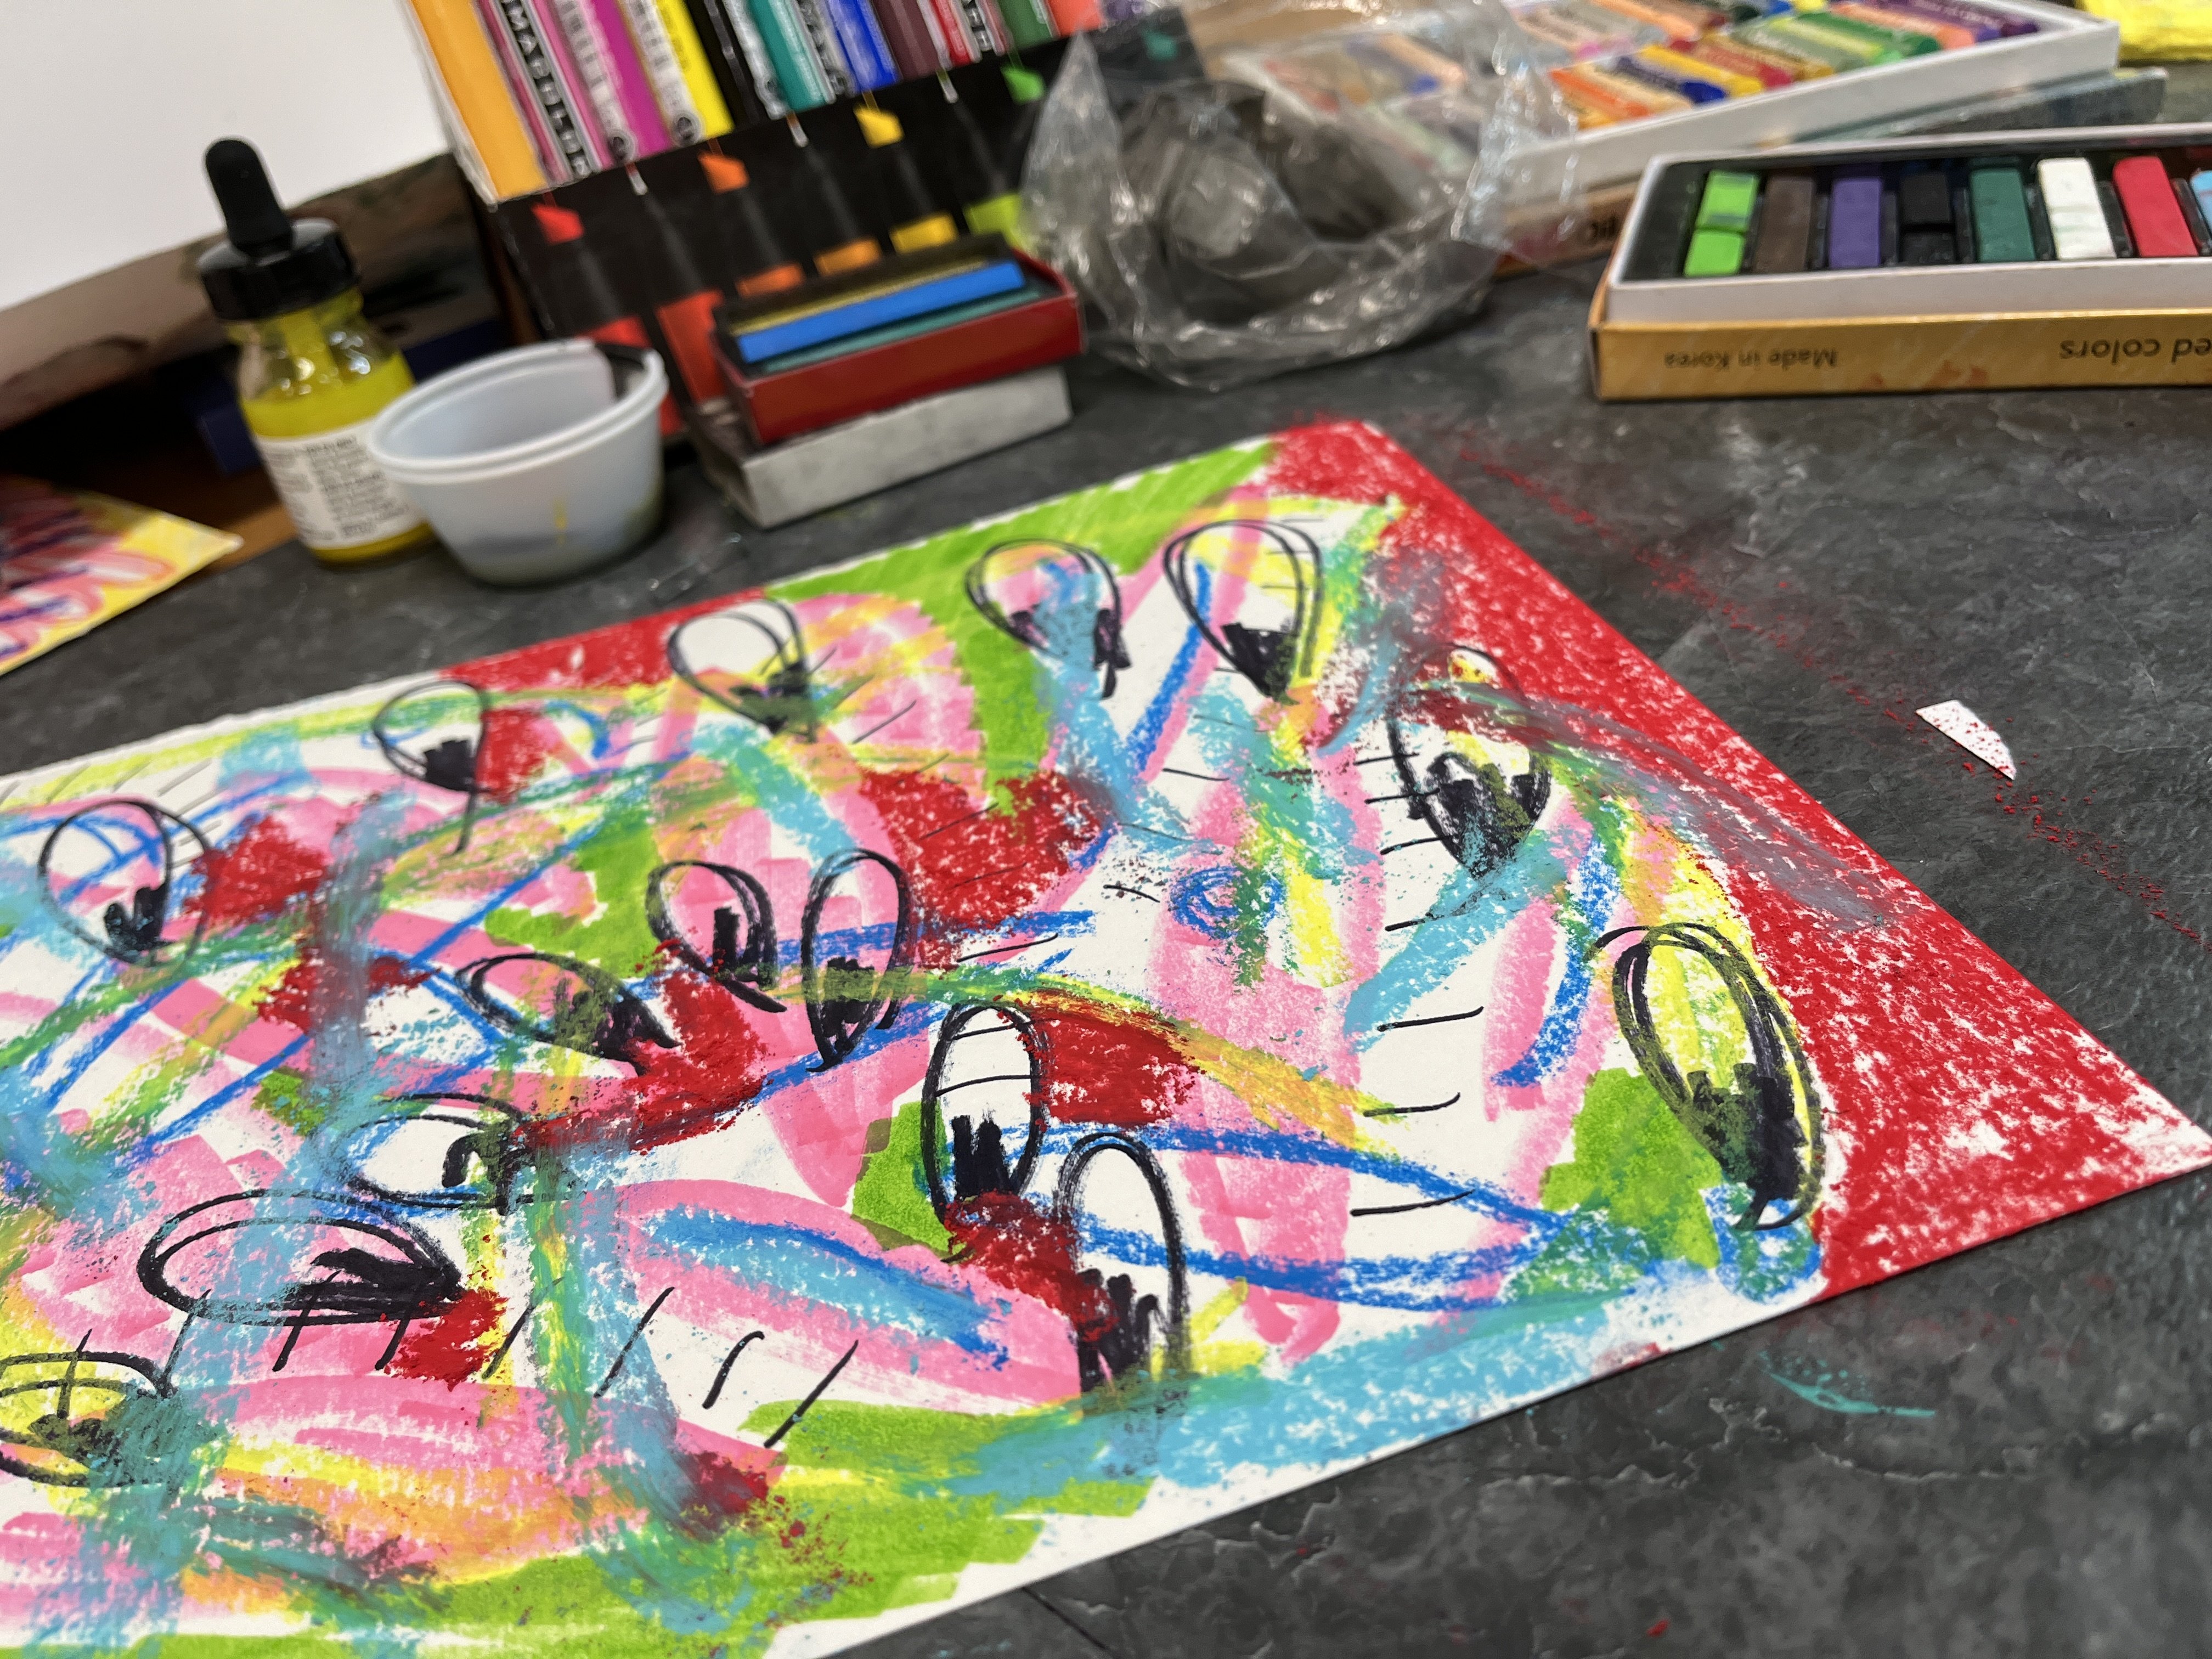
5. Final Project: So for this project, I'm going
to use a circle stencil. And I happen to
have in the studio in some special paper from the same sketch book that I was doing my color studies on. So as to our page out trimmed
it down and a pencil. And then I'm just going
to start breaking up the drawing space by
tracing the circles, the edges of the stencil itself. Just to give me the interesting
areas to work with. As I navigate this project, it's important to draw a rather
lightly with your pencil because I haven't decided exactly what colors are going
to go into this piece yet. So I want to have the option to have the pencil
lines disappear, just help the color. And if I'm going to
have light passages, I don't want a dark pencil
line going through it, but I can show you a
trick for that too. I tend to draw a
pretty heavy handed. So I always have to
kinda keep an eye on my pencil pressure and really fight to
maintain those lights. Keep trying, kinda flipping
it around as I go. And I really like
circles and ions. So this tends to
kinda be my go-to, especially when I'm
not sure what I wanna do for an artwork. But I know that I want
to enjoy working on it, especially colored pencil
because it takes a bit of time. But I also want to
break up the space, so I'm not fighting with the colored pencils
to fill a large area. And this piece is pretty small, but this is a pretty
small piece of paper. So I don't need to do much, but you can just
keep going and tall. Happy with what you create it. On our rage. Fairly happy with that. I'm going to do just a
little bit more to give me some more interesting
shapes to work with as each shape area, each space is going to be a different different
color passage that I get to play with. Sometimes as you move
the stencil around your current discover shapes that you
hadn't thought about, that you really enjoy. You bet different art concepts like repetition and pattern. Aco, different shapes. So fun. That's what are, it's really
all about having fun. I kind of like the section here. I want to repeat something
kind of like that, add some interests
but also kind of mirror that design aspect. That looks great. I'm happy with that. All I did was traced the edges of my pencil to kind
of capture some lines, some shape, break up
the picture plane. So what I can do now before I go in with colored
pencil is I'm going to take my eraser and I'm just going to lightly go over with
the flat edge of it, lightened my lines because I don't know exactly what
colors I want to use yet. I want to have some
weight passages, so excited to create ranges
of value in my pieces. So I can have a lot of contrast. But I don't want these pencil lines to have to be something I
have to work around. You can like I can make
the outer edges of all of these shapes darker. And that's one way to
kind of hide the pencil. I want the freedom
to be able to go through and do white
areas on the edges job. And a 10 limits
the possibilities. So you can already see how
light these are getting. And it doesn't take long,
just a quick little dusting over with the eraser. And then we'll be all set
to start experimenting with different colored pencil
combinations and values. And if you're
really light handed with the pencils begin with, you probably can skip this step. You tend to be heavy
handed like me. This is a great way around it. And ready to get out my colored pencils and have some fun. You can apply color
pencil technique to any type of imagery you'd like to explore in your artwork. And it does take some time. So be patient with yourself
as you learn how to control the pressure that you apply
with the pencil as well as the colors that you create
as you mix them together. There will be moments where you try color combinations
and you're like, I didn't quite work out the
way I thought it might. And then other happy accidents and surprises along the way. So I highly recommend you have a small notebook where
you can kind of test out different ideas before you take it into your
bigger project. But I also recommend that for this class you
were pretty small, gave herself some time
to really explore the techniques without trying
to create enlarge artwork. And then as you become
more comfortable with it, you can take your artworks
as large as you'd like to. So this size is good for our practice and
experimentation aspects as you're learning the
different techniques. And then what I did for my final project was I just
cut a piece of paper out of this and trimmed it
down so that it was kind of a manageable size for the space that
I was creating it. And the amount of time I wanted
to spend on this project, you're gonna wanna regular
pencil to kind of break up the space and kind of map out what you're
going to work on. You can use any
shapes you want to. So for this piece, I just used a circle stencils and the edges of it as
well as the circles on it to create different lines
and kind of break up the drawing space so that
I had areas to work with, map up my abstract design that way you can kind of intuitively and organically let the
composition come together. You're going to want to
sharpen our on-hand to make sure you can keep those
tonsils nice and sharp so you have full control
over where your color goes as well as summer to
collect those shavings, because we're going to be
sharpening our pencils a lot. So if you're a sharp nerves like mine and it's just
an open-ended one. I tend to use the lid of
my colored pencils, right? So I'll have my pencils
open and then I just use this to
collect the shavings. It's kinda works pretty great. And so here we have the finished
artwork that I created, combining all the colored
pencil techniques that we learned in the initial steps of working with colored pencil. So I always began initially with just one color and of creating
a value scale with that. And then layering
additional hues that are related and then popping some of the white even
brighter if I want to. And then kind of building
additional richness when I start blending other
color families together. So you can see a lot of
that reflected here, where we've got some
monochromatic areas just focused on one color and different brightnesses
and darkness essays and a different pencil pressures
to get the range is there. And then I've got
other areas where I've blended quite a bit
of color together. You see down here, but my thumb, there's a lot of cool
versus warm for contrast. And just kind of naturally
happened as I built it up. There's some areas that
I'm less excited about, but it happens with
every artwork and it's all about the
process for me. But there are some exciting color combinations
in here that I'm excited to explore in future
colored pencil pieces. And we just see what you come up with and what color
combinations you try. Make sure as you're
working through the lessons that you post, pictures of your color studies, height of all get
inspiration from each other. And I would love to see your in-progress photos from your full pieces to remember,
they can be very smart. They don't have to be a
long time this piece. So you can work very small and still get some really
great color work done, especially if you don't
have a lot of time. We're going to have a
lot of fun together. So let's get going.
6. Final Thoughts: I've really loved
sharing colored pencils techniques with you, and I can't wait to
see what you create. So please be sure to post your projects in the
project section. As you explore the
different techniques, please be sure to also post
your in-progress as well. I'd love to give you feedback along the way and kind of share in the artistic process that we're exploring in this class. And don't forget
to leave a review. I'd love to have your feedback, but how I can make this class in future classes even
better until next time.
 Elisabeth Wellfare, Artist, Art Educator