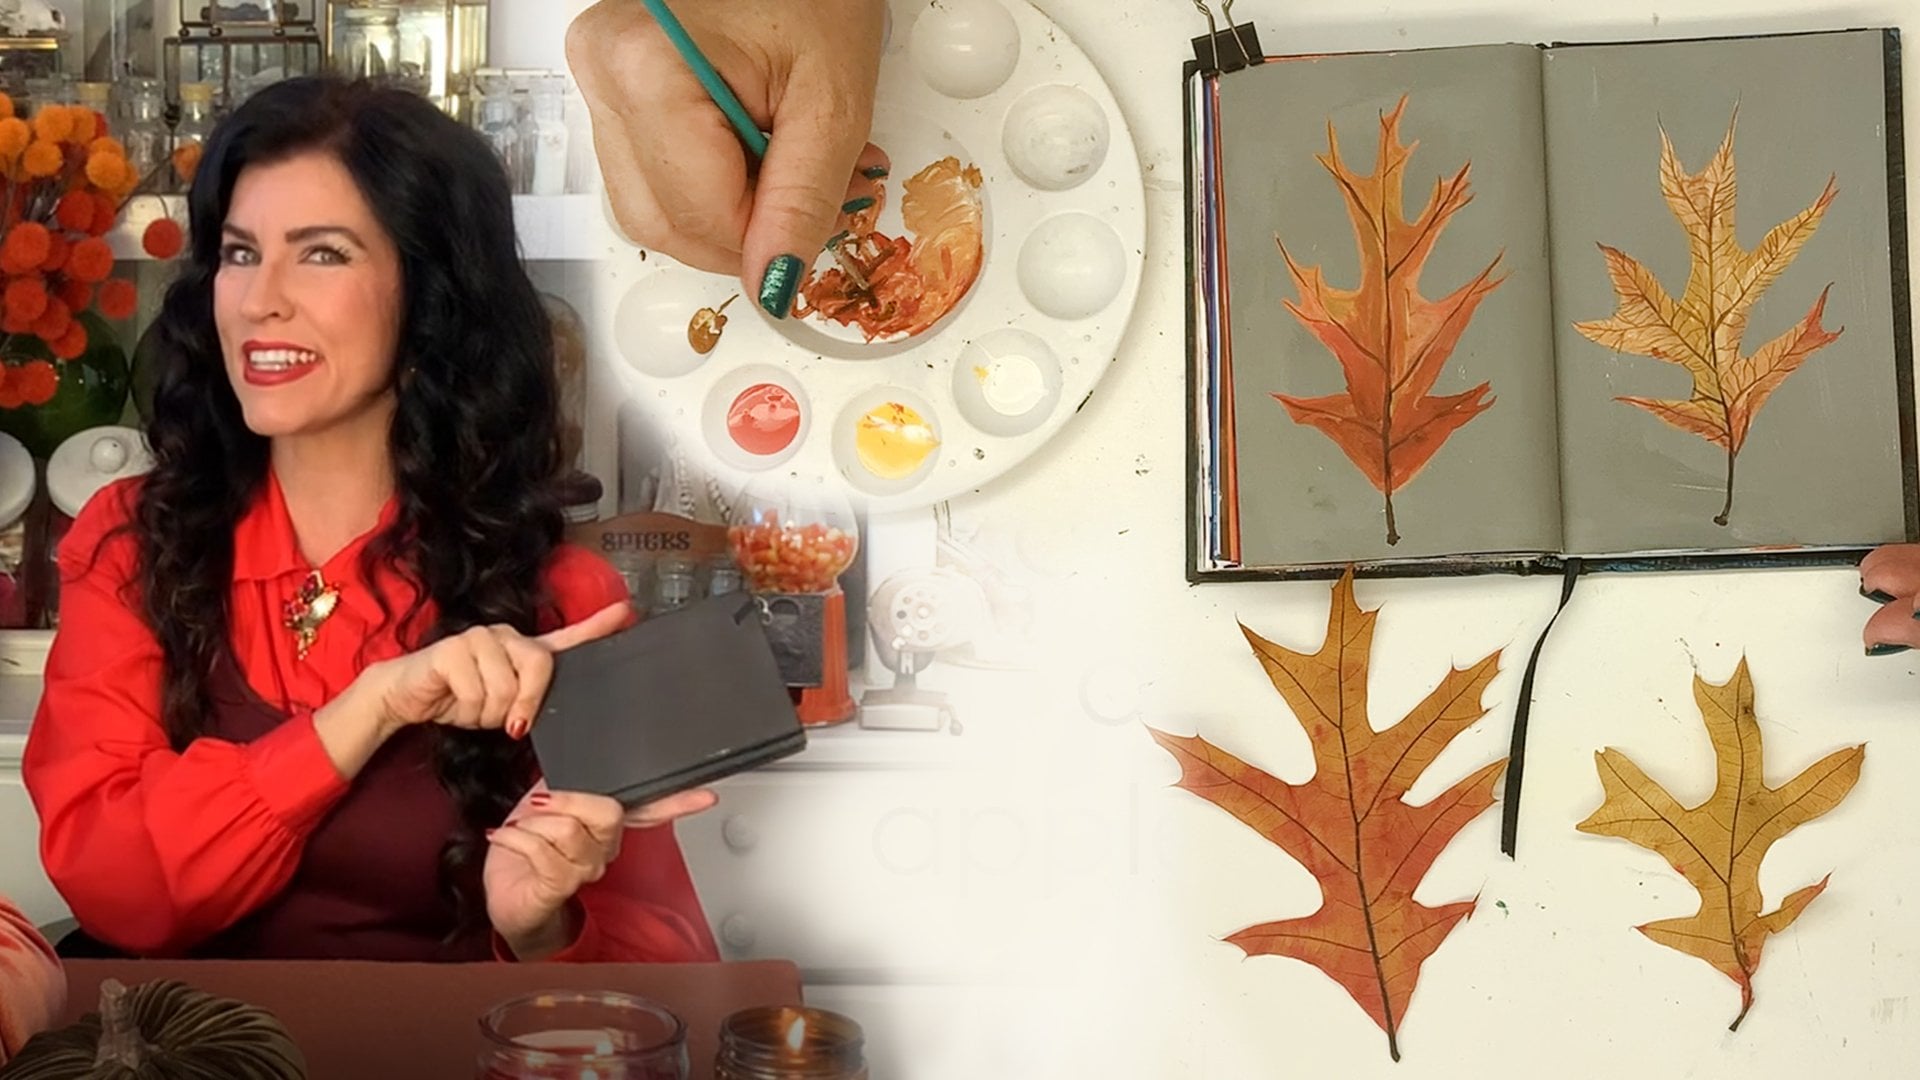
Transcripts
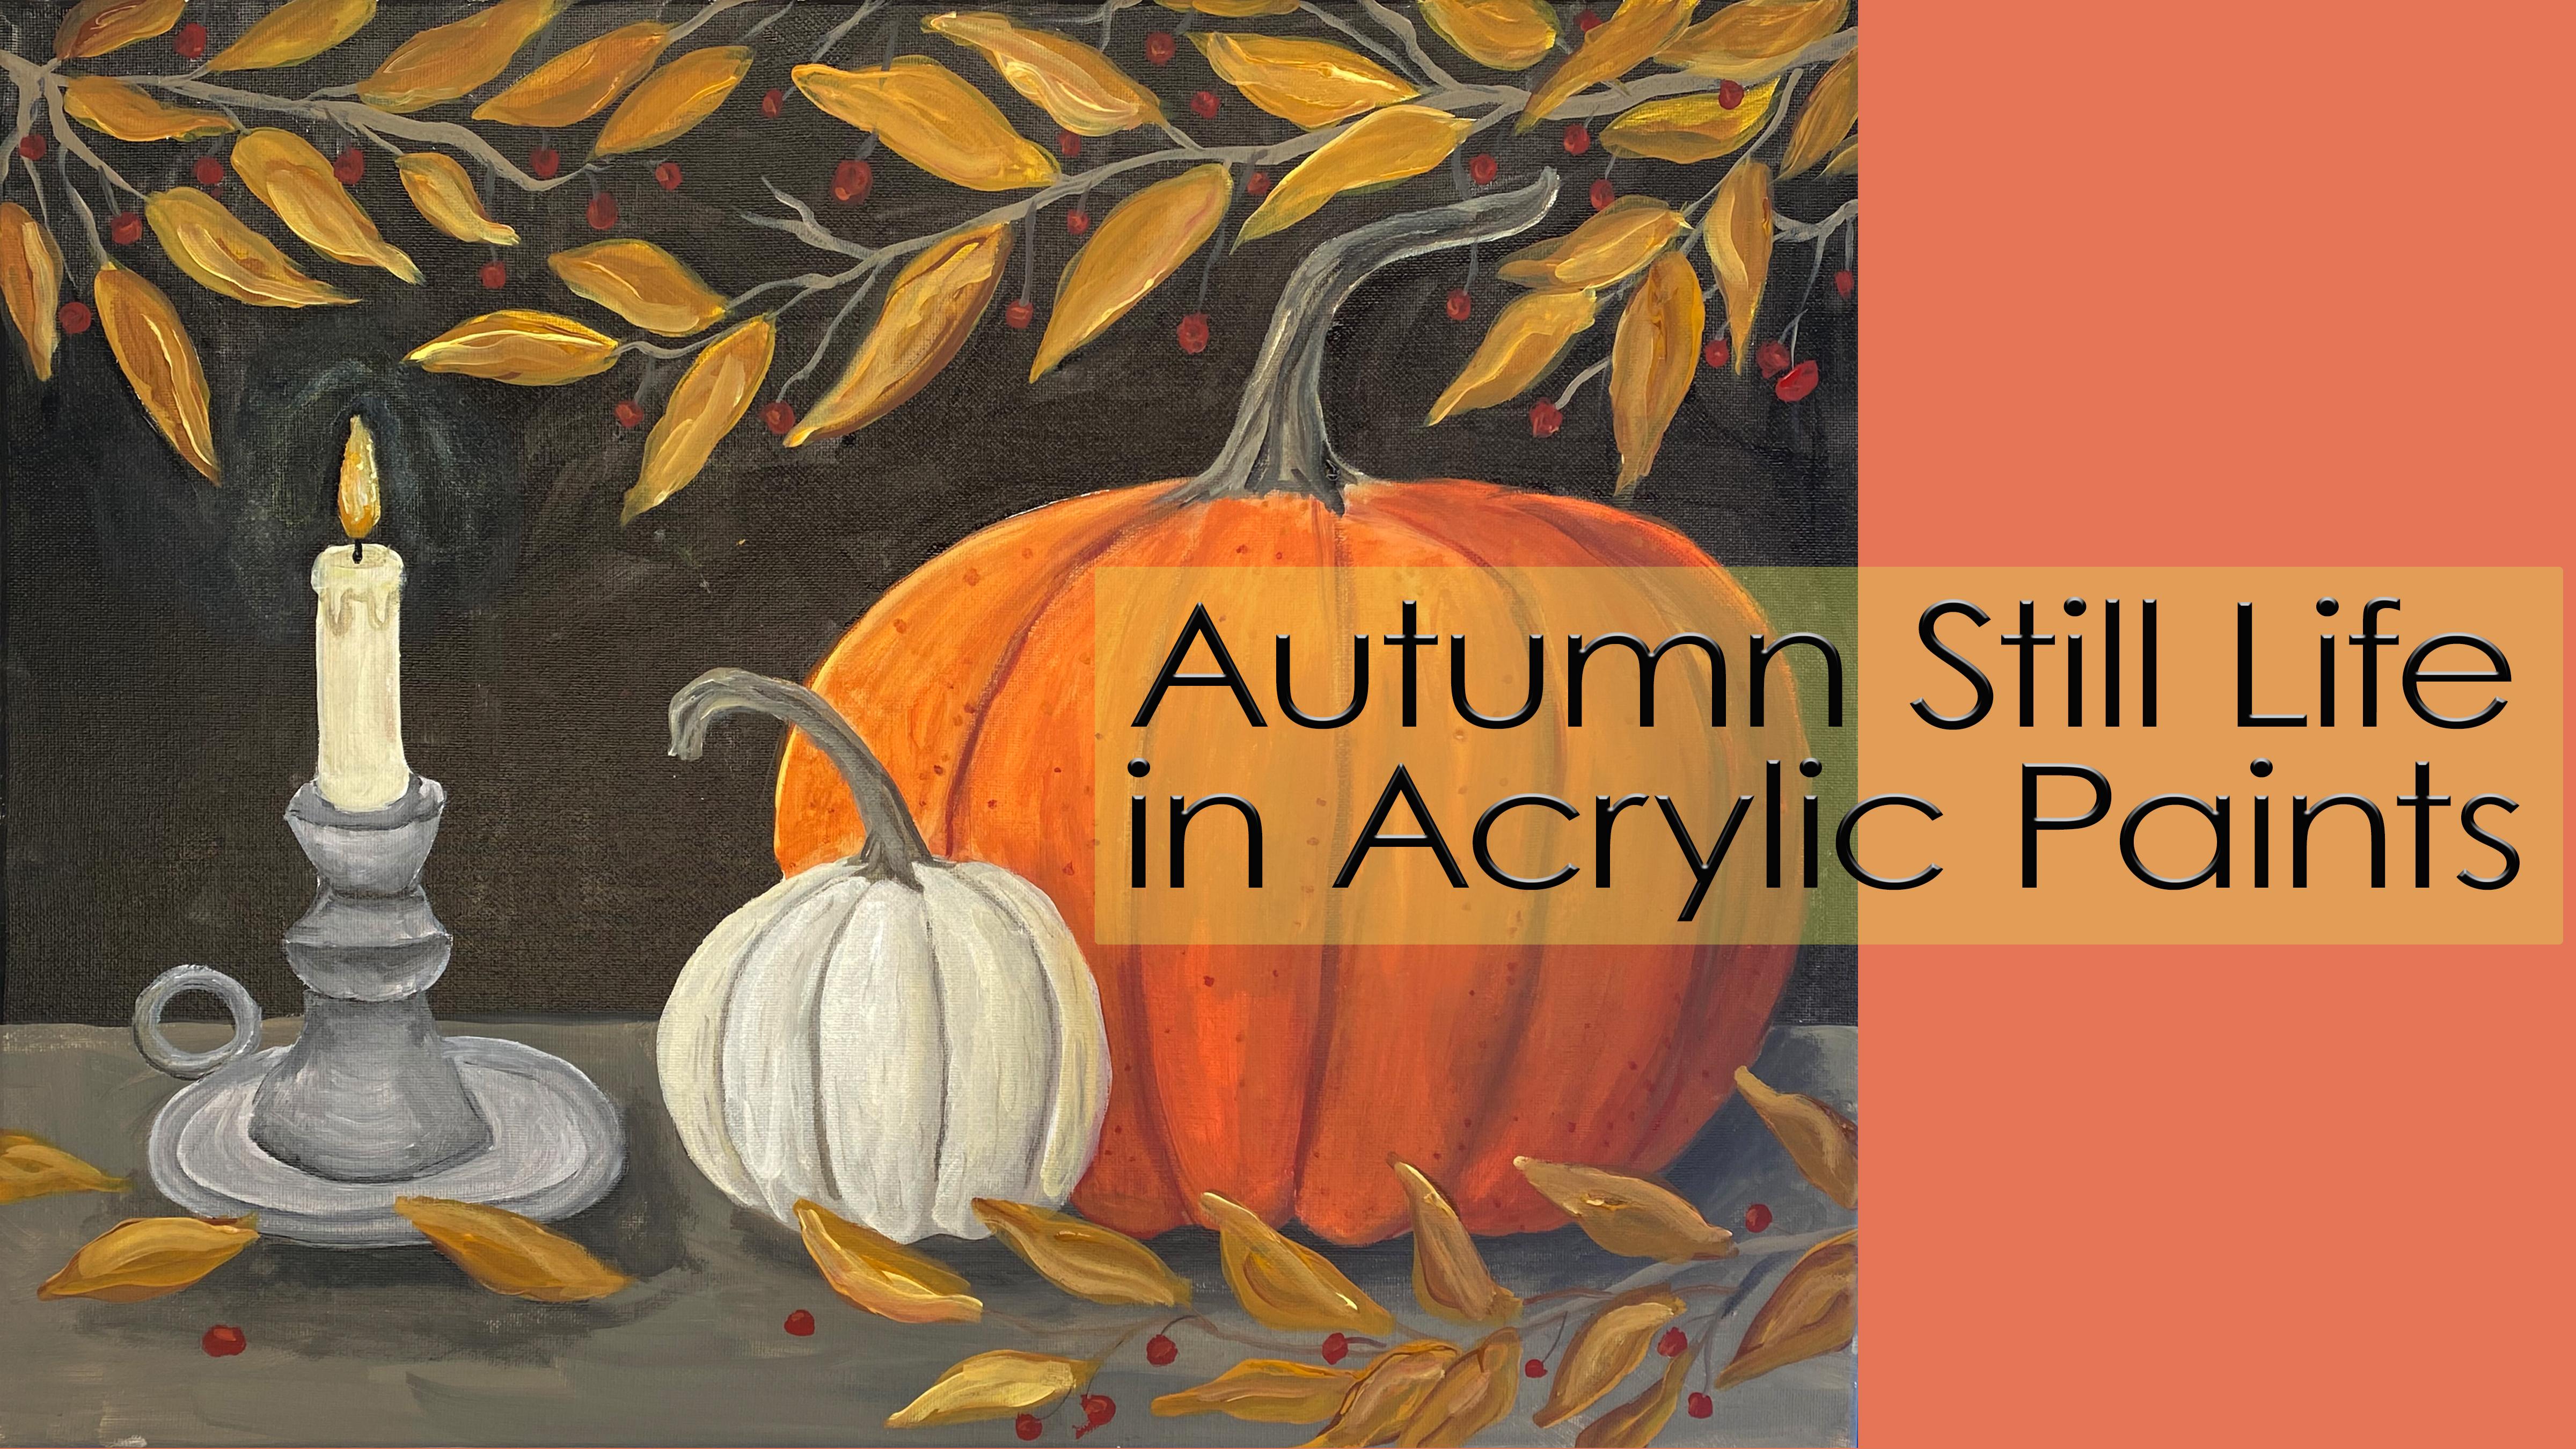
1. Hello!: Hi there. I'm Laura Urging, and I'm an artist from Lonoke, Texas, and I'll be your
instructor for this course. We are going to be painting an autumn still life
using acrylic paints. We're going to be
focusing on pumpkins, a candle, and an assortment
of leaves and berries. This course is for
anyone who wants to improve their acrylic techniques
and paint a still life. I've chosen comforting, cozy, autumy subjects for our project, and I've also used a really warm but somewhat simple
color palette. So there's not a ton
of color mixing. We're going to be focusing
more on techniques. Be focusing on two
ways to paint leaves, the first of which is working
on a dark black background where we leave the leaves blank initially and then paint
over them in a later phase. The next type of leaf we'll work on is the same variety of leaf, but painting on an already
painted foreground. You'll be painting
on top of color. The next thing we'll
be working on is creating a three dimensional
form from the pumpkins. We'll be using colors, shadows and highlights and little details to give them
a more realistic appearance. The last thing that we're
going to work on is creating a light source within
so we'll have a candle, and we'll use that light to create highlights and shadows. So I hope you'll join me. See you soon in
the first lesson.
2. Supplies: Supplies. Supplies for this project are relatively
straightforward. You'll need a pencil and eraser
for the initial sketches. You need acrylic paint. I have a variety and pretty much anything you
have on hand will be fine. We use a range
from black, white, red, yellow, orange,
and shades of brown. Feel free to
experiment and not use the exact same colors I'm
using in this project. If you want to make the
pumpkin more of a greenish, bluish color, for
example, that's fine. If you want to make it a
deeper orange, that works too. We use a variety of
brushes that vary from the smallest number zero brush to a larger 1 " flat brush. Again, experiment with
what you have on hand. The canvas in this
project is 20 by 16, but anything in that
aspect ratio will be fine. You need a palette,
water, and paper towels. Optionally, you can
also use a blow dryer to speed up drying time
between each step. In the next video, we'll get started on the
initial sketch.
3. Sketch: Now we're going to begin
the sketching portion. First, we're going to establish a horizontal line for the table. Then we're going to sketch in a large flat oval for
the larger pumpkin, and then a smaller rounder one. Here's a pro tip. Fill up
all of the canvas area, try to make the images and the
individual elements large. One beginning mistake I see
is people try to crowd all of the elements into a tight
beginner spot in the center. So try to really
make it fill up. Alright, we're going to
go for an oval shape for the base of the plate
and a round finger loop. Follow the rest of
this sketch to get the general overall shape
for the candlestick, and then a tall rectangular shape for
the candle at the top, draw in a flame and
connect it with a wick. Next, we're going
to work on a stem, and then horizontal, excuse me, vertically curved lines for
the ribbing of the pumpkin. You can make your stem as
interesting as you want. I like to give it
a little curve. These ribs really help add dimension to the pumpkin when
we start shading later on. I like to add a little
variety to the stem to match up at the top of
the rib, as well. Now I'm going to
sketch in a branch and start on the leaves. They're a vaguely almond
shape with a slight curve. They end with a tip,
and they're located every other spot on the branch. They're not directly
across from each other. Go a little ways and draw a leaf and then go a little
farther and draw a leaf. Make the stems get narrower
toward the end of the branch. We're also going to add on
little berries in a moment. They're going to
be vaguely round, slightly oval
shapes, and they're connected by a very thin stem. A lot of this will
be obliterated when we do the black outline, but you can frequently still see a little bit of the sketch leftover enough to
help you as a guide. Now we're going to refine the candlestick and just add some swoops
and dips in there. Next, we're going to start
painting the background, so it's time to get
out your paints.
4. Background: Background. Now we're going
to start with the table. I'm going to mix up
a dark brown shade of a muddy mushroom color. I'm going to mix black and
yellow with a little bit of white until I've got a
mushroomy warm brown color. I'm going to choose one
of my larger flat brushes to start working in the
background of the table. Now, I'm not aiming for
perfection and smoothness here. I'm just working
around those contours. I'm going to add a lot of
layers to the top eventually. But with the table, I do want to cover white. I don't want any of the white of the canvas showing through, but I'm not trying to get it in there perfectly and exactly. You'll see I just obliterated a little bit of the
bottom of the pumpkin. That's not quite perfect and I'll probably change it later. Once this is dry, I will
probably add more of the color of the pumpkin
over that bit of the table. I can refine a lot of
these edges later. Next, I'm going to be
going on to black. If you're going to
use that same brush, make sure to wipe
off the excess on your paper towel and give
it a good wash in water. Sometimes you can really muddy a background color if you have color left in
your brush still. Make sure you clean
the brushes out really well before
you use them again. Also, don't set
aside a brush with acrylic on it or it can
really ruin the bristles. If you're not going
to be able to wash it until you're
done painting, stick it in a separate cup of water just to keep
that paint soft. I'm going to work around the contours of the
object above the table. Just using solid black here. You can mix in other colors if you want a little more depth, but for simplicity's sake, I was going with solid black. I typically like to mix in another color to my background, but like I said, this
is a shorter tutorial, so I was trying to just get
going with the background, but experiment with adding
other colors for a richer, warmer black or a cooler
black, if you want that. Now, if you're having trouble getting I
made a mistake here. See how I went into the stem. I'm taking water immediately
and I'm scrubbing water on to that stem and then I'm wiping it
off with a paper towel. If you get to it
quickly, you can just scrub it off like that. Now, if you're having
trouble getting the paint to smoothly
move around the contours, add just a touch of water. Now, you don't want very liquid paint or it'll
be transparent, but just a drop or two of
water to your puddle of black can help it move more
smoothly around these shapes. We're going to paint
around the leaves now. I like to use a flat brush
that's a little bit smaller, maybe half an inch or so, maybe even a little
smaller than that. I like to load my
brush pretty often, and then I twist my
brush as I work to get excess paint on either side of it to help me smooth
around the edges. As I twist it while I paint, it also helps me get into the pointed edges of the
almond shapes of those leaves. Continue working in this
fashion until you have all of the black background painted around the pumpkin
and the leaves. I am covering over the
spaces for the berries. It would be too tedious in the time we have to
go over the berries. If you really want
to do that, you can, but it's going to be very
time consuming red is a pigment when we make
red berries later, the pigment will be enough
to cover the black. However, the yellow
we're going to use for the leaves is relatively transparent and it's hard to get a complete coverage over
a black background. I like to leave the leaf
portion and the stem portions, the white of the canvas. So keep working on that.
Now in the next step, you might want to blow dry
in between steps just to ensure everything is
nice and dry. All right. Next, we're going to be
working on the color of the pumpkins and the candle. Give your brushes a good
wash between this step, freshen your water and squeeze
out some of the pumpkin
5. Pumpkins and Candle: It is time to paint our pumpkin
selection and our candle. Start out with orange. If you have orange
paint, use that. If not, mix a pile of yellow
with a little bit of red. Always start with more
yellow and then add red. I'm outlining my pumpkin,
the larger pumpkin, avoiding the small
pumpkin in front, and I'm establishing
the perimeter. I'm using pretty thick paint. I'm just getting it
on there quickly. We're not aiming for
total details right now. We just want that
basic color in there. I'm going to mix up
two other colors. I'm going to mix up a
lighter yellowy orange. I'm just adding more
yellow to that orange. Then I'm going to mix
up a darker orange that has rust tones by adding red and a tiny smidge of brown or black just
to get a deeper color. At this point, I'm just trying to get more paint on that area. Add the lighter color to the upper left and
top of pumpkin. This is where the candlelight
will be hitting it. It doesn't need to be neat, it could be very messy
at this point. Then when you mix up
that darker color, we're going to concentrate on
the lower right hand side, which is where the
shadows would fall. It's away from the candle. We're going to
have darker pieces so behind the pumpkin
in the foreground, the little pumpkin,
the pumpkin will be in a little bit more shadow because the pumpkin
is in front of it. Go ahead and start
blending those. I like to wipe my brush off occasionally on paper
towel so that it's not as thick with paint and then just keep going back
into those colors and gently work
your brush back and forth to blend them when
they still a little bit wet. All right, I'm
drawing in ribs now. They're vertical, but they're
not straight up and down. They always meet back
toward the bottom wrapping around at the stem at the top and the bottom
of the pumpkin. Then I'm using the
same technique for highlights and shadows, but I'm concentrating
on each rib at a time. See how at the bottom
of the horizontal area, they're a little
bit rounded where that rib pokes out like a
little rounded section. I'm adding more
middle color again, more of that central orange. Then I'm going to try to make them look a
little more three dimensional by adding highlight
toward the top again, where the candle would touch and shadow down toward the bottom. You can also use darker colors
to increase the ridges, which makes them look
more three dimensional. Now we're moving on
to the candlestick. I'm mixing a light gray. Just focusing on the part that looks like a
little plate or a bowl. Again, it doesn't
need to be perfect. We're just trying to
get some color here. Follow your sketch,
add more gray. You should also mix up a
lighter and darker gray. Wherever the candlestick
is poking out the most, the roundest pieces
on that top column, it will be lighter
where it scoops back up inside and has a divot
or a part that curves in, you'll paint a darker gray. Also on the bottom underneath where of the candle won't touch, those areas will be
dark and you can shade those a little more to make it look more three dimensional. Now, to give even more detail, sometimes I'll use a technique where I mix up a very dark gray, it's almost black and I'll draw a line under that rim right
there where the candle sits, a line in the middle, and then
I'll pull down this color. I will pull down
little sections like little feathery strokes just to help spread that
color around evenly. Then I get a dry
brush and gently go back and forth to blur
those hatched lines. That way you get an even
amount of color through there, then come back with a dry
fluffy brush and blend. I repeat it sometimes until it's the amount
of darkness I want. I'll run a little bit
of a darker rim around the outside of the
bowl too or the plate. I'm adding the thumb loop, an American colonial style, just a circle where you would stick your finger in
to help hold the candle. I'm using the same techniques for shadows as I
do for highlights. I'm adding a much lighter white and then getting a
fluffier brush to blend it. Refining this shape
a little and adding a shadow along the bottom of
that finger or thumb loop. Just adding a little detail, a little ridge around
the candle holders pace. Now I'm moving on
to the pumpkin. I'm mixing white yellow, and a little bit of black. I'm aiming for a
creamy grayish color. Basically, I want
a white pumpkin, but nothing's really pure white. I'm starting with a
mid range beige gray. I'm using some of
the same color to establish the stems
on both pumpkins. I'll refine them more
later, but for right now, I just want to get some
base color on those stems. I'm going to paint the
actual wax of the candle, a very pale yellow. I'm using some of
the pumpkin color I have mixed with white
for the candle base, the actual stick of the candle.
6. Top Leaves and Pumpkin Details: Top leaves and pumpkin details. The first thing we're going
to mix up is our leaf color. Start with yellow and brown. We're going for a tannish
amber base color. Pick one of your
medium flat brushes, load it up and start filling in the areas of leaves that
you've already left white. Now, don't worry if
you're still seeing some white or
transparency differences if you run over into
the black area. This is just our first coat of the leaves and we will
apply more paint later. Right now we're
just attempting to fill in that white leaf base. I'm actually extending
the leaf a little bit. I'm extending around the outside
edges and in some cases, I'm extending the
point a little bit. It's very tedious to paint exactly inside that white space, so I'm just using it as a guide. I would recommend blow
drying here or stepping away for a few moments so you don't smear the paint
in the next step. Go ahead and paint a few leaves
along the bottom as well. I touch up any other
little last bit problems I see if I see any
white showing through. Now we're going to mix
up the branch color. I mix up brown and
white and if you want, you can add a touch of black. We're just going for a color that's somewhat similar
to the table color, but a little lighter
and a little browner. Pick one of your smaller
brushes and start from the diagonal
corner and work in. Make the branch thinner as it comes into the
piece of the painting. As you're trying to collect the leaves along the
stem, take your brush, very thin brush and go from the branch out to the
base of the leaf, so it looks like it's attached. Then repeat this
on the other side. Remember, keep the branches thinner as they move away from the main
part of the branch. That will help them
look more realistic. I like to keep the paint a little thinner for the branches. I find that when I'm doing
really fine details, a thinner paint
helps keep the paint flowing rather than dragging
and creating a blank spot. This will mean
mixing up some paint and adding a little
bit of water, not too much or it will
become transparent. You have the right amount
when the paint flows freely, but you can't see
transparency through it. Now I'm going to
work on the pumpkin. I'm mixing up a gray
and I'm adding ribs. Remember, they meet up at the stem and the
bottom of the pumpkin. I'm going to fill that in a little bit and blend
to soften those edges. Then I'm going to mix up
a brighter white color. I'm moving to a fresh brush now, and I'm keeping it pretty light, white with just a little
bit of yellow and gray, but it's a pretty light color. Now I'm going to
move to a dry brush, really clean that brush off, and scrub at these lines where they meet to soften
those harsh edges. I also round the bottom of the pumpkin out toward the
bottom of the table like that to give it a more realistic rib shape rather than just a
complete circle. Keep refining it. Then I'm going to move on to darkening the ribs a little bit more with a
darker gray color, a little bit of yellow and gray in the earlier
light gray color. Again, dry that brush
off and then use blending motions to smooth
out those harsher edges. I continue until I'm happy with the three dimensionality
of the pumpkin shape. Now I'm going to go
back to my base orange. When I was adding highlights
and shadows earlier, you'll notice it
obliterated a lot of that very basic local color. The local color is
just the main color of an object without
lighter shadow. I'm going back in
with my basic orange, a nice basketball
elementary pumpkin orange and I'm putting it in
the middle of the ribs. I'm also extending it up
to the tops and the sides in places I think it
needs it. I'm not done. I'm just always continuing
to work with acrylic, the more layers
you use, the more depth and complexity you
add to your painting. Now I'm carefully
painting around the stem of the
little white pumpkin. On the right side, it seems too dark to me, but that's fine. I intentionally
made it too dark, but I like to have
a little bit of that deeper russet red
shade showing through. So in some of those areas, I'm adding a little
more water to my paint to help it be
a tiny bit transparent. Sometimes that can
be a positive. Now, with a deep color, I'm mixing the orange with red and a little
bit of black and brown. I'm working on the ribs. Again, use the same technique we used for the little pumpkin, get a dry brush, dry it off on your paper
towel or get a new one, and just make scrubbing
blending motions to soften that transition where the
rib dips into the pumpkin.
7. Shadows and Foreground Leaves: Shadows and foreground. I'm going to start
with a shadow color of black and a smidge
of white and brown. I'm aiming for the table
color but very deep. Black with just a little bit
of brown and white in it. Use a smaller brush, water the paint down
a tiny bit and direct it to the right bottom
side of the pumpkins. We're looking to put the shadow areas opposite the candle. Imagine where the candlelight
is shining and put the shadows away from they
would fall under the pumpkins. I come back with another brush. You can either clean off the
brush you just used or use a new fresh brush to soften that line like we did in
other steps of this painting. As you can see, I added a little bit more
table color under the shadow. I had the shadow extending farther than I thought
looked realistic, so I went ahead and added a little more table color there. All I'm using the same
colors from earlier brown, white, black with a
little more brown this time and I'm refining the stem. I'm going to do
that on both sides. Now, where the stem
attaches to the pumpkin, it grows in between the
ribs where you see a rib, the stem grows into that crevice in a points like a star or
something like that. Now I'm going to
work on the shadow around the candle holder. It will be below it
in all directions. I'm really concentrating
on getting a little shadow beneath these
particular leaves as well. Same technique, water the shadow paint down a little
bit, use another brush. If you've extended
the shadow too far, you can mix up a little more
table color and blend it all together with a
clean, soft brush. The reason you don't
want to blend with any existing shadow
color is you're just going to make a muddy mess. It'll just smear
that shadow color everywhere on the table
and not look very neat. That's why we clean off the
brush or use a new one. Okay, I'm mixing up the leaf color again
with yellow and brown. This time, I'm going
heavier with the yellow. I'm starting to give more depth and complexity to the leaves. I like to use a flat brush
and as I'm painting, I tend to twist my brush
a little bit to get more paint off of it and
give me a sharper edge. Now, I don't need to blend
these perfectly at all. In fact, sometimes I like to
make two puddles of color, like a brownish petal and a more yellow puddle and get a little bit of both of
those colors on my brush. That way, you're
mimicking some of the natural variations you
find in leaf colors in nature. If a leaf is located
behind the branch, remember to leave
the branch there and we'll come back and touch up that branch a little bit later, but just keep
overlapping the leaves. If they run off the
edge of the painting, just extend the paint to
the edge of the canvas. You can continue to paint over into the black
area if you want to. It's not a problem if you extend over the leaf
that is already painted. Now I'm going to add a
branch at the bottom, yellow and brown and black. Remember, it gets
thicker toward the base and as the branches move
away, they're thinner. At the very end of the branch,
I'm going to add a leaf. Now I'm going to start
painting on more leaves. If your shadow color
wasn't completely dry, you may get smearing here, make sure you've let
your paint dry for that shadow layer or use a blow dryer to make
sure it dries quickly. Again, the leaves are located in every
other leaf position. They're not equal
across the branches. There's a little space between where each new leaf starts. Go ahead and refine your
branch a little bit. Take that branch color and make sure the leaves are connected. If there's an area
where you can see
8. Berries and Final Details: Berries and final details. All right, everybody,
we're almost finished. This is where we're adding
in those final touches. I'm mixing up a flame
color of yellow and white. I just want to make it
a little more intense. I'm using a very fine brush
and trying to keep it within the confines of the space I've already
made for the flame. Now, I'm going to
paint black around the outside edge just to
define that a little bit more. I'm painting black around the outside and then
smushing it around with a cleaner
brush just to give a sharper background so
the flame stands out more. I'm going to blow dry that. Then I'm going to mix up a
new color for the berries. I'm going to be using red with a touch of brown and black. I'm going for a deep
burgundy wine color. Using a flat brush, I'm going to start making small round shapes in
between the leaves. I like to take my brush, place it on the
canvas and spin it around in a circle to
get around movement. You might practice this on a scrap piece of
paper a few times, but I touch my brush with
paint and then I smush it in a circle and I'm going
to continue this all the way around
anywhere I have branches. In nature, you would see
these overlapping and hiding from behind leaves
partially and things like that. But for this, I'm going
for more of a pattern and an easier way to paint
them for a smaller project. I'm just putting them in full circles everywhere you
see them on the canvas. But if you want them to
look more realistic, you'd have a few that
were obscured by leaves. I'm going to add them to the branch that's
in the foreground. I'm also just going
to place a few on the table as if
they've been knocked down and they're just
randomly scattered around. Put a few at the base
of the candlestick. Now I'm going back into the berries to give them
a bit of a highlight. I'm taking red with just
a touch of yellow and I'm going to touch it to the berries in the
direction of the candle. If the candle is to the right, I put the
light to the right. If the candles to the left, I put the highlight to the left. I'm going to repeat this on all the berries on the canvas. Just a small little touch
of highlight will give them more depth and realism. I'm going back with my
branch color and I'm now connecting all of the
berries to the branch. Start at the middle
of the berry on the top edge and just connect
them with a very thin line. Most of the time they hang down. This fruit is called a droop, which is spelled DPE, but I think they also
droop like DROP. That's how I remember
droops hang. They hang from one little
sliver of twig or branch that connects it to the
wood. All right. This might be a good time
to blow dry your canvas and clean off your brushes
before we go to the next I'm adding a yellow to the center of the candle flame and then I'm going to mix up a yellow and a white and add
some drips to the candle. I'm going for a slightly darker color than what
I already have there. You can add a little
gray to it to help it stand out more. I'm just creating a
little drip pattern. I'm going to create the puddle, which is a half circle shape
right under that flame. I'm going to use solid black and a very thin brush to add a wick. Now I'm going to refine that finger loop a
little more by mixing up a darker gray and accentuating that
shadow under the loop. I'm going back over
the leaves now with a brighter golden yellow. It's yellow and white
and just the tiniest bit of orange and our brown, just so it's not a
day glow yellow. I'm not overblending these. I want to keep this. Oops. Again, if you make a mistake, just try to get it off
with water as soon as you. Now, I'm not aiming
to over blend these, but I am wanting a
more intense layer on top to obliterate
the foreground. On the top, remember, we left the background white before
we started the leaves, but we didn't do
that on the table, so we'll need a little bit thicker of paint on the
leaves at the table. I'm continuing on top of all the leaves we already
have with a much lighter yellow to give the
impression that lights coming through hitting
the edge of those leaves. Sometimes the
leaves are a little bit transparent too with light. It gives it that nice glow
you see when a leaf is backlet try not to
overblend this section. For the purposes of this class, I'm leaving the
canvas up and down. But if you want to turn
your canvas around and upside down so you can reach
the leads more easily, I do that a lot
when I'm painting. Notice I've mixed an even
lighter yellow here. This is that yellow we
were working with before, that goldenytan yellow with
more yellow and white. I'm paying special attention
to the tips of the leads. I'm making sure to turn my brush when I pick
up the paint to give a nice sharp edge to
allow me to paint a sharp tip to that
almond shaped leaf. I'm mixing up more of the
white for the pumpkin. I'm going for a much
more dramatic, light, whitish bone color here with white gray and a little bit of yellow, but
it's mainly white. I felt like I was losing the pumpkin a little
and I really wanted to stand out as though
it's sitting in front of the other
larger orange pumpkin. I'm just working on
getting the color into those the plumped out areas
that are not the ribs, the section that's extending. Then as we did before, I'm going to go get a
dry or a clean brush to soften those edges so that it blends back into the
recessed rib shape. Using a deeper brown, I'm going to refine the
stem a little bit more. I'm carrying it down into the
base of the pumpkin so that you see some grooves in the stem and where it
attaches to the pumpkin. You'll see when the vines
have withered and dried, they have more definition than just being smooth
when they're picked. Shrivel a little
bit. Make sure to put some of the lighter
color on the candle side because that's where
those highlights would fall and deepen the
shadows on the side, away from the candlelight. Keep going until you're happy
with how it stands out. I really wanted
that white pumpkin stem to stand out against
the black background. I think I've achieved that now. I'm moving on to details on
the large orange pumpkin. I'm mixing up a variety of orange shades that
match my lights, mediums, and highlights, and I'm just adding some dots and lumps. Not all pumpkins are smooth. This one is not a super
warty variety of pumpkin, but it does have some little
dots and texture to it, some little lumps and bumps. I'm just adding those, deepening the ribs a little bit more
with more of our shadow color. Just dabbing it a little
bit with a paper towel. There were a few areas I thought
were a little too thick, so I just dabbed them
with a paper towel. I'm also going to
add some remember, you don't have to keep these consistent with the lights
and shadows because they might actually be
different colorations on the pumpkin when you find a pumpkin like
this in real life. You don't have to
have just shadowed and highlighted bumps. You can mix them
up a little bit. All right. I'm going to mix a medium gray
for this pumpkins texture, I'm going to give them some
vertical grooves and lines. I want these to be up and down. I'm continuing to
darken the ribs a little just for more
realism and depth. I want to add some vertical, almost bark like sections
to this pumpkin. I just wanted to
have some groove so it's not perfectly smooth, like something you'd
get at the store. I want it to look a
little more realistic. All right. We're wrapping up just a few little more
highlights around the candle. I'm going to water
down some yellowish white paint, very, very thin, then almost immediately I'm going to come back on top with a slightly slightly damp brush
and soften that highlight. I'm going to do it again,
you can just repeat this. You can leave those
lines if you want, but I'm just going
for more of a glow.
9. What To Do Next: Okay, everybody. By now, you should have a
pleaded still life. So what did you think?
Did you like it? Are you happy with
how it turned out? Do you have any questions? Please get in touch with
me and let me know. I'm happy to answer any questions you have
about this project. In just a moment, I'm
going to show you how to share your project
to the class gallery. But first, I want to ask you
to please leave me a review. If you enjoyed this class, it'll help other
students find it. And more than anything, it
really helps me as a teacher. So please, please, please
if you don't mind, if you like the
class, I would really appreciate you
leaving me a review. Also, let me know if
there's anything you'd like me to cover in future classes. I'm always interested
in what you guys would be interested in learning. So I'm about to leave
you instructions on how to upload your image
to the class gallery. On projects and resources
within the main class screen, it looks the same
for all the classes. Then click Create Project. It's that green
button on the right. Then you have a few
things to fill out, upload your image,
then choose a title, and you can write a
project description. You can add more images
or a video if you want. Then in the upper
right hand corner, there's the green
button called publish. Click, click click it. All right, everybody,
that's it for this time. I'll see you in the
next class. Bye.
 Laura Irrgang, Artist, Author, Illustrator