Transcripts
1. Welcome: O Well, hi, everyone. My name is Carrie Sanders,
and I'm an artist, a teacher and a creative here in beautiful Farmington, Utah. I'm here in the mountains, and all the leaves are
starting to change, like a quilt outside
is so beautiful. This has inspired me to create this fun
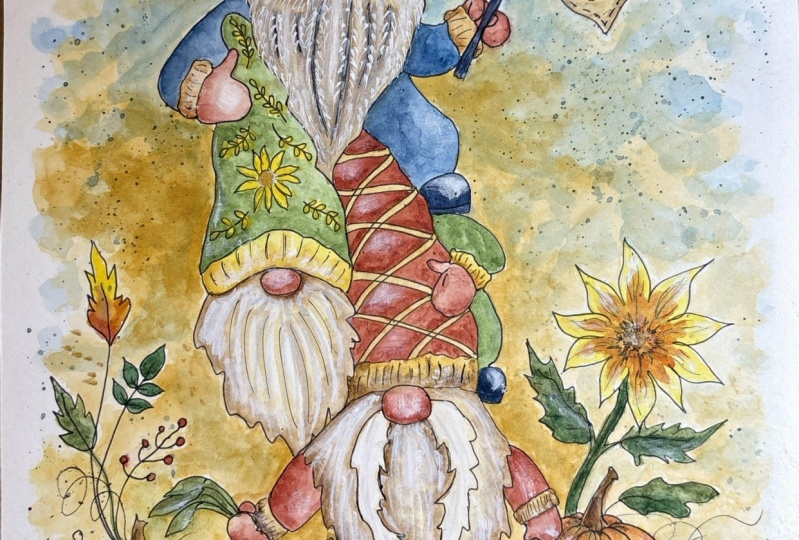
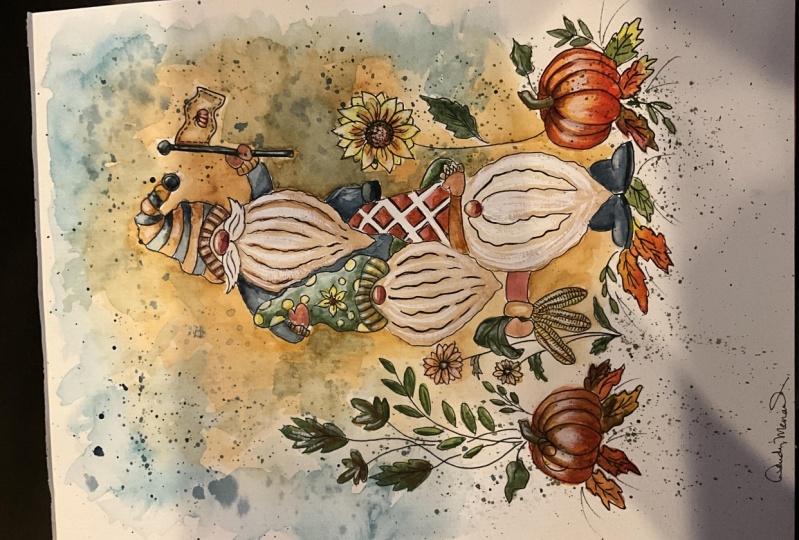
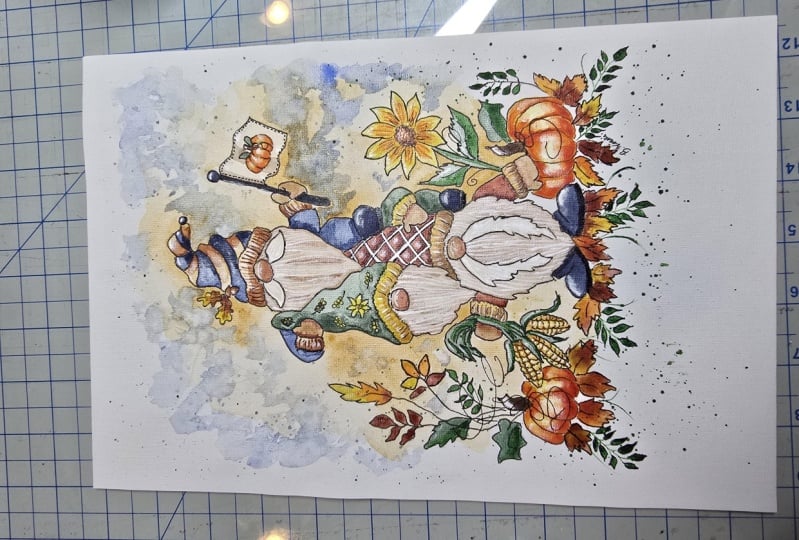
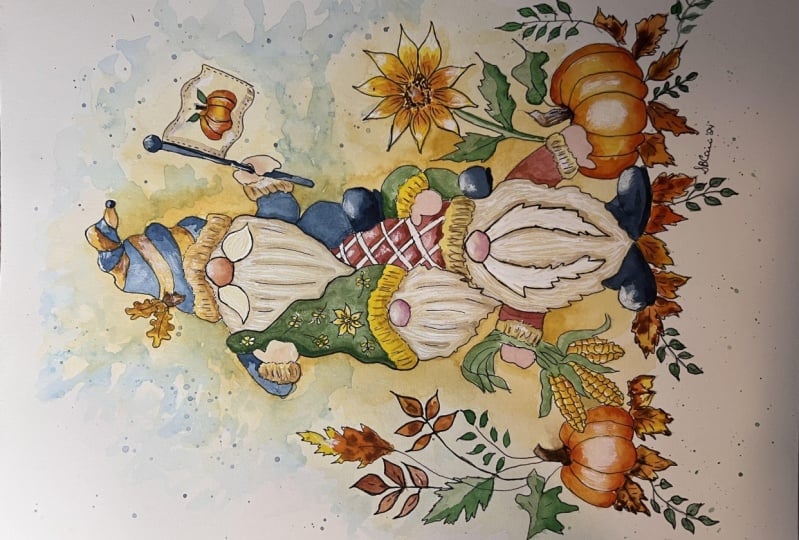
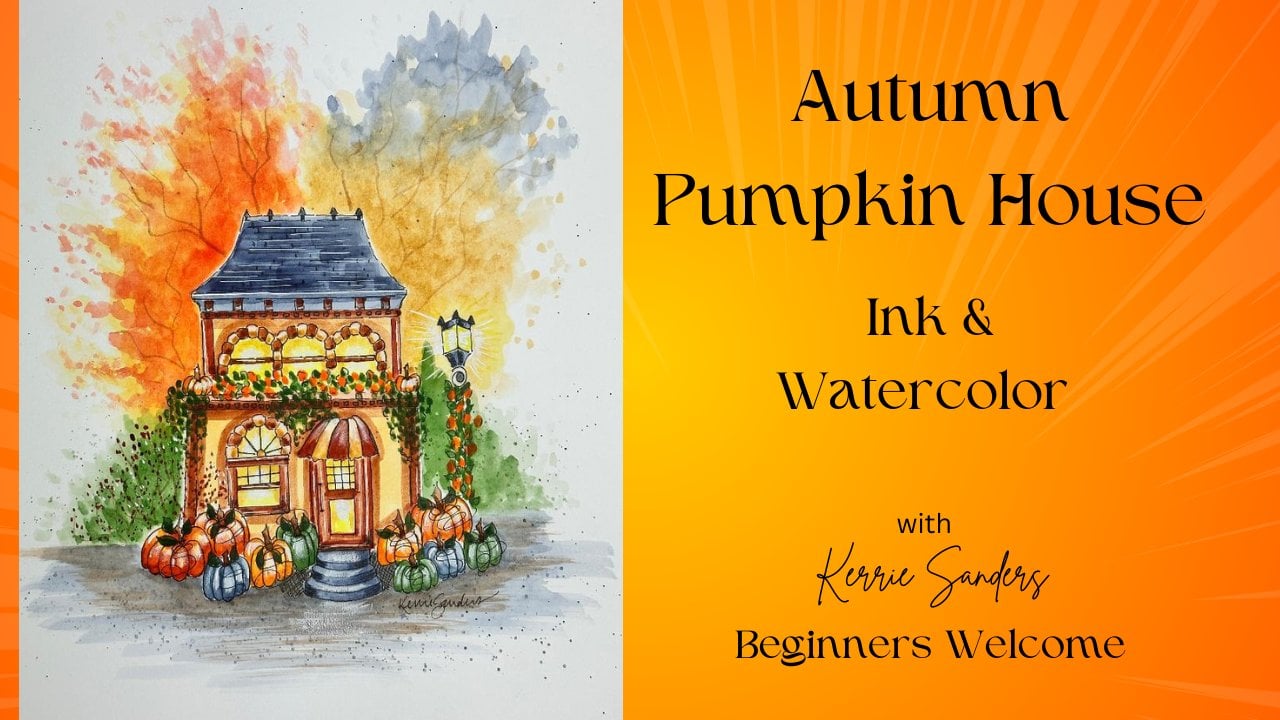
piece for us today. This is an autumn nome tower. These cute noms
are surrounded by pumpkins and some flowers
and colorful leaves. It's done in ink, and then
we do the watercolor, and then we do some
more inking on top. This is a piece that is for people who have some
experience painting. If you've never painted before, then please take a look at
one of my other classes, and then come back to this one, you'll have a better experience. All of my classes,
I provide for you in real time so that we
can paint it together, and you are in control. You have the ability
to speed it up, slow it down, stop and start it, do whatever you need to do to make sure it's the best
experience for you. We are going to be doing some techniques such
as highlighting, both putting on and
taking out highlights. We'll be doing shading, we'll be doing glazing and wet on wet techniques
will splatter. And of course, lots of aching, and some other things as well. And so it's going
to provide for you a great base to
sharpen your skills, as well as add to your toolbox, if there's some things that
you haven't experienced yet. And it will help you
in this project, as well as future
projects to come. You know, I have been
teaching since I was 19 for many, many years. And I have learned
during that time that the best thing that I
can do is provide you with opportunities and
teaching techniques and make sure that you
have fun along the way. And so that's what I try
to do in these videos, and I'm with you every
step of the way. I was fortunate
enough to be picked up by a big box store that took my pattern book and published it out over 10,000 copies
sold across the country, as well as pattern packets
that went along with that. And I've entered and won many art contests
over the years, and I only share that with you so that you
understand that art has been a big part
of my entire life. And I just have such
a love of sharing art with others and feel so grateful to be here on Sk share with you. If you would like to take a look at some of my other classes, well, I have a little tease here for you right on my wall. But you can just go into the search bar at the
top of this page, type in my name, Cary Sanders, and all the classes that I
already have available to you will populate and
you can just scroll through and see if something
that's interesting to you. Also, if you'd like to click
the little Follow button, then you'll get a
ping every time I pop out a new class and you can see a pass of interest to you. I'd really love to spend
some time with you either in this class or
one of my other classes. But if this class
looks like it's fun and you'd like to
take this with me now, then let's go into
the next video where we talk about the
class projects more, and we'll get into
supplies and our palette.
2. Class Project: Alright, my fellow
friends and artists. Today, your class project is to complete one autumn nome tower. And you can do this easily
by following my videos. Step by step, I take you
from beginning to end, and don't forget that
you're in control. You can start and stop the
videos, speed them up, slow them down,
whatever you need to do to make it the best
experience possible for you. When you have finished,
if you could take just a moment and snap a pick of your finished project and upload that into
our class gallery. Just look for this button
on this page of Skillshare. Then that will give me a notification that
you have finished, and I get to go in and make
some comments on your piece. And also, we as each
other's students get to see what each other
has done, which is so fun. Nothing but love guys,
no judgments here. And we love to see how they all turn out because
we're all unique. We all have special
abilities and talents. And it's like giving
a group of people the same cake recipe
or the same casserole. And they all turn out just
a little bit differently. So it's so fun to share and see what each other
has done. All right. Thanks again for
taking this class, and I'll see you in
the next video where we start our supplies,
our palette, and applying the pattern. O
3. Supplies & Pattern Application : Let's do a quick review
of our supplies, and then we can dive
right into Inking guys. You'll need to print out the PDF that I have provided for you
on this page of skill share, that will give you the pattern that we'll
be working with. You'll need a little piece
of graphite paper to apply the pattern and a
piece of tracing paper. You'll just trace that pattern onto a piece of tracing paper, which we can apply
to our watercolor paper using the graphite. Today, I'm going to
be using a block, which means it's already
sealed around the edges, and this is going to
be hot press paper. You can use cold press or hot
press. It doesn't matter. I prefer hot press when
I'm inking because it has a little smoother
surface on the paper, but you'll be fine either way. Also, I'll be using 140
pound watercolor paper. And this is a heavier
weight paper, and you'll have a
better outcome, guys. I always say watercolor paper is more important than the type of brushes you use or the
type of pink that you use. It's all up to your paper. And so treat yourself to some nice 140 pound or
better watercolor paper if you're able to do that. And for brushes today, I would say, grab
your favorites. We don't need very many really. I'll be using one or two flats. These are a ten and a six. And a variety of rounds, and these are my favorites. Of course, you know, number
four is always my favorite. So I have a four and a six, and this is also a six. It's just a little bit
bigger, slightly bigger. And then you will need a liner brush and a
fine detail brush. This is a one ought, and this is a let's see what is this? This is a 20 ought. So something that you can
do some fine details with. And of course, we always
need my favorite tool ever, our handy dandy tissue. We'll be using quite
a bit of that. Something to put your water
in and a towel and a palette, of course, and a spray bottle
to keep your paints pliant. Let's go ahead and
review our palette. No. Here's what I am using. Guys, I always say, substitute, use what
you have at home. If you don't want to go
out and buy something. If you want to try
something new, then I provide you
with what I use. And sometimes it's nice
to start adding to your tool kit here a little
there a little, so to speak. Today, I'm going to be
using cad yellow medium, yellow ocher, orange,
transparent orange. And it doesn't look
like a big difference, but it makes a huge difference. And Tera Verte and Hooker's
green, brown matter, Burnt Sienna, burnt umber, Naples Yellow, emerald,
blue and indigo. And then of course, I'll be using Blee proof
white. I use this. I much prefer this
over guash white, but you can use either
one that you want. It's just that Blee
proof white is more opaque and you'll have a
better outcome with it. And then as far as inking goes, I'm going to be using an 03. So that tells you the
tip that I'll be using. Guys, the most important thing
here is to make sure that whatever you use is waterproof. I want you literally to make a mark on some watercolor
paper, let it dry, and then paint over it, make
sure it does not smear, bleed, it needs to be
completely waterproof. This one happens to
be. It's a stdler. I also use micron and
a multitude of others. There's even some ballpoint
pens that you can use, such as Muji or Naval. But this is what I'm
going to be using today, and so grab your supply. Reapply the pattern, and then
we'll dive right in inking. I'm going to go ahead and show you how to apply the pattern. And if you know how to do this, you can just skip this and
apply your own pattern, or you can certainly put this on the fastest speed and
zip right through, make sure we're on the
same page with things, apply your own pattern
at your own speed. So what you need to
do first is print out the PDF that I have provided for you on this
page of skill share, just print a copy of that
out on your printer. Once you have done that, then make sure that you
have some tracing paper, and you're just going to trace that pattern onto a
piece of tracing paper. And then we're going to
take that tracing paper and we're going to use that to apply it to our
watercolor paper. You're going to take a
piece of your graphite, make sure you have
the right side down. Only one side will
apply the pattern, and just slide that
under. And away we go. I'm going to be using a stylist, which has a little
knob on the end. You can use a pencil
or pen, of course. I just choose to use
a stylist because it maintains the
integrity of my pattern, and I only have to
trace this once, and I can use this
over and over and over and I can keep
this in my files. Go ahead and get to this point. I'm going to speed
up the tape because it's kind of boring
to watch somebody trace on a pattern and you
apply yours at the same time, and I'll see you
on the flip side. At Mt f.
4. Inking First Step: Okay, I know I've
pushed this a lot, and this will be my
last time I promise, but it's so important
that you make sure that you test
your marker or your ballpoint pen or fountain
pen or whatever inking tool you choose to
use and make sure that it is completely
waterproof. Please, please
because we are going to be doing the bulk
of the inking now. We'll do our watercolor, and then we will add a
little bit of inking on top. And I am not going to be putting every detail of the
pattern in at this point. So it's okay to speed up the tape and move
ahead of me here. But just be aware some of the things that I will not
be adding in at this point. Also be aware guys that
ink doesn't dry instantly. And so try not to smear it, try not put your hand in it until it's had a a few
minutes to dry completely. Oh. Oh. Now, you notice when
I applied my pattern, I just did a dotted line for all of the arm
bands and head bands. And it's because what
I'm really going to do is ad and I'm going to
do a broken line here, but kind of a squiggly line. This is a ribbed head band. So I just wanted it to
be kind of lumpy bumpy. Yes, that's a technical. Work with me, people.
So just a little bit of a lumpy bumpy and keep up broken.
Kind of like that. Name is on these
armbands, these cuffs. Now, be aware of the
hand and the pole and the positioning that
pole goes into his hand. O h Oh. Oh. If you've done other watercolor and
ink projects with me, I'm usually more
loose with my inking. But for this pattern, I'm sticking to the
actual pattern. Just because of the nature
of what we're doing here, we're doing people basically and actual things that have to look like corn and
pumpkins and whatnot. So I'm going to When
I applied my pattern, I only did the stem. I just did an indication. And now we can go ahead and
add in the little wet shafts. It just would've
looked too gummed up, too messy if we tried to do it. You know, both times, like on top of each other. So Sometimes you just need you just got a
free hand a few things, but you need an indication, a reminder of where it
goes or the placement. And this is a good time
to shape up your flower. Like mine looks a little
wonky here and there, so I'm just gonna make
the petals look nice, I'm gonna take my time on it. Ink, Let's things
be very forgiving, which is wonderful. I loved ink. Great, how to do, guys. This is so fun. It just
It takes life so quickly. A Now, this can be confusing. You've got a hat, a hat, a leg, a shoe, an arm. That's why I keep
the pattern handy. If all falls, go back to your pattern and take a look
and go, what did I do here? Because that will help
keep us on track. And it's important to realize
what's on top of what? So this hat is on top of things. The shoes on top of things. Oh. Okay, take a deep breath. Are you holding your breath? I know I was. Don't be
afraid to take a break. Shake out those fingers a
little bit if you need to. Now, the plaid on his hat, all I did was those
indication lines, but it's actually kind
of a double line. So I'm gonna keep
my pattern close, and put the double in because it'll help
us when we paint. Sorry, I'm trying to keep
my hand out of the way of the camera can be a little
tricky here and there. Hey. We'll go doubles one way, and that's easiest if you
just go all one direction, and then we'll go all
the other direction. It's a hat, so don't be
afraid to bend them, make them wave a little
bit. Here we go. Did it. Okay. Wow. That
was one of the hard parts. We got through it just fine. Okay? One thing I want
to point out is I didn't put the lines in
for the beard on those top two on
purpose right now. We'll do that later. Oh. Okay. Now, again, this
is a great time to shape up your petals if you
need to on this flower, and I am going to put in some dots just to kind
of help me with the center. I didn't want to draw a circle cause it's going to be dots. I don't want to put a
ton of them in just yet, but let me see how that
helps give us a guide. Sometimes we need a help, right? Right. That's all
I'm going to do on the main portion of
that flower for now. Oh, I don't know if you
can hear that rain. We're getting heavy
thunderstorms right now. We've got the monsoon rains
coming up from the South. I may have to stop
filming for a minute. It's. Oh, dear. Let's see if we can finish this guy on the
bottom first. Oh. His hand in. Now, there's a gap
between his cuff and his hand because we got those corn stalks
that he's holding. Right? And his thumb just
kind of pokes out over here. So make sure that you're
looking at your pattern. Right. You don't be worried
about the stocks being, you know, just right
and all matching up. We're just going
to jam him through his hand right here.
And it's okay. Same here. Okay. I like to make these corn
husks a little bit. And I'd like him to kind
of flip on the ends.
5. Inking 2nd Step: This is where I like to make the actual corn see at the edge, how it's just a bit wavy
for those corn kernels. Just those little details. We're going to make this a fun and a little more meaningful. And then we're going to take
a couple rows up again. I'm going to make it
a gy. Technical term. Same here. Oh. Great. And then let's
bring them across this way. Oh, my gosh. Is that adorable? And don't get carried away. You don't have to
do a zillion rows. Don't make them too tiny 'cause we're not gonna
go that detailed. That's all we need
right there. I'm gonna bring some stocks down there. They're not floating great. Alright. Oh. M. Oh. I'm gonna do my leaves last, 'cause I like to turn
my board upside down. Right. Hey. One more over here. Oh. Okay. Okay, I have decided
not to ink in these bottom leaves until the end because we're going
to do them wet on wet, and sometimes they move
around a little bit, take on a little bit of
a life of their own. So we will ink those
last when we do our final details in ink. And
so we'll just leave those. So give a double check, Make sure you have
everything inked in that you would like to have
inked in at this point. And let's that completely
so we don't spear anything. And while it's doing that, make sure you have
all the paints you need we'll start painting. Oh.
6. Background & Splatter: Before we start to paint, if you happen to
have lines that you didn't ink over by
mistake, that's okay. But you need to go in and just clean them up a little bit because once you
put paint on top, obviously, you can't
remove the lines. And so The things that I have found that
seem to work well on graphite graphites
a little tricky to erase are some
professional erasers. You can't just use
a pencil eraser. So the white eraser
seems to work okay. Honestly, I like
the gum eraser the best to erase graphite lines. And a needed eraser can work, but this is the least
successful I have found. So I would recommend
that you use one of these three erasers
and lightly grow over. Please make sure your ink is completely dry so you
don't smear your ink. And then just lightly go over. It is going to lift
some of your inking. So don't press too hard. You don't want to go too
light on your inking, but if there's a line that you're like, I
really blew it there, and I've got this big
line that's out there, then just just go ahead and use your Gumm eraser and
erase that real quickly. And if by chance, you
press too hard and you lift out too much of your ink line, don't
worry about it. We'll put it back in, so
no stress and no worries. I just wanted to give
you that little tip. Alright, picking up. This
is a well loved brush, picking up my number six round. And I'm going to give you ratios of water and paint
throughout this class. It helps you understand
how much paint I'm using. This is going to be a 9010
mixture 90% water, 10% paint. And I'm going to dive right in. I'm gonna have a tissue handy. We're going to just
kind of start. We'll start down here where
it doesn't matter too much. We're not going to
blend anything here. Just to give you a feel for
your paper, your brush. You know, it's kind of
ease into it a little bit. We're going around the
flowers, around the pumpkin. And I'm just going to blend that a little
bit with some water, soften that edge a bit. Great. Now, let's go ahead
and add a little more here. Same thing, going around
the flower, the leaf. You could get some on there. It's not the end of the world. Just soften it with water. I to go around
these petals a bit. Great. Now, I'm going to take water on my brush.
This is just water. And I'm softening that edge. Notice how I'm pushing
down on my brush. Just to get a nice
soft edge there. I'm going to id that
out a little bit. I don't want it to
be around edge. So see how I'm going
in and out with that. Just to make it
more interesting. Alright. We're getting
our confidence up, so let's keep on
working our way up. And now I'm making the
yellow ocher a little bit stronger around our
cute little nomes. Okay? Just picking
water on my brush. Well, water. H that
out a little bit. Good. Hey, water on my brush. Hang it out a little bit. Ing it around the flag. I'm gonna use it out. Cute. Cute cut cute. I got it on the
hat. That's okay. We're gonna do quite a
bit with it on the hat. But I'm just gonna touch it
with my tissue to soften it. It's a big deal. It doesn't matter if you get on
those oak leaves. I want it stronger up here. Turn your board upside
down, if it's easier. I'm just not because
of the camera. So don't be afraid to just turn your board and make
it comfortable for you. I'm just adding only more
of 85 15 around his body. I want it a little bit stronger. Good. Now, water on the brush. You know by now, we're
going to jig it out a little bit. Oh, Now, notice I've left
white areas between. Remember we're going to come
in with some of that blue. Little leave areas where it
can be like a true blue. So not everything is blended. And notice I'm just going
to go over these flowers, but I only have
water on my brush. That's okay. Also, keep in mind,
especially you beginners that watercolor dries
one value lighter. So keep that in mind as
you're applying this. It's going to be lighter
than what you're seeing. But we can always come in
and add another layer. We can glaze a layer on top, and that will be a nice addition if you feel like it's too light. No worries. Hey, I'm just going to lightly
touch that bottom. I want it to soften as
we meet those leaves. Wait. Beautiful.
How are you doing? Yeah, fund? I can't believe
the transformation already, and we just got started. That's the beauty of watercolor. Awesome. Alright.
If this is as dark as you feel like it
needs to be, then stop. I'm adding a little
more depth to it here just 'cause I know it's gonna dry a little bit
lighter. Oh, I like that. And I want it to be just a
tad darker around this nome. And I'm still keeping
those white spaces available for the
blue that's coming. And I'm ad I want it to match this side a
little bit better. Add just a touch more
color right there. Just touching it
in. It's still wet, so it'll blend nicely. Yep. B it out. Nice harvest fall colors. Gorgeous. All right. Let's let that dry, and then we'll
come in with blue. Okay, making sure that your yellow ochre is completely dry. I actually used a hair dryer, or you can use a heat tool, or you can just wait
for it. That's mine. Now I am picking up this
beautiful emerald blue, and it's kind of like
a cornflower blue. It's a beautiful fall blue. And this is a 9010 mixture
on my number six round. And we're going to
come in and lightly go over some of this yellow
ochre here and there. Now, I say lightly because what happens when you
mix yellow and blue? You get green. And
we don't want green. So I'm not digging it into. I'm just laying it on top of the yellow ochre
here and there. And then I'm going to pull it out into some of
these white areas there where you actually
see the blue. Beautiful. I'm going to soften
that a little bit. Touch it here and there
with your tissue. Oh, that's gorgeous. Alright. Let's put some more up here. Using an up and down motion. And then I'm going to use
just water on my brush. I go to pull some out a little
bit further There we go. Soften. So pretty. It's one of my favorite colors. I know. I say that a lot. How can you be an artist
and not love color, right? Okay, I've got a nice
white spot here. I'm gonna pull up
some of that blue. Yes. I want that
to fade a little. Now, it's up to you how much
speckling you want it to, you know, how much
you want it to look kind of speckled there. And I like that texture. I like it to look like that. If you want it more smooth, then just keep using more water on your brush and smooth that
out a little bit. Okay. Sing out of ta. Okay. Now, I'm not going
to bring it down too far, a little more around the body. But I'm being aware of
these plants right here. That's why I didn't make the
yellow too dark over here. Always be aware of the full
composition of your piece, especially as you're laying
in backgrounds like this. You can't really go
in and undo it as easily as some other areas
that you could reverse. I'm just going to soften that. Now, I might come in. I'm not going to go under it, but I might have a
little right here, so it's kind of got
some continuity. Like that. Me over here
with the sunflower as well. Mm hmm. Wait. Okay, step back and take a look and see if
there's anywhere else you want to add to
it before we splatter. I've taken tissue, you know, my handy dandy favorite tool, and I'm going to take a
little bit of this indigo, and this is a 9010 mixture. And then I'm going to clean out my brush
before I pick up, but I am going to pick up some
of this beautiful emerald. And we're going to mix
those two together. So I would say
about a 50 50 mix. And that's going to give
us kind of a denim blue, which is actually what
we're going to use on clothing of one
of these nums. But I didn't want it too dark and I didn't
want it too light. So now I'm taking
it and keeping it at a 9010 mixture, and
I'm going to splatter. I like to use the tap method
where I tap with my finger. I feel like I can control
things a little bit better, but I always tap on the palette once or twice just to get
rid of some of the excess. I'm going to cover this
little flower here for a second. All right. So once I have it down, I like to do little
areas at a time, because now I don't want it to look like all
dark dots like that. So I'm going to take my
tissue and just gently lift. This is a straight
up and down motion. Don't swipe or you'll
have schmears. But you can see how that
lightens some of them, keeps some of them dark, and you have a nice mixture, and that's what I like to do. Now, you can splatter however
you like to splatter, and that will be
just fine, you know. But I'm just showing you the
way that I like to do it so that you have options
to try and choose from. You bring some up now. And I'm just gonna touch. I'm gonna leave at
darker at the top. Did you get a big one like that? Just touch it. Let's
get rid of it. Hey. S. Ed. We had a few
more right there. See how you can kind of direct it when you're using
the finger tap. I just wanted a few right there. Here right here. Now, we're not doing the lower part because
we're going to come in with green and
do those later. So let's lift off our
tissue and see how we did. Oh. Oh. Let's that completely, and we'll move on
to the next step.
7. Washing in Gnomes & Flower: I'm starting with my number
six flat and yellow ochre. But before I do, I wanted to just remind you or point out if you haven't
done this before. There's three great ways to
make marks with a flat brush. That's why I like them so
much. They're very versatile. So obviously, you can
just use the flat edge, and we will be doing that. And then you can use
the chisel edge, which is coming straight
up on top and you can make very thin thin lines. And then you can always use just the corner
of your brush. To fill in areas as well. And we'll be doing a variety
of marks using our flats. And so I like to expose
you to a variety of techniques that you can
do with your flat brushes. So if you don't have a flat
brush, treat yourself to one, I would say a good
medium size like this, a six, a four, maybe an eight. Any of those would be a
great one to start with and start to learn different things and expand your knowledge, your skills, and
see what you like. Now, we are using
a 9010 mixture of yellow ochre and just
coming in and doing every other stripe on this hat. How I use the chisel ledge
in that little area. Get a nice line there. Okay, great. Now, we're also
going to use it to fill in the ribbing on the
edge of the knit cap. Great. Le the cuff. And I'm gonna take it down to
a 955 and fill in the flag. I just go right over
the pumpkin. It's okay. Oh. Oh. Well, this
is called a wash, where you do one coat of
paint, all one value. And the key to getting a
smooth look is to have enough load your brush enough that you can do
at all or close to. And also to move quickly so that your paint blends together and you don't have
any brush strokes. I'm actually going to switch
to my number ten flat, and we'll keep going
with the yellow ochre. I want this to be a 955, so quite thin down. Just do a thin
layer on the beard, not the nose, so we'll
go around the nose. But what we're going to do
is just base coat the ends. We're just doing a wash,
all one value, 955. Just to warm up our paper. We don't want a stark
white value to work on. And because we're doing
all these autumn colors, we want a nice warm value, not a cold value,
not a cold tone. So we're going to
come in and we'll do some shading on this, and we'll do some highlighting,
we'll do some inking. So don't worry about
how it looks right now. I just want to warm
up our paper here. This is where you can
use that chisel edge to come in above the nose. I switched to a ten so
I can fill it in fast. And not have marks
showing individually. R. While our yellow
ocher is drying, let's pull out some of
our cad yellow medium. This is a 9010 mixture. You can see the
pigment is actually quite strong for a yellow. It's very opaque,
which is great. That's what we're going
to want to work with. By the way, you notice
that I'm putting my paint in the corner. And the reason I do that in the corner of the well
is so that I have room to work with it out here with the amount of water
that I want to. It just gives you more
versatility rather than clopping that paint in the middle of your well
and then you're like, where do I put my water? Now, we're going to add the
highlight to our pumpkins. And let's actually just work
our way down. Shall we? We can go ahead and touch in
these little wheat shafts. They look like little blobs
right now. That's okay. Don't worry about being
super individualistic. Be a little more careful
on the flour here. We can go ahead and
put in the ribbing. Again, we're still at a 9010 make sure it's
just quite strong. Which is great,
'cause you remember it's going to dry
one value lighter. I want to put it
on his arm cuff. He only has one arm showing. Let go. All right. Let's keep moving down. We're going to do our sunflower. I'm using my number four round, by the way, my favorite brush. It's so versatile. It
comes to a nice point. Holds a lot of water and paint. I'm going to leave the
center white for now. All right. So moving
down. Let's go ahead. We're going to put
yellow just on the ridge where the high
light would kind of show. If the light we're hitting it, round that around a little bit. And then let's
pick up some water and just soften that edge. So it doesn't look like
a stripe. There. Okay. Soften the top as well. And let's come over
and do the other one. O and soften that
with some water. Great. And let's
do our corn stock. Corn Cb, I mean. Have you ever walked
through a corn field? I did that once when
I was in the Midwest. I always wanted to
just walk through a cornfield and disappear
and see what that was like. And it was very humid and
sticky and kind of spy. Wasn't quite what
I had hoped for, but it was still really cool. They were way taller than I am, and I'm a tall girl. Alright. That's all we need to do in our cad yellow medium. Our yellow ochre
should be dry up here. So coming back to the mixture
that we used to splatter. Remember this is a mixture of emerald blue and our indigo. It's got a little more of the emerald blue
cause it's so light. I only takes a touch
of the indigo. And then I take it to a
9010 ratio with the water. It's going tissue. And so we've got
this 9010 mixture that we're going to
use on his clothing. He just kind of we're
going for a denim blue. And we're just going to do a wash. A one value, fill it in. Right. Now, let's do
his sleeves and pants. I could have switched
to a flat brush. That was just this
little area, so Oh. Nice. Okay, moving on down, I have pulled out some
of this terra verte, and this is a very
opaque color as well. It has a lot of pigment in it. So I have taken this to a 955, and I'm going to
use my number four. When you see me touch my tissue, I'm just pulling off
some excess water or paint so that I have
better control. I'm just going to go around these little wet shafts and bring in all one
value at the terra verte. Oh. It's gonna soften the edge
where it met right there. Great. So it's much all value. I'm gonna t that dry before
we come in with more. I'm gonna take this
to his sleeve now. And to this pant lk. It's another great
harvest color, isn't it? Beautiful fall, sage green. Love it. Good. While we have this,
let's go ahead and add this to some
of our leaves here. Just the s flower leaves. We're going to be particular
here for a minute. I have a glare from my
bright lights, Eric. Can't see very well for on
this angle. There we go. So if you go out of the lines
like I did right there, just touch it with
a water brush. And if it's still wet, it
should lift out for you. Looks like it went
out right here, too. Right. And we can do our
pumpkin leaves. That went in a little darker
than I wanted it too, so I'm just coming in
with a water brush. I'm going to lift off. See how I just touch my tissue, that pulls it off of my brush. Great. Okay, let's
do the other one. You know, I've never
grown a pumpkin. I feel like I'm kind
of a gentleman farmer. I love to grow tomatoes and I've grown a
few other things, but I actually had
to look up how to draw the shape
of a pumpkin leaf. I had to pull up a pumpkin online and see what
it was shaped like. There. All right.
That looks good. And let's do this leaf as well. Oh. Touch it. Pull it off. This is called
lifting a high light. You can also use it
for pulling off paint, and I like the way it leaves it kind of dark around the edge. We're using a 9010
mixture of our rate. And we're just going to
touch go down one edge. It's going to look
strong for a minute. Don't panic. Hey.
Now, water brush. Soften that. Just to
blend it a little bit. Beautiful. You can see how that just adds a nice shadow,
some depth to it. Let's do it around the hat to or excuse me around the brim. I bring it up a
little bit higher. Okay. Now I'm going to do a soft
edge with the water brush. T my tissue. Good. All right.
8. Shading & Adding Skin Tone: Let's come in with per mix. A just a little more indigo
now to our mixture here. Let me see how that
took it darker. And I'm doing a 955. So it's quite thin. We're just going to add a
little bit of shading to the bottom side of
this fluffy ball here. And to the bottom
side, the inside edge. We will come back
and add some water. Hey, this is the water brush. And I'm just going
to soften that. So a little bit more. Now, you can make
this as dark as you want or kick it as
light as you want. I just want a nice contrast between this dark spot
and this light spot. That's what I'm doing. The
hat's crunched over here. Hey. And let's do the same
with the sleeves. Makes sense that
it would be darker back here underneath his hat. Hey. And next to his beard. Probably all the way down. Behind that hat,
behind the shoe. Hey, and then water brush. Good. Okay. Let's let that dry. Coming into indigo blue, and I've got a 9010 mixture, so it's pretty strong. And I'm using my small flat. I'm gonna come in and
do a wash of his feet. I should say of their feet. Oh. Alright, while that's still wet, rinsing out and using a water
brush. Just gonna lift off. I'm not too worried about
these little ones up there, but I want to lift
off a little bit. Just on the toe. Just curving my stroke, following the
contour of his boot. Same thing on the side. Always be aware of
the curvature or the contour of whatever it is you're painting
and follow it. That doesn't look
funny. There. That just adds an automatic
highlight for us. Maybe I'll do just a tad up
here on each one of these. Great. Well, I've got
the Naples yellow, brown matter, Burnt sienna
and burn umber out. Let's take some Naples
yellow at a 9010. And let's go ahead
and just face in the Now, we're going to
mix a little bit of this snple sellow,
in the middle. And it's not going to
take much brown matter. What we're striving for is
just kind of a pinky coral. Just a beautiful
fall shade here. I'm going to add just
a Get it to the color. You like it to be, guys, test it out on your
paper on a scrap paper. And then we will come back in and we'll shade it
with the brown matter. And then take it to a 9010. That's about the color
I would like it to be. Now, we have these stripes. It's not the end of the world
if you paint over them, but I'm going to try not
to, for the most part. We'll come in with some white. Such a pretty color,
beautiful fall color. If you're holding your
breath, take a deep breath. Sometimes it gets
intense when we're doing small areas and
trying to be careful. If you need to switch to
your really fine brush, do that. I love my number four. It has a nice fine tip, I have a lot of
versatility with it. Great. And now let's go ahead
and do the sleeves as well. O et's let that dry. Okay, guys, we need to
mix up our skin color. So let's pick up some
of our yellow ocher. At a 955. Let's add in a
little bit of brown matter. That was too much.
Just a tiny bit. Let's go. A teeny bit more. And then the tiniest
amount of blue. And then test it out.
Good. Okay. So let's start with that and wash
in the nose and the hands. But before it dries,
we'll add a little bit more to the
nose. So be aware. And Awesome. All right. Now, while that's
still a little bit wet. Let's add in just a touch of the brown matter on the bottom. It's a little wet
on wet technique. How I touched it
lightly on the bottom. You can see how it's bleeding
upwards, which is perfect. And you can control it by
just using a water brush, going across that top,
touching the tissue, just to keep the top light and the dark on the bottom edge. And then you can do that. You know, to whatever value
you want to take it to, do you want him to
have a real red, kind of ddy looking
nose or just more pink, just a little soft pink nose. You could also do it to the hands like where
he's gripping it here, gripping that hat, and
maybe gripping the pole. So it might be a
little more red. And let that blend in.
Nice. How that go, guys? If you've never done
a skin tone before, now you know how to do it.
This is great to know. You would allow in portraits or just other
characters like this. Great. Let's do
next. Pull that in. Pull in the hand. A little too much water there. So now I'm going to add a
little more brown matter. The bottom. I like kind
of that rosy ddy look. And on the bottom of his hand. Okay, I'm gonna keep an eye
on that and do the next one. Don't forget his little
thumb poking up there. And touching the
pumpkin here. Okay. Now, I'm gonna just touch. Top of his nose.
Bled a little bit. Just water brush here. Hey. Down. A a little brown matter. Just to that bottom edge. The fingers. Maybe a little
under the cuff on this one. Awesome. Water brush. Great. How to do.
9. Shading: I've now added our final
two colors to the palette, orange and transparent orange. And let's go ahead and wash in the orange
to our pumpkins. Is going to be a 9010 mixture. I'm using my number four, and I'm going to do the bottom portion
and the top portion. And yes, it's going to
look like a piece of candy corn for just a minute. Don't worry. It won't last. I just have water
on my brush now and softening that edge,
same with the top. Then I'm going to bring it
down on the outer edges, the outer two pieces. And just to touch
on the creases. Don't want to lose that yellow. That's why I'm going
really gently. A little more depth
on the bottom. Good. We're going to leave that. And let's come down
to the ones on the lower and same process. These are going to be
brighter because we don't have that yellow
ocher underneath it. Now, we just water on the brush. Soften. Okay. I'm gonna pick a little up.
Bring it down on the outside. Around that corn, Maybe
there's a little shadow. We are going to come in with transparent orange
on top of this. But we don't want to lose
that beautiful yellow. Let's do our next one. Hey, a on the brash. And then a little
more on the bottom. Good. Let's let that dry. While those are drying, let's come up to our sunflower and just take a little
bit of this orange, this 9010 mixture, still sticking with
my number four brush. And we don't want to
lose our yellow tips. But we're just going to add
a bit of orange goodness. From the center out, I'm just
kind of pulling out ion. Going to use this together
right towards that center. Maybe soften a little
bit here and there. I don't want every petal to
look the same, you know. And I'm going to add
little bit in the center. Good. Okay. Now, this top one should be dry. Let's pick up a little of
our transport and 9010. This color is so
rich. It's going to add quite a punch to the
orange that we've done. So go slowly. Water on my breast. Same thing on the bottom. If you don't have
transparent orange, cad red light would work. This doesn't have quite the
same kick or quinocridin red. Water. Notice when I'm softening
with water, I'm pulling down. I'm not letting it go
up into that yellow. Don't want to lose that yellow. Now up here, I'm going to
pull it up, pushing it up. Good. And I might just intensified a little
bit right around the stem. That's where it will be the darkest is deep in
that stem area. Maybe a tad more on the bottom. I'm just touching, almost
an up and down motion. It's wet, so it's going to
be a little bit of a wet on wet and blend up
a bit by itself. Water on my brush. Beautiful. I soften this just a teeny bit more. Et's do this big guy over here. And really, guys,
it's personal taste. So I want you to make sure you're doing this the
way you want it to be. Maybe you like it, just the light pumpkin
color. That's fine. Just leave it orange and don't put the
transparent orange on top or just do the tiniest
amount to shade on the bottom. Make sure that you're
hay and you're personalizing these pieces
to make them your own. Now, because this one's so big, I am doing a little round, to see that little
round sculptured to make it look curved. Remember what we said earlier, always follow the
curve of your piece. Pushing this up, as
I soften that edge. Good. All right.
Let's let that dry. Oh, sorry, before we do that. I go to add just a teeny
bit here and there. Not a lot. See how strong it is. It'll take over your flower if you All right. Let's turn our attention
to this hat while we're letting that ry and come
over to our brown matter. And just add a little
bit of shading. This is a 9010. And we're just going
to add a hint. It's not like we're going
to be super particular. We're just going to add
maybe a little V shape on the bottom of these checks. It's gonna fade into
the background. But it's gonna be
enough to make you feel the richness of the
fabric, feel some dimension. Good there. All right, while
we have our orange out. Let's just put the tiniest
amount on this corn. We don't want to lose
the beautiful yellow, but we need to add just a little hint of
character to it, right? So I'm gonna kind of
stick with the lines. B Now, if you wanted
to be really clever, you could do like
Indian corn and do the rows, different colors. But you don't have to be that
complicated. I don't think. Okay, let's come up to these cute little oak
leaves and the acorn. And I'm going to start
by putting a little bit of yellow medium on the
tip or the upper side. They don't have to be twins. They don't have
to match totally. And then I'm going to come
in with some burnt sienna. Great. And then where they touch, it's a
little wet on wet. They're going to blend
together nicely. And if you don't want
that to take over, just pull it back down. Pull that down a little bit. And then I may come in with
a second coat of the yellow. That's fine. Let's add
to our acorn here. Now, while we have
our burnt sienna, we're going to do a little
bit of shading on that cap. This is what we're going to use to shade our yellow ochre. I water on my brush now. This apning pinging
out a little bit. Water on my brush. I
like that contrast. If you're thinking, Oh, my gosh, are,
that's really dark. Remember, it's going to
dry one value lighter. But also, good contrast
gives you a good dimension. It makes it more interesting. So don't be afraid of it. If you don't have dark
darks and light lights, and we haven't put our
light lights in yet. But if you don't have
those two together, what you have is a flat piece. Hey, just water around my brush, and I don't want to
lose the light area of the top portion. Hey. Very good. Now, I want
to be the same for our cus. I see.
10. Shading Beards: All right. It's moving
down to the next hat. Spot into our terra verte. We already shadowed this
side, which is fine, but we didn't do
our arm over here, so probably
underneath your foot. All right. And then just water. Now, if this is too
subtle for you, you can use the
Hooker's green for a deeper shading,
higher contrast. I really like this sage green, and so I'm just
trying to maintain the integrity of
having a light green. I'm going to deepen this
shadow just a bit right here. I got just a touch right there because it's shod be right. It's a dark spug. I just need to deepen this
brown matter right here. How yours looks,
so just you gauge. I think I'm okay with the hat. So let's take some
of this se color, our rate, and add
in our cornstoks. Right here. We're just
going to wash these in. Remember, wash all one value. Oh yoke. Now, let's pick up some
of this burnt sienna. And let's add a few dots. Notice I'm just staying
on that outer edge. I'm leaving space. We're going to come in with
some burnt umber. Let's let those dry a bit. Coming into our burnt umber, and this is a 955, so very thin really
watered down, super light. We're going to do shading
on our beard and mustache. And then I'm going to use
water on my rush to soften. As to the next one. Three. Now, you might be feeling
like this is dark. But remember, we're
going to come on top of this with our white. And what did we learn earlier? If you want your white
highlights to stand out, you put something
dark behind them. So tru the process and understand that it's
going to be just fine. And your white highlights
are gonna look beautiful. O. Good. Now, I'm
actually going to let this one dry a little
bit before we come back in and do
around the mustache because it's too close
to the outer edge. So let's let that be for
just a minute while we do. Let's come up. We didn't put our lines in up here,
but that's okay. We're going to do them
now. And the soften those. We're going to come in and
want them nice and soft. And, that's dry enough
that we can come around. Okay, let's finish
around the nose, and then the outer edge. And that's really gonna make
this mustache stand out, especially once we
put white on it. U Okay. And on this bottom one, we're actually going
to do the cuffs, all the ribbing with
the burnt umber. Oh. And we need to put our shading
on this cad yellow one, which is going to be
done with yellow ochre. Let's do that, w. Remembering a little bit here. And then if you feel like it, you can put a little bit on
the center of that flower. Little too much water
that we've done. Okay. I might put just a touch
of yellow ocher right up underneath. Right
there at the top. Okay. And let's take some
of this burnt umber. Sorry, I'm bouncing all over, but we're just at that point where it's all these little
things that need to be done. But we're going to
bounce. That's okay. Let's do our two
stems with our umber. And I'm going to lift off a little bit of
highlight at the top, so just wipe off my brush. Touch touch and press, wiping it off on my tissue. You can see how it
gives a nice highlight. Nice, Let's take the tiniest
amount of umber, 955. Teeny, tiny, and just a little bit of shading
next to the pole. And maybe a little bit
down here in the fold. And then let's do that stem. And let's take some
indigo and do that pole. You can use your flat brush, or you can use your round. I'm gonna use my round. Get nice and slow. Don't press hard. I'm going to pull a
little off the tip of that right there, where
a highlight would be. Okay, let's use some of this indigo and strengthen
the shadow on these boots. So the sole is going to
be our darkest point. Bringing that right across. Ts. Bring it up on the
sides with some water. And that gives it a
nice rounded edge. Again. And water. Okay.
11. Colorful Leaves: Our last one, our little
set of feet down here. I go to be darker
underneath his beard. We don't want to lose that
nice highlight we did earlier, but we can sweep some
of this down under. And just water on the
brush, just soften. Let's keep the other foot. I think to some water. Keeping it ed. Nice. Okay, now we can add a little bit
of shading on that pole. I'm a a little darkness
into the hand. Be darker there. Ply
right in the grip. Probably on the edge
where attaches. Under the round ball and on
the bottom edge of the ball. Right. Then since
we're using indigo, if you need to strengthen
any shadows on his denim. This is the time to do it. I think I'm pretty
good because I don't I don't want to lose this beautiful
blue that we use. I want it to stay
nice and light. So I don't think I'm
going to add it anymore. We're going to do some leaves
with some hookers green, which is a deep rich color. Now, if you don't
want it this dark, you can mix it with
some ravert and get a nice medium green. But again, I want contrast. I want some light,
I want some dark. So I'm going to do this
set here in the dark. Yes, I'd love that,
see that rich green, beautiful fall color. Gorgeous. All right. Let's continue with
Hooker's green. And this is like a 955. It goes on so dark. I'm just going to put a line down half of that
stem. I'm going to go up. And I'm going to do the
bottom half of this. Pick up some water
and soften that. R, I just wanted a
little bit darker. I wasn't dark enough for me. Yeah. Hey, S the other.
Do the bottom half. Good. And let's come
over on the other side. I think I will do this set here. Oh. Okay. And let's do half our pumpkin leaf. So let's just wash this
in the bottom half. And same with the other side. It almost creates a vein for us. You can choose to
paint it in or not. We have a little bit of
indication with our ink already. And this one that we
did earlier Good thing. Great. Now, I'm going to do medium On the top. Let's see, I've loaded
my brush, pretty good. I'm going to pick up some orange while that's still wet
and let those touch. Blend. They'll just blend. Hey, we'll give those just a
minute to see what they do. Is going to touch a little
bit where they touch. Let me pick up
some brown matter. And do these leaves right here. Now, you can be doing any
color you want, you know. These are just autumn leaves. I'm actually gonna take some of this brown matter and touch down here in the orange. Oh, yeah, that's pretty. That's kind of the bottom. Nice. Okay, I'm gonna do some fricena. Cad yellow. This one's
gonna be kind of a mi. Umber. Let me a little orange. I'll do a mix right there and add
a little bit of orange to my burnt umber now.
And to my sienna. I'm going to encourage
that orange up. Yellow just wanted to take over. Beautiful. Let's step back
six feet and take a look and see if we are missing anything other
than our highlighting, if we need to add some shading
or whatnot. All right. The final thing that
we're going to paint in are our beautiful
leaves at the bottom. Yes, I've turned my board
upside down to do this because it's easier
to pull them, and you can do the same or you can do it the other way,
whatever ses is for you. So we're going to do a lot
of wet on wet technique, and it's going to be similar to what we
did over here where we just do multiple
colors on our leaves, we want them to look all di different changing
of the colors, and there's no right or wrong. And if you go outside the line, don't stress about
it because we're going to come and
at these in later. Although, again,
it's kind of hard to get rid of these lines once they're on there
with the graphite. I would caution
you to be a little bit careful, but stress. Stress. And I would just say you can
use really any of the colors that we've used
on this entire piece. So whatever strikes
you, just go for it. I'm just going along my palette
and picking up a variety. The burnt umber, burnt sienna, brown matter, orange, I'll
be using yellow in a minute. Ca yellow, I'll even be
using some of the greens. Just try to mix it up a little. So there's no need to take
a lot of time on these. You should buzz through
my quickly. Foo. L et's see. Okay, let's let those dry.
12. Highlighting Phase 1: L et's put our leaves
on the vine here. And I'm going to go
with the hookers green, the darker green because
everything down here is so dark. No, I did not ink
this one in first. I find it much easier to paint my little leaves like this
and ink them afterwards. So you decide what was easier for you and
learn from that. And that's what you
can do the next time. I just never had and
add in a little vein. And once your leaves are dry, you can add in the vein. When I went over to dry, I realized that I had this
little yellow smudge, you can see it
underneath that vine. And so I thought,
Well, no problem. I'll just add a few
vines that come down, and it will be disguised. So that's what I'm doing. And if that happens to you, you can try to lift it off, or you can just cover it up. And I decided to cover it up. Great. Okay. I've set my pints
panes and put them away. So I've picked up a small flat and some of my
bleed proof white. I like to work on
a watercolor paper that I can keep really close to my keys as I'm working because we're going to go
through it fairly quickly, and I didn't want
to be reaching far. So dry brushing. If you've
never done that before, is literally taking
a brush that is dry. In other words, don't
dip it in water first. Pick up some of this bleed proof white and then wipe
most of it off. And let me show you
on a dark piece. You're going to literally
brush on dry scratchy paint. So it looks like maybe
an old barn door or an old fence where
it's been whitewashed, and it's peeling off, so to speak, and that's
what you want. You want some of that under
coolor to show through, and you want it to look kind
of scratchy and texture, and it looks so cool. So this is what we're going to do for a lot of
our highlighting. I'm going to be using this small flat for a
little bit here. We may switch to a
bigger one soon. Let's just start with
this little pumpkin. We don't want to lose our
beautiful yellow highlights. So just start sparingly. And just to put on a little bit. And you'll kind of get a
feel for it as we go along. You'll decide, how much
you want on there. Are you a person that
like strong highlights, a lot of character, or do
you like subtle highlights? And you want just
a little touch. And there's no right or wrong. It's whatever you
like. You B you. That's what I love
about painting is we can all be ourselves. Everyone's unique, and you're gonna come out with
a beautiful piece. So I'm going to put
a little bit of highlight on these
top two bumps here. Look how fun that is. It just brings them to life. I think it adds so
much character. And then I'm going to bring
it down across the front. Now, you can see I'm going on fairly light at first because
I can always add on more. Now, can you take this
bleed proof white off? Yes, but. Yes, but
it is water soluble, but it will leave a
little film of white. So if you want to
practice first, if you haven't used it before, and you're not sure.
Practice. That's okay. L practice just like I did there and get a feel
for it or start in a more obscure place
than the middle of the top hat. Maybe take it easy. Start Start down here
somewhere. That's okay. And get comfortable. This jar is going
to last me a year. And yeah, it kind of
thickens up over time. I've opened up
before, and it's been like literally. It's
been like thick jello. And just put a few
drops of water in, stir it with the back end of your brush, and
you're good to go. Now, I'm just going to put a few using that very tip
of my flat brush. I'm going to add a little bit
on the ribbing of this n. The tiniest amount on the
tip of his nose, the top. Cute. Let's leave
the beard for now. Let's stick with what
we're doing here. I just a little highlight on S, I'm going to make it round where this flag is curving out.
Just a little here and there. A little bit on his cuff. On this chiseled edge there. Are you kind of getting
a feel for it now? You're kind of understanding where you would like it to be? I'm up on the
chiseled edge here. Now I'm flattening
it out. Beautiful. Okay, I'm not gonna do
any on the arms or legs, but I am going to
put some on the. I'm gonna curve it. Curve
it down the other way. I'm doing the ribbing.
My hand out of the way, doing the ribbing
on this band here. Game. I'm gonna do that beard, but it's tiny on the nose. And this band On this hat, I might just do a tiny bit on some of those squares
in our highlighted area. I like that. This gives
it a little dimension. Oh. Hey, on the ft. O. A little bit more. Yeah. Oh, I like that. We did so much to
preserve that highlight. We got to make the
most of it, right? Let extend this
out a little bit. Okay? Let's see where
else. Make this a bit st. Okay, ale bit on the corn. Just touching. I'm just going up and down
on the center of those rows. A little bit just on this upper portion of
the center on there. And a little bit
on the tips here. Don't cover up all
your beautiful yellow. Isn't this the fun part? It's
just all coming together. It's looking so good. I hope you step step back frequently and take a
look at it from six feet, get a better perspective. And it looks so much cuter when you see all of it
together as a full piece. Just putting a little
on the leaf there. Let's move over to
our pumpkins now. We can make sure you are
curving your strokes. Great. I'm gonna put just a couple of little lines
on the top of the stems. Now, I'm not gonna
put any on my leaves. Now there. I might put put just a little
on this upper one. Just, maybe this one too. Okay, I'm just looking.
13. Highlighting Phase 2: I've switched to my liner
brush. This is a three ought. You could use a one ot, two ot, whatever, a five out. I just want some thinner lines, and I'm going to
thin this paint down to this is now it's just
the opposite as before. So I am now at 90%
paint and 10% water. And yours is going
to depend on how new or old your white paint is. Anyway, we just want it to be viable so that we can
make some fine lines. I'm rolling this, pulling
it to a fine tip. Okay. And I'm just going to do a little extra
highlight here and there, maybe just to make
a little mark, and it's going to be curved. Just a couple little
emphasis areas here as well. And probably down
Pumpkin a little bit. On the stem. Do you see how those little highlights just make a big difference. I'm going to bring one
more down, I think. Okay. There. A, just a couple. Maybe more than a
couple on the ribbing. And I cross the nose. Yep, I like that. More on the
ribbing in the center area. Mm hmm. Maybe a little bit on
the pole. Broken line. Yeah, I like that. A
little bit on the wheat. Especially if it's covered
with green, there's something. It's a great time to perk it up. Like there. I'm just going
to touch it with some white. I'm going to do the
ends of some of these petals or all of them, and some little white dots
on top of the center. Dogs. I don't think I'll do
any on that leave. Alright. Let's take a look at this little guy here
with his white stripes. Great time to clean him up. Oh. A. Okay. If you just want to
emphasize any of your corn. Just a couple of mine need it. And just emphasizing
some of this. Make sure you curve those on the stem if you
decide to do that. And let's see. So anywhere else? I just add a little bit here. I think I'm about them white. Emphasis there. Hey, step back, take a look and see if you need white on the exterior portions. If not, let's move towards
the beard and the mustache. Y. This is going to make such
a difference to your piece. This is a very
exciting step here. So I always start with the
mustache and a little outline. I stay inside of my ink lines, but if you need to, we can come back
in and ink them. It's not a problem. And then I just start layering
in some lines. All right. Now, for the outside, we're not going to
go like around. We're just going to start
bringing them down. Eek them curve. They're going to be
kind of dry, brushy. You see how putting
all that effort into your beard has made now these white hairs
sand out beautifully. So good job. I'm trying not to lose those brown
streaks that we put in. I'm going to add a
little more definition to the outer edge here, just a little bit more. I really like to hit right
under the nose pretty hard. But we don't want to look
like a straight across. We want it to look of staggered. So be aware add a few more right underneath
that mustache there. This is where I'm going
to add a smaller strokes. Just a few marks
right here up under. O. Look how cute that
beard came out. All right. Let's do the next. Curve. This little guy doesn't
have a mustache per se. But when we go
underneath his nose, we'll make him a little
bit stronger and a little bit longer than
the one we just did. So we kind of hint at it. Let's come back to
the outside now. Okay. Now, I'm going to know, from the nose, they still
have to come curved, guys. We're pounding them
in right here. That's okay. But curve them. Look cute. Cute. And we still managed to keep
our brown streaks in there. It looks great. Now, this is going to dry a
little bit lighter. If you're using white guash, it's going to drive a lot
lighter than this will. This is more opaque.
That's okay. You just need to
add more layers or decide how opaque
you want it to be. Okay, so the trick
to this last guy is to not worry about his
mustache for a minute. So we're just going
to go around it, which means a lot of
short marks here. Them curved. Oh, my gosh, I can't even. They are so cute. Who made up gnomes anyway? I need to look up the
history of Gomes, like, Why don't they have eyes? Why is their hat so low? I have so many questions. Why is their beard down to their feet? So many questions. All right. Now, so let's come
up to the top. Let's add a few of these
shorter little guys under the nose, just
to make that nice. And then we're going to
bring some really long ones down that are almost straight. Se just a gentle contour. Adding some shorter
ones at the bottom. It just makes it a
little bit easier than trying to make a hair that
goes all the way down. And sh hairs make
it look stacked, makes it look more
dimensional, thicker. What's the word I'm looking for? All right. We want
to keep some of that nice yellow ocher showing because our intent is to make this white mustache
now really pop. So you can see I am being
intentional with the placement. S Great. If you step back and pull back so you can see it
a little bit better. Does your mustache stand out? Is it more white than
your background? If not, add more white or wait till it dries and wash in some yellow ocher
behind it if you need to. Remember that we are going
to touch up, so don't worry. No stress there. It's okay. Again, I'm being
very intentional. I'm trying to follow
the contour of this mustache with a
lot of short marks. Is this a nice, pushy,
fluffy white moustache? Oh, deep breath. Did you hear I just
took this deep breath? If you're holding your
breath like I was? Don't pass out on me,
guys. Take a deep breath. H. I. I feel on mine, I can see standing
back a little bit, that I want to use a wider flat and add just a touch
more to my pumpkins, these big ones.
Just a little more. Yes, right there in the middle. Here too. Y. I'll show you
this just as an example. I don't like where
it came down here, so I just have
water on my brush. Just go to lightly touch it and see how it just
takes a backstage. This blends out a little bit. When you're ready, pull out your ink and we'll
touch up together.
14. Ink Touch Ups & Leaves: I've decided to pick up some of this hookers green at a 955 mix, and I'm just going to add a few more a few more
vines here and there. I think that's all. And when I stood back six feet
and took a look, I came back and I added just
a touch of a white outline. You can barely see it
right there on the flag. I left room for the inking
that we're going to do. So if you're ready now, let's go ahead and pull out
our markers. All right. We're not going to re in
the whole piece obviously. But there are a few places
that we can finish up. Little stitching
lines on our flag. And if you want to add
any scroll word to it, Now, I am going to add
a few rib lines here. Just a few, not very many. Now I have lost some
of the mustache, so I'm going to add When you're inking
on top of inking, a great way to do it is to do broken lines and just
short little lines. Okay. Especially down here
on this checkered. I'm mostly going
to do the corners. O here and there. Oh. If you want to add lines
coming out from the center of your flower, you can. Oh. Adding a few really light ones, and not even on every petal. Everything's fine.
I'm going to connect. I have floating leaves. I wanted to put these
vines in after it was dry. And if you want to re emphasize your veins that we painted in over here on these big ones. Now, I don't think I
went over scrolls, but if you want to do
scrolls on your pumpkins, the key is, once you start, don't stop. Just keep on going. So I think I'm going
to add a couple. I'm going to emphasize
these little corners down here, so it's really dark. See how that sets
in the pumpkin, and then I'm going
to start up here, so it swirls around
the stem there. Same thing here. I'm
going to set it in. Following the contour. See how I'm following
the contour of the way we
painted our pumpkin. Okay. All right.
Anything else over here? We'll do our leaves last.
So don't worry about those. I'm coming back up to
the top here, actually. So, I want to strengthen this. Go to strengthen
some of these wheat. Just here and there.
And some dots around the center
of this flower. H. O. O. Oh. Good. On the ribbing and here and
this ribbing over here. Great. Okay? The mustache. This is a great time
to go ahead and add more distinctive hairs. The outer edge there. Oh. Hey, I think I'm good. I'm just looking at it here. I'm going over. Great.
I think we're good. I'm gonna emphasize
here a little bit more. Okay. De that one, too, and
I'm going to do this one. I want them to make more
of a bold statement. All right. Just bringing that fly down. Okay. I think we can do these
leaves on the bottom now.
15. Final Ink & Splatter: I think we can do these
leaves on the bottom now. All right. This is where you're going to clean them up and add that little jaggedy edge and the vein that
goes down the center. Yeah. Oh. Oh. Now, notice I'm not putting all the veins
that go into a leaf. I'm just doing the center. That's all we really
need. We don't want to overpower all the beautiful colors
that we've mixed. If you're not sure
which direction they should go start
with your vein, and that will give you the
direction that you need. Okay. Oh. Last one, guys. Okay. One more time.
Let's step back six feet, see if there's
anything else that you need to in or paint. Ah. I've already seen something. I didn't add these in. So I'm just going to
add these lines right here where we painted our
little shading right there. Okay. So if there's anything
else that needs to be added. It is time for us to do
our final splattering, which is the bottom
half, as you can see, I've used our favorite handy
dandy tissue to block off the top portion as well as the
center tower of our nomes. I'm going to water this
hooker screen down to 1955, using my number four, and I'm going to tap a couple
of times into my palette. I'm going to protect
that pumpkin just a tad. I don't mind if a
few get on there. And it this bottom portion. Adds a lot to our greenery. That's pretty cute. Tap
into your palette first. You know, while it's
still wet, again, I'm going to touch a few, just to lighten up
some, keep some dark. Here and there. I'm going to protect this
pumpkin and the corn. Oh, my gosh, that
looks so fun. So good. Here a little bit more right there. Okay. Then I'm going to touch touch a few while they're still wet. They dry so fast
under my hot lights. I like to do it in
sections. All right. Now, I wouldn't mind a few right there. It's
going to be tricky. Yes. There we go. I like that. Looks like we've already got
some over there, so that's good. All right. And then let me show you
what I did with my pen. Oh, my gosh, didn't
that just complete? It just rounded it out nicely. So I did take my pen, and you saw me do the scrollies
here on the pumpkins, but I added just a
couple at the base of these vines and a couple at
the base of the S flower. Just to tie it in. Again,
always keep in mind your composition and
the cohesiveness. And I think we're ready
to sign our name. So let's go ahead
and grab our pens. Always sign your name, guys. Always be proud of your artwork. I am so proud of you for
finishing this piece. Go ahead and sign your
name. Let's do it together. You have a special gift and talent that not
many people have, and so always be proud
of what you've done, and I'm so happy that you took my class and spent
this time here. Thank you so much for your time. I do appreciate it, and I
hope it was a benefit to you. I'll see you in the next video.
16. Congrats & Bloopers: Well, congratulations,
guys. You did it. You have finished your fun
and cute Autumnm Tower. I'm so glad that you
took this class with me. If you could take
just a moment to snap a tick and share that
in our class gallery, then that allows me to get a notification saying
you've taken the class, and we can chat back
and forth there, and I really would appreciate seeing what you
have accomplished. If you feel like this
class was a benefit to you and you learn something
or sharpen some skills, and you know someone
else that might benefit, then all you need
to do is look for this link on this page of Skillshare and share
the link with them, and both you and
your friend will benefit from Skillshare,
which is pretty cool. Also, if you think
it would be fun, it's holiday season to
take another class, then I have a few posted here to kind of tease
you a little bit. But all you need
to do is go up to the search bar in Skillshare
here, type in my name, Carrie Sanders, and all the
classes that I have will populate and you can just scroll through and see if something
looks interesting to you. It would be so fun to share
another class together. And lastly, if you would like to take a
peek at some of the work that I'm doing on my own
in my personal art life, then all you need to do is go to my website carry
Sanders art.com, or you can check out Insta
at Carrie Sanders Art. Thanks again for joining me. I hope you'll take a moment to click that little follow
button so that you get in notification whenever
I pop out a new class, and you can see if that's
of interest to you. And until the next time, I guess it's time for bloopers. All right. Happy
fall, everybody. Your class project
today is to complete one autumn nome
Tower. One autumn. We're going to do this
one more time. Take 20. But we will be doing
some color mixing here, which is really fun. We'll be splat. We'll be due. We'll be due. Who do. Oh, my gosh. Wet on wet. We'll also be doing we'll also be
doing some splattering, and what's the word
I'm looking for? Senior moment. Fabulous.
Fabulous, darling.
 Kerrie Sanders, Artist, Teacher, Creator.