Transcripts
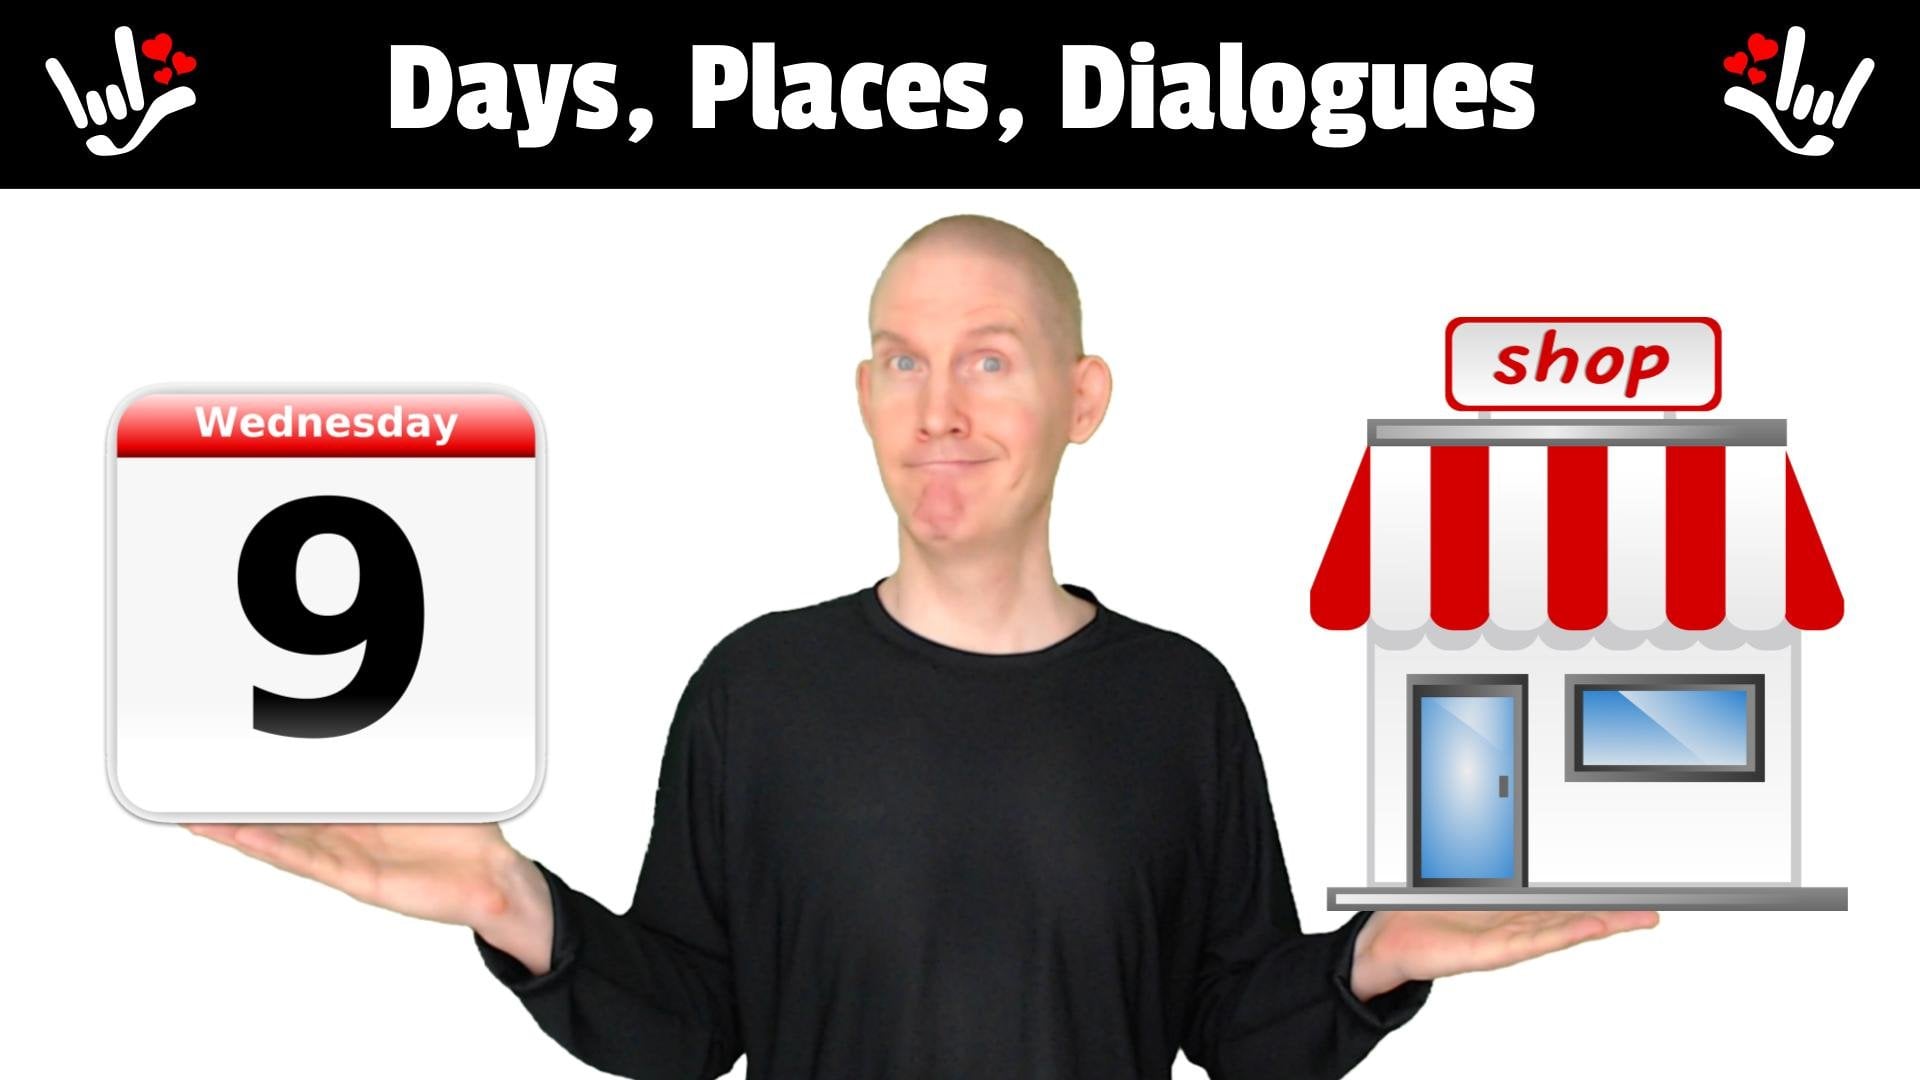
1. Course Intro + Tips: Are you ready to learn over 500 signs in
American Sign Language? Well, we've taken over 500 signs and divided them up
into useful categories. Now within each category you're going to learn in groups of ten, learn ten signs have reviewed ten signs review?
Ten signs review. Review. Yes, it's gonna be a two-part
review to make sure you can sign and understand the ten
signs that you just learned. After you've learned all
the signs in one category, we're going to have a big test for all the signs
in that category. What an opportunity
to show your skills. Now after the test, we're going to do
something really fun. You're going to
assign dialogues. Yes, we are talking about
complete questions, complete statements using the
signs that you've already learned in the course to
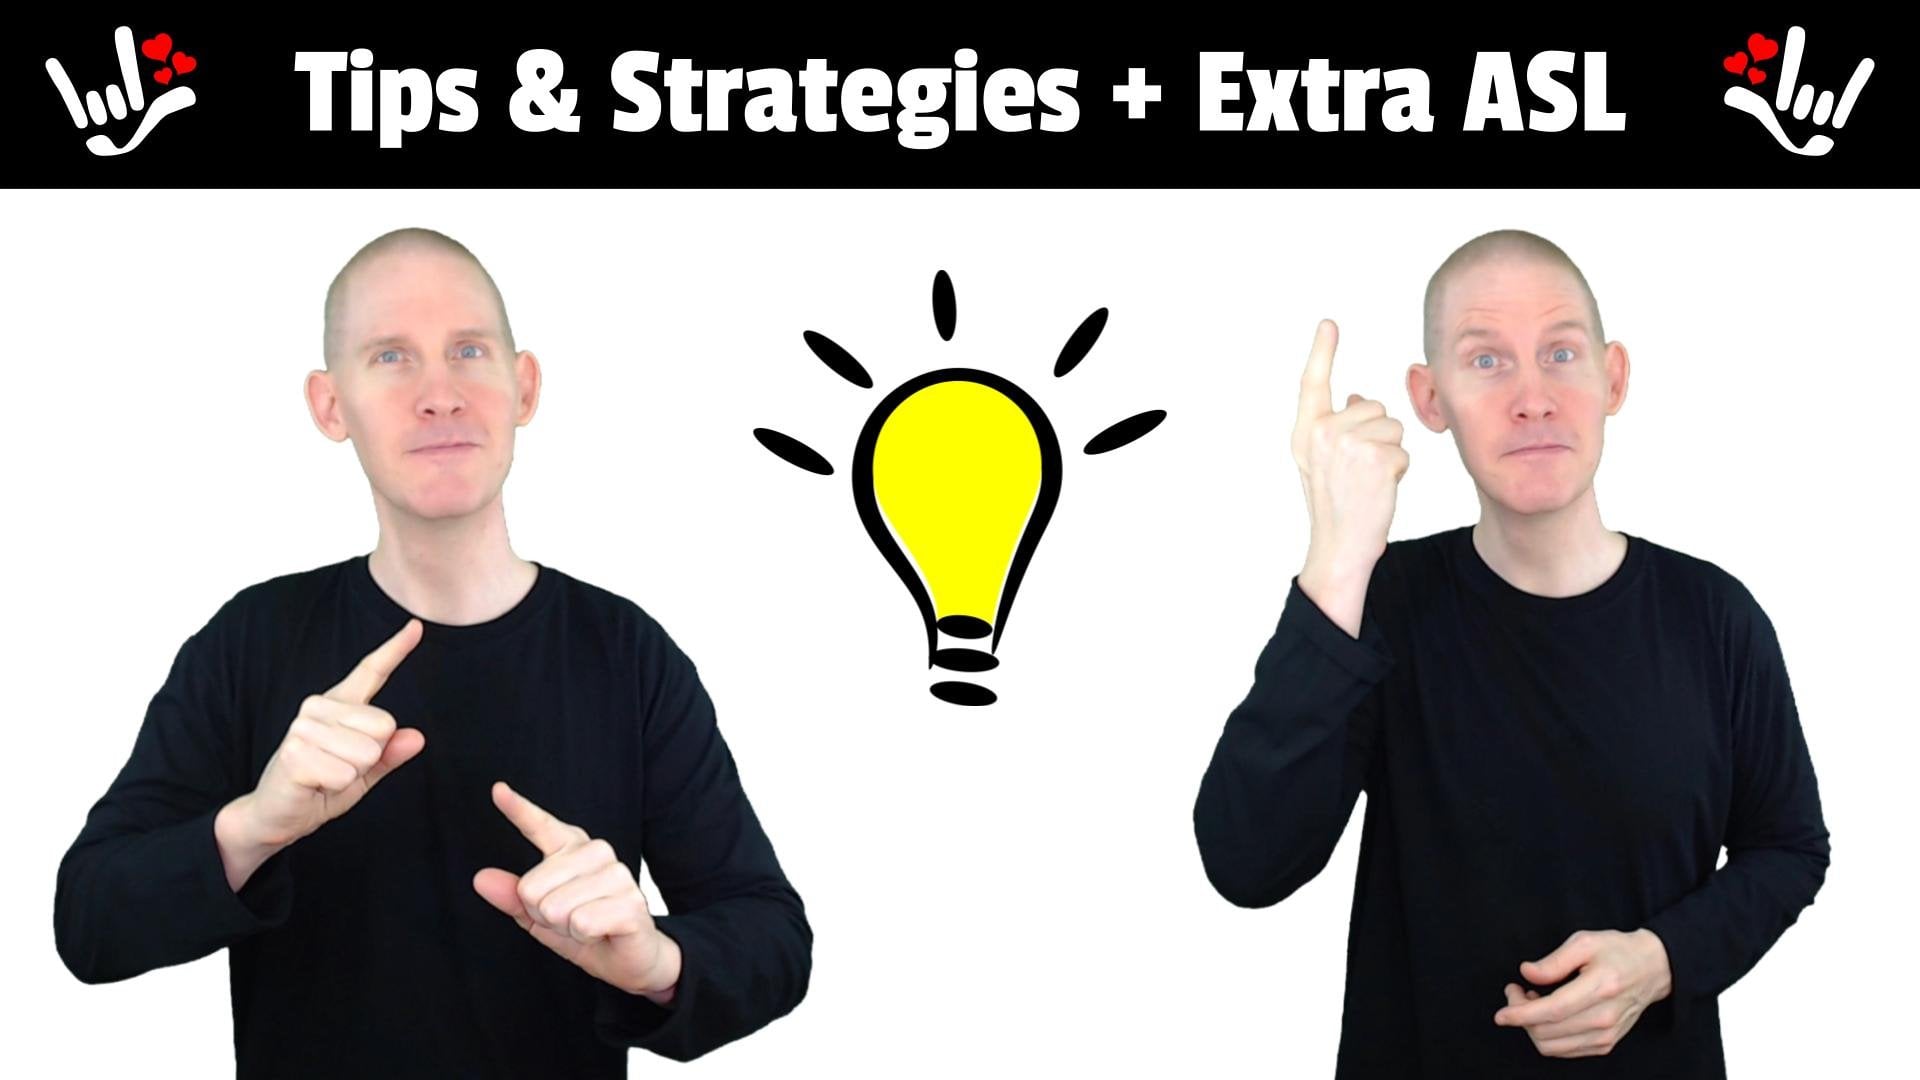
form complete sentences, we have a ton of content. Have fun, enjoy, go nuts. In this ASL tip, we're going to talk about
the lesson format for vocabulary signs
throughout this course. Alright, so I'm going to
show you the framework that I'll be using for
teaching you the signs. Alright, so here it is. First, I'll introduce the sign, then AAG spleen the
sign, show the sign. And we'll do sign
with me uh-huh. Practice and then conclusion. Right. Let's take a look at each one. So when I introduced the sign, you'll see me and I'll be like, here's the sign for whatever and I'll show
it to you regular speed. Alright, next, I will
explain the sign. Now this is where
I'm going to go into detail about handshape, hand position and movement, how things are happening, how our bodies moving, facial expressions that are
important for the sign, and just get into detail
about this sign itself. Next, I will show you the sine will have already been
showing you this side, but most likely it was in slow motion explaining
things going very slow. Once I get to show you the sign, I'll show
you from the front. I'll show you from the side. I'll show you from
the other side. In Australia from
the front again. Now this is a wonderful
way for you to just absorb what I'm doing. Sometimes there are signs that you look straight
on and you say, Okay, I think I get
what he's doing. But when you turn to the side, you see that the
hands are actually moving forward and backwards or a little bit
different than if you're only looking straight on. Alright, next we'll
move to sign with me. Alright, you're going
to hear me a lot throughout this course saying sign and sign-in, sign with me. This is your opportunity
to practice with me, get hands-on experience, duel
with me as I'm doing it. Now I imagined during
the other parts two, you've probably
already started moving your hands and
figuring it out and practicing what I'm showing you right now with
the sign with me. I urge you just sign
with me, get practice. Sign language is such
a hands on language. I mean, literally
and just doing it, make that mind-body connection. It starts getting in our memory and we remember in the future. So win-win. Okay, and at the end, I'll do a conclusion where
I'll wrap things up. I might add a little
bit extra information. If there's an alternate sign, there's another
version or something. I don't know if that extra about the sign and it'll
be the conclusion. Okay. So we just reviewed
the lesson format. It's the same format for all vocabulary signs
throughout this course. The vocabulary sign, of course, will change, but the
format will be the same. Makes it a little bit
more predictable. You know what, you're
going to get end. Yeah. Okay. So this was an ASL tip. Wonderful. This ASL tip is a
reminder to sign with me. Sign with me. Now I urge you if you
want to get the most out of this course
and just absorb the sign language that
I'm teaching to you and the resources and just
being able to do it. Sign with me. You're going to absorb it. The mind body connection
is just going to grow because you're doing it, you're practicing it, right? If we just sit and watch
it and we're like, okay, we kind of imagine it. Well, that's a step in
the right direction. But if we get our
hands involved, holy cow, it's like it's just
wow, I've done that before. I know how it feels.
That's what he did. A-ha. Okay. So I urge you sign with
me and have fun spiral, have a wonderful time. Sign language is incredible. Sign with me. Okay, This was an ASL tip rate.
2. Learn | Starter Signs 1: Starters, signs, number one in this group are going
to learn how to sign ASL. Hello, goodbye. Deaf hearing. Sign. Thank you. Okay. Excuse me. Sorry. Now, for each
one of these signs, we have a separate video lesson. I'm going to teach
you hand shape and position and motion. And we're gonna do practice after you've learned
all ten signs, we're going to have
a two part review to make sure you can sign the signs and also understand when I'm
signing them to you. Okay. Let's jump in. Here's how we sign ASL. You guessed it,
we're just going to assign each letter
of the alphabet. Asl is short for american
Sign Language is an acronym, so we just go a, S, L. Basically we're
just finger spelling. Look into already in
the fingers spelling. Alright, so let's take a
look at each of the letters. We have a, we have S and we have L. Now for
the a star like this, fingers together, bring them
down VM alongside, right? Now, go like that. Now I'm right-handed,
That's my dominant hand. That's the one I write
with. I throw with. I feel comfortable
with my right hand. I'm going to sign and
fingerspell using my right hand is
my dominant hand. If you're left D, that's
your dominant hand. Go ahead and sign
with your left hand. Okay. So back to the letter a. We have a when you sign it all
by itself, It's like that. Let me show you from the signs. Alright, let's move on to S. There is an S right now in a was like this with the
thumb over on the side. Take the thumb, put it in front. You have an S. Another way to remember is like
Put up your dukes, like you're going to box or
something. Look at that. I'm holding two S's. Just take one of them
and put it right here. S sign an S l by
itself go like this. S from the signs. Okay, let's talk about
l. Very straightforward. L. You've ever seen someone
do this to mean loser? Well, by golly, you know how
to sign in L. The long way. Go like this. Fingers
spread apart. Last three down, just
leave the index finger and the thumb sticking out
there and go like this, l, l, all by itself. L from the side. Okay, Now here we are. Let's put the letters
altogether. Nice and slow. Here we go. A, S, L. Alright. You more time. Okay. Now sign with me. Makes sure you're
signing with me. Let's do ASL three times. A, S, L. Alright. Third time,
a little bit quicker. Okay, well, we just
talked about how to sign ASL or American Sign
Language does an acronym, sign each of the letters. Alright? Another thing, when
you put your hand up there, you're not going to go a S, L because it's all in one word or in this
case an acronym. So leave your hand
position right there. Hand shapes are going to change, but leave the hand position
right there and go a, S, L. Alright, if you go a little bit confusing
because we're talking about three
different things there. We just need one, a, S, L. Okay? Here's the sign
for hello. That's it. Very straightforward. Use your dominant hand.
I'm right-handed. I'm going to make this
handshape a boat like this, put it up near ahead
and just go, alright, somewhere between a wave
and a solute, right? So we're Hello from the side. Alright, from the front again. Alright, so sine with me, Let's do it three times. Starting from the rest position, you're like, what is
the rest position? Well, when you see a sign
language interpreter, when they're not signing, their hands are usually
right about here. I call this the rest position because when they need to sign, when suddenly they need the
spring into action they like and then they
can sign like crazy. Okay, So when we're
doing practice, I'll say starting from
the rest position. So sine with me. Let's do hello three times. Hello. Okay, Now keep in mind
you're going to learn very quickly that
facial expressions, whatever is happening
on your face, is very important in
American Sign Language. It's paramount, super essential in American Sign Language
because whatever is happening on your face is also included with the communication when you're moving
your hands, right? So if I'm like this, I'm not sending out the same
vibe as if I were like this. Alright, so whatever
your facial expression, you can use it to boost the sign depending
on the situation. Okay, we just talked
about how to sign Hello. Here's the sign for goodbye. Very straightforward. Use your dominant hand. I'm right handed, so I use this hand with your
fingers together. Now we're just gonna like
flap or fingers down. So we have goodbye
from the sides. From the front again. Starting from the rest
position, sign with me. Let's sign goodbye three times. Goodbye. Okay. We just talked
about how to sign goodbye. Here is the sign for death. Okay, use your dominant hand. I'm right handed and shape
just the index finger, like you're gonna point, uses side of the tip of
the index finger. First, we're going to touch
here high up on her cheek, just in front of our ear. We're going to come down and
touch the side of our mouth. So altogether it's death. From the side. From the front again. Alright. Starting from the
rest position, sign with me. Let's sign deaf three times. Yeah. Okay. Now keep in mind, you may see people sign it in the opposite
direction where they started through the
side of their mouth and they go up
closer to their ear. Death. That's a variation you may see to be consistent
throughout this course, we'll be signing where we start the ear and come down to
the side of the mouth. Go like this. Yeah. Okay. We just talked about
how to sign deaf. Here is the sign for hearing. Okay, Now this sign refers to a person who is able
to hear, right? Use your dominant hand. I'm right handed and
shape his index finger. We're going to put it right
here in front of our mouth, tip pointing off to the side. We're just going to
make a couple forward rotating circles right
in front of our mouth. Like the words are rolling
out of someone's mouth. Hearing hearing from the sides. From the front again. Hearing. Alright. Starting from the rest
position, sign with me. Let's do it three
times. Hearing. Okay. We just talked about
how to sign hearing. Here is the sign for sine. Okay. We're going to use both
hands, hand shapes, our index fingers, right? We're going to put
it about here, tip spacing in a little bit. We're going to make
backwards alternating, rotating bicycle motions
just a few times. Sine sides from the front again. Okay, Starting from the rest
position, sign with me. Let's do it three times. Sine, sine. Okay? We just talked about
how does sine sine? Here's the sign for. Thank you. Okay, use your dominant
hand. I'm right handed. We're going to make
a flat hand shape, fingers together,
thumb alongside. Now, turn it around,
palm facing in. Use this part right here. Get close to your mouth. You can lightly touch your
lips, that's fine. And just go straight out. Alright, so if I'm signing with you and I wanted
to say thank you, I'll go like this.
Right from the side. From the front again. Starting from the rest
position, sign with me. Let's do it three times. Thank you. Alright, now, keep in mind your facial expression helps to communicate the situation. If you're sincere, you might
have a look like this. If you're in CC insincere, you might have looked like this. Alright. Facial
expressions, so, so much. Alright, so direct the movement
to whoever you're saying. Thank you to if I'm assigning with you and I
want to say thank you, I'll direct it to you. Thank you. Alright. We just talked
about how to sign. Thank you. Here's how we sign. Okay. Alright, just use letters
from the alphabet o and K. So how do we make an O go
like this fingers together, take the tips of the fingers, curved them down and touch
the tip of the thumb. Well, it even looks
like an O. O. O. Let's talk about a k.
How do you make it k? Go like this. Last
two fingers down. Take your thumb, put it
in-between your middle finger, index finger, and press against the side of
the middle finger. Right? K. Alright,
let's make it again. Last two down. Them pressing against the
side of the middle finger. That's a k. K. Let's put it all together. Oh, Kay. Right from the sides. From the front again. All right. Rest position. Sign with me. Let's sign okay. Three times. Okay. Alright. Now keep in mind you're
not going to go like this. O k. We're just going to
put it all together in one hand position. Hands shapes change, but the hand position
stays the same. Okay? Alright, because it's
all one acronym. We're all one word, one concept. We're just going to
leave it right here. Okay? Alright. We just talked
about how to sign. Okay. Here's how to sign. Excuse me. Okay. We're gonna use both hands. I'm right-handed. That's
my dominant hand. My non-dominant hand. I'm just going to
make a flat hand, fingers together them alongside. We're going to put
it down here as a platform palm facing up. Now your dominant hand,
right hand for me, I'm going to start like
that with a flat hand, but we're going to
bend the fingers down. Alright, now take the, take the tip of those fingers
and we're going to swipe twice forward
on our platform. Excuse me. From the sides. Run again. Okay. Rest position,
sign with me. Let's do it three times. Excuse me. Alright. Now remember the
facial expression. If you just
inconvenience someone and you want to apologize, Excuse me, go like this. Excuse me. It's not really a big situation. You could just have
more of a neutral look. Okay. We just talked
about how to sign. Excuse me. Here's the sign for sorry. Okay. We're gonna use our dominant
hand. I'm right handed. We're going to make the
hand shape of the letter a from the alphabet.
How do we make an a? Well star-like this
fingers together when the fingers down them alongside,
there's an eight. Now we're going to use the inside part and
we're just gonna do a couple of
circles on her chest. Sorry. From the side. Run again. Okay. Starting from the rest
position, sign with me. Let's do sorry, three times. Sorry. Alright. Have you been noticing
my facial expression so important in
American Sign Language? I'll be going like
this, making a face. I just stepped on your foot or inconvenience to
I'm apologizing. Sorry. Alright. Now the facial
expression might not be that way. So whatever fits the situation, let's say you're a little kid, your parents or forest
and you do apologize, but you don't really feel it, but you're going
to say it anyway. So you might be like this. Alright, maybe you're
sincere and you really feel like, oh sorry, alright. Either way the
signs the same with the facial expression adds so much information
to the situation. Okay. We just talked about
how does sign sorry.
3. Review | Sign & Understand: Well, I think it's
time for some review. Yes. We're going to review
starters signs number one. So what's going to happen is something's going to
pop up random order. You've already
learned it, Alright, I need you to sign
it. It'll pop up. I'm going to hang out
here for a moment. That's your cue to
sign whatever you see. Alright, So I'll pause and I'll go here to
the rest position. And then I will sign the answer, compare your answer with
mine and sign along with me. Alright, here we go. First one, I need you to sign this. Sign. Sign. Okay. So see how it works. Something pops up, I pause. You raise me. You tried
to sign it before. I do. All right. Hello. Thank you. Sorry. Hearing ASL. Okay. Deaf. Excuse me. Goodbye. Okay. Just like that, we reviewed the signs. If you need to go back
and repeat this video, more power to you. Okay, Let's move forward. Okay, let's do some review
and this time around, you're going to understand
starters signs, number one. So what
does that mean? Well, you're going to see that guy down there
with the glasses. And now I'm going to
assign something, something you've
already learned, Random Order, of course. And you try to
understand what I'm signing when I sign
it, you understand it? Just shout it out loud. Okay. So here's the first one. Sale loud what I'm signing. Alright. So what
did I sign? I sign. Thank you. All right. See how it works. You
guess what I'm signing? Say it out loud. Alright. So I signed there. Hello. Sorry. Good-bye. Asl excuse me. Sign okay. Hearing okay. That was some review for understanding starters
signs. Number one.
4. Learn | Starter Signs 2: Well, look at that. We're already on starters
signs number two. Now in this group, you're
going to learn how to sign. Please see you later. I love you. Name with hey, yes, no, maybe not. Now for each sign, we
have a separate video. We're talking about handshape
in position here, motion. You're going to learn it all. After you've learned
the signs will have to review where you
sign your practice signing the signs
and also practice understanding when
I assigned to you. Okay. What are we waiting
for? Let's jump in. Here is assigned four, please. Alright, use your dominant hand. I'm right handed. Risk and
make a flat handshape. Bring your other
thumb alongside. Now put the palm facing in. It. Just rub your chest
a couple of times. Please. From the sides. From the front again, please. Okay. Starting from the rest
position, sign with me. Let's do please three times. Please. Alright. Facial expression. Whatever's necessary
for the situation, you really need something
you're hoping they can do it, please, right? If it's not a big deal, please. Alright. Okay. We just talked about
how to sign, please. Here's how we sign.
See you later. Okay. Now we're taking
two separate signs, C and later, and we're kind
of mashing them together. Alright, The first part, c, use your dominant hand. I'm right handed.
We're just going to put up two fingers like that. We could say the peace
sign or the letter V. Flip it around so it's facing
in, put it right here, close underneath there,
I just go forward. Alright, that's
the first motion. See from the side. The second sign is later. The handshape is the letter
L from the alphabet, or like L for loser, right? Just go like this
later from the side. Okay, so we're going to
combine those two signs into see you later. Alright, So when you're going
out for the first part, C, change it to an l. See you later. Alright, from the sides. From the front again. See you later. Alright, rest position,
sign with me. Let's do it three times. You later. Okay. We just
talked about how to sign. See you later.
Here's how we sign. I love you. Okay. This works with the IL-10, the I love you acronym. We're going to use
this handshape. How do we make it started like
this, middle two fingers, middle finger, ring finger down and just leave
it like that. Now I'll put it out in
front of you a little ways and you can just kinda shake it. I love you. From the sides. Run again. I love you. Okay. Starting from the rest position, sign with me. Let's do it three times. I love you. Okay? Now you
don't have this shape. You could also go straight in. You could shake. You could just be like, alright, whatever fits the
situation to how much Love you want
to show, right? Okay. We just talked
about how does sign. I love you. Here's
the sign for name. Okay, we're gonna use both hands and the hand shapes
are the same. Wonderful. We're going to
use Hs from the alphabet. How do make an H
well-stirred like this last two fingers down. Put these two together. Take your thumb
and just press it against your ring finger. Alright, take that one and tilted forward
and twist right? So we have an H. H When you sign an eight cell
by itself would be like this. Okay, so we have H's,
both hand shapes. Now we're going to take
our non-dominant hands. So I'm righty. So my left hand, non-dominant hand,
put it right there. Dominant hand, ATM shape. We're going to tap on top twice. Name, name from the sides. From the front again.
Alright, starting from the rest position,
sign with me. Let's do it three times. Name. Okay. We just talked
about how does sign name? Here's the sign for width. Okay, we can use both hands. The hand shapes are the same. The letter a from the
alphabet. How to make an a? Well, go like this
fingers altogether renamed down, thumb along side. There's an a and we
need a for both hands. We're gonna bring
them together and just push forward slightly. Width from the sides. From the front again. Okay. Rest position, sign with me. Let's do it three times. Width. Okay, we just talked
about how to sign width. Here is the sign for Hey. Alright, now keep in mind, hey, it's not like hey, hello is more hey, I'm trying to get
your attention. Hey, alright, use
your dominant hand. I'm right handed. We're just
going to use an open hand. We could say the number of
five fingers spread apart. It just wave at a couple
of times in front of you in the direction of the person that you're trying
to get the attention from. Alright, so if I'm trying to get your attention, you're
not looking at me. I'll go, hey, alright, here's how it looks
from the side. From the front
again. Hey, alright, starting from the rest
position, sign with me. Let's do it three times. Hey, you're going
to notice more of a deliberate action is not just flopping around
your hand there. Hey, alright, now, keep in mind, there's no need to be
rude with this one. You don't need to go over from someone's face and be
like, Hey, hey, hey. Now my understanding and my
experience growing up with my deaf brother in and around the deaf community
is that deaf people, their ability, their visual
ability is astounding. It's absolutely incredible.
Growing up with my brother, you'd see things in the woods or wherever
we were playing. But we will you just see things? I'm like, Oh, it's like
it's there but I didn't notice it because their
ability is incredible. They say when you don't
have one of the senses, the five senses you only have
the other for those other four gets stronger
and I believe it. Okay. So if you go like this in
a deaf persons direction, they most likely see you. And if they don't respond, it's because they're
busy with whatever they're doing at the moment now, but it's a real emergency. You might actually
just go over there and move them on the shoulder. How we got to go. Right.
Okay. But most likely they see you because their
visual ability is astounding. Okay. We just talked
about how to sign. Hey, like you're trying to
get someone's attention. Here's how we sign. Yes. Okay. Use your dominant hand. I'm right handed. We're going to make an S from the alphabet. That's
the handshape. How do we make an
S? Well, go like this fingers together,
bend them down. Goldman front. That's an
S. We'd also say it's a, it's a fist, It's an S. Put it right here. We're
going to swivel forward, tilt forward a couple of times. Yes. Yes. From the sides. From the front again. Okay. Rest position, sign with me. Let's do it three times. Yes. Alright. At the same time, it's natural for me. It's just natural.
The nod your head, you're given an affirmative, you're reinforcing
the signal that it's yes, it's affirmative. Yes. Now if you go like this, you're sending conflicting vibes. You can kinda mess with people. But yes, by itself,
There's regular. You can nod your
head or at least just have a neutral
look on your face. They may see people, They do it multiple times. They
might do it once. Yes. Now, if they're really, really either inspired,
yes, yes, yes, right. They might do it all the
time like crazy. Alright. Okay. We just talked about
how does sign? Yes. Here's the sign for No. Okay. Use your dominant
hand. I'm right handed. It started like this. Put the last two down with the index finger and the
middle finger together. Rotate your thumb so it's
a little bit in front. I'll just bring
the fingers down. No. From the sides. From the front again? No. Okay. Starting from the rest
position, sign with me. Let's do know three times. No. Alright. Notice
I'm shaking my head. It just it's natural
and it reinforces whatever I'm trying
to communicate in this situation. Negative. No, no, no, I'm doing it once. And for this situation
that's just fine. You may see people do
it multiple times. You need to lay it in there. No, no, no. I told you now
might see it once, couple times or just
whatever fits the situation. Now when I do it in
the course here, I'm just gonna do it once. No. Okay. We just talked
about how to sign. No. Here's the sign for maybe. Alright, we're going
to use both hands and the hand shapes are the same. Flat hands. Alright, bringing us together, thumbs alongside. Now we're going to turn them
so the palms are facing up and we're just going to
go up and down alternating. We're not going together. We're going up and down. Alright, kinda think
the scales of justice, right your way, in your opinion, your way in which you're
gonna do trying to decide. We have maybe from the side, from the front again. Okay, Starting from the rest
position, sign with me. Let's do it three times. Alright, see my facial
expression that works. If the situation, you
know, you're not sure, whatever you like, maybe, maybe, right, facial expressions
so important in American Sign
Language is part of the total communication packets. Yes. Okay, we just talked
about how does sign may be. Here's the sign for not use your dominant
hand. I'm right handed. Make the hand shape of the
letter a in the alphabet. How to make an a like
this fingers together, fingers down, thumb alongside. Now we're going to use
the tip of the thumb, put it underneath her chin
and just flick forward. Not not at the same time. Shake your head because you're trying to convey, communicate. Negative, not from the side. From the front again. Alright, starting from the
rest position, sign with me. Let's do it three times. Not okay. We just talked about
how to sign or not.
5. Review | Sign & Understand: Here are some review. Yes. It's time for you to sign
starters signs number two. Only starters signs number two. Okay. So in a moment
somebody is going to pop up. I'll hang out here, I'll pause. That's your cue to raise me, sign whatever you see. Before I do, I'll go like this, then I'll sign it and
show you the answer. You can compare your answer
with mine and sign with me. Yes. Okay. I need
you to sign this. Yes. Right here we go. Hey, See you later. With not name. No. I love you. Maybe, please. Okay. Well, that was review
for starters, signs. You sign-in started signs, number two, you need to go
back and repeat. Why not? Let's do some review
where you try to understand what I'm signing. Alright. Only starters
signs number two. Okay, here we go. What am I signing? No. See you later. Name. Width. Maybe. Hey, please. Not I love you. Yes. Okay. And that was review for understanding
starters signs number two. Okay. Wonderful.
6. Learn | ASL Pronouns: Let's talk about ASL pronouns. We're gonna be talking
about two types. One type is personal pronouns. I, you, he, she, we, they, you plural. When you see the P, L down
there in parentheses, it means plural as
in more than one. Okay, We're also going to be talking about
possessive pronouns. This show possession, my, your, his, her, our,
their, your plural. Now something
absolutely wonderful about pronouns in ASL is that personal pronouns and possessive pronouns have
something in common. Well, for personal pronouns, they all have the
same handshape. Right in here is the handshape. We can say the index
finger, the pointer finger. We're gonna be doing a lot of pointing with a
wonderful thing to remember is for all of
these personal pronouns, we're going to use
the index finger. Now, something similar
with possessive pronouns. The same handshape for all
of the possessive pronouns. This warren, It's a
flat hand like this. Fingers together,
thumb along side. We're gonna be going like this
a lot to show possession. It's the same handshape for all of these possessive pronoun. Okay, so we have a separate
video for each one. We're going to talk
about handshape and position and motion. Do lots of practice in after you've learned
all the pronouns, will do review to make sure you can sign and understand them. Okay, here we go. Here is assigned for
the personal pronoun I. Very straightforward. Okay, use your dominant
hand. I'm right handed. Now, we know that this
is a personal pronoun, so the handshape is the same
for all personal pronouns. It's the index finger, yes, the pointer finger. In this situation, we just
want to indicate ourselves. I write it also works for me. Me from the side. From the front again. I just use the index finger,
just come in and point. Alright, so from
the rest position, sorry, in with me. Let's do three times. I okay. We just talked about
the personal pronoun I. Here's how we sign my. Okay, so it's a
possessive pronoun in the hand shape is the same
for all possessive pronouns. Like this, just a flat hand. Bring it to the other
thumb alongside. Now it's my We're
going to indicate whatever the thing
is, it's mine. So we're gonna go mine. My from the side, from the front again. Now in English we might say my contexts, it might be mine. Either way the sine
is the same, my mind. Okay. From the rest position,
sign with me. Let's do it three times. My okay. We just talked
about how to sign. My hear is assigned for you. This may be the most
straightforward. I knew all of ASL you. Okay. It's a personal pronoun. What do we know about
personal pronouns? Their hand shapes. That's right. The handshape
for all personal pronouns is the index finger,
the pointer finger. Alright, so I'm
signing with you. I'll make sure my body
is facing you and I'll go you alright, from the side. Run again. Right now
if I'm sitting here, but I'm signing with you, I'm going to do what I
can to turn my body. Just show you not only respect, but you can see my
signs much easier. You Okay. So from the rest
position, sign with me. Let's do you three times. Alright, now quick note. Some people believe
that pointing is rude. In ASL you need to
point to communicate, to indicate whoever you're referring to. So I
wouldn't look at it. Looking at it as
pointing like you're not getting someone
someone's face, you're referring to them, you're indicating that person, in this case you, because we need ASL is a visual language that we need some reference. What
are you talking about? Oh, you, okay. We just talked about
how does sine u? Here's how we sign your okay, It's possessive pronoun and all the possessive pronouns
have the same handshape, the flat hand, alright, now it could be your truck, your money, you, or whatever, but I just need to
indicate that it's not mine is not hers, it's yours. So I'll go You're
right from the side. From the front again. Your starting from
the rest position. Sign with me. Let's do your three times. Your Okay. We just talked about how to sign your here is the
sign for he or she. Okay. It's a personal pronoun, so we know the handshape
is index finger. Yes, all personal pronouns have this handshape right here. Okay. So we're just going
to point at the person. If it's Tom, he's over there. We'll go here. If it's married,
she's over there. We'll just go sheet. Now you're thinking, well that's easy if the person is here, what do we do if they're
not physically present, but we want to refer to
them when we're signing. Well, I have an answer for you. We're just going to
point off to the side, pretend like there's
an imaginary Tom or an imaginary Mary. And we just point
off to the side. So we'd go He Si okay. So rest position. Why don't
you sign with me three times. It will pretend that
Mary's not here, but we're going to refer
to her and go sheet. Sheet. Alright, here we go. See okay, Now this sign when
we're pointing at someone, the he, she pronoun, personal pronoun
is what we would call a gender neutral pronoun. Big words, what does it mean? Means that whatever the
person's gender is, whatever you think it is, whatever they identify as well. It's all gonna be the same
sign. It's wonderful. It's simplifies things. We just point because all
we're doing is indicating, referring to whoever it is. It's a single individual, that person that individual
he she wherever they are, just do one pointing
motion in their direction. Okay. So we just talked
about how to sign he or she that person, that individual like this. Here's how we assign his or her. Okay, It's a possessive pronoun, same handshape for all
possessive pronouns. Flat hand. It's Peter. He's over there and we want to
indicate that it's his stuff would go is if it's
Sarah, she's over there. We'd want to indicate
her stuff. We'd go her. Okay. Now you're thinking, what
if they're not here, but we want to assign that it's their stuff or Hearst
up or his stuff. Well, we just do it
off to the side. Alright, so we're just doing
one single push either in the person's
direction if they're here or just off to the side. Okay. Let's do some signing
rest position. Let's pretend the person
is not here and let's just do it off to the
side three times. Here we go. Sign with me. Okay, Now this is a gender-neutral pronoun.
What does that mean? Well, it means whatever
the person's gender is, whatever they identify as if you know it or you don't know
and you're unsure, well, it's wonderful in
ASL it's going to be the same sign no matter
what their gender is. It's just a single individual. That's where we're going at
here for this side, right? Just one push in
their direction. Alright. There we use, there is in the single person possessive their stuff
there, whatever. His stuff. First
off, over there. Oh, right. Single motion to indicate
a single individual? Yes. Okay. We just talked about how to
sign his her there. Uh-huh. Here's how we sign. We okay. Personal pronoun we know the handshape is
the index finger. Yes. So all we're gonna do
is use our dominant hand. I'm right handed, index finger. Okay. I'm going to tap once
on this side of my chest. I'm gonna go over
here and tap again. So we have, we write if you're left e to start
on the other side and go. We I'm right-handed,
so I'll go like this. We from the side, from the front again. We sign with me. Let's do it three times. We okay. Now this sign also works
for the concept of us. You know, you and I were
together, whatever we us. Okay. We just talked about
the personal pronoun sign or we here is the
sign for our okay. Possessive pronoun handshape is the flat hand length
that we're gonna do is gonna start on one side of our chest and just curve and
touch on the other side. Alright, so you're going
to start touching here. You're going to end
touching over here. We will like this. Our our. Now I'm right handed so
I use my dominant hand. I'm gonna go like that in our if you left D, that's
your dominant hand. Just do it from the other side. Our right so I'm right-handed hour now
this could be our stuff, our money, our car, our whatever are from the side. From the front again. Now I do realize it's hard to keep that flat hand rigid when
you're going like this. So hope you curve a
bit to make it over. No worries. All right. Rest position, sign with me. Let's do it three times. Hour. Okay. We just
talked about how to sign the possessive
pronoun hour. Here's how we sign they. Okay. Personal pronoun we know the handshape is
the index finger. Yes. Now we're just
going to be making an arcane motion off to the side in the direction of
whatever group of people were signing about
as Tom George, Harry, their friends and
family and everyone. We just go if it's two people over there,
Martha and Frederick. Alright, so off to the side, they they know if they're physically presence is
quite straightforward, just arc in their direction. If they're not here, we're just gonna do it
off to the side like there's an imaginary
group of people here. And we'll go, they they take a look at me
signing it from the sides. Okay. Something very important here. If you've noticed, I've
always been signing day off to the side. Right now. There's a very specific
purpose for that. First, imagine that there's
an invisible line right here, runs straight up and down. And I've always
been signing off to the side and I don't
cross the line in front. Because if I cross the
line in front like this, it no longer means they. It means you plural
as in you all. For this video we're
talking about day. We need to remember to
go off to the side, either side of that
invisible line. Alright, they, they,
they're way over there. We can go. They remember
off to the side. Okay. Rest position. Sign with me. Let's pretend that
people aren't here, but we're going
to refer to them. We'll just do it
off to the side. Here we go. Okay. We just talked
about how to sign. They remember that
invisible line. You need to go on either side
if you want to sign them. Here's how we sign there. Okay, It's possessive pronouns. We know the hand shape is just a flat hand and
we're just going to arc in the direction of the people that
we're referring to, their stuff, their money, their dog, whatever,
they're there. Now, if they're here, we
just arc in their direction. If they're not here, they're
not physically present. We'll just do it
off to the side. Like there's an imaginary
group of people right here. There. Alright. Watch me signing
up from the side. From the front
again there. Okay. Rest position. Sign with me. Let's do it three times. A. We're going to pretend
that people aren't present, but we want to refer to
them while we're signing. So just do it off to the side. Here we go. Okay. Now you must have
noticed by now that I've always been going
off to the side. I'm not going in front. I don't go over here. Now first pretend there's an
invisible line right? Now if you cross that line, it no longer means there. Now this video is
all about there, so we want to communicate there. So we need to make
sure we're going off to right invisible line there. There, we don't cross because then it becomes your plural. As in I'm talking to an
audience and I see your cars, your ideas, whatever,
your, your plural. But in this video we're
focusing on there, so we gotta go off to the side. They're there. They're way behind me there. Right? Okay. We just talked about the possessive
pronoun there. Here's a sign for you
plural or you all. Okay. Personal pronoun index
finger is the handshape. Yes. Now pretend I'm talking to an audience or you
and your friend, you're right, they're
a group of people. I'll go you plural or you. All right. There's an arcane
motion right here. Pretend there's an
invisible line right here. You need to cross that line. You plural, because if you don't cross that line,
you go over here. Then it means they, This video is all
about you plural. So we gotta make sure to
cross that invisible line, u, as in URL, from the sign. From the front again. Okay,
rest position, sign with me. Let's do you plural three times. Alright, now if you're
up on stage and it's a huge group, then
you would just go, you write you plural, you are a small group of people in front of
you. Just go like that. Okay? Now remember, cross
that invisible line because if you
don't cross it and you go off to the side,
what does it mean? It means they, we need you
plural, so you plural. We just talked about
the personal pronoun, you plural or you all. Here's how we sign your plural. Possessive pronoun, and shape. Just a flat hand right there. And I'm talking to an audience, I'm talking to you
and your friends, at least two or more people. So your houses, your
keys, your dogs. We make sure to go
in front and we're going to cross like an
invisible line here. And we're gonna go
your, your plural. Alright, we're not gonna
do it off to the side. Because if we do it
off to the side, it means there, as in another
group of people over there. But I'm talking to your group of people right here
in front of me, so I'll go, you're alright. Here's how it looks
from the side. From the front again. Kind of like you're
cleaning off a window. Alright, rest position. Sign with me. Let's do it three times. Your plural. Okay,
we just talked about the possessive
pronoun your pleural. Make sure to cross
the invisible line.
7. Review | Sign & Understand: Well, good, golly me. It's time for some review. It's time to sign. You're going to sign
all ASL pronoun, Okay, we're going to
cover both types, personal pronouns and
possessive pronouns. And I'm going to throw them
at you in random order. Okay, So in a moment
something is going to pop up. I'll hang out here for a moment. That's your cue to sign it. Sign it before I do, I'll go like this and then
I'll sign the answer. Alright, I need
you to sign this. V. That person, that individual. Remember this is
the sign for E, c, It's a gender-neutral pronoun
is for a single person, single individual who is 0.1
time in their direction. You're as in your
pleural, right? Remember to cross that
invisible line here. Your plural, I'm talking to you and your friends
and audience, whoever. You. Really straightforward you. My my, alright. Possessive pronouns, all
hand shapes like that. So mine is her. Possessive pronoun
handshape like that. If they're not here, just go off to the side. If they're here.
Well, it's easy. It's Tom, it's his. They are if they're over there, they were not here
just off to the side. They remembered to arc. And don't go in front, don't cross that, that
invisible line y. That's right. Because
if you go like this, it means you plural,
we need day. So off to the side. I, I, we we, personal pronoun, index finger. That's right. We, you plural, as in you all. Two or more people. Make sure the grass invisible line, right? What does it mean if
you go like this? It doesn't mean you plural. It means they, they, they, we need you plural. You're just a single port
pushed in your direction. Your they're, if they're over there, there. Alright, we're gonna
make an arc, an arc in motion off to the side there. They're not here,
just do it down here, off to the side there. Why don't we cross in front? Because it no
longer means there. It means your plural, right? So we've gotta do it
off to the side. There. There there are Our okay, we'll look at that. We just did review for the personal and possessive
pronouns in ASL. Need to go back again
and redo it. Why not? Let's review your understanding
skills for ASL pronouns. We're gonna do both personal
and possessive pronoun. Okay, so we've got the guy
down there with the glasses. That means that I'm
gonna be signing. So I'm going to
assign a pronoun. You take a look and
shout it out when you understand what I'm
signing redeposit, the video had me repeat. That's just fine. Alright, here we go.
Here's the first one. What am I signing? Mine? Your plural. You hi. Our they there is her single individual. You plural or you all. We your Qi Shi that individual that person. Just one single individual. Well, we just did review your understanding review
for ASL pronoun fabulous.
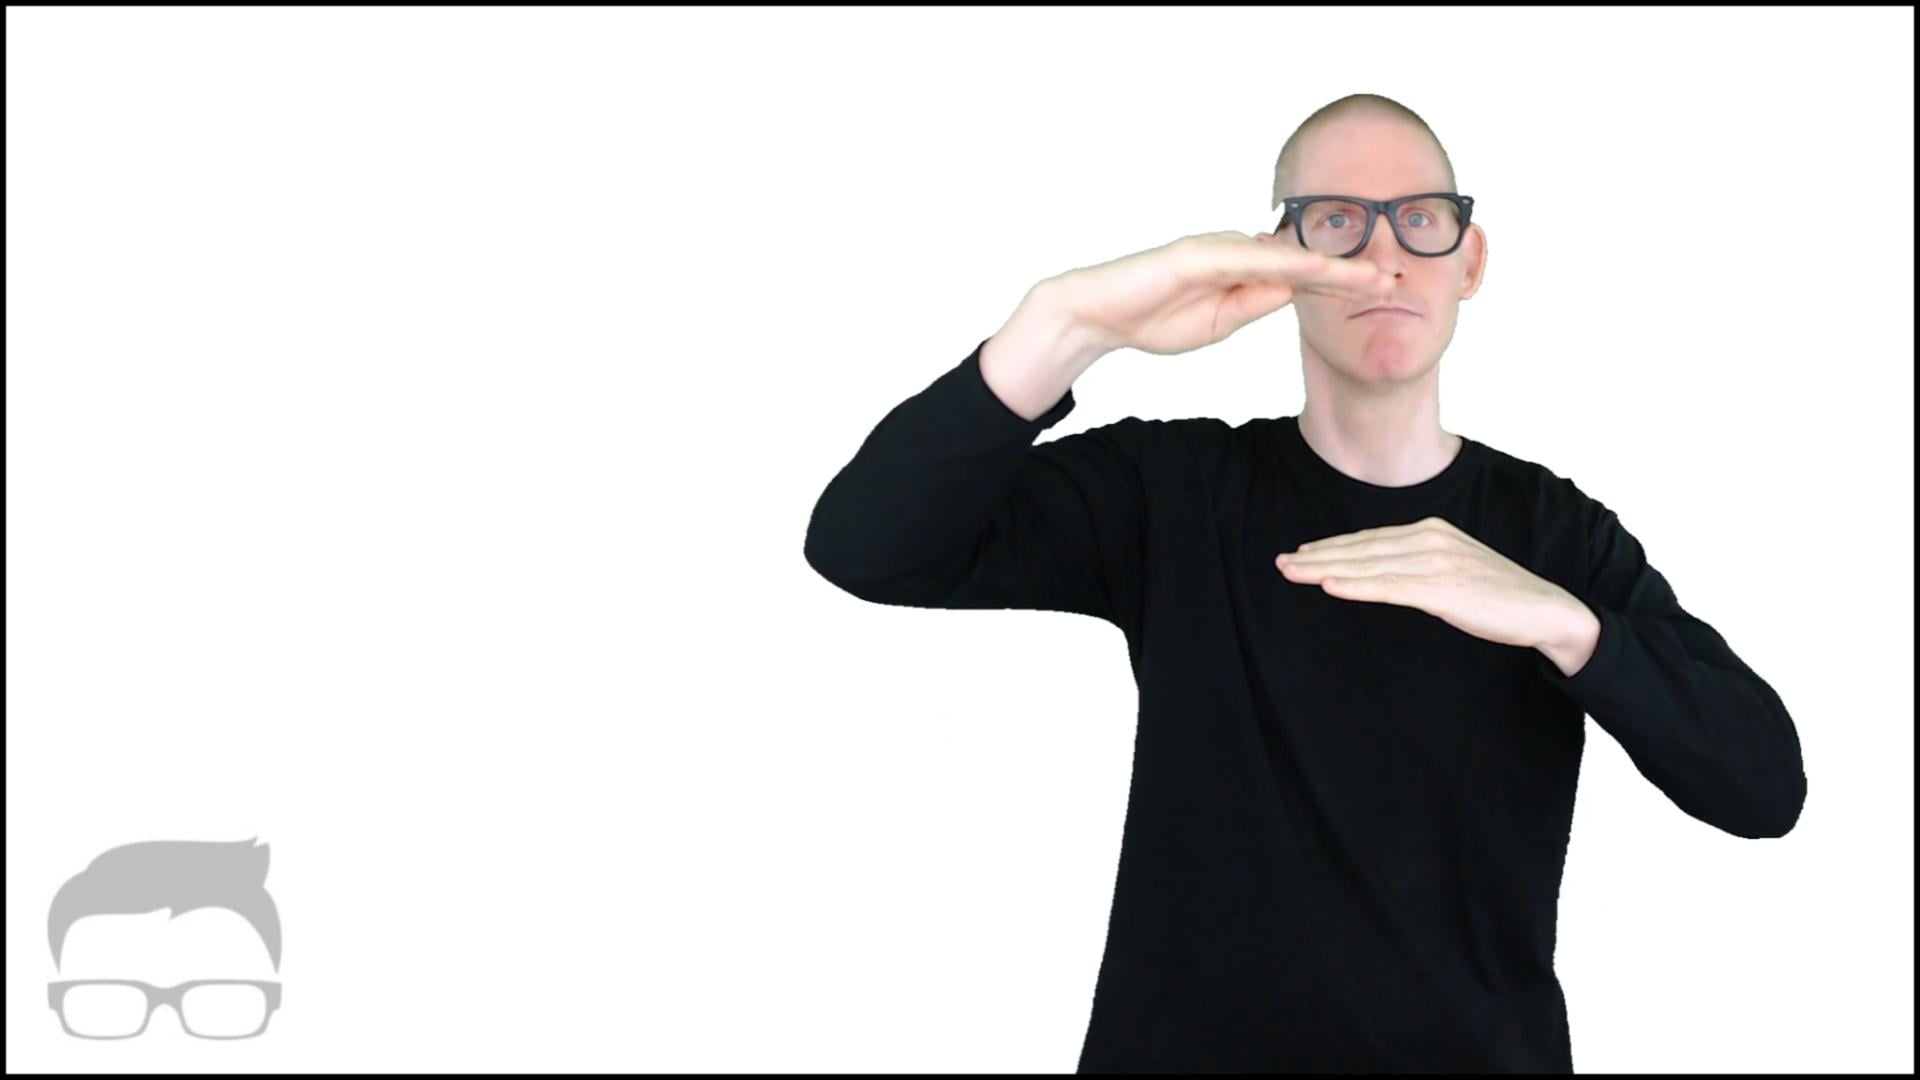
8. Explore | Testing Format: It's time for a test. Yes, you've been
learning and learning. Let's have a test. Check your skills. So we're going to cover
all starters signs and all pronoun sign. You've learned to start assigns. One, started assigns
to an ASL pronouns, okay, it's a total of 32 signs. Well done, way to go. Now it's time for a test
and we're going to have a two-part test, signing
in understanding. The first part is signing, so you're going to
sign what I show you, I can explain it to you. We have a timer here, but I think I'm
just going to show you first how it works. Okay. So take a look. Okay. So that's how this signing
portion is going to work. So let's review
what just happened. I put on my glasses. Alright, maybe you
weren't expecting that. When I put on my glasses, I won't be talking. When we do the big tests like
this, I won't be talking. It'd be silent lesson. We'll communicate
in sign language. That's why we're here. Okay, so we have a
timer over there. The timer is going to
be for three seconds. I put on my glasses like this. Then they said I
signed test test. Right. Then I went to
this screen and I signed. You. See that? Right? So something
pops up and you sign, then I think I gave you a
thumbs-up Like you can do it. Yes. So I went like this. I nodded, add two and
we went to this side. So I start the timer and you raise the timer so
you sign what you see. The timers for three seconds. You can erase it or you can pause the video
and take your time. Either way, when
the timer is up, I'm going to assign the
answer in this case name. I urge you to sign with me and compare your
answer with mine. Okay. So that is how this
signing portion works. Basically sign what you see in race the timer and
have some fun. Alright, the second part
will be understanding and we're not going to have
a timer you to just have me. So let me show you how it works. Okay, similar, just this time is going
to be understanding. Alright, so let's
review what happened. So I went like this, I would test where I put my
glasses are no talking test. And I'm like, wow, right? Then we went to this screen
and I wouldn't like this. Me. I sign you doing something. You try to figure out
what I'm signing and then why you shut out
what I'm signing. Then it went like this. Right. And your job
is to take a look at me and try to figure
out what I'm signing. I won't be talking. I'm only going to sign it once if you need
to have me repeat, pause the video,
go back, repeat. That's just fine. I'll pause for a
moment, then I'll show you the answer and then
I'll sign it again. Alright. I urge you to sign with me, sign with me to
get more practice. Okay. So that's how it works. We're going to have a
two-part test where you sign. That's the first part. Second part will be where I sign and you try to understand. Yes. Now this is a
wonderful opportunity to get tested and
check your skills. You've been working so hard
and learning like crazy. Well, let's check it out.
Alright, here we go.
11. Dialogue #1: Here's our dialogue, okay, now if you want to attempt
it all by yourself, I'd say that's a fabulous idea. Pause the video, go ahead and sign it and do it to remember. And then when you're
ready, unpause the video and we'll
do it together. Okay? Alright, so here we go. The dialogue is,
Hey, I love you. And the responses. Okay, Thank you. Goodbye. Okay, so let's
start with the first part. Hey, I love you. Alright, we're gonna do
this sign for, hey, hey, hey, hey, like you're saying hello to someone is hate
to get their attention. Hey, how are we going to get their attention with emotion? Because it's an
exclamation mark, right? So we're not like, hey,
we're gonna be like, Hey, hey, use your
facial expression. It's so useful in common in ASL. Hey, now we have I love you. What is it? I love
you, I love you. So let's put this part
together. Here we go. Let's sign it a few times. Sine with me. Here we go. Hey, I love you. Are you signing with me? Okay. So let's go to the second
part of the dialogue. Okay. Thank you. Goodbye. Alright, so let's go to the first one, which is okay, how do we
sign it? That's right. Okay. Alright, now maybe
in this situation, maybe the person is kinda caught off guard and that
the thinking it's a little bit strange
that some person ran up to him and they're
like, I love you, right? So they're like, Okay, alright. So this sign might have a facial expression and
a little bit unsure. And we have thank you because
they want to be polite. They're unsure where
they still want to be polite. How do we assign? Thank you. That's right. Thank you. Thank you. And goodbye. Goodbye. This is a weird
situation. Goodbye. Okay. So we have three signs back
to back to back. Let's do it. Sign with me. Okay. Thank you. Goodbye. Alright. Again, again. Let's
sign it again. Alright, let's speed
up a little bit. Okay, so that was the second
part of the dialogue. Well, by golly, let's
put it all together. Yes, That's just go ahead
and sign the whole thing. Now, first part, I'll say it
out loud is we get quicker. I won't I'll be quiet and then we'll just
sign for practice. Here we go, step-by-step. Hey, I love you. Okay. Thank you. Goodbye. Alright, so sine
with me. Here we go. Alright, again, here we go. Alright? And I urge
you don't be shy. Put the emotion on your face. If you watch people
who are signing, who are experienced designers
and the deaf community, they use their facial
emotions like crazy. In spoken English, we use the inflection in our voice
and it just gets out. We also use our face, maybe not as much we use
our voice. It's happening. Well in ASL when you're signing, they use their face and their body movements
are short like crazy. Let me show you
what it would look like if it was just a robot. Alright, you'd see
the difference. I'll do it as a robot, and then I'll do
it with emotion. Okay, here we go, robot. Now the signs are the same, but we miss so much
meaning, right? Okay, Now let me put
it with more emotion. You see the difference?
Yes. Okay. So that was our first dialogue. Hey, I love you. Okay. Thank you. Goodbye.
12. Dialogue #2: Dialogue number two. Yes. Now feel free
to pause the video, work through it on your own. Use what you've learned. Uh-huh. Alright,
when you're ready, unpause the video push
play and we'll move forward together.
Alright, here we go. So first let's take
a look in ASL. Excuse me, sorry, you all
you plural sign. Answer. Hello. Yes. I sign ASL and
English, something similar. Excuse me. I'm sorry. Do you all sign or can you
all sign and the answer? Hello? Yes. I sign ASL or
I can sign in ASL. Okay. So let's take a look
at the first part. Excuse me. Sorry. You all sign. You plural sign. Alright. Sign by sign. Here we go. Excuse me.
How do we sign it? That's right. Excuse me. Excuse me. We have sorry. Sorry. Sorry. I feel maybe you feel like you're
inconveniencing the person. You all how do we sign them? You all you all sign? Sign, right. Sign. Okay. Now we have an
opportunity here. See the question mark,
excuse me, sorry. They're kinda like mini
sentences by themselves. But you, you plural sign, is it you all sign? It's a question in an English
would be like, do you sign? Do you all sign? It's a yes no question.
It's very important. We need to know if it's the
WH who, what, where, when, why question or a
yes-no question. Since this is a yes-no question, we're going to raise our
eyebrows and lean forward. Alright, so this is
how it would look. You all sign. Alright? Uh, raised,
raised eyebrows, lean forward a little bit. Alright, pretend you're
in your backyard and your backyards surrounded by offense and defense
is like this high, and you hear something crazy
going on with your neighbor. You want to peek over
and see what's going on. You're gonna go like this. Alright, now that's
the face you need. Would you want to
communicate a yes, no question in ASL. Alright. So once
again, you all sign. I rose up, lean
forward a little bit. Yes, no question like that. Okay. So let's assign this
whole thing step-by-step. Sign with me. Let's go nice and slow. Excuse me. Sorry. You all sign. I rose up leaning forward. Excuse me. Sorry. You all sign. Alright. Again, here we go. Alright, yes, no question. Raises eyebrows, lean
forward a little bit. Okay, that was the first
part of the dialogue. Let's go to the second part. Hello. Yes, I sign ASL. Okay, here we go. How do we assign hello? Hello, right. Just a greeting. Hello. Pleasant
look on your face. Yes. How do we sign
it? That's right. Yes. I I sine, sine, sine in ASL, ASL. Alright, let's put
it all together. Yes, here we go. So in with me. Hello? Yes. I sign ASL. Now, technically you
probably don't even need to sign ASL here.
You could just go. I sign, but I stuck it in there because
it's good practice. Okay. So let's do
it again. Again. Hello? Yes. I sign ASL. Look at that. Look at you, you're sign-in. Alright, here we
go. Alright, well, let's put it all together. First part, question and
answer the response. Go nice and slow. Sign with me. Excuse me. Sorry. You all sign. Hello. Yes. I sign ASL. Complete dialogue.
It's a mini dialogue, but it's look, it's
all the statements. We've got a question and
we have more response. Alright, again, here we go. Excuse me. Sorry. You all sign. Hello. Yes. I sign ASL. Right. Again. Let's speed
up a little bit. Fantastic. Okay, feel free to go back and practice as
much as you need. You're building up your fluency.
13. Dialogue #3: Dialogue number three, feel
free to pause the video, work through it on your
own when you're ready, push Play and we'll work
through it together. Alright, here we go. So an ASL, they with us. They hearing, no, they def, maybe they with us in
English, something similar. Are they with us?
Are they hearing? Know, they're they're deaf. Maybe they're with us,
they might be with us. You're gonna notice
quickly that in ASL we're not signing MR. Is was where the n we're not signing those small
words. It's very efficient. It's wonderful. Okay, so let's do
the first part. They with us, they hearing
two questions back-to-back. We sign day. They let's say in this
situation it's tom, Sarah and their family. They're gonna be over there,
so we'll refer to them. They write, how do
we assign width? Width, right? Ice. I'm trying to trick you. How do we sign us? That's right. As is the same sine as we write. We write us. And they with us in English
would be are they with us? So it's a yes, no question. You already see my
eyebrows going up. Alright. With us. With us. Right? So when you sign
it, they with us. Alright, in this situation, maybe it's a tour group or
something in a big crowd or something and people are moving around in someone's
asking, are they with us? They with us. I rose up, lean forward. Alright. They once again, they group of people hearing. How do we sign hearing? Hearing. Hearing. Right. And since this is
a yes-no question, are they hearing the hearing?
14. Learn | Family Signs 1: Family signs, number one, you're about to learn the
signs in ASL for family. Father, mother,
parents, daughter, son, brother, sister,
husband and wife. Okay. We have a separate
video for each one. We're going to cover
hand shape and position and motion
and do practice. After you've learned them all, we'll do some review to
make sure you can sign in. Understand them. Okay. Here we go. Here is the sign for family. Okay? We're going to use
both hands and the hand shapes are the same. We use the letter F
from the alphabet. Well, how do you make an F?
Well, I'll start like this. Use your thumb and your index finger and
bring the tips together. Alright, that is an F handshake. You sign an F all by itself
would just be like this. F. Okay, so we have
to F hand shapes. Alright, well, we're
going to start here with the tips of the index fingers
and the thumbs together. Now we're going to come around
and touch the pinky tips. What kinda making a little
circle The Crown maybe family. From the sides. From the front again. Okay. Starting from the rest
position, sign with me. Let's do it three times. Family. Think of like the
circle of trust in the family. We just talked about
how to sign family. Here is the sign for father. Okay. Use your dominant hand. I'm right handed.
We're just going to use an open hand
shape like this. Fingers spread apart.
Use the tip of your thumb and tap
twice on your forehead. Farther from the side? From the front again. Bother. Okay. Starting from the rest
position, sign with me. Let's sign father three times. Father. Okay. This works for dad, Pops father or whatever you call that
person in your life. Father. Now keep in mind
later in the course, I might be saying up
higher and then I go down like this to sign father. Alright, now in regular life, you're not going to
squat down here, but I will squat
down to make sure you can see my hand completely. Father. Father. Okay. We just talked about
how to sign farther. Here is the sign for mother. Okay. Use your dominant hand.
I'm right handed. We can use open hand, fingers spread apart, tip
of the thumb on the chin. Twice, tap twice. So we have mother from the side from the front again. Rest position, sign with me. Let's do it three times. Mother Okay. We just talked about
how to sign mother. Mom. Mother. Here's how we sign parents. Okay. Use your dominant hand. I'm right handed,
open hand shape like this tip of the thumb
tap once on your chin, once on your forehead. So literally were
signing mom dead. And since this is more
of like a compound sign, we're putting two
signs together, rolling and tap once. Alright. So mom by itself
would be two taps, mom or mother and dad would be two taps when it's by
itself bother or dad. But together when we do parents, we're just going to tap once
once for mom wants her dead, or once for mother,
once we're father. So we have parents
from the sides. From the front again. Okay. Starting from the rest
position, sign with me. Let's do parents three times. Okay. We just talked about
how to sign parents. Here's the sign for daughter. Okay. We're going
to use both hands. Now. I'm right handed with
my non-dominant hand. For me, my left
hand, I'm going to make this handshape just a flat hand and I'm going
to put it right down here, palm facing up. We're just going to leave
it there for a moment. Dominant hand,
we're going to make the B handshape like the B from the alphabet.
How do we do it? Like this fingers together. Put your thumb in front. Okay, now use this side
of the finger right here. Just come here and tap
close to your chin. Now come down and put
it on your other arm. So we have daughter. So when we finish the palms
of both hands are facing up. This is actually
the sign for baby, but we're not going
to do the full sine. We're just gonna go here
and then come here. So we have data from the sides. From the front again. Daughter, Alright, rest
position, sign with me. Let's do it three times. Daughter. Daughter. Okay. We just talked about
how to sign daughter. Here is the sign for sun. Okay. We're gonna
use both hands. I'm right-handed with
my non-dominant hand. I'm going to make a flat
hand, left hand for me. I'm gonna go down
here like this, leave it there for a moment. Dominant hand,
we're going to make a B handshape from
the alphabet B, like this finger spread apart, bring them to the
other thumb in front. I'll take the side
of the finger here. We're going to come
up here to our head, kinda like we're
going to salute, then we're going
to come down here. So we have sun. When you finished, the palms of both hands are facing
up, down here. This is actually
the sign for baby, but we're not going to
do the complete sign. We're just gonna do part of it. So we have sun around the sides. Front again. Okay. Sign with me. Let's do it three times. Son. Okay. We just talked
about how to sign Sun. Here's the sign for brother. Okay, we're going
to use both hands. First, let's make
the l hand shapes with both hands, okay, now with your non-dominant hand, I'm right handed,
so I'm gonna start with my non-dominant hand. I'm going to put it down here. Okay. Now the thumb on top, I'm going to lay it over
a little bit because this hand is going to
be coming down on top. We don't want to
crush our thumb. Alright, so with your dominant
hand, I'm right-handed. We're going to take the
tip of the thumb and just touch once on our forehead. Then we come down and land
on top of our other hand. We have brother from the side, front again. Starting from the rest
position, sign with me. Let's do it three
times. Brother. Okay. We just talked about
how to sign brother. Here's assigned four, sister. Okay, we're going
to use both hands. Start with l hand shapes. I'm right-handed, That's
my dominant hand, my non-dominant hand. I'm going to put it
right down here. The thumb part of the element
of folded over, alright? Because this hand is going
to be coming down and we don't want to crush our thumb. So we're just going to
fold it over there, leave it there for a
moment. Dominant hand. Take the tip of the thumb, just touch with the tip
of your thumb. Right here, right next to your chin area,
right down there. And just come down. Sister from the sides. Run again. Okay. Rest position,
sign with me. Let's do sister three times. Sister. Okay. We just talked about
how to sign Sister. Here is the sign for husband. Okay. We're gonna use both hands. The hand shapes are the same. Like this. Fingers together, gums
alongside or kinda loose. Notice bend the fingertips
town down a bit. Alright, so fingers together, kind of a loose hand there
but bent a little bit. So I'm right-handed,
non-dominant hand. I'm going to put it right
down here, palm facing up, dominant hand them and use
the side of my index finger. Just tap lightly on
the side of my head, forehead and come down. So we have husband
from the side. From the front again. Husband. Alright. Starting from the rest
position, sign with me. Let's do husband three times. Husband. Okay. We just talked
about how to sign. Husband. Here is
assigned for wife. Okay. We can use both hands,
same hand shapes. Start like this,
bring us together. Now we're just
going to curve down our fingertips a little bit. Thumbs can be close to the
side, just kinda loose. I'm right-handed,
non-dominant hand for me, I'm going to put it right there, palm facing up, dominant hand. I'm gonna use this side of my
finger and just tap lightly on my tin the side of my
chin, then come down. So we have wife from the side. From the front again. Wife. Alright, starting from
the rest position. So in with me, Let's do it three times. Wife. Okay. We just talked
about how to sign wife.
15. Review | Sign & Understand: And just like that, it's time for review of
family signs, number one. Okay. So in a moment, something is going to pop up
and I need you to sign it. So I'll hang out
here for a moment. You try to sign it before I do. So I'll hang out, I'll come
here and then I'll sign it. You compare your answer with
mine and signed with me. Okay. I need you to sign this. Mother, parents, wife, family, daughter, husband, son, brother, sister, father. We just did review if you
want to go back, repeat. That. Sounds wonderful. It makes sure you
got these signs down before you move forward. Okay. Let's do some
understanding review for families signs number one, only only those signs. So in a moment, I'm
going to sign something and you take a look and try to figure out
what I'm signing. Just shout it out loud. Okay. Here's the first one. Okay. So what did I sign? Well, I signed family. Okay. Parent's son, sister, daughter, mother, husband, father, brother, wife. Okay. We just did understand
and review for family signs. Number one, wonderful.
16. Learn | Family Signs 2: Family signs. Number two, you're about to learn how
to sign children, kids, baby, aunt, uncle, cousin, grandma, grandpa,
nephew, and niece. Okay. We have a separate
video for each one. We're going to cover handshape, pen position, hand motion, and do practice after
you've learned them all, we'll do some review. Alright, here we go. Here is assigned for children. Okay. Use your dominant
hand. I'm right handed. The handshape is
just a flat hand. Fingers the other thumb
alongside now tilted down, put it about here,
palm facing down. And we're gonna go 12, right? So imagine there are
a couple of kids, their two children, and we're just tapping them
lightly on the head. So we have children
from the sides. From the front again. Children. Alright. Starting from the
rest position, sign with me. Let's do it three times. Children. Okay. We just talked about how
to sign children. Here is the sign for kids. Okay. Use your dominant hand. I'm
right handed. The handshape. We can say our devil
horns like this, like you're rocking out. Or we could go like this. Alright, take the middle
two fingers, put them down. Take your thumb,
put it in front, so the index finger, the
pinky, they're sticking up. Now take the side of
your index finger, put it down underneath
your nose and just wiggle your pinky finger a few
times. Up and down. Kids. Kids. From the sides. From the front again. Kids. Alright. Starting from
the rest position. Signed with me. Let's do it three times. Kids. Okay. We just talked
about how to sign kids. Here is the sign for baby. Okay. We're going
to use both hands, hand shapes, just going to
be flat hands like that. Thumbs alongside. Now
I'm right handed. So my non-dominant hand, I'm going to put it
right down there, palm facing up, kinda like
that's our cradle, right? With my dominant hand, I'm gonna put it over here. Kinda like I'm holding
the baby's head, the back of the baby's head. Now we're just going
to rock back and forth like we're
rocking the baby. Baby. From the sides. Front again. Baby. Okay. Starting from the rest
position, sign with me. Let's do baby three times. Baby. Okay. We just talked about
how does sign baby. Here is assigned four. Aren't. Okay. Use your dominant hand. I'm right handed, That's
my dominant hand. When you use an alphabet
letter a, that's a handshape. It's good like this
fingers together, bring them down, them alongside. Now put your hand here on
the side of your face. We're not touching a little
ways out and just pivot, pivot it couple of times, twist it, swivel it. So we have from the sides from the front again aren't all right Starting from the rest
position to sign with me, Let's do it three times. Aren't aren't. Okay. We just talked about how to sign aren't here is the
sign for Uncle. Okay. Use your dominant hand.
I'm right handed. The handshape is the letter
U from the alphabet. Make a u. Well start like this. Last two fingers down
these two together. Take your thumb and put it
on top of your ring finger. So we have you take that you
were going to put it over here about the same
level as our temple sidebar overhead there,
sorry for forehead. And we're just going to swivel back and forth a few times. Uncle. From the sides. From the front again. Uncle. Alright, starting from the rest position, sign with me. Let's do it three times. Uncle. Okay. We just talked
about how to sign uncle. Here is the sign for cousin. Okay. Use your dominant
hand. I'm right handed. We're gonna make the letter
C from the alphabet. How do we do it?
Like this fingers together, notice curved down. So while I'd actually
looks like a seed, now put it here but the same
level as your ear and just swivel pivot twist a few times. So we have cousin
from the sides. From the front cousin. Okay. Starting from the rest position, sign with me. Here we go. Three times. Cousin. Alright, now one more
piece of information, cousin, all by itself, unless we can see the person, we don't know if it's male or female or what gender, right? So if it's a female cousin, take that C, move it down
and just do it down here. If it's a male cousin, move it up, put it over here. Cousin, as in a male cousin, you're gonna notice
that in general, males signs are on the
top half of the face. Female signs are on the
bottom half of the face. So male cousin like that, female cousin down here, there's regular
cousin like this. So when we're doing
testing and review later, I'm just gonna do the regular
sine at the ear level. Cousin. Okay. We just talked
about how to sign. Cousin. Here is
assigned poor Grandma. Okay. Use your dominant hand.
I'm right handed. So you can use an open hand like that finger spread apart, use the tip of the thumb. We're going to start
by touching our chin. Now we're going to bounce
out twice like this. One to grandma. From the side. Front again. Grandma. Alright. Starting from the rest position, sign with me. Let's do it three times. Grandma. Okay. We just talked about
how to sign grandma. Here is the sign for grandpa. Okay. Use your dominant hand. Just
a flat open handling that. Your tip of your thumb, put it on your forehead
and we're going to bounce out twice 12. So we have grandpa from the sides from the front again. Okay. Starting from the rest
position, signed with me. Let's do grandpa three times. Grandpa. Okay. We just talked about
how to sign grandpa. Here is the sign for nephew. Okay. Use your dominant
hand. I'm right handed. First, we're going to
make the hand shape of the letter n from the alphabet. How to make an n?
Well, go like this. Take your thumb, stick it
in-between your middle finger and your ring finger and
close up your fingers, right? We have one knuckle to knuckles. That's an n. Alright, you go over three, that's an m. And we
don't want an m, We want an end to knuckles. Alright, so we have that n. Now to sign nephew, we're going to modify this a little bit and let our fingers, the index finger and
the middle finger just go out a little
bit straighter. Alright? You have a regular n. Notice that
these go out, okay, so there's your handshape, put it up here on the upper part of your head
and just go back-and-forth. Nephew. From the signs. Nephew. Alright, starting from the
rest position, sign with me. Let's do it three times. Nephew. Okay. We just talked about
how to sign nephew. Here is assigned four. Nice. Okay. Use your dominant hand.
I'm right handed. First, we're going to make
an end from an alphabet. How do we make an n?
Well, go like this. Take your thumb
sticking in-between your ring finger and your
middle finger and close it up. So we have one
knuckle to knuckle, that's an n. Now if you
have three knuckles, 123, that's an m.
We don't want an m, We want an end to knuckles. Okay, so that's an n handshape. We're going to take these
two fingers and just let them relax and go out straight. Alright, so we're
gonna put that down here and we're going to
rotate back and forth. Nice. Nice. From the sides. Nice. Okay, Starting from the rest
position, sign with me. Let's do it three times. Nice. Okay. We just
talked about how to sign. Nice.
17. Review | Sign & Understand: Here we are is time to review and sign family
signs number two. So you're going to sign. Right. So somebody's
going to pop up something you've seen before. I need you to sign it. I'll hang out for a moment. You try to sign it before
I do radical like this, then I'll come up here
and then I will sign it. Compare your answer with mine, signed with me to
get more practice. Okay. Here we go. I need
you to sign this. Kids. Grandma, nephew, aunt, uncle. Nice. Cousin, baby, grandpa. Children. That was review where you signed family
signs number two. Okay. Let's do some
understanding. Reviewed just family
signs number two. Alright. So I'm going to sign something and you
try to guess it. Shouted out loud. Say it out loud. Okay. What am I signing? And grandma, kids. Baby. Nice. Uncle Children, grandpa. Cousin. Nephew. Alright. So that was review for families signs number two, understanding if you
need to go back and repeat, well, why not? Make sure you got
these signs good and you're understood
and you can do them, sign them, understand them
before you move forward.
18. Learn | Family Signs 3: Family signs number three, you're about to learn how
to sign twins, triplets, relationship, engaged,
wedding, honeymoon, married, separated,
divorced, adopted. Okay. Separate video for each one. We're going to cover hand shape
and position hand motion. And we'll do practice after
you've learned them all. We'll do some review,
two-part reviews, signing in, understanding. Well, what are we waiting
for? Let's do it. Here is a sign for twins. Okay, use your dominant
hand. I'm right handed. Alright, I'm gonna
make the number two, or we can say a V
from the alphabet. How do we do it? Well, go like this last two fingers down. Take your thumb and put it
on top of your ring finger. We're going to use our
index finger and we're going to touch
once on this side. And then once on this side, on this side is using
the inside part of the finger over here, using the back part. And we're just rubbing lightly. So we have twins. Alright. Two kids, two
kids that look the same. So we have twins from the signs. Alright. Starting from the
rest position, sign with me. Let's do it three times. Okay, we just talked
about how to sign twins. Here is assigned for triplets. Okay. Use your dominant hand. I'm right handed, That's
my dominant hand. We're going to use
the number three, that's the handshape.
How do we do it? Well, go like this.
Last two down, we have 123 fingers
left. That's R. Handshape. Okay, use our index
finger and we're going to rub down
once on this side, and then rub down
again on this side. This side is the inside
part of the finger. Over here it's gonna
be the outside part. So we go triplets. Triplets from the sides, from the front again. Starting from the rest
position, sign with me. Let's do it three times. Alright, now keep
in mind you may see people that do it the
opposite direction. They start over here and
then they come over here. Alright, so the
motions are the same. They might just do it
in opposite order to be consistent throughout
this course when we're signing triplets, we're going to
start on this side and then go over to this side. Okay, we just talked about
how to sign triplets. Here's a sign for relationship. Okay, we're gonna
use both hands. The hand shapes are the same. Wonderful. We're going to use the letter F from the alphabet. How do we make an
F go like this? Alright, take the index
finger and the thumb, put the tips together. You sign an F all by itself. It looks like this F. Okay, so take our two Fs and we're going to
open up right here so we can link them together like two people in a relationship. Alright, so we're going
to put it about here, and we're just going
to push out twice. Alright, relationship.
Or we can say push, pull. Somebody like that. From the signs. Relationship. Okay, Starting from the rest position,
sign with me. Let's do it three times. Okay. We just talked about how
to sign relationship. Here's a sign for engaged. Okay, we're going
to use both hands and the hand shapes
are different. So I'm right-handed,
That's my dominant hand. With my non-dominant hand, flat hand like that. Bring us together thumb
alongside, put it down there. That's like our platform. Okay. With your dominant hand. For me, my right hand, I'm going to make the
letter e from the alphabet. How to make an E? Well, go
like this fingers altogether. Now bring the thumb down in and curve the fingertips down. Alright, I signed
an E like this. Some people, many
people go down and they touch the tips on
the thumb up to you. For me, I grew up
sign it like this. So we have E. Okay. So take the E handshape, we're going to hover it
over our ring finger there, do a little circle and go down. Like we're tapping where the
engagement ring would go. Engaged from the science. Engaged. Okay. Rest position
signed with me. Let's do it three times. Okay. We just talked about
how to sign engaged. Here's a sign for wedding. Okay, we're going
to use both hands. The hand shapes are the same. A star like this
fingers together. Now bring your thumb in front, but leave a gap right here. Okay, so we have to
hand shapes like this. I'm right-handed,
non-dominant hand. I'm gonna put it right here,
dominant hand about here. And I'm just going
to close them up. So my dominant hand, fingers, we're actually going to go
inside my non-dominant hand. Alright, so you're joining together, you're
getting hitched. Wedding from the side. Wedding. Okay. Rest position. Sign with me. Let's do it three times. Okay. We just talked about
how to sign wedding. Here's how we sign honeymoon. Okay, use your dominant hand. I'm right handed. Risks can use the tip of our middle finger. So start like this finger spread apart and just bend down
your middle finger. Use the tip. Touch once over here on the
side of your chin. Touch again over here on
the other side, here tin. So we have honeymoon
from the signs. Honeymoon. Alright,
starting from the rest position, sign with me. Let's do it three times. Okay. We just talked about
how to sign honeymoon. Here's how we sign married. Okay, we're going to
use both hands and hand shapes look
somewhat like this. Alright, so fingers
spread apart, bring them together, thumbs alongside and just kinda
curving them down here. Now I'm right-handed
my non-dominant hand. I'm going to put it right
there, palm facing up, dominant hand on top, and just clasped together. A bond of marriage. Married. From the side. Married. Alright, starting from the
rest position, sign with me. Let's do it three times. Alright, now this sign
can be used as here like describing
they are married, but it can also be
used as a verb given the right context to marry. Alright, so we just talked
about how does sign married. Here's the sign for separated. Alright, now we're talking about a relationship of marriage, whatever they were together, but now they're separated. Okay, the hand
shapes are the same. We're going to be
going like this. Alright, we could go like
this, fingers together. Now curve them down. Just kinda loose hands there. I'm right-handed, That's
my dominant hand. So non-dominant hand, I'm going to put it
right down here, platform, palm facing up. Take my dominant hand. I'm going to come
down and squeeze. This is actually the sign for married marriage
to Mary, married. Now, in this situation, they're no longer married or at least they're not
together anymore. So we got to separate them. Separated from the sides. Separated. Alright, starting
from the rest position, psi in with me. Let's do it three times. Okay. We just talked about
how to sign separated. Here is the sign for divorced. Okay. The hand shapes are the same. Wonderful. We're going to use d from the alphabet.
How do you make a D? Well, start like this. Okay, We're going to put
our fingers altogether. We're going to take
the last three, take the tips and touch
the tip of your thumb. So we have a D and actually
even looks like a D, right? D. So that's the handshape
or both hands. We're going to take the
tips of the fingers, bring them here, touching. And now we're just
going to twist out and separate because we have divorced from the sides. Divorced. Alright. Starting from the rest position, sign with me. Let's do it three times. Okay. We just talked about
how to sign divorced. Here is assigned for adopted. Alright. With your dominant
hand is basically like you're grabbing the kid and bringing
them into the family. Adopted, from the sides. Adopted. Alright, starting from
the rest position, psi in with me. Let's do it three times. Okay, in alternate version
you may see is like this. Adopt it. How like you're picking up
something from the ground. Like the kid adopted to be consistent
throughout this course. We'll be signing
adopted like this. Okay. We just talked about
a way to sign adopted.
19. Review | Sign & Understand: Time for review.
This time around, we're going to assign
you are going to assign families
signs number three. Okay. In a moment
somebody is going to pop up, you sign it. I'm going to hang
out for a moment. You try to beat me, sign it before I do, I'll go like this and
then I'll sign it. Sign with me and compare
your answer with mine. Right? I need you to sign this. Married, engaged, triplets, adopted relationship, separated, wedding, twins, honeymoon, divorced. And that was reviewed, signing review for families
signs, number three, you want to repeat? Go nuts. Let's do understanding review for families signs number three, I think you know how it works. So I'm going to assign something only from
Family Science number three and you try to figure out what the heck I'm doing,
just shout it out. Alright, here's the first sign. What am I signing? Adopted triplets, three fingers, triplets. Divorced, married, honeymoon, relationship. Wedding, engaged, separated twins, two fingers, twins. And that was
understanding review for Family Science number
three. Marvelous.
20. Learn | Family Signs 4: Family signs number four, here's what you're
about to learn. Grand plus like grandson, granddaughter,
something like that. Something plus in-law,
son-in-law, brother-in-law? Uh-huh. Step by step, son's step dads that
fathers, stuff like that. Half half-brother,
half-sister, argue, get along, hate, help,
ignore, and love. Okay. Separate
video for each one. I'm going to explain
handshape, hand position, hand motion, and we'll do practice after you've
learned everything. Well by golly, we're gonna
do a two-part review where you sign and
also understand. Alright, here we
go, Let's do it. Okay. So you might be thinking, how do you sign
grand like grandson. Granddaughter. Grandchildren. Well, we'll
get to those in a moment. Just the grand part. All we're gonna do
is fingerspell. Fingerspell, right? So we're just gonna go g, r, a, n d. Okay, so let's take each letter
individually and see how it works. G, G, a G looks like this. How do you make a G?
Well, imagine that you're measuring the
thickness of a book, right? It's this big, I swear. Now, take that handshape
and flip it forward. Alright, so now we
have a G, G. Alright, that's how it looks from
the side G. So we have G. Now when are we gonna go
like this, star like this? Take our last two fingers, put them down, and I'll
take the middle finger, put it behind the index finger
and the thumb in front. That is in our kind
of like you're hoping something that's going to happen, your fingers
are crossed. That's an R. So, so far we have
G and we have our, alright in a gonna be like this. How to make an a, go like that. Fingers together, fingers
down, thumb alongside a. Okay, so we have G, our a, n. And it looks like this. How to make an end
goal like this? Take your thumb,
put it in-between your middle finger
and your ring finger, and I'll close it up. So we have two knuckles, 12, that's an n. If you
put three knuckles, that's an m. M, we don't want an M, That's 123. We only want to for n. Alright? So we have n, okay? So, so far we have G R a N. Alright, Now d looks like this. D. How to make a d like
this fingers together. Last three, we're going to
take the tips of the fingers, touched them to the
tip of our thumb. Alright, that's a D. D, alright, so
altogether we have G, R a N D. Alright, let's do it a few times and we'll speed up as we go. G, r, a, n, d. So altogether it's
grand. Speeding up. Grand, grand. Alright, there's
no need to finger spell this part exceedingly fast because the main goal
is clear communication. If you fingerspell a myelin
minute, well, that's nice, but if no one understands what the heck you're
signing is pointless. So the main idea is
clear communication. The more you practice, the more fluid and natural that it feels and your speed automatically
picks up, right. Okay. So once again, grant okay. So let's put it together with some signs that we've
already learned. We have grand son, so it's literally
going to be two parts. Grand. You remember how to
sign sun? That's right. Sun. So we put it together. Grand son. Just like that. Alright. Alright. In case you wanted to see it from
the side. Here we go. Grandson. Okay, so let's do grandson three times. What always started
from the rest position? Alright. Let's move
to grand daughter. Okay. So we know grand, grand. You remember how
to sign daughter? Well, it's somewhat
similar to sun. Sun starts up here, daughters starts down here, goes down there, right? So altogether we have grand
daughter from the side. Right? And the idea is
that you don't space in-between grand and daughter because they're connected
in the same concept. So you wouldn't go
grand daughter? No, you just put
them back to back? Grand daughter. Alright. Sorry. From the
rest position, sign with me. Let's do it three times. Granddaughter. Okay. Let's move to grant
excuse me, grandchildren. Alright. First part,
we know it grand. And how do we assign
children? That's right. Like we're tapping
them on the head. Right. Children. So let's
put it all together. Right from the side. Okay. So rest position,
sign with me. Let's do grandchildren
three times. Okay. So we just talked about taking grand and then
adding something to it. And we practice grandson. Granddaughter and grandchildren. Okay. Wonderful. Let's talk about
how to sign in law. Now we'll be using this in
conjunction with mother, father, son, other
signs like that. So just this part right here. It looks like this. Okay.
Let's talk about this sign. Hand shapes are different. I'm right-handed,
non-dominant hand for me, I'm gonna go like
this right there, palm facing forward, my
dominant hand them and make the handshape with the letter
L. L for loser, right? The inside part, we're
just going to tap once against their open palm in-law. As little bit of
extra information. This is based on
the sign for law, like law and lawyers
and stuff law. But here for in-law, we're just gonna do
it once, one tap. Now here it's gonna
be a compound sign. For example, when we
get to mother-in-law, It's just one concept, one person, but we're
using multiple signs, squishing them together
to make a compound sign. So we're just going to
tap once for in-law. Okay. So sine with me starting
from the rest position, Let's do in-law three times. Okay. So let's put it into practice. Let's do mother-in-law. First off, how do you sign
mother? Gonna go like this? Now I tap twice. However, since this
is a compound sign, we're just going to
tap once, right? Before I talked to
they said that law, the sign for laws
like this twice. But here we're just doing once because it's a compound sign, multiple signs being squished
together into one concept. Alright, so mother-in-law
would look like this. Short and sweet. Now if we went like this,
you'd be understood. It's just more efficient to
go like this from the side. Okay, rest position,
sign with me. Let's do it three times. Alright. Let's move to
how boat father-in-law, how do we assign father
just the sign for father. That's right. Two tabs. What do we know
about mother-in-law? We just do one tap. So the same thing with phyla. We're just go father in-law. Alright, rest position,
sign with me. Let's do it three times. And just make sure it's clear. In real life, if you
and I were signing, I wouldn't be squatting down. But here in this recorded video, I want to make sure you
can see my full hand. I don't want it to be
chopped off like that. Like my fingers
have disappeared. Uh-huh. So father in-law? Okay. Let's do son-in-law. How do you sign sun? That's right. That's right. Son. So altogether we have
son in-law, just like that. Alright. Rest position.
Sign with me. Let's do it three times. Course. We're going to
move to daughter-in-law. So how do we assign daughter? Well, we know that
sun was up here, so daughters down here, right? So altogether we have
daughter in-law. Alright, let's do
it three times. Rest position, sign with me. All right. How about
brother-in-law? How do we sign brother
for a star? That's right. Okay. So let's do
brother-in-law. Now this one's real nice because when we're
going brother, we already have
the L hand shapes. We go down brother, and then we just
open this one up for in-law. Right. Here we go. Rest position. Sign with me
three times. Here we go. Right. And sister-in-law,
how do we sign Sister? Alright. Brother was up
here, sisters right here. Okay. So sister-in-law through it three times. There we go. Okay. Well, we just
did a whole bunch of practice and talked
about in-law. Right. So taking
the family members sign and then just
adding in-law. Okay, Well done. Let's talk about
how does sine step, as in with family
members, right? Step mothers, fathers to
brother and on down the list. Right? So step in
this situation, the sign for step here
looks like this. Okay? Now if we take
this sign and it's all by itself, it's isolated. It means taking turns
like it's your turn. And it makes sense, right? Because in this situation, the biological mother
was the first one and now it's the turn
for the stepmother. Okay. So this sign, the handshape, use
your dominant hand. I'm right handed, going
to be l like an alphabet. L or L like a loser, right? Put it about here. The thumbs facing towards
you, the tip of the thumb, index fingers facing
off to the side, pointing off to the side. And we're just going
to flip it forward. Alright, so literally by itself, it's like turn, like it's
your turn to do something. Here. We're going to
use it for step in this situation from the side. So we're basically just flicking the thumb over the top, right. Okay, So let's put it into practice. Well, how about this? Why don't we just
practice this burst rest position sign with me. Here we go. Let's do it three times. Step. Step. Alright, let's put it together. We're going to
assign step mother. So first, what is the sign
for mother? That's right. You double tap on the chin, but this is a compound sign. You remember we talked before
about compounds signs. So what would we do
in this situation? How would we sign
mother differently? Because this is a compound sign. It's right. We're just going to
tap mother once. We have step mother, if you went like this step, you tap twice, that'll be fine. You'll be understood.
It's just more efficient to go like
this as a compound sign. Alright, so we have step
mother from the sign. Okay. Rest position,
sign with me. Let's do it three times. Alright. Let's move
to stepfather. It could be stepfather, just like stepmother
can be stepmom. Alright. So
stepfather, How do we sign father? That's right. All by itself would be two tabs. What do we know
about compound sign? We just need one tab. Alright. So altogether,
Let's do it. Step father. Uh-huh. Okay. Rest
position, sign with me. Let's do stepfather three times. Okay. How we move
to step brother? How do we assign brother? Uh-huh. Like that. So
let's do step brother. This is real nice because we're L hand position
already for step, we go straight to brother. Okay. Rest position
signed with me. Let's do it three times. Let's move to step sister. How do you sign
Sister? That's right. Sister. So let's do step sister. And let's do it three times. Sine with me. Alright, practice
makes improvement. Now we have step son, so we have step, how
do we assign sun? That's right. The
other step, son. Three times sine
with me. Here we go. Step daughter. How do we do it? Uh-huh. Uh-huh. Step daughter. Right. Three times starting from the rest
position. Here we go. Okay. Fantastic. We just talked about how
to how to sign step, step, and then added to a family member to
make it a compound sign. Alright, wonderful. Let's talk about
how to sign half in the context of half
sister, half-brother. The sign for half all
by itself is like this. Okay. So literally we're
going to be signing one, moving down and signing
to the numbers, right? So use your dominant
hand. I'm right handed. First we need the number one is just the index finger,
the pointer finger. We're going to put
it here tilted forward just a little bit. Now we're going to drop
it down and make a two. When you make it too. This is one, this is a two. Alright? Or like V for victory. So we are one to, one to just drop it
down just a little bit. 1.5, kinda like there's
a fraction, you know, there's a one on top
the line and the second envelope numerator
denominator, right? So 1.5 from the side, right? Once again it's half. So rest position, sign with me. Let's do have three times. Okay, now we're going to use that to make it a
compound sign, right? Two separate signs,
mush them together. So we're going to
do half sister. What do you think? How
would we sign it? Go ahead. Uh-huh. Uh-huh. That's right. We're gonna go half
and then we'll go sister, just like that. Okay. From the side. All right. Rest position. Sign with me. Let's do it three times. Alright. Let's move to half-brother. Go ahead. How would you sign it? Half brother. Alright. Starting from the
rest position, sign with me. Here we go Three times. Okay. Wonderful. So we explored, we did practice for half plus SR plus brother in a
family context, right? So half and then brother
or half, sister, right? Okay. Here is the
sign for Argue. Okay, we're going to use
both hands, the hand shapes, so the same index
fingers, right? We're going to point the
fingers at each other and we're just going to
drop them down, right? Even in a picture, you
know, they're getting their fingers are
pointing at each other. So the sign is argue
from the side. Argue, right? You can have a facial
expression which shows the situation, right? Usually you're not
arguing like hahaha, be more like this or
something serious. Argue. Alright, rest position,
sign with me. Let's do it three times. Argue. Okay, we just talked
about how to sign argue. Here's the sign for get along. Okay, so we have two people or a group of people and
they work well together. They enjoy each other
and they get along. Both hands, hand shapes are
the same. Go like this. Make flat hands,
take the fingers, keep them together
but Ben them down. We're going to tilt them
forward so the tips of the fingers are
pointing together, alright, and the palms
are facing together. We're just going to start
in and push out kind of like a bulldozer. Uh-huh. Get along from the sides, get alone. Okay. You probably want to
have a pleasant look on your face because they're
getting along if you like. It puts out opposite vibes. Familiar, probably
trying to express. Get along. Alright, rest, position, sign with me. Let's do it three times. Okay. We just talked about
how to sign get along. Here is the sign for heat. Okay? We're going to use
both hands and we're just going to be
flicking our fingers, thumb, middle fingers and just flicking like you're
going to flick a bug or something like that. So we're going to put
them on board here. They're touching together
and just flick out, Alright, hate. Now I urge you to put it in a facial expression which
fits the situation, whatever level of
hate you choose. But either way it's probably not going to be a happy face. It's gonna be something
definitely more serious, maybe even a nasty
look. From the side. We have heat. Okay. Rest position,
sign with me. Let's do it three times. Right now the flicking motion is quick. It's kinda violent. It's not like, oh, it's not a little love tablets. Hate. Okay. We just talked
about how to sign hate. Here is the sign for help. Okay. We're going
to use both hands, different hand shapes. I'm right-handed, That's my dominant hand,
non-dominant hand. I'm going to make a
flat hand down here, palm facing up.
That's our platform. Okay. With your
dominant hand for me, my right hand, we're
going to make the a from the alphabet
handshape, right? Like this fingers together
down them alongside. Now we're going to put it
on top of our open palms, start a little bit
lower and raise it up. Help from the sides. So we have help. Okay. Rest position
signed with me. Let's do it three times. Okay. Something important
about this sign. This is what we would
call a directional sign. So what does that mean?
Well, the generic sign all by itself is just
like this. Right. But if I was signing like I help you, I would go like this. Like I'm bringing you the help. Wanted to sign, you helped
me. I'd go like this. You're bringing the help
to me if I wanted to do, she helps him that
I go like this. Or we help you all. Uh-huh. So you help me I
help you help all around the sign all by itself when
it's just there's really no context just to
sign. It's like this. Help. Okay. We just talked
about how to sign. Help. Here is
assigned for ignore. Okay. We're gonna use
our dominant hand. I'm right handed and we're just going to put up four fingers. Alright, so put that
thumb in there and we use the tip of the index finger, touch our nose, kind of wrap
it around and throw it away. Ignore. Add a facial expression
which fits the situation. You probably wouldn't be like, it'd be more like, alright, people usually don't
like to be ignored. So put it on your
face from the sides. Hey, ignore. Alright, rest, position, sign with me. Let's do it three times. Okay. We just talked
about how to sign ignore. Here's the sign for love. Okay, the hand
shapes are the same. We can call them fists. We could also say that the
letter S from the alphabet, how do we make an S like that? Bring us together, bring
them down, thumb in front. That's an S. So we need two S's. Now we'll just cross them. Cross your arms and give
yourself a little hug, share the love with herself. Love from the sides. So we have low, alright, starting from the rest
position, sign with me. Let's do it three times. Alright, lets your
facial expression add to the situation. If you're just
feeling it, It's us. Wonderful. Love, which is
regularities, Okay, Love. Okay. We just talked
about how to sign love.
21. Review | Sign & Understand: It's time for review. Yes. You're going to sign families signs number for only
family signs number four. Okay. So how does it work? I'm sure you remember some
of this is going to pop up. You sign it, tried
to sign it before. I do, I'll hang out. I'll go here and
then I'll sign it. Compare your answer with mine. Alright. I need
you to sign this. Half. Sister. Love. Mother-in-law. Ignore. Step farther. Are you get along? Help. Grandchildren? Hate. Okay. So that was signing review for
family signs number four. Awesome. Okay. Let's do
understanding review for a family signs number four. So look at me, I'm going
to sign something. You try to figure out what am I signing to shout it out loud. Alright, here's the first one. What am I signing? Ru half brother, hate. Get along. Daughter in law, Help, love, grandson. Ignore stepmother. That was review for understanding family
science number four. We need to go back and
repeat do it again. Why not?
24. Dialogue #1: Okay. In many dialogues. So in ASL, he ignore your aunt? Yes, My aunt engaged. Alright, feel free
to pause the video. Take a moment and signed
through this dialogue. Alright, when you're
ready, push Play, and then we'll do it
together step-by-step. Alright, here we go. Alright, so let's
do the first part. He ignore your aunt an English, Something like he's ignoring your aunt or does he
ignore your aunt? But in ASL, alright, he ignore your art. So how do we sign he? Now let's pretend he's over
there. We can see him. It's Philip. Alright.
What do we do? We pointed at him. We just indicate him. He what is the sign for? Ignore. Ignore your your your
your signing to me. You just go like this to me. Alright. And aren't how do we sign it? Aren't it's right on okay. We have a yes no question. So an English does
he ignore your aunt? So the answer is
gonna be yes, no. I suppose someone
could say maybe. So because this is
a yes-no question, what do we need to do to
indicate a yes, no question? Let's write raise
those eyebrows, lean forward a little bit, like you're peeking over
your neighbor's fence. There is a face of
a yes, no question. Okay. So when you sign
it, go like this. Alright. So when I signed, aren't I raise my eyebrows
and lean forward? Now you could go like this
through the whole sentence, but it's a little
bit uncomfortable. So you can wait to
get to Aunt, alright, so he ignore your hand
and save the question, raises the eyebrows, the
face like that for the end. Alright, so let's put
this all together. Sign with me. Let's do it in nice
and slow step-by-step. Ignore your right a little bit quicker. He ignore your aunt. Okay. Good, good, good. Let's go to the second part
of this mini dialogue. Yes, my aren't engaged. There'll be ASL. So in English? Yes, my aunts AND gates or yes, My aunt is engaged. Here we go. Sign by sign. Yes. How do we sign it?
Do you remember? That's right. Yes. You can nod your head in
the affirmative as well. Yes. You go like this. We're
sending out conflicting vibes. You could do it to mess
with people, right? So we have yes. My how do we sign it? Let's write flat hand
possessive pronoun my. My, aren't, aren't engaged. How do we do it? Let's write engaged. Okay. So let's sign it
altogether step-by-step. Sign with me. Yes. My aren't engaged. Alright. Again, here we go. Quicker. Okay. So we've done both parts. Well, let's sign it
all. Here we go. So starting There,
we go through it. Nice and slow step-by-step sign with me will speed up as we go. He ignore your aunt. Yes. My aren't engaged. How cool is that? Okay. Full sentences,
mini dialogue. Wonderful. Look at Hugo. Here we go. He ignore your hand. Yes, My aunt engaged. Okay. Now I'm not going to talk. We're going to speed
up. Sign with me. Okay. When you're
citing this part, when you go he ignore you, might have a like a frown
on your face because it ignores not really
a happy thing. And then you go,
your you're doing, aren't remember to raise
those eyebrows because we've got to indicate
a yes-no question. Okay. So this dialogue
we went through, we signed it step-by-step. You want to repeat,
get more practice. I say more power
to you. Well done.
25. Dialogue #2: Okay, in other
dialogues, so an ASL, their family love, argue, know, their family, get along. Alright, I welcome you to pause the video,
work through it, signed through it on your
own and when you're ready, push Play and we'll
sign it together. Okay, here we go. So the first part, their family love, argue. That's ASL English,
something like this. Does their family love to argue? Alright, those small words does to an ASL, we're not
going to sign them. It's very efficient
straight to the meat. Alright, so let's
do it step-by-step. There. Let's say it's a family
and they're sitting over there and we're
gossiping about them. Alright, how do we sign there? It's right there. They're arc in their direction. Family. Family,
love, love, right? How do we sign argue. Argue. And this is
a yes, no question. So an English, does their
family love to argue? Alright, So yes, no question. We're going to raise
those eyebrows. Once we get to the sign for
argue, raises eyebrows, lean forward a little bit, have an inquisitive look that indicates a yes-no question. Now, no need to go like this
through the whole sentence. Just when you get to
the sign for argue, raise those eyebrows up. Now, argue the sign all
by itself in isolation. You might have a frown. Argue, argue, but the yes, no question is going
to take control. So once you sign
argue no need to front anymore because here it's at the end of the sentence. Yes, no question. Okay. So let's do some practice. Nice and slow. Sign
with me step-by-step. Their family love. Argue. Alright, again, here we go. Their family love argue. I rose up, lean forward. Okay, let's go to the second part of the
response in the dialogue. No, there's no their family
get along in English. Something like know
their family gets along or they get along,
something like that. Okay. So let's do
it step-by-step. Know how do we sign
it? That's right. No. No. We can shake our head
if we really want to make sure we're getting the
negative of cars. No. They're right there. Family. Family. That's right. Get along. How do we sign? Get along? That's right. Get along. Get along. Right. So altogether Let's do it. Sign with me. Know their family, get Alone. Alright, Again,
know their family, get alone. Alright, bit quicker. Okay, so let's do both
sides of the dialogue. We've practiced both. Let's put them together, nice and slow through
the whole thing. Next time round will speed up. Here we go. Sign with me. There. Family, love. Argue. I rose up. Yes, no question. Know their family. Get along. Again. Here we go. Their family love, Ru know
their family get along. Right speeding up. Okay. We signed
everything step-by-step. If you need more
practice for you, feel free to go back
and repeat. Alright.
26. Dialogue #3: Okay, another dialogue. You hate her parents? I love her mother. I
not lovers. Stepdad. Alright, feel free
to take a moment. Go ahead and sign the
dialogue by yourself. Pause the video
when you're ready. Push Play will sign it together. Okay, let's do it. You hate her parents in English, something like do you hate her
parents? Okay, here we go. How do you sign you? Probably the most
straightforward side and all of the whole language. You That's right. Hey, how do we do it? I hate her. Let's see. Let me
give you a scenario. Let's say Sally, She's not here, but we're signing about her. How did we refer to her? Here? It's a possessive pronoun. How do we refer to her if
she's not here? That's right. We're gonna pretend
there's a little imaginary Sally over here. Just do it off to the side. Her parents, how do we sign it? That's right. Parents,
literally mom. Dad. Parents. This is a yes, no question. You can answer. Yes, no, or maybe you
hate her parents. Hint, hint. That's right. I rose up, lean
forward a little bit. We want to communicate
a yes-no question, and you don't need to hold this through the whole sentence. It's uncomfortable. Once used to parents. Raises eyebrows, lean forward. Alright, let's sign
it altogether. Sign with me step-by-step. You hate her parents? I rose up. You hate her parents? Okay. And the response,
I love her mother. I love her stepdad. Okay. So an English
I love her mother. I don't love her step dad. I'd probably say an English. So here we go. I I that's right. How do we assign love? Love. Heard, remember it's
Sally, but she's not here. We're going to refer to her
after the sign her mother. How do we assign it? A mother? I I not how do we sign? Not like this. Not not at a handshape right
there and tip of the thumb. Not shake your head. You really laid in there
that it's negative not. Alright. One dimension
not is a fabulous sign because you can
put it in front of any sign to get the
opposite, right. So not love, not
happy, not hate. Maybe whatever you want
to get the opposite. Love, love her. Her stepdad. How do we sign stepdad? Step. Right. We don't need to go to
tabs for dad or fathers. Same thing because it's a
compound sign step there. All right. Let's do it altogether.
Sign with me nice and slow. I love her mother. I not love her. Step dad. He's a jerk. Alright, again, here we go. I love her. Mother. I love her. Stepdad. Right speeding up. Alright, so we're
not using Hate here, but we don't love. So you could say not
love if you really wanted to raise it to
level, it could just go. I hate her step dad. Okay. Putting it all together. Let's do it nice and slow. Sign with me. You hate her parents? I rose up. I love her mother. I not love her. Stepdad. He's a jerk. Okay. Here we go again. You hate her parents? I love her mother. I not love her. Step dad. Right. Speeding up. Okay. We signed step-by-step. The whole dialogue. If
you want more practice, feel free to repeat.
27. Learn | Emotion Signs 1: Emotion signs number one, Here's what's you're
about to learn. Angry, bored, busy, confused, delighted, depressed,
embarrassed, emotional, excited. Fine. Okay, we've got a separate
lesson for each one. We're going to talk about
handshape, hand position, hand motion, and do
lots of practice. After we've learned all
of these ten signs, we're going to do
a two-part review where you sign and understand. Alright, here we go. Here is the sign for angry. Okay, we've got a few
things going on here. First, the hand shapes
are like claws. Alright, so start like this
and just kinda come down like you're going to
attack something, right? Turn them around. We're
gonna put them a boat here, and we're just going to let
them blowing up, right? Angry. At the same time, watch my face. Right at a facial expression
which fits the situation you probably wouldn't be
like, because it's angry. You're angry, rage
from the side. Angry. Rest position. Sign with me. Let's do it three times. Okay. We just talked about
how to assign angry. Here is the sign for board. Okay. Use your dominant hand. I'm right handed, just going
to use our index finger. We're going use the tip
of the index finger, put it on the side of our nose, start with our palm facing
forward and just twist. Alright, so we finished
palm is facing in. So we have board. At the same time add in kind
of a board expression on your face from the sides. Board. Okay. Rest position,
sign with me. Let's do it three times. Board. Okay. We just talked about
how to sign board. Here's how we sign busy. Okay. We're going to use both
hands, different hand shapes. I'm right-handed, That's
my dominant hand. So with my non-dominant hand, I'm going to make a fist. We'd also see the letter
S from the alphabet. How well this fingers
together bring them down. Fellman front. Okay, Now that's gonna be my platform when to
put it down here, palm facing down with
my dominant hand, I'm going to make the
letter B from the alphabet. Fingers, the other
thumb in front. Now use the palm area here. I'm going to rub lightly on the back of our fist over here. We're going to go like
this. Alright, Just quick frenetic movements
back-and-forth. Busy from the side. So we have busy, Alright, rest,
position, sign with me. Let's do it three times. Okay, now it's important
here to go quick, kinda small jerky movements
because if you go like this, it means business. Yes, like commerce, business. I have a business wherever
we're looking for busy here, so we need to go
small and quick, busy, like a busy bee. Okay. We just talked about
how to assign busy. Here's how he signed.
Couldn't be used. Okay. It's a two-part sign. Then we're going to motion together. The first part we're going
to use our dominant hand. I'm right handed, index finger. And we're just gonna
go think, think. We're gonna go think, and then we go like this. It's kinda like the cloud
of confusion down here. We use hand shapes like this. Alright, put your
non-dominant hand underneath, dominant hand on top and just do alternating circles
are rotating circles. Alright, so altogether, we have now added a facial
expression which supports it. You're kinda exasperated
what the heck is going on? So we have confused
from the side. Confused. Alright. Rest position,
sign with me. Let's do it three times. Okay. We just talked about
how to sign confused. Here's how we sign. Delighted. Okay, we're going to use both hands and
hand shapes are the same. Like this, fingers spread apart. Take the middle fingers,
bend them down. Alright, Those are
the hand shapes. Now we're just going
to lightly touch on her chest and then just
kind of filling them up. Delighted. Right? Now adding a
facial expression. Very important. If you're like this. You
don't look delighted. If you're like this.
Or at least a happy, pleasant look on your face. Delighted. Uh-huh. From the sides. Delighted. Rest position. Sign with me. Let's do it three times. Okay. We just talked about
how does sign delighted. Here's how we sign depressed. Okay, we're going
to use both hands, same hand shapes, go like this. Now bend down your
middle fingers. Only your middle fingers. Reuse a tip to the
middle fingers, put them on our chest
and just slide down. Depressed at an a
facial expression which shows that you're
feeling depressed. Depressed from the sides. Depressed. Rest, position, sign in with me. Let's do it three times. Okay. We just talked about
how to sign depressed. Here's a sign for embarrassed. Okay, the hand
shapes are the same. So like this. Now I'll just kinda
loosen them up in the fingers down
just a little bit. We're going to put them here
so the palms are facing in. And first we're going to shrink down because we're embarrassed. It's uncomfortable. Now we're going to go like this, alternating movements
with our hands, these kinda Klar
loose hands here. So we have embarrassed. Just think like,
you know, your face is starting to get read and oh my goodness, embarrassed. Remember the facial
expression very important. From the sides. Embarrassed. Alright, starting from the
rest position, sign with me. Let's do it three times. Okay. We just talked about how
does sign embarrassed. Here's the sign for emotional. Okay, the hand
shapes are the same. We're going to use e
from the alphabet. How to make the letter
E? Well, go like this. Bring us together a curve, the tips of the fingers down. Bring your thumb down under. Alright, now I sign an E
like this where there's a gap in-between the tips of
the fingers and the thumb. You'll see many people sign in link that you will also see many people come down and touch where they
sign an E like this. Now I grew up sign and E like this. This is how I sign it. So in this course we'll see me sign like this. You
want to sign it? You like that? Go nuts. Alright, so we
have E and we have e to hand shapes
for the letter E. Okay? Now we're going to take them and bring them close to our body. We're going to use these parts right here of the
ys and we're just going to rub up
lightly on our chest. Emotional. Emotional. Now notice how the
movements are alternating. We're not going at the same
time, are going alternating. So one goes up and then the
other and then the other. Uh-huh. So we have
emotional from the sides. Emotional. Alright. Rest,
position, sign with me. Let's do it three times. Okay. We just talked about
how to sign emotional. Here's a sign for excited. Okay, I'm going to
use both hands. Go like this. When your middle fingers down, just two middle fingers. We're going use the
tip to the middle fingers and we're gonna go up lightly on our chest. We're gonna do
alternating movements and have a happy face. Excited from the sides. Excited. Alright, starting from the
rest position, sign with me. Let's do it three times. Okay? There's another sign which
is similar, delighted. Alright, so first I'm
going to sign delighted, and then I'll sign excited. Tell me if you can see the
difference. Here is delighted. Now, excited. Alright, the hand
shapes are the same, but with delighted,
we are just going up once with the happy
face and excited. We're doing these
alternate movements, like bursts of energy. Excited. Okay, we just talked about
how to sign excited. Here's how we sign, fine. Okay, use your dominant hand
and shape is just like that. Fingers all spread apart. We're going to take the tip of the thumb and we're going to tap twice on our chest. And just have a
neutral expression. I feel fine from the sides. Fine. Alright, rest position,
sign with me. Let's do it three times. Okay. We just talked
about how to sign. Fine.
28. Review | Sign & Understand: Okay, let's do some review. You're going to
assign emotion signs. Number one. Alright, so in a moment something is going
to pop up. You sign it. I'm going to hang
out for a moment, then I'll go like this,
then I'll sign it. You tried to sign
it before? I do. Okay. I need you to
sign this. Emotional. Emotional, busy, busy, right? Quick movements. Delighted. Excited. Alright, so quick, remember, delighted is just one. And excited is like bursts of little positive emotion vibes. Right? Angry, depressed, confused, fine, embarrassed. Board. And that was review for sign-in emotion
science number one, if you need to go
back and repeat. Wonderful. Let's do
understanding review for emotion science number one. Alright, so watch me, I'm going to assign something. Alright, take a look at me, try to figure out
what I'm signing. Just shout it out loud. Alright, here we go.
What am I signing? Delighted. Busy, like a busy bee. Fine. Emotional, confused, angry, bored, depressed, embarrassed, excited. Okay, that was review for understanding emotion
signs. Number one.
29. Learn | Emotion Signs 2: Emotion signs number two, you're about to
learn how to sign. Frustrated, full,
happy, heartbroken, humiliated, hungry, jealous,
lonely, mad, mind blown. We have a separate video lesson for each one you're going to learn hand shape and
position and motion. We'll do lots of practice
and then we'll do a review. Alright, let's do it. Here's how we sign. Frustrated. Okay, use
your dominant hand. I'm right handed.
We're going to make the hand shape of the
letter b from the alphabet. How do we do it?
Well, I'll start like this, fingers together. Thumb in front
there is a B, okay, now we're gonna take the
back part of the fingers of that B and we're just gonna
do backwards motions, touching or rubbing
Archean lightly. Alright, at the same
time it's frustrated. Supportive facial
expression which fits something like this. Frustrated from the sides. Frustrated. Okay. Rest
position, sign with me. Let's do it three times. Okay. We just talked
about how to sign. Frustrated. Here's how we sign. Okay. Use your dominant hand.
I'm right handed. We're going to make the
hand shape of the letter b from the alphabet like this. Fingers the thumb in
front, we have a B. So renews the back part here. We're just going to start
here and go up to our chin. At the same time
you can puff out your cheeks because think
you've eaten too much food and you're just pull from the sides. Full rest position. Sign with me. Let's do it three times. Okay. Remember this
situation is for food. So we're talking about being
full. You've eaten too much. Okay. We just talked about
how to sign full. Here's how we sign happy. Even looks happy. Okay, we're going
to use both hands, same handshape, just flat hands. Alright, I'm right-handed,
That's my dominant hand. I'm going to put it about here. Non-dominant hand a
little bit lower. We're just going to rub up
twice at the same time. Have a pleasant, at least a pleasant or a happy
look on your face. Happy. From the sides. Happy. Okay, rest position. Sign with me. Let's do it three times. Alright, keep in
mind, it is common to do with just one hand. Happy to be consistent
throughout this course, I'll be signing it with
two hands like this. Okay, We just talked
about how to sign. Happy. Here's the sign for heartbroken. Very expressive. Okay, Basically we're
going to use both hands. We're just going to be
making this twisting motion right over our heart rate
because heartbroken. Alright. Right over your heart,
heartbroken from the sides. Add in a facial expression
which fits, right? You can never have
a intensity level, whatever pizza
situation if it's okay. Heartbroken. Say Oh my goodness, my heart just oh, right. Oh, okay. Rest position. Sign with me. Let's do it three times. We just talked about
how to sign are broken. Here's the sign for humiliated. Okay. Now first the facial expression, a pained look on your face. Oh my goodness, right? Now, their hands, we're gonna
be making this motion here. Now, imagine a turtle taking its head and going
back into its shell, right? So this is the turtle head, this is the shell and
it's going down, right? The hand shapes with
a dominant hand is just to S, a fist. We could say non-dominant hand is like a C handshape
from the alphabet. I'm going to put it down there. Right here and just
go down the turtles going back in because
it's humiliated, right? So remember two parts,
facial expression, kind of a pain look plus
going back into the shell. So we have humiliated
from the sides. Humiliated. Alright, rest position
signed with me. Let's do it three times. Okay. We just talked about
how to sign humiliated. Here's how we sign hungry. Okay, use your dominant hand. I'm right handed.
We're going to make the letter C from the alphabet. Like this fingers
together, curve it down. It actually looks like a c. I take the tips of the fingers, tip of the thumb and we're
going to put it about right here starting upper part
and just slide down. Hungry. From the sides. From the front. Hungry, alright, starting from the rest position, sign with me. Let's do it three times. Okay. We just talked
about how to sign hungry. Here's how we sign jealous. Alright, use your dominant hand. I'm right handed, That's
my dominant hand. We're going to make the letter X from the alphabet.
How do you make an x? Well, just stick up
your index finger, your pointer finger,
curve it down. So you have like a
Captain Hook are right, that is an x, sine x all by
itself would be like this x. So that's our handshape. We're going to take the tip. We're gonna get close
to our t. You can touch lightly or
not touched at all, just get close and we're
gonna go hook because we're jealous at an facial
expression which shows, I don't know,
anger, displeasure, discomfort, something like that. Jealous from the sides. So we have jealous. All right. Rest
position, sign with me. Let's do it three times. Okay. We just talked about
how to sign jealous. Here's how we sign lonely. Alright, use your dominant hand. I'm right handed and
use the handshape, just the index finger, uses side of the finger there. We're going to rub twice on our chin kinda
backwards circles. Lonely. Add a facial expression
which shows loneliness. From the sides. Lonely. Right now they're not quick, jerky movements were trying to drag it out
because we're trying to convince the other person that we're lonely or
that is loneliness. Alright, rest position,
psi in with me. Let's do it three times. Okay? We just talked about
how to sign lonely. Here's how we sign mad. Okay, use your dominant
hand. I'm right handed. We're going to have
this nice claw shape here because it's
like we're grabbing her face because we're ******
off because we're mad. Mad. So go over here, just
kinda twist up and have a intense angry look on
your face. From the sides. From the front. Mad. Okay. Rest position. Sign with me. Let's do it three times. Okay. We just talked
about how does sign med here's how he sign. Mind blown. Okay. Use your dominant
hand. I'm right handed. We're going
to start with an S. We can say a fist. We're gonna put it
right at the side of her forehead, just
touching lightly. And now we're going to
make it kind of explode. Because our mind is blown. At the same time adding the facial expression
which shows, wow, oh my goodness,
Something like that. Because your mind is
blown. Rubbing the sides. Mind blown. Okay. Rest
position, sign with me. Let's do it three times. Okay. We just learned how
to sign mind blown.
30. Review | Sign & Understand: Okay, Let's do signing review for emotion signs number two, only emotion signs, number two. Alright, so I'm going
to show you something. You sign it before I do. Alright, here we go. I need you to sign
this. Heartbroken. Full mind blown, happy, lonely, mad, humiliated, frustrated, jealous, hungry. Okay, that was signing review for emotion signs number two. It's time for
understanding review of emotion signs number two. So watch me. I'm going to assign something and shout
out what I'm signing. Alright, here we go.
What am I signing? Happy. Yeah, less full. Heartbroken. Mind blown, frustrated, humiliated, hungry, mad, lonely. Okay, that was understanding
review for emotion signs. Number two. Wonderful.
31. Learn | Emotion Signs 3: Emotion signs. Number three, you're about to
learn how to sign. Proud, puzzled, sad,
scared, shocked, shy. So, so surprised, tired, upset. Okay, We have a separate
video lesson for each one. That means you're going to
learn handshape hand position, hand motion into practice. Alright, After we've learned
all ten will have review, right, let's get started. Here we go. Here
is assigned four. Proud. Okay, use your dominant
hand. I'm right handed. We're going to make
the, a hand-shaped from the alphabet like this, fingers together, fingers
down, thumb alongside. We can use the tip of the thumb, start down here and just
rub up, straight up. Proud. Just touching
lightly. Proud. Have a competent look
on your face because you're proud from the sides. Proud. Alright. Rest position,
signed with me. Let's do it three times. Okay. We just talked
about how to sign. Proud. Here's how to sign. Puzzled. Okay. Use your dominant hand. I'm right handed, That's
my dominant hand. We're going to make
the handshape both the letter X from the alphabet. How do you make an x? Well,
start with your index finger. Now a curve it down like
your Captain Hook high. We're going to use the back
part of the finger of the x, and we're just going
to put it on our forehead at the same time, have a confused look
on your face because your puzzle from the sides. Puzzled. Alright, starting from
the rest position, psi in with me. Let's do it three times. Okay? We just talked
about how to sign. Puzzled. Here's how we sign said. Okay, we're going
to use both hands, just open hands like that finger spread apart, just loose, turn them through the
palms are facing in started about your nose
level right there and just go down and have a sad look on your face. From the science. Said, Okay, rest
position, sign with me. Let's do it three times. Okay. We just talked
about how to sign. Said here's how we sign. Scared. Okay. We're gonna use
both hands, flat hands. We're going to start
here, kinda lose. And then they shoot
out like lightening. Scared at the same time. Have a scared Look, are shocked. Look on your face,
open your eyes. Scared from the side. Scared, right. It's like a jerky movement. It's not like I'm so scared. It's like scared. Okay. Rest position. Sign with me. Let's do it three times. Okay. We just talked about
how to sign scared. Here's how we sign shocked. Alright, so the
first part, we're going to use our index finger. We're just going to assign mind. Or we could say,
think we have mind. Rosen, the hand shapes down here just like this,
right? And just go. So we have mind frozen. In other words, shocked and
on your facial expression. Have a shocked,
surprised, walk, bemused. Look. From the side. Shocked. Rest position. Sign with me. Let's do it three times. Okay. We just talked
about how to sign. Shocked. Here's how we sign. Die. Okay, use your dominant
hand. I'm right-handed. I'm just gonna make a
flat hand right there. Now we're going to bend
all the fingers down. We're going to use the
back part of the fingers, lightly touch her cheek and
just kinda curl up because we're shy from the sides. Shy. Okay. Starting from the
rest position, sign with me. Let's do shy three times. Okay. We just talked
about how to sign shy. Here's how we sign. So, so alright, use
your dominant hand, but just can use the open hand like that finger spread apart, put it right here, and we're
just going to move it, tilt it back and forth. Phase just kinda have like
a neutral expression. It's so, so nothing
great, nothing horrible. Just so, so from the side. So okay. Rest position, sign with me. Let's do it three times. Okay. We just talked
about how to sign. So so here's how to sign. Surprised. Okay. Same hand shapes, both hands. We're just going to be
doing a flicking motion where we end up with
straight index fingers. Put them about here, same level
as your eyes and just go. Alright, you can close your
eyes quickly for a moment then I open up like
you're surprised. Surprised. From the sides. Surprised. Okay, rest position,
sign with me. Let's do it three times. Alright, now this is very similar to the
sign poor wake up, wake up in the morning, but the difference is
the intensity level. So watch this. Here's
how we signed wake up. Now here's always sign
surprised. See the difference. Okay. We just talked about
how to sign surprised. Here's how we sign tired. Okay, we're going to use both
hands, same hand shapes, go like this, fingers
together, thumbs alongside. Now we're going to
bend the fingers down. So this is the handshape. Now put it right here at
the sides of our chest, not in our armpits, just to the sides of our chest. And we're just gonna go down. Tired, tired. You can show that, you know,
you're tired on your face. There's a lack of energy. Tired from the sides. Tired. Alright, starting from
the rest position. Sign with me. Let's do it three times. Okay. We just talked
about how to sign tired. Here's how we signed upset. Alright, use your dominant hand. I'm right handed. Risk
can use a flat hand, fingers together,
thumb alongside. Now we're going to start with
the tips of our fingers. We're just going
to lightly kinda swipe up on our stomach here. We're going like this and then come back in where it's flat. So we swiping, touching right here and then coming down
and touching down here. So like this, upset
at same time, have unpleasant
look on your face from the sides. Upset. Okay. Rest position. Sign with me. Let's do it three times. Okay. We just talked about
how to sign upset.
32. Review | Sign & Understand: Okay, it's time to
do is sign in review for emotion signs number three. So I'm going to
show you something. You sign it before I do. Alright, I need
you to sign this. So, so tired. Puzzle. Said surprised, shocked, upset, shy, proud, scared. Okay, that was signing review for emotion signs number three. Alright, let's do
understanding review for emotion signs number three. So watch me, I'm going to sign something and you shout
out loud, but I'm signing. Okay, So here we go. What am I signing? Puzzled, tired, scared, shocked. Said proud. Shy. Surprised. So, so upset. And that was understanding review for emotion
signs number three.
33. Learn | Emotion Signs 4: Emotion signs. Number four, you're about to
learn how to sign. Exhausted, worried a lot. If cry, fall in love,
feel, hope. Think. Who? Okay, We have a
separate video for each one. You're going to learn handshape
hand position here in motion and do practice after you've made it through
all the signs will have two-part reviews signing
in understanding. Alright, here we go. Here's how we signed. Exhausted. Okay. So it's building on
the sign for tired, but tired is just kinda okay. Lack of energy. Exhausted is oh, no energy at all. So you need to embellish
the sign for tired, exhausted from the sides. So we have exhausted. I urge you just have fun with
it puts your emotions in. Now, may not feel irregular, but if you watch people
signing for them, it's regular people in and
around the deaf community. It's regular to just fill up your signs with lots of
facial expressions and body movements to just show an express what
the situation is. Okay, so rest,
position, sign with me. Let's do exhausted three times. Okay. We talked about
how to sign exhausted. Here's how we sign. Worried. Okay. We're going to use both hands, flat hand shapes, fingers together, thumbs alongside that. We're gonna be putting
them up here and making alternating circles at the
same time that we have like, unpleasant look on her
face because we're worried from the sides. Okay, We have worried. So they kinda like backwards
alternating circles up here. Alright, worried. Three times starting from the rest position,
signed with me. Here we go. Okay. We just talked about
how to sign worried. Here's how to sign a lot. Okay. Same hand shapes, both
hands, just like this. Go like that. Bend your fingers like you're going
to catch a ball. Alright, Those are the
hand-shaped start here. The tips are facing
together and just go out. At an facial expression
which shows a lot, kind of like from the sides. A lot. Alright, rest position,
sign with me. Here we go three times. Okay. We just talked about
how to sign a lot. Here is the sign for if you use your dominant
hand, I'm right handed. We're going to make
the hand shape of the letter I in the alphabet. How do you make an eye? Well, go like this. Fingers together. The first three or
the middle of three, we can say put them
down in front, leave the pinky, pinky
fingers sticking up. Use the tip of the
pinky and just tap twice underneath there. I know I'm right handed, so I'll tap twice
underneath my right eye. If your left ear, just do
it two times over here. Alright? I'm right
handed. From the sides. If alright, starting from the rest
position, sign with me. Let's do it three times. Okay. We just talked
about how to sign if here's how we sign Cry. Okay. Same hand shapes, both hands, index fingers, palms facing in and just trace
where the tears would go. Alright, have a sad
look on your face. Might be strange if
you're like this. Right. So we have
cry from the sides. Cry. Okay, Starting from the
rest position, sign with me. Let's do it three times. Alright. We just talked
about how to sign Cry. Here's how we sign,
fall in love. Okay. Both hands, different
hand shapes. I'm right-handed with
my non-dominant hand. I'm going to make a flat hand
here, put it right here. That's our platform dominant
hand, just index finger. Now take this part
right here and place it lightly against your nose and
your mouth just right here. Alright, now we're gonna
go one to fall in love. So you bounce once
and then you bounce forward again on your
hand, your platform. Fall in love. From the side. Fall in love. Okay. Starting from the rest position, sign in with me. Let's do it three times. Okay. We just talked
about how to sign. Fall in love. Here's how we sign, feel. Okay, use your dominant hand. I'm right handed. Just going to use the tip of our
middle finger. That's it. We're going to start
down here and just swipe up once on the
side of our chest. Feel from the science. Feel. Right starting from the rest
position signed with me. Let's do it three times. Okay. We just talked
about how to sign feel. Here's how we sign. Hope. Okay, we're going to use both hands are gonna
be doing the same thing. Start like this. We're going to
bring them up here. I'm right-handed, I'll
put one right here. Non-dominant hand for me,
my left-hand about here, just going to start
up in come down. So we're going to end up
like shelves, I guess. So we're gonna go hope. From the sides. Hope. Alright, rest,
position, sign with me. Let's do it three times. Okay. We just talked
about how to sign hope. Here's how we sign. Think. That's it. We're just going
to use our index finger of our dominant hand. I'm right handed and just
tap the side of our head. Think. From the sides. Think, alright, starting from the rest
position, sign with me. Let's do it three times. Alright, the sign also
works for mind, mind. Here we're using it as think. Okay, we just talked
about how to sign. Think. Here's how we sign. Who? Use your dominant hand.
I'm right handed. We're going to make the L
handshape like LPAR loser. I take the tip of your thumb, put it on your chin. Now you're just going to curve your index finger
a couple of times. Who? Who write to make sure we're
communicating in a question. This is a WH question. Who, what, where,
when, how, and why, those we're going to
prove our eyebrows, bring them down a little bit, have an inquisitive look. So altogether we have
who from the sides? Who right. Starting from the rest
position, signed with me. Let's do it three times. Okay. We just talked
about how to sign. Who
34. Review | Sign & Understand: Okay. Time for review. Time for you to sign
emotion signs, number four. Right. So you sign
what I show you and try to do it
before I sign it. Here we go. You sign this? Cry? Worried. Hope. Exhausted. Fall in love. Feel a lot. Yeah, I think. Okay. We just did a review for sign-in emotion
science number four, if you want to go back, repeat
as many times as you need. I say Wonderful. This is understanding
review for emotion signs. Number four, you know it I'm going to assign
you shut out loud. I'm signing. Okay. So what
am I signing? Here we go. Exhausted, Worried. Hope. Fall in love. I think. If if h2, lot, cry, feel ready. That was understanding
review for emotion signs, number
for Fantastic.
37. Dialogue #1: Okay, Here's our dialogue. We have a question
and the response. Feel free to pause the
video, take your time, work through the dialogue
and when you're ready, push Play, and we'll go
through it together. Okay, here we go. Alright, The first
part, you think your mom emotional in English, something like do
you think her mom's emotional or mom is emotional? Alright, let's do
it step-by-step. You you. That's right. I think I always sign it. I think her Let's say it's Mary and Mary
sitting over there. She's not privy to
our conversation, but we're assigning about her. So her and her what? Her mom how do we assign mom? Mom? Emotional? How do
we sign emotional? E hand shapes? Emotional. Good, good. Now this is a yes, no question. So what do we need
to do when we get to the sign for emotional at
the end of the sentence. Right? Eyebrows, eyebrows up,
lean forward a little bit. So it looks something like this. You think her mom emotional? Alright, let's do
it all. Here we go. Sign with me nice and slow. You think her mom emotional? Eyebrows up. Right again. Here we go. You think her mom emotional? Okay. Let's move to the
second part of the response. So yes, I think she
hoped fall in love. Okay. So in English? Yes. I think she's hoping
to fall in love. I think she hopes to fall in
love, something like that. Let's do it step-by-step. How do we sign? Yes. Yes. Uh-huh. I I think think she
remember it's married. She's over there. She would just point everyone's see, indicator. Hope. How do we assign hope? That's right. Hope. Fall in love. How do we sign it? Fall in love. Okay. Let's put it all
together. Nice and slow. Sign with me. Yes. I think she
hope fall in love. Again. Yes. I think
she hope fall in love. Okay. So we did both sides. Let's put it all together. Let's do everything
nice and slow. Sign with me. Question and
response. Here we go. You think her mom emotional? Yes. I think she hope fall in love. Right now you might be
thinking a little bit strange. We are having a conversation
with ourselves, dialogue a question in
response with herself. But it's wonderful practice
because we had to sign the question and the
response, the statements. Alright. Again, here we go. You think her mom emotional? Yes. I think she hope. Fall in love. Okay. Wonderful. We did the question where we did
the response. We did it all.
38. Dialogue #2: Okay, Here's our dialogue. Now we've went
over all the signs except for the first one person. So here's how we sign person. Alright, flat hands like that. Just like you're sliding
down the sides of a box. Just go person. Okay, you should know
the rest of the signs. So feel free to pause the video, work your way through the
dialogue and when you're ready, push Play and we'll
sign altogether. Alright, here we go. First. First part, person, cry
a lot, I feel depressed. Who? Alright, That's ASL version. English would be
something like Who's the person who's crying a
lot and feeling depressed? Alright, so let's
do it side-by-side. Here we go. Person. Alright, flat hands. We're just gonna go
person, person. Alright. Cry, cry. A lot. How do we sign a lot? Let's write a lot. Feel. I redo it. Feel, Let's
write feel depressed. What's the sign? Depressed? And the question we're
WHO? How do we do it? Who is right? Who? Good, good. And the question mark
is we want to make sure it's a WH question. Remember yes-no questions. We raised eyebrows. Wh question like
this one who we're going to lower the eyebrows,
furrowed eyebrows. Who write, you don't have to go like this through
the whole sentence. But once you get to the end, so person cry, feel depressed. Who? For those eyebrows? Right? All right. So let's take a look at this. Let's sign step-by-step,
sign by sign, and watch what I do when I
get to the comma, cry a lot. Alright, so here we go. Here we go. Sign with me. Person, cry, lot. Feel depressed. Okay. Do you see what
I did when we got to the comma after I did cry a lot, then I signed feel depressed. I shifted over just lightly because in
English is very clear. We have two separate ideas
here because you will put and in-between the person who is crying a lot and
feeling depressed. Now, who is it? Who is the person
doing that stuff? Well, in ASL, we don't sign and in this situation
it's unnecessary. We just shift over
a little bit and suddenly we have a
new mini context, a new concept and idea. So watch again, here we go. Person, cry a lot. Feel depressed. Who? Alright, here we go. Let's do it. The other person cry a lot. Feel depressed. Who? Alright, Again,
person cry a lot. Feel depressed. Who? Okay, so that was the first
part of the dialogue. Let's jump to the second. My sister, heartbroken. She lonely. Write in English. My sister is heartbroken and my
sister is heartbroken. She's lonely. Right here we go. My how do we assign it? My in my what? My sister how do we
assign sister? Sister. Sister. Heartbroken. How do we do it? We're just going to
grab that hardened, twist it, it's heartbroken. She now let's say the
sister is not here, but we want to refer to her. What do we do? That's right after the sine
xi and see what she's lonely. How do we assign lonely. Lonely. Okay, put
it all together. Sign with me. Let's go nice and slow. My sister heartbroken. She lonely. Again. My sister heartbroken. She lonely. Alright, We did both sides. Let's go through
it step-by-step. Sign with me. Here
we go side-by-side. Person, cry a lot. Feel depressed. Who? My sister. Heartbroken. She lonely. Right again, let's
speed up a little bit. Person. Cry a lot. Feel depressed. Who? My sister. Heartbroken. She lonely. Okay. And I urge you
just to throw in your facial expressions
and embellish. Alright, what seems like embellish gene for
a hearing person, someone who's not signing
a ladder in Iran, the deaf community, it
seems like it's overacting, but I assure you that once you get in the deaf
community and assigning, it's like they just embellish naturally because
facial expression, it says such a
visual language in such a wonderful way to give
tiny details and nuances. And the situation is by using the facial expressions
and body language. So I would urge you
to try to embellish extra because that's
what they're doing. Right. Okay. Sounds good. We did it all.
39. Dialogue #3: Okay, we have another dialogue. Feel free to pause the video, work your way through it and do some practice when you're ready, push Play and we'll
sign it together. It's time. Here we go. Here's
the first part. If they delighted you, jealous, Alright, an English, Are you jealous if they're delighted or if they're
delighted? Are you jealous? Something like that. Let's go step-by-step. If how do we sign
it? That's right. If they let's say in this situation it's a group
of people are over there. We can observe them.
How do we assign day? That's right, index
finger, personal pronoun. They are in their direction. They delighted. How do we sign? Delighted. Delighted, delighted. Alright, remember the difference between delighted and excited. Similar, delighted. Just one. Excited was like
little bursts, right? So we have delighted. You. You, that's right. How do we assign jealous? That's right. We're
going to have that hook down there and go jealous. Yes. No question. How do we indicate
show yes-no question. Raises eyebrows, lean
forward a little bit. That's right. Don't have to do it through
the whole sentence. Just go like this. If they
delighted you, jealous. Alright, let's practice. Sign with me nice and slow. If they delighted you. Jealous. Right now, jealous. The sign all by itself in
isolation. Let's find it here. Jealous. You might put a
skull on your face. Jealous. However, we have
a new situation. Jealous is part of the question and it's
a yes-no question. Now here it's at the
end of the sentence. So we're not going to scowl, we're going to raise
their eyebrows instead. So unlinked is jealous. We need to communicate that. Yes, no question. Alright, here we go. Again. If they delighted you, jealous. Okay, So that is the first part. Let's go to this response
to the question. Maybe, if I happy, I think you jealous. I didn't English something
like maybe or perhaps. If I'm happy, I think you're jealous.
Alright, here we go. Let's do the ASL
version step-by-step. How do we assign maybe, maybe like you're
weighing options. Maybe, perhaps, maybe if, if that's right, I, I happy. How do we assign happy. Happy. I, I think think you, you jealous? Right now here it's
not a question. We don't have to do that. Eyebrows off stuff up stuff. So you could just look like little pirate jealous
scale if we need to. Alright, let's pull out
the other sign with me. Nice and slow. Maybe if I happy, I think you just write
again, here we go. Maybe if I have p, I think you jealous. Okay, let's put the
two parts together. We have the question
and the response. Let's do it all. Yes, step-by-step. Sign with me. Here we go. If they delighted you. Jealous. Maybe. If I happy. I think you jealous. Right? Again, let's go
a little bit quicker. If they delighted you, jealous. Maybe. If I happy, I think you jealous. Feel free. Repeat as often as you need
to go back and practice. Pause the video, speed up the video is stored
on the video. Whatever works to get you
sign in and moving forward. Okay, wonderful.
40. Learn | Color Signs 1: Colors, signs. Number one, you're about to learn
how to sign. Color. Black, blue, brown, gray, green, orange,
pink, purple, red. Okay, We have a separate
video for each one. You're going to learn how to
do handshape hand position, hand motion, and
we'll do practice. After you've learned all the
signs will do some review. Let's jump in, let's do it. Here's how we sign color. Okay, use your dominant hand. I'm right handed. The
handshape is just like that. Open fingers spread apart. I'll turn it around so
the palms facing in, put your fingertips
in your mouth area, not touching just out in front. And we're just going to
twiddle our fingers, move our fingers back-and-forth. Color from the sides. Color. Okay. Starting from the rest
position, signed with me. Let's do it three times. Okay. We just talked
about how to sign color. Here's how we sign black. Okay. Use your dominant hand. I'm right handed, That's
my dominant hand. Handshape is the index
finger, the pointer finger. Alright, we're going
to use the tip part of our index finger and we're just going to slide
it across our forehead. I'm right-handed. I'll start
over here, slide across. If I was lefty, I'd start over here and slide across
the other way. Alright, so I'm right-handed
black from the sides. So we have black. Okay. Rest position, sign with me. Let's do it three times. Okay. We just talked about
how to sign black. Here's how we sign blue. Okay, use your dominant hand. I'm right handed, That's
my dominant hand. We're going to make the
hand shape of the letter b from the alphabet.
How do you make a B? Well, I'll start like this, fingers together
dumbed down in front. Sign a B all by itself. It's like this, B. Okay, so we're gonna take
that B handshape and we're just going to twist it back
and forth a few times. Blue from the sides. So we have blue. Okay. Starting from the rest
position, sign with me. Let's do it three times. Okay. We just talked
about how to sign blue. Here's how we sign Brown. Okay. Use your dominant hand. I'm right handed, That's
my dominant hand. Handshape is the letter B
from the alphabet like this, fingers together,
thumb in front. Now we're going to
use the outside part of our index finger here, put it on the side of her face. I'm lightly touching and
we'll just slide down. Brown. From the sides. Brown. Okay. Rest position,
sign with me. Let's do it three times. Okay. We just talked
about how to sign brown. Here's how we sign gray. Okay, we're gonna
use both hands, hand shapes like this. Now we're gonna put
them down here, palms facing in with
your dominant hand. I'm right handed. That
one's going to start a little bit in
non-dominant hand, a little bit out, then
we're just going to rotate positions and come back. So we have gray from the sides. Gray. Alright, if your
fingers tap each other a little bit,
not a big deal. We're just trying to
go back-and-forth. Rest position signed with me. Let's do it three times. Okay. We just talked about
how to sign gray. Here's how we sign green. Okay. Use your dominant
hand. I'm right handed. That's my dominant hand. Handshape is the letter G from the alphabet.
How do you make a G? Well, imagine you're trying
to measure how thick something is and you're
like, It's this thick. Yes, it is. Alright. Now,
take that hand shape. It's a G handshape
flipping forward. That is a G. That's a G. So take that g handshape and we're just going to wave it back-and-forth. That means green. From the sides. Green. Alright, starting from the
rest position, sign with me. Let's do it three times. Okay. We just talked
about how to sign green. Here's how to sign orange. Okay, use your dominant
hand. I'm right handed. We're going to be making a fist. We're gonna be opening,
closing it in front of our mouth. Orange. From the sides. Orange. Alright. Starting from the
rest position signed with me. Let's do it three times. Okay. We just talked
about how to sign orange. Here's how we sign pink. Okay, use your dominant hand. I'm right handed. We're
going to use a hand shape of the letter P from the
alphabet. How do you make a p? Well, it started like this. Pinky ring finger down. Alright, take your
thumb and press it against the inside part
of your middle finger. Right now that's
actually the sign for a cape to make a p, we just flip it down. That's it. We signed a P l by itself
would be like this. P. Alright, let's do
it one more time. Pinkie, ring finger down, thumb pressed against the inside part of
the middle finger. Flip it down. We have a P
and that is R handshape. We need for pink p. Alright, we're going to take the tip of the middle finger. We're just going to rub
down twice on her lips. Pink. From the sides. Pink. Alright. Rest position. Sign with me. Let's do it three times. Okay. We just talked about
how to sign pink. Here is the sign for purple. Okay, use your dominant hand. I'm right handed.
We're going to make the hand shape of the letter P. P for purple pea. How to make a p.stance
go like this. Last two fingers down, thumb, pressing against
the inside part of that middle finger,
flip it down. That is a p.sit. Take that p.ball and just twist it back and
forth a few times. We get Twitter lit, moving back and forth. So we have purple
from the signs. Purple. Alright, rest position
signed with me. Let's do it three times. Okay. We just talked
about how to sign purple. Here's how we sign. Read. Alright, use
your dominant hand. I'm right handed, index finger. We're going to turn
it around, use the inside part of
the index finger, put it on our lips
and just slide down. Read from the sides. Read, Write, rest,
position, sign with me. Let's do it three times. Okay. We just talked
about how to sign read.
41. Review | Sign & Understand: Let's do signing review
for color signs. Number one. Alright,
in a moment, somebody is going to pop up. You sign it before I do, I'll hang out here for a
moment, then I'll go like this. And then also in the answer. All right, I need
you to sign this. Brown, pink black, green, red, purple, blue. Gray. Color orange. Okay. That was signing review
for color signs number one. Let's do understanding review for color signs, number one. So I'm going to sign something. You take a look at me. I had to figure out what
I'm doing and shout it out. Right here's the first one. What am I signing? Green. Pink. Orange. Black. Red. Gray. Color. Purple. Brown. Blue. Okay. That was
understanding review for color signs number one, do you want to go back
and repeat? Why not?
42. Learn | Color Signs 2: Color signs number
two, that's right. You're about to learn
how to sine tan, white, yellow, silver, gold. Mix, bright, dark, light, shiny. Okay, we've got a separate
video for each one. That means you're going
to learn hand shape and position hand motion
for each sign. Then we'll do practice. And after you've
learned them all, we'll do some review. Alright, here we go.
Here's how we sign tan. Use your dominant hand.
I'm right handed. We're going to make the letter T from the alphabet.
How do you make a T? Well, go like this.
Put your thumb just on the other side
of your index finger. Close up your fingers. Alright, that's a t. B sine a t by itself
would be like this. T. Alright, take the inside part, put it up on your cheek
and just slide down. Ten from the side. Ten. Okay. Starting from the rest
position, signed with me. Let's do it three times. Okay. We just talked
about how to sign ten. Here's how we sign white. Okay, use your dominant
hand. I'm right handed. We're gonna put our fingers
together and we're gonna be going like this on our test. Alright, so start apart. The tips are touching your
chest and pull them out. Alright, pull the tip cell, pull your handout
and close it up. So we have white. White from the sides. White. Alright, rest position,
sign with me. Let's do it three times. Okay. We just talked
about how to sign. White. Here is assigned for yellow. Okay. Use your dominant
hand. I'm right handed. We're going to make the
letter Y from the alphabet. It looks like, hang loose man, that one. Go like this. Middle three fingers
put them down, pinky thumb sticking out. That is why if you sign a
y by itself be like this. Why? Okay. So take that why handshape and just twist
it back-and-forth. Yellow. From the sides. Yellow. Alright. Rest position. Sign with me. Let's do it three times. Okay. We just talked
about how to sign yellow. Here's how we sign silver. Okay. It's a two-part sign. First, use your dominant hand, right index finger, and
just tap on your ear, your ear lobe right here. So first part, now we're
going to make an S handshape. We can just say the fist and
just twist it a few times. So we're gonna go
one and then two. So altogether it's
silver earrings or something and
they're silver. Uh-huh. So from the sides. Silver. Alright. Rest position. Sign with me. Let's do it three times. Okay. We just talked
about how to sign silver. Here's how we sign Gold. Okay. Two-part sign first,
index finger, just touch your ear lobe, the bottom part of
the ear for a moment. And then we're going to come
down and do yellow r hat. So the Y handshape but just
shake it back and forth. That's yellow. To get gold, we go like this. Alright, so we have
gold from the sides. Gold. All right, rest position,
sign-in with me. Here we go three times. Right. In case you're curious. This is also the
sign for California. Gold or her. Okay. We just talked
about how does sign gold? Here's how we sign mix. Okay, use both hands. Hand shapes are like
claws, like that. Now I'm right-handed, so
my non-dominant hand, I'm going to put it down
there on the bottom. Dominant hand for me,
right hand for me on top. And we're just gonna do circles. They're not moving together. You're gonna be like
you're mixing stuff up. Mix from the sides. Mix. Okay. Starting from the rest
position, sign with me. Let's do it three times. Okay. We just talked
about how to sign mix. Here is the sign for bright. Okay, we're going to
start with o hand shapes, kinda squished. O hand shapes. How to make an O, well go
like this. Curve it down. Tips are all touching
the thumb tip and we have an OH, alright, we're going to
make two of those, squish them down
just a little bit, but the tip so
they are touching. And now we're just
going to let them explode because it's bright. Room the sides bright. All right. Rest position. Sign with me. Let's do it three times. Okay. We just talked
about how to sign bright. Here's how we sign dark. Okay. Both hands, same hand shapes, just flat hands, fingers
together, thumb alongside. Now I'm right handed, so my non-dominant hand, I'm
going to turn it round. It's gonna be just a
little bit dominant hand. Turn it around as well. It's gonna be inside, so we're not going
to be touching, but the inside one dominant
hand is gonna go in front of the non-dominant hand. Alright? So like Shades coming down. Dark. Dark from the sides. Dark. Alright. Rest position
signed with me. Let's do it three times. Okay. We just talked
about how to sign dark. Here's how we sign light. Okay. Now this is light
like light blue, light red, like stuff like that. A lighter color. I liked. We're going to use both
hands, same handshape. Start like this
finger spread apart. Now bend down just
your middle fingers. Alright, we're going
to start here with the tips of the middle
finger is pointing down. Now it's going to curve them up. So when we finish the tips of the middle fingers
are pointing up. Light from the sides. Light. Alright. Rest position,
signed with me. Let's do it three times. Okay. We just talked
about how to sign light. Here's how we sign shiny. Okay. Both hands, different hand
shapes. I'm right handed. So with my non-dominant hand, I'm going to make it letter
S from the alphabet. We'd also say a fist like this, fingers together down,
Bowman front. Put that down. That's gonna be our platform with our dominant
hand like this. Now just bend down
your middle finger. Use the tip of that
middle finger. Touch the back of your fist. Now bring it up. And as you bring it up,
you're gonna wiggle. Shiny from the sides. Shiny. Okay. Starting from the rest
position, sign with me. Let's do it three times. Okay. We just talked
about how to sign shiny.
43. Review | Sign & Understand: It's time to do signing review for colors signs, number two. Alright, so somebody's
going to pop up. I'll hang out here. You sign it before I do. Alright, I'll come up
like this and then I'll sign the
answer. Here we go. I need you to sign this. Gold. White, shiny mix. Yellow. Ten. Light. Bright, silver. Dark. Okay. That was signing review
for color signs number two. Let's do understanding review for color science number two. So watch me, I'm going
to assign something. You tried to figure
out what I'm signing. Just shout it out loud. Right here we go.
What am I signing? Mix? Silver. Dark white. Gold. Shiny light yellow. Bright tan. Okay. That was
understanding review for color signs number two.
44. Learn | Color Signs 3: Colors, signs. Number three, you're about to learn
how to sign rainbow, colorful, beautiful,
ugly crayons, nose ring like, dislike or end, which we have a separate
video for each of these, you're going to learn handshape, hand position, hand motion. We'll do practice.
Then after you've learned all of them
will do review. Alright, let's jump
in. Let's get started. Here's how we sign rainbow. Okay, use your dominant hand. I'm right handed.
We're going to be making the number four. Alright, porque. We just took our thumb means we have four fingers sticking up. Now, palm facing towards you. Start over here and we're
just going to trace a rainbow in the
sky, makes sense. Rainbow from the sides. Rainbow, right, starting from the rest
position, signed with me. Let's do it three times. Alright. We just talked
about how to sign rainbow. Here's how we sign colorful. Okay, now this is based on
the sign for color, right? Dominant hand, hand
shapes like this. Put it right here. Now wiggle back and forth your fingers. That's colored.
We want colorful. So we're just gonna
do it with two hands. Now, wiggling those fingers,
hands back-and-forth. Colorful. From the sides. Colorful. Okay. Rest
position signed with me. Let's do it three times. We just talked about
how to sign colorful. Here's how we sign beautiful. Okay, use your dominant
hand. I'm right handed. We're going to start with
this handshape right here. We're going to start over here. We're going to do like a
fan in front of our face. And we're going to
come down and then end up in a handshake. Alright, so like this, and close up the fingers
and in a handshake. So we have beautiful,
from the sides. Beautiful. Alright,
starting from the rest position, sign with me. Let's do it three times. We just talked about how
does sign beautiful. Here's how to assign ugly. Okay, use your dominant hand. I'm right handed. Started
with that index finger, right? That's our handshape. We're going to start right here, right underneath your nose. Pull it across in,
curve up the finger. Ugly. From the sides. Ugly. Add an a facial expression
which supports ugly. Rest position. Sign with me. Let's do it three times. We just talked about
how does sign ugly. Here's how we sign crayons. Okay, two parts sign, literally we're going to be
signing color and right. Alright, so the
first part, color, open hand like that and just go like this in
front of your mouth. Alright, the second part, right? Non-dominant hand,
make a platform there. So be writing on dominant hand. Just pinch together your middle index
finger and your thumb. Now, just like it's a little
pencil and your writing. We have color writing. In other words, crayons. From the side. Crayons, right, starting from the rest position. Sign with me. Let's do it three times. Okay. We just talked about
how to sign crayons. Here's how we sign nose ring. Okay, use your dominant
hand. I'm right handed. We're going to close
up our fingers to choose our thumb
and index finger. Touch the side of our nose
like our nostril right there. And we're just going to tap
twice with our index finger. Nose ring. From the sides. Nose ring. Alright, rest
position, sign with me. Let's do it three times. Okay. We just talked about
how to sign nose ring. Here's how we sign like Okay, use your dominant hand.
I'm right handed. We're gonna be using the tips of our thumb and our middle finger. Alright, we're gonna be making
this motion on our chest. So start like this, spread apart and just
pull out and together. When you finish the
tips will be touching lake from the sides. Like alright, rest
position, sign with me. Let's do it three times. Okay. We just talked
about how to sign, like here's how we sign dislike. Okay. Now it's based on
the sign for like. So first let's do like
like using the tip, your middle finger,
tip of your thumb and going like this on your test. So just pulling out. So that is like, but with dislike we need
to do something extra. We were gonna do like
and then throw it away. Dislike, adding a
facial expression which shows that
it's unpleasant. You don't like it.
From the side? Dislike. Okay. Starting from the rest
position, sign with me. Here we go Three times. Okay. We just talked about
how to sign dislike. Here's how we sign wit. Okay, we can use both hands, same hand shapes, letter
a from the alphabet. How do we make an a like this? Fingers together, fingers down, thumb alongside,
that's an eight. Now we're going to need
that for both hands. We're going to start about here. Then we're just going
to go up and down. They're not going together,
they're going alternating. Alright? Like which one? At the same time. This is what we would call
a WH question words who, what, where, when,
how, and why, right? So we're going to
put our eyebrows and have a look on her face, like what's happening
over there. Okay. So when you sign it
together, be like this. Which from the side wit rest position, sign with me. Let's do it three times. Okay, we just talked
about how to sign width. Let's talk about how to
communicate or, or end. Now if you notice, I put them in brackets right
there in lowercase. So we don't have a
separate sign for all n, But we have a body movement and we're going to
call it a body shift. Alright, so let me
show you an example. Alright, so first
let's talk about, or we have blue or red. Alright, here's how I
communicate that to you. Okay. Did you see what I did for
or let me do it again. Okay. Or in this case is a body shift were basically
given two options. Blue shift read right. So altogether. Okay. So why
don't you sign it with me? Let me do it from the side
so you can see first. Okay, rest position,
sign with me. Let's do blue or
red three times. Alright, let's try another one. Let's do Tom or an, alright, so a little bit
of finger spelling here. First, Tom, T, O, M, right, so we fingers
spell his name, Tom. Then we can move over. We
can go this way or that way. Tom or n. Alright, Tom. And so that movement
in there is the or, either or given a
couple of options here. Let's try end. Alright. Now, let's
do blue, red, tan. Now in English you'd probably
go blue, red, N tan. So an ASL, because we have
three different concepts here, we have the different
colors, blue, red, tan. We're just going to
shift our body slightly. You don't have to go
way across the room, but just move over a little bit. So here we go. We go blue. Read ten. You could keep going
back and forth. Blue read ten. I mean, literally it's
like blue and red and tan. But because we're just
doing the motion, I'm not going to say n, right? So blue, read ten. Now if they were short
names would go like this. Eva, Sam. So each one basically
has its own space because they're all
individual, independent. In this case, people before it was colours,
separate concepts. Alright, so when we're
talking about or, or n is just a shift of the body not flinging
yourself across the room, just can be a small shift. Alright? Personally, when
I do or I go a little bit farther because
it just makes it clear that you
have two options. If it's, an AI might
be more subtle, but there's still a movement, alright, so or end. Okay, So when you see
this for testing, we're gonna do review
will be testing. I'm going to ask you to
understand it and also sign it. Just do a body shift, Alright, go like this. Maybe a couple of times. Alright, the idea is there's
not a separate signs. We're not really doing
anything with our hands. We're just shifting our body
to get the concepts that we have multiple things maybe or there are a couple
of options or, and there's a series of things. Alright? So when you see this pop-up and testing and
review, just go like this. Like you're ducking and weaving. Okay. We just talked
about how to sign or end.
45. Review | Sign & Understand: Let's do signing review for
colors signs, number three. Okay. Something's
going to pop up. I need you to sign it. I'm going to pause,
hang out here for a moment, then
I will sign it. You try to sign it before I do. Here we go. I need you to sign this. Beautiful or end, right? So there's not a separate sign, It's more just a body
movement of body shift. Okay. So or end. Like colorful, ugly. Which? Nose ring? Rainbow. Dislike crayons. Okay. This was signing review for color
signs number three. Let's do understanding review for color signs number three. So take a look, watch me. I'm gonna be signing something. Shout out loud, but I'm signing. Alright, first one.
What am I signing? Like? Colorful, ugly crayons or and nose ring. Beautiful. Which? Rainbow? Dislike. Okay, this was understanding review for color
signs number three, need to go back and do
review again whether it's signing your
understanding. Go ahead.
48. Dialogue #1: Alright, here's our dialogue. Take a look at it. Feel free
to work your way through it. Pause the video, and
do the dialogue. When you're ready, you can push play and then we'll
sign it together. Alright, here we go. First part, gold or silver. You like which? Alright, so in English, which do you like gold or
silver or something like that? Now in ASL, is do
it side-by-side? Gold. How do we do it? Gold? Now we have the ore body shift or
were like gold or silver. Alright, so gold, silver, you, you like, how
do we sign it? Like, which are
assigning a width? And this is a WH question words we're going to
infer the eyebrows. So WH question, who, what, where, when, how,
why in width, right? So which just go like this. At the end of the sentence, you don't have to hold this phase through
the whole thing. Gold or silver, you like, which? Alright, let's get some
practice. Here we go. Gold. Silver. You like which? Gold? Silver you like which? Okay, that's the first
part of the dialogue. Second part, I don't like gold, silver, I like purple. Alright, in English, I
don't like golden, silver. I like purple or I don't
like silver and gold. I like purple, right? Asl here we go, step-by-step. I I don't like trying
to trick you here. Don't like so same thing
as dislike, right? So I'm just going to
go like this, right? Dislike. We learned that sine, same meaning as don't like. Okay, gold, gold and silver. Alright, there's
no ore body shift, it doesn't say and,
or, or down there. But we have two
separate concepts. We have gold and silver
lining them up, right? So we'll just shift
over a little bit to make sure there's separate. I, I like like purple, purple, P handshape purple. Alright, let's put it all
together. Here we go. Sign with me nice and slow. I don't like or
dislike gold, silver. I like purple. Alright, again, here we go. I don't like gold. Silver. I like purple.
Right. Speeding up. Okay. You did both parts well, by golly, let's sign
everything together. Sign with me nice and
slow step-by-step. Gold, silver. You like, which? I don't like, dislike. Gold. Silver. I like purple. Alright, Again, gold, silver. You like, which? I don't like. Gold. Silver. I like purple. Okay, We signed the
whole dialogue. Feel free to go back and
practice as much as you need to.
49. Dialogue #2: Okay, another dialogue. Feel free to pause the video, work your way through
it, signed by sine. When you're ready, push Play, and we'll assign
it all together. Okay, here we go. First part, Tom,
nose ring, colorful. You think ugly? Alright, an English Tom
has colorful nose ring. Do you think it's ugly or
Tom's nose ring is colorful? Do you think it's ugly?
Alright, and ESL, let's go through
it step-by-step. Tom, we're gonna do a little
finger spelling, right? Tom. Tom. How do we sign nose
ring? That's right. Nose ring. Colorful. How
do we do it? Colorful. You, you think? Think ugly. How do we sign ugly, ugly, ugly. The sine by itself, we're going to kind of error. But here it's at the
end of a sentence and is part of you think ugly? A yes, no question. We signed ugly this time. We're going to raise
their eyebrows. Ugly. You think? Ugly. Okay. How do we review how do we make sure that it's
a yes-no question? Raises eyebrows, lean forward
a little bit. That's right. Okay. So lucky you. We have two separate
sentences here, right? Tom, nose ring,
colorful, you think? Ugly. Here we go. Let's sign
it. Sign with me. Nice and slow. Tom.
Nose ring, colorful. You think ugly. Again. Tom. Nose ring, colorful. You think ugly. Alright, quick note here, Tom and his nose ring. In English, we'd go Tom's, we do apostrophe S here just because Tom is
next to nose ring, it's understood that
whose nose ring? Well, It's Tom's. Alright, let's speed up signing
the whole thing. Alright, second part
of the dialogue. Let's do it. No, I think his nose ring
beautiful in English. Something like no, I think it's his I think his nose
ring is beautiful. But in ASL we don't worry about is MRAs was worth
throw them out. Here we go. How do we sign? No. No. You can take your
head too if you want. No. I I think think he is. Now let's say he's not here. We were talking
about Tom, right? Let's see. Tom, his nose ring. So he's not here. We'll just do it
off to the side. He is still referring to
him right? Nose ring. Nose ring. How do we assign
beautiful. Beautiful. Okay. So let's do it
step-by-step sign with me. No. I think his nose ring
beautiful. Again. No. I think his nose
ring beautiful. All right, let's
put the two parts of the dialogue together. Let's sign it all side-by-side. Sign with me. Nice and slow. Tom. Nose ring. Colorful. You think? Ugly? No. I think his nose ring. Beautiful. Alright, Again, a
little bit quicker. Tom. Nose ring. Colorful. You think ugly? No, I think his nose
ring beautiful. Okay, we did the whole dialogue. Feel free to practice
as much as you'd like.
50. Dialogue #3: Okay, We have a dialogue here. What's this two questions
in the first part. Okay, feel free to pause the video, work your
way through it. Take your time side-by-side and work through the dialogue. When you're ready, push Play, I'll be here, I'm here. We'll assign everything
side-by-side. Okay, here we go. First part, crayons, you plural as in you all crayons
you all like, which? Like dark red. Alright, so in English, something like you guys, which crayons do like or
which Kranz do you all like? Do you like dark red. Okay. Step-by-step crayons.
How do we sign it? It's right. Crayons. And now we have you plural or you
all, how do we do it? That's right. Arc in front index finger. You plural? Like, like which,
how to do it? Which? Right now this is a WH question. So the first question up there, we're gonna be
throwing our eyebrows. Crayons you plural, like which? Which? Half? Alright, like, like
how do we sign dark? Dark, That's right, and dark, dark red. How do we assign read? Read. Good. Now, the second part, short little question down
here is a yes, no question. So in English would be,
do you like dark red? Now on ASL to communicate
yes-no questions. Raised, eyebrows, lean forward. The one on top is a WH questions
you furrow the eyebrows. Second one is a yes-no question. Raised those eyebrows. Okay, let's do it nice and slow. Keeping in mind the
eyebrows sign with me. Crayons. You plural? Like Whit. Like dark red. Right? So the person is
actually sign it. It's like they're
asking you before you can actually respond
to the first one, they fire another
question at you. Alright, again, here we go. Crayons. You all like, like dark red. Alright, that's the first part. Let's get to the second
part. Here we go. Yes, we like dark red. We love crayons, rainbow color. So an English,
something like yes, yeah, yeah, we like dark red. We love rainbow colored crayons. Alright, so different word
order a little bit in English, but ASL, this is
how we'll do it. Let's do it. How do you sign? Yes. Yes. You can nod if you want. Yes. We how do we do we we Like like dark dark red, red. Good, Good. We again, we how do we sign love? Love. Crayons. Rainbow. How do you sign rainbow? Right? Four fingers, rainbow, just trace one rainbow. Color. Color. Okay, So many sentences,
many statements together. Let's sign altogether, sign
with me nice and slow. Yes. We like dark red. We love crayons, rainbow color. Okay, so let's do the one. Yes, we like dark red. We love crayons. Rainbow color. Speeding up. Alright, let's put
it all together. Alright? Crayons with two S's, not in my house. Okay. So let's go step-by-step sign and everything. Sign with me. Real crayons. You plural? Like which? Like dark red. Eyebrows up. Yes. We like dark red. We love crayons, rainbow color. We get that. Right
again. Let's do it. Crayons, you plural,
you all like, wait. Like dark red. Yes, we like dark red. We love crayons, rainbow color. Alright, let's speed up. Alright, pop quiz. What if it was light red
instead of dark red? How we do it? So let's go through,
let's sign it, but we're going to swap
out dark with light. Alright, let's do it. So
crayons you all like which? Like light red? Uh-huh. Yes. We like light red. We love crayons, rainbow color. Alright, so you can switch out, maybe if it was bright, bright red, you could do that. Dark red, dark green, whatever you need to do to
switch out and give you more options, Go for it. Okay. We signed both parts of this dialogue questions
and the answer, and we did it all step-by-step, put it all together,
signed it all. Go ahead and practice
as much as you'd like.
51. Learn | Home Signs 1: Home signs, number one, you're about to learn
how to sign home, house, backyard, front yard, door, window, entrance,
garage, roof, room. Okay. We have a separate
video for each one. You're going to
learn hand shape and position and motion
for each sign. We'll do practice after
you've learned them all, we'll do some review. Okay, Let's jump in. Here is the sign for home. Use your dominant hand.
I'm right handed. We're going to take
this handshape right here, scrunch it up. So all the tips are
touching together. Alright, so you're
gonna touch once here on your lower cheek and touch again up on your higher, higher
up on your cheek. Home. From the sides. Home. Okay. Starting from the rest
position, sign with me. Let's do it three times. Okay. We just talked
about how to sign home. Here's how we sign house. The hand shapes are the same. We're going to use the
letter b from the alphabet. How do we make a B go like this? Fingers together, thumb
in front, there's a B. Now we need to bees. So we're going to start here. I gets the roof of the house. Now we're just going
to trace the outline, alright, so the
roof and the sides. So altogether we have
house from the sides. House. Okay. Starting from the rest
position, sign with me. Let's do it three times. Okay. We just talked
about how to sign house. Here's how we sign backyard. Alright, so you
notice two parts. First, we're just
going to point back. Then were going to finger
spell yard y, a, r, d. So altogether we have from the sides backyard. All right. Starting from the
rest position, sign with me. Let's do it three times. Okay. We just talked about
how to sign backyard. Here's how we sign front yard. Alright, two parts, we're
going to have front, so hand-shaped is flat there, palm facing in this common kinda cover your face or slide
in front of your face, front finger, spell yard. Alright, why ARD? So altogether we
have front yard from the sides. Front yard. Alright. Rest,
position, sign with me. Let's do it three times. Okay. We just talked about
how to sign front yard. Here's how to sign door. It looks like a door. Okay. We're going to make B hand-shaped from the
alphabet like this, fingers together, thumb
in front, that's a, B. Both hands, same handshape. We're going to bring
them together. Alright, now we have
two doors here. One is going to
open and shut door from the side door. Okay. Rest position, sign with me. Let's do it three times. Okay. We just talked
about how to sign door. Here's how we sign window. Okay, we're going
to use both hands. Same hand shapes be
from the alphabet, like this, fingers together, thumb in front, That's a b. We need two of them. Alright, we're gonna
put them horizontally, palms facing in. Now I'm right handed. So with my non-dominant hand, put it down here, down
below dominant hand. We're gonna go on top,
just touching lightly. And then with a dominant
hand, we're going to go up, down, open like a window. Window from the sides. Window. Alright, no need
to move the bottom hand, just move the top one
up, down, rest position. Sign with me. Let's do it three times. We just talked about
how to sign window. Here's our design entrance. Okay, flat hands, those are
the hand shapes, both hands. Now I'm right handed with
my non-dominant hand. I'm going to put it right here, kind of curve it a little bit. Now with my dominant hand, I'm going to go under, alright, kinda like it's a tunnel maybe, but this is the entrance to
the secret K over whatever. So we have entrance
from the sides. Entrance. Okay. Starting from the rest position
signed with me. Let's do it three times. Okay. We just talked about
how to sign entrance. Here's how we sign garage. Okay. We're going
to use both hands, different hand shapes.
I'm right-handed. So my non-dominant hand, left hand, just gonna do
a flat hand like that. We're going to
fold it over here, so arms down and it's
folded flat across. This is like the entrance, the opening of our garage,
just the garage here. In for a dominant hand, we're going to use number three. Alright, that's
gonna be our car. So we're going to
tilt it down here. So the tip of the thumb is
pointing up and we're just gonna go 12 in our garage. Garage. Garage. Kind of like we're
parking it in the garage. Garage from the sides. Garage. Starting from the rest position. Sign with me. Let's do it three times. Okay. We just talked
about how to sign garage. Here's how we sign roof. Okay, we're going
to use both hands, be hand shapes, alright? Like this, fingers together,
thumb in front, That's a B. Now we're going to take those
two Bs and we're going to form the roof. Alright? And we're just going to slide
down the sides roof. Roof. Now for house, we would
slide down the sides and then do the sides
of the house as well. But this time we just want the roof section
brew from the sides. Roof. Okay. Rest position. Sign with me. Let's do it three times. We just talked about
how does sign roof? Here's how we sign room. Okay. Both hands,
same hand shapes, just flat hands, fingers
together, thumbs alongside. Now I'm right handed with my non-dominant hand. I'm
going to put it over here. Dominant hand right about here. Okay? Now we're just
going to go like this. Alright, so the dominant
hand is going to stay on the inside and the
non-dominant hand is gonna go on the outside. They're going to move
at the same time. Room. Now, if you notice, we're
making the sides of the room like we're looking down and there's little
people in there, right? Room from the sides. Room. Okay. Starting from the rest
position, sign with me. Let's do it three times. Okay. If you notice, I'm not just sliding
them sideways. I'm more like putting
them into place. Alright. So up a little
bit then down room. Okay. We just talked
about how to sign room.
52. Review | Sign & Understand: Alright, let's do signing
review for home signs. Number one, something's
going to pop up. You sign it before I do, I'll hang out for a moment. Then I will sign it. Okay.
Compare your answer with mine. I need you to sign
this entrance. Home room, front yard, roof, door, house house window, backyard, garage. Okay. That was signing review
for home signs, number one. Okay. Understanding review
for home signs, number one. So take a look at me. I'll be signing over here. Alright. So I'll be signing you. Take a look. He's doing
something that looks familiar. You just shout out
what I'm signing. Alright, so what am I signing? Window. Home, front yard door, garage, entrance, room, house, backyard roof. Okay. That was
understanding review for home signs number one. Either part of the review
signing or understand. You need to review again, do it again for more
practice. Feel free.
53. Learn | Home Signs 2: Home signs number two, you're about to learn how
to sign attic, bathroom, basement, bedroom, dining room, family room, front door, hallway, kitchen, living room. Okay. We've got a separate
video for each one. We're going to cover handshape in position here in motion. Do practice after
you've learned all ten, we'll do a review. Alright, here we go.
Here's how we sign attic. That's right. We're just going
to finger spell it a lot of short words in ASL, you're going to notice that
they just fingerspell. Okay, So we're just
gonna do it a few times, get some practice. Here we go. A, T, T, C. Hey, did you notice what I
did with the double tees? I didn't go a T, T C, G, a, T, T C. So for double letters
in this case, adding the two T's, we're gonna do one and then slide over for the second one. We have attic from the side. Okay. Attic. Starting from the rest
position signed with me. Let's do attic three times. Okay. We just talked
about how to sign attic. Here's how we sign bathroom. Okay. Use your dominant
hand. I'm right handed. We're going to make the
T from the alphabet T, Omega t. Well, go
like this finger just on the other side of your
index finger and close it up. See one knuckle, that means the t. If we see two knuckles, that's an n, and three
knuckles that's an m, but we just want one knuckle. So we have a T. Now take that
T handshape with this shaky back-and-forth bathroom
from the sides. Bathroom. Okay. Starting from the rest position,
signed with me. Let's do bathroom three times. Okay. We just talked about
how to sign bathroom. Here's how we sign basement. Okay. We're going to use both
hands, different hand shapes. I'm right handed with
my non-dominant hand. I'm just gonna make
a flat hand fingers together at them alongside. I'm going to put it right
about here, palm facing down. Dominant hand. I'm going to make the letter a from the alphabet. Alright, fingers
together down them alongside. Now I'm gonna
put it right here. So the tip of the
thumb is pointing up underneath my hand and
just do a few circles. Basement from the sides. Basement. Okay. Rest position,
sign with me. Let's do it three times. Basement. Okay. We just talked about how
to sign basement. Here's how to sign bedroom. Okay. Two-part sign
literally bed room. Okay. For the first part, user flat
hand, your dominant hand. I'm right handed.
So I just put it on the side of your cheek
and kinda tilt your head. That means bed,
right second part, room, flat hands starting like
this and now go like this. Dominant hand is gonna go in. Non-dominant hand will
be on the outside when you finish room. So we have bedroom
from the sides. Bedroom. Okay. Rest position. Sign with me. Let's do it three times. Okay. We just talked about
how to sign bedroom. Here's how to sign
dining room. All right. So literally it's
eat plus room. Okay. So for it, we're just
going to take our pan, scrunch it up, swallow
the tips are coming together and just
tap our mouth once. That means E. Now for room we're
gonna take flat hands, start like this and then go in. So dominant hand is going
to be on the inside. Non-dominant hand will
be on the outside room. So altogether we
have dining room. From the sides dining room. Okay. Starting from the rest
position, sign with me. Let's do it three times. Okay. We just talked about
how to sign dining room. Here's how to sign family room. Okay, So literally it's
family and room. For family. We're going to use f
hand shapes like this, index finger, thumb down. We're going to start
together and we're going to come around and touch Pinky's family. For room. We're going to use flat hands, start here and then come in. Alright, so the dominant hand, my right hand for me,
it's gonna go like this. Non-dominant hand
will go like this. It's gonna go at the same time. Room. Alright, so altogether we have family room from the sides. Family room. Starting from the rest position. Sign with me. Let's do it three times. Okay. We just talked about
how to sign family room. Here's how to sign front door. Okay. Pretty literal. We're going to have
front light hand just come down and
for new phase. And we're going to
assign door, door, the hand shapes our
bees from the alphabet, put them together,
open, close together. We have front door. From the science Front Door. Rest position, sign with me. Let's do it three times. Okay. We just talked about
how to assign run door. Here's how we sign our way. Okay. Use both hands,
same handshape, flat hands, fingers
together, thumbs alongside. We're going to put
him about here, closer to your body,
palms facing each other. Then we're just
gonna go straight out like the walls
of the hallway. Hallway from the sides hallway. Okay. Rest position. Sign with me. Let's do it three times. Okay. We just talked about
how to sign all way. Here's how we sign kitchen. Okay. We're going to use both hands. I'm right handed, so non-dominant
hand for me, let hand. I'm going to put it
right down there. That's our platform. Dominant hand is gonna be the
handshape both the letter K from the alphabet.
How do we make it k? Go like this? Pinky ring finger down. Take your thumb,
press it against the side of your middle finger. That's a k. Okay. Take that k first. We're going to put it here and we're going to flip it over. We have kitchen from the side. Kitchen starting from the
rest position, sign with me. Let's do kitchen three times. Okay. We just talked about
how to sign kitchen. Here's the sign for living room. Okay. Use your dominant
hand. I'm right handed. Make the L handshape
from the alphabet, or we say L per loser, right? Take the tip of the thumb
and we're just going to rub up twice on the
side of our chest. Living room. Living
room. From the sides. Living room. Okay. Sign with me. Let's do it three times. Okay. We just talked about
how to sign living room.
54. Review | Sign & Understand: Let's do is signing review
for home signs. Number two. Alright, Something's
going to pop up. You sign it before I do. Alright, I'll hang out and I'll sign the answer. Here we go. I need you to sign this hallway. Bathroom, living room. Bedroom, basement, family room, kitchen, dining room, attic, Front Door. Okay. That was signing review
for home signs number two. Let's do understand in review
for home signs number two. So I'm here, I'm gonna be signed and take a look
at what I'm doing. Shout out loud when you
understand what I'm signing. Okay. So what am I signing? Living room, bathroom, attic, bedroom, hallway, family room, Front Door, kitchen, basement, dining room. Okay. That was
understanding review for home signs. Number two.
55. Learn | Home Signs 3: Home signs number three, you're about to
learn how to sign. Alarm, bed, chair,
ceiling, closet, coffee table, couch,
fireplace, floor, stairs. Okay, We have a separate
lesson for each one. You're going to learn
handshape, hand position, hand motion into practice. After you learn all ten
signs will do some review. Alright, let's do it. Here's how we signed alarm. Okay. We're going
to use both hands, different hand shapes.
I'm right handed. So with my non-dominant hand
them and make a flat hand, fingers together,
thumb alongside. Just put it right here. Dominant hand going to
use the index finger. Now the side of
the index finger, we're just going to bang
it twice against our hand. Alarm from the sides. Alarm starting from
the rest position. Sign with me. Let's do it three times. Okay. We just talked
about how to sign alarm. Here's how we sign bed. That's it. Use your
dominant hand. I'm right handed,
going to make a flat handwrite their fingers
together, thumb alongside. Now I'll just put it on
the side of your face. I'm touching and lean
over just a little bit. Bid from the sides. Bed. Okay. Starting from the rest
position, sign with me. Let's do it three times. Okay. We just talked
about how to sign bed. Here's how you sign chair. Okay. We're going to use
both hands, same handshape. It's going to change a
little bit at the end, but we're gonna start with
use. How do we make use? Well, go like this fingers
together, last two down. Take your thumb and put it
on top of your ring finger. Alright, we're going
to need two of those. Now I'm right handed with
my non-dominant hand. I'm going to put it right down
there like it's the bench, maybe the seating area right
now with my dominant hand, I'm just gonna go over
top and do it twice. Now these are like the legs of the person and
they're sitting down. So we have chair from the side. Chair. Okay. Rest position. Sign with me three
times. Here we go. Okay. We just talked
about how to sign chair. Here's how we sign ceiling. Okay. We're going
to use both hands. Start with flat hands like that. Now we're going to turn them. We're going to curve the
fingers down just a bit. Now I'm right handed with
my non-dominant hand. I'm going to put it right there. Dominant hand, I'm going
to put it in front, touching the fingers and now
just go out a little bit. Ceiling from the sides. Ceiling. Okay. Starting from the rest
position, sign with me. Let's do it three times. Okay. We just talked about
how to sign ceiling. Here's how to sign closet. Okay, we're going
to use both hands. Now the hand shapes,
we'll start with index fingers for both
hands, I'm right-handed, so my non-dominant hand, this is like the clothes, the rod that goes across
and you hook everything on. So we're gonna go like this. And now with their
dominant hand, we're gonna use that index
finger and hook it down. Because it's gonna
be the hangers like the hooks on the hangers. Now we're gonna go
123. Right now at the same time we're
just kinda moving over because the hanger rod
would be kinda long. So we'll go closet
from the sides. Closet. Okay. Starting from the rest
position, signed with me. Let's do it three times. Okay. We just talked
about how to sign closet. Here's how to sign coffee table. Okay, so literally we're
doing coffee table. So coffee first, make two fists. We'd say two S's.
I'm right handed. So non-dominant hand, write down their dominant hand on top, just kinda rub across a couple of times, a
couple of circles. I'm lightly touching the top. Coffee. Okay, Now we need table. Here's how it looks. Alright.
Flat hands, both hands. I'm right-handed,
non-dominant hand laid down their dominant hand on top and just bump a couple of times. Table. So altogether we have coffee
table. From the sides. Coffee table. Alright, starting from the
rest position, sign with me. Let's do it three times. Okay. We just talked about
how to sign coffee table. Here's how to sign counts. Alright, is a two-part sign. So literally sit long bench. Alright. So the first part, sit, we're going
to use hand shapes like use from the
alphabet. How do we do it? Last two down fingers together, thumbs on top of
our ring finger. I'm right-handed,
non-dominant hand. We're going to put it over here. Dominant hand, there's
curl the fingers over top, like legs over top. So sit. Right now, there's
a long bench part like this. What do you see? Hand shapes, put them down here starting together, go out. So altogether we have
out from the sides. Count, starting from the
rest position, sign with me. Let's do it three times. Okay. We just talked
about how to sign cout. Here's how we sign fireplace. Alright, so two parts sign
we have fire and then we're just showing the
outline of the fireplace. So fire, how do we do it? Started like this. Flip them around so the
palms are facing in and then just wiggle your hands and
alternate up and down, like these are the
flames of the fire. Fire. Now please, just index fingers, just trace the top part, the outline of the fireplace. So altogether we have fire
place from the sides. Fireplace. Alright.
Starting from the rest position, sign with me. Let's do it three times. Okay. We just talked about
how to sign fireplace. Here's how we sign floor. Okay, use both hands. We're going to make bees from the alphabet. How do we do it? Fingers together,
thumbs in front. Now bring them down, have them touching each other
and just go flat and out. Floor from the signs. Floor starting from
the rest position. Sign with me. Let's do it three times. Okay. We just talked
about how to sign floor. Here's how we sign stairs. Okay, we're going to use both
hands may be hand shapes. Alright, fingers
together, those in front. Now I'm right-handed
my non-dominant hand. I'm going to put it
right down there. Alright, kinda flat palm
facing down. Dominant hand. I'm going to start
here the same level, but then I'm gonna raise it up. And as I'm raising up, I'm going to go like this. Alright? So suppose you could say rays and
swivels back-and-forth. Basically, we're trying to
show the stairs going up stairs from the sides. Stairs. Okay. Starting from the rest position, sign with me. Let's do it three times. Alright. We just talked
about how does sign stairs.
56. Review | Sign & Understand: Let's do sign-in review for
home signs. Number three. Alright, then the moment
something is going to pop up, you sign it before I do. Here we go. I need
you to sign this. Fireplace, bed, couch, stairs, ceiling, chair, closet, coffee table, alarmed. Floor. Okay. That was signing review for home
signs number three. Here is understanding review for home signs, number three. So take a look at
me. I'll be signing. Try to figure out what
the heck am I doing? Okay, so what am I signing? Chair, ceiling, stairs, alarm, fireplace, couch, bed, closet, floor, coffee table. And that was understanding review for home
signs, number three.
57. Learn | Home Signs 4: Home signs number four, you're about to learn how to
sign, oven, refrigerator, sink, stove, table, toys, hide, play, what color, where. We've got a separate video
lesson for each one, you're going to learn how to
do handshape hand position here in motion.
We'll do a practice. And then after you've done
all ten signs will do review. Alright, here we go. Here's how we sign oven. That's right. We're going
to finger spell it. Short words like these, it's very common to just
fingerspell in ASL. So here we go. O V E N. That's right. Oven. From the sign. Oven. Alright, starting from the rest position,
sign with me. Let's do it three times. Okay. We just talked
about how to sign oven. Here's how we signed
refrigerator. Okay, we're just going
to finger spell our E, F. Basically we're going
to shorten the whole word down to our E, F, alright, from the side. Refrigerator. Starting from the rest
position, sign with me. Let's do it three times. Okay. We just talked about how to sign communicate
refrigerator. Here's how we sign, sink. Alright, another short word that we're just going
to finger spell, S, I, N, K, sync from the side. Sink. Okay, Starting from
the rest position, sign fingerspell with me. Let's do it three times. Okay. We just talked
about how to sign, how to communicate
fingerspell sink. Here's how to sign stove. We're going to finger spell it. S t o v e stove from the sides. Stove. Okay. Starting from the rest
position, sign with me. Let's do stove three times. Okay. We just
talked about how to sign fingerspell
communicate still. Here's how we sign table. Okay. The hand shapes
are the same for both hands, just flat hands. I'm right-handed,
non-dominant hand for me, I'm gonna put it right down their dominant hand
on top unnoticed. Bumped twice. Table
from the sides. Table. Okay. Starting from the rest
position, sign with me. Let's do it three times. Okay. We just talked
about how to sign table. Here's how we sign toys. Okay, same hand
shapes for both hands we're going to use t
is from the alphabet. How do you make it t?
Well, go like this. Take your thumb in-between your index finger and
your middle finger, then squeeze down. So we just have only
one knuckle showing. Alright, now we
have t hand shapes. Now we're just going
to go like this. This shake them, swivel them. Toys from the side. Toys. Okay. Starting from the rest position, sign with me. Let's do it three times. Okay. We just talked
about how to sign toys. Here's how we sign hide. Okay. We're going to use both
hands, different hand shapes. I'm right-handed, That's
my dominant hand. For me, my non-dominant hand just going to make a flat hand, put it here, let it loose
curve a little bit. Dominant hand are going to
make an a from the alphabet. Like this, down
though alongside. Now we're going to use it
and we're going to put it underneath, like it's hiding. So we have hide. So you start up here and then
you stick it underneath. Hide from the side. Hide. Okay, Starting
from the rest position, psi in with me. Let's do it three times. Okay? We just talked
about how to sign Hyde. Here's the sign for play. Okay, hand shapes are the same. We're going to use wise
from the alphabet. Alright, go like this. Middle three fingers put
them down, like hang loose. Those are why hand
shapes to sign play. We'll put them about here, palms facing inward a little
bit towards each other. Now we're just going to swivel. Play from the side. Play. Okay. Rest, position,
sign with me. Let's do it three times. Okay. We just talked about
how to sign play. Here's how we sign what color? Okay, Now this is one of the signs where we're just
gonna be signing color. And because we're turning
our eyebrows downward, kinda scrunched number eyebrows, we get what color? Alright, so you
don't have to do a separate sign for what? You just have to do the sign
color and for your eyebrows. So we have what
color? From the side. What color? Okay. Rest position. Sign with me. Let's do it three times. Okay. We just talked about
how to sign what color. Here's how we sign where we're going to use our index finger
of your dominant hand. I'm right handed and we're just going to wake it back and forth. Where at the same time, since this is a WH question sine who, what, where, when, how, and why, which we're
going to throw those eyebrows have an
inquisitive look like this. What's happening over there? And it will go like this. Where? From the side? Where? Alright, starting from
the rest position, sign with me. Let's do where? Three times. Okay. We just talked
about how to sign where.
58. Review | Sign & Understand: It's time for assigning review
of home signs number four. Alright, so in a moment, something's going to pop up. You sign it before I do. Alright, here we go. I
need you to sign this. Stove, hide, sink, one color toys, oven, refrigerator, play. Where? Table. Okay. This was signing review for home
signs number four. It's time for
understanding review of home signs number four. So take a look at me. I'm gonna be signing something. Try to figure out
what am I signing. Here we go. What color? Sink, oven, toys. Hi. Refrigerator. Table. Where? Play stove. Okay. This was understanding review for home
signs number four.
61. Dialogue #1: Okay, Here's a dialogue. Feel free to pause the video, sign everything, and
then when you're ready, push Play will sign it together. Okay, here we go. First part, Pete
house. What color? In English? Something like what
color is Pete's house. Alright, so here, Pete
house, what color? Pete, It's a name and we're
just going to finger spell. Here we go. P, E, T E. Pete. How do we sign
house? It's right. House. What color? Pro and the eyebrows. It's right, design color,
furloughs, eyebrows. This plus this gets
you to what colour? Alright, so this is a
WH question, right? So we're gonna
furloughs eyebrows. Here we go. Let's sign, sign with me. Nice and slow. Pete. House, Watercolor. Pete house, white color. Okay, that is the first
part of the dialogue. Let's do the second part, I think is how it's red, white, green in English,
something like, I think his house is
red, white, and green. Okay, so we have an
opportunity here. Remember the colors
shift a little bit. I remember. Alright, here we go. I, I think. All right. Index finger. Think his nose, Pete, Let's pretend he's not here, but we're assigning about him. How would we do here is
let's write off to the side. His how do we assign house? Yes, House. Read do you remember the colors? Whew. Alright. Red, white, white, and green. How do we sign it? That's right. Green. Green. Okay, so let's take a look at how it would
be nice and slow. Sign with me. I think his house
red, white, green. So did you see my
little movements there? So literally it would
be something like, I think is how it's red
and white and green. Because those shifting
movements basically mean, and that's kinda the idea. But since ASL is such
a visual language, we're just shifting to
make sure that each one, each color has its own space, its own concept, right? Alright, so let's do it again. Again. Sign with me. I think his house,
red, white, green. Alright, let's put the
full dialogue together. Here we go all the way through nice and slow sign with me. Pete. House. What color? I think his house red. White, green. Alright, again, Pete house, what color? I think his house red. White, green. Alright, speeding up. Okay, So we signed the full dialogue, the question, the answer
or the response, right? If you want to go back
and practice more, I say, why not?
62. Dialogue #2: We have another dialog. Alright, feel free
to pause the video, work your way through
it side-by-side. When you're ready, push
Play will sign it together. Alright, let's turn it together. Right here's the first part. Married like hide toys. Where? Alright, so in English
something like where does Mary
likes to hide toys? Alright, so let's
go step-by-step. Finger, spell the name. M, a R. Why? Mary? Mary. How do we sign? Like It's right. Like like how do we assign hide? Hide, toys, t hand shapes
to shake them? Toys? Where? Where, where? Wh questions, who are
referring those eyebrows? Where? Alright, let's tie
it all together. Sign with me nice and slow. Mary like hide toys. Where? Again? Mary like hide toys. Where? Alright, let's move to the
second part of the dialogue. So I think she liked
hide toys, garage. Alright, in English, I think she likes to hide the toys
in the garage, right? A lot of extra small words
in English that we're just going to throw out
and not Signing ASL. Alright, so here we go. I I think I think that's right. She right now, she's not here. I think it was Mary, wasn't it? Mary? It was married. Alright. So she's not here, but we're going to refer
to her. What do we do? Right just off to the side. She alright. Like Uh-huh. Like hide hide, toys. And how do we sign garage. Garage. And you might be thinking, well, could we sign in the
garage in grinds? Yeah, that's a possibility. But in this situation, the context is, you've
got the garage. It's kinda clear that it's
hiding in the grades, so not necessary to sign it. If you really want to sign in, you could go in grades. Alright. So let's
put it all together. Here we go. I think she like
hide toys, grinds. Alright. Again, I think she
like hide toys, grad. Alright, let's put
it all together. Both sides of the dialogue, nice and slope. With me. Here we go. Marry. Like hide toys. Where? I think she like hide toys. Garage. Right. Again, will
be quicker. Mary. Like hide toys where? I think she like
hide toys grind. Okay. So we did everything
sign by sign step-by-step. We did some practice. We want to do more practice. Why not? Okay.
63. Dialogue #3: Here's another dialogue. Okay, feel free to pause the video, work your
way through it. Take your time signing everything and push
play when you're ready to sign along
with me. There we go. Okay, Sarah, bread,
like play living room. Alright, an English, something
like do Sarah and Fred like plane and the living room or liked to play in
the living room. Okay, So let's
take a look at it. Let's start with sarah
fingers spelled name. Here we go. Fingerspell. Es a, r, a. Alright,
Sara. Right, Fred. We're going to finger
spell his name as well. F, r, e, d. Fred. Like how do we sign it? It's right, like play. How do we assign play? Why
hand shapes play, play. And living room.
How do we sign it? Right. L handshape. Living room. This is a yes, no question. You can answer.
Yes, no, or maybe. So Sarah Fred, like
play living room. See the eyebrows. Lean
forward a little bit. Yeah, that's right
because we're going to communicate a yes-no question. You don't have to go like
this with a whole sentence to set the n surf read
like play living room. We need to end like
this to make sure is communicated as
a yes, no question. If we don't raise their eyebrows and we
just go Sarah Fred, like play living room
and leave them down. Then it's a statement which
is useful to know as well. But if you wanted to switch, it just raises eyebrows. It's a question. Alright, sign with
me. Nice and slow. Sarah. Fred. Like play living room. Alright, See what I did
with Sarah and Fred. Now I didn't leave them in
the same spot I did Sarah. Then I moved a little
bit over for Fred. And it just shows here's
another individual, right? Okay. So let's sign it again. Again. Sarah. Fred. Like play living room. Okay. We'll find out. No, they love play basement. In English, something like no, they love playing
in the basement or are they love to
play in the basement? Alright, here we go.
How do we say no? No. Alright, like this, you can shake your
head if you want. No. They was Sarah end Fred, I believe yes, it was. So how do we do they
now they're not here, so we're going to refer to
them, but they're absent. How do we do it? Right
off to the side. They they love. How do we sign it? Love
play play basement. How do we assign Basement? Basement. Okay, let's
sign this bold response. Here we go. No, they
love play basement. Alright, Now here you
might be thinking, do we have to assign
play in the basement? In the basement, it's possible, but we already set
up the situation. Alright, where do they
want to play, right, Sir, Fred, like
playing living room. Alright, so now the context is, do they like to play
there or some place? And we are answering
with another place. Just kinda understood. You don't need to sign
in if you don't want to, if you want to go nuts. Okay. So once again, here we go. No. They love play basement. Right? Question, answer. For mini dialogue. Let's sign it together. Nice and slow. Sign
with me. Sarah. Read like play living room. Know they love play basement. Right again. Again. Sarah. Fred. Like play living room. Know they love play basement. Alright, another question
answer dialogue. We did it all signed
by sine to be sped up, we sign the sign faster. Okay. If you want to go back and repeat, That would be wonderful. More practice, the
better more practice. You just get more
fluid to get more competent and you
speed up as you go. Alright? But remember, the goal
is not to sign fast. The goal is clear communication. Clear communication. So if you're signing
a mile a minute, but nobody understands you. Well, I guess you can be
happy in front of the mirror if we're not having any
conversation or communication, the goal is clear communication. And just by default, the more you sign, the quicker you'll be because
you more comfortable, you may make the mistakes
and then you get over those mistakes
and you just speed up. Okay, wonderful.
64. Learn | Personality Signs 1: Personality signs, number one, you're about to learn how to sign and understand personality. Arrogant, bold,
careless, closed minded, compassionate, crazy,
easygoing, friendly, frugal. Okay, We have a separate
video lesson for each one. For each side, you're
going to learn handshape hand
position, hand motion. We'll do practice. We'll do some review after
you've learned all ten signs. Okay, let's do it. Here is the sign
for personality. Okay, use your dominant
hand. I'm right handed. The handshape is the letter
P from the alphabet. How do we make a p? Well, start like this pinky
ring finger down. Take your thumb and press it against the inside part
of your middle finger. Alright, if we stop there, That's a K. We don't want to k, We want to P. So we're just
going to flip it forward. Alright, once again, alright, there's our p, Okay, so that's R handshape
that we need. First, we're going to take
the tip of the middle finger, put it about here, lightly
touching our chest, and then just flip around. We have Personality, alright. The Brown and code
back into your chest. Personality from the sides. Personality. Okay. Starting from the rest position, sign with me. Let's do it three times. Okay, we just talked about
how to sign personality. Here's how we sign arrogant. The hand shapes are the same. We're going to start
with the L's from the alphabet or L
for loser, right? So we do have two L's. Now we're going to
take the tips of the index fingers and just
bend them down a little bit. So we end up with these
hand shapes right here. Okay, now we're gonna put one
on each side of our head, start in not
touching just close, and then go out. Just a quick jerky movement. At the same time, add
an a facial expression because you've all just imagine if
you think someone's arrogant or you know, you're more like, alright? So go like this. Arrogant from the sides. Arrogant. Alright,
just think big head, do you know they're
full of themselves? Arrogant. Starting from the rest
position, sign with me. Let's do it three times. Okay. We just talked about
how to sign arrogant. Here's how we sign bold. Okay, two-part sign. First part, use your dominant hand. I'm right handed,
handshape, index finger, and we're just going to
assign think or mind. Alright, the second part, we're going to make two fists, or we could say two
S's from the alphabet. I'm right-handed, so
non-dominant hand, I'm going to put it about here. Dominant hand was
gonna go like this. Okay, so altogether
we have bold. Alright, kinda have
a competent Look. We're thinking audacious, bold. Okay, from the sides. Bold. Okay, rest position,
sign with me. Let's do it three times. We just talked about
how to sign bold. Here's how we sign careless. Okay, we've got a few
things going on here. First, the hand shapes, just bees from the alphabet
like that, or V for victory. Both hands. Now
I'm right handed. So I want to put my right
hand on the inside, non-dominant hand over
here on the outside. And we're just gonna go in, in front of our
face and back out. The same time. Put a facial expression
like you don't care. Whatever they do
because it's careless. So altogether careless
from the sides. Careless. Okay. Rest position
signed with me. Let's do it three times. Okay. We just talked about
how to sign careless. Here's our design close minded. Alright, So literally
it's mind AND gate shut. Alright, so the first
part, index finger, your dominant hand,
just go like this, tap on the side
of your forehead. And then we're gonna
go flat hands. We're going to turn
them down like they're gates that opening and shutting. And we're just going to go shut because it's a mind
and it's closed. So altogether we
have closed minded. From the sides. Closed-minded. Alright, when you're
starting the gates, it's not like a nice
easy shutting the gates. It's more of a jerky motion. Alright, rest position,
sign with me. Let's do it three times. Okay. We just talked about
how to sign closed-minded. Here's how does
sign comparison it. Okay, we're going
to use both hands, same handshake, go like this. Fingers spread apart
now and just bend down, just your middle finger. Alright, now we're gonna
put them out here so the tips of the middle fingers
are pointing that way. We're gonna go like
this. Dominant hand and right hand a little
bit on the inside. Now we're just gonna go 12. Alright. Comparison it from the sides. Compassionate.
Alright, on your face, have a nice, kind,
pleasant look. You wouldn't want
to be like sending out conflict environment. So go like this. Compassionate. Okay. Rest
position, sign with me. Let's do it three times. Okay. We just talked about
how to sign compassionate. Here's how to sign crazy. I'm sure you've used or
seen that sign before. Maybe you didn't know it
fits in ASL. Alright. Dominant hand, I'm
right handed just to index finger and just do a forward circle
around your ear. Alright. Now put it into facial expression
which fits crazy. Crazy. From the side. Crazy. Okay, rest, position,
sign with me. Let's do it three times. Facial expressions
are so important. Alright, first, let me
show you a robot mode, and then I'll show you
with a facial expression. Alright, robot mode on. Now you understand because
the actual hand movements, all that's the same. But now what if I do this? All right, now I'd really just a adds extra information
that whatever's going on, whatever person we're signing about it, they're just crazy. Okay. We just talked about
how does sign crazy? Here's how to sign easygoing. Okay. Hand shapes are the same. Just flat hands like that
finger spread apart this loose. I'm going to put them over here, palms facing down. We're
just going to go down. One's over, down again. And we're going to do it with
the look on her face and body expression that there's
not a care in the world. Easygoing, carefree, laid-back,
easygoing. From the side. Easygoing. Okay. Starting from the rest
position, sign with me. Let's do it three times. We just talked about
how to sign easygoing. Here's the sign for friendly. Okay. We're going to use both hands, open hand shapes like that, fingers spread apart, flip
them around, palms facing in. Now they're going
to move towards, towards the side of our
head, kind of backwards. And we're gonna be twiddling,
flicking our fingers. At the same time, have a smile or a pleasant
look on your face? Randomly. From the side. Friendly. Okay. Rest position, signed with me. Let's do it three times. Okay. We just talked about
how to sign friendly. Here's how we sign Bruegel. Both hands go like this. Finger spread apart,
just bend down, just your middle finger. Alright, use the tips of your middle finger and
we're going to be making small downward movements on this side of our chin,
alternating movements. So we have Bruegel, the side. Bruegel. Alright, starting from the rest position, sign with me. Let's do it three times. Okay. We just talked about
how to sign Bruegel.
65. Review | Sign & Understand: Let's do signing review for
personality signs number one. Okay. Something's
going to pop up. You sign it before I do. Okay, here we go. I need you to sign this. Bold, arrogant, careless, easygoing, crazy, frugal, close minded, friendly, personality, compassionate. Okay, that was
signing review for a personality signs number one. Okay. It's time for understanding review of
personality signs number one. That means I'm going
to sign something and you try to figure out
what the heck am I doing? And shout it out loud. Alright, here we go.
Here's the first one. What am I signing? Easygoing, compassionate, arrogant, Bruegel, careless, bold, personality, crazy, close minded, friendly. Okay, that was
understanding review for a personality
signs. Number one.
66. Learn | Personality Signs 2: Personality signs number two, you're about to learn how
to sign and understand. Bunny. Generous, gullible,
hardworking, honest, humble, lazy, lenient,
mean, mischievous. Okay, We have a
separate video lesson for each one you're
gonna learn handshape, hand position, hand motion. Do practice after we've done all ten signs will do review. Alright, here we go.
Here's always sign. Funny. Okay, use your dominant
hand. I'm right handed. Go like this. Fingers together,
thumb alongside pinkie, ring finger down. Alright, That's our handshape. Use the tip of the index finger
and the middle finger and just go 12 on the
tip of your nose. Funny. From the side. Funny. Starting from the rest position. Sign with me. Let's do it three times. Okay. We just talked
about how to sign. Funny. Here's how to sign. Generous. Okay, we're going to
use same hand shapes. Emotions are just
gonna be alternating. So we're going to
start like this. Alright, closed up, palms
facing up like we're holding some money or something
or coins or whatever. And we're gonna go
and let them go. Next one go, let them go, and we're going to
alternate like that. So we have generous you're just putting out the
cash from the side? Generous. Okay. Starting from the rest position, sign with me. Let's do it three times. Okay. We just talked about
how does sign generous. Here's how to sign gullible. Okay, we're going to
use our dominant hand. I'm right handed,
fingers spread apart. We're just going to use
the back of our hand, put it against our forehead, and just bend the fingers
down a couple of times. At the same time having
facial expression which shows gullible, not
too intelligent. Gullible from the side. Gullible. Signing from the rest
position, sign with me. Let's do it three times. Okay. We just talked about
how to sign gullible. Here's how we sign. Hard working. Okay, we're going
to use both hands. Now the hand shapes
are the same. We're going to make fists, or we could say S is
from the alphabet. Now I'm right handed, so my non-dominant hand, I'm going to put it
right down there. That's my platform. Back to the fist facing
up. Now, dominant hand. You can use a fist as
well for the handshape, we can use this part down here, like the bottom
of the palm here. And we're just gonna go 123. Alright, so let lightly
touching the back of our fist, 123 at the same time put
a facial expression. They're really just going at it. Alright, so we have hard
working from the side, hardworking, rest,
position, sign with me. Let's do it three times. Okay. We just talked about
how to sign hardworking. Here's how we sign, honest. Okay. We're going to use both
hands. I'm right handed. So my non-dominant hand just
going to make a flat hand, put it down there,
palm facing up. That's our platform.
Dominant hand. I'm going to make the
letter H from the alphabet. How to make an H
will go like this. Fingers altogether. Pinkie ring finger down. Take your thumb
and just press it against the side of
your ring finger. Alright, go like that. That is an H. H. Now we're going to take the
palm and we're just going to slide it forward
on an open hand. Honest. From the side. Honest. Starting from the rest
position, signed with me. Let's do it three times. Okay. We just talked about
how to sign, honest. Here's how we sign humble. Okay. We're gonna use both
hands, same hand shapes, just flat hands, fingers, the other thumbs alongside. Now I'm right-handed,
non-dominant hand. I'm going to put it about here, palm facing in with my
dominant hand, same handshape. We're just going to
use the bottom part. We're going to start here and
we're going to slide down. Alright, humble. At the same time put a facial
expression kinda go down, like you're trying
to show meekness, like submission. You're humble. Humble. Humble. Okay, Starting from
the rest position, sign with me and let's
do it three times. Okay, We just talked
about how to sign humble. Here's how I would assign lazy. Okay, use your dominant hand. I'm right handed hand
shape of the letter L. L is in loser or her. Take that L and we're
just going to slap the side of our chest over
here near our shoulder. Lazy at an facial
expression which shows, you don t think lazy,
it's the greatest thing. Lazy from the side. Lazy. All right, Starting from the
rest position, sign with me. Let's do it three times. Okay, we just talked
about how to sign lazy. Here's how to sign lenient. Okay, It's a two-part sign. We're gonna be
signing art and soft. So the first part, just use your dominant hand,
I'm right handed. Use your tip of
your middle finger. That's it. Once over your heart. Heart. The second part, we're
going to start like this, alright, and we're
just going to bring it down and close up. So together we have heart
soft, which is lenient. From the side. Lenient. Okay. Sign with me starting
from the rest position. Let's do it three times. Okay. We just talked about
how to sign lenient. Here's how to sign mean. Okay. Handshape, starting like this. We're just going to bring them down kind of like their claws. I'm right-handed this,
my dominant hand. I'm going to put it up
here in front of my mouth, not touching just
about right here. Non-dominant hand for me, left hand, I'm going
to put it over here. Now what we're gonna
do is we're going to switch positions and ended up, end up in fists, acids. We will like this. Mean, mean. Now it's a quick jerky movement. Mean at the FaceTime, have like a scowl on your face? Mean from the side? Mean. Starting from the rest position. Sign with me. Let's do it three times. Okay. We just talked
about how to sign mean. Here's how to sign mischievous. Okay, use your dominant
hand. I'm right-handed. I'm going to go like this.
Make the number three, right from this,
the numbers three. How do we do it? Last
two fingers down. That's it. Okay. Take your thumb, move it towards the front
just a little bit. We're going use the tip of
the thumb and we're going to rub on our head twice. Alright, at the same time, these bunny ears, these
fingers are gonna come down. So it's like a motion like
this on the side of your head. Mischievous. Ms. Davis. From the side. Ms. Davis. Okay. Starting from the rest
position, sign with me. Let's do it three times. Okay. We just talked about
how to sign mischievous.
67. Review | Sign & Understand: Let's do sign-in review for personality
signs, number two. Okay, something's
going to pop up. You sign it before I do. Alright. I need
you to sign this. Honest, generous. Ms. Davis. Lazy, hard working, gullible. Mean, humble, funny, lenient. Okay, that was signing review for a personality
signs number two. Let's do understanding review for personality
signs number two. Okay, so watch me, I'm going to assign something. You try to figure out
what I'm signing. Shout it out loud. Here we go. What am I signing? Miss Davis? Honest, generous, hardworking, lazy, mean, humble, lenient, gullible. Funny. Okay, that was understanding review for a
personality signs number two.
68. Learn | Personality Signs 3: Personality signs. Number three, you're about to learn how
to sign and understand. Nice, nosy, open-minded,
patient, polite, responsible, rude,
selfish, sensitive, smart. Okay, We have a separate
video lesson for each one. We're talking about handshape, hand position and motion, and lots of practice. After you've learned all ten
signs will do some review. Okay, here we go. Here's how we sign. Nice. Okay, we're going
to use both hands, same hand shapes,
just flat hands. Alright, I'm right-handed,
non-dominant hand. I'm going to put it down
there, palm facing up. Dominant hand. We're going to
start at the back and just slide forward and have a
pleasant look on your face. Nice. From the side. Nice. Starting from the rest position. Sign with me. Let's do it three times. Nice. Okay. We just
talked about how to sign. Nice. Here's how to sign. Nosy. Okay. We're going to use both hands,
different hand shapes. I'm right-handed,
non-dominant hand for me, there's gonna make a C
handshape right there. Alright. See, going
to put it down here. Them facing off to the side, pointing off to the side. Dominant hand. We're going to use our index finger, right? We're just going to curve
it down just a bit. We're going to tap our nose and then just hook on our thumb. Nosy kinda have a
displeased look on your face. From the side. Nosy. Alright. Starting from the rest position, sign with me. Let's do it three times. Okay. We just talked
about how to sign nosy. Here's how to sign open-minded. Okay, first part,
we're going to use your index finger and
just sign mind or think. Alright, so we have mined
and then we're just gonna go gates, open. Alright, flat hands bring them together and then
just open the gates. So altogether we have mind
open, in other words, open-minded. From the side. Open-minded. Okay. Starting from the rest position, sign with me. Let's do it three times. Okay. We just talked about
how to sign open-minded. Here's how to sign patient. Okay. Use your dominant
hand. I'm right handed. We're just going to make the, a handshake from the
alphabet like this, fingers together down,
thumb alongside. Now we're going to use the
back part of the thumb. Started about your lip, your middle of your lips there, and just go down. Patient from the side. Patient Starting from the rest
position, signed with me. Let's do it three times. Okay. We just talked about
how to sign patient. Here's how to sign. Polite. Okay. Use your dominant hand. I'm right handed. We're just gonna do an open
hand right there. We could say a five hand, take the tip of the thumb
or it's going to rub up twice on the
side of our chest. Polite. From the side. Plate. Okay. Have a pleasant
look on your face. Starting from the rest
position signed with me. Let's do it three times. Okay. We just talked
about how to sign polite. Here's how to sign responsible. Okay, we're going
to use both hands. Start like this, flat
hand shapes fingers, the other thumb alongside. Now we're just
going to bend down the fingers altogether, right? Those are our hand shapes. Now we're gonna put
them over here and just tap on our shoulder twice. Responsible. From the side? Responsible. Okay. Starting from the rest position, sign in with me. Let's do it three times. Okay. We just talked about
how to sign responsible. Here's how to sign rude. Okay. We're going
to use both hands, different hand shapes.
I'm right-handed. So with my non-dominant hand, flat hand, put it
in their palm up. That's my platform. Dominant hand going
to start like this. Bend down, just
the middle finger. Use the tip of the
middle finger, started the back and
just slide forward. At the same time have a
facial expression which is we have rude. From the side. Rude. Okay. Rest position
signed with me. Let's do it three times. Okay. We just talked
about how to sign rude. Here's how to assign selfish. Okay, we're going
to use both hands, same hand shapes, these, or we can say number two. Alright, How do we
do it? Go like this? Last two fingers down,
take your thumb, put it on top of
your ring finger. Okay, now we're gonna take those and we're
going to hook them in because we're
selfish, we want it all. So take this and then make the bunny ears go down
like you're hooking. So we have selfish, do it twice and add a facial expression would
show some attitude. Selfish. Selfish. Okay. Starting from the rest
position, signed with me. Let's do it three times. Okay. We just talked about
how to sign selfish. Here's how to sign sensitive. Okay, use your dominant
hand. I'm right handed. We're just going to use the tip of our middle finger. That's it. We're going to put it
starting right here, touching your chest and
then just flick out. So down in a way. Sensitive. From the sign. Sensitive. Okay. Starting from the rest
position, signed with me. Let's do it three times. We just talked about
how to sign sensitive. Here's how to sign smart. Okay. Use your dominant hand.
I'm right handed. Handshape, It's just
the index finger, the pointer finger,
we could say, use the tip of the index finger, put it on the side of your
head and then just go out. Smart. From the side. Smart. Okay. Starting from the rest
position, sign with me. Let's do it three times. Okay. We just talked
about how to sign smart.
69. Review | Sign & Understand: Let's do signing review for a personality signs number three. Okay, something's
going to pop up. You sign it before I do. Alright, I need
you to sign this. Nosy, rude, open-minded, patient. Smart, nice, sensitive, responsible, selfish, polite. Okay, that was signing review for a personality
signs number three. Let's do understand
and review for a personality science
number three. So I'm gonna be sign-in. You take a look at me and figure out what the heck am I signing? To shout it out loud. Okay, here we go.
What am I signing? Rude, Smart, hastened, selfish, open-minded, nosy, polite, nice, sensitive, responsible. And that was
understanding review for a personality
signs. Number three.
70. Learn | Personality Signs 4: Personality signs,
number of poor, you're about to learn how
to sign and understand. Strict, stubborn, stupid, talkative, understanding,
weird, believe. No. Don't know why. Okay. We have a separate video
lesson for each one. We're going to cover
hand shape and position hand
motion. Do practice. After you've learned all
ten signs will do review? Yes. Okay. Here we go. Here's how to sign. Strict. Okay. Use your dominant
hand. I'm right handed. We're going to make the letter V from the alphabet, alright? Or we could say Peace
man, how do we do that? Last two fingers down, thumb on top of the ring finger. Now we're going to bend
the bunny ears down, alright, and this is
the handshape we need. Okay, so we're
gonna go like this. And at the same time have an
unpleasant look on her face. Strict. From the side. Strict. Okay. Rest position. Sign with me. Let's do it three times. Okay. We just talked
about how to sign strict. Here's how to sign stubborn. Okay. We're going to use our dominant
hand. I'm right handed. The handshape is just
like this flat hand. We're going to use
the tip of our thumb, put it on the side of our head and we're just going to curl up our fingers or fold down our
fingers at the same time, have a look on your face
which shows stubborn. Like you ain't telling me
what to do from the side. Stubborn. Starting from the rest
position, sign with me. Let's do it three times. Okay. We just talked about
how to sign stubborn. Here's how to sign stupid. Okay. We're going to
use our dominant hand. I'm right handed. We're gonna
make a V from the alphabet. We can say V for victory or
peace man, go like this. Last two fingers down, thumb on top of the ring finger. Okay. Reduce the back part of the
fingers and we're just going to smack ourselves in the
forehead at the same time, have a look which fits stupid. Stupid. From the side. Stupid. Okay. Starting from the rest
position, sign with me. Let's do it three times. Okay. We just talked about
how to sign stupid. Here's a sign for talkative. Alright, we're thinking
like motor mouth. Okay. Both hands,
different hand shapes. I'm right-handed. So
my non-dominant hand, we're gonna make a C handshape
right there like that. Someone's mouth,
right? Dominant hand, just going to make a flat hand
and we're going to stick, insert our fingers in there and we're just
going to go up and down. So we have talkative like
their gums are flapping, they're just talking like crazy. Talkative. From the side. Talkative. Okay. Starting from the rest
position, sign with me. Let's do it three times. Okay. We just talked about
how to sign talkative. Here's how to sign
understanding. Okay, now this is based on
the sign for understand, which is just like this. Alright, so we're using
our dominant hand, index finger and we're starting like this and
we're flicking up. The sign for understand all
by itself is like this. Then you nod to show
that you understand. Now understanding
we're describing a personality trait, alright? We're just going to repeat
it using both hands. Alright, so like this, we can still nod to
show the affirmative. This person knows
what we're doing, understanding we're
just gonna go 123. I'm understanding from the side understanding. See how my head
keeps nodding even though I've finished
doing the signs. If you really want
to lay it in there year, they really understanding. Okay. Rest position,
sign with me. Let's do it three times. Okay. We just talked about
how to sign understanding. Here's how to sign. Weird. Okay, use
your dominant hand. I'm right handed.
We're going to make a W from the alphabet. How do we make a w
will go like this. Thumb. Just hold down the
pinky with your thumb. Leave these three
fingers sticking up. There's a W. Now we're going to take the w's ticket sideways, so the palms facing
over this way, we're going to bring it
in front of our face as we wiggle the three fingers. Weird. At the same time, have
a look on your base that shows strange.
That's weird. Like this. From the side. Weird. Starting from the rest position, psi in with me. Let's do it three times. Okay? We just talked
about how to sign. Weird. Here's how to sign, believe. Okay. It's a two-part sign. Literally are going to be
signing mind or think. And very like we're married were very connected
with our beliefs. We go like this, which is
believe from the side. Believe starting from the
rest position, sign with me. Let's do it three times. Okay. We just talked about
how does sign believe? Here's how does sign. No. Okay. Use your dominant
hand. I'm right handed. Close the fingers up them
alongside the other. Spin down the fingers a bit. We're going to use
the tip and just tap twice on the side of our
forehead, side of our head? No. At the same time, nod like, you know, from the side. No. Starting from the rest
position, sign with me. Let's do it three times. Okay. We just talked
about how to sign. No. Here's our design. Don't know. Okay. So it's based
on the sign for No. But this time we're just
going to touch once and go out and shake our head
because we don't know. The handshape is like this. Alright. Together with them
alongside it, just bend down. We can use a tip.
We're going to go like this and then go out. Dough know from the side. Don't know. Starting from the rest position,
signed with me. Let's do it three times. Okay. We just talked
about how to sign. I don't know. Here's
how to sign y. Okay. Use your dominant
hand. I'm right handed. We're going to be forming the y handshape at
the end of the sign. So why is this middle
three fingers down? We're going to start by using those middle three fingers and just lightly swipe or touch
on the side of your forehead, then come down and
form the full y. And when you finished
the full why the letter from the alphabet, the palm would be facing you. Alright, so once again,
that's why handshape from the alphabet when you use the middle three fingers
and come down like that. And this is a WH question signs. So who, what, where,
when, how, why? Alright, so furloughs, eyebrows. Have a look on your face like something's
happening over there. Alright, so go like this. Why? Why? From the side? Starting from the rest position, sign with me. Let's do it three times. Okay. We just talked
about how does sine y.
71. Review | Sign & Understand: Let's do signing review for personality
signs. Number four. Okay. Something's
going to pop up. I need you to sign it before
I do. Right. Here we go. Sign this talkative stupid, stolen. Oh, and in real life,
don't squat down. I do squatting down so you
can see my full hand. Right. Weird. Understanding. Strict. Don't know. Believe. Why? No. Okay. This was signing review for a
personality signs number four. Let's do understand
in review for a personality signs number four. So take a look at me. I'm going to assign something, you figure out what I'm signing. Just shout it out loud. Okay. What am I signing? Stubborn. Cognitive. No. Weird. Strict understanding. Stupid. Why? Believe? Don't know. Okay. This was
understanding review for a personality
signed number four.
74. Dialogue #1: Okay, Here's a dialogue. Feel free to pause the video, work your way through it
and sign the whole thing. When you're ready, push Play
and we'll sign it together. Alright, let's do it. First part, you
believe Abby gullible? Alright, so in English
they'll be like, Do you believe Abby is gullible? Asl throw out the MR. Is was worried of
small little words. We're not going to assign them. Okay. So here we go, side-by-side. You you believe,
how do we do it? That's right. Believe. Now we have a name, so let's fingerspell a, B. B. Why? Abby? What do we do? A double
letters when we finger spell, we're gonna go one and then
another one off to the side. So we have Abby Abby gullible. How do we sign it? That's right. Kind of a silly
look on your face. This is a yes-no question. Raises eyebrows, lean
forward a little bit. That's how we indicate
a yes, no question. You can answer.
Yes, no, or maybe. Alright, so when you're
signing the sentence, you believe Abby gullible. Then raise your eyebrows
when you get to gullible. Alright, so let's take a look, see how it is signed
with me. Nice and slow. You believe? Abby? Gullible. Alright. When you're
signing gullible, it's a little bit awkward because you're covering
up her eyebrows, right? So when you finish
signing gullible, just leave your eyebrows up and have this
look on your face, kind of freeze it for a moment. It makes it very
clear that you're asking a yes, no question. Alright, so let's sign
again. Here we go. You believe Abby? Gullible? Eyebrows. Okay. Let's do the second part. Yes. I know she not smart in English. Yeah. Yes. I know she is in
smart, something like that. Alright. Here we go. Side-by-side.
How do we sign? Yes. Yes. You nod your head
if you want to. I I we say no. That's right. No. She and we're
talking about her. And what kind of assumes
he's not present because we wouldn't be so bold
and rude in front of her. Right. So let's pretend
she's not here. How do we sign about her? She is right after the sine xi. Not how do we sign? Not like this. Nut, nut. And smart. Smart. Right? Now this is a wonderful example
of where you can put not in front of pretty much any word to
get the opposite, right? If it was not
gullible, not nice. I don't know, whatever
the Nazi want to use. Right here. It's not smart. So here we go. Let's sign the
other sign with me. Nice and slow. Yes. I know she not smart. Again. Yes. I know
she not smart. Okay. Let's put it all together. Let's sign the whole thing. Nice and slow to
start and we'll speed up period of sine with me. You believe Abby? Gullible? Yes. I know. She not smart. Again. You believe
every gullible? Yes. I know she not smart. Okay. We did the full thing. We worked our way through
it. Did practice. You need to go back
to more practice. I say, why not? Practice
makes improvement?
75. Dialogue #2: Here's the dialogue. Feel free to pause the video, work your way through
it, signed by sign and get some practice. And when you're ready, push Play and you can sign it with me. We'll do it together. All right. Okay. Let's do the first part. Your mom nosy, strict y. So in English something like, Why is your mom nosy and strict. Okay. So by sine, how do we sign
your your mom or mother? What's the sign? That's right. Mom. Nosy. How do we do it? Nosy? Or you're getting
your nose hooked in someone else's business? Strict. Strict. Why are we sign it? Why? Uh-huh. You already see my
eyebrows for wind because it's a WH question. Who, what, where,
when, how, why, right. So for those eyebrows when
you're signing y, right, probably already
seen in general, the question words go at
the end of the sentence. So why? Let's do it altogether.
Sign with me nice and slow. Your mom. Nosy. Strict. Why? Okay. So in English you might be no, you would say nosy and
strict when an ASL we're not gonna do a separate sign for and we're going to That's right. We're just going
to shift our body. So your mom nosy, strict. Why? Again, Here we go. Your mom? Nosy, strict. Why? Alright. That was
the first part. Let's do the response. My dad lenient, my mom dislike. Okay. So in English,
my dad's lenient. My mom doesn't like it
and my mom dislikes it. Right. Okay. So let's
go step-by-step. We go My How do we do it? My my what my dad did
or farther, right. How do we assign lenient? Literally hard. Soft, which is lenient. Right? My my my what? My mom. Mom. How do we sign
dislike? That's right. Thank You. Like it but you throw it away. Dislike, right? In this, in this context, she dislikes what
else you disliked. Set the data is lenient. Alright? Alright, let's do it altogether. Sign with me. My dad lenient. My mom dislike. Again. My dad lenient. My mom dislike. Okay, Let's put it all together. Pieces of the puzzle. Assign the whole
thing. Nice and slow. Sign with me. Here we go. Your mom? Nosy, strict. Why? My dad lenient. My mom dislike. Alright, so we're getting
the context here that dads lenient and moms
nosy and strict, possibly because dad is lenient. Blades Rama. Okay.
Let's try it again. Again. Sign in with me. Here we go. Your mom? Nosy, strict. Why? My dad lenient. My mom dislike. Alright. Okay. Little bit quicker. Okay. Good, Good. Go back and review practices
much as you need to. All right. Wonderful.
76. Dialogue #3: Okay, Here is your dialogue. Feel free to pause the video, work your way through it. When you're ready,
come back and push. Clay will sign it all together. Okay, Let's do the first part. Troy, brand believes
Sam hard working. So in English, something
like do Troy and friend believes Sam is
hardworking, something like that. Okay. Let's do some
finger spelling. T, R, O, Y. We have Troy and we
also have friend f, r, a n brand. Right? How do we sign
believe believe. Sam, S, M, sim and hard
working, how do we sign it? Right? Grinding
away hardworking. And this is what
kind of question? Yes, right? Yes, no question. You can answer
yes, no, or maybe. So we're going to
raise those eyebrows, lean forward a little bit. That's how we indicate
a yes-no question. So here we go. Sign with me. Nice and slow. Troy, friend. Believe. Sam. Hard working. Right. So we had two names right
away at the beginning. So we need their own space to show two different individuals. So I put Troy over here
and I put Fran over here. Alright, so let's do it again. Again. Troy, Fran, believe Sam, hardworking. Alright, that was
the first part. Let's go to the response. Don't know. I know Sam lazy,
rude in English. Probably something
like, I don't know. I know Sam is lazy and rude. Okay. So the first
part don't know. You could sign. I don't know. But it's kinda redundant
and it's more effective and more efficient to
just go straight to don't know because it's
obviously I'm signing it. Answering the question
contexts makes it obvious who doesn't
know, right? Okay. So first sign this. I don't know. That's right. Don't know. Make sure to take that head. Don't know. I I know. I resign it. No. No. Sam. Lazy lazy, rude. Rude. Right. Okay. So altogether sign with me. Here we go. Don't know. I know Sam, lazy, rude, right? So for n down there to communicate
two separate concepts, lazy and rude, to
shift a little bit. Here we go. Sign again. Don't know. I know Sam. Lazy, rude. Okay, let's put it all together. Induce both sides
of the dialogue. Alright, so let's
work our way through. Sign with me. Troy, friend. Believe Sam, hardworking. Don't know. I know Sam. Lazy, rude. Okay. Again, Troy, friend. Believe Sam. Hardworking. Don't know. I know Sam. Lazy, rude. Okay. We did the whole thing,
step-by-step practice. You wanna do more practice. I welcome you to go ahead and do as much as you'd like to.
77. Learn | Question Signs 1: Questions, signs. Number one, you're about to learn how
to sign and understand. Question, how, what, when, where, why, how many, how much? We have a separate
lesson for each one. We're going to cover handshape, hand position, hand motion. Do practice. After you've learned all ten,
we'll do a review. Okay. Here is the sign for question. Does it look familiar? Yeah, it's produced tracing
the question mark, right. So we're going to use
our index finger, our dominant hand.
I'm right-handed. I'm going to go
like this, trace, pull it back in due
to the dark question from the side question. Okay. Starting from the rest
position, sign with me. Let's do it three times. Okay. We just talked
about how to sign. Question. Here's how we sign, how we're going to use both hands and hand
shapes are the same. We're going to start by making A's right from the alphabet. A's go like this,
fingers together, fingers down, thumbs alongside. Now we're just going to open up, relaxed our fingers so there
it can breathe a little bit. We're going to put it down here. So the knuckles are
pointing together. Tips of the thumbs
are pointing back at our chest and we're just
going to roll forward. How in at the same time
for all your eyebrows, because this is a WH question. Who, what, where, when,
how, alright, so pero, those eyebrows have an
inquisitive look on your face and go how? From the side? How starting from the rest
position signed with me. Let's do it three times. Okay, you may see different
variations of the sign for how in this course we're gonna be
signing it like this. You may see people sign
like this where they just swivel one side or
maybe where they go like this one goes
forward when it goes back. So just keep in mind, there are different
variations for the sign, how to be consistent. In this course, we're gonna
be signing it like this. Where they move together,
right? Bro, those eyebrows. Alright. We just talked
about how to sign. How Here's how we sign. What? We're going
to use both hands. Flat hands just
kinda loose there, put them about here,
palms facing up, and we're just going
to go in and out at the same time for those eyebrows because this
is a WH questions sign. Who, what, where, when, how, why, which we go what? From the side? What starting from the rest position
signed with me. Let's do it three times. Okay. Another version of what you may see is for the
non-dominant hand. For me, my left hand, flat
hand, put it about here. Dominant hand, index finger, and it just slides down
the open part of the hand. What? That's another version you may see to be consistent
throughout this course. I'll be signing it
with the open hands, palms up like this. What we just talked
about, how to sign. What? Here's how we sign when okay. Same hand shapes. Index fingers. Yes. I'm right handed, so my non-dominant hand, I'm going to put it
about here, tip, pointing off to the side
of their dominant hand. I'm going to touch once, circle around and touch again. When when from the side. Remember for those eyebrows
is a WH question sine. So we have when starting from the rest
position, sign with me. Let's do it three times. Okay, now you may notice
that people don't always touch each
time when they go. It might just get close, especially when they're
signing really quick. It's in a conversation
and a full sentence. It might just get close. But either way you're going
to have this twisting motion with the fingertips. When when okay. We just talked about
how to sign when? Here's how to sign where? Okay. Use your index finger
of your dominant hand. I'm right handed. That's
my dominant hand. Index finger, palm facing forward tip of the
finger pointing up. We're just going to
wiggle it back and forth. At the same time. W-h question, what do we do with the eyebrows? It's right further
and put them down. Where inquisitive
look on your face, like what the heck
is happening over there. From the side. Where starting from the rest
position, sign with me. Let's do it three times. We just talked
about how to sign. Where here's how to sign, which we're going
to use both hands. We're going to use a hand
shapes like from the alphabet. Go like this, fingers together, fingers down, thumbs alongside. Now we're going to put
them here and we're not going to go up and
down at the same time. We're going to rotate,
alternate wit, right? Kinda like there are two
options here, like this. These are the hand shapes. Wit, see my eyebrows. It's a WH, question sine, so who, what, where,
when, how, why, which for those eyebrows, which from the side. Whit starting from the rest
position, sign with me. Let's do it three times. Okay. We just talked
about how to sign, which here's how to sign who? Okay. Use your dominant hand. I'm right handed.
We're going to make an L handshape like L for loser, or L from the alphabet. Now we're going to
take the tip of your thumb, put it on her chin, and just scrunched down, curved down our index
finger a few times. Who? It's a WH question. Science. We know that our eyebrows furrowed down
kinda gets scrunched. Inquisitive look from the side. Who? Okay, rest position,
sign with me. Let's do it three times. Alright. We just talked
about how to sign. Here's how to sign. Why? Use your dominant
hand? I'm right handed. We're going to be forming the
letter Y from the alphabet. How do you make a
Y go like this? Middle three fingers, put them down like hang
loose, that is a y. Okay? So what we're gonna
do is gonna take the middle three
fingers to the tips. We're just going
to lightly touch, brush the side of our head and come down and close up into a y. So we have y. Remember to follow the eyebrows. It's a question, WH questions sign who, what,
where, when, how, why, why? From the side? Why? Okay. Starting from the rest
position, sign with me. Let's do it three times. Okay. We just talked
about how to sign y. Here's how to sign, how many? Okay, we're gonna
use both hands. They're going to be
doing the same thing. Alright, so we're going
to start down here, fingers all scrunched
up tips together. And we're just gonna go up
maybe like fireworks bar, right? So how much? Because it's a WH questions
sign for those eyebrows. Who, what, where, when, how, how, how many? So we're going to throw
the eyebrows and go like this. From the side. How many? Okay, Starting from the rest position,
sign with me. Let's do it three times. Okay. We just talked
about how to sign. How many? Here's how we sign, how much? We're going to use both
hands, same hand shapes. Start down here,
fingertips altogether, and just spread up and
open your hands. How much? Now for those eyebrows, this is considered
a WH question. Who, what, where,
when, how, how much? Uh-huh. So much from the side. How much? Starting from the rest
position, sign with me. Let's do it three times. Alright, now you may
have noticed if you've already learned this
sign for how many? Well, how much looks
exactly the same? That's because it
is the same sign. So how much is the same
sign for how many? We just talked about
how to sign, how much.
78. Review | Sign & Understand: Let's do sign-in
review for questions. Signs, number one,
something's going to pop up. You sign it before I do. Okay. Here you go. I
need you to sign this. How many what where? Why? Which when? Who? How much question. Okay. This was signing review for questions
sign number one. Let's do understanding review for questions signs number one. Alright, take a look at me. Watch me. I'm going to assign you figure out
what am I signing. Just shout it out loud. Okay. What am I signing? Where wit why? How many or how much? That's right In case
you said how much how many and how much are
the same sign, right? How many? How much? It just
depends on the context, what the English
representation would be. How many, how much? Question? When? How much, or if you said how many
you would be, right. Because how much and how
many are this same sign? Yes. What who and that was understanding review for questions signs, number one.
79. Learn | Question Signs 2: Questions, signs number two, you're about to learn how
to sign and understand what do what For what kind? What name, what
time. Do you mind? Both. How sign for who? About what? Okay. We have a separate video
lesson for each one. You're going to learn handshape
in position, head motion, do practice after we've
made it through all ten, we'll do some review. Okay, here we go. Here's how to sign. What do okay, use both
hands, same hand shapes, where it's going to be using
the tip of the index finger, tip of the thumb
and just pinching a few times like this where
the tip is pointing up. Now this is a WH question. Who, what, where, when, how I, which borough? Those eyebrows inquisitive look like you want to know something. What do what do from the side? What do rest position
signed with me. Let's do it three times. Okay. Now, what do
would be smart for? What do you do? What does he do? You went did you go to the bank? What do he went to the mall. What do you go to work? What do what do you
do there right now? Who's going where
and who is doing? Who's doing what is going to
be dependent on the context, but just the base
signed by itself. What do like this? Okay, we just talked
about how to sign. What do? Here's our design. What for? Okay, use your dominant hand. I'm right handed,
handshape, index finger, and we're just going to touch
the side of our forehead, go out, come back
in and do it again. So we have what, four. Alright, now this sign, onetime all by itself
just means four. Right here we're going to
be signing what, four. So we need to do a
couple of things. We're gonna go 12, but
also with the eyebrows, further eyebrows,
scrunch them up, have an inquisitive look. So we have literally is 44. Understood as what
For? What For? You want You want me to do that? What Bohr. From the side. What form? Starting from the rest position. Sign with me. Let's do it three times. Okay. We just talked about
how to sign what four. Here's how to sign what kind? Okay. Couple of things going on here. First, It's a WH questions sign. So we're going to
throw those eyebrows inquisitive look or
how it's happening. At the same time we're going
to assign kind right now. Type. What kind is it? Uh-huh. Okay. How
do we sign kind? Well, we're gonna make K hand
shapes from the alphabet. How do you make a K? Go like this? Last two fingers down, take your thumb
and press against the inside part of
your middle finger. That is a k and k l by itself. Okay, now we need two of them, right? I'm right handed. So my non-dominant hand, non-dominant k, and I'll put it about their dominant hand. I'm going to put it on
top both K hand shapes. And I'm gonna go
around and bump. So we have kind now I'm
following the eyebrows. So that automatically gets us to what kind of questions sign. Now this is one of
the examples in ASL where you just do the sign. We can call it the base sign. But because you're
throwing your eyebrows, suddenly it's creating a
question, a WH question. What kind? So the difference would be kind, neutral expression
just like kind, type of ice cream,
whatever. Uh-huh. But when you further eyebrows, it becomes what kind
what kind of shoes, what kind of picture,
What kind of movie? What kind of whatever. What kind? From the side. What kind? Okay. Starting from the rest
position, sign with me. Let's do it three times. Alright, so if you want to
communicate this eyebrows, very important for them. Okay. We just talked
about how to sign. What kind? Here's how
to sign what name. Okay, we're gonna
use both hands. The hand shapes are the
letter H from the alphabet. How to make an H? Well, go like this,
bringing us together. Last two fingers down. Take your thumb
and just press it against the side of
your ring finger. Go like this. That is an eight. You sign an eight
cell by itself. Eight. So we need two of them, right? I'm right-handed, That's
my dominant hand, non-dominant hand for me, I'm going to put it right there. H handshape, dominant hand. Just going to go like
this one to name. Okay, So the base sign
all by itself as name. But we want to do what name? So we're going to mix in furrow in our eyebrows like this. We get what name? Alright, now it's a WH question. Who, what, where,
when, how, why. So prove those eyebrows, have an inquisitive look
what's happening over there. So go like this. What name? Alright, now this is
a wonderful example of just doing a base sign and you add in the
furrowed eyebrows and automatically you
get a question sign. So you don't need
to sign what name. You just go straight
for. What name? From the side. What name? Rest, position, sign with me. Let's do it three times. Okay. We just talked about
how to sign what name? Here's how to sign what time. Okay. So the base sign is
time. Use both hands. I'm right-handed, non-dominant hand just going to make a fist, put it down there, pretend
you have a watch on. Take your dominant
hand, index finger, and just tap on it twice time. Okay, Now we want to
assign the questions. Sign what time. So it's a WH question
for those eyebrows inquisitive look at the same
time that you're signing. Time. What time? Okay, Now this is a
great example of taking a regular sign that this would be time
without any facial stuff. But when you go like this, it turns into a question
sine, very useful. What time? What time? Okay, Starting from the rest
position, sign with me. Let's do it three times. Okay. We just talked
about how to sign. What time? Here's how to sign. Do you mind? Okay. Use your dominant hand. I'm right handed, just going
to use the index finger. Alright. Use the tip
of that index finger, tap once on her nose and
I'm signing with you. So I'm gonna go like
this, then point at you because I'm going to
ask you, do you mind? Just go like this? Do you mind? Okay. Now this is what we would consider a yes, no question. So think about it in English. Do you mind the person
might say yes, no, maybe. So it's a yes-no question. Now in ASL, when we want
to communicate a yes, no question, we
raised the eyebrows, lean forward a little bit. Pretend like you're peering
over the fence into your neighbor's
backyard and you're like What the heck is happening. There's the yes-no question,
facial expression. Alright, so in this
example we're gonna go to mind from the side. Do you mind starting
from the rest position? Sign with me. Let's do it three times. Okay. We just talked
about how to sign. Do you mind? Here's
how to sign both. Okay. So the base
sign is just both. Like you have two things
and you want both of them. How do we sign it?
Well, I'm right-handed. That's my dominant hand. With my non-dominant hand, I'm going to make the letter C or a C handshape. We're
going to put it right there. Pompeii seen in, with
my dominant hand, I'm going to start like this
with a v. A v Peace man. Flip it around, palm facing in, going to put it right here. We're going to pull
it down and close up the V I give to things and
who were taking both of them? Both. Both. Now we want to communicate
a question, alright, in English, something
that would be similar to Do you want both? So it's a yes, no question.
Do you want both? And someone could say,
Well, yes, no, maybe. So raise those
eyebrows for yes-no questions in ASL.
So go like this. Like you're peeking over your neighbor's fence
and you want to see what's happening over here? Yes, that's a yes,
no question phase. So we're going to go like this. Both. Both. Okay. From the side. Both. Starting from the rest
position, sign with me. Let's do it three times. Alright, now, given the context, we need more information. We just did the base
question sine both. But this could
work for someone's like the red one
and the black one. And you're surprised
you're like both. Die, you're just gonna
do one or you want both? Your thinking both. Uh-huh. Okay. We just talked about
how to sign both. Here's how to sign. How sign. Okay. We're going
to use both hands. And we're just gonna
do this sign for sine. Alright, so index fingers, both hands, pull
them apart here, we're gonna do backwards
rotating bicycle motions, not together, just backwards,
alternating, rotating. Uh-huh. We have sine. Now that is the base sign, but here we're gonna be
making a question sine, It's a who, what, where, when, how a WH question, right? How we're going to borrow
the eyebrows because we're signing sign and we go like
this at the same time, have like an inquisitive look. It's gonna be understood as how sign like how do
you sign something? Maybe like truck or
use fingerspell or you find a word and you're
like, how assign, right? How do you sign it? Alright, for those eyebrows and do
the sign for sign. How assigned from the side. How sign? Now if you actually
went like this, how the sign for how sign, you'd still be understood. The thing about, well,
how we're doing it here, how sign, it's very efficient. Quick, straight to the point. How sign is just because we're
doing the eyebrows thing. If you just go like this. It's just the base
sign for sine. But we want how son question. Okay, Starting from the rest
position, sign with me. Let's do it three times. Alright, now, as a beginner
or if you're starting, you're improving even
if you're advanced, this is a useful sign because you want to know
how to sign something. You see a word is fingerspell, there's written down
or you write it down and you go how assign. Okay, good, good. We just talked
about how to sign. How sign? Here's
how to sign for h2. Okay, we're gonna do two
separate signs here. We're gonna do four. And then the question
is sine, who? Together? It's just a
nice little combination which is very useful. So someone pops up, they have a gift or delivery. It could be like for who. So let's do this first sign for use your dominant
hand, index finger. Go like this and
just go out for. All right. And then the
questions sign for who? Using the L handshape
tip of the thumb there, put it on your
chin and just curl up your index
finger a few times. At the same time,
you could do it for the whole thing, for who? You can scrunch up
those eyebrows. At least you need to be going like this at the end
when you're signing who? We want to demonstrate
a WH question, right? Who, what, where,
when, how, why, which we have for who, or if you want, you
could go for who. Makes sure when you're
doing who scrunch up the eyebrows? From the sign? For h2. Okay. Starting from the rest
position, sign with me. Let's do it three times. Okay. We just talked about
how to sign for who? Here's how to sign about what? We're gonna do, two
different signs here to get the nice little mini
question about what, what are you talking about? What are you proud about? What are you happy
about? About what? Okay, So for the
first sign about, we're going to go like this.
We can use both hands. I'm right-handed and use the index finger for that
one non-dominant hand. Just going to squish, squish, squish all the tips together. Put it about here. Taking
that index finger, we're going to start
at the top and rotate around one circumference
or one revolution. So we have about, about from the side. Okay, So we have about, and then the question sine, what WH question for
those eyebrows? What? Just flat hands,
palms facing up, shake him a few times. So altogether we have about
what about what you sign? About what you all are
talking about? What? Okay. From the side. About what? Now you can throw
your eyebrows through the whole thing while
you're signing about. Or at the very least, you need to be going
like this about what? So at this end of the sentence, I wrote down communicating
a WH question. Okay, Starting from the rest
position, sign with me. Let's do it three times. Okay. We just talked about
how to sign about what
80. Review | Sign & Understand: Let's do a signing review for
questions signs number two. Okay. Something's
going to pop up. You sign it before I do. Okay. Are you ready? I need you to sign
this. What name? About what? For what kind? What time? Both. Both. Remember this is a WH question. I'm sorry. A yes, no question. So we're gonna raise
those eyebrows. Yes. No question. Both. What for what do do you mind? Keep in mind it's
a yes-no question. So raise those eyebrows. You mind how sign okay. That was signing review board
question signs number two. Let's do understanding review for questions signs number two. Okay. So take a look at me. I'll be over here
waving my arms around. You try to figure out
what I'm signing. Okay. Just shout it out loud. Here we go. Both. What kind how sign? What time? For who? What name? Do you mind? What For? About what? What do okay. This one is understanding
review for questions signs. Number two, you want
to go back and repeat either the sine or the
understanding portion. Why not? More practice
makes improvement?
83. Learn | Verb Signs 1: Verb signs. Number one, you're about to learn how to
sign and understand, arrive, become blame, break, bring BY, can't complain, cook, dislike. Okay, We have a separate
video lesson for each one. You're going to learn handshape, hand position and
motion for each sign. We'll do practice
after you've learned all ten signs will do review. Alright, I can't wait. Let's do it. Here's
how we sign, arrive. Okay, we're going
to use both hands. The hand shapes are the same. Flat hands, fingers together, thumbs alongside,
I'm right-handed, That's my dominant hand. My non-dominant hand. I'm going to put it about here. Palm facing towards me. Take my dominant hand, my right hand for
me, palm facing in. We're gonna go out and like
that, like we're arriving. Arrive from the side. Alright? Okay, Starting from the rest position, sign with me. Let's do it three times. Okay. We just talked about
how does sign arrive. Here's how we sign become. Okay, we're going
to use both hands, same handshape, flat hands. Alright, I'm right-handed,
That's my dominant hand. My non-dominant hand. I'm going to take it,
put it right here, palm facing in with
my dominant hand. I'm going to go this
way, palm facing out. Alright, now we're
just going to switch over n, rotate the hands. So we have become
become, from the side. Become okay, Starting from the rest
position, sign with me. Let's do it three times. Okay. We just talked
about how to sign become Here's how
to assign blame. Okay. Both hands,
different hand shapes. I'm right handed with
my non-dominant hand, just going to make a flat
hand, put it down here, palm facing down with my dominant hand them and make the hand shape of the letter a. How to make it a like
this fingers together, bring them down, film alongside. Okay, I'm gonna go like
this and I'm just gonna go across and push out blame. I'm pushing the blame
towards someone. Blame from the side. Blame. Okay. Starting from the rest
position, sign with me. Let's do it three times. Okay. We just talked about
how to assign blame. Here's how to sign break. Alright, now this
is break as in like broken in the picture,
something's broken. Break. Okay, both hands,
same handshape. S is from the alphabet. We could also just say, alright, we're gonna put them together
and we're just going to wake your snapping a pencil. Break from the side. Break, starting from the rest
position signed with me. Let's do it three times. Okay. We just talked
about how to sign break. Here's how to sign bring very straightforward
same hand shapes, both hands, flat
hands like that. We're going to put
them down here on one side, palms facing up. Now, just bring them over here. Bring the sign. Bring rest position,
sign with me. Let's do it three times. We just talked about
how to sign bring. Here's how to sign by going use both hands,
different hand shapes. I'm right-handed, That's
my dominant hand. Non-dominant hand, flat hand. Put it down there,
palm facing up. That's our platform with
their dominant hand. We're just going to put
all the fingers together, bringing them down so
they're touching the tip of the thumb right
now, flip it over. We're gonna go 12, right? Like this is the money
we're buying something. We're making a purchase by side by okay. Starting from the rest
position, sign with me. Let's do it three times. Okay. We just talked
about how to sign. Bye. Here's how to sign. Can't. Okay. Index
fingers, both hands. Yes. Now I'm right-handed,
non-dominant hand. Put it right about
here, palm facing down to base it off that way,
pointing up that way. Dominant hand, index finger. We're just going to flick down. Just flick the tip
of our other finger. Can't. Alright, the same
time, shake your head. It's a negative.
Can't do it cannot. Kent from the side. Can't starting from the rest
position, sign with me. Let's do it three times. Okay. We just talked
about how to sign. Can't Here's how
does sign complain? Okay. You can use your dominant
hand. I'm right handed. We're going to make this C
handshape from the alphabet. Like this. Fingers together, curved
fingers down, alright? And we can use the tips of the fingers and the
tip of the thumb. And we're going to
go 12 on our chest. Complain. From the sign. Complain. All right. Starting
from the rest position, signed with me. Let's do it three times. Okay. We just talked about
how to sign complaints. Here's how to sign cook. Okay. We're gonna use both hands, same hand shapes,
just flat hands. Now I'm right-handed,
That's my dominant hand. So my non-dominant
hand put it down here. That's our platform
palm facing up. Dominant hand, same handshape. We're gonna go 12. Like we're cooking something from the side. Cook. Okay. Starting from the rest
position, sign with me. I know you're signing
with me, right. Let's do cook three times. Okay. We just talked
about how to sign cook. Here's how to sign dislike. Okay, we're gonna use our
dominant hand and it's based on the sign for
like two like something. You use the tip of your
middle finger to your thumb. And we're going to be going
like this on our chest. Alright, so this is
like pleasant face. Now we're gonna do dislike. So it's like you like it, then you throw it away. Dislike. Add in the
facial expression to boost your message.
From the side. Dislike, starting from the
rest position, sign with me. Let's do it three times. Okay. We just talked about
how to sign dislike.
84. Review | Sign & Understand: Let's do signing
review for a verb. Signs number one. Okay, something's
going to pop up. You sign it before
I do. Alright. I need you to sign this by become blame. Bring cook. Can't dislike. Complaint. Break. All right. Okay. That was signing review
for verbs signs number one. Let's do understanding review for verbs signs, number one. Okay, so I'm gonna be
signing something. You take a look, can you
shout out what I'm signing? Here we go. Bring, become, arrive. Complain. Blame. Kent. By dislike. Break. Cook. Okay. This was understanding review for verbs,
signs. Number one.
85. Learn | Verb Signs 2: Verb signs number two, you're going to learn how
to sign and understand. Don't want, drink, drive to eat, explain, feel, find,
finish, give, go-to. Alright, separate video lesson for each one we're talking about handshape and position
hand motion practice. After you've learned all
ten, we'll do review. Okay. Here we go. Here's how to sign. Don't want okay, so it's
based on the sign for want, the base sign like this. Right? So hand shapes
like that start out here and pull it in. That's one. But now it's don't want. So we're going to
go like this and rejected, push it back. Don't want from the side. Don't want. Okay. Starting from the rest
position, sign with me. Let's do it three times. Okay, We just talked
about how to sign. Don't want. Here's our design. Drink. Really straightforward. Use your dominant hand.
I'm right handed. We're going to make the C
handshape from the alphabet. Now let's take the tip
of your thumb here. We're going to put it
close to her mouth. You can lightly touch
if you want to. And we're just
going to pivot up. Like we're holding a cup
and we're taking a drink. Drink from the side. Drink. Okay. Starting from the rest
position, sign with me. Let's do it three times. We just talked about
how to sign drink. Here's how to sign drive to like you're driving
to a location, right? Alright, hand shapes our fists. Just pretend there's a
steering wheel and we're grabbing it and we're
just going forward. We're showing that we're
driving somewhere. We're going to somewhere. Drive to from the side. Dr. to. Starting from
the rest position. Sign with me. Let's do it three times. Okay. We just talked
about how to sign drive to here's how to sign, eat. One of the most straightforward
signs and Oliver, ASL, okay, use your dominant
hand. I'm right handed. We're just going to go like this and squished down
our fingertips, everything touching right there. Just tap once on your mouth. So we have eat from the side. It started from
the rest position. Sign with me. Let's do it three times. Okay? Just tap once. If you tap twice, it means food, alright, similar, just a noun
instead of a verb. So we want eat, the verb, the action, so just go once. We just talked about
how to sign it. Here's how to sign. Explain. Okay, same hand
shapes for both hand. The letter F, How do we make
an F will go like this. Index finger, thumb,
bring the tips together. There's an F. Okay, we're gonna take those F's. I'm right handed my
non-dominant hand. That F is going to be a
little bit farther out. Dominant hand a little
bit farther in. And we're just going
to rotate twice. One to explain. We're not looking for
a rigid movements, we're looking for smooth. So we have explained from the side, explain. Okay, Starting from the rest
position, sign with me. Let's do it three times. Okay, we just talked
about how to sign. Explain. Here's our design feel. Okay, use your dominant
hand. I'm right handed. Go like that. Stick your middle finger, bend down your middle finger. We're just going to use the
tip of your middle finger and swipe up once on the
side of your chest. Feel from the side. Feel. Alright, starting from
the rest position, psi in with me. Let's do it three times. Okay? We just talked about
how to sign feel. Here's how to sign bind. Okay, use your dominant hand. We're going to be
using the hand shape of the letter F. Alright? First we're going
to start where it's open like this and then it's going to come together and we're going to
do it down here. Like we're picking
something up with the tip of our index
finger and our thumb. We have find fine. From Zion. Find, rest, position, sign with me. Let's do it three times. Okay. We just talked
about how to sign bind. Here's how we sign, finish. Okay? Both hands, same
hand shapes like that. Start here, palms facing in, alright, fingertips
pointing at each other. And we're just
going to flick out. Finish from the side, finish. Starting from the rest
position psi in with me. Let's do it three times. Okay, Now this is a useful sign and it fits different concepts. This with the same sign. It can be finished like here, all done all over. Already. Finished. Okay. We just talked
about how to sign Venice. Here's how does sign give? Pretty straightforward.
Use your dominant hand. Go like this fingers together. Now squish them down.
Here's our handshape. Flip it over. Like
you're holding something and you just
give it to someone. Give the sign. Give starting from the rest
position, sign with me. Let's do it three times. We just talked about
how to sign give. Here's how to sign. Go to like you're
going somewhere. Alright, both hands, index fingers. We're going
to put them right here. First, the tips of the fingers
is pointing straight up. Now let's kinda like two
rockets that are shooting off. Go-to. Go-to. Now you can go to the
other side. That's fine. Go to goto, up to you. From the side. Go to All right. Starting from the rest position, psi in with me. Let's do it three times. Okay. We just talked
about how to sign go-to.
86. Review | Sign & Understand: Let's do signing review for
verbs, signs number two. All right. Do you know
something's going to pop up? You sign it before
I do, Here we go. Drive to eat, give, Find, explain, drink, feel. Go to finish. Don't want. Okay. This was signing review for
a verb signs number two. Let's do understanding review
for verbs signs number two. So take a look at me. I'll be signing something. You shout out what I'm signing. Here we go. Find Dr. To finish. Go-to, give, drink. Don't want, eat, explain. Feel. Okay. This was understanding, review for verbs,
signs, and over two.
87. Learn | Verb Signs 3: Verb signs. Number three, you're about to learn how
to sign and understand. Have, hope, heap, learn, leave. Like live, look for love. Make. Alright, separate
video for each one. We're going to cover handshape, hand position and motion. Do practice. After
you've learned all ten signs will do review. Let's get started. Here's
the sign for help. Okay, we're going
to use both hands, same hand shapes, go like
this fingers together. Now we're just going to bend all the fingers down like
this, keeping them straight. We're going to start
out here, tips of the fingers pointing in. We're just gonna go in and
then lightly touch our chest. Half half from the side. Have okay, Starting
from the rest position, psi in with me. Let's do it three times. Okay? We just talked
about how to sign have here's how to sign hope. Okay, we're going
to use both hands. Now we're going to start
like this fingers together. Alright, now we're
gonna bring them down just a little bit. We're gonna be making
this movement, alright, I'm right-handed,
non-dominant hand. I'm going to put it up here. Dominant hand, I'm going
to put it right here. And we're gonna go like this. Hope from the side. Hope. Starting from the rest
position, sign with me. Let's do it three times. Alright. We just talked
about how to sign hope. Here's how to sign, keep. Okay, we're gonna
use both hands, same handshape the letter K from the alphabet.
How do you make it k? Go like this. Alright,
Last two fingers down. Take your thumb and
press it against the inside part of
your middle finger. That is a k. If you sign a k by itself would
be like this. Okay? Okay. Now we're going to use
both cases for both hands, the non-dominant hand,
I'm right handed, non-dominant hands
gonna be down here, dominant hand on top. And now just go like that. Like you're keeping
something from the side. Keep, alright, starting
from the rest position, sign in with me. Let's do it three times. We just talked
about how to sign. Here's how to sign, learn. Okay. We can use both hands. I'm right-handed, non-dominant
hand, just a flat hand. Put it down there.
That's our platform. With your dominant hand, pretend like there's
some powders from saying we're
going to go like this, scrunched her fingers up, take a little bit of powder
and put it in our brain. It's like magic dust and
we are learning something. Learn from the side. Learn. Alright, so
you're picking up the information and put
it in, in your brain. Learn, starting from the
rest position, sign with me. Let's do it three times. Okay. We just talked
about how to sign learn. Here's how to sign. Leave. Okay, use your dominant hand. We're going to start with
this handshape right here. Alright, kinda like you're
going to catch a ball, put it right here, fingertips pointing
off to the side. We're just going to
bring it to this side and close up the fingers. Leave. Alright, It's not as slow
motion like molasses. It's just a quick alright. So we have leave from the side. Leave starting from
the rest position. Sign with me. Let's
do it three times. Okay. We just talked about
how to sign leave. Here is how to sign like Okay, we're going to
use our dominant hand, the tip of the middle
finger, tip of the thumb. And we're gonna go like
this on our chest. So we're starting
to spread apart, go out and touch the middle
finger and the thumb. So we have like how a pleasant
look on your face because you like it from the side. Like okay, Starting from the rest position
psi in with me. Let's do it three times. Okay? We just talked
about how to sign, like here's how to sign live. Okay. We're going to use
both hands, same handshape. The letter a from the alphabet. How do you make an a like that? Bring us together, fingers
down them alongside. There's an eight and
we need two a's. We can use the inside part. Start here lightly touching
and just slide up. So we have live from the side. Live. Okay. Starting from the rest
position, sign with me. Let's do it three times. Okay. We just talked
about how to sign live. Here's how this sign look for. Alright, use your dominant hand. I'm right handed, That's
my dominant hand. We're going to make the
letter C from the alphabet. Alright, now we're gonna put it here in front of
our face and we're gonna go a couple of
circles in front. Look for. This also
works for a search. Like you're looking
for something. Your facial expression. It can be kinda like where
is it, What's happening? Where does it look
for? From the sign? Look for starting from
the rest position. Sign with me. Let's do it three times. Okay. We just talked about
how to sign, look for. Here's how to sign love. Okay, hand shapes are the same letter S
from the alphabet. Right fingers together down. That's an S. We
need two of them. Now your dominant hand, I'm right hand is gonna
go on the inside, non-dominant hand
on the outside. And we just give
yourself a little hug. Love from assign, love. Starting from the rest position, psi in with me. Let's do love three times. Can't you just feel
the good vibes? Okay. We just talked
about how to sign love. Here's how to sign, make both hands same handshape. S is how do you make Ss
like this fingers together, fingers down the arms in front. Now I'm right handed. So
my non-dominant hand, I'm going to put it down
their dominant hand. I'm gonna put it on
top and we're just going to twist twice. Make. Alright, now imagine
for a moment those long pepper shakers. Or maybe the waiter
comes over and goes, right, basic same motion. Make, make. Alright, so we're just going
to twist make from the side. Make. Okay, rest, position,
sign with me. Let's do make three times. Okay. We just talked
about how to sign make.
88. Review | Sign & Understand: Let's do signing review for
verbs, signs, number three. Okay. Something's
going to pop up. You sign it before I do. Alright, I need you
to sign this. Learn. Have make love. Keep. Like hope. Look for leave. Live. Okay, that was signing review for a
verb signs number three. Wonderful. Let's do
understanding review for a verb signs number
three, you know how it works. So I'm going to be
signing something. Take a look at me, figure out what am I
signing. Here we go. Have love. Look for learn. Live. Like hope. Make, Leave. Keep. Okay, that was understanding review for
verbs, signs number three.
89. Learn | Verb Signs 4: Verbs, signs. Number four, you're about to learn how
to sign and understand. Move, need, prefer, read, remember R1, C,
Steel, stop. Take. Okay, We have a separate
video lesson for each sign. You're going to
learn hand shape and position hand motion
for each sign and we'll do practice after you've learned these ten signs will do review. Yes, we will. Alright, let's go.
Here's how we sign. Move. Both hands,
same handshape. Alright, fingers together,
bring them down. And just kinda like
they're squished. Owes, we can say, alright, now we're going to start
over here, tips facing down. Just come over here
and go like that. So we have move, move. Right now this could
be moving an object. This could be moving
from home to home. Move from the side. Move. All right. Starting from the
rest position, sign with me. Let's do it three times. Okay. We just talked about
how to sign move. Here's how to sign. Need to use your dominant hand. I'm right handed. We're going to make
the hand shape of the letter x, like Captain Hook. How to make an x?
Well, go like this. Index finger is curving
down like Captain Hook. So we're going to take
that x and have the tip of the index finger
pointing straight forward. Now we just drop it down, swivel it down, move it down. Uh-huh. We need from the side. Need starting from the rest
position, sign with me. Let's do it three times. Now this sign works for need. It works for must, it works for Should. We just talked about
how to sign need? Here's how to sign, prefer. Okay. Use your dominant hand. I'm right handed. Just bend
down your middle finger. We're just gonna use the
tip of the middle finger and tap twice on our chin. Prefer. From the side. Prefer. Alright, starting from the
rest position, sign with me. Let's do it three times. Okay. We just talked about
how to sign prefer. Here's how to sign. Read. Both hands,
different hand shapes. I'm right-handed,
non-dominant hand for me, my left hand, I'm going
to go flat, right? Turn it like that palm
facing in your book. You're reading material, whatever it is with
your dominant hand, we're going to make
a V handshape. You're seeing Peace man. Or number two. Now those
are gonna be our eyes, maybe our scanner and
we're gonna go one to read from the side. Read, okay, Starting from the rest
position, sign with me. Let's do it three times. Okay. We just talked about
how to sign, read. Here's how to sign. Remember. Okay, we're going to use
both hands, same handshape. A's from the alphabet. Fingers together at fingers
down, DM alongside, I'm right-handed, That's my dominant hand,
non-dominant hand. And put it here, tip of the
thumb pointing straight up. We're going to take the
tip of your other thumb. Our dominant hand, tap
on the side of our head, come down and tap on
the tip of your thumb. We have remember
remember from the side. Remember right starting
from the rest position, psi in with me. Let's do it three times. Okay, we just talked about
how does sign remember? Here's how to sign, run. Okay, we're gonna be using
L hand shapes both hands. Now we're going to be
hooking them together. The index finger of your
dominant hand, I'm right handed, is going to hit cook against the thumb of your
non-dominant hand. Alright, now we're gonna do
is we're going to start here. We're going to go,
we're going to squeeze, then go forward, squeeze again. So we have run. Alright? So you can
squeeze like this. Alright, you're hooked
up and then you squeeze run from the sign. Run. Okay, Starting from
the rest position, psi in with me. Let's do it three times. Okay, we just talked
about how to sign run. Here's how does sine C. Okay, we're going to use
our dominant hand. I'm right handed.
Alright. We're gonna make the V handshape. How to make a V go like this. Last two fingers down, thumb on top of the ring finger. Flip it around. Now
we're gonna get closer, lightly touch underneath
your eye and just come out. See from the side. C. Okay. Rest position. Sign with me. Let's do it three times. Okay. We just talked
about how to sign C. Here's how does sign steel. Okay. Both hands,
different hand shapes. I'm right-handed,
non-dominant hand them and make an S,
or we can say a fist. Alright, there's my S. We're going to lay it down here. I'm going to stick out our
elbow just a little bit. With your dominant hand. We're going to make a V of v. Handshape like bunny
ears are peacemakers. Right now we're going
to come down to our elbow and we're
going to hook it and pull it in because
we're stealing it. Steal from the side. Steel. Okay. Rest position. Sign with me. Let's do it three times. Okay. We just talked about
how to sign steel. Here's how to sign. Stop. Okay. Both hands, same handshape. Lead hands, fingers
together, thumbs alongside. I'm right-handed. So my non-dominant hand
put it right there. Palm facing up. Dominant hand. We're just
going to chop onetime. Stop. Sign. Stop. Okay. Starting from the rest
position, sign with me. Let's do it three times. Okay. We just talked
about how to sign stop. Here's how we sign. Take really straightforward. There's something
there will reach out. We'll take it. Take from the side. Take. Okay. Starting from the rest
position, sign with me. Let's do it three times. Okay. We just talked about
how to sign take.
90. Review | Sign & Understand: Let's do sign-in review for
verbs, signs, number four. Okay, something pops up. You sign it before I do, I need you to sign this. Run. Prefer. Read, steel. Need. Remember. C. Take, stop. Move. Okay, this was signing review for verbs
signs number four. Let's do understanding review for a verb signs number four. Alright, so take a look at me. I'm gonna be signing something. You shout out loud what
I'm signing right? Here we go. Prefer steel. Move. Remember C. Read, stop, RUN, need. Take. This was understanding review for a verb
signs. Number four.
91. Learn | Verb Signs 5: Verbs, signs number
five, here we are. You're about to learn how to
sign and understand thing. Traveled to try
understand, use weight. Walk to want will work. Alright, We have a separate
video lesson for each one. For each side, you're
going to learn hand shape and position and motion and do practice after you've learned
all ten signs. Well, by golly, we
will have review. Yes, we will. Okay. Let's do it. Here's how to sign. I think That's it. Use your dominant hand.
I'm right handed. Handshape is index finger. Just tap once on the
side of your head. Think. From the sine. Think. Okay, rest position,
sign with me. Let's do it three times. Okay. We just talked about
how does sine think? Here's how to sign traveled to. Use your dominant hand.
I'm right handed. We're gonna make a
V, or peace sign from the alphabet V.
So how do we do it? Last two fingers down, thumb
on top of your ring finger. Now these are kinda bunny ears. We're going to curve
them down just a little bit. That's
our handshake. Now I'll pretend it's
like our vehicle and we're traveling
to somewhere. Travel go around and then stop. Traveled to from the side. Traveled to okay. Starting from the rest
position, sign with me. Let's do it three times. We just talked about
how to sign traveled to here's how to sign dry. Okay. Both hands,
same handshape. The letter a from the alphabet. How do you make an
a logo like that? Bring us together, fingers
down, thumb alongside. Now take those A's, put them down here for
the palms facing down. We're just going to
push out and curve up. Try. From the side. Try. Okay. Starting from the
rest position, sign with me. Let's do it three times. Okay. Something important, interesting, depending
on where you are, what deaf community you
with, you're signing with, you may see different hand
shapes used, alright, now the motion is
still the same, but you might see with
the letter T, try. You might see with
the letter S, try. And like we're
doing it here with the letter a, a hand shapes. Try. Okay, now it'd be
consistent in this course, I'm gonna be using a
hand shapes throughout. Just keep in mind, you
might see S and chips. You might see t, hand
shapes, all signing. Try. Once again in this course we'll be
using a hand shapes. Try. Okay, we just talked
about how to sign. Try. Here's how to sign. Understand. Alright,
use your dominant hand. We're just going to
make a flicking motion with their index finger. Put it here, palm facing in up near the side of
your head and just go. Alright, so flick your
finger up at the same time. Nod like you
understand. Understand. From the side. Understand. Okay. Starting from the rest
position, sign with me. Let's do it three times. Okay. We just talked
about how to sign. Understand. Here's how to sign. Use both hands,
different hand shapes. I'm right-handed,
non-dominant hand. I'm going to make the
letter S from the alphabet. Alright? Fingers, the other
fingers down, thumb in front. That's an S. We're
going to put it down here with the
palm facing down. Now with our dominant hand, we're going to make the
letter from the alphabet. How do you make a you
will go like this. Fingers altogether. Last two fingers down, thumb on top of the ring finger. Alright, now use this part. We're just going to rub twice
on the back of our fist. So we have use use
from the sign. Use. Okay. Starting from the rest
position, sign with me. Let's do it three times. Okay. We just talked
about how to sign use. Here's how to sign weight. Okay. Same handshape. Both hands renews
open hands like their fingers spread apart
and I'll turn them around, palms facing in, put them off to the side in
front a little bit. Now just twiddle your fingers
like your Twitter LinkedIn, you're waiting from the side. Wait. Okay. Starting from the rest
position, signed with me. Let's do it three times. Okay. We just talked
about how to sign weight. Here's how to sign walk too. Alright, now we're gonna do like a little mini person
here and they're wiggling their legs and
walking somewhere, right? So the handshape, just
use the number three. We go like this last two fingers down. Now flip it around. So these are the legs.
This is I guess one of the hands start in
it just walkaway. Walk to the side. Walk too. Alright, starting from the
rest position, psi in with me. Let's do it three times. Okay? We just talked
about how to sign walk to here's how to sign one. Okay. Hands like this. We're going
to put them on down here, palms facing up,
just loose hands. Now we're going to pull them in. And when we pull, our
fingers are going to curve down like we're
gravitons or not letting go. Want want. From the side. One, It's pretty quick motion,
kinda jerky. We're not like slow motion. Want we're like we want it. Okay. Starting with the rest
position, sign with me. Let's do it three times. Okay. We just talked
about how to sign one. Here's how to sign will
use your dominant hand. Just use a flat hand shape their fingers together,
thumb alongside. Now we're going to
start over here near the site of our face. We're not touching
just off to the side. Now we're gonna go forward. Will like you're going
into the future, right? Will from the sign. Will starting from the rest
position. Sign with me. Let's do it three times. Okay, Now this is
a very useful sign because you can put this in front of any verb to
get the future right. We'll go we'll eat,
will meet. Uh-huh. Okay. We just talked
about how to sign will. Here's how to sign work. Okay. Same handshape, different
hand position essays. Yes. Those are the hand shapes. Now, I'm right-handed,
non-dominant hand for me, I'm going to put it
right down there. Alright, dominant hand. You can use the bottom
part here and I'm going to tap twice on top. Work from the side. Work. Okay. Starting from the rest
position, sign with me. Let's do it three times. Okay. We just talked
about how to sign work.
92. Review | Sign & Understand: Let's do is signing review
for verb signs number five. Alright, Some that's
going to pop up. You sign it before I do. Here we go. I need
you to sign this. Use traveled to work. Understand. Try. Wait. Want think, will work too. Okay, This was signing review for verbs signs number five. Let's do understanding review for verbs signs number five. Alright, so watch me
move around my hands. You shout out what I'm
signing. Alright, here we go. What am I signing? Understand. Traveled to try. Walk to wait. Will work. Use. Want? Think. Okay. This was understanding review for
a verb signs number five.
95. Dialogue #1: Okay, here's your dialogue. I urge you to pause the video. Take a moment, work your way
through it. Signed by sign. These are signs that we've
already learned in the course. When you're ready push Play
and we'll sign it together. Okay, Let's sign it together. So we have they
need help by house. Alright, in English,
something like, do they need help
buying a house? Right? So let's jump in. Here we go. Alright, let's pretend
they're not here, but we're going
to refer to them. We just do it off
to the side like an imaginary group of people. They need. Need need Help, Help. Help, right? Bye. Bye. Bye White House. And this is a yes,
no question, right? You can answer yes, no, or maybe they need help
by house. I rose up. So when when you're
signing house, eyebrows should be going up. Lean forward a little bit. We need to communicate
a yes-no question. If you don't raise your eyebrows and you stay like
this the whole time, It's a statement which is
a big difference for him. A question, right?
They need help by house versus they
need help by house. Okay. Let's sign it together.
Sign with me. Let's go nice and slow speed up. They need help by house. They need help by house. Well, let's find out, right, the second part. Maybe I think they
want move, right? So an English, somebody like maybe I think they want to move. Alright, let's do
it. How do we sign? Maybe I think think we did it before. They were pretending
they're not here. They if they were here, we just do it in their
direction wherever they are. Want want to move, move, move. If you wanna do it in this
direction, move, that's fine. We just need to get
that communication that they're going from
one place to another. Alright? Alright, let's do
it all together. Here we go. Maybe I think they want move. Again. Maybe I think they want move. Okay. Let's put it all together. Question response. Let's sign it all. Sign with me. Here we go. They need help by house. Maybe. I think they want move. Right? They need help by house. Maybe. I think they won move. Okay. We did it all step-by-step,
sign by sign, question by question in
question in statement. Alright, if you
want more practice, repeat the video Fast-forward, use whatever section you need to get more practice
and improve. Alright.
96. Dialogue #2: Here is your dialogue. Today. I urge you to pause the video, work your way through
its sign by sign. I get some practice. Take your time
when you're ready. Push Play and we'll
sign it together. Alright, let's sign it together. Here we go. Well, first let's
see your mom hope keep weird couch. Don't English. Does your mom your mom thinking to keep
the weird couch or she hoping keep the weird
couch, something like that. Okay. Let's do it. Here we go. Your mom. Mom. Hope I will
do it. Good. One. Hope. Hope. Keep, keep, write K hand shapes. Keep weird, weird, weird. How do we assign couch? All right. Couch. Sit long
bench in her couch. And yes. No question. Right. So when you get to couch, raise know those eyebrows. Lean forward. Right here we go. Sign with me. Your mom. Hope. Keep weird couch. Your mom, hope keep weird couch. Alright, let's go
to the response. Here we go. Don't know. My dad prefer use chair, kinda changing the subject
there, but who cares? This is wonderful
practice, right? So in English, I don't know, my dad prefers
using the chair or my dad prefers to use
the chair. Alright. Now, don't know. You could sign. I don't know. Uh-huh. But since this is a dialogue between we're
assuming two people, if this person has this person, you can skip sign-in
I because it's kinda obvious you're
talking to yourself. Okay, here we go.
How do we assign it? Now? My, my dad, alright. Double-tap, dead. Prefer, prefer. Use, use, use. Use what? The chair. Chair. Chair. Okay. Let's do it altogether. Let's sign. Don't know. My dad
prefer use chair. Right. Again. Don't know my dad
prefer use chair. Okay, let's get to the
complete mini dialogue. Let's work our way through it, or go nice and slow speed up
Here we go. Sign with me. Your mom, hope. Keep weird. Couch. Don't know. My dad prefer use chair. Again. Your mom. Hope. Keep weird. Couch. My dad prefer use chair. Okay. We did it all step-by-step. Somebody signs
sentence by sentence. If you need more practice,
go back and repeat. Alright.
97. Dialogue #3: Okay, Here is your dialogue. I urge you to pause the video, work your way through it. You've learned all the signs. Take your time step-by-step. Okay, when you're ready, push
Play will sign it together. Alright, let's sign it together. Here we go. The first part, excuse me, your grandma complain why? In English? Something
like Excuse me. Why is your grandma complaining? Here we go. First sign
excuse me. How do we do it? Excuse me. Excuse me. Next up we have your your grandma
grandma. Grandma. Right? Complain. Complain,
complain. Why? Question, WH
question, word sign. Why? Burgos eyebrows y. Alright, let's put it all together. Nice and slow. Sign with me. Let's go sign by
sign. Here we go. Excuse me. Your grandma complain. Why? Alright, again, here we go. Excuse me. Your
grandma, complain. Why? Alright, Now you notice I'm not following my eyebrows
through the whole sentence. You could if you want to, if that feels more
comfortable and you're really upset or you want to
know something like that. Just make sure that at the
end when you're signing, why for those eyebrows. So through the rest
of the sentence, you could just be signing
irregular like this. And then at the end, why? Alright, let's do it again. Okay, let's get to the response. Here we go. We break her window. She strict. So an English Something
like We broke her window. She's kinda strict.
She's strict. Alright. Let's do it. We we break. Good one, break her. Alright. Let's say Grandma isn't here, but we want to refer to her. So what does put
her off here like an imaginary grandma and we'll go her write her her what? Her window. Window. Window. She Where do we put her we put her
up here to this side. Remember when we did her. So she just pointed at her. She strict. How do we sign strict. Strict. Okay. Let's sign it altogether. Nice and slope. Sign with me. We break her window. She strict. Alright. Again, we
break her window. She stripped. All right. We did the first
part and the second part. Let's put it together. Have a nice little
mini dialogue. Okay, so here we
go, sign by sign. Let's work through it. Sign with me. Let's do it. Excuse me. Your grandma complaint. Why? We break her window? She strict. Well, then here we go.
Let's do it again. Excuse me. Your grandma. Complain why? We break her window? She strict. Okay. Go back and do as much practice as you
need to feel comfortable. Alright, so we worked through
everything side-by-side, the question and the
response. Wonderful.
98. Learn | Common Things 1: Common things. Number one, you're about
to learn how to sign and understand backpack, ball, bicycle, boat, book, bottle, barks, broom, candle, car. Alright, We have a
separate video lesson for each one where you're
going to learn handshape, hand position and
motion for each sign. Then we'll do practice. After you've made
your way through all ten signs will
do some review? Yes. Okay. Here we go. Here's how we sign backpack. Okay. We're going to use
both hands and we're gonna use a hand shapes
from the alphabet. So fingers together, figures
down, thumbs alongside. Okay, now we're going to use the back part here of our hands, the a hand shapes and
we're just going to tap twice on our chest. Just imagine the backpack
straps are coming over and you're adjusting
them or you're holding them, they're gonna go
backpack. From the side. Backpack. Okay. Starting from the rest
position signed with me. Let's do it three times. Okay. We just talked about
how does sign backpack. Here's how to sign ball. Okay. Same hand shapes, both hands. Just pretend like you're
going to catch a ball. That's the handshape. We're going to put
them here and go 12. So we're going to tap
twice with the fingertips. Ball, Ball, make it round because balls are
round from the side. Ball. Okay. Rest position, signed with me. Let's do it three times. Okay. We just talked about
how to sign ball. Here's how to sign bicycle. Okay, we're going to
use S hand shapes from the alphabet like this, fingers together, fingers down, thumbs in front, or we say fist. We're going to put them down
here, palms facing down. And just like we're
pedaling a bicycle. Bicycle from the side. Bicycle. Okay. So starting from the rest
position, signed with me. Let's do it three times. Okay. We just talked about
how to sign bicycle. Here's how to sign boat. Okay, So we're gonna make
this boat hinge shape with their hands like this flight
hands kinda curve them down. So we have the
sides of the boat. Now we're just going to go one to kinda like he's
riding the waves. So we have both from the side. Okay. Starting from the rest
position, sign with me. Let's do it three times. Okay. We just talked
about how to sign both. Here's how to sign book. Okay. We're going to use flat hands, both hands, fingers
together, thumbs alongside. We're going to bring
them down here like the book is closed, open it, close it, open it. So we're gonna go
12. And we have book from the side. Book. Alright, starting from the
rest position, sign with me. Let's do it three times. Okay. We just talked
about how to sign book. Here's how to sign bottle. Okay. We're going to use both hands. Now I'm right-handed,
That's my dominant hand. My non-dominant hand. I'm going to make
a flat hand shape, fingers together,
thumb alongside. Put it here, that's
gonna be our platform with the dominant hand, my right hand for me, I'm gonna make a C handshape
from the alphabet, fingers together,
curve them down. It's a C. Alright, so we're gonna put it here
and we're just going to rise up kind of like we're on
the outside of the bottle. We're touching the
bottle and sliding up bottle from the sign. Bottle. Okay. Rest position, sign with me. Let's do it three times. Alright, we just talked
about how does sign bottle. Here's our design box. Okay, we're gonna use both
hands, flat hand shapes. Alright, that's how
we're going to start. We're going to do the sides of the box and then just
do the other side. So my dominant hand is
right, I'm right-handed. I'm gonna put that one on
the inside when it goes in. And the non-dominant hand for me it's gonna be on the outside. So altogether box. Box. Alright. From the side. Box. Okay. Rest position, sign with me. Let's do it three times. Okay. Now, this sign box
is the same sign for room, like living room, the
dining room, whatever. So it's room, but it's also Box. Now, the important thing to remember is that the
signs are the same, but the context, the
details will be different. All right, so just keep in mind, you only have a context. It's gonna be very clear
what the sign actually is. But here for our purposes
in this sign box. Okay. We just talked about
how to sign box. Here's our design, broom. Okay. Both hands, flat hand shapes like that bring us
together. Thumbs alongside. I'm right handed,
so non-dominant hand, I'm going to go like that. That's our platform
or our floor. Alright, dominant
handler is going to go like this one too. Like we're cleaning the floor
with the broom sweeping. We have room from the side. Broome. Okay. Rest position signed with me. Let's do it three times. Okay. We just talked
about how to sign broom. Here's how to sign candle. Okay, we're going
to use both hands, different hand shapes. First with your dominant hand, I'm right handed,
open hand like that. Flip it around Pompeii, CNN and we're just
going to wiggle their fingers like this is
the flame of the candle. With your non-dominant hand, make an index finger. I'm right-handed, so
my non-dominant hands, my left hand go like this. Now we have our flame. We're going to put the
tip of our index finger right on our wrist, right. Something like that,
and then wiggle. So we have candle. This is like, I guess the
wax portion of the candle. And this is the flame. Candle. From the side. Candle. Alright, starting from the
rest position, sign with me. Let's do it three times. Okay. We just talked about
how to sign candle. Here's how to sign car. Very straightforward. We're going to use both
hands seem hand shapes. When you say S is or fists, just pretend there's
a steering wheel here and you're grabbing it. And now you're just going
to steer a couple of times. Car from the side. Car. Okay. Starting from the rest
position, sign with me. Let's do it three times. Okay. We just talked
about how to sign car.
99. Review | Sign & Understand: Let's do sign-in review
for common things. Number one, in a moment, something will pop
up, you sign it. Before I do. Here we go. I need you to sign this. Bottle. Candle, backpack, boat, car, ball, bicycle, book, room. Barks. Okay. This was signing
review for common things. Number one. Let's do understanding review
for common things. Number one, in a moment, I will be signing. You. Take a look
at me, soak it up, try to figure out
what am I doing? What am I signing? Alright, here we go. Here's the first one. What am I signing? Boat, candle, box, backpack, car, bicycle, bottle, Ball, book, room. Okay. That was
understanding review for common things. Number one.
100. Learn | Common Things 2: Common things. Number two, you're about to
learn how to sign and understand
diaper, dictionary, elevator, fork, game, glass, homework, knife, lamp, magazine. Alright, separate video for
each one you're going to learn hand shape and
position hand motion. We'll do practice
and then review. After you've learned all
ten signs will do a review. Okay, here we go. Here's how we sign diaper. Okay. We're going to use
both hands seem hand shapes and
we're going to be making this kind of
pinching motion At, are a little bit
above our waste. Alright, so like this. Alright, so put them
here and go 12. Diaper. Kind of like your opinion on the diaper or at least the old
versions with the pins or her diaper from the sign. Diaper. Alright, starting from the
rest position, sign with me. Let's do diaper three times. Okay. We just talked about
how to sign diaper. Here's how to sign dictionary. Okay, we're going
to use both hands, different hand shapes. I'm right-handed, That's
my dominant hand. With my non-dominant hand, I'm going to make a flat hand, put it there and
tilted forward just a little bit with
the dominant hand, we're going to make the
letter D like D and dictionary d. How to make
a D will go like this. All the fingers together, take the last three fingers, take the tips and touch your
thumb. It looks like a D. Okay. We're going to use
the tips of the fingers and we're
just gonna go 12. Dictionary. Keep
the index finger pointing pretty
much straight up. Dictionary from the side. Dictionary. Okay, Starting from
the rest position, psi in with me. Let's do it three times. Okay? We just talked about
how to sign dictionary. Here's how we sign elevator. Okay, we're going to use both hands, different hand shapes. I'm right-handed, That's
my dominant hand. My non-dominant hand. I'm just going to
make a flat hand, fingers together,
thumb alongside, leave it hanging out there for a moment with my dominant
hand them and make the letter e from the
alphabet. How to make an E? Well, go like this
fingers together. Fellman front, now curved
down the tips of the fingers. Now I signed an E like this, where there's a gap between the tips of the
fingers and the thumb. Many people sign it that way. I grew up in the deaf
community sine of e like this. You'll also notice depending on where you grew up and
what part of the country. Many people sign an E like this, where the tips of the
fingers come down and touch the thumb to be consistent. I'll be signing E like this
throughout the course. But if you want to
sign it like this, I say go nuts. Okay, so we have
our E handshape. We're going to use
the side of the hand here and we're going to
start down here and do it. An elevator does up, down. So we have elevator from the side. Elevator. Okay. Starting from the rest
position, sign with me. Let's do it three times. All right, Another
quick version for elevator that you may
see is to go like this flat hand and put like
this a person on topic, they're standing there and
then riding up the elevator. To be consistent
throughout this course, I'll be signing the
elevator like this. Okay, we just talked about
how to sign elevator. Here's how we sign pork. Okay. Both hands, different
hand shapes. I'm right-handed,
non-dominant hand, the flat hand fingers,
scalar thumb alongside. Put it down there, palm facing up. Dominant hand. We're going to make a
W from the alphabet. How do you make a
W star like this? Take your thumb and just
pin down your pinky finger. These three fingers pointing up, we're going to use
them like they're our fork and we're going
to stick our hand. We're gonna do it twice. Fork. Like these are the times I think they're
called of the fork. Fork. From the side. Fork. Okay. Starting from the rest
position, sign with me. Let's do it three times. Okay, We just talked
about how to sign fork. Here's how does sign game. Okay, both hands
shapes are the same. We're going to use the letter
a from the alphabet A's. Now we're going to
put them towards each other and we're just
going to come in twice, 12 like two opponents and they're going
head-to-head game, game from the side game. Okay. Starting from the rest
position, signed with me. Here we go three times. Game. Okay. We just talked about
how to sign game. Here's how to sign glass. Okay, use your dominant
hand. I'm right handed. We're going to make
the hand shape of the letter X from the alphabet. How do you make an x?
Well, go like this. Just stick up your index finger, curve it down like your
Captain Hook are great. That is an x. Okay. Take the tip of
the index finger and tap twice on your pearly
whites on your teeth. So we have glass. Right? You don't want to
actually touch your teeth, even dig deeper in your fingers
in the mud or something. Just get close. All right, so smile and kind
of like you're tapping on the window glass from the side. Glass. Starting from the rest position. Sign with me. Let's sign glass three times. Okay. We just talked
about how to sign glass. Here's how to assign homework. Okay, we have a
compound sign here, so we're gonna be bringing
two signs together. The sign for home and work. Okay, so let's talk
about the sign for home. Take your dominant hand, squish it all together.
We're gonna go 12. Alright, home. That's assigned for home. How about work? Here's the sign for work. We're going to use both
hands S hand shapes, non-dominant hand down below, dominant hand, tap twice on top. So together you would
have home work. Now you're thinking because
I know you're perceptive. When I first signed it, I introduced the sign. I didn't tap twice. I would say yes, you're right. Now. Sign language is very efficient and has found ways to just communicate what it needs to
be done most efficiently, what the most efficient
way possible. Okay, So instead of
doing two tabs for home, we're just gonna do one. Instead of doing
two tabs for work, we're just gonna do one. Alright, so altogether it
ends up being home work. Alright, quicker than alright. If you sign it with
the full signs, you'll still be understood. Just keep in mind
is very common and more efficient to
just go like this. Homework from the side. Homework. Okay, Starting from the rest
position, sign with me. Let's do it three times. Okay. We just talked about
how to sign homework. Here's how we sign knife. Okay, we're going
to use the same handshape or both hands. Hs from the alphabet. How do you make an H
will go like this. Fingers together, last two down, thumb just precedents. Your ring finger. Alright, go like that. That is an 88. So we're going to have two
H's, non-dominant hand. I'm right handed, so
my non-dominant hand, the H is going to
put it right there. Dominant hand. You
can use that H and just go off the tip twice. Knife. Night. Kinda pretend like you're
holding a carrot and you're slicing off the tip of it
or something or shaving it. Knife, peeling attack. We wouldn't shave a peeling the carrot knife from the side. Knife. Okay. Rest position,
sign with me. Let's do it three times. Okay. We just talked
about how to sign knife. Here's how to sign
lamp. That's it. Use your dominant hand.
I'm right handed. We're going to start like
this with the fingertips together and just
let the light shine. Like your arm is a
lamppost and you just blow lamp from the side. Lamp starting from the rest
position signed with me. Let's do it three times. Okay. We just talked
about how to sign lamp. Here's our design magazine. Okay, we're going
to use both hands, different hand shapes.
I'm right handed. So my non-dominant hand just
going to make a flat hand, fingers together,
thumb alongside. I'm going to turn it here
so the palms facing towards me now with my dominant
hand them and make the G, the G handshape
from the alphabet. How to make a G? Well,
let's say you're trying to show someone how thick the
book was that you're reading. It's this thick, I swear. Well, that is a G handshape
when we turn it forward. Alright. So we're going to
leave it like this. We're going to start
down here on one side, index finger on the other
side, and we're gonna go 12. So we have magazine from the side. Magazine. Okay. Starting from the rest
position, sign with me. Let's do it three times. Okay. We just talked about
how does Sign Magazine.
101. Review | Sign & Understand: Let's do a signing review
for common things. Number two, time
for you to sign. Something is going to pop up. You sign it before I do, right, I need you to sign this game. Elevator, magazine, diaper, lamp, fork, glass, Homework, dictionary, knife. And that was signing review
for common things number two. Let's do understanding
review for common things. Number two. All right, so watch me absorb what I'm signing and just shout out
loud what I'm signing. Right here we go.
What am I signing? Magazine, dictionary, elevator, limp, glass, diaper, knife. Again. 4k homework. Okay, that was understanding review for common
things number two.
102. Learn | Common Things 3: Common things. Number three, you're about to learn how
to sign and understand. Microwave, motorcycle,
newspaper, notebook, paper, pencil, plate,
printer, sailboat, scissors. Okay, for each sign, we have a separate video. You're going to learn handshape, hand position and motion and do practice after we've done, all ten signs will have review. Alright, here we go.
Let's get started. Here's how to sign microwave. Okay. We're going to use both hands. You're going to start with
like loose fist, right? So tight fists, kind
of a loose fist. We're going to put
them down here, palms facing in and
we're just gonna go we're just going to open up our fingers
and then go back in. Kind of like you just
nicked something in the microwave? From the side. Microwave. Okay. Rest position
signed with me. Let's do it three times. Okay. We just talked about
how to sign microwave. Here's how to sign motorcycle. Alright, pretty straightforward. You're grabbing the
handles of the motorcycle. You're giving it some
throttle room room, right. So we have motorcycle
from the side. Motorcycle starting from the
rest position, sign with me. Let's do motorcycle three times. Okay. We just talked about
how to sign motorcycle. Here's our design newspaper. Okay. We're going to use both
hands, different hand shapes. I'm right-handed,
non-dominant hand for me, my left hand going to
make a flat hand shape. Fingers, the other thumb
alongside, put it down here. That's our platform with
their dominant hand, but it's gonna be making
a pinching motion with their thumb and
index finger like this. Put your thumb down
there and go 12. Newspaper from the side. Newspaper starting from
the rest position. Sign with me. Let's do it three
times. Three times. Okay, now, keep in mind this is the same sign for printer. Like you know, you print
papers at home or whatever. Your printer, computer printer. Now you're thinking, how will I know newspaper or printer? Well, very rare,
rarely do we just sign or save single
words without a context. A context is key, so newspaper or printer, depending on the context, if the person is in front of
their computer and they're pointing out and they're
frustrated with their printer. They probably mean printer
and not newspaper. If they're holding a
newspaper and like, oh my goodness, newspaper,
we need context. Right now. We have a picture, we know what it is.
It's newspaper. Okay. We just talked about
how to sign newspaper. Here's the sign for notebook. Okay, So this is like
a compound sign, two signs being molded together. So the first part note
is based on, Right. Okay. So non-dominant hand make that platform their
dominant hand just pinch your thumb and your index
finger together like a mini pencil and you're writing right here, we're
just gonna go quick. Note, alright, Now, book the sign all by
itself would be like this. With two flat hands, put them down there
and go 12 per book. But here it's a compound sign in ASL has ways to be
very efficient. So we're just gonna
go note book, right? So we're just gonna go once. Now if you went like
this and you did the whole thing and
then you went book, you'd be understood if you want an efficient way
and very common way to do it, you just go like this. So we have notebook
from the side. Notebook. Okay. Rest position, sign with me. Let's do it three times. Okay. We just talked about
how to sign notebook. Here's our design paper. Okay, we're going
to use both hands. Just use flat hands. You don't have to be rigid. Just kinda loose
flat hands there. I'm right-handed,
non-dominant handwrite their dominant hand on top. We're just going to
bounce on top twice. And we're gonna do a
little bit sideways. We're not going
straight up and down. We're going sideways. Paper from the side. Paper Starting from
the rest position. Sign with me. Let's do it three times. Okay. Now, keep in mind, we don't want to go straight up and down because that gets closer to the sign for school. Alright, hands like that. School. We don't want that
here. We want paper. So close up those fingers, flat hands and go. We have paper. Okay, We just talked
about how to sign paper. Here's how to sign pencil. Okay, pretty straightforward.
I'm right handed, so my non-dominant hand
and make a flat hand, put it down there and that's
my notebook, my paper, whatever I'm writing on
with my dominant hand, just going to pinch
together my thumb and my index finger and just pretend I'm writing principle. Alright, obscene people
would go like this to be consistent
throughout this course. We'll just go like
this from the side. Pencil. Okay, Starting from the rest
position, sign with me. Let's do it three times. Now this is basically, this is the same sign for writing your writing
something down. But in the context, if you're asking for
something and you say this, they're going to
understand is pencil not like writing, right? This is the tool, so we need context and here we
can see a picture. What is it? Well, it's a pencil. Okay. We just talked about
how to sign pencil. Here's how to assign plate. Okay, we're going
to use both hands and shapes are the same. They're like l's but kinda rounded because you want to make a circular shape there for a
plate, like a round plate. And we're just going to
place it in front of us. Plate from the side. Plate, starting from
the rest position psi. And with me Let's
do it three times. Okay, We just talked about
how does sign plate. Here's how to sign printer. Okay. We're going to use both hands. I'm right-handed, non-dominant
hand, just flat hand, their palm facing
up, dominant hand. We're going to use our
index finger and our thumb. Put the thumb down
touching the open hand and go 12 printer. From the sign printer. Okay, Starting from the rest
position, sign with me. Let's do it three times. Alright, now, keep in mind, this is the same exact
sign for newspaper. And you're thinking,
well, how do I know printer or newspaper? The magical word is context. Context. Now right here
we have a picture. It's kinda obvious
we're gonna be talking about a printer, right? Someone's at their computer, having their papers stuck in
the printer is going to be pretty easy to tell
that it's printer there holding the newspaper,
newspapers everywhere. Alright, so use contexts to finger figure out
what this sign is. Very rarely, even
in spoken English, does anyone Come, come up
to you and just say like, pi, expect you to
know if they're talking about pilot to eat or the mathematical number pi 3.14. So it's similar in sign
language is very rare. So he's going to walk up
to you out of the blue and go, you know, if I'm saying printer
or newspaper, now, very, very unlikely, you're going to have contexts. Okay? We just talked about
how to sign printer. Here's how to assign sailboat. Okay, we're going
to use both hands. The hand shapes were actually
the same, like this. Flat hands, fingers together, thumbs alongside, notice
Ben them down a little bit. Alright, so I'm right handed. So I'm gonna put my first
one there, palm facing in. The second one, I'm going to wrap it around and behind it. Alright, so we have the sale being pushed by the wind, right? So we're gonna go
like this sailboat. Sail boat. There's two nudges
forward from the side. Sailboat. Okay. Starting from the rest
position, sign with me. Let's do it three times. Okay. We just talked about
how does sign sailboat? Here's how to sign scissors. Very straightforward. Okay, use your dominant
hand. I'm right handed. We're just going to basically
use these two fingers here. Alright, that's it. We're gonna put it here
so the palms facing in and just make
a cutting motion. Scissors from the side. Scissors started from
the rest position. Sign with me. Let's do it three times. Okay. We just talked about
how to sign scissors.
103. Review | Sign & Understand: Let's do is signing
review for common things. Number three,
alright, in a moment, but something's going to pop up. You sign it before I do. Alright, I need you
to sign this paper. Newspaper. Alright, so
same sign for a printer, but we know it's a newspaper because there's a
newspaper right there. Newspaper. Scissors, motorcycle, notebook, pencil, printer. Alright, again, same
exact sign for newspaper, but it's obvious it's a printer. So we'll just do printer. And we know it's a printer
because of this context. Plate. Sailboat. Microwave. Okay. This was signing review for common
things number three. Let's do understanding review for common things number three, alright, so take a look at me. I'll be signing, absorbed
what I'm doing and shout out loud what I'm
signing. Okay, here we go. First one, what am I signing? Notebook. Scissors, motorcycle, sailboat, plate, pencil, microwave, newspaper. If you said printer, you would also be
right because all you saw was assigned by itself. There was no context. But now we have
context or newspaper, right? We just did newspapers, so it must be printer. Now it's obvious because we have a picture printer paper. Okay, that was understanding review for common
things. Number three.
104. Learn | Common Things 4: Common things. Number four, you're about to learn
how to sign and understand sleeping bag, spoon, telephone, test, truck, TV, TV remote, umbrella,
vacuum, wet wipes. Alright, We have a separate
lesson for each one. You're going to learn handshape, pan position and motion. Do practice after we've done all the signs, will do a review. Alright. Sounds
good. Let's do it. Here's how we signed
sleeping bag. Okay, so we have two parts. First we're just gonna go sleep. Then we're gonna go be a G. What is fingerspell bag? Nice, short, sweet little word. It's very common just
to finger spell those. Okay, So the first part, sleep. Dominant hand, I'm
right handed like this. Put it round over your
eyes. Just come down. Sleep. Okay, and
then we're going to spell bag B, a, G. Big. So altogether we have sleep bag. In other words, sleeping bag. From the side. Sleeping bag. Okay. Starting from the rest
position, sign with me. Let's do it three times. Okay. We just talked about
how to sign sleeping bag. Here's how to sign spoon. Okay. We're going to
use both hands and the same handshape
for both hands. Use from the alphabet. How do you make a u?
Well, go like this. Fingers altogether. Last two fingers down, thumb on top of the ring finger. That's a you don't spread
the fingers are that becomes a V. We want
you give them together. So we have to use, alright, now we're going
to turn them around. I'm right handed, so
my non-dominant hand, I'm going to put it about here. Dominant hand, going
to put it right here. Just gonna go like this one too. Alright, so the
palms are facing in dominant hand is the one on
top coming to your mouth? Twice? Spoon. From the side. Spoon. Okay. Starting from the rest
position, sign with me. Let's do it three times. Okay. We just talked
about how to sign spoon. Here's how we sign telephone. Really straightforward. Use your dominant hand. I'm right handed.
We're going to make the y handshape
from the alphabet. How do we do it? Like this? Middle three fingers down
together. There we go. Now I'll put it here
like this is the phone, the receiver, the
head piece, whatever. And we're just gonna go 12
telephone from the side. Telephone. Alright,
starting from the rest position, sign with me. Let's do it three times. Okay. We just talked about
how to sign telephone. Here's how to sign test. Okay. We're going to use both
hands and the hands are just gonna be
mirroring each other. So we're going to
start like this. Alright, index finger
is pointing up. We're going to hook
down, come down, bend those index fingers, and then come down
to flat hands. And the flat hands
are facing palm down. So we have Alright, so we go 12. Test from the sign test. Okay, Starting from the rest
position, sign with me. Let's do it three times. Okay. We just talked about
how to sign test. Here's how we sign truck. That's right. We're just
going to finger spell it. This is a sign for
finger spelling. So here we go. Let's
get some practice. T, r, u, c, k. Let's write t. Are you see k, the t, like that? We're just having one
knuckle on the side here. Go over to knuckles 12, that's n equals m. We
don't want that one. T are distinct arms hoping for something to
hold it in our, alright. So we have t are right
now you like this. You like their fingers together, two down, thumb on top
of the ring finger, you see very straightforward
C. So we have t, r, u, c, and k. K. How do you make a k like this? Alright, Last two fingers down. Keep these spread apart. Thumb pressing against the inside part of
our middle finger, k. So we have truck. Truck. All right.
The more practice, more fluid you
become and it just flows truck from the side. Truck. Okay. Starting from the rest
position, sign with me. Let's go sign it. Fingerspell it three times. Okay. We just talked about
how does psi and how to finger spell truck. Here's how we sign TV. That did T from the alphabet
and V, V for victory. So t like this, right? There's our t and
then we have v, so t v from sine t v, right, starting from
the rest position. So in with me, Let's do it three times. Okay. We just talked
about how to sign TV. Here's how to sign TV remote. Pretty straightforward. We're just going
to finger spell t and v. And now we
just go like this, like we're pressing the
button on the remote, right? So altogether we have T
V remote from the sign, TV remote. Starting from the rest
position sign with me. Let's do it three times. Okay. We just talked about
how to sign TV remote. Here's how to sign umbrella. Pretty straightforward, right? The hand shapes are the same. We're going to use S
is from the alphabet. We could also say fists. Alright, now I'm right handed, so I want to take my
non-dominant hand, non-dominant fist, put it right down there, I'm
going to leave it there. Dominant hand is gonna be on
top and we're just going to slide up like we're
opening Umbrella. Umbrella from the side. Umbrella. Okay. Starting from the rest position, sign with me. Let's do it three times. Okay. We just talked about
how does sign umbrella. Here's how to sign vacuum. Okay, Couple of
things going on here. First, let's start
with the hand shapes, different hand shapes.
I'm right handed. My non-dominant hand, left hand, right gonna do a flat hand down there that's
like the floor, the platform with
your dominant hand. We're going to make
a C, but we're going to squish it way down. Alright, so it ends up
being something like that. Okay, Now this is our vacuum
and we're gonna go 12, like we're vacuuming
something up on the floor. At the same time, make this motion or
this facial expression, like air is being
going back-and-forth. Vacuum. From the side. Vacuum. Okay. Starting from the rest position, sign with me. Let's do it three times. Okay. We just talked
about how to sign vacuum. Here's how to sign wet wipes. Okay, we're gonna
do two parts here. First, we're going to go wet and then we're gonna do wipes. Alright, so let's
start with wet. When you use both
hands, start like this. And shapes like that. Just kinda loose there but closing up a bit
and just bring them down and then close them up so your fingertips are
all touching together. So we have wet wet wipes. We're going to use
a hand shapes. Okay? First one
non-dominant hand is put it right there. Your dominant hand. We're going to open
that AC it for just a moment so we can wipe underneath and then pull and close and go
back to the a shape. So we have wipes. Wipes. So altogether we
have wet wipes. Wet wipes. Wet wipes from the side. Wet wipes. Okay. Starting from the rest
position, sign with me. Let's do it three times. Okay. We just talked about
how to sign wet wipes.
105. Review | Sign & Understand: Let's do is signing review
for common things number for something it's
going to pop up. Your job is to sign
it before I do. Alright, Test Your
Skills. Here we go. Let's do review. Go
ahead and assign this. Wet wipes, sleeping bag, umbrella, telephone, truck, test, vacuum, spoon, TV, TV remote. Okay. This was signing review for common things number four. Let's do understanding review for common things number four. So take a look at me, absorb what I'm doing and shout out loud when
you understand. So here we go. What am I signing? Umbrella, sleeping bag, TV, remote, telephone, vacuum, wet wipes, test, spoon, truck, TV. Okay. That was
understanding review for common things. Number four.
108. Dialogue #1: Okay, Here's our dialogue. Take a moment,
pause the video if you want to work
through it on your own. And when you're
ready, push Play, and we'll assign together. Alright, here we go. Here's the first part. Candle. Andy, want how many? Alright, so an English, how many candles does Andy want? Here we go. How do we sign candle? That's right. Candle. And going to
finger spell a, N D, Y. And how do we sign want? It's nice. Verb, useful verb. Want. How many questions?
Sign, how do we do it? It's right. How many? How many? Same sign as how much. But here we're not
looking for a price. We're looking for how
many candles, how many? For those eyebrows? Alright, let's do it altogether. Sign with me nice and slow. Candle. And want how many? Candle? And want how many? Alright, that's the first part. Let's go to the response. Don't know. I look for sleeping bag. Alright, forget
about your candles. Let's focus on my sleeping bag. So an English, I don't know. I'm I'm looking for
a sleeping bag. So an ASL here we're going to go and go straight to don't know. It's pretty obvious. Let's say you're the
ones signing with me. So it's a little bit redundant
if I say I don't know, you could now that's
a possibility or you can just go straight
away to don't know. Alright? Alright. So I already understood in the
context that it's me. I'm the one saying I don't know. So here we go.
I'll do we assign, don't know, kinda
give you the answer. Let's write. Don't know. Alright, shake their head. No, no. I, I. How do we sign the verb? Look for look for
your searching. Look for sleeping
bag. How do we do it? Sleeping bag. Alright, let's
sign. There we go. I don't know. I look for sleeping bag. Don't know. I look for sleeping bag. Okay. So we have both
sides imagining there and some shopping store or
something like that. You're talking about
what they're gonna do and different focus. Alright, step-by-step, sign
with me nice and slow. Candle. And want. How many? Don't know? I look for sleeping bag. Again. Let's do it. Candle. Andy. Want Many know, I look for sleeping bag. Okay. We did it
all step-by-step. We worked our way through it. We want to go back, repeat, do it again, get more practice? Why not?
109. Dialogue #2: Here's our dialogue. Feel free to pause the video,
work your way through it. The sign down there
for more case you're wondering like this, more like dead or you
go double up to you. Alright, so work
your way through it. Pause the video, push Play when you're ready
to sign it with me. We'll do it together. Alright, here we go.
First part, magazine. You have how many?
Write in English? How many magazines do you have? Alright, so how do we do it? Step-by-step? Magazine. Magazine. Magazine. Now we're talking
about magazines here, but you could be
talking about anything, TVs, books, sailboats, anything. You pick your vocabulary
word. Alright, here we go. You, you have the verb. How do we do it? Useful verb, have, have. How many? Furloughs, zeros, how many? Okay, Let's do the full thing. Sine with me. Magazine. You have how many? Magazine you have? How many? Okay, Let's do the second part. A lot. Tom Beth won by more. So an English, Something like
a lot, a lot of magazines. Tom and Beth wanted to buy more. Okay. Let's take a look at it. A lot. Do you remember
how to assign it? A lot? Depending on how many you
can put it on your face. But just like a regular allot
where it's like boatloads, loss, whatever fits
the situation. Okay. We have Tom, Tom and
we have Beth. Beth. So we're gonna be using a
place maybe here for Tom. Then we're going to move
over here for Beth. Tried to show different to different people,
to individuals. Want Halloween, one
useful sign, want buy. How do we do it?
Right? Right. By like you're putting the money in your you're purchasing something. By more, you remember more. Here we go altogether. Sign with me a lot. Tom, Beth. Want buy more? Again. Here we go a lot. Tom, Beth, want buy more? Okay. Let's put it all together. Question in response. Let's work our way through
it. Nice and slow. Sign with me. Magazine. You have how many? A lot. Tom, Beth. One. Buy more. Again. Here we go. Let's do it. Magazine. You have how many? A lot. Tom, Beth won by more. Alright. Okay. We did it step-by-step, sign by sign practice. You want to do more practice? I say That's fabulous.
110. Dialogue #3: Here is our dialogue. It's extra juicy bit has two types of questions
in the first part. Alright, feel free
to pause the video, work your way through its
sign by sign. Go-to leisure. Take your time. When
you're ready, push Play. And by golly, we're going
to assign it together. Alright? Alright, let's sign it together. Okay, So an English,
something like, what color is Tories backpack, you know, ASL Tory backpack. What color? You know, in tin with my
eyebrows there. Okay. Tory, how do we do it? Fingerspell? Tory. Tory. Are we do backpack?
Backpack. Backpack. Okay. What color? Bunch of things rolled into one there you got
a question mark. We got color, we've
got what how do we communicate that the
most efficient way. That's right. What
color, what color? Now if we did this by itself
just to sign for color, which is the sign for color. But when we furloughs eyebrows, it suddenly transforms
it into what color? Because this is a
WH question word questions sign what color? All right. You you how do
we say no? It's right. No. Now we get to the second
question. Alright. Do you know? Yes, no question. Raised eyebrows. Alright. So once you get to know,
raise those eyebrows. Inquisitive, look like you're
peeking over the fence. Okay, This is really cool. So the first part, you have a WH question,
furloughs eyebrows. Second part, like a second
quick fire question. Do you know? Uh-huh. Okay. So let's do it. Signed with me. Tori, backpack. What color? You know, putting down the
price today, you know? Uh-huh. Alright, again, here we go. Tory. Backpack. What color? You know? That was the first part.
Let's get to the response. Yes. No. Her backpack black, blue. So an English Something
like Yeah. Yes. I know her backpack
backpack is black and blue. Okay. So let's go step-by-step. Yes. How do we do it? Yes. That's right. Yes. No, Uh-huh. Now in English we say, I know, Alright, here we can be
efficient in sign language. You know that you're
signing with me. I've already answered yes. You know, I'm gonna
give you my response so I can just go no. No. Like I'm aware of it. No. I don't have to sign
if you want to. You can, but
efficient not to her. How do we do it and
see what was her name? It was tori, Right? Yes, Tori. So she's not here, but we're going to
sign about her. How do we indicate her? Refer to her with all
her being present, but we want the
possessive pronoun hurt. That's right. Her just one motion
per off to the side. Like an imaginary
Tory, her backpack. Backpack. How do we assign black? Color? Black. Black and blue. How do we assign blue? Blue, right? Okay, so at the end there
it ends black, blue. How are we going to
differentiate black and blue? Hint, what does my body doing is you're gonna
go black and blue. Or you could do black
here in blue over here. Either way, we're
just trying to show two different independent
concepts, right? Black, blue. Okay, Let's do it all together. Here we go. Yes. No. That sounds strange. As
you might guess, no. But we're not doing no
negative is like, I know. Alright. Yes. No. Her backpack black blue. Right? Again, sign in with me. Yes. No. Her backpack. Black, blue. Okay. By golly, we're going to
join this dialogue together. Let's do the whole
thing step-by-step, sign by sign. Sign with me. Here we go. Tory. Backpack. What color? You know? Yes. No. Her backpack. Black, blue. How cool is that? Alright, we've got statements. We've got two kinds of questions all in this little
situation here. Fabulous. Okay. Let's
do it again. Again. Tory. Backpack, what color? You know? Yes. No. Her backpack. Black, blue. Alright. We did it all
step-by-step, sign by sign. Lots of practice. You
want to practice more. I say that is fan tabulates.
111. Learn | Place Signs 1: Play signs. Number one, you're about to
learn how to sign and understand airport, bakery, bank, bar, bookstore, building, bus station, business,
cafe, car dealership. Okay. We have a separate
video lesson for each one. It needs video. You're going to
learn hand shape, Position, hand motion
for each sign. We'll do practice
after you've learned all ten signs will have review. Alright, here we go. Here's how to sign airport. Okay, use your dominant hand. I'm right handed.
We're just going to make the I love you. Handshape. Are you familiar with
that? Well, go like this. Middle two fingers
put them down. That's the I love you handshape. Okay. We're going to use that as our plane because it
fits for airport. So take your plane and
just go two times 12, like it's about to fly or it
is flying from the airport. So we have Airport
from the side. Airport. Okay. Starting from the rest
position, sign with me. Let's do it three times. Okay. We just talked about
how to sign airport. Here's how we sign bakery. Okay. You might notice
the two parts sign. Literally we have bake store. Altogether, we have bakery. Okay, let's talk about
the hand shapes. The first part for bake, we're just going
to use flat hands. Alright? No, I'm right handed. So my non-dominant hand, I'm
going to put it right there. That's the oven and I'm
going to stick the bread in. The second part store
will go like that. Hand shapes are just like this. Go like this, bring them down. Alright, go like this and go 12. So altogether we
have bake store, which is bakery. From the side. Bakery. Okay. Starting from
the rest position, sign in with me. Let's do it three times. Okay. We just talked
about how to sign bakery. Here's how we sign bank. That's right. You guessed. We're going to finger spell it. So we're just gonna
go be a n k bank. Bank. From the sign bank. Okay. Starting from the rest
position, sign with me. Let's do it three times. Okay. We just talked about
how does sign finger spell? Think. Here's how we sign bar. Okay. The handshape is, you can say thumbs up or
like a loose a, Alright, like a regular
array is like this down DM tight to the sign. You can let your thumb
be sluice a bit. Now it's like a
bottle at the bar. Bar from the side. Like you're taking two quick
swings from the bottle bar. Okay. Starting from the rest
position, sign with me. Let's do it three times. Okay. We just talked
about how to sign bar. Here's how we sign bookstore. Okay. Two-part sign. First,
we're gonna do book and then we're
gonna do store. Alright? Now if you
take the sign for book all by itself outside
of bookstore, it would be two
times 12. Alright. Hand shapes like that
come down to form the sides of the book one too. But here we have a compound sign and we're just going
to open it once. Okay, that's the
first part book. And the second part is store. Right hand shapes restore, go like this fingers together. Now let's bring them down
and touch the thumb. Pointed tips down
and go one to store. So altogether we have book
store bookstore from the side. Bookstore. Okay. Starting from the rest position, sign with me. Let's do it three times. Okay. We just talked about
how to sign bookstore. Here's how we sign building. Okay, we're going to use both
hands, same hand shapes. Start with plaid
hands like that. Take the fingers and just
bring them down a bit. Okay, Now what we're
gonna do is we're going to put layer on layer on layer, like a building is rising up. Building. Alright, so it's just 123. And as you build, move
your hands higher. Building from the sign building. Okay. Starting from the rest
position, sign with me. Let's do it three times. Okay. We just talked about
how to sign building. Here's how to sign by station. Okay. So literally we're
going to finger spell bus, BUS, then we're going
to assign area. Okay, so the first
part bus to school, B, U S, right now area. This is the handshape
just to open, spread apart hand put it there, palm facing down
and go like this. Kinda like your policy and your waxing off the
top of a table. So we have bus station
from the side. Bus station. Okay. Rest
position, sign with me. Let's do it three times. Okay. We just talked about
how to sign bus station. Here's how we sign business. Okay, the hand
shapes are the same. We're going to use
B handshape through both hands, like
in the alphabet. Go like this, brings
together thumbs in front. Okay, Now I'm right handed, so my non-dominant hand, I'm going to put it
right down there, palm facing down. Dominant hand. I'm going use this part,
the bottom part of the hand and just go one to business from the side. Business. Okay. Just a slow kinda
Archean movement there. Rest, position, sign with me. Let's do business three times. Okay. We just talked about
how to sign business. Here's how we sign cafe. That's right. We're
just going to finger spell it. Fingerspell. See a f e cafe from the side. Cafe. Okay. Starting from the rest
position, sign with me. Let's do it three times. Okay. We just talked about
how to sign Cafe. Here's how to sign
car dealership. Alright, so literally it's
going to be car store. Makes sense, right? If the first part for car, we're just gonna make
fists or S hand shapes. Pretend there's a steering
wheel here, grab it, go a couple of times
like this car. The second part for store,
we're going to go like this. Handshape. Fingers the
other bring them down and go 12 tips of the
fingers pointing down. Store. So altogether we have car store. In other words, car
dealership. From the side. Car dealership. Okay. Starting from the rest
position, sign with me. Let's do it three times. Okay. We just talked about
how to sign car dealership.
112. Review | Sign & Understand: Let's do signing practice. Replace sines number one. Okay, somebody's
going to pop up. You sign it before I sign it. Alright, here we go. I
need you to sign this. Bank, bakery, bus station, airport, bookstore, business, car dealership, cafe, bar, Building. Okay. This was signing review for a place
signs, number one. Let's do understanding review
for play signs, number one. Okay, so take a look at me. I'm gonna be doing something. You try to figure out
what I'm signing. Just shout it out loud. Alright, What am I signing? Airport, bakery, building, bus station, car dealership, bookstore, cafe, bank, business bar. Okay. This was understanding review for play
signs. Number one.
113. Learn | Place Signs 2: Play signs. Number two, you're about to
learn how to sign and understand church, clinic, clothing store,
coffee shop, college, company, courthouse, downtown,
fire station florist. Okay. We have a separate video for each one for each sign, you're going to learn hand shape and position hand motion. And we'll do practice
after you've learned all of these ten
signs will do review. Alright, here we go. Here is the sign for church. Alright, we're going
to use both hands, different hand shapes. I'm right handed with
my non-dominant hand. I'm just going to
make an S or we can say a fist, put it down there. So the back of the
business facing up with our dominant hand, we're going to make us see
like from the alphabet. Alright, reduce the bottom
part of the sea and just tap twice on the
back of our fist. So we have Church.
From the sign. Church. Okay. Starting from
the rest position. Sign with me. Let's
do it three times. Okay. We just talked
about how to sign church. Here's how we sign clinic. Okay. Use your dominant
hand. I'm right handed. The handshape is a letter c. C from the alphabet
like C for clinic. Okay, we're gonna take that c
and we're going to pretend, you know how the Red Cross
they have a little plus sign, the cross sign right on the shoulder or
whatever, the red sign. We're going to
trace that with RC. So we're gonna go vertical down and then
horizontally across. So we have clinic and we're just using
this part of the thumb, the outside part of the thumb
as we trace their clinic. From the sign clinic. Okay. Starting from the rest
position, sign with me. Let's do it three times. Okay. We just talked
about how to sign clinic. Here's our design
clothing store. Okay, two-part sign
literally we're going to assign clothing and store. Alright, so for
clothing, go like this, we're going to use our thumbs, just the tips of our thumbs. And we're gonna go
12 down our chest. Alright, just touching
with the tips of our thumbs, clothing. The second part is
store hand shapes, fingers together, bring
them down here like that. And we're gonna go 12. Tips of the fingers are
pointing down 12. So altogether we
have clothing store. Clothing store. From the side. Clothing store. Okay. Starting from the rest
position, sign with me. Let's do it three times. Okay. We just talked about how
to sign clothing store. Here's how to sign coffee shop. Okay, two-part sign,
literally we're going to have coffee store, right in this case, coffee shop. So how did we do coffee? Well, make two Ss
with your hands. I'm right-handed,
non-dominant hand, write down their dominant
hand on top and now just grind like a coffee grinder. Yes, coffee. Now we need the sign for store. Alright, fingers
together, come down, touching like that.
Tips facing down. Go one to store. So altogether we
have coffee store, or in this case we
have coffee shop. From the side. Coffee shop. Okay. Starting from the rest
position, sign with me. Let's do it three times. Okay, We just talked about
how to sign coffee shop. Here's how we sign college. Okay. We're going to use both hands. Hand shapes are flat hands, fingers together,
thumbs alongside. I'm right-handed,
non-dominant hand. We're gonna put it down
there, palm facing up. That's our platform.
Dominant hand. We're going to go like this. We're gonna go tap up
and then a circle. So altogether we have college. College right now. Think if you're, if you know the sign for school
is like this. All right, open hand school. Now colleges, higher education. So flat hands this
time I'm gonna go bounce up and around. College from the side. College. Okay. Starting from the rest
position, sign with me. Let's do it three times. Okay. We just talked about
how to sign college. Here's how we sign
company. That's it. All we're gonna do is sine C, o company, from the side. Company. Alright, starting from the
rest position, sign with me. Let's do it three times. Okay. We just talked
about how does sign company here's how
we sign Courthouse. We're going to have
a two parts sign. We're going to have
court and house. Makes sense. The
first part, court. We're going to use f hand
shapes for our hands like this, index finger, thumbs together. We're going to put
them down here. They're facing each other. Now we're just going to
go up and down together, but side-to-side alternating
like this scales of justice. Court chord. Now we have house. The hand shapes our bees
from the alphabet like this, fingers together, thumbs in
front we have two b's, right? We're going to bring
them together at the fingertips to form the roof, slide down into the
sides of the house. So altogether we
have house okay. So altogether for this, we have Court House. Courthouse from the side. Courthouse. Okay. Starting
from the rest position, psi in with me. Let's do it three times. Okay. We just talked about
how to sign courthouse. Here's how we sign
downtown. Okay. We're going to use both hands. Hand shapes are flat hands, fingers together,
thumbs alongside. Now I'm right handed. So I'm going to take
my non-dominant hand, put it about right
there at an angle. Dominant hand. Take the
tips of the fingers. I'm going to touch lightly
and then I'm gonna go down. Uh-huh. And as I'm
going down in a way, I'm making wavy movements, kinda like the rooftops, the tops of the buildings. Okay. So we have downtown
from the side. Downtown. Okay. Rest
position. Sign with me. Let's do it three times. Okay. We just talked about
how to sign downtown. Here's how we sign fire station. Okay. The handshape is B. Use your dominant hand. I'm right handed, but here's the other thumb
in front, That's a b. Now we're going to take the back of the hand and we're going to tap twice on her forehead. Now I'm bending down so you
can see my complete hand. Okay. Now think of a fireman. They have those big helmets, those big hats right there, and on the front they
have the shield. So that's what we're assigning. Alright. Fire station. Now this sign also works for
fire man or firefighter. But in this context we're
using it for location. So it also works
for fire station. From the side. Fire station. Okay. Starting from the rest
position, sign with me. Let's do it three times. Okay. We just talked about
how to sign fire station. Here's how to sign florist. Alright, so literally
we're going to assign flower store. Makes sense. Alright, how do we sign flower? Well, use your dominant hand, fingers together, bring
them down. A scrunched up. Hang in there. We're
going to go 12. Just tap on your cheek
once on each side. Wow. Alright, now we're
going to assign store. And shapes like this.
Fingers together. Bring them down, tips pointing, pointing downwards and
where to go one to store. So altogether we
have flower store. In other words, florist. From the side. Florist. Okay. Starting from the rest
position, sign with me. Let's do it three times. Okay. We just talked about
how to sign florist.
114. Review | Sign & Understand: Let's do signing review for
play signs, number two. Okay. In a moment,
something's going to pop up. I need you to sign
it before I do. Alright. I need
you to sign this. Coffee shop. Clinic, florist company, courthouse, clothing store, Church, College, downtown, fire station. Okay. That was signing review for a place
signs number two. Let's do understanding review for a play signs number two. Okay. You're going to see
me signing something. You shout out loud
what I'm signing. Alright, here we go.
What am I signing? Clothing store, clinic, florist, downtown, courthouse, fire station, coffee shop, company, Church, College. Okay. This was understanding review for play
signs. Number two.
115. Learn | Place Signs 3: Play signs number three, you're about to learn
how to sign and understand three-way
gas station, Grocery Store, Jim,
hardware store, high school, home,
hospital, hotel, library. Okay. We have a separate video
lesson for each one. For each sign, you're
going to learn hand shape and
position hand motion. And we'll do practice. After you've learned
all of these signs by golly, we'll have review. Okay, here we go. Here's our design Freeway. Okay, we're going
to use both hands. The hand shapes are the same. We're going to start with
use from the alphabet. How do you make
you go like this? Bring us together.
Last two fingers down, thumbs on top of ring
fingers. Alright, that's a U. Now we're going to take those
use and bend them down. Alright, now I'm right-handed. I'll keep my right-handed
you on the inside, non-dominant hand
on the outside. We're going to go
like this, 1212. Just imagine two lanes of traffic and they're coming
towards each other. Divided just quickly. Freeway from the side. Freeway. Okay. Starting from the rest
position, sign with me. Let's do it three times. Okay. We just talked about
how to sign freeway. Here's how to sign gas station. Two-part sign we're going
to assign gas and store. Right. The first part, gas. We can use both hands.
I'm right-handed, non-dominant hand. We're going to make
an O handshape. Just closed up a little bit. Alright, put it down there. Alright, with your
dominant hand, make a thumbs up, alright, take the
thumb and stick it into the whole
of your other hand. Like you're inserting
the gas nozzle gas. Now we need the sign for store that's going to
represent station here. Right-click this fingers
together, bend them down. Tips of the fingers
pointing down and go 12. So we have gas store in
other words, gas station. From the side. Gas station. Okay. Starting from the rest
position, sign with me. Let's do it three times. Okay. We just talked about how
to sign gas station. Here's our design grocery store. Okay, two-part sign,
literally eat store, right? How do we sign Eat well, make this closed-up
handshape right there and tap once
on your mouth. Eat. Store. Gonna go like that. Similar hand shapes, alright, and go like that. And B12. So we have store altogether, we have it store, grocery store, from the side. Grocery store. Okay, Starting from
the rest position, psi in with me. Let's do it three times. Okay. We just talked about how
to sign grocery store. Here's how to sign, Jim. Okay. The hand
shapes are the same. Both hands start like this. Fingers together. Last
three fingers down. Now place your
thumb on the inside and curl your index
finger over the top. Alright, there we go. Once again, let's do it. Fingers together last
three down thumbs in. Curl your fingers
over the thumbs. Right now I'll
pretend like you're holding the handle is
where the jump rope and go one to Jim. Jim. Okay, Starting from
the rest position, psi in with me. Let's do it three times. Okay. We just talked
about how to sign Jim. Here's how to sign
hardware store. Okay, the first part,
we're just going to go HW for hardware
and then do store. Alright, so h w store. How do we do store? Well
like this fingers together, bringing them together,
tips pointing down, go 12. So altogether hardware store. From the side. Hardware store. Okay. Rest position,
sign with me. Let's do it three times. Okay. We just talked about
how to sign hardware store. Here's how to sign high school. Lets it H S. H S high school. From Side High School. Okay. Starting from
the rest position, sign in with me. Let's do it three times. Okay. We just talked about
how to sign high school. Here's how to sign home. Okay. Use your dominant hand. I'm
right handed. The handshape. There's bring
everything together and the tips of the fingers
touching your thumb. Alright, now we're gonna go 12. So one down lower
and one up higher. So altogether it's home. Home. From the sign. Home. Okay. Starting from the rest
position, sign with me. Let's do it three times. Okay. We just talked about
how to sign home. Here's the sign for hospital. Okay. We're going to use our dominant
hand. I'm right handed. The handshape is a letter
H, Rome the alphabet. How to make an H go like this, bring us all together. Last two fingers down, thumb just press against your ring finger.
Tilted forward. That's an 88. Okay. Now use the tip of the middle finger and
we're going to trace a plus sign or we can say a cross like Red Cross
on her shoulder. Hospital hospital. Room design. Hospital. Okay. Starting from the rest
position, sign with me. Let's do it three times. Okay. We just talked about
how to sign hospital. Here's the sign for hotel. Okay. We're going to use both hands. I'm right-handed,
non-dominant hand, index finger, or just
put it right there. Let it hang out for a moment. Dominant hand,
we're going to make the letter H. That's
the handshape. How do you make
an age like this? Fingers together, last two down. Press against your ring finger, your thumb, turn it
forward. That's an eight. Okay, now we're
going to connect it to our flag pole, I guess. And we're just going to
wave it back-and-forth, like it's a plague. That's the sign for
hotel. From the side. Hotel. Okay. Starting from the rest
position, signed with me. Let's do it three times. We just talked about
how to sign hotel. Here's how we sign library. Okay, use your dominant
hand. I'm right-handed. Hand shape is L for loser, or just L from the alphabet. Put the L right here,
palm facing forward. And we're gonna go 12 library, just a couple of circles. Library from the side. Library. Starting from the
rest position, sign with me. Let's do it three times. Okay. We just talked about
how to sign library.
116. Review | Sign & Understand: Let's do signing review for
play signs. Number three. Okay. In a moment, if something
is going to pop up, you sign it before I do. Alright, here we go. I
need you to sign this. High school gas station, grocery store, hotel, gym, home, Library, hospital, hardware store, freeway. Okay. That was signing review for play signs number three. Let's do understanding review for a place signs number three. So take a look at me. I'm gonna be doing
something signing. You try to figure out what am I signing.
Alright, here we go. Hotel, gas station, hardware store, grocery store, home, high school, freeway, Library, hospital. Jim. Okay. That was understanding review for
place signs number three.
117. Learn | Place Signs 4: Play signs. Number four, you're about to learn
how to sign and understand mall, movie theater, museum, neighborhood,
office, park, parking lot, pet store, pharmacy, and police station. Okay. A separate video
we have for each one, you're going to learn
handshape hand position here in motion for each side. We'll do a practice
after you've learned all ten signs will do review. All right. Let's jump in. Here's how we sign mall. Okay. We're just going to
finger spell m, a double l. Alright, the two L's at the end. We're just going to do kinda
flinging off to this side, m, w l mall. From the sign. Mall. Okay. Starting from the rest
position, sign with me. Let's do it three times. Okay. We just talked
about how does sign mall. Here's how to sign
movie theater. Okay. We're gonna
use both hands. I'm right-handed,
non-dominant hand, just going to make a
flat hand right there, put it down here, palm facing
in with my dominant hand. We're just going to use
a five number five, which is to open finger
hand here, flat. We're going to put
it right here, and we're going to go back
and forth. Movie theater. Right now this sign works for a movie and also works
for movie theater, especially when we're talking
about places or locations. Movie theater from the side. Movie theater. I guess
it's also common to say, you know, going to the movies. Okay, Starting from
the rest position, psi in with me. Let's do it three times. Okay, we just talked about
how to sign movie theater. Here's how to sign Museum. Okay. First let's make
m's with both hands. M's from the alphabet. How to make an M or put
your thumb in-between your ring finger and
your pinky, right? We should have 123 knuckles. If we only have two,
that's an n. If we only have one knuckle on
the left side of the thumb, that's a t. No, we don't want to t we
don't want it to end. We want an LMA. Both hands. Now take the EMS, the fingers. We're just going
to let the fingers go out straight, right? Those are the hand shapes. When we sign Museum, we're gonna go like this. Trace the roof and trace
the sides. Museum. From the sign museum. Okay. Starting from the rest
position, sign with me. Let's do it three times. Okay. We just talked
about how to sign Museum. Here's how we sign neighborhood. Okay? Two signs in
one, lucky you. First we have neighbor
and then we have area. So altogether neighbor area,
which is neighborhood. Okay, so let's start
hand shapes like that. Flat hands. We're
going to put them down here, alright, together. Go over and we're going to go up and turn into
the hand shape like this and do like your wax
in the top of your piano. Really have neighborhood. Alright, flat hands
starting together, go over, go up, turn into five hand,
and go like that. Neighborhood. Just
a fluid motion. No need to pause.
No, don't pause. Just go out together. Okay, So we have neighborhood
from the side. Neighborhood. Alright,
starting from the rest position, sign with me. Let's do it three times. We We just talked about
how to sign neighborhood. Here's how we sign office. Okay. Same hand
shapes, both hands. Oh, it's from the alphabet. How would you make O's like
this fingers together, just curve them down so
they even look like ose. Now we're going to
put them down here. Alright, now we're
going to come in. So it's gonna be
12. And the hand that comes in will be
your dominant hand. I'm right handed. So
I'll go like this, That one's in the other ones on the outside and they're going
to move at the same time. Office office from the side. So we have office
kinda like we're doing two walls and then two more walls and the hand
shapes or just O's. So we have office okay. Rest position, sign with me. Let's do it three times. Okay. We just talked
about how to sign office. Here's how to sign Park. We're just going to
finger spell fingerspell. P a R, K. Alright. Park. Park. From the sign. Park. Okay. Starting from
the rest position. Sign with me. Let's do it three times. Okay. We just talked
about how to sign Park. Here's how to sign parking lot. Okay. Use your dominant hand. The hand shape is just
the number three. Alright, we're gonna tilted forward like this is
our car, alright? And we have a row of cars. We're just gonna go like it's
a parking lot. Parking lot. From the side parking lot. Now, how many cars do
you want to put it in the parking lot depends on you. Right. If you want to
embellish the situation, it's just a long row, maybe put a lot, right? If this is normal,
just go like this. Okay, Starting from the rest
position, sign with me. Let's do it three times. Okay. We just talked about
how to sign parking lot. Here's how to sign pet store. Two parts sign literally we're
going to assign pet store. So how do we sign pet? Well, I'm right-handed,
so my non-dominant hand, I'm going to make an
S, put it down there, back to the fist is facing up. This hand, my dominant
hand gonna go like this. Use the tips of the fingers. It just pet the back
of my hand like a pet. The second part is store.
How do we do store? Well, go like this. Fingertips pointing down, go 12. So altogether we have pet store. Pet store. From the sign. Pet store. Okay. Starting from the rest position, sign with me. Let's do it three times. Okay. We just talked about
how to sign pet store. Here's how to sign pharmacy. Alright, two-part sign. We're gonna be signing
medicine store. Alright. How do
we sign medicine? Well, I'm right-handed,
non-dominant hand, flat hand, put it into
their palm facing up. That's our platform.
Dominant hand. I'm right handed.
We're going to bend down just the middle finger. We use the tip of
that middle finger, put it in the middle of our hand in wiggle back and forth. Medicine. Medicine. Right
now we need store. Right-click. This brings
together everything down, tips pointed down
and go one to store. Altogether we have
medicine store. In other words,
pharmacy. From the side. Pharmacy. Okay. Starting from the rest position, sign with me. Let's do it three times. Okay. We just talked about
how to sign pharmacy. Here's how to sign
police station. Use your dominant hand.
I'm right handed. The handshape is a letter
C from the alphabet. Just use the inside
part of the Sea and go 12 on the side of your chest. Police station. From the sign. Police station. Now this sign
also works for a police. Alright, in this situation we're using location, the place. So it works for police station. Alright? Another hand shape
you may see is like this. Alright, without
the last fingers, just the index finger
sticking up police station. To be consistent in this course, we're going to be
signing it like this. The full seat. Police station. Alright. Rest position. Signed with me. Let's do it three times. Okay. We just talked about
how to sign police station.
118. Review | Sign & Understand: Let's do signing review for
a place signs number four. Okay. Something is
going to pop up. You sign it before I do. Right. I need you to sign
this neighborhood. Movie theater, pharmacy, museum, office, mall, parking lot, pads, store, park, police station. Okay. This was signing review for place
signs number four. Let's do understanding review for play signs. Number four. Alright, In a moment I'm
going to sign something. You shout out loud,
but I'm signing. Alright, here we go. Office, movie theater, pharmacy, pet store, museum, neighborhood, mall, police station, parking lot, Park. Okay. That was
understanding review for play signs. Number four.
119. Learn | Place Signs 5: Plays signs number five. Okay, you're about
to learn how to sign and understand
post-office, restaurant, road, salon, school, store, subway, train station x2. Already. For each sign, we're gonna do a
separate video lesson. We're going to cover
hand shape and position hand motion and do practice after you've
learned all of these ten signs
will do a review. Okay, here we go. Here's how to sign post office. That's it. We're just
going to go pee. Oh, alright. Think of a PO box. That's post-office. P. Post office. From the sign. Post office. Starting from the rest position. Sign with me. Let's
do it three times. Okay. We just talked about
how to sign post office. Here's how we sign restaurant. Okay. Use your dominant hand. I'm right handed.
The handshape is a letter r from the alphabet. How do you make an r? Well, your fingers are crossed, you hope something is happening. Well, I'm holding to ours. We just need one. Right? Flip
it around, palm facing in. We're gonna go 12. So lightly slide
down the sides of your mouth and then slide
down on the other side, like this is your napkin. And you're dabbing your
mouth at the restaurant. Restaurant. From the side. Restaurant. Okay. Starting from the rest
position, sign with me. Let's do it three times. Okay. We just talked about
how to sign restaurant. Here's how to sign
road. That's it. We're going to use flat hands, both hands, fingers
together, thumb alongside. We're going to put
them down here, leave them parallel and
just go straight out. Like it's a path. It's road. It's a street road from the side road. Okay. Starting from
the rest position, psi in with me. Let's do it three times. Okay. We just talked
about how to sign road. Here's the sign for Salon. Alright, So literally it's
assigned per haircut. But since we're doing
places in this context, it works for salon. Alright, the handshape
is going to be V from the alphabet
or peace man. Right? Now I'll just pretend it's a pair of scissors
and you're cutting your hair salon from the side. Salon. Okay. Starting from the rest
position, sign with me. Let's do it three times. Okay, We just talked
about how to sign. So on. Here's our design school. Alright, same hand
shapes, both hands. Just we can see five
hands like the number five or is flat hands,
fingers spread apart. Now I'm right-handed,
non-dominant hand. I'm going to put it right
down there, palm facing up, dominant hand on top and
just go 12. That's it. School. Kinda like we're
clapping sideways. Score from the sign. School. Okay, Starting from the rest
position, sign with me. Let's do it three times. Okay. We just talked
about how to sign school. Here's how to sign store. All right, hand
shapes are the same. Go like this fingers together, bringing everything down
the tips, all touching. Point the fingertips
down and just go one to swivel out two times, move out two times. Store. From the sign store. Okay. Starting from the rest
position, sign with me. Let's do it three times. Okay. We just talked about
how to sign store. Here's how we sign subway. Okay. Both hands, different
hand shapes. I'm right-handed, That's
my dominant hand. So non-dominant hand,
I'm just going to make a flat hand like that.
Put it right there. Palm facing down,
just off to the side, pointing off to the side. Dominant hand. I'm going
to make a y, right? This is my right hand,
that's my dominant hand. So why handshape? Go like this, middle
three fingers together and down,
like hang loose. Alright, take that y, put it underneath and go
back and forth. Like it's underground
because it's a subway from the side. Subway. Okay. Starting from the rest
position, sign with me. Let's do it three times. Okay. We just talked about
how to sign subway. Here's how to sign
Train Station. Literally we're going
to assign train area. Okay, so the first part, train hand shapes are you use from the alphabet
how to make a u? Well, go like this
fingers altogether. Last two fingers down, thumb on top of the ring finger. Alright, now I'm
right handed with my non-dominant hand
that you handshape, put it down there like
the tracks of the train. My dominant hand that
you put it right on top and go back and
forth a couple of times, just slightly rubbing. Train. Okay. The second part we have area which we're here
to work for station. Alright. Take your hand like
that flat, put it up here. Kind of like you're
waxing off the top of the cupboard or
Dustin or policy. Uh-huh. So altogether
we have trained area, which is train station. From the side. Train station. Okay. Starting from the rest
position, sign with me. Let's do it three times. Okay. We just talked about
how to sign train station. Here's how we sign a zoo. Okay, we're just going
to finger spell z o and let the two O's just
kinda fly off to the side. Xue from the side x2. Okay, Starting from the rest
position, sign with me. Let's do X2 three times. Okay, We just talked
about how does sine X2? Here's how we signed already. Okay, we're going to
use hands like this, flat hands or we can
say number five hands. We're going to put them
right here, palm facing in, and then just let them flake
out, flow out already. Already, from the side. Already. Okay. Starting from the rest position, sign with me. Let's do it three times. Okay? Now this sign is
useful because it covers multiple
similar concepts. Here we have it as already. It also means finished, finish, all over, completed, all done. So something happened
and now it's in the past because already finished over. Uh-huh. Okay. We just talked about
how to sign already.
120. Review | Sign & Understand: Let's do signing review for
a place signs. Number five. Okay. In just a moment, if something's going to pop up, I need you to sign
it before I do. Alright, here we go. You sign this school. Restaurant, store, road, salon. X2. Already. Subway post office, train station. Okay. That was signing review
for play signs number five. Let's do understanding
review for a place signs. Number five. Alright,
so take a look. I'm gonna be signing, right? Try to figure out
what I'm signing and shout it out loud.
Right here we go. Store, school, Subway, road, restaurant, zoo, train station. Already or finished? Finished. All done. Oliver. Already. Salon. Post office. Okay. That was
understanding review for a place signs number five.
123. Dialogue #1: Okay, here's your dialogue. Feel free to pause the video. Take your time, work
your way through it, sign by sign and get some practice when
you're ready, come back. Push play will sign it together. Alright, let's start
in it together, right? First part, Mark, Lucy
won go-to Museum. In English, something
like do market. Lucy want to go to the museum? Alright, let's do it. Asl.
Finger spell the name. Mark. Mark. Alright, move over just
a bit per Lucy. Right? Two different people, two
different spots here. Mark. Lucy. How do we sign want
want want what? Go-to. How do we sign? Goto. Goto. And where
are they going? Museum. How do we sign it? Museum. Museum. Right now this is
a yes-no question. Do market and Lucy wanted
to go to the museum? Yes. No, maybe. So what do we do for
yes-no questions? That's right. Raised those eyebrows, lean forward a little
bit inquisitive. Look like you're peeking
over your neighbor's fence. What the heck is going on? Alright, let's put
it all together. Let's sign it. Here we go. Sign with me. Mark. Lucy. Want go to museum. I rose up again. Here we go. Mark. Lucy, you want go to museum? Alright, let's do the second
part of this mini dialogue. No, I think they
prefer drive to bar. It english, something like no, I think they prefer to
drive to the bar or go to the bar or something like that. Alright, here we go. Sign by sign. How do we assign? No. No. No. You can shake your head. No.
I I think how do we sign it? It's right. Think they alright. Let's pretend they're not here. What was it, Mark, lucy, right? That's right. Mark and Lucy. Let's pretend they're not here, but we want to refer to them when we're signing, but we do. It's right off to the side. They got an arc. They prefer how do we sign it? Refer. Prefer what? Drive to how do we do it? Pretty straightforward.
Drive to yes. Bar. How do we assign bar? Like drinking bar. Okay. Let's sign
the whole thing. Here we go. Sign with
me nice and slow. No. I I think they
proof per drive to bar. Alright, this is kind of
a nice long sentence. 123456 plus no. Alright, here we go again. No. I think they prefer
drive too far. Okay, let's put the dialogue,
the parts together. Let's do it. The whole thing. Nice and slow. Sign with me. Mark. Lucy. Want go to museum
and learn stuff. No. I think they prefer
drive to bar. Again. Here we go. Mark. Lucy. Want go to museum. No. I think they prefer
drive to bar. Okay. We're the full dialogue
step-by-step, sign by sign. You want to keep
practicing more. That sounds great.
124. Dialogue #2: Here is your dialogue. Feel free to pause the video,
work your way through it, signed by sign and get some
practice when you're ready, push Play and we'll
sign it together. Alright, it's time
to sign it together. Your knees are
defined purple house, right in ASL and
English, pretty similar. The journey's already
find the purple house. Alright, step-by-step. Your, how do we do
it? You're right. Possessive pronoun your
nice. Do you remember? Nice. Nice. Already. Already. Hi Theresa and find, find purple, the color
as P handshape, Purple. Purple. House. House. This is a yes-no question. You can answer. Yes, no. Maybe how do we indicate
a yes-no question in American Sign Language?
That's right. I rose up, lean
forward a little bit. You're peeking over
your neighbor's fence. Okay? Now you don't
need to hold this space through the whole sentence
just once you get to the end, like when you sign house, put up those eyebrows. Alright, let's get
some practice. The whole thing signed with me. Nice and slow.
Your nice already. Find Purple house. Again. Your nice already
find Purple house. Right? Let's do the response. No. My aunt find yellow
train station. Yes. Or changing the subject. But why not? It could be a response. So in English, no, My aunt found a yellow
train station will be due. Right. Let's go step-by-step. No. How do we assign my my how do we assign aren't a
handshape right about here. Back-and-forth. Find. Find. That's right. How do we assign yellow? Why handshape yellow? Yellow. And train station. How do we sign train station? Train station. Okay, let's sign the
responsible thing. Sine with me. Let's
do it nice and slow. Know my find yellow
train station. Again. Here we go. No, My aunt find
yellow train station. Alright, let's put the pieces
of the dialogue together. Step-by-step. Sign with me. Let's do it. Your
knees already bind. Purple house. No, my ions bind
yellow train station. Again. Here we go. Your knees already
find Purple house. Know my aunt. Bind. Yellow train station. Okay, We did the pool dialogue step-by-step signed by
scientists in practice. You want to practice more. Feel free to restart the video and do
whatever you'd like.
125. Dialogue #3: Here is your dialogue. Okay, feel free to
pause the video, work through it side-by-side
and practice, practice. When you're ready, push Play, we'll assign it together. Okay, here we go. Let's sign it together. So the first part, Joe Ted, Bob need traveled
to park with me. Right? In English. Do Joe tenant bob need to travel to
the park with me? Okay, here we go. Let's fingerspell Joe. Who else? Ted and Bob. Right. See what I did
there? I did Joe. Then it moved over for Ted. I move back for Bob. Each one has their own
space, three individuals. How do we signed need need, need what traveled to how
do we assign traveled to its right in park. How do we sign it? Which
is fingerspell park. Right? How do we assign width? Width with who? With me, me or I write same sign
me. And let's see. It is a yes, no question. Raises eyebrows, lean
forward a little bit. Joe, Ted, Bob, need traveled
the park with me, right? No need to go like this to the whole sentence.
It's uncomfortable. There's once you
get to the end, me. Alright, let's do it altogether. Sign with me. Nice and slow. Joe. Ted, Bob, need travel
to park with me. Again. Here we go. Joe. Ted. Bob. Need traveled to park with me. Alright, let's
sign the response. Joe. Maybe Eve will bring
Bob, ted with her. Alright, in English. Joe, maybe evil bring evil, bring Bob and Ted with her. Yeah, something like that. Okay, here we go. Can you spell Joe? How do we sign? Maybe
a good sign to know. It's right. Maybe Maybe Eve, eve will sign, will like
future will happen. Will, will bring. How do we do that? Nice verb. Bring, bring and bring who? Bob and Bob and Ted, right? So Bob, ted. Or you could do Bob ted, as long as they each have
their own spot with width. Her. Let's think about
this one. Let's see. So E will bring
Bob, ted with her. Right? Now, her here, it's not
a possessive pronoun. It's not like her bag or
house or car, whatever. It is, a personal pronoun, known English we'd say her. That's how it
represents a concept, but it's basically
the same as xi. Alright? So the sign is going
to be the same as sheet. So Eve will bring
Bob ted, with her. Now it depends. Is Eve
here if she's here, which is pointed at
her, if she's not here, we'll do it off to the side. We'll just pretend
she's not here. Her. Alright, so make sure
that it's clear. Once again, her down here is
not a possessive pronoun, so we're not using
the open hand. We're just gonna point
because it's basically sheet you could do it will bring
Bob ted with sheath. That's basically how
it would be if you're just signing the signs, right? The English concept grammatically
correct would be her. Right? Either way, we're just
going to point her. Okay. Let's do it. Sign with me. Nice and slow. Joe. Maybe Eve will bring Bob ted with her. Again. Joe. Maybe eve will bring Bob ted with her. Alright. Okay, let's put both
sides together. We've done it all
side-by-side practice that. Let's do it all. Here
we go. Sign with me. Jo. Bob. Need traveled to park. With me. Joe. Maybe Eve will bring Bob, ted with her. Again. Joe. Ted. Bob. Need traveled to park with me. Jo, maybe if we'll bring Bob, ted with her. Awesome. Lots of signs here, lots of small little words here. More signs, the
better more practice. Okay, we need to go back
through and practice again. I say more practice
makes improvement. Okay.
126. Learn | Time Signs 1: Times sines number one, you're about to learn how to
sign and understand time. Second, minute, hour, day, week, month, year, now, later. Okay, for each one we have
a separate video lesson. You are going to
learn hand shape and position hand motion. You'll do a practice
and we'll do a review after you
learn all ten signs. Okay, Let's jump in. Here is how to sign time. Okay, use both hands now, I'm right handed with
my non-dominant hand. I'm gonna make an S.
We can say a fist, put it down there, pretend
you're wearing a wristwatch. If you are great with
their dominant hand, make your index finger handshape
and we're just going to tap twice time. From the side. Time. Alright, you
may see some people, they don't make a fist, they
just have a hand down here. But either way we have
tapped into white time. Alright, throughout this course, I'll be closing out my fist. Neglect this time. Okay. Starting from the rest
position, sign with me. Let's do it three times. Okay. We just talked about
how to sign time. Here's how does sine. Second. Let's write out we're
gonna do is fingerspell, fingers bell, S, E, C for a second. Scc from the side. Second. Okay. Starting from the rest
position, sign with me. Let's do it three times. Okay. We just talked
about how to sign. Second. Here's how
to assign minute. Okay. Use both hands.
I'm right-handed, so with my non-dominant hand, just going to make a flat hand. They're like the
face of the clock. With your dominant hand, just stick up your index
finger, your pointer finger. We can take the inside part. We're going to start here with the index finger
pointing straight up. And then we're just
gonna go once. Click, right like the
minute hand on the face of o'clock is just moving
over 11 minute, minute. From the side. Minute. Okay. Starting from the rest
position, sign with me. Let's do it three times. Okay. We just talked about
how to sign a minute. Here's how to sign our okay. Both hands. I'm right-handed,
non-dominant hand. Glad hand for the
face of the clock. Dominant hand. Just make that
index finger right there. We're gonna put it
right here and just do a circle around the
face of the clock. Like it's going all the
way around for one hour. Right? Our so the minute hand is going
all the way around. Do we have one hour? Okay. From the side. Our starting from the rest
position, sign with me. Let's do it three times. Okay. We just talked about how to sign our here's how to sign day. Okay. We're going to
use both hands and arm. I'm right handed with
my non-dominant hand, just going to make a
flat hand right there. We're going to lay
it right down here, kinda like it's our
horizon, perhaps. Dominant hand. We're
going to make just the index finger, the
pointer finger. Take your elbow, stick it
on top of those hands. The hand down there,
the open hand. And now just go down. Alright, for this hand you're going to have the
palm facing in, start here and go down. So we have dy Maybe this is the Sun, this is the horizon. Today. Run the side. Day. Okay, Starting from the rest
position, sign with me. Let's do it three times. Okay. We just talked
about how to sign day. Here's how to sign week. Okay. Both hands. I'm right-handed,
non-dominant hand, glad hand like that. Put it down here. It's
our platform palm facing up, dominant hand. We're just going to stick up our index finger like
we're gonna point. Alright, now we're going
to start in the back using this part of the hand. Go right here and slide forward. Week from the sign. Week. Okay. Rest position,
sign with me. Let's do it three times. Okay. We just talked about
how to sign week. Here's how to sign month. Okay, we're going
to use both hands. The hands shapes are the same. Index fingers, yes,
pointer fingers. Alright, now I'm right-handed, so non-dominant hand goes
start with that one. Would put it right here, tip of the index finger pointing up, palm facing off to the side. Now my dominant hand, index finger as well. I'm going to use
the back part of the finger and I'm just
going to start at the top of this one and just slide
down. Just one time. Month. From the side. Month. Okay. Starting from the rest
position, sign with me. Let's do it three times. Okay. We just talked
about how to sign month. Here's how does sign year. Okay. Both hands,
same handshape. Essays from the alphabet. Yeah. So we can say this. There we are. I'm right-handed,
my non-dominant hand. Alright, that S handshape
going to put it right there, right? Dominant hand. We're going to
hover over the top, go around and go plop. We have year. Alright, kinda like the earth
revolving around the Sun. One revolution we have
year from the side. You. Okay, rest position,
sign with me. Let's do it three times. We just talked about
how to sign year. Here's how does sign now. Okay, hand shapes are the same. The letter Y from the alphabet, how do you make a Y
will go like this, middle three fingers
together and put them down, like hang loose. Take those y's.
I'm here in front, palms facing in and just
drops straight down. Now from the side. Now. Alright, It's
not as slow motion. Now. It's more abrupt now. Okay. Starting from the rest
position, sign with me. Let's do it three times. Okay. We just talked
about how does sign now. Here's how to sign later. Okay. Both hands. I'm right-handed,
non-dominant hand, just flat hand
shape right there. Okay. So like that palm
facing off to the side. Dominant hand, l, like LPAR loser or algorithm,
the alphabet, I'm going to take that,
put it right here starting with the tip facing up, pointing up, and
just go like that. So turn it forward. So we have later from the side. Later. Alright, starting from the
rest position, sign with me. Let's do it three times. In alternate version
for the sign later is to use the same
L handshape with your dominant hand and just
go like this later later. Alright, to be consistent
throughout this course, we will be signing
later, like this. Later. Okay, we just talked
about how to sign later.
127. Review | Sign & Understand: It's time for signing review
of times signs, number one. Okay. Something's magically
going to pop up there. I need you to sign
it before I do. Alright, here we
go. Let's do it. Minute, month, year time. Our later week day. Second. Now. Okay. This was signing review for a
time signs, number one. Let's do understanding
review for a time signs, number one. All right. Take a look at me. I'm
gonna be doing something. You tried to figure
out what I'm signing. Just shout it out loud. Here we go. Later. Second minute. Week. Year. Time. No. Month. Our day. Okay. This was understanding review for a time signs. Number one.
128. Learn | Time Signs 2: Times sines number two, you're about to learn how to
sign and understand morning, afternoon or night today. Tomorrow. Yesterday, after
before, soon on time. Okay. You know what, we got to
separate lesson for each one. You're going to learn a
handshape hand position and motion for each sign. We'll do practice
after you've learned all ten signs will do review. Yes, let's do it. Here's how to assign morning. Okay. Same hand
shapes, flat hands. Alright, now I'm right-hand
is with my non-dominant hand. I'm going to put it right here, just laying like a horizon. How about that dominant hand? We're going to put it underneath and we're just going
to bring it up. Like it's the sun
rising in the morning. It makes sense. Morning from the side. Alright, so the horizontal
hand is gonna be touching the inside part of your elbow
and then just bring it up. Morning. Alright. Starting from the rest position, sign with me. Let's do it three times. Okay. We just talked about
how to sign morning. Here's how to sign afternoon. Okay. Hand shapes are the same. Flat hands. That's right. I'm right-handed, non-dominant hand, put it in right there, like it's our horizon.
Dominant hand. We're going to have the
palm facing forward, bring it forward and touch
close to your elbow. Now we're going to
art board here and go 124 afternoon. From the side. Afternoon. Alright. Starting from the rest
position, sign with me. Let's do it three times. Okay. We just talked about
how to sign afternoon. Here's how to sign and night. Okay. Both hands, we're
going to start with flat hand shapes like that. Now I'm right-handed, non-dominant
hand put it down here, like it's our horizon,
okay? Dominant hand. We're starting with
the flat hand, but we're going to
bend down the fingers. So we have this
handshape right here. Now we're just going to
bring it down and go 12, like it's the sun, It's
gone down and it's night. One. Night from the side. Night. Okay. Starting from the rest
position, sign with me. Let's sign it three times. Okay. We just talked
about how to sign night. Here's how we sign today. Alright, it's a two-part sign and
literally we're going to assign now and day. Alright, for now,
the hand shapes are the same letter
Y from the alphabet. Flip them around, just
drop them straight down. Now. Know, alright, per day we're
going to use both hands. Alright? I'm right-handed, non-dominant hand for me
going to make a flat hand, put it right down
their dominant hand, index finger. Okay. That's it. Use your elbow, put it
on top and go down. So we have d. So altogether now day which
is today from the side. Today. Okay. Starting from the rest
position, sign with me. Let's do it three times. Okay. We just started
about how to sign today. Here's how does sign tomorrow. Alright, use your dominant hand. I'm right handed, going to make the hand shape of the letter
a yes, from the alphabet. Right fingers, the other
fingers down, thumb alongside. We're going to put it
right here at the side of her face palm
facing this way, starting with the tip of the
thumb pointing backwards. Now we're just going
to rotate forward. So we have tomorrow. Alright, I'm not actually
touching my face, just getting close
tomorrow. From the side. Tomorrow, starting from the
rest position, sign with me. Let's do it three times. Okay. We just talked about
how to sign tomorrow. Here's how to assign yesterday. Okay. Use your dominant hand.
I'm right handed and handshape is a letter
from the alphabet. Fingers, the other fingers down them alongside
that is an eighth. We're going to use
the tip of the thumb. We're going to start down
here closer to our chin, go one and then to backup
pair up on her cheek. Yesterday. From the side. Yesterday. Okay. Starting from the rest position, sign with me. Let's do it three times. Okay. We just talked about
how to sign yesterday. Here's how to sign
after both hands. Same handshape,
wonderful. Flat hands. Now I'm right-handed,
non-dominant hand. I'm going to put it right
down there, palm facing down. Dominant hand. I'm going to
leave it like a ridge hand. Now I'm just going
to write it across. Just slide it across because
it's not now it's after. After. From the side. After. Okay. Starting from the rest
position, sign with me. Let's do it three times. Alright. We just talked
about how to sign after. Here's how to sign before. Okay. Use your dominant hand.
I'm right handed. When you use a flat hand
shaped flip it around, put it over here and
just push it past. Before. There's a balloon floating here and
you're just going to get behind me right
before the sign. Before. Alright? Now this
concept is for like in the past, before, back when? In the past, alright, we're going to use
it for before. Alright, starting from
the rest position, sign with me and let's
do it three times. Okay. We just talked
about how to sign before, like in the past. Here's how to sign soon. Okay, we're going to
use both hands and the hand shapes are Hs, yes, so the same h from the alphabet. How
do we make an H? Well, go like this.
Bring us all together. Last two fingers down. Take your thumb, just press
it against your ring finger. Now, tilted forward. That's an eight.
We need two H's. Alright, now I'm right-handed,
non-dominant hand. I'm going to put it right there. Alright, tips of the
fingers pointing forward. My dominant hand
them and take the H, go on top and just rub back
and forth a couple of times. Soon. This short
little movements soon. From the sign. Soon. Okay. Starting from the rest
position, sign with me. Here we go. Okay. We didn't talk
about how to sign soon. Here's how to sign on time. Okay? Now it's based
on the sign for time. Alright, we're gonna
use both hands. I'm right-handed,
non-dominant hand. There's the fist, put it
down their dominant hand, just use this tip of
the finger and go 12. That's for time like
you're going to tap on your watch here. We're going for
on-time like punctual. They show up right on time. Just go like this. We're kinda
embellishing the tap. It's not just a little depth. It's like right on
time. From the side. On time. Okay. Starting from the rest position,
signed with me. Let's do it three times. Alright. We just talked
about how to sign on time, like punctual on time.
129. Review | Sign & Understand: Let's do signing Review Board
times sines number two. Alright, Something's
going to pop up. You sign it before
I do. Here we go. Before today. Afternoon. After tomorrow. Yesterday. On time. Morning. Soon night. Okay. That was signing review four times signs number two. Let's do understanding
review for a time signs. Number two. Alright,
so take a look at me. I'll be doing something.
You take a look and try to figure out
what am I signing? Right here we go. What am I signing? Yesterday? Today? Morning before like in the past? After soon night. Tomorrow. Afternoon. On time. Okay. This was understanding review for time signs number
two. All right.
130. Learn | Time Signs 3: Times sines number three, you're about to
learn how to sign and understand Monday, Tuesday, Wednesday, Thursday,
Friday, Saturday, Sunday, weekend, early, late. Alright, We have a separate
video for each one. We're going to cover
handshape pan position here and motion and do practice after you've learned all ten signs will do review. Alright, here we go. Here's
how does sign Monday. Okay, use your dominant hand. I'm right handed. First, make the letter M from the alphabet. How to make an M
will go like this. Stick your thumb in-between your pinkie ring finger
and close it up. We should have 123 knuckles on the left side of
the thumb, right? M. Now, take that M and just let your fingers stick
out just a little bit. Flip it around palms facing up, and I'll just do a few circles. So we have Monday from the sign. Monday. Okay. Starting from the rest position, sign with me. Let's do it three
times. Alright. We just talked about
how to sign Monday. Here's how to sign Tuesday. Alright, use your dominant
hand. I'm right handed. Handshape letter T from the
alphabet. Go like this. Finger just down
the other side or index finger. Close it up. We should have one knuckle, only one knuckle on the
left side of the thumb. Alright, if you have
two, that's an n, We have three, that's an m. Know we wanted tea for Tuesday. So just one knuckle, take that handshape the T, flip it around,
put it about here, and do a couple of circles. That's Tuesday. From the side. Tuesday. Alright, starting from the rest position, sign with me. Let's do it three times. Good, good. We just talked
about how to sign Tuesday. Here's another sign, Wednesday. Alright, dominant hand,
I'm right handed. We're going to make a
W from the alphabet. How do we do it? Well, take your thumb and just pinned down, hold down your pinky
three fingers up. That's a W. Take the W, flip it around palm facing towards you and just
do a few circles. Wednesday. Wednesday. Okay. Rest
position, sign with me. Let's do it three
times. All right. We just talked about
how to sign Wednesday. Here's how to sign Thursday. All right. Use your
dominant hand. I'm right handed going to make the letter H from the alphabet. How to make an H star like this? Fingers together, pinkie
ring finger down, thumb, just press against
your ring finger. Turn it forward. That's an eight. Put it about here and just do a
couple of circles. Thursday from the side. Alright, we have Thursday starting from the rest position. Sign with me. Let's do
Thursday three times. Keep in mind there's another alternate way to sign Thursday, which is also quite
common to go like this. Alright, so literally
it's just a quick from T letter T to eight. Th kind of throwing that H
off to the side. Thursday. That's another
version you may be seen to be consistent
throughout this course. We're gonna be
signing Thursday with just the H hand
doing the circles. Also a very common way
to assign Thursday. Alright, we just talked
about how to sign Thursday. Here's how to sign Friday. Alright, use your dominant hand. I'm right handed
and handshape is a letter F. F for Friday. Yes. Alright. Take that f. Well,
how do we make an F? I go like this, index finger, thumb,
bring them down. That's an F. Flip it around, put it about here, and just
do a couple of circles. So we have Friday, Friday, run the side. Friday. Alright, starting from the
rest position, sign with me. Let's do it three times. Okay. We just talked
about how to sign Friday. Here's how to sign Saturday. Okay. Make a handshape with
your dominant hand. I'm right handed. Letter the S, letter S from the alphabet. It's just a fist
like this fingers, the other fingers
down, thumb in front. Flip it around,
put it about here, and just go a couple of times. Saturday from the side. Saturday starting from the
rest position, signed with me. Let's do it three times. Okay. We just talked about
how to sign Saturday. Here's how does sign Sunday. Okay. Use both hands and the hand shapes are
exactly the same. Yes. Hands like this,
fingers spread apart. Put them about here. We're just gonna do a
couple of outward circles. Maybe there's a pretend there's a big glass window
here and we're kinda wax in it or wiping it, polishing it, cleaning it. Sunday. From the side. Sunday. Starting from the rest position, psi in with me. Let's do it three times. Okay? An alternate
version of Sunday, which is also very common,
is to go like this. Sunday. Alright, now potentially
a little bit confusing, but if you have enough contexts, not confusing at all, is that this is also the same for wonderful,
great, incredible. And it's also Sunday. Alright, so similar signs, we need context to make sure to understand the difference
in this course to be consistent throughout
we're going to be signing sunday like this. Alright, couple
of circles there. Sunday. Okay. We just talked about
how does sign Sunday? Here's how to sign weekend. Okay. Going to use both hands. I'm right handed. So
non-dominant hand. Good to make the hand shape of the letter b from the alphabet, fingers together down in front. That's a beat. Now we're
going to put it right here. Tips of the fingers
pointing away. Alright, palm facing in. Now with your dominant hand, we're going to make
the index finger, yes. Now we're gonna go
like this slide. Once we get to the tips
of the fingers, the end, we're going to chop it off, alright, change into the
flat hand shape and chop. So we have weakened from the side weekend. Okay. Starting from the rest
position, sign with me. Let's do it three times. Okay. We just talked about
how to sign weekend. Here's how to sign early. Alright. Both hands, I'm
right-handed, non-dominant hand, just going to make a flat hand, put it right there,
palm facing down. Now with my dominant
hand for me, my right hand, I'm
going to go like this. Just bend forward the tip
of your middle finger. That's all we're going to use. The tip of the middle finger. Start here and just rub across your knuckles all
the way to the other side. Early. From the side. Early. Okay. Starting from the rest
position, sign with me. Let's get some
practice three times. Alright. We just talked
about how to sign early. Here's how to sign late. Okay. Dominant hand. I'm right
handed, handshape. Flat hand. Okay. We're going to put it
here and we're just going to put it down late, right? Maybe there's something down
there and we want to push it past late from the side. Late. Alright, starting from the
rest position, sign with me. Let's do it three times. Okay. We just talked
about how does sign late.
131. Review | Sign & Understand: Let's do a quick review
for days of the week. Now we learned each
one individually, separately, which is fabulous, Right? Forgetting the sign. But it's so common
to just go Monday, Tuesday, Wednesday, Thursday,
and through the week. So why don't we signed it that
way. Alright, here we go. Sign with me. Let's go nice and slow
and will speed up. Here we go. Monday, Tuesday, Wednesday, Thursday, Friday,
Saturday, Sunday. Are you noticing a pattern of circles or circular movements? Right? And let's do it again. Sign with me a
little bit quicker. Monday, Tuesday, Wednesday, Thursday, Friday,
Saturday, Sunday. Alright, one more time for
good measure. Here we go. Monday, Tuesday, Wednesday, Thursday, Friday,
Saturday, Sunday. The days of the week. Wonderful. Okay. This
was some quick review, four days of the week. Let's do signing Review
Board times signs. Number three, something's
going to pop up. You sign it before I do. Alright. Here we go. Weekend. Wednesday, Sunday, Saturday, Tuesday, late Friday, thursday, early Monday. Okay. This was signing review for a time
signs. Number three. Let's do understanding review for a time science number three, take a look at me, try to
figure out what I'm signing. Just shout it out loud. Friday, Sunday, Wednesday, Tuesday, Saturday, Thursday. Weekend. Late. Early. Okay. This was understanding review for a
time science number three.
132. Learn | Time Signs 4: Times sines number four. Well, look at that, the
months of the year. All of them. Bit of
finger spelling here. We're going to look at
each one individually. Do the finger spelling
will go nice and slow. Make sure you got
the hand movements down after we've
learned all the months. Well, we'll put it
together for some review. Alright, let's jump
in. Here we go. Here's always sign January. All right. You guessed it. We're just going to sign
the first three letters, just fingerspell the
first three letters, j, a, n. That's it. And that will give us January. From January. Okay. Starting from
the rest position, sign with me, will go
slower and we'll speed up. Here we go. Okay. We just talked about
how to sign January. Here's how to sign February. Yes, you know it.
Just finger spelling. F E B. F E B. Okay. That is February from the side. February. Starting from the rest position. Sign with me. We're gonna go slower
than will speed up. Okay. We just talked about
how to sign February. Here's how to sign March. This time we're going
to finger spell the full month. Alright. So we have M a R C H, M a R C H. And I know that your
fingers spelling with me to get extra practice,
right? Uh-huh. Uh-huh. March. March. From the side. March. Rays starting from the rest
position, sign with me. We'll go slower
than will speed up. Okay. We just talked
about how to sign March. Here's our design, April. We're going to finger
spell the whole thing. Here we go. A P R I L, a P R I L. So we have April from the side. April. Okay. Starting from the rest
position, sign with me. We'll go nice and
slow and speed up. Okay. We talked about
how to sign April. Here's how to sign may. Nice, short sweet word, M a, Y. So we have Mei from the side. May write sorry, from
the rest position, sign with me will go
slower and speed-up. We just talked about
how to sign ME. Here's how to sign June. Okay. Just going to finger spell it. J, U N E from the side. June, starting from
the rest position, sign with me, will go
slower and speed up. We just talked about
how to sign June. Here's how to sign
July. That's right. Fingerspell J, U, L. Why? July? From the sign? July. Starting from
the rest position, sign with me will go
slower and then speed up. We just talked about
how to sign July. Here's how to sign August. That's right. We don't have to finger spell the whole word. Just the first three letters. A, U, G, August from the sign. August. Starting from the rest
position. Sign with me. Let's do it three times and
we'll speed up as we go. Okay. We just talked
about how to sign August. Here's how to sign in September. We're going to finger spell the first four letters in this case, S, E, P, T. Alright, so we have
September from the side. September. Alright, starting
from the rest position, sign with me, starting
slower and we'll speed up. We just talked about how
does sign September. Here's how to sign October. Right? It's right. Finger spell the first three letters, O, C, T. So we have October
from the side. October starting from
the rest position signed with me will go
slower and speed-up. We just talked about
how to sign October. Here's our assigned November. That's right. Finger spell
the first three letters. N, o, v. November. From the side. November. Rest, position, sign with me, will go
slower and speed-up. We just talked about
how to sign November. Here's how to assign December. Fingerspell the first
three letters D, E, C gives us December. From the side. December, starting from the rest position. Sign with me. Let's
do it three times, speeding up as we go. We just talked about
how to sign December.
133. Review | Sign & Understand: Let's do a quick review. Four months of the year. Alright, now we learned
each one individually, but it's also common
and useful to be able to just sign it
back to back-to-back. Now, before we do
that, keep in mind, March, April, May,
June, and July. We're going to finger
spell the whole word. Uh-huh. March, April, May, June, July, fingerspell
the whole word. The other ones, the longer ones, just do the first few letters. Most of them, it's
just the first three except for September, which is the first four. Alright, so keep in
mind we're going to be finger spelling for pretty
much all the months. Some of them March, April, May, June, and July. Fingerspell the whole thing. The other ones, just
the first few letters. Alright, so why don't we just go through
and we're going to assign the whole months or
all of the months at once, one by one. Here we go. January, February, March, April, May, June, July, August, September, October,
November, December. Okay. Go quite a bit
of finger spelling. Is you notice how I was moving back and
forth a little bit. Alright. What I was doing is communicating separate words. It was all finger spelling, but one was over here, the next one over here,
the next one over here. That way we can make it very clear there are
separate concepts, in this case, separate month. Alright, Let's go
through it again. Alright, sign with me. We can say fingerspell with me. Here we go. Remember
for each one, move a little bit, alright, keep all of the letters in
one spot for one month. Move over a little bit
for the other one. Alright, here we go. January, February, March, April, May, June, July, August, September, October,
November, December. Now the thing with
finger spelling is you just got to do it. The more you do it,
the more you improve, the more you practice, things become more fluid and more easy and your
speed picks up. Alright? So if you're having, if you're struggling
with your hand, it's like I told you to
do an a and it didn't do an a. I urge you just
to take a moment, relax and remember it's part
of the process, alright? Learning anything of
substance living, you're learning a
language here, right? We're learning
something awesome. So be patient with yourself, push yourself, push yourself, get the drive to move forward. But understand that things take time and finger spelling
is one of those things. You just got to do it
and do it and do it before we know it would
be like, I'm doing it. Okay. So this was quick review
for months of the year. Alright, let's move forward. Let's do signing review four
times sines. Number four. Alright, here we go. Some that's going to pop up. I need you to sign it
before I do. Here we go. May, December, February, January, September, April, August, March. June, October, July, November. Okay. This was signing review
for time signs number four. Let's do understanding review for a time signs number four. So take a look at me. I'm gonna be doing something. You try to figure out
what am I signing. Just shout it out loud. Alright, here we go.
What am I signing? December, January, may, February, April, August, November, June, October, September, July, March. Okay. This was understanding
review for time signs, number for a lot of
finger spelling here, and a lot of finger
spelling comprehension. If you need to go back practice review
understanding, sign-in, I say go nuts and practice
makes improvement. That's worth repeating. Practice makes improvement
practice does not make perfection because
perfection does not exist. And if it did exist, it'd
be boring because you can level up anymore
if things are perfect. Practice makes improvement. You've got this.
134. Learn | Time Signs 5: Times sines number five, Look at you making progress. You're about to
learn how to sign and understand spring, summer, autumn, winter, next week, next month, next year. Often, not yet, sometimes. Okay. We have a separate video
lesson for each sign. That means you're going
to learn handshape, hand position and
motion and do practice. After we've gone through
all ten signs will do review. Alright, here we go. Here's how does sign spring? Okay. We're going
to use both hands, different hand shapes. I'm right-handed,
non-dominant hand for me. Going to go like
this, make us see from the alphabet.
Put it right there. Alright, dominant hand. We're going to start like
this, scrunched together. We're gonna go one and sprout into like a flower and
we're gonna do it twice. So we have spring from the side, spring Starting from
the rest position. Sign with me. Let's
do it three times. Okay. We just talked about
how does sign spring. Here's how does sign summer. Okay. Use your dominant
hand. I'm right handed. We're going to start with
just the index finger, the pointer finger
handshape, right? Put it right here, pull it across your
forehead and hook down. So your fingers curved. Like this summer? Summer? Kinda like you're wiping
the sweat off your brow. Uh-huh. Summer from the side. Summer. From the rest position. Sign with me. Let's
do it three times. Okay. We just talked about
how to sign summer. Here's how to sign item or fall. Okay. Can you use both hands? I'm right-handed,
non-dominant hand for me, just make a flat hand shape, put it right there.
Dominant hand. We're going to make the B
handshape from the letter, from the alphabet B, right? We're going to take the inside part and
we're just going to rub down twice on her elbow. Item from the side. Autumn. Okay. Starting from the rest position, sign with me. Let's do it three times. Okay. We just talked
about how to sign item. Here's how does sign winter. Okay. Same handshape or both hands? Essays or we'd say fist. Let's put them right
here, palms facing in. And we're just gonna go 1212, like it's winter and we're cold from the side. Winter. Starting from the rest
position, sign with me. Let's do it three times. Okay, some extra info
about this sign. Now this is the same
hand movement for cold. Alright, the hand
motion, alright. The difference
between winter and cold is see what happened. Winter and cold. So you put a whole
facial expression, body like you're
shivering, that's cold. Winter. Alright? Another way to sign winter
that you may see is to use w hand shapes and do that
same motion, winter. Winter, to be consistent
throughout this course, we'll be using S handshape, just fist and going
like this winter. Winter. Okay. We just talked
about how to sign winter. Here's how to sign next week. Okay, now it's based
on the sign for week. Alright, but we're gonna
go out extra next week. Right hand shapes. Well, I'm right-handed,
non-dominant hand, flat hand. Put it down there,
palm facing up. Dominant hand, just going
to use the index finger. We're going to slide
forward and then keep going and kinda hook
around at the end. We have next week. Week all by itself would
be like this week, but then you stop for next week. We're not going to stop.
We're going to go like this. And then around next
week from the sign. Next week. Okay. Starting from the rest
position, sign with me. Let's do it three times. Okay. We just talked about
how to sign next week. Here's how to sign next month. Okay? This is based on
the sign for month. Alright, let's talk hand
shapes, index fingers. Yes, very useful handshape.
I'm right-handed. Non-dominant hand for me, I'm going to put it right there. Alright, dominant hand. I'm going to slide down using
the back of the finger. Just go like that. That is month that just
assigned for a month. Now we're here to sign
next month, right? So we're gonna go like this. All right, now, it's like an embellished form of the sine month because we're
still going to get to month. But we're going to
jump and then come out kinda like we're leaping
into the next month. Next month. Alright, so this hand is
going to move out there and at the same time this
one's kinda chasing it. And then we signed month and do like a little jumping motion. So we have next month from the side, from the front. Okay. Starting from the rest
position, sign with me. Let's do it three times. Okay. We just talked about
how to sign next month. Here's always sign next year. Okay. Now, the sign just for year
all by itself would be fist, right hand shapes like this. That's year, alright,
but we want next year. So we're going to
use those same fish. So we say S is, we're
going to start right here. They can be lightly
touching, that's fine. Now we're going to use the
dominant hand which is on top. And we're just going
to go out into an index finger is pointing
into the future next year. From the side. Next year. Okay. Starting from the rest
position, sign with me. Let's do it three times. Okay. We just talked about
how to sign next year. Here's how to sign often. Okay. We're going
to use both hands. I'm right-handed. My
non-dominant hand gonna make a flattened
hand right there. That's our platform
dominant hand. We're going to start
with the flat hand, but we're going to bend down the fingers
altogether like this. Alright, we can use the
tip of the fingers. We're going to touch once
on the back of our hand down here and once
again, midway up. Often. Often from the side. Often. Okay. Starting from the rest
position, signed with me. Let's do it three times. Okay. We just talked about
how does sine often? Here's how to sign. Not yet. Okay, use
your dominant hand. I'm right handed, going to make a flat hand
shape right there. We're gonna go here and just wag their fingers a little bit. Wave your hand. At the same time. Have
this kinda look on your face now yet? From the side? Not yet. Okay. Starting from the rest
position, sign with me. Let's do it three times. Okay. We just talked
about how to sign. Not yet. Here's how
to sign sometimes. Okay. Both hands, different
hand shapes. I'm right-handed,
non-dominant hand, flat hand. We're going to put
it right down there. Dominant Hamburg can
use your index finger, just the typical index finger. We're going to start
here, palm facing in. We're gonna go down,
up, down again. We're making a circle, which is a forward
rotating circle. Alright? It looks like this. Sometimes, sometimes
from the side. Alright, so the circle is kinda tilted, alright, like that. The circle is not going
straight up like this. It's going tilted to
the side. Sometimes. Okay. Starting from the rest
position, sign with me. Let's do it three times. Okay. We just talked about
how to sign. Sometimes.
135. Review | Sign & Understand: Let's do signing
review per time signs. Number five. That's right. So I'm just going to pop up. You sign it before I do. You ever go you sign
this next week? Autumn. Often. Winter. Not yet. Summer. Next month. Sometimes. Next year. Spring. Okay. This was signing review for a
time signs number five. Let's do understanding
review for time signs. Number five, take a look at me. I'm gonna be doing something, waving my arms
around, do my hands. You try to figure out
what I'm signing. Alright, here we go. What am I signing? Next year? Winter. Sometimes owe them. Often. Next month. Not yet. Next week. Summer, spring. Okay. This was understanding review per time
signs. Number five.
138. Dialogue #1: Here's your dialogue. Feel free to pause the video, work your way through
it side-by-side and do some practice
when you're ready. Push Play will sign it together. Alright, let's sign it together. So in ASL, gel-like, arrive late. Why an English? Something like why does
gentle lake to arrive late? Or why does general
like arriving late? Alright, here we go. We have a name, a name. So let's fingerspell.
Here we go. J E N, N a, right to ends. So one here, another
one off to the side. Jenna. Jenna. Like, how do we sign? Like yes. Like like, how do we do arrive? Arrive late? How do we sign late? Late? Why question we're WH
question word how we do it. That's right. Why? Why? For all
those eyebrows, WH question is do it altogether. Jenna? Like arrive late. Why? Again? Here we go. Alright, let's go
to the response. Maybe she want you become mad. So an English sounded
like maybe Shu wants you to become mad or
maybe she wants you to be met. All right. Let's jump in. How do we sign? Maybe
maybe maybe she is Jenna. Let's say she's not here. We're signing about
her. How do we refer to her index finger, personal pronoun
after the side sheet. Want how we do it? One, u, u. How do we assign become
the verb, become, become, become. Mad. Emotion side. How do we sign mad? They're put in the
facial expression mat. Alright, let's do it altogether. Here we go. Sign with me
nice and slow, side-by-side. Maybe she want you become mad. Again. Here we go. Maybe
she want you become met. Alright, let's put the two parts of the dialogue together. Let's work through
it. Sound by sine. Sine with me will
speed up as we go. Jenna, like, arrive late. Why? Maybe she want
you become mad? Alright again, Jenna,
like arrive late. Why? Maybe see why you become mad? Okay. We worked our way
through it. We did practice. You want more practice? Go back. Watch the video again. Why not?
139. Dialogue #2: Here's your dialogue,
worked through it. Pause the video, take your time, get some practice to the signs. When you're ready. Push
Play will sign it together. Alright, let's sign it together. So Steve drive to
college when an English, something like When did
Steve drive the college? Alright, here we go. Finger spell the name. Let's do it. Steve. Drive to how do we sign
drive to like you're holding the steering wheel drive
to drive to college. How do we assign college? College? And the
WH question word with the furrowed eyebrows. When how do we sign? When? When? When furloughs eyebrows
altogether, Let's do it. Steve. Drive to college when? Alright, notice I'm not going like this through
the whole sentence. You could may seem a
bit uncomfortable. What I did, I just went
Steve drive to college. When so when I'm signing when WH question where do we
want to communicate a WH question for
those eyebrows? When the 2D in Steve
drive to college, when? Alright, let's do the response. Yesterday he leave. We depressed. Write in English.
Yesterday he left. We're depressed. Here we go. How do
we sign yesterday? Yesterday. That's right. He now he's gone. You went away to college. So we're going to sign about
him, but he's not here. Write this off to the side. Heat. And he went, he leave.
How do we sign it? Leave. Alright, now a quick note. You can notice that
an English will say yesterday he left. We conjugate the
verb, but in ASL, the bird is going
to stay the same because the sine is
going to be the same. We don't conjugate our hands. So we just leave it here
as the simple present. Alright, Now, yesterday,
who that's gonna give us context that it
was past tense. Alright, so in
English we conjugate the burbs in ASL don't
conjugate the verbs. We add extra information and the context to get verb tense. Okay, So leave, leave. We, we, we, we depressed. How do we assign depressed. Depressed. Put on your face? Right altogether. Sign with me nice
and slow. Yesterday. He leave. We depressed. Again. Yesterday. He leave. We depressed. Okay. Let's put the two parts together and work
our way through it. Sign with me. Steve drive to college. When? Yesterday he
leave, we depressed. Again. Here we go. Steve drive to college. When? Yesterday he
leave, we depressed. Alright, I urge you to use the wonderful
capabilities of our face, our facial expressions,
and body movements. Alright, you could just
embellish the situation, show all of the emotion and just really make it clear
what happened, right? He's a great guy, Steve. I see him for like six months. We're depressed. Alright, just use your
body like your acting. Alright. It seems
like embellishing. But once you get in and
around the deaf community, it's not embellish in anymore, it's just how it is. So I urge you to practice, have fun with it, right? It's very expressive. It's very wonderful. Alright, we just worked
through the dialogue. Feel free to go
back and practice whatever section you want. Do it all again up to you.
140. Dialogue #3: Here is your dialogue. Feel free to pause the video, work through it step-by-step. The signs, get some practice. Alright, when you're ready, push Play and we'll sign together. Let's sign together.
Alright, first one, next month, your uncle, what do, alright, so an English, something like,
what's your uncle doing next month or next month? What is your uncle doing? Uh-huh. Once you're going to do Let's
do it all step-by-step. Next month, how do we sign it? Next month. Alright, so just regular
month like that, but we need to leap
into next month. Next month. Right? Your iris and your possessive pronoun
flat hand, your uncle. How do we sign uncle? You handshape Uncle. Uncle. What do how do we sign
that? Wh question? What do pero the eyebrow is very important
for wh questions. Who, what, where,
when, how, why, and here we have what do
alright, let's sign it all. Here we go. Sign with me. Next month. Your uncle. What do again? Next month, your uncle or do. Right. Let's do the
response here it is. That's assigned in this one. He will excuse me. He will go to a car
dealership one by boat. Okay. Excuse me. So something in English, something to the
effect of he'll go to a car dealership where he's
gonna go to a car dealership. He wants to buy a boat. Alright, you're going
to notice quickly those small little
words, am, are, was, were, and the
ASL, throw them out. We're going straight for
the meat. Very efficient. So here in ASL he will
go to car dealership. Pretty straightforward,
want by boat. Now you could add
in I I'm sorry, he he won by boat. But we've already it's been
redundant because we've already key for the first
part and second part. We already know is
he won by boat. It's very simple,
straightforward. We could sign he
and then he again, but it's unnecessary
and it's extra. Okay. So let's go step-by-step. Here. Not here. What do we do? Right? He, he just after the side like
an imaginary person. He will are going
into the future. How do we sign? Will? Will. Will, will what? Go to how do we sign go-to. Right. Go to go to
car dealership. How do we sign it? Right. Hint. Hint is car store. So that represents
car dealership. How do we do it? Car dealership. Right. So it's literally
car store and it works out for a car
dealership. Right. Where they sell cars and
I guess boats. Right. How do we assign
want want, right? By how do we signed
by by by right. In boat. He wants to buy a boat
at the car dealership. They got it all. Boat. Okay. Let's sign
this all together. We have 1234567 signs, two mini, two little sentences. Here we go. Sign with
me, nice and slow. He will go to car dealership. Want by boat. Again. Here we go. He will go to car
dealership. One. By both. Cool. Alright, let's put the
two parts of the dialogue together and work through it. Here we go. We assign with me. Next month. Your uncle, what do he will go to? Car dealership. Want by boat? Right. Again. Next month. Your uncle do he will go to car
dealership one by boat. Right? Isn't it? I find it fascinating. Learning
the language here. It's just like puzzle pieces. We're just moving things
around, switching things out. Maybe it's next week, maybe it's next year. Your aunt, your knees, your mom or whatever. We just can move things
around like puzzle pieces and suddenly sign about
so much stuff. Okay. Let me do one more time. Okay. We did everything. We worked through it
side-by-side did practice. I urge you if you
want to practice more practice makes improvement. Practice makes improvement.
141. Learn | Occupation Signs 1: Occupations signs number one, you're about to learn how
to sign and understand. Person, accountant,
actor, advisor, architect, artist, assistant, athlete,
carpenter, cashier. Alright, We have a separate
lesson for each one. That means you're going
to learn handshape, hand position, hand
motion for each sign. We'll do practice. After you've learned all ten, we'll do a review. Okay. Here we go. Here's how to sign person. Okay. Use both
hands, flat hands. Pretend you're holding
the side of a box, the top part, and you're just going to slide down the sides. Let's IT person from the side. Person. Okay. Starting from the rest
position, sign with me. Let's do it three times. Okay. We just talked
about how to sign person. Here's how to sign Accountant. Okay. It's a two-part sign. Literally we're going to assign count person, which
becomes accountant. Alright, The first part count, we're going to use both hands. I'm right-handed, non-dominant
hand, just flat hand. Put it right down their
dominant hand, the hand shape. How to make an F go like this. Index finger, thumb
tips together. Now we're going to start
back here and we're just going to slide forward. That's count. Count
from the side. Alright, so we have count and then we're going
to add on person. How do we do person, flat hands, like you're holding the sides
of a box. Just slide down. Person. So altogether count person, which is accountant.
From the side. Accountant. Okay. Started from the rest position.
Signed with me. Let's do it three times. Okay. We just talked about
how to sign accountant. Here's how to sign actor. Alright, we have
a two-part sign. So literally is gonna
be theater acting, act this sign right
here plus person. So the first part, we're
going to use a hand shapes. I'm going to put them here. And we're just gonna
do backwards rotating, alternating movements
towards our chest. Theater. Alright, second part is person. Flat hands go like this, like you're holding a box,
just slide down the sides. Person. So altogether we have theatre
or act or drama person. Altogether. Actor from the sign actor. Okay. Starting from the rest
position, signed with me. Let's do it three times. Okay. We just talked
about how to sign Actor. Here's how to sign advisor.
Alright, two parts. Literally, advice, person makes
sense for adviser, right? The first part, we're
going to go like this. So it both hands,
I'm right-handed, non-dominant hand,
flat hand like that. Put it right down their
dominant hand start like this. We're going to put it over
here and then we're going to open it up and
shoot it across. Kinda like it's a advice or information or something
popping out and do it twice. Alright, so that's advice. Now we need person. Glad hands go like this, like you're holding
the sides of a box and just slide down. Person. So altogether
we have advice. Person. In other words, advisor. From the side. Advisor. Okay, Starting from the rest position, sign with me. Let's do it three times. Alright. We just talked
about how does sign advisor. Here's how to sign architect. Okay. Two-part sign. First part, when you use a hand
shapes the thumbs, we're just going to use the
tip was tip, so the thumbs, and we're just going to
trace like half a square. Alright. Then we're
going to drop down into person per person flat hands like you're holding the sides
of a box, just slide down. So altogether we have Architect. Alright, so draw that
little half square and then dropped down into
person from the side. Architect. Okay. Starting from the rest
position, sign with me. Let's do it three times. Okay, We just talked about
how to sign architect. Here's how to assign artist. Alright, literally two
parts, art person. Okay, so the first
part, both hands, I'm right-handed,
non-dominant hand, just flat hand like that. Put it along their palm facing off to the side. Dominant hand. We're going to make an
eye from the alphabet, which is basically just sticking
up your pinky like that. Now take the tip of your pinkie. We're gonna go 12 on the
flat part of our hand. And then we dropped
down into person. So we have art person, right? Person has flat hands like that. Like you're holding
the sides of a box drop straight down. So altogether Art, person, artist from the sign. Artist. Okay, rest
position, sign with me. Let's do it three times. We just talked about
how to sign artist. Here's how to sign assistant. Okay, we're going
to use both hands. Hand shapes are the same. Just thumbs up dude. Like that. We can say two A's and then just
loosen up your thumbs. That's fine. I'm right handed. So with my non-dominant hand, I'm going to put it about here. Palm facing in dominant hand. I'm going to put it
underneath and tap twice, just with the tip of my thumb on the bottom part of my hand. So we have assistant. Assistant from the side. Assistant. Okay. Starting from the rest position, sign with me. Let's do it three times. Okay. We just talked about
how to sign assistant. Here's how to assign athlete. Okay, two parts
literally compete. Person, right? The first part, a hand shapes right there. We're going to put
them right here and go alternating back and forth. Alright, compete. Second
part is person, right? Hands go like that, just like you're sliding
down the sides of a box. Person. So altogether
we have compete person, athlete from the side. Athlete. Okay. Starting from the rest
position, sign with me. Let's do it three times. Okay. We just talked about
how to sign athlete. Here's how to sign carpenter. Alright, two parts, sign
literally carpentry. Person. Makes sense. Alright, The first part,
really use both hands. I'm right-handed,
non-dominant hand, just flat hand like that.
Put it right there. That's our platform
palm facing up. Dominant hand, make a fist, or you can say the letter
S, bottom part of the fist. We're going to put
it here and go 12. Carpentry. Alright, we're
going to add that to person. Flat hands, like you're
holding the sides of a box. Slide down person. Alright. Altogether. Carpenter. From the side. Carpenter. Alright, starting from the
rest position, sign with me. Let's do it three times. Okay. We just explored
the sign for Carpenter. Here is assigned for cashier. Okay. Use your dominant
hand. I'm right handed. We're just going to be
pretending like there's a cash register here or maybe a big calculator
or something, and the person is just ringing up your bill right there
total in your bill. So what a cashier does? Uh-huh. So we have cashier
from the side. Cashier. Okay. Starting from the rest
position, sign with me. Let's do it three times. All right. We just explored
the sign for cashier.
142. Review | Sign & Understand: Let's do signing review for occupation science number one. In just a moment, pop-out
some there's gonna pop up. I need you to sign
it before I do. Right here we go. I
need you to sign this. Architect, actor, carpenter, artist, advisor, athlete, accountant, assistant person, cashier. Okay. This was signing review for occupation
signs. Number one. Let's do understanding review for occupation
science number one. Alright, so take a look at me. I will be signing something. I need you to try to
understand what I'm signing. Just shout it out loud. Alright? Okay,
what am I signing? Assistant carpenter, actor, artist, person, architect, advisor, athlete, accountant, cashier. Oh, okay. This was
understanding review for occupation
signs. Number one.
143. Learn | Occupation Signs 2: Occupation signs. Number two, you're about to learn how to
sign and understand Chef, chiropractor,
comedian, designer, Dr. driver, employee,
engineer, entrepreneur. Alright, We have a separate
video lesson for each one. We're going to learn
hand shape and position and motion and do practice after you've learned all ten signs will do review. All right, let's jump in. Here is how to sign chef. Okay. Two parts, sign cook, person, which is yeah. Okay. First part, cook. We're going to use hand
shapes like this flat hand. I'm right handed, non-dominant hand. Put it right down there. That's our platform. Dominant hand on top
go 12. That is cook. Alright, now we need person. Same hand shapes.
Just go like that. You're grabbing the
sides of a box, slide straight down person. So altogether we have Cook
person, which is chef. From the side. Chef. Okay. Starting from the rest position, sign with me. Let's do it three times. Okay. We just talked
about how to sign chef. Here's how to sign chiropractor. Okay, So two parts sign this motion like we're
manipulating the spine. And then we go person. Alright, so the first part, we're just going to use hand
shapes kinda like this. We can say, oh is
opened them up, spread the fingers
apart a little bit. Now one down here,
non-dominant hand, dominant hand on top. I'm right-handed. I'm
going to go like this. Like there's an imaginary
spine there and just go. Alright. Second part is person, flat hands, like you're
holding the signs of a box, go straight down.
That is person. Alright, so we have
chiropractor from the side. Chiropractor. Okay, Starting from the rest
position, sign with me. Let's do it three times. Alright, we just talked about
how to sign chiropractor. Here's how to sign comedian. Okay, two parts sign
literally funny person. Alright, how do we sign?
Funny, well go like this. Dominant hand, fingers together, last two fingers down. Alright, there's R handshape, renews the tips of
these two fingers and go 12 on her nose. That is funny. Alright, add in person, right? So we have funny
person, literally. Comedian from the side. Comedian. Alright, starting from the
rest position, sign with me. Let's do it three times. Okay, we just talked about
how to sign comedian. Here's how to sign dentist. Very straightforward
teeth person. Alright, how do we sign teeth? Use your dominant
hand, index finger, just tap on your teeth, or at least tap just
close to your mouth. Indicate you know, the
teeth to go like this. Alright, then we're
gonna go to person. Alright, flat hands go
like that straight down. That's person. Altogether
we have teeth. Person which is Dentist. Dentist. Okay. Starting from the rest position, sign with me. Let's do it three times. We just talked about
how to sign dentist. Here's how to sign designer. Okay. First part,
we're going to go like this. Both hands. I'm right-handed,
non-dominant hand, flat hand like that. Put it right there. Like it's our Notepad or a drawing
pad, something like that. Dominant hand make the
hand shape of the letter d from the alphabet
D. How to make a D? Well, last three
fingers together, bringing them down tips,
touching the thumb. Alright, now we're
gonna go like this as if we're drawing
with the tip C-bar, D right over here, and we're just
going to waive it. And then go down to person. Alright, person is flat
hands go like this, just straight down. So
we're going to like this. Designer from the side. Designer. Okay, Starting from the rest position, sign with me. Let's do it three times. Okay. We just talked about
how to sign designer. Here's how to sign, doctor. Okay, we're going
to use both hands. Go like this. We're gonna make
flat hand shapes. Right now I'm right-handed, so with my non-dominant hand, I'm going to put it down here. Now. I'm going to tilt
it up so my wrist is right up there
and easy to access. Alright, with the dominant
hand is still flat hand. We're going to bend
down all the fingers. Use the tips of the fingers, tap twice on our wrist. Dr. Dr. From the side. Dr. Okay. Starting from the rest
position, sign with me. Let's do it three times. Okay. We just talked
about how does sine dr. Here's how does sign driver. Okay. Two-part Signed
literally, we're going to assign car person. The first part, car. Use both hands. We're going to make fist. So we could say the letter
S from the alphabet. Put them here, like there's a steering wheel, you grab it. Go like this a couple of times. That's car. Now we need person. We're going to use flat hands, go like this, just
drop them down. Person. So altogether we have car
person which is driver. Okay. From the side. Driver. Okay. Starting from the rest
position, sign with me. Let's do it three times. We just talked about
how does sign driver. Here's how to assign employee. Alright, So literally
it's work person. Alright, so the first part, we're going to use
two S's or fist. I'm right handed, so my non-dominant hand is
going to go right here. Dominant hand, use that
bottom part right there and go one tap work. Then we're going to
immediately dropped down into person together. Employee or worker? Employee from the side. Employee. Okay. Starting from the rest
position, sign with me. Let's do it three times. Okay. We just talked about
how to sign employee. Here's our design engineer. Okay, we're going
to use both hands. Why hand shapes? Make wise? Well, go like this. Middle three fingers
together and then down, like hang loose, right? Take those y's palms facing down and just touch the
tips of the thumbs. Now I'm right-handed,
That's my dominant hand. I'm going to twist down
with my dominant hand. Engineer from the side. Engineer. Okay, rest position,
sign with me. Let's do it three times. Alright, now keep in mind you
may see some people go like this and add person. That's a possibility
that you may see to be consistent
throughout this course. We won't be adding person. We just do this sign right here. Engineer. Okay, we just talked about
how to sign engineer. Here's how to sign entrepreneur. Alright, two parts.
We're gonna do business. Person. The first part, business. We're going to use B
handshape, both hands. I'm right-handed,
non-dominant hand. We're going to put it right
down there, palm facing down. Dominant hand. Use a
bottom part and go 12. Business. Second part is person, flat hands go like that, drops straight down person. So altogether we have
entrepreneur from the side. Entrepreneur. Okay,
Starting from the rest position, sign with me. Let's do it three times. Okay, We just talked about
how does sign entrepreneur.
144. Review | Sign & Understand: Let's do signing review
for occupation signs. Number two. Okey-dokey.
In just a moment, something's going to pop up. You sign it before I do. Alright, I need
you to sign this. Designer, chiropractor, comedian, driver, employee, dentist, chef, Dr. entrepreneur, engineer. Okay, This was
signing review for occupation signs number two. Let's do understanding review for occupation
signs, number two. Alright, here we go. Watch me. I'm going
to do something. You try to figure out
what am I signing. Alright, here we go. Comedian, chiropractor, driver, employee, designer, chef, Engineer, doctor, dentist, entrepreneur. Okay. This was
understanding review for occupation
signs. Number two.
145. Learn | Occupation Signs 3: Occupations signs number three, you're about to
learn how to sign and understand
farmer, firefighter, florist, interpreter,
janitor, journalist, judge, landlord,
lawyer, manager. Alright. You're going
to learn hand shape and position and motion
for each one. And after we've done that, we're going to do practice? Yes. After you've
learned all ten signs, we're gonna do two-part review? Yes, signing in, understanding. All right. Let's jump
in. Let's get started. Here's how to sign farmer. Two-part sign,
literally farm person. Alright, for the first part
is to use your dominant hand. I'm right handed, open
hand-shaped fingers spread apart, use the tip of the thumb. We're just going to
trace along our tin from the opposite sign to you like I'm right-handed,
my right side. If you're left-handed,
just do the opposite. We have farm. Now we need person
person flat hands, like you're holding
the sides of a box and just slide down. Person. So altogether farm person, which is farmer from the side. Farmer. Okay. Starting from the rest
position, sign with me. Let's do it three times. Okay. We just talked about
how to sign farmer. Here's how to sign firefighter. Okay. Use your dominant
hand. I'm right handed. Handshape is letter B from
the alphabet B, right? How to make a V for years
together, the m in front, just use the back part
and we're going to tap twice on her forehead. Now imagine a big
fireman's hat, right? They have that. She'll do
that badge shape right here. That's what we're
going to mimic. So we have firefighter
from the side. Firefighter. Okay. Starting from the rest position, sign with me. Let's do it three times. Okay. We just talked about
how to sign firefighter. One quick thing, keep in mind, some people might have
an open hand shape, that's another version
of the sign, right? To be consistent
throughout this course, we're going to use the B
handshape, go like this. Alright, firefighter. Okay. Here's how to sign. Laura, just literally,
flower person. Makes a lot of sense, alright, for flour, use your dominant
hand. I'm right handed. We're going to scrunch
up all the fingers to the tips are together. Touch once on this side, once on that side. Flower. If your left ear just do
it on the opposite side. Right? I'm right handed, so I go like this, That's flower. Now we need person flat hands. Like you're holding the sides of a box and just slide down. So altogether flower person, in other words,
florist. From the side. Florist. Okay. Starting from the rest position, sign with me. Let's do it three times. Okay. We just talked about
how does sign florist? Here's how to sign interpreter. Alright, two parts.
Sign interpret person. Alright, The first part,
we're going to make f hand shapes from the
alphabet, like this. Index finger, thumb
tips together. Put them down here,
the tips just lightly touching or at
least getting very close. Now to scroll back and
forth a couple times. Alright, interpret. Now, I need person, flat hands go like that and
just slide down person. So altogether interpreter
from the sign. Interpreter. Okay. Starting
from the rest position. Sign with me. Let's do it three times. Okay. We just explored how
does sign interpreter? Here's how we sign
janitor. Okay. Two parts literally, it's
gonna be clean up person. Uh-huh. The first part, open hands like that. I'm right handed, non-dominant
hand, right down here. Palm facing up. Dominant
hand. We're gonna go 12. Kind of like your Dustin
something off, clean up. Now we go to person flat
hands again, right here, drop-down person,
altogether, clean up. Person. In other words,
janitor. From the side. Janitor. Okay. Starting from the rest
position, sign with me. Let's do it three times. Okay. We just talked about
how to sign janitor. Here's how to sign journalist. Okay. Two-part sign
newspaper person. Alright, The first part,
we use both hands. I'm right-handed, non-dominant
hand, just a flat hand. That's our platform
dominant hand. We're gonna be making
this pinching motion right here with our
thumb and index finger. Put your thumb right
down on your hand, just leave it there
and then just close up your finger twice. Newspaper. Right
now we need person, flat hands, person, person. So altogether we have
journalist from the side. Journalists. Okay. Starting from the rest
position, sign with me. Let's do it three times. Okay. We just talked about
how to sign journalist. Here's a sign for Judge. Okay. Use your dominant hand. I'm right handed. Last
three fingers down. Take your thumb and
just push it in against the side of
your middle finger. Now wrap your index
finger over the top. Alright, there we go.
Let's do it again. Last three down, DM prestin, index finger over the top. Now we're just going
to pretend like we're holding a hammer, a gavel, and go one to
make order in the court. Judge. From the side. Judge. Okay. Starting from the rest
position signed with me. Let's do it three times. Okay. We just talked
about how to sign. Judge. Here's how
to assign landlord. Ok. use your dominant
hand. I'm right handed. We're gonna meet the hand
shape of the letter l, like L for loser, right? Or it is L from the alphabet. Go like this. Start here
and go one to right. We're just using that l, We're
going to swivel forward, come back up, move over just a little bit, swivel
forward again. So we have landlord from the side. Landlord. Okay. Starting from the rest
position, sign with me. Let's do it three times. Okay. We just talked about
how does sign landlord. Here's how to sign lawyer. Okay. Two-part sign
literally law person. Okay. The first part, law. We're gonna use both hands. I'm right-handed,
non-dominant hand, flat hand. Put it about here.
Dominant hand, L from the alphabet,
we're gonna go 12. Law. Now we need person, flat hands go like
this. Just slide down. Person. So altogether law, person. In other words,
lawyer. From the side. Lawyer. Alright. Starting from the
rest position, signed with me. Let's do it three times. Okay. We just talked
about how to sign lawyer. Here's how to assign manager. Gonna be a two-part sign,
literally control person. Make sense. The
first part, control. We're going to use X
hand shapes both hands. How to make it x? Well,
stick up your index finger. Curve them down like your
captain Hook's two hooks, right? Put them here. Now which one's gonna go out
while the other one goes in? So alternating. Alright, so we have control. Now we need person,
flat hand shapes, go like this and just
dropped down person. So altogether control person, Manager. From the side. Manager. Okay. Starting from the rest position, sign with me. Let's do it three times. We just talked about
how does sign manager.
146. Review | Sign & Understand: Let's do signing review for occupation signs, number three. Right. Something's going
to have pop-out pop up. I need you to sign it
before I do write, go ahead and sign this. Janitor, firefighter, journalist, Farmer, interpreter, judge, florist, manager, landlord, lawyer. Okay. This was
signing review for occupation science number three. Let's do understand interview for occupation
science number three. So take a look at me. Alright, I'll be
signing something. You figure out what I'm signing. Just shout it out out loud. Here we go. What am I signing? Interpreter, journalist, Farmer, firefighter, landlord, Judge, florist, janitor, lawyer, manager. Okay. This was understanding review for occupation
signs number three.
147. Learn | Occupation Signs 4: Occupation signs,
number of bore. You're about to learn
how to sign and understand mechanic,
model, nurse, optometrist, pastor,
pharmacist, photographer, pilot, plumber, police officer. Okay, We have a separate
lesson for each one. You're going to
learn hand shape and position hand motion
and do practice after you've learned
all ten signs will do a two-part review for
signing in understanding. Alright, let's jump in. Here's
how we signed mechanic. Okay. Two parts sign. We're gonna have wrench person. How do we do rent? Well,
going to use both hands. I'm right handed, so my
non-dominant hand, index finger, put it down there, tip pointing
forward, dominant hand. We're going to make
a V like V for victory from the alphabet
V. Now we're going to use those and clamp on clip onto the tip of our index finger
of our non-dominant hand. Then we're gonna go one to rent. Next we need person, flat hands, star right
there and dropped down. Person. So altogether
wrench person which is mechanic. Okay. From the side. Mechanic. Okay. Starting from the rest
position, sign with me. Let's do it three times. Okay, something important. This sign for mechanic is the exact same sign for Polymer. Now before we freak out, keep in mind that all language, sign language, spoken English, spin is German,
whatever has, context. Context is wonderful. Very rarely, if ever, there's someone walk
up to you and say mechanic or sign, then go. Did I sign mechanic or
did I assign and plumber know it just doesn't
happen that way when we're communicating,
we have contexts. So if you're in a spot and
they're working on cars, engine blocks, all that stuff. And someone goes like this. Are you going to think plumber? Know, you're going
to think mechanic. Alright, now let's say you're in your bathroom, there's a toilet, people around, waters
gushing like crazy. Someone goes like this. Are you going to
think mechanic know, you'll be thinking plumber
because you have contexts, you have the information, the
situation, what's going on. Alright, so it's
important to remember. That can mean mechanic, it can mean plumber. Here we're using
the form mechanic. But given the situation
once you get out there, it'll be easy to know what they mean or what you want to convey. Okay, we just talked about
how does sign mechanic? Here's our design model. Okay, use your dominant
hand. I'm right handed. Handshape is a letter
from the alphabet. How do you make it go like this? Index finger, thumb
tips together. Right now, put the
tips right here on your shoulder or close to your shoulder and just
going to go like this, right to swing your shoulder. Pretend you're on a fashion, fashion runway and
you're going to stretch your stuff. Right? So we have model from the sine model, okay, Starting from the rest
position, sign with me. Let's do it three times. We just talked about
how to sign model. Here's how we sign nurse. Okay. We're going
to use both hands. I'm right-handed,
non-dominant hand, just gonna do a flat hand, put it right here, and
tilt your wrist up. Alright, somebody like that with your dominant hand or
your fingers together. Last two down. There we go. So we're going to use the tips. First. We're going to bend down
just a little bit and go one to nurse from the side. Just think of the nurse is
trying to take your pulse. Nurse. Okay. Starting from the rest
position, sign with me. Let's do it three times. We just talked about
how to sign nurse. Here's how to sign
up Tom interests. Alright, literally
we're gonna do eyes and Dr. makes sense, right? The first part, use
your index finger, just go 12, just
underneath your eyes. No need to poke
yourself in the eye. Just go eyes. Now we're going to do Doctor, we're going to use both hands. I'm right-handed, non-dominant
hand flat hand shape. Put it down there with
your wrist tilted up. Alright, dominant hand, flat. Bend down those fingers a bit, use the tips and go
12 on your wrist. Dr. So altogether eyes. Dr. Optometrist. From the side? Optometrist. Okay. Starting from the rest
position, sign with me. Let's do it three times. Okay, we just talked about
how to sign optometrist. Here's how to sign Pastor. Okay, use your dominant
hand. I'm right handed. We're just going to be using
the G handshape, right? It's the same handshape
that you would use if you're saying how
thick is the book? Well, it's this thick. Alright, we're
going to use that, use the tip of your
fingers and go like this. Right here, your neck. Alright, Now this sign also
works for a priest, right? So think of a Catholic priest. They have the black outfit and that little white
thing right here. All right. So we're going to use therefore pastor as well. Pastor from the sign. Pastor. Starting from the rest
position, sign with me. Let's do it three times. Okay. We just talked
about how to sign Pastor. Here's how does sign pharmacist. Alright, literally we're
going to do medicine. Person. Makes sense. How
do we do medicine? Well, we can use both hands. I'm right-handed,
non-dominant hand, flat hand. That's our platform.
Dominant hand. We're going to just use the
tip of our middle finger. So Ben that middle finger down, put it here and go
back-and-forth. Medicine. Now we need person. Glad hand shapes go
right here and just dropped down person, altogether, medicine person,
or in other words, pharmacist. From the side. Pharmacist. Okay. Starting from the rest position, sign with me. Let's do it three times. We just talked about
how to sign pharmacist. Here's how to sign photographer. Okay, So taking a picture
person makes sense. First part, how do we do
it? Well, go like this. Last three fingers down there, we're gonna go with
like here, like we're holding a camera. Now I'm right-handed,
That's my dominant hand. I'm going to go click. I just took a picture. Alright, The second
part is person. Use flat hands, go right
here and goes straight down. Person. So altogether taking a picture, person, photographer. From the side. Photographer. Okay. Rest, position, sign with me. Let's do it three times. We just talked about how
to sign photographer. Here's how to sign pilot. Alright, literally why person? Alright, so the first part, use your dominant hand
and we're going to make the I love you sign. All right. Like this middle
two fingers down. That's I love you sign now
it looks like an airplane. That's what we're
going to use it for. So go here and go fly. Right next we're
gonna do person. Just flat hands start
here and go person. So altogether, why person, which is pilot? From sine? Pilot starting from the rest
position, sign with me. Let's do it three times. We just talked about
how to sign pilot. Here's how does sign plumber. Okay. Two parts wrench person. How do we sign rent? Well, both hands.
I'm right-handed. That's my dominant hand. Non-dominant hand for
me, the index finger. Alright, I'm gonna put it here
like I'm pointing forward. Dominant hand them
and make a V like victory V from the alphabet. Take those and I'm
going to clip onto the tip of my index finger
up my non-dominant hand. I'm gonna go one to rent. Okay. Then we're
gonna go to person, flat hands and go down person. So altogether wrench, person, plumber from the side. Plumber. Starting from the rest position. Sign with me. Let's
do it three times. Okay, something important here. This sign for plumber is the exact same
sign for mechanic. So we're not going to freak out because it's very uncommon
that would anybody would walk up to you and go like this and then immediately say, what did I sign,
plumber or mechanic. Know, you're going
to have contexts. So a few of your
bathroom or kitchen, the pipes are going crazy, water shooting all over. Some of those like this. Are you going to think
mechanic like fixing your car? No. You didn't think plumber like fixing your pipes,
the water problem. Now if you're in a place
where they're fixing cars, there's engines, tools, oil, all that stuff all around. Someone goes like this. Do you think they mean
plumber? Of course not. They mean mechanic right
now we just need contexts. That's how language works. How often do we talk
in single words? Not that often.
There's a context. We have extra information, things we can see things
that are going on. Okay, so here we just
learned how to sign Plummer. Just keep in mind it's the
exact same sign for mechanic. And your cue, your clue to know the difference is context. Context very important. Okay, we just talked about
how to sign plumber. Here's how we sign
police officer. Okay. Use your dominant
hand. I'm right handed. The handshape is C from the alphabet.
How do you make a C? Well, go like this
fingers altogether, curve them down and by golly, it even looks like a C. Now take the inside parts and just
tap twice on your test. I'm right handed, so I'll
go over to the other side. If I was left yet
to go like this. Alright, so I'm right handed. So we have police officer from the side. Police officer. It also works for COP. Starting from the rest position. Sign with me. Let's
do it three times. Right. So we did police
officer keep in mind that another hand shape which
is similar is this, right? It's still kinda have that
C thing going on there, but we're not doing the full C, just the index finger
and then go like this. Alright, just
basically mimicking the badge of the police officer. That's another hand shape you'll see to be consistent
throughout this course. I'll be using the full C
handshape going like this. Okay. We just talked about
how to sign police officer.
148. Review | Sign & Understand: Let's do sign-in review for occupation signs. Number four. Okay. In a moment you're going
to see something pop up. You sign it before
I do. All right. I need you to sign this. Nurse, model, optometrist, pharmacist, police officer, pilot, pastor, photographer, plumber. How do we know it's
not mechanic contexts? Yes. Area the
information around it. Plumber. Mechanic. How do we know we're not indicating
plumber context? Yes. Look at the picture, right. Mechanic. Okay. This was
signing review for occupation signs number four. Okay. Let's do
understanding review for occupation
signs, number four. All right. Take a look at me. I'm going to sign something, try to figure out what
the heck I'm doing. Here we go. Optometrist, model, mechanic. Or if you said plumber, you would also be right because there was
no context, right? This is one of the
unique situations where I'll do is sign. And you try to guess what
I'm signing right now, keep in mind it could be
plumber or mechanic, right? Once you get out
in the real-world, very easy to see with contexts, what's being signed. Alright? Pharmacist, police officer, pastor, photographer, pilot, nurse, plumber in here. How do we know it's a plumber? Contexts the situation. Alright, if you
answered mechanic, when I was going like this, you said mechanic,
well, you'd be right. If you said plumber,
well, you'd be right, because right here
in this whitespace, there's no context, right? But once you get
here, are obvious. Plumber. Okay. This was
understanding review for occupation
signs number four.
149. Learn | Occupation Signs 5: Occupation signs number five. Okay. You're about
to learn how to sign and understand
salesperson, scientist, secretary, server,
soldier, student, teacher, technician,
therapist, veterinarian. Okay, We have a separate
video for each one. You're going to learn
handshape, pan, position, hand motion, do practice. Right after you've learned
all ten signs will do two-part review, sign-in,
and understanding. Alright, let's dive in. Here we go. Here's how
to sign salesperson. Alright, two parts, cell person. Alright, How do we do sell? Go like this, fingers together. All the tips down together, start here and just
go forward once. Cell. Now we need person. We can use flat hands, go right here and
dropped down person. So altogether cell person. In other words,
salesperson. From the side. Salesperson. Alright,
starting from the rest position, sign with me. Let's do it three times. We just talked about how
to sign salesperson. Here's how to sign scientists. Alright, first part, we're
gonna do science and person. So a science use a hand-shaped, we can use the tips like that, the tip of our test tubes maybe reporting the chemical
point and another one. So we have science. And now we need person, flat hand shapes go like
this, drop them down. Person. So altogether
science person. And we get scientists
from the side. Scientists starting from the
rest position, sign with me. Let's do it three times. Okay. We just talked about
how to sign scientists. Here's how does sign secretary. Okay, the first part, we're going to use
a k handshape with our dominant hand
and a flat hand with their non-dominant
hand, right? Non-dominant hand down there, like we're going to
write down something a k. How do you make
a K go like this? Last two down, put your thumb against the inside part
of your middle finger. Now we're going to use the
tip of the middle finger and go once on our lips. Now we're just
going to slide off the side like we just
wrote down a quick note. And we're going to
drop down into Person, person, flat hands, person. Alright, let's start
from the beginning. So we have Secretary,
from the side. Secretary. Alright. So they
quick wrote down a note and then person okay. Rest position. Sign with me. Let's do secretary three times. Okay. We just talked about
how to sign secretary. Here's how to sign server. Okay. First part,
serve and then person. Throughout the whole thing,
the hand shapes are the same. Yes, flat hands. Now I'm right-handed,
non-dominant hand. I'm going to start down here. I'm going to put my
dominant hand first, go back and forth
a couple of times and then down to person. So altogether we have server. They're bringing you
something from the side. Server. Okay, Starting from the rest
position, sign with me. Let's do it three times. Alright, we just talked
about how to sign server. Here's how to sign soldier. Okay, We're gonna be signing
army or military person. All right, hand shapes
like this. A hand shapes. I'm right-handed, That's
my dominant hand. I'm gonna put that one on top, non-dominant hand
down below and go 12. That works for army or military. Next you need person, flat hands, go like
that and drop it down. Person. So altogether
army person, soldier from the side. Soldier Starting from the
rest position, sign with me. Let's do it three times. Okay? We just talked about
how to sign soldier. Here's how to assign student. Alright, literally learn
person or learner. Alright, first part, learn, we're going to use both hands. I'm right-handed,
non-dominant hand. Just put a platform down
their dominant hand. Pretend like you're picking up some sand or powder
or something. I'm gonna go like that
and put it in your brain. It's like information. Put it in the brain. Learn. Now we need person, flat hands, put them right
here, drop them down. Person. So altogether,
learn person. In other words,
students from the side. Student starting from the
rest position, sign with me. Let's do it three times. Okay. We just talked about
how to sign student. Here's how to sign teacher. All right, literally
it's gonna be Teach, person. Alright, teacher. How do we assign teach? Well, start with o hand shapes.
Live from the alphabet. Squish them down a little bit, pull them about here close to
your head and just go out. Teach, right? Like you know, the information
is in your head and you're getting it out through
your teaching it, Teach. Now we need person, fled hand shapes, put them about here, drops straight down. That is person. So altogether teach person. In other words,
teacher. From the side. T2, starting from the rest
position, signed with me. Let's do it three times. Alright. We just talked
about how to sign teacher. Here's how to assign technician. Okay, two parts
we're going to do with technology in person. How do we sign technology? Well, both hands,
different hand shapes. I'm right-handed,
non-dominant hand, just going to make a fist or
we could say the letter S. We're going to put it about
here with our dominant hand, which is going to use the
tip of our middle finger. And we're gonna go 12, right? So just tapping on this
part of the hand down here. Technology. Now we need
person flat hand shapes, put them about there and go. So we have person
altogether, technology, person or technician.
From the side. Technician. Alright,
starting from the rest position, sign with me. Let's do it three times. We just talked about
how to sign technician. Here's how to sign therapist. Literally it's help person. How do we assign help? Well, I'm right-handed, non-dominant hand,
just flat hand. Put it right down
their dominant hand, a from the alphabet. Bottom part of the a, put on top of our hand and raise it up. Help. Now we need
person flat hands, put it about here
and dropped down. That is person. So altogether we
have help person. In other words,
therapist from the sign. Therapist, Starting from the
rest position, sign with me. Let's do it three times. Alright. We just talked
about how to sign therapist. Here's how to sign veterinarian. Let's write. All
we're gonna do is fingerspell the first three
letters of the long word. All we're gonna
do is go V, E, T. That's it. Veterinarian.
From the side. Veterinarian. Starting
from the rest position. Sign with me. Let's do it three times. Okay. We just talked about
how to sign veterinarian.
150. Review | Sign & Understand: Let's do signing review for
occupation signs number five. Alright, so this is
going to pop up. You sign it before
I do. Here we go. You sign this? Teacher? Secretary, salesperson, soldier, veterinarian, student, server, scientist, technician, therapist. Okay. This was
signing review for occupation signs number five. Let's do understanding
review per occupation signs
number five. Alright. Take a look. I'm going to assign something. You figured out what I'm
signing and shout it out loud. Alright, here we go.
What am I signing? Soldier, secretary, technician, server, teacher, veterinarian, therapist, salesperson, student scientist. Okay. This was
understanding review for occupation
signs number five.
153. Dialogue #1: Here's your dialogue. Feel free to pause the video, sign it, go at your leisure,
work your way through it. Good practice.
When you're ready, push Play will sign it together. Okay, Let's sign it together. Alright, nola want
become engineer. So an English,
something like does know the one to
become an engineer. Those small words in
English, do does, did MRE's was where the n thrown out in ASL don't sign
them. Right here we go. Nola. Want want become become an engineer
or we sign it? Engineer. Right. And it's a yes-no
question. Hint, hint. Raise those eyebrows. Right. Let's do
it. Sign with me. Nola want become engineer? Again? Nola want become engineer? Alright, notice how I just put my eyebrows up at the
end of the sentence. It's much more
comfortable that way you could go like this to
the whole sentence, but it's awkward
and uncomfortable. Alright, let's sign
the response first. No, she not hungry
work, she lazy. Write in English would be
something like Now she doesn't really want to work
because she doesn't have the desire to work. She's lazy. Now the sign for
hungry is useful. It can mean different things
in different contexts. And here we have a
pretty clear contexts. Someone is asking, does she
want to become an engineer? Someone else is responding now she doesn't really have
the desire to work. So the sign for hungry.
Well, how about this? We'll get there. How do we assign No. No. She index finger. She's not here. We'll
just point out to the side like an
imaginary person. She, alright, not
how do we sign? Not right thumb. Stick it under naught. Naught. Okay. Hungry. What is the sign for hungry? You feel hungry.
You have hunger. Uh-huh. C handshape. Hungry. Hungry. Right now in this situation, it's going to be the
same sign in English, you might say something like, she doesn't have the desire, she doesn't yearn, alright, don't know urge to
do something here. We can sign hungry.
The sign hungry. And it would mean
the same thing. She just doesn't want to do it. He doesn't know how to work. So we'll go hungry. And it's going to be not hungry. And an English is think
it'd be like no desire. Work. How do we sign it?
The verb work. Work. She she what? Lazy. Lazy, right. L handshape. Lazy. Okay. Let's
do it altogether. No, she not hungry work. See lazy. Know, she not hungry work. She lazy. Alright, let's put
it all together. Full dialogue, step-by-step,
Step-by-step, side-by-side. Here we go. Sign with
me. Nice and slow. Nola. Want become an engineer? I Rosa know, C
naught, hungry, work. She lazy. Right? Again. There we go. Nola. One become engineer. Know. She not hungry. Work. She lazy. Okay. So we did the whole
thing step-by-step, standby sign with practice. You want to go back
and do more practice? I'd say that's wonderful.
154. Dialogue #2: Well look at this. We have a dialogue just for you. Feel free to pause the video, work through it side-by-side
and get some practice. And when you're ready, push Play, we'll
assign it together. Alright, let's sign
it together, right? You think our teacher,
look forward, Jean English, somebody like, do you think our
teacher is looking for gene are searching for Jane? Alright, let's do it. You, you ever useful
index finger? Think. Think. Our, how do we sign our
possessive pronoun? Hour? That's right. Teacher. Yes, teacher. Look for or search,
looking for something. How do we sign it? Right. Look for and finger
spell the name Jane. And what kind of question? Yes. No question.
You can answer. Yes, no or maybe so raise
those eyebrows, right? When you're doing
gene raises eyebrows. No, it's not needed
you could for the whole sentence but
bit uncomfortable. I recommend just
doing it at the end. Alright, let's do it
altogether. Here we go. You think our teacher,
look for Jane. Again. You think our teacher
look for Jane? Right? Let's do the response. Yes, Jane, not like
finished homework. Write in English. Yeah, gene doesn't like
to finish your homework. Alright, Now look here and if
you remember, we have not, like now there's two
separate signs there, but we could combine them
into one side or one word. What do you think? A high dislike. But just like in English, you might say I dislike ice cream or I don't
like ice cream. You have a couple of options in ASL. You can do
the same thing. You could sign I
dislike or I not like. Alright, let's
take a look at it. Here we go. Yes.
How do we sign it? Yes. Uh-huh. Affirmative. Jane. Jane. How do we sign? Not not
shaking their head. Not how do we sign Lake. Lake. Lake. Alright. So we had not like, not like or you could
just do dislike. Alright? You wanna do not like. Why not? If you want to do dislike, dislike, Why not?
Just like English? So often when people
are learning language, someone tells him it has to be this way and it's the only
way to do it in Nala. Now if that's your teacher and they're giving you a grade, you might want to do is
do it how they say it, and didn't get the grade
and do well on the test. Once you get out
in the real-world, just remember that language
is flexible, very flexible. And it's wonderful because it's, it allows us the ability to do so many things in so many
different situations. So once you get school
brain and we're like, it's gotta be this way. That's the only way
it's black and white. Well, that works
for school land. But once you get out and
real-world, real deaf community, there's realize
there's a lot of gray or is quite flexible. And it's wonderful
because language evolve this moving, it's alive. So you might see, not like, you might see dislike. Alright, I'm rambling. Let's get back to the
signing. How do we sign? Finish, finish finish homework. I would do it. Hi, homework. Let's write homework, right? Let's put it all together. Psi in with me. Nice and slow. Yes. Jane not like
finish homework. Yes. Jane, not like finish homework. Alright, let's put it all
together so it makes sense. There we go. Sorry, in with me, Let's do it. You think? Our teacher, look for Jane? Yes. Jane. Not like finish homework. Notice here. Jane, we could say she
and I we could just go. Yes. She referring to
her off to the side. She's not here. Imaginary Jane. She but you could finger
spell it as well. Alright, thank you. What an English do you think
George wants an ice cream? Now you could say,
yeah, He wants one. Where you say, yeah,
George wants one. Options, languages flexible. Alright, let's sign it off. Here we go again. You think our teacher,
look for jane? Yes, Jane. Not like finish homework. Alright, we did the whole thing. Practices many times. You need to feels good to get improvement and just
work through it. Alright, let's move forward.
155. Dialogue #3: Another dialogue, go nuts. Pause the video,
work through it. You know, all the
signs we practice. We've done all those signs. So go ahead. Alright, if you want
to do by yourself, pause the video
when you're ready, push Play will sign it together. Let's sign it the other. So plumber go to your
house when in English, something like When did the
plumber go to your house? Alright, here we go.
How do we sign plumber. Plumber, right? Goto. Goto. I have your your house. House. When question we're WH question, word
questions, sign. When. Further eyebrows,
extremely important. Communicate that WH question. When? Alright, let's do it altogether. Sign with me. Plumber. Go to your house
when right? Again. Plumber, go to your house when? Alright, let's
sign the response. Let's see plumber not arrive. We wait. Now let's use it
in this situation. Let's pretend we're upset. We took the whole day RF to wait for the plumber
and he or she, they did not arrive.
Were ****** off. Alright, so why don't we
just embellish our signs and use that in the situation were upset, they didn't come on. Okay, so let's in English, the plumber didn't arrive. We've waited and waited. Okay, let's do it. Plumber. Plumber.
Not, not, not right. So an english be like didn't ASL not arrive, how do we sign? Arrive, arrive, right? Arrive. We, we wait. How do
we assign weight? Right? Now this is one
thing, absolutely cool, but itself, the basic
sine by itself is weight. You're just waiting. But watch. What do you think I'm trying to communicate if I go like this? Now becomes a little
bit more obvious. First, I'm upset
about waiting and I keep doing this sign
longer and longer. So it's like, Oh,
you had to wait a really long time
and it pastes job. Alright. Use the
facial expressions, embellish the signs to explain and communicate what's happening in the situation. We already built up the
situation where we're upset. The plumber didn't
show up and we scheduled the whole day
for the plumber to come. They didn't show up. So we wait. Okay. So let's sign it all
here we go. Sign with me. Plumber, not arrive. We waste. Alright again,
plumber not arrive. We wait. Okay, Have some fun with it. Alright, let's do it All. Question response,
step-by-step. Here we go. Sign with me. We'll go slow
and then we'll speed up. Plumber. Go to your house. When plumber not arrive. We wait. Again. Here we go. Plumber. Go to your house. When plumber not
arrive, we wait. Okay. Let's try it. Sign it. First part
will be regular. It's just the person
asking the question. But down below, let's say it didn't really pull
this off them. What, where does happy we didn't have to go
to work that day. We're at home and watch Netflix while we're waiting
for the plumber to come, but the plumber never showed up. So we're not ******
off this time. We're just going to
share some information. Let's change our
facial expression and body movements
were not upset. Now, we're not disappointed. We're just kinda sharing
info, right? Let's do it. Okay? Now I urge
you to have fun. Now it feels, might feel a little bit awkward
that you're using all these extra
facial expressions and body movements
doing all this stuff. And it was kinda
like embellishing. It doesn't quite
feel quite right. But keep in mind in
the deaf community, people signing with each other, signers that have been doing in around the deaf community
for a long time. They do it, they
embellish because it's not really called embellishing anymore because
it's just so natural. That's just how
you do it, right? Because it just why? Good question. Why?
Because it communicates so many details
about the situation. Right? Okay. We
signed everything step-by-step question
statement, question response. Alright.
156. Learn | Numbers 0-100: In this section we're
going to focus on numbers and specifically
numbers 0 through 100. So you're going to
learn how to sign them and also how to count from 0 to 100 will first divide up the
signs into smaller chunks, 0 to 910 to 1920 to
29, stuff like that. It will get some practice. Then we'll put them all
together and we'll sign from 0 to 100 without stopping. Okay? After we've done
the numbers, well, we'll do some dialogues
with numbers. Great opportunity to
do full sentences, signs altogether, and do
questions and answers. Alright, well, let's jump in. Let's count some numbers. Okay? I'm big. Let's focus on numbers
0 through nine, since the signs are pretty
much going to be alright here, I thought, why not just zoom in. So you can see my hand easier. So let me count 0 through nine. You can watch, you can try to do it along with me either way. When I'm finished,
we'll go one-by-one and we'll talk
about each number. Okay, here we go. 0123456789. Okay, so let's take a look. 0 is really straightforward. You know how to sign an
OH from the alphabet. Well, you know how to
assign a 00, yes, 0. Let's do one. Okay, here's a one. Right? So it's just the index finger, but since we're counting here, we're going to flip
it around and have the back part
facing towards you. I could say palm facing in. So we have one. Alright, to just put up that second finger,
It's just a v. Alright, go like that. That's 22 fingers, three. Let your thumb go up. Okay. Some people, they'll go
like this for three, but we're not going to use
that in sign language. We're going to go
like this for three. Alright, there's the handshape. Since we're counting here, show the back of the hand. Alright, let's go to four. Tuck the thumb in and
put up four fingers. 45, let the thumb back out. So we have five. Okay, so let's go back. Let's just do one through five. Well, heck, why don't we
just start back at 0, alright, so here we go. 01234. Five, okay, so one through five, you're going to have the back
of the hand facing forward. Or you could say the palm facing in because we're counting, we're counting from 0
or eventually to 100. When you're counting for his
numbers one through five, have the back of the
hand facing forward. If you're doing a phone number, if you're doing a social
security number or postal code, like a series of numbers, your hand will face forward. But here we're counting. So one through five, hand facing backwards,
palm facing in. Okay. So let's go to 66. Okay. Big thing you notice is that
I've flipped from here. I flipped around now six, thumb and the pinky just
come and touch each other. Now you're thinking,
well this kinda looks like a W. It's similar. When I do a W, I
pinned down like I pinned down the pinky like
hold it in place right. When I do a six, I just have the thumb and the tip
pressing against each other. Kind of a subtle
difference from the side. This will be a six,
and then this is a w. Alright, either way
you got these three fingers sticking up here. So 66, Let's go to seven. Alright, so six was here, seven, you just move
over one finger. I bet you can guess
what eight will be? Eight? Yes, Eight and nine. Alright, so let's
do 6789, right? So 6789, palm facing forward. We're just going to
go along the fingers. 6789, just like that. Okay. So why don't we go through and we
shall do it again. Because practice makes
improvement. Yes. Alright, so here we go. 01 is a one like this. No is one like this because we're counting
right, one through five. Palm facing towards you. Alright, here we go. 23456, alright, six, palm facing forward. 789. Well look at that,
just like that number 0 through nine.
Let's do it again. Will just flow nice and N flow. Well, here we go. 0123456789. Okay, a little bit quicker. 0123 456789. Alright, so if you'd like to
go even quicker, you know, feel free to boost the speed, speed up the video or you can slow it down as well up to you. All right, so we just talked about numbers 0 through nine. Fabulous. Let's talk about
numbers ten through 19. Alright, so watch me, I'm going to count through
them just onetime fairly quickly and then we'll slow
down and go one by one. Alright, so we
have 101112131415, 16171819. Okay, so you're
gonna notice some shaking going on, right? First for ten. This use your thumbs
up and you're going to go like this, 1010. Alright, since we're counting, you're probably just
gonna do a onetime. If it's ten all by itself, someone might shake
it a few times. 101011. Do you remember
the sign for one? Alright. It was like that because we're
counting palm facing in. That's right. So we're just gonna
go like this. 11. 11, I bet you can
guess what 12 is. That's two we want
1212 right now. 13. Okay. Three was like this
this time round for 13. We're going to close up these fingers and just go like this. 1313. Alright, why is it 13? Well, just think of like this is the third finger, right? Three. Close them up. 131314. Alright, like that, 14 hideaway, that thumb, it's just
tucked in there. 141415. Alright. Let their thumb blackout fingers
still altogether. 15 15166 was like this. Now we're just going
to twist two times. 161617, I bet you can guess. Right. 1717, just a couple of shakes. 1818. Right. And also palm facing forward
just like six through nine. Palms facing forward
for 16 to 191919. Right. Okay. So why don't we go through it
again a little bit quicker. I'll have the numbers
light up. Why not? Here we go. 1011, 1213141516171819. Okay. Alright, let's do it altogether a
little bit quicker. Sign with me. Here we go. 10111213141516171819. Alright, little bit quicker. Let's do it. 10111213141516171819. Okay. If you want to practice
at a quicker speed, feel free to adjust the
speed of the video. I can go quicker or slower
because here I'm digital. Alright. We just talked about how to
sign numbers ten through 19. Let's talk about
numbers 20 through 29. Okay, so I'm gonna assign
through them and take a look. Then we'll go one by
one, right here we go. 2021. Twenty two. Twenty three. Twenty four. Twenty five. Twenty six. Twenty seven. Twenty eight. Twenty nine. Right. Okay. Let's jump in 200. Going to use your thumb and
your index finger and just tap twice from the side. 202020. Twenty, right,
Let's move to 21. Make an L handshape
like L for loser or L from the alphabet and just take your
thumb and go like this. Twenty one. Twenty one. Twenty one. Okay. So 20202122, pretty
straightforward. Go like they're
facing forward this time for the two because we're
not at one through five, we're at in the
twenties now, go 2222. So this one's really
going to swivel down, just wow, wow, Right,
slap it down there. 22. Alright, let's go 2021. And 22? Yes, that's right. 23. Go like this. Middle finger. Twenty-three.
Twenty-three. Twenty-three. Let's go back. 202122. And what was it? 2323. Let's go a little bit
quicker. Here we go. 20. Twenty one, twenty two, twenty three. Twenty four. Twenty four. So this will be our 20
and then we go to four. 24. Alright, let's go 20. Twenty one, twenty two, twenty three, twenty four. Twenty four. Okay. Let's go to 2525. Middle finger this time
with all of the fingers spread out and then flip that
middle finger down twice. Twenty-five. Twenty-five.
Twenty-five. Right. Let's go to 20202122. Twenty three. Twenty three. Twenty four. And what was 2525. Okay. So 23 is like this. The middle finger going down in 25 is all fingers like this. And middle fingers going down. Right? Twenty six. Twenty six, twenty six. So we add the 20 part and
then six, number 626. Realize go 20. Twenty one. Twenty two. Twenty three. Twenty
four, twenty five. And how do we do 2626? That's right. Twenty-six I bet
you can guess where 27 is. If 26 is like this. Twenty seven half twenty
seven. Twenty seven. Twenty eight. What do you think? Twenty eight. Twenty eight. Twenty nine. Twenty nine. Twenty nine. Right. So when you're just doing 26 to seven to eight to nine
twenty six twenty seven, twenty eight, point nine. Who's going up the fingers
with the 20 in-between? Okay. So let's go nice and
slow. Here we go. Twenty twenty one twenty two. Twenty three. Twenty four. Twenty five. Twenty six. Twenty seven. Twenty eight. Twenty nine. Right. So let's do them all together. We'll do a slower then we'll
speed up a bit. Here we go. 20 twenty one. Twenty two. Twenty three. Twenty
four. Twenty five. Twenty six. Twenty seven. Twenty eight. Twenty nine. Yes. My my experience, the 20s for some reason
or the most challenging, maybe, maybe the teams as well. But the 20th of the most
challenging because there's this kind of Elder, It's not as straightforward
as the two. So we can do it. You've made it this far. Let's do it again. Here we go. 20 twenty one. Twenty two, twenty three, twenty four. Twenty five, twenty
six, twenty seven. Twenty eight. Twenty nine. Alright, so what is the
cure if something is difficult or it's
just not working? Practice, practice,
practice, practice. Feel free to repeat this
video as often as you need to get the 20s down. Okay. We just talked
about numbers 20 through 29. Alright. Number is 3239. I'm gonna be honest with you. After you've finished the 20s, you've done the ones
that tends to twenties. The numbers from here on upper, much more
straightforward. Yay. Okay, so take a look. Let me count 3239 then
we'll go one by 130. Thirty one, thirty two
thirty three thirty four. Thirty-five. Thirty-six. Thirty-seven. Thirty
eight. Thirty nine. Right. Okay. So 30 Let's do it. It's just 30303030303131313131. Thirty-two. Thirty-two. Thirty-two.
Right. Thirty-three little bit more interesting. 3333. You remember how we signed 22? The two handshape and
we slapped it down. 22, you're going to notice a pattern with double numbers.
So we're going to do 22. Thirty-three here. And I bet once we get to 44, you'll be like, Oh, yeah, 44. We'll talk about that when
we get here right now. 3333. So you have the
three, just slap it down. 3334, back straight up. Thirty-four. Thirty-four.
Thirty-five. All right. Why don't we count
from 30 to 35. Here we go. 3031, 3233. That's right. Those double numbers
thirty-three. Thirty-four. Thirty-five. Alright, let's go to 36. What do you think? Very straightforward, 36, which is Thirty-six. Thirty-six. Thirty-seven. Thirty-seven. Thirty eight and thirty nine. Okay. So let's do them all. Here we go. 30 thirty one thirty two, thirty three slab in a
down double numbers, 3435. Thirty-six. Thirty-seven,
thirty eight, thirty nine, and onward. Alright, let's do it
a couple of times. Here we go. 30 thirty one, thirty two
thirty three thirty four thirty five thirty six thirty seven thirty eight
thirty nine. Okay. One more time. 30.5 thirty one thirty
two thirty three thirty four thirty five
thirty six thirty seven, thirty eight thirty nine. Okay. So this was numbers
30 through 39. Wonderful. Okay. Number is 40 to 49. I'll jump right in. Watch me and then we'll go one by 140. Forty one, forty two, forty three forty four. I have double number forty four forty five forty
six forty seven, forty eight, forty nine. Right. You got this. I'll do it for 04040. Forty one, forty two, forty three, forty four. That's right. 44, double now. Double numbers. Remember 20 to 33, and now we're at 44. Just slap them down. 4445. Okay. Let's go back and do
40 to 45. Here we go. 40. Forty one, forty two, forty three, forty
four, forty five. Okay. What do you think
about for forty six? Forty six. Forty seven. Forty eight, forty nine. Good, good, good. Let's do them all. Starting at 40. Here we go. 4041. Forty two, forty three, forty four, forty five, forty six, forty seven, forty eight, forty nine. Alright. Let's do one more time. Here we go. 40 forty one, forty
two, forty three, forty four, forty five, forty six, forty seven, forty eight, forty nine. Onward. Okay. We just
did number is 4349. Repeat as much as
you need to write. Let's do number is 5359. Watch me and then
we'll do it together. Here we go. 5051, 5253545567859. Right. Let's do it. 5050 fifty one fifty
two fifty three, fifty four fifty five. The whole number, 55565657589. Right? Alright. Very straightforward. Here we go. 5051525354556. Fifty seven, fifty
eight, fifty nine. Alright, one more time
for good measure. Here we go. 50. Fifty one. Fifty two. Fifty
three, fifty four, fifty five, fifty six, fifty seven, fifty
eight, fifty nine. Alright, seems
kind of redundant. But especially when
you're a beginner, sometimes the hand is just not doing what
you want it to do. This practice is going to
help get all those kinks. Get out the kinks
just make it more smooth as you're
signing practice, practice, practice makes
improvement. Okay. We just did numbers
50 through 59. Okay, it's time for
numbers 60 through 69. Alright, take a look, then
we'll do it one by 160. Sixty one sixty
two, sixty three, sixty four sixty five sixty six sixty seven sixty
eight sixty nine. Alright. So how was how do we do 6060? Let's write 6 zero sixty
one sixty two sixty three sixty four sixty five
sixty six double number. Sixty six. Sixty seven. Sixty eight. Sixty nine. Right. Alright. One more time. Let's do it. 606162636465666768691. Last time for just
for the heck of it. There we go. 60 sixty one. Sixty two, sixty three, sixty four, sixty five, sixty six, sixty seven, sixty eight sixty nine. Voila. These were numbers
60 through 69. Here we are numbers
70 through 79. So take a look. Here. It is 7071727374757677787970. Seventy one, seventy two, seventy three, seventy four, seventy five, seventy six. And yes, you've been
paying attention. Well done. 7 seven, seventy seven, seventy
eight, seventy nine. Where are we? Okay. Here we go. 70 seventy one, seventy two, seventy three, seventy four, seventy five, seventy six, seventy seven, seventy
eight, seventy nine. Okay. So all this practice right now is just going
to help you a lot. Once we go through
0 to 100, right? One last time, here we go. 70. Seventy one, seventy
two, seventy three, seventy four, seventy five, seventy six, seventy
seven, seventy eight. Seventy nine. Alright. We just did number
70 through 79. Who would've known numbers? 8389? Here we go. Watch me. 808182. Three eighty four
eighty five eighty six eighty seven eighty eight eighty nine is
working our way up. Let's do it. 80 eighty one, eighty two, eighty three, eighty
four, eighty five, eighty six, eighty
seven, eighty eight, double number 88
and then 89, again. 80 eighty one eighty
two, eighty three, A4, A5, A6, A7, 8889. Okay. One last time. 80 eighty one eighty
two eighty three, A4, A5, A6, A7, 8889. Just like that number
is 80 through 89. Wonderful. Numbers. 9399. Take a look. 90 ninety one. Ninety two, ninety three, ninety
four. Ninety five. He's six. Ninety
seven. Ninety eight. Ninety nine. Okay. Here we go. 90 ninety one. Ninety two. Ninety three, ninety
four, ninety five, ninety six, ninety seven, ninety eight,
ninety nine, right. Double numbers, slap them down if that's what
it takes to remember. Slap, slap 99. So we had 20 to 3344. Fifty five, sixty six, seventy seven eighty
eight in our arm. Slap him down. 99. Alright. Aerial vertebrae quicker. 90, ninety one. Ninety two. Ninety three. Ninety four, ninety five. Ninety six. Ninety seven. Ninety eight. Ninety nine. Okay. One last time, quicker. 90 ninety one. Ninety two. Ninety three. Ninety four, ninety five, ninety six, ninety seven, ninety eight, ninety nine. Alright. Numbers 9399. Magical. Here's how to sign the big 100. Okay. Are we going to do is one, the number one, and then form a, see the letter C
from the alphabet. Why would we do is see, do you think Latin, C stands for 100, right? So we'll just go one C, one hundred, one
hundred hint, hint. What do you think
you do for 500? You'd go five hundred, five hundred, right here
we're focusing our 100s. So there's 101 C, one C in a market like you're
not gonna go like one. See, you need to have them close enough
together so it's smooth. One hundred, one hundred. Okay, we just talked
about how to sign 100. Next, next step is
counting from 0 to 100. Are you ready? Let's go.
157. Count | #0-100: Here we are. It's time to count
from 0 to 100. We're going to put
it all together. I'm just going to go
at one speed through from 0 all the way to 100. If I'm going too slow, adjust the video speed
and have me speedup. If I'm going too fast, adjust the video speed
and have me slowed down. You have control.
Alright, here we go. Let's start with 01234567891011, 12131415161718192021222324252627282930. Thirty one thirty two thirty three, thirty four thirty five thirty six thirty seven thirty eight. 3940414243444546474849505152535455565785960. Sixty one sixty two sixty three sixty four sixty five sixty six sixty seven sixty eight sixty nine. 70717273747576777879808182, A2 A3, A4, A5, A6, A7, 888990919293949596979899100. Well done way to go about it. We just counted from 0 to 100. Like I said at the beginning, if the speed wasn't for you, it was either too
fast or too slow or maybe it was just
right like Goldilocks. Too hot or too cold. Just right. Alright, we need to
adjust the video, have been slowed down. So in slower, that's fine. You want to speed up
adjusted video and speed up. Okay, Well done.
158. Dialogue #1: Here is your juicy dialogue
with some numbers. Yes. I urge you pause the video, work
your way through it. Signed by sine gets in practice, get those sentences
and the mini dialogue. And when you're ready, push
Play will sign it together. Alright, let's sign it together. So an ASL, max by 83 diaper. Why? In English, something like
why did Max, why 83 diapers? Okay, something
interesting here. Diaper in English,
you're going to put an asset the end to show
that it's plural, right? More than one diaper,
diapers in ASL. Now this is a representation
of the English concepts. But here I'm not going
to write diapers because the sign is gonna
be the same no matter what. If it's diaper or
if it's diapers, the sign is the same. So I'm just going to
leave it like that. How do we know it's plural? The number? Yes, of course it's not just
one single diaper. We have 83 diaper, so we know it's more than one. Okay, So let's sign
this. Here we go. Max. Max. Finger, spell the name. Bye. Bye. The number. How do we sign a D3? A3, Let's see, 83. Diaper. Diaper. And the questions sign wh
throwing the eyebrows. Why? Why? Right. Let's put it together. Sign with me. Max by 83 diaper. Y. Max by 83 diaper. Why? And if you think it's the
weirdest thing in the world, world put it on your face. Why? Alright, let's do the response. Here we go. Don't know
before he by 100. So in English something like, I don't know, before
he bought 100. Okay, so a few things we
can see there were not conjugating by because you don't conjugate signs in ASL, right? We know that it's in the
past because we have before. Right. And don't know here,
you don't have to sign. I don't know. The person in this situation.
You're being asked. So if you just say
don't know, right. You don't have to
say I don't know. You could sign if you want to. Alright. Let's get to it. How do we assign? Don't know. I don't know how to
sign. Don't know. Don't know. Before before
in the past before c0. Well, let's say he's not here, but we'll just refer to him off to the side
like an imaginary guy. He buy. How do you assign 100101100? And we know that we're
talking about diapers because before it was diapers. Right. So let's put
it all together. Sign with me. There are no before he buy 100. Don't know. Before p by 100. Something with the diapers. Okay, we have the full dialogue. Sign with me will go
slower and we'll speed up. There we go. Max by 83 diaper. Why? Don't know before e by 100. Again, max by 83 diaper. Why? Don't know
before he buy 100. Okay, we worked
through the dialogue, sign by sign step-by-step. Wonderful.
159. Dialogue #2: Here's your dialogue.
Pause the video. I urge you to pause the video. Work your way through it
side-by-side and take your time. No hurry. When you're ready. Push Play will sign it together. Alright, let's sign it together. So an ASL, Eva steel
47 motorcycle, wow. Write in English
something like Eva. It was steals 47 water cycles. How, or even stole
47 motorcycle. How? Alright. Alright, here we
go. Let's sign it. Eva fingerspell. Eva steel. How do we sign steel? Steel? We have a number. Forty-seven. Forty-seven. Forty-seven
white motorcycle. Motorcycle. And how those eyebrows
how put it altogether. Sign with me. Let's do it. Eva. Steel 47 motorcycle. How? Ava steel 47 motorcycle. How? Alright, let's get
to the response. I think you remember
you mechanic. So an English something like I think I think you remember
you're a mechanic. Now we don't know
all the details, but there's some
finger-pointing going on in the situation.
So let's jump in. Here we go. I I think you
how do we sign? Remember? Good sign. Remember, right. Remember you? Mechanic who? Nice one. How do we do it? Mechanic. Literally
wrench person, in other words, mechanic. Yes. Alright, let's do
it all together. I think you remember
you mechanic. Alright, again, I think
you remember you mechanic. Alright, let's put
it all together. Here we go. Sign with me, will
speed up as we go. Eva steel 47 motorcycle. Wow. I think you remember
you mechanic. Eva steel 47 motorcycle. Wow. I think you remember
remember you mechanic. Right? Opportunity here.
Notice how I signed. Remember I started
to go like this for some reason I was
thinking maybe steal, but I didn't go like
this right away. What did I do? What did I do? Because I made a mistake, right? What was my reaction? Well, I did my little
funky thing and then I just went back to
the sign, right. Just go back to it. Pause for a moment,
go back to it, and then go forward. Alright, here we go. Whole thing. Okay, wonderful. We worked through the dialogue. Feel free to repeat
as many times as you need to get
the smooth lists. The smoothness between
the signs as you're making the complete
sentences. Okay?
160. Dialogue #3: Hello, Okay, here's your
dialogue, worked through it. Pause the video.
When you're ready. Push Play. We'll sign together. Alright, let's sign together. So hospital, you see 95 nerves. What do an English Something like at the hospital
you saw 95 nurses. What were they doing? Right here we go.
Hospital. Hospital. You you see C 9595. Let's write. Nurse. What do what
do I wrote down? What do? Alright, let's
do it on hospital. You see 95 nurse. What DO hospital you see? 95 nurse. What do alright, let's get to the response. They busy work, help
25 doctor in English, something like they were busy working and helping 25 doctors. Right. Notice I'm shifting
in-between work and help. Because in English you would
say there were working and helping 25 doctors. But in ASL we're not going to assign a n. We're just
going to shift here. Work. Help, right? Alright. How do we sign it? They're not here. Off to the side. They they just an
imaginary group of people. They, that's how we refer to
them. If they're not here. And busy, busy, busy like
OB work, work, work. I'm shifting a little bit over
because in a moment we're going to go to help, right? So work, help and when we shift
it's like and help write. Twenty-five. How do we
signed twenty-five. Twenty-five. Twenty-five. If if you
sign 25 like this to five, I'm going to tell you be
straight with you is pretty much guaranteed
you'll be understood. Alright. It's very
common as well. Let's go to five. Twenty-five. It's just even more
common to go like this. 2525, this is so quick 25. Remember if you go to 25, you're pretty much good to go. Alright, doctor. Doctor, nurse, nurse. Now, doctor. Okay. Let's do it. They busy work. Help 25. Doctor. Again. They busy work. Help 25, Dr. Okay. Let's put it the
other so we have both sides of the mini
dialogue here we go. Sign with me. Hospital, you see 95 nurse. What do they busy work? Help 25. Doctor. Hospital. You see 95 nurse. What do they busy work? Help 25, doctor. Okay. So we worked our way
through this dialogue, sign by sign, step-by-step,
part by part. Fabulous.
161. Learn | Food Signs 1: Food signs number one, you're about to learn how to
sign and understand food. Breakfast, lunch,
dinner, desert, snack, thirsty, hungry,
fasting, vegetable. Okay, We have a separate
lesson for each one. That means you're
gonna learn handshape, hand position and
motion for each sign. Do practice after you've learned all of these
signs over here, we'll do two-part review. Alright, here we go. Here's how to sign food. Okay, use your dominant hand. I'm right handed.
We're just going to scrunch all the
fingers together. So the fingertips are together. Tap twice on your mouth. Food from the side. Food. Starting from the rest position. Sign with me. Let's do it three times. Alright, something
which is important, you need to tap twice. If you just tap
once, it means eat. Like the verb, which
is also very useful. We're here to sign
foods, so tap twice. Okay, We just talked
about how to sign food. Here's how to sign
breakfast. Okay. It's gonna be a two-part sign. Literally we're
going to assign eat. Morning. Morning. How do we sign Eat? Well, use your dominant hand. I'm right handed, but
all the fingertips together and just tap
once on your mouth. That is eat. Right now for morning, we're going to use both hands. We're going to go like this. Start with flat hands. I'm right-handed,
non-dominant hand. I'm going to put it right here. Dominant hand, we're going
to put it underneath. We're going to bring
it up. It gets the sun coming up
in the morning. Morning. Morning.
Alright, so for breakfast altogether
we have Eat morning. In other words,
breakfast. From the side. Breakfast. Okay. Starting from the rest position, sign with me. Let's do it three times. Okay. We just talked about
how to sign breakfast. Let's talk about
how to sign one. Alright, two-part sign. Literally eat noon. First sign, Eat, go like this
with your dominant hand, all the fingertips together, tap once on your mouth. Eat. Right now we need to sign noon. We're gonna go like this. Alright, flat hands,
I'm right-handed, non-dominant hand, put it right down there. Dominant hand. Just go like this. You're going to be touching
down your elbow area. Noon. Noon. So
altogether eat noon, which is once from the side. Lunge. Starting from the rest position. Sign with me. Let's
do it three times. Okay. We just talked
about how to sign lunch. Here's how to sign dinner. Alright, two parts sign, we're gonna go eat night. Alright, that is dinner. So first part, eat, go like this
fingertips altogether. This is my right hand,
that's my dominant hand. Just tap once on your lips. Eat. Right now we need night. Okay. We're going to use both
hands. Glad hand shapes. I'm right-handed,
non-dominant hand, put it down here, like
it's our horizon, right? With this dominant hand,
you're going to curve down the fingers and
just go like this. Alright, so this
would be the Sun, this is the horizon
and this one's going down. So it's night. So altogether will go eat night, which is dinner from the side. Dinner. Okay. Starting from the rest position, sign with me. Let's do it three times. Okay, We just talked
about how to sign dinner. Here's how to sign dessert. Okay, we're going to use both hands shapes which are the same. The letter D from the alphabet. How do you make a deep,
well, last three fingers, bring them down so
the tips are touching the thumb. Those are Ds. Okay. Take those d's, tilt them forward so the index fingers are
pointing straight forward. And now we're just going to tap twice with the fingertips. Desert from the sign. Desert. Starting from the rest position. Sign with me. Let's
do it three times. Okay. We just talked about
how to sign desert. Here's how does sign snack. Okay, use your dominant
hand. I'm right handed. We're going to be
making this motion like we're feeding chips or something or snacks
into her mouth. Right. So it says
three fingers, thumb, index finger, middle finger,
and go in like this, kinda flicking out
but pointing in towards your mouth because that's where you
send your snacks. Snack. We're gonna do
it twice from the side. Snack. Okay. Starting from the rest
position, sign with me. Let's do it three times. We just talked about
how to sign snack. Here's how to sign Thursday. Okay. Use your dominant hand. I'm right handed. Just
use the index finger. Alright, we're gonna
use the tip of the index finger and just slide down our throat. Thirsty. You can add an a
facial expression which helps show how thirsty you are. From the side. Thirsty. Starting from the
rest position, sign with me. Let's do it three times. We just talked about
how to sign Thursday. Here's how to sign hungry. Use your dominant hand.
I'm right handed. We're gonna make a C, C shape
from the alphabet, right? We're going to take
the tip of the finger, tip of the thumb, put it about here on our
chest and just slide down. Lightly touch in your chest. Hungry. From the sign. Hungry. Starting from the rest
position. Sign with me. Let's do it three times. You can add an a facial
expression which shows your level of hunger. Just regular damaged. Oh, OK. We just talked about
how does sign hungry? Here's how to assign fasting. Okay, use your dominant hand. I'm right handed.
The handshape is the letter F from the alphabet. F. Now use the tips of the
thumb and index finger. Start over here. And it's like you're
zipping your mouth closed because
food's not going in. You're fasting?
Fasting? From the side? Fasting. Okay. Starting from the rest position, sign with me. Let's do it three times. We just talked about
how to sign fasting. Here's how to sign vegetable. Okay, use your dominant
hand. I'm right handed. We're going to make a V
handshape from the alphabet V, or like victory peace man. Okay, we're going to use first our index
finger, tap ones. We're going to flip
it around and tap once with our middle finger. The tip of our middle
finger look like this. Vegetable. From the side. Vegetable. Okay. Starting from the rest
position, sign with me. Let's do it three times. Alright, we just talked
about how to sign vegetable.
162. Review | Sign & Understand: Let's do signing review for
food signs. Number one. Alright, in a moment,
something tasty is going to show up and I
need you to sign it. Before I do. Here you go. Sign this. Lunch. Yummy, breakfast, Desert dinner, hungry, vegetable, snack. It is flicking it into your mouth and it's
probably tasty. Fasting food. Thursday. Okay. This was signing review for food
signs. Number one. Let's do understanding review for food science. Number one. Alright, so in a moment I'm
going to sign something. Take a look at me and just
figure out what I'm signing. Shout it out loud, right? What am I signing? Vegetable. Eat your veggies. Breakfast, dinner, thirsty, desert, snack, fasting, hungry. Once food. Okay, this was understanding review for Putin
signs. Number one.
163. Learn | Food Signs 2: Food signs number two, you're about to
learn how to sign and understand apple, bacon, banana, beans, beer, bread, butter, cake, candy, cereal. Okay, We have a separate
video lesson for each one. We're going to cover
handshape hand position here in motion and do practice. After you've learned
all ten signs will have a two-part review
to make sure it's sticking in your brain.
All right, Here we go. Here's how to sign apple. Alright, use your dominant
hand. I'm right handed. The hand shape is a letter from the alphabet.
How do we make an x? Well, put up your
index finger and just hook it down
like Captain Hook. Okay, now we're going to use the knuckle of
that index finger, put it on our g can just
twist twice quickly. Apple. From the sign. Apple. Okay, Starting from the rest position,
sign with me. Let's do it three times. We just talked about
how to sign apple. Here's how to sign bacon. Hand shapes are the same. We're going to use the
letter U from the alphabet, how we make you wear. I'll start like this
fingers altogether. Last two down, thumb on
top of the ring finger. You take those, use put them here so there are tips
are together just slightly. Now we're going to pull
out at the same time, make wavy motions like how the Bacon's kind of
wavy when it starts crispy, crackling and cooking. Bacon. From the side. Bacon. Starting from the rest
position signed with me. Let's do it three times. We just talked about
how to sign bacon. Here's how to sign banana. Okay. Couldn't use both hands,
different hand shapes. I'm right-handed,
non-dominant hand, just make it index finger, like that's our
bananas sticking up. Alright, dominant hand. We're going to close up
and just bring the tip of the thumb and index
finger together. Now it's like you're
peeling the banana. 12. Banana from the side. Banana. All right, Starting from the
rest position, sign with me. Let's do it three times. We just talked about
how to sign banana. Here's how to sign beans. Okay, different hand
shapes. I'm right handed. My non-dominant hand, just going to use
that index finger. Put it here, palm facing in, tip off to the side. Right. Now with
your dominant hand, we're just going to use our
index finger and our thumb. And we're just going to pluck, pull on the end of our middle, on our index finger. Two times. Beans. From the side. Beans, rest position, signed with me. Let's do it three times. Alright, we just talked
about how to sign beans. Here's how to sign beer. Okay, use your dominant
hand. I'm right handed. The handshape is the letter
B from the alphabet. Finger see other thumb
in front, That's a beep. Now we're going to
take the outside part of the index finger and just rub twice over here off
to the side of our mouth. Beer. Beer from the sign. Beer. Starting from the rest
position, sign with me. Let's do it three times. Alright, now you might be
thinking this looks very similar to the sign
for the color brown. Well, let me show you
the difference there. Close, similar but different enough to know once you know. Okay. So first let me sign beer. Now let me sign brown like
the color brown. Bear. Brown. Brown is going to be basically
a whole cheek thing. Nice long slide down beer. It's just gonna be
two quick ones. Alright, Okay, we just talked
about how to sign beer. Here's how to sign bread. Okay, we're going
to use both hands, starting with flat
hand shapes like this. I'm right-handed,
non-dominant hand. I'm going to put it
down here, Pompeii. So then this is
our loaf of bread. I have dominant hand start
with a flat hand shape. Now we're going to
bend down the fingers. We're going use just the tips. And we're going to go
like this one too. Like we're slicing
our loaf of bread. One to bread from the side. Bread. Starting from
the rest position. Sign with me. Let's do it three times. Alright, we just talked
about how to sign bread. Here's how does sign butter. Okay, we're going
to use both hands, different hand shapes. I'm right handed. So my non-dominant hand just going to make a flat
hand like that. We're going to put it
here so the fingertips or tilting down a little
bit, flat, open hand, dominant hand, fingers together, last two down. That's our handshake. Now we can use the tips of these two fingers
and we're just gonna go 12 butter, right? So just rub lightly
twice on your open hand. Butter. From the side. Butter. Alright, starting from the
rest position, sign with me. Let's do it three times. Okay. We just talked
about how to sign butter. Here's how does sign cake. Okay, we're going
to use both hands, different hand shapes. I'm right handed with
my non-dominant hand, I'm going make a flat hand. Alright, put it
right down there. Palm facing up.
That's my platform. Dominant hand. We're
going to go like this. Kind of looks like you're
going to catch a ball, right? And maybe a claw hand shape. And we're gonna go 12, right, straight up and down. One to imagine there's a cake, a layered cake or
something right there. So we have cake from the side. Cake. Okay, Starting from the rest
position, sign with me. Let's do it three times. Okay, keep in mind, it's also common to
fingerspell cake. Just go like this. See a K, e, right? Cake? You may see that as well to be consistent
throughout this course, we'll be signing cake like this. Okay, We just talked
about how does sign take here's how to sign candy. Okay, use your dominant
hand. I'm right handed. Just gonna use
that index finger. Stick it on a
chicken, twist twice. Do it quick. Candy from the side. Candy. Alright, starting from the
rest position, sign with me. Let's do it three times. Okay. We just talked
about how to sign candy. Here's how we sign serial. Okay, use your dominant hand. I'm right handed, just going
to use our index finger. And we're gonna be
going like this, right? Curving, bending
our index finger as you bring it across
in front of our mouth. Right now you can
imagine maybe it's a caterpillar, it's crawling. Or it could say you're
wiping your mouth because you are a little bit
sloppy with your cereal. Cereal. From the side. Serial. Starting from the rest position, sign with me. Let's do it three times. All right. We just talked
about how to sign cereal.
164. Review | Sign & Understand: Let's do sign-in review for
food signs. Number two. Alright. Something tasty is
going to pop up. I need you to sign
it before I do. Alright, go ahead,
sign this. Beans. Bacon, cereal, Banana, butter, candy, beer, apple, bread, cake. Okay, this was signing review for food science number two. Let's do understand the review for food signs now overdue. Right. So take a look at me. I'm going to be
signing something. Just shout out
loud, I'm signing. Alright, here we go. Serial. Butter, bacon, candy, banana, beans, cake, apple, beer, bread. Okay, this was understanding review for food
science number two.
165. Learn | Food Signs 3: Food signs number three, you're about to learn how
to sign cheese, chicken, chocolate, coffee, cookie, corn, doughnut, eggs,
french fries, fruit. We have a separate video
lesson for each one. We're going to talk
about handshape, hand position, head
motion into practice. After you've learned
all ten signs will have two-part review just for these ten signs.
Alright, here we go. Here's how to sign cheese. Okay, we're going
to use both hands. Start like this. Now
the hand shapes are not tied together and they're
not spread apart. It is loose in the middle. Now I'm right-handed,
non-dominant hand going to put it down
there, palm facing up. Dominant hand, same handshape. We're going to come down basically palms together and
we're going to twist twice. Cheese. Cheese from the side. Cheese. Okay. Start from the rest position. Sign with me. Let's do it three times. All right. We just talked
about how to sign cheese. Here's how to assign chicken. Alright, use your dominant hand. I'm right handed.
We're just going to use our index finger
and our thumb. We're going to put the back of our hand close to our mouth. And we're just going
to pinch twice. Chicken from the side. Chicken starting from
the rest position. Sign with me. Let's
do it three times. Okay. Now this sign works for both the Chicken Run around
squawking in the farmyard, and also the chicken that's already been cooked and
you're ready to eat. So we have chicken. We just talked about
how to sign chicken. Let's talk about chocolate. Alright, both hands. I'm right
handed, non-dominant hand. I'm going to make an S, Put
it down their dominant hand. We're going to make us see from the alphabet or C for chocolate. We're going to put
it right here and do a couple of circles. Chocolate from the side. Chocolate, starting
from the rest position. Sign with me. Let's do it three times. Alright, we just talked
about how to sign chocolate. Here's how to sign coffee. Alright, the hand
shapes are the same. We're going to use S
is from the alphabet, or we could just say two-fifths. Now I'm right handed, so
my non-dominant hand, I'm going to put it right
down their dominant hand, I'm going to put
it on top, right, not exactly on top, a little bit off to
the side and then go around like I'm grinding coffee. Coffee. This go round a couple of times. Coffee from the side. Coffee. Starting from
the rest position. Sign with me. Let's do it three times. And I know that you're
signing with me, right? Lots of practice. We just talked about
how does sign coffee? Here's how to sign cookie. Okay. Can you use both hands? I'm right-handed,
non-dominant hand. Just a flat hand shape. Put it down there,
palm facing up. Dominant hand. We're
going to go like that. Kinda like you're gonna be
picking up the cookies. So we have the
rounded spot here. Now we're going to put it here. We're going to tap,
twist, tap again. We have cookie, cookie, cookie. Starting from the rest
position, sign with me. Let's do it three times. Okay, so remember to twist. So a tab, twist, tap again, because if you don't twist
and you just go like this, it means cake. Cake is delicious too, but here we're
looking for a cookie. So remember, one
twist to cookie. Alright, we just talked
about how to sign cookie. Here is the sign for corn. Alright, use your dominant hand. I'm right handed, index
finger right now. Put it close to your mouth
and just twist twice. Corn. I'm not touching my mouth is getting close near the front. Corn from the side. Corn. Okay. Rest position,
sign with me. Let's do it three times. Keep in mind that you may see some people just to
finger spell corn. It's very common to this finger spell short words like this. Corn. Right throughout this
course to be consistent, we're gonna be signing
corn like this. Alright, wonderful. We just talked about
how to sign corn. Here's a sign for
doughnut, right? Use your dominant hand. Handshape
is r from the alphabet. I'm right handed, so
I'm going in with my right hand. Right.
How do you make an r? Well, like your whole body
and something's happening, you're crossing your
fingers, there's an arm. Now point the tips
towards your mouth. Start a little bit
above your mouth and just trace a circle
around your mouth. Donuts are circular. We're going to make a circle. Donut from the side. Doughnut, starting from the
rest position, sign with me. Let's do it three times. We just talked about
how to sign Donut. Here's how to sign eggs. Alright, both hands going
to use the same handshape, the letter U from the alphabet. How to make you go like this? All fingers together,
last two down, thumb on top of the ring finger. Alright, we have to use, now I'm right handed,
non-dominant hand. I'm going to put it
about right there. Dominant hand. I'm just
going to go like this. Kinda like I'm
breaking open an egg. Eggs from the side. Eggs. Okay, Starting from the rest
position, sign with me. Let's do it three times. Alright, we just talked
about how to sign eggs. Here's how to sign french fries. Okay, use your dominant
hand. I'm right handed. We're going to make the
hand shape of the letter F from the alphabet, right? Just bring the tip
of the finger, tip of the thumb together. There's an F. Now put it about here and we're
just gonna go 12. So kinda one to
tapping into the sky. French fries. From the side. French fries. Okay, Starting from the rest position,
sign with me. Let's do it three times. Alright, we just talked about
how to sign French price. Here's how we signed brute. Alright, use your dominant
hand. I'm right handed. Handshape is a letter
from the alphabet. Now I'll take the tip of
the thumb and index finger, put it here at the side of
your mouth and we're just going to swivel forward. Twice, twist, twice. Fruit. From the sign. Fruit. Okay, Starting from the rest
position, sign with me. Let's do it three times. We just talked about
how to sign root.
166. Review | Sign & Understand: Let's do signing review for
food signs number three. Okay. Something's
going to pop up. I need you to sign
it before I do. Alright, here we go.
Sign this. Cookie. Chicken, fruit, coffee, chocolate, eggs, donut, cheese, french fries, corn. Okay, this was signing review for food
science number three. Let's do understanding
review for booed signs. Number three. All right, so take a look at me.
I'm gonna be signing. Shout out loud when
you understand what I'm signing, right? What am I assigning? Fruit? Chicken, coffee, corn, doughnut, cookie, chocolate, eggs, cheese, french fries. Okay, this was understanding review for food
science number three.
167. Learn | Food Signs 4: Food signs number four, you're about to learn
how to sign and understand hamburger, hot sauce, ice cream, juice, catch up, meat, milk, orange,
pancakes, pasta. We have a separate
video for each one. We're going to cover handshape, hand position and
motion into practice. After you've learned
all ten signs, we will have two parts review
for just these ten signs. Alright, here we go. Here's how to sign hamburger. Okay, we're going
to use both hands, same handshape, right? It started like this
fingers together. Just kinda curve them down and we need them to fit together. Alright, if you've ever molded
hamburgers and real life, taking raw hamburger
and then forming them. Well, you already know the
sign. I'm right-handed. Non-dominant hands start down their dominant hand on top 12. So we have hamburger
from the side. Hamburger starting from
the rest position. Sign with me. Let's
do it three times. We just talked about
how to sign hamburger. Here's how we sign hot sauce. It's gonna be a two-part sign with a C handshape right here, put it right here,
close to your mouth. Have a look on your
face like this. Hot sauce with a y hand shape. Alright, **** out some sauce. So altogether we have hot sauce. No need to posit between this
nice and smooth flow from one side to the other side. Hot sauce. Starting from the
rest position, sign with me. Let's do it three times. Alright, we just talked
about how to sign hot sauce. Here's how to sign ice cream. Very straightforward. Use your dominant hand. I'm right handed, going to make an S handshape or a fist.
Now this is a co-owner. We're holding the cone and
now pretend to lick it twice. I don't recommend
actually licking it. Who knows where your hands and Ben what germs and whatnot. But just pretend stick
your tongue out. Like you're pretending to
lick it twice. From the side. Ice cream, starting from the
rest position, sign with me. Let's do it three times. We just talked about
how to sign ice cream. Here's how to sign juice. Okay, use your dominant
hand. I'm right handed. We're just gonna be
signing the letter j in front of our mouth. How do we do with Jay?
Well, go like this. All the fingers together, middle three fingers
down, dome in front, and then just trace a J in the air with the tip
of your pinky finger. J. Right? Now we're going to do it right here
in front of our mouth because this is where juice
goes. Most of the time. We have juice from the side. Juice. Alright, rest,
position, sign with me. Let's do it three times. You may also see people
just sign a J off to the side right over
here for it to mean juice. And if you have contexts,
you can see Zeus, There's something juicy that
you're gonna be drinking. Well, it's easy
to know, alright, to be consistent
throughout this course, we're gonna be signing juice right here in front
of our mouth. Juice. We just talked about
how to sign juice. Here's how does sign ketchup. Okay. We're going
to use both hands. I'm right-handed,
non-dominant hand. We're going to make an OH, from an out from the alphabet, right? Put it down there
like we're holding the bottle and it's upside
down. Dominant hand. Just gonna do a loose flat
hand right there and go 12. Like we're trying to get the
ketchup out of the bottle, that stock ketchup
from the side. Ketchup, starting from the
rest position, sign with me. Let's do it three times. Alright. We just talked
about how to sign up. Here's how does sign meet. Okay. We're going to use both hands. I'm right-handed,
non-dominant hand just to open flat
hand like that. I'm going to stick
it right down there. Palm facing in dominant hand. Start like this. Use the thumb and the index finger
and we're going to pinch right here on our
non-dominant hand in-between, our thumb, in our index
finger right here. Alright, so we're gonna pinch
and just shake once meat. Now imagine you're
picking up like a steak or something.
And you shake it once. Meat from the sides. Meet. Alright, starting from the
rest position, sign with me. Let's do it three times. All right. We just talked
about how to sign meet. Here's how we sign Milk. Alright, use your dominant hand. I'm right handed. We're
just gonna be closing upper hand into a fist
and doing it twice. One to milk from the side. Milk starting from
the rest position. Sign with me. Let's
do it three times. Alright, we just talked
about how to sign milk. Here's how to sign
orange, right? We're just going
to be closing up our hand or dominant hand into a fist twice in
front of our mouth. Orange. From the sign. Orange. Alright, starting from the
rest position, sign with me. Let's do it three times. Right? Now this sign
works for the fruit, like we're doing it here,
and also the color. Alright, we just talked
about how to sign orange. Here's how to sign pancakes. Okay, we're going to use both
hands, flat hand shapes. I'm right-handed,
non-dominant hand. Put it down there.
That's like our pan. And there's a pancake on it
which needs to be flipped. So we're going to
use our right hand. Well, for me, my right
hand, dominant hand. We're gonna go 12.
Pancakes from the side. Pancakes. Starting from the rest
position, sign with me. Let's do it three times. We just talked about
how to sign pancakes. Here's how to sign pasta. Okay, we're gonna
use both hands. Hand shapes are the letter
i from the alphabet. How do you make an eye
will go like this. All fingers together, middle three fingers down,
thumbs in front. We have eyes. Now we can
use the tips of the eyes. We're going to come
together, tap, and then we're just
going to loop out twice. Pasta from the side. Pasta. Okay, Starting from the rest
position, sign with me. Let's do it three times. Alright, this sign also
works for spaghetti. It works for noodles. And here we're
using it for pasta. Alright, we just talked
about how to sign pasta.
168. Review | Sign & Understand: Sign-in review for food
signs, number four. All right. Somebody
is going to pop up. It's likely tasty and delicious. I need you to sign
it before I do. Right, go ahead, sign this. Hamburger juice. Pancakes, hi sauce, milk, ketchup, orange, ice cream, pasta, meat. Alright, this was signing
review for puede signs. Number four. Let's do understanding review
for food science. Number four. All right. Take a look at me. I'm
going to be signing. You've figured out
what I'm signing and just shout out loud. Right here we go.
What am I signing? Ketchup, hamburger, pancakes, milk, juice, meet orange, pasta, ice-cream, hot sauce. Okay, this was understanding review for Putin
signed number four.
169. Learn | Food Signs 5: Food signs number five, you're about to learn
how to sign and understand peanut butter, pizza, popcorn, pork, salad, sandwich, seafood, soup, t, water. Okay, We have a separate
video lesson for each one. We're going to cover handshape hand position here in motion and do practice after you've
learned all ten signs. Well, we're gonna do
a two-part review for just these ten signs.
Alright, here we go. Here's how to sign
peanut butter. Alright, two parts.
We're going to do nut using a hand-shaped
just the tip of our thumb. Now you can actually flick
out from your teeth or just get close. Nut. And we're gonna do butter. All right, I'm right-handed, non-dominant hand,
just flat hand. Put it down their dominant
hand go like this. Last two down. Your hand shape. Just go up once. Right? Now the sign
for butter all by itself would be twice, right? But since we're combining, we're making a compound sign
here for peanut butter. We're gonna go nut
butter, right? Just one flick up this time. Alright, so we have peanut
butter from the side. Peanut butter starting
from the rest position. Sign with me. Let's do it three times. Okay. We just talked about
how to sign peanut butter. Here's a sign for pizza. Okay, we're going to
use our dominant hand. I'm right-handed. Now think of the letter Z, like in pizza, right? Z, That's how we make it z. But because there are
two Zs and pizza, we're gonna do Tuesdays at once. So make a V, went down the bunny ears and
notice trace two z's. Alright, that's the first part. Now we'll drop into an a, like a double Z and then an
a for pizza from the side. Pizza starting from the rest
position, sign with me. Let's do it three times. Alright, now, Pizza
has many variations depending where you are
in the deaf community, what states are in what
region, all that stuff. Okay. Here are a few that I've seen. First is to spell it
out more like this. P, double Z, a Hi Pizza. Another way I've seen
is to like you're grabbing a piece of pizza and you're kinda shoving it
in your mouth for pizza. Alright, to be consistent
throughout this course, we're gonna be using the
double Z to a pizza. Alright, so whenever
I signed pizza in this course, I'll
be going like this. Just keep in mind, pizza
has many variations, probably more many more
than what I've shown you here just in this course,
we're doing like this. Alright, we just
talked about how to sign a version of pizza. Here's how to sign popcorn. We're going to just
be making flicking motions with the
index finger, right? Once with their dominant hand and twice with the
non-dominant hand. So like this, That's
popcorn from the side. Popcorn starting from
the rest position. Sign with me. Let's do it three times. Okay. We just talked about
how to sign popcorn. Here's how to sign pork. That's right. We're just
going to fingerspell. Fingerspell. Let's do it. P, O, R, k. So we have pork. Pork. From the sign. Pork. Starting from the rest position, sign figures spill with me and go slower,
then we'll speed up. Okay, We just talked
about how to sign pork. Here's how to sign salad. Alright, just think
of a tossed salad. And these are the tools are
you using to toss the salad? So we're gonna go 12
salad from the side. Salad, starting from
the rest position. Sign with me. Let's
do it three times. Alright, we just talked
about how to sign salad. Here's how to sign sandwich. Alright, we're going to use both hands, different
hand shapes. I'm right-handed,
non-dominant hand. Let's go flat hand. Let's bring the thumb in front. Alright, something like that. We're going to put it
right here in front of our mouth like we're
getting ready to eat. Dominant hand, flat hand, when the fingers down just a bit and we're going to go 12. Like we're filling our sandwich. Sandwich from the side. Sandwich, starting from the
rest position, sign with me. Let's do it three times. Alright, we just talked about
how does sine sandwich? Here's Alice sign seafood. Alright, two parts. We're
just going to finger spell C. So S. Then we're going
to do food, right? The handshape for
food is go like this. The tips together and
tap twice on your mouth. So altogether we have sea food. Seafood from the side. Seafood. Alright, starting from the
rest position, sign with me. Let's sign seafood three times. Alright, we just talked
about how to sign seafood. Here's how to sign soup. Alright, going to use both
hands, different hand shapes. I'm right-handed,
non-dominant hand, start with a flat hand,
their fingers together. Now we're going to
curve, it becomes our bowl because we
use bowls for soup. Right? Dominant hand,
I'm right handed. We're going to make a you. Alright? How do you make
a you will go like this. Fingers together, last two down, thumb on top of
your ring finger. You can let it
curve a little bit. That's gonna be
your spoon right? Now we're just going
to take one to, to sips from our soup. Or we could say two spoonfuls. So we have soup from the side. So okay. Rest position, sign with me. Let's do it three times. We just talked about
how to sign soup. Here's how we sign t.
Alright, both hands. I'm right-handed,
non-dominant hand. I'm going to make an O. We could say that's our cup. Uh-huh. Dominant hand.
We're going to use the F F handshake
from the alphabet. Now we're going to use
a tip with these two fingers, index and thumb. Pretend like we're
holding our tea bag and we're just going to lightly
go around the rim of the cup. Tea from the side. Okay. From the rest
position signed with me. Let's do it three times. Alright. We just talked
about how to sine t. Here's how we sign water. Use your dominant hand. The hand shape is W from
the alphabet, right? Go like this. Take your thumb
pinned down your pinky. That's a W. Uses side of the index finger
tap twice on your mouth. Water. From the side. Water. Starting from the rest position. Sign with me. Let's do it three times. Alright. We just talked
about how to sign water.
170. Review | Sign & Understand: Let's do sign-in review for
food signs number five, something's going to pop up. You sign it before I do. Alright, here we go. Sign this. Salad. Pizza. Ti popcorn, seafood, water, pork, peanut butter, sandwich, soup. Okay. This was signing review
for food signs number five. Let's do understanding review proposed science number five, right, so take a look,
watch me, I'll be signing. You. Try to figure
out what I'm doing. Shout out loud, right? What am I signing? Water. Pizza, seafood, pork, soup, salad, popcorn, peanut butter, sandwich. T. Okay. This was understanding of review for food
science number five.
173. Dialogue #1: Okay, Here is your dialogue. Feel free to pause the video,
work your way through it. When you're ready, push
Play, we'll assign together. Alright, let's sign
together the first part, luke, Ruth, hide
fruit, what, four. Alright, so in English
something like water, Luke and Ruth hiding fruit poor or y or Luca, Ruth hiding proof. Alright, let's do an ASL loop. Just fingerspell. Look. Ruth, same thing. Ruth. Hide. What's the sign? That's right. Hide, cover. Look. How resigned fruit. And what for wh question,
how do we sign it? What for? Literally were just
doing 44. It means what? Bohr. Altogether. Here we go. Sign with me. Luke. Ruth, hide fruit. What poor. Luke, ruth, hide fruit. What bar? Alright, let's
sign the response. In ASL. They scared later
can't eat, right? An English, Something like
they're scared that later on and they won't be able
to eat something like that. Right? Let's do
it. They, Alright, let's say they're not here,
but we're referring to them. So just pretend like it's an imaginary group off to the side. They scared. How do we sign scared. Scared later, later. Later, you also may
see its sign later. In this course we'll be
doing this way later. Can't, can't shake
the head, can't eat. Right? Let's do it altogether. Sign with me slower
than quicker. They scared later. Can't eat. They scared later can't eat. Alright, altogether. Full dialogue. Let's do it. Luke. Ruth, hide
fruit. What for? They scared later. Can't eat. Again. Luke. Ruth. Hide fruit. What form? They scared later. Can't eat. Okay. Well, we signed
everything step-by-step. If you want extra practice, feel free to repeat the video.
174. Dialogue #2: Here is your dialogue. Okay, feel free to
pause the video. Work your way through it. Do all the signs, get
lots of practice. And when you're
ready, push Play, and we'll sign together. There's one sign in there that I don't think
we've covered yet. Still. Right? It's like this. Why hand shapes still, still? Alright, go ahead and practice. Alright, let's sign
it all together. First part, you eat, drink a lot already full. Write in English. You eat and drink a lot or you already full.
Are you full yet? Okay, so let's do
it and so alright, you you eat, drink, drink. How do we sign? A lot? A lot. Already. Already. Four. Okay. Well, this is a yes-no question, So raises eyebrows when
you're signing for okay. So let's do it
altogether. Sign with me. Here we go. You eat, drink a lot already full. You eat, drink a
lot already full. Alright, let's go
to the response. Not yet. I still hungry. Server. Where? Okay. So an English?
No, not yet. I'm still hungry. Where's the server? Right? So they must
be at a restaurant and he's looking for the
server or the waiter. Okay, So here we go. Let's sign it. How
do we say Not yet? Like that and a wagon
that down there. Not yet. I I still hot Here's the sign. Still. Like something's ongoing. Is continuing still. Why hand shapes to start
here in rock up? Still. Still. Why it's still hungry? How do we sign hungry
hungry server, like the waiter or waitress.
How do we sign it? Server? Where? I always sign it. Wh
question, how do we do it? Where where? That's right. Right. Let's do it altogether. Sign with me. Here we go. Not yet. I still hungry server. Where? Not yet. I still hungry server. Where? Alright, let's put
it all together, starting the whole thing. Nice and slow. Sign with me. Here we go. You eat, drink a lot already full. Yet. I still hungry. Server where you eat, drink a lot already full. Not yet. I still hungry server where? Okay. We worked through
the whole thing. Feel free to practice
as many times you need to feel more confident, more fluid with the signs. Okay.
175. Dialogue #3: Here is your dialogue. Feel free to pause the video, work through it
when you're ready. Push Play, we'll sign together. Alright, let's sign together. Breakfast now. You all you plural,
one, eat what? Alright, so in English, it's
time for breakfast now, breakfast is served now. What do you all want to eat? Alright, let's do it. I'll resign breakfast. Breakfast. Breakfast.
Now. How do we sign now? Now? Now? Yeah. You all are ready. Do you all, as in you plural? Want, want, eat, eat. What question were
a WH question, how we do it? For
others? Eyebrows. What, what right altogether. Sign with me. Let's do it. Here we go. Breakfast. Now. You all want eat
breakfast, know? You all want eat what? Alright, let's do the response. Here we go. They want french fries. I eggs, bacon, right? So an English, they
wanted french fries. I want eggs and bacon. Now here. And that second sentence
where they weren't french fries, I, eggs bacon. Alright, so in English
you might be like for me, for me, eggs and bacon. Write in English you
might not go for me. I want eggs and bacon. You might just shorten it up. That's what we're
gonna do here in ASL. Because it's pretty
much understood wanting because we did it the first time they
want french fries. Now I'll just indicate myself. Me, I eggs and bacon. Alright, here we go. They,
They're probably here. We're all eating together. Let's say they're sitting
there, sitting over there, sitting over there right
next to us, or we do it. They just indicate
them they want, want french fries for breakfast. Always learn french fries. French fries, right? I, I eggs, eggs. Eggs, and what else? Bacon, alright, so we have eggs. Bacon, move over just
a little bit to show. And there's body shift. They're two separate
things, eggs and bacon. Alright, let's do it altogether. They want french fries. I eggs, bacon. Again. They want french fries. I eggs, bacon. Okay, let's do it all together. The full dialogue. With me. Breakfast. Now, you all want eat what? They want. French fries. I eggs, bacon. Right? Here we go again. Breakfast. Now. You all want what? For the eyebrows? They
want french fries. I eggs, bacon. Okay. We did the whole thing. We
worked through it side-by-side sentence by sentence,
question, response. Okay.
176. Conclusion + Study Tip: Well, look at you. You've learned over 500 signs
in American Sign Language. Well done, way to go. Okay, here's one last tip. I urge you to use the
review sections and the tests from this
course as ongoing review. It's a wonderful way to be like, let's see if it's
sticking in my brain. All those signs I learned. Let's see if I still remember. And if not, just go
review the sign, do the review, do the test. Wonderful opportunity
for ongoing review. Okay. I want to say a huge thank you for giving me this
opportunity to T2. I had an absolutely
fabulous time. Thank you. Alright. See you soon.
 Able Lingo ASL, American Sign Language (ASL)