Transcripts
1. Course Introduction: In this course, you're going to learn how to sign and understand noun signs in American Sign Language. How many? 120 of them, yes, that's right. Okay. We took those 120 signs and we divided them up into groups of ten. So that's 12 groups of ten signs, eat, okay? Each individual noun sign has its own video where we go over hand shapes and positions and movements would do it from side to side. So you can see all the angles. And we do lots of practice right? After we've learned ten signs in one group will do mini review. After we've done three groups of ten signs will do mid review. And after you've done everything in the whole course, we'll do final review and testing where we cover in test you on everything in the course? Yes. Okay. Now, what kind of testing do we do? Well, we always do it in two parts. We do signing and we do understanding. Very important to do both sides if you want to improve your skills, yes. And you might be thinking, okay, so what kind of nouns did you choose? Well, we took a long time to identify and make a nice long list. Nouns which will help you out in everyday use that are common, practical that you can use immediately, right? Okay, we got a lot of content. There's a lot for you to learn. You can boost her skills, sign practice, get tested, review. It's all in there. Okay. Have fun. Booster skills.
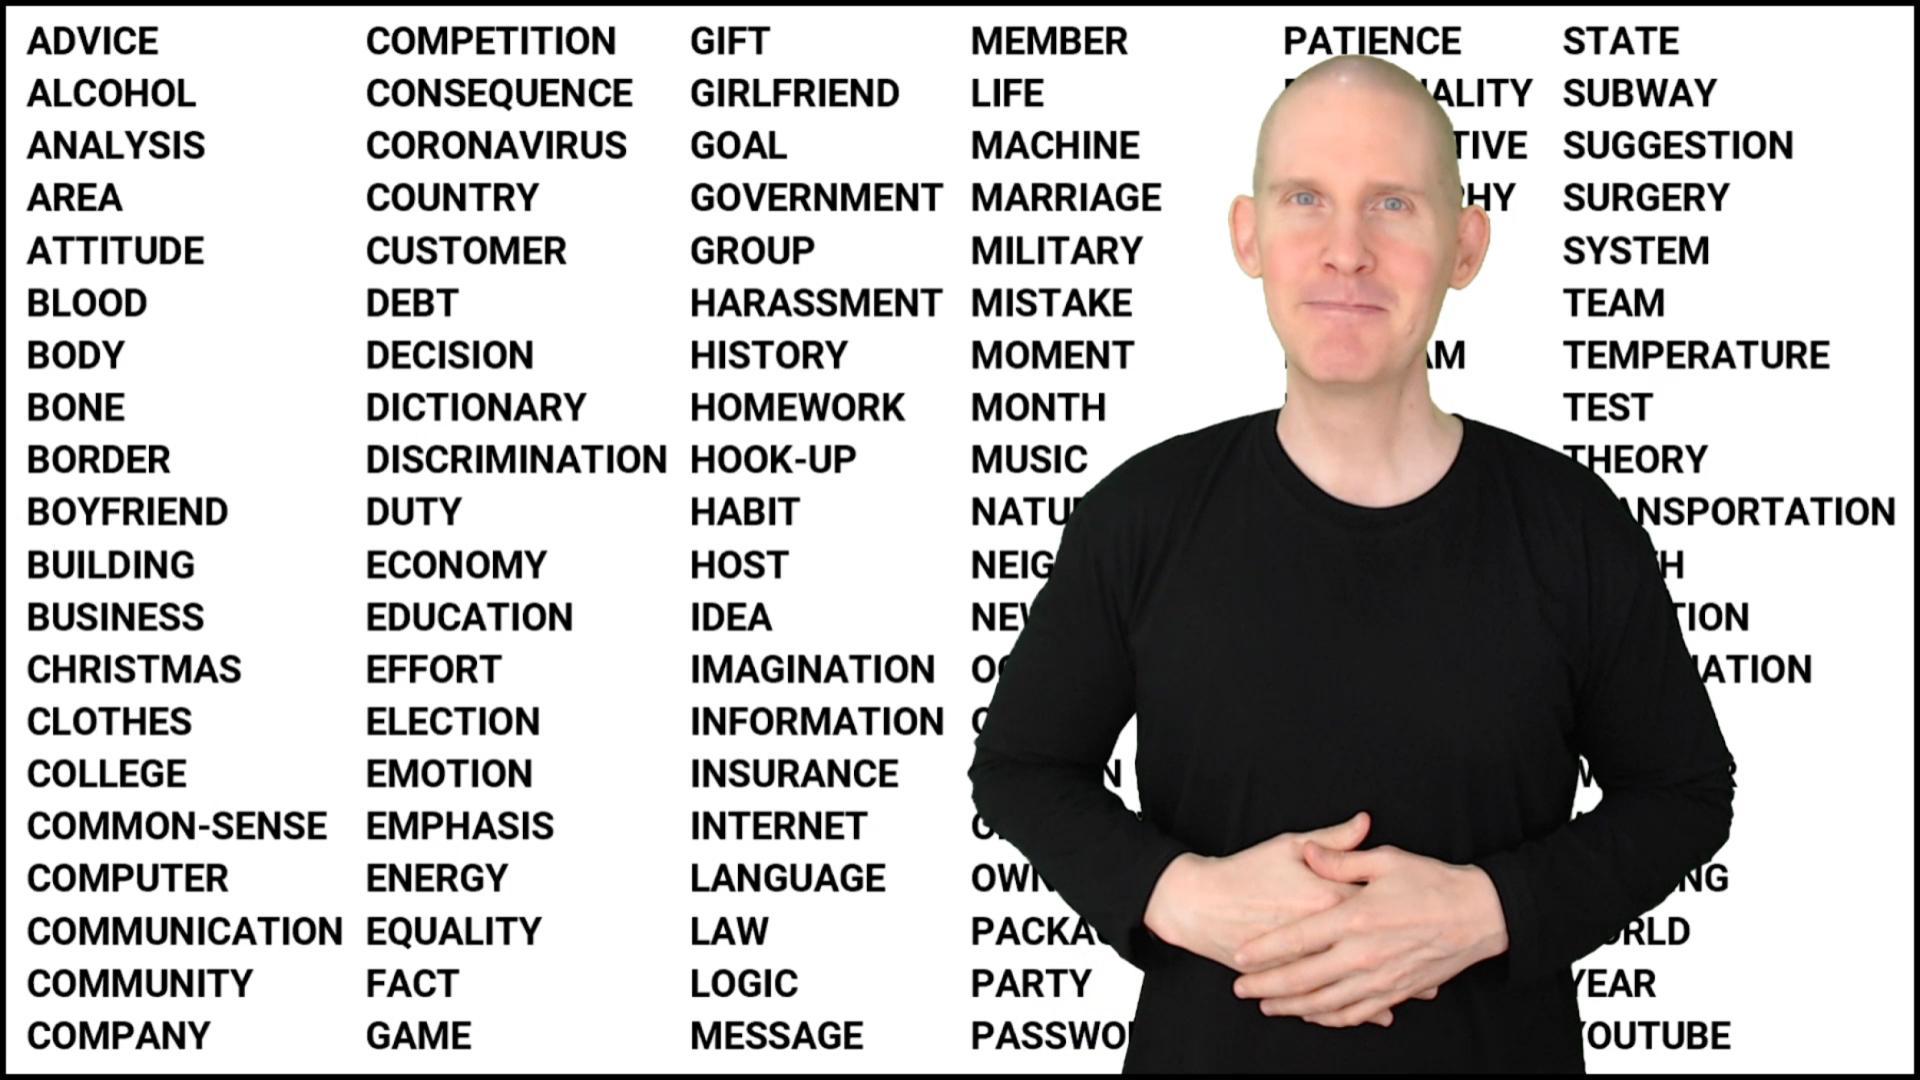
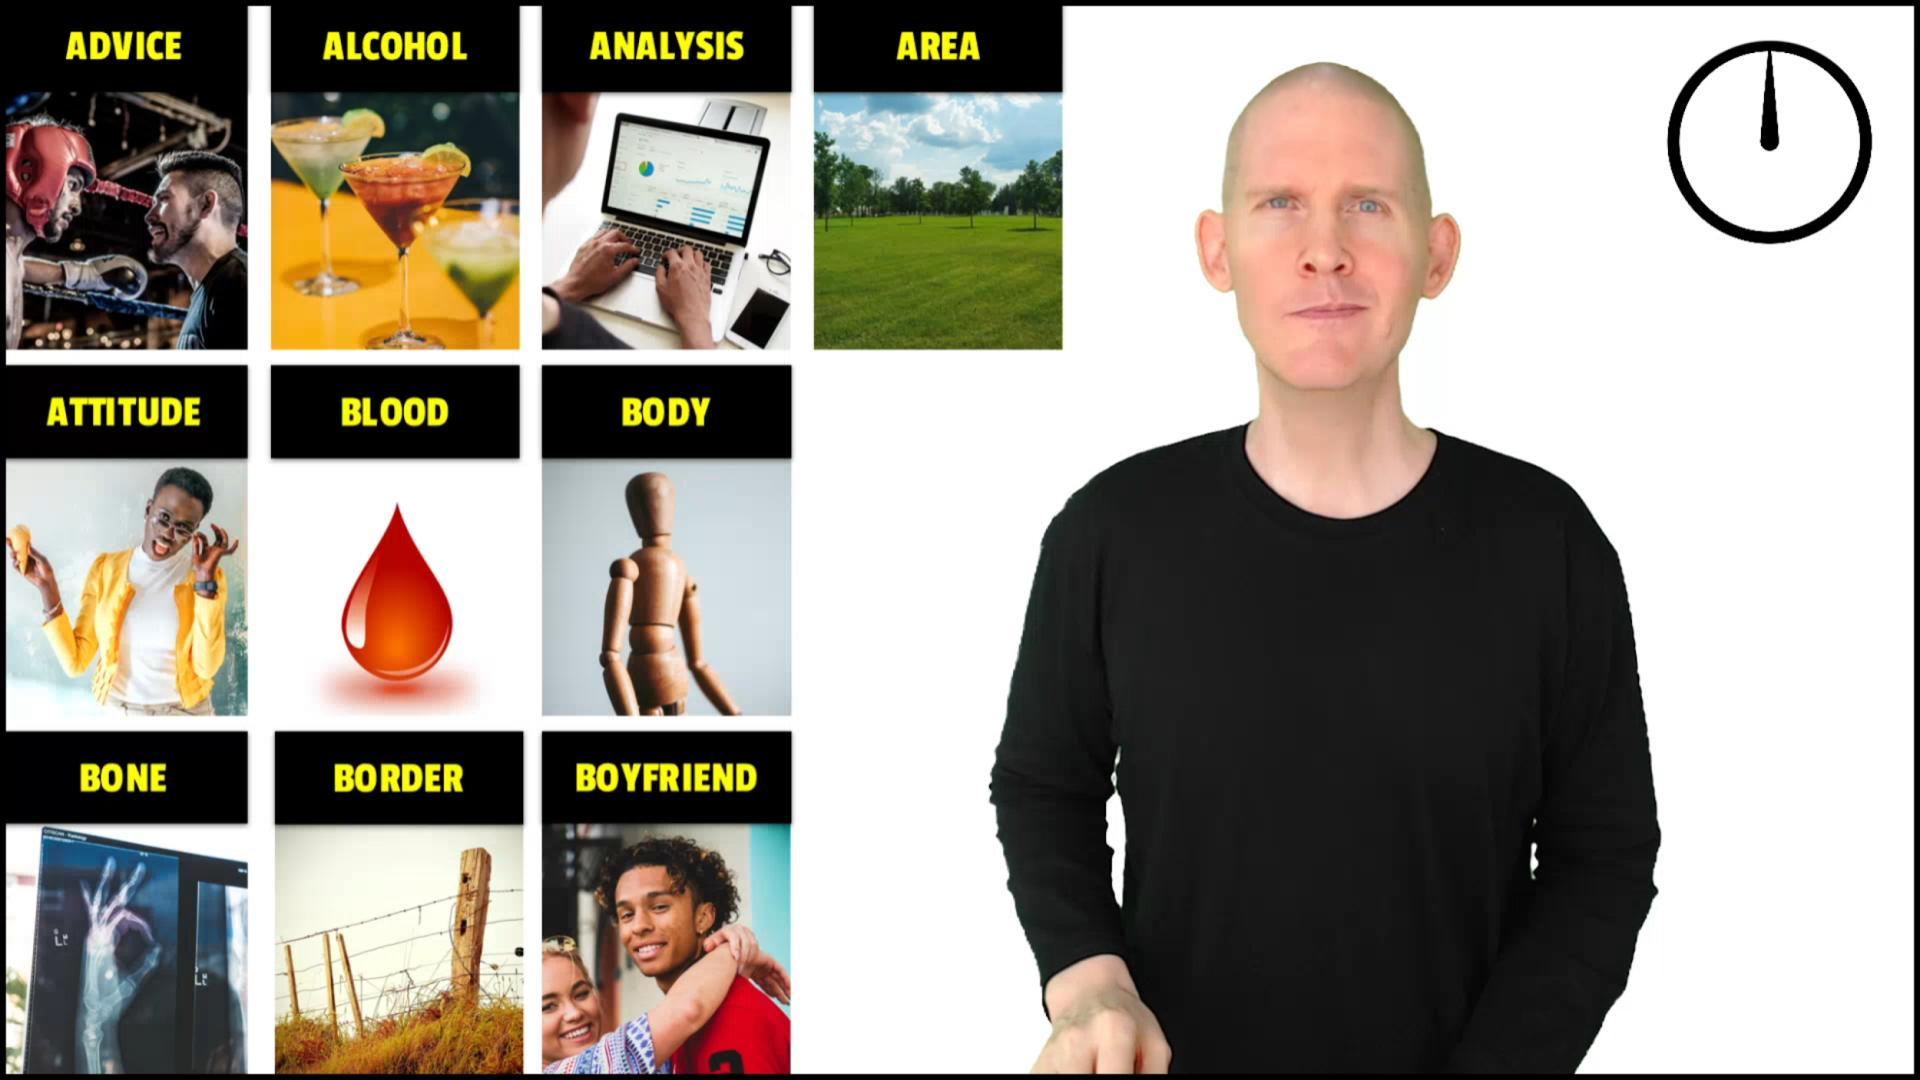
2. Explore | Group 1 Nouns: Oh, okay. The journey begins. Yes. Let's talk about what you're going to learn in group 1. Nouns. Advice, alcohol, analysis, area, attitude, blood, body, bone, order, boyfriend, okay, So we have a nice group of 10 signs, ten nouns. Now I'm going to teach them to you one by one. So yes, that means we have a separate video lesson for each sign where we're going to learn it, practice it, talk about it, hand shapes, hand motions, all that stuff. In After we've learned all ten signs. After you've learned all ten signs will have review. Yes. This means you'll be signing and you also watch me and try to understand what I'm signing. Well, Let's jump in. Let's learn these signs. Let's do it.
3. Learn | ADVICE: Here is the sign for advice. Okay, we're going to use both hands. I'm right-handed, so with my non-dominant hand for me left, I'm going to make this handshape right here. We're just gonna put the fingers together with Tom alongside. Now take that, put it down here. Pompeii seen down, That's our platform. With your dominant hand. I'm right handed. We're going to start by making this handshape right here. Basically just taking the fingers, putting them together and putting them down on the tip of the thumb. Okay. Now we're gonna put that down here about basically where your knuckles lineup just put it right down there and then we're going to go 1, 2. Advice. Advice. All right, once again, you've got that platform, this handshape right here, put it down there, and then just go 1, 2, right from the sign. Advice. Other side from the front again. All right. So starting from the rest position, sign with me. What's that? What is the rest position? Well, I call it the rest position right here where our hands are like this. If you've ever watched sign language interpreters when they're not signing, their hands are usually about here somewhere because PVD, they can quick springing action is start signing. Okay, So when we're doing practice signing, we're going to start in the rest position. So sine with meaningless started the rest position. We're going to assign advice three times. Here we go. Advice. Advice. Advice. Okay, So in this sign, to remember it, It makes me think of like someone is hiding in weight down here and they're just waiting to spring out and tell you what's on their mind here. And then all sudden law become Howard their advice. Or you can maybe like there's a horn or something. But either way, you have it down here and it just comes out twice. Now this sign, this concept also works for other words in English, couple are influenced like I'm under their influence on her influence. And what else? There was another one. It was Counsel? Yes. Council. Like I'm going to you for Council because I need your advice and counsel. Okay. So quick review. Non-dominant hand for me. I'm right handed, so my non-dominant hands right here make this handshape flat hand, put it down there, that's our platform. Now take your dominant hand, going to go like this, make this handshape. We're putting it right here about lined up with our knuckles. Start on one side, like you're hiding down here and then just jump out twice. 1, 2. Advice. Advice. Okay, we just talked about how to sign advice.
4. Learn | ALCOHOL: Here is the sign for alcohol. Okay. We're going to use both hands and the hand shapes are the same. Yes, we're going to use devil horns like Iraq in how these hand shapes right here. Now how do we make them? Well, sterling, this, the middle two fingers, you're going to go down and then you're going to pin them down with your thumb. We can say your thumb in front. So we have the horns, right? Okay. So I'm right handed with my non-dominant hand, my left hand, I'm going to put it about right there. Now me take my dominant hand. I'm just going to tap twice on top. So I'm using this part, the bottom part of the hand-write here, just going right on top one to alcohol. Alcohol from the sign. Alcohol from the other side. Alcohol from the front again. Okay. So starting from the rest position, sign with me. Let's do it three times. Alcohol. Okay. So maybe a way to remember is that in certain situations, alcohol is the demo. So remember the devil horns? Yes. Okay. Non-dominant hand put it down their dominant hand tap twice on top. Alcohol. Okay. We just talked about how to sign alcohol.
5. Learn | ANALYSIS: Here is the sign for analysis. Okay, the hand shapes are the same for both hands. Wonderful. We're going to use the letter V, both hands, right? We'd also say the number two. We can say Peace man, right? Now, how do we make a V? Well, go like this pinky ring finger down, thumb on the front, in the front, on top of the ring finger. Now we have our v's, Okay? Now the idea is look at them as kind of like clause you're trying to dig into things, are snooping around because you're analyzing the performance analysis. So you're digging around, okay, so that's the idea. Now, take those bees, put them above here, right palms facing forward. Now we're going to do two motions. We're going to go like this one too. All right. So there's a bag of information, whatever we're digging into it. All right. One to kind of a circular motion right here. One to like there's something there and you're opening it up, opening it up. And analysis. Analysis from the sign analysis. Other side. Analysis from the front again. Okay. Rest position, sign with me. Let's do analysis three times. Analysis. Analysis. All right, quick review. Hand shapes are the same letters V, or we could say Peace man, right? So we have those bees, put them in bold here, fingers straight at the top. Now we're going to bend the pink bunny ears down as we go down one and go down again. All right, so a straight curved, straight curved and analysis. Analysis. Analysis. Okay. We just talked about how to sign analysis.
6. Learn | AREA: Here is the sign for area. Okay. To use your dominant hand. I'm right handed in the handshape is just a flat hand, fingers spread apart. Now we're going to put it about here, Pompeii seen down, and we're just gonna do one circle, right? So it goes from the outside to the inside in that area? Area. From the side. From the other side. Okay. From the front again area. All right. Rest position sign with me. Let's do it three times. Area. Area. Okay. So what would be a way to remember this? Well, pretend your wife's unit car, you're watching someone watching a car and they're going to watch the roof of the car. So they go like this and they go like this. Same motion, same handshape for area. Area. All right. Remember open hand flat right there, palm facing down. Use your dominant hand and just do a circle. One time. Area. Okay. We just talked about how to sign area.
7. Learn | ATTITUDE: Here is the sign for attitude. Okay, use your dominant hand. I'm right handed. We're going to make the hand shape of the letter a from the alphabet a, B, C, write a. How to make an a? Well, go like this, bring us together, put them down here. Like you're going to start making a fist but just leave the thumb here at the sign. So we have a okay. So take that a, we're going to go about here. We're going to go a circle and then in, alright, so the A's here, bring it over here, do a little circle and then goes straight into your chest. So when you finish, you're still in a handshape reduce pressing against your chest in this part right here is what's touching your chest. All right, so we have added two. We have the circle and then bring it in. Attitude from the sign. Attitude. From the other side. Attitude. All right. From the rest position, sign with me. Let's do attitude three times. Attitude. Attitude. Okay. Quick review, handshape, going to use the letter a, put it about here. Do a circle. When you're doing the circle, you can approach to get closer to your chest. Just make sure you leave some space out there. So do that circle and then you can bring it in attitude. Now when you're signing this sign, facial expressions are so important in American Sign Language, they add so much information. So I'm going to assign this in two different ways. And you think, what extra information might I be trying to convey even though I'm not signing anything extra? Alright, here we go. Okay. Hopefully, when I went like this, you might be thinking, Oh, he's talking about someone with the horrible added to it and just don't want to be around them. Or when I went like this, there must be someone with an attitude we like. All right. Just by putting the facial expression, you get so much. Oh, right. Oh, we just talked about how to sign attitude. A handshape, make that circle, bring it in. Attitude. Okay.
8. Learn | BLOOD: Here is the sign for blood. Okay, we're going to use both hands and the hand shape is exactly the same for both hands. Were just can use open hand here, fingers spread apart, just a flat hand. We'd also say the number 5, right? Okay, So I'm right-handed, non-dominant hands still in the hand five handshape here. Gonna put it right here, right about right there. Pompeii seen in, now this one's not going to move, it's just going to hang out there stationary. Dominant hand for me, my right hand, I'm going to start on top a little bit on the outside, a little bit in front and I'm just going to bring it down and flood or the fingers. Blood, blood. Imagine like a trickle of blood and it's trickling down and we're fluttering to show trickling number like that. Blood from the side. Other side. Blood from the front again. Blood. Okay. Rest position sign with me. Let's do it three times. Blood. Blood. Okay. Quick review. Number five, handshape, just open hand, fingers spread apart, non-dominant hand. Put it about here. It's just going to stay there. It's not going to move dominant hand here a little bit up and a little bit out front so we can go in front. And as we're going down, we're going to have blood or the fingers. Blood. Blood. Okay. We just talked about how to sign blood.
9. Learn | BODY: Here is the sign for body. Okay, the hand shapes are the same for both hands. We're just going to use this handshape right here. Flat hand, start like this, bringing together tongues onside. Now we're going to turn them in and they're going to not be touching but parallel with each other. Straight line here. Now we're going to tap once on our chest, tap ones on our stomach, abdomen area. So we have body. Your body from the side body. Other side. Body. From the front again. Okay. Starting from the rest position. Sign with me. Let's do it three times. Body. Body. Body. Okay. Hand shapes. Remember flat hands here, fingers together, thumbs alongside, turn them in palms facing in there at about the same level. Now start on your chest, tap once, and then go down and tap on her stomach. Once again. 1, 2 makes body. Body. Okay. We just talked about how to assign body.
10. Learn | BONE: Here is the sign for bone. Okay, the hand shapes are going to be the same for both hands. Now let's start by making the handshape or the letter B. Let's make the letter V. Or we could just say Peace man, or the number two. How do you make a V? Go like this pinky ring finger down, take your thumb, put it in front on top of the ring finger. Now we have these hand shapes right here. Now pretend these are bunny ears. Now Ben the bunny ears down. Suddenly we have the hand shapes we need for bone. I'm right handed with my non-dominant hand. I'm going to put it here, palm facing in, okay, and a little bit space out with my dominant hand, I'm going to put it in front. Now we have a cross here and we're going to bring them together twice. 1, 2 bone, bone from the sign. Bone. Bone, other side. Bone from the front again. Okay. Rest position. Sign with me. Let's do it three times. Bone. Bone. Okay, quick review of the hand shapes. Start with the letters V. Take those bunny ears, curve them down. That's what we need. Non-dominant hand right there. Pompey's in, in dominant hand right here. We're crossing at about the risks. Now this one too. Now you can say they're moving in towards each other. You could just tap with one hand if you want. That's point 1. 2 is bone. Bone. Okay. We just talked about how to sign bone.
11. Learn | BORDER: Here is the sign for border. Okay, the hand shapes are going to be this same. We're going to use the letter I like from the alphabet, right? How do you make an eye? Well, just stick of your pinky. That's one way. The longer way we can say like this, bring us together. Index, middle and ring finger down. Put your thumb in front. Pinky stick it up there. That's an eye. Okay. Let's take those eyes. Let's put them here so the palms are facing in. We're going to touch the tips of the eyes and we're just going to pull straight out. We're going to make an imaginary line in the air, right? That is border. Border from the sign. Border. Border. Other side. Border. Okay. Rest position. Sign with me. Let's do border three times. Border. Okay. A few things about this sign. Let's see, where should we start? Let's start with an alternate sign for border. This is a different sign, same meaning, just another way of doing it. Okay. I've also seen borders sign like this. Okay. We're, the hand shapes are like this. Non-dominant hand goes in front, take this one and just slide up your arm. Makes sense. You know, there's a nice line there. There's a border. There's the border, right? That's an Alternate Version to be consistent in this course, I'm always going to assign border like this with the eyes border. Okay. Now this sign here, the same movement, the same sign can mean multiple different things depending on the context. Okay? So I've seen that this can be used for line, string, wire. Okay? So how do we know what it means? Right? Well, just think of it this way. It's spoken English is very uncommon for someone to walk up to you and say a single word like Pi. And expect you to know if they mean, you know, Pi, the prover to eat cherry pie, or the mean pi, like the magic mathematical concept 3.14. Now it's the same in sign language is very rare, probably won't happen, that someone comes up to you and just goes like this with absolutely no context. Well, we're talking about countries in a dike, this border, right? We're talking about fixing something. I might need the wire, like drawing something or I need a line or my shoe is I need to fix up the tie someone up string. So to make a long story short, you will have contexts to know what this means. Now in this course we're just going to focus on the sign for border. All right, so every time I be going like I'm going like this, I'm going to be talking about border o k. All right, quick review. Hand shapes going to be the letters I, the letter I take those tips of the eyes and put them together and just go straight out. Border. Border. Okay. We just talked about how to sign border.
12. Learn | BOYFRIEND: Here's how we assign boyfriend. Okay, now you're thinking, I think I said two signs there and I would say yes, just like an English, It's a compound word, boy, friend. Well, in American Sign Language we have boy, one signed in print, another sign. Okay. You're going to learn two signs in this lesson. Oh, right. Okay, so let's start with boy. Here's what it looks like. Boy, boy. Okay. So the hand shapes going to be like this fingers together. It's going to be coming down and touching the thumb right? Now, just close it up once you get to your forehead. Boy, boy. Boy. From the other side. Boy. Boy, front again. Boy. Oh, okay, now we need friend. Here's how we signed print. Alright, use both hands, we're going to use our index fingers. I'm right-handed, so my non-dominant hand, I'm going to put that one right here, palm facing up, index fingers sticking out. Take my dominant hand, that index finger, put it on top. All right, Now we're going to go one. Now we're going to flip over and do the exact same thing, just on the opposite sign. All right, so I'm dominant hand right here, that one's on top and they'll flip it. That is friend, friend, friend, right? Notice how the index fingers don't really stay straight. The kinda curb a little bit. You can see that print from the side. Friend and other sign from the front again. Okay. Now we have two signs. We have boy and we have friend. Now to make boyfriend, We just make sure there's not a lot of space in between the word to make it a compound sign. So you wouldn't go like this. Right? That would be two separate boy and then there's a friend we want boyfriend. So put them together. Just like that. There we go. Boyfriend from the sign. Other sign. From the front again. Okay. So basically it should just try to be fluid when you're going boy, to friend. Okay. Rest, position, sign with me. Let's do boyfriend three times. Boyfriend. Okay, good, good. So we learn quite a lot in this lesson. We learned three ways, three different words, really, boy, friend and boyfriend. Okay, so for boy, Remember, go like this. When you get to your forehead, close it up. Boy, boy. Brand index fingers, non-dominant hand, their dominant hand on top, one to print. Now for boyfriend, put them together. Nice fluid movement. Boy print. Boy print. Okay, we just talked about how to sign boyfriend.
13. Explore | Group 1 Test: Once this, you've already learned how to assign 10 nouns, 10 signs. Well done, way to go. Well, I think no, I know that it's time for testing. Okay. Right. And you may want to pay attention because this is the testing format for the entire course. All right, when we do review and testing, we do it in two parts. The first part will be signing, see that hand down there. The second part will be understanding recognition. Okay, let's talk about the first part. Well, better yet, how about I just show you, okay, We're gonna do a mini quiz, which is the signing portion. All right, so you watch me and then we'll talk about it. And I'm going to put on my glasses because when I put on my glasses for review, I don't talk. I'll be quiet or just communicate in sign language. Okay. So here's an example testing part where you sign, okay. Okay, So did you see how it worked? Well, first I did a little intro. Alright. So I said, You look at that, whatever's out there and you sign. Then I would think I gave you a thumbs up or something like that and you can do it. All right. Then I went to this screen where actually had the sign and it was something that we've already learned. All right. So I'm only going to show you things that we've already went over, right in this section is specifically going to be group 1 nouns. Okay. Showed it to you and I ran the timer. The timer is per three seconds. Now this is your opportunity. You can pause the video, pause the timer, and take your time and sign wherever I show you or you can raise the timer and try to do it more quickly. I'm going to show you stop in random order. Alright, so keep guessing. Right after the timer is up, then I'm going to sign, alright, and you can compare your answer with mine. All right. So that is the first part where you're signing you sign. All right. In the second part of review, in the understanding part, the recognition part, there won't be a timer, but you will have me. Okay? So I'm going to assign a 100 and you try to understand what I'm doing. Now let's do the same thing. I'll show you how it works. A little quick mini quiz here, and then we'll talk about it. Okay, glasses on. Okay, So that is how the understanding review sections work. Our right. So I did a little introduction. I said I sign. You. Take a look at me, watch what I'm doing is doing something and then ah-ha, when you understand what I'm doing, to shout it out loud. All right. So I signed it and then I showed you the answer and I signed it again. Okay. So remember when we do review in this section, this review part only, we're going to be doing group 1 signs always drawn a match, a random order. We were to review parts one, we're used sign and then also an understanding part where I sign in both parts of the review where in the glasses only communicated in sign language. All right. What an opportunity. Let's do it. Let's jump in and do some review.
16. Explore | Group 2 Nouns: Okay, We're in group two nouns. Let's explore and take a look at what you're about to learn. Building business, Christmas, clothes, college, common sense, computer, communication, community company. Okay, we're going to learn each of these signs one by one. We have a separate video lesson for each one. And after you've learned all the signs, we're going to test you? Yes. Okay. Let's do it. Let's jump in.
17. Learn | BUILDING: Here is the sign for building. Okay, we're going to use the same handshape or both hands go like this. Fingers together come alongside. Now we have these flat hands here. We're gonna take the fingers and bend them down a bit so we have these hand shapes. Okay. All right. So I'm right-handed with my non-dominant hand. I'm going to put the first one right here. Now pretend it's like the bottom level of the building that we're about to create, right? Take my dominant hand. I'm going to make another level. Now I'm gonna make another level, and I want to make another level. So we're just going to go 1, 2, 3. And that's the sign for building 123 from the side building. Other side building. From the front again. All right. Rest position. Sign with me. Let's do it three times. Here we go. Building. Building. Okay, So a quick review. Hand shapes like this. Bend them down and we have a level. Take make another level. We're going to slide out, make another level and make another level. So 1, 2, 3, we have building. So we're just building up, making a higher building and adding levels as we go. Okay, one thing about this sign, I have seen an alternate version. We're still building something, but instead of using hand shapes like this, it's going to be just two fingers, right? Like that. And go 1, 2, 3. So you may see that version of building 123. To be consistent in this course, I'm going to be signing building like this throughout with this handshape right here. Okay. So all right, so just build up the levels. You get to the top and that is building, Alright? Okay, we just talked about how to assign building.
18. Learn | BUSINESS: Here is the sign core business. Okay. We're we can use both hands. The hand shapes are the same. Yes, we're going to use the letter b for both hands. How to make a be, well, go like this. Fingers apart, bring them together, take their thumb, put it in front. There we go. We have two Bs. Now I'm right-handed. So with my non-dominant hand in the B handshape, I'm going to go like this. We have a platform. Okay? My dominant hand, I'm going to use the bottom part, the base of the hand here, and I'm going to make contact twice on my other arm, 1212. So we have business. Business. Okay. Notice I'm staying in the B handshape the whole time. Business from the side business. Other side. Business from the front again. Okay. Starting from the rest position, sign with me. Let's sign it three times. Business. Business. Okay, quick review. Hand shapes going to use the letters be like from the alphabet a, B, C, B. Non-dominant hand. Put it down there, make a platform dominant hand. Use this part here. It may contact twice with on your other arm, one to business. Business. Okay. We just talked about how to sign business.
19. Learn | CHRISTMAS: Here's how we assign Christmas. Okay, use your dominant hand. I'm right handed, so I use this hand and the hand shapes going to be the letter C, like in the alphabet, right? How do you make a C go like this? Fingers together. Now curve the fingers so you have something that looks like a C, a hub, okay, take that C tilted forward and we're going to start right about here. Now we're just going to slide up so that our c is basically upside down. Alright, Christmas. Christmas. Alright, so visualize with me for a moment. Imagine a Christmas wreath, alright, the big read as a whole in the middle, right? Kinda like the shape of a doughnut hole in the middle. So we have the wreath, the hole in the middle. And we're going to take our C handshape. We're going to go inside the wreath, like we're grabbing onto the reef and we're just going to slide up. So inside the wreath, grabbing onto the inside and this slide up, stay in the hand. C handshape the whole time. Christmas. Christmas. From the side. Christmas. Christmas. Other side. From the front again. Okay. Resting position sign with me. Let's do it three times. Here we go. Christmas. Christmas. Okay, quick review. Handshape. Letters C are right. Now. Imagine there's a big wreath here and imaginary wreath with the hole in the middle. The hole in the middle, stick your C in there like you're grabbing the inside of the wreath and just slide up. Alright, so we have Christmas. All right. We just talked about how to sign Christmas.
20. Learn | CLOTHES: Here is the sign for clothes. Okay, we're gonna use both hands and we're just going to use this handshape right here. We could say the number five handshape produced all the fingers stretched out. Okay, we're gonna use both hands and the movements are going to happen at the same time. We're going to use the tips of the thumbs and we're going to touch twice on our chest. Now it's a downward movement. Both loads from the sign. Floats. Other side. Loads from the front again. Okay. Starting from the rest position, sign with me. Let's do clothes three times. Clothes. Clothes. Both are right. Quick review hand shapes are the same just like the number five, I had to open hand, take those storms, use the tips of the terms. Go to your chest in slide down quickly, twice. Clothes. Clothes. Okay. We just talked about how to sign clothes.
21. Learn | COLLEGE: Here is the sign for college. Okay, we're going to use both hands and the hand shapes or this seam. We're going to use these flat hands right here. How do we make them fingers apart, put them together, them alongside. Okay. Now, I'm right-handed with my non-dominant hand. Take that handshape, put it down here. Now we have a nice platform, okay, with my dominant hand, I'm going to go like this. I'm going to tap once and I'm going to go up and make a circle, kind of tap and then hover. So we have college. College. All right. So you notice there's a tab and when I come back up, I'm hovering a go a little bit in front and then I come back. So when I finish, my dominant hand is hovering directly on top, above, above my non-dominant hand. College. College from the side. College. Other side. From the front again. Oh, okay. Let's do it three times, starting from the rest position, sign with me. There we go. College. College. College. Interesting note, the sign for school is like this. Alright, so you're going like this with open hands like that school. Now it makes sense that higher learning would be higher up the signs a little bit higher, right? So one tap. College. Okay. Quick review hand shapes, flat hands like this, bring you together thumbs alongside non-dominant hand. Put it down here, palm facing up that your platform dominant hand. We're going to tap and honor way up. We're going to hover, do a little circle, come back, and be directly above our non-dominant hand. College. College. Okay. We just talked about how to sign College.
22. Learn | COMMON SENSE: Here's how we assign common sense. Okay, use your dominant hand. I'm right-handed. Now we're going to use two letters from the alphabet. Those would be the hand shapes. We're going to start with a C, Then we're going to change to an S, right? So first, how do you make a C? Go like this? Fingers together. Now curve them down so you have a C. Alright, so that's a C. Now in S is just a fist and I put up your dukes, I have two Ss, one way we could say fingers together, come down the arm in front, That's an S, right? So we have a c, we have an S. Okay, so let's start with the C. Remember dominant hand. I'm right handed, so I take my C, I'm going to turn it right here. So the DMS right here, take the tip of the thumb, touch the side of my forehead. Nominee come out in Millikan, S, C, S, C, S. So that's the sign for common sense. From the sign. Other sign. From the front again. Okay, rest position, sign with me. Let's do common sense three times. Common sense. Common sense. Okay. The facial expression during this sign depends on the situation, but you know, the expression that common sense is not so common. So if you want to sign it, you might have looked like this. You know, like what happened to the commonsense? Just a neutral face. My work as well, common sense. Okay, quick review. Remember we started with that C handshape right here. Take the tip of the thumb, put it at the side of your forehead. Right. So we have the C up there, come out and make the S. All right? Common sense, right? When the S is up here, it's tilted kinda like you're holding a sign of a mug or a picture or something. Okay. We just talked about how to sign common sense.
23. Learn | COMPUTER: Here is the sign for computer. Okay, we're gonna use both hands with your non-dominant hand. So I'm right-handed, non-dominant hand, just make a fist. Alright, now lay it down here so we have a platform, okay? Dominant hand make the letters C like an alphabet, a, B, C. They have the C there. We're going to use the bottom part of the thumb right here, the outside partner. Suppose, now we're just going to go 1, 2 on the back of our forearm right here, but the wrist area, we're going to make contact. Okay. So one to computer. Computer from the sign Computer. Other side computer. Okay. From the front again, starting from the rest position, sign with me. Let's do computer three times. Computer. Computer. Okay. Quick review. Non-dominant hand. Make that fist laid down their dominant hand. We have the letter C. Okay, go like this, 1, 2, making contact with the back of the thumb. 12 is computer. Alright, note about this sign in alternate version that I've seen is using the same hand shapes C. But instead of doing something like this, it just uses the tip of the thumb and goes 1, 2 on the forehead computer. Computer. Now you might be thinking, we don't want to get out a real life. Which one should I use? Well, if you're not sure, you could just use one and see how it goes. If you're able ask your local deaf community and see how they do it and then sign it how they are. So in this course to be consistent throughout, whenever you see me signing computer, I'm going to sign it like this computer. Okay. We just talked about how to sign computer.
24. Learn | COMMUNICATION: Here is the sign poor communication. Okay, we're going to use both hands. Now there's different movements, but the hand shape is the same. It's going to be the letter C, like the alphabet. Right fingers, the other carbon down. So we have to seize. Now I'm right handed, so I'm going take my dominant hand. And when I put it here close to my chin, my mouth area, non-dominant hand. I'm going to put it about the same level just farther out. Now we're going to do is switch three times 1, 2, 3. Communication. Communication from the side. Communication from the other side. Communication from the front again. Okay. Starting from the rest position, sign with me. Let's do it three times. Medication. Medication. Okay. Quick review. Hand shapes using the letter C, dominant hand, starting closer to your mouth, don't actually have to touch just about here, but the same level as your tin, non-dominant hand C handshape, put it out there, seem level. Now we're just going to switch 123 medication. Okay. We just talked about how to sign communication.
25. Learn | COMMUNITY: Here is the sign poor community. Okay, the hand shapes are the same like this. How do we make it well, rehearsed together DOM alongside. Now we're just going to make like a little steeple appoint the mountain peak over here. We're going to go one and then do another one over here. Alright. Community, right? You probably noticed the tips of my fingers come together. They come apart slightly and move over. And then I go again, merely from the sign. Merely from the other side. Melody from the front again. Okay, rest position, sign with me. Let's do it three times. Immunity. Immunity. Okay. This sign like this works for community and it also works for city, city. Like a city, town like that. Now, thinking, how do I know which is which, right? Well, in any language, it's very uncommon for someone to walk up to you to say a single word. You know, all by itself. We usually have contexts. We almost always have contexts in spoken English, right? Someone walks up to you and says, pi. Now you're probably most likely thinking like cherry pie or delicious, That's eat. But maybe they're talking about the mathematical equation 3.14, right? How would you know? Well, you know, because there's contexts, it's really uncommon, never heard. So who just walks up and says one word? So the same for this. Is it city or is it community? Use the context, you're going to have more information. Okay, quick review and shapes you like this. All right. Go like this. Go one make a little steeple and another one over here. So we have community. Okay. We just talked about how to sign community.
26. Learn | COMPANY: Here's how we assign company. That's it. Okay, we're going to use two letters from the alphabet. I bet you can guess which ones are ready. We're gonna do a C and then we're just gonna immediately do an O. All right, so that's going to be how we sign company, right? How do we make a C? Well, go like this, bring us together. Now we're going to curve and it just looks like a C. Now how do we make an O? Just put the tips of the fingers together. So we're just gonna do it in a fluid movement. C o company from the sign. Other side. From the front ahead. All right. So our doing is a little bit of finger spelling, right? This is the sign for finger spelling. All right. Rest position. Sign with me. We'll say fingerspell with me. Let's do company three times. Company. Okay. When using this sign, I have seen sometimes where people will go see and then oh, they'll do all little bit to the side. Co, CO, It's also common this hominid do it throughout this course, just go like this. Ceo or the hand does it really changes. The sea. Just becomes an OH, so the placements not moving around. Co Okay. So great review for company. Just do two letters back-to-back, c, o. All right. We just talked about how to sign company.
29. Explore | Group 3 Nouns: Well, hi dog, it's grouped three nouns. Let's explore what you'll be learning. Competition, consequence, coronavirus, country, customer, that decision, Pictionary, discrimination, duty. Okay. You know, we have a separate video lesson. Each sign, we're going to practice it, learn it, talk about it, hand shapes, position, all that stuff. Right after we got through all the signs, we're going to have review in testing. Yes, we'll leave that for later. Right now let's jump in. Learn these signs. Here we go.
30. Learn | COMPETITION: Here is the sign for competition. Okay, we're going to use the same handshape or both hand is going to be the letter a from the alphabet like ABC a. How do you make an a? Well go like this. Fingers together, bring the fingers down like that, and then just put the thumb alongside. We have two a's. Okay. So I'm right-handed, so this is my dominant hand. I'm going to put my first a right here. Now it's tilted back a little bit. So the tip of the thumb is pointing towards my face. I guess I'm gonna take my non-dominant hand, take that a and tilted forward so the tip of the thumb is pointing away. Okay. Now all we're going to do is rotate a few times. We're going to go 1, 2, 3, as well as we could say, tilt back and forth. Petition. All right. So 1, 2, 3, competition. All right. And we're not they're not moving at the same time. They're not tilting together. They're tilting opposite. Competition from the sign competition. Other side. Competition from the front again. Okay. You started from the rest position. Sign with me. Let's do it three times. Competition. Competition. Okay? This sign can also work for the English words contest. I can work for sports. So all the same sign. It just depends on the context where we're trying to communicate, right? In this course throughout, I'll be using a port competition. Okay, quick review. Hand shapes are the same. We're going to use the letter a. Now dominant hand started here, tilted backwards tip of the thumb towards you. Non-dominant hand a over here, tilted forward. Now just rotate back and forth. Competition. Competition. Okay. We just talked about how to sign competition.
31. Learn | CONSEQUENCE: Here is the sign for consequence. Okay, we're going to use both hands. The hand shapes are different. I'm right-handed, so this is my dominant hand. With my non-dominant hand, I'm going to make the letter B, like in the alphabet. How do we do it? Well, put your fingers together, take your thumb, put it in front, that's a B. Take that b and we're going to lay it down here. So the palms facing in, we have this nice platform here. Okay, with your dominant hand, make the letter C like in the alphabet, alright, bringing us together and just curve down, we have a c. Now take this part right here. We're going to place it on top of our finger right here and just let it off and down. Those slide in, down. Consequence. Consequence, from the side. Consequence. Other side. Okay, from the front again, consequence, right? So you just slide it along the top of the finger once you get to the end off the cliff. Consequence. All right, rest position. Sign with me. Let's do it three times. Consequence. Consequence. Okay, quick review, non-dominant hand. Make the B handshape, put it down there, that's our platform. Pompey's in, in dominant hand, make us see Vitamix, the thumb here, placed it on top, slide down off the cliff. Consequence. Consequence. Ok. We just talked about how to sign consequence.
32. Learn | CORONAVIRUS: Here is the sign for Coronavirus. Okay. Different hand shapes. We're going to use both hands. I'm right-handed with my non-dominant hand. I'm going to make the letter S. Or we could just say a fist like Put up your dukes. We have a fist like this. Fingers together, fingers down them in front. Okay. Take that fist, put it about here. Now the top part of the fist is facing towards you. Dominant hand, just do an open hand. We could say the number five, okay, Now we're going to use the open part of the hand right here, and we're going to put it on top. It's tilted to one side. Now we just fill it across. Now I am making contact. I'm touching the top part of my fist. So we just go across coronavirus from the side. Coronavirus. Other side. Coronavirus from the front again. Okay. Rest position, sign with me. Let's do it three times. Coronavirus. Coronavirus. Okay, So this sign also works for the concept of COVID-19, and of course, coronavirus. Now works. Okay, quick review. Non-dominant hand make the S or if I put it right there, the top part of the face is facing towards you. Dominant hand. We have the open hand or the number 5, put it on top so it's tilted in. Now it's going to fan out. Coronavirus. Coronavirus. Okay. We just talked about how to sign coronavirus.
33. Learn | COUNTRY: Here is assigned for country. Okay, we're going to use both hands with your non-dominant hand. I'm right handed, so my non-dominant hand here, I'm going to make this handshape. Right winger see other thumb alongside. Now I'm going to turn it in, put it about here is my palms facing towards me, right? We have the arm down here. Dominant hand. We're going to make the letter Y. Y. How to make y star like this? Middle three fingers together and down, there we go. Why? It's like hang loose. Now we're going to take that y, we're going to use this part. We're going to turn it in, come down to this part of our arm and do two circles. Country, country, a hub and I'm lightly making contact and my arm. Country. Country from the side country. Other side. Country from the front again. Okay. Rest position. Sign with me. Let's do country three times. Country. Country. All right, quick review. Non-dominant hand. Make that flat hand shape. Turn it in right here, arms at an angle in front of the body, dominant hand. We're going to make the hand shape of the letter y, Aha, turn it in. Now we're just going to use this part to touch this part of our arm twice, doing a couple of circles, circular motion, one to country. Country. Okay. We just talked about how to sign country.
34. Learn | CUSTOMER: Here is assigned for customer. Okay, the hand shapes are the same in the more sins are the same, right? The hand shapes are the letters C, But the C irregular see would be something like this. We're going to take those seas and we're going to expand them, stretch them up. Alright, so first, how do you make a C? Well, start like this, bringing us together. Notice curve like that. All right, we'll do it both hands. Alright, so regular CEIS take those as stretch, stretch him up. Now turn them forward so they're flattened front of you. Start about here, about this bottom part, and now it just goes straight down. Customer, customer, from the sign, customer, other side. Customer. All right. From the front again. So it good. Rest position. Sign with me. Let's do it three times. Customer. Customer. Okay? So this sign, this concept also works for consumer. It works for a client. And of course it works for customer. You know, the person coming in to buy stuff. Okay, quick review the hand shapes of this seam. Start with the letter C. Now, just stretch it out to like a big open C. Alright, turn off forward, start up here and just go straight down. Customer. Customer. Okay. We just talked about how to sign customer.
35. Learn | DEBT: Here is the sign for that. Okay, we're going to use both hands. Non-dominant hand, I'm right handed this, my non-dominant hand. I'm going to make this handshape. Right wingers the other thumb alongside. Now we're going to put it down here kinda like it's our ledger, It's our platform or showing something that has just a flat platform, their dominant hand, we're going to use the index finger. We could also say the number one pointer finger. Take that finger, the tip of the finger, and just tap twice, poke twice on your platform on your open hand. Debt. From the side. Yet other side? From the front again. Okay. Starting from the rest position, sign with me. Let's do it three times. Debt. Debt. Okay. This sign this concept also works for Bill, you know, like the bill that you get when you go to the restaurant or something. Bill that just think of it like, you know, you're the debt collector and you're showing to someone you all this debt bill. Okay. Quick review, non-dominant hand, this hand shape right here, put it down there that your ledger that your book that you're going to show people right now, you're going to point to it, tap twice. Yet. Yet. Another version quite similar that I've seen for this to be signed is to first go like this and kind of like the idea of money, right? And then go like that. So altogether it would be like we better pay up. Okay, throughout this course to be consistent, I'll be signing debt like this. Okay. We just talked about how to sign that.
36. Learn | DECISION: Here is the sign for decision. Okay. You probably noticed it's a two-part sign. So literally we are going to be signing, think or mind and then decide. Alright, so think, decide or mine, decide and together IT, decision, make sense. Decision. All right, The first part is use your index finger and just tap on the side your forehead. Alright, the second part, we're going to use the letters F, right? How to make an F? Well, start like this. Fingers spread apart. Take the index finger and the thumb, put them together. We have two Fs, okay, now we're going to put them down here to there are tilted forward. The tips of the thumbs and index fingers are pointing together and now just go down. Okay, so we're gonna take the first part, think are mined and go to this side. And together, decision from the side. Decision other side. From the front again. Okay, Starting from the rest position, sign with me. Let's do it three times. Decision. Decision. All right. Quick review. It's a two-part sign. Literally we're going to be signing mind or think to side and put it together it decision, right? First sign. First part is index finger, tap on the side of your forehead. Now go to the letters F, Put them abroad here and just go down. Decision. Decision. Okay? We just talked about how to design decision.
37. Learn | DICTIONARY: Here is the sign for dictionary. Okay? We're going to use both hands, different hand shapes. I'm right-handed, so my non-dominant hand, I'm gonna make this handshape right here. Fingers the other come alongside. Now we're going to put it down here. That's our platform. We can say it's our open dictionary. I don't know, our book, something like that. Dominant hand. We're going to make the letter D, like in the alphabet. How do you make a D? Well, go like this. We're going to leave our index finger up, last three fingers, we're going to bring them down and touch the tip of your thumb. So we have a d right now we're going to take the tips of these fingers and we're just going to go 1, 2 onto our poem. Dictionary. Dictionary from the side. Pictionary. Other side Pictionary from the front again. Okay. Rest position, sign with me. Let's do it three times. Pictionary. Pictionary. Okay, maybe a way to remember this is pretend this is like your duster, your feather duster. This is your book version of a dictionary and your Dustin it off because, you know you usually use an online dictionary, your phone or something. So dictionary, quick review, non-dominant hand, make that platform dominant hand. We're going to make the letter D. Use the tips of these fingers and just go 1, 2. So I'm making contact. 1, 2, dictionary. Okay, we just talked about how to sign dictionary.
38. Learn | DISCRIMINATION: Here is the sign for discrimination. Okay. We're going to use both hands with your non-dominant hand. I'm right handed, so this is my non-dominant hand going make a plaid hand, fingers together, come alongside. Now we're going to put it here. That's going to be our platform. It's not flat like this is kinda tilted here to the side. Pompeii's in that way. Dominant hand. We're going to make the letter D, like in the alphabet, right? Like this, that we have a d, Okay, now we're going to use the tips and we're basically going to trace an x on our open hand. All right, we're going to use the tips of the D and go like this, 1, 2, discrimination. Discrimination. All right, so the first swipe are coming in towards our body, right? And the second one is we're going away. Discrimination, discrimination from the sign. Discrimination from the other side. Discrimination from the front again. Okay. And I am actually making contact and what you're going to hear that, but I'm making contact with my hand each time I'm swiping. Okay. Starting from the rest position, sign with me. Let's do it three times. Discrimination. Discrimination. Okay. Quick review, non-dominant hand. We have the platform here. It's going to be tilted facing that way. Dominant hand make the D. Now we're just going to swipe an x on our hand, one to discrimination. Okay. We just talked about how to sign discrimination.
39. Learn | DUTY: Here is the sign for duty. Okay. Both hands different hand shapes. I'm right-handed. So my non-dominant hand him and make this one by hand brings together tom alongside. Notice put it down here, flat Pompeii, seen down as our platform. With the dominant hand, we're going to make the letter D, right? Like this. Those figures come down. We have a d. Now use the tips of these fingers and just tap twice on the back of your hand. Duty? Duty. Duty. Other side from the front again. Duty. Okay. Rest, position. Sign with me. Let's do it three times. Duty. Duty. Okay. Quick review, non-dominant hand. Make that platform palm facing down, dominant hand. We have the letter d. Use the tips of these fingers and just tap twice on the back of your hand? Duty. Okay. Okay. We just talked about how to sign duty.
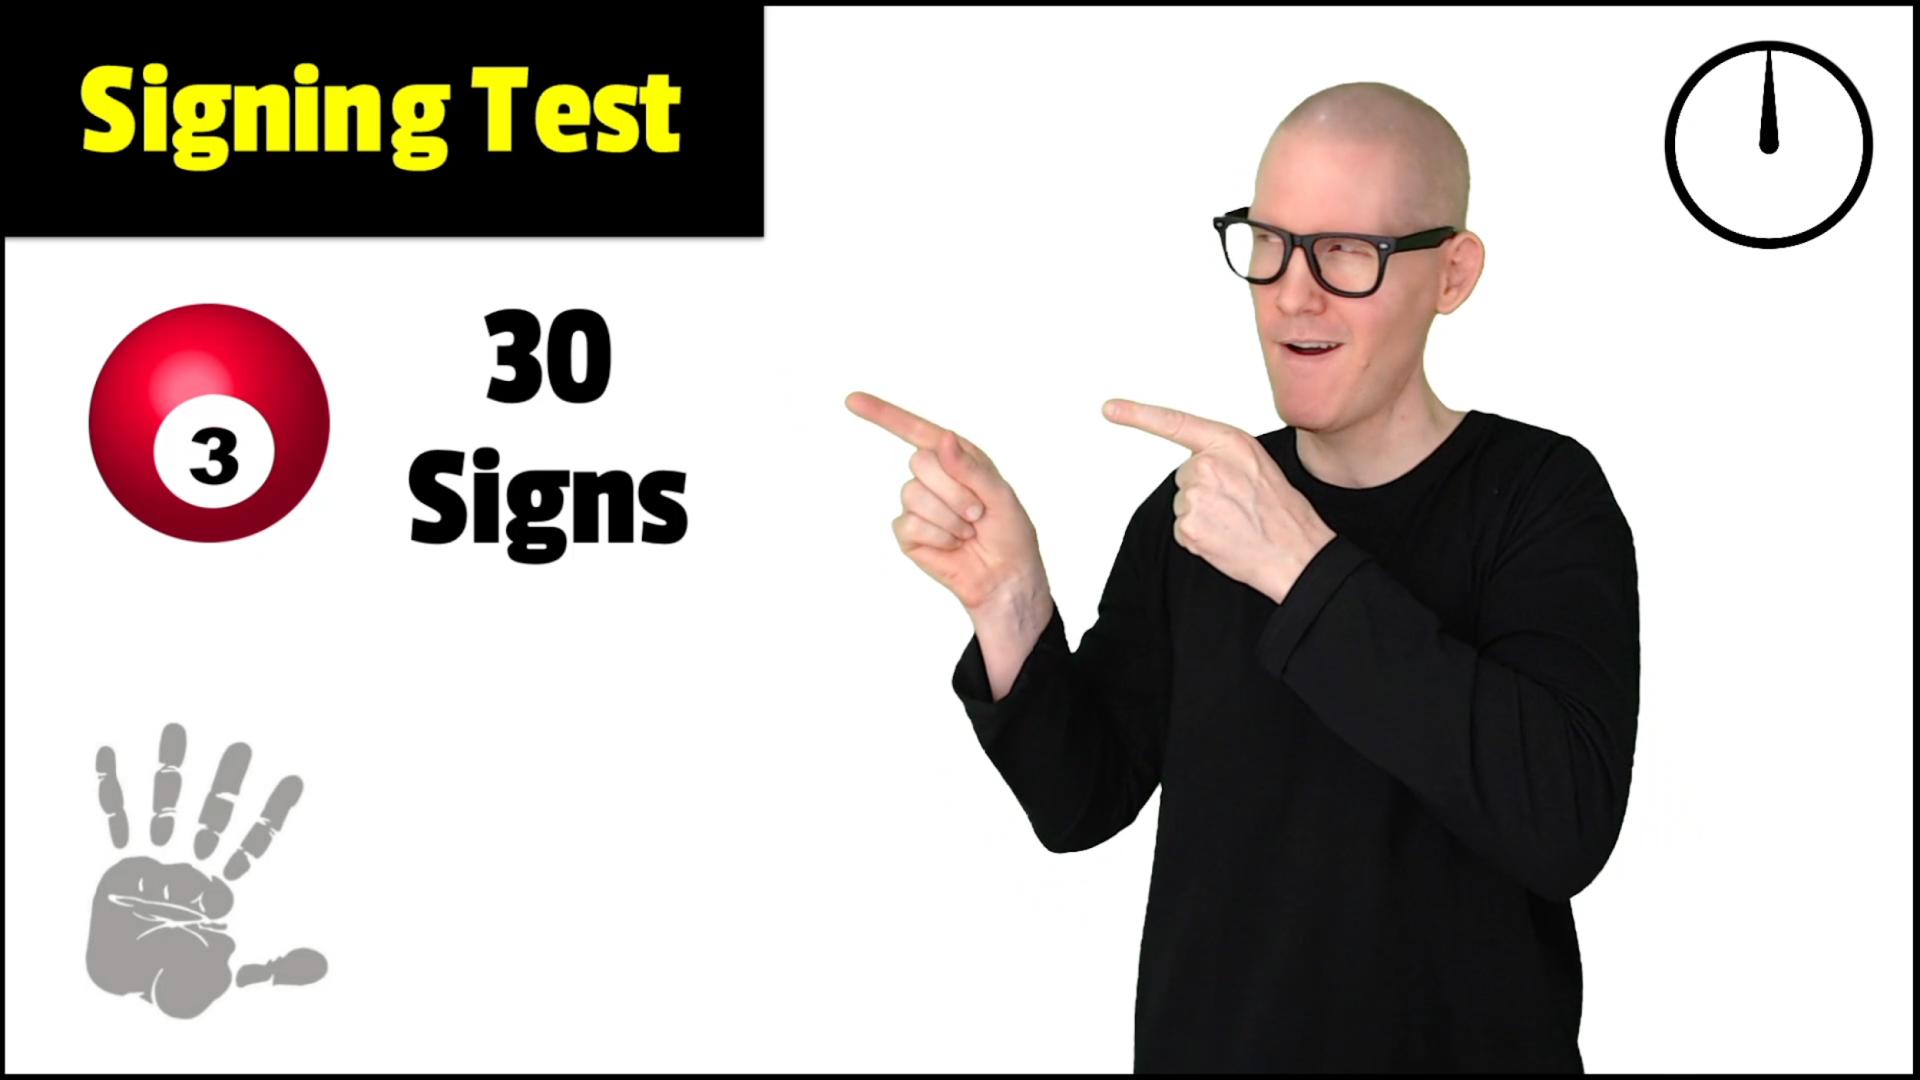
42. Explore | Groups 1-3 Test: Well look at that. It's already time for review of groups 1 through 3. Wow, time flies. That's right. You've learned 30s signs, three groups, 10 signs a peace. Do the math. That's 30 signs. Way to go. Okay, let's get focused here, review and testing. The first part is going to be signing, let me get my timer. The timer will be for three seconds and I'm just going to use all of the signs we've learned in the last three sections. And I'm going to throw Manchu one by one random order, right? So you see it, you sign it, you can raise the timer, pause the video, take your time Up to you. Right? When the timer is over, I will sign it. Okay. That's the first part were used sign that hand down there. In the second part is going to be recognition. We could say understanding until have me yes, I will be signing. So I'm going to assign and you're going to watch me, he's doing something looks familiar. Aha. So you shout it out when you understand what I'm signing. Now, I'm only going to sign it once. So if you need to have me repeat, pause the video, rewind in heavy, repeat as much as needed. After I sign, I will go to the answer right. Then I will sign the answer. Okay. So we always do review in two parts. First you sign, then you understand. Okay, so lots of signs, random order one by one. It's going to throw Manchu sign like crazy, watch me sidelight crazy. All right. Course, can't forget it's testing and this is kind of a major one is like mid review. Got my glasses on throughout all the testing. I won't be talking. Alright, let's do it.
45. ASL Alphabet Review: Hey, hi. Okay.
46. Inspiring Quote #1 | Decipher: Hey, hi. Hi.
47. Inspiring Quote #1 | Answer: Hey, hi. Hi.
48. Explore | Group 4 Nouns: Oh boy, oh boy, it's group for nouns. Let's take a look at what to be learning. Economy, education, effort, election, emotion, emphasis, energy, equality, fact, game. Okay, We have a separate video lesson for each sign. We're going to explore the sign, the hand shapes, hand position, do lots of practice. After that, we'll put them all together and do review and testing. Okay, Well, let's jump in and learn these signs. Here we go.
49. Learn | ECONOMY: Here is the sign for economy. Okay, we're going to use both hands. I'm right-handed is with my non-dominant hand. I'm going to make this handshake. How do we do it? Well, put your fingers together, thumb alongside. Notice put it down here, palm facing up, that's our platform. With your dominant hand, we're going to use the hand shape of the letter e from the alphabet. Okay? How do you make it e? Well, start like this. Bring us together. Notice curve the tops of the fingers down and put the thumb underneath. We have an E, Okay. So we have a platform, we have an e. Take this E with your dominant hand, flip it around, use the back of your hand and tap twice on your open palm. Economy. Economy. From the side. Economy. From the other side. Economy. All right. From the front again. From the rest position, sign with me. Let's do it three times. Economy. Economy. Okay, interesting note about the letter E in American Sign Language, right? It's common to see it like this. It's also common to see its sign like this, right? Where the tips of the fingers come down and actually touch the thumb. Right. So depending where you are where I grew up in the deaf community, we signed it like this. In other deaf communities, they may sign it like this. I would urge you to follow your local deaf community. But either way, if you cern like this or like this, you're going to be understood. Another interesting note, I have heard that this E right here is called the screaming, ie. This is the mouth, I guess, and it opens up and it's a screaming. So I guess this would be like the calm and relaxed e. Either way, it, to be consistent in this course are going to be signed in E like this. All right? Okay, so quick review for the sign for economy. Non-dominant hand mic, that platform, put it out there. Dominant hand, handshake with the letter E. Flip it over, use the back of the hand. Tap twice. Economy. Okay, we just talked about how to sign economy.
50. Learn | EDUCATION: Here is the sign for education. Okay, the hand shapes are going to be the same. We're going to be teens in them as we go, but the be the same for both hands. Okay, First we're going to start with the hand shape of the letter e. Like an alphabet, e, f, g, right? Ie. How to make an E? Well, go like this. Fingers together. Top parts, curve them down, put the thumb down in front. Now this is how I sign and E This is how I grew up. Sign in it are in and around the deaf community. You may see it in other parts where they put the tips of the fingers down. So that is also an E, hope you learned a like this great sign like that. I learned a group like this. This is how I do it. So it's an E. Okay? So we have two ys. Now we're going to take the sides of the index fingers right here, and we're just going to place them at our forehead, right either side of our forehead. Ok, and now we're going to bring them out and change to D. So we're going to start with ease and we're going to change to DES, like ED, ed, education. It makes sense. How do we make it d, Well go like this. These three fingers bring them down, touch the tip of the thumb. And we have D is right. So we're going to start with ease and we're going to shift to D's, right, So here we go. We have E going out to DES. All right, so that's sine is education. Education, education. Other side from the front again. Okay, so remember, start with the ys. We put them right here. I'm touching lightly. So as you would have to touch it, you get close. But this makes further up around there. Now just come out and go to Ds. Okay, Starting from the rest position, sign with me. Let's do education three times. Education. Education. Okay, interesting note, I have seen this done with just one hand, the dominant hand. So you may see like this, the movements the same, just using one hand education to be consistent in this course, I will be using two hands like this for education. Okay, quick review. We're just going to be transitioning from the E handshape to the D handshape. We'll start with the ease up here. This side of each each side of the forehead notice come out and go to D's. Right? So we have education. Education. All right. We just talked about how design education.
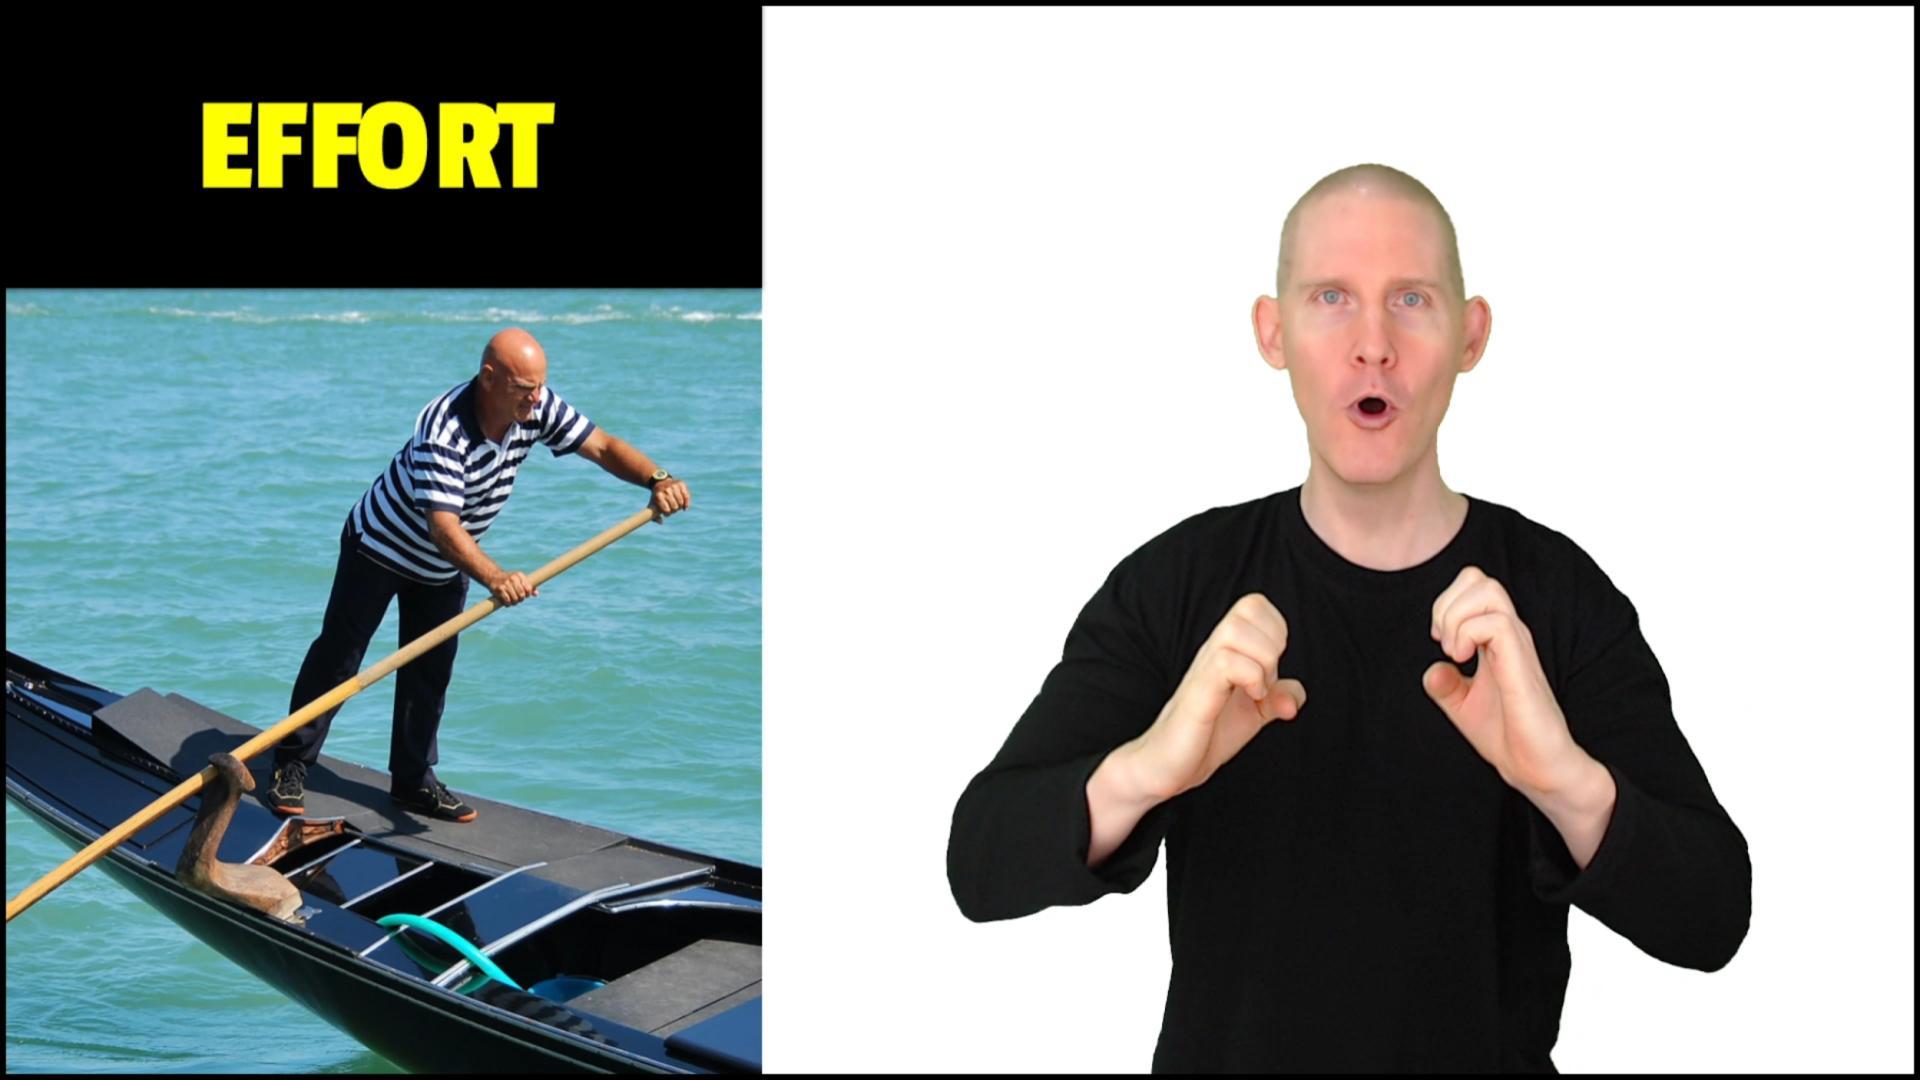
51. Learn | EFFORT: Here is the sign for effort. Okay, we're going to use the same hand shapes are both hands. All right, we're going to use the letter E, right? Like in the alphabet, how do you make an E? Well, go like this fingers together, tips of the fingers curved them down, bend them down and just put your thumb underneath. All right. Now this is an E how I signed it growing up in the deaf community, in around the deaf community, other deaf communities, you may see them sign like this. All right, where the fingertips come down and touch the thumb. Consistent throughout this course, I will be signing E like this. Okay, now we have our two E hand shapes. We're going to put them down here. So I guess the open parts facing towards each other like that. Okay. And we're just going to push out and turn up effort. Effort. And it makes sense you are pushing, it takes an effort to port effort from the side. Effort from the other side. From the front again. Effort. All right. Starting from the rest position, sign with me. Let's do it three times. Effort. Effort. Okay. But while doing this sign, I was thinking what is the weight? That would be an easy way to remember this sign, a memory device. That the best I could come up with with some sort of Zen master, right? You're just like. So if that helps you remember the sign for effort, maybe, well, let's do it. Okay, quick review. Hand shapes are the same. We're going to use letters E. Now turn them in, right? So the knuckles are here, they're kinda pointing forward like that. All right. Now we're just going to turn them in push forward effort. So when you finish, the palms are at that way before the palms are facing straight in effort. Effort. Remember Kung Fu, Zheng, ninja, whatever. Okay, we just talked about how to sign effort.
52. Learn | ELECTION: Here is the sign for election. Okay. Different hand shapes. We're going to use both hands. I'm right-handed, so with my non-dominant hand, I'm going to make the letter O like an alphabet. How to make an O? Well, fingers, the other ring, all the tips down and touch the thumb. It even looks like an O. Great. Now let's take that o and put it down here. Kinda like it's a cup, It's a little jar, something like that. Now with your dominant hand, we're going to make the letter F like an alphabet. How to make an F index finger, thumb bring the tips together and we have an F. Ok. Now to sign election, we're just going to go like this twice. 1, 2 election. You can kind of think that you just cast your ballot, you voted already folded up the piece of paper, you picked it up and you're putting it in election. Election from the side. Election from the other side. From the front again. Election. Okay, Starting from the rest position, sign with me. Let's do it three times. Election. Election. All right. Quick review, non-dominant hand. We're going to make the letter O. I'm right-handed this, my non-dominant hand. Right. Take that. Oh, turn it down, put it right there. It's just a cup waiting for something to be inserted. Dominant hand made the letter F right there we go. Take the tips of the thumb and index finger and go like 1, 2, election. Okay. We just talked about how to sign election.
53. Learn | EMOTION: Here is the sign for emotion. Okay, the word emotion starts with an E. So the hand shapes our Ha, is yes, good, good. How do you make an E? Well, star-like this fingers together, tips of the fingers, bend them down, curve them down with the thumb underneath. All right, we have two 0s. Okay. This is how I grew up. Sign in the E in and around the deaf community. It's a very common way to sign the IEP. You may also see in East sign like this where the tips come down and touch the thumb. Also a very common way to assign an IEP. I would urge you to sign how your local deaf communities signs it, whether it's E or E, we are going to be understood so pure like, I'm not sure which one should I do is pick one brought out there. You're going to be understood, Okay? All right, we have two ys, let's take those 0s. We're going to use this part right here of the eaves, bring it in close to our chests. Alright, now we're gonna make alternating circular bicycle movements that lightly touch our chests. Emotion, emotion from the side. Emotion. Emotion. All right. Can you see that kind of bicycle motion here where we're coming in right there alternating. We're not going at the same speed. We're going one after the other. All right. We're just going to use this part of the E, the touch lightly on our chest. Okay. Other side. Emotion. From the front again. Emotion. Okay. Rest, position. Sign with me. Let's do Emotion three times. Emotion. Emotion. Okay. You may be thinking how many times should I touch and rotate? I don't think there's an exact number. Just do a few emotion. An alternate version that I've seen of this sign is still using the hand shapes, whether it's E or E. All right. And they take those and they used the front part and they turn them in and then they do this circular motion. We have emotion to be consistent throughout this course, I will be doing the 0s like this where they're more parallel like this. Emotion, emotion. Okay, quick review, hand shapes, letter e. Ha, we're going to use this pirate here, this side of the E, we could say, bring them into our chest area. Now we're gonna do alternating bicycle circular movements and touching lightly on our chest, right? So we have emotion. Emotion, emotion. Okay, we just talked about how to sign emotion.
54. Learn | EMPHASIS: Here is assigned for emphasis. Okay, we're going to use both hands. The hand shapes are different. I'm right-handed, so with my non-dominant hand, I'm going to make this handshape. Fingers together. Thumb alongside number's going to put it down here so it's sideways. Pompeii seen that way. Leave it there for a moment. Dominant hand, going to make the thumbs-up sign. That's it. Stick out your thumb. Now we're going to take the tip of the thumb. We're going to stick it to the inside part of our hand right here. Okay, start like that. Now we're going to move forward. And as we move forward, we're going to twist our thumb down. Emphasis. Emphasis. I produce, sticking it in there and pushing it in. Really earn gotta make sure there's emphasis. Yes. Emphasis from the sign. Emphasis from the other side. Emphasis from the front again. Emphasis. Okay, rest position, sign with me. Let's do it three times. Emphasis. Emphasis. Okay. So depending on your body language, it shows how strong that emphasis is. Mean you could be just like or it could be like, Oh, I'm relayed on there. Yeah. Okay. You XOR body language express more of the situation, what's happening? Okay, quick review. Non-dominant hand, this handshape, stick it right there. Dominant hand, thumbs up, dude, right. Take the tip of the thumb, stick it in there right now if you look in my fist or the handshape right here, the palms facing down. Okay. Right there, it's flat. Now we're going to rotate forward and move forward with our body a little bit. Emphasis. Emphasis. Okay, we just talked about how to sign emphasis.
55. Learn | ENERGY: Here is the sign for energy. Okay? Both hands, different hand shapes, non-dominant hand just make a flat hand like that. Put it out there. We're going to extend our arm a little bit and we're going to be focusing on our bicep area. Alright, dominant hand. Well, let's see what's the handshape energy starts with the letter E, wink, wink. And saves going to be an E? Yes. Okay. How do you make an E go like this? Fingers together, curve the top parts of the fingers down, put your thumb underneath. This is a very common way to sign E. It's also very common to put them down so the tips of the fingers are touching the thumb to be consistent. I'll be signing E like this throughout the entire course. Okay, So we have our non-dominant hand just hanging out here. This is our bicep area right here. We're going to take that E and we're just going to curve over our bicep. Energy, energy from the side. Energy, energy. So maintaining that E handshape, start here and just do a curve over your bicep, like you making your bicep seem really big. Energy. Energy from the other side. Energy. Energy from the front again. Energy. Okay, rest position, sign with me. Let's do energy three times. Energy. Energy. Okay. I have seen this sign words like we've been saying it where it starts at the shoulder and goes straight down to, we could say the inside of the elbow. I've also seen it where it starts higher up on the shoulder and it goes way down to the mid forearm. Energy. Energy. So different ways to sign it to be consistent in this course, I'm going to start at the shoulder and I'm gonna go over to the inside part of the elbow. So right above the bicep. Energy. Energy. Okay. Quick review, non-dominant hand just kinda laid it out. There, is going to be focusing on our bicep area. Dominant hand letter shape, ie. Energy starts with E. Wonderful. Okay, now we're gonna take the inside part of the E right here, but the thumb side, we're going to put that at our shoulder. We're just gonna do a curve over our bicep. So start at the shoulder and then come down to the inside part of the elbow. Energy. Energy. Okay. Good, good. We just talked about how to sign energy.
56. Learn | EQUALITY: Here is the sign for equality. Okay? Hands, hips are going to be the same for both hands. We're going to start like this. We are periods together, come alongside and we're gonna take two fingers and just bend them down. Like we kinda have two shelves maybe. Right. We're going to put the tips of the fingers together in about at the same height as our chin round about right there. Now we're going to bring it out and just do a circle and come back in. Equality. Like you're going around the globe or something. Equality from the sign. Equality from the other side. Equality from the front again. Okay, rest position, sign with me. Let's do it three times. Equality. Equality. Okay? So this sign, it also works for other concepts and you know, depending on the situation, the context. So it also works for justice. It works for equality, like we've been doing. And just the concept, you know, fair for all. Equity. Equality. Okay, quick review. Handshape, start like this. Flat hands, bend the fingers down, keeping the fingers together. Now bring the tips of the fingers together and put them about level with their chin. Now we're just going to go round about and come back in. Equality. Okay? Redis talked about how to sign equality.
57. Learn | FACT: Here is the sign for fact. Okay, the hand shapes going to be the same like this. All right. Put your fingers together, comes alongside. Now I'm right-handed, so with my non-dominant hand, put it down here. Pompeii got a platform? Yes. With my dominant hand, I'm going to use the bank part of the fingers here and I'm going to come down and I'm going to tap it once. Alright. Fact tract from the side. Back. From the other side. Fact from the front again. Okay. Rest position. Sign with me. Let's do it three times. Fact. Ok. Now this situation, this sign makes sense. You're talking with someone and they don't believe you and you're like, Hello, it's fact. All right, This sign, this concept also works for proof. Alright? Fact proof. And depending on the situation, you can put it in your body language and in your face, right? You're really trying to show someone who might. You really was not a big deal in fact. Okay, quick review. Hand shapes like this non-dominant hand, put it down there, make that platform dominant hand flip it around. We're going to use the bad part. We're going to tap once on our hand-write here. Oh, I did want to note that I've seen this sign an alternate way which is very similar just as one extra step is to go like this with the index finger. Go right here and then go straight down, right? If we go here, it becomes a true, something real. But this a tap ones and then go here. Fact, fact. Okay, to be consistent throughout this course, I'll be signing fact like this. Okay. We just talked about how to sign fact.
58. Learn | GAME: Here is the sign for game. Okay? The hand shapes are going to be the same. Going use the letter a, like in the alphabet a, B, C, a. How do you make A's? Well, go like this, bring us together. When the fingers down, just put your thumb alongside. All right. Take those A's. We're going to turn them into the thumbs are facing up right now. We're just going to come together twice. 12 came from the side. Came from the other side. Came from the front again. All right. Rest position. Sign with me. Let's do it three times. Game. Game. Okay? So it is pretender to opponents and they're coming together head to head. And we have a match, we have a current tests, we have a game theme, quick review hand shapes. We're going to use the letter a in the alphabet. Turn those A's down. Tom's pointing straight up and go 1, 2, team. Okay. We just talked about how to sign game.
61. Explore | Group 5 Nouns: My Mamiya, it's group five nouns. Let's take a look at what you'll be learning. If girlfriend, goal, government, rope, harassment, history, homework, hookup, habit. Okay. You know, we have a separate video lesson per each sign. We're going to explore a hand shapes, hand positions, and do lots of practice, okay, after we've learned all ten signs will have review and testing, but forget about that for now. Let's just learn the signs. Here we go.
62. Learn | GIFT: Here is the sign for gift. Okay, the hand shapes are the same and we're going to be used in the hand shape of the letter in the alphabet. Now a quick way to remember is just to say like Captain Hook are we have two hooks. The longer way is to go like this. Last three fingers down, DOM in front, index fingers just curve the method top two hooks. Okay, let's take those two axes. We're going to put them about here, and we're just going to rotate forward. Gift. Gift, makes sense. It's like you're presenting a gift to someone. Gift from the side. Gift from the other side. Gift from the front. Okay. Starting from the rest position, sign with me. Let's do it three times. Gift. Gift. Okay. Quick extra information. I have also seen where it's common to finger spell fingers bell gift. Instead of doing the sign, they might just go G I F T, and just finger spell it out. Once again, G I F T. It's also common as well to be consistent in this course, I'm going to be using the X handshape version and we're just going to go down gift. All right, so quick review and shapes letter x or we can say Captain Hook or put those x's right here and just swivel forward, tilt forward. Dft. Okay. We just talked about how to sign gift.
63. Learn | GIRLFRIEND: Here's how we assign girlfriend. Now you're thinking that's more than one sign that I would say yes, you're right. Just like in English, it's a compound noun, compound word, we have girl, we have friend. So in American Sign Language, something similar. We have girl and we have friend. Okay, let's start with girl. Now use your dominant hand. I'm right handed. Make the hand shape of the letter a. You can even just do the thumbs up. That's all right. Take the sign of the thumb, put it up or a little ways up on your cheek. Now we're just going to slide down. Girl. And I'm making light contact. Girl. Girl. Okay. Second part is friend. This is what friend looks like. Okay. A lot of index fingers are now on. Okay. My right hand, that's my dominant hand. Non-dominant hand. Take the index finger, put it here. Pompeii scene up. Dominant hand, go like this. For the index finger on top. That's one. Now we're just going to flip it over and do the opposite side. And the whole motion 12 means friend. Friend from the sign, other sign. Print. Okay. So we have the two parts. We have girl right from the side again for girl, girl, girl. Now we just go straight to print, right? Right. You're gonna gonna go fluids straight through. You wouldn't want to be like this. Because then you're sending the message that it's two separate things where we're talking about a girl and then there's also a friend. But in this situation, we need to make it together. So we're gonna go girlfriend from the sign. Girlfriend. Other side. Girlfriend from the front again. Okay. Starting from the rest position, sign with me. Let's do it three times. Girlfriend. Girlfriend. Girlfriend. Okay. So it's two signs in one to get the get the idea of girlfriend the sign. So we have girl letter a inside part of the thumb, girl sliding down on the cheek girl. Now we have index fingers for rent and put it all together. We have girlfriend. Okay. We just talked about how to sign girlfriend.
64. Learn | GOAL: Here is the sign for goal. Okay? When you use a lot of index fingers, both hands are index fingers or you say the number one. Rest of the fingers down in front. Leave those fingers up. Okay. I'm right-handed, so my non-dominant hand, I'm going to put that index finger right here. Just there. It's pointing up into the heavens. Right now I'm gonna take my dominant hand, start here and point at it. And I'm going to look at it as well. All right, so that is a goal. That's the goal. I'm headed. Their goal from the sign. Go from the other side. So from the front again, go. Okay, Starting from the rest position, sign with me. Let's do it three times. Goal, go. All right. A slight alternate version that I've seen of this sign is with the non-dominant hand still up there holding that goal up, whatever it is right there. But this time with the dominant hand, go like this. Have decided your head like thinking, I think, and then point, it will be like this goal. Go to be consistent throughout this course. I'll be signing goal like we already signed it like this. Goal. Go. Okay. Remember index fingers, non-dominant hand, put it up there, just going to hang out there for a while until we point at it with their dominant hand goal. And you're going to want to look at it. It doesn't make much sense to go like this. And I'm looking at you, but I'm talking about my goal. So look at the goal. Goal. Okay. We just talked about how to sign goal.
65. Learn | GOVERNMENT: Here is a sign for government. Okay, we're going to use our dominant hand. I'm right handed and the handshape is the letter G, like in the alphabet. Well, how do we make a G? Well, the quick and easy way is to say that you're estimating the size of something and you're like, it's this big I swear it was this big or this thick, right? Take that hand shape tilted forward while we have a G, right? The longer way of explaining it we could say we start like this, all right. These three fingers down, now we're putting the thumb and the index finger kind of parallel with each other, then we just tilt forward. That is a G on the inside it would look like then when you sign a G, We'll just go like this. G. G. I think the easier way to remember is like it was this thick, I swear, tilted forward a half a G. Okay. So take that G, We're going to put it here. All right, So the tips are pointing up, pointing up. Now we're going to do a rotation and go in, right? It's like a quick look. And then we go in. And when I go in, I'm actually touching the side of my forehead. So the Gs here, tips pointing up, do a loop and in, we could say a swivel. Writers make like making the sound from the side. Government, government. Other side. Government. From the front again. Okay. Starting from the rest position, sign with me. Let's sign government 3 times. Government. Government. Okay. I have seen a couple of variations of this sign. Let's see the first one. We still uses the G handshape. That G handshape. And it goes like this. Government just kind of to one to two hops, we won't government. All right, that's one variation. Another I've seen is with the index finger was still going up here. Instead of using the G, going like that, the use the index finger go like this curve. And then in government, government, to be consistent throughout this course, I'm going to be using the G handshape version. All right, so start like this, do that, and then go in government. Government. Okay, so quick review, g, hand shape, how to make that G Again, it's this thick, I swear, tilt that forward. Aha, we have a G or take that g. Put it about here off to the side of your head, not touching yet, pointing up. Now do a loop and go in government. Okay, We just talked about how to sign government.
66. Learn | GROUP: Here is the sign for group. Okay, we're going to use both hands seem hand shapes in similar motions, right? Imagine you're trying to catch like a ball. We have this loose hand here, alright, fingers spread apart. Or you go like this and just bend them down a little bit with the loose hand, like you want to catch something. Both hands like that. First we're going to put them about here. Now we're just going to swivel to the backside. Just a quick short movement. Group. Group, right? You can imagine maybe there's a globe or something in there. And we're just starting on one side and we are going to the other side. Group from the side, group. Group. Other side. Group from the front again. Okay. Starting from the rest position, sign with me. Let's do it three times. Broke. Broke. Okay. So this sign, depending on the context, it can mean different things similar. It can mean cluster, like a cluster of something. Cluster. It can mean a category. It can mean a section that's possible. It can mean population. It can mean a set of something. Well, in this context, in this course, we're going to be using it for group. Group. Just remember that this sign can mean multiple things depending on the context. We always say context, right? So we'll have lots of information here we'll be using for group. Brooke. Alright, I wanted to give you a variation of this sign that you might see. It's like this using the hand shapes G, G, right? R2, r2, right? They take the G's, these are the G's, right. They put them here, tips pointing forward and then they go round and then the bottom part of the hand comes together group. You may see that version as well to be consistent in this course, we're going to be signing group like this throughout the whole course to be consistent. Okay, quick review. Hand shapes to, to loose hand-shaped like you're gonna catch a ball. Both hands start here with the palms are facing forward. Now we're just going to flip them around. When we finish the palms we're facing in rope. This quicksort movement group. Okay. We just talked about how to sign group.
67. Learn | HARASSMENT: Here is the sign for harassment. Okay. The hand shapes are similar, just a little bit different, right. First, let's go like this. Fingers together. All right. With your dominant hand, put that thumb in with the non-dominant hand. Just leave the thumb out because we need this space right here. Okay? It'll make sense in a moment. With your non-dominant hand. I'm right handed. This is my non-dominant hand. I'm going to put it right here, palm facing in. And we have this open space right here. We're going to take my dominant hand in this handshape, minimise the bottom part here, kinda like It's a knife and it's cutting. And I'm gonna go 1212. Harassment from the side. Harassment from the other side. Harassment from the front again. Okay. Rest position. Sign with me. Let's do it three times. Harassment. Okay. You probably noticed my face kinda gets when I sign it, right. I suppose it's possible for my experience with harassment has been that it is usually in a negative situation, usually approaching some sort of criminal activity or potential to approach criminal activity. So it may be strange to sign harassment like this. You're probably going to put it on your face like it's an at least, at the very least, it's an unpleasant situation, right? If it's just not too bad, but it's harassment. Say really bad, like, oh, horrible. Put it on your face. You're going to learn very quickly when you watch people's side. And as you learn, the face is just an important tool for signing in American Sign Language, our facial expressions conveys so much information. That's why I'm saying like this. I'm giving you a conflicting signals, right? Conflicting messages, harassment. Most people think that's negative. Why are you smiling? So it makes sense to put it on your face. All right, quick review. Hand shapes like this. Fingers together. Dominant hand, I'm right handed. Put that thumb in non-dominant hand, just leave it right there. Right? Non-dominant hand, put it right here. Dominant hand like the knife chopping, we're going to go 1, 2, harassment. Okay. We just talked about how to sign craftsman.
68. Learn | HISTORY: Here is the sign for history. Pretty simple. We're going to use a handshape dominant hand of the letter h. How do you make an age? Well, star-like this. Pinky ring finger down, index finger and middle finger come together. Notice place your thumb in there alongside your middle finger. Right? Now, turn it. So it's like that. Now we have an eight. So if you sign in H is going to be like this eight on many pictures of different hand signs, you might see an H looking like this. And I think they're trying to be convenient to show you how it looks on the inside. But to actually sign in H like this, It's not going to happen. But inside an age like this, eight. Okay, so we have our eight hint shape. We're going to put it out here and we're just going to go 1, 2, history, history from the side. History. Other side. History from the front again. Okay. Starting from the rest position, sign with me. Let's do it three times. History. History. Okay. In alternate version which is close but adds in the other hand, which I've seen is with the non-dominant hand, make a fist, right? Or the letter S, put it down here, and this is our platform with the dominant hand still going to use the age. We're going to use the bottom of the middle finger and tap twice on the back of our fist history. So that's an alternate version you may see to be consistent throughout this course. I'm going to be using the hand shape and just going one to history. Okay, quick review. We're going to make the letter h, right? How do we do it? These fingers down these two together, thumb in alongside the middle finger. Now turn it in, that's an H, right? Take that eight, Pull over here and go 1, 2, who's going to Bob it up and down twice? History. Okay. We just talked about how to sign history.
69. Learn | HOMEWORK: Here is assigned for homework. Okay, you're thinking it's a compound noun, so it's a compound sign. We get an extra sign. Yes. Okay. So it's two signs in one that we're going to put together, we have home and then we have work homework. All right. So let's talk about home. Just the sign for home all by itself would be like this. Okay. The handshape, take all the fingers, put them together, put the tips down, touching the thumb. That's the handshape. Now we're going to touch one's closer to our chin and then once again higher up on her cheek. Home. Home from the sign. Home. Other sign. Home. Run again. Home. Okay. So that's home all by itself. Now, when we make it a compound sign, we're just going to tap once. All right, we'll get back to that in a moment. Let's talk about work. Here's the sign for work. Okay, hand shapes are the same. We're going to use the letter S, or even better, we could say, Put up your dukes. I'm holding two Ss. Yes, I'm right-handed. So with my non-dominant hand, I'm going to put that first S right here, tilted just a little bit towards me, the top the side of the fist, I'm gonna take my other S the other fist, my dominant hand uses the bottom, the base, the top of the wrist here, and tap twice on top. Work work from the side. Other side. Work from the front again. Okay. So we have the sign home and then we have the sign work with now when we bring it together, ASL American Sign Language is very efficient, right? So instead of going like this, we're just going to go once and then go straight to work. Home. Work. Home, work from the side. Homework. Other side homework from the front again. Okay. Starting from the rest position, sign with me. Let's do homework 3 times homework. Okay, so the alternate version of this sign, which you also may see is to do the full version of home and then full version a work. When I mean full version of work, I mean two tabs. Alright? Alright, home work. That's an another version you may see which is common to be consistent in this course, we're just going to tap once per home and goes straight to work. Homework. Homework. Okay. So quick review, handshape per home right here. Go like this. It with the fingers altogether. Tap once. Now we're going to make fists. The letters S, one down there, one here, tap with the wrist or bought base of the hand. 12. So altogether we have home work, homework. Okay. We just talked about how to assign homework.
70. Learn | HOOK UP: Here is the sign for hookup. Okay, let's be clear on the meaning before we even explore the sign. Now this would be two individuals that get together one night and then they are no longer together again. So we're talking about a one night stand type situation. We're not talking about oh, I hooked up with my friends at them all. No. That would be like to meet your friends. This is a bit more scandalous. Okay. So we're talking about hookup like a one night stand. Okay. The sign once again, I'll write the hand shapes are going to be the same. They just change as we get to the second part of the sign, Let's start with hand shapes like this. Alright, fingers together, thumbs alongside. Now I'm right-handed, That's my dominant hand. I'm going to put that one right here. My non-dominant hand, I'm going to put it here on top. And I'm just going to slide apart. And as I slide apart, the end hand shapes going to be the letter a, a, an alphabet a, B, C, a. So we start with the flat hands, pull apart, the fingers are sliding and then go to a hookup. Hookup from the sign. Hookup. Hookup. Other side. From the front again. Okay. Starting from the rest position, sign with me. Let's do it three times. Hookup. Okay, quick review and shapes starting like this. Alright, dominant hand, put it down here, palm facing up. Non-dominant hand. We're going to put it here on top. The fingers are touching each other. Now we're going to slide apart and at the end go to a hand positions a's right. Any like that? Hookup. Hookup. Okay. And quick, remember the meaning for this sign is not like I hooked up with my friends at the mall. Well, in a strange, scandalous situation, possibly either way, we're talking about two individuals that hookup for a one night stand, so they're together and then they're no longer together. Okay. So we just talked about how to sign hookup.
71. Learn | HABIT: Here is the sign for habit. Okay. The hand shapes are the same, just a placements a little bit different. We're going to be using Ss. Yes. Or we could just say fists, put up your dukes. Aha, two S's. Okay. So I'm right-handed. So with my non-dominant fist, my non-dominant hand, I'm going to put that one down here, making a platform dominant hand. Okay, with my S, I'm going to use this part, but the wrist area, I'm going to come over and touch my other arm. Now I'm just going to drop straight down. Habit. Habit from the side. Habit. From the other side. Habit. Okay. From the front again, have it starting from the rest position. Sign with me. Let's do it three times. Habit. Habit. Habit. All right. A couple of variations that I've seen for this sign. One is with the non-dominant hand to make a flat hand shape. Put it right there. Dominant hand, go like this with the fingers kinda loose and spread apart. And when you go down, make a fist. Alright, so this one stays flat and this one turns into a fist. So that's another version I've seen. Habit. Habit. Okay. Another variation I've seen which is kind of a hybrid between the one we just learned in, one we learned before is like this flat hand, fist on top and just go down habit. All right, so those are a couple of variations to be consistent throughout this course. I will be signing habit with the two-fifths. The two S's, right? One there, one there and down. Okay, quick review. Hand shapes are the same. Wonderful. We have Ss or we could say fists. I'm right here and it's with my non-dominant hand. Make that platform dominant hand. Touch about here against your other arm. Habit. Don't drop straight down. Have it. Okay. We just talked about how to sign habit.
74. Explore | Group 6 Nouns: Okay, Group 6 nouns, right? Let's take a look at what you'll be learning. Host, idea, imagination, information, insurance, internet, playing with law, logic, message. Okay, We have a separate video lesson for each one where we're going to explore the sign, talk about the hand shapes, do practice right after we've learned all those signs will do review. Yes. But let's learn the signs first. Here we go.
75. Learn | HOST: Here is the sign for host. Okay, we're going to use both hands and they're going to be doing the same thing. Okay? The first hand shape is just a loose in shape like this. A 100 bigger spread apart, Kinda like you're going to catch a ball. Let's put them down here. Palm spacing down. Right now we're going to go up in form fists. Or we could say we're ending in the S handshape and like an alphabet letter S, host. Host from the sign. Host, other side. Host from the front again. Okay, Starting from the rest position, signed with me. Let's do it three times. Host. Host. To try to remember this sign distinct, the host has a ladder responsibilities, right? They gotta do and all that stuff. Checking on people, preparing things wherever, whatever, sodas, pretend they're picking up the responsibilities, they're grabbing them in yet, but I'll do it, I'll take care of it. Host. Host. A quick review in shapes starting loose hands down here like you're going to grab something. All right. Now raise them up in form. Fists. Host. Okay. We just talked about how to sign host.
76. Learn | IDEA: Here is assigned for idea. Okay, use your dominant hand. I'm right handed. We're just going to make the hand shape of the letter I, like in the alphabet IJK, right? I, okay, how do we make an eye? Well, start like this. Put your fingers together. Middle three fingers are going to go down the thumbs going to go in front and the pinky just hangs out there. That's our i i so if you sign in, I all by itself would just be like this. I okay. We're gonna take that i, we're going to put it here on the side of our forehead and we're just going to go out. Like I have an idea, idea. Idea from the sign. Idea, other side. Idea from the front again. Okay, Starting from the rest position, sign with me. Let's do it three times. Idea. Idea. Quick review, handshape, dominant hand. I'm right handed the letter. I take the tip of the eye, sight of the forehead and just go out. Idea. Remember this sign you could think, you know, the kitchen timer went often. I have an idea. Idea. Okay. We just talked about how to sign idea.
77. Learn | IMAGINATION: Here is the sign for imagination. Okay, we're going to use both hands and the hand shapes are the same. Yes, they're going to be the letter I, like an alphabet, h, I, j. How do you make eyes? Well, go like this. Bring us together. Middle three fingers are going down, dumps going to be in front, in the Pinky's are just they're sticking up. Okay. Now we're going to take those eyes, we're going to turn them in so the palms are facing in. Okay, now we're gonna go on alternating circular movements. Alright, to go like this. This is the sign for idea. Idea like a single idea, idea. So when we're doing imagination, imagine you're having lots of ideas. Hence the schwa, imagination. Imagination. You can have this lookup wonder on your face, or you can have a neutral look. It's up to you. So you like rule imagination, wow, what an imagination. Or just neutral. Either way we have these eyes and we're throwing them out, we're not going at the same time. No, we are going to be forward circular movements alternating from the sign. Imagination from the other side. Imagination from the front again. Okay, Starting from the rest position, sign with me. Let's do it three times. Imagination. Imagination. You might notice that I'm not actually touching my head at all. I'm just getting close to the thought bubble we have and just putting out ideas. Alright, imagination. Quick review the hand shapes are the letter from the alphabet. Turn them so the palms are in. Now we're close to the head and we're just going to go out because we're just thrown out or ideas part of our imagination, right? Circular movement, movements, alternating motions, imagination, imagination. Okay, we just talked about how to assign imagination.
78. Learn | INFORMATION: Here is assigned for information. Okay, we're going to use both hands in the hand shapes are quite similar. We're just going to change a little bit. Okay? Firsthand shapes, we're going to use our this waste 0, what we call a squished 0. So take a regular o like from the alphabet. Owes no squishing down. Alright, so all the fingertips are together like squished O's. Okay, I'm right-handed, That's my dominant hand. So I'm going to take that one, put it close to my forehead or lightly touching my forehead, my non-dominant hand. I'm going to put it over here just off the side of my tin. Okay, Now think of information coming from your brain, your thoughts, maybe in information coming from your mouth, you're speaking. Now we're going to take these hand movements that we're just going to bring him out and open them up. I like we're getting that information out. Their information. Information from the side information, other side. Information from the front again. The information, alright, so remember squished 0, 1 at the side your forehead lightly touching or disclose another one down here off to the side of your chin. Now just go out in open like that. So the end hand shapes are just loose hand shapes, fingers apart, maybe like you're gonna catch a ball, a Loose him seem like they're so together and then out. Just getting that information out there. All right. Three times starting from the rest position, sign with me. Here we go. Inflammation. Inflammation. The information. Okay. Quick review. Pick those O's, squish them down, one on the side, your forehead, one over off to the side, your tin notice open up. Alright, you hold an information, now you're sharing it. Information. Okay. We just talked about how to sign information.
79. Learn | INSURANCE: Here is the sign for insurance. Okay. That's it. Use your dominant hand. I'm right handed. The handshape is letter I, like in the alphabet, I. How do you make an eye? Well, star-like this middle three fingers put them down, thumb in front in the pinky. Just stick it up there. Now take the I put it about here. All right. Palm facing forward tip of the pinky points straight up. Now we're going to make a circle. We're going to go down and around. Insurance. Insurance from the sign. Insurance. Other side. Insurance from the front again. Okay. Rest position. Sign with me. Let's do it three times. Insurance. Insurance. Okay. Quick review. Dominant hand. I'm right handed, so I'm going to make the hand shape of the letter I. Yes, I put it out there. Right now. We're just gonna do a circle down and around. Insurance. Okay. Good, good. We just talked about how to sign insurance.
80. Learn | INTERNET: Here is assigned for internet. Okay, we're going to use both hands. Start like this with flat hands, fingers spread apart. Now turn them in. Take the middle fingers, bend the middle fingers down and touch the middle fingers at the tip. Now with your dominant hand, I'm right handed. So this one, I'm going to twist back and forth with my dominant hand, kinda twiddle it back and forth. That's word, twiddle. Moving back and forth, swivel from the sign. Internet. From the other side. Internet. From the front again. Internet. Okay. Rest position. Sign with me. Let's do it three times. Internet. Internet. Internet. All right, quick review. Hand shapes like this. Bend those middle fingers down, bring the tips together. They're touching dominant hand for me, my right hand, just move it back and forth. So we have Internet. Internet. Okay. We just talked about how to assign internet.
81. Learn | LANGUAGE: Here is the sign for language. Okay? We're going to use both hands and the hand shapes are going to be the letter L from the alphabet. Now the easiest way to remember how to do an l is when you see this and someone's like loser, It's an L handshape. Okay. Well, the long way we could say go like this, last three fingers down. So we have two L's. Okay. Take those L's. You're going to lean them forward through the palms are facing down. Now the thumbs are kind of at this angle right here. Okay, now we're gonna make waving motions as we move out. Language. Language, right? Make sure it goes slow. Going to go like this, down, down, down, up, down. So the wave emotions just to twist in, right? One to language, language. Let's speed it up. Language. Language from the sign language. Other sign language from the front again. Okay. Rest position. Sign with me. Let's do it three times. Language. Language. Okay. I have seen an alternate version of this sign which is quite similar to is without the wavy movement, just go like this language. Language. That's an alternate version. You may see language to be consistent throughout this course. I'm going to be signing language with the wavy movements like this language. Language. All right. Quick review. Hand shapes, letter L, each hand. Okay. Take those L's, put them down here. The thumbs are tilted up because you're going to be tilting them down, start there and go 1, 2. So it's like down, up, down, down, up, down. And as you're going up and down, you're waving, pull your hands apart. Language. Language. Okay. We just talked about how to sign language.
82. Learn | LAW: Here is assigned for law. Okay, we're gonna use both hands with different hand shapes. Now I'm right-handed, so with my non-dominant hand, I'm going to go like this, right fingers together, thumb alongside. I'm going to take that flat hand and put it right here, leave it for a moment. Dominant hand them and make the letter l like in loser, yes, L. How do we do an L like this last three fingers down, just leave it like that. Okay, Take the inside part of the L, Now turn it forward just a little bit and we're going to go 1, 2 la. La. From the sign. La. La. Other side. Law. From the front again. Okay. Rest position. Sign with me. Let's do it three times. La. La. Okay. You're welcome to put a nice, stern, serious look on your face. If that fits situation right. It's the law or just do neutral Up to you. Okay. Quick review, non-dominant hand, flat hand shape right there. Put it about right there. Dominant hand make the l inside part of the L. Put it right here. We're going to tilt the board a little bit and go 1, 2, LA. Okay. We just talked about how to sign law.
83. Learn | LOGIC: Here is assigned for Logic, user dominant hand. I'm right handed. We're going to make the handshape love the letter L, just like her loser, right? L. How to make an L? Well, go like this last three fingers down, freeze the hand like that. Now we're going to use it tip, put it about the about the same level as our temple right the side of our head, not actually touching reduce, getting close and just do a forward circle. Logic. Logic from the sign, logic. Logic from the other side. Logic. Logic from the front again. Logic. Okay, rest, position, sign with me. Let's do it three times. Logic. Logic. Okay, quick review. Hand shape is letter L, right? Take the tip of the L pointed somewhere near your temple, the side of your head there. And just go forward and do a quick circle. Logic. Okay, we just talked about how to sign logic.
84. Learn | MESSAGE: Here is the sign for message. Okay? Going use both hands. We're going to start with the hand shapes of the letters C, like ABC. See how to make a C. Well, fingers together, curve down. We have two things that look like C's. Alright, I'm right handed, so with my dominant hand, my C right here, I'm going to put it right there. Non-dominant hand. I'm going to tilt it forward right now. Can leave the Pac-Man mouths pointing facing towards each other. Now we're going to close up the seas and we're going to pull apart. And we're going to do it twice. Right? So the ending hand shapes are these squished hands right here. So we started like this, squish it down and pull apart. Do it twice. Message, message. Now when you're coming down, the fingers aren't really getting in the way of each other. They might brush lightly, but they're not scrunching, are grabbing each other. It's just message. Message from the sign, message. From the other side. Message from the front again, message. Okay, Starting from the rest position, sign with me. Let's do it three times. Message, message, message. Okay? A variation for this sign that I've seen is to use these hand shapes instead of Cs that are like when you finish, you're in the handshape of letter F. When you start, the thumb and index finger are open. All right, so you go like this message. Message, right? That's an alternate version. You may see now whether your local deaf community goes like this, or they go like this, or they have another variation of the original sign that's possible. I would urge you to sign it. How they do it. Signed a higher local deaf community, does it if you're not sure, just sign it and then figure it out, they're probably let you know or you can ask, okay, to be consistent throughout this course, I'm going to be signing message like this with the c hand shapes coming down, squishing, pulling apart. Okay, quick review. Start with the C's, Alright. Dominant hand right there, upright, see non-dominant hand and have the CBOT tilted forward and we have the gaping mouths pointing at each other. Now we're going to close up the fingertips in pull apart and we're going to repeat it two times. Message. Okay? We just talked about how to sign message.
87. Explore | Groups 4-6 Test: Oh, okay. You know, it it's time for review and we're going to be reviewing groups four through six. Let's last three sections. That is 30 signs. Yes. You Ben busy? Well done. Okay. You know what we do review. We always have two parts, assigning part where you're going to sign. We're going to have a timer up there. You can raise the timer, you can pause the video and just sign when I showed you right after that, we're going to and understanding part where I'm going to assign you try to understand what I'm doing. I'm only going to assign each sign once. So if you need to have me repeat, just rewind the video. Okay. Signing part you sign understanding part I sign with lots of signs. I'm going to throw Manchu randomly one at a time. And it's only going to be from groups four through six. Okay, Let's jump in. Great opportunity to show your skills. I'll put on my glasses. They're here somewhere. Here they are. I won't be talking will communicate in sign language. Let's have some fun. Here we go.
92. Explore | Group 7 Nouns: It's group seven nouns. Let's explore what to be learning. Life, machine, marriage, member, military, mistake, moment, month. Music, nature. Okay, you know what, We have a separate video lesson for each one. And in this lesson per each sign, we're going to explore hand shapes, hand position, and do lots of practice. Right? After we go through all the videos for each lesson, we're going to put them together and do review and testing. Yes. First, let's learn the signs. Okay. Here we go.
93. Learn | LIFE: Here is the sign for life. Okay, we're going use both hands and the hand shape is this same, wonderful. We're going to use the letter a from the alphabet. Okay? How do you make it a? Well, star-like this. Put your fingers together, have them all come down and just put your thumb alongside. Okay. We have to eight. Now take those A's and turn them into the palms facing towards your body. Start about here. You could be lightly touching your chest, That's fine. And just go up. Life. Life from the sign. Life from the other side. Life from the front again. Okay. Starting from the rest position, sign with me. Let's do it three times. Life. Life. Oh Kate, I have seen an alternate version for this sign in is to use the hand shapes of the letter l, like L for loser, right? L, right. Take those L's, turn them in and now just make the same movement. Just go up. We have life. Life. You may see it sine that way as well to be consistent in this course, I'm going to be using the letters a for hand shapes whenever I sign life. Life. Okay, interesting note, some academics in ASL world see this sign with the L's life as to English has been to English because it uses initialization else in the sign, the handshape. Alright, so they frown on this one, other ones don't care. They do it this way. They do it this way. I'm a fan, I'm a supporter of signage, how you're deaf community signs it. In other words, sine at how your local deaf community does it. So if your local deaf community uses L's and they go like this, I would sign it that way. If your local deaf community uses AES a handshape, I would sign it that way. Once again, to be consistent throughout this course, whenever I'm signing life, I'm going to use AES and go like this. Okay, quick review, hand shapes, letters a, turn them in so the palms are facing in. Started about here. You can lightly touch and just go up life. Okay? We just talked about how to sign life.
94. Learn | MACHINE: Here is the sign for machine. Okay, we are going to be using both hands. The hand shapes are just loose fingers spread apart, kind of like that. Now we're going to turn them palms facing in. We're going to start about here. Now we're going to put them together so the fingers overlap. They kinda mesh together like the gears in a machine. Now we're just going to go down twice. So we meshed together and then go down twice. Machine. Machine from the side machine. Machine, other side. Machine. From the front again. Okay. Starting from the rest position, sign with me. Let's do machine three times. Machine. Okay. Once again, both hands, hand shapes are just kinda lose their fingers spread apart. Put them here, palms, palms facing in. Now go like this, mash them together and just go down twice. Machine. Machine. Okay. We just talked about how to sign machine.
95. Learn | MARRIAGE: Here is the sign for marriage. Okay, we're going to use the same handshape. Start like this fingers together. Now curved fingers down just a little bit so that it's a curved hand, cheap thumbs just hanging out there on the side. That's fine. I'm right-handed, so that's my dominant hand. With my non-dominant hand, I'm going to put it down here. Palm facing up. Okay. Now my right hand, my dominant hand to suny come down on top and clasp them together. Marriage. Finally, like a bond. Marriage. From the side. Marriage, other side. Marriage from the front again. Marriage. Okay. Starting from the rest position. Sign with me. Let's do it three times. Marriage. Marriage. Okay. Quick review and shapes like this. Bringing together of thumbs just kinda hanging out. They're curved fingers down, just a little bit. Non-dominant hand down their dominant hand on top, go to the other, clasp them together. Marriage. Okay. We just talked about how to sign marriage.
96. Learn | MEMBER: Here is the sign for member. Okay, use your dominant hand. I'm right handed. First, we're going to make the letter m, like in the alphabet m. How to make an M? Well, go like this. Middle three fingers, put them together. Take your thumb and put them on the other side of the ring finger and squeeze down. So the thumb is in-between the pinky and the ring finger. So we can go 123 knuckles and then there's your thumb. Him. Okay, now we're going to modify the M just a little bit. We're gonna take the three fingers end sticking out straight. Okay, so we have this handshape. We're going to take the tips. We're going to go over here. Touch once, come across, touch twice. Member, member. Alright, we're not dragging across. It's once bound and then twice from the sign member. From the other side. Member from the front again. Okay. Starting from the rest position, sign with me. Let's do it three times. Member. Member. Okay. In Alternate Version to this sign that I've seen is to use a little bit different handshape to go like this, bring us together. Now curb those fingers down, keeping them together. And now we're going to use the tips and then just do the same thing as before, 1, 2 member, member. So that's an alternate way. You may see it to be consistent in this course. Whenever I signed member, I'm going to use a modified m handshape, right? So this is a letter am sticking out straight and then go 1212. Okay, so quick review, handshape user dominant hand, I'm right handed. Make the letter M. Now let those three fingers stick out strikes. We need those tips, right? We're gonna go 12, right? I'm righty. So if you're a lefty, make that same M handshape right there with the fingers sticking out. Just go to the other side. 1, 2. Right. So I'm right-handed. One too. Okay. We just talked about how to sign member.
97. Learn | MILITARY: Here is the sign for military. Okay, we're going to use both hands in the hand shape is the same. Who? Ha, OK. It's going to be the letter a from the alphabet. How do you make an a? Well, star-like this brings together all the fingers down in DOM, alongside. There we go. Now I'm right-handed. I'm going take my first a and I'm going use the inside part. And I'm just going to put it about right here. Non-dominant hand. I'm going to take it palm facing in, inputted about here, not directly underneath a little bit off to the side. Now we're going to tap twice. Military. From the side. Military from the other side. Military from the front again. All right. Now you can just tap. You don't have to bang and smash to tap. Okay. Starting from the rest position, sign with me. Let's do it three times. Military. Military. Military. Okay, now, depending on the context, this sign can work for multiple concepts, right? So we have military, it also can work for army. It can work for Soldier. Okay, so in this course we'll be using it as military. Quick review. Hand shapes the letter a. First one, dominant hand on top. Second one, non-dominant hand down below a little bit off to the side and notice tap twice. Military. Okay. We just talked about how to sign military.
98. Learn | MISTAKE: Here is the sign for mistake. Okay, use your dominant hand. I'm right handed. We're going to use the hand shape of the letter Y, like in the alphabet. Now a quick way to remember y is just hanging loose. All right? I'm holding a y. Yes. Along way is to go like this, bringing us together, put the middle three fingers down, leave the pinky and the thumb hanging out. That's a y. Okay. Now to sign mistake, we're going to take the y. We're going to use the inside part and bring it down and touch her chin. Mistake. Mistake from the side. The stake. Other side. Mistake from the front again. Okay. Rest position. Sign with me. Let's do it three times. Mistake. Okay. Couple of things. Put it on your face to add extra emotion in information to the situation. If this is a little mistake, not a big deal, right? If it's a horrible all my goodness, it's just a life destroying mistake. Okay, another note. This sign also works for the concepts of incorrect, wrong, error and of course mistake. So in this course we'll be using to poor mistake. All right, quick review. Handshape is the letter Y? Yes. Like in the alphabet X-Y-Z, white. How do you make y? Middle three fingers down. Hang loose, man, that's a y. Yes. Take the inside part right here. We're going to put it in place it against our chin. Mistake. Oh, I can't believe it take okay. We just talked about how to sign mistake.
99. Learn | MOMENT: Here is the sign for moment. Okay, we can use both hands. Now I'm right-handed. That's my dominant hand. With my non-dominant hand, I'm going to make this handshape right here. We could say a flat hand is bringing the fingers together, thumb alongside. Gonna put it here, leave it there for a moment. Dominant hand, just use your pointer finger, index finger. We'd also say the number one. Okay, Now we're gonna take that number 1. We're going to use the inside part, place it against our hand open hand, having the finger points straight up. Now we're going to pretend that it is like a minute hand, just go like this. You still one click. Moment. Moment from the side. Moment. Other side. Moment. From the front again. Moment. Okay, Starting from the rest position, sign with me. Let's do it three times. Moment. Moment. And you may have guessed that this side, it also works for minute, like a minute, minute. We're going to be using here for a moment. Okay, quick review. Non-dominant hand, flat hands, sticky, right there is maybe the clock on the wall. Dominant hand. Use the index finger. You don't have put the thumb in front. You can put it alongside the index, the middle finger in there, because when you place it on your hand, it's nice and flat, right? Your thumbs in front kind of gets in the way a little bit up to you. Okay. So take the index finger, put it there, it's starting pointing straight up and now just do one click. Like one minute moving over. That's assigned for moment. Moment. Okay. We just talked about how to sign moment.
100. Learn | MONTH: Here is the sign for month. Okay. This sign is all about index fingers. Yes, to start pointer fingers, we could say the number 1, just like you're pointing. Okay. I'm right-handed. That's my dominant hands with my non-dominant hand, my index finger. I'm going to stick it right here. Now the palm of the hand is facing that way. Okay. Index finger pointing straight up in the air. All right. Dominant hand. I'm gonna take my index finger permanent tilted forward, um, use the back of the index finger, put it here and slide it down. Month, month. All right. So first index finger, non-dominant hand pointing straight up, palm facing to the side. Dominant hand. Take the index finger, tilted forward so the nail part is facing forward. We're going to go like that. The bank of the index finger on top, towards the top of the index finger, slide it down. Month from the side. Month from the other side. One from the front again. Okay. Rest position. Sign with me. Let's do it three times. Month. Month. Okay. Quick review. Index fingers, all about the index fingers, non-dominant hand. Put it right there. So the palms facing to the side, index pointing straight up, dominant hand. Take the index finger, turn it palms facing in. All right. Take the back of the index finger, touch the top of this side of the index finger over here. Now slide down month by month. Okay. We just talked about how to sign month.
101. Learn | MUSIC: Here is the sign for music. Okay, the hand shapes are going to be the same PR both hands, all right. Winger together them alongside. I'm right-handed, That's my dominant hand, my non-dominant hand. I'm going to put it down here on facing in. It's not flat, it's tilted up like that. Dominant hand, same handshape. We're going to go like this. Start out here and just go in and out. Music. Music is going to flow. Music from the sign. Music. Other sign. Music from the front again. Okay. Rest position. Starting from the rest position, sign with me. Let's do it three times. Music. Music. Our right quick review. Hand shapes are exactly the same. All right, my dominant hand over here, I'm gonna take my non-dominant hand, put it right there. Pompeii sin in not flat, just kinda like that. Curved up, tilted up a little bit. Dominant hand. We're going to start out here, go in, sweep back out. Music. Music, right? So nice fluid motion. We're not stopping, were just coming in and coming back out. Music. Okay. We just talked about how to sign music.
102. Learn | NATURE: Here is assigned for nature. Okay, we're going to use both hands and the hand shapes are different. I'm right-handed with my non-dominant hand. I'm going to make the letter S hub. We could do say a fist, fingers together, bring them down, thumb in front. Now we're going to tilt it down to the back of the fittest is pointing up, that's our platform. Okay. With your dominant hand, we're going to make the letter you, like in the alphabet. You how to make a u star like this. Fingers together, index finger and middle finger together. Other two fingers down, thumb on top of the ring finger. That's, uh, you you separate them. That's a V. We don't want to V, We want to you. Okay. Well, we're going to do is we're going to take the u. We're going to start over here where the bottom of the palms facing forward, we're gonna do a circular movement, come back up and touch nature. All right, So we're just circling around coming back in, landing on top of our rock, our platform. Nature nature. Once again, from the sign. Nature. Other side. Nature from the front again. Starting from the rest position, sign with me. Let's do nature three times. Nature. Nature. Okay. And alternate version that I've seen of this sign is to first with the non-dominant hand instead of a fist or an S down here, just a flat hand. Flat hand. All right. And the dominant hand, instead of making a you were going to leave those fingers together, but just leave the thumb hanging out at the side. Right? Now I have two that the movements pretty much the same nature. Nature. All right, so that's an alternate version you may see in this course to be consistent throughout, I'll be using the S for the non-dominant hand, the platform in the EU for the dominant hand. So nature. Nature. Okay, quick review. Non-dominant hand, letter S, put it down there, that's your platform, your rock from nature, if you will. A dominant hand make the letter U, that's the handshape. Now take the you start here. You're going to swipe something aside, go around, and down. Around and down. Nature. Nature. Okay. We just talked about how to sign nature.
105. Explore | Group 8 Nouns: Good, Golly Miss Molly, It's group eight nouns. This is what you're going to learn. Neighborhood news, ocean office, opinion, opportunity, owner, package, party, password. Okay. We have a separate lesson for each sign. For each sign we're going to explore the handshape hand position, do lots of practice. After we've learned all the signs will put them together and do review, but that's for the future. Right now let's focus on learning these signs. Here we go.
106. Learn | NEIGHBORHOOD: Here is the sign for neighborhood. Okay, Now lucky you because this is actually two signs in one, yes. We literally have neighbor and then we have area. So altogether it becomes neighborhood. Okay, let's talk about the first part. Neighbor. The hand shapes both hands. We're going to be like this. Bring us the other thumb alongside this flat hands. Start here with the palms facing together. And we're just gonna take our dominant hand for me minds this one and go like this neighbor. Neighbor. This sine xy also works for next two. Here we need a four neighbor, neighbor from the sign, neighbor, other side neighbor. Okay? Alright, so we have neighbor. Now we need the sign for area. Here's assigned for area. How are we going to do is take the number 5 hand, fingers spread apart, flat hand, put it up here and just go around in a circle. I like your policy and the top of a countertop or the car or something? Area. Area. Area. Okay. So we have the two parts. We have neighbor, now we have area. Okay, So let's put them together and let's see how we transition. Neighborhood. Neighborhood. Okay, so do you notice I'm not pausing, not hanging out and then go into area. It's almost immediate to the fluid motion neighborhood. Neighborhood. Okay? So we have neighbor immediately. Once you get over here, instead of stopping, we're going to go into that five handshape and then go into area, neighborhood. Neighborhood from the side. Neighborhood. From the other side. From the front again. Okay. Starting from the rest position, sign with me. Let's do it three times. Neighborhood. Neighborhood. Neighborhood. Okay, quick review. Remember it's a combination of two signs. We have neighbor and then we have area. Makes sense. Okay? So the first part, neighbor, light hands right here, starting together, palm spacing together, dominant hand, just bounce over. Neighbor, neighbor area, handshape like that. Put it down there, palm facing down and just whacks the top of the counter area. Area. Now we put it together with a nice smooth transition between neighbor and area. Okay? Neighbor area. In other words, neighborhood, neighborhood. Okay? We just talked about how to sign neighborhood.
107. Learn | NEWS: Here's how a sign news. You're like, Hey, that's Fingers spelling. And my answer is yes, That's finger spelling. You're going to find that is quite often that these small words in American Sign Language data's fingers spell. And yes, this is the sign for fingerspell. So we're just going to go like this in E, W, S, In other words, news. Okay, let's do it letter by letter, and then we'll speed it up and gets you more fluid. Or HA, Here we go. In. How to make an end. Well, start like this. We're going to take our thumb, put it in between the middle finger and the ring finger and bring him down, bring the fingers down. Another way to explain it. You could say take the pinkie ring finger, put them down, put your thumb on the other side of the middle finger, then bring those fingers down. Either way when we're looking at it, we need to have two knuckles and then of thumb, one to thumb. If we have three knuckles, 123, thumb, that's no longer an n, that is an M. That's right. We don't want to m, We want an end. Now if we only have one knuckle, what letters that it's a T. We don't need a T, we need an end to remember, make sure we have 12 knuckles. And okay, II, he looks like this. How do we make it go like this fingers together. Take the tip of the tips of the fingers, bend them down. Now take the thumb and put it underneath the real II. This is a very common way to assign E. Now it's also common to have the tips of the fingers come down and actually touched the thumb. Now I grew up in and around the deaf community signing E like this is possible, very possible in your deaf community, other deaf communities they sign E like this. I would urge you to do it, how they do it, how the deaf community does it. So this is how I grew up, sign it. This is Hobbes signage throughout the course. Alright, interesting note, this is called a screaming E. I guess it's like the mouth opens up and goes. Right. So this is the Chilean and relaxed II, I guess. All right, so we have e, e, okay, w, w, how to make a W? Well, go like this. Take your thumb and just pin down, hold down your pinky, leave these three fingers up and that is a w. W, right? S. This, make a fist. You will like this, put up your dukes. Why I'm holding two Ss, we just need one s. So when you sign IT, S, How do we do it the long way? Well, go like this. Fingers together, all the fingers down, thumb in front. That's a fist. That's an S. Okay. So we did all the letters. Here we go. We have N, E, W, S, news. I assume that your fingers spelling with me right? Here we go. News. News. Speeding up. News news. Okay, shake those fingers. Now let's do it again. Here we go. News. News, news. All right, let's do it a little quicker, closer, irregular speed, nudes. News. Okay, so remember pronounced news, just fingerspell, just going to go n, e, ws and anything like learning anything. It's just practice. You just have to practice in your fingers and your hands would become more fluid? You can do it. Practice makes improvement. Okay. We just talked about how to sign or better yet, fingers bell news.
108. Learn | OCEAN: Here is the sign for ocean. Okay. I bet you can see what we're going to imitate the waves, Yes, right? The hand shapes are the same for both hands. We have flat hands. Just relax them so the fingers are curved down just a bit. All right. Relaxed hands. Put them down here, palms facing forward. Now we're just going to go 1, 2. So we're going to imitate the waves. Ocean, right? Nice fluid motion, not it's low in ocean. Ocean from the side ocean. Other side. Ocean. From the front again. Okay. Starting from the rest position, sign with me. Let's do it three times. Ocean. Ocean. Okay. An alternate version I've seen for this sign is to add another sign, excuse me, before it. So they go like this, water and then the sign down here. Now how do we sign water? Just take the wwe, use the inside part of the index finger and just tap twice on your chin or your lower lip. All right. Let's an alternate version for ocean. In this course to be consistent throughout, I won't be assigning water. I'm just gonna do the wave motion down here. 12. Okay. Quick review. Hand shapes like this. Now let them relax fingers spread apart down here, palms facing forward. Now roll like the waves, one to ocean. Ocean. Okay, we just talked about how to sign ocean.
109. Learn | OFFICE: Here is the sign for office. Okay, the hand shapes are the same. We're going to be using the letter O, like an alphabet. O, how to make an O well-stirred like this fingers together. Take the tips of the fingers, bring them down to the tip of the thumb. Look through it. It's an oh, yes. Okay. So take those O's, we're going to put them down to the tips of the fingers are pointing together. Bottom part over here. Okay. So we have one and we have to office. So we start out here. I'm right-handed, That's my dominant hand. So I'm gonna put that one in. And at the same time, the other one goes in front office. Office. Office from the sign office. Other side. Office. Run again. Okay. Starting from the rest position to sign with me. Let's do it three times. Office. Office. Quick review. Hand shapes are the letter O. Yes. Okay. So take those O's, put them down, that's the starting position. Now go 12. So we can have a bounce bounds. And when you're coming in, dominant hand is going to come in the inside. The same time, non-dominant hand is going to come in on the outside. So we have office. Office. Okay. We just learned how to sign office.
110. Learn | OPINION: Here is assigned for opinion. Okay, use your dominant hand. I'm right-handed. Now first we're going to make the letter O like an alphabet. How do we do it? Well, fingers together, tips of the fingers, touch the tip of the thumb. Now take that o and squish it down. That's the handshape we need. It's a squished 0, 0, squish it down. The tips of the fingers are all together with the thumb. Now we're going to go like this. Put on the sign of her forehead and just come out. One's opinion. Opinion from the side. Opinion other side. Okay. From the front again, opinion. Starting from the rest position. Sign with me. Let's do it three times. Opinion. Opinion. Okay. Quick review, handshape. Have that. Oh, squish it down. We need a squished 0. Take the tips of the fingers. Good at deciding forehead. Just come out once. Opinion. Okay. We just talked about how to sign opinion.
111. Learn | OPPORTUNITY: Here's how a sign opportunity. Okay, renews both hands. The hand shapes are the same and we're gonna go from one letter to another letter. All right, so first we're going to start with O's, right? How do you make an O? So like this brings together tips of the fingers come down and touch the tip of the thumb. We have two O's. Now we're going to put those O's right here. They're kinda tilted, right, the open parts there that way and this one's that way. All right, so we have two O's. Now they're going to move forward and become p's. The letter Ps for the hand shapes are going to be the same. Start from o down the peas are thinking how to make a p.stance. Great question. Start like this. All right, Now we're gonna take the last two fingers, pinkie, ring finger, put them down. Take your thumb, put it in between your index and your middle finger, but press against the side of the middle finger right now that's a K. Hmm. Interesting thing about a k is that if you flip it down, it's a p. Ah, their regard to a p.sit, long journey, but we're at a p, right? So these are peas. Once again go like this. Pinky ring finger down, middle finger in there pressing against the middle finger or thumb in there pressing against the middle finger, flip it down. Those are Ps P. So if you sign a PHd, go like this P. Okay, back to our sign. First we have the ose. Now we're going to transition as you move forward to Ps 0, 0 p. In other words, opportunity, opportunity from the sign. Opportunity, opportunity. Other side. From the front again. Opportunity. Okay. Starting from the rest position, sign with me. Let's do it three times. Opportunity. Opportunity. Opportunity. When I end, you probably noticed my index fingers are pointing straight forward. Maybe a new opportunity. Okay. Quick review, starting with the letters. Oh, we're taking those O's, putting them here. And we're going to transition as we move forward into Ps, o p. In other words, opportunity. Opportunity. Okay, we just talked about how to sign opportunity.
112. Learn | OWNER: Here's how we assign owner. Okay. You probably noticed it's a combination of two signs. Literally we have ONE, like the verb, own something, and then we go to person. So we have ONE, or in other words, ONE person. Okay, So altogether, Let's talk about the first part. One, own, we're going to take these hand shapes right here. We're gonna put up on here like we're grabbing something because we're showing possession, I guess we grab them, bring it in. So the hand shapes that you have when you're touching your chest are just these hand shapes right here, fingers together bringing them down, touch in the thumb. So you go like this, you grab it and you come in. One from the sign, ONE other side. Okay. So that's the first part, ONE. Now we need person. We're just gonna take these two flat hands right here, bring us together tom alongside. And we're gonna start here and just go down kinda like there's a box here and you're sliding down the sides. Person, person, other person. Okay, so let's put the two signs together. We have ONE person, in other words, owner. Owner from the side. Other side. From the front again. Okay. Starting from the rest position, sign with me. Let's do it three times. Owner. Okay. Another version which is very similar that I've seen for this sign is instead of doing two hands at the top, just doing one for own on her. Right. So until it still uses two hands when we do person, but just one hand PER ONE. To be consistent throughout this course, I'm going to be signing on with two hands on her own. Her right. Quick review. We have two signs coming together. We have ONE like take possession of something on that. We have person for all. Go the hands down here, you're grabbing something, bring it in. These are the hand shapes when you're touching your chest. So we have ONE. Now we need person, right hand shapes startup there. Slide down like you're grabbing a box and sliding down the sides. Person on person, altogether. Owner. Owner. Okay. We just talked about how to sign owner.
113. Learn | PACKAGE: Here is the sign for package. Okay, we're going to use both hands and the hand shapes are exactly the same. The letter C, yes, from the alphabet, how do you make a C? Will like this springer see other. Now we're just going to curve down and make hand shapes. It actually look like say's, Yes, take those seas. We're going to put them down here. And we're just going to pretend, imagine that somebody has handedness of packets and the package is about that big. So we are grabbing the size of the package with our C hand shapes and we're just going to shake it a little bit. Package, package from the side package. Other side. Package from the front again, package. Okay, Starting from the rest position, sign with me. Let's do it three times. Package, package, package. All right, quick review. See hand shapes both hands and we're gonna take those seeds tilting forward so the thumbs are on top. We're grabbing the side of the package and we're just going to shake it a couple times. Christmas ornaments. I wonder what's in their hut packets. Okay. We just talked about how to sign package.
114. Learn | PARTY: Here is the sign for party. Okay, the hand shapes are the same. We're going to use the letter Y from the alphabet. How to make a y? Well, you could just say like, hang loose man, those are, those are wise. We could also go like this, middle three fingers together, bring him down. Those are wise, okay, now take the y's, put them here, palms facing each other. Now we're just going to swing back and forth. Hardy. Hardy. From the side, party, party, other side. From the front again. Now you might be thinking, how many times should I swing back and forth. Well, how wild is your party? Resist a little gathering, get-together party. Wow, it's uncontrollable. There's h1, h2, h3 consistent. I'll be doing it three times 1, 2, 3. So the sign will be the same every time you see me. Party. All right. Rest position. Sign with me. Let's do it three times. Party. Party. Party. Oh, okay. Couple of things about this sign. First, an alternate version, using the lead, the hand shapes, p, The p hand shapes. So the motions will be the same, but we're going to use Pi's instead. That's an alternate version of party. Still dancing back and forth, right? To be consistent in this course, I'm going to be using the hand shapes. Why? Party? Party. All right, something else. You might be thinking that this sign party looks like another sine play. Well, how about you tell me very similar sign party. Then I'll pause and then assign play, see if you can see the difference. Party. Play. Okay, Similar hand shapes, of course, both have y's, but they're different enough that it's easy to see that they're not the same with party. We're swinging, our arms are moving back and forth. And 100 is tuners swinging motion, alright, with play, arms are not moving, you just do on the wrist, swiveling, switching back and forth, play. Also with party. It's synchronized, right? Synchronized whatever. With play. It's just random twisting. Okay, quick review for party. We're going to use the hand shapes of the letter Y. Take those y's about here. Now we're just going to swing back and forth. Hardy already. Okay. We just talked about how to sign party.
115. Learn | PASSWORD: Here is the sign for password. Okay, use your dominant hand. I'm right handed. The hand shape is a letter a, like in the alphabet, a, B, C. How do you make an a? Well, fingers apart, put them together, bring them down from alongside. Take the back part of the thumb and just tap against your closed mouth your lips twice. Password. From the side. From the other side. From the front again. Okay. Starting from the rest position, sign with me. Let's do it three times. Okay, couple of things about this sign. First, this sign in work for other concepts. If he worked for secret, it can work for a private and of course password. Okay, an alternate version for this sign that I've seen is so literally it's private word and this time the only tap ones. And then they sign word. So this is word. How do we assign word? Does quick? Well, use this handshape with your dominant hand. Like how thick is it that thick? Non-dominant hand, index finger and just go like this word. So the alternate version for password is literally private word. Okay, to be consistent throughout this course, I'll be signing password like this with the double tap right back to the thumb. Okay. Quick review. Handshape is the letter a. Use the back of the thumb, tap twice on ellipse with a closed mouth. Okay. We just talked about how to sign password.
118. Explore | Group 9 Nouns: Group NIH nouns. Oh yeah. Let's take a look at what you'll be learning. Patient's personality, perspective, philosophy, power, price, Program, reason, relationship, research. Oh, okay, we have a separate video lesson for each vocabulary sign. And we're going to explore hand shapes and position movements and do lots of practice. After we've learned each sign will do testing and review. Yes. But first, let's learn the signs. Okay, here we go.
119. Learn | PATIENCE: Here is the sign for patients. Okay, use your dominant hand. I'm right handed. We're going to make the hand shape of the letter a, like in the alphabet, a, B, C, a. How to make an a? Well go like this fingers together, bring them down, them alongside. Okay. Now use the back of the tip of the thumb. Put it here at your, your lip in between your lips and just slide down. And you're going to stop resting on your tin just for a moment. Okay. So altogether it looks like this patient from the side. Patients other side? From the front again. Okay. Starting from the rest position, sign with me. Let's sign patients three times. Patients. Okay. Now you might be thinking, well, this sign patients seems awfully familiar and I think you might have something to do with another cyber. Well, let's see. There is another sign for password and secret, and it looks like this. So first I will show you the sign for password, and then I'll show you the sign for patients. And I'll do them back-to-back. Right. You see if you can see the difference here we go. First password. Now, patients. Okay. Hand shapes the same for both. Then we have the a and we're using the back of the thumb, right? But then when we get close to the movements are different. Okay. So for password, we're just going a double-tap on our lips. That's also the sign for secret. Right to tabs, kind of sealing our mouth shut right? Right. With patients, we're using the back of the tip of the thumb and we start at the top like our bottom lip or ray between our lips and we just slide down to our 10. Then we pause. Patients, patients password once again. All right, so there's enough of a difference that we can tell they're not the same. Okay, quick review for the sign per patients. A hand-shaped letter a from the alphabet. Use the back of the tip of the thumb. Start here between ellipse, read it the lives, and slide down to your 2ND and then just pause for a moment. Patients. Okay. We just talked about how to assign patients.
120. Learn | PERSONALITY: Here is the sign for personality. Okay, use your dominant hand. I'm right handed. We're going to make the hand shape of the letter p hat p. How do you make a p? Well, stern like this, ring finger, pinky down, take your thumb. You're going to put it in between the two fingers, but make sure you're pressing against the side of the middle finger. Right? Now, if you recognize this is actually a K. Wonderful. So if you know how to make a k, you know how to make a P because P is just a k that flip down. Uh-huh. All right. So this is a p. Let's go through it again. Pinkie, ring finger down, thumb pressing against the side of the middle finger, right? That's a K. Clip it down. That is a p, right? So we have the P handshape, we're going to put it flat for a moment. Take the tip of the middle finger, bring it in pointing towards our chest. Now we're just going to flip up and go in. Personality. Personality from the sign. Personality, other side. Personality from the front again. Personality. Okay, Starting from the rest position, sign with me. Let's do it three times. Personality. Okay, quick review. Dominant hand. We're going to make the hand shape of the letter P. How do you do a p.sit? Well, pinkie, ring finger down. Take your thumb, press against the side of your middle finger. That's a k. We're halfway there. Take that K, flip it down. It's a p. Yes. Take the tip of the middle finger, point towards your test. Notice flip it up and goal in personality. Okay, We just talked about how to sign personality.
121. Learn | PERSPECTIVE: Here's how we assign perspective. Okay, I'm right-handed, so this is my dominant hand. With my non-dominant hand, I'm going to stick with my index finger, the pointer finger. We could also say the number one, how do we do it? Well, go like this last three fingers, put them down, come in front. Okay, now we're gonna put it right here, so the palm is face into this side. All right, with your dominant hand, we're going to make the letter V, or we can say the number two. How do we do it? Well, pinkie, ring finger down, come in front on top of the ring finger. Okay, now, like we're viewing something, a hub or perspective, we're going to point towards the index finger right now. We're going to bring it around to the front. Perspective. Perspective from the side. Perspective. From the other side. From the front again. Okay, rest position, sign with me. Let's do perspective three times. Perspective. Okay. I have seen an alternate version of this sign which is pretty similar. Let me show it to you. It looks like this. Okay. So instead of starting right here and go into the front, it starts here and lightly touching like your cheekbone area and then just coming down, right? So to view a perspective, that's an alternate version, you may see it be consistent throughout this course. I'll be signing perspective like this. Okay, quick review, non-dominant hand. So I'm right-handed. My non-dominant hand, index finger, pointer finger. Stick it right there, palm facing off to the side. Dominant hand mic, the number 2, or we could say peace sign or V. And we're going to turn it down, like it's checking out the index finger over here from one angle and then another angle. Perspective. Perspective. Okay, we just talked about how to sign perspective.
122. Learn | PHILOSOPHY: Here is the sign for philosophy. Okay, use your dominant hand. I'm right handed, so we'll use this hand. Now we're just going to have this simple handshape right here. Fingers apart, flat hand. We're going to put it up here at the sign of our poor head. We're going to bring it out. And as we bring it out, will flutter our fingers. And we're going to repeat that two times. Philosophy from the side. Philosophy. Other side. Philosophy. From the front again. Philosophy. Okay. Starting from the rest position, signed with me. Let's do it three times. Philosophy. Okay. Dominant hand. I'm right handed. This handshape right here. Now we're just going to put it up here. And as we go out from our forehead, we're gonna flutter our fingers, right? What are those fingers? And we're gonna do it twice. So 1, 2, philosophy. Okay, we just talked about how design philosophy.
123. Learn | POWER: Here is the sign for power. Okay, Reduce both hands. I'm right-handed. So with my non-dominant hand, the hand shape doesn't really matter too much to stick a loose hand, that's fine. We're going to put it out here because we're going to be focusing on our bicep area. Yes, power, dominant hand. I'm right handed. We're going to make the letter C like an alphabet. C. How do you make a sea star like this? Fingers together, curve them down. We have something that looks like a C. Okay, we're gonna use the tips of the fingers and thumb. And we're just gonna go straight into our bicep. And we're actually going to be touching our bicep power. At the same time, you can add an, a facial expression which kinda shows, you know, it's really powerful. From the side. Power, from the other side. Power from the front again. Okay, Starting from the rest position, sign with me. Let's do it three times. Power. Okay, quick review. My right hand is my dominant hand, so non-dominant hand and shape just loose. Stick it out there. We're going to be focusing on the bicep, dominant hand, letter C. Take the letter C, the tips of the fingers and the tip of the thumb, bringing it straight into your bicep. Alright, you've got a big bicep there, right? Power. Power. At the same time, put it in a facial expression which kinda, ooh, you know, powerful. Wow. Okay, we just talked about how to sign power.
124. Learn | PRICE: Here is the sign for price. Okay, we're going to use both hands. I'm right-handed. That's my dominant hand is with my non-dominant hand. Just going to make a flat hand, fingers together them alongside. We're going to put it here, have the open part facing off to the side, right? Dominant hand. We're going to make the letter X. The easy way to remember X is just think Captain Hook are long way we can go like this. Last three fingers down, we have the index finger. We're going to take the thumb, put it in front. Now, bend the index finger down into a hook. Hook like Captain Hook. Okay. We're going to use the top part of the finger, the bent over part right here. Okay. We're just going to start here in rubbed down on our open hand. Price. Price from the sign, price. From the other side. Price from the front again. Quick note I am making contacts on lately rubbing against my open hand here. Okay. Rest position, sign with me. Let's do it three times. Price. Price. Okay? This sign also works for the concepts of cost, charge, and of course, price. Okay, quick review, non-dominant hand, right hand, put it down there, open hand, facing to the side. Your dominant hand make the letter x, like Captain Hook, are great. Take the outside of the top of the finger and we're just going to start above and then rub down price. Price. Okay? We just talked about how to sign price.
125. Learn | PROGRAM: Here is the sign for program. Okay, we're going to use both hands. I'm right-handed. This is my dominant hand, non-dominant hand. I'm going to make this handshape right here, fingers together, thumb alongside. Now we're going to turn it into the palms facing towards your body. And we're not going to be straight up, we're just going to be tilted a little bit. I'll leave that there for a moment. Dominant hand, we're going to make the letter p half like in the alphabet. How to make a p? Well, star-like this pinky ring finger down, thumb. Take the thumb and press against the inside of your middle finger, against the side of your middle finger. And that's a K. Wow, wonderful thing about a case that a k is just a p when it's flipped down. So we have P, once again, p. Okay? So we're gonna take that p.ball first. We're going to hide it behind our hand back here. Now we're just going to go up and come back down. And when we come back down will be on the other side of our hand. So we have program from the sign program, other side. Program from the front again. Okay. Starting from the rest position, sign with me. Let's do it three times. Program. Program. Okay. In case you're curious, the only times that my hands are really touching each other lightly is at the beginning, I'm resting against right here. And then when I go over, I rest down this part right here and resting against the back of my hand or the back of my arm right here, wrist. So we have program. All right. Now program, it works for like coding, you know, your HTML, your C plus, plus, whatever the code for a program also works for like a program of educational events, something like that. So we can go program. Okay, quick review, non-dominant hand, flat hand, turn it in kind of an angle here. Palm facing towards you. Dominant hand is going to be the letter p. Haha. How to make a p.sit, remember cystic K, which is flipped down. Take that p.ball, hide it back here for a moment. Now, bring it up and back down. When you bring it down, bring it on the other side of your hand. Program. Program. Okay. We just talked about how to assign program.
126. Learn | REASON: Here is the sign for reason. Okay. Use your dominant hand. I'm right handed. The handshape is a letter are like in the alphabet. Okay. How do you make an r star like this pinky ring finger down. Now we're going to cross the index finger in front of the middle finger and take the thumb and put it on top of the ring finger. Okay. Kinda like, you know, I hope it happens. Right. That's an R handshape. Okay? So once again, R and we're going to take the r, we're going to turn it into the palms facing towards us. And the tips of the middle finger and the index finger put them a boat here off to the side of your forehead, not touching just out there and do two small circles. Reason? Reason from the sine reason. Other side. Reason from the front again. Okay. Starting from the rest position, signed with me. Let's do it three times. Reason? Reason. Okay. Quick review. Dominant hand and shape as letter r, like that. Okay, those fingers down cross these dominant parent. That's an art. Turn it in. So the palms facing towards you, take the tip of the index finger and the thumb or the middle finger, put him right about here, not touching your forehead just a little bit off. And due to small circles, reason. Reason. Okay. We just talked about how to sign reason.
127. Learn | RELATIONSHIP: Here is the sign for relationship. Okay, we're going to use both hands. The hand shapes are the letter F. We'd also say the number nine. Well, how do we make F's go like this. Bring your spread apart. Tip of the index finger, tip of the thumb, bring them together. You can see through. Okay. Now, I'm right-handed. That's my dominant hand with my non-dominant hand and the F handshape, I'm going to turn it down. All right, So the circle part right here is facing up dominant hand also in the F. But I'm gonna open it for a moment because I'm going to link up with my other F, right? So we have a little link there going on, right? Dominant hand is straight up, non-dominant hands tilted forward. Now we have a link up. We're just going to push out twice 1, 2, or you can say going back and forth twice 1, 2. Relationship. Relationship from the sign. Other side. From the front again, relationship. Okay, Starting from the rest position, sign with me. Let's do it three times. Relationship. Relationship. Okay? Now this relationship doesn't only have to be romantic, it can just be like a relationship with your coworker, with your child, with your neighbor, whoever. Okay. Quick review. Hand shapes are the letter F in the alphabet f. Okay. Non-dominant hand, put it down there. So the circle part of the app is pointing facing up. Dominant hand. We're going to open the F just for a moment so we can link up a half. Makes sense, It's a link, it's relationship. Now there's push out twice, 1, 2, relationship, relationship. Okay, we just talked about how to sign relationship.
128. Learn | RESEARCH: Here is assigned for research. Okay. We're going to use both hands. I'm right-handed, so with my non-dominant hand, I'm gonna make this handshape bigger, see Other them alongside. And I'm going to put it down here so it's tilted just a little bit. It's not straight up, it's not flat, kinda tilted there. Now with my dominant hand, I'm going to use my index finger, pointer finger. Number one. Take the tip of the finger and we're just going to poke in, slide off the tip of our hand, right at the tip of the fingers. Research. Research from the side. Research. Other side. Research from the front again. Okay. Starting from the rest position, sign with me. Let's do it three times. Research. Research. Okay, a slight alternate version that I've seen seem hand shapes. One down there is that the platform is a little bit flatter. And using the index fingers startup instead of kinda poking off the tip, it's more of a swiping motion across the open hand. Research. So you may see that version as well. Research to be consistent throughout this course. I'm going to be signing research like this. All right, so it's tilted a little bit and just poking, sliding off the tip of the fingers. Research. Okay. Quick review. Non-dominant hand, flat hand, put it down. They're not flat, not completely to the side, kind of in the middle there. Now take your index finger, use the tip and we're just going to poke in slide 2 times off the tip of the fingers. Research. Research. Okay, we just talked about how to sign research.
131. Explore | Groups 7-9 Test: Here we are. Another mid review, making progress. Making progress. Okay. We're going to be reviewing groups seven through nine and you know what, we're going to have signing and understanding. So let's take a look. What have we learned? Regroups 10 signs of beats apiece. That's 30 signs. Yes, way to go. All right. First part is going to be signing. Now we're talking about review, right? And with the signing part will have a timer. Alright, so I'm going to show you something. You can race the timer, you can pause the video and assign your leisure. It's up to you. Either way, when the timer is up, I will sign the answer and you can compare what you signed with me. Okay? Alright. In the second part of review, no timer. But you'll have me when you see that guy down there, it means you're going to be watching. So watch me sign and you try to figure out a ha ha sale now what I'm signing, I'm only going to assign it one time. So if you need to have me repeat and sign it again, just rewind the video. Okay. So once again, sign-in were used sign and then understand in will I will sign. And we're going to be using 30 signs, which come from the groups seven through nine. I'm going to be thrown the mare to random order one at a time. So just sign and understand like crazy. You know, I wear my glasses so I won't be talking, will communicate in sign language, and will test your skills. What a great opportunity to show and demonstrate what you got, right. Let's do it.
134. Inspiring Quote #3 | Decipher: Hi. Hello.
135. Inspiring Quote #3 | Answer: Hi. Hello.
136. Explore | Group 10 Nouns: Holy cow in Mamma Mia. It's already time for group 10 nouns. All right, let's see what you'll be learning. Resource, respect, right? Road, rule, Science, Service, signature, Situation, society. Okay. We have a separate video for each sign where we'll cover hand shapes, hand position, motions, movements, and do lots of practice right after we learn all the signs, you know what we're gonna do, testing and review. But we'll leave that for later. Right now let's jump in, attack these signs and learn, learn, and learn.
137. Learn | RESOURCE: Here is the sign for resource. Okay, we're gonna use our dominant hand. I'm right handed, so I use this hand. The hand shape we're going to use is the letter R, like an alphabet, are how to make an r? Well, start like this. Last two fingers down. Now we're going to cross the index finger in front of the middle finger, put the thumb on top of the ring finger. All right. So that's an R short waves who just like, you know, I hope it's going to happen or you crash your fingers behind your back. We have our hand shapes. Okay, now we're gonna take that arm, we're going to turn it around so the palms facing up. We're going to put it here per one and then go over here for 22 altogether, It's resource. Resource is two bounces from the side. Resource. Other side. Resource from the front again. Okay, Starting from the rest position, sign with me. Let's do Resource 3 times resource. Resource. Okay, in alternate version for this sign, this concept that I've seen is to still use the R handshape with your dominant hand, with your non-dominant hand, make a platform, put it right down there. Now at the bottom part of the palm, to the side of the palm, we could say we're going to go 1, 2 resource. So that is an alternate version you may see to be consistent throughout this course. Whenever I sign resource, I'm going to be doing it like this. Okay, quick review, handshape, dominant hand. Our from the alphabet, the letter R. How do you make an r? Well, good. Like this pinky ring finger down, cross those and thumb on top of the ring finger. Hey, we have an R, turn it down to the palms facing up. Notice bounds twice. Resource. Resource. Okay, we just talked about how to sign resource.
138. Learn | RESPECT: Here is the sign for respect. Okay? We're going to use both hands and the hand shapes are the same. Great. We're going to be using the letter r from the alphabet are how to make an r? Well, star-like this pinky ring finger down, take your index finger, put it in front of the middle finger. Thumb on top of the ring finger. Okay. So we have two R's. Now I'm right-handed, so with my non-dominant hand and would take my first R and put it about here, level with my mouth. There's a little bit in front. Second R is going to be up and out just a little bit more. Now we're going to pretend that we're kind of like climbing this hill here. So we start here and then we go out. Respect, respect from the side, other side, from the front again. Okay, Starting from the rest position, sign with me. Let's do it three times. Respect. Respect. Okay. Couple of things I've seen in common that your eyes kind of follow when you go respect. Now it might not make sense if you're driving and try and assign at the same time. But in general, I've seen it where the eyes will go up as a sign of respect. Okay. A couple other versions that I've seen. One is to use just one hand, your dominant hand still in the R handshape. Start over here, just touching the side, your forehead about your your temple area, and then just going straight out, respect. Respect. All right, That's another version. A third version I've seen is to use the letter x like Captain Hook, x, go like this and then go like that. Kinda like you're tipping your head in respect. Respect. To be consistent throughout this course, I'm going to be sine respect to always using the two r's like this and respect. Respect. Okay, quick review. Hand shapes the letter R. All right. I'm right handed this by dominant hand, non-dominant hand. Put it right here in front of your mouth. Second hand is up here. The second are up and a little bit out. All right, now we're just going to go farther up. Like we're climbing the hill. Respect. Respect. Okay. We just talked about how to sign respect.
139. Learn | RIGHTS: Here is the sign for right. Okay. We're going to use both hands in the hand shapes are the same. Yes, we're going to go like this for yours, the other come alongside. Now I'm right-handed with my non-dominant hand. I'm going to make a platform right there. Flatten hand. Your tip is pointing off to the side. Now with my right hand, my dominant hand, I'm going to go like this seem hand shape. I'm going to start in slide forward and then spring up. Right? Right. Okay. So the tips or the side of my finger, pinky finger here starting on this side, sliding forward pretty quickly and then springing up right from the side. Other side. Right? Right from the front again. Okay. Starting from the rest position, sign with me. Let's do right three times, right? Okay, couple things. First, this can work for right, as in a singular one, right? And all can also going to work for multiple writes. Just put it right here because it's so common to hear it as a plural. Okay, so let's do a quick review. Hand shapes the same like this, fingers together, thumb alongside. I'm right-handed, non-dominant hand down there making a platform, dominant hand. You kinda slicing in and then you're going up like you're standing up for your rights. Right? Okay. We just talked about how to sign, right.
140. Learn | ROAD: Here is the sign for road. Okay, pretty straightforward. Use both hands. These are the hand shapes. Put your fingers together, tom alongside. Now we're gonna put them down here so palms are facing each other and we're just going to stay parallel and just move forward a little bit. Road from the sign flowed. Other side road from the front again road. All right. Starting from the rest position. Sign with me. Let's do it three times. Road, road, road. Okay, Now this sign can work for multiple concepts. It can work for path. If you work for street, if you work for way, and of course for road. All right, hand shapes, pretty straightforward plant hands, put them down here. Palms are facing each other. We're going to stay parallel the whole time, start in a little bit close and then go out road. Okay. We just talked about how to sign road.
141. Learn | RULE: Here is the sign for rule. Okay, we're going to use both hands. Now I'm right-handed. So with my non-dominant hand, we're going to go like this. Fingers together, thumb alongside. We're going to put it here so it's facing forward with your dominant hand. We're going to make the letter R. That's the handshape. How do you make an r? Well, go like this pinky ring finger down in index finger in front of the middle finger, thumb on top of the ring finger. Or you could just say, you know, I'm whole potpourri, something's happening. It's an R. Okay, now we're going to use the tips of the fingers up here and we're going to tap once, twice, right? So once on top of our open hand and then once down below rule rule from the sign. Other side. Rule from the front again. Okay, Starting from the rest position, sign with me. Let's do it three times. Rule. Rule. Okay. If you know, if you remember the sign per la like law of the land, it's very similar, but the handshape is the letter L. So now we're doing it with an R, which means rule, right? Similar but not exactly the same concept. So the L with the law is law and R is rule. Makes sense. Okay, quick review. This is my dominant hand, so non-dominant hand, we're going to make a nice flat hand here. We're gonna put it right there. Dominant hand, make the hand shape of the letter R. Use the tips, start once on top, go once on the bottom as well. Rule. Rule. Okay. We just talked about how to sign rule.
142. Learn | SCIENCE: Here's how we assign science. Okay, organisms, both hands, hand shapes are the same. They are, but thumbs up. That's it. Yeah, One along the way we can say like this, bring us together, bring the fingers down and just leave the thumbs there were not put in the mid to make a's reduce, leaving them out here. Okay, now pretend there's a part of big beaker. I don't know, some container right there. Take your dominant hand. We're going to put it over here that I'm right-handed, non-dominant hand for me, my left hand over here. And we're just gonna do pouring motions. Right. So we're gonna go starting with your dominant hand, me, my right-hand go 123. We have science from the sign. Science. Other side. Science from the front again. Okay, Starting from the rest position, sign with me. Let's do it three times. Science. Science. Okay. So we're actually doing our dominant hand twice. And you just put in it, you're pouring stuff into the mix, right? Helps you. You could pretend you're an evil sciences or something you like. This is my making my special brew. Okay, quick review. Hand shapes are the same and just use the thumbs up that handshape right there. Okay. Now, I'm right-handed, so my dominant hand is going to go here, non-dominant hand here. And we're just going to make pour in motion. We're gonna go 123. Pretend you're pointed into a bucket or a container or whatever. 1, 2, 3. That is science. Okay. We just talked about how to sign science.
143. Learn | SERVICE: Here is the sign for service. Okay. The hand shapes are the same. We use Plaid hands here, fingers together, thumb alongside. Now I'm right-handed this my dominant hand. We're gonna put it flat palm facing up little bit farther out. Non-dominant hand for me, my left-hand flat palm facing up a little bit in. Now we're just going to switch him positions. Service, service. Now it's not too difficult to imagine a waiter or waitress or server. They're going to serve you and they're bringing something lad hands, right? Service from the side. The service. Other side. Service from the front again. Okay. Rest position. Sign with me. Let's do it three times. Service. Service. Okay. Quick review. When you use flat hands, fingers together, thumbs alongside. I'm right-handed this my dominant hand. Put it down there, flat hand, palm facing up little bit farther out. Non-dominant hand here seem hand position, handshape and a little bit farther in. Now just rotate. Slide in and out. Service. Okay. We just talked about how to sign service.
144. Learn | SIGNATURE: Here is the sign for signature. Okay. We're going to use both hands. I'm right-handed. That's my dominant hand. With my non-dominant hand, my left hand, I'm gonna go like this, right? Bringing the other thumb alongside. I'm going to put it down here. That's our platform palm facing in that direction. Okay. With my dominant hand, my right hand, I'm going to make the hand shape of the letter you like in the alphabet. How do you make you, you well go like this pinky ring finger down for the index and middle finger together and the thumb in front on top of the ring finger. Okay. Now we're gonna take that you were going to use the bottom part of the fingers and we're just gonna slap on top of our POM are open hand signature. Signature from the side. From the other side. Signature from the front again. Okay. Starting from the rest position, sign with me. Let's do it three times. Signature. Signature. Okay. Quick review. Non-dominant hand. We're going to make that flight hand put a, put it down here per platform. Dominant hand for me, my right hand. You the hand shape of the letter you. Okay. I'll take the inside part of the fingers and just slap on top of your open hand signature. Okay. We just talked about how to sign signature.
145. Learn | SITUATION: Here is the sign for situation. Okay, we're going to use both hands and different hand shapes. So I'm right-handed, That's my dominant hand. With my non-dominant hand, I'm going to make the index finger or the pointer finger. Number one. How do we do it? Well, just the last three fingers down, DOM, in front. There we go. Now we're gonna take it and put it right here directly in front of us, a little space, little ways out with your dominant hand, my right hand for me, I'm going to make the letter S like in the alphabet. We would also say like a fifth. How do we do it? Brings together, bring the fingers down, dominant front. All right, Now we're going to start with the S in back with the palm facing forward. All right. Now we're going to bring it around, rotate it around and put it in front. Situation. Situation. From the sign. Situation. From the other side. Situation. From the front again. Okay. Starting from the rest position, sign with me. Let's do it three times. Situation. Situation. All right. Quick review. Hand shapes are different. We're going to use both hands, non-dominant hand for me, my left-hand index finger, yes. Put it right here. The palm spacing off to the side. Tip of the finger is pointing straight up. Okay, leave it there. Darwin, hand's going to be the letter S or a fist. We're going to start here in the back with the palm facing forward, facing towards index finger. Now we're going to rotate around and, and in front and women in front the palms are still facing towards the index finger. Situation. Okay. We just talked about how to sign situation.
146. Learn | SOCIETY: Here is assigned for society. Okay, the hand shapes are the same. And here they are. They're the letter S, or we can say two-fifths. Put up your dukes. Aha, I'm holding two fists. Ok. Now, take those fists. We're going to start here with them touching together in the palms are facing forward. Right now we're just going to loop around and make a circle, like there's a ring here. And we're just going to round it. Society. So we're staying in this S handshape the whole time. We're touching, coming around in, touching again. Society from the side. Society, from the other side. Society, from the front again. Society. Okay, Starting from the rest position, sign with me. Let's do it three times. So society, society. Okay, quick note, this sign also works for the concept of sociology. Sociology just depends on the context, and of course we know that it also works for society. Okay, quick review. Hand shapes, letter S, how to make it as well. See other fingers down, bomb in front. There we go. Take those two S's, put them together in front of you. Now just make a circle and come back together. Society. Okay? We just talked about how to sign society.
149. Explore | Group 11 Nouns: Or years Group 11 nouns. Okay, let's take a peek. You were to be learning state, subway, suggestion, Surgery, System, team, temperature, test, theory, transportation. Okay, We have a separate lesson for each one. And you know, we're gonna be covering hand shapes, hand position, movements, and lots of practice. All right, let's learn the signs then we'll get to testing. All right.
150. Learn | STATE: Here is the sign for state. Okay, we're going to use both hands, different hand shapes. I'm right-handed, so my non-dominant hand, I'm going to make this handshape, but here's the other thumb alongside. We're going to put it about here, palm facing forward, dominant hand for me, my right-hand make the letter S like in the alphabet. Or we can say like a fist. All right, how to make an S, fingers together, fingers down, thumb in front. Okay, now we're gonna take this side of our S, so the sign of our fist, first, we're going to put it on top and we're going to go down below. So we're gonna go 1, 2 state from the side, from the other side. State from the front again. All right. Starting from the rest position, sign with me. Let's do it three times. State. A state. Okay. Quick review. Non-dominant hand for me, my non-dominant hands lefty. Going to make this handshape, put it about right here. Dominant hand. I'm right handed going to make the letter S, right? Take the side of the S or side of the first ones on top, ones down below. State. Okay. We just talked about how to sign state.
151. Learn | SUBWAY: Here is assigned for Subway. Okay, we're gonna use both hands. Now I'm right-handed, non-dominant hand him and go like this when used together, thumb alongside. Now I'm going to put it down here at an angle. Okay, palm facing down with my dominant hand, I'm going to make the letter Y, like in the alphabet. How do you make a Y? Well, go like this. Middle three fingers, put them together and put them down. It's hanging loose. That's the same handshape. Okay. Now we're going to use the knuckles, the fingers outside of the fingers of the middle three fingers. And we're going to put them here underneath our open hand. And we're going to slide down twice Subway. So I am making contact with this part right here. And then we start at the tip or the front part, the top part, and we go subway. Slide twice. From the sign. Subway. Other side. Subway. Okay. From the front again, subway. Starting from the rest position. Sign with me. Let's do it three times. Subway. Subway. Okay. I have seen an alternate version for Subway and it looks something like this. So the hand shapes are the same, but actually we're going to be doing the opposite motion. So we have the non-dominant hand here on top palm facing down is more flat this time not quite an angle, right? And we have the y handshape and we're just going to go underneath and go forward one to Subway. So that's another alternate version. You may see subway to be consistent throughout this course. I will be signing subway like this. All right, quick review, non-dominant hand, flat hand there, put it down there, kind of at an angle. Dominant hand, the hand shape is letter Y. We're going to be using this part to touch, right, the three fingers here to touch underneath, towards the top of the hand underneath and then slide down twice. Subway. Subway. Okay. We just talked about how to sign Subway.
152. Learn | SUGGESTION: Here is the sign for suggestion. Okay, we're going to use both hands and the hands. Hips are the same, wonderful. So bringer see other terms alongside. We're going to start down here, palms facing up, plant hands. Now we're going to jump and go. Who write like we're holding something and I want to show it to you because I have a suggestion. Suggestion. From the side other side. From the front again. Okay. Starting from the rest position, sign with me. Let's do it three times. Suggestion. Suggestion. Okay, quick review. Hand shapes are the same. Glad hands here, start down here, palms facing up. We're holding onto something. We have an idea and a half, we haven't a suggestion and we're sharing with someone suggestion and we're putting it on a platter suggestion. Okay. We just talked about how to sign suggestion.
153. Learn | SURGERY: Here is assigned for surgery. Okay. Both hands different hand shapes. I'm right-handed. That's my dominant hand. With my non-dominant hand, I'm going to go like this. Fingers together them alongside. I'm going to put it over here. So we kind of have a platform that's facing up to the side with my dominant hand, I'm going to make the letter a, like in the alphabet a, B, C, 8. How to make an a go like this. Fingers, the other fingers down, thumb tied alongside. Now we're going to use the tip of our thumb in kind of pretend like it's a scalpel, you know, pre-surgery. We're going to start here and then just slice down surgery from the side surgery. Other side surgery from the front again. Starting from the rest position, sign with me. Let's do it three times. Surgery. Surgery. Surgery. All right. So when I'm making contact with the tip of my thumb and put it at about midway down my hand and then just going straight down surgery. All right. I have seen a couple of variations for this sign and I like to share with you. One is to use the same handshape but tilted up in the same handshape with the a and then just go like this. Alright, so we have a slicing, cutting motion, just the hand. The non-dominant hand is straight up surgery. Surgery. All right. Another variation I've seen is with the same handshape words up like that. But instead of an a, we use a y. So just stick out your pinkie there. Now we'll use the tip as well and we just cut down surgery. Alright, to be consistent throughout this course, I'll be signing surgery like we just did it earlier. Surgery. Right with the DOM the non-dominant hand tilted forward as a platform facing off to the side, a handshape now. Okay. Quick review. Non-dominant hand. I'm right handed, so this is my non-dominant hand. I'm going to make this handshape, put it down there. A handshape for the dominant hand. I'm right handed. When you use the tip of the thumb, That's our scalpel. And we're going to start here and just cut down surgery. Okay. We just talked about how to sign surgery.
154. Learn | SYSTEM: Here is the sign for system. Okay, the hand shapes are the same. We're going to be using the letter Y from the alphabet. Why? How do you make y? Well, go like this middle three fingers together, bring them down. Hang loose, man, we have two y's. Okay. Now take those wives, put them here, read about here. Palms are facing down with the thumbs are touching together. We're going to go straight apart and then straight down. So we have this 90 degree angle at the top, like it's a top of a box. That's where we're tracing system system. From the sign system. Other side. This them from the front again. Okay. Starting from the rest position, sign with me. Let's do it three times. System. System. Okay. Quick review. Hand shapes are the same. Why is yes, like hanging loose. Okay. Now put them here. Tips to the thumbs touching together. Palms are facing down, right here we are. Now this trace the top part of a box system. So out straight down system. Okay, we just talked about how to sign system.
155. Learn | TEAM: Here is the sign for team. Okay, the hand shapes are the same. We're going to use the letter T from the alphabet. How do you make a tea? Well, collect this. Take your thumb, you're going to put on the other side of your index finger and bring everything down. Okay. So we have one knuckle and then a thumb. All right. If we have two knuckles, It's no longer a T, it's n, right? It's an end. If we have three knuckles, 1, 2, 3, and then add thumb, it's m, right? It's an MPS. We want one knuckle because we needed T, a T wave. So we have two T's, Let's bring them together. So the index finger, the knuckle right there, knuckles are touching each other. Now we're gonna do a circle and come together. Alright, so there's this part of the hand is going to touch this part over here. So altogether we have team from the sign team, other side. Team from the front again. Team. Okay, Starting from the rest position, sign with me. Let's do it three times. Team, team. All right, quick review. Hand shapes, letter T from the alphabet. Remember one knuckle, that's a T. Two knuckles is the M and N. Three knuckles is an M. We wanted T1 knuckle. All right, so put those T's together, touching at the beginning and I'll do a circle like there's a ring here, go around it, come together and touch again. Team. Maybe imagine like an American football huddle, right? And it's a run in a circle. We have a team? Yes. Okay. We just talked about how to sign team.
156. Learn | TEMPERATURE: Here is the sign for temperature. Okay, we're going use both hands, different hand shapes. I'm right-handed, That's my dominant hand. With my non-dominant hand, I'm going to make the index finger, or we could say number 1, the pointer finger. How do we do it like this last three fingers down, thumb in front. Okay. Take that index finger, put it here on facing off to the side tip pointing up with your dominant hand. We're going to make this handshape, flat fingers together, thumb alongside. Now we're going to use the outside of the pinky right here. We're going to line it up with our index finger. And we're just going to go up and down a few times, like this is our thermometer, thermostat, whatever in this is just the temperature going up and down a few times. Temperature. Temperature from the side. From the other side. From the front again. Okay, Starting from the rest position, sign with me. Let's do it three times. Temperature. Temperature. Okay, an alternate version that I've seen, which is very similar, is that we have the index finger over here. Same thing, but with this hand instead of going like this, we're going to use another index finger. Then we're going to put it along there and just do the same thing. Temperature. That is an alternate version you may see to be consistent throughout this course. I'm going to be signing temperature like this. Okay, quick review, non-dominant hand, index finger, pointer finger. Put it there in front, right palm facing away, hip pointing up, dominant hand and make that flat hand we're going to use outside of the pinky finger. We're going to line it up there flat and we're just going to go up and down a few times and I am making contact and rubbing lightly against my index finger. Temperature. Okay. We just talked about how to sign temperature.
157. Learn | TEST: Here is the sign for test. Okay, we're going to be doing the same thing with both hands. And we're actually going to be using three different hand shapes and it just flows, right? So the first hand shape is this one. Then it goes down to this one, then it goes down to this one. All right, so we have index fingers, pointer fingers, number one, and actually goes down to x. All right, This the handshape for x, you just curling down, curving down at index fingers, still pointing forward with the palms. And now just go to flat open hands. We'd say five hands. All right, so 1, 2, 3, 1, 1, 2, 3. So all together in a nice fluid motion, we have Test Test little bit quicker from the sign and rest. Other side. Best. From the front again. Test. Okay, Starting from the rest position, sign with me. Let's do it three times. Test. Test. Okay, quick review. Three hand-shaped starting up and moving downward. Firsthand shape is the number 1 or the pointer finger. All right, palms facing forward. There we are. We are at one. Now the second hand shape is an x. We're just going to curve down. Ben down the index finger, 12, that's the second hand shape. Now, flat open hands. So we have 1, 2, 3, 1, 2, 3. Right now. Try to be as fluid as possible. So we have test test. Okay. We just talked about how to sign test.
158. Learn | THEORY: Here is a sign for theory. All right, Pretty straightforward. Use your dominant hand. I'm right handed. We're going to make the hand shape of the letter t, like in the alphabet T. How do you make a T? Well, go like this. Put your thumb on the other side of the index finger and then bring everything down, right? So remember we need one knuckle, men of thumb. We have two knuckles and a thumb. What is it? It's an N. We don't want an n. If it's three knuckles 123 and a phone, What's that? It's an M. Okay. So remember we just want one knuckle than the thumb that is a t. Remember, theory starts with a T, So we wanted t, Okay, take that t, turn it in. We're going to take the top part here, but the thumb and the knuckle touch lightly against her forehead. And we're just gonna go straight out. Theory. Theory from the sign theory. Other side. Theory from the front again. Okay, Starting from the rest position, sign with me. Let's do it three times. Theory. Theory. Okay, quick review. We're going to use the T handshape, right? Remember one knuckle then it down, we just need one knuckle, right? So turn it in. Use the top part right about here. Put it against the side of your forehead. Got an idea. You got something going on in there and why it's coming out. It's a theory. Theory. Okay, we just talked about how to sign theory.
159. Learn | TRANSPORTATION: Here is the sign for transportation. Okay. Use your dominant hand. I'm right handed. All right. First we're going to make the letter V or you say the peace sign, or we can say number two, how do we do it? Well, pinkie, ring finger down. Take your thumb and put it on top of the ring finger. Right? Now, leave the index finger and the thumb spread apart. You put them together. It's a UE, we don't want to you, we want to V, right? We have a V. Now, turn it. Now Ben, those top bunny ears down. Okay, So these are the bunny ears. Bend them down. Okay. So that's the handshape that we're after, right? We have a V When the bunny ears down. Okay, put it down here, turned up a little bit. Now we're just going to go out twice. Transportation. All right. Nice and slow. One to transportation from the sign. Transportation. Other side. Transportation. From the front again. Transportation. Okay. Starting from the rest position, sign with me. Let's do it three times. Transportation. Transportation. Okay. In alternate version, which is quite similar, just a little bit longer, is like this transportation. Alright, so it stretches out in straight lines. A bit more, further transportation. All right, so that's an alternate version you may see to be consistent throughout this course. I'll be signing transportation like this. All right. It's more like a swivel with the wrist here. 1, 2, transportation. All right. Quick review. Handshape. Start with the letter V. We have the v. Take those bunny ears, bend them down. That's R handshape that we need, right? Put it here, palm facing down. You can curl up a little bit at the beginning. Notice go out twice. Transportation. Okay. We just talked about how to sign transportation.
162. Explore | Group 12 Nouns: What? We are ready to group 12 nouns? Well, let's see what you'll be learning. Truth. Vacation, vaccination visitor, whether webcam, wedding, world. Here, Youtube. Oh case. We have a separate video lesson for each sign where we'll explore hand shapes, hand position, and movements, and do lots of practice. Okay, so first we'll learn all the signs one by one, and then we'll put them together and do review and testing. All right, what are we waiting for? Let's do it.
163. Learn | TRUTH: Here is the sign for truth. Okay, we're going to use both hands, different hand shapes. I'm right-handed. So with my non-dominant hand, I'm going to make this handshape fingers together. Tom alongside. We're going to put it down here. That's our platform right in front palm facing up with our dominant hand. I'm right handed. We're going to make the hand shape of the letter U, the letter U in the alphabet. You, how do you make a u? Well, go like this pinky ring finger down, thumb in front on top of the ring finger and put these two fingers together. Right. So that's, uh, you you separate them. That's a V. We don't want to be we want a U. Okay? So we're gonna take the bottom part of the hand right here, the sine part. We're going to put it on the back part of our platform and we're going to slide forward. Truth, truth from the side. Truth from the other side. From the front again. Okay. Starting from the rest position, sign with me. Let's do it three times. Truth, truth. Okay, So this sign also works for the concept of honest honesty. And here we're going to use it for truth. Okay, quick review, non-dominant hand. That's my left hand. I'm not Lefty, right? We're gonna put the hand shape like this. Put it down there by form palm facing up with the dominant hand. I'm righty. We're gonna make the handshape. Now. Take the side of the hand, the bottom part down here, put it on top, the back part of the platform. Slide forward. Truth, truth. Okay, we just talked about how to assign truth.
164. Learn | VACATION: Here is the sign for vacation. Okay, we're going to use both hands. The hand shapes are the same. First, start like this with the number five. We could say flat hand, the fingers spread apart. Take your thumbs and we're going to bend them in, bring them in just a little bit. Now using the tips of the thumbs, only the tips of the terms. We're going to touch the sides of our test twice. Vacation. Vacation, right? So we're lining up there. The fingers are more or less pointing at each other, right? Only the tips of the domes are touching and we bound twice. Vacation. Vacation from the sign. Vacation other side from the front again. Okay. Starting from the rest position, sign with me. Let's do it three times. Vacation. Vacation. Okay. This sign, it also works for the concept of Holiday Inn like we've been using it for vacation. All right. Quick review. Handshape store with the numbers 55 or we could say open hand. Pick the thumbs, bend them in front a little bit, coins them to the front of it. Now using the tips of the TMS, DMS, tap twice on the sides of your chest. Vacation. Vacation. Okay. We just talked about how to sign vacation.
165. Learn | VACCINATION: Here is assigned poor vaccination. Okay, we're going to use both hands, different hand shapes. I'm right-handed. This is my dominant hand. With my non-dominant hand, I'm going to make the index finger or the pointer finger number 1. Now I'm going to take it, I'm going to put it about here. So the palm is facing to the side and the tip of their fingers pointing straight up. Okay. With my dominant hand, I'm going to make the number 33. All right. How do we do it? Well, I'll just put down your pinky and your ring finger. Leave those fingers up. That is three. Okay. We're going to rotate the three forward to the back of the hand is facing forward. Right now we're going to bring it together with the fingers together, go up to our index finger and press with our thumb. Vaccination. Vaccination, right? So the hand movement with the dominant hand is something like this. We're going like this, bringing them together and pressing with the thumb like that. Like that. Right? It just do it against your index finger. All right. Vaccination from the sign. Vaccination. From the other side. Vaccination. Okay. From the front again. Vaccination. Okay, Starting from the rest position, sign with me. Let's do it three times. Vaccination. Vaccination. Okay. Quick review, non-dominant hand for me, my left hand, Bacon, an index fingers stick it up there, palm to the side, tip straight, straight up in the air. Dominant hand. We're going to make the number three in ASL three, okay, Now we're going to flip that three around, put it here. We're going to bring the two fingers together and press with the thumb. Once we get to the index finger. Vaccination. Vaccination. Okay, we just talked about how to assign vaccination.
166. Learn | VISITOR: Here's how we assign visitor. Okay. Now you're thinking that's a two-part sign and I would say yes, that's right. So literally we have visit person. And when we put it together, It's visitor. All right, let's talk about the first part. Visit. Hey, hand shapes are the letters B, or we can say number two, where we say peace sign, but that's a handshape or we do it. Right open hand, pinky ring finger down, dome on top of the ring finger. Leave these apart. Now a flip them around so the palms are facing in towards you and you're just going to alternate a couple of times. Visit. Visit from the side, visit. Other side. Visit from the front again. Visit. Okay. That's the first part. Visit. Now we need person. How do we do person? Well, put your hand shapes like this, fingers together, thumbs alongside, pretend you're grabbing the top parts of the side of wax and you just sliding down. Person. From the sign person. Other sign person. Okay. Front again person. Okay. So let's put the two signs together. Literally visit person, which makes visitor. Here we go. Visit person. Okay? And since it's a two part sign, the idea is to not really pause in the middle, just be fluid, moving from one side to the other. So visit her visit person, in other words, visitor. Okay. From this side. Visitor. Other side. Visitor. From the front again. Okay. Rest position. Sign with me. Let's do it three times. Visitor. Okay. Quick review. This is a two-part sign. Literally we're doing visit person. The top part up here, visits going to be using the letters V for both hands. Flip them around back in the hands facing forward, palms facing in. Now we're just going to alternate one out, one in and then just kinda go like that circular motions visit. And then we're going directly to person and ships like that. Flat hands to slide down the box person. Okay. Altogether we have visitor. Okay. We just talked about how to sign visitor.
167. Learn | WEATHER: Here is the sign for weather. Okay, the hand shapes are going to be the same. The letters w, the letter W. How to make a W? Well, go like this. Take your thumb. Now we're just going to pin down the pinky, right? So we have these three fingers sticking up. Kinda even looks like a W. Now take the w's are going to face forward, palms facing forward. We're going to start about here. We're going to go in, our, IN, OUT, right kinda squiggly movement's going down. Whether whether from the sign whether other side, whether from the front again, whether okay. Starting from the rest position, sign with me. Let's do it three times. Whether whether an alternate version I have seen for this sign is to do squiggly movements, but we just use an open hand so they start about here, go in like that. All right, whether that is an alternate version you may see to be consistent throughout this course. I will be signing weather like this with the W hands. Okay, quick review. Hand shapes. I ha w, yes, leave them facing forward. Start about here. You're going to go in, down, in, in, in, down, in, down whatever, doing squiggle emotions. Whether OK, we just talked about how to sign, whether
168. Learn | WEBCAM: Here is the sign for webcam. Okay. Or we can use both hands. I'm right-handed. So this my dominant hand with my non-dominant hand, I'm going to make the index finger. Now we're going to hang out for a moment with your dominant hand. We're going to make a loose hinge shape. Kind of like you're going to catch a ball this nice and loose like that. Okay, so turn it in so the fingers are facing towards your face. Take your index finger and just touch against your wrist area. Maybe you're inside your forearm area right about there. And now we're just gonna shake the fingers toward us. Webcam. Webcam. From the side. From the other side. Webcam. From the front again. Webcam. Okay. Starting from the rest position, sign with me. Let's do it three times. Webcam. Webcam. Okay. This concept, this sign also works for recording myself on video. All in one sign. Here we are going to be using it for webcam. Okay, quick review, dominant hand. We're going to be making that loose hinge shape right here. Fingers pointing on the same direction. Like you're going to catch a ball like that. We're going to turn it around so it's facing towards our phase non-dominant hand. We're gonna take that index finger and just press it against our inside of our forearm and wrist area there. Now this move the fingers down. Webcam. Webcam. Okay. Redis talked about how to sign webcam.
169. Learn | WEDDING: Here is the sign for wedding. Okay, we're going to use the hand shapes of the letter b in the alphabet like a, B, C. How do you make a B star like this? Fingers together, take your thumbs, bring them in front o k. Now we're gonna take those bees, turn them down so they're vertical. They're pointing at the ground, tips of the fingers pointing at the ground. We're going to bring them together and join them. Now my dominant hand is going to stain the B handshape the whole time. Won't like that. My non-dominant hand starts like a bee, but when this one comes in, it's going to open up the thumb so the fingers can go in, right. So if it was flat, it would be something like this. Watch my thumb over here. All right, can you see how the term open up? Alright, so as B opens up, let's it in waiting, waiting. Waiting from the sign. From the other side. Wedding. From the front again. Wedding. Okay. Starting from the rest position, sign with me. Let's do it three times. Wedding. Wedding. Okay, quick review. The hand shapes are the letter B like in the alphabet. Just fingers together, thumbs in front. Now I'm right-handed. Put down, write down their non-dominant hand down there so they're parallel pointing down. We're going to bring them together in, right? When they get together, the thumb of your non-dominant hand is going to open to let the fingers in the kinda joined together. So you kind of look at that. All right, this one opens up so it can take in and grab the other one. Wedding. Wedding. Okay. We just talked about how to sign wedding.
170. Learn | WORLD: Here is assigned for world. Okay, the hand shapes are the same. We're going to use the letter W. How do you make a W star like this? Take your thumb, pin down your pinky finger, let the other three fingers stick up and we have W's, right, I'm right handed. So with my non-dominant hand, I'm going to put my first w right here, palm facing in. My second W with my dominant hand, I'm going to put it on top. All right, rest for a moment. Then I'm gonna do a full revolution in rest again on top. World. World. From the side. From the other side. World. From the front again. Okay, Starting from the rest position, sign with me. Let's do it three times. World. World. Okay, in alternate version I have seen for the sign world is to go like this. Right? With open hands here. Kinda like there's a big globe right in front of you, a big beach ball type thing. Start at the top, slide down the sides and then you're kinda holding it, right. World. That's an alternate version you may see be consistent throughout this course, I'll be using the W hands going like this. Okay, quick review. Hand shapes. W's, yes, non-dominant hand. For me, my left hand, I'm going to put it about there. Pompeii seen in dominant hand this w put it on top, do a revolution, touched again, right? The only times I'm touching is at the beginning and the end. World. Okay? We just talked about how to sign world.
171. Learn | YEAR: Here is the sign for year. Okay. We're going to use the hand shape of the letter S. Yes, in the alphabet. We would also say two fists, like, you know, put up your dukes, man. I'm holding two S's. Okay. So I'm right handed with my non-dominant hand them and take that S put it right down here. Side of the fist is pointing up. Okay. With my dominant hand, I'm take the palm facing and I'm just going to mirror this one. I'm not going to touch it yet. Hover on top, and I'm going to go around and then blop on top. Here. Here, from the side. Here. From the other side. Here. From the front again. Here. Okay, Starting from the rest position, sign with me. Let's do it three times. Here. Here. Okay. Quick review. Hand shapes are the letter S. Yes, non-dominant hand. Put it down there, just leave it for a reason without moving the whole time. Dominant hand, hover on top, make a full revolution and then bop right here. Ok, We just talked about how to sign year.
172. Learn | YOUTUBE: Here is the sign for YouTube. Okay, we're going to use both hands. I'm right handed with my non-dominant hand. I'm gonna make this flat hand shape right here, fingers together and come alongside. And I'm going to turn it so the flat part is facing off to the side. All right, leave it per sec with my dominant hand them in and make the y hand-shaped like in the alphabet. Why? How to make a y star like this? Three fingers together, the three middle fingers bring them down, hang loose. That is a y handshape. Ok. Now take the tip of the thumb. We're going to point it at our open hand here. And we're gonna do two rotations. Youtube, we can say two circles. Kinda like a bicycle, I guess you're moving forward and around. Youtube from the sign. U2. U2. From the other side. Youtube from the front again. Okay. The tip of your thumb may bump lightly against your hand. That's fine. No worries. All right. Starting from the rest position, sign with me. Let's do it three times. U2. U2. U2. Okay. Quick review, non-dominant hand, flat hand here. Put it like that open part facing off to the side. Dominant hand. Make the letter Y a hot. Take the tip of the thumb. Now we're just gonna do two rotations with the tip of the thumb pointing at the open hand. Youtube. Okay. We just talked about how to sign YouTube.
175. Explore | Groups 10-12 Test: Look at this, it's already time for review. A group's 10 through 12. So 10, 11, and 12. You studied and learned all of these signs. All right. Last three sections, last three groups, 10 signs a piece. That's 30 signs. Okay. In our review and testing, we have two parts. One part is we're used sign you see that hand down there? The second part is where I sign. First part, we're going to have a timer and you can raise the timer, or you can pause the video and that's fine as well. Take your time. You want to raise the timer, try to sign it before the timer is up, and then when the timer is up, I will sign it as well. Compare your answer with mine. Okay, In the second part. No timer. Once you'll have me, how nice and I'm going to be signing and you'll be like a ha is doing something, looks familiar. Aha, aha. So use Shadow loud when you understand what I'm signing, I'm only going to assign it one time. So if you need to have me repeat, just rewind the video. Okay. All right. So first part, you sign second part, I sign in all parts lots of vocabulary, 30 sines. I'm going to throw Manchu in random order. Only the signs from groups 10 through 12. All right, let's have some fun. Next time you see me, I'll have my glasses on. I won't be talking and we will sign. Okay.
178. Inspiring Quote #4 | Decipher: Hi. Hi.
179. Inspiring Quote #4 | Answer: Hi. Hi.
180. Explore | Test Format: Look at this. Absolutely incredible. You've learned 120 noun signs. That's freaking awesome. Way to go. Let's reminisce for a moment. We did groups 1 through 3, 30 signs with a groups four through 630 signs, group seven through nine, another 30 signs, groups 10 through 12, another 30 signs. So that's a total of 120 signs. Okay. Now it's one thing to do, review and testing for a group of ten signs. You know, it's a step in the right direction, but it's, you know, it's lower level. Okay. Then we did 30 signs. Okay. Even better. But what about taking it to an even higher level where you're tested on everything. Are talking about random testing of all 120 signs. Now this is just going to put you at a higher level, a pure able to do this, right? And why not? You've learned them. Okay? So in the next few lessons, we're only going to be focusing on testing and specifically signing sign-in name, right? Okay, so let's take a peek here and talk about it. You're already familiar with the testing format, but we'll go over it anyway. We're going to have a timer. The timer is going to be for three seconds. Let's take a look. What does that look like? Okay, So that is a 3 second timer. So basically what's going to happen is we're going to divide up all of the signs of the sardines into four groups. Okay? Doing 120 signs in row is not impossible, but it just takes a really long time. So this is what we're going to do. We're going to do signing test1, 30 signs, dynein test2, dynein test3, and signing test for now, each one will have 30 signs, but it's not like before. This time is going to be completely random. So is it going to be assigned from this group? Is going to be assigned from one of these groups. Is there going to be assigned for one of these groups? Who knows? The whole thing is, I have a pool of 120 signs to throw out to you one at a time, random order, and you just sign like crazy. So let's take a look. We've got our timer. I'll show you something. I'll start the timer. You can raise the timer or you can pause the video and take your time, but it's up to you though. Looks something like this. All right, I now add, we get started. I showed to you use sine law. When the timer is up, I'll sign it right. Then we go right away into the next one. Boom. And we're just going to go and go and go. Like I said before, we're going to divide it up into groups of 30 signs. Alright, random signs, not in an order. Random keep in mind guessing. Keep you on your toes, keep you signing like crazy. Okay, So just to make sure it's clear, the next few lessons are only for testing, signing, signing, signing, sign-in. We'll get to the understanding stuff in a bit, but right now it's just signing, science signing. All right? And remember, I have 120 signs could choose from. So if we need to go back and do some review, that's fine. If you want to jump straight into the testing up to you. Alright, it's nice to have choices. All right, There's always put in the glasses on. So I will not be talking during the testing. I will be quiet. Right. I'm going to show you stuff, you sign it, you stop, you sign it. Compare your answers with mine when the timer is up. All sign it as well. I feel good. I hope you feel wonderful as well because you've come this far. Let's bring it to another level. Let's just see what you got. Show your skills. Have a good time. There we go.
185. Inspiring Quote #5 | Decipher: That brings us to read and write as women age language. The first stage. Okay.
186. Inspiring Quote #5 | Answer: That brings us to read and write as women age language. The first stage. Okay.
187. Explore | Test Format: Okay, so we're on the second part of final review and testing. And we know that the second part is always understanding. Right? We're going to use all 120 signs. Oh, yeah. Yeah. Okay. So I'm going to be signing I'm going to throw signs that you one-by-one random order. You take a look what I'm doing. You're like, I know he's done it before. Aha, huge. Shout it out loud when you understand what I'm signing. Okay. So a 120 signs is a lot and that's great for one single video. It's a really long video. I divided it up into four parts, understanding test 1234. So each one will have 30 signs, but it's not like the mid review that we did before because now it includes everything. Right. So those first 30 signs in group 1 understanding test could be 30 signs from any group, right. One 512 board 37, whatever. I'm keeping you on your toes. Okay. So I'm going to be signing I'll put my glasses. Right. And we're just going to go through right. We're just going to I'm going to sign nor the answer. Then I'll sign the answer. Next one, I'm going to assign. Show you the answer. I'll sign it. Next one. We're just gonna keep going. Keep going. Okay. We've made it this far. We did this signing, which is very important. But oftentimes we forget about the other half. We need to understand when people sign to us, right? Here's an opportunity to raise your understanding to another level because we're not just doing like 10 signs or 30 signs. We're doing 120 signs random order and you don't know what's going to come at you? Yes. What an opportunity. Okay. Let's jump in.
192. Inspiring Quote #6 | Decipher: Hello. Hi.
193. Inspiring Quote #6 | Answer: Hello. Hi.
194. Conclusion & Thank You: Okay, I want to say thank you for studying with me in this course and giving me the opportunity to teach and hang out with you for awhile. I hope you had a wonderful time. Learn some skills that you can use right away and jump in there and starts signing. Okay, Have a wonderful day. See you later.
 Able Lingo ASL, American Sign Language (ASL)