Transcripts
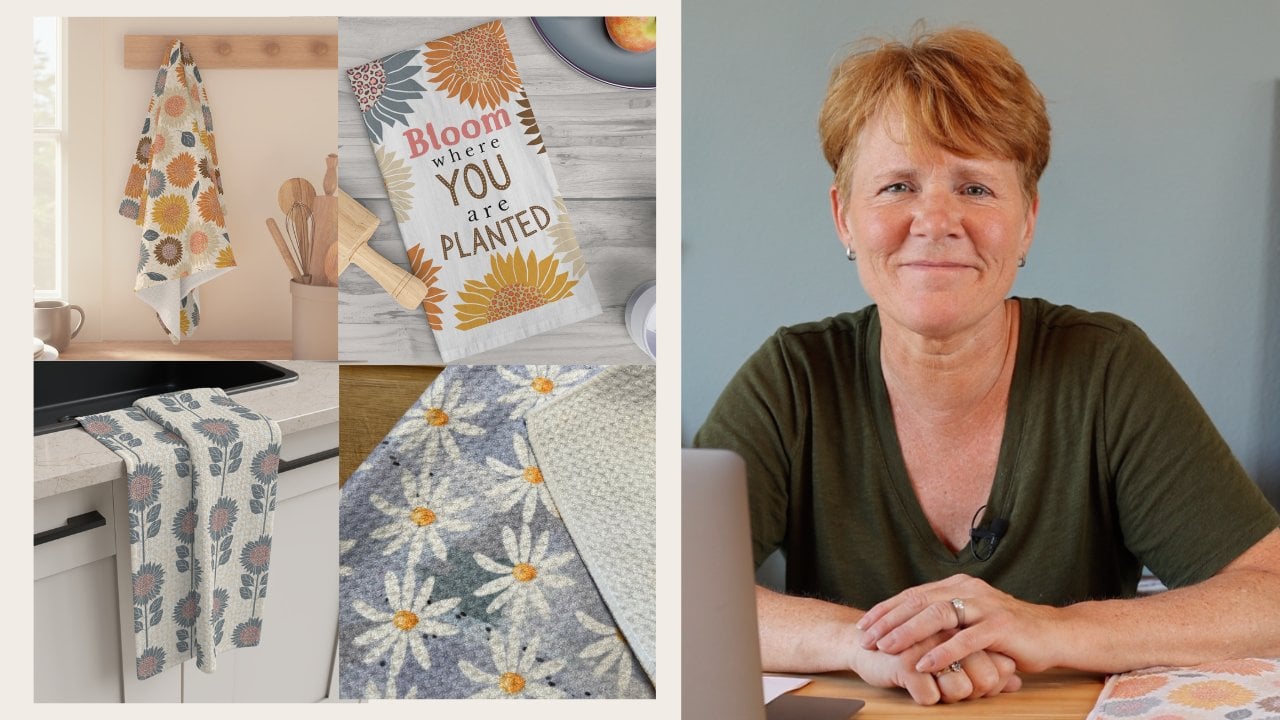
1. Get Started with Printify Print on Demand: Hi everyone. My name is Carrie Barnes and I'm an artist, designer and teacher. In this class, I want to
show you how to add at print-on-demand
revenue stream to your Etsy or Shopify site. I spent over 22 years
growing and managing my own traditional product-based
business until I left that business in 2021 to follow my dreams to become
an artist and build a business that would
allow me to put my creativity front and
center and grow my art brand. The business side of
art can be frustrating, especially if you haven't
had a business before. Starting a
print-on-demand business allows you to really focus on your art-making while selling your designs on
best-selling products. And without adding a lot of extra stress and a bunch
of manufacturing overhead, it really is the easiest way to get your art into the hands of customers and collectors who are excited to connect
with you and your art. First, we'll go over how
print on demand fulfillment works and its advantages
and disadvantages. I'll also share with you
why I chose to use print a phi as my first print
on-demand partner. Then we'll go step-by-step through opening your
printf phi account and show you exactly how orders
are placed and fulfilled. We'll talk about what
type of art works best for different
types of products. And I'll help you
prepare the art so that you can get the
very best results. We will go step-by-step
through creating four of the most popular
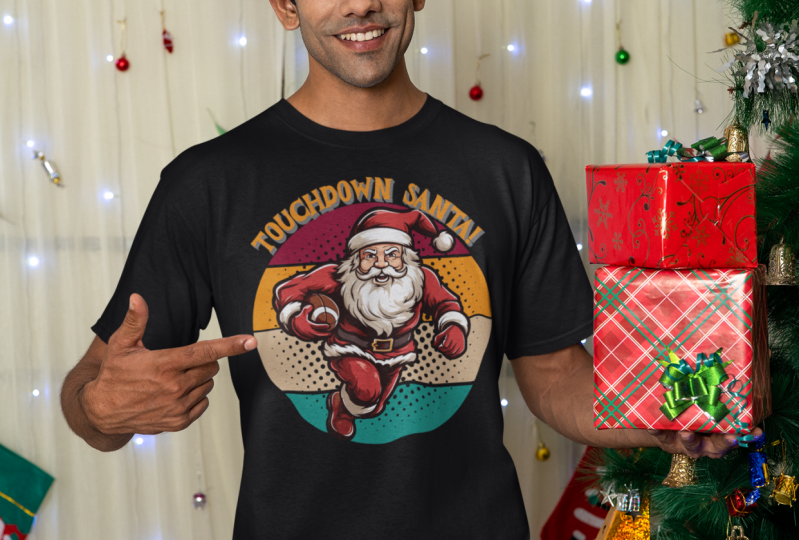
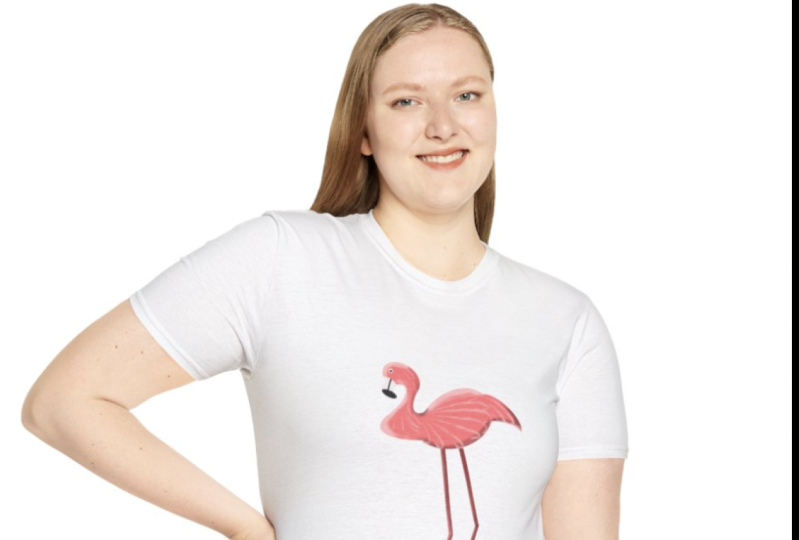
types of products, including T-shirts,
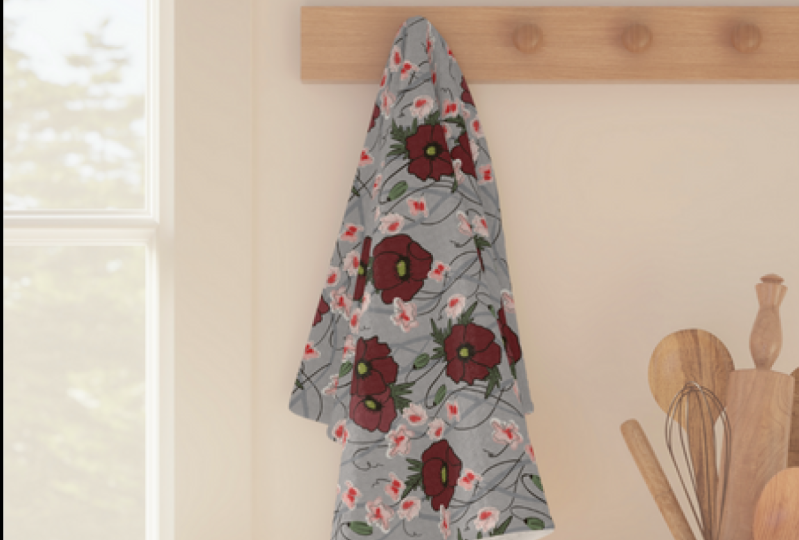
bugs, kitchen towels, and stickers are magnets. You'll learn about the
importance of mockups and how to go beyond the basic
printer fi mockups. I'll show you how
to add your art to the mockups in a believable way. So that's your
designs will really stand out and get you noticed. Once you have your products designed and your
beautiful mockups created, we will connect your
printer phi account and publish your products to
your Etsy or Shopify site. By the end of this class, you'll know not only
how print on demand fulfillment works and how
to best prepare your art, but also how to open
your printer phi account and connect it to your
Shopify or Etsy store. My goal is to enable you to get your beautiful products
out into the world without stressing about the
technical aspects or investing a ton
of time and money. All I recommend you
to have as you watch this class is a notebook and
something to write with. So you can capture
the steps that you'll take to start your print
on-demand journey. So grab your notebook and a
pen and something to drink, and let's get started.
2. Printify Print on Demand Basics: In this first lesson, in case you're new
to print on-demand, I just like to quickly touch on how print on-demand works. Some of the advantages and disadvantages and why
I chose printed phi. Okay, So here's a
very simple diagram on how print on-demand
works in general. So first you're going to select a print-on-demand partner. That could be, it could be
printed phi like I use, or could be prideful or
society six or red bubble. And you're going to design a unique product
from their catalog. And then you're going to apply your artwork that fits your
brand to that product, then you're going to post
it somewhere online. If it's red bubble
or society six, you're going to be posting
it on their platform. If it's printf or print defy, then you are going
to either use it on your Etsy shop or even
on your own website, like a Shopify site. Then a customer is going to be shopping online and they're
gonna find your product. They're going to place
an order through whatever online store or
platform that you're using. And then that print-on-demand
printing partner and will produce
and ship the items. And then they'll charge you for the cost to make those items. So your profit will be the difference between what
you're charging and what your print on-demand partner is charging you to
produce those items. The print-on-demand model
has a lot of advantages over the traditional way to have
a product-based business. And I have them listed here, a few of them anyway. First of all, it requires
a minimum investment, super easy to get started
with very little money. You can easily grow and
scale your business without adding a lot
of people or space. Because you don't
have any inventory, you don't need a warehouse. And what I love
is you can manage these businesses from basically
anywhere in the world. Along with the advantages
come some disadvantages. One of the disadvantages
that you really don't have end-to-end control over
your customer experience. And branding opportunities
may be limited. And also it can be hard
to get traction on those larger sites
and get noticed because there is so
much competition. But overall, the advantages far outweigh the disadvantages,
in my opinion, especially when you're comparing using print-on-demand to
get your artwork out into the world versus investing
in a warehouse and inventory and a lot of money and people to pack and ship and
things like that. So it's definitely a
great way to get started. So why did I choose Print defy? Well, the main reason why I like print F phi is that it's
actually not one provider. It's a network of
providers that are providing this print
on-demand service. They're located all
over the world so that you are able to choose
a provider that is possibly closer to you
so that you can save on shipping costs and then you can pass those onto your
customer, which is amazing. I like print F phi
because it interfaces really easily with
Shopify and Etsy. And we're gonna be
going over that later in the course here. They have a really
large selection of really wonderful items over 750 products and they're
always adding more. I found the quality
to be really high. High-quality equals half
happy customers, right? We want to be offering top of the line products that
we're proud to offer. And also, I've found that
print if I seems to have better prices overall than
a lot of the providers. So that results in
higher profits, which, Who doesn't like that? Now that you know a little
bit more about printed phi, Let's get your account opened.
3. Open Your Printify Account: Okay, So in this video, we are going to create
your printer phi account. It's really easy to do. We're here, we are on the
homepage at printer phi.com. Just going to click
this sign-up, green Sign Up button here. It'll take you to the
account creation page. You have a choice. You can
either click Continue with Google or you can enter
an email and password. So this is basically
a one-click, I'm going to click
continue with Google. This will take you to
some marketing questions and just answer them
as best you can. None of the answers to
these questions will affect the way your printer
phi account functions. So let's go through these. What describes the best? I'm going to say, I have
my own e-commerce store. What is my main objective? Order merchandise, grow
my current business, start my first
online business or order product,
products for myself. I'm going to click girl,
my current business. What brings you to print defy. Let's see. Let's just
say product selection. And we're just going to
pretend we're beginning here. What are your current
monthly sales? How do you currently
fulfill your customers? The products and merchandise? Say I'm just getting started. How did you find out? Google search? So our printed phi account
is created and here's a little page that
shows you where you can go from here you can order
samples, which is nice. You can connect your store to
print a phi or you can even start designing your
first custom product. So what I'd like to
do first is to get your store connected and make sure everything is
functioning properly. So join me in the next video and I'll show you how to connect your printer phi account to either your Etsy or
your Shopify site.
4. Connect Printify to Etsy or Shopify Store: Well now in this video, we are going to help
you connect your store, either Etsy or Shopify to
your printer phi account. So we're going to click
this button here. Here's my new store. You can see there's
nothing connected yet. We're just going to click
the green Connect button. And you can see there are quite a few options
for connecting. You can do Shopify, ETC. Now I have Walmart, Squarespace, eBay, Wix, WooCommerce, big
commerce, press to shop. And API down here is if
you're going to have like a computer or delegate developer actually do something
custom for you. So definitely not going to
worry about that right now. We're just going
to concentrate on these top two ones we
have Shopify or at z. So let's do Etsy first. I'm going to click on
this Connect button here. And it's going to prompt me
to sign into my Etsy shop. So we just going to put
in your email address and your password. Here. It's just verifying it, saying anytime you connect an app to Etsy, you're
gonna get this. And is it says an application
would like to connect to your account and you're
currently signed in here. And you want to
verify that that's the store that you
want to connect. And then it just just saying printer Fy wants to
connect and it's going to be able to
connect to your account, read your email address and your listings and
things like that. All of the things
that it needs to do to interface with Etsy. So if that's all okay with you, you need to grant access, which is down here
at the bottom. So I'm just going to
click grant access. And we have success, and it's just that easy. So now that store is
connected, it says here, check out this article
on how to start selling printed phi has a lot
of good resources. You can check out that will
allow you to go even deeper. We're going to help
you go step-by-step through adjusting your account
settings and everything's so the other thing I
wanted to mention is that another nice thing about printer files as you can
connect multiple Etsy stores. So if you're a seller who
likes to have only one type, may maybe have a mugshot
and a T-shirt shop or something for your
art or your stationary. And you'd have
those all separate. You can connect each
one of those stores and have a want just one
hub in the print, one print if I account, that keeps them altogether,
which is really nice. So that's how you
connect an Etsy store. Next we're gonna go and
connect a Shopify site. So here we are at the
My Account screen. And in order to connect another, so I'm going to click on this
little green person icon. And I'm gonna go
down to my stores. And again, you can see
here Etsy is connected. And I'm going to click
here to add new store. And we're going to
select Shopify. And here is where
you will put in your actual URL and you
don't need the http, you just, as you can
see in the example. And so mine is, I'm actually connecting a store from one of my other companies. And then we hit Connect. And it will ask you to login
to your Shopify store. Very similar to
what we saw in ETC. It's going to ask permission for the two apps to
connect to each other. And it just tells you
what it can access. Its gonna be able to edit
orders, products, et cetera. So I'm willing to install
the app into Shopify. We've installed the printer
phi app into Shopify. So you can see here apps and printed five print
on-demand is located here. Going to see click on
this open full site. And that will take us back to
our printer five main page. If I click on my store, I can see that I have no
products created yet. And if you click on
this arrow up here, you can see that my
Etsy store is connected and my Shopify store
is also connected. So now that you have
your stores connected, in the next video, I'm going to walk you
through how to manage your account settings
in print a phi, so that printed phi operates
as you expect it to.
5. Manage Your Printify Account Settings: Okay, so now we've opened
your printer phi account and connected it to your
Etsy or Shopify store. This video, we have just a few more things to set up before we can get to the
really fun part of creating your products. So here we are back
in print or five. And what I'm gonna do is walk
you step-by-step through these setup options so that
you can make sure that printer phi is functioning
the way that you intended to. So if we go up here by this drop-down menu in
the upper right corner, you can see I have my two demo accounts
set up and connected. So we're going to click
manage my stores. And we're going to, these are the settings over here and also here or
the store settings. So we're gonna go into the Etsy store and click this
little cog for settings. And we're going to add
the store name, save. And then it takes us back to
this welcome onboard site. So I'm just gonna go back where
we were before. Get back. So this is set. Then we're gonna go over
here to this left menu and we can edit our
ship from a dress. You have a couple
of choices here. You can either use the
printed by default. And in the case that
a customer maybe refuses a package
or it is returned, the return address will be
where if you choose the print, if I default, the return address will be where the
product was printed. You can also choose to
use customer address here where any returns could
come right back to you. And some people want
to use do that. Even if it's a custom
item you might want to have to address, maybe contact the customer and see why they
refuse the package. Or you can also, in the event that they don't
want it for some reason, you could also use that those items for you to take pictures of or a samples
and things like that. You may, even if it's
not personalized, you may even be
able to resell it. So some people want it to
come those packages to come back to them to you. Something to keep
in mind is that this address will also be
visible to the customer. So if you don't want people seeing maybe
your home address, if you don't have
a business address that the packages can
come back to you. You might want to just use
the printed by default. Then we also have addresses for Great Britain and also
Germany, going to hit save. Then we go to the Preferences, and we're gonna go through
all of these preferences. These are very important
in having your printed by sight function the
way you're expecting it to. So here's order routing. Order routing automatically
will send your order to an alternate print provider when the original is unavailable. And one of the benefits, as I had said before, is that printer phi is a
network of print providers. So if you're using, if you're selling things
like a t-shirt or a mug, where there are several
print providers, especially in apparel, they
can automatically find another provider if the provider that you've chosen
is out-of-stock. So if you do that, you can click here and
enable order routing. And that way it
will automatically, they'll automatically pick, they'll automatically
pick someone for you. So if you enable order routing, you also are going to click
this little setup top-down. The providers can choose how much they're
going to charge you. So you'll, will see a range of costs for the
exact same items. So you're going to want to set a minimum or maximum
rather additional cost per item that you're
willing to spend to substitute and have another print provider
fulfill your items. So you want to make sure that
you know how much you're willing to go up so that you
are still making a profit. Also, you can choose
to only do exact product matches because if you read the fine print
up here at the top, if no substitution is
available for an exact match, they'll find the
closest match unless you have this checked. So if you're gonna do
automatic routing, I would suggest that you do. It's up to you. But if you want to make sure to have the exact same
quality of t-shirts, say, you can check this and they'll only substitute
that same truth. Same item. I personally don't like to
do automatic order routing. I like to have those
items come in and then allow me to make the decision on how that
is going to be handle. Out-of-stock is
going to be handled. Then we come to order approval. You have several choices here. If you're doing a lot of personalizing and
things like that, you may have manual checked. And that's where you'll
see each thing come in. You can go over all
the details and manually send each
item into production. If you have a flood of orders
coming in, you may not. That might not be practical. But for, I think for most of us, manual setting will
work just fine. Another other options are automatically within
1 h or automatically within 24 h. If you're finding that you're
getting people canceling, a lot of people canceling, which I don t think
happens very often. You may want to have
that order wait for 24 h just in case the customer
is changing their mind. Another option which I like is automatically at a
certain time every day. The reason this one is
beneficial is that it results in just a single charge to
your credit card per day. Otherwise, print if I will
charge you the cost of each item as they come in or
as the orders are released. And if you're getting a lot of charges on your credit
card throughout the day. A lot of times they kinda makes the credit card
companies a little bristly and they might flag
some of those as a fraud. So there's another way
you can avoid that and we'll be going over
that in a little while. But another way and to keep your accounting
really simple and simplified is to check this and you'll just
get one charge a day. All your orders will go
through at the same time. You can pick the time here. Next, we're going to look
at order View settings. And this is going to determine
what you're going to see on your Orders page so
you can show all the orders, which would be if you're connected to your
Etsy store and you're manually fulfilling things
that you're creating by hand, you would see those
orders as well. Also, if you're using another
print POD print provider, maybe you're using
print full for some things and those are coming through on
your Etsy store. You would also see those. Or you can only show
those orders that are fulfilled just by printing
PHI and not anything else. The reason you
might want to show all orders is in the event that one of your providers say you're using printf
fall and they're out, then you can easily
transfer that order, edit it, and have it fulfilled
by another provider. Tracking notification
settings only refer to manual and sample orders. So manual orders are orders that aren't coming through any of your stores or sample orders
that you placed directly. So this is tracking
just for you. You can choose soon as it's available or at a
certain time of day, or if you don't need tracking
emails for those things, you can check that as well. So those do not apply to the orders that are being
placed, say through Etsy. Etsy takes care of
those and sends the tracking directly to
the customer automatically. Next, we have automatically send delayed orders for
two production. So this is in the event
where there may be some kind of shipping
restrictions, maybe into another
country, things like that. Some of this I think is maybe
leftover from the pandemic. So you can choose if
there's some kind of reason that an order
can't be delivered, you can send it'll
notify you and then you can click if you have send
orders to production manually, you can assess that and see
how you want to handle it. Here it says you can manually
send orders affected by shipping delays to production
on your order details page. The alternative is to send orders to production
automatically. And then that means that there
may be a shipping delay, but they're going to
release the order to production anyway and it'll just sit there until
the delay has been resolved. Personally, I like
to have a little more control over these things. So if there is an event of any kind of delay
or order delay, I would prefer to have
them notify me and B, have the ability to send the orders to
production manually. Here, you can check whether
you want to receive order status e-mails
and they'll send them daily with what's happening
with your account. I kinda like to be notified. You'll want to click
save to save those. That's the store setup there. And what we're gonna
do is we're gonna go back into managing stores. And then we're going
to look at over here at these global
print device settings. Let's get, let's fill in
the rest of the items here. So click on your account. I'm going to enter the
name of your business. You're going to want to fill
in your contact details, your phone number, your address. This will be what appears on
your invoices and whatnot. My files section is
where you would see any of the assets
that you've uploaded. I personally upload
my design files as I design them and I'll
show you how to do that in an upcoming lesson. If e.g. you may want to use this to do some bulk uploading. So maybe you design a bunch
of t-shirts for the holidays, teacher designs for the
holidays and have them already at the same time and you just want to bulk upload. This is a great place to do it. Now the Payments tab is
very important course. So let's go through this. So every time an order is
placed or sent to a production, you're going to be charged
for the cost of that item. So this first part here,
this current balance, you have the ability to top
up your balance with PayPal. And so you can connect your credit card to
a PayPal account and then put your
PayPal information and top and top up your balance. When you top up your balance, then if you keep
a balance of say, 100 or $500 in here, then when those
orders come through, they will just come off of that balance and
your card won't be charged for every order which the credit card company
is actually prefer. And then you're going to
set up a credit card here, credit or debit card in
case this balance falls below and they need to charge your card for production costs. So it's kinda nice to keep a
running balance in here if you want to avoid those hits to your credit card all day long. Printed phi offers a service
called printer phi premium, which is a
subscription-based service. I'm going to talk a
little more about this in a bonus lesson. But here is where
you can upgrade and subscribe to that service. There's a lot of benefits
in doing that if you're at the right place and we'll talk about that in that bonus lesson. And coupons. If you have any coupons
here, you can add them. And if we go across
the payments tabs, here's where all your
transactions would appear. You can see all your invoices, your individual
order invoices here, and of course, any
withdrawals that you've made. Let's move on to the taxes tab. So valid resell certificates
then can qualify you for a sales tax exemption on orders made
through print a five. And you can read more on what resale certificates are
and how to submit them. They are reviewed within a week and they'll inform you if
there's any changes and then you would submit it
here through my stores. Let's click Settings. These are just global settings. And you can choose between
metric or the imperial system. You can choose your time zone. I'm in the Central Time Zone, and then e-mail notifications. You can check if you want product launch
announcements, etc.. Invoiced frequency and format
upon payment or monthly, depending on how you want
your accounting to be. Grouped, login details,
and then delete my data. You have the right to
access information we hold about you and the right
to be forgotten bias. So if for any reason you want
your data to be deleted, if you're done with
print, if I go there. Lastly, we have connections. This is API tokens. If you have a web
developer or some kind of programmer who's working
on a custom solution for you. This is the only time
you would need this. So if you're selling through Etsy for sure
You don't need it. Even with Shopify, you
probably won't need it either. So that's it. We're all set up. Now that you have all your
printer settings just the way you want them, you're ready to start
creating your products. So meet me in the next
video and we'll talk about the best practices for
creating your artwork.
6. Artwork Guidelines for Print on Demand: In this video, we're going
to talk about how to prepare your artwork and
take some things into consideration that are specific
to either print defy or the digital printing
processes that they use so that you can avoid
any unwanted surprises. Print if I put out
this great article, top five tips for POD success. And I just wanted to touch on a few things that really stood out to me were most important that I found most important. The first is, of course, you need to use
high-quality designs. And what that really boils
down to is resolution. Poor or low resolution
is not going to produce the quality of print
that you're looking for. So each of the items
that you create, each of the types of
products that you create will give you the maximum print size that
can be applied to that item. So what I would
suggest is that you create your file
at least that big, if not bigger, at 300 DPI, and then you should be good
across all your products. In fact, what I like to do is I consider what products
they might designing for. And I design for the
largest product, which for me is
gonna be t-shirt. I designed the file
t-shirt size and at 300 DPI that way I can
shrink it down if necessary. And I'll still have a really nice high resolution for whatever product that
I want to put it on. Then print if I suggest that you consider backgrounds when
you're creating your artwork. So right here they say for
directed garment products, they recommend using
transparent backgrounds. That's like t-shirts,
sweatshirts, things like that. And for the all
overprint products, they suggest it's a good idea to have a solid white background, and that's because those items are solid white to begin with. Lastly, you want to avoid
any kind of small details. And here they suggest
the artwork in your art should be no
smaller than three pixels. So these little tiny details, if they're smaller
than three pixels, they may not show up. Next, we want to consider
the color space that you're designing in and the
print colors that are going to show up in your designs and identify uses
the RGB color space. However, they caution us that
the color range that you're going to see in your
products is much more limited than
what you're going to see on your computer screen. And this mainly
affects if you're, if you're an artist who uses a lot of vibrant
colors and vibrancy is really a central part of your
design that could affect how that could
affect the results. They give a really
nice illustration here in this document. And on the left here you
can see very bright, almost fluorescent colors is what you're going to see
on the computer screen. And when it's actually printed
to the garment is going to be a little bit dull
down and more muted. And a part of that is
because the inks are actually soaking
into the garment. Now they also give some guidelines like
if you want to have a better idea or maybe kinda do a preview of what your
artwork might look like. You could convert it to
the CMYK color space, which has a more
limited palette range. You can do that
in Illustrator or Photoshop just to
give you a guideline of what your artwork
might look like if you're concerned that
this could affect you. Next, we're going to talk about transparency and gradients. If you use this type of
shading in your artwork, identifies pretty clear on this. They say please avoid gradients going all the
way to transparency in your designs when you're designing for directed garment. That's your apparel designs. So something like this
that goes all the way to transparency won't be
possible in directed garment. And part of the
reason for this is that in the directed
garment process, they put a base of white under the colors in order to make the colors more
vibrant and pop off. The next thing I wanted
to talk about this under base that is created.
And this is why. This is why the gradients
don't work very well. In the directed garment process, they do put a base of light. They spray a base of white
under your design to help the colors come
through to be more vibrant and to have like
a really good detail. Another thing that's really
important to consider and that I learned
is if you have white in your design and you're going to be
printing on a dark t-shirt. So this white under base is only applied under colors
that aren't white, like true white, which
will be the hex code. Ff, FF, FF, if you're familiar with
the hex code for white. So what I've learned to do is take my designs that
would normally have a true white in them and apply a slightly
off-white hex code, such as FCFs, CFC. And that way, when the computerized directed
garment process happens, they're going to see
that this is not true white and they're going to lay down that white under base. And then this slightly
off white on top of it, which still looks
white and new design. However, you're gonna
get the benefit of that nice double
layer and your image, the white parts of
your image will be as vibrant and have the detail that the rest of
your image does. So now that you
have some general guidelines around what kind of art works best
for print on-demand, the real fun can begin. So join me in the
next lesson as we create your first
design in Canva.
7. Prepare a T-Shirt Design in Canva: So in order to start preparing
my first design in Canva, I'm going to consider the
largest file I'll need across all of the products
that I want to offer. And in my case, it's
going to be a t-shirt. So we're going to create
a t-shirt design. And I'm going to create a go up here to create a
design click in there. And I'm gonna do a custom size. And I know that my t-shirt
file should be 4,500 pixels wide by 5,400 pixels tall. Then I hit Create new design. And I'll show you where to find that information
in print defy, when we add our t-shirt
designs into print to phi. So here we are with
our blank page. And I'm going to come
over to the left here where it says
uploads and I'm going to upload an art file that I have created in procreate
and Photoshop. You click uploads and then
click this upload files. And it's going to ask
you to find where it is. So remember where I put it. I believe I put it
on the desktop. Yes. Okay. So here's our sunflower
leopard print. And it will upload, give you a little
progress bar there. And when it's ready to upload, I'm going to add
it to my design. So what I like to do is
I activate the canvas by clicking once you can see
the purple line around it. And then I just click
once in my art file. And it adds it right
to the design. They're going to center
it good size actually. And you can see that
it's centered if I slide it back and forth
when it hits that purple, that little purple guide there, and that is the center. So I'm gonna go like that. Looks about right. And then I'm going to add
some simple text to this. The easiest way to add text
is to just hit the T on your keyboard and you'll
get a nice text box here. So I'm actually going to move it up here so you
can see what I'm doing. We're going to type wild. And I'm going to
change the font. And the way you do that
and you highlight it. And then you click
this drop-down here. And there are a
ton of free fonts. Some of these fonts
have a crown by them, which means they're free
to Canva pro users. But there's plenty
of fonts here. And I'll show you in
a minute where you can upload your own font if you have something that you use in your business that
you want to use here. However, you can
only upload fonts if you have a Pro account, but I'll show you
how to do that. So I am going to search for
something I've used since. So wild dot fill. I'm just going to click
and make this bigger. Position it also in the middle. Probably make that a
little bit bigger. And I'm going to add
another, It's quite large. Wild child. And I'm gonna make
this a different font. This one is a retro font that
I like called Bright retro. You just arrange the elements
where you like them. So it looks good to you. I'm actually going to
change the color of the text. You highlight it. And then click here
for the text color. And what will happen
is it'll show you what it's picking up in
some of the document colors. Or you can click here. I like to do and
get the eyedropper. So if you click the eyedropper and then you can
take that over to your artwork and pick any of the colors in your
artwork just like that. So I'm going to pick
this bright orange. Let me click off and I'm
gonna do it for this too. No oranges already
there from before, so I'm just going to click that. And there we have it. So if you wanted to upload your own font, you can click this
drop-down here. And if you have the pro account, you can come all the
way to the bottom here where it says upload a font and click on that. And it will ask you to find
where on your computer that stores so that you can upload it into your Canvas account. So now that we have
created our art file, the teacher to file
that I want to make. We're going to
export it as a PNG. So in order to do that, here is where you could name your file so that when it's downloaded
you can find it. So I'm going to put wild
child sunflower t-shirt. And you click Share. And you're going to come
down here to download. You want to download
it as a PNG. Leave the file size the same. We're going to click
transparent background. And it does look like if in order to download as a
transparent background, you are going to need
though Canva pro account, which is pretty
reasonable per month. It's I believe I pay
$10 or so a month. And with all the capabilities that this program has
totally worth it. We're going to hit download. And there we have it. Our first art file is
created for our t-shirts. And we're going to set
this aside for now. And we're going to talk a
little bit about mockups.
8. Source Great Mockups on Etsy: As you'll see in an
upcoming lesson printed phi does offer some basic
standard mock-ups. But especially if
you're gonna go into apparel and print your designs on T-shirts and
sweatshirts and things. I would strongly urge
you to go beyond that and invest in some
professionally styled mockups. I would recommend that you have at least two to
three mockups for each style of apparel
that you have, including a one for each color, and possibly a flat
lay where they arrange a scene on
a flat surface, as well as a hanging photo
is very nice as well. So let's take a
look here on Etsy. And as you can see
from the search bar, I've put in the word mockup and then the name of
the item that we're going to be creating
in print device. So the T-shirt we're going to be creating
together a little bit later is the Bella
and canvas 3,001. So as you can see from
the search results, there are a huge variety of people and there's new ones
being added all the time. You can get things
like these flat lays. You can get lifestyles. You can get things like
these on the hangers. This is very pretty. So you just need to
scroll through and find a style that really speaks to you and
kinda fits your brand. I've found that you could probably expect to
pay at this time about two to $6 for
individual mockups. But then you can
also keep an eye out for complete store
bundles like here, like the entire shot bundle, if you like, the style that the photographer
that shop is offering, a lot of times you can
get a pretty good deal. It'd be like a flat fee
for their entire store. And a lot of times that will
include lifetime updates. So as they add new styles, as print ads, new
styles of things. And if they keep up with it, then you'll have access
to those as well. So that can be a nice option. Lastly, to complete
your listing and assist your customers and
choosing the right size. You're going to want to also have a sizing
chart for your apparel. And you're going to want
to have obviously one for every type of apparel
that you have. So you can purchase one
already styled like this. Or you can, if you're
feeling resourceful, you could get this
information off of the manufacturer's website
and create one of your own. I did end up purchasing mine. Just to save some time. I'll include a list of my favorite Etsy mock-up
makers in the resources, but new ones are being
added all the time. And I strongly urge you to
do your own research and find ones that really speak
to you and your brand. So join me in the next lesson. I will share with you how
to add your design to these mockups and then adjust
those mock-ups for realism.
9. Add Your Art to the Mockups: Okay, so now it's time to add your artwork design
to your mockups. What I like to do when
I get started is create a master file of all the mockups for one
given type of apparel, or at least the ones that I want to use for a given season. So let's create
that in Kanban now. Okay, so we're gonna
go up and create a new design for
this master file. And we're going to Custom Size. And I found the size 20 2048. By 13, 66 worked for me. Create a new design, going to name it the product type that
these mockups represent. So I'm going to name it BC
for Bella and canvas, 3,001. That's the name of the
t-shirt will be creating shortly. And then mockups. Then you'll go to
the uploads and upload your purchase
mock-ups into Canva, just like we did with
your art design. You can do a bulk upload
like this if you want to choose them all open. Once they're done uploading, you're going to simply
drag each design onto a new page as
the background, and I'll show you
how to do that. So I click here and drag. And if you drag it
to the right place, it'll pop in just like that as the background.
Just like that. And then you're
going to do that for each of your mockups and
create one giant master file. So if you click Add
Page Down here, I'm going to just continue
to do that for each one. So then we have a file
full of mockups of the abelian canvas
3,001 t-shirt in different colors
and as a flat lay. The next thing
we'll need to do is upload that art design file that we exported earlier. Upload. Find your file. Once that's done uploading, you're going to add that
design to each one of these mockup pages that
you wish to use and urine and keep in mind obviously that some of your
designs may not work on some of the
t-shirt colors that you want to offer and it
will just skip those. So let's add that art work. Or to do that, I'm
going to activate this. So there's a purple
square around the edge and just click once. And then we're going to
position this in size it so that it looks kind
of how we're going to create it in print f phi. So if you need to rotate it, as you can see, this
is not quite right. Well, let's size it first
actually click and drag. This takes a little bit, I found at least for me, it took a little bit of
getting used to and trying to figure out how big I wanted the art in
relation to the T-shirt. I like to take it up. Once we do the design
in print defy, you'll notice that we can't go like all the
way up to the color. There is a little
bit of a margin there selected, drag
it down a little bit. And then I like to
look at the edges of the color and kinda
have that lineup there. Okay, that looks pretty good. The next thing I like to
do, and this is a pro tip. In order to make your artwork look like it's part
of the t-shirt. You're going to want to
reduce the transparency from 100% down to
like 86 or 90%. This will help look
the art look less digital and more realistic. So in order to do
that, we simply click this checkerboard up here
where it says transparency. And drag the slider
down a little bit. You don't want to go too far. You don't want to
look faded obviously. So I find somewhere
in the mid 80s, little bit brighter, eight. As you can see, that just
sets it back a little bit and is reflective of how the directory government
printing the ink actually kinda sinks into the T-shirt instead of like
laying on the top. So now I'm just going to repeat this process for each
one of the mockups. Obviously the next shirt
I have here is red, and I'm guessing this orange and the red is going
to look pretty bad. So I can put it on there, but I probably would
not choose to do that. Right. So I'm going to skip
that one and go to this 11 thing you want to be really mindful
of is that you're sizing the mockups between
mock-ups about the same. So e.g. That's why I like
to look at the color. Like how far is this
coming out from the color? How far down is this
gonna go to sit there? Because you want this
one to match kind of what this looks like
in the sizing here. Again, transparency. Go. Last one. Back. Obviously some of these mockups are ones that I just got for where I'm doing a
set of holiday once. So I'm not sure if a sunflower wild child to
really go in that setting, but you get the idea just for demonstration. So there we go. Several mockups.
Skip the red one. After you're happy with
how your mockups look, join me in the next
video and we'll export the finished files.
10. Download Finished Mockups from Canva: Okay, so before I
export my designs, I like to name each page with the color and you'll see
why in just a minute. Now this isn't really a color, so I'm just going to
name it flat lay is red. This is the white. Lack. This color is dark
heather. Okay. So those are all named. Then I'm gonna go up
to the title here. And I'm going to
append the name of my design to the title
that I currently have. So it's gonna look
like actually, I'm going to name it to the end. Dash, wild child, Sunflower. Okay. You'll see what this creates. We're gonna go share, we're going to
download these pages. Again, click on Download or
downloading them as PNGs. They don't need to
be transparent. We're going to
click on the pages and we're going to select just
the pages that we wanted. So I'm going to uncheck
this all pages. And I know I want all
of them except for, well, actually, the
easiest way to do this. Let's click all the pages and
I'm just going to uncheck Read because we didn't
actually do that one. And we're going to click
done and download. And what this will create is a dot zip file in your
downloads folder. And you'll want to expand that. So if you're on a Mac, you can just double-click
to expand and zip file. And I believe Windows users do a right-click and
then hit extract all. So I'm on a Mac, so I'm just going to
double-click the zip file. And what you're going
to end up with is a new folder with
the name of your, the type of mockup
and the art file. And if we click into this, what you'll have is separate individual files of
each of the colors. So if I click in here, you will have each of
the files ready to go. At this time. You can go ahead and
delete the zip file. So we don't need that anymore. So we're going to leave this folder in the
downloads file for now and turn our attention
back to print a five. So we're almost there. And in the next video, I'm going to show
you how to create the actual products
in printed phi. See you there.
11. Design a T-Shirt in Printify: Alright, we made it, and
in this lesson we're going to create your first
product in prettify. So here we are in print.
And as you can see, we have no products creating
yet in this demo account. And if you mouse over
the catalog tab, you can see just how
many different items that they have available for
you to add your artwork to. It's a really
amazing and they're adding new stuff all the time. But today, let's start
with creating a T-shirt. I'm going to click
here on t-shirts under women's clothing. And I'll just scroll
down a little bit so you can see the variety. Lots of different makers, different next style
or neck lines. There's a t-shirt dress,
things like that, crop tops, pajamas, all kinds of stuff for
you to investigate. We're going to scroll back
up here and we're going to select this was one of
their best selling t-shirts, which is the Bella
and canvas, 3,001. So we'll click in there. And as you can see, it'll give you a little bit of detail. If you click here, it'll shoot
you down to the bottom of the page where it gives
more detail on the collar, the fibers, side seams,
care instructions. Here's a size guide in
case you want to make your own size guide as
opposed to buying one, you can get the
information here. Alright, so we're gonna go
back up to the top here. There's a lot of providers. So as I've, as we've
been talking about, printer phi is a network
of print providers and especially for apparel
like this popular t-shirt. There are a bunch of them and you can see they have
a rating scale here. And this is sorted by how
highly rated there are. And I have to check at
what how the ratings are. I believe it's has to do
with price and ship time. And yeah, I'm not exactly
sure all the things, but this is their rating system. Also, you can see at a glance on this table here, the location. So this one's from Canada. Here's the United States want
to pay attention to that. Of course. Here is the price. It'll state two prices, the regular price. The regular price. And then down here in green, it'll say like regular price is $10.30 or from $9 with
printf high premium. So that's that discount, that subscription discount
that I referred to earlier. And if you want to
look into that, you can check out the bonus, the little bonus lesson
on penta five premium. You can see how
much the shipping starts at average
production time. It's like only a half a
business day right now for Monster digital or
super-fast print areas. So you can see they've print
on the front and the back. Up here, this one from Canada, print geek only prints
on the front side. So you'll want to pay
attention to that. Kinda shows you at a glance
how many colors they offer. If you click in
here more details. You can see. Again, the colors. If you click to shipping, you'll see the detail
of the shipping costs. So the first item is for 35 and then additional
items are 220. And you can see shipping
to different parts of the world is all
outlined there for you. If you click production, you get a little bit more
detail on their technology, their quality control,
and also packaging. That's kind of interesting. It shows you an
example of how the, how the product is
going to come packaged. Let's go back to
product variants. And I just wanted to
speak to this real quick. I was I've gone to only offering a select
number of colors, even though there is a ton
of colors, gorgeous colors. One thing you want
to keep in mind is that you want to look at how many providers
offer the various colors. To keep things simple, I've opted to mainly just
offer white and black, athletic Heather and dark gray
Heather for the holidays. I've also introduced
like a heather red. And you can see there's 23 providers for
the black and white. There's 14 providers
for the 2 gy. There is only six providers
for the Heather red, which is a little bit of a risk. But like if I scroll down here and you have this
beautiful Heather olive, which I'm sure is
a gorgeous color, but there's only three
providers that offer it. So in the case of an out-of-stock
from Monster digital, it will be harder to
find a replacement for that exact item if there's
only three providers. So it's up to you. I chose to keep
things more simple, but that is something
to keep in mind. So let's click out of here. And let's get our
t-shirt designed. So you go to the provider, we're gonna do the
monster digital. And we're going to click here on this green button
and start designing. Here's our t-shirt blank. If you look to the lower
right-hand corner, you can see the print file
requirements for the t-shirt. It says JPEG, PNG and
SVG files are supported. Here's the maximum file size. Here's the print area size
4,500 by 5,100 pixels. And if I mouse over that, you'll see that's the print
area size for the large, which is what we designed for. They actually do scale. It. They do. I think it's called image
scaling or something like that. Where on smaller t-shirts they'll print it slightly
smaller to try and keep it in proportion with a
larger or smaller t-shirt. So that's the print
area size for the large and here's the
maximum resolution. Okay, So let's add
our artwork in. So I'm going to add a
design from my device. Here's my Downloads file. Here is the Wild Child
sunflower T-shirt that we created in Canva. Hit Open. And boom, there it is. This little dot here is
the center of the t-shirt. Center of the design. Sorry, it's the
center of the design. And if it kinda like Canva, if I wiggle it back and forth, I can see the
crosshairs and I know that it's right in the
center of the T-shirt. Also, if I slide
this up and down, you can see there is a
margin from the bottom of the color to where the edge
of the printable area is. And I like to take, let's just take this all
the way up to the edge, try and keep it in the center. Then I'm going to look at
the edges of the color. And while I'm doing this, what I like to do is
try and keep an idea, keep an eye on the
mockups that I created. And how big did I make
this on this mock-up? Because the mockups are what your customers are going
to see in your listings. And you have to make sure
that printer phi is going to print the same size on the t-shirts as you're
showing on your mockups. That's why I like to
create the mockups first. This looks pretty
close to me for now, and let's do a preview. Okay, they'll offer up some
mockups so that you can see what that is
actually going to look like on your shirt and
you can compare it, compare it to your mockup. So I'll always go
back and forth. I like to refer to several of the mockups
because they do look different in different angles and different people,
things like that. I feel like this is very
close to this size. This might need to come
down a little bit, but I think it's real close. I just like to click around
and look at all of them. You can see this is
an over-sized t-shirt and the image was scaled up. Okay, so that looks good. I'm going to click back to Edit. And if you recall,
in our mockups, we're going to do white, black, and the heather gray. To add those to
this design file, you click up here at
prices and variants. You see here's the white is checked and we're gonna go down. We're going to add black,
dark gray, Heather. Those are the ones we're going
to add and we hit Update. And you'll see they
have been added here. Okay, so this becomes
the default design. If I click to the black, I can preview it here. I can click in the gray
and preview again. And you can click in and
see the mock-ups as well. If this doesn't look right. So e.g. if you're
creating a design that has maybe white text
or black texts, obviously, that's not
going to work on a black like black text wouldn't
work on a black t-shirt. So you can create the same art file with
different colored text. And here, if you click here, you can make a specific
design for that t-shirt and upload a separate
file just for that color. And they'll print
that instead of the default design
that you've created. When you're happy with that, we're going to
click Save product. And here it is,
what we've created. You can see the three colors, the white, the black,
and the dark gray. And they give you a generic
description for that t-shirt. You can use some of that. You can also add your
own description. This title here, I'll look, I'm going to change. And this is for you can have one title in
print a phi and then you can change the
title like say an Etsy, to include all your SEO
and keywords and things. But in order as, as you create a lot of
products and print a file, you're going to want a
title that is easy to find. So I'm going to call this
BC 3,001 for the t-shirt, dash, wild child, sunflower. That way I know it's this
product and this artwork. Alright, if we scroll down, you can see that here are all of the sizes that are offered
and here are the costs. So you can see from
small to extra large, the cost is $10.30. And then it's a
little bit more for two and a little
bit more for a3x. So if you're going
to edit the price, so I'm going to say these t-shirts are
going to be one price. So if we edit the price
and we make it say 24, 99. And the two XL, let's make $1 more. And the a3x L dollar
more than that. Okay? This profit
here is your profit, but it doesn't have
the shipping included. So you have to keep that in
mind that there will also be shipping taken out
of this purchase here. Product visibility in the store. You can have if you
want to push it to the, to your Etsy or Shopify store, but you're not ready to
have it listed right away. You can click Checkbox hide in store and it won't
be active right away. Here you can choose the
variant Visibility. Show All variants
as available for purchase regardless
of stock status. So I like to actually have that checked for these
really popular t-shirts that have a lot of different
providers because if the stock status
goes out for one, the chances are really
good that I can get it through another person. So I don't necessarily
want to miss out on a sale and have it not
listed in my store. Because even if monster
digital say goes out of stock, I can still find another
provider to fulfill that order. So that's the one
I like to choose. There are a couple
of other options show in stock variance as available and
out-of-stock as sold out. And you can also
show only show in stock variants and hide
any out-of-stock variance. So it's up to you. And then here is the
shipping profile. I don't have any
shipping profiles set up in my Etsy store yet, my mock-up Etsy store. So here it would create
a new shipping profile. If I had some setup, there would be a drop-down. So I create a shipping
separate shipping profile for each type of item because they all have different prices that
go with that item. So T-shirts are generally
T-shirts will be one cost, mugs, old cost, a different
amount, et cetera. So you would create, either create a new
shipping profile or select one that you've already created in your Shopify or Etsy store. And when you're happy with that, right now, we're just going
to save this as a draft. And we're going to move
on to the next item.
12. Design a Mug in Printify: Okay, So in this video, let's create a mug. And mugs are a great gift item. You don't have to worry
about sizes and whatnot. So let's create a mug. Going to go into catalog here, it's right at the top
of home and living. So we'll click into that. And as you can see, they have a ton of different
drink where options. I'm going to actually
filter this by fulfillment location
because I want to make sure it's the United States. So they checked, checked. There we go. So then I know that all
of these are in the US. And I'm looking for
a white ceramic mug. I'm gonna do this 11 ounce white ceramic mug
from district photo. And you can read the
specifications here. Here's district photo. Here the costs regular without
printf I premiums for 63. With printed premium is $3.56. Shipping is for 99. It is a wraparound print. Jaw show you very quick
production time right now. Details here. Let's see. For 99 to ship the first mug, 309 to ship the second log. Logs are a little
expensive to ship. They require extra cushioning
so they don't break. Let's start designing. Here is the mug template. You can see the print
area size here as 24, 75 by 11, 55 at 300 DPI. These there's an outer, so you want your artwork to fill this whole dark black
outer rectangle. However, the inner
part here with the dashed lines
is the safe zone. So you want your
artwork to extend into. If you've got a
full wrap-around, e.g., which I'll show you. You want it to extend
into the gray area. Otherwise, the cropping might
look a little bit funny, but you don't want
anything important in that dark gray area because it may get clipped
off a little bit. So let's actually don't need
to upload, but if you did, you upload it from
my device here, I have already uploaded
the Wild Child design. So let's click on that
from our t-shirt. So as you can see, it's a little bit bigger
possibly than we need, but not too much. And these here,
this dotted line, as you can see, will be
the center of the side. And this is like the
other orientation. So I like to start off with is lining the center
of my design up. A little bit bigger. Center of my design
up with the center of that line. Right? I think when I maximize
that a bit more. There we go. Okay, Just like we
did with the T-shirt, you can hit Preview. And let's click into
the right port. The right view
looks pretty good. There's some lifestyle photos. Unlike the t-shirt.
The t-shirt mockups, these lifestyle photos I
think are really great. And I totally happy to use
these right out-of-print defy. Although there are also some
really good mockups that you can find in Etsy as well. Especially if you're
selling, stylizing. Especially if you're styling
for like a Christmas, like this is showing. That looks really good to me. Depending on how
your artwork is, you may find that you need to scooch this out a little bit towards the outer side
in order to make it look centered on
that profile view. So here this is all set up. I want one exactly like
this on the other side. So they have, I believe this
is it, a duplicate function. So it's going to create
one exactly like that. I'm going to put it
approximately here. Now I want these to be
exactly the same height. So if I click on this
and I look at here, over here to the right
at position top. Here, you can see it's 3.62. So I want this one to
be at 3.62 and it is, but if it was down here, say a little bit drifted, I can just highlight that
and put 3.6 to hit Return. And it will position it
exactly where I need it. I'm going to make that centered, making sure my top
position stay the same. And let's preview. Let's click this. That
shows you both sides of it. Look at the left-hand side. Looks good. That's all there is to
that type of artwork. So before I exit out of this, I want to show you what
it looks like to do. Maybe if you're an
abstract artist or a watercolor artist, what the wraparound
view looks like. So we're just going to
delete these for now. And I've uploaded one
of my watercolors. We're going to load it in here. As you can see, the aspect ratio is not correct because
it's a square watercolor. I like to keep an eye
on this resolution, so it's 662 DPI and I don't
want to go lower than 300. So what I can just
do is drag this out and see how that looks. And here I'm still
above 300 DPI, then I can kind of position
this around where I like it. Okay? Then if I hit preview, it'll show you what the
wraparound looks like. So if you're a fine artist
or abstract artist, then you want this
type of an art mug. You could do a series like this. And I think they look really cool and make
great gifts as well. So when you're happy
with your design, again, you're going to
click Save product. Okay? And you're going to change your title, product description. And there is only one variant, so you don't have to
worry about that. Again, you can edit the price
if you like, and that's it. So join me in the next video and we'll create a kitchen
tea towel together.
13. Design a Kitchen Tea Towel in Printify: Okay, so let's create
a kitchen tea towel. Go up to the catalog, and we'll go into towels. Like everything else. They have a bunch of great
options from the flour sack, kinda cotton, tea towel, if beach towels, all kinds of stuff to
investigate here as well. We're going to select
this soft tea towel. This is not the flour
sack type of towel. This is actually thicker
and more absorbent. So this is also from
district photo. And here are the details
about the tea towel. You can see it's a little
bit of a waffle weave, but it's a nice big size. It can do an all
over print and it is super absorbent, which
is why I like it. Let's click down here, just take a look at
the price quick. Regular without premium is 858. With premium, It's only 661. Shipping on the first item is 450 and additional items
are 340 in the US. So let's start designing. I'm going to show you actually two different
ways to do this. One in Canva and
one in Photoshop. So with this, I'm going to
also introduce you to here. This is a download. You can download the
design template. The mug also has this option. We didn't go through that. I don't really find that I
need to use it with the mugs, but it's kinda handy with
this tea towel templates. So you click here to download
the design template. And it will create a zip file
in your downloads folder. You need to double-click
that to expand it. And if I open this up, you'll see that it
creates the template in an Illustrator file as
well as a Photoshop file. So I'm going to open
the Photoshop file. So here we are in
Photoshop and this is what the template
file looks like. As you can see, it has all of these layers
over here are on, this is the guide layer that
we're looking at on top. The size that you're going
to want is 16 by 25. However, the resolution
only needs to be 200 DPI. The outer red rectangle is the full size that
you're going to need. That's the full 16
by 25 inch size. The bleed area here,
this lighter gray, it will be cropped out in
the production process. Inside the dark black line is your because they print area. And then inside the dotted
green line is your safe zone. Okay. The reason I wanted
to show you this part in Photoshop is that I have a repeating pattern
that I've created. And I want to fill
the entire side of this with the repeating pattern. So if you're familiar with Photoshop or even if you're not, weren't just going,
it's pretty easy to use this template guide. For now I'm going to turn
this guide layer off. And I'm going to click
into the, your design. Also going to turn
off the background because I don't want to
export that the background. When I export the
rest of the file. If I click the layer and
activate the layer file, what I want to do
is I'm going to use the paint bucket
to fill this area, this entire area
with my pattern. So I'm going to activate
the paint bucket by hitting G for the shortcut. And then I'm gonna
go up here and instead of filling with
the foreground color, I'm going to select Pattern. And there's a drop-down here. And I can see that my pattern
that I want is selected. Actually. In here. It's already selected. I'm gonna go here and I'm
just going to click to fill. That is the pattern. And then you can activate, re-activate the layer
that is the guide layer. And just kinda take a look at where things are
going to be cut off in your design
and see if this is going to work for
you or not and you can adjust your artwork accordingly. This looks fine to me since it's just a repeating pattern. Then I'm going to
export it as a PNG. So I'm going to turn
off the guide layer. I made sure that the background
layer was turned off. I'm going to go up to File Export and quick
export as a PNG. And I'm going to put
it here at desktop. And I'm going to
call it tea towel. Name of this is retro run
known kilos and save. And that's all there is to
doing this in Photoshop. I really like this. Really easy to use
design template. If you don't want
to use Photoshop and you'd rather use Canva. Let's hop over to Canva
and I'll show you how simple it is to
do it there as well. So here we are in Canva. And I simply took and created a file that
was a 16 by 25 ". And you could throw a repeat pattern in
here if you wanted to. But instead what I
did was I uploaded my leopard sunflower
without the words. And I just placed it around
like this and till it, till it got to kind
of how I wanted it. And like everything
else you just share and download as a PNG. And we'll show you how this design looks on
the tea towel as well. Okay, so now we're
back into print defy. And we're in the design
screen for the tea towel. And we're going to upload these two designs
that we just created. So here's the retro run Oculus. And that looks pretty good. And then we're going
to hit the preview. And let's see what it looks like in some of the
lifestyle shots. So I really loved
these lifestyle shots. It really gives you
an idea of the scale and how it's really going to
look in an actual setting. So as with the mugs, I think these backups are great. It saves you from doing a
lot of fiddly work in trying to do a mock-up of a piece
of fabric in Photoshop. And I'm totally think
it's fine to just use the ones that print a phi offers us to keep
things really simple. Okay, so let's go back here. And let's see, I'm just going to hit the
little trash can here. And let's see. Okay, so and let's upload
the leopard, sunflower. See what this one looks like. This is the one that
we created in Canva. Okay, let's do a preview. So like I was saying, it really gives you
an idea of scale. And now that I see how this looks on
the tea towel itself, I think I put probably scale those sunflowers down a
little bit so that you can see more of
them when or more of each sunflower when the file. So you can see more of each sunflower when
the towel is folded. It looks pretty good there, but you can just use these previews to see how
you like your tea towel. And when you are happy with it, you're going to
click Save product. And again, change
your description. So it's something
that you can find. Edit your description. Here's the pricing. And then if you have a
shipping Profile Setup, you can select that as well
and hit Save As Draft. So that's it for the tea towel. And join me in the next video and we'll
create our last product, which is a sticker.
14. Design a Sticker in Printify: Okay, here we are. And let's create our last item, which is going to be a sticker. So back to the
catalog drop-down. And we're gonna go all
the way over here, two magnets and stickers. There's several options here. We are going to look at
the kiss cut stickers. Some people confuse kiss
cut versus die cut. And they also offer the die
cut and the die cut sticker. The edges are actually cut out. And this is created from
a heavier like vinyl. Whereas when you
get this sticker, the sticker is cut out, but the presentation, you'll
actually have the rectangle. So like if it's a two-by-two, you'll actually have a
two-by-two piece of material and then the sticker itself will be cut out and when
you peel it off. And that'll make more
sense in just a minute. So we're going to click into
the kiss cuts stickers. They are available in a white or a transparent background, and they come in four sizes, two-by-two, 34.6 inch square. The prices seem
really good to me. $1.39 or $1.07 with
parental five premium. Shipping is 399 for
the first sticker. But if you click in here, you'll see that each
additional shipping item is only $0.09. So if you can work
some bundles in there, then you can maximize people's shipping,
which is awesome. So let's start designing. There's a couple of things
you want to keep in mind when you're
designing stickers. Let's start. So it starts off with a
two-by-two sticker default. Over here, you can see
the print area size is, and as for the two-by-two, is 559 by 559 at 300 DPI. So let's just load in something we already
have in our library. So that'll be our wild
child sunflower again. And I like to maximize
the size on this. All the way to the
edge of that black. I'm going to center
it just like that. So then you can do a preview. So this is the preview with
the white background applied. I like to use the white
background that way. I always know that my colors
are going to pop off. You can choose a transparent, but you have to be
careful when you are thinking of maybe applying
a transparent back sticker to black or some kind of a dark background because it
won't show up quite as well. So things that you want, I want to point out here, you can see that the wild and the child are connected
to the sunflower. And there are more than
two connection points. This is really solid here and definitely very solid down here. If your elements are too
far away in your design, then there's a
possibility of them being cut out and separated
from the main design. Now, you may want that, like if you wanted four
different things in the different corners
and people to have four different stickers
that kinda coordinated. That works out really well. And I'm going to show
you an example of that. Let's go back to the edit. And before I show
you that example, I'm going to show
you how to, how to. Now that we've designed
the two-by-two, you can click on the
prices and variance. And we can, all you have to do is check on all the sizes that you want. If you wanted to do them in all the sizes, you just do that. Click there. If you want
to do them in all sizes, you just click and hit Update. And you'll see it
has added them all. And the nice part about it is that you don't really
have to re-scale it, it rescales it for you. So if I click two-by-two,
four-by-four, you can see that the artwork
has been automatically scaled up for each of
the designs for you. So now let me show you a, an example of a design that where the elements are
a little bit too far away. So I'm going to hit
the trash can there. And I've added a design
in the library here. Mary and bright. I'm going to make it big. Let's hit Preview. So as you can see here, you can easily see where the cut lines are going
to be on this sticker. And you can see that the Mary and is going to be separated from the bright
and the mountains, which for this design is
probably not what you want. So you're going to, I always make it a practice
to preview these stickers. It's really easy to see where the cut lines are going
to be and if it's where you expect them to be. Okay. When you like it.
If you like it, you're going to
save the product. You get a bunch of different
kinds of mockups there. Again, you're going to name it. Can change your prices here and create your
shipping profile. And we'll save this as a draft. There we go. So now that we
have our four items created, the next video, we're going
to talk about how to publish those to our Etsy
or Shopify stores.
15. Publish Printify Products to Etsy Store: Now that your products have
been created in print, if phi is time to publish
them to your store. So let's do that now. Okay, so here we are again on the byproducts page
in print a phi. As you can see, we have all these little items that we've created together. And they say unpublished. I was playing around with the
sunflower leopard tea towel so that you can see it
has unpublished changes. One thing I want to
mention is if you have two stores setup
like I do here, I have an Etsy store, and I also connected
my Shopify store. If you have them
both, you can only work in one at a time. So this one has been highlighted as we've been
adding these products. So these all exist
in Etsy store. And if I wanted to offer the same products
that I'm offering in my Etsy store on my website. I can copy them over to my Shopify store by clicking
on these three buttons. And from here I can publish the in-store or it
can do all these things. But what I want them to
do here now is copy too. I'm going to copy it over
to my Shopify store. And here they say, due to sales channel variations, some details might be lost. Copying products to
a different store can take up to 20 min. In the meantime, feel free to
continue using printer phi. Alright, so I'm just
going to hit Got it. Then I'm going to select
my Shopify site to copy to and hit Copy products. And that was very fast. The product has been copied. So let's turn our focus back
to the Etsy store and I'm going to show you how
easy it is to publish. There are the way I like to
do it. I like to click in. And one thing I wanted to
show you here is I'm going to publish this wild child
sunflower mug to Etsy. And the mugs have so many mock-ups that
it's going to ask you to choose ten because you can see the little
warning up here. Etsy allows only 1-10 mockups. So I'm just going to
quickly look through here. This one is Halloween. I think I'll uncheck that. And I don't think this red and blue really goes with
the orange mug there. So I'm going to uncheck that. You can see once we did that, it freed it up to publish. So all you have to do
to push it to Etsy then is hit Publish. And here you'll see
it's publishing. And if I hit Refresh, it'll say hidden here, which means it's published, but it is hidden on Etsy
because I indicated to hide it and save it as
a draft instead of go active right away. So let's hop over to Etsy
and see where that ended up. So here we are in
the listings page, and this is an active listing. But if I look over here, you can see there's
one sitting in drafts. So let's take a look at the
drafts and there is our mug. After you publish
your item as a draft, you're going to
want to go in and optimize that listing
before making an active. And there are some settings
that I'd like to go over with you that are specifically
relevant to, ETC. Okay, so here we are
in our draft listing. And as you can see, all of the printer
fi mockups have been pushed into the listing. And they're all here. This is that sunflower or tea towel. And I just wanted to point out, Etsy lets you do ten. I believe there's
our ten photos and they encourage you to
use as many as you can. You can edit and crop these. And if you've never had an Etsy listing or is this
your first time using Etsy? Then you can crop and you can
get rid of some of these. Sometimes some of the
printer fi mockups are like seasonal and it doesn't
really apply to your listing. You can always just hit the trash can and get
rid of some of those. It also will offer
up a thumbnail. So this is the primary one. And you can, if you
want a different one, you just take the one that you want and slide it over and then that one
becomes the primary. You can you can
also add a photo. So like for our
t-shirts when we did all those beautiful mock-ups, you just click, Add a photo here and you find it on your desktop. And add it that way. You can adjust the
thumbnail if you like. That looks pretty good,
just the way it is. And so that's the
that's the photos. Then let's scroll down here. Here's where obviously
you would put the title. We're not going to
talk about optimizing your Etsy title for SEO
and things like that. That's a whole different video, but that's important to do so that you get found correctly. So this section
right here is very important when you're
using print-on-demand. So this is the who
made it section. And normally if you're
doing a hand-crafted item, it would be I did, but this
is where you're going to select another
company or person. It is a finished
product made to order. You're going to
select the category. And if sometimes
it pops in here, sometimes you just
have to search for it. We're going to go down here. You can select
colors and whatnot. I do like to usually
do material here. So like cotton microfiber. If it applies to an
occasion or holiday, you can select that. I like to do manual renewals until I know if something is
going to be selling well, it is a physical
item because so you can leave that I would suggest editing the description to
being something a little bit more friendly and descriptive, something in your voice
that fits your brand. Here's the next section that's only specific to
print on-demand. So because somebody
else's making it, you need to add a new
production partner. So I'm gonna click on that. And what I like to do is we're
going to say print defy. You can choose whether or not to show this name to the buyers, and I usually opt
to turn it off. Descriptive title. This will appear this
descriptive title. Instead of actually showing the name of the
production partner, you can just say what
they suggest here. A print shop. I like to put the location of where the item is
being produced. And so this is from
district photo and I looked up the address for district photo and
I found out that it is actually in belts
fill Maryland. So let's hop back over here. Ville Marilyn, There it is. About the production partner, how buyers understand what
this partner does for you. And they print my
tea towels for me. You could also, if you're doing a lot of different things, you could say they
print my items for me. Why are you working
with this partner? I don't have the
technical ability or equipment to make it myself. What is your role in
the design process? I designed everything myself. And what is this partner's role in the production process? They do everything for me
and then save that partner. And we're going to check that
for the production partner and then we can continue on. Of course, here's the tags area. You definitely need to use all 13 tags if you're going
to maximize your SEO. As we go by here, this is this skew you don't want to mess
with because this is what tells printf defy
exactly which item in your printed phi catalog is
connected to this listing. We come down here, you can see that create a new shipping profile
was checked when we created this listing and here
is what it would look like. This is the profile
that it came up with. You can edit this if you wanted this to be your
soft tea towel profile. And not just for this design. You can just change
it and edit it. Here. It already puts in what
their origins zip code is. If you want to let more
or less processing time, you can change this here. The shipping this
came right off of the print defy
provider's schedule, what they charge for shipping. And then I only shipped to
the United States personally. But if you shipped to
other countries and you can edit and change
all of these. So I'm actually going to remove these so that I'm only
shipping to the US. Save that profile. Lastly, I wanted to show you this returns
and exchanges area. So this is a simple starter
policy which says the buyer can return or exchange
the item must return within 30 days
responsible for return, shipping costs, and loss. Any loss in value, you can apply that policy or
you can create a new one. Now with print-on-demand
products, a lot of they are printed to order odd times
it so they're customized. And you may not want to
accept returns or exchanges, which is my preference for
my print on-demand items. So I turn this off here. I've set exchanges and know it will have
a thing on there. Let's see if it'll pop
up, save and apply. Here it is. It does say the buyer can contact seller about any issues. So in case there was
a mix-up or they miss something in quality control
and the print is wrong, the, the quality of it
is not up to par, then they can contact you, but just exchanges for a wrong
sizes or things like that. That's why I'm putting no
returns or exchanges here. Okay. When you're happy
with everything, you just hit Save and Continue.
16. Publish Printify Products to Shopify Store: Okay, so lastly, let's hop
from our Etsy store over to our Shopify store
on printed phi. And here you can see the tea towel that
we moved over from our Etsy store and copied
over to this Shopify area. And I just wanted to show
you there's a couple of things in the Shopify part that are just a
little bit different. Basically, it's
the same process. The mockups are the same. Got your title and your
description. This is nice. It adds up in tags for you. You can add more tags. For your Shopify SEO. You can edit the price here. I'm going to hide in the store. And down here is something nice That's a
little bit different. You can actually add this to a collection that you've
already predefined in Shopify. Here. I created a collection called
artisan kitchen tea towels. So I'm just going to add there. And then you hit Publish. And now you can see that it is hidden. It's been published. So lets hop over to our Shopify store and take a look at where
it appears there. And here we are in Shopify. As you can see,
our tea towel came over and we can
just click in here. You can see the
mockups are here. You can edit this just like you would any other item
on your Shopify site. Come over here, hit active, pick a sales channel. And all you do is hit Save. And your item is active
and ready to go.
17. Bonus: Printify Premium - Is it worth it?: So in this little bonus lesson, I just want to chat
a little bit about printed phi premium and some
things you might want to take into consideration when deciding whether or not you
want to sign up for this. So before you sign up, you'll see this banner here. Get up to 20% discount
on all products with printf I premium and get it now, so we're just going
to click into that. And here's a page
on printed phi, which gives you some more detail about what the
subscription is all about. And one thing that's important to note is that
you get up to 20%, that's up to, it's not 20% and not all products are
available for the discount. The cost is if you
want to pay monthly, it's $29 a month. Or you can do the
yearly if you're a volume seller and you know that you're gonna be able
to take advantage of this. You can do the yearly, which is 24.99 a month. And if we scroll down, you'll see some discount
examples that they give and what kind of savings
you expect to get if you have
the subscription. So e.g. on this tote bag, the regular price is 821, the premium price is 632, and you get a savings of $1.89. So depending on the
products that you sell, you kinda have to look at
what your savings would be and how many things you're selling per month
to see if you could justify the 29 dollar
price per month. So let's say you're selling
this mug right here. For every mug that you sell, if you had the
printer five premium, you'd be saving $1.71
over the regular price. So if you're paying $29 a
month divided by $1.71, you'd need to sell
about 17 mugs a month in order for your sales to justify
the subscription price. So when I started, obviously
my sales didn't really justify the price of
printed by premium either. But I decided to
invest in it anyway. And that's exactly the
way I looked at it. I looked at it as an investment. And when I was looking at my
competitors pricing on Etsy, I realized that I would
need to be a print by premium subscriber in order
for me to be competitive. And that's the reason I decided to sign up for it right away. So let's scroll down here. And you can see what you're, they're kinda giving you
a little chart here what your yearly savings could possibly be depending on your
average purchase volume. So you can take a look at that. Another thing you can consider
is that you can buy it for a month and
then turn it off. So if you're going to want
to be buying some samples, you could consider that
because they do offer $129 free credit on
your next sample order. So you could try it out for
a month and see how it goes, and then you actually get $29
worth of product in return. So eventually that doesn't cost you anything
to give that a try. You might also consider signing up for print
a high premium on months that you know, you're going to experience, like maybe a seasonal spike. So if you know you're
really busy in the fourth-quarter from
October to December, then you could subscribe to print five premium for
those months as well. So that's really all
I wanted to chat about and make you aware of. On printed five premium, you can decide what kind of products that
you want to offer. You can click here to see the discounts that
are offered on certain products and decide for yourself if printed phi
premium is right for you.
18. Final Thoughts: Thank you for enrolling
in my class today. I hope you feel ready
and excited to begin your print on-demand
journey with printed phi. I can't wait to see
what you create. Feel free to comment below in the class discussion if you have any questions or comments about what I've covered here
today and you can follow me on Instagram at carried
dot Barnes dot art. If you follow the
class valuable, be sure to follow me
here and you'll be notified when I
launched my next class. I'll see you next
time. Bye for now.
 Kari Barnes, Abstract Artist / Surface Designer