Transcripts
1. Welcome Introduction: Hi there. I'm Care Barnes and I'm an artist
designer and teacher. Welcome to my newest class, An Artist Guide for starting an art sticker business with
print of Fi print on demand. Designing for art
stickers can be a fun and rewarding addition
to your art practice. And when you see how
easy it is to create a sticker business
around print on demand, I think you're going to love it. When I first started
learning about how to add art stickers to
my art business, I generally found there were
just two options available. The first option was
to print stickers in my studio on my own equipment. The second option was to outsource the sticker
printing and then be required to order and bulk and stock a
ton of inventory. And neither of these options
were going to work for me because I didn't have a lot
of time or money to invest. Fortunately, at
around the same time, I started learning
about print on demand. And it was then
that I knew I found my answer through the
magic of print on demand. You can just focus
on your art making without the hassles of
printing them yourself, stocking a bunch of inventory, or investing a lot of time in shipping and fulfilling
the orders yourself. However, using print on demand
for your sticker business does come with some special considerations around packaging, pricing, and design, which will be covering in this class. First, we'll lay a basic
foundation by looking at some of the pros and cons of using print on demand
for your stickers. And we'll discuss how to set some realistic goals for
your sticker business. Next we'll talk
about the importance of designing for
a specific niche. And how to go about finding
a niche that both speaks to you and is likely to be attractive to
your ideal customer. Then we'll dive into the ins
and outs of sticker design. We will look at the types of stickers that are
available on printifi. Learn the art requirements around designing your stickers. Design a cohesive
collection of stickers. And learn how to create some outstanding mock ups that will really get your
designs noticed. Lastly, we're going to touch on the sales and marketing
of your stickers. Including how to price
and pricing strategies, settings to consider
when publishing your designs and what
selling platforms are available from printer Fi. By the end of this class,
you'll know not only how to turn your art into
beautiful stickers, but you also understand how to price and package those stickers and let the magic of print on demand print and fulfill
your sticker orders. All I recommend that you have with you as you
watch this class is a notebook and
something to write with. Let's get started.
2. Printify vs Printing at Home: Why would you want
to choose a print on demand provider over printing and or shipping the stickers out of
your home or studio. Let's take a look at the pros
and cons of each option. If you're printing
your own sticker, one of the main
benefits is that it potentially results in the
lowest cost per sticker. However, it does have a lot
of cons that go with it. It requires a large investment, especially if
you're going to use a high quality printer and high quality
sticker materials. The quality can vary
widely depending on the equipment that you're using and the method of cutting. You're also going to have
a large time investment to print and cut your
finished stickers. Then the other option would be to outsource your printing. The pros in this is that
it often results in a very high quality
sticker and you also have access to high quality
materials like those removable vinyl stickers that won't leave a residue. However, with the outsourcing, you often have to order in
like a bulk minimum quantity, which results in a larger
investment inventory before you even really know which designs are going to be popular
with your customers. In addition, both
of these options will require you to package, purchase postage, and ship
the orders you receive. This will require an
additional investment in shipping materials, as well as your time to take the orders to
the post office. If we look at using a print on demand service to
print your stickers, there's a lot of pros here. You don't need to manually
fulfill your orders, which was huge for me. The stickers will go from, they'll ship directly from
the printer to the customer. You can choose to order
stickers in advance, say you wanted to do
an in person event. You can order the
stickers in advance and have them shipped directly
to you if you like. Or you can have them
printed on demand. As the orders are placed, your print on demand
provider can seamlessly integrate into popular
sales platforms like Shopify or Etsy. There are some cons
that go with it. You aren't able to inspect
each order before it ships. This can be hard to
relinquish control of that. You really have to have
trust in the print on demand provider that you
choose that they were going to be sending out quality products
to your customers. Another one is that often the branding for
your business is limited to your name on the return shipping
label on the package. This can vary based on the
service that you choose, but that's often a limitation. Lastly, you'll find that there's a higher base shipping price for that first single sticker, and we're going to be
talking about how to get around that or defray those costs a little
later in the class. Please join me in the next
lesson as we look into setting some realistic goals
for a new sticker business.
3. Set Realistic Goals: Now before we get too far along, I thought it might be helpful
to talk about setting some realistic goals
and expectations. And some strategies
that you might find helpful as you set about this new adventure
into Sticker Doom. While as we saw in
a previous lesson, using print on demand for your sticker fulfillment can
make a lot of things easier. However, finding
success in this or any business is often
never really easy. Like building a house,
taking time to lay good foundation for your
sticker business is essential, and this class will
help you with that. Some of the keys to success that we'll be addressing
in upcoming lessons include defining your niche and really understanding
your future buyer. Researching your competition and having a good pricing strategy. Creating beautiful mock ups
that really get your designs noticed and optimizing your
time with a good workflow. Consistency is king or queen. Success with a sticker business usually doesn't
happen overnight. You'll give your new business the best chance if you focus on the long game and putting in
consistent effort over time, because things can take a
little time to get rolling. I would like to suggest that you set some milestone
goals that you can celebrate to keep
you excited and motivated as you grow
your sticker business. Like a tiny plant that needs nurturing to grow and
reach its full potential, your new sticker business will
require regular effort and inputs from you in the
form of market research, creating new designs,
posting listings, and doing marketing outreach. In addition to sales, try setting and tracking
milestone goals, like hours log per week, or tracking the number
of new designs and listings you post per
week or per month. It may take some
time, but if you stay consistent and have a little
patience before you know it, your new sticker business
will be flourishing. Please join me in
the next lesson as we dive into designing
for a niche. And how to find a niche that
not only speaks to you, but is likely to be
trending as well.
4. Research Sticker Niches: As we touched upon in
a previous lesson, one of the keys to success
in selling stickers online is to identify a
target market or niche. In this lesson, I'll show you some easy ways to get
your creative deuces flowing and gain clarity when researching and selecting your
niche or target audience. What is a niche? Niche is
just a specialized segment of the market for a particular kind of
product or service. To really create
designs that resonate, you're going to
want to start with a more focused or
narrow audience. For example, say you want
to design for pet lovers. But instead of a designing
for all pet lovers, you might select a subset
called dog lovers. And even better yet, would be those interested in just a specific breed like
German Shepherd lovers. The more niche you
get, the easier it is to really identify
specific images, phrases, and colors that will really speak to
your selected group of potential customers. If you're having
trouble thinking of or selecting a niche
to get started with, I have some suggestions
for you to try. Let's take a look at red bubble. Red bubble is a print on demand marketplace
where you can get custom made items like T shirts and clothes and
home and living things. I don't personally post items
for sale on Red Bubble. I find their pricing model a
little bit too restrictive. Have limits on what you
can charge for things. I've also found that
the profit margins are generally lower than
other marketplaces. However, it can be a good
place to do a niche research. Here we are at
Redbubble.com Let's go up to the top here and click
into the stickers category. This is the stickers home page. You can see you could look
into different types of stickers if you know that you want to address
one of these items. Specifically, if
you scroll down, you'll also see some
trending themes like fan fiction and
critters of chaos, traveling, things like that. You'll also see some artists
collections that are popular or featured like
this Lisa Jane Murray. If you go all the
way to the bottom, you can also see that they
have highlighted red bubble, has highlighted
additional themes that you can drill down into. Let's scroll back up to the top. Click here into all stickers. And you can see there's a ton of designs in the grid here. But what I want to
draw your attention to are the bubble
topics across the top. You can look through
these topics of note that red bubble
has decided to feature. You can look in here
and see if there are any themes that
might resonate with you. These are obviously top
level themes like dog, as we talked about earlier. You're going to
want to Niche down a little bit further into that then as doing
some research on here. You can also click this drop
down here on the right. It defaults to most relevant, but you can also review what's trending or the newest
designs that have been posted or the best
selling of all time. Once you have a general idea of the niche you
want to explore, you can also try taking
a look at some of the leading sticker
shops in that niche. Here we are at the
C marketplace, probably the biggest
marketplace. Let's take a look at an example. I'm going to look up
book lovers stickers. Whatever niche you've decided
to look into further, just search your niche name
and stickers after it. I'm going to type in
book lovers stickers. As you further research the
niche that you've chosen, if you're looking on Etsy, one thing to make note of are things like the ones that
have the badges like Popular now or best sellers can give you an idea of what is
trending at the moment, what colors people are using. You can look at what kind of prices things are
being offered for. That's going to be
very important, especially as we get a little bit further
on in the class. This type of research can really give you some insights as to how much interest there
is or might be for niche, you might become aware of also some sub niches that you maybe
hadn't thought of before. And really help you drill down into very specific designs. It can certainly give
you some inspiration as to what types of
designs and colors, even phrases that you
could incorporate. Not to copy, but just to get inspiration for your
future designs. Once you've selected a niche, your homework is to answer
these three questions. Who are these people?
Where do you find them? And what stickers do they want to help you dive a little deeper into your niche
and answer these questions? It may help to create something
called a buyer persona. A buyer persona is a
fictional representation of a person who is most likely to buy your product or service. You can dive very deeply into
creating a buyer persona, but for starting our
sticker business, let's just keep
it to the basics. To create a buyer persona, I would suggest that you brainstorm things
about your niche, such as demographics,
including gender, age, location, income,
things like that. Think about what their
interests might be, What are their favorite brands? What channels do they prefer? Are they on Instagram or Tiktok? Do they prefer e mail? Social media is a big one. Are there any influencers that your customers
might follow? Are there any Facebook
groups that they are a part of that you could look into to learn more about
things that they talk about. What are the topics,
what are the sayings? Things like that. Also think
about what are their goals? What do they wish to achieve with your
product being stickers? This could include expressing creativity such as with
journals or scrapbooking. They could be needing branding Like with business packaging, people purchase stickers
because they want to belong to a group or
express their identity. Even just enjoying
some humor to brighten their day could be a
goal of your buyer. Different personas might include the book lover who
wants to celebrate their bookish side by purchasing stickers to decorate
their personal items. Or Kindle could be the scrapbooking mom who is capturing their
kids milestones. Or the business person
who enjoys using a physical planner and needs stickers to
beautify the process. As you dive into this deeper, you're going to find
that stickers do serve different purposes
for different groups. Putting yourself in your
customers shoes and really understanding
who they are and why they need or want to
buy stickers will make designing for
them so much easier. As you refine your niche, it is valuable to take into consideration some
of the many ways that art stickers are used
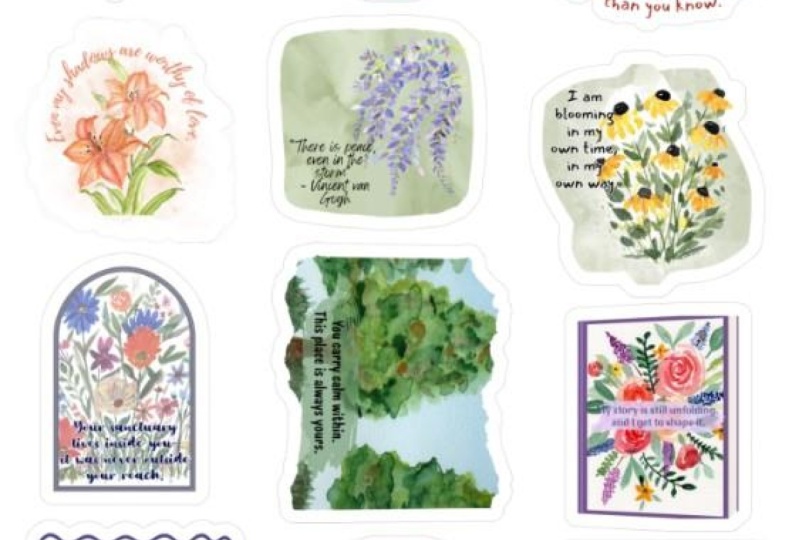
to enhance people's lives. I've created three
resources for you and place them in the resources
section of the class. The first one is a buyer
persona worksheet, where you can identify
the different themes, maybe that you're
going to be exploring. And then are themes or niches that you're
going to be exploring? A place for you to just track all your
notes and thoughts. Another is a list of popular
niches to help you started, get started if you're stuck. And the last one is
a list of some of the most popular uses
for art stickers. After taking some time to get some more clarity on who
you are designing for, please join me in the next
lesson as we take a look at what types of stickers are
available through printifi.
5. Select a Sticker Style: Now that you know who
you're designing for, it's time to select a canvas. In this lesson, we're going
to take a look at a few of my favorite stickers that are available through Printifi. If you don't already have one, you can sign up for a
free Printifi account. And I've included link to sign up in your
class resources. If you go up here to catalog, you'll find the stickers in the home and living category
under magnets and stickers. As you can see, they have
many styles to choose from. They've got bumper stickers and sticker sheets and die cut holographic stickers
and all kinds of fun things to explore. But for the purposes
of this class, we're going to concentrate on the first three
that are listed here. The first two are what
is called kiss cut. The last one is a
die cut sticker. Let's briefly talk about
the difference between a kiss cut and a
die cut sticker. A kiss cut sticker
is partially cut, meaning that the sticker shape
is cut through the vinyl, but but the backing
paper stays intact. What your customer
is going to receive is basically a square
piece of vinyl, but the sticker will peel
off in the sticker shape. A die cut sticker has the vinyl and the paper backing
cut right through, leaving the exact shape of the sticker without
any excess material. Now let's take a closer look at each of the individual
sticker types. The first listing is it's called just kiss cut stickers and it's from a company called
Spoke Custom Products. If you click on
the provider info, you can see that it comes
in four different sizes. And they're from two by two squared on up to
six by six square. If you click in to the
Start Designing tab, there's a little
information button up here that toggles back
and forth gives you a little bit more information on the design process
On this sticker, you are only allowed
one image per product. You need to use
transparent PNG files. Something to consider
on designing stickers in general is that the white space
doesn't print, meaning that there
is no white ink. Let's take a look at the
second kiss cut design, and this is called
kiss cut vinyl decals. The other Kiss cut stickers
were actually like a glossy paper and
these are a vinyl. Let's click in here. If you go under Provider Info, you can see that these are a
little bit larger stickers. There are three by
four, four by six, six by eight, and then a
large eight by ten sheet. What's interesting with these click into the
start designing is that you can actually layer multiple sticker design
files onto one sheet. Then as long as the
edges of the designs are more than 0.3 " away
from each other, they will cut out as
separate stickers. We're going to be
going into more detail on that in an upcoming lesson. Over here, you can download
a design template. This is especially useful
if you might be wanting to design your sticker
sheet in Photoshop. But I'm going to be
showing you a method where you'll design and arrange all of your
sticker elements right here in print of pi. Let's take a look at the last type of sticker
I'd like to show you. This is just called
a die cut sticker from printed simply, these are quite a bit more
expensive than the other two. They are a premium vinyl that is actually rated to last over five years in all
weather conditions. You can use them outside. They come in five
different sizes. They're also square from
two by two on up to six by six if you click here on. These can only
have one image per product and they also use
the transparent PNG files. Now here's a couple of the die cut stickers
that I actually created for my nieces. I do like how they turned out, the colors turned
out really great. They're a nice, really heavy
water resistant vinyl. The one thing I was a little concerned about, if you zoom in, you can see that the edges
are a little bit rough. That is something that
I might take into consideration if I was
thinking about selling them. But overall, I think they
printed really beautifully. My preferred sticker
type of the three is the kiss cut stickers from
stickers and posters. Please join me in
the next lesson as I share my workflow for creating a themed kiss
cut sticker sheet using Canva and Printifi.
6. Prepare Designs in Canva: One of the hurdles to overcome when selling
stickers to print on demand is overcoming
the higher cost to ship that first sticker. Now we're going to be talking
some pricing strategies in an upcoming lesson. But some of the ways to reduce the shipping cost per sticker are you can sell bundles
of individual stickers. You could sell multiples of
the same sticker design, and this is often to businesses. Or you could sell a collection of stickers on a single sheet. In this lesson, we're going to focus on that last
strategy and use Canva to design a
cohesive collection of stickers around a
book lovers theme. To start determine the largest
sticker you want to print. The kiss cut sticker sheets
that we're going to be using come in those
four sizes there. If the largest sheet is
the eight, ten size, I'm estimating that I want to do three stickers across a three, four inch sticker size should be the largest
that I would need. The reason for this
is that you can always make an image smaller, like for some of these
smaller sheet sizes. But if you try to
enlarge a smaller image, you're probably
going to end up with a poor quality pixelated image. If you already design in Photoshop or Illustrator
or even another program, you'll want to export your finished images as
transparent PNG files. If your individual
sticker designs are already prepared and you
feel comfortable with that, feel free to jump ahead
to the next lesson. Let's hop on over to Canva to design our individual stickers. Here we are in Canva. Canva does have a
free version that you can use to design with, however, in order to be able to export your sticker files as
a transparent PNG, you will need to be on
a paid plan to start. You're going to go up in
the right hand corner here and click Create a Design. Then we're going to
do a custom size. Then if this is set to pixels, you're going to want to
change it to inches. We're going to do a
four by four sticker. Four by four and then
click Create New Design. Then depending on if
you want to use some of the elements that are
in Canva like I did, you can go to the Elements tab here and you can do a search
on whatever your theme is. For example, we're going
to do book lovers. I want graphics, so I'm
going to click on C. All as you can see, Canva has a bunch of really
fun graphics that you can either use just right out of the box here the
way they have them, or you can use them
as inspiration to design something
similar but different. For example, say I like this mug here that
says, I love books. I just clicked on it. Then you're going to want to enlarge it as
much as you can. We don't want the edges touching them to make
the list a little bit smaller like that. Okay, What we're doing here is we're going to create a file and you're going to
have one sticker per page, and you're going to add as
many stickers as you want. I'm going to go up here and
I'm going to add a page. I'm going to do that again. Let's just click this
little bookworm guy. Click and drag and
make him as big as you can without touching the side. The edges, obviously you don't
want to cut off and so on. And you're going to
want to repeat this for all the designs that
you might want to include in your collection. Here's an example of my
finished book lovers file. I believe I picked out
12 different stickers. These are all just from canvas. If you want to use images
that you've created outside of Canva that aren't transparent and you want to save it as
a transparent background, you can go to this uploads
tab over here and you can select files off of your computer to
include in your design. Also if you use
the ones in Canva, you want to keep in mind
that some of these, like this book addict one, have elements where you
can customize the colors. They're not all like
that. This bookworm, it does not give
you that option. But what I did was I took the ones that were
able to be customized. I changed the colors so that my whole collection
was more cohesive. And you'll see that as we view the whole collection
in an upcoming lesson. Next you're going to
want to make sure that you name each one of the pages. Like I put bookworm
and books here. And book addict, because we are going to
export this document. And what Campbell will
do for us is create an individual transparent
PNG sticker file for each one of our pages. It's really slick. What we'll do here is we're going to click the Share button and
then click Download. Make sure it says P and G here. I keep the size as at one.
Just don't change that. Make sure you click
Transparent Background Again, you'll need this little crown. Means that it's a paid feature, you'll need a canvas
subscription. Then you're going to want
all the pages selected. Or if you're redoing this, maybe you change something. Then you would click here and you would just the
pages that you would want and then click Done and download here. It'll give you a little
notice that it is done. Then if we check
our downloads file, you'll see that it creates
a book lovers picks, which is the name that I
named it up here, do zip. The reason it says
two here is because I actually have a couple
other files name. The same thing for when
I actually did this. If you open the
zip file on a Mac, I just double click
here, it opens a folder. Then if I click into the folder, you're going to see
that it has created all of the PNG's which
are also transparent. If I take a look, you can see
that they are transparent. Now, before we move on and take those
stickers that we just created to create our finished themed sticker
sheet in print of Fi. Let's talk a little bit about some design considerations when designing for any of these print on demand sticker products. You're going to want to avoid any very small details that
may not print clearly. You're also going to
want to pay attention to any negative space
in your designs. Because if a void
area is large enough, you may get cut out
that you didn't intend. Please join me in
the next lesson as I show you an
example of this, as well as one way to fix it by adding a stroke to
your design in photo.
7. Add Outline in Photopea: Sometimes you'll
find a need to add a stroke or an outline
to your design. You'll also find a need for this when creating some
of your mock ups. So I'm going to show you
how to do this quickly and easily using a free online
software called Photop. Photo P is a free online
software that actually performs a lot of the
functions that Photoshop does. Now, I regularly use
Photoshop myself, but I wanted to give
this free program a try. I found it super quick
and easy to use, and I think you will too. First, let me give
you an example of what I'm talking about by getting unexpected cutouts
due to negative space. Here is my transparent
P and G file. Just resize that.
As you can see, this is all what I'm talking
about, negative space. You're going to see
there's a lot of large fields within my
design of negative space. When I hop over into printifi, I've loaded it into a sticker. I'm going to do a
preview and show you what this file looks like. This is the preview. As you can see, all of these little spaces here
are going to get cut out. I would much rather have
that solid that looks weird. One way to fix this is to create a stroke or an outline
around your image. It's super easy to do in photo. You're just going
to go to pop com. The program is
already ready to go. You don't need to
create an account. You're going to simply drag
your file onto the workspace. You're going to want
to enlarge it a little bit because what it's going
to do is add an outline, and we're really close
to the edge here. Just go to image canvas size. You can add like a four
inch to a half an inch. I'll just type in 4.5 and
4.5 and then hit, okay. It just expands it and gives
us a little bit more room. Then over here on the right, you'll see the layers panel. You're going to just double
click on this layer. And that brings up
the layer style menu. What we want is a stroke, so we're going to
click here on Stroke. Then you can just use this slider as you can see
it changing in the preview, however wide you want it. Now keep in mind that
the program is going to, the printifhi program
is going to add an eighth inch white border on top of the border
that you're creating. You just want to
keep that in mind. I'm going to show
you let's say we do we want to make sure
that this is set to white. This color here or whatever color you want your
sticker border to be. You could make it
a different color if you wanted, but I
want it to be white. I'm going to set
it at 15 pixels. And then click okay. Then you just come
up here and you go File Export as and
export as your PNG. And then click Save. Here's the new file with
a 15 pixel stroke on it. Let's click Preview
and see how that looks now as you can see, it looks much better. But if you look
really closely here, there's a couple little
slashes here that didn't quite get
filled in on the O's. This is size dependent, so if I enlarge this and then preview it again, you can see that it's
much more apparent. And then also there's
another one over here. If this is happening,
you can also take a brush and simply paint
in the negative space. That's still giving you trouble. Let's jump over to
Photo and see what that looks like here. In you'd simply go over to this left panel
and select the brush. Make sure you're in
the swatches file. You can just click on this white and then just go ahead and
paint in your problem areas. Like I'll be filling in the
O's here, just like that. And maybe even over
here a little bit. All right, then we
would export this. And let's take a look at
what that looks like. Here's that same file
where I filled in the o's. You can see it looks pretty
good on white as expected. But if you were looking to
do a transparent sticker, not so much as you can see,
there's all these gaps. If you wanted to do a
transparent sticker, you'd have to paint the
entire background in, that's totally doable as well. It's a tool that I
wanted to show you, that you can play around
with to try and help solve this problem of the
negative space issue. When you do run across it, please join me in the
next lesson as we take the individual
stickers we created in Canva and create
our finished them sticker sheet in print.
8. Design Your Sticker Sheet: Once our individual
stickers have been created, it's time to arrange them on our sticker sheets in printifhi. You're going to want to select the kiss cut vinyl decals here
from stickers and posters. And then click the green
Start Designing button. You can close this
information tab here by clicking on the Eye. Come over here to the right where it says Select Variants. And click this will show you all of the sizes
that are available. If you're not sure about a size, I would suggest
selecting it anyway. Now as design wise, it's easier to add them
now rather than after you have your whole
sticker sheet finished. For me, the three by four
size is a little bit small unless you just have
a few stickers to include. I'm only going to design for
the three largest sizes. But to do that, you can't unselect this unless there's
at least one checked. I'm going to check
the four by six, then I'm going to uncheck
the three by four. You're going to do four
by six, six by eight, and eight by ten. Then you can click the X to
close the variance window. I'm going to click back in here on this little design tool, the layer tool to start with, we're going to click
here on the four by six, because we're going
to start designing with the four by six size. The next thing we
need to do is to upload the stickers
that we created in Canva or elsewhere into print. I like to click and the
files onto my canvas. You can also go over here and click the Upload button
and do it that way. As you bring them in,
you can just click and just generally size them. We're going to do that for
each file that you created. As you're resizing, I
should mention you want to keep an eye on here
is the bookworm, the resolution here and you don't want it to
go below 200 DPI. You can see as I slide
them bigger or smaller, the DPI is going to change. Of course, just
keep an eye on that when working with
your files here. Okay, say you were happy
with this arrangement. You're going to click
the preview button now, this front mock up view, we'll show you where all the
cut lines are going to be. You can see here that the
castle and the book of spells is globed together
as well as the book addict. This one, the bookworm and the book addict is a little
bit too close together. Okay, We're going to
go back into edit. You would just move them apart. It's generally about four inch. I might even take this cat out, you just hit the garbage can here. You can also see the size
of your sticker because this canvas that we're working
on is only four by 6 ", It's easy to be deceptive
how big this actually is. As you slide these up and down, I can see that this bookworm
one is just under 2 ", around 2 " tall and high. We can judge how big your finished
stickers are going to be. I'm going to just check and
see again how that looks. As you can see now, you can clearly see where
the lines are for each sticker and none of
them are running together. This also is going to show you if you're going to have those problems with the cutouts. This is a great place to check that you'll be able to see if you're going to need
to add a stroke or do any extra editing at this time. When you have your
smallest sheet designed, as you can see here where
the grade out area is, we're working on
the four by six. We're going to click on the
next size up and print a Fi. As you can see, tries to scale
it up best it knows how, but it's not always perfect. You're going to check
the preview again. As you can see here, the Book of Spells is now running into the
castle a little bit. You would want to change
that and edit that. What's really nice is
that you can create specific designs for
each of the sizes. Here in blue you
can see it says, make a specific design for the six by eight size because
those are running together, one size is not
going to fit all. Here, we're going to click that, make a specific design. You can see I'll put a little
blue button here that's indicating that we're creating
a unique design for this. And then I'm just going
to drag this down. I'll smidge drag this down and
that should fix the issue. There we go. When you have your sheets all designed with the cut lines
where you want them, you're going to click
on Save Product. If you scroll down, you'll
see the listing details. This is where you would add
an SEO friendly title here. And then you would
also, of course, want to edit the
description as well, leaving some of this
technical data in there, but also adding
something a little more friendly and enticing
for your customers. For now, we're going
to be saving this as a draft until we can talk
about a few other items. Congratulations, your set of sticker sheets has been created. Please join me in the next
lesson as we go beyond the basic printifhi
mock ups and create some mock ups that will really get your sticker
designs noticed.
9. Create Standout Mockups: Now that we've got our
sticker sheets created, let's create some really outstanding mock ups
to go with them. Here we are, back in print. This is a picture of my actual finished book
lover sheet that I made. I'm sure that you have noticed possibly that printifi does offer some generic mock
ups if you notice they were lurking over here
in the top right. I'll just scroll through these. May want to use some of
these in your listings depending on what niche
you're designing for. However, I don't feel
that any of them really showcase the fact that this is an entire collection of
stickers on one sheet. To build these sticker
sheet mock ups, we're going to use Canva, as well as some elements from a mock up that I
purchased on at C. If you search sticker
mock ups on at C, type that in here, you will find a lot of
options to choose from. I chose this mock
up from Massey Max. I'll include a link
to this mock up and a few others that
we're going to be talking about in the
resources section. I like this mock up because I thought it just
looked really clean. And she says that
you can use it with either Photoshop or Canva. Here we are back in Canva, and I wanted to show
you a preview of the finished sticker sheet mock up that we're going
to be creating. Okay, you're going to want to start with a new file that is 2,700 pixels wide by
2025 pixels tall. At the time of this recording. It is the perfect size for a mock up according to
Ets's recommendations. Again, to do that, you're
just going to choose file, Create new design, custom size. And then you can put in those width and
height requirements. But since I already
have this file created, I'm just going to click in
the upper right hand corner here to add a page. I'd just like to talk about
the background for a moment. I have chosen this
darker background because you want to
make sure that you have enough contrast in your mock up to get noticed when
it's a little tiny square. It's the difference value
here that draws the eye. You'll see more of what I'm talking about as we build this. Next we're going to want to
jump back to printifi and take a screenshot
of our mock up. Let's go back to printifi. I am building this mock up
for the six by eight size. You're going to
want to make sure that that is selected here.
You see how it's gray. If it was different, you
can just change which one. You can see they have
different aspect ratios. Okay? But we're going to go
back to the six by eight. What you're going to
need to do is take a screenshot on my Mac. I go command shift four. You want to get as close as you can but leave a small border. What you're just really
looking to capture is the correct aspect ratio
of your sticker sheet. If I click and drag, that's pretty good, and release that will put
that file on my desktop. Then we're going to place that
screenshot on our canvas. I just simply drag
mine to upload it. Then you'll just
size it, staying relative to, for example. This is the second
one I'm creating. I want to look at this one. This is my four by six size. If they're comparing the
two next to each other, I want this one to
look slightly bigger. It's going to look
different because the aspect ratios are
different, which is nice. I'm going to drag that
down a little bit. Then you can add a drop shadow. To do that, you're going
to click on Edit Photo. Come down here to
Special Effects. Click Shadows. Click on Drop Shadow. Here's where you can adjust
how much you like it. So if you want a little less, it's a little harder to see
on this dark background. Enough enough of a drop shadow have it pop a little
bit off the page. That looks good. And then
we're going to go back, click back into your canvas. Okay, now we're going to
want to add the hand, and these are some
of the assets that I got from the massy mockup file. As you can see, we have a transparent hand
that looks like that. And then we have the thumb
that goes on the top. Okay. We're going to click
and drag the hand. Just going to refer to
how I did it earlier. Going to make that much bigger. Okay. And if you want, you can add a drop shadow
to the hand as well. I find that it looks nice to have the hand and the sticker
sheet kind of match. Then you're going
to want to pick a featured sticker and you're going to add
a stroke to it. In photo P, like we showed you, like I showed you in
a previous lesson, this over, I have selected
this little bookworm. I made sure that it had a stroke around it
because that is what printifhi is going to add when it prints the stickers. You have to make
sure that your mock up is reflective
of that as well. Then I know that this
one is around 2 ". What I did was
measured my thumb, I went, okay, well, my thumb is about 2 " long. If this is a two inch sticker
that looks about right, you just need to get it close, then I'm going to place
it over the top of that thumb like so you can put it at a
little angle if you want. Then we just add the
thumb over the top to complete the illusion of
it being held by the hand. This can be a little bit tricky to get its
size just right, but if you just
take a little time with it, it's not too bad. Fuser arrow keys that has like a little bit more
finer adjustments. Then to add a title
like I have appear, I'm just going to
click on my Canvas and then click for text. Text box will appear. And I'm just going to
put sheet size four. This is 6 " by 8. ". Then if I click here, I can add a text color. Oops, guys, I got to have
to highlight it first. And then click the text color. And then I can place it with this little arrows. There we go. Now the nice thing about this is that once you have one
of these sizes finished, all you really need to
do is duplicate page. I'm going to do that now.
Here's my duplicated page. All you need to do is
take a new screenshot in print of Fi for the eight by ten size
and put it in here. Add the drop shadow. But when you come over
to this part of it, when you click this thumb is on top of the sticker, right? If you right click,
you'll get layer. And you can just send the thumb backward one layer
and you'll see you can access the sticker and say if I was editing
the eight by ten, this would be another inch
big because they went. 1 ", two inch 3 ". This would be, I
would estimate it. Do a little better
job than I'm doing here. Make it bigger. Then right click
on the bookworm, hit the layer, send that backward and it's
behind the thumb again. And then just change
this two, eight by ten. Once you have one created
the rest of them, don't take too much time. As long as you do all
of your screenshots here in print, it
should go pretty quick. Just a couple other tips. I would suggest that
if you're going to do a listing with several of these different size sheets, you're going to want to keep
the hand size consistent. And if you do it by the
method of just copying, that's just going to
happen organically. I would suggest you
do your best to get the approximate size of
your sticker correct. It doesn't have to be perfect, but definitely would be nice. Again, when you just
need to pick up one feature sticker to create that extra stroke on for
your featured sticker. You're going to have one file that you send to printifi and then another file
that you're adding that stroke to so that you
can create your mock up. Lastly, I just want to
mention again about the value contrast
on your mock up. If I scrunch this down, you see the smaller you get, the value contrast between this really light sheet
sticker sheet and this dark background is
really going to be a lot more eye catching than if we would use a light
color background. I also wanted to share
a couple other mock ups I really liked that you
may want to consider using for your stickers if you just wanted to feature
a single sticker. I thought this background
was really nice. I got this off of
Creative Fabrica, that's a great resource
for sticker designs, inspiration and
mock ups like this. Again, I borrowed the hand
that we use from Massey, but I used this background from another set of mock ups
and made it my own. I thought that was really nice. Then I also found this piled up sticker bundle mock up that
I thought was really cool. It does require
Photoshop to use it, but it's pretty cool
because you just add the individual stickers to
different layers in Photoshop. As you add the layers or
as you add the stickers, it builds the background
automatically for you. And then I just exported it from Photoshop and put it in here
and added the word bundle. I believe he has a five bundle and a ten bundle
mock up as well. And again, links to these will be in your
resources section. Now that you've got your
beautiful mock ups created, please join me in the next
lesson as we talk about pricing strategies and shipping profiles
for your stickers.
10. Pricing Strategies & Shipping Profiles: You almost have all the pieces necessary to complete
your sticker listing, but how much should you charge? How can you be competitive
with those who ship from home? In this lesson,
we're going to dive into how to price
your sticker sheets. I touched on this in a
previous lesson very briefly, but one of the hurdles to overcome when selling
stickers with print on demand is the higher cost
to ship that first sticker. To find the shipping
costs in print, you're simply going to
click into the item that you're selling and then
click on Provider Info. If you go up here to
the shipping tab, you'll be able to see all of the shipping costs from
the United States, Canada, and here's the
rest of the world. Just taking a look now
at the United States, you can see that
that first item is $4.69 whereas each
additional item only incurs a nine cent charge. This 4609 is what we
really have to overcome. If you do a little
research on Ets, you'll find that a nice
removable vinyl sticker might go for around 3909. I think it stands to reason that your customers
certainly aren't going to want to pay more for shipping than they
do for the sticker. But if you create a
sticker sheet like we have with ten to 12,
three inch stickers, the retail value
there is much higher, and then the cost to ship on a per sticker basis
is much lower. Let's take my book lovers sheet. As an example, I was able to build a sheet that
included 11 stickers, most of which were in the two and a two to
three inch range. Now our cost from printifi for
this eight by ten sheet is $7.09 or it's just $5.46
if you have print premium. Print premium is an
optional subscription that you can get from printf. When you have a
larger sales volume, it makes more sense,
becomes more attractive. Let's say that you were going to charge $12 for this sheet, plus 4609 for shipping. And the total cost then to
your customer is 16 69. Now, your average cost
per sticker there, then, if you divide that
by the 11 stickers, is $1.51 which is a lot less than the
customer would normally be paying if they are buying an individual
sticker, for example. Now if you are selling on Etsy, you're going to have
Es sellers fees at the time of this recording. The sellers fees would
be 6.5% transaction fee, 3% payment processing fee, and a 25% item fee. Your total fees there would be $1.83 Your total profit
would be the 16. 69 less your Es fees, less the cost from
print of Fi will use the seven oh nine
to be conservative. Unless the shipping from your
provider, which is 4609, that would leave
you with a profit for selling this one sheet of $3.08 Which isn't
really terrible seeing as once it's created
and the listing is up, you don't really have
to do a whole lot if you're using a sports, everything just flows through and goes right to the customer. That would be a 25%
margin on $112 sale. But let's take a look
at another example. Say you were going
to offer the sheet $414.99 The cost then to
the customer is 1968, Your average cost per
sticker is still only $1.79 versus an individual
sticker price of 3909. Your at C sellers fees would be $2.11 Your profit margin goes to $5.79 which is 39%
on that 14 99 sale. Which is much better then
as you really get rolling. Like I mentioned before, if
you have a Pri Fi premium, your cost for that sticker
sheet goes down to 5406. Then you're looking
at $107.42 cent profit or a 49% profit margin on a 14 99 sale,
which is really good. An additional
strategy to consider here is that in your listings, you could offer to your customers to buy
multiple sheets and save. And you could say
something like, the additional sheets
purchased will incur no additional cost for shipping because if
you'll remember. Cost to ship an additional
sheet to the same customer is only $0.09 With these profit margins that
I've showed you here, you could easily absorb
that nine cent cost and adjust your shipping profile so that when the customer
purchases additional sheets, they will not incur
an additional charge. And then shipping cost
per sticker really dives. Lastly, we are speaking of
the Etsy sellers fees here. One additional benefit to selling in sticker sheets as opposed to
individual stickers is that you'll be saving on
the E listing fees right now. Et listing fee is
$0.20 per listing. If this sticker sheet had been done as an
individual stickers, you would have 11 listings at $0.20 which would
cost you $2.20 whereas it would
just be $0.20 if you create the same type
of listing as a sheet. Before we move on to
publishing our listings, I'd like to touch on
shipping profiles. When you go to
publish a listing, printifi is going to ask you to select a shipping profile. Here's our product and if we scroll through the
listing details here, you'll get to the
shipping section here, it says assign a shipping
profile by default, it's going to say automatically assign a new shipping profile. If this is your first
sticker product, you probably should select
this as it's going to fill in a lot of the basic
info that's required, like the shipping zip
code, for example, that you might not
know because it's shipping from a print
on demand provider. However, after your initial
listing is published, you're going to want to select that sticker profile
that's created the first time by clicking
this drop down button. And I don't have
one created here, but you would see your sticker profile and you want to want to select that one on all
subsequent publishings. This way, all the same types of stickers are going to
have the same profile. If you need to
update what you're charging for your
shipping down the line, you're only going to need
to do it in this one place. So let's take a look
at how you would edit this profile in Ets. Here we are in Ts and
you're going to want to go to settings and
shipping settings. Okay. And this is
my test account. So I have these three shipping
profiles already created. And you're going to
go to the one that's created and you're
going to go to Edit. And here is where you're going
to see all those details. Like here's the origin zip
code I was talking about, that you might not
otherwise know. These are all pre filled in. Here is where you would
change the price. Here, for example, if
you like the idea of offering additional
sticker sheets at no additional charge, you would see like a
nine cent charge here. And all you'd have
to do is edit this, click in here and
edit it to zero. Then your customer would
not be charged for additional sticker sheets that were placed on that same order. Please join me in the
next lesson as we finalize our listing and
get ready to publish.
11. Publish Your Listings: Now that you have all the pieces completed for your listing, including your
sticker sheet design, some beautiful mock ups, a pricing strategy for your sticker, and
shipping profiles. It's time to publish.
But let's take one more look at that listing before we hit that
Publish button. Let's just take one last look at our list before
we hit Publish. At the top here, you
can choose to include some of these mock ups
and you can click here. Here is where you
would again create an SEO friendly title and edit the description to be a little more customer friendly. Here is where you would assign your shipping profile and
this is your first sticker. Leave it at automatically
assign is what I recommend. Let me come to variants. This is where you
will edit your price. You would simply click
the variant that you want to edit the price for
and then click Edit Price. Then here you can type in the price that you want
and then click Apply. Printf will offer up a
suggested retail price, but you by no means
need to stick with that here in the
publishing settings area, if you're not sure that
you want that product to go live right away, maybe you need to add
in some mock ups. For example, you can click Hide in Store and then
it will publish it to your store without
making it live here. Variant visibility, you can show all variance as
available for purchase, show in stock variance as available and out of
stock as sold out, or only show in stock variance, and hide any out
of stock variance. I usually choose this. I find that this section really
applies to like apparel, things like that that
go in and out of stock. I don't see a need to do that. I think this one works
really well for me. Then sync product details. These are automatically checked, but if you don't
want to use any of the mock ups and you're only using your own
custom mock ups, you can uncheck
this and then they won't be sent over
when you publish. When you're ready and everything looks good and to
your satisfaction, simply click the published
button down here to push your listing to your
chosen sales platform. Please join me in the next
lesson as we take a look at the different selling platforms that interface with printer Fi.
12. Selling Platforms: Once you have your
sticker sheets designed, you have several options available for selling
them through Printifi. First of all, it
is possible to use Printifi without
connecting a store. But it will require
you to manually submit any orders
that you would take. Another option is
to connect a store, which will end up
automating much of the selling processes,
including orders importing. That is ultimately going to save you a lot of time and help you focus on maybe creating more art and scaling
your business. Printf integrates with many of the popular
selling platforms, and I've listed
them here for you. There are quite a
few to choose from. If you'd like to dive deeper
into setting up an interface through either the Ets or
the Shopify platforms. You can check out
my first class, which is the Artists Guide
to print Ify print on demand with your Etsy
or Shopify store. In that I go into more detail on how to
get those connected. Another option has
recently become available that may
appeal to beginners, and that is the
Printf pop up store. The pop up store is an all in one solution from printifi
that allows you to easily create your own
sharable online store with a unique URL under
the print Fit domain. Let's take a look at an
example of their demo store. Here's the example of
Printf's pop up store. It is a really
nice, clean design. It allows you to have the name
of your store and a logo. Up here in the left hand corner, you can see the URL would
be something custom. The name of your
store dot print off. Do me then you can just add
in all your products here. Another nice thing about this option is that after
the order is placed, print Fi takes care of everything including
the customer service, which is a really amazing, this could be a really easy
way to get you started. Whether you want to enter
your orders manually, get started with a pop
up shop or even create a fully integrated online
shopping experience. You're sure to find
an option that gets your beautiful stickers up for sale and out into the world.
13. Wrap Up & Class Project: Thank you for enrolling
in my class today. I hope you feel
inspired to start a sticker business of
your own using print on demand to simplify your
processes and make it super easy to grow
and scale your business. To complete the class project, simply create a sticker
sheet in print of Fi and upload one of your mock ups to the project and
resources tab below. I can't wait to see
what you create. Feel free to comment
below if you have any questions or comments on what we've
covered here today. And you can always follow me on Instagram at Care dot Barnes. If you found the class valuable, simply follow me
here and you'll be notified when I
launch my next class. Until next time, bye for now.
 Kari Barnes, Abstract Artist / Surface Designer