Transcripts
1. Introduction and Supplies You Will Need: I Hi, friends. How are you? I hope you're having a
really great day today. I'd like to introduce you to this project that we will
be working on today. This is a project that was
inspired by Gustav Klimt, and he was an Austrian artist
who liked to use patterns, and he also liked to
use the color gold. This is a project that was inspired by his
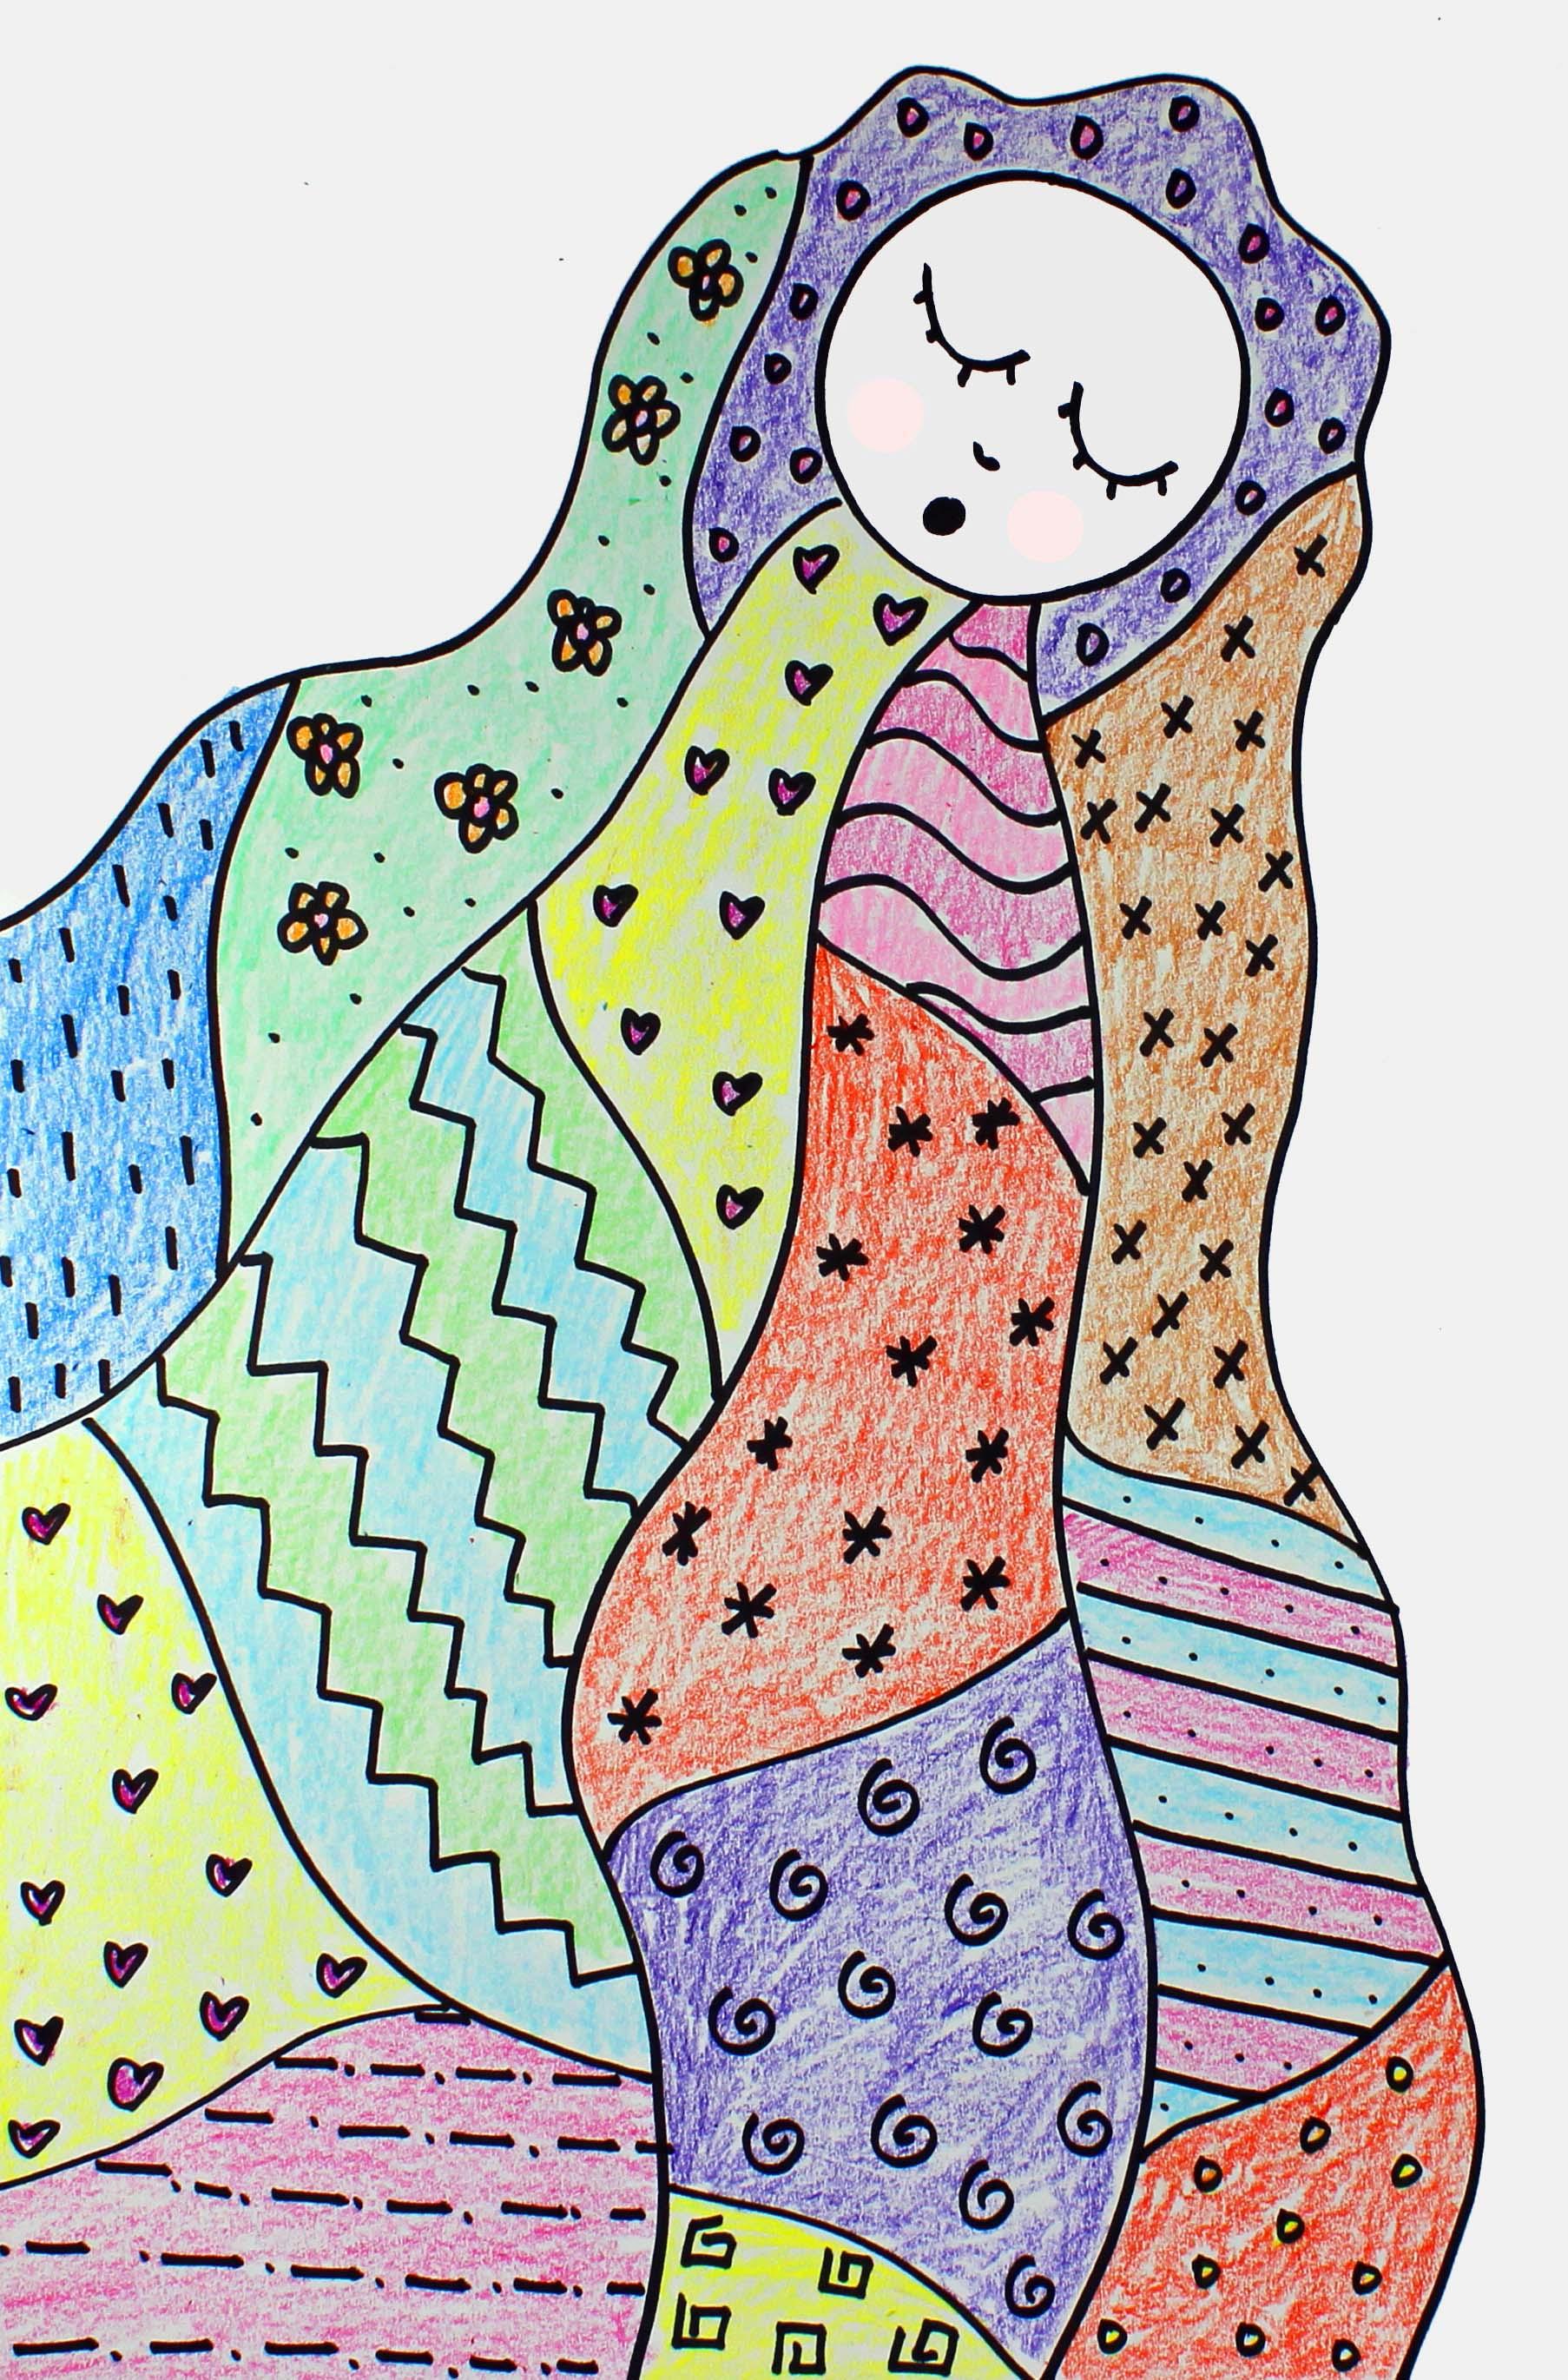
work called Baby. So we have a little baby here, and it's a sleeping baby, and he or she is cuddled up in this beautiful
patterned blanket. So I hope that you have
fun with this lesson. Let's get started. You're probably
wondering what supplies and materials you will
need for this project. So let's talk about that. The first thing
that you'll need is a piece of white paper. You will need a pencil
and a permanent marker. You will need some color pencils
or some crayons or both. So go ahead and gather
your supplies and materials and I'll see you
back here in just a minute.
2. Step 1: Draw a Baby in a Quilt: In this step, we
are going to draw our Gustav Klimt
inspired baby artwork. So what you're going
to want to do first is take the cap off of your marker, put it on the back of your
marker so it doesn't get lost. And we're going to go up close to the top of
the piece of paper, but we're not going to
touch the top, okay? So you're going to put your
hand at the top and go maybe about four fingers down, and that's where
you're going to start. We're going to start
by making a circle. Now, when I say a circle, I don't mean a tiny
circle like this big. I mean a circle about
this big, okay? So about as big as your fist. My fist is a little
bit bigger than yours, but about as big as your fist, that's about how big
your circle needs to be, because if it's really a
small circle like this big, then you're not going to be
able to see baby's face. We are making baby's face, right now, we're
going to draw it. Okay, so watch what I do first. I'm going to go
slowly and carefully, so I do my best work, and
I'm going to make a circle. I had a lot of experience
making circles, so I'm pretty good at it. But if your circle doesn't look exactly like
mine, that's okay. You just need to practice more at home, practice at school. The more you practice your
circle making skills, the better you will get at it. Okay. The next thing
that we're going to do is around the top of the circle, we're going to make
some ruffles. Alright? Let me show you what I
mean. Very soft ruffles. So like kind of a
squiggly line like this. Alright? So I stopped
here about on the side, and I started on the side. So that's the ruffle that's
surrounding the baby's face. Now what we're going to do is we're going to start
at this ruffle, and we're going to
make some gentle, flowing fabric coming
down like this. This is going to be part
of the blanket down here. Okay? We're going to do the
same thing on this side, gentle flowing fabric coming
down slowly and carefully. So this is the fabric blanket, and this is the baby's face. Alright, so the baby's
going to be sleeping. So remember, we're going to put the eyes right here
in the middle, and we're going
to make them like this because he's
going to be sleeping. And if you want to put
some little eyelashes, that might be kind of cute. And babies have small
noses, don't they? So I'm going to make
a little small nose and a tiny little mouth. Oh, look at how cute my baby is. I bet your baby's cute, too. Alright, now that we have our baby and the outline
for our blanket, what we're going to do is
we are going to divide our blanket into a few
different sections. So watch what I do. I'm going to start here
underneath the baby's chin, and I'm going to just
make flowing lines. So just barely flowing
like this. All right? We don't want to make zig
zags or anything like that, because this artwork is more
flowing than sharp lines. So we want to make sure that
it looks like it's flowing. So I have two lines coming down. I think I'm going to make one
more like this. All right. Now that I have these lines, what I'm going to do is I'm
going to start dividing these into sections for my
patchwork blanket. Alright? So what do I mean by that? That means I'm just going
to divide each one of these spaces maybe
two or three times. So I think I'll divide
this one right here. With a soft curved
line, and like that. So I have three different
spaces on this side. Now I'm going to do the
same thing over here. So one, two, this one's
a little bit longer, so maybe I'll make
another one right here. So I have one, two,
three sections plus this one at the top that
shares with the other side. Now, for these two sections, I'm going to do the same thing. Just make very soft
flowing lines. And these are going to be for the patchwork quilt or blanket. Okay? Do you see how
I'm dividing these? I'm going slowly and carefully
so I can do my best work. And I feel like down here, maybe I'll go like this to divide that a little bit more because that space
was really big. And right here, maybe
I'll do the same thing. So this is going off
of the piece of paper. Alright, so that's the basic
outline of our baby drawing. When we come back, we will add some patterns to
our baby drawing. So I'll see you back
here in just a minute.
3. Step 2: Draw Patterns on the Quilt: In this step, what we're going to do is we
are going to add some patterns to
our baby drawing. Each of these
little spaces right here will have a
different pattern. I have put together some
patterns for you to look at just in case you'd
like to get some ideas. This example sheet will go
up at the end of this step, so you can take a
look at this and see if you want to use
any of these ideas. So you are going to decide what kind of patterns
you'd like to put in each section
of our baby blanket. So, for example, if you want
to put some hearts here, we're just going to make
some little hearts. We're not going to add hearts, plus stars, plus
triangles, plus dots. We're just going to
add hearts, okay? Swoops, I need one more
right there. All right. So I have my heart. I'm going to look at my pattern sheet. I think for this
section right here, I'm going to put
some waving lines. So I'm going to
fill up this space with waving lines like this. I think that'll
look really nice. And then I'm done
with that section. Now I'm going to look at my
pattern sheet to get ideas. And remember, if you have
your own ideas on patterns, go ahead and use your ideas
because this is your artwork. Alright, so I think for
this section right here, I'm going to make
some little stars. This is how I like to
make stars sometimes. Going to just space
them out a little bit. And I'm just going to
fill up that whole space with those little
stars just like that. Okay. I'll take another
look at my pattern sheet, and I think I'm going to maybe make some
little Xs right here. So what I'm going to do
is speed up this video. You can watch me, and it'll
just last for a minute or so. And then I'm going to put this pattern example
sheet up on the video, and then you can get some ideas. I'll see you back here
in just a minute. Alrighty friends, welcome back. As you can see, I applied my different patterns
to my different spaces. I just wanted you to be aware
that if you need to use your pattern in more
than one space, that's perfectly fine. For example, I used hearts here, and I use Hearts
again over here, so you can do that
if you'd like. Now it's your turn to
apply your patterns. I'm going to put this sheet
of paper onto the video. I
4. Step 3: Add Color to the Design: And Alrighty friends,
in this video, what we're going to do
is we are going to apply some color to our baby blanket. And if you'd like to apply
color to the background, you can do that, as
well. It's up to you. So I think I'm going
to use my crayons, and I'm going to make sure that when I'm finished
using my crayons, I put them back into the
crayon box so they are nice and safe for the next
time that I use them. The first thing that I'm
going to suggest that you do is get your pink out. And what we're going to do
first is we're going to add a light pink to
our baby's cheeks. So go ahead and do that. Grab your light pink
and ever so lightly. Not really hard. Really lightly add some pink crayon
to your baby's cheeks. That's what Gustav
Klimt did, too. Alright? And he kept the baby's face pretty
pale, pretty white. Okay. After you've done that, you're going to go ahead
and just start coloring. Now, when you have
something like this, a pattern like this
with these flowers, I would suggest that you use a different color for your flowers than you
do for your background. That way, your flowers
will really stand out. So what I'm going to do is I am just going to start
with my coloring. I'm going to take my time
to fill up my space, and I am going to do a really
good job on my artwork. So again, what I'm going to
do is I'm going to fill in each space on my baby artwork except for the actual
face on the baby. All right? So you can watch me or you can get
started on your own. I'm just going to
be coloring here. And what I'm going to do
is speed up the video. So it goes pretty quickly, and I'm not really coloring
that fast in real life. But it will look like I am. So you can start or
you can watch me. I'll see you back here
in just a minute. Oh Alright, friends, I'm finished with my coloring of my baby drawing, and I put all of
my crayons away. That's really important
that you do that. I've decided to keep my
background plain white. If you want to apply color to yours, go ahead and do that. But I've decided that I
like the way that it makes the baby blanket stand out if I keep the
background white. If you do decide to
color your background, that's fine, because this is your artwork and you should be able to do what
you want to do. So I hope that you
enjoyed this lesson. I'll see you next time. Y.
 Em Winn, Teacher, Art Instructor, Artist