Transcripts
1. Introduction and Supplies You Will Need: Hi, friends. How are you? I hope you're having
a great day today. I'm excited about sharing
this project with you. This is a drawing and
watercolor painting project that I designed,
especially for kids. Students do not need to have any drawing or
painting experience at all to be successful
with this project. I will guide students step by step through all the
steps they need to take. Today, we are going to
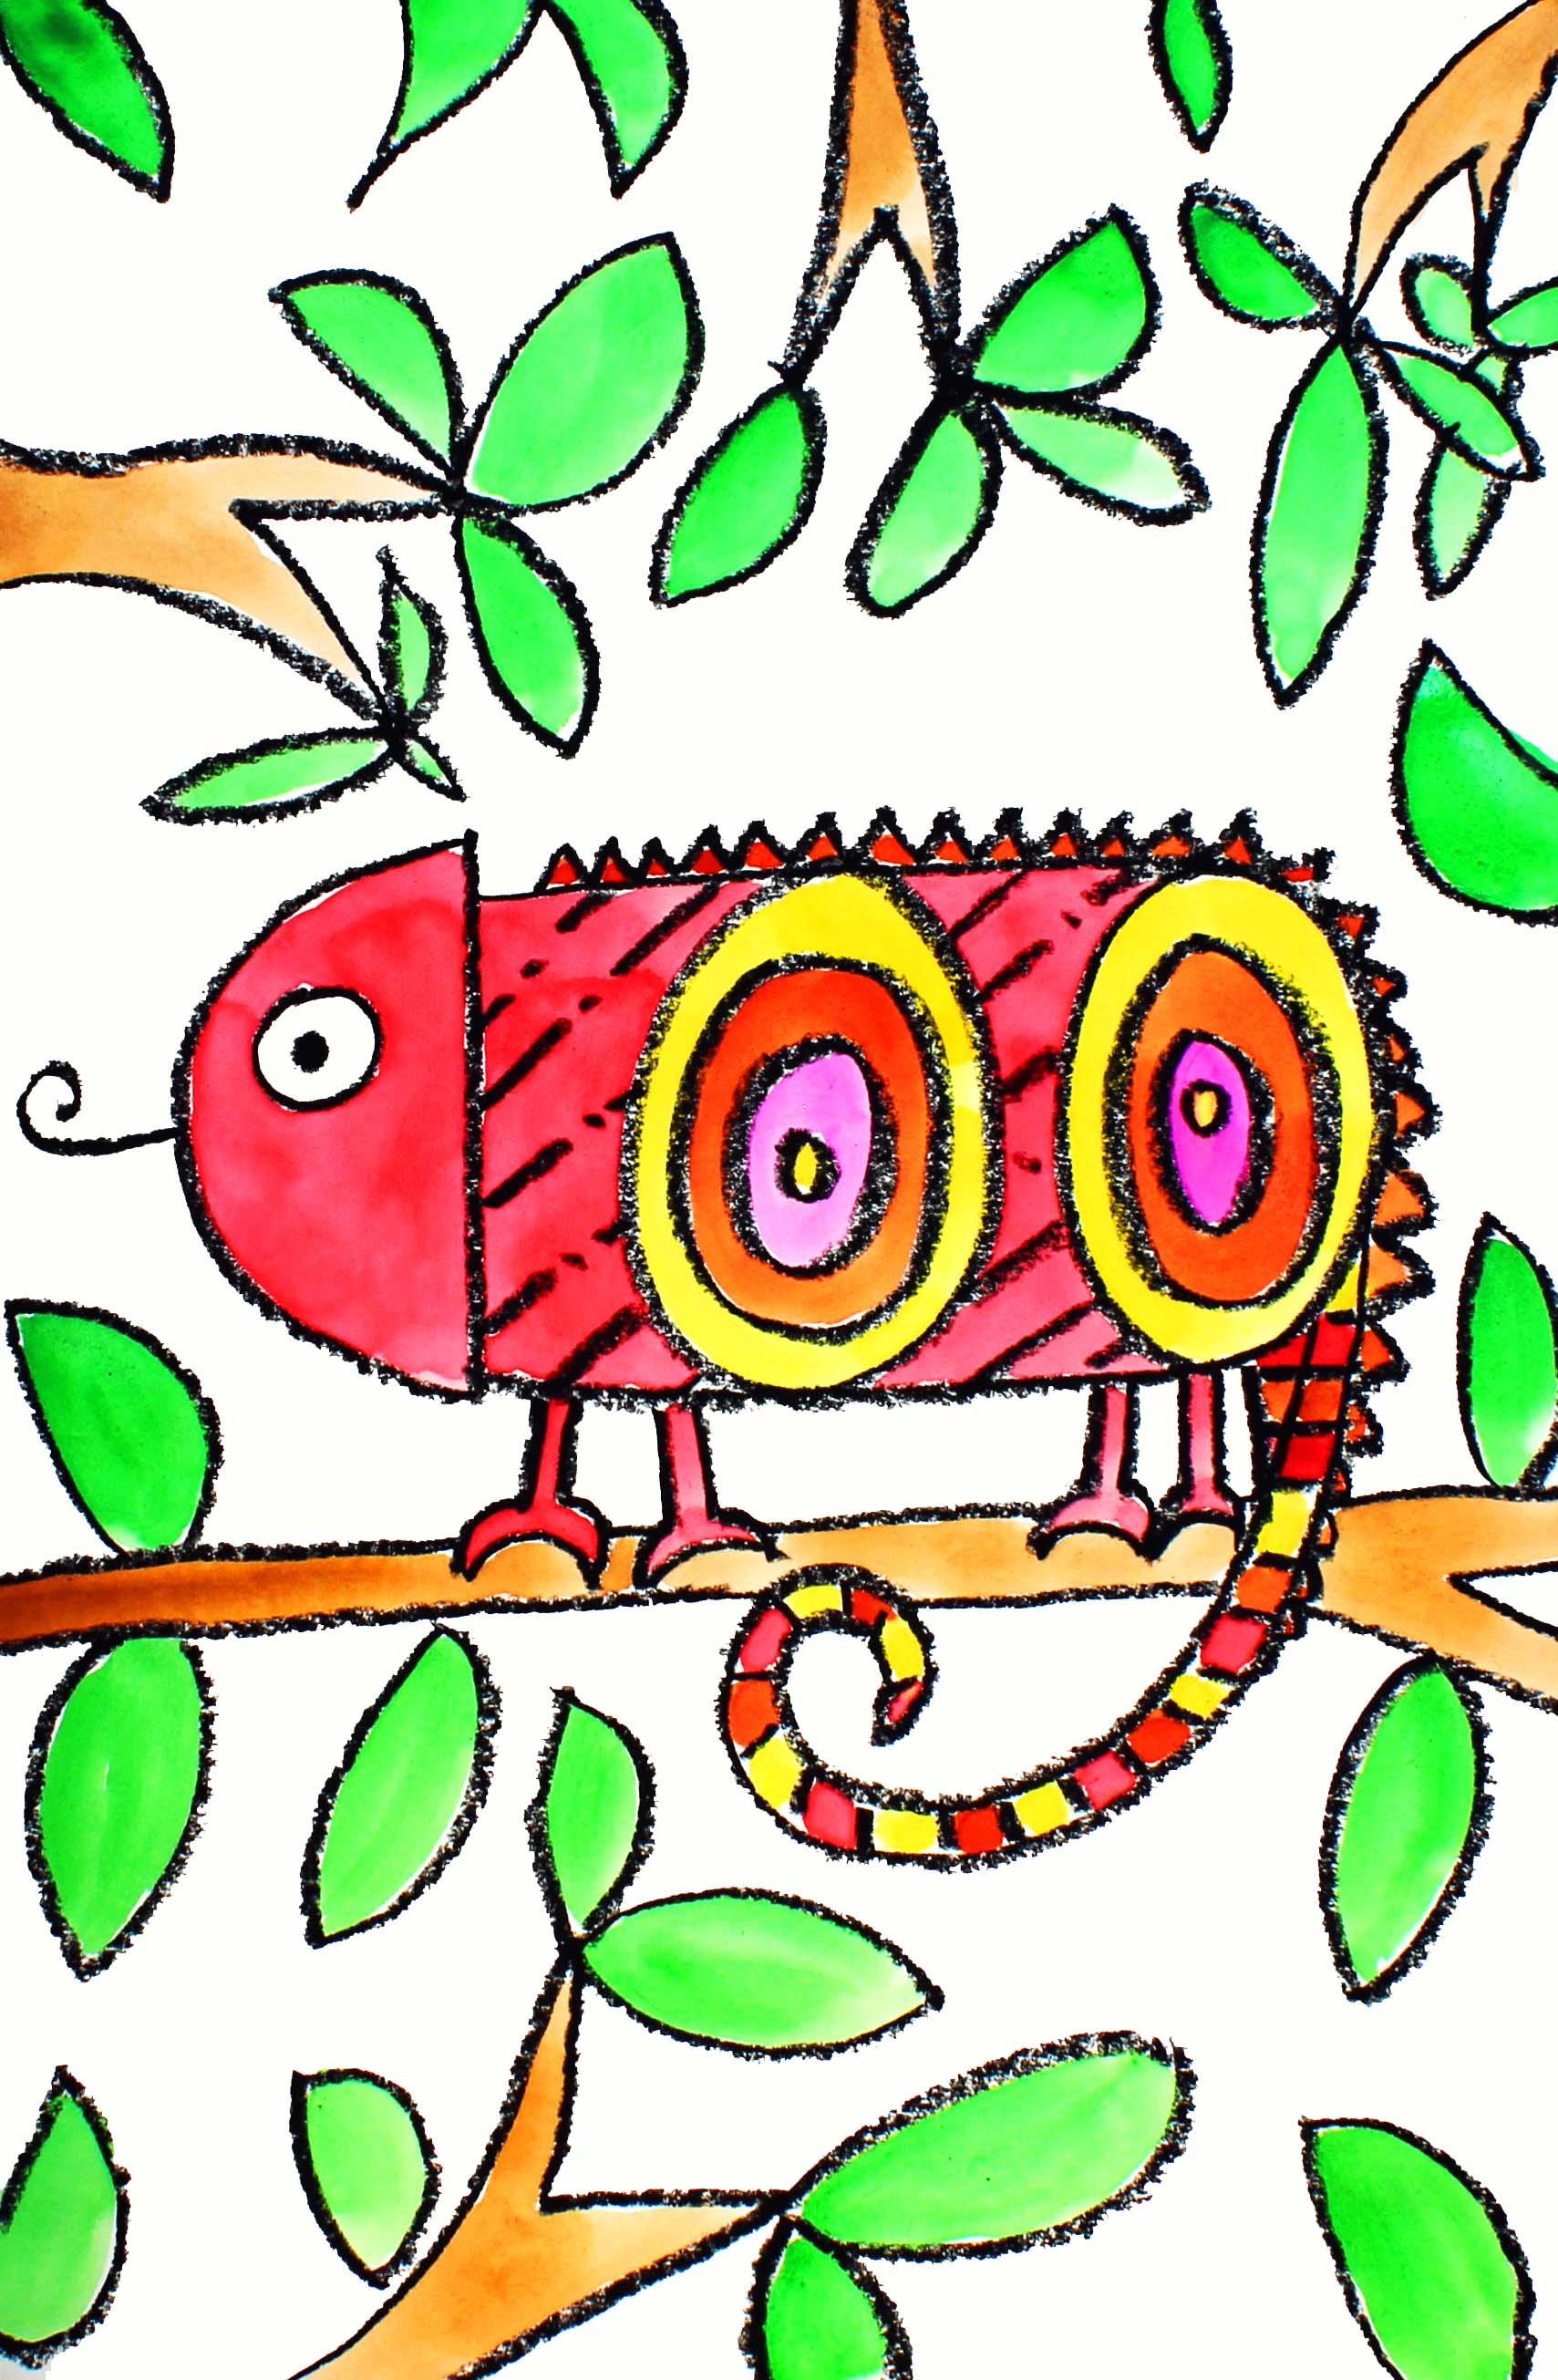
be using the number 100 100 to create this chameleon in the jungle
standing on a branch. I hope that you have a lot
of fun with this project. Let's get started. Let's talk about
the supplies and the materials that you will
need for this project. The first thing
that you'll need is a sheet of watercolor paper. You will need a set of watercolor paints
and a paintbrush. You will also need a cborable
with clean water and a black oil pastel or
crayon and a paper towel. So go ahead and gather all of those supplies and materials, and I'll see you back
here in the next video.
2. Step 1 Draw a Chameleon Design: In this step, we
are going to draw a chameleon that is made
using the number 100. So let's get started. Go ahead and pick up your
black oil pastel or crayon. And what we're going to
do is we're going to come to about right here
on our piece of paper, and we're going to
write the number 100. So we're going to make
a one and then a zero, and then another zero. And our 100 is going to be pretty big
on our piece of paper. We want it to be large enough so that we can add some
details around it. Okay? So let's start about right here and let's make
the number one. And then next to the number one on the right hand
side, let's make a zero. And then another zero right
next to that first zero. There's our number 100. If your zeros aren't
exactly the same size, that's okay. Don't
worry about that. All right, what we're going
to do now is we are going to take a look at this
area right here. This is going to be the head and the face of our chameleon. And we're going to
make a curve line going from here to here. Okay? So let's go
ahead and do that. That's going to be the
head of our chameleon. Now, over here is
going to be the body. We're going to turn this
area into the body. But let's focus on the
head for right now. So chameleons have
pretty big eyes, so let's make a
really big circle. Inside of that circle, let's add a dot for the pupil. And then let's add a tongue. So if you have
enough space here, you can make a longer tongue. But if you're like me and
you have just a little area, you're going to make
a shorter tongue. So the tongue's going
to come out this way, and I'm going to make mine
curling around like this. If you'd like to make a
straight tongue, that's okay, or if you want a curl
to come down this way, that's okay, as well.
It's up to you. Now that we have our
chameleons face, what we're going to do is we're going to move to this area. This is the back area
of our chameleon. We're going to start
a little bit from the top of our number one, and we're going to travel along. We're going to touch the top of this zero and the
top of this zero. So let's go ahead and do that. Go to come along here like that. This is going to be the
back of our chameleon. Alright? Now, what we're going to do is add a little
bit of detail here, so some little connecting these. So we're going to make a zig zag line coming down like this. Now what we're going
to do is we're going to follow this line right here, this part of our zero, and we're going to
follow that down, and we're going to make a tail. It comes down and then
curves around like this. Now what we're going to do
is we're going to double up that little tail like this, curl around like that. Alright, let's move to the
bottom of our chameleon, and we're going to do the same thing that
we did on the top, but we're not going to
put the spikes. Okay? So we're going to follow
this around and then stop right there at the
head of our chameleon. Okay, we're going to
add some details up in this area and on the
tail in just a bit. Now let's make the feet and
the legs of our chameleon. So some straight lines and then some curve
lines coming like this and then going like this. Their feet are very
interesting and unusual. This curve lines and
then another curve line. And then let's make two
more feet in the back. Now that we have our basic
parts of our chameleon drawn, what we're going to do is
we're going to come back into the body of our chameleon and
the tail of our chameleon, and we're going to
create some designs. So take a look at
your chameleon, and you get to decide the designs that
you'd like to make. Okay? I'm just going to
give some suggestions, and then you get to
do what you'd like. This is your artwork, so you
get to do what you'd like. So what I'm going to do
is I am going to make some circles within this zero. So I'm going to make
a smaller circle, a smaller circle, and
even a smaller circle. Alright. That looks pretty neat. So I'm going to do the
same thing over here. Circle. Smaller circle. Oh, this is going
to be a tiny one. Like that. Now I'm going to
make some other designs here, maybe some lines with some dots. So line dot line. Alright. Now I'd
like to add some more vis onto the
back of my chameleon. I think I might
even want to go a little bit further
down the tail like this and make sure they get smaller and
smaller. Like that. I think that looks pretty neat. I might want to thicken up this tail a little bit right here. And then I think
I'm going to make some lines on my tail to give it a little
bit more interest. There we go. I think
I'm going to not put any details on the inside
of my head and face, but you can certainly put
details in there if you'd like. Now that we have our
chameleon completed, let's create a background
for our chameleon. So the first thing that I'm
going to do is I'm going to make a line coming out
from one of his feet. And this is going to be a branch that my
chameleon is standing on. It doesn't have to be perfectly straight because you
know how branches are. They're not perfectly straight. So I think I'm going to have the branch come along
here like this. And I'm going to
jump over that tail and come out like this and then come down a little bit
and then make a V here. I like to make this
type of branch. So it looks like this
branch is going along Dodd, and then it separates
off into other branches. All right. Now I'm going
to make some leaves. So it looks like my
chameleon is in the jungle. You can make as many or as
few leaves as you'd like. Now, I do have quite a bit
of space in the background, so here at the top and
here at the bottom. So I am going to add
some more details. I'm going to add some
more leaves and branches. So I'm just going to come up, come down like this with a V, and then I'm going to add some more leaves to
fill up that space. Alrighty friends. So I filled
up my background space. If there's anything else that you'd like to add
to your design, go ahead and do it now
because in the next step, we are going to be adding some watercolor paints
to our chameleon design.
3. Step 2: Paint the Design: In this step, we are going to
paint our chameleon design. So let's get started. The first thing that
I'm going to do is I'm going to add a drop or two of water into each
of my pans of paint. And what this will do is it
will soften up my paints a little bit so that they
are easier for us to use. So I do encourage my students to take that step because
it really does help. Now that our paints
are softening up, let's turn our attention
to our design. So here we have our
little chameleon, and this chameleon is made
out of the number 100, as you probably remember. And what we're going to
do is we're going to focus on painting the chameleon, the branch, and the leaves and all of the branches and
leaves in the background. So that's what we're
going to focus on painting in this step. So let's start by
painting our chameleon. About the color or colors that you would like to
paint your chameleon. You get to choose
the colors that you like because this
is your artwork. I'm going to choose
the color red, and I think I'm going to
stick with the warm colors, the red, orange and yellow, maybe a little bit of pink. I haven't decided. So I'm
going to go ahead and start painting the face
of my chameleon red, and then I'm going to
paint the body red, too, and then the details. I think I'm going to paint
those orange and yellow. So I'm going to
speed up the video, and what I'm going to do is I'm just going to
focus on painting the chameleon and the
leaves and the branches. So you can go ahead
and watch me, maybe get some ideas, and then you can get started
on your own artwork. Alrighty, friends,
I'm finished painting my chameleon and my
leaves and my branches. And I really like how
my artwork turned out. I hope that you had a lot
of fun with this project. I will see you next time.
 Em Winn, Teacher, Art Instructor, Artist