Transcripts
1. Introduction: Hi. Welcome to artists Central Siri's. I'm so excited to have you here. This class we're gonna be learning about creating effective shake arrangements. My name's Jennifer Morehead. I'm a former art professor. I've taught the skills to students for over 34 years, and I'm so excited. Share them with you. If you see in this diagram on the Left Earl, the art elements on the right are the design principles combined together, his composition. So the bangle learning all these things. This is making a great composition. Who is this force for a beginner? If you have any interest in art, it's for you. Fine Arts Graphic Design illustration. PHOTOGRAPHY INTERIOR Decide anything that's related to the arts. Some teaching you are concepts through hands on exercises. These air very fast, quick exercises. But it's imperative for hands on experiences because it's part of the creative process, making an object that eye hand coordination. And I teach you the necessary skills for decision making and analytical thinking. So if I did it step by step, you're gonna walk away and do another project, not understand how to do it. Here you have the essential skills that you could apply to other art areas as well was applies applications to computers. But all my classes are hands on and it will be investigating, shaped through positive, negative spatial divisions. And then we'll begin to understand how shape is used in a composition. Effectively, I really look forward to seeing you in class.
2. Art Materials & What is Shape?: Welcome back in this section, I'm going to be discussing the art materials you'll need as well as what is shaped. The materials you're gonna be needing for my class are nine by 12 inch white paper, at least 10 sheets of it. I have mine from a sketchbook that's great to use, and also this is perforated, so these sheets are easy to come out. Also gonna Neely's 10 Sheets of Black construction paper. Make sure it's dark on both sides so that it really creates that wonderful contrast that we're trying to achieve. Pair, scissors, an Exacto knife, a glue stick, a stainless steel rulers What I prefer so that if you have a plastic, but it's kind of hard to cut with also having a cork back. Having a cork back to it doesn't tend to slide is easily when you're cutting and then a cutting board. And what's nice about the cutting boards is that they're gritted out as well as ruled out, and they're easy to make really great shapes from what is she really shapes and element of art, as we discussed earlier, But more specifically, it's an enclosed space, so it has boundaries that are defined by other elements of art, such as lines, colors, values and textures. Shapes are limited to two dimensions, like them with as humans. We have this visual perception of trying to organize shape, to be something as we look at clouds. We just don't just look at the clouds were looking at shapes of saying, Oh, there's a face there. There's a dog there in this class were not going to put shapes together to create something but understand how shape works together as a shape, talking about shape and looking at positive negative. This is a great example, but my views. But it's like looking at my arm and teaching Students had a drawn armed. They're so focused on the arm and that visual perception of how they look at it. They're not looking at that negative space. And if you look at the negative space, which is the space around my arm, you can start to see this triangular form. And if I tell him to drill those forms and look of the shapes around it, sure enough, that arm appears wonderfully. We're gonna try to stop booking at shape of what we think we know we're going to start really looking at shape as we've never seen it before. This is great. Quote from Henri Matisse to look at something as though we never seen it before. Requires great courage. That's what we're gonna be doing and you have the courage to create.
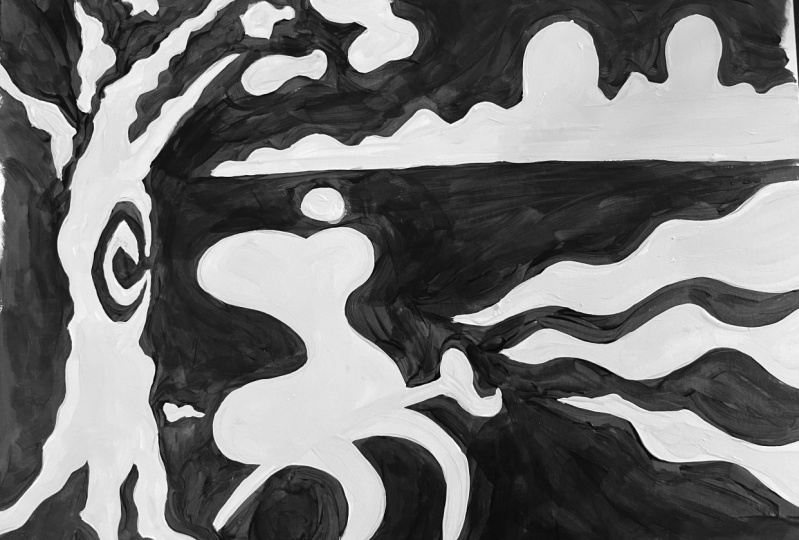
3. Balance : Welcome back. This section is about balance. In this section, I'll be explaining about definitions of symmetrical and asymmetrical balance. Details of exercise one and you'll see a demonstration on the, uh, art materials will need for this class and examples of famous artists along the way to help you understand? I bet you excited. This is exercise one. You're gonna start up with one sheet of white paper, cut out five circles. They don't have to be exact. It's nice. Curves circles out of one sheet of black construction paper. Each circle must be of a different size. Arranged the shapes into an interesting asymmetrical composition and glue the black circles onto the white. You'll be dean, your scissors. One piece of the black construction. Pay for one piece of the white paper and you're glue stick. I'm just gonna begin to show you just cutting it. The act of cutting it. You're having to really think about what? You got this shape here, your cut into the shape here, you're already seeing negative space with positive space. This is a really good exercise because it's really big. You think putting everything together very careful to show you what I don't want to seize. When you have things that are pointy like this, you're getting what you call a convex shape in here. So we want to eliminate. That doesn't have to be a perfect circle, but you just wanted to have rounded shapes to it, just giving the idea about symmetrical balance. So magical balance is, um, eared imagery on either side. So if I flipped it this way, be the same this way you could really break it up. This is a truly a symmetrical balance. When I'm moving this around, it loses a symmetry. So now the weights start shifting to the left. But the definition of symmetrical bounces when both sides of the peace are equal and that is they are identical or almost identical. I've chosen three artists that I thought would be a great example of symmetry. Here we have Frank. Still, this is definitely an exact smeared image of each other. The next one is Victor Bahceli. He has more of that composition where it's symmetrical, but it's not exact. His work is wonderful, especially when he doesn't in color. It does three D pieces. You should look them up sometime and Then here is Bridget Riley, who does up art and has a whole different effect to symmetry. But it is symmetry in here. Let's start with our second shape. Remember, these are all gonna be different sizes. Doesn't have to be perfect. This is just cutting shoots in there, trying to get all the little ones off pieces. I'm just gonna place these two shapes next to each other. They're no longer that Pierre. Symmetrical but outs. But it's close enough to be more symmetrical than asymmetrical, just the way their place here. If I was to moving around a little bit and at another shape to it. Now we're getting into what they call a symmetrical balance that has a feeling of being balanced. Asymmetrical balance. The two sides of a composition are not the same, but the appear to have an equal visual way. So we'll be talking about a lot of this visual. Wait native positive Seitzer unequal and evenly distribute throughout the outwork leading the viewers eyes through the piece. Three artists here that their artwork deals with asymmetrical balance. The 1st 1 here is Morceli. Kandinsky, you have these floating circles all around, beautifully composed and it has that feeling of balance. Here we have a piece by piece boundary on asymmetrical balance you can feel with Trio is a little bit slightly to the right. But it certainly has that wonderful balance and weight to it. A thing about a good asymmetrical balance. It should work at any angle. So I'm gonna flip it upside down for you to see that. Okay? And then, lastly, we have that that was appropriate would be won by Vincent Van Gogh. Very, very notable piece. Starry, starry night with the large tree on the left and that yellow moon in this guy on the right and that Yingying effect throat the middle. I think it's very appropriate. Easy to see. And I thought this would be helpful Trying to cut a smaller shape. Going to be different from both of the other piece is gonna shape. That's pretty good. More to go. They're gonna feel really small, square out, make a little easier to cut. There we go. In this project, we're not going to be oh, overlapping them or uniting them together. But we're going to be detaching them so they'll be separated from each other these cues are what adds character to our shapes. Excuse our size, detached imply proximity, overlapping convex, con cave and subtracted. These are the ones we're gonna be working on in this particular class. In this section, we're going to be working with size and detached and try to think of really creating a wonderful composition. It will be an asymmetrical balance of feeling of balance. It's so important to work on your own. The follow me step by stop. Why? Because you learn the art concepts with making your own decisions. That's the creative process. The next section we will self critique your operative. It's really interesting. You learn about no tan, and then the following section, I'll demonstrate helpful hints so you can You can go back if you choose to would redo to improve your artwork. So you'll be kind of learning this process, redoing stuff and just learning and most importantly, is have fun. You are exploring art concepts through his fund and wonderful exercises, so enjoy
4. "Notan" : Self-critique: I'm glad you're back. This section we're going to be covering no tan and doing a self critique of occur begin with a definition of no tan and no tan is a Japanese term in a Japanese way of looking at design. It's kind of that Ying Yang effect. You will notice that I've crop my image on the screen for the rest of my videos, the cropped images the size of my piece of white paper that I'm working on. Why I'm doing this. You'll be able to see my art designs better with the actual edges. It's great to learn all the art vocabulary, crop e and images the active cutting away in discarding the unnecessary portions of the image. It's a lot more to cropping, but that will get into later. Now let's begin with our self critique with, ah, positive attitude. Very important. I've always told my students got to be really positive and feel good about what you're learning. I know sometimes it gets frustrating and what not, but just stay positive and hang in there and just go for it. Let's look at this as thes black shapes are going to be rocks so we're going to get be giving in a positive shape, and I have a lot of creeks out here. So we'll think of these rocks with the creek flowing through it from the top to the bottom . As this water rushes through, does it flow through too easily? That would happen if it was open like that. The water is coming through it. A very nice flow through it doesn't get hung up anywhere. That's why we don't have things touching. But it has a nice flow. If you've got a nice flow going, it's working. Next is we're gonna look at visited whole different way, as these black shapes are now, Holes in a barn like this is the barn wall right here and these air holes that you're looking through. Give yourself a few seconds of that. And now we're starting to look at this negative space in here was now becoming positive for you isn't interesting. Is it too one sided desert? Is it too much the same? Or does it have an interesting shape to it now that has an interesting shape to it, then it has a good asymmetrical balance, and having this and looking at. This is the first step towards creating a good design. You're starting to look at positive negative and how they interact with each other, not to critiquing your artwork. Do you see room for improvement? The next section are helpful fence just for this particular exercise. And always remember, our kitty means to evaluate your artwork analytically. Not to criticize part of the creative process is to evaluate your artwork. These are not mistakes but learning experiences. If it doesn't make sense now, keep going because you'll eventually say, Ah ha! Now I get it.
5. Tips on Balance for Exercise #1: Hey, great to have you back in this section. This is tips on the asymmetrical balance that pertains to the project that we worked out things to avoid. If they're evenly placed, it almost feels too much of that spacing around. I don't want to do that. Try not to take it off the pages. Well, keep them all on the page. I have a lot of weight with the larger one. But you also have a lot of weight Visual weight with this one. Can you see how powerful this could be by itself? So be thinking in that regards of their very powerful when they're placed far away from each other. If you get too close to it, you're getting what you call touching, and then it creates a feeling of tension. We don't want to create that. At this point. I want to start moving this around. That's what's so great about these cutouts of really easy to work with and look at it visually. So anything right in the center and it's gonna not get that nice feeling of balance. I don't want to touch or go into corners If you look already. Oh, my gosh! you've got all this space and it's hard to view. I don't want to go too close to the Edge is. But I'm gonna bring it in and have it least different variations off spacing and spacing between these. I'm not gonna be touching edges on great things. They're definitely going to be detached thing about composition. It's it's a feeling, and it's a process of learning and going back and forth where you feel like Okay, now I'm understanding it. So I don't feel like, you know Oh my gosh, it's too frustrating. That's what art hardest challenging this, MTI said. Being an artist is being having a lot of courage because you do. You've got to really think about a lot of things at once and taking the time without that. So it's a difference of being an artist and not being one. It's kind of dangling here. Uh, now it feels right. So I'm going to stop here now you see, this is the piece that I used in herself. Critique. I look at this now on my so could make changes to it. Artist felt making and creating art piece. You keep making more art because you learn something from HR piece, you make what you learn by going to the next piece, where you might eliminate what you have learned to the next art piece or try to do something completely new arts, a passion you have to feel good about just making it and not worry about each individual piece that has to be perfect.
6. "Notan" : Symmetrical Balance: this section, we're gonna be still working on No Tam. But this time we're gonna do a symmetrical balance. Positive shape and negative shape also are the same as foreground and background. Positive shapes occupied positive space. The area around positive shapes. The background is negative space at place. Repairs on a wooden table. I took a photograph of it. So you get an idea Figure ground relationships, the figure being the pears themselves, in the ground, being the background, but still thinking about positive natives. So what I've done for you here is I cut out those shapes in the black construction paper, and then I cropped it down to match the same size as I don't have my photograph. And you can really see how effective that negative spaces and doing it in black and white like this. You don't get so caught up with the grain in the wood and the highlights on the pairs. But to really focus on shape, positive negative shape. Of course I have to play around with it because I like the paper with the cutouts in it. So I created my symmetrical valence here and I played more made of asymmetrical balance. Now the cutout shapes on paper. I'm gonna have you keep them and collect them because at the very end, we're going to be assembling these together so you could cut up new shapes as well as the older shape. So just hang on to what you have. And then I found an art piece by the T's. It's a little more figurative, but I think it works well and showing you how this positive negative shape works for exercise to. You're gonna start out with one sheet of white paper. You're going to cut out 14 by four inch square out of the black construction paper. You're gonna be cutting out geometric shapes from the square and reflect out to create a positive, negative, symmetrical composition. Then you'll glue the black shapes onto the white paper. What's great about this cutting mat is it has a grid system on it, so we're able to measure it out. So place it down here and I'm going to go four by four inches. You very careful working with the exact the night. Nice. Nice edge to it coming back here. Never throw these away because we can also use these sheets later. So here we have our four by fours,
7. "Notan" - Symmetrical Balance 2: Hello again. This section is gonna be no tan, and we're gonna work with symmetrical balance. You should have your four by four inch square already done, and I'm cutting and triangle out of there If you'll see that line of conning office is a 45 degree angle. And here you get an idea of how it's placed on what it looks like. We have covered the queues size and detached in the last segment, and in this segment, we're gonna be working on subtracted. So attractive is a method of taking away. I try to build on it. You can plan a completely out, but I kind of like looking at things and seeing how they look together and make changes with that. I'm at the early stages of my project, so I'm not really concerned of cutting it so exact, because I know I'm gonna go back and recut it after I figured out what I really want to do here. I've got another one. So I've already creating a really nice symmetry in my piece. I think the straight lines really work effectively. As I said before, do not go out the corners because then it goes into a different aspect of it and kind of change that square. So you want to keep that squared image within it Here? I'm going through, and I'm I'm going to place it on my paper because there'll be a lot easier to go back and figure things out because I can place my square back there and have my image is already up . This is another way of cutting it out. Is once I kind of one side. I'm go on another four by four and cut it out, figuring out, Do I want to add something more to it? What am I gonna add? I just like I like really with it saying, Oh, I like that although it won't work with this, but it's just a nice design. Use your pencil sparingly, if at all, because it does not erase. There's different things you can cut out to help you along here. I'm going to use a circle. I've got the circle. I'm not that thrilled with just that, so I'm gonna cut war into it. Of course, it's not even there as you see it, but I don't like what's going on. It's changing in a way that doesn't interest me as much. Now, I tried something else here and I thought, Well, maybe that will work. And I can do it upside down on the other side. And I thought, Well, I tried something different of bringing the lines down. This works much better. See, with it across it is not fitting in with the right side. Looks much better. So now I'm gonna go ahead and work with this so really experiment because it's so exciting . There's such a vast thing you could do with that and really good detailed. So go for it if you really want to do that. But this is a really great hands on experience in its It really gives you a sense of accomplishing something. Preparation is the first step of the creative process. After that is incubation, illumination and implementation. What you need to know about preparation, This is This is for artists, writers, musicians, anyone that's creative. You have to go through this process in order to create it is just part of it. This is a time to explore play around, Dude, you're planning stages planning with the ideas mess, you're out materials. It's trying to figure out stuff and just getting the ideas in that motion going in this class, I'll be talking a little bit about the other stages as well. He artists that I'm going to introduce you to for this segment is M. C. Escher, the white and black birds. They're the same shape that he has some interlocking together here. He's turned the shape. I didn't into something, and it goes out the other side. Look at it closely. You figure this out. I like what it changes from detail of the fish that kind of slowly emerges up into the bird . And this is one of my favorite pieces of looking at the morning tonight. Really, really exciting. This is great opportunity to put this in the project gallery. I'd love to see what you've done with this project. See, in the next section
8. Geometric Shape Relationships: this section is on geometric shape. Really? Chips. You probably thought you didn't have to see me again right in these next segments that this is gonna be fast paced, moving things around. And this is where you're gonna get to concept building. So get excited. Get ready because we're doing so far back to her cues. We've covered, size, detached and subtracted in this section, we're going to be working on implied and proximity about geometric shapes. Sometimes starting out with a simple square or other geometric shapes is the answer. Jimmy. Shapes come from geometry, which is the math of shapes made of points and lines. Do you magic shapes or shapes made out of points and lines, including the triangle square circle. When you're working with rectangles and squares, it creates a very formal balance, and this balance is also considered very traditional. When you start adding diagonals to your composition, it starts to alter very dramatically. So you need to start really working on looking at that space surrounded and it starts with those angles. Start to form a directional Lina's. Well, here's something very minimal. So don't think having tons of shapes Israel important. I mean minimal is just as effective. It depends which you really want to say. A good tip is a really good composition. Works well on every side that you're viewing your art piece. Turn your artwork around when you are creating it. This will give you a different perspective. If it's only working on one side but not working the other than you're not clearly looking at all the shapes within it. Always be looking. If you're doing something realistic, it's good to change it around. In this piece, I'm putting together a triangular form and this called implied shape, implying shape shapes that are placed by either touching or overlapping other shapes to create an enclosed space, which is actually shaped well. You've been learning so much. This is a good time to do an exercise Exercise. Three. To start out with. Using one sheet of white paper, cut out a variety of lease. Seven shapes of squares and rectangles included implied shape in the composition. You're always welcome to ask me questions. You're also welcome to put this in the project. Calvary. If you want me to view it, just enjoy working on this and really experiment
9. Geometric Shape Relationships 2: the section is geometric shape relationships. Part two. We're still working around with the shapes of the squares and also the rectangles moving them around. And now we're going to be adding more things to it is touching, getting a proximity and even adding triangles to this as well. So we keep adding to this to see how things work together, from going very basic to very, very dynamic spacing, arranging pick up quickly and changes proximity. Proximity means nearness an art. When the shapes air next to each other, they create unity if you notice with shapes that air rectangle and square. When I line this up on the left hand side, you can see that it becomes very formal very quickly. But when I add more diagonals to it, as they see on the very left, it can change it and make a little bit less formal. We're gonna cut into the rectangular shapes and give it a little more, but angle to it. This will give it more dynamism to my design. Having the diagonals really create a very dramatic and very expressive and this triangle that I'm using close to it and the nearness to it that proximity and almost creates a line so you really can create so much by using these shapes. It's time for exercise. Five. So we're going to start out using one sheet of white paper, cut out a variety of least seven shapes of squares. Rectangles and triangles include the proximity of shape into the composition. See, see what you come up with for the rest of the segment. I'm gonna have you look at the progression that's being made as it's going forward. Hopefully, this will get any idea of how to work With shapes even more effectively, - circles create a sense of infinity protection and femininity to our design, while triangles create a stability, energy and even aggression. - Johnson A few artists that I thought might be of interest to you. The pieces are done in black and white, using geometric shapes. The first start is, is Ellsworth Kelly, second artist Here is Barnett Newman, and then we have Robert Holyhead was occurring artist. This shapes air quite interesting. It has washes in the background that really create a visual texture to them. I look forward to seeing in the next segment
10. Organic Shape Relationships: This section is titled Organic Shape Relationships. The queues for this segment are overlapping, convex and con cave shapes. Organic shapes are defined by not being regulated by patterns or exact dimensions in their angles, curves or lengths of lines. In fact, they're just like shapes. We find in nature with all the randomness freedom you might see in a rock formacion, a tree branch or leaf chewed by an insect. Definitely. This is a project she can work with your scissors on is you know, I really having fun with this, even though these air really fun and kind of very loose type of shapes. There were more difficult to work with because you're dealing with a lot of asymmetrical balance. But there's something fun about him that kind of take on a life of their own. I'm going to cut out five shapes. Each one will have a different size to it and certainly a different shape, really having a lot of variety a good tip to know what we were talking about a little bit earlier. In this class, there's positive negative foreground background well here you can really get an idea the foreground and background. It's really created mostly with convex and concave shapes. I'm starting out with three convex shapes and then three con cave shapes. I'm going to try to start working them together. They're very much different. There's a lot of points on them. There's a lot of angles was trying to work them together and then bring in more shapes, more organic shapes and you've cut out for exercise. Number six is to start out with using one sheet of white paper, cut out a variety of at least seven shapes of convex and concave shapes of the black construction paper, and try and create an overall design composition that you're leaving detached areas and really creating equal amount of positive and negative space for alas, que, which is overlapping. You'll note that the more you add an overlap, you have less and less of that negative space. So you great a lot of density and a lot of weight to your piece. Exercise seven started with using one sheet of white paper cut out of a variety shapes of the black construction paper. Create overlapping shapes that have more positive shapes and negative shapes. Try to create density in your piece I've chosen to artists for this section. 1st 1 is Henri Matisse. I know I've showed some of his work before, but I wanted you to really see that He does do cutouts in his work here. You get an idea of him having it all over the place. He'd love to look at his work. He got a lot of energy and pleasure out of it, as well as having a very lyrical here. You get a whole wall of it. And here are some war of his pieces. The other artists I chose with Jean are another term for the organic shapes is biomorphic is very similar, but I think they're very lyrical and lying and area and fun to look at. Well, I'd love to see some of your work and then the next section is about our project. It should be lots of fun. So I'm really enjoying this. I hope you are a swell
11. Project Details: this section is about your project. The class projects to cut an odd number of shapes, geometric and organic, out of black construction paper. Arrange shapes by using one of the cuse learned in class in a creative art piece and paste them down a white sheet of paper. You can also use the pieces that you've already cut out. You know they could be remnants, and you can use those as well so you could do a whole combination of stuff. The Golden Projects to make an overall good composition with your art element of shape. Really be creative and push your ideas. You can do several of these using different cues and shapes or doing a combination of, um, and try to title your works. You have a Pacific meaning that you're trying to address, and if you want, you can try to reproduce one your art pieces on your computer. Remember to have fun. Enjoy being creative. Upload your project to the Project gallery because I really want to see your work there. All the cues that we've learned size, detached, implied proximity, overlapping convex con cave and subtracted really learned a lot. You can always go back and review these if you'd like to. And as I said before, we would touch base again on the four stages. The creative process. Because you will be doing this in this project you will be preparing, which is researching your ideas and trying to figure out what you want to dio. You're gonna be working with materials. You'll be starting the process. There's an incubation time. A percolation is when you sit back and just try to figure out what am I gonna really do? You almost have to, you know, stand back and get away from it for a few minutes or longer. And then when you get that illumination, it's like a light bulb idea. It's like, I know what I'm gonna do now and you get all excited. So now it's time to implement it, actually, baking it and creating your piece of work. How exciting is that? I've done a few pieces. Just it kind of give you an idea. I had worked on a 18 by 24 because I have so many remnants and I just played with them and I come on like what was happening with this? I used a whole combination of everything. You could see the overlap and you can see the cutouts. You could see everything that's going on here, and I gave it a tile of jazz because that's how it feels. There's a lot of vibrancy and there a lot of movement, and if you look towards the center part of it, I broke that down and cut that out. And if you'll see it, it takes on a whole different approach and I call this one. Watch out. So there's a lot more stronger angles and pointy, sharper things in there. So really think about what you want to create. Can't wait to see your piece in the next segment. It's my final thoughts.
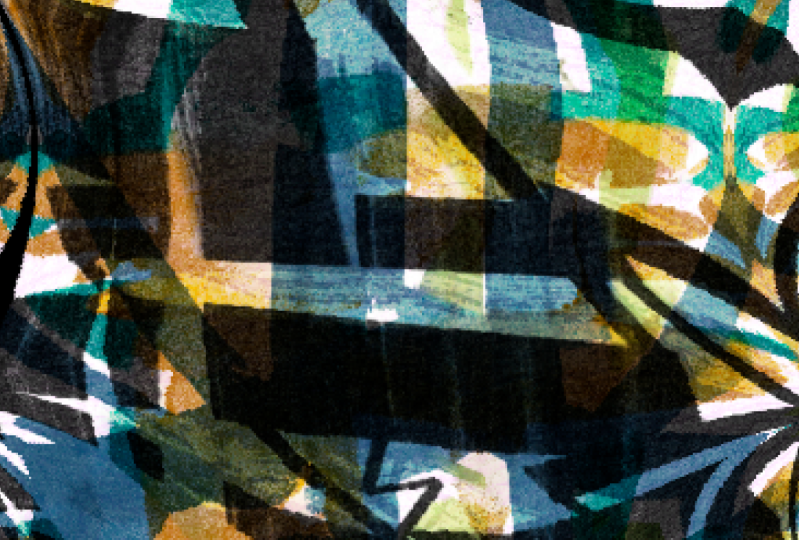
12. Final Thoughts: this is the final segment. I thought the exercise were fun. I hope I get to see your projects in the project gallery and come take some or my classes. If you follow me on skill share, you'll be notifying classes being published by name, and you can join in on my Siris of art essentials. Siri's. That's my channel classes and teaching. That's all the art elements and the principles of design. I look forward to seeing you again. I have some of my artwork I want to share with you following this and take care. Thanks. Two years ago, I traveled on the Cal battle trail with my horse near Durango, Colorado, for maybe 100 plus miles. There's such beauty in there, but in the inner parts of it that people don't see very much. They had a lot of damage to the trees by bugs. It's a lot of dead trees laying around. I thought they were pretty interesting because I just saw it just looking at these almost black and white shapes for days. But the thing that really interested me is that there was growth coming up so you'd see some really beautiful flowers just growing among these dead trees. So I thought, What? It what a wonderful idea. Kind of like something dying and but being reborn, it was just kind of Ah, wonderful natural process. I really got excited about it. I'm in my incubation sage because I started with my drawings and some paper paintings because I'd like to do drawings and paintings together and have a large assortment of him. But this is just gives you a little bit of idea of what I saw. I'm sharing with you. This'd first people I've shared with with I hope you enjoy it and really want to go back and work out these. So it just couldn't Sure, in you being an artist and we're all in stages, they lead you to other stages. I'm working on a series of work that much different from this, but still dealing with flowers and things. So everything kind of comes together. I really enjoy this class and I just can't wait to have you back
 Jennifer Moorhead, Artist, Art Professor, and Entrepreneur