Transcripts
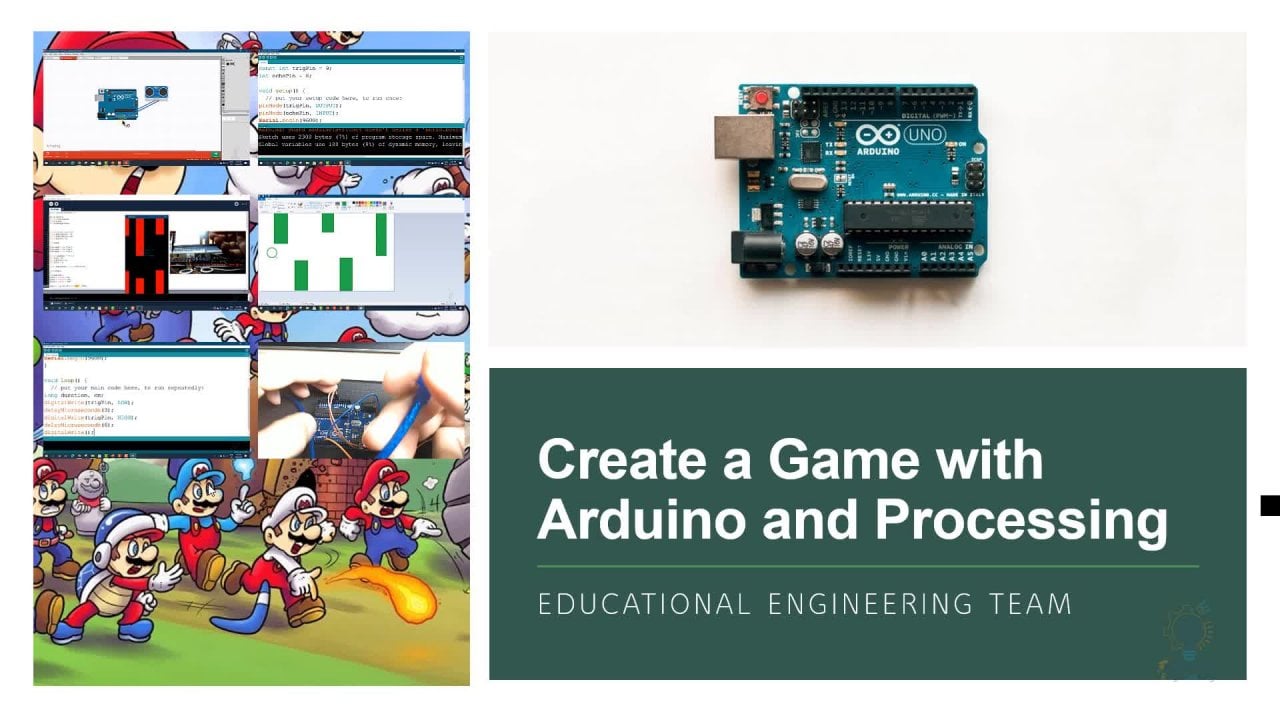
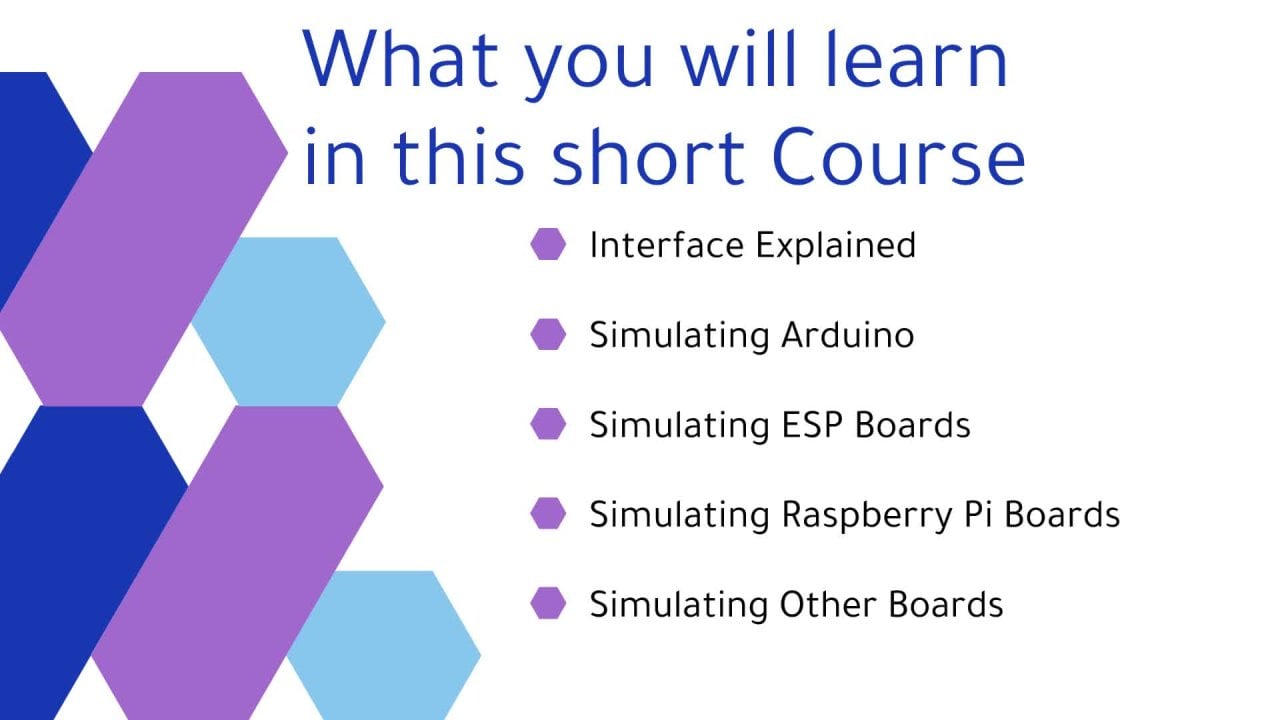
1. 1 Introduction: Hello and welcome to Arduino simulation course, virtual playground for visual development. This is Ashraf from educational engineering team. Now, listen about what you will learn in this course. First, you will learn how to simulate different Arduino balls, how to connect different electronic elements to the spores, and how to control them. You will also learn how to program Arduino balls visually using virtual playground. You will also learn how to simulate lids, switches, since holes, Servo's inputs and outputs and a lot of other devices. You will also learn why using a virtual playground is important before moving to the practical implementation. A full virtual playground, which is basically a simulated Arduino on other bolts. Playground, which you can program with the ordinary Arduino language. You will also get clone, use simulated lids, switches, and other components. Programming Arduino balls visually is a very fast and easy process. It will save you a lot of time. A visual programming environment allowing you to program Arduino and support other balls as well. You can also program ten, say femto, input, output, ESP, control, y'know, and other polls, as you can see in this slide. Now, you'll be introduced to Arduino Uno, and I'll do it omega. And what you'll be introduced to can be used with any other balls. I will teach you more than one software. Will also talk about our application that you can use for Arduino simulation. All of these will make your Arduino programming away much easier. And you won't have to bare on actual Arduino balls to learn. You can also use these methods and these playgrounds. With teaching, I'll be, you know, for kids and for other people who don't have access to on Arduino board or don't have either the time or the money to buy on. Thanks for watching this quick introduction. This is Asherah from educational engineering team.
2. 2 Download UNO Simulator: Hello and welcome to this new lesson I will show, I will explain how you can get all download the first Arduino software. Now, let's hit the all plows R. And let's use Google search engine here, right? Owner. Do SEM. As you can see, this is the name of warfare software. Now, once you click Download, you will get through directly to our Google site. Click here. And here you can see different versions. You can download the annual these versions. But as you can see, this is 2020, very much is basically the US version. You kind of get that from the number 2.22.3, output 2.6. Now to download this click here and the arrow. As you can see, it's downloading sellout 20 megabyte file. So toward Orden, take long. Okay, now let's open up our file. As you can see you once you open up the file, you will give this full lot owner, Aldo sim. And these are the software files. This is our EXE simulated file on or are those same? Double-click, we need to extract this file since, since it's either.zip archive. So extract all to the same location. Now as you can see, this is the extracted fall. Now double-click here or run it as administrator or as you can see, is telling you that this is an, a, a C file who that it sounds recognizing it's okay. Run anyway. Here it is. This is our first simulated playground for Arduino on, as you can see, this is our Arduino Uno, and here we have different electronic components. In the next lesson, you will get to learn everything about this amazing user interface and how to use it. Thanks for watching this lesson.
3. 3 Coding and Simulation Your First UNO: Now let's get a quick look at this user interface. As you can see, this is our Arduino Uno, and here we have an bars folded bins, as you can see here. Until now, each of these elements has a books right beside it, as you can see here, and the resistor. And on the visa. Now in this box you'll have to lie the pin number that you want to use all to connect this element. So let us say that we want to connect this piece of number 13. Now, this B is always connected to win over 13 here. Now, you can connect other components. Eyelid, a silane signal, or any other. As you can see here we have our square, see servo, Amato and Balsari. And here we have an antelope and both from 0 to five volts. Here we have a lid as lumbar and 27 signals here we have RGB lid and SPI protocol, TFT, display, cereal, this thing, module, and a lot of other component. So let's say that we want to connect this. Ok, now we have to be so bizarre and that it connected to pin number 13. Now what you need to do is allows your cold. You don't have to write on the Arduino software. All what you need to do we are, is largely workload in this area. As you can see here, we have the void setup and void loop. Now, as you can see, we have our muscles here, but we will cover this laser. Now let's talk about the file. Fine, execute on allowing us. In the file, you can load your iron all file, which you have already created using Arduino IDE for coding statistic out using this algorithm. You can also find anything inside this text. You can execute law simulation by clicking gram or F9. Or you can't step into tip over, step out of p12 and run till. These are for debugging. So depending on what you are going to do, you can't basically use this Execute me. Now as you can see here, we have an immediate execution or slow machine. You can animate with highlighting on artificial delays. Or you can slow by ten x times. So you can monitor what's going on in your software. Here we have options, software options. Here we can configure the output devices and their preferences. And here we have the Windows. We can give the serial monitor, digital wave forms and analog reforms. And this is a quick help guide. You can click on it. And it will open up a PDF file that will help you use this amazing software. Now, let's continue. This is called the lab bench down, and this is the code down. Here. You can't get your variables. You will see each of the variables that you have already defined in your code and its value inside the memory. So, and here we have the Status Bar. You can get a message here is to run all step, so software is ready. And here we have the toolbar fly over hands. You can get hands are out anything. Once you click here. As you can see, if I pointed my mouse over any of these icons I can't get. Hence, now this tool bar is like an icon tool bar for these or the most used menu's inside here. As you can see here we have the step functions and here we have run, run continuously for the simulation. Here we have the stop, and here we have the reset button. Now, this is everything you need to know how the user interface. Now, let's say that you want to bite a symbol codes that will turn on and off eyelid. New simulation environment, and turn off and turn on and off bees or bizarre and your simulation environment. Now, to do so, we are already hooked up Baeza and road 13, the peaceful, the lids here. So it's connected to pin number 13. Everything that we need to do now is basically code these two elements. Now, the peaceful Ireland isn't a self oscillating bazaar. It is a more basic device. If you want a bus, you have to send our terrain of high, low, high, low to that element. About ten milliseconds cycle will do. And I will write as symbol code to do that so that we can heal that bizarre. And if you want to interact with our button, we can connect our button to any of these elements. So let's say that we want to connect our button to bin number three. And as you can see here, we have these push buttons. So let's try three. And as you can see, once you write that print number here, it will turn on here. So if I look for, it will turn on red for I'm not using four or so. Again, I'm connecting push button two, bell number three, and visa was unrelated to be number 13. Now, the bush button element is more than just a button. You can basically use it as a normally open or normally flows or connected to five volts or ground depending on your needs. Now what you need to do is simply go. And let's say that we want the count variable so that we can monitor what's happening. And let's write a very simple codes. Let's remove all of this. As you can see here. We have an initialization for a count variable, and inside the setup we have count equals 0. Now let's assign them Lord, for pin number 13. To be out. And inside the volume loop. Leave the count equals count plus one. Now we are going to ask if now if digital read, if digital read for bin number three equals hi. So if someone clicked on band number three, what we need to do at this point is since a beep, otherwise, we will just delay until the number 13 off. So digital 33 and low. Now, let's delay after this if statement. Now, I have to make it buzz here. We need to add a for loop. So let's initialize our embattled variable. Now here for i equals 0, i, I asked 20 or less than 20 sub-lattice. And inside the folder. We need to draw it high and low. Okay, with a thin milliseconds delay. So high, low, high, low, and we'll keep repeating itself. So we will hear the buzz or the buzzing from that P x2 bizarre. Otherwise, it will turn off the bizarre. And that's it. Now, let's compile the code. Humble, successful. And now here we have our cold. As you can see. Now you can start planning simulation. Okay, let's stop it. And then all these numbers from the TFT. As you can see, I will laugh, you can hear it or not. It's coming out from my speaker that we install. You might hear it. It's like a noise in the background. Now the lid is thin and going on of the puzzle is doing that as well. As you can see that it's here also certain angle, none of. So what happens here? We simply wrote a code that assign pin number 13 to be as an output that ought to be used as an output. Here. We asked if the push button here, number three, which is connected to pin number three here, is high, which means the push button is pressed. As you can see here. Now, it was pressed so it executes in a for loop. The for loop will basically, since a high signal then wait ten milliseconds. Vincent allows signal to be number 13. Otherwise we'll turn off leptin. So pin number 13 has a Beso bizarre eyelid. So it kicked in and go on and off that lid on that piece. So bizarre. So let's run the simulation again. Now. As you can see, I pressed on this push button and it stopped running. Now once I remove the mouse-click, it will keep moving. Now here you can see the variables and their values inside the memory. And this is for the count variable, and this is for the i, which is basically for this four loop. If I click here, it will stop. Again, it will continue. Now you can do the same with all of these elements inside this amazing simulation software. Now to double-click on it. And we did this codes that we just wrote, then compile it, accept it. After that, you can simply click here to start the simulation and click here to stop it, or simply click here, executes from to start the simulation. That's it for the very first simulation software. If you have unquestioning gardening anything, please ask that you aren't able. I will add more information and all documentation on how to use other elements and this simulation software. Thanks for watching this long lesson.
4. 4 Download and Install Visual Simulation Software: Hello and welcome to this new lesson in which we are going to download the annex software for simulation, Arduino bolts and other type of bolts. So let's head to sell engine Gauguin. And right viz, we know. Now, click on the first result. As you can see, this, Reno is the largest innovation or innovative software. And it's basically a visual programming environment allowing you to program your Arduino boards. It currently supports over shall Arduino bolts. It's our bolts thrust pair by ten, say femto, ESP. And other Arduino clones, which has a wide range and supports also bolts. And that components found in this software uplands presents their hardware components and you will easily be able to create and design your programs using other ITE drop option. No hardware, equipment is needed to run this software. And they'll design modes. Once you have completed the design, you can either use your Arduino ball or connect. Undrawn your hardware Arduino board. Now, to download the software, you can simply go to the Downloads section. Here you can see that has support for CRM and it has a lot of new features for a spy. Other options. Now, click here to download the latest version, 7.8.3. It will take some time. It's about a 120 megabyte file, so it will take two minutes. So let's explore the new added features. Improved year SPI tells it to add the graphics categories and algae bloom on ans ram storage state elements. It improved microSD card support. So suppose my philosophy called I square C, SPI, communication protocols. It has, and furthermore, it has a lot of great options. And they keep updating the software frequently. And as you can see, it's a very good-looking software. And with abuse like assimilation machine, no. For sure they have paid options and they are upside. But if you are just getting started threads, you can use the free version. And social knots. All components are supported in the free version, but most of them are. If you need more options, you can't shake their all learning section. But for me and for you, I think that a free version is more valid enough. As you can see, it will take about 30 seconds to finish download this software. Now the downloading is done and open up the foil. Double-click the setup. You'll need to install it on your PC anyway. Okay, now click, click Next, Next. Next, then install will take I'm in it. Okay? Now if you have a software antivirals to ask you a few on, to accept, click Allow all. Now, once you're done lunch with Rino, then finish. As you can see, it's loading the software libraries. And this is a free version of the software. Here we have our Arduino, as you can see, if I can done with it. And you can see the ends and outs, the digital and analog pins. These are the Prins numbering system. And as you can see here, you can send to Arduino IDE for dilation. Once you're all done here, we have the serial monitor. And in the next lesson we will get to know their user interface and how you can use it. Thanks for watching this download and install lesson. If you have unquestionable few faced an IT problem, please ask and that you are on the air ball. I'm here to help you.
5. 5 Coding Arduino using Visual Blocks: Now let's talk about the user interface. As you can see here, we have arguing owner. If you double-click on the Arduino, you will get to change the abort type. You can't choose any other bold, as you can see, Arduino, other foods. Every our cortex. And out further bolts from this list. And there's also a Rasberry Pi. And as you can see, you can search here if you want honor. And click on the owner, then click OK. This is our board, and this is the navigation bar. If you want to navigate through the bolt, since it's a very long ball. And you can see all of these elements. Here. We have the Arduino ball, thes. As you can see, you can't shake that digital pins from here and change the properties. You can also check the R-square. See Charles, the different modules, E belonged plus s4 watchdog timer. You can't change anything from here. Now, if you are connecting shields, you can. Then from here, if you want to this area and this is the say components area from here are different elements. You can add outputs, you cannot in boats, you know, Murray motors. As you can see, once you click on an element, it will show you a sub-menu from us you can't choose. And here, Thermotoga sublinear shows you different motors. If you click on the DC motor, it will open another sub-menu that will show you different types of DC motors. Servomotors will do the same. You can't ride the RFM robots here. So now we have a servomotor. And if you want to search for an item, let me show you now. Let's search for our lids. As you can see, here, we have our digital lives, several signals and play. And here we have an analog display. Here we have liberate. You can't drag it and robots here, here. And here we have RGB lids. As you can see, it has the three RGB terminals and the n point. You can also add a button. As you can see, this is the button break. Now, this software is basically used to help you code your Arduino without actually writing codes. So let's test this out and the next lesson. But for now, let me finish explaining the user interface so that you know what you all dealing with. Now here we have a help section. Here we have the serial monitor, a terminal, and here we have an oscilloscope window. If you are connecting a channel from your Arduino, you can't see what's happening. And this child here. Now. The last thing that we want to talk about here is can born on priorities. As you can see here. If you clicked any of these components, you can see more options that you can deal with. With our maximum ball smear on balls, the initial value for this servomotor. Do you want to enable it or disable Earth? Do you want to use the PWM liable or not, and you want to name it or not. Now, we have all of these elements. And let's say that we are connecting our digital pin number two from Arduino to this lids. So let's drag it until what's here. Now let's remove these filaments. Now as you can see here, we are connecting pin number two to eyelids. We can also add a pulse generator. As you can see, this is a pulse generator. And we can't connect this pulse generators to bin number 13, which is basically the dish, the LED pin. Now, connecting above generators to bin number 13 means that we are going to turn on and off the LED that's connected to pin number 13. And to do so, what you need to do is basically go here to the Arduino IDE icon, click on it. Now, once you click on it, you will see that the software, which is basically viz Reno added are cold here and the Arduino IDE. And this code is basically doing what you are or what you are aiming for from this block structure. So the pulse generator will send pulses, and these pulses will be on our frequency of one millisecond. So the lids and buffers theme, which is basically the built-in lists and all undoing ownable will turn on and off. So to measure that, this code is uploaded to our algorithm walled so that we can see if it's working or not though. And make sure that the bolt is Arduino. And make sure that you are connecting your Arduino board. So let me connect my algebra ball. Okay, now my Arduino balls connected, go to the Tools com, aren't COM three, what you need to do is basically upload the code. Now, I haven't broken anything. That coding is all done by that visual, you know, which is the visual Arduino programming software. So I haven't done anything here. And as you can see in my Arduino honor, that it is turning on and off. Now, if you want to increase the delay or the frequency, you can increase this to, let's say five. And the recording will be edited on its own or lots you need to do here is simply click on the Arduino IDE icon and you will get a new code. Again, I haven't thrown anything so long by the software. All what you need to do at this point is click Upload. That's it. This is the new codes which our Arduino is blinking away much faster than previously, as you can see in that video. That's, it's for how to use the software to turn your visual blocks into code without actually writing a cold. It's a very easy to use and the amazing software supports a lot of balls. So I highly recommend using this software if you are new to programming. Thanks for watching this lesson. If you have unquestioned, B is asked and working on the report.
 Achraf Mad, Creative Engineer