Transcripts
1. How to Apply Gold Leaf like a BOSS: Introduction: Hi, everyone. Welcome to my first skill share class. My name is Danielle Trudeau, and I'm gonna be showing you how to apply Gold Leaf to your artwork today. So we're in recovering a couple of different chapters today. We're looking at things like our materials, the steps than what you take as well as some other fiddly little things such as incompatibilities of materials. Let's get started.
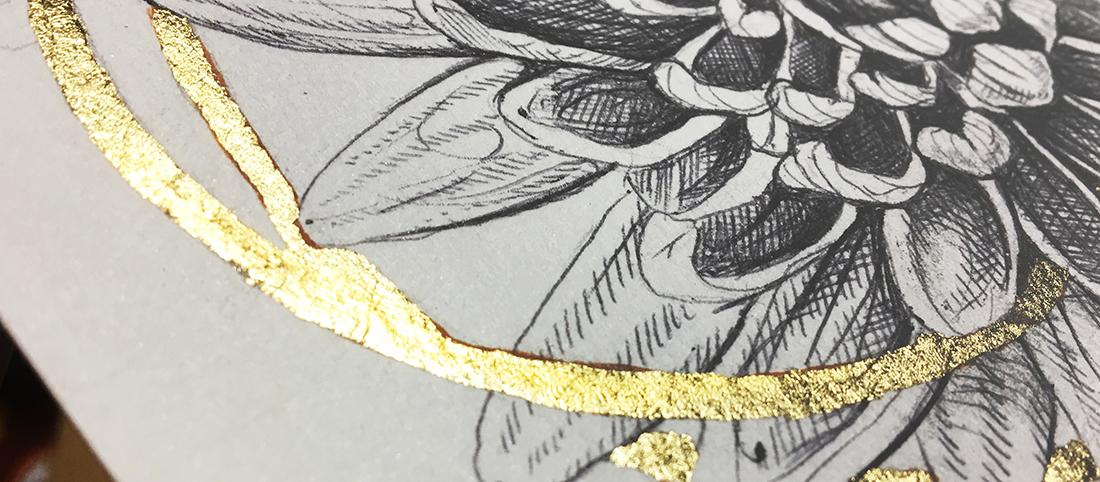
2. What is Gold Leaf?: So the first chapter that we're gonna be looking at is what is gold leaf? Gold leave is a sheet of gold that has been hammered or pressed down to a desired thickness , usually pretty thin to make those very thin sheets. And like other gold products, it can come in a range of carrots and colors. So there are different types of gold leaf again, like gold products. Gold leaf could be riel, or it could be imitation, and this is not necessarily a bad thing. Genuine gold leaf is made of real gold, typically 22 carats, whereas imitation gold leaf is typically made with copper and zinc. Your instinct might be to say, here real goal was always better. Why would you even use invitation gold? But let me tell you why that might not be cracked. So for genuine gold Lee, it is made of real gold. It's quite expensive. It should be applied by different method called water gilding. It will never tarnish as long as it's 22 carats and above, and therefore it does not require ceiling. An imitation or complicit gold leaf is made of copper and zinc. It's quite inexpensive and it can be applied using a size adhesive. However, imitation gold leaf does tarnish and therefore require ceiling. So now that we know that there are two different types, when do you use each of them? So for riel gold leaf due to the cost of the actual leaf itself, it's important to use this when you're looking to increase the cost of the item rather than for purely aesthetic purposes. When the gold leaf will be the final step. The other time that you want to use gold leaf is when you do not intend on painting over afterwards. Metal leaf can be used as sort of a base layer for other layers of paint on top, and this could be a very unique and fantastic use of gold leaf. But I would definitely not recommend using real gold leaf for this due to the cost now imitation gold leaf. Ah, highly recommend using this when you intend on painting over it. It's also important to note that this is by far the more budget friendly option of the two . All in all, it could be really difficult to tell the difference between real gold leaf and imitation gold leaf, especially ones, has been applied. And since rial gold leaf, while resistant to tarnishing, is not a resistant to abrasion, and it's still recommended to apply a sealant into the final phases anyway. So tarnishing imitation gold leaf Kantar nist you to two things air and ammonia. Aaron Exposure will cause the imitation leaf to tarnish by reacting with the molecules. Ammonia will also tarnish the imitation gold leaf. This can present itself is a problem when using a curling pain, since wet acrylic paint can actually give off small amounts of ammonia, and this could have a negative effect on that imitation gold leaf. So there's actually a couple different colors or types of metal leaf that you can get. Let's talk about them briefly. While gold is most common color of medal leaf, there's actually a range of others. Silver and copper color leaf are also fairly common. Silverleaf, like gold, could be both genuine or riel and imitation rial. Silverleaf is made with real silver, but unlike rial gold leaf riel, Silverleaf is actually prone to tarnishing and will require a sealant. Imitation. Silver leaf is typically made up of alumina and will not tarnish copper leaf is another one that I frequently use is typically made with real copper. It will tarnish over time and form a sort of greeny blue patina. This can actually work in your benefit in the long run if you choose. So now let's go over a few terms that you might see in this tutorial leaf. This refers to the thin pressed metal often comes in a variety of colors and compositions. Bull the base color that goes beneath the gold leave. Historically, this is red in color and is made of clay mixed with adhesive. One water gilding in modern times bowl typically refers to the paint below the leaf. The color of the paint that you choose can have an effect on the overall tone of leaf. So keep this in mind, sighs. Sighs refers to the adhesive used in modern day applications of gold leaf holidays. These are actually small spots where the gold leaf did not adhere to the surface, usually due to lack of adhesive in that area. Skew ing's skewing zehr loose fragments of gold leaf. Here's a little tip for you. I like to collect these in the small container to use to fill holidays later on or for future projects. So now that you have learned what gold leaf and other metal leaves are, we're gonna be looking at a couple of application methods next.
3. Application methods: so there are two main types of application for gold leaf. There's more historical method called water gilding. It's a pretty lengthy process. And then there's a modern day application, which uses an adhesive called size. Today we're going to be learning a lot more about size adhesive. We're not really gonna be covering water gilding do twit being more of a historical method . So now, to look at application methods, their two main types that we're going to talk about here. The 1st 1 is called Water Gilding. Water gilding is a more historical method of applying gold leaf, in which she actually used an adhesive made from rabbit skin. The process begins by applying layers of gesso, which serve to produce a smooth surface to apply the leaf to as well. It absorbs adhesive, so the leaf bonds properly with a surface. Ah bull is then applied, made of a combination of red clay and the rabbit skin adhesive. The final step to applying the gold leave is to introduce moisture into the dried bowl containing adhesive, usually by brushing the surface with a water so to brush, then carefully applying the leaf to the surface and burnishing with cotton. This method is quite lengthy and requires finally tuned timing. The other type of application method is going to be using size adhesive. In modern times, we have size available to use in both a water based and an oil based formula. Sizes offend adhesive that often looks milky when wet but drives down to be clear. There's a range of drying times available, so choose whichever is most suitable to you. In this tutorial, I will not be talking further about water gilding, but will only be talking about size adhesive. All right, let's head over to the next chapter materials.
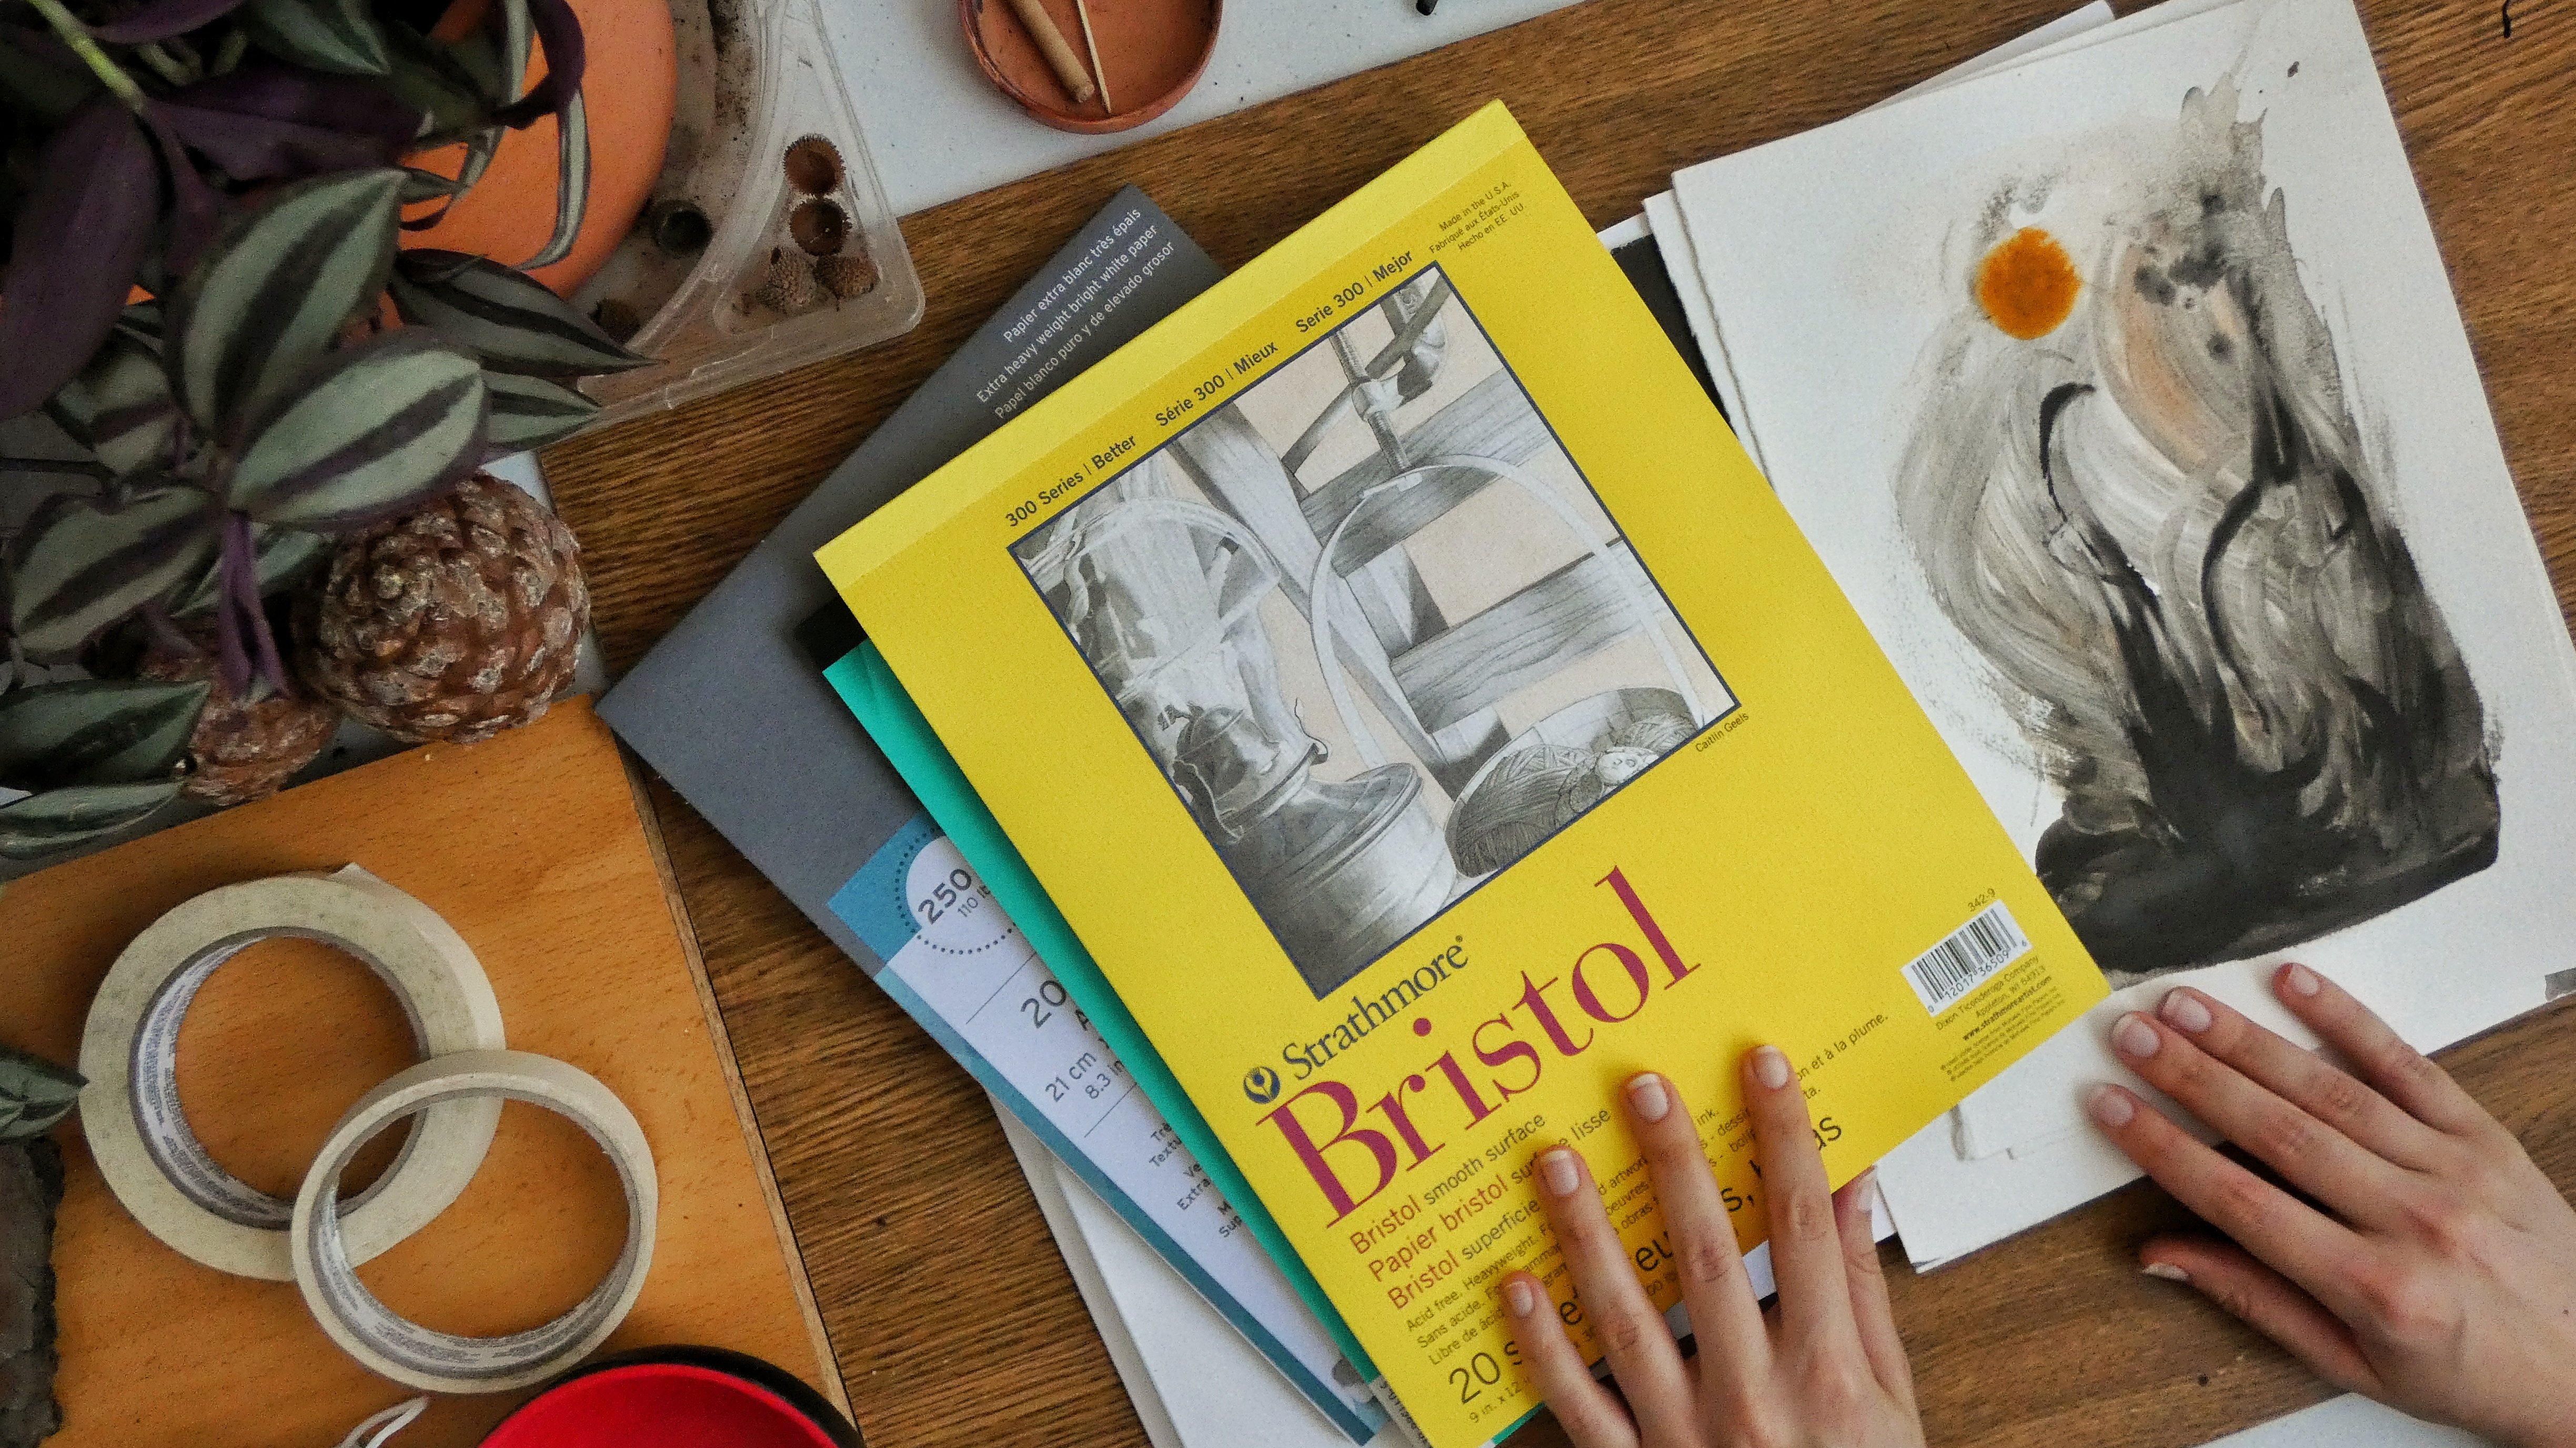
4. Materials: so gold leaf can be applied to a huge number of surfaces. The possibilities are endless as long as you're paying close attention to the actual preparation of the surface. Your gold. I tend to use gold leave mostly in my paintings, which is usually either done on acrylic or oil paint, usually on canvas for wooden panel or relatives on paper as well. But like I mentioned earlier, the possibilities are endless. One thing to know that if you are applying toe oils, you must ensure that the surface below is completely dry. Let those oils dried however long it takes. The reason behind this is that as oil dries, it could have the tendency to shrink festival. The moisture leaves it, and if you apply your gold leaf prior to it being dry, it might actually cause a gold leaf to crack down the road. And you don't want that one more thing to keep in mind when you're preparing your surface for your gold leave. Is that due to the thinness any well, imperfections on the surface below will be very apparent if you're looking for that nice, flawless, mere like shine. Make sure you put a little extra time into preparing that surface. Grab some fine grit sandpaper and give that a nice white down. So now let's talk about some materials that we will be using. Gold leave can be adhere to a huge variety of services. Nothing is off limits with proper application. The most frequently applied to paper and my paintings with the possibilities are endless. If applying to oil paint, it's extremely important that the paint is fully dry prior to applying the gold leaf. If the pain does not dry prior to it, it can cause a gold leaf to crack and separate down the road. Also, oil paint is more inert when dry, which will actually prevent any adverse reaction between the adhesives and sealants. One thing to keep in mind when it comes to surfaces in gold leaf is that due to the thinness in the metallic quality of the leaf, any imperfections in the surface will be very apparent after the application. So if you want that nice mirror like shine, put a little extra working to make sure that surface is nice and smooth. Now let's look at the adhesive. Still like mentioned earlier. This is called size, and it typically comes in two different formats. We're gonna be looking at water based and oil based sizes for water based. I have always had success with the Mona Lisa metal leaf adhesive size by the Browns speedball. It's inexpensive and thin enough to be applied in fine detail with brush when wet. It's milky fluid, but drives perfectly clear and tacky. I find that it drives within 30 minutes and has an open time of vote 24 hours. This fluid can be cleaned from your brush. Using simple water, though I highly recommend using a bit of soap to ensure that the brush is truly clean. After application. Now oil based size, I recommend Japan gold size by the brand Windsor and Newton for applying gold leaf over oil paint. It is a relatively short drying time compared to other oil based adhesives. It could be clean from your brush using solvent, so ensure that you have some on hand to clean those brushes. Now let's talk about the leaf. Choose your leaf based on the color that you desire and also the different types of pain that you will be using alongside the leaf. Refer to the earlier section about riel versus imitation metal leaf to help you choose brushes. You will need a brush in order to apply the size, but the brush type in size will actually be dependent on what you're covering with gold leaf. Use a finer brush for smaller details and a larger brush for covering larger areas. I recommend not using your favorite brush for this part is you would hate to accidentally glue the bristles together. Oh, for modern gold leave application. A traditional goal is not required. Depending on the project. You can paint the area below the leaf, and it will have different effects on the finish. Look, reds can give the gold leaf more vibrant and rich look, whereas black and blues could make it look more cool toned. Play around with this to see what works for you so sealants. Other incompatibilities can get a little confusing. So let's break this down step by set to make it nice and simple sealers. They're typically two types of sealings. Permanent and removable. Permanent ceilings are designed in such a way that they are permanently applied, whereas removable ceilings are formulated so that they could be dissolved, typically by using a solvent. Ceilings also need to be chosen carefully, depending on the type of paint where the surface that is applied to sealants intended for oil paint can be used on both oil and acrylic paint. However, sealants intend for acrylics cannot be used on oil paint, so ceilings and their incompatibilities can get a bit confusing. Well, let's break this time. Step by step, this handy chart should be able to help you choose the correct materials for what you would like to do, Keeping in mind all of the incompatibilities. Let's start at the top and with our base layer, the base layer, maybe the actual base of the painting, or maybe a few layers. And I divide my basis into two categories. Oil based and non oil based, oil based bases refer to oil paint and non oil based bases referred. A paper and a curly paint or Jess Oh, let's break down the needs for oil based base. Because the base layer is oil paint, it requires an oil based size for the gold leaf application. You then must choose whether or not you would you like to use genuine real gold leaf or imitation. We choose riel gold leaf. You will have three choices for sealant. Permanent oil based, removable, oil based or no ceiling at all. Since really gold leave will not tarnish, the technically does not require a sealand. However, asylum will help to protect it against physical abrasion. I personally use removable oil based sealant. If you choose imitation gold, leave over an oil based base, you have two choices. Permanent and removable oil based sealants. Again, I personally use a removable oil based sealand. Now let's look at our non oil based base acrylics and Jess Oh, and paper. Because we're not using an oil based base, water based size should be used. Let's look at acrylics and Jess. Oh, first, If using riel gold leaf, you have the most flexibility when it comes to your ceilings. Here, you can use any water based or oil based ceilings as well as no sealant. Using imitation gold leaf, you can either use a fast drying water based sealants, spray or permanent or removable oil based sealants for the ceiling spray. I highly recommend Onley using a fast drying water base one. And the reason behind this is that because it's a water based spray that is acrylic in nature. It may actually have a negative effect with that imitation leaf, so you want something that dries really quickly, so there's no chance of the ammonia interacting with the gold leaf. Now let's look at paper again. Because it's a non oil based base. You want to use a water based size to apply your gold leaf. For real gold leaf, I recommend using a brush on water based sealant or not at all. For imitation gold leaf, I recommend Onley using a fast drying spray sealant. You may ask why we cannot use an oil based sealant here. The reason why I don't use on for paper is because unless your paper is prepared properly, as in fully prime, there's a chance of the oil. The ceiling will leach into the paper and create some unwanted effects, such as greasy patches or yellowing. Not exactly what you want to see on your artwork after all of that hard work. So to combat this, skip the oil based sealant and stick with water based one something that is important to note here is that all ceilings that you use must be high gloss to maintain that nice metallic quality for you, something that is a match or even a satin finish. You are going to completely ruin that nice metallic gloss equality, and it's going to turn into like a muddy, yellow sort of color, not very attractive. A few other tools that you may find handy are going to be forceps. Your tweezers. These air very handy when it comes to actually handling the gold leaf, as well as cotton balls, cotton pads or cotton gloves. These are nice and soft and will help to burnish the gold without producing scratches. So now that you know about all the materials that you're gonna be needing to apply your gold Lee, let's get looking at the actual steps in which you quiet.
5. Steps: How to Apply Gold Leaf: all right, so let's look at the steps that you will take to apply gold leaf before we get started. It's really important that you prepare your environment. So do the fitness of that gold leaf. It has a tendency to get everywhere, and because it's so thin, it takes just the slightest breeze for it to go flying into the air. So do yourself a favor before you get started. Close any windows. Get out of the draft area if you're currently sitting in one and try your best not to SMEs or breathe too hard while you're applying it. That little gust of air that might not seem like a big deal will send everything flying. And gold. Leaf is kind of like glitter in the way that wants us in your home. Good luck getting rid of it. Like mentioned earlier. There's a huge range of surfaces that you can apply gold leaf to in this class, only gonna be covering artwork, but really the possibilities air analysts. So there are many ways to prepare surface for our work, so I'm not going to cover all of these methods simply those that air for preparing for actual application of gold leaf. I mentioned the use of a bowl earlier, which is a colored base on which to apply the coldly. So I started having effect math. My outlook. I would like to put so choose carefully, which and then is completely dry, hired a moving forward. I start off by mixing kind of a reddish brown tone with basic acrylic paint and then thinning it out a little bit so I can get some accuracy and applying the bull toe where their gold leaf will go. Let this dry completely. - Now it's time for the adhesive. The size that I use is pretty fluid and then, which is great for achieving finer detail with gold leaf. The type of brush that you will use will depend on what you were doing, you know, very gently swirl the bottle of size, but do not shake the bottle by shaking the bottle. You're gonna be introducing little air bubbles into it, which actually can cost a really negative effects for getting a smooth application of gold leaf. Dip your brush and apply it to the surface. The size that I use begins milky and then dries to a clear and tacky finish. Take care When applying the adhesive, try to avoid going over the same spot as it can cause rippling, and this will be very apparent in the leaf after the application. Now walk away for a little bit and let it dry. The Mona Lisa's size that I use typically drives within 30 minutes and the Japan gold size , usually of culture, to an hour. You can tell when the size is ready for gold leaf by touching it very gently with your knuckle. It should be tacky, but not sticky should not pull up onto your finger. Now we get to play with the shiny stuff. I recommend using forceps or tweezers to help you place a leaf as well as to pick it up. You want to avoid touching the gold leaf with your fingers as much as possible. Not only can the oils in your skin tarnish the leaf, but your fingerprints can be very tricky to burnish out afterwards. If you would like to handle the gold lee for their hands, Ah highly recommend getting a pair of cotton jewelers gloves. They prevent fingerprints from imprinting the gold, and they keep the oils of your skin away, and they can also be used to burnish the gold. After application. I recommend overlapping your pieces slightly, just a few millimeters. This will make your life easier when it comes to filling in the gaps or holidays. To press the gold, leave into the size. Grab a small sheet of tissue paper and lay it on top of the leaf. Gently process over the surface, but without dragging the paper around. You don't want to rip up the leaf. If you were wearing cotton gloves, feel free to press gently with your fingertips. Are you having a tough time picking out that gold leaf? Take a small piece of wax paper and press it to the gold. Leave with wax side down. The lee should stick to the wax, which will allow you to lay down larger piece of leaf with more ease and hopefully wrinkle free. The size will stick to the leaves stronger than the wax well, so the wax paper will lift away freely after application. Now we move on to burnishing, so now we have a bunch of gold leaf chunks, hopefully stuck well enough to the adhesive, but we want to add a bit more shine, usually something soft, like a cotton patter. Bo begin to gently polish the surface, moving in small circles. This does two things. It removes the loose bits of gold leaf that don't have any size to stick to and polishes the gold. If you have any stubborn flakes that won't lift away easily, grab a soft, clean paintbrush instead. I like to collect a little fragments or skew ings in a small container for future projects or for filling in the holidays. In the event that you have small gaps or holidays that don't have any leaf, adhere to them. Take a small brush loaded with size and apply it to the blank spots. Repeat the process with the gold leaf, using smaller fragments to avoid wasting. And now you're done. See how beautiful and shiny that looks and now on to the final step sealant. Now that we're done applying the gold leaf, it's time to choose your sealant. Hopefully, you have identified the proper sealant for your artwork and are ready to apply it. If using a brush on sealant, grab a clean brush and gently stroke the ceiling onto the painting working in even strokes in a single direction. Be careful not to apply too much pressure with the Brussels of the brush over the gold leaf . You don't want to intend the gold if you're using a fast drying spray. Sealant. Ensure you're using this in a well ventilated area were outside and give nice light, even strokes over the entire surface. I recommend using several thin layers working with a light hand, rather than using a single heavy layer of the spray sealant. Make sure you let a dry between the lighters. Now, before we move on to the next chapter, I want to briefly talk about two different styles of gold leaf application. These air two types of application that have drastically different looks. I like to refer to the two styles as clean and vintage. With clean style. You apply the sheets of gold leaf, trying your best to keep them fully intact without wrinkles or imperfections. This creates a very smooth, mirror like effect for the vintage style. As I like to call it, you dust and scatter loose skew ings the small fragments of gold leaf over tacky size and keep packing it on until the entire surface is covered. You may need a few layers of size to fill in the gaps and insurance all covered and then burnish everything together. This results in a much more textured look which diffuses the life more softly than the clean style. All right, so now you should be aware of all of the steps that you need to take to buy gold leave. I know. Could get a bit confusing at times, but just slow down and look at your steps to make sure that your meeting all those compatibility ease and you should be fine.
6. Other Applications & Conclusion: So in this final chapter, we're gonna talk about a couple of other application methods as well. Some other techniques. So now you should have a pretty decent understanding of how you're gonna be applying that gold leaf. Now, let's look at another technique. So gold and other metal leaves can actually serve as a fantastic base for other parts of your painting. By starting off with that nice, shiny base and putting transparent layers of paint on top, you can create this amazing, vibrant, luminous quality to the paint that actually catches the light and a really unique and amazing way. So do the finicky nature of gold leaf. Of course, we're gonna have to take some extra steps to make sure that it is compatible with all the paint. And then it lasts a very long time so you can paint on top of gold Lee with both oils and acrylics. But one thing to mention here is that I don't recommend painting on top of real gold leaf. The major reason behind this is that real gold leaf is quite expensive. And why would you bother spending all that money on riel gold leave if you're just gonna cover it up anyways. Typically, when you apply both riel gold leaf and imitation gold leaf to a painting, you can barely tell the difference anyway. So unless you want to be able to boast about using real gold leaf are recommend using imitation if you intend on painting over it, so now you should know how to apply gold leaf to your paintings. So let's wrap up by talking about a few other applications and techniques. Gold and other matter. Leaf can also be used as a base for a painting by building up layers on top of it. With paint, you can create some very need effects and out a captivating, luminous quality of the work. So, of course, due to the delicate nature of gold leaf, it takes some special care in preparation to properly paint on top of it. You can paint on top with either oils or acrylics first off due to the cost factor. When it comes to using riel gold leaf, I do not recommend painting over it. If you do intend on painting over the leaf, I recommend that you choose Imitation leaf instead to paint over imitation goalie for the curl X. You must add a barrier of sealant between the leaf and the acrylics to prevent the ammonia from the wet paint from tarnishing the leaf. By spraying a coat of fast drying water based sealand onto the gold leaf, you can successfully prop the surface for taking more layers of acrylic paint without causing tarnishing. It is un recommended to finish off the entire piece with a few more thin layers of spray sealant to paint over imitation gold. With oils, you need to pay attention to the type of sealant you use as well. What do you use it? You have the option of either using a permanent oil based ceilings are removable oil based ceilings or no ceiling at all between the gold and oil paint that will be placed on top? Would, I personally recommend is not adding a layer of ceiling between the gold and the oil, but then finishing off the entire painting with a layer of sealant when everything is complete? Here is why imitation gold will not react with oil. Paint isn't as it does not produce ammonia, so technically you do not need a ceiling between these layers. You can use a permanent oil based ceiling if you would like, but is not required. I do not recommend using a removable oil based sealant between the gold oil because the probability that the solvent in the mediums use with the upper oil paint layers may actually cost some adverse effects. So the easiest option here, Issa. Simply add the sealand is the final step in your painting process. All right, so that brings our class to a close. I really hope that you found it helpful, and I hope you can find some really great ways to add gold leaf and other metal leave to your artwork. And it could be a little confusing with those incompatibilities of paint sealant and size gold leaf. But I hope this class helped out a little bit of clarity to the whole ordeal. If you have any further questions or concerns or anything that you want to show me, feel free to reach out to me. I'm always looking for new artwork to look at. Thanks for watching
 Danielle Trudeau, Artist. Teacher. Lover of cats.