Transcripts
1. Welcome: Hello, my name is Stata and I've been using Procreate Dream
software for a while now, and based on my experience, I'll be teaching you
Procreate Dreams. Procreate Dreams is an
all new animation app packed with powerful tools
that anyone can use, Create engaging hand
drawn animations, motion graphics, and enhance them with photos,
videos, and sound. In this course, I'll be teaching you all the tips and tricks to learn procreate dreams better and bring illustrations to life. We'll be discussing
with various ways to animate illustrations
in procreate dreams. Like tumbling, twirling, moving, spinning, rotating looping, and spaying
animations, et cetera. So goodbye for now and
see you in the class.
2. Objective: My goal for the course is to equip you with the skills
you need to create your animations
in procreate dams as you fall along in the course, you're going to be creating simple animations from scratch. I'll also talk about
how you can take your procreate artwork
into procreate dreams. See you on the first lesson.
3. About this Class: This course consists
of two parts. Firstly, we will discuss about procreate reams,
interface and gestures. And where, which function
is located so that we can work fluently in
procreate dreams, we will also learn what exactly animation is and what are all
the possibilities we have. Within procreate dreams, I will show you three
methods of animation. Animation with key framing, frame by frame animation, and a new performing mode
in Procreate Dreams, for which everyone is
super excited about, We'll be learning about how
to share your animation. Import procreate artwork
into procreate dreams, importing procreate brushes, importing audio into
animation, et cetera. The second part of this
course consists of giving your hands
on experience with animation by doing
live animation using all the methods Procreate
Dreams has for us. I'll also be sharing some
other animations to give you an idea about
different animations we can explore in
procreate dreams. At the end, I will also be sharing a procreate
dreams sheet sheet, where I have mentioned
all the shortcuts of gestures which we will be using on a regular basis in the Procreate Dreams
software. All right. Did I make you curious
enough about the course? So without further ado, let's jump right into
it, see on the class.
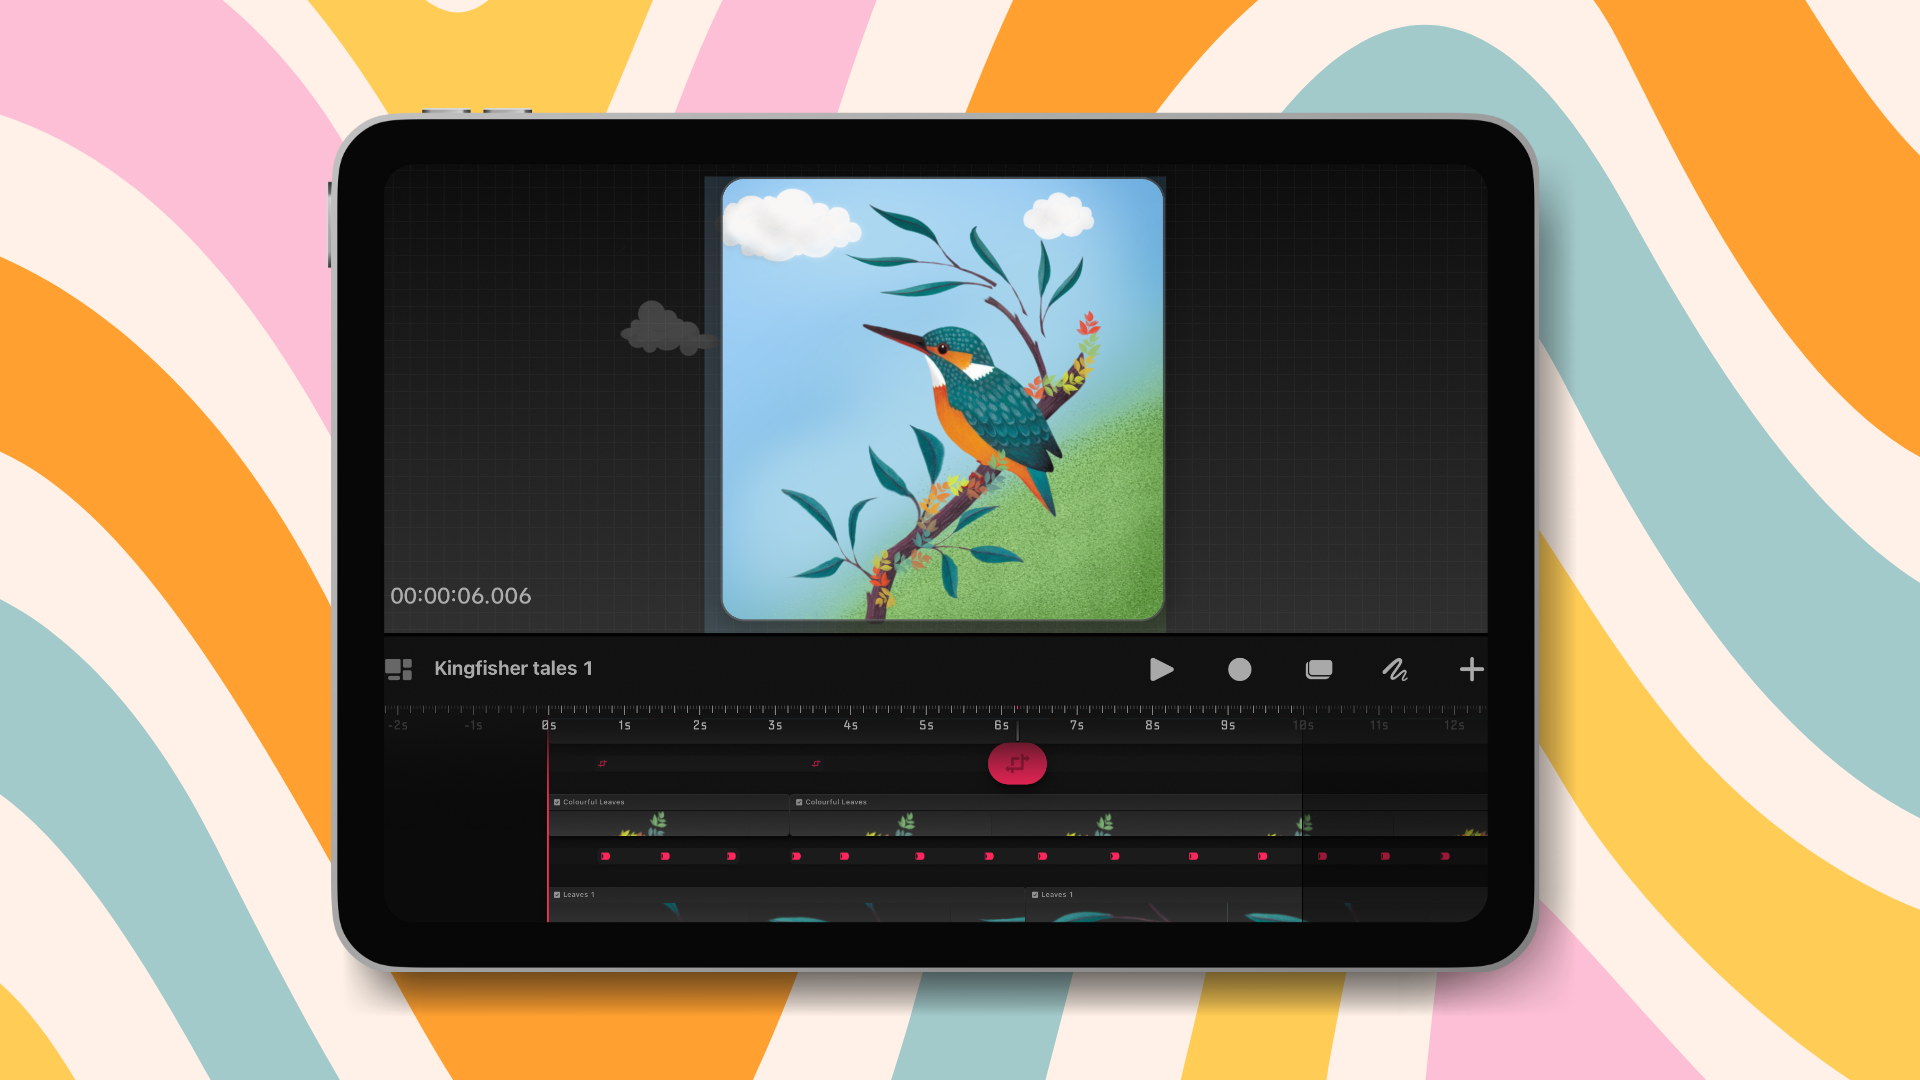
4. Procreate Dreams Interface: In this video, I'm going to give you a tour of the
procreate dreams interface so you will know how to navigate around as you
create our animations. When you open up
procreate dreams, you will step into the theater and this is where
all your movies are. If you're familiar
with procreate, it has the gallery of artworks and Gene has a
theater of movies. Here you can see I've got a whole bunch of
movies in my theater. A couple things you
can do in the theater. You can long hold on a project and you can see different
options have appeared, like you can rename Duplicate, Share Copy, or
delete the project. Over here, there are two
different options where you can store the files on your cloud drive or you can
store files on my ipad. Over here, you have got the stylet butter where you
can select different movies. But most importantly, we have
this little plus sign in the upper right and we type
that to create a movie. You can swipe all down to get these different templates in different sizes and resolution. But for now, let's choose
the white screen template. There are some options before
we jump into a project. Here under the three dots, you can tap that and you can set your default frames per
second and duration. Let's go ahead and just
set those at the default, then let's go ahead
and tap empty. And that will take us into the Procreate Dreams interface. The interface is divided
into three parts. Up here is the stage, then in the middle we
have the tool bar. Then down here is the time line. Starting up here is
your movie place. But we also have outside stage that we
call the backstage. This is called the gray area, is called the backstage. This is the non visible
area around the stage. Elements that are in this area
would be out of the frame. And it's great to have
all extra working area because you can
have something over here and then bring it
into your movie and go back out and we will
get to play with that. The other thing in the stage
is this the time code. You can actually tap it to access some different
options for editing your en, skin and setting the background
color of your project. Don't worry about that for now. We will definitely
revisit that soon. Next up we have the tool bar, which is this bar that
goes across the middle, starting over on
the left hand side, we have these little
rectangles that will just take us back
out to the theater. Let's go back into our project, and then this is
your movie name. By clicking on it, different
options have appeared. Here you have movie properties. You can set frames per second and the
duration of the movie, as well as the resolution. There are some
different options. Under stage playback, this
is also really important. This is where you could
export your movies. But we will come back to that once we have made
some animation. And then there is some
other preferences. We have some different
options like draw and paint gestures,
history, et cetera. Okay, let's go back into a movie then We have some tones over here
on the right inside. The first icon is
the play button. The next one is
the little circle, and that is how you enter
the performing mode, which is how you can
record movements, actions, effects in real time. We'll get to play
around a lot on that. Next we have the cycle. This is the select
button, you can cut, copy, paste, duplicate
tracks as you wish. Next we have is the
Draw and Paint mode. If you tap on it, you will enter into the draw
and paint mode. You can draw
characters, et cetera. Now we can see we have
this little plus sign. If you tap on it, you can
add different tracks, photos, videos, text
files, et cetera. Now suppose if I
want to add a file, you can, you can select any of the file
you want to import. Like if I select
this tap on open, you can see the
file will import. And you can see the
file has already been imported into your
procreate reams. Let's go ahead and visit
the draw and paint mode. If you tap on it, you can see some different
essential tools had there, like your brushes. If you tap on it, you can see all the different brush
sets have appeared. Then we have the
smutch tool eraser, we have layers option, and we also have
the color picker. If you'd be using procreate. You can see that these options are also similar to procreate. So if I want to choose a color, if I choose a blue color, let's draw something here. Then I can select
a brush out here. Let's go for the chalk brush, and I will draw a simple circle. If I want to increase
the size of the brush, you can select here, you can drag for up and down, and also for the opacity. Right? One thing I want to show you right of the bat is when you are drawing
in procreate, as you are not confined to draw within the
bounds of this stage, which is the little
gray rectangle, you can actually draw anywhere inside or outside the stage. You can draw over, you
can draw over here, you can draw overhare, like I've mentioned before. You can draw elements over here and then move
them into the screen. When you animate,
you can draw like really long backgrounds and then scrawl across to make
some camera movements. All right, so you can see
we have created a big mess. We have to undo them. In order to undo, just take two fingers and
tap on the screen. This will undo the objects. Now, in order to redo, we have to take three fingers. Tap on the screen like
this, and this will redo. Then you can take two
fingers and you can hold them down for
a continous redo, that will go all the
way back really fast. Then of course, you can take three fingers down
for a continous redo. I think those gestures
are some of the ones you will probably use
in procreate dreams. But in the next lesson, I'll be teaching you
even more gestures for working in procreate dreams. Okay, let's go back to drawing. Let's choose a color. I'll draw another circle. Let's choose opal color,
And choose a brush. I'll take the same brush, increase the size, and I'll
draw another circle here. Now when we do that, you notice something has
filled up in a timeline area. And this is a track. This track is filled up
with a piece of content. When it comes to
procreate dreams, you can think of tracks as
containers that whole content, your tracks are the entire
duration of this movie. You can fill it with
multiple pieces of content. You can adjust the duration
of this piece of content by just dragging the edge
of the piece of content. Or you can just long press the content and you can
choose filled duration. You can see the entire
time line has been filled. Likewise, you can also repeat
the same with this content. You can choose full duration. Now in order to fill up the
entire time line till here, you can choose one of the edge
of the time line and just track like this, the same. You can repeat
with this as well. You can see the entire time
line has been filled up. Now you can also move content forward or backward in
the time line like this. By long pressing on a content, you can move forward
or backward. You can also move the track
up or down like this. It is good to know that
tracks that are at the top will be in front of the tracks that
are at the bottom. Now if you tap and hold
on a piece of content, some options have appeared. Now you can rename
a piece of content. You can highlight blend modes, mask fill, duration, like
we have just already did. You can choose Track options and you can delete the content. Here are three
different options, Cut, copy, and paste. But let's go ahead and
exit back to the gallery. You have this little symbol
with the rectangles here. Just tap on it like this. You will exit into the gallery. In the next video,
we're going to talk a little bit more
about gestures. Goodbye for now. See you in
the next lesson. Bye bye.
5. Gestures: In this video, we're going
to learn about gestures. You have already learned about two finger tap to undo and three
finger tap to redo. Let's learn some more
important gestures which are used in
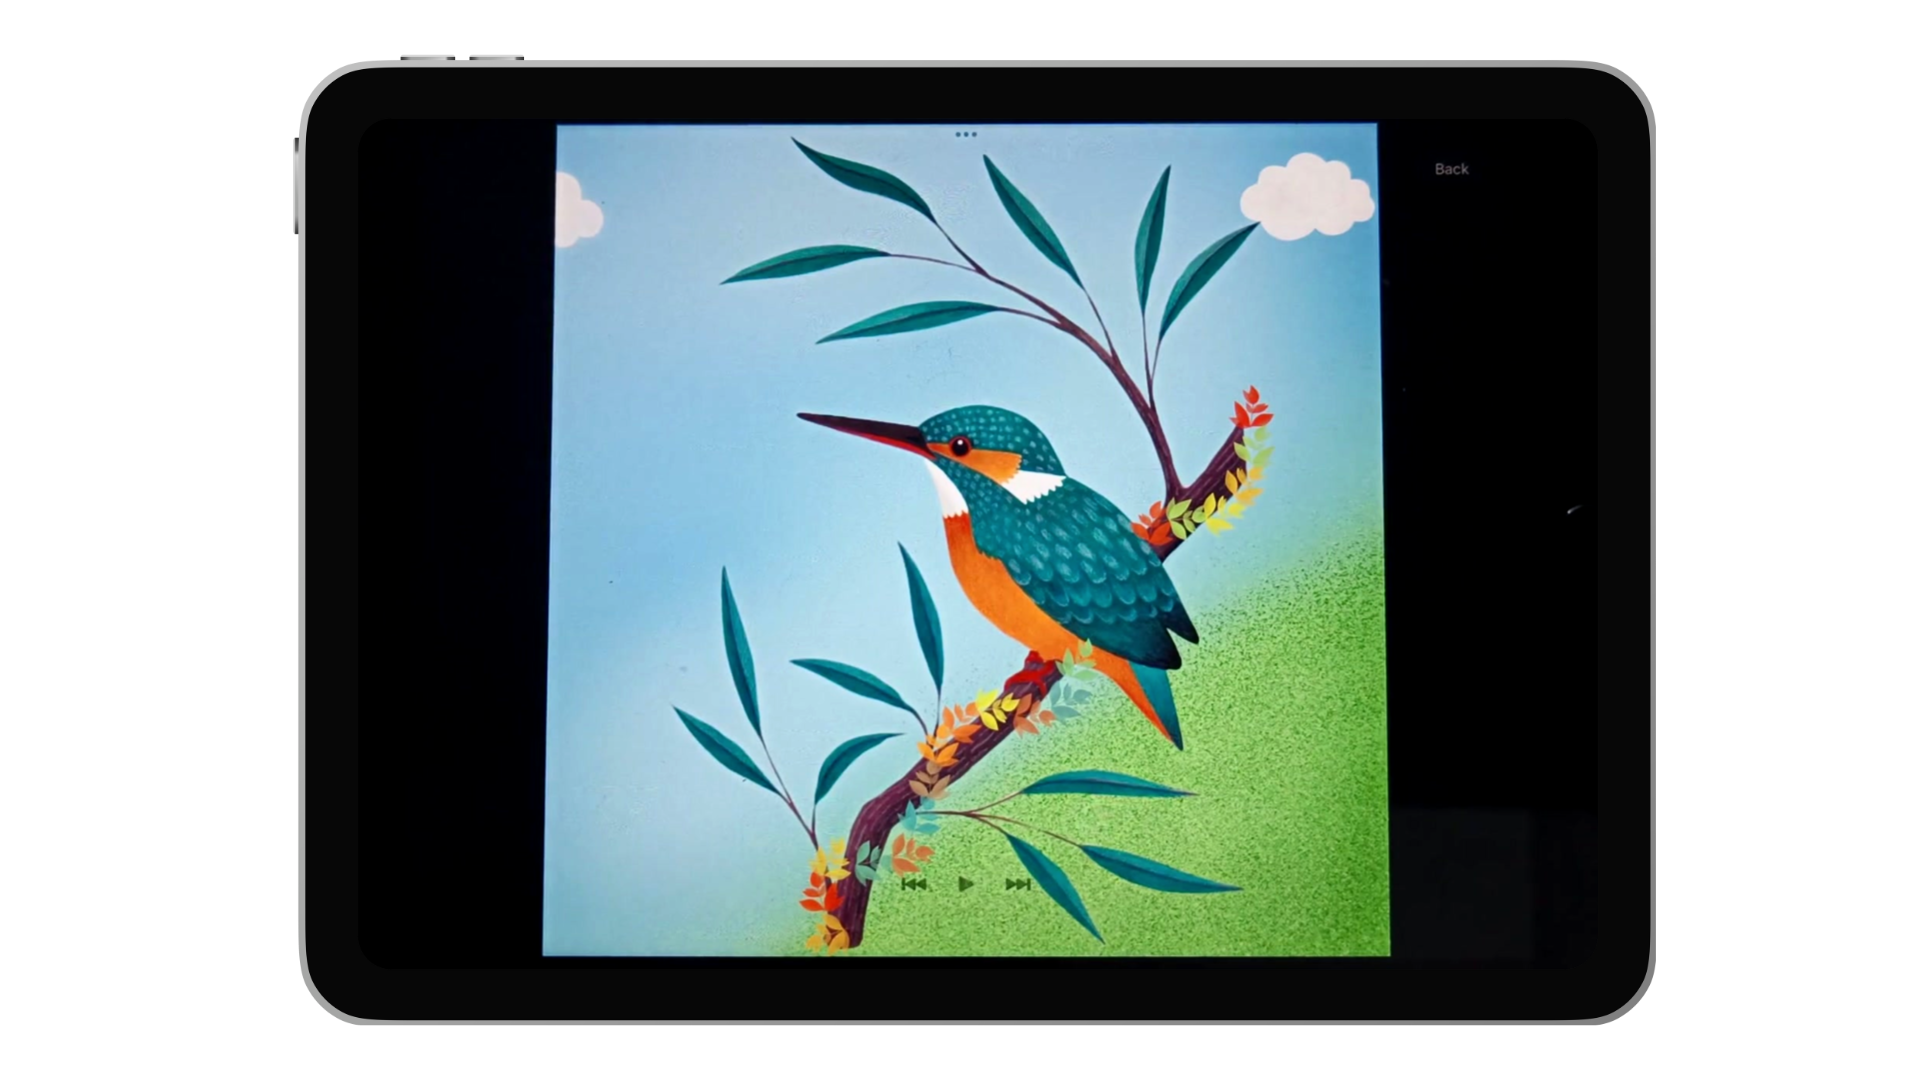
procreate reads. We are going to open up one
of the finished animation. This is including in
your class resource. Also, we're going to open
up one of the finished. Let's open this. This animation has several
tracks filled with content. Let's learn about zooming
around here in the timeline. You can take two fingers and do a pinch to spread and
zoom in or out like this. If you take three fingers and slide them
horizontally like this, yeah, this will
adjust the timescale. This will show a lot of time. And then this way we will zoom into a short
amount of time. Like this. You can
see the frames have appeared like this. You can zoom out, you can take three fingers and move them vertically like this. This will adjust
the vertical scale. It just make a little easier to see your tracks
and everything else. Then if you do a quick
pinch gesture like this, this will fit the entire
movie onto the screen. You can see your
entire time line area and all your tracks. If you keep double tapping, eventually you get
to maximum zoom. Like this, Like this, you can see you have entered
into the frames frames. Okay, now let's go back. We'll do a quick pinch out
to get all the way back out. And let's go back
to the time line. Okay, so you can see the entire timeline has
appeared and we have exit into our time line. Got it? In order to o, we'll take three fingers like this,
vertically and horizontally. Now let's talk about this little icon which is
called as the playhead. Now you can move it back and forth to scrub
through your movie. If you zoom in into the time
line to a certain area, then your playhead will play
only up to this portion. Like if I hit on play, it will only play
from here till here. And it will loop in
again and again. It shows it adjusts
the timescale and which is really great for previewing just a
portion of animation, so you can focus it on
what you are doing. You can also take back the playhead and flick
it back like this. Or this will go all the way back to the C thing and then
it will start your movie playing like this,
as you can see. Now take four finger and tap it on the screen to enter
into the full screen mode. Now take a finger and you can scrub back and
forth on your movie. You can tap down here. You can see the video
is under your control. You can see here are some
controls to the interface. You can tap four fingers again to exit from the
full screen mode. Now let's zoom in and
talk about this playhead. If you see a little
clapboard symbol, you can tap the playhead and
get the key frame pop over. And these are some tools
used to create animation, which we will get into
more later then if you long press on a piece
of content like this, you get the content pop over. And there are some options
to cut, copy, duplicate, rename, highlight, blend, mask, fil, duration, track
options and delete content. That's all about gestures. They do take a little
practice to get used to, but once you get them, they become second nature. They're also useful for
working in procreate dreams. Now you have a really
good overview of what the procreate dreams interface looks like and how
to use gestures. In the next video, I'm
going to introduce three key ways of animating
in procreate dreams. And then we are going to
start with animation. Good, now see you
in the next lesson.
6. 3 Keys ways of Animation: In this video, we are going
to be discussing about the three key ways of animation in procreate
dream software. Here they are number one, frame by frame animation. Second is key framing. And third is using the performing mode in the
procreate dream software. Hail. We are going to have a little sneak peek of all the
three ways of animation in procreate dreams we'll
be discussing in depth in our next
lessons. Let's begin. First is frame by
frame animation. I'm going to choose this now. In order to do frame
by frame animation, you have to enter into the draw and paint
mode, which is this. Now you can see different
objects have appeared. Now, in order to swipe down, we will just drag, we will enter into the draw
and paint mode and the flip Ok will
appear in front of you. Here you can see different
frames are created one by one. And this is what frame by
frame animation looks like. All right, let's move forward to the next key
way to animate in procreate dreams is
animation by key framing. I would choose this one. Key frames essentially points on a timeline that defines that
the state of your content, where it is, what shape it is, what effect it has, et cetera. We would have a key
frame that says, I look like this here. And then another key frame here says that I
look like this here. Then the software will run smoothly transitioning
those two states. So it would move it across, it would change the effect,
or change the side. But it would smoothly transition one key
frame to the next. This is a great way to create precise movements
in your animations. For example, in this
project I have created the blinking effect
in the eyes of the characters using the
key framing animation. If I play it, you can see
the blinking of the eyes. Okay, let's move forward to the last method of animating in procreate dreams is by using the performing mode in the
Procreate Dreams application, which is a very brand
new innovative feature launched by the
Procreate Dreams. Basically, let me show you, I would choose this project. If I enter into the
performing mode, which is this icon, take the play all the way to the beginning and click
on the performing mode. If I want to just swing
or make circles of the, it will record a long
wise C. I'm making few circular movements
here on the project and meanwhile my timeline is already playing like it has
already recorded. Now if I hit pause and I
flick back the playhead, you can see all the movements
have been recorded. It's a great way to create very organic,
expressive movements. And it's also a great
way to just quickly animate something because
you are doing it by feel. I love animating through procreate performing
feature because you really just get into a feel of it and it's just a fun experience. Those are the three ways that you can create animation
in procreate reams. And in the following
three lessons, we're going to spend
each lesson going through those three types
of animation in detail. First, we will
explore performing. And we're going to
create an animation using performing feature. And then we are going to
explore key framing manually. We will do three key
framing and then finally, we will explore frame
by frame animation. For those three projects, we are going to be drawing
our own subjects to animate. But I don't want you to worry too much about the art
making drawing process. We're just going to be
drawing simple things to get ourselves familiar with these
three types of animation. I'm very excited to get
started animating with you. See you in the next
lesson. Bye bye.
7. Performing a Leaf: Welcome to our first follow
along animated lesson. In this video, we're going
to be explaining one of the three key ways of animating appropriate dreams
Using performing tool. This is a really awesome
tool, Appropriate dreams. It allows you to
capture movements and apply effects in real time. It will capture movements. It is just a lot of fun and it's a great way to very
quickly animate something. But also it lets you create very organic movements because
you are doing it by hand. So I'm really excited
to show you cool things that you can do with
the performing feature. Let's get started. Here
we are in the theater. Let's go ahead and start
a new movie project. We are going to tap
this little plus sign. Let's just choose
four K white screen and we're going to add empty. We are in the stage right now. Okay, let's draw something. We are going to enter
into the draw and paint more. Let's draw a leaf. I'm going to choose
a brush studio pen. Let's choose the
color soft green. And let's draw a
leaf right here. Make sure the opacity and the brush size are according
to your requirements. And let's draw something. Okay, that's perfect for me. Let's fill the
color, okay? Okay. As you can see, if you zoom in, there are still gap right
here. I don't know. But hopefully,
procreate dreams will fit and correct this as well. Okay, I'm fine. Okay, let's choose
erasordraw strokes right here to add effects. Okay, that's perfect for me. Let's just leave this a curve. Let's draw circle right here. Okay, that's fine for me now. Now what we'll do
is we will choose a darker shade of green
to add some shading. Okay, I'm going to choose the chalk brush and I'm
going to add a layer. And I will choose as the clipping mask so that the shade does not go out
of this brown boundary. Okay, let's, okay, let's
draw shading over here. I'm going to, I'm
going to do this, you can do shading as
for your requirements. I'm choosing like this. Okay. Now I'm going to choose a lighter shade of green
to add a highlight. So it, let's give
highlight here. I'm going to choose a
little lighter shade more. Okay. I have this also also. Okay. I think it's fine. Now, I'm going to choose a
little bit of darker sheet, choose studio pen, and I'm going to draw some
details on the leaf. Okay? Like this rest. I'm done with the drawing
of the leaf. Okay. Let's, let's wind up here. Okay. I'm done with the
part of the leave click on. Done. Okay. Let's try animating
it through performing. To enter the performing mode, you are going to tap this
little circle right here. Just tap it, you will notice it changes
to a little red square. It also says, ready
here, Right here. It says it is ready to record
your movements right here. Okay, let's put a pencil on here and just swing, make
little movements. And you're going to notice
that the timeline is playing here on the back. Meanwhile, you are just making few movements on the
stage of right here. You can also move the leaf here, as I've already told you, that you can use this back
space to record movements. Okay, let's just pause and just flick back the playhead all the way to the
beginning. Like this. You want to see that
the movements have already been recorded
using the performing mode. You will see that as you
swing along the leave, the movements are recorded
and it is playing now. Okay. One thing I want
to show you right here is using this
modified button. If I'm going to tap it, you're going to see
motion filtering. What it does is it soothes out all the movements
you have done. Okay. Like I am at 38%
if I swipe it down to eight or 9% Okay. Tap done and just flick back the playhead
all the way to beginning. Let's see what it does now. What it is doing is it is recording movements
more quickly. Now if I want to
modify it to 100% like this and tap done,
let's see what it does. Just flick it back, you're going to see that the movements
are now all soothed out and it will look more like soothing movements and not very expressive as you can see. That's how modify and
motion filtering works in the procreate dreams.
I'm going to pause. Okay, let's explore some
of the things you can perform on procreate dreams. You might have noticed that you have the Red Mountain
Parks around it, these dotted lines with
nodes in the corners. Let's practice making this bigger or smaller
using the scale. To do that, we are going to tap one of the corner
of the nodes and drag it in and out to make
it bigger and smaller. You go in and out like this. Now, now you can grab the top or bottom of this leaf
mountain box like this. You want to see that the leaf is squashing up and
down like this. Or what you can do is
you can take one of the sides or the edges of the mountain box
and click on this. And just flick it like this. It, you can see the leaf is
flipping so quickly, right? Okay. Now, let's
rotate this leaf. In order to rotate,
you're going to see that you have
the mounting box. You have four corners on the mounting box
and you're going to grab one of the
nodes right here. You want to see that you have this little gray
circle appearing. Just click on it and just
drag and move simple motions. You can rotate,
flip it completely. You want to see that
the leaf is turning, flipping, moving,
swinging, twirling. And it's so beautiful to see
that we are rotating all the way to the field right now. Another thing I want to show you is how to edit your
anchor points. This is the point around which the object rotates and scales. Another type of things, let's
edit our anchor points. You can see three
different dots right here, topic, and you have
three different options. Horizontal, flipping vertical, and but we got to
choose edit, Anchor. Okay, tap here. A plus sign has appeared. Now if I want to just drag the plus sign
all the way here, all the movements will be
recorded around this plus sign. Okay, let's play it. Tab done. And let's just play now you're going to see
all the movements are around that plus sign. See, okay. Now in order to edit it again, pause and we're going to choose edit.
Anchor, point again. Tab three dots, edit, anchor. Now, just drag it all
the way to the center of the leaf and just
draw it all the way to the beginning and
see all the movements are recording are done through
the middle of the leaf. Correct. Now we have two other really
cool transformation tools which you can use to perform
in procreate dreams, which are Distort and Warp tool. But in these tools, in order to record
the movements, we have to make sure that the content is on
a single layer. In our case, there are two different layers
and meanwhile, there is no feature in the
procreate dreams in order to combine and pinch to convert
it into a single layer. Correct. What we're
going to do is Here is, in order to zoom in, you will see a little sign has appeared right here, right? If we just tap on it, we will see that our
layer has been hidden. Okay, we're going to add a new content track from this
plus little sign tap on it. And we're going to add
a new content track. We will see that here
is a new portion has appeared where we
will draw our content. Okay, let's draw something. Go to the draw and
paint mode now. Choose a brush, I'm going to choose this stamp brush of mine. Let's choose a color. Let's
choose an orange color. Okay, let's tap on it. And you can see a stamp brush
has already been appeared. It's so pretty, right?
Okay, Tab done. Now, we are going to be using
what tool in this drawing. First of all, in order to
use the performing mode first we have to make sure that our content has been
filled up in our layer. In order to do that,
you can see little, a little rectangular
line is here, We can just tap and hold. And here is the option coming which is called fill duration. And just tap on it. You can see the entire track has
been filled with this. Right now we have to
shift on the left. You can do this in two ways. First you can just drag hold
and drag it to the left. Likewise, the content
will shift to the right. The other method is just take one of the edge of
the and just drag it. So these are the two ways in order to shift the track left, right, or up, down, right. Okay, now we are going
to use the Warp Tool. Make sure that Playhead is
all the way to the beginning. You are in the perform mode. Click on it, now click on it. We have three different options. Choose Move, and we're
going to use Warp Tool. Now you can see
different anchor points have appeared, right? And we are going to choose
any of the anchor point, like it totally depends on you and the flow
of the object. I'm going to grab
this anchor point and I'm going to just
make circular movements. You will see that the
timeline is already playing. It is recording slow movements and gentle movements
all the way. You can use swing, you
can use circular motions, you can go up down,
et cetera, okay? I'm going to hit pause and
just see what it has recorded. Just flick it back
and you're going to see simple motions has
already been recorded. If you want to modify, I've already told
you, click on modify, you can use motion
filtering and you can make it even more smoother or quicker according to
your requirements. Okay, now it done. Now in order to play around
Warp Tool a bit more, just click on it again. Hit on Performing mode, and you're going to grab any
of the nodes right here. I'm going to choose this, I'm going to swing here,
make circular movements. Likewise, you can grab and do multiple movements as
per your requirements. Okay, I'm going to do swinging
motion, circular motions. Up, down, left, right.
Oh, it's so fun. Right? Okay, I'm
going to hit pause and I'm just going to
see how it has recorded. Yeah, it's pretty cool. Now, let's do it again. Okay, now I'm going
to grab this one. I'm going to grab this one. Okay, so it's moving so quickly and it is adding
so cute effects, right? Likewise, you can add multiple movements in your
draw Warp tool as well. Okay? All right, now that we
have done some animation, you will notice that
in the timeline, if you zoom in, all
these little tracks have appeared with
red symbols in them. These are called the key frames. This is how performing in
procreate Rams works look like. It automatically
creates key frames for each of the movement and
adjustments that we make. If you're not familiar with the key frames, don't
worry about it. We're going to talk more in
the accompanying lessons. So far, we have performed some movements,
rotation, whopping, but I think real
magic happens when we combine all of the movements
and animations together. Okay, so let's begin. Okay, let's tap this, go all the way to the beginning. Now what we're going to do is we're going to be performing
Tap the performer. Meanwhile, we are
going to choose move. Now we'll grab one of the notes of the content
and we are going to swing. Let's undo it. You have
to rotate it, right? So we're going to grab one of the notes and we are so fun. Our leaf is swing and rot. Let me show you twirling, right? Okay, let's pause. Go all the way to the
beginning Pa first. Now, in order to
twirl it or flip it, I'm going to grab one of the
edge of the mounting box. Just tap and hold and
flick it like this. You can move it smaller or you can go slowly or
quickly like this. Flipping, flipping lane. Oh, it's so fun, right? Posit. Now we can also move, we can make the leaf
go smaller and bigger. And we can use and play with all these
different types of animations like this. Now let's hit play. Now you're going to see
all the different motions have been recorded in one leaf. It is whopping, also
it is rotating. It is swinging, It is also going smaller and
bigger like that. Okay? Now, if I want to move the
frame from here to here, what I'm going to do is f, I'm going to grab this, play it all the way
to the beginning. Just posit now I'm going to take the leaf all the way to the
starting point so that it will appear in the stage that as if the leaf is
appearing and it is starting from here
and it is going and swinging and moving all
the way across the stage. Okay? So I'm going to choose, I'm going to tap on it so that the mounting
box will appear and I'm going to shift it to the left and to the backstage. Okay? Meanwhile it is recording all the movements
on the backstage. Right? But we have to move the leave all
the way through here. And I want the leaf to go move and in the swinging motions and circular motions
like this, okay? Now, I'm going to
choose performing mode. And now I will record
simple motions, okay? Like our leaf is like going
crazy right now, isn't it? Okay. Now let's go all
the way to the beginning. And let's see. A leaf is performing like it is going crazy
right now, right? These animations
are so, so pretty. We can just play and
it is a lot of fun. Now, one more thing
I want to show you is how to change
the color of the leaf. Or if I want to just blink the leaf or change the opacity
of the leaf, let's do it. There are some more tools
which I want to show you here is like if I
want to go here, just drag it so that
the leaf is appearing. Okay? Yeah. Now, just
click on Playhead. Since we have already
explored these options, now I'm going to choose the other option which
is the filter mode. Let's start from Opacity. I'm going to choose Opacity now, since the playhead is
right here right now, it will record the movements
from here till here. The performing mode is already on Click on the filters
and click on Opacity. Now what I'm going to do is I'm going to decrease
the amount of opacity. And increase the amount of
opacity like this and this and this space it is playing. It is creating a
blinking effect, right? It is appearing and
it's disappearing. Likewise, you can also play
with the other effect, which is H SP, which is hue saturation
and rightness. If you play with the hue, it will change the
colors quickly. If I want to go all the
way to the left and right, it is changing colors and
changing the color of the. It is so beautiful, right? Okay. Pause and go, all the way to the beginning
and click on play. See, it is blinking,
swinging, twirling, rotating, whopping, changing
colors and changing opacity. These were all the
different effects which we have learned so far. I hope you enjoyed
learning how to animate using the performing feature
in the procreate dreams. There are many cool features in procreate dreams which we will
explore in future lessons. In our next video, we're
going to cover key framing. Goodbye for now. See
you in the next lesson.
8. Keyframe Animation: Hello and welcome to
our next follow along lesson in Procreate Dreams
using keyframe animation. What's the most
awesome thing about key framing is that you have to draw something once and then animate it without
having to redraw a cain. And again before pigging, I'll be importing Dreams file into Procreate
Dreams application. I've also shared the same file into your class resources, Pac. So you can download this
Dreams file into your ipad. And now I'm going
to show you how to import the Dreams file into your Procreate
Dreams application. Let's get started. I'm going
to tap on this plus sign. Now I'm going to choose the
square layout right here. And I'm going to tap on empty. Now in order to import the
streams file into our project, you have to click on
this little plus sign. You have to choose File option. Now you can see the calls
animation is right here. You have to tap on it
and click on Open. Now you can see our
project has imported and now we will begin animating using the
key frames animation. Now you can see we have imported our file into appropriate
Dreams application. Now we're going to see what are the contents which
we have right here. Just open the group. Go down. We have this fall leaf one, let's see what all the
contents we have for leaf two, cloud one, clouds two, we have this main
character, go one. We have the drawing and
we have the background. Okay, let's go one by one. If I tap on it, you
will see this is a character number one
which is for leaf on E. If I tap on this,
that's a second. Leaf clouds. If I click on here, these are my cloud one. This is cloud two, This is our main character and
this is the background. Since we have an overview of the contents now let's
start animating it. We will begin with
our fall leaf one. Okay, let's zoom out
a bit. Tap on here. This is our fall leaf on. I want the animation
to happen from here, because I want the
leaf to be moving around here and it's swinging
in the air like that. Okay. I'm going to make
sure that the motions are like it's twirling around
and waving in the air. Okay. To begin with, I'm going
to tap on the clapboard, Choose move, and
choose move and scale. You will see a track has
appeared, which is great. Track has appeared, and
this is our key frame. This is our starting
point right here. And now, since our track is off, it's like how many seconds? It's like 10 seconds. I want the next key frame, which I want to create in
our track is at 5 seconds. Let's suppose if I want the
track to minimize, yeah, I'm going to swipe it right to the left
with three fingers. This will make sure that our suppose it has come
into our project. Okay. I'm going to
choose till 5 seconds. I'm going to click here again. Click on the clapboard, Cho, choose move and scale. This is our first way to
create keyframe right here. The second way I want to
create an easy keyframe is by just clicking at the end point right here
and just double tapping it. You see we have this
white option has appeared that shows that we have already
created a keyframe. Okay, so now you can see that our leaf is moving
all the way straight. But this normally does
not happen, right? Because our leaves have to
like swing and move around. This is very much easy
using the perform tool. But since our lesson is
on key framing only, we are going to just animate our second
leaf using key frame. You have to add multiple key
frames in order to move, move our leaf into a swinging
motion. Okay, let's do it. Let's suppose I want my leave
to start from here, okay? It is already in
our project since our first key leave leave was starting behind our project. But I want this leave to happen
from inside the project. Okay, let's click on tap, tap, move, and choose
move and scale. Our key frame track is created, our key frame is created. Now I want the motion
to be swinging, okay? Let's create small key frames. Okay, I'm going to tap
here, just double tap it. And you're going to see
that a keyframe is created. Now, I'm going to move it, sorry, I'm going to
move it till here. Now, I'm going to add a
little key frame right here. Now I'm going to move the
key frame right here. Just duplicate it
again and again. Now I'm going to
add keyframe here. Now just double tap it. I'm going to add key frame here. Just duplicate your motions
again and again until you are fully satisfied with
the movement of the leaf. Okay, I'm going to add here, I'm going to add here it is. Moving here slowly and steadily. Let's tap here and let's move across the object.
Okay, let's play. See, it is moving so quickly, but we do not want that
artificial movement of the right. So we can do it in one way
by first zoom in a bit. What we can do is just take one key frame and
drag all the way. Let's suppose at the
end, drag it down, take this keyframe and
just spread key frames in, in gaps so that all the key frames fill up
our entire key frame track. Okay, let's try this way. Let's go this and we are done. Now, if we just play, we are going to see little sweet movements of
the leave, right? It is moving slowly and it is moving
smoothly than before. Right, now, I want
the leaf to rotate. I'm going to select
this keyframe, since this is our
second key frame, and the animation will be
happening from here till here. I want to rotate here. You can select this option. And since rotation happens in all the way to three
60 degree, right? But I'm going to, you can choose according
to your requirements. You can choose three 60 or one 80 or in the multiples
of three 60. You can do any, okay? But for this I'm
going to choose, let's suppose 90 degrees, okay? So if I go back
and just hit play, you will see little motions are coming and it
is waving, right? But our motions stopped
right here, right? Because it was, it
happened from the start. I have added motion and it is again coming to
the starting point. See, the motion is not here, so I'm going to add
motion from here. Okay, I'm going to
add again 90 degrees. Let's hit play. It
is again swinging. Let's suppose I want the
leaf to rotate full circle. I'm going to add
three 60 degrees. Let's now it's rotating
three 60 degrees circle. Okay, Let's do one 80 degrees. Okay? It's rotating half circle. And let's suppose
I want again 90, 90 was pretty cool,
right? Let's play. Okay, I think 90 degrees
is looking more cool here. Let's again add 90
degree rotation. Let's play again at 90. Okay, then we are done. Okay, now let's
animate our clouds. Since this is cloud one, and I want my clouds
to move from the left, I want the animation
to begin from here. Okay, let's go at the start. Click on move, choose
move and scale. And here key frame
will be created. And you can see this white
key frame is created. And let's go all the
way till the end. Click on it, you will see the
key frame track is created. And now I'm going
to add motion here. I will just tap on it. I'm going to move all the
way across the screen. Okay, I'm going to
choose this one first. Now I'm going to
move it and it will go all across the screen.
I'm going to hit play. Now let's suppose if I want my clouds to
become smaller in size, I'm going to go at the end. You're going to see the
mounting box has appeared. Just choose one of the nodes of the mountain box
and just drag it. See our animation
is happening and our clouds are moving
across the screen. Right now, let's suppose I
want my clouds just hit pause. I want my clouds
to become smaller. At the end, what I'll do is
just click on this key frame. Our clouds are right
here right now. Click on one of the nodes
of the mounting box and just drag it smaller like this. Now this will make sure that
the clouds start from here. And this will come
right all the way here, but the size will decrease. Let's play. You will see the
clouds are becoming smaller, slowly and steadily, right? So this is how you add
different motions. You can also play with
opacity if I hit Pause. And let's go all the
way till the end. Now, just click on
this clapboard. And if I'm going to choose
Filter and choose opacity, I'm going to decrease in
the amount of opacity. Okay? It is disappearing. The clouds are
disappearing at the end. Let's replay and you
will see the clouds are disappearing and also they are becoming smaller in size, right? You can animate this all the way through using the key
frame feature as well. You can also use the
Perform feature which I already showed you in
our previous lesson, but this was our
key frame lesson. Okay, let's begin animating
our second cloud. Now I want my cloud
to start from here. I want my cloud to go all the way across the
screen to the left. Okay, let's click on the
clapboard, choose move. Click on move and scale. A key frame will be
created right here. Now go all the way to
the end. Double tap it. A key frame will be created
right here as well. Okay, now I want to add motion. Okay, Now click on the
Cloud track. Click here. Now I'm going to drag the
cloud all the way to the left. Okay, now I'm going
to head play. Now hit play. Now you're going to see the clouds are
moving in opposite direction. One is moving from the
left to the right, other is working
from right to left. Okay, so that's how animation works using
key frame feature. Now let's suppose I want to change the color
of the cloud. Okay, so what I'm going to do is let's change the
color right here. Okay, I'm going to tap the C. I'm going to click on Filter
and I'm going to choose SSP. Okay, So just drag
down the rightness. And now just hit play. I don't know what's happening
with my offensil right now. See our cloud is changing
its color right here. That's how we can combine
multiple functions in procreate dreams and use different features and animate our characters in
procreate dreams. Okay, okay, now let's begin animating our final
character, which is our main. Okay, let's imagine first how
our character will appear. I want my character
to appear from the top and it
should bounce here. Okay, let's first drag
the character all the way to the top from here. Now, just tap on the clapboard, choose move, Tap
on move and scale. Key frame will be created, go at the end, double tap it. Key frame will be created
right here as well. Okay? Now, since our
keyframe is here, I want my character
to move here. Let's play, See, our character is moving smoothly from the top
to the bottom, okay? But what if I want my goal to appear so quickly as if it
is falling on the ground? What I'm going to do is hold the ski frame and drag it
all the way to one seconds. Let's hit, it has
appeared so quickly as if it is dropping on
the ground right now. Let's add a little bouncy
effect on our Gul. In order to do that,
let's zoom in. I'm going to add key
frames right here. I'm going to add two
key frames, first here. And then I'm going to
add second key frame, very much closer, because
it's happening very quickly. Okay, second is
created right here. Okay, let's just go to
our first key frame. Now go to our, just hold one of the edges of our mounting box
and it is flipping. It is coming down
from the centers. We have to edit our
anchor point, right? Just go to three dots. Click on it, anchor, and just drag it all the way
to the bottom of our Go tab. Done now just hold one of the
edges of our mounting box, it a bit smaller. Now go to the second key frame, it will be in its
original position. Now just hit play, you're going to see a little
bouncy effect has created. If you want the bouncy
effect to be more smooth, what you can do is just drag this key frame
a bit forward. Drag this as well,
a bit forward. And now hit play.
This bouncy effect is so smooth right
now, isn't it? Now let's enter the
full screen mode by taking four fingers and
tapping on the screen. Hit Play button, and you're going to see the whole
movie playing around. It's so beautiful, right? You can also take a finger
and just drag left. All right, as play requirements, that's how you can create animation using key
frames in Procreate Dreams. In the next lesson, we're going
to cover the third player of animation in procreate dreams using frame by frame animation. Good, now see you
in the next lesson.
9. Frame by Frame Animation: Hello and welcome to our
last method of animating in procreate dreams by using
frame by frame animation. In this project,
we are going to do some super friendly animation using frame by frame animation. You will receive a downloadable resource file for this project. So you have to import the resource pack onto your
Procreate Dreams application. Now to import the files into your Procreate
Dreams application, tap on this little plus sign. Now you have to select
the files option. Click on file. Now choose
this mango frame animation. Now if you tap on it, click open, you will see that the file
will start importing. We have this resource
pack right here and we will be animating frame
by frame animation here. Now let's get started by adding a new content track here for
my frame by frame animation. So let's add a track. You will see a gray
track has appeared. This will be a new content track where we will be animating. Now in order to enter
the flip book mode, you have to go into the
draw and paint mode. Now you can see that this little gray bar in the center of the
screen has appeared. If I drag that down, you can see we have entered
into our flip book mode. Now I can move my flip
book around the flip book, you see these
squares right here. These are called the
pages of our flip book. Now, if I want to close it, you will see that you have again reached onto
your time line. If I again want to enter
into your flip book mode, I'm going to choose
this little gray bar and I'm going to drag
it down like this. Again, flip book
mode will appear. Now let's draw something
in our flip book, I. Let's choose white color only. Now let's choose a brush. I'm going to use chalk brush. Okay, let's draw something now. This is our frame. And
now let's zoom in. Let's draw just a stroke. You can see a stroke has
appeared, increase the size. Okay, Now let's add some. Go to the next frame. You can see the previous
frame is appearing, right? These are called
as the onion skin. And also you can play around
with the properties of this onion skin by
tapping on the time code. Just tap on it and
you're going to see different options
have appeared. You can hide the skin, you can show it, or hide it. You can play around with
the colors of the skin, like backward and forward. There'll be two movements, the ones which are going forward and the ones
which are going backward. You can change the color
of both the skins. Also you can set the
number of frames. You can change the opacity
of the skin likewise. Okay, let's draw adding few strokes and just
complete our animation. Let's add a stroke here. Just undo, I'm adding a stroke. Okay, I'm going to add the
stroke from the start. Now, add a new frame. I'm going to add
again from the start. And I'm going to complete all the way around till
the starting point. Okay, let's just
quickly add one by one. Okay, it's going smoothly. Again, it's not necessary that you have to
be precise enough, but the more random it gets, the more fun it gets. Okay, So I'm going to add
frames one by one by one. See you can see a flip book
is coming up quickly, right? Adding new frames again and
again, again and again. I'm going to show you
what effect it creates. This is a really exciting tool. By procreate dreams, you can act and play around
with multiple motions. You can also explore some different motions
using this tool only. Meanwhile, you can just
lower down the size. Oh, it has got a bit thinner. It's taking too much
of frames, right? But trust me, this is going to be a lot of fun
when we are going to see the animation if let's
do it here on the way. Okay, so we're almost there. I think the shape of the
mango is changing now. It's getting so poky right here. Definitely the mango doesn't
looks like this but anyways. Yeah. Giving a hands
on to frame by frame. Right. Okay. We are reaching at the beginning
almost and then we are going to replay how it has
created our animation. Let's go slowly and steadily. All right, we're almost
reaching until the end, but one thing you have to make sure is you have to repeat. When you come to
the starting point, you have to repeat the frames. I'm going to tell you a bit, let me tell you quite a while. We we have completed
a full circle. I'm repeating it. Why? Because I want the
circle to complete for at least few moments to look like it's
coming natural, right? So I'm going to
repeat two frames more and make it circle. Now let's, let's exit from our book mode by
tapping on the cross sign. Now let's see what
it has been recorded by just going all the way to our frames and
seeing how many frames. Oh my God, we have created
a lot of frames right here. Okay. Now, once it gets
fit into our whole space, now hit play button and
you're going to see that these white strokes are covering up our whole
mango right here, right? If you want to enter into
the full screen mode, what I've told you, you have to take four fingers
step on the screen. You're going to see that our cute frame by frame
animation is happening. But if you want that, you are seeing that
these white lines are covering up our mango. What you're going to do
is first exit pause now. First of all, you have
to just group them. In order to group our frames, what you have to do is
click on this button. Now you can group all
the frames together. You can group players. You can group tracks. You can group frames. You have to do this only
by your Apple pencil. Okay? Okay. Just give a simple
stroke from right to left. In order to like this
by just drawing a line. You will see all the frames
have been selected right now. In order to group them, just long press any of the
frame. Click on Group. This will turn all the
frames into a group. You see our group has
been created now. Just shift this group
from here to here so that it starts from the
starting point right here. Now we have to bring this white line to the
back of the mango, right, because we can see that it is covering
upper mango a bit. First, just turn this off, add a new content
track from here. We are going to add a content
track right above it so that it gets below the mango and it gets
above the background. Okay, add a new content
track from here. You see we have created a
new content track now Just take this track and bring it all the way
down to the back. Here. Now let's play. You see the line is appearing
at the back of a mango. Let's enter into a full
screen mode and you see it's appearing beautifully. Now that's how frame by frame animation works
in procreate dreams. Okay, let's deep dive some more methods of
frame by frame animation. Now if you see that there are some curvy and wiggly
lines happening, let me tell you
that I have created these curvy lines using the same frame by
frame animation. Let me show you. Just hit first. Let me go onto this
curvy lines track. Just open a top, drag
it all the way down, and you're going to see that these multiple frames are here. Because I created this effect using frame by frame animation. See, I created multiple
tracks and I duplicated them just to create
more lengthy effect. That's why I duplicated this. You can also
duplicate in order to create more lengthy impact
onto your animation. Okay, what I did,
let me tell you, first of all, in
our first frame, you can see these
lines appearing. Okay? First of all, I drew five lines, five curvy lines like this. Okay? But when I, when I added a second key frame, I drew like suppose if I drew the curvy lines
here like this. But on the second key frame, I drew just the opposite. Like suppose if the
line is going up, I drew it to the town, then up, then down, then up, then down. So likewise, you have to use the motion to
the opposite direction, because that's how the
animation will work, right? If you just repeat all
the way again and again, animation will not work. Okay? So you have to add the animation in
the opposite direction. And then you're
going to duplicate these multiple frames until, unless you are satisfied, you got to keep adding
all the frames. And then you're going to
group it using this tool that was one of
the other example of frame by frame animation. Okay, let me show you one more
example of frame by frame. Let's go back to movies. Let's swipe it all the way down, and let's just choose this. If you're going to see zoom in, I have multiple
frames right here. Okay, let's play. Oh, that's so cute. If you want to just zoom in a bit so that this
blank space goes away. Now, just hit play, you're going to see our
ball is popping up, right, right, again, and again, to the left, and
right, and left. It's just looping around. See, it's such a cute animation. Right, So what I did, I took key frames and drew
a ball on our first frame, since it is in its
original position. Now I added a new key
frame right here. You can see it is slowly
changing its shape, right, because it
is swinging now. Now, if I go onto
the third frame, you can see it again. It is changing its shape. Right now it is going all the way to the
flat, flat direction. Because it is swinging and
popping on the ground, it has become more flat now. It is coming back slowly and steadily into our
original shape. It is coming back into
its original shape. You have to make sure
that the starting point, that the ending point and the starting point is
into its original shapes. So that all the motions
which are happening, they are between the frames. In order to make the motion into a
smoothing effect, right, Hit play, you're going to see a pumping effect
happening, okay? Now one thing I want to
tell you is there are three different playback
modes of our object. Since this animation
is happening in a mode which is called
as the ping pong effect. Now in order to edit this, we're going to go to the
name of our Dreams file. Click on it, Now go
to our timeline. You can see ping pong
effect has been selected. You can play around with these effects.
You can choose Loop. If I select this loop, and I'm going to click
on Done Now here play. Now you see our motions are looping again and
again again and again. That was all about frame by frame animation in
Procreate Dreams, I hope you enjoy this lesson. In the next lesson,
we are going to be covering looping and spinning
characters animation, which is going to
be a lot of fun. Goodbye for now. See
you in the next lesson.
10. Loping Animation: Welcome back to a lesson, and in this lesson we'll be learning about
looping animation. How to spin characters just to create a looping effect so
that it goes on and on. So I'm going to be teaching you how to set up your
animation to do that. We're going to be creating
fun and colorful shapes. Just click on plus sign and we're going
to choose a template. Let's choose a square
template empty. First of all, let's go
to our dream name file, and we're going to be
editing the duration. Let's tap it to 5 seconds, that's going to be fine. Now let's go to our draw and paint mode
and draw our characters. Let's choose color. I'm going to be
choosing pink color. Let's choose a bright pink. It looks more fun, right? Let's choose the brush now let's select monoline
brush. It's fine. Okay, let's draw, let's just swipe it down so that we get a
more clearer view. Okay, let's draw a shape in the shape of a cloud
or it's a flower, right? I can take it any shape. See, it's looking so colorful. If you just zoom and you
can see these lines. Procreate Dreams hasn't launched any feature yet to fill up these lines like we had in
our procreate application, you just manually fit it. Meanwhile, I'm going
to do it very quickly. Okay, now we are done. You can also eliminate the
step as their requirements. Okay, I'm going to choose Done. Now we're going to add
a new different track. And we're going to add a second character on our second track. Make sure that you have
two different tracks for different characters
because we are going to be animating
them independently. Okay, now let's draw
our second shape. Let's go to the draw
and paint mode. Let's choose a color. I'm going to choose
a blue color. Okay, now let's select a brush. I'm going to select
mono line only. Now let's trap draw character. Let's draw a character
in the shape of a star. You can also overlap it. You can draw it quickly. You can also go out of the boundary, you
can fill the color. Now, color draw it. Let's fill the gap here quickly. Okay, Now, in order to make
it more funkier, you can just make soft
edges of the star, round edges to make
it look more cute. Okay? That totally
depends on you. I'm just doing it now. We are done with it. Okay. Tape. You can also edit the
shape if you want, just tap on here, we'll see
a mountain box will appear. Now grab one of the edges
and just drag it small, or you can also add. You can also edit
the shape again, you can move characters
anywhere you want. Okay, now let's draw
a third character. Just click on Plus Sign and
add a new content track here. And then just go
to Draw and paint. Choose a color, I'm
going to choose green. Now you can choose
any color you want. Just swipe it down
to draw a character, I'm going to choose a triangle. This time you can make it overlapping and you're going to fill the color.
Just fill the gaps. Now done, and we have a third
character right now. You can edit the
shape if you want. You can make it like look fat. Okay, now let's just add
our fourth character. Add a new content track. Go to draw and paint mode now. This time I'm going to
choose yellow color. Okay, let's draw
the s of square. Okay, let's just fill it. Oh, it's looking so cute. See, you can see the shapes are overlapping with each other. Right? You can just fill
up the gap right here, although it's not appearing. But let's go it
in a perfect way. Okay, I have done now. You can edit the sheet
by clicking here. And you can make it smaller
and you can shift it. Okay, Now we are done
with all the characters. Now now you can see all the different characters
are on different tracks. Now what you can do is just tap and hold one of the tracks and choose
Filled Duration. You can see the duration
has got filled up. We have 5 seconds of our video. The entire 5 seconds
has got filled up. Likewise, you can repeat it with all the four
shapes right here. Just swipe it and
I'm going to tap. Hold this fil duration. Tap, hold this fil duration. And last one, fil duration. We are done with
our 5 seconds now. Okay, now let's draw
eyes of our characters. Okay? Now, before drawing
the eyes of our characters, we have to just imagine
what I contains. The white part and the
black part, right? So we are going to be drawing those parts in two
different tracks, so that we can independently
animate them, right? Because we are going to
be moving the eye around, spin around like that. So we are going to be drawing
on two different tracks. Okay, so let's begin. Let's add a new content track. And just go to the
drawing paint more. Choose a white color
for the background. And just draw our eyes here. Just draw a circle here
and another circle. This will be the background. You can make a big or small
as per your requirements. Okay, I'm going to be
choosing this shape. Okay, now we are
done. Let's start. We have drawn the ice. Now we are going to be adding new content track for our pupil. Go to the draw and paint,
choose black color. Now I'm going to
be drawing pupil, I'm going to be
drawing a big one. Does it look cute? Now, after we have added
the eyes, isn't it? Okay, let's tap done. We're going to see that
we have added eyes. Now what we're going to
do is just fill duration. Just click on Fill Duration so that our entire content
gets filled up. In order not to make
it more complex, just group one of just group the characters
with the ice together. Okay, just go on this option, click on these tracks, and just tap and hold
and click on group. One of the characters along with the eyes got grouped
up together. Now let's just repeat the same step for other
characters as well. We are first just
exit from this mode. Now go to this green
shaped character, add a new content track. Go to the draw and paint mode. Choose white color,
swipe it down, and draw our eyes. I'm going to choose this oval shaped eyes for this character. You can play around
with the shapes and the eyes as you want. I'm just going to
manually fill it. Just tap done. Now add a new contul track here
to draw the pupil. Choose black color.
Just swipe it down. I'm going to be
drawing a small pupil. It looks more funkier
here right now. Tap done. Now we are going to be grouping
them all together. First, click on Fill Duration, then going to this option and we are going
to be grouping it. You see we have our
second character ready. Now just go to our
fourth character. First. Exit, add a new
content track here, go to Draw and Paint
mode, choose White color. Just wipe it down and I'm
going to be drawing the eyes. Let's choose a circle here. Okay, that's perfect for me. Now, tap done. Now add a new
content track for the pupil. Go to draw and paint mode. Choose black color,
swipe it down, and draw the pupil. Now, just tap done. Yeah, tap done. We have our third character ready and just first
fill the duration. And then just group them by
long pressing clic group. We have our third
character ready. Now our fourth
character is left. Just exit from this group mode and add a new content track. Right above it, we have
our content track ready. Now go to drawing Paint
mode. Choose white color. Now just wipe it down and draw. I'm going to be drawing
bigger ice here. Okay, we are done. Add a new content
track for the pupil. Go to draw paint more, choose black color.
Strike it down. And I'm going to be
drawing a small pupil just to make all the characters independent and different
from each other. Okay, now just fill duration
and then just group them. Long pressing tap on group. Now you can see we have all
the fold characters ready with our pupils
and eyes tap done. Now you can see we have extra
content tracks over here. You can just delete them by long pressing them
and delete track. Just delete them quickly so that our project space
doesn't look messy. Okay, just delete
the extra layers. Okay, now we are done. Yeah. Now just wipe three fingers to the left
and just fill up it. You can see that our content has filled up with
the project space. And now just let's
just open the group. I can see we have
three different parts, the pupil, the wide
circle, and the character. Okay, now we're going to do is we have to animate
the eyes first. And then we are going to be
spinning the characters. Okay, now first what we have to do is we have to rotate our pupil in order
to move around, spin, and create a funky
animation to our eyes. Okay, let's just tap
it and just move. Or you can see that the pupil is going outside the
boundary of the eyes. Okay, what we have to do
is just grab just long, press it and choose this
option which is called mask. And choose clipping mask. Now this layer is being
clipped to this air. Now if we move it, we can see that the
pupil is not going outside the boundaries
of the eye right now. We can animate it.
Now to animate them, I'm going to be using
performing mode. Let's just grab it. Yeah, we have reached
the end here, which is 5 seconds. Go to all the way
from the start. Choose performing mode. Now we are going to
be rotating our eyes. Okay. You can move
like simple motions. You can rotate them left, right, top down.
Okay, Like that. Okay, let's start. Oh, our eyes are
looking so cute, right? We are playing around. Okay, it is done. Now, just flick it back
and you're going to see these motions are
looking so quick, cute. Now, okay, I've done, we're going to be repeating the same step for our
other characters. Okay, now let's just close the group and go to
our green shaped character. Just repeat the same step. Clip the black pupil
to the white circle. Just tap and hood
and choose mask. Choose clipping mask. Now go all the way from the start, choose
performing mode. Now I'm going to be
rotating the eyes. See it's looking so fun. Top down, left, right. But since we have reached
the end of the timeline, the performing mode
has stopped Now, let's just flick it
back and just play. You're going to
see cute animation is happening in our eyes, right? Not just exit and repeat the same step for our
second character. Third character, sorry. Okay, just open the group. This pupil shaped to
our white circle. Choose flipping mask. And now we are going to
be animating it simple. Oh, it's looking so cute. As if our characters
are going mad. Just stop it. Close the group. Just repeat the same step
for a last character. Just go to our pupil. Layer long, press it, choose mask, choose
clipping mask. Now we are going to be animating click on performing mode. Now this is going to
be only rotating eyes. Now you're seeing, okay, let's tap done and in
order to flick back the playhead and you're going to see our eyes are
spinning, right? It's looking so cute and the characters have
come to life, right? Okay. Now just close
this group first. Yeah, now what we
are going to do is we're going to be spinning
the characters one by one. Okay, let's just choose
this character first. Click on the playhead,
choose move, choose move, and scale. You're going to see
a content track, like a key frame track
has appeared now I'm going to be going all
the way till the end. And I'm going to be
adding a new track here. Just double tap it so that
a keyframe is created here. Now I am going to
be rotating it. Okay? So just click on it and
I'm going to choose rotate, since rotation forms a full three 60
degree circle, right? So I'm going to be
multiplying it to seven 20 so that the spin
happens quickly, okay? You can just play around
with that motion. Just going to choose seven 20 so that it forms
a double circle. And in the time frame of five
second, it happens quickly. Now I'm going to
see how it happens. Just flick it back, you see our anchor point is on
the different side, right? So first we have to edit our anchor point by clicking
on Just choose Edit Anchor. See it is right here. But we don't want the circle
to happen around this. We're going to
choose Anchor Point and just go all the way to
the center of a character. Now just hit play
and you're going to see our characters pinning. But there is still one problem. We have to set our easing line that happens all the way smooth. Now just play. Now I see our animation is
happening smoothly. Now, right tab, done. Now you see our animation is happening in a
looping effect right? Now let's just animate our other characters by
just going to the playhead, all the way to the start. Click on Playhead, choose
move, choose move, and scale. Keyframe track will be created. Now go all the way to the end. Now just double tap it. You have the keyframe
track right here now. You can just rotate them, You can choose three 60 or you can make like smaller spin. Let's just go ahead
with three 60. Now I'm going to
choose three 60. Okay? Now, before I'm going
to see the spin, I'm going to set
easing still linear. I'm going to also see
what's happening. I have to select the
anchor point as well. Now just go to these three dots. Edit our anchor
point to the start, to the middle of the
character and tap done now just zoo out and
flick back the playhead. And you're going to see our
characters are rotating. But what if I want
these characters like this is also rotating
in the anticlockwise, but I want one character to rotate in like the
opposite direction. What I'm going to do is
just go to this key frame. Since I have rotated
like plus three 60, you can also rotate it to minus three 60 to make sure that the spin happens
in a negative direction. Okay, so just hit tab
and just flick back the playhead and you're
going to see the rotation is happening in opposite
direction, right? Again. You can see this
spin is happening quickly. This pin is happening slowly. And these are moving all the way on the opposite direction. Likewise, you can animate the different characters
right here, hit pause. Now let's just animate
a third character. Go to the playhead, tap, move, choose move, and scale. Now just go all the
way to the end. And you're going to just
double tap it here. That a key frame track will be created
right here as well. Now we are going to be
animating our character now. Click on, just click rotate. I'm going to choose seven, 20. I'm going to add a fun little
quick animation right here. Okay, now since it is done, I'm going to be adding, just edit our set all
easings, set it to linear. Now I'm going to be
editing our anchor point. Just go to three dots. Edit, anchor, go all the way to the center
of the character. Tap done now just flick it
back and you got to see the animation happening so quickly on our third character. It is looking so cute right now, let's just animate our
star shaped character. Just hit pause now, just tap on move, choose move and scale. Go all the way to the end. Click key frame here, tap on it. I'm going to be setting
all the easings to Lina. First edit the anchor
point to the center. Now I'm going to be rotating it. Let's just choose minus
three, 60 degrees. Now tap down, Just
flick it back and you're going to see
all the characters are spinning and rotating. The eyes are rotating. You see just enter into
the full screen mode. We're going to see
a fun animation, looping, spinning
characters are happening. Let's just exit from our full screen mode by tapping on four
fingers on the screen. Just play around
some settings here. Let's click on the playhead and play around with
the filter option. If I choose Filter now let's choose Opacity And bring
down the opacity to. Now let's just exit from our full screen mode by tapping four fingers
on the screen. And just play around some of
the settings like opacity. Just click on the playhead, choose Filter, and
just click on Opacity. And I want to bring down
the opacity to 70% Okay? You can see this overlapping
effect happening right here. It's looking good, right? Let's, I want to bring down the opacity of
green character as well. Just tap on the playhead. Choose Filter, choose opacity. Just bring down down the Pacity to 70 or 80% as
play requirements. And also for our yellow
character, choose Filter. Click on Apacity and
bring down the capacity to 82% That's fine for me. Or you can bring down the Asit. It's disappearing, so I
don't want that to happen. You can select 84%
that's fine for me. Now play. And you're going to see
the looping animation. And you can see the characters
are overlapping, right? You can tap on four
fingers and enter the full screen mode. All right? You can just go all the
way to 5 seconds and just click on four fingers and you will enter
the full screen mode. And you're going to see all
the animation till 5 seconds. You see the characters are overlapping and you can
see the effect here. Right now, just exit from
the full screen mode. And I'm going to play
around a few settings more. Now if I want the pink shaped
character to change color, I'm going to play with HSP. Just stop on the
playhead, choose Filter. Click on HSP. I want, I want this color to
change from 1 second, now I want the HSP
to turn it red. And then from 2 seconds onwards, I want the color to turn purple. Then on 3 seconds, I want the color to turn. Dark blue. And then a 4 seconds, I want the color to
again appear pink. And then at 4 seconds, I don't want anything
to happen now. Just step on four
fingers and hit play. And you're going to see the
color is changing, right? It's looking so
cute. Just hit play. I will show you that we
have created fun animation. Here we have added characters. Then we have played
with the opacity. We have played with the HSV hue, saturation and brightness. We have added our eyes. We are spinning the characters. We are spinning the pupil. We are rotating it and creating a whole looping animation. Now let's create
a blinking effect to the eyes of our characters. In order to do so, let's exit. Now, let's go to first
character first. You have to imagine what
makes our eyes blink. See, there is pupil, there is white circle. Obviously the animation will happen on the white
circle, right? Because the pupil doesn't
blink the white circle. Blink. In order to animate, we have to make sure we are on the white circle because the animation will be
happening on the white circle. Okay, so we have to go
to the white circle of our eyes on this layer. And we are going to
be using two methods. First is the perform mode and
second is our key frames. Now let's begin using the
perform method first. Hit on the perform mode first, then you see it's ready. Now make sure you are
on the white circle. Just grab the top edge of the I. Just make a faster blink so that the blink
happens quickly. While you are in
the perform mode, make sure that the video will
be playing and you have to make the spin the blink
to happen very quickly. Okay, Just grab the top
edge and make it blink. It is like it's not
moving and it's not blinking as per
R, the natural way. Right? If I head play, you will see the blinking is
not happening properly and accurately because it's
not closing properly. And that's how perform
method fails here. The next method which we are going to be using
is the key frames. By manually adding key
frames to make sure that blinking happens accurately and it closes at the right spot. What we are going to do is first undo by
tapping two fingers. Then we are going to
create manual key frames. Right on this layer. Okay, just tap on the playhead, choose move, choose
move and scale. Now I'm going to be first dragging this key frame
all the way to 1 second, because I want that link to
happen right at one seconds. Okay, now I'm going to be creating two more key frames
by double tapping it. You see three key
frames have been created now on the
second key frame. Now imagine we are three
key frames, right? This one is open,
this one is open. Now, I want the middle keyframe to create a blinking effect. I'm going to be grabbing
the bounding box, the top edge of
the bounding box, and I'm going to be closing it perfectly like you can zoom it and you can
close it perfectly. Now if I go back
and just hit play, you see the blink has
happened so quickly, right? But it is happening too quickly. So what we can do is just track the key frame bit on the right side to make the
blink happen naturally. Okay? Just go back and hit play. Now you see that the blinking is happening in acute
and natural way. Just hit play and you see that the blink has
happened so accurately. You can also repeat the steps on the second or as
per your requirements. I'm going to choose the third. At the third second, I'm going to be creating a
key frame track right here. And I'm going to be duplicating
it and duplicating it. Now I want the key frame. Just adjust the key frame. I'm going to be adjusting
this keyframe here as well. Okay, Right here. Now, I'm going to be grabbing the middle of the
key frame and just, I'm going to be closing the eyes by grabbing one of the edges. And I'm going to be just
closing it so accurately. Now if I zoom out
and if I hit play. Yeah, If I go back
and I hit play, you see the happening. You see the blinking
is happening, so cute. Now, likewise, we are going to be animating the blinking effect on other characters as well. First of all, we are going
to be closing this group. Now go to our blue character, open the group, and go
to our white layer. Just add a keyframe here. Choose move, tap,
move, and scale. And now we are going
to be grabbing this key frame all the
way to one seconds. Now, add other key
frame by having a sufficient gap to make the
blink happen slowly Here, double tap it, so
that it turns white. Now again, create a keyframe
here, double tap it. Now we have to animate only on the middle of the
key frame, right? Because the blinking will happen only on the
middle of the key frame. Okay, let's begin. Go to the middle
of the keyframes and just grab the bounding box, the top edge, and just close it. Now we are going to go back
all the way and just play. And you're going to see that it is happening so
naturally, right? Just hit pause. You can repeat
it on 3 seconds as well. Go to 3 seconds, tap on the key frame. Double tap it, add
two more key frames. We are going to be adjusting
the time of the keyframe. Just drag it, Just drag
it and create a gap. All right, so go
to the middle of the key frame and just
grab the bounding box, the top edge, and just close it. Go back and you're going to
see it is happening now. Let's suppose if I want the
blink to happen slowly, just grab some more gap. And just now you're going to see it's
happening naturally now. Okay, you're repeat
the same effect on other characters as well. Now I'm going to be
closing this group. Now let's go to a
third character, which is the green character.
And open the group. And go to our right here and create key
frames right here. Let's suppose if I want the blink to happen
from 2 seconds now, I'm going to be creating
key frames at 2 seconds. Just double now create a
gap and double tap it. I'm going to create a third
key frame, Double tap. Now go to the middle
of the keyframe. Just grab the top edge of the public box and
just close it. Okay? I'm going to go
to the key frame, grab the top edge of
the pounding box, and I'm going to
close it like this. Now, if I hit play, you will see the blinking
is happening slowly. Now. Likewise, you can repeat the same step at 4
seconds as well at key frames. Double tap it. Double
tap it. Double tap it. You going to animate on the
middle of the keyframe on? Okay, make sure that you are animating
only at the middle. Now, grab the bounding box, the top edge, and you go
to close it perfectly. Now just hit play and
see it happens so good. If you hit play pattern, you're going to see our blinking is happening
on the characters es, creating a cute
lively animation. Right now, let's just close it. We are going to be going to our fourth character
and animating the eyes open the group go to the
white layer at key frames. Let's suppose I want the
blink to happen twice. Okay, I'm going to
be going like if I want 1 second one key
frame is already created. Now go to second key frame, add a keyframe here. Add a key frame here as well. Now, add a key frame.
One more key frame. Okay, And add another key frame. Now I'm going to be animating
on our second keyframe. Click on it and grab
the pounding box. I'm going to be closing
it perfectly now. I'm going to be going to
our fourth key frame again, I'm going to grab the
pounding box top edge of it and I'm going
to be closing it. Now if I go back and hit, you're going to see the
blinking is happening twice. Likewise, you can play around
with the blinking at key, adding key frames as
for your requirements. Okay, I'm going to create again a blinking
effect at 4 seconds. Add a keyframe here. Now just add a keyframe and then just add
a keyframe here. Go to the middle and grab the top edge of the bounding
box and just close it. Go back and hit play. Now that was all about creating the blinking
effect on our characters. Close the group and
fingers and hit play. Now see, our characters
have come to life, right? I hope you enjoyed
this lesson of creating a looping animation by making cute and fun
spinning characters with blinking eyes. If you're a procreate user, and you might be
wondering how to take your procreate artwork and bring it into procreate dreams so that you can animate it. And that is exactly
what I'm going to be teaching you in
the next lesson. Good be for now. See
you in the next lesson.
11. Importing Procreate Artwork into Dreams: Hello and welcome
back to our lesson. In this lesson, we are going
to be learning about how to import procreate artwork
into procreate dreams. There are basically a
number of ways to do this. The first method is by using
the split view option. Here the procreate
application is open and now we are going to be, let's just go to gallery back. We are going to be just clicking on the three
dots at the top. Just click on it and choose
a split view option. Now our Procreate has shifted to the left and we are going to
be opening Procreate Dreams. Now you see both applications have been opened
and procreate is on the left and procreate
reams is on the right. Now before importing the procreate artwork
into procreate dreams, you have to make
sure that the design which you want to import, you have duplicated
that design in order to avoid any mistakes
in the future. Let's just duplicate it first
more, click on Duplicate. The artwork has been duplicated. Now in the procreate dreams, you have to choose the plus sign and select any of the template. I'm going to select the square template and click on empty. Now just hold this artwork and go to Procreate Dreams
and just release it. You'll see the artwork
will start importing. See it has been imported
so smoothly right now. Let's move to the other
method of importing procreate artwork
into procreate dreams is by using the holding feature. Now we have to hold
the artwork first. Let's just choose this and swipe up till you see the Procreate Dreams
application, right click on it. And we are going to be adding a plus sign by using
the other finger. Okay, Now just
select the template. Click on empty. Now you are going to be
releasing the file here. Now you will see this is the second method of importing the procreate
artwork into dreams. All right, our artwork
has been imported. Now let's go to our draw and paint mode and
just select on the layers. You're going to see all
the different layers. All the different artwork is
on different layers, right? But unfortunately,
you cannot see here because it is just
a flat image right here. What you are going to do
is just tap and hold on this and you're going to see an option called convert
layers into tracks. So we're going to select
it and you see the group has been created
and you will see all the different artwork
is on different tracks. Right. That's how we import procreate artwork into dreams and convert the
artwork into tracks. Now we can animate all
the different tracks individually and
independently to each other. I hope now you have
learned on how to import your procreate artwork
into procreate dreams. To animate the artwork without having to save the
layers individually. In the next lesson, we
are going to be animating this whole scene by using all the different ways of animation we have
learned so far. Good bake for now. See
you in the next lesson.
12. Animating a Scene: Hello and welcome
back to our lesson. In this lesson, we'll be
animating whole scene where a kingfisher is sitting
on a branch of a tree. And the wind is blowing, the leaves are flowing, the clouds are moving, the sunset is
happening and changing its colors. Let's get into it. Here you can see we have our artwork imported into
a Procreate Dreams file. And you can see here
a group is there, where all the layers have
been imported. All right. You can see our background,
the Cloud Slayers. You can see the branch, the bird, and you
can see the sun. Okay, so we have our
artwork imported. Now let's get started with
animating our characters. Let's start with the sun first. Imagine our sun will be coming from the
left hand side and it will be going and swinging around and moving
across the screen. Okay, let's begin. Just drag the playhead all
the way to the beginning. Now before animating our sun, you have to make sure that
it is on the right track. Since it is at the top, everything will be
coming at the top. Sun will be appearing in front of every other tracks, right? So we have to just make sure it is between our background
layer and the clouds. Okay, I'm going to add a
new content track here. I'm going to swipe it
down and bring it down, okay, our sun will be
behind our clouds. Okay. Now just click on it. We can see the bounding
box has appeared. Now make sure the sun is
at the starting point. If I suppose I want my
son to appear From here, it will be moving
all the way across the screen and will be
going on the backstage. Okay? Now, just click
on the perform. Now we are going to
be moving our sun. Just grab the sun and just move slowly and steadily
across the screen. And goes all the way to
our backstage like this. Okay. Now just flick it back and see the animation happening
slowly and steadily. All right. Now we can also
use one more feature here. Just hit pause. I'm going to go to modify. Yeah, we make sure that
the motion filtering is set as per your standards
or as per your requirement. If you lower it down, the motion will happen more quickly. If you grab it all
the way to 100, the motions will be
happening smoothly. Just play around with the
settings like this tab done. I I think it's fine with the
motion happening like this. All right. That was how
we have animated the sun. Likewise, we'll be animating different characters
like clouds. Now let's move to
our second part, which is the clouds just
tap and hold this cloud. And I'm going to be using
the Perform mode again. Just make sure to place the cloud from
the starting point. Suppose if I want my clouds
to appear from the right, and I want my clouds to move across the screen to the left, Okay, Just tap on the perform mode and just make
simple motions like this. And it is moving slowly and steadily across the
screen like this. Tap done, now, just flick it back to see the animation
happening. Right? Likewise, we are going to be animating the
other clouds as well. Now just grab the other cloud. I want this cloud to
start from right here. Okay, so meanwhile
the first cloud is starting from the backstage. I want this cloud to
start from here as well. Let's choose perform more again. And now I'm going to be
animating and moving the clouds. Okay? It is moving very slowly. I want the cloud to remain
on the stage like this. Okay? Tap done. Just flick it back. Tap done. You're going to see
different motions are happening and they are
independent to each other. They are moving at
their own pace, right? Let's just animate
our last cloud like this chose the third cloud. Go all the way to the start. I'm going to be using the
Perform mode and let's just start our cloud
right from here. And I'm going to be moving this across the
screen like this. It is moving slowly, slowly across the screen
like this. Right tap. Not just flick it
back and you can see the animations happening
so smoothly, right? All right, let's suppose I
want to change the color of the sun like it is
moving and it is changing into orangish
color, right? I'm going to be starting
on the playhead. Click on Filter, choose HSB, and you're going to
see the track has, has been created right now. I want my HSB to
start from 2 seconds. I'm going to be dragging all
the way to 2 seconds and I want the color to
change till 3 seconds. I'm going to be
creating a track here. I want the color to change
into oranges, all right? Just click on play here and you're going
to see the color is happening, looking so pretty. Just stop on play and you will see the sun is
changing its color and it is going and
moving fs the screen. See? All right, now let's
just go to our kingfisher. And we are going to be animating the kingfisher using
the warp tool. All right, go to move and
choose the warp mode. All right, so you can see
different nodes have appeared. Now we are going to be animating this part of the
kingfisher where it will be breathing and it will be like it will be creating
a breathing effect. All right, just hit on perform mode and we are going to be moving this part of the
body of the kingfisher. All right? Just add
simple animation and just make sure that you are just doing it very smoothly. All right, since
we are done now, you're going to just flick it back and you're going to see our kingfisher is
breathing softly, right? All right. That's
how we can create breathing effect
onto our characters and bring characters into life. All right, now we
are going to be animating the tail and the
beak of our kingfisher. And we are going to be
using the walk tool again. Let's go to our
King Fisher body. We are going to be
using the tool. All right, all the
nodes have appeared. Now we are going to be grabbing the tail of our kingfisher and we are going
to be moving it. All right, now hit perform mode. And we are going to be moving
the tail like smoothly, and make sure that it aligns
to the movement of the body. It creates a
beautiful animation. All right, now we are done. Hit play, and we are
going to see that the smooth animation is
happening with our fisher. Now we are going to be
animating the peak as well. Just hits. Now we are going to
be animated the peak. Go to the Kingfisher body. Now go to the tune again again. And now just grab this part of the body of our
kingfisher. All right. Just click on Performing
mode and just make small movements like this. All right. See it is creating such
a beautiful effect. And as if our kingfisher has come to life
and it's breathing, our clouds are moving and the sun is going
across the stage. So it's creating
a lively effect. And a beautiful effect. Right now, we'll be animating
the leaves of our branch. All right, let's go to the
leaves group, open it, and you're going to see all
the different leaves are here and they are on two
different different tracks. Right? We'll be animating one
by one and we'll be using the perform mode because
it is super friendly and it is really just
animating by feel. All right. Just click on
the playhead tap move, choose the wool again, and we are going to be
animating across the nodes. All right. Just
click and perform. You're going to
animate one by one, just move and just create
simple motions like this. You're going to see that our leaves are coming
into life, right? Just flick it back
and you're going to see simple motions
are happening. Our leaves are moving and
adding cute little animation. Likewise, we are
going to be repeating the same step with other
part of the leaves. Just open it up. We're going to grab
the leaves one and just take another
part of the leaves. Let's suppose I want
to take this part now. I'm going to be grabbing this portion and we are
going to be moving this. It is creating cute
animation, right? We're going to be repeating
the same steps again and again until we reach the
end of the timeline. Just flick it back and you're going to see animation happen. Likewise, we are
going to be repeating these steps to all the
parts of the leaves, okay? Now, just go back again to
our leaves number one, okay? Now, since we are done
with leave part one, let's go to our
leaves number two. And we are going to be
using the walk tool again. Go to perform mode and we are going to
be animating again. Just choose any part
of the leaf and make simple motions to make sure the leaves are
coming into life. And adding a Sal
animation here like this. Then I'm going to flick it back all the way to the start again. Take this section. I
just turned it off. Just turning it on. This is our second part. Just choose the walk tool so
that the nodes again appear. Now I'm going to
be just grabbing this section and I'm going
to be moving like this. We're going to add
circular motion or wavy motion like you can play
around with that tab Done. Now we are done with
this part of the leave. Now we are going to be
grabbing the other leaves. Leave part three, which is this. Now again we'll be
using the walk. Just click on Perform Mode. We are going to be animating
this section first, then we'll be animating
the other section as well. You're going to
add little motion, or way, or circle motion
as per your requirements. Now just go back again. Grab the third layer, third part of the leave
click on the Warp tool. I'm going to be using
this section that makes sure that our
whole part moves. All right. To be gentle, since we are done
with this as well, now we are going to
be tapping on Done. Take other section. Let's move to leaves number
four, which is this. We are going to be using
the Warp tool again. Now I'm going to be
grabbing this section. Just click on Perform
mode and just add simple, simple cute motions and
bring the leaves into life. I'll just flick it back. Go back all the
way to the start, Grab the leaves
number four again. Going to go to, so
that the nodes appear again and now I'm going
to be moving them. See it is happening so cute. Our leaves are moving
and it is waving around. Just tap done. And just go to the last part
of our leaves, which just leaves number five, which is right here. Go to the Arbol. Just tap on the perform mode. Now I'm going to be grabbing this section and I'm going to be adding circular motions here
to create a windy effect, as if the wind is
flowing and leaves are twirling around and
swinging in the air. All right, we are done.
Just grab it back. Go to the leaves
number five again, just go to the B two, so
that the nodes appear. In this part, I'm going to
be grabbing this section, I'm going to be moving the
leaves around like this, swinging and moving,
and we are done. All right, now if you just zoom out and tap
four fingers and hit play. Now you're going to see all the animations are
happening together. Our sun is moving
across the stage and our clouds are moving
slowly and moving across. The wind is blowing, the leaves
are flowing in the wind, and our kingfisher, which is sitting on the
branch of the tree, it is moving and
it is breathing. All the animations are happening together and looking
so beautifully. Just click on back. Now we are going to be animating the last part of our leaf, which is the colorful leaf. I'm going to be using
the Arbol only. Click on the perform mode now. We are going to be adding sweet little animation
here as well. It will make sure
that this part of the leaves is moving
as well with the wind. Just add sweet circular motion
or wavy motion swinging. We are done. Just tap four fingers and enter the
full screen mode and just hit. Now you see we have animated the whole scene using different tools we
have learned so far. In the next lesson,
we are going to be covering about how to share your animation once you have created the whole animation,
Appropriate dreams. Goodbye for now. See
you in the next lesson.
13. Sharing your Animation: Hello and welcome
back to our lesson. In this lesson, we are going to be covering about how to share your animation and procreate
dreams. Just go back. We're going to go
to our movie name. In my case the name
is stream line. We're going to tap it and you're going to see
different options of appear. Just go to Share button and you're going to
see different options. Like you can export
your animation in the form of a video
as frames, as images. You're going to export
only the current frame. Or you can export the entire
procreate Dreams file. The Dreams file, which I have attached as a class resource, was downloaded right from here. Also, here are some of the custom settings
you can play around. There are different formats, video the file container, and you can just play
around with them. That was all about
how you can share your animation in
procreate dreams. In the next lesson, we are going to be covering
about how to import your procreate brushes
into procreate dreams. Good, now see you
in the next lesson.
14. Importing Procreate Brushes: Hello and welcome
back to a lesson. In this lesson, we're going
to be discussing about how to import your procreate brushes
into procreate dreams. Like we discussed earlier, about how to import your procreate artwork
into procreate dreams, the method is almost the same. Let's just go and
recap the same. Okay, let's just move on to
our procreate application. All right, We are going to be importing
procreate brushes. Okay, let's just open this up. I'm going to open one
of our brushes back. Suppose, let's just import
this brush set. All right? I'm just tap and hold
this entire brush set. I swipe up with other finger and go
into procreate dreams. All right, now I'm
going to tap it. Just select any other
template you want. Selecting the square template. Now I will just go on
to draw and paint mode. And now I'm going to go on the brushes and now I'm
going to release it. Now you see the brush pack
has already been imported. And you can see all the different
brushes available here. This was one of the method of importing procreate brushes
into procreate reams. Now let me show you the
other method as well. This is called as
a split method. Let's suppose if you have procreate dreams opened
up in your ipad. Now I'm going to be choosing the split view option
on the other side. I'm going to be
opening my procreate. Let's go, let's go back and select one of the other brush set
I want to import like I want to import fur brush like suppose I'm going to be dragging all the way
from here to here. You can see the brush
pack has been imported. And you can see if you see the fur brush has been
imported right at the bottom. Let's suppose if you do not find the brush
sets at the top all the way anytime you can just scrawl all the
way to the bottom. Sometimes it happens that the brush sets does
not appear at the top, you can just find it at
the bottom that those were the two methods of importing the procrate brushes
into procrateams. In the next lesson, we're
going to be covering about how to import your
audio into animation. I hope you enjoy the lesson. Goodbye for now. See
you in the next lesson.
15. Importing Audio into Procreate Dreams: Hello and welcome
back to a lesson. Now, after we have
learned how to import your artwork and
rushes into Procreate dreams, now let's learn
about how to import your audio into animation
and how to edit it. So we have a website
called Pixabay where let's just open crew and you got to see the
Pixabay.com website. This is a website where you can download audios, videos, images. Absolutely. For free and they are absolutely
royalty free. We'll be choosing Pixabay
as a go to website to download audios for our
animations, Inprocreate Dreams. Now what you have to do is just click on the dropdown
button right here. You're going to select the
sound effects or you can play around with music as well
as for your requirements. I'm going to choose
sound effects for now. Now in the search bar, I'm going to be typing some words like birds sharp. You're going to see some
search results right here. You can select any. Let's just go with
the first option and you're going to just drop down again with
the sound effects. And you're going to see the RC, the total amount of royalty
free sound effects, which is more than 10,000 plus. Right, Isn't it cool. So you can play around with any of the sound
effects and you can download any of the sound
effects for your animation. All right, let's
just click on Play. See, you can just analyze which of the sounds will
be the best for animation. All right, and you got to select download it as important,
appropriate age. All right, let's just
play another one. This is not the
one which I want. This is a quiet on. All right. All right. I'm going to be
selecting this one. So what you have to do is just start on the
download button. Meanwhile I'm going to posit, just click on the
download button. We're going to see
this download option. Just tap on it and you have
to save it in your files. I'm going to be saving on my ipad and in the
procreate Dreams folder, and I'm going to be
clicking on Save. Now once we have
our audio ready, we are going to choose
our Dreams file. Let's go to Procreate Dreams. We are going to be choosing
our Dreams file here. Let's choose the
Kingfisher Tales, which we just animated
in our last session. I'm going to be adding the audio track into
this animation. Okay, let's tap it now. Before adding the audio track, we have to add a new
track from here. And then we will be importing the audio track into
our procreate dreams. Now in order to import, you have to just swipe up and open the file folder and just drag this file long, hold it and just use
the other finger. And go to your Procreate
dreams and just release it. You're going to see
the audio track has been imported now. You can just play around
with the settings a bit. If I just go back all the way to the beginning and
just tap on play, you're going to see a
few voice is coming. That's the effect
the audio sack has created to our
animation right now. If you want to edit it now, let's just go onto our
playhead and tap on this. And we're going to see
two options are coming. One is level and the
second one is edit. If I choose level, you're going to see
the volume you can decrease and you can increase the volume as
fhere requirements. If I choose like zero, since the audio is
right beginning and the video is
starting right now, I'm going to select
the other key frame you're going to see this is
our audio keyframe, right? This was the audio right
where the level is zero. And you're going to select another audio where
you can just fade in the voice up to
20% or 20% right? So you're going to see a slightly increasing
volume sounds. So if you just tap on play, you're going to see the
voices starting from zero and coming all
the way to 20% right? If you want to increase it, you can always increase it. I'm just going to grab
it all the way to 50% And tap done now. Just hit play and you're going to see a
fading voice, right? You can play around
with the fading out a bit like from at the end just going all the way to 9%
Just tap on the playhead. I'm going to be going up
to 85% and at the end, all the way to 10 seconds, I'm going to be
decreasing the volume all the way to 0% All right. Now if I just drag my play head all the way to the beginning
and just click on play, you're going to see the
fading in voice, right? Like the voice is starting all
the way from zero and then it's increasing and
it's getting fade out. These are all the
effects which you can play around
with the audience. Another tool which
I want to show you is you can just split
the audio track. Like I just showed you, there were two
functions here, right? The levels and the edit. Now, if you tap on edit, you can just split
the audio track. If I click on Split, this audio track has become
split from this one. You can just tap and hold and there are different
options. You can delete it. Duplicated copy, Cut Pace. Asper requires. I'm
going to cut it now. Just track all the way to the beginning and
tap four fingers and hit on plate and you're going to see our
animation is happening. And we have imported our audio so beautifully
into our animation. Likewise, you can play around with the animation
and you have to make sure that the audio which you're importing goes at par
with your animation. Right, that was all about how to import your audio into your
animation and how to edit it. In the next lesson we
are going to be showing you some other ways of animation
we can do in procreate. As. Good bye for now. See you in the next lesson be.
16. Some other Animations: Hello and welcome
back to a lesson. Let me show you what other animation Jack
created for you. If I tap on four
fingers to enter on the first screen mode and
I'm just going to plate, let's just rewind
it and play that. All right. Just observe all the animations happening
on the background. Okay. You can see our files moving. The boat is moving the flag
and the sail is moving. I've also added a
few creatures here. If I just zoom and you're going to see all
the different elements which I have added in this, the different leaves, fishes, bubbles coming up here. If I just again go all the way back to
the beginning and case, I've added the waves, audio effects from today. Just you can play around with the different effects
and audio effects. I've applied motions. That's how you can create your animations differently and you can just play
around with that. Now the other
animation which I want to show you is just if I hit on back and go onto the rectangles are if I just tap four
fingers and just hit play, you're going to see
the clouds are moving across and you're going to see our sun is changing its color slowly and steadily and
the waves are coming up. You can see the animation, the warp effect happening here. All these are different
styles in which you can create your animation
in a different way. You can just play
around with it. Now this is another animation. Let's just tap four fingers and you're going to see that I've added traffic audio
effects on fix. And you can see multiple
cars, colorful cars, right? And I have animated the
tires and the wheels on individual layers so that I can animate them
independently. All right? What I've done is that I
have drawn a single car, and then I've
duplicated that track, and I have changed the colors
and also the positions. So you can see that I have
multiple cars In our Tra, you're going to see that
little tires are moving. It's creating such
a cute animation. Along with the sound effects
that are added from Fix. That's how you can create
multiple animations. And you can just
play around with different effects which we have in our procreate dreams file. I hope you enjoy this lesson. In the next lesson, we are
going to be discovering a bonus file regarding all the gestures we have
in our procreate dreams. Goodbye for now. See
you in the next lesson. Be.
17. Bonus : Procreate dreams Cheat Sheet: Hello and welcome
back to our lesson. In this lesson, we are
going to be covering about the bonus file which we have
in our class resource pack. Let's dive in and explore
what we have inside. So as you can see that we have the procreate
dream sheet sheet, which is specifically
designed for all the procreate dreams users. This dream sheet sheet contains
all the gestures which are used on a day to day basis
in the procreate dreams. The cheat sheet also contains all the QNs
of the users who are coming across
with various queries while using procreate dreams. This is also if you want to recall the
gestures at one go. Let's open now. This is a procreate
dream sheet sheet. Now if you swipe down, you can see the gestures. You can see all the
gestures which you have by using procreate dreams. Now, as I said, we have
the QNA's as well. This is all about the regular inquiries of
the procreate dreams users. You can find and take help from the list that
goes on and on. You have multiple and
various types of questions. Like you have the
questions on draw mode, you have the questions
on timeline edits, then you have the questions
on playback mode. That's all. This guide is
just a go to file if you are new to procreate
dreams and you are learning how to animate
and procreate dreams, all right, good bye for now. See you in the next
lesson. Bye bye.
18. Wrap Up: Hello and welcome
back to a lesson. So now we have reached to
the end of our course. I hope you have enjoyed learning the basics of procreate dreams. The three ways of animation, namely, performing key frames, frame by frame animation, the various gestures which we
have in appropriate dreams. You see that we have dived into all the features which we have currently in appropriate
dreams application. We have almost covered all
the different animations. The looping effect, spilling,
curving, twirling, waving. Then we have all the motions
moving, scale and filters, Guion blur, opacity sharpened, Noise like so on. Then we have covered also the looping effect using
frame by frame animation. You have different
multiple tools and where we can
animate accordingly, then ping pong and one shot. Likewise. All right, I hope
you have enjoyed this lesson. For any query, you
can also connect with me on my various channels, which I have on my int profile, Youtube in linked in. All right, so one
more thing I want to tell you before ending up with this course that I'll also be bringing up with new lessons
on procreate dreams. As soon as the new updates are released on
procreate dreams, I hope that we will
stay connected. And for any query, you can just contact me on various profiles which
I've mentioned below. I hope you enjoy the lesson. Goodbye for now, take care.
 Harshita Katiyar, Illustrator and Animator