Transcripts
1. Intro Video: Hi, I'm Martin. In this class, I'll be teaching you how to animate phone graphics
just like this. [MUSIC] For our first project, you will design your
own phone graphics and you will animate them using the technique I'll
teach you, such as masking, scaling, offset paths,
pattern making, text animator, echo
and many more. This class is suitable
for graphic designers or illustrators that want to
animate their own design. You don't need any After
Effects experience, but you need to know a
little bit of illustrators. Well, I'll see you in class.
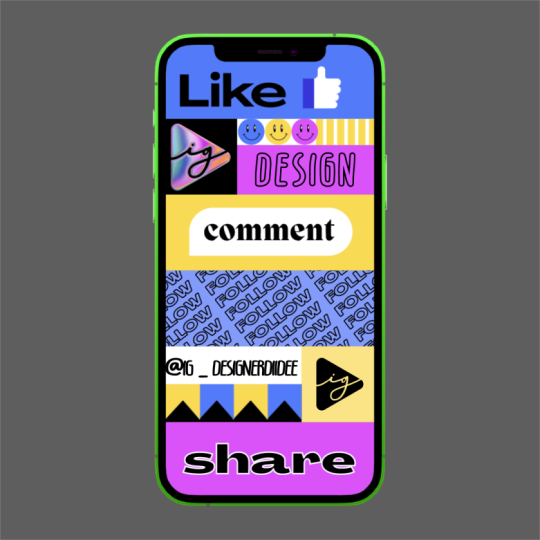
2. File Preparation: [MUSIC] We are here
in Illustrator. To prepare your Adobe
Illustrator file for animation, the things that you need to pay attention to is to separate all the layers that you're planning to animate separately. I have separated
all the files here, and this is the
file that you can download in the project folder. Here is our phone, the phone and then
this is the thumb, so you see I have separated
everything that I want to animate separately
as a different layer. After Effects can
read the layer, yes, this one is the heart, this one is the
black box, smiley. I want to animate
the smiley face, and circle differently, that's why I need
to separate them so I call it smiley red face, and make sure you
name all the layers otherwise it will get
confusing in After Effects. This is the circle,
this is the green face, smiley green, smiley
pink face, smiley pink, this is the green bar, white plate, here's
the love text, the yellow plate, command, the white bubble
text, green plate. Now, this one, usually when we want to animate, we need to release
the clipping mask if there's something
that has clipping mask, but for this particular case, we will actually recreate
everything in After Effects. I just need a guide
of how it looks like, therefore, I don't need to
release the clipping mask. This one I put it in a
one layer called follow, red plate, bookmark,
bookmark white plate. I separated all the ribbons separately because I want to
animate them individually, and the black plate
and then to add text, the yellow plate,
this your text, and then the blue bottom plate. Those are all our layers. One thing that you also should
take note is this phone, this one is a bitmap image, is a PNG, maybe it's a better
practice to embed the link, if you don't know how
to do that you can go to Window, and then links. I have embed this one but if you haven't you can select on
the phone or whatever, a PNG assets or bitmap
assets, and you can go here. If you haven't embed, the option will be embed, you can just embed,
and then it will be embedded in your AI file. The next thing is to save, you can go to File, Save As, therefore this one, I will just name it
Masking UI_AE_02. I usually put AE as a
coding name for my naming, this means that this file we
will be used for animation. I'll just click "Save", make sure you take this create PDF Compatible File, otherwise, After Effect will not be
able to read your file, and then you can
just click "Okay" and then see you
in After Effects.
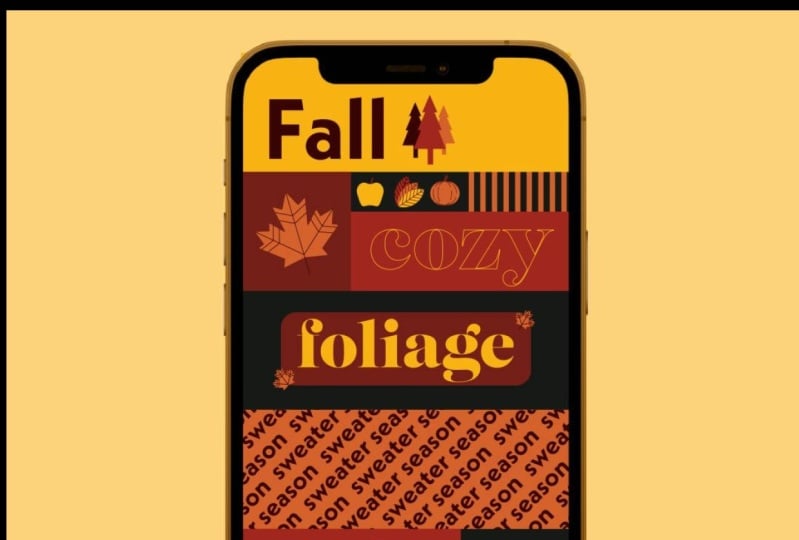
3. Design Adaptation: [MUSIC] Now that your file is
ready for animation, there are few things
that you can do. First, if you want to
use the design provided, this design that I have
separated the layers, you can use this design to directly animate
in after effects, or the other way, the one that I actually
recommend you to do is to recreate
your own design. You can recreate your
own design in two ways. First is to just
adapt this design. What I mean by adapt is you can just change the text to
other texts that you want. Let's say this is
becoming your name or this becoming
some other words. Just change the words and you
can change just the icon, but you can maintain all
the grid system here. You can change the color
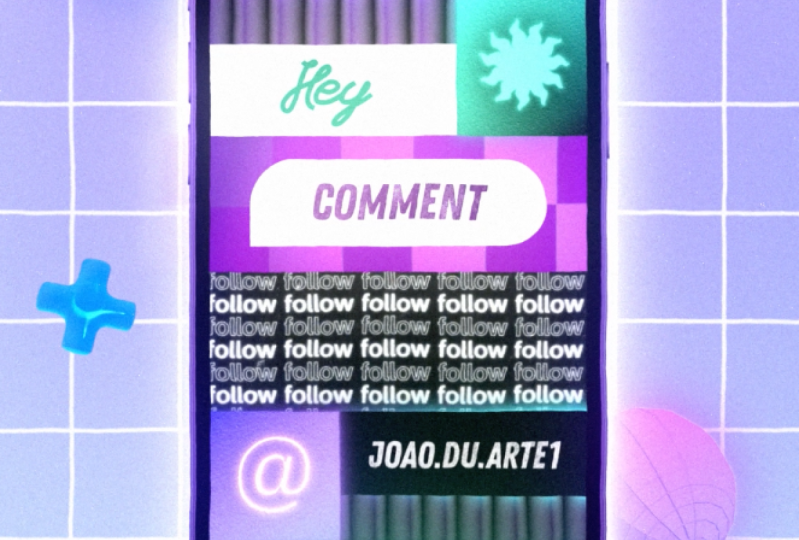
to your own color palette, and yes, that's it, and you can use the file. The last method is to completely
recreate all of this. This may be take
more time for you. It will be great
because you will have your own original design. But if you want to do that, what I recommend you
to do is make sure you maintain there is at least
one text layer like this. There's also another
text layer that is stroke base because we will
try animating the line in, and also keep at least two
icons like this or like this. Maybe it becomes star or maybe become either icon
that you want. Also make one pattern, at least simple pattern based on one element because we will
animate pattern as well. The last one is the
duplicated element, which is like echo now because
we will try to explore the effect called echo to
make it duplicated layers. Make sure your design have all of those elements and
you're good to go. Don't forget to separate
all the layers like this, and you'll be ready
for animation. [MUSIC]
4. Folder Management: [MUSIC] Before we go into After Effects, there is one very
important thing to know, which is folder management
for After Effects. After Effects is using
borrowing system. That means it will link all the assets into
their own folder. Therefore, if you keep your
assets in different folder, it will actually
become a missing link. The way you organize your
files should be like this. This is your project folder. You can name it whatever
you want and you should do it before you even
create After Effects file. Otherwise, after After Effects
linking all the files, it will become missing link
if you change the naming. Make sure you name properly this name,
whatever you want. My project is called Masking UI. Inside this folder, you will create bunch of
folder like this. This is your AI file. If you have Photoshop file, you will create another
folder called Photoshop. This is the file that
we created earlier, Masking UI_AE_01,
and is the original. Whatever AE file that After Effects file that
you will save later on, you will save in this folder. This will be if you have any live-action footage
from your camera, you can put it here. If you have any JPEG
you can put here. If you have any PNG,
you can put here. If you have reference,
you can create reference folder and so on. Output is for your
rendered file. You can keep all your
render file here. Makes sure everything is
inside the same folder. If by any chance you
have to change computer, you just need to
bring this folder, the main folder, and nothing
will be missing link. The next is After Effects.
5. Import and AE navigation: [MUSIC] If this is the first time
you open your After Effects, you will see welcoming
window like this. It might be empty for you, for me because I have opened many different
files before, so I will see my recent files. I will ignore this at the
moment and start a new project. If you don't see the same
like mine, actually, we will go to Window Workspace. I'm using the
standard workspace. In After Effects
you can actually customize how you want
to see your window. If you accidentally move something like
this, for example, or you accidentally close
something like this, you can actually
reset all of these by going to Window Workspace, reset standard to saved
layout and it will go back to how the
factory setting is. Let's import our AI file. This is our project library
and import our file here. There are many ways to import. You can just double-click
here and it will open this and I will go
to my Masking UI folder, go to my AI, go to this file. Don't double-click this file. What do you want to
do is actually make sure this is composition
retained size. If you choose "Footage", it will only select one
layer of this file. What you want is
Composition Retain Layer Size. Let's just do this. You can ignore the
last one for now. Just this one and
then click "Open". It will give you this. This is called composition. If we double-click this, you will see all of the layers that we said
earlier in our Illustrator. You will see this
folder as well. It has all the
layers that we need, but it's already embedded
inside this one. This is your preview window. Wherever you animate, you
will see the preview here. This is your timeline window, you can see all
the seconds here. You need to set the
duration first of all. If you see now the
duration usually we will follow the last
file that you did. Previously I did something
with 16 seconds, so it's on 16 second. The way you adjust this
is by pressing "Command K" or control K on Windows. Command K will open
composition settings but if you don't
remember this shortcut, you can also go to Composition,
composition settings, see Command K. Then here we will see that I have
set this as 1080 by 1080, which is an Instagram
square ratio. We will just maintain
that as it is. Make sure this is square pixels. We will use frame rate 30 frame per second for this project. This is the duration. Let me cancel this first. Sometimes you don't see this duration as a
second like this. If I press "Command" or
"Control" on Windows, it will become frame. With this setup if
I press "Command K," What do you see
here is also a frame. Usually we want to use
seconds rather than frame because it's more difficult
to count like 30, 31 second is the difference. I will not want to do this, I will cancel that and again, I will come here
and press command. They become seconds again. I'm okay now. Then I think I will change
this duration to 10. I'm not sure yet how
is our iteration, but for the starting point, I'll just make it 10
and click "Okay". There are a bunch of tools here. You see this hand tool. You can actually press
space bar for that. This can do this. You can also use
the hand tool here. You can scroll down and up here. Then zoom. Zoom tool
is to zoom here. You can hold Alt to zoom out. You can also use the middle
mouse scroll for this one, or you can also use this fit
or you can make it bigger. I will just use fit for now. This is quite important button. This is a setting
for your animation. Full will give you
full resolution, but it will use more resources. It will be slower
on your system. If you animate and then it will come like
you and you animate, you can change this to half. If it's still laggy you can even reduce the third or a quarter. This will not affect
the rendering. The rendering will use
the highest resolution. In the timeline, you can also zoom
in and zoom out. What do you need to know
about this timeline is if you see this 0100f, this is one second. Since we are using 30
frames per second, within one second you
will see 30 frames. This is 15 frames. You can zoom in and
zoom out this timeline by using this slide. You see when I zoom in, it shows more like five frames, 10 frames, 15 frames, 20 frames, 25, and
this one second. On 2 seconds. You can use this
bar or you can also use shortcut plus or minus. If you press minus
to zoom out and if press plus it will zoom in. The next thing you want to
do is to save this file. We will go to File, save as, and go to Masking AE. We will save in AE folder,
name this Masking_01. You can name it
whatever you want, but it's a good practice to get number 01 and let's animate.
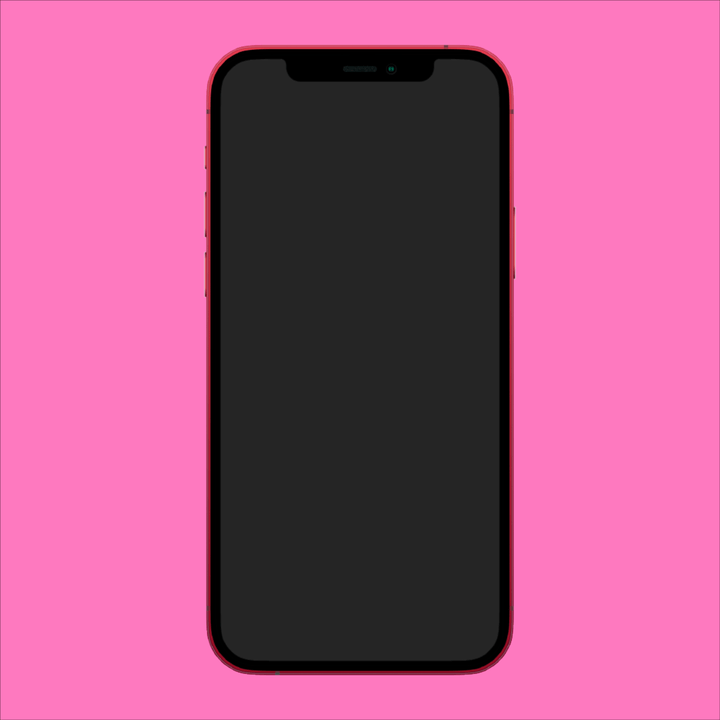
6. Hue Saturation: The first thing I wanted to
do is to color my phone. At the moment the color is pink and it's very similar
to the background. I want to change the color. This is the phone layer. I will select it and I will go to this
Effects and Presets. If you don't see this,
you can always go to Window find Effects and Presets and make
sure it's ticked. I will go here and I will type hue and then take Color
Correction, Hue/Saturation. If you don't see this, you
can also go to Effect. It's grayed out because we
need to go here, select, and then go to Effect, find Color Correction,
and Hue/Saturation. This is the effect that we want. We can just double-click
while selecting this layer, or we can also drag
this to our layer. By the time you drag that, it will have a
parameter here for the hue/saturation and this
will only affect this layer. I want to change
the master hue of this phone by dragging
something like this, then you can see it's changing. You can change it to
whatever you want. I actually want to find
something like a dark red maybe. Maybe I will reduce
the lightness a little bit and then maybe
increase the saturation. Make it look like this. Let's
change the zooming to fit. I just want it to be
dark red like this. You can change it to
whatever you like.
7. Layer Color Coding: [MUSIC] Now we want to
animate starting from the back plate of
each of the elements. To do that, first of all, we will hide all
the elements first, so you will only
see all the plates. Let's find all of them. Actually, I will try
to color code them first so it's easier to see. This thumb, like
and blue box top, let's color the layer to blue. Then I will hide
the thumb and like. In this heart and black box they are
together so I will color them red and then I
will hide the heart. I will actually lock this phone so I don't accidentally move it. Then this smiley, there
are a lot of them. Let's color them yellow. You can color them
anything you want. I will hide all the smiley face. This white plate, I think is supposed to be yellow as well. This green bar I will
just color it green. Love text and the yellow plate, this one is supposed
to be yellow, but let's just color it orange, and then hide the love. Then this command text and the bubble and the green
in the middle, let's just color it purple. Let's hide these too. Go to follow, hide the follow. Color both of them red. This bookmark, just leave
the color like this. If you accidentally
double-click something, it will open this box, this preview window which is
specifically to this layer, you can always come back here, click on this tab and you will go back to your composition tab. All this ribbon, I
will actually cover them fuchsia, which is a pink. This bookmark text
I will hide them. Hide this up, and both of these I
will color them yellow. These two will be blue and the background
will be fuchsia. I will lock the background so we don't
accidentally move them. This is the preparation
to animate each of them.
8. Rectangular Mask: The first technique
that I want to introduce you is masking. I want to animate
this blue plate. Let's go up blue box top, and then I will zoom.
Press "z", zoom. Press "v" to go
back to this tool, this is the default tool. First of all, you have
to select this layer. You will go to this
rectangular tool, click it, and then let's
draw a mask like this. You see by the time
I draw it's actually masking my layer, and what we want to
do is to animate this from here to [NOISE]
something like that. I will start from here
which is the end position. You see my layer by the
time I will use that mask, it will add a mask here. I want to open this
mask and then set a key frame on this
stopwatch on the Mask Path. Click here, you will create a diamond shape
which is called key frame and I want to drag this
diamond shape to the side. At the beginning I want
to make this shape. Let's double-click this layer. Press "v" again,
double-click this layer. By the way if you
cannot see this mask, we can always
change the color by clicking here and
you can change it to whatever color that is more visible; dark red or something. In order for you to change this, you can double-click
exactly at the mask. Double-click like this.
If you double-click, it will create this
bounding box and you can drag like this. If you hold "Shift" and then
click on one of them you can actually change this and just change one of the corner, or if you hold "Shift" you
can adjust both of the masks. I will undo them. What
I want is to take these two and I will
direct holding "Shift". I will direct to the left,
something like this. I will take care
and I will press "Space bar" to
preview my animation, so you see something like this. The speed is determined by the position of
this key frame, so if you think this is too
slow you can actually move it forward and you can
see it become faster. If it's too fast, you can bring like this and
your mask will be very slow. This is how you
adjust the timing. Actually, I want to
swing our render region. When we play like this;
press "Space bar", it'll keep on playing until 10 seconds before it loop
back to the beginning. I want to just swing
this render region. Let's say we said like this, if you render this column, it will be just
rendering this region. You'll see what
happened if I swing like this if I
press "Space bar". When it reach this,
it will lope back. This is quite useful for
judging your animation, so I think it's too slow at the moment and we'll
move it to here. Let me see. I think it's okay. You see this
animation is linear, this is called linear key
frame, is the diamond. Linear means there is no
slowing down or speeding up in the animation and
it's very flat animation. Let's change this
into Easy Ease, so I will select both of these and then I
will right-click, go to Keyframe Assistant, and then I will put Easy Ease. The shortcut is F9, so by the time I
click that it will give me looks like this. This means it will slow down, picking up speed, and then
it will slow down again. If I play this maybe it's
not very noticeable, let me just make it like this. If I want to show this
more clearly to you, maybe I will use this Graph
Editor and I click this. If you see, this is the
trajectory of our animation. If I make something like this, I will make it more extreme
both sides like this. Now if I play the animation, you should see
that it's actually slow down at the beginning and then it will pick up speed. This is the peak of the speed, and then it will slow down again. See, something like that. This is Easy Ease, but I don't want it to be that extreme so I will
actually go back here. I will select both of
my key frame again and select "Command", hold Command". Click on the key frame, it will reset back to the
original state which is linear. I will just select
both of them and then I will just
right-click, use Easy Ease. This is the default Easy Ease. This is what we
want to do for now; something like that,
but I think I will make it like this.
9. Transform Properties and Circular Mask: Now, I want to animate
this black box. Let's go to the black box. I want to use scale. This is the basic of animation. If you open any layer that you bring in
from illustrator, you will see a
transform properties. This is position. You can animate position. This is x position, this
is y position like that. You can also click and drag
to move it. This is scale. We can make it bigger or
smaller, and rotation. Opacity is transparency.
I want to scale. This is anchor point. If you see this anchor point. Anchor point is where the
axis of the object is. If the anchor point
is on the center, if I rotate, it will
rotate from the middle. But let's say I use this tool. This is anchor point tool
and the shortcut is Y. If I move this by holding
command, I will lock it. If I move it to the bottom left. If I rotate now, it will rotate from that corner, so this is anchor point. I want to scale
from this corner. Let's take that holding command, lock it to the top left, and then at the beginning, press F again for default tool. Go to scale, set the keyframe
on the scale, and again, this is N position, so I will move it to the right and change
the number to zero. Let's play this. It
will animate like that. Again, it's very slow, so maybe I will make
it half the speed, and then I will select both
of this and then right click. Keyframe assistant,
make it easy ease. Let's take our animation. Actually, I want
the blue to animate first somewhere that
I will animate in, then the black box
will animate in. I will slide this maybe
here and then let's see. They're not coming
in at the same time. Let us use a masking again. Select white plate, select this rectangle
tool, make a mask. Go to open this keyframe here. This is N position. Again, I will move
it somewhere there. Then I will press V, double click on this mask, and then move it like this. Select both of them, right click, keyframe
assistant, easy ease. Then I will trim
the beginning of this layer so we know
that it starts from here. Let's see the animation. I think it's a bit late.
Let's start from here. Let's see if it start
from the beginning. Let's animate this green bar, and I want to animate
them one by one. The green bar is here. I'll zoom in now. Holding spacebar
again to navigate, press V while
selecting green bar. I will select my mask. I will draw unmask like this, and then here in the green bar, I will actually duplicate
this mask a few times. I will press Command
D to duplicate, and then I will move it
to the side like this. Then I will press Command D
again, move it to the side. Press Command D again,
move it to the side. Press Command D. It doesn't
have to be too precise. I have all of them,
and then now, I want to open each of them and set a keyframe
on the mask as path. You will start to see
that there's tons of settings here that we
don't really need to see. If I go here and then
I press U, so I cut U, it will open just the
keyframes there we have set. We don't need to see either parameter that we
don't want to see. This is the N position. Again, I will move them somewhere here. I will select all of these and
then move it up like this. Move them all like this, and then trim this. If we play this now, it will animate together. But what we can do is, let me make it quicker, I
will select all of them, move it slightly here, and then let's see. Now, they animate at
different timing. Complicated animations if
you observe most of them, usually they consists
of simple animation, but they animate in
the different timing. We will use this concept
for the whole project, and you will keep on seeing later the power of staggering
timeline like this. What I want to do is
to make it easy ease. Let's see our animation. I think we need to
move it earlier. Maybe something like this. Let's see, fit. Don't forget to save, Command S. I want to animate this and I will go to this mask
and ellipse tool. I will use this
ellipse this time. Make sure you select this. Then you will click and draw. Hold Alt and Shift to make
it proportional like this. Let's just put it here. Press V again, double click, and then you just
readjust little bit so it's roughly in the middle. You can use arrow key to slowly make it somewhere
in the middle. We want to animate this, expanding in the
circular manners. Let's go to the mask,
open this mask, and we'll animate
the mask expansion. If I drag like this, you can see that it will animate
something like this. Let's get a keyframe. Click keyframe here,
and enlarge this until it covers the whole
thing so this will be our final position. Move this final position
away to 15 frame maybe. Let's shrink this down. Let's click this and then
press arrow down so we can slowly see when is
the finishing point. I think that's the
finishing point. It will animate in
a circular manners. It's time to unite it. Again, I will turn this
into easy ease, close it. Let's go fit. I will speed up the animation for these three because I will
use the same technique, which is masking 1, 2, 3, 4, 5. Later on, I will tell you different techniques
for this one. They look pretty
good. You see just by having the same technique
over and over again, but when you animate them at
different timing like this, it will look quite cool.
10. Alpha Matte and PreComping: Let's do a different
technique for this one. This is the ribbon.
I want to animate them coming out from
the top one by one. Let's actually animate
them all together, pink, green, red ribbon. Press P for position. Set a keyframe for all of them. Move all the keyframes
to the 15 frames. This is about the animation
that we use for the rest. Then let's move
the Y position up, maybe somewhere here and then change all the
keyframes to Easy Ease. Easy Ease is the most common easing that we use
in After Effects. It will look a bit weird because we're actually
coming up from here. What we want to do
is to mask all of these inside of this black box. There are a few ways to do this. I will show you the first way. This is the black
paint. The first way is to use alpha matte. The way to do it is by
duplicating this back plate. Press Command D to replicate
so we have two of them. Then I put it on top
of this yellow ribbon. Then on this yellow ribbon, you will need to find
this track matte. If you don't see this
track matte make sure you have this checked. See this one, make sure it's on. If it's not, you can also check with this
toggle switch mode. You need to find
this track matte. Then on this yellow ribbon, change this to alpha matte. By the time you do that, you will see that
these two layers is now having this icon. It means that they are
too now interconnected. Then this plate is now hidden. This yellow ribbon is using
this black plate as a mask. If you see now, the
animation looks like that, is no longer going up. This method is good,
but you can see that it will have
a lot of layer. Now if I want to
do for this one, I need to duplicate
again the black plate and it will have
a lot of layers. There's another way
which is pre-camping. I will undo this one. We're back to only
having one black plate. I will actually select this black plate and then
I'll pre-compose this by pressing Command Shift C. Or
if you cannot remember that, you can go to
Layer, Pre-compose, Command Shift C. It
will ask this question, leave all attributes or
move all attributes. I will show you what happens if I choose this one,
leave all attributes. If I click this, nothing
seems like happened, but you'll see this
become a pre-composition, and if I double-click this, it will actually
create a group that has only him inside, and it creates this new
composition, something like this. The size will be
exactly as this layer. I will undo this and then I
will do it one more time. This time I will select all of these layers,
including the ribbon. Select all these to black plate. Command Shift C. When
I do this this time, if I select more than one layer, you only have one option here, which is move all attributes
into new composition. If I click "OK" it will
actually group everything, and if I double-click this, now what you will see is the whole group is using
the composition size, which is 1080 by 1080. You've seen now we ended
up the same like just now, all our element is not mask, although they are in one group, but they are still on top there and it's not
masked by the black bar. We don't really want to do
this because this will end up making us need to do alpha
matte for each of them again. What I want to do is
I will undo this. I want to use the first technique
in the pre-composition. For that I will actually remove
all the positions first, press U for the keyframing, and I will delete all of our animation.
Delete them first. No animation. I will
pre-compose our black plate. Command Shift C, just
the black plate. Leave all attributes and then it will become
it's own group. If I double-click, it's here. Then I will actually
copy paste all of this. Actually, I will cut
them, all of these four. Select all of them. Command X to cut them.
Go to black plate. Command V. You might see
them in different locations, so we need to zoom
out a little bit. You don't really know where the effect will place them,
apparently it's here. Let's take them up.
Press V, bring them up. Let's just manually place them roughly where they were before. Somewhere here. Let us
check them outside. It looks okay. It looks
they're at the right position. Go back in. Now we
can reanimate them. Press P for position. Animate all of them.
This's end position. Move them to the 15 frames
and then move them back up. Select all of them, right-click and then Easy Ease. We have exactly same animation. But now outside everything is masked properly and
it's just one layer, it's very tidy. This
is what we want. But then now the animation
looks very uniform, let's offset the timing. Select all of them, move them slightly
in different timing. Let's check the animation. It looks good, and make
it slightly faster. I think it looks good. We also need to animate the black plate. Let's select this
back plate mask and then animate the mask. This end position. Animate like this. Select them. Right-click. Easy Ease. Then move the ribbon
slightly after. That's the outside.
It looks good. Let's zoom out. The animation looks good. Let's save this.
11. Make Them Fancy: [MUSIC] Now we have the base animation and
it's looking good so far. There's another way to make this animation looking
more complicated. This step is optional. It's not very necessary if
you don't like the effect, but let me show you one trick. Let's start with the blue plate. I'm going to zoom in here. The blue box top. What
I want to do is to duplicate this three times and offset the
timing a little bit. First of all, I will
duplicate this once. We have the exact same one, but I will go to
effects and presets and I come here, I will type fill. Then I will double-click this to apply that effect
to this blue plate. By default is giving
me this red color. I don't really want red, but I will actually offset
this timing a little bit. It happens slightly later
than the first one. I will copy the color. I have exactly the
same color now, but I want to make it
more maybe darker, maybe something like
this. I click Okay. Now if we play the animation, I have two exact same animation but happening at
different timing. If you do this three
times, let me see. I will duplicate one more
time and change the time. I go somewhere here and
make the color even darker. If I play now, actually
with the same animation, you have three different
color of animation. If you imagine you
apply to all of them, it will make the
animation even more busy. Let me try to do that
but first of all, what I want is actually this
color is our original color. I want that color to be
on the top of everything. Actually, we did a wrong one, I should come here, copy. Actually, this color should be same like this as the original. I will go to the second one, take this field Command C, and on the bottom one I will
Command V, that effect. Now it's same color and
then I will make it darker. Something like this.
Now, the ending is the correct color. Then you see with
this kind of effect, it's a good practice to be tidy. Once you don't see the
first layer anymore, I can press Command and the right arrow
to go frame by frame. You'll see by the time it's
covered by the second layer, I will trim this layer by
pressing Alt and close bracket. I know that this layer end here. If I press Command and
the right arrow again, by the time the second
one is covered, I will also trim this layer
off and close bracket. Then this is the
last layer on top. That is the one that
I will maintain. Now we see something like this. Let's zoom out, save it. Something like this.
Let's do that. I will speed up and do for the rest the
three duplication, and we'll see you soon. [MUSIC] I realized maybe the beginning
should be linear keyframe. I'll press Command
and click on this to become a linear keyframe but the behind
should be easy ease. I think that might work better. [MUSIC] I'm done the keyframing. You can see that the animation
now becoming super busy. This is really optional, it's really up to you
whether you want to do this or you just want to
stick with the first one. I might adjust the
color a little bit to make them more to
the color palette. I will do that, and we'll
see you in the next lesson.
12. Intertial Bounce Expression: [MUSIC] I ended up with this color. The color palette is the same. I maintain all the
same color palette, and this is what
I ended up with. I'm going to proceed with this one and animate
the first one. Let's zoom here and let's go and animate this
like and thumb button. First of all, I will
animate the thumb button. I'm going to zoom in
here and go to thumb. The thumb button will animate
right after the last plate, finish animating somewhere here. I will press open bracket
to just post this here. I want to animate it
scaling from this corner. I'll adjust this anchor point, press Y, or this tool. While selecting and dragging hold command so it will
lock to the corner down. Then I will press S for
scale holding Shift, press R for rotation. I'll bring in these
two-parameter. I will select both of
them, create a keyframe. Move them somewhere here maybe. I will rotate a
little bit like this, and I will make the scale zero. Let's see how it goes. It looks a bit slow
at the moment. Let's actually isolate
the render region here. Yeah. Something like
this. I want to use expression to bounce this. What I want to do
is to scale this up and then make it
bigger and then smaller, so it looks like a bounce. The traditional way to do
that is by doing this. This is a 100 percent. I will go somewhere in the
front and then click on the scale and then make this
bigger than a 100 percent. When we play. It will look
like that. Go like this. Maybe it goes the
same with this. I'll copy the rotation, paste it here, go back to this one and then make
it more than that. It's like bounce like that. Logically, if you want
to do this properly, you have to bounce more
than that and then bounce back and then bounce
the other way back and there's a lot
of keyframes involves. There's a way to automate
this using a script. Actually I will delete this keyframe in the
middle. Create here. Say first, I'll go to my Chrome, and then I will type inertial
bounce After Effects. This expression wrote
by Harry Frank. What we want to do
is to copy this in a cell bound script
that he wrote. You will copy from here. Just copy everything, take
everything command C, go to After Effects. Then you hold out
on this stopwatch. I will do one by one to the
scale first, hold alternate. Click open a script
dialogue box. We will just paste this
command V and click outside. Let's see what's going
on when we do that. Automatically apply
a bounce like this. The default setting
usually is too much. What we need to do is let's open this scripting
right-clicking there. What you need to
know is you don't need to worry about
all of these things. You just need to change
the first three parameter. Amplitude, frequency and decay. Frequency is how many
times they bounce. You'll see it a lot now. We will just reduce this to one. Erase this to one. Let's see how it goes. Like that. It's
actually a bit slower. Let me just move it faster. The bounce at the
moment is super huge. What controlling that is either these two things is amplitude. Let us reduce the amplitude
from 0.1 to 0.05. Then let us see how it goes. Then the decay is actually usually when you want
to reduce decay, you should increase the number. Let's increase it to four. I think it looks good.
I will apply this. I will select all of them, click and then Command C. And then actually I will apply them to the rotation as well. I'll click here and then Command V to paste
the script, click outside. Let's see how it looks like. Maybe move this to
the same timing. It looks pretty good. Yes, this is initial
balance expression. Let's actually animate
this like button. I will animate the position. I press P for position, bring it somewhere here. Set a keyframe.
This is N position. At the beginning, maybe
it's on the side like this. If you see it's actually
out of the box. You can use either the
pre-comping or the format. Maybe for this one I
will just use a format. I will take this blue box
top command D to copy, put it on top of the like. Click on the like, toggle
and then find a format. It'll be missing. But you'll see now is must based on this. You see these two icons, and the blue box will be hidden. These two things is actually
now linked together. You guys can see, yes. Then I will adjust
this to easy, ease. I think I want to slow
down this, slowing down. I will select this keyframe, open my graph editor, select this, and then make it more dramatic by pushing
this to the left. Let's see the animation. It will make it slow down more. I think looks pretty good.
Now, let us see on the fit. You can now see
from the beginning. I think they can come
a little bit earlier. Yeah. Looking good
so that is position and the initial
balance expression.
13. Copying Expression: [MUSIC]. All right, let's
animate the art. I'm going to turn
on my art layer. For this one, I'm just going
to quickly do a scale. I will move it somewhere here, press "S'' for scale, set a keyframe, and then go to the beginning then
set it to zero. Again for this one I want to use the industrial
bounce expression. But we already have the
good setup in the thumb. I will go to the thumb
layer and I press "ee" to open the expression
that we have wrote. So [inaudible] ee is to open any expression parameter
that you set on one layer. I will just take
this copy and then go to scale holding Alt and click on the stopwatch and
then Command V to paste it. Then let's see how
it looks like. A bounce and it looks good. I will make it slightly faster. Let's see how it looks
like. It looks good. If you want you can also
duplicate this three times like our earlier method. I press "Command
D" to duplicate at a focal field move it,
change the timing. Maybe this one I
change it to yellow. Let me move like this. Then maybe duplicate
one more time, change the time.
Stagger the time. This one maybe the color
change it to green. We have the same color palette
and then always so fast. Let's make the keyframe slower. I think the bounce expression is actually making it quite weird. I think I will remove
the expression. But you guys can
play around with it. But I think I'm just going
to keep it on the last one. Again, as a good habit, once the first one is
covered by the green color, hold "Alt" and then close
bracket to trim it. The same with this
once it's covered, trim, so you don't see the
duplication of it behind.
14. Trim Paths: [MUSIC] The next thing I
want to do is to animate the text love. I will find my layer
and turn it on. I want to use this technique
called trim paths, which is a method to do
a line art animation. Maybe I will start
animating somewhere here or bring it here. First thing I need to do is
to convert it to shape layer. I will right-click Create
Shapes from Vector Layer. When I do that, again, it will keep my original and create shape layer out of it. I will actually change
this to orange. We have exact same thing. But this time I want
to animate the line. If I open this shape layer, shape layer will have a lot of different things to animate. What we want to do is
now divided into four. Group 1 is e. Let's just name this group E. Then
this is the V group. Press, "Enter" you can name
it to v, and then press, "Enter," then press, "Enter, L." This is similar like create outlines
in Illustrator. Now we can animate
them differently. What I want to do
is go to the L, open the parameter,
and then go to this arrow and add an
effect called trim path. You don't see anything
yet at the moment. Let me open this. It has a few parameter. If I animate this, maybe you cannot see
anything now but I will try to hide this
by clicking this. Now you see it better. There's a shortcut
called Command, Shift, H. This is to hide bounding
box plus the line. Now if I animate this, you can see what's going on. In trim path there are
field parameter and means. You animate the ending. This is the beginning.
If you animate the star, it will also do that. If you animate the offset, they will move like this. You can do many
things with this. You can animate each of them. But for this case, I just
want to animate them out. Undo. I just want to animate this n from 0-100,
something like this. If you think that
direction is wrong, you want to animate it
to the other direction. You can use this one and it will animate to
the opposite direction. I think this is what we want. Yes. I will create
a keyframe here. Then I will press, "U." We can just isolate that
particular keyframe. Then I will go here and I
will animate it to 100. Let's see. Let's press, "B" to isolate the
render region here. So fast. I will move it slower. Let's animate the letter
O with the same trick. I had to open this back, go to O, click on
the O at trim path. Open this parameter. Set a keyframe here. Go behind animated the
0, and then let's see. It looks pretty
good. Press, "U." Looks pretty good.
Let's animate the v , is the same thing. Go to v, trim path. Open it, set N. Press, "N." Then actually, I just want to animate the e as well. Trim path, open it, set a keyframe on n
and then press, "U." We can just now see, go to the beginning, change both to zero. I think something
like that. Of course, you can play around
with the timing. For example, maybe the O
should happen slightly later. Maybe something like that. Let's see the whole
animation, go to fit. I think we can start
earlier. Let's trim paths.
15. Layer Parenting: The next thing is to animate the text bubble, is this one. Let's zoom in here. On this one I want to introduce a
concept of parenting. First of all, I will
press Command Shift H to make my bounding box appear. What I want to do is to animate this bubble text to
scale from here. I press Y and bring this down, hold command, it
lock to the corner. You see when I do this, I want the comment text to follow whatever
I animate here. There's an easy way to do that. I will select on comment and
I will use this pick whip. This is called
parenting pick whip. When I click this pick whip and drag it to the white bubble, it will actually inherit all the transform
parameters from here. Whatever I do with this, the comment will follow
if I scale like this. If I rotate, this layer will
follow that particular one. We can also do parenting
to certain parameter. Let's say you just want
to inherit the scale. You can use this and
parent it to just scale. But on this case actually I
want to inherit everything, so I will just maintain that. Let's animate the white bubble. Actually, let's start
animating when it's here. Let's bring them here. Now I just need to animate
this particular one, the white bubble texts. Scale and probably rotation. Then this is the end position. I'll select both of them, move it somewhere here. Maybe I'll rotate a little bit and then change
the scale to zero. Animate something like this. Again, I want to use
in a sale bounce. In a cell bounce
is the expression that I use all the time. I will go to my thumb, press E, E again, and then copy. Close it. Go down here. Alt, click on the scale Command V. I'll click on the rotation, Command V. Let's see
how it looks like. It's very slow, so I will
move it still quite slow. I think that's good.
16. Motion Tile: [MUSIC] How do we create something
interesting with this pattern? First of all, I'm going
to recreate this text. I will actually just hide this follow pattern and
then use this text too. Then just come
here and then type follow or you can type
whatever text you want. You can use whatever
font you want. I'm using a font
called Abril Fatface. This is the font size, this is the tracking, this is leading if
you have more line. You can explore, all of these is similar like Photoshop
or Illustrator. We will use an effect
called Motion Tile. But, this effect only
works for pre-comp layer. First of all, we need to
pre-comp this follow layer. I'll press "Command Shift
C" to pre-compose and then maybe call this Follow Text. You only have one
option for this. Click "Okay". Let's double-click this to enter the isolation
mode of that layer. You cannot see
anything now because the background is black
and our text is black. You can either turn this to see the transparency and
you can see the text, or you can also change
the background color by pressing "Command K" for
composition settings. You can change the
color to anything. It doesn't really matter because this is actually transparent. The color will not reflect it on anything in the main comp. If you go out, it's
still transparent. At the moment, the
composition size is very big. We want to make it small
and following this text. I will use this tool down
here, region of Interest. I'll click this, and
then I'll roughly draw maybe roughly
something like this. Then I will go to Composition, and crop composition
to region of interest. If I do this, our
composition settings will follow this size and it will
become small like this. If we come out now, we can rearrange
wherever you want. Then go here to the Effects and Presets and type this
effect called Motion Tile. When you type motion tile, is inside stylized Motion Tile. If you go here, you can
also access from Effect, find Stylize and then
find Motion Tile. Select it and then
it will give you this effect on this layer. At the moment, it doesn't
look like anything. There's nothing different. But if you increase
this output width, you start to see
that it's actually duplicating this layer
to the left and right. If you use the output height, IT will increase
something like this. The more you increase, the more the effects will
need to process this data, so don't use more
than what you need. We will actually mask this
inside of this plate. I think this is roughly okay. Let's clip mask this first. I will use this red plate, duplicate and then put
it on top of this layer. Select this layer and
then use the Alpha Matte, and then it will be
inside of the plate. I want to rotate this, so I will press "R" for rotation and I will rotate
maybe something like this. You see now we see a gap, so we can increase
the output height. There's another thing that
you can do with this face. If you select this, you'll see it will
shift the copy. You can also use
horizontal shifting. It will give you something
like this which is quite nice. The benefit with
pre-comping this first, so if you now you
go back to this, you can actually change
this text to anything. Let's say you
change to anything. Then if you go out,
it will change. But of course, you need to
readjust the composition size by doing "Command K" then you can adjust
this width and height. But, actually I will undo this. I will use my follower texts and then I would just
want to add follow. When I come out, it
will give me this. This distance is a
bit too big for me. The way to adjust
this distance is by minimizing this
composition size. Again, I can use this tool and then draw
something like this, maybe something like
this more type. Then go to "Composition" and then crop again.
Then we see outside. You can play around
with this until you get the result that you like. Let's save this. This
is Motion Tile effect. You can of course play around
with the other parameter, for example, you can animate
this if you want to. This is pretty interesting. But, you can play around with the
rest of these settings. If you click "Mirror Edges", actually it will
mirror your text. Just play around
with this effect, is pretty cool effect.
17. Text Animation Preset: [MUSIC] We've got
this animation now. Our pattern looking good, but it looks quite static. Let's animate using
the text animator. First of all, I want to
go to my precomp here. There's an easy way
to animate your text. First of all, you have to
select this layer, the text, and then go to this arrow, effects and presets and then click on this
hamburger menu here. Then you can go to
Browse Presets. When you click this, it will
open your Adobe Bridge. If you haven't installed it, just install from the
Creative Cloud subscription. It will open this by default and you need to
navigate into the text. Double-click and then
there's a bunch of presets that After Effects
have prepared for you. Let's say you want
to animate in, you can go to this folder. After Effects actually
has a lot of example. For example, if you
click like this, you see there's a lot
of fancy text animation that I usually never
use because in the advertising world usually they don't really
need this kind of fancy and looking
weird animation. There's some preset that is simple and generate
like for example, this. I use this sometimes
because it looks very simple and it looks classy. But I never use crazy stuff
like this matrix stuff. This effect is the
one that I use the most actually typewriter because it's so generic
and it's those standard. Let's say you want to
apply any of these, you can just double-click while selecting this layer
in After Effects. Let's say I want to
use this typewriter. I can double-click this and it will apply here
in After Effects. If you press U, it actually gives you
these two keyframes and you can bring it here, you can see that it's giving
you this text animator. Let's say you apply this
and you don't like it. To delete this effect, you need to open this
text and then you just click on this animator and then you just
delete the whole thing. Then it will go back to normal. Then you can again go to brush
presets and you can find another effect that you want There's actually bunch
off crazy stuff like this. This is the increasing numbers. Sometimes I use this.
This is like a time code. This is like buzzwords. Lot of things that
you can play here. You can click and then
try to see what it does. You can just play
around with it. But for this particular case, if you know the name, you
can also type it here. I will just use typewriter
actually then select and see. I will go out. Maybe
I will start a bit later. I think
something like that.
18. Text Animator: [MUSIC] To focus on this text, let's solo this text. I think we need to
solo background and maybe we also solo the plate. This is the button
to solo the layer. Let's go more in depth
with this text animator. If you create a text layer, there's actually a lot
of parameters here, but the one that very
powerful is actually inside this animate arrow. To control certain
things in text animator, you need to choose what
you want to do with it. Let's say we want to make this
the letter go one by one, letter by letter
up from down here. That means it's
affecting position, so let's try to add
the position here. When you add position, it will actually give you a
bunch of parameter here. What it means is start is this beginning line and end
is this beginning line. If I adjust this area
here, for example, you will see the
beginning move here and I will adjust the end here. This means this position effect will only affect
this region of area. Let's say this position is to
set our affector position. Let's say we want the text to go down from here coming from here. You can actually see
that this position is affected by this region. This offset is, if I
move it to the left, you will see that it
controls where this area is. If I move it to the left, it will actually
go from nothing, then come here, then it
will go until the end. This is the meaning of it. What we want to do is to animate everything
from down here to up. With that actually, we
can open this advanced. If you see here, add means this is included. If I change this to Subtract, it will invert that. This is secluded. Just leave it at add. This
square means the area affected is affected
by this square shape. I will actually change
this to Ramp Up. I think now we can
animate this from here, it will go up bit by bit,
something like that. Ramp up means from
nothing you will just go to the
affected position. With this, you can see
that if we animate, set a keyframe
here and move this back and then go somewhere here, and then we animate
something like this, we will get this result. It's a bit fast so
I will adjust this. It will look like that. At the moment it's
affecting in this manners. If you want it to be
less steep like this, you can enlarge this area, something like that, and you
will have a more smooth. I think this is pretty good. Once you set up this animation, you can actually add
other things to this. This is at the moment
it's position. Let's say you want to
affect scale instead, so let's add to
the same animator. You can add scale. If you change this to zero, this thing will start from zero. It will go something like this. Let me remove the
position so you can see what happened
with the scale. You can see the power of it. If you have set one
range selector, you can actually add
different kind of animation. You can add opacity or
even skew or scale. I think for this one, I might want to do position and maybe I will apply the scale
into the other one. Let's remove the scale. Let's delete this scale and then move it back down like this. I want it to be alpha
matte by this plate, so I need to
duplicate this plate, Command D, put it on
top and alpha matte. Now, if we see, it will
come in like this. That's looking pretty good. Let's un-solo. Let's see our animation. Don't
forget to save. Let's adjust This follow. I will go back to the follow, and actually I will remove
the typewriter effect. I will delete the
whole animator, so we don't have that
typewriter effect anymore. I want to animate the scale. With that, I can come here
and then I can add scale. You see at the moment that anchor point is at
the bottom here, by default is at the bottom. If I scale this, it will actually scale
from the bottom. I don't really want
that to happen, I want it to scale
from the middle. With that, we need to
adjust the anchor point. But if I add the adjustment
of anchor point here, it will actually
become pretty strange. Let me try something. If I add this property and
then anchor point here, and I adjust this thing
down, something like that. If I open this range selector
and if I animate this, it will actually
affect the position. This is because
this range selector is a vector anchor
point and scale. We don't really want to
animate the anchor point, so I will undo everything. I'll Undo until this
is on the scale. We will affect only the
scale with this animator. I will animate here, 200, then I will
change this to zero. It will animate from zero,
something like this. Then at the moment it goes
one-by-one like this. I need to change
this to ramp up. By the time we do that, we
need to adjust this to minus 100. It's now doing that. Our anchor point is
still at the bottom, so we need to add click. We don't want to add it here, so we want to come
to the follow, the main one, and then
add an anchor point. It will actually adding
another, animator number 2. With this now we can set it down and then
move everything up. Now it will animate
from the middle. This range selector,
the second one that we added is only to affect
the anchor point, it doesn't affected
by these keyframes. Now, we have this and
then when we go out. Press "U" for keyframe, and it should
happen around here. Something like that.
Let's play this , it's looking pretty good.
19. Offset Paths: Let's animate the ad. I will activate this ad and then zoom in
here so we can see. We're going to use an
effect called Offset Path. First of all, we need to convert
this into a shape layer. This effect, sometimes it
doesn't work if your text that you brought in from Illustrator is in
the form of text. So if you want to
use this effect, my recommendation is to outline your text first
from Illustrator, and then when you bring
into After Effects, usually it will work. For this one, I will
right-click and then Create Shapes from Vector
Layer. Click this. It will hide the original
and create shape layer. I will actually zoom in one more time so we can
really see what's happening. I will open this. Then I will add Offset Path. Offset Path is literally like what you know in Illustrator. It will give you by
default 10 outwards. What we want is to
animate from inwards, maybe from nothing like this. We set a keyframe here. From here, go back to zero, so it will go like this. From nothing to here. Let's say, I think from
here we want to see. Then I will press "Alt
and open bracket", and then let's see
the animation. Let's see fit, so that is offset path.
20. Echo: [MUSIC] Let's move
on to the next one, which is the share text. I will zoom in here. We will use an effect
called Echo here. First of all, we need to
animate it coming in. Maybe I will move it right here. We'll start. I press P for
position, set a key-frame. This is N position and we'll
move it somewhere here. The first position, I will move it somewhere out of
frame like that. Maybe the position should
be somewhere here. Let's check it out.
Something like that. Of course, use alpha
matte from this one, Command D, put it on top, and then alpha matte. It will be constrained
inside this mask. For this effect to work, we need to pre-com this layer, this share text layer. I will Command Shift
C to pre-compose. Make sure you choose this one to bring in
all the attributes. If not, it will not
work. Yes, "Okay". Then we will add type here
and effects called Echo, and then click and drag it. By default is giving you
this weird-looking thing. This is because by
default is set on end, so we need to change this
to compose in front, so the original would
be composite in front of the effect. We have one echo at the moment because
this is set at one. You can add this to maybe
two or three or four, or whatever number you want. Let's do seven maybe. Let's see the effect. It's looking pretty
good. You see this a little bit
of artifact here. I think it's better by
the time you reach here, we animate this number of
echo, set a key-frame. Press U, hold Command and left arrow and right arrow to make sure this is exactly
where it should end. Move one frame forward
command and arrow, and then change this to zero. You will see that by the
time it reach back here, it will go back to
original without any echo, so it will remove
all the artifacts. A lot of parameters you
can play with here. If you reduce this number, it will actually make
the distance nearer, and if you increase the number, it will make the
distance further. You can just play here. But this number is
pretty sensitive. I think you have
to try like this. Let's say I change it to 0.01. You'll see it will
come very near, and if I change it to 0.05, it makes it quite far. I will actually make
it back to default. It looks pretty good. This intensity is just to reduce the opacity of the
beginning or the end. This decay is the end. I'll let you guys
play with this, but I will actually
stick to this.
21. Fill and Offset Timing: [MUSIC] Moving on to the smileys. Smileys are actually
here. Let's find it. Smiley pink. Actually we'll use just one and then
duplicate later on. So first of all,
what I want to do is to change the color over time. Let's go to this smiley pink, then I will add an
effect called fill here, double-click it by default
is giving me this red color. I actually want to pick
from my original pink, and I will set a key
frame for the color. I will press "U", and maybe I will move it here. Let me grab all my smiley. Then let me see. I
think it should start right after the
white has appeared, like this, maybe here.
Let's bring them here. It should be exact,
so let me put it on 15 frames so it's easier for
us to measure the timing. Here, I want it to be pink, and then maybe after 10 frames, I want it to change
to different color. Maybe green, and maybe
after another 10 frames, it will change to red color. At the moment, let me press "B" to isolate
the render region here, P and N. It looks pretty weird because it's interpolating
between these two color. When it's interpolating,
it'll become different colors from
our color palette. I want it to be just
like stop motion change. For that I will select all these key frames and
then I will right-click. Then I will use this thing
called toggle hold keyframe. When I do that, what toggle
hold key frame does is it will maintain this
keyframe until you change the value
on the next one. If you see, it
will maintain pink until this keyframe,
it will become green. Then it will maintain green
until this keyframe will become red, so let
us see the effect. That is actually what I want, but it seems like a bit fast. I will actually change it to
extend the duration, maybe. Maybe it should be
somewhere here. Let's see. I think
it's pretty good. I wanted to actually
look at the moment it's changed every 15 frames, it's supposed to be here. Here, I actually want
to copy the first one. It will go back to pink, something like this, and
then it needs to go forever. Of course you can copy paste
this and paste them there. But I want to use
this expression, so I will click on the
stopwatch and I will type loop. By the time I typed that, the after effect will
suggest me bounds of this, and we will use this
called loop out. Just click here and
then click outside. With this, it will actually look the keyframe that I
have set up here, and it will keep on looping
out of the last one. If I press play, it will get one one
looping forever, if I zoom out this and
then I will extend this, you guys can see that this keyframe will
be a loop forever. That is what we want, but we want to duplicate
to the rest. With this, I actually will
just pre-comp this two things, the eye and the
circle common CC. Then I will call this smiley. Make sure I select this by
default it will be this. I'll press," Okay". Actually our pre-comp,
the size is very big. I will go into this smiley. I want to constrain the pre-comp
size to just this size. If you remember, we will use
this tool and then we will draw something like this. This is to make it easier in
scaling later on outside. So I will string
to this and then go to crop composition
to region of interest. Our pre-comp will be this small. Then usually the
location will be jumping to somewhere that
you don't really know. You need to readjust
this back there. Put him somewhere here, and then I will
animate the scale. Press" S" for scale. Set an end position and then come here and then
put it to zero. Then it was something like that, change this to the last
keyframe into Easy Ease. That's something like that.
I will duplicate three times and then I will
move the position here, then the last one here. Then I need to readjust
the timing so they offset at the exact 15
frames of the duration. Let me go to the first. Let me go somewhere where it changes color, somewhere here. I will shift this until it
changes color exactly there. Then I will shift this
one until it change to the other one. Exactly there. Then I will trim this out, and then open records. Press U for scale. I see we need to
bring this key frame inside this keyframe here. It'll be something
like that. They will scale up at different
timing and it will exactly changing color at
15 frames each. Let's take the animation. We fit this, C from
the beginning, press "B" for the beginning. This is the whole animation.
22. Render: To render your animation, you need to set
your render region. Makes sure it start at zero. Come here and then press B, and then it's up to you how
long you want to render this. I think I will set it at
four seconds, maybe here, and then press N to
shrink this and save it. Then you want to
go to composition, add to Adobe Media
Encoder queue. If you click this, it will open another software called
Adobe Media Encoder, and you have to
wait for a while. You will see the Adobe Media
Encoder window opening here, but you still need to wait. When it open you
still need to wait because it will appear
here, your render queue. If it doesn't appear
yet, you have to wait. Yeah. It appear now. Makes sure you have H264 here. By default, it will be H264, but if not, you can
just click here. It will open another setup. Sometimes it can
take time, but yes. If it's not H264, you just go here and then
make sure you choose H264. Don't worry about the rest. For the rest, just leave it, and then click Okay. This one you can keep it to
match source high bitrate, is a good setting already. This is where you want to
save the file, click it, so it's masking and an output and then you can
call it anything, maybe Mobile Coolness or
you can name it anything. Make sure your number them. Save and then click
this play button, it will render your animation. Once it's rendered, you can
go and check in your finder, go to your output, and then this will
be our animation.
23. Animate Out Everything: You have your animation done.
It's actually finished. But what I'm going to do next is actually to animate out then. It will loop back to
nothing the beginning, something like this.
This is optional. You don't have to do
this. Sometimes I will speed up this process. Let's start one by one. So I will start with this like, I will animate out the like. Well, maybe you can start
animate out from this four. From here I will start
animating the like out. This like, press U
for the position. So it come from here. Maybe I want to animate
it out going up. I'll set the key frame here, maybe move like this, press V, and then move it out like that. Let's check it out. Yeah, it will move out like that. Let's animate the
thumb, press U, maybe somewhere here
let's set a key frame, and then go like this and then I will just copy paste this, copy paste, copy paste. But since we have expression
here that will bounce, make sure you trim your layer here so it
doesn't come back. See let's animate the
blue top, press U, so right after this two
thing's gone I will set a key frame here
and then animate it. It comes from the
left to the right, then maybe the exit is
just go to the right. Double-click on the mouse, animate this out, something like that. Let's
move on to the heart, press U, set a key frame, move here, change it back to zero and then don't
forget to trim this. Let's see, remember
the time here. Let's animate the
black box press U. The animation out should be pretty straightforward we
just need to copy paste. Let's change this to
zero and then trim. Then let's animate the smiley. Actually, we don't
need this smiley anymore, so I'll delete. Let's set scale, somewhere here, set a key
frame for all of them, move a little bit, scale
to zero, trim the layer. Maybe I should set
this diagram as well. Then let's animate
the green bar, press U, let's set a
key frame for all, save, don't forget, then
Command C, Command V. Then let's animate
the white plate, press U, Command C, Command V. Then let's
animate the laugh, press U, set key frame for all, move them here, Command C, Command V. Then let's
animate the yellow plate, press U, maybe somewhere here, set a key frame, copy paste. I will actually speed up all
the animating out process, I think you should know already. [MUSIC] I think we got the whole animation
done. Thank you guys.
24. Conclusion: Congratulations, you
made it this far. I hope you enjoy the class and thanks so much for
taking the class. If you make any cool stuff, don't forget to
submit them here. You can also tag me if you
upload them on your Instagram. If you have any
problem, as always, just ask me here, or you can also email me or
ask me in my social media. Thanks guys, keep
on practicing. Bye.
 Martin Altanie, Motion + Interaction Designer