Transcripts
1. Introduction: Being able to create something is one thing, but being able to work with others is a whole different ballgame. Understanding how to utilize packaging of files within After Effects really allows you to do this effortlessly. In today's class, we're going to be going over the essentials of properly organizing and packaging up your projects in After Effects. My name is William Kesling, and I'm a digital design artist, living and working in California with a concentration in video editing, motion design, and art direction. For this class, we're going to be diving into a project that is already finished and ready to be sent off to a client or a co-worker. We're going to start to organize the folder structure in a way that will allow anybody else to be able to dive in and navigate the project. Then we'll finish off by trimming the fat and getting rid of clips that aren't used, and then packaging up the project so you'll get a folder that you're able to send off effortlessly. Knowing how to do this properly allows you to be able to push yourself and work with others in a way that you were never be able to before. It's also really important because practicing organization and understanding folder structure will help you save a lot of time in the long run. I'm excited to see what you guys create. Be sure to post you guys work and don't be afraid to ask questions or start a conversation within the discussion board.
2. Organizing Your Project: For this class, it's all about organizing your projects from the beginning correctly. When you organize your project from the beginning it helps the entire workflow. Obviously, it's all the same, work more upfront so you don't have to at the end of the project. You don't want to have to go through the project and start to organize everything, delete everything that wasn't used, and it becomes a large hassle on you. Always just think about that when you start a new project. How can I be more organized? How can I be more focused? What is my objective? Where's this going and who is going to have to use it down the road? Also, don't always put everything on one hard drive, or multiple different hard drives without labeling any of those hard drives, or on your desktop in random folders. Being able to organize your projects in individual folders to where know known where they are, whether it's labeling them physically or digitally on the computer, is a great start to be more efficient and add more value in your company. And it's great, because organizing your projects from the beginning allows you to not only think about yourself and how it'll help you at the end of the project, but anybody else that has to dive into the project it'll be saving them a lot of time. You helping yourself will help others as well. That being said, let's dive into the project that I've supplied for you guys, and let's see what we can do to make it clean and package it up as if we were going to send it off to a client.
3. Creating a File System: Now that we've made it over to the desk, the one thing to point out is that everything always starts with the naming system. Especially with an organized project, you have the naming systems organized ahead of time so it saves you time in the long run. What I wanted to do was I wanted to show you how I set up my folder structure for when I start a new project. Let's say you have a project and it looks like this. Skillshare_Class, you've got an After Effects file floating around, so PNGs, audio, and then a couple other things as well. What I'm going to do is I'm going to create a new folder. I will call this one Version 2, and I'll create a new folder and I'll call this one Version 1. I'm just going to give you guys an example of how you guys can better organize your folder structure. I know that I'm going to be working in, let's say After Effects, so I'm going to create an After Effects folder. This is before I've even started anything. I know I'm going to be working in Premiere Pro, so I'm going to create a Premier Pro folder as well. I know that I'm going to be having some footage in my folder, so I'm going to create a footage folder. I definitely know I'm going to have audio, so I'm going to create an audio folder. I may have some effects and assets, so maybe I'll just call that Assets and I'll put effects in there if I need to. Maybe I'll even have some PNGs or we'll just call this one Design, and maybe even within Design, we'll have PSD and then we'll also have PNG. Let's say I even have an Illustrator document if I'm doing some motion design. It's really important to start like this and to be organized from the very beginning. It's one of those things that you just don't really think about because you might be pushed for time, and so you might just jump right into something. But it's important to know that jumping right into something should be jumping right into structuring your folders and then getting into the program that you're working in. I chose this as my labeling system, but let me tell you there's many different ways to label your guys' folders. Labeling something Design isn't always designed. Doing an export folder and labeling it Export is sometimes called renders. There is this industrial standard that gives you a foundation of understanding what is accepted in the industry that you're working in, but I think that the most important thing is to be consistent. If you're going to label something Export, if you're going to label something Design in the very beginning of your project, if you're going to label it Footage in the very beginning of your project, then make sure you spread that on every single thing that you do for that single project. Like I said, there is a fundamental foundation of how to organize and what to call things. But it really is up to you when it comes to organizing these things or up to the company that you're working with. If there's nothing set within the company that you work with, then it's really up to you to be consistent and really start to practice utilizing a good system. After learning this simple tip and trick, I want you guys to go and create maybe your folder structure, how you guys would work, what's most important for you guys, whether it's footage, design, maybe just purely After Effects, maybe more Premiere Pro, start throwing your footage in there, and let me know what you guys think, and if you guys have any things that you guys have learned or what works best for you. If you guys have any questions, let me know as well.
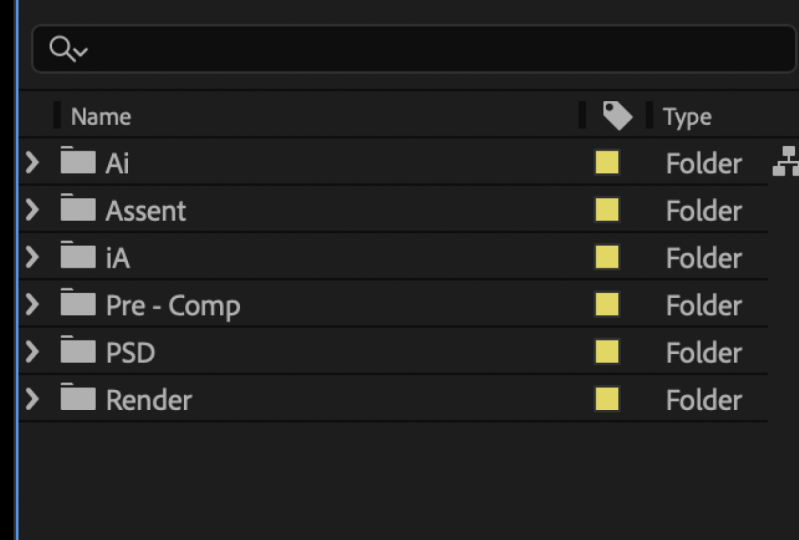
4. Organizing in After Effects: Now that we learned the quick trick and tip about organizing your folder structure from the very beginning, we're going to dive into a project that is intentionally a little bit messy and we're going to clean it up, trim some of the fat, organize. I'm going to show you guys how I organized a folder and then how I also package it up so I can ship it off. As we go in here, we can see within our project panel in After Effects that it's pretty messy. We've got audio files all over the place. We've got JPEG sequences all over the place, and we've got doubles of things. This project really doesn't have that many files in it, but it does have a variation of files we will be able to pretend and work through this so you guys could tackle something that's much bigger down the line. What I'm going to show you guys within this exercise is how we can just send off one composition. But what I want to do is I first want to show you guys how I would organize all of this. Starting right from the bat, I would maybe say, let's see if we can get some of these things organized by type. By type will obviously make it so all the PNGs are next to each other, the MP3s are next to each other and so on. What I want to do is obviously I want to take the music files and I want to basically select all those, just holding Command and selecting them, and I want to drag them into their own folder. The little folder icon down here, and we'll call those "Audio". Now, with our audio folder, well, that's good. We already have a footage folder. It looks like there's something in it. Looks like just another PNG sequence. What we'll do is we'll collect all the other footage and we'll drag it into that footage folder as well. Now, we have that organized. We have audio organized. See animation. Not too much in animation, but maybe what we can do is, you go ahead and delete that, just clicking "Delete". Within footage, we can go ahead and select all of our footage, make another folder called that "Animation", and so now we're even more organized. We've got other comps. I'm going to go ahead and call this one Pre_Comp because I know that those are pre-comps, meaning those are compositions within compositions. Then these must be all of our main compositions. I'm going to go ahead and throw those in another folder called "Compositions" or for short, we can do "Comps". What I like to do is either put MASTER_comps or I like to just put a _comps, and I use the underscore so when we go back to the naming, it'll go to the top. Right now, _comps, we have the comps, but then let's throw the pre-comps within the composition folder as well just to make it organized. You've got solids. Solids or something that After Effects creates for you when you create a adjustment layer. If you create a solid, they'll throw it into a pre-made solid's folder. I like to throw this underneath an Assets folder, or even sometimes in Other folder, because a lot of times when you send the clients, they're not going to have to get into specifically going into the project panel and trying to find the solid. The solid is already going to be in the individual project sequence that you're working in. We'll got that go footage. We've got this looks like we have a VFX, visual effects. We'll drag that into footage as well, just so the visual effects is underneath footage. Then it looks like we have a bunch of PNG images. We're going go ahead and drag that and we're going to type that PNG. You guys can label this IMG if you guys want to, and I am going to put this underneath footage as well. I'll sometimes put PNGs and images underneath Assets. Now, this is how it should look, and so if I get rid of type, I mean, if I go from type to name, and I click "Name", you'll see that now _Comps is at the top because it has the underscore. I sometimes use an underscore, sometimes I use an asterisk. It's really up to you. Just be consistent. Now within my comps, I maybe want to go through this. Since I'm pretending that I had been working in this and I'm just here to clean up, I know that my version 4 of this comp is the one that I actually am going to send off. I'm going to go into version 4 and I'm going to see that it's a little bit messy here. What I want to do is I just want to clean this up. I'm imagining that somebody is going to have to get into this. I want to make sure that whoever has to get into this is not going to have to worry about much. What I'm going to do is I'm going to go through the layers and see which layers I'm using. Obviously know that I'm not using that red solid, maybe I was using that solid for something on a mask or something like that, and I'm not using that. I know that I'm not using any of these audio files because well, they're not on, so I'm just going to get rid of that. Right now, I call this trimming the fat. I'm just trimming the things that I'm not using. It looks pretty good right here. I'm going to go ahead and save it. I think what I want to do now is I want to go into the pre-comps that I had within the composition because you can't just assume that the composition, once that's clean, then everything's good. You want to make sure that you go through the pre-comps within your composition as well. It looks like my pre-comp is pretty good and it's organized, so I don't have to worry too much about that. I'm going to go ahead and go back into this comp right here. Now, one way to go back and forth within compositions is to click Tab. Tab will then show you multiple different compositions that you can jump into. The blue line obviously is the one that you are in previously. It helps you jump back and forth, instead of trying to find it over here. Now that I have seen that all this is good, my composition looks really clean, I'm going to go ahead and go to the end of my music file because usually the end of my music file, especially for an edit like this, which was a tonal edit, I know that the end of my music file is the end of my edit. Just to give you an example, let's say it was all the way over here. It's like my soundtrack. I'll click O to go to put the play head at the end of my soundtrack, I would then click "End" to bring the looping period to the end of that soundtrack. Now, if I were to clean this up even further, what I would want to do is I would want to trim all of this fat right here. What I'll do is to Shift Command X, and Shift Command X will trim the rest of that fat so then you have a composition that is just what you want. Now, if I were to play it, at a loop there, and there's really nothing more. But if you want to leave, the person has giving into it, a couple more seconds, you could always go back into the composition settings by doing Command K. Doing Command K will bring up the compositions for that comp. Then within Command K, what you can do is you can do it under duration and you can make that, let's say 15, and you'll see that once again, it's added a little bit of time, so both be able to add anything if you wanted them to do an end title or anything like that. But I don't really necessarily do that. I want to do this all over again. Click O on my keyboard to go to the end of soundtrack. I'm going to click "End" to bring the play head to the end of there, and I'm going to do Command Shift X to trim that fat. But it's good to go through and color code these things and make sure that everything is labeled. It looks like for the most part, everything is labeled. This adjustment layer isn't labeled, it's just adjustment layer 2. Now that we know that we're actually using that one, what we can do is see what's in that adjustment layer. It looks like we have a glow and we have a slider control. What we can do is we can go ahead and click "Enter" with have on that adjustment layer and we can label it Glow+Slider_control. A lot of times with labeling, I got in a habit of using underscore. It's just like what the computer reads as a space most of the time. We're working in digital marketing and digital media and all this stuff, so I just started doing underscores for almost everything, which was a good habit to get into, and I was hard to get out of. My soundtrack is yellow, which is great. My footage, two of them are green and one is brown. I think I can just go ahead and make these all, let's say a red, and then I have my adjustment layer. Let's make that a green just so it's a nice contrast. Then I've got, it seems like a pre-comp, but that's also footage too so I'm going to label that red as well. Now, we can see that we really like have pushed this, and we've organized it, and we've made it a lot easier for you to go through if you needed to jump back and forth between multiple different projects. Some of these tips, either apply it to this project and work with through this project that is provided to you or maybe take this and work in another project that you already have working on in your company right now. Start a discussion. Let me know what you think works better or what works best for you. I'm totally fine to answer any questions that you guys may have and I'm looking forward to seeing what you guys post.
5. Packing a Folder to Ship: Now that we've organized our project and we have everything looking really good, now we want to package up the folder. The packaging up process is basically creating a condensed folder of the entire project, or at least the necessary files that are needed to be able to play back the project in the program. If I'm sending this file all the way across the country, I would want this to be a package file so that when the person opens it up in After Effects, everything gets linked by the program and they're able to edit a review or do whatever they need to in the project. Linking is the biggest thing, and a lot of times when you don't do this correctly, you get a lot of unlinked files. Unlinked files means that the computer program can't find the files necessary for the specific edit and it gets unlinked, and then the person trying to work in it can't do anything because they don't have the files necessary to continue the project or continue to edit or to make a review. What I'm going to do is I'm going to dive into the same project that we had just cleaned up. I'm going to think, what does the client need to get into? Does the client need to see all my previous versions that I was working through to get to this final edit? In my instance, I'm going to say that they only really need to see that last version for edit. When they only need to see the last version for edit, I'm only going to give them the necessary things to be able to work within that last version for edit. What I'm going to do is, I'm going to do something calling reducing the project. This is version 2 of reducing the fat. What I'm going to do to reduce a project is I'm going to first select the composition that I want to reduce. I only want to keep this stuff that is within this composition. If I actually wanted to keep the stuff that was in all of these compositions, what I'll do is select comps and then it would basically keep all the stuff within my project that has to deal with these and it'll get rid of everything else that doesn't deal with those compositions. But right now I know that I only want to select "Master Comp 4", so I'm going to select that one and I'm going to go up to file, dependencies, and I'm going to click "Reduce project". Now what it did is it basically deleted all the files within this project that weren't being used within Master Comp version 4. Now, what I always like to do just out of habit is double-click that comp, playback what I have, and make sure that everything is still playing how it should be playing. Deleting those files, what it's going to do is it's going to make the project folder a lot smaller, which is going to be more nice for the person going into it. One, when they download it. Then it's also going to be nice because it's not going to be confusing. We're giving them exactly what they want. Since I only have one version right now, I can actually relabel this to Master Comp v1. See what the pre-comps are. It also deleted one of the pre-comp, so I just have one pre-comp. You can go through here and see if there's any other things that are just empty now that you could delete, but it looks like everything is a lot more condensed and organized just from that one click. Now what I want to do is since I've reduced the project is not I want to collect the files and I basically want to make this one-click consolidated packaged folder, and you'll really see how easy it is. I'm going to click the "Master Comp v1." I'm going to click "File", and I'm going to go down to the dependencies. I'm going to go to collect files. This project needs to be saved first. Do you want to save it? Of course I want to save it. Then there's a couple of different things in here. Click "Source Files", "All", "For All Comps", "For Selected Comps", "None." I want to do all. If I wanted to, and I wanted to not reduce my project beforehand, and I wanted just to select certain projects from certain comps, I would just select the comps. I'm going to go ahead and click "All", "Generally Report Only." You don't need to click that. "Reveal collected project and Finder when finished." I do this just because it's nice to see that everything worked out. You can see down here at the very bottom, you're going to collect 735 files, it's going to be 160 megabytes, will be collected. A hundred and sixty megabytes for a collected After Effects project is very small. I think if you get to something like one gig, two gigs, you're going to have to start worrying about upload and download speeds, but 160 megabytes is not bad at all. Before we do this, I want to show you guys one thing. After seeing this, let's say 116 megabytes, although it's not bad, let's say that is a little bit too big for what the client is asking. We're going to do cancel. What we'll do is we'll go into the footage folder. Now, what we can do is we can actually take the four PNG sequences that we have and we can actually take those and we can replace the footage with placeholders. Replacing the footage with placeholders, we're basically doing exactly what it says. It'll take the footage and I'll put a placeholder there, but it'll keep that exact name. Let's say the client on their side side the co-worker that you had that works across country has the footage already. What you could do is you could assume that they'll be able to relink it or you could walk them through the process of relinking the footage, which I'll show you guys. What you can do is you can replace this with a placeholder, which will then take that footage away, and not actually have it in the project. Replacing footage with a placeholder and you'll see, I'm going to keep the exact same name. I'm going to keep the exact same size. A lot of times you don't want to switch this. I'm going to do that for all of these. Now that I just put placeholders for all of these files, when I send this off to somebody, what I would expect them to do since they have the footage, they would basically go into this. They right-click it once they upload it, once they go into this project, and they would replace it with a file. Then they would go into the file that they would have all set up here. They would basically go and they'll click "Open", and then they would be able to import the footage themselves. Now I want to go back to where if I just had the placeholders, let's see how big the file would be if I were to collect it now. If I want to go to down to dispensaries and collect files, the project needs to be saved. Let's save it. Then now it's 62 megabytes. Getting rid of those image sequences and those actually footage files made it 100 megabytes less than what it was initially. I'm going to go ahead and click "Cancel", and I'm going to relink all the footage here just because I think 160 megabytes isn't bad. I'm going to go file, dependencies, and then I'm going to go to collect files. I want to save it again. I'm going to go collect, and then I'm going to go and find a spot of where I went to collect it. I'm going to go in version 2. What I'm going to do in version 2 is I'm going to go and I'm going to say, well, I need to have an export folder. I'm not going to be afraid of creating a new export folder. I'm going to call this "Skillshare_Class_v1_Clean_up." I like to call it, source, "SRC_Folder." Then I'm just going to click "Export" and then click "Save." Then what it's going to do, it's going to work in the background to basically consolidate all of the footage, whether it's on your desktop, or whether it's on your documents, or whether it is a folder on your computer, it's basically going to bring all that footage together and put it into one concise folder. Now you have this one concise folder that's highlighted right here that you can then send off via email, or Google Drive, or a hard drive if it's a larger file, but it's always good to know how you're going to send these off to the client. You can see within the package folder I've consolidated all the footage into its own footage and visual effects folders and all the audio that we used into the audio as well. Now after learning these techniques of how to clean up a project, how to then reduce a project, and then how to collect a project into a concise package folder, I want you guys to go ahead and give it a stab and try it out whether using the project that we provided to you guys or doing something on a project that you guys are working on right now. Be sure to send screenshots or ideas that you guys have or what works best for you. I'm really looking forward to seeing what you guys create and how you guys can stay organized from the very beginning of your project all the way to the end so it creates a seamless transformation or seamless handoff to a client or a co-worker.
6. Final Thoughts: With all that you guys have done it. You guys have taken a project that was really messy, organized it, collected it, and now you guys are ready to be able to ship it off. I'm excited to see how you take what you've learned, apply it to your projects that you're working on now or projects in the future, or just how you work through the project that we gave you. I'm excited to see what you guys create. Let's have a discussion about it. Feel free to post screenshots of what you guys think work best for you. I'm here to answer any questions that you need. Thanks again, and I look forward to seeing what you guys create.
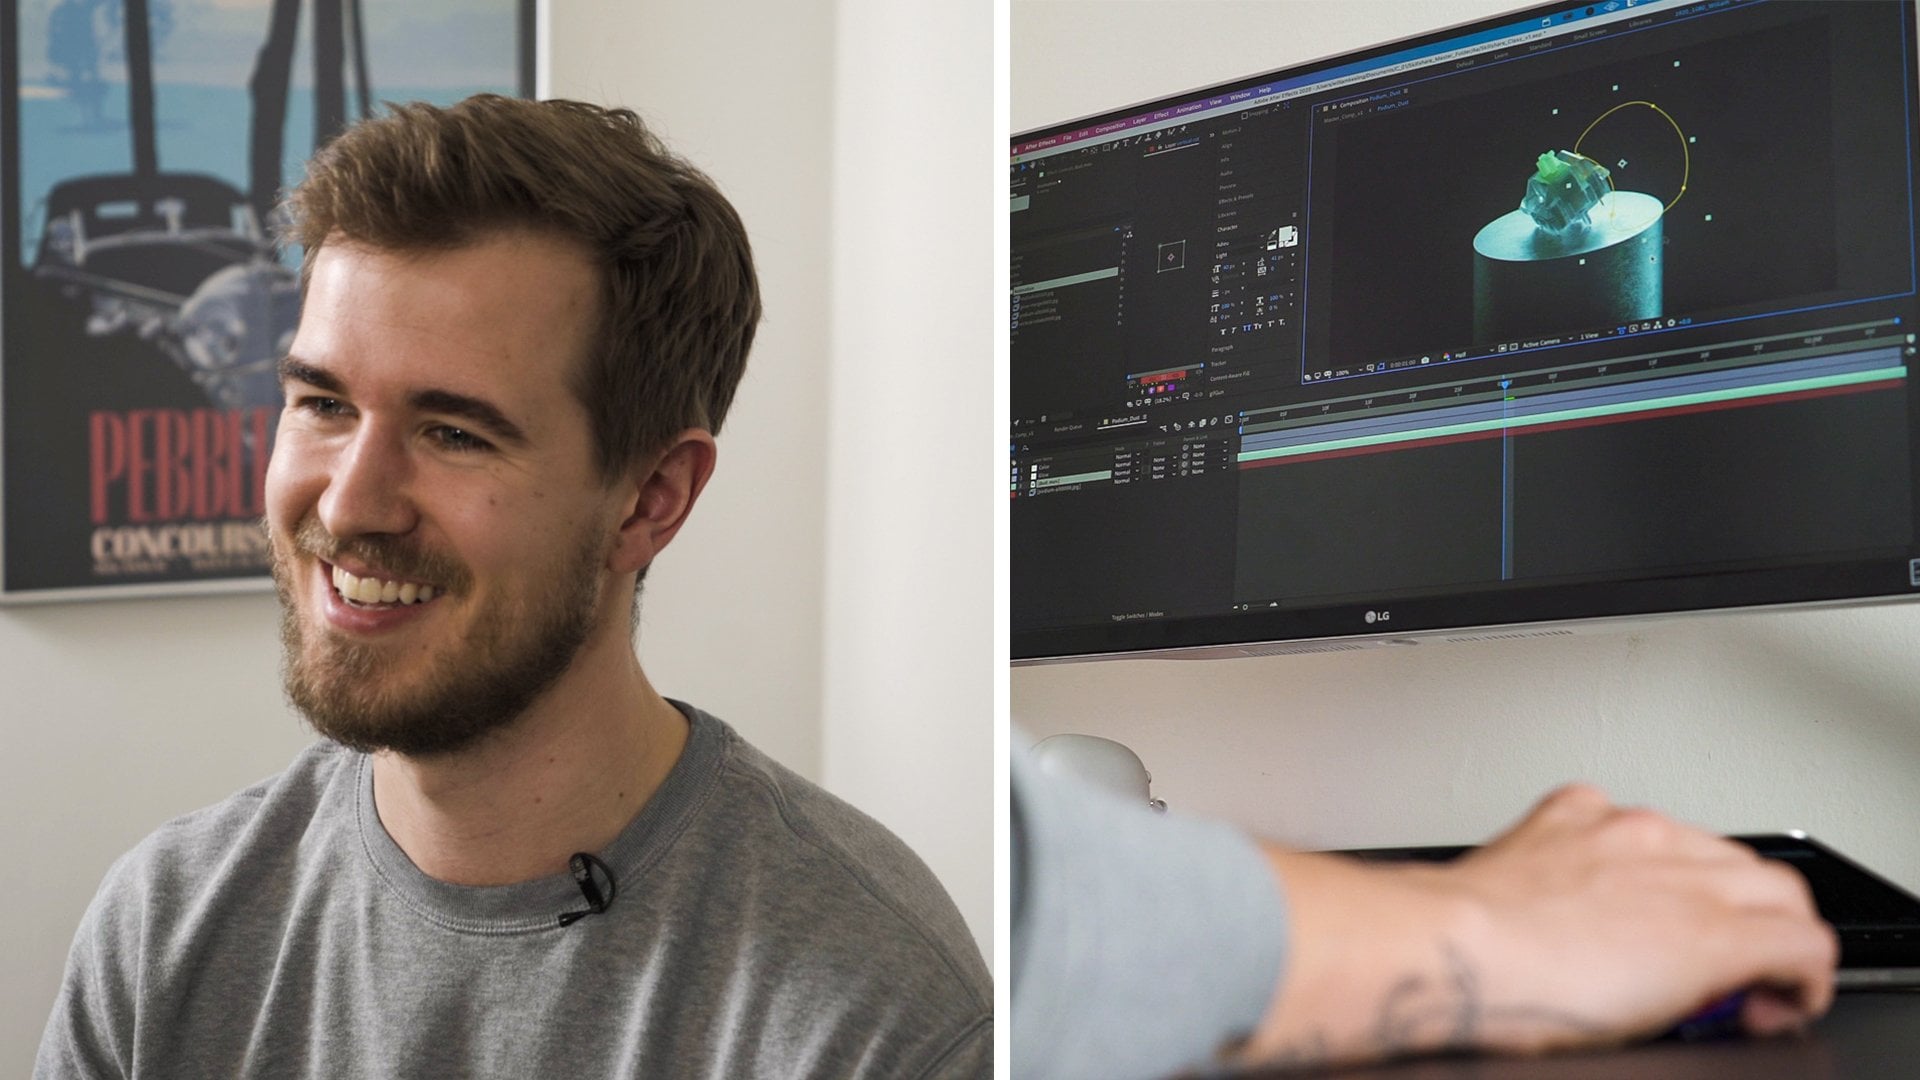
 William Kesling, Motion Designer & Videographer