Transcripts
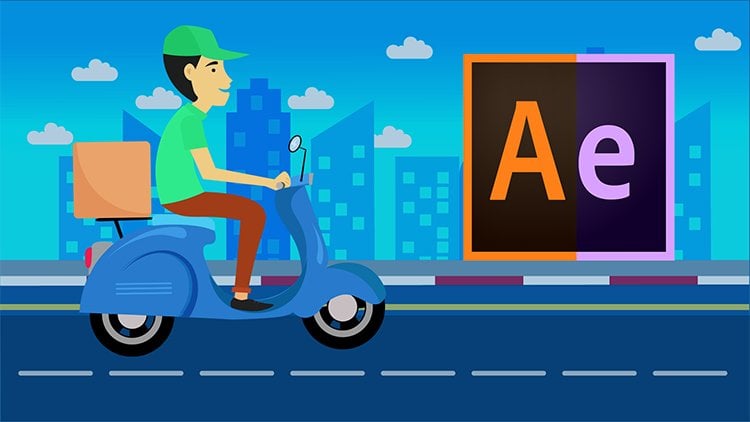
1. Introduction: Hello, everyone and welcome to the animated infographic scores with the adobe after effects. In this course, you will learn how to design different types of infographics using the ability after effects software from scratch. You will also learn to enemy these infographics professionally brigade, high quality projects and presentations. You can use infographics professional presentations and sell them to companies and individuals for a decent amount of money. Plus that learning to create infographics will help you get special jobs with high profile companies. Also only your skills and improve your resume, making it look more solid and professional. After completing the course, he will be able to screen professional infographic designs in a short amount of time using the techniques show in the course.
2. First Infographic Design: Hello, everyone. And welcome to the animated Infographic scores. And this course we will learn to design infographics and animate them using the after effects software. In this video we were created this infographic right here. As you see, we have treat different colors. But it's the same infographic. They close their and we start by opening a new project. New composition. And we used these settings and we said the duration to eight setting eight seconds. Then we click. Okay, Perfect. Now let's click here creates on new solid. Then we paint the background with this color. Perfect. No, we hadn't met. So writes click import file. And we add the image of the member here It is a drug it to the timeline right here. I just its size. Perfect. Now I want to reduce the passivity of this image. Go to a new bestie from here. Here it is. And I was just the best e like this. I will decrease its perfect In case you wanted to use a different color for the background . You can go here solid settings and you can select any color you want from here. In case you didn't like the color I'm using. Now the background is set, so select the rectangle to and go down to the alleged stool and we will draw a circle in here. We hold the shift button while we are drawing a circle so that the circle is symmetrical. Here we are Now I go here to the Phil and I will select the radio Radiance option. I click. OK, double click here and I would change the circle color toe lights blue in here and I would choose a darker color in here. Perfect. I just discovered a little bit click, OK? And I just the radiance from here. The angle of the great things perfect Closed this layer. I just stroke size from here. I make it thicker. Then I select the anchor point to and I hold control plus shift and censored the anchor point Like this Click here and then I hold the shift button while I drove a bigger circle in here like this. Then I removed the Phil and I would reduce stroke size like this. Now I go here I looked the background and the map image as well so that they don't move that I used the selection tool just like the two circles. Then I go to a line. I click here and here to center the two circles like this. Now it's like the circle that I select the anchor point tool. And I select the anchor points while holding the controlled blast shift buttons. And I drag it to the center like this. And here we are of shape is in the center perfectly. Now I select this layer I zoom in, I select the Ellipse stool and I would draw small circle in here about this size. Perfect. It's like the Phil and I paint it with white. No, I select the circle and I click on control plus D to duplicated. Then I will drag the duplicated one and put it right here and here we are perfect. Close this layer. And now I would add the test So I select the text tool and I will type a one in here. For example, I select the text. Then I click here to change the phones. Of course, you can select any front you want. You don't have to use the same front I will use. Yes, I will select this one and I just decisive to text like this and just a little bit more, and I'll put it here. Pull it. I need to click here first on, select any layer. Then I select the pencil and I draw a line in here. So this is our life. Perfect. Put it here. Then I adjust the position of the text. Then I will increase the size like this. Then I will add another Texan here. I will copy the text from this website. It's called Let's, um dot com. Lauren Gibson. It's a website that offers example text for any use. So no rights Clegg selected were escalate. We copy the text was left the textile. I draw a rectangle in here. Then I based the text inside of it. As you see, the text is very large. So I will hold control plus eight. Just let the whole text. Then I would decrease the text size from here. Perfect. Then I go to paragraph and I will align text like this. And this is the final look. Our infographic design. I'll see you in the next video to see how to make the same design in different scholars and have to animate your design. So that's it for this video. Thanks for watching. And as I said, I'll see you in the next video.
3. Design Animation: Hello, everyone. And welcome to this video. In the former video we created our infographic design, and in this video we will see how to animate our design. There's just a small adjustments needed here. Perfect. First, we will make our design appeared out of nowhere. And to do that we select the shape layer. Don't click on us from the keyboard to get this scale setting. Sorry, I need to go back. But the cursor here first. Then I click on skill. I changed the setting to zero. Then I put the cursor in here and I put 100 in here. No, I quickly perfect. No, it's like a key frames and right click the next Lexie frame assistance and I select Easy is now. It's like the key frames. Then I copied them using the pro plus C from the keyboard a select the large circle there. Click this from the keyboard to get the skills sitting. Then I click here and controllable. Sweet based the defames in here. Now the effect is applied to both circles. Now I will make the circle or Old State have to do that was left this layer, then a click click are from the keyboard to get the rotation setting the nuclear stopwatch . Here I hold the old button and I click home stopwatch to get this gold right here. Now I type this coat. Then I click enter and no one I click play. As you see the circle is rotating. You may wonder why, in this case we use the code and not the key frame to make this circle rotate. I'll show you why. For example, we go back here and we used key frames to rotate the circle. Click on rotation, but the cursor in here and I put, for example, 100. Then when I click play as you see it reaches it reaches this point and stop rotating. And if I want to make it rotates all the way, I need to widen key frames, which will cause the circle to rotate very slowly. As you know, the wider the key frames are, the slower the speed will be. So that is why we used the goat and set off the key frames in this case, and it's very easy. Just select the layer, hold the old button and click on stopwatch didn't take this coat and click enter. This number here is 100 represents the speed So the higher the number, the festive the circle rotate Now you see, when we click play the circle rotates perfectly And now I will make the texts I will mask the text so I will zoom in, zoom in a little bit as I said and I selected texts Then I select the anchor point to and I put the key frame in here. Then I select this layer right click I go to mask new misc I opened the layer to get the mask setting the my click you know animates. Then I select position in here we'll start masking the text Now I click here on Stop bunch Then I hide the text like this. Then I go here and I put the text back in its original state. Perfect. Now when I click play here we are. I would make it a little bit slower. Perfect. I zoom out and here we are when we keep playing. This is our design So far now we will apply the same thing On this text I select this layer right click select mask New mask. Then I opened the layer I click on Animate that I slept position I need to put I need to make sure that the two texts appear and disappear at the same time. So I will put the cursor here in the same refrain. But the Gerson, as they said in here the night click on stopwatch Here I hide the text. Then I go here but the person right here in the same position at former key frame. Then I showed the text again like this now when I would pay. As you see, we move this line right here to do so. Let's let the anchor point toe and I put the key frame in the middle right here. Click on is to get this case sitting. But the cursor right here, I reckon scale like this and I will hide the line like this. Then I go back here and I show it in here like this. Now when we click play, it looks like this. The line appearance before the test. It's a little bit fast. So just the key frames like this I would drag used to be friends right here. And this one right here as well. I want to select these two key frames and I put them right here. Go back and get playing. And here we are. It looks perfect. As you see, the key frames are in their perfect position. Now I look all the layers like this, but the cursor bet right here at the beginning. And as you see, our design is perfect. And that's it for this video. I will see you in the next video to show you how to duplicate the design with different colors.
4. Duplicate Design: Hello, everyone. And welcome to this video. In the former video, we saw how to animate our design. In this video we will see how to multiply the design. So instead of creating the new design from scratch, we will only duplicate the current one. So I select this layer. Then I hold control plus shift. Then I select the top layer to select all the layers. Then right click here and I slept spree combos. I click OK to make our design in a single layer. Perfect. Like you see any. Our whole design is in a single layer. Some would say that it's easy to duplicate this shape. All we have to do is to select the layer control plus D to duplicated. And that is wrong Because the way because this way will cause some problems. And I will show you why we slept the shape layer and we duplicated with control plus deed. Then we move the shaped like this. But let's say that I want to get it. The shape, for example, will change its color. I make it in this country like this and I click open now. When I go back as you see any change we make on the replica. It will be done on the original one as well. So any adjustments you make on the replica would be done to the original one. So as I said, this is why it doesn't work. So I go back here and I will delete this new composition. I just made rats clicking here and I go to reveal and I select reveal layer source in project. Then I go here, I select the spree compose and I duplicated using control plus d. Then I drag it and I put it right here. Then I dragged a new shape and I persist right here. Then I will adjust the shape color like this I just discovered as well. Click. OK. And now when I go back as you see, the original shape stays the same. While the changes we made applies only to the selected shape. Now make some more adjustments. For example, I will change this number. I'll make it go to I revealed more of text like this. And of course, you can change the sex if you want. Now I go back and as you see here we are. We have two shapes. Now let's click here and again. A select reveal. Reveal layer Source Project. Select the pre composition I duplicated control plus D I drug. It's here and I drug it like this. I put that sword shape in the rights. Then I select all the three shapes. Sorry, control plus shift. Slept all these layers. Then I go to your toe line. Click here. Perfect. I need to just to make sure that it's the same space between all three designs. Perfect. Now I select third shape double click on its layer and I will adjust it like this. Double click on the film. I changed the color. I'll make it in pink or maybe on purple. But it's better now. Of course, I will change the numbers. Otri, I go back here and here we are out. Three designs are ready. I go back, I click play and as you see, the same think applies on all three designs in an easy and simple way. And if you want, you can decrease deeper and speed. As you see the shapes appear too fast for you. You can decrease the steeper and speed all they have to do you go here to the key frames and you white in the space between the key frames and the wider the space between the key frames, the slower the speed of the parents will be. And then our the network, the Speed Professor, the appearance will be so if you want to slow the brilliance, just make sure that key frames are far from each other. So this is how you create an animate, this type of infographic. That's it for this video. Thanks for watching. And I'll see you in the next video toe. Work on another type of infographics.
5. Second Design Part 1: Hello, everyone. And welcome to this video. In this video we will work on another type of infographics. Here it is. I will show you how to design this infographic and how to animate it. So I opened a new project. I will leave these settings as they are. And I would put eight seconds in duration. Click. OK, now let's click here with Let's new solid And I would be into the background and white. Now I go here and I activate the rulers. It's like the pencil and I start growing like this with the first thought in here and another one in here to draw a line like this. Then another one like this. Perfect. I don't have to fill and I just stroke size and I make it in black. Perfect. Now I zoom in and I drove. Sorry, let's go back. I drove the ruler. I put it here, the other one in here to make sure that our lines are straight. I slept the mental and I just the lines to make them straight like this. And this as they said, we need the line to be fully straight. Perfect. Then I remove the rulers from here. So here are two reliance so far. No, I will add the months. It's like the text tool. I zoom in and I start typing right here. Make sure to type in capital letters. And I started typing months names in here. January February, etcetera. Perfect. Now I put all the months names in here. Sorry. Let's go back. I select them like this. Who they are. It's like the text tool. It's like told the whole the text, the whole text, and I just its size like this. Perfect. And then I put them right. You and in here I will type the rates. The infographic is just an example. You don't have to put the rates and months in here like I did what you type in here. Depends on what the subject you're making this infographic for. I'm just showing you how to create this type of infographics. So you're free to put whatever you want in here. Now is, um in and I joked, rectangle in here I click here first. Then I select the rectangle tool and I draw a rectangle in here. This I paint it in black and I dont move the stroke. And as I said, I paint is in black now control plus D to duplicate the shape. Let's let the shape the necklace control was due to duplicated. And I put it above this one like this. Then I keep duplicating and put in the next shape over the former one until I covered the whole line so I would keep going like this perfect man. Now we will adjust the space between the shapes. No, I slept selection tool. So I need to lock the background with a background layer and this layer as well. Perfect. Then I select all shapes like this. I select a line. I click here and you and as you see now, these shapes are aligned on organized perfectly. Now I don't make some adjustments. Let's let this shape. So first I select the anchor points. Then I put the key frame in here. Then I will adjust the size of this rectangle like this. Perfect. Now I count four shapes, Then I select the fifth. Then I selected the anchor points. I put the key frame, but I put the key frame right here. It is selected and I put it here and I just the shape same as the bottom one. I put the ruler here to make sure that this shape is the same size as the bottom one. Then I just its size like this. Sorry, perfect. Again. I count four shapes and I just the 5th 1 Double click on it. I slept the anchor points. I put it here on the right side. Then I just decides of the rectangle like this. Then I keep going like this. I would add two more shapes in here, so I duplicate this one. Then I put the next and the last one on top like this. Double click on it. Put the anchor points in here and I just its size like this, same as we did with the former shapes. Perfect. No. Increase the length of this line like this. Perfect. Now he's amount, and I unlock the background just a little bit like this. Then I look it again. Now it's like these shapes and I aligned them again because we added two more shapes on top and that needed to be aligned properly. Now I would change the color of the loan shapes. It's like the shape to make these long shapes look like landmarks. Side Baines's with dread. Again, I created a painted in red. Sorry, it's not the same color he used eyedropper tool to copy the color like this. And I keep going until I paint all the long shapes like this. And the last one like this. Perfect. Now zooming and selected textile to add numbers in here again. This is just an example. You can type any numbers you want your like in here. Yes. I put the number right here. Then I duplicated and I put it in here. I make this 1 40 duplicated and I make it 16 Here. Keep going like this. Now, to save time, I will select all three numbers like this. Then I duplicate them and I put them up here. Perfect. Then I duplicate these two numbers. I select them. Control was D and I dragged him up like this. Perfect. And now I will change The numbers, of course, is you have 2040 60. So naturally this would be any 100 120 140 And then 160. Perfect. Now I will select the numbers and aligned them slept Numbers like this. When I go to align, click here and here are the numbers are aligned with shapes. Just some tiny adjustments in here. Just the position of these two numbers. And here we are. We have the months, the rates, and this concludes this video. So I will see you in the next video to continue working on our design. Thanks for watching.
6. Second Design Part 2: Hello, everyone, and welcome to this video in the former video. We created this design and we got here so far. So in this video we will complete our design. So I zoom in Elizabeth, a select direct angle tool to draw the Collins inside Infographic. I will put random Collins because this is just an example. But when you are doing your own infographic, you need to be precise with your information. So I don't the first column in here. Perfect. I looked this layer as well to work comfortably. It's like the anchor point tool, and I put the anchor points. Keep frame in here, a change. The current color. It's like the column there. Then I duplicated using control plus D. Then I dragged here. It changed the column size and color. Perfect. Now I selected the Anchor point tool, and I put the key frame in here. I gave duplicated economy until I cover all the months. And, of course, I changed the size and color of each color just the size like this. Then I changed the color like this again control plus D to duplicate the column, and I changed its size and its color as well. Click OK now I will select all these four columns once at once and I will duplicate them like this. Control pas de. I dragged them right to you Safest time We duplicate on four of them again and we put them right here as well. Perfect then I just the size of the columns like this And make sure to keep all the rectangles Anchor points down as we did for the first ones. Perfect As see as I said, keep the anchor points down here Now I select all the columns and I aligned them like this Perfect. As you see, there is the same space between each color. So here we are. Our infographic design is completed. So I will see you in the next video to show you how to animate our design.
7. Design Animation: Hello, everyone. And welcome to this video. This is our design. It's completed. And in this video I'll show you how to animate our design. So I start by removing the rulers. Now I unlock the months names layer. Then I could hear its opened the layer go to transform. Then I slept your bestie setting and I make it at zero. Move the cursor here, Andi, I make it. It's 100% again in here. No one, I think play. There's a scene. Now I select all the layers of the shapes in here. In this line Here they are, these shapes. I'm going to select all their layers. So I slipped Metrobus shift. It's like the bottom layer. Then I go to the top layer right click a select be composed to make all those layers in a single one layer. Perfect same thing for the numbers I was let all of them and put them in a single layer. Right click weaken bows. Okay. And here we are. I select this layer that I click you from the keyboard to show key frames here the next acute. I open this layer I go to do best he sitting about the aggressor here I said the A bestie at 0%. Then in here I will set the Betsy to 100%. I click Play. Perfect. Now it's looking The key frames. I copied them. I select this composition. I opened it transform And I based them right here about this key frames. In here I click play. And as you see how design looks like this so far we look this layer didn't remove to take care of the columns. It's like the first column layer the nightly s from the keyboard to get the scale setting. And I put the key frame the crecer in here first, 0% in here. Sorry to go back First I need to click here. Unlike the column. Then I put 0% in here. Click on scale. I go here, but the cursor right here and I put it back. That's 100% in here and here we go. Take a look at one. We click play Perfect. We slept in the key frames then right click. Sorry. Let's click on them. I got to keep him assistant. Then I select Easy's and a few ones you can edit the appearance Speed off your shape from here from the graph editor, for example, would make it look like this. It starts slowly, Then increase the speed like this. I go back and I leave the graph editor as at its deviled states. Now I select this layer and I won't do the same thing to this column selected as from people to get the skill setting. But the cursor here unlinked first the layer the night click on scale. I go back here and I put 0% in here. Perfect. Now on display. As you see, the two cons move at the same time. Same thing, but this column as well. I go here, I unlinked the layer going to stop, watch just scale sitting. I go back here, put the cursor in here and I would put 0% in here different now, As you see, creek columns work the same thing. And I keep going until I lay this apply this effect. All the columns link. Could it on scale. I go back here, then I put 0% Any perfect. You can select the key frames from here over the next one was selected. But this the cursor in here unlinked click on scale. You go back here and we put 0% in here. And as I said, I keep going until I cover all the columns and here we are. Take a look when we click Play. Our design goes like this, and you could increase the duration of the animation by increasing space between the key frames, for example, was like this key frame and put them in here like this Play. As you see, it's slowing down a bit. And, of course, you can make each column appear or move by itself, and not with another column to do so. All we have to do is to make sure that the key frames here are different than any other. Just make sure to shovel the key friends like this. Just let your friends and we put them here. Then did the one put them here? I leave this one as it is, then it's like this one, and I put it here like this, as it said, just shuffled them around. Perfect. Here we are with a click play. Each column appeared on its own timeline. Not like before all the columns abuse at the same time. It looks better this way. So this this is our infographic animated. And now, if you want the coms beard disappear again. It's very simple about the cursory in here. Then I select this key frame Click on Control Policy, then control Veto basis in here. Then I do the same for each of the columns controlled. See Control V. I selected control C Control V. Keep going until I cover old columns. Then I'm off the Christian to here. And I said the sculptures, Your percent, All the columns. And here we are. One week late, columns disappeared. They appear at first you wait a little bit and they are gone. Perfect. You can hide those shapes as well. But the Christian here we set it at zero in here. First I need to go here to the investing. But the question here and I put it at zero. Then what about the cursor in here? And we said it at a 100 it correctly. And here we are. As you see, the shapes disappeared as well. We could do the same thing for the rest of the design the line, the months and the numbers as well. Slept the besting, you know, Put the christening here. Same as the 1st 1 The open ends. We go to the best een do the same thing in troubles. Feet to base the key frames. And in the months later as well he opened the land, never click playing and has see the whole design disappears. Take a look at the design When we play as they said, the whole design beers then disappears. The design appears. You wait a little bit and it disappears totally like this. And of course, you can adjust the space between Nicki Frei me wants to adjust the speed of the process. Example like this and when we could play is gonna take a little bit of time. Perfect. So this is how to create this type of infographics and have to animate each and every part of it. So we reach the end of this video. Thanks for watching. And I'll see you in the next video toe. Work on a different type of infographics
8. Third Design part 1: Hello and welcome to this video. In this video, we will work on this infographic design right here. So we opened a new project and a new composition with the same settings and eight seconds in duration like Okay, Perfect. I opened and you sold it, right? Click New Solid. And I painted the background with whites. Now I look at the background or the solid from here. Now I select the lips stool, and I would draw a circle in here. Make sure to hold the shift button while you are going to circle to get symmetrical circles . I just It says a little bit like this. No, I don't want to fill and I will increase the stroke size. Perfect. Now I look this layer, I select the anchor points tool. Then I hold control plus shift and I dragged the anchor point to the center of the circle like this, Then control plus D to duplicate this circle. And then I increase the circle size like this while holding the shift button. Perfect. I leave a small space between the two circles. Then I will paint this circle with a darker color. Now I select circle layer again Control plus D to duplicated And I'll just its size like this while holding the shift. But I just decided to stroke a little bit. Then I copied the circle again and I increase its size with the same way I hold the shift button and I increase it from here. I just decides of the stroke. Perfect. Then again, I duplicate the circle for the last time and I would increase its size as well. Using the same way like this. I just decided to stroke like this now is perfect. Now I select this layer. Sorry, I need to go to this layer. And I changed the circle color like this. Then this one again. I changed the color like this. And this is the last one like this. Perfect. Now we will move to animates our design. I am Look this layer. Then I click here and I select dream path. I opened three path Then I go here and I just setting like this to the end. Then I do the same for all of the circles. Right click. It goes to trim Pass. I opened the dream path setting I go to the end setting. And I just the rate like this. I make it at 16% in here. 65. No rights. Clegg. Trained bands go here, and I make it at 70% in here. As you see, each time, I add 5%. Right? Click on bad going back. Which means in here we will put 75. Perfect. We go for less one rights, Blake. We had a drink bath, and we make it at 80% in you. So this is our designed. So far as you see, we have cut part of the design and now we will start animating process. But the grocer here, the neck click on stop lunch. As you see, we have here 60. So we need to remember the number because we will make it zero. Then what? But the cursor here. And we put it bet at 60. And here we are. Quickly. If you can't remember numbers, you can reverse the process. You put the cursor here first, then I click on stopwatch. Then you put the cursor at the beginning and said it. Zero In here. As you see, it's the same process reversed. In case you can't remember numbers. Now we will apply the same thing for all of the circles. I'm gonna stop lunch. I put the question here. Then I put zero back in here again about the Christian here. I couldn't stop lunch. Go back here And I put 0% now. But the Christian in here and likely gonna stop lunch. But the person in the beginning and I click in here and I put 0%. Now I couldn't stop watch, but the crystal here and 0% perfect. Now, when we click they here we are no ugly control plus a to select all the layers and click on I just like the only key frames layers because we need only the key frame layers. Otherwise, we will have a lot of layers to navigate, which will cost us some time. And here, as you see, all the key frames are selected. Only the key frame layers are selected surgically control plus ages left all the layers the neck like I to get on Lee. The key frames layers. Now I will edit the key frames slept These took your frames. They are and I dragged them right. You I was just a key frame positions like this. I slipped them and I dragged them like this. Now, when we think bay here we are, You can see our design appears gradually one by one. Now we select all the shape would drag it to the left to get some space to put more information is in here like you saw in the first off the video in the beginning of the video as they saw you as I showed you our design now control plus I to cover all the key frame layers like this control plus a Then you click I from the keyboard.
9. Third Design part 2: No. I slept around the rectangle tool and I don't direct Kendall in here. Small one. I remove the stroke and I activate the film. Perfect Have been to direct angle with this color. Now it's like the rectangle tool. And I drove this little shape right here. Perfect. I put his year. Now I select the text, the text tool and I will type inside the rectangle. For example, I type 01 I just the position of the text like this. Now go here to this website and I copy this text. The sex is just an example. I select its XTO then control plus V to paste text than control plus ages Select all the text and I paint it in black like this. But the text right here that's Lex. Both direct and go and it's sex and I'll put them right. Perfect. Now I change this layer color to remember it. Then I select all three layers and I couldn't control plus D to duplicate them. Then I'll put the replica down here. I drag it down, using the down bottom from the keyboard. Now I will duplicate the rectangle and the sex five times based on the number off circles in our design. Perfect. I slept in the text and I drag it up a little bit manually like this. Perfect. No, it's Let's hold the sex and I put them down here. It's like the first text like this. And I was just the space between each text like this between each line. I pulled this one up a little bit, put this one down, and I pulled this one like this. Perfect. Now it's like this rectangle. I will change the rectangle, scholar, and I'm paying them with circles color so that each line refers to one of the circles and you consider any information. Then it will be represented with same color in the infographic circles, so each text represents a circle. And, of course, as I said, this is just an example. You can select any calorie wounds and even type anything you want. So as I said, this circle represent this one and this rectangular presents this one, etcetera. No, it's like the less one. And I copy the color like this. Perfect. Just the space between these two like this perfect I click bay. And here are our designs off so far. Now I will link each text with its opposite rectangle to make sure everything is linked. When we animate the info texts, we select the rectangle layer than the number layer, then the text layer. Then writes Blake and I select recompose. I click OK, and here we are. The sex, the number and direct angle. All are in a single layer. In case you didn't understand, I'll re explained in simpler way I select the rectangle layer. Then I look for the number layer. I drag it next to the rectangle layer like this. So have you. Now I look for the next layer and I drag it next to the rectangle and number layers. Then I select all three layers like this. As you see right click and I select recompose to put all the layers in a single pre composed or layer like this. So we have used the number directing go and the text layer all at the same rate layer. I will do the same thing for all the five lines. Now let's Clegg recompose. And here we are. After I had any new recomposed, I try it in case there was an error to save time. So if there was any error or any mistake, we fix it before we go far in the design. Now it's like all these view layers, right? Click recompose. Okay? And he will. This is the last line, the one before it, the one performance second line and the first line like this. They're all ready now. We put the question here to play perfect. Now, after circles finished appearance, we will talk about the texts. Never click on the first layer, then be from the keyboard to get the position setting. Click on Stop lunch and we remember this number. We hide the text like this. Then we put the number back in here 960 we click Play as you see now, the text will appear after the circles. Nice, like the two key frames then or it's click and I go here. Keep framed Assistant Eazy e's. No, I just did graph like this. I go to the graph editor. That's click and make sure to act to check it. It's be graft from here, so that it is grab is activated. Now. When we play area as you see it starts slowly that it speeds them. It decreases the spate speed a little bit. Perfect. Just a little bit adjustment. It's a small perfect. Now I go here. I select Tookie frames than control plus C to copy them. I go here, I select this layer I could be to get the position sitting. Then I click control plus V to paste the key frames Year supply the same setting to this layer without having to do the whole thing from the beginning. Now I do the same for the rest of the layers. I just adjust the position of the key frames like this to be a little late from each other . Perfect. Now when we click, play, take a look. Perfect. We can adjust the speed if we want. Like this. As you know the wider to keep frames, the slower the speed will be and the network speedier it will be. Now we click play to see the whole design. As you see the circles appear first, then the text Perfect. So we reach the end of this video. This is how to create this type of infographic and have to animate it. So that sent thanks for watching. And I'll see you in the next video to work on the next Infographic
10. Fourth Design: Hello, everyone. And welcome to this video. This is the design that we will create in this video. As you see, this design is similar to former one we created during this course. So I will include the design file with the course so that you can use it instead of creating this whole designed from scratch. And we will move to create the next part off this design. Now, instead of opening in your project, I will open the file. Then I would resume the work from there. This is the file. And here it is. This is our design. And this is the file that I would include in this course. As you see, this is the former designer created in this course, and we cap it this part to use it in this design. Now we go back here, and if you want to create this design from scratch instead of using this file, go ahead and give it a try. Now we will make some adjustments to the design. So we opened this layer, I would change the color of these shapes, make them in great like this. Keep going like this until I cover all the ships. Perfect. Now go back here. So this is the design that our include with the course. Now we resume working on our design. I need to click here first. Then I select the pen tool and start growing. As I said, what I'm putting here is just random. Just to show you how to create a certain infographic. Now pull this up a little bit. Perfect. Remove the fill from here. Then I changed the color of the stroke order line like this. Perfect. Make sure that it's have three pixels in here. And here are This is our first line. Now I will add some dots or circles in here. It's like the rectangle to And I slept dear Lives too. I hold the shift button and I drove a circle in here A small one and I activate to fill and I painted with this gunner and the stroke. I will make it in this color. Perfect. Now I select the anchor points of the circle and I put it in the center of the circle like this. Perfect. No, I duplicated the dot or circle Select a slayer. The nightlight control plus D. Then I put it here. I duplicated again. I put it here, then again in here. Perfect. Now I'm gonna draw another line. It's like, Look here. Then I select the pencil and I started drawing again. Start doing like this perfect meal. I would remove the filled. I just cut off the stroke a little bit like this. Now it's perfect. No, I will select this layer. And I would change its color like this so that I can no each layer and where it belongs. This is just to sort out each layer and recognize that it belongs to now. I slept circle there and control plus D to duplicated. Then I put it here and I make it in yellow as well. Then I drag it and I put it right here his home in a little bit. It is No. I need to change its color to the same kind of as the life. Now it's like the film. Then I use the eyedropper tool to copy the color and based it to the circle. A copy from here and here. It's basic to the circle and has receded circle or the dog is in its same color as it left its life. So each dot needs to be insane color with the line that she belongs to or it belongs to. Now I keep duplicating circles and I put them right here. Perfect. This is the second line, and we will go one more line. So I select the pencil and I started growing. First I need to cook down like this. It's like the pencil. And I started going like this. I started going from here. I keep going like this until I deem the line fit. And of course, as they said before, this is just random informations. You can put whatever you want in here. Now remove the Phil and I changed stroke color. Perfect. No. We make this layer in the same color as its line to sort it out. Now we have this circle, so I duplicated and I drag it up here and I changed thoughts color as well. Here it is. This is our circle I selected and I put it here. Need to zoom out. It is. And now I put it right here. So I put it here and I changed its color first to the same color as the line. So I will use the eyedropper to copy and paste the color from the lines of the circle. Perfect. Now, as I said, I will duplicate circle. So I need to go back. I selected then control plus D to duplicate it. But the 1st 2nd 1 in here, the 13 here, another in here. And I keep going like this three months ago, one to entry. Perfect. And here we are. So this is the final look. Our design. Thanks for watching. And I'll see you in the next video to see how to animate out design.
11. Design Animation: Hello, everyone. And welcome to this video in the former video. We created this design right here. And in this video I'll show you how to animate this design. So first we start from the bottom here we slept the layer of this slide right here. Open it. Go here to end. And we slipped three pence. We opened the dream path. We go to end and click on stopwatch to put a key frame in here. Put the cursor right here. Then we need to have zero in here. And when we go back to here, we put 100% in here. Now, when we go back and inflict May, you were as you see, the line looks like speeding train to go back. And here we are, just the speed of the light. Now we're gonna go to the dots or the circle layer. I'm gonna just the speed of the line like this. I think it looks perfect. Likeness. Now we select the first thought layer. You put the cursor in here, then click on us to get the scale setting. Click on stop lunch. Nan, Put zero in here, then you put the cursor right here and we put 100 in here. Now look like May. Perfect. The dots appeared after the line cross its position. So now we're gonna select these two key frames like this and control plus C to copy them. Then we're gonna apply the key frames to the rest of the circles. We selected the circle layer of like as to get the scale setting. But the cursor right here, then control plus V two based. The key frames then was like the next circle layer or the dot layer. But the crystal huge control plus V two based but key frames. And I will keep going until I cover the rest of the dots. And this will apply on the rest of the lines as well. The less one control plus v. Perfect. Now, when you click plane, take a look, the circle or the does appear after the line cross its position. Perfect. Now, as I said, we're gonna apply the same thing to the rest off the lines. Now I select the lie layer. Here it is. I open it, Then I click end. I can copy the whole process and place it to the next line. But I will do that one more again to show you if you didn't pay attention or if you made if you missed anything so I would go to end in here. You go back, click on end And what what? Zero in here. And I put 100% in here. Never play perfect. And I was like, the first stop layer I click on s to get the skull setting than control plus V two based the key frames and I keep going until I covered the whole dots in that certain line Just select the layer clicking as from the keyboard Their control buzz V two based The give rings Perfect. Now when I click play here we are perfect No, I need to just I click on me and I just speed off the line like this because the thoughts appears before the line reach its position. No, no could play perfect. It's still appears before the light, so I need to just speak a little bit now. It looks perfect. Now we're more to the last line. And now I'm going to copy the trim pet. I select the key frames control policy and I select the line layer control plus V first, I need to click on the from the keyboard, then control plus V and here were perfect. Now I'm gonna copy the key frames. Select them control plus C and then I go to the first dot layer. You hear applicant s from the keyboard to get the skills setting, then control plus V to paste the key frames. And it's just this one a little bit like this. Perfect. Now the next one in here, click on s Control V. You can based the dots or the key frames without clicking on us to get the skill sitting. But I rather you do that so that you can see where the exact position where you based your key frames. That's why we click on the scale after we got be the key frames. Perfect. Now is the last one. And here we have a clip plane and our design looks perfect. So this is how to animate this infographic type. And as you see, it looks professional and in a good quality. And you can use what you learn here to design difference kind or different types off infographics and You can change a lot of things in this infographic with what you learn in this video. So that's if this video thanks fortune, and I'll see you in the next video toe work on the next type of infographic.
12. Fifth Design: I love everyone and welcome to this video. And this video will work on this design. Right Here you are. Take a look at the design. This is our design when it's fully animated. And in this video we will only show I will only show you how to design this to create this design on the next video out. So we have to animate it. So now we hope we save the design first. You don't have to do this. Obviously only had to do is to go to file new and open a new project with the settings usual settings. We select a lot of videos. So writes Gleick knew solid and we make the background in this color Perfect. Now we locked the background layer we select the rectangle to and we drove the first rectangle in here. Perfect. It's like the anchor point tool click. Here I select the rectangle. I select the rectangle, the anchor point tool and I put the anchor points right here. I put the rectangle in here and I will make it in white that I select this layer and control plus D to duplicate the rectangle. I put it down here but need 1st 1 and I just the rectangle like this again. I duplicated one more time and I just it like this as well. That control blood d again. Sorry. Go back. Control plus D and I put it down here. I'm just it like this. Then for the last time, Control plus D and we complete this side like this. Now I select all the shapes and I go to a line. I click here and here to make sure to align the rectangles like this. Now put them right here and I will change the color off each shaped like this The 1st 1 I will leave it in white. The 2nd 1 I painted this color and this is the 3rd 1 fourth and the fifth. Perfect. Now I just decides of this rectangle a little bit on It looks perfect. Now I select all the shapes that control plus D to duplicate them. And I reversed them like this and using the keyboard, I grabbed them to here using the rights button of the keyboard up with me and I will leave space between them to put the text as you saw in the original design at the beginning of the video. Now just the size of these shapes or rectangles like this. Perfect. And as I said, leave a space between each shaped like this and to put the text between each rectangle as you saw in the beginning of the video, of course. And of course, this is just an example. It's totally up to you what you're gonna put in here. The information's size off the shapes, the rates, the text, etcetera. Everything in here is just an example. And we are creating an infographic for anything you will use the informations you have now outputs that they'll be photo shopping here. There's just an example again, it's like the text and I just its size like this. I put 30 secs in here and now I select this place and I will type Adobe illustrator again. I selected like this and I put it in the middle like this. Now the text tool click here and we're gonna type adobe in design like this. Select the text and I center it like this. Then again, text to click here and I will time after effects. Center it as well and we move to the last text. I haven't Adobe Premiere Pro Center it as well. Then I select all the text and I go to line a click here and in here to make sure that the text is centered and aligned. And now we will add the rates in here. So it was like the text or click here. And we put, for example, 60%. I'll make it and yellow like this. I just its size. And with the selection tool, I put it right here and control plus D to duplicated. Then I dragged in here. Sorry. And he just left the whole shape and I drag it to the right a little bit too much Perfect. Now again, I selected text and I will make it. For example, 90% of now it's like the text the number sunny control plus D duplicated. And I put it in here I selected and I changed 90 to 70%. Now I selected control pas de again to duplicated. I put it here and of course I would change the rates again. For example, I will put 35% in here. Now we duplicated again. I put it here. And I would put for example, 25% in here. Perfect. Now again, I duplicated the number separate here. And of course, I would change the right number 40% in here. Or maybe that's too much. 35. That's better control pas de And again, I changed the right number, but 50% in here. Then again, I duplicate the rates. I put it here, double click in here. I select this one. L and I will make it 90%. Then again, I duplicate the rates. I brought it here. And of course, I would change the rate as well. I put 80% in here and for the last one I select the rate I duplicated by controlled was D sorry, selected and control. Pous de and I put the last great in here and I'll make it at Perhaps I'll make it at 63. That's better. Now I slept the whole design and I drag it to the sensor a little bit. And here So this is the final look for design, as they said in this video will only creative and next video. I'll show you have to animate it. So thanks watching. And I'll see you in the next video
13. Design Animation: Hello, everyone. And welcome to this video and the former video. It created this design right here. And in this video we will see how to animate our design. It's always select this layer. We need to just the layer, so right click and we select orange to identify these layers. This just to organize the work. You don't have to do it. It's very to do which organize your work because as you see, we have here a lot of layers so that you need to know what each layer refer to. But as they said, it's optional. You don't have to. No, It's like this rectangle layer. The public is from the keyboard to get the scale sitting. I only the layer I couldn't stop watching here. Then I put 0% in here. Sorry, I go here and I put 0% in here instead. And I put 100% in you Dick Plate. Here we are Perfect. Same thing again. I select this shape layer applicant s from the keyboard a link it the next stop lunch 0% in here about the cursor in here. Then I go here and I put minus 100% perfect now, in effect, play here. That's perfect. There we moved to the next shape in here. In the rights we put minus 100 in the left puts 100. So I go here. It's like this layer as from the keyboard. A link it I click on Stop lunch. As you see, I have here 170. So I need to remember this number. I put 0% here about the cursor here and in here. That was 170 back here we are deeply perfect. No, I go to the next layer again, I guess from the keyboard. I remember this number minus 120 but the cursor in here but scale and I go back here a link and I put 0% in late, perfect again. I moved to the next shape. Select its layer. I clicked on as to get the skill setting Ayan link it. I clicked on stopwatch and go back here and I put 0%. Then I moved to the next one selected slayer as from the keyboard. I leave this one like this because to save time always but the cursor in here first so that you don't have to change this number and go back again. So I just put the cursor I click on Stop launched. The number is selected Then I go back here a link it 0%. And here we are. It's easier than going toe the process tomorrow or not Now again. And now when I click play here now I'm gonna just the appearance off the shapes like this. You can shovel the layers as much as you want. As you see in here, we adjust the time off the appearance with shade just a little bit like this. Perfect. No, in a play, greats. Now I'm gonna move to animated text as you see these phrases right here. Now it's like the first text layer on a week, like on P from the keyboard to get the position setting and we will make the text appear after the shapes are clear. It will make the shapes appear first, then the sex right after the shapes are totally in here. That's why I put the Christian in here. I leave space between the key frames the negative composition in here put the cursor and to put the key frame in here. Let's look here and I adjust the position of the text like this. I pull it up until they disappear. Now, when we think playing as you see, the text appears from above. But I'm gonna add an effect in here to make the text bounce. After it reached the end, it will bounce a little bit. It's up with the Christian here on. I put the same amount in here, but I will adjusted a little bit like this example like this. And when they as you see, sex bounces a little bit, there's a scene here, 2382 and in here, 2970. Or perhaps I'll make it to Hunt. 2000 started 200 38. Now I go here, actually can be to get the position setting. I'm gonna stop bunch. I go back here. Uh, just, for example, we have here how much we have here 388 So make it at 408. I will add 20. Perfect. Like this? Like this. Then you go back here and but the crystal here and I pulled the text up like this. Perfect. Now I will do the same thing for the rest off the text, but the crystal here I could compete from keyboard. It's let's stop, but from a position. And I had 20 in here. So 541. But the crystal back in here and I put it up like this until it disappears. Perfect. Now click, play and area. Always click play when you finish editing or adjust in a certain layer so that you know, if your adjustments are made and there is no error, instead of going to another layer, adjust in it and the area will affect all your work. So after you make any adjustments, make sure it's a chicken first. Now go back here on. I pulled a text up like this. Perfect. Then, for the last text I click on B. I couldn't stop lunch. I go here, I click here and I type plus 20 to add 20 instead of remember in the old number and the wind, all the Met just put plus 20 end. It will add 20 automatically. Now we bold text up like this until it disappears. Great. Now we put the question here with bay and hear all the text bounce when they come down After the shapes finish, sex comes down and it bounced a little bit. Now we're gonna work on the rates in here like this. After those shapes appeared, then the text. Then we will make the rates appear. Now I click in here on this layer. I clicked as from the keyboard to get the skull setting. I couldn't stop watching Apple 0% in here, but the cursor back in here and I put 100% back. Now go back quickly and he were perfect. Now, instead of the when all the work from the beginning, I will select key frames control plus C to copy them. Then I select this layer control plus V. This one here again control plus V, and you can click on I from the keyboard to see where you based it. Your key frames now again in here Control plus V and make sure to leave the cursor in its space in its place. Then select the next layer Control plus V. It's like the next layer Control plus V until you finish all the layers. No control plus a Then I click on I from the keyboard to see all the key frames in here. Now, as you see Perfect Now we go back. You could play shapes appear first than the text with a little bounce And finally the rates . So this is how to animate our design I hope elected And this is the final video of the score Spanx watching. And I hope to see you in another course of mine. Thanks for once.
 Joseph Adam, Graphic Designer