Transcripts
1. Introduction: Do you want to bring
your arms to life and see the world
through our nanometers. Hi, my name is Dr. J, K, L, and M, an animation art director and illustrator
living in Chicago. But you might recognize
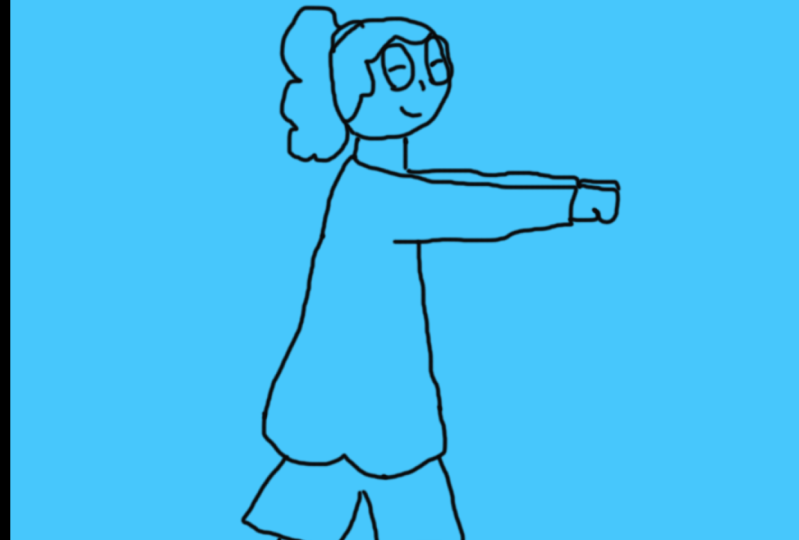
me better as this girl. My job is to bring life
to drawings and images. I create animations
for brands worldwide, but also for my
social media channels and for my friends and family. Animation is eye-catching and can gauge your viewer
in a unique way. In this class, we'll go over
how to use Photoshop to animate a looping dance
animation that is unique to you. We're going to be
focusing on three of the 12 animation principles. How to animate pose, to pose, arcs and squash and stretch. All the animation
principles are important. The three that we're focusing on in this class are connected with printing fluid believable motion that captures the viewer's eye. Throughout the process,
we'll cover how to observe and find where
arcs exists around us. Squash and stretch
effects characters with the help of some clay, the basics of character
design and how shape and color can say a
lot about your character. How to animate
pose to pose using a reference video of yourself
to extract key frames. I started making his animated
dance loops as a way to share information with my
audience on social media. They're fun to watch and make them fall. I'm
trying to share it. Easier to digest. This class is gonna
be perfect for anyone who's just
getting into animation. To make the process easier, you'll have access to
my class Guidebook, which outlines the key
points from each lesson. Am I working product files
for your own reference? Whether you're an
illustrator looking down another skill
to your tool belt, or someone who wants
to get into animation, but not sure where
to get started. This class is a
great way to kick start your journey and
tell you innovation. You'll come out of it
with the ability to pull the animation principles
from your everyday life. They use it in your work. By the end of it,
you'll not only have a fun animated dance loop to add to your portfolio or
social media channels, but also a framework to use for your enemy of
work going forward. Once you're able to see the
world through nanometers, I, the sky's the limit
with white and create. I'm so excited to get started
and I hope you are too.
2. Class Orientation: Your class project will be to create a dancing
loop animation with the character that
you've designed yourself if you love drawing. But our new data emission, this cost will be
perfect for you. I'll take you through
the principles of animation as well. C2, few shortcuts make you're
animating time quicker. For this class, you'll
need a computer with Photoshop on it,
a drawing tablet, clay or conditioner
and cornstarch, and any camera that can record video like the wider your phone. In terms of animation, these hand-drawn animations
can be done fairly quickly, but anything that
you're animating is going to take some time. So we've already spent a little bit of time on your project. I'll be here to guide you
every step of the way. And if you get lost
or feel free to leave any questions in the
discussion section. And I'll try to get back to you. You'll have access to the class guidebook
and my working files, which you can find
in the resources section of this class. Once you've finished making
your way through the lessons, I'd encourage you to
share your work in the project gallery so we
can all see what you made. Everyone are we making
unique character and dance loop for this class? And I'm so excited to
see whatever omics.
3. Pose to Pose Practice: Key Frames : We're looking at an
animation or video. What you're really saying is
when two pictures or frames, one after another very quickly. It's not actually
moving, but your mind perceives it as motion
when you're animating. There's two ways of thinking
about how you want to put your pictures or
frames together. Either pose to pose or
straight ahead animation. Ollie Johnston and Frank
Thomas and they're 1981 book, The Illusion of Life
Disney Animation introduce the idea of
the 12 basic principles. They're still used by
many US animators today. I won't be going over all
of them in this class, but just a few that
I think will be helpful for creating
your animation. One of these principles
is straight ahead animation and pose to
pose animation there, straight ahead animation, which involves drawing
the first key pose. And then I'll sequential in-betweens after that
to create your motion. There's pose to pose animation, which we'll be
using in our class since it gives you
more control of your animation and endpoints or Chrome proposed
suppose animation, you created key poses for
your character and then in-betweens between them to create the emotion
that you want. Your key frame is the frame that indicates important
aspects of your movement. In this example, this is going to be the
cup on the table, grabbing the cup, I'm
picking up the cup. These three poses are the pinnacle of the motion
that you're showing. The in-betweens are all the
frames in between them. When you're planning
out your animation, tried to think about
what key poses your character will have. This will make animating
smoother later. If you're new to animation, try this exercise to get familiar with the
idea of keyframes. Take a video of yourself
doing a simple action like opening your fridge or
standing up from a chair. Then watch the video back and try and pick
out some keyframes. Grab a camera or your phone and videotape yourself
doing something simple. Here I am filming
opening a book. When I'm watching
the video back, I'm going to be looking
for places where there's either a
pause in the action or movement that highlights
what the sequence is about. Right here. The video is just focused
on the steel book. I'll consider that a keyframe, since it's still in the
eye, focuses on it. The next keyframe
will be me grabbing the book and starting the
motion of opening it. The keyframe following it
will be the book open. The keyframe I'll close on would be the book lying
open on the table. This exercise is
meant to be easy and get you used to seeing
videos as pictures. You can do something in your routine that
you do every day, like pouring your cup of
coffee or opening your closet. See something that you do
all the time in a new light. Look for which
parts of this maybe Monday and action are
really important. The next lesson,
we'll go over how another animation principle can add some life to your pictures.
4. Arcs Out in The Wild: When you look at how
most things move in this world, I'm also a robot. Usually they'd all
in a straight line. Whether it's your
dog's tail wagging or your back hunched over your
computer watching this video. Usually things that
occurs to them. In terms of the 12
principles of animation, these curves are known as arcs. Adding these arcs and tear animation can help
the movement look more believable since your eye
recognizes them from real life. When you look at this
pendulum swinging, the string moves in an arc and so does the ball
along the bottom. In this animation,
you can see that the character moves
in an arc and lands and a key pose That's also in an arc when you're
creating your animation, keep his arc type
motions in mind. They'll help the
final piece look more believable and
pleasing to look up, try to find arcs in
your everyday life. This could be the way that
leaves fall off the tree, the way the waves in an
ocean curls over itself. Or even as your roommate
sitting in a curve position, you don't even have
to leave your house to notice oxygen your life. This will be actively observing stereo pot, watching the action. I'm noticing not
only that my hand is making an arc or full circle, but the ripples of
water make while I'm stirring are also an art shapes. So throughout your day, see
where he knows arcs around, you know, some things around you are making
undulating motions. You can do this exercise
just with your eyes. But I'd highly
recommend recording it so they can look
back on it later. Noticing these arcs in your
surroundings will help you recognize how you can
use them in your own work.
5. Squash & Stretch: Playing With Clay : The last principle of animation
and going to introduce to you in this class is
squash and stretch. Squash and stretch exaggerates movement of characters
and objects. It also shows your viewer
how squishy an object is and can help your animation
from looking too rigid. This character uses a lot
of squash and stretch. When the characters in the
air, their body stretches out. When they hit the floor,
their body squashes down. This gives the idea
how much weight they have and how they react
to their surroundings. When you're editing with
squash and stretch, remember to keep the volume the same when you're animating. When the character is
being stretched out, you make them narrower. And when they're
getting squashed down, they need to be wider. A great way to visualize squash and stretch is through clay. When you stretch it
out, you can see how the middle becomes more
of an hourglass figure. When you squash it
down, you can see how flows down into a pancake. Using squash and stretch can
be a great way to show what your character is made out of how they react to the
world around them. As long as I've lived
here character. To get a better understanding
of the concepts. Grabbed piece of clay or
if you don't have any, make your own, squash the clay, play with it, Stretch it out. See how the clay reacts to these movements and use
it as inspiration for your character later on when we designing that character
in the next lesson.
6. Designing Characters: Color & Shape: In this lesson, we're going
to design your character, which is one of the most
fun parts of my opinion. You can either do
this starkly in Photoshop or on a
piece of paper, whatever you're more
comfortable with. I'm going to take you through
a few steps to figure out how you want your
character to look. For example, I'm
gonna show you how I designed my character
that I usually use. I want this character to
look relatable, cute, and seemed friendly,
which is why she is mostly made
up of round shapes. People generally connect rounder shapes with approachability. But if you want your
character to appear stronger or more balanced, image issues with
more pointed edges, very character like squares or triangles, give me a character. Different shapes can give
you a whole new character. When you're designing
your character, keep in mind that we redrawing
them over and over again. It's tempting to give
them a lot of detail, but redrawing every button and crazy hairstyle can get
tiring after awhile. When you're designing
a character. Trying to make them
simple enough that you handled fall off while
you're animating. But give them enough detail that they representing what you want to animate.
For my character. I want to turn to look like me. Now. I worked for Home and
barely leave my house. So I'm usually
wearing my glasses because I have
terrible eyesight. And we usually also wearing
some kind of sweatshirts, shorts and slippers combo. Now my slippers are
actually bears, but I thought the ears
on the bunny slippers would be more fun to animate. So it's often about if
you're drawing yourself, it doesn't have to
be a 100% accurate. You allowed to have
fun and experiment. You're just trying to capture the essence of what
you're drawing. So when I'm drawing the
character I usually use. I start with the head, which is a circle before
making my way down. Then we'll move on to the body, which is kinda like
a pair oval shape. The arms are like half moons that flare out at the
end like a penguin. Then I'll add in the legs, bunny slippers,
ponytail and glasses. As you can see, she's mostly
made up around the chiefs. But if I wanted to design
the same character, move maybe a little bit stronger or have more assertive
personality. I'll try dry her with shapes
that have more edges. I'll start with the
head as more of a box and add a
rectangle for the neck. The body is kinda an
inverted triangle and then have the glasses
and hair and end points. But you know, you can be really creative with your character. They don't even
have to be human. Maybe you want your
character to be a slice of pizza that has a combo
round and pointed shape. Because if it's the concept
that you're going for, I'm going to start with
a base of a triangle. And then at some round half
circles for the crust. The arms are some lines with rounded circles
on then to them. And remember to
be creative here, to go along with the pizza idea. Maybe he has a mushroom knows, tried to play and have fun with your character while
you're designing it. You can base your character on yourself or person like
my first character. Or you can base your
character more on a feeling like the second one
which was more assertive. Or take it somewhere
more wacky and fun like the third pizza idea. Your character is
personal to you. Try a few different
drafts and approaches to find the character that feels
right for your animation. Now another thing you want
to think about is color. Not only if you want to
color your animation, but also what colors
you want to use. In this class, I'll show you
how to color your animation. But I personally leave my
animation with an outline look. Because one, it's a lot faster than coloring
everything in. And two, I want my career to seem transparent
and truthful. I won't go too deep into the psychology of character design. We picking colors, it can be
helpful to have an idea of what colors people generally
associate with these colors. Here's a little chart
to help you out if you're not sure
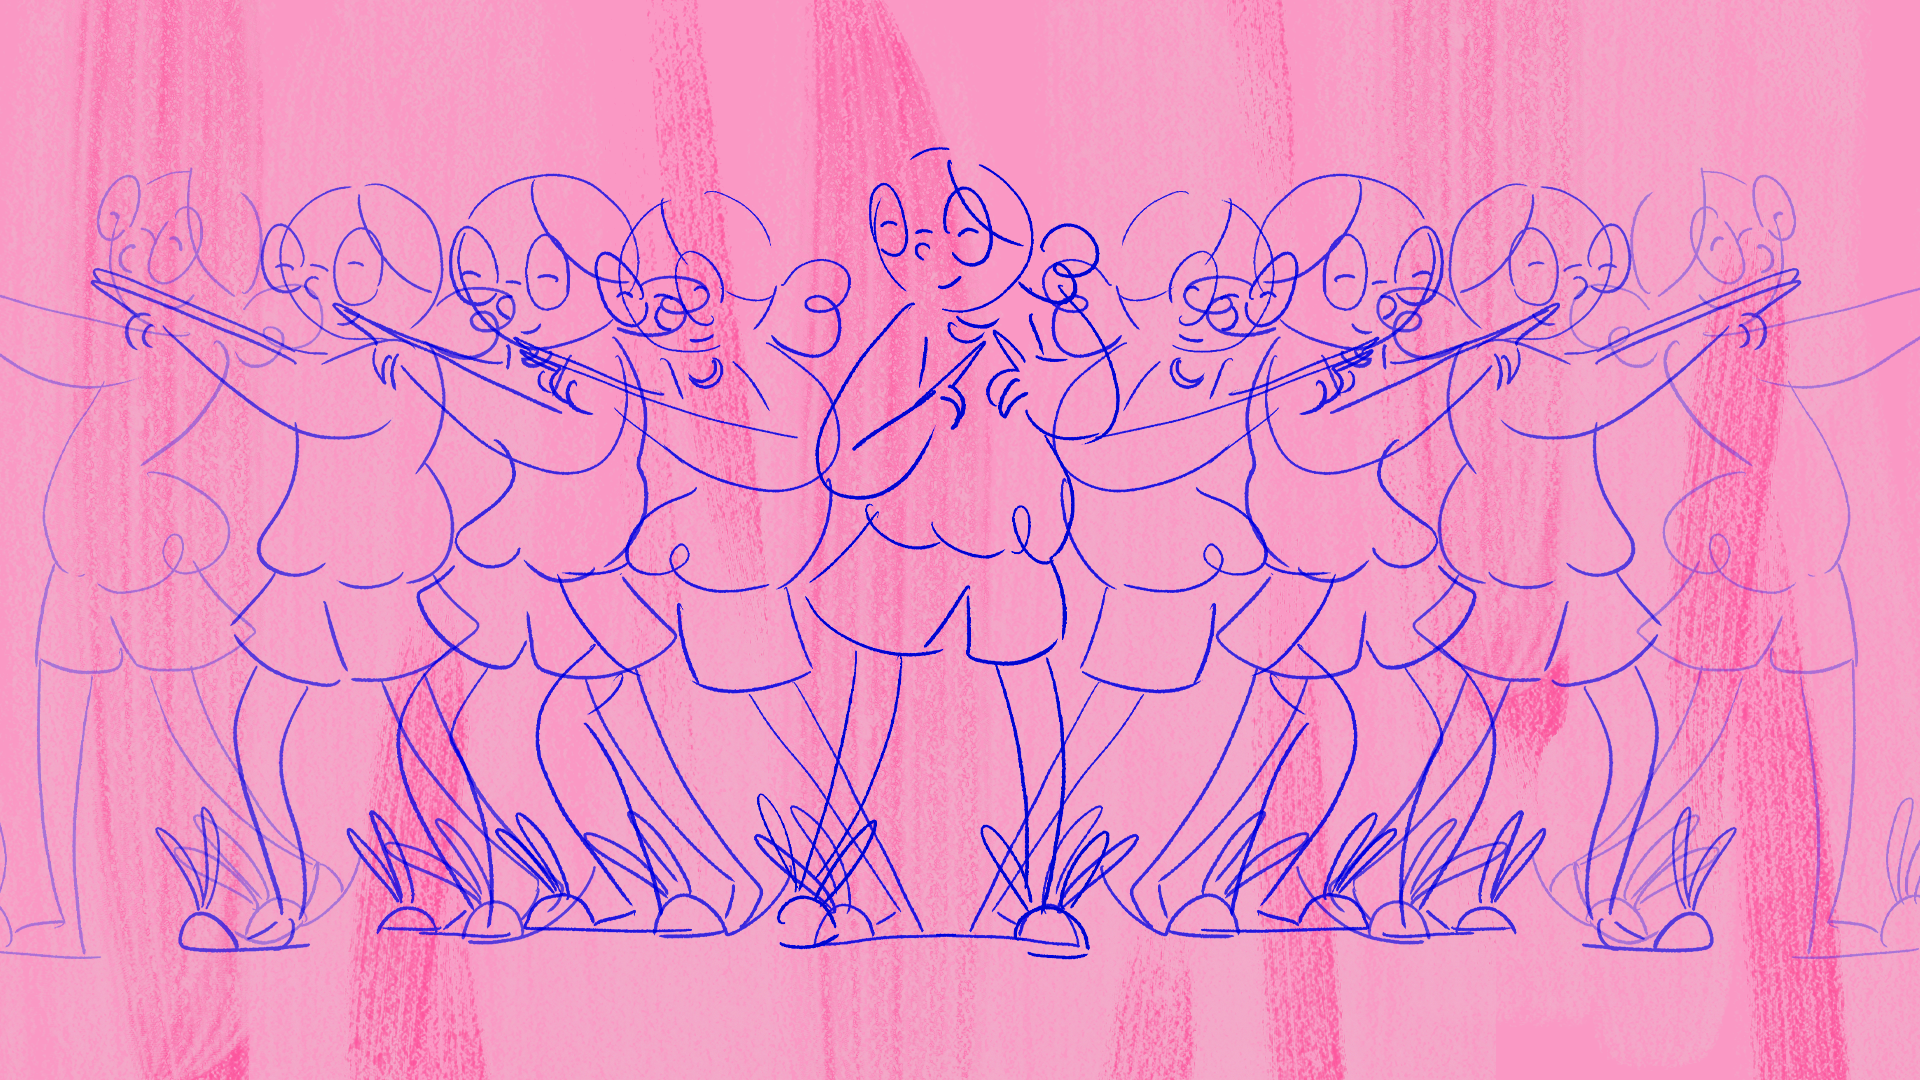
where to get started. For my character, I usually
draw her in pink and blue. I really like this color combo, but I also like
what it represents. I think usually it's
associated with playfulness. Although blues scene
is calm and truthful. If you're going to
color your character. Tried to pick two
to three colors to color them with weak, a lot easier to color, and also give your character
a sense of cohesion. Tried a few different
versions of your character. Try different shapes
and color combos until you find one
that's unique as well, simple enough that you can
draw over and over again. And we have your
character ready. Let's jump into the next lesson.
7. Recording a Reference Video: This lesson is all
about reference videos. What are they? What
do you need them for? Reference videos are
live-action footage that animators use as
reference for their projects. They can help the
animation process go a lot smoother since
you're not guessing about what the
motion should look like and you have
something to go off of for this class. So we're making a
looping dates animation. So when you fill your
reference video, keep that in mind and try making motions that
are easily looped, like walking, jumping,
pointing, things like that. Just things that are easily
repeated over and over again. Having a reference
video makes the animation process
go a lot smoother. So I'd highly recommend having one. Is there a few
reference videos? I took my dog for an animation. Either the animation
is highly stylized, having a reference
to see how her legs move together and how her ears popped up and down was really helpful in completing
the animation. If you're like me and
a major introvert, making reference video may
feel upward or embarrassing, but it's just meant for you
and it supposed to be fun. Unless you're like
me and putting it on the Internet for
everyone to see. But I hope that you have a great time making one
throw on some music, have a fun dance party, and just try to be loose and
see what you come up with. We have a reference video
that you're happy with. We can go into the next lesson, which is starting to
animate your character, which is why you're
all here for.
8. Sketching Key Frames: In this lesson,
we're going to use the reference video that we took to sketch out our keyframes. This will give us
the key points of motion in our animation. If you remember from earlier, we'll be using the post
pose animation method. These keyframes
will your guideline and endpoints of our animation. First thing to do
is scrub through your reference video and
pick the loop that you want. Crop the video to those frames, and upload the
video to computer. You can do this
by emailing it to yourself, texting
it to yourself, or air dropping whatever works, open up Photoshop and
create your canvas. I'll put up the
most common sizes depending on what you're
using this animation for. I like to use 300 DPI
because it's high-quality, won't lose quality when
it's posted in Photoshop. Go to Window, timeline,
create video timeline. Then click on the Create Video Timeline in the box or pops up. Go to the hamburger menu and set your
timeline frame rate. Most animations are created in either 24 or 30
frames per second. This means that you guys
secondary animation, you'll need to draw
24 or 30 frames. The more frames that
your animation has, the smoother the
animation will be. I'm personally going
to use 24 frames here. You can zoom in and out of your animation frames with this slider with the
mountains on it. Then create a new group and
name it reference layer. Then go to Layer Video layers. New video layer from file and dropping your
reference video. These timeline layers are
kinda like a roll of film. You can see all the photos
are frames on one line. And I put my reference video in the corner and scrub through
to find the keyframes. And go pull out the
frames that show the pinnacle part of the motion. Once you've found
your keyframes, use this as a tool to cut
out the frames they want. And then you can
delete the rest of the video. While I'm
cutting these out. I also like to put
them all together. So when it plays, it
will play them back one after another,
like a roll of film. Then create a new
group, a new layer, and use the scissors
tool to make the same amount of frames
as there are key-frames. Click on your first layer,
change the brush tool, I'm sketching brush and your draw your character and the
pose of your first keyframe. When you're drawing
your keyframes, you may also want to
use your Onion Skin setting in the hamburger menu. Somebody unawares prefer just to flip through the keyframes. I personally like
to use onion skin because it allows
me to reference the pose before or after my current pose
while I'm drawing. And then repeat with the
rest of the keyframes. Will you play this
back? You'll have a very fast repetition
over your animation. To slow it down, you can
stretch out the frames of your animation to get
them to hold longer. You play it back.
It will be slower since your eyes
seeing more pictures. A couple of tips while you're making your poses
for your keyframes. Remember delivered places
you can incorporate the other principles
of animation like arcs and
squash and stretch. Don't rely too heavily
on your reference layer. Keep in mind that
animation is meant to be an exaggerated
version of real life. Use your reference layer as
a starting point and then see where the principles of animation can be
used to push it. Remember to label
your layer groups. These animations
are fairly simple, but it's a lot easier
to keep track where your layers are when everything
is labeled correctly. The keyframes you create
in this lesson are going to be the baseline for
the rest of the animation. There'll be the
posters we use to connect the in-between
drawings together. Once you finished
sketching your keyframes will clean them up
in the next lesson.
9. Outlining Key Frames: When you have all your
keyframes all sketched out, you can either leave them
in the sketchy version if that's the aesthetic
choice you're looking for. If you want the lines to look
a little bit more defined, you can trace over them
and clean them up. You can turn off your
reference layer for now. Then create a new group, a new layer and
label it outline. Create the same number of frames as your sketch layer
and line them up. Choose a brush for your
outline. He's a hard brush. If you're looking for
something more bold or something with more texture, if you want to stylize, look. Then trace over
your first sketch. You can connect all the lines if you want the
character to have a defined border or leave them open for more
illustrative style. Then repeat for
all the keyframes. Tried testing out
different brush textures to find the one that
you're looking for. Adobe includes
thousands of brushes and their subscription
on their website. If you're drawing
something circular and one more perfect shape, increase the smoothing
of your brush. Give me your character
and outline like this can help make them more
visible and cleaner. It's not necessary,
but it can help bring the vision of
your character to life. Well, you're done
tracing over keyframes. We can start working
on our in-betweens, which uses a lot of the same
steps as making keyframes.
10. Drawing Inbetweens: When you hover keyframe set up, it's time to make the in-between drawings
to connect them. Making in-betweens is pretty
similar to making keyframes. There just tends to be
a lot more of them. But always showing
your shortcuts so your handmade time
is a lot faster. So now you can
turn off your line layer and in your sketch layer, make a new layer and
use this as a tool to cut a bunch of frames and place them in-between your keyframes. Like the name implies,
you're going to be drawing the poses in-between
your keyframes. This is another place it's
helpful to use your Onion Skin setting to see the
post before and after. Instead of changing how many
frames you see before and after my current pose and
my onion skin settings, I prefer to move
my keyframe poses in towards my current
primary Milan. I think it's easier to see. And I can also flip
through my frames faster. Look back at the reference
video we made to get an idea of the motion
that you're looking for. This isn't meant to be an
exact copy, a reference video. It's just there to give
you a starting point. Then you can start
sketching your in-betweens. The more drawings you have, the slower and smoother
animation will be. When I'm drawing
in-betweens, Asia, use the Scissors Tool to cut about three frames in which we write key poses
to start with. When I play it back, if I feel like the motion is
too fast or slow, I'll adjust the keyframes
to get the timing I want. While sketching, I'm looking
at the post before and after trying to visualize
suppose in the middle of them. Guineans can setting is helpful here because
I'm able to see exactly what my character was and where are they intended. Endpoint is, while I'm working, I also occasionally a
disabled adults and setting umbrellas in a while and scroll through my
animation instead. This makes it easier to see if I forgot to draw any parts of the character's body and make sure the animation is
flowing high. Wanted to. If you want something to
move very quickly though, you can also incorporate
a smear frame. You dress Mary,
you're essentially making a blur of the motion. Like you're drawing
multiple frames at once. They go by so fast that your
eye doesn't even notice. But they can't look pretty
funny when you pause on them. If you ever need a laugh, look up, smear frames
on Google Images. Big guaranteed to
brighten your day. You're drawing
these in-betweens. Look for places where
you can incorporate the animation principles with the poses I'm working on here. I'm actively trying to
exaggerate the curve and characters back to give her
poses more of an arc shape. While you're drawing
your character, think about where you can cover character's body or motion
to give them more of an arc. Or we can push and pull their body tannins and
squash and stretch elements. This might not apply
to all animations. But if you have your character
doing the same action, not I'm excited that
animation like mine is. You don't have to redraw those
firms on the other side. Group the first half, your
animation, then duplicate it. Move the new group to the
end of your first group. Then go to edit, transform
and flip horizontal. Line up your animation
with the keyframes that you created
earlier on that side. When you play back Gil the
same animation, both sides. Then you can delete the initial keyframes
maybe for the other side. And that's the initial
animation done. Now we're going to
repeat the process without blending or in-betweens, just like we did for key-frames. Your outline layer, you're
going to make a new layer, cut the same number of frames you made in your sketch layer, and draw over your sketches. Then groupies, Then
group these frames, duplicate them, and flip them just like you did
for your sketch layer. While you're working. Remember that even
though his animation can be relatively quick to
make in terms of animation, it still can take a
good chunk of time. Try listening to a
podcast, watch TV, or listen to music while you work to make it more enjoyable. Also, remember to
get up and stretch every half an hour
to 40 minutes, get some water, a stack, or just take a break isn't meant to be fun,
enjoyable experience. So feel free to take breaks as needed and come back when
you're feeling refreshed. Also, remember to save often, there's nothing worse
than losing your work. With your keyframes
and in-betweens connected together and outlined. You have an animation. But
this initial animation done, you can use these frames
to create a loop.
11. Looping the Animation: When you have your
animation completed, you can create a
loop with the frame so you already created
and just a few seconds without having to redraw everything over and over again. In Photoshop. Take your outline
group and duplicate it. Move it to the end
of the first group. Repeat until you
add the length of time that you want
your animation to be. You can also just the
title and length. If you need more time
for your animation. Play the animation back to make sure that loop seamlessly. If you see the background
become transparent, you may need to extend
the background layer at the bottom of
your video timeline. I'm also going to change the
background layer to pink. You can make your background
layer whatever color you like or leave it as wipe. Your animation is
looping seamlessly. You can see how the final
product is turning out. It's so fun to see
your character come to life after all the
work that you put in. Even though you have
a looping animation. Now, this might not be the final look that
you're going for. If you're interested in adding
color to your animation, I'll be sharing how to do
that in the next lesson.
12. Adding Color: I didn't color TV
animation isn't necessary, but it can add another
layer of depth to your animation and add more personality to your character. Adding color to
your character is pretty similar to
the methods we used earlier for animating
them for the animation. So make her social media. I usually like to use a color background
layer as my color. Then if we want to
fully coloring your character or part
of your character, I'm going to show you
how to do that by coloring my character's
shirt and shoes. This is similar to how
you create in-betweens. Create a new group,
namely color. Also before I start coloring, if I know I have a lot of
different colors I want to use. I will usually create this
group name is something like color frame brace and duplicated every time
I use a new color. That way you can have all your colors on
different layers, which makes it easier
to go back and change anything if you need to. You don't need to keep cutting
and bilayers reframes, then create a new layer
and scrub through clean animation layer and create the same amount of frames
in your color layer. Duplicate your color base layer, and click on the first layer. There are a few ways to
color your animation, and I'm going to show you too, if you're looking for more of
a flat color for animation, on each layer, outline where
your color is going to be. Make sure the shape is closed
and the line connects. Go back with the paint
bucket tool and fill in. The paint bucket tool in
Photoshop is a little outdated. Even we use the
paint bucket tool. It may have an outline from where it hasn't
filled in all the way. This can even be true when
the tolerance setting is as high as setting of 255. Just double-tap the
paint bucket tool, do get it fully colored. I like to outline first
and then go back in with the paint bucket tool for all the rest of the frames, color and until
you reach the end of the initial
animation you made. Once you have your first
loop of animation color, you're going to duplicate
the color layer like you would for creating
a looping animation. Duplicate it until your
animation is complete. The second method of
coloring can be helpful if you want a lot of
texture on your animation. I'm going to duplicate my color base layer and make
another group. Take the texture
brush you want in color and where you
want the color to be. P for the remaining frames. When you're coloring,
try to stick to about two to three colors max, especially if this is your
first animation that you made. Keeping your color
palette minimal can be a great way to have
your character look more coherent and make the animation process
easier on yourself. Color can be great
way to elevate your character and make
them more eye-catching. It can give your character
more personality, and also can give you insight
into what their motive is. Now that you've colored
in green animation, you might want to
add a little bit possessed your
background as well. I'll be showing you how to
do that in the next lesson.
13. Adding a Textured Background : You now have a
looping animation. If you're happy with your
piece, you can leave it as is. But if you'd like to make it a little bit more eye-catching, you can try adding texture
to your background. Doing this combines
a lot of what we already covered
in the course. It only takes a few
minutes to complete. Underneath your animation
at a new group. Legal background texture,
create a new layer and use the scissors tool to cut around three to
four longer frames. I try to hold these frames
for a four to six rooms each. Allows her to focus
on the more it keeps it from distracting from
your initial animation. He's a heavily texture
brush and make some very large
heavy brushstrokes. I might also add in a secondary color with some smaller strokes. Duplicate your layers until you reach the end
of your animation. Texture to your Rocco
can be an easy way to make your animation even
more visually appealing. They can add secondary
motion to your animation, which can be visually pleasing
without the distraction. Now that your
innovation is complete, you should share it. And I'll show you how to do
that in the next lesson.
14. Exporting Your Video: Congrats on finishing
your animation. Animating is a ton of work, a shoe proud of yourself, especially if it's one of
your first times animating. And I'd encourage you
to share your work both on here in the
project gallery, as well as with your friends and family and on social media. It takes for your work, go to the hamburger menu and
click Render Video, name it whatever you like and select where you'd
like to save it. Formatted as an H.264, which will make it an MP4. And you can easily share it on your social media channels. For the range she's
your work area. Then render. Once it's exported, playback to make sure it's how
you want it to be. Gather your videos rendered out. You can either share
with your friends, upload it to social media, or even put it on
your website or portfolio if you make any animation so you
post on social media, please tag me. I would
love to see them.
15. Conclusion: Congrats on making
your way through this Skillshare class and coming out of it with a
new skill if you're new data meeting
and an animation. As a full-time animator, I know how much work
goes into animation. A shoe feel really
proud of your work. I hope that you've enjoyed
animating with me and learning about a few
principles of animation, making a goofy reference video. In any meeting your personalized
character and Photoshop. I hope that you're
feeling inspired and with these skills
under your belt, I hope that you anime
more in the future. After this class, I
hope that you start seeing the world a little
bit more like an animator, where arcs are in
your everyday life or how objects are affected
by squash and stretch. And don't forget to share your project in the
project gallery. I would love to see
how they turned out. If you share them on social
media, please tag me. I'd love to check
them out there too. If you enjoyed the course,
I'd appreciate it. If you left a review, it'll be great to get your
feedback on it. Thank you so much for joining
me and happy in a meeting. You draw you draw all the
frames of the sequence. Oh my god, everyone. We making everyone. Oh my god. Oh my god.
 Georgina Cahill, Animation Art Director