Transcripts
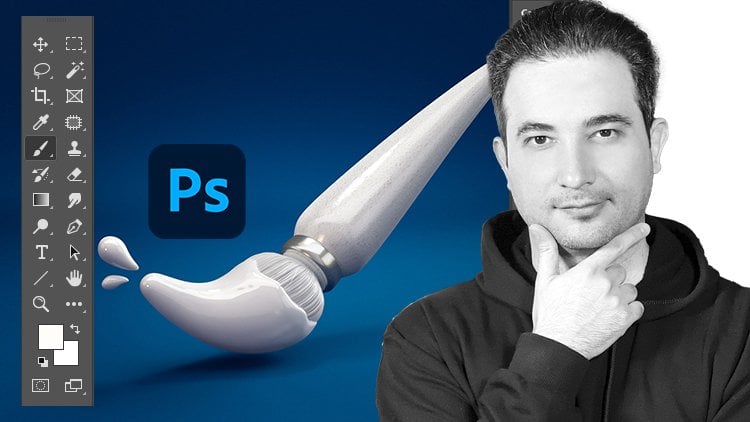
1. Introduction and Overview: I am solely art.
And in this course, you will learn a powerful new
workflow between creating a 2D composition in Photoshop and animating your
artwork in After Effects. We take your first lesson to explain the process of
creating a mat bending of your composition in Photoshop didn't be jump right
into creating a project. By learning how to use Photoshop projects
in After Effects. We learn ways to
position our layer, animating a flying bird, using our camera for
animation and working with particles to create a realistic
is now from the scratch. And finally, rendering of a
project in After Effects. Also for bonuses,
we will show you how to work with
Adobe Audition and Adobe Premier Pro
to edit and mix a very cool soundtrack for other project to bring
our animation to life. This course is full
of helpful tool for getting some of
the toughest part of the Photoshop
and After Effects. Working easy for you. Issues like animating
a bird wings. Camera movement. Working with particles
are explaining depths. So you can let your
creativity flow. This course is assuming you have intermediate experience in
Photoshop and After Effects, how we take guessed
the burst of approach. So you can follow along. If you have never used
Photoshop or After Effects, and you're interested to
animate your artworks. This course, we'll show you how to start and
invert to focus on. By the end of this course, you have a good knowledge
of creating an, animating your projects in
Photoshop and After Effects. Alright, let's get started.
2. How to use Clone Stamp to Pain the Background: This is our movie frame. You just going to be
animating F their effect. And this is gonna be the area that we're just
going to extend and just make larger image inside. Now let's go to your full. If you have After Effects, you have images and
you have PSD file. Go to images and
uploading a number. You can just drag this unit on background and just drag
it and drop it inside. Photoshop. Anything we design, it
should be inside this area. I'm holding down Shift and
Option or Alt and Shift to drag this precent, we have to clone the
area to make it larger. I'm just going to DCs
on a smart object. So we cannot really
edit. To edit this. I'm just going to right-click, Right-click and put it
on Rasterize Layer. Now, if I go to my clone stamp tool from now and I'm just going to just press S on my keyboard. Make sure opacity is a 100% and it's on
the current layer. For now, I'm just going to press Command or Control Semicolon to remove these lines so I can
just kind of a distracting. I'm just going to hold
down Alt or Option. Click in this area and
just paint to that area. You see it's very sharp. You see that at the edge. If I zoom in a little bit, you see it's graded
very sharp edges. You're just going to hit
Control Z or Command Z. And I'm just going
to right-click and bring the hardness to 0. Click outside. Now if I
hold down Alt or Option, paint will be no problem. Basically, what I'm doing
is I'm holding down Alt, I'm selecting the area. So you can see that I'm painting is a plus sign under right side that
it's showing me. I'm just copying
from these areas. I'm just going to
copy these areas. Just press holding
Alt and paint area. Same length Spacebar to
go down a little bit. I'm just holding
Alt is my point. I'm just going to paint this area here. See that? For now. Sometimes you see
it doesn't make sense. Some of the areas you don't need to worry about it.
We fix it later. First, I just need to fixed area to make sure I'm just painting
and make these larger. Because in After Effects, when you make the file larger
than you move your camera, some of the area from
the back that is empty. You see what I mean? I can explain it on
After Effects better. So for now I'm just
going to press Control Z or Command 0. You can see in the left
side, it's fine for now. We will definitely
have to work on that. For now is pretty cool. It's going to click here, area and painted
to make it faster. To make sure you're just going to horizon
should make sense. We don't want to
just like crazy. I'm selecting Alt. I'm just going to make
it a little faster. You don't need to worry. The color doesn't match, so I'm just going to repaint. This is pretty cool for now. Because we add a lot of
things on top of each other. You don't really
see these areas. Anyone would combine me, change this guy with different ascribe,
different elements. We don't need to
worry about that. This is gonna be liked a
background for us right now. Even though we can
improve, press S again, hold on Alt window,
we can improve, lift off this part. Maybe improve this. A bit. Not bad for now.
3. Cloning the Mountain: I'm just going to go
to your folder fine. And bring down we have the moon, we have the mountain and we
have the castle. For now. I'm just going to
bring the mountain. Just drag it and drop it
inside your artboard. Press Enter for now to see our
frame back to movie frame. Press Command or
Control semicolon. So this is the area
that we need to put our images. Just
going to come here. Press Control or Command T, hold down Alt or Shift. It just going to bring to science from descent
or download a bit. No holding down, Shift again. Just going to bring this down. Smaller. If I zoom
in, I can bet it. I can see this is the
area that I'm going to design and finish the
Arthur for myself. Just going to bring down I think VCs. Good. Now press Enter. For now. I'm just going to
press Control Minus do the same thing that we
did with the other area. I'm just going to expand these
mountain, make it larger. Command Control,
semicolon control plus the first one I'm just going to remove
this area is a little bit. So I'm just going to come here, right-click and rasterize
layer so I can edit it. Let's put it unmask. Press B on your
keyboard for brush, or it can just come
here and choose brush. Then right-click. You already should see
this right-click here. You can see we have these
kind of brush here. It should be here. Then select outside, press Control Plus to
zoom in a little bit. Plus. Make sure your foreground color is black, the background
color is white. So now I'm just going
to remove these areas, mitigating, move
this car for now. Basically I'm accomplishing
is going to start. I'm going to combine this
mountain, my castle. The castle is going
to be exactly on top of these mountains. So for now you don't need
to worry about anything. You just follow. In the same way that
I'm doing this. Basically going
to mask this out. You can see these spots and make original image
that I don't like. I'm just gonna select
my original image. So press S on your
keyboard for Colonus them to live a square bracket and we can decrease
the size of our brush, press Alt, copy and
paste this area. So did you move an option? Now let's go back to our mask. Make sure this is selected. I think the mask is okay,
press Control Minus. Now we need to expand
this mountain. Press S on your keyboard. Hold down Alt or option. But before we do that, we have to go to our layer. Hold on Alt. Keep painting Mountain. Make sure you're going
from edge to edge. And it's exactly
like the mountain. We do our best here, but we don't need to worry about anything because
there's a lot of clout and other stuff that
is going to come up in front of this mountain
so we don't really see it. But we always tried
to do the best work. I see this is kind of
repeating as not nice. So I'm just going to pick up, hold on Alt and select
the other areas that it doesn't
look like the same. It's fine. Little bit of cloud
here and there. So you can see what I mean. When you right-click, make sure the hardness is
non-zero if he get, let us sharp edges because
the hardness is on a 100%. So make sure the
hardness is nonzero. The outside. Alright, don't worry about these ARV
going to fix that. Now. I'm just going to
press Alt or Option. Copy the same thing. If we don't have edges here. It's like mountain and clouds. We don't need to really
worry about anything more. Maybe a little bit of this area. We had coming to the bottom. I'm just going to
press Control minus this is pretty cool.
4. Use Level Adjustment to Add Haze and Light to the background: Let's fix the background. If I turn this off, you see the background is
a cyan as a letter dark. So first of all, let's
select the background layer, press Control or Command
L to pick up the level. Now, let's bring the left side and make it a little brighter. This handle, Let's move it to the left side letter to
make it more brackets. Mostly when you are in this guy, you haven't let her haze to
add like Hazel that a bit. You see the output level. Bringing this to the right side. It's adding a little bright
and hazy look to our image. Just gets too much.
Now it's fine, I guess. Now press Okay.
5. Adding haze to the Mountain: Now let's turn on the mountain. Press Control L at
the letter haze. So it's cool for now. Auto problem with that'd
be half is the color, what color that we have here? It's a little bluish. Let's go to Channel and
pick up the blue channel. Now if I move this handle, you see I can change
the atmosphere. So what color is this guys? Let us cyan. And I'm just going to
move this to the right. If we get a little color inside. If you change any of this,
bringing these the left, if you had a son
at the background, we could add more
yellow if she'd, but for now it's fine. We had a literate. You can just add a
little bit of color, very little, not much risk. If we add a little bit of I
think they're pretty cool. I'm just going to
stick with this one. Then we add some lights at end. So it's going to
match perfectly. For now. It's fine.
Not press Okay.
6. Use Brush to Composite the Mountain into the Cloud: Press V on your keyboard. Then combine these two
together with the background. Press mass again. Press B on your keyboard
for brush to right-click. Pick up a brush that is
not really hard edges, the hardness is 0 and
increase the size. It calcine. Press
control plus D zooming. Now, if I just start painting, I'm just going to
move every team. The work on opacity for now to remove the very sharp edges. The opacity is on a 100%. I'm just going to zoom in more. And left square bracket to
decrease the size of my brush. Fix the corners. I'm going to do the same
thing with the right side of the mountain to remove
the many sharp edges. All right. I think the sharp, sharp edges are gone from now. Maybe just gonna fix them
better without this. Ok. Control Minus make these
press right square bracket to make it larger. And now bring down the opacity. Because what I'm gonna
do is I want to say that the mountain and the
background is OK together. So this is what I'm gonna do. I'm just going to start
painting on the mask. I'm just going to
painting to the top. Make sure your
foreground color is black so we can paint
the same thing. First. I'm just going to go around. Just combine these. Like mountains, back and background are
going to combine together, especially at the edges. So we get the
letter sharp edges. It means I'm going
to mix very well. Right now. I'm just
going to combine these. I think this is pretty cool. Background is just
kind of showing up. Other way to do that. But for now I'm just going
to stick with this play. I think this is the
best way of doing that. We don't touch the top. It's like the mountain is
coming out of the cloud. Pretty cool year. Definitely need to
add more cloud. If I press Control 0. You can see right now it's
combining very, very well.
7. Use Color Balance to Match the Castle to the Background: So remember delight is
coming from the right side. So anything, any image
that we adding this, it should be in the
same direction. Press V on your keyboard to
bring up the images again. Right now, let's bring the 0 for caseloads like the castle
and drag and drop it. All right, K, It's right-click Rasterize
Layer so we can edit it. Let's come here right-click
and select the magic one to click outside. So we get this selection hold down Shift to
get the plus sign. You can add these small
letter bridge here. Shift to get the plus. Now press delete, remove
the area around the edges. Now press Command or
Control D to de-select it. Click and pick up my move tool. Let's press Control
or Command T. Shift Alt. Drag this from the center. I'm just going to
zoom in for now. What I'm gonna do is I'm
just gonna make sure this is exactly match
deadline, press Enter. So this is the area that it should be
totally managed to be perfectly combined
with the mountain to be really realistic. I would show you
how we can do that. It's actually very simple. The first thing is if we
combine these two together, before we do that, we have to fix the lights, the lights of these
and the mountain. It doesn't match
really. For now, I'm just going to go
to Image Adjustment. Color Balance beneath to add a little bit of cyan and a little bit of
yellowish look to it. Now it's look like the
color is the same letter. So we add a list ion
and we add in midterm. We don't touch the
shadows for now. Okay. Make sure the
catalog is selected. Let's make a copy of castle. So if you made a mistake, you have the original
file by sequential j. It's Castle going to type. What did you No, we don't touch. The discontent is off. You work on the castle copy.
8. Blend the Castle to the Mountain : Press S on your keyboard for
cleanness them to make sure this is on current and below. Now I'm just going to
track these, put it here. So basically, I can combine
decent layer and delay, blow it because it's
current and below. I'm just going to zoom
in, but Control Plus for space and left square
bracket holding down Alt. I'm just going to add
this area to the top. I'm selecting the area
at the bottom and moving it up to combine
these two together. It's like These two
are 200% match. So you have to be
careful and you have to really go slowly. Sometimes. Press Control 0. You have to do to two times. Let's right-click, make sure the hardness is here and pick up one that doesn't have the
sharp edges leak outside. Select the area and click books much better.
If you just click. Because make sure that
the lines are match 0. It shouldn't be in a
straight line for sure. I'm just going to
select this area. This could bracket make my
brush size less smaller. Like mountain is going up. Pretty cool. I'm trying to find very
interesting part of the image to see and feel the gaps because you have a little
dark for these edges. So probably we need to let
her dark hair a bluish color. This is what a little brighter. So we need some lines
that like it's matches, like this is the line. Match our image to be the gap. Just like going through
step-by-step to fail. The gaps. Here we go. I think
this is pretty cool. Now, what do we have? Press V on your keyboard. Very sharp edge. And this one, and
this sharp edge is because of the castle. Castle is selected. Come here and select blur to just slowly go at the bottom, just at the bottom. Just like paint it over. You see we remove those
very sharp edges. Now press Control is 0.
9. How to Create Realistic Shadow: You kind of combine
these two together. I think it's pretty cool. Press V on your keyboard, but it still is not realistic. Why? Because we don't have shadows. Press Control J. So basically we
duplicated the castle. Press Control T and
drag these down. So just like we track this
backwards, I'm going up. This is one way to do
that. Press Control Z. Now, the second way then, which is easy to
press Control T, it right-click and
flip vertical. Same thing. Make it a little smaller
from the height side. Then right-click. Make sure you choose the skew. Now it is Q. I'm just going
to move it in this direction. Has a set delight is coming
from the right side. The shadow would be
created on the left side. Here we go. See. For now this is okay. But it's like a straight line
to make it a little shape. Let's right-click and
choose the warp tool. Now I can shape these
pressing TOEFL. Now, we have a little messy area here which you have
to remove it first, I'm just going to
add a layer mask. Press B on your keyboard, make your brush and
let us smaller. Bring the opacity to 60 eighths and start to remove
in these areas. Basically, we don't need this. I'm just going to remove this. Warning. Is going to be fine. Map. Make sure you select the
castle copy to this one. Now, hold on Command
or Control and click. And later time now we
have a selection here. Make sure your foreground
color is black. Press Alt or Option Delete
to make this totally blank. Right? Now, press Control D. As you see these shadows, right now we have a
very, very sharp edges. To fix that. Let me just go to filter
blur and Gaussian blur. You see, bringing
this up a little bit. Now, we actually wanted to
do mostly in this side, the shadows press Control T, right-click and mark it up. This shadow, I'm just going
to get a nice area and drag the shadow is going to
be mostly these areas. Maybe. This way. Now press Okay. Now select the mask, press B on your keyboard. You have a lot of shadows in the air which we don't
need to unrealistic. Going to remove those. Make
sure the opacity is a 100%. So we're actually removing every day just something
that you don't really see. Sometimes you're going to put right square bracket to
make this a little larger. Same thing. Basically we are
removing average. Again, a steel does shadows,
not that realistic. Select the actually at the time. Now, go to Blending Mode
and put it on overlay. Then you see the shadows is exactly going inside the cloud. The press Control Zero. If attendees off,
it's very normal. If I turn it on, it's exactly inside and you see
the darkness inside. This darkness, it
totally makes sense. Basically. Be created
the shadows we added below the castle
to be more realistic.
10. Adding the Clouds to the Artwork: Let's pick up the file again. Now we need to add some cloud. Drag this one, number 05. Make sure you put it on top. For now. Let's make it let us
smaller, hold down, Shift. Be in the same proportion. Leave it here. These are the Cloud and you are going to animate
in After Effects. But for now, we're going to add everything inside of Photoshop. In animation part declined from left is going
to the right side. Now, we don't need to mask and basically the mass
doesn't Morgan after effort. You have to make sure of when you have
something like this. Right-click on it. First, you have to convert
it to a Smart Object. Then again, right-click
and rasterize layer. The same thing with this one. Anyone that has mask, right-click first, you have to convert
it to a Smart Object. Then again, right-click, you
have to rasterize the layer. Now we have the Cloud, right-click and rasterize today. Make sure all of them has names. Let's go back to fines
and bring data cloud 06. Hold down Shift to keep the
proportion and just leave it here. Press Okay.
11. Compositing the Moon behind the castle: So we added the Cloud. Let's go back. And you have these
two Cloud which is gonna be in
France at the end. Let's go to 09 mountains
and dragging and drop it inside Photoshop. Press Enter. Now we need to see
our video frame is am pressing Command
or Control semicolon. Bring back these rulers. We know exactly if
I turn this off, this is the area that we are
going to see in the movie. Stick this on again. Didn't have to bring this. Let's bring down the opacity to see the tip of the cast and it just kind
of come out which is fine. Acidic the cloud. Go back to file and
bring down the moon. Hold down, Shift and Alt. To decrease the science
from the center. Again. You go more into the
moon is going to be here exactly after the
background. Here you go. I'm playing around with my
arrow keys to get it right. Now, Let's right-click on it and rasterize it,
then you can work on it. If I zoom in, you see the edges. If you have little depth, we have a letter, darkness. If I hold down Command or
Control and select this, then I go to my
rectangular marquee tool. Then right-click
and press fader. There. I'm just going to
put it on five for now. Then I'm just going
to select an inverse. Then press delete two or three times to get to the
dose blank areas. Now press Control D. Now
you have the moon press, press Control J to
duplicate the layer. Then go to Normal and
put it on overlay. We get a very dark areas
tennis off for now. This moon, it should be a
little brighter and declare, it should be a little bluish. I'm going to image
adjustments, color balance. I'm just going to add a
little bit of cyan minus one and a little bit of bluish. Plus line. And press Okay. Then again, pressing
Command or Control L. Increase the
light little bit. Now if I turn on this
moon, is second one. Bring down the opacity. Control 0. Now it's perfectly match and
it's behind every day. All right, this is great. If I click on the council, I think the castle
is a little dark. Breast control. And again, and increase and
increase the middle line. I think this is pretty cool. Me zoom in. Nice. Maybe if I press
Control L again, because if I zoom in, I see it's very sharp, which is shouldn't be sharp
because it's at the top. We need to add letter of haze, going to bring the output limit
the right to add labor of haze and light around area to combine it with the
actual image pairs. Okay, so let's Control
Z before and after. It's brighter.
12. Cloning and Masking the Sky: Now press Control Zero and
bring the mountain again. The mountain is going to be, Let's bring back the opacity. Let's right-click on a
mountain and Rasterize Layer. First of all, we have
to clone this area. Press S on your keyboard, right square bracket
to make these larger. Hold. Alt. Click the area. You can add this. The same thing with this one thing is this area. The lift sign is fine. Trying to not get messy. Cool area. Maybe a little bit of copy. This angle, which
is fine, I guess. All right. I think this is pretty
cool and this is fine. Right now we have these
two on top of each other. What I'm gonna do, I'm just
going to remove this guy. Press V on your keyboard. Now, let's go to
Quick Selection, and let's go around this area
to see if we can just get these parts will not Alt
to get the minus sign. To go back. Hold on. I'm just holding Alt. Alt. Now press the layer mask. If you press the layer mask,
this is going to happen. But press Control Z, go to select an inverse. Now, you can click on the
layer mask to remove this guy. This is very interesting
and it's perfect for now.
13. Combine two Mountains and Adding the Climber: Let's bring going to
defy the mountain. This one. Yes. Going to
drag this and drop these. Press Enter, make
sure glaze on top. One of the things that you
always have to remember is light is coming
from right-to-left. Now, disguise has a shadow. Shadow is left to right. So it means you have to reverse this press Control or Command T. Right-click and put it on a
flip horizontal. Just nice. Bring down the opacity
so you can see what is exactly behind it. Now, before we do
anything, we need the guy. We need to copy the guy. Just going to select
my lasso tool. Just going to go
around this person. Press Control J. Just going to rename
it to the guy. For now. I'm just going to turn that off. Selecting the mountain
press Control T and make these is smaller to
see what we are going. Play around with the opacity. So you can see the combination. It's going to be here. Do you see the lines
of this mountain? Move this up and down until
you get it right off. Let's press Enter for now. I think it's perfect. It's exactly underlying
bringing this up. All right. Control T. Bring this up. We have more shadows. It's like from the left side. Drag this to the right. We also can drag
this to the left. Press Control Zero. The first thing first,
let's remove the area that, which is around this. And I'm just going
to right-click on this to rasterize layer. Add a layer mask to it. Press B on your keyboard, make sure the opacity is 100% to remove this
area very quickly. If you want to remove edges, the opacity must be on 100%. Now I'm going to zoom in.
I'm going to right-click. I'm going to change
back my brush, zooming. Going to go around edges. The edges that I want
from my combination. Right? Inside. Going to add let Lake. After combining
these two mountain, we're going to add a
very nice lake inside. You see this is perfect. If I zoom in. Because you will need these shadows can make this pressure
let us smaller. Usually move this area. Press X on your keyboard. So if we are flipping foreground
and background color, I can paint this back. All right, this is perfect. We already have the shadows.
14. Add The Climber to the Mountain: Is shadows are very, very dark. I'm going to right-click here
so you guys can see pickup, any brush that I
want, Hardness 0. Bring down the opacity, maybe 3635 square bracket. And make sure press X on your keyboard so
we are switching the foreground background color. I'm just going to very small. I'm going to come
for these edges. Combine these it
to image together. Definitely we have shadows, even though we need to bring
it down, maybe a little, maybe 15 because it's
casting bright light here. So definitely we
got the shadows at their back. Makes sense. We don't need much shadow
here, probably shadows. It's very hard to remove
this sharp edges. That's why we have to
increase the opacity. Now it's much easier. Down Control Plus to zoom in left bracket to I'm always following the edges. We don't get a little different. What I'm gonna do,
I'm using my pen. Let's press Command semicolon to remove the lines. A little bit. Opacity, the ship goes down. Now let's right-click. Pick up this one. Combined. Make sure the
opacity is on hard x. You can just make this white. This is what we need. We need to make the
area around it white because it's going to
be looked like a lake. If I'm going to
add something like Lake, let off edges. Here and there. Basically. In the right side, we have increased the
size of my brush. We can make it faster. So here we created kind of a leaky area
side and we have a guy. This is pretty cool. Now I'm going to select the image
pressing V on my keyboard. Go inside left square bracket to make it a smaller
hold down Alt. We can remove the guy. Make this smaller again. So I have the guy very quickly. I'm just going to remove
the area around the person. I'm going to select
the guide layer mask. Now we can paint the shadows, so make sure you're not
removing the shadows. Let's find out the position
of the person first. I'm just gonna put it here. These lines are kind of match. Skew the guy. We can
get the lines match. This is pretty nice. Then press OK. Just going to zoom
in. Basically most of the areas are at nice
this B on your keyboard. So we can fix areas. That doesn't make sense. The rest does. We can always play around
with anything here. This is smaller. I can
go around the person and basically we don't
really see the person. You just see somebody. Because the person who is
going to be very small or quickly in motion which
is going to pass through. We don't really see the detail, but we tried to compose
this as best as possible. So that's why I always try to
make the best competition. Even though if somehow we could close that a person
is perfectly matched. Beat our area. Trap, background. It makes sense. Perfect. Make sure it's larger. We can make it quicker. Perfect. Now we added
the guy Control 0. Now we added some sort of
a lake which is empty. We should add some
water inside which we do a couple of minutes.
15. Color grading with Level Adjusments and Color Balance: Now, first of all,
we need to combine the color of this mountain
and these mountain. Let's extending the
mountain press Control L. Let's add a lot of
lights and a little light. So these two are
perfectly match. Maybe a little darkness
as well. Not too much. See how much dark. You can add to this. To make this more realistic.
I think this is cool. They have to play around with this area a little
bit to fix it up. Go back and force to see if now the koala
is kind of match. Okay, good to image
adjustments. Color balance. Make sure we add a little bit. Maybe this is dark cyan or red and blue to create
some sort of color. I think this is pretty nice. If you add water is
gonna be much nicer. Behind, let them miss
the area around here. Attendees off. Zooming. Come on up and select the layer mask, press B on your keyboard. It's fixed this
area as I believe I can fix this by just
going through the edges. Area is increased the
size of the brush. Yes. Much better. Now let's right-click here
and pick up this one. Make sure the opacity
is down. Maybe 20. Slowly. I'm going to on
top of this little maybe. Yes, we've got to
remove this as well. Probably just going to stick
with this line to make it more realistic for and even this line can
be worried as well. As long as we are
following the lines. I think how we receive and get more realistic
photo combination. Do I need to do these
50s as well? I do. Press Control. Zero. Color is less cyan because we're going
to have lake inside.
16. Composite the lake on top of the mountain: Now it's time to add the lake. Let's go back to
our file number 14. Drag and drop the lake. Press Enter. What do we need for now is this area's going to
select these areas. The plus sign actually
going to add a little off holding down shift
to add the plus sign. Inside. Some adding leg I'm
selecting just this area. Now press Control J. Now turn these off the lake. Let's pick up the Move tool. I'm just going to add this
combined this, put it inside. What I need to do
is press Control T, zoom in a little bit, right-click and click on warp. Now we can play around
with these handles. And I can put this inside. You see, I'm just moving
the handlers around to make sure is going to be perfectly match our lake. Let's look at this is the
way that you're going to see it because we had
seen it from this angle. You see it with the rough edges. Fix this mountain so it's like a reflection of this mountain. We might delete it and the app deflection of
this mountain inside, probably we can
because we have edges. You have to remove that
more pressing Enter. We added, put it inside this. This is going to come
up here below the guy. All right, I'm just
going to zoom in. Let's bring down the opacity
so we can see the edges. Now, I'm just going
to add a layer mask. Do is press B on my keyboard. Right-click, Right-click
again and pick up this brush. Opacity a 100%. Now, you can zoom
in for this one. Be really accurate. I can just remove these areas, the edges and at the
corner and we can add, we see this letter black area. Minute to add a
little of black area. To see the slide. This is the edges at a corner. The water is not
totally to the top. There is a litter gap between the water level and the bottom. This little areas that we need to add a level
of Dark Side. Pretty cool. As you see as easy
to create this, you have to have
a little patient. You can put on music. So after watching this, if you minimise press X on your keyboard so
you can go back. Press X again. These areas, the grass. We don't really need the grass. We just need this edges. Okay. Let's bring up the opacity, see how it looks. On Tuesday. Make sure
the mask is selected. Make sense because it's
like the shadow of this. Because this is, no, I mean, you cannot add grass, random water, so probably
doesn't make sense. But it should be dark edges. Because stone or something. Let me just remove
the guy for a second. We can fix this area as well. Fine. Edges. Nice. Go download a bit.
17. How to create realistic reflection on the water: You see the shadow of
this see this mountain. I'm just going to
select the mountain and pick up my Lasso Tool. I'm just going to cut,
just take these parts, press Control J, reflection. We can drag and drop it here. Let's zoom in a bit. Press B on your
keyboard so we can, we can remove this, can
change their reflection with this actual mountain,
which really realistic. I click whatever you see, it's going to be horizontal
and also vertical. Press Enter, drag it up. Pressing V on your
keyboard to come here. To make it level with
the water and press T. Right-click and perspective. Perspective. I'm just going to angle. Makes sense. Skew, Control T, letter, rotate it this way. Way. Better. Now we can work this. B. Here we go. For now. I'm just going to
click on the mask, bring down the opacity. Press B on my keyboard. And very quickly I'm
going to go around area connecting this water. Now, let's bring back
the opacity to person. Standard is off. Select this area. I'm just going to
select this area. My lasso tool, just area around my keyboard. Now I can paint this because basically they don't need this. Cloud. Just put it on current
clamp by itself. This data slowly so we
can do a better job. It doesn't matter if
it's not perfect. Because you can have
something on top of it. Going to do something
very quickly here. For now, this is great. Control D go up and
then on deflection, reflection, it shouldn't
be totally sharp. And I'm going to
go right-click on the blur and going
around the edges. Make it to blend in. Some of the areas
should blend in. It shouldn't be really sharp. Steel, you can see it, but it shouldn't be sharp. Need to fix this
area of the link. B on your keyboard. Smaller. Scroll
around this area. You can just select this area. Just select this area. Press Shift, Delete to bring up the fill
and put it on content aware. I'm just going to try and see if content Emma bicep
just going to fix it. Yes. Content over. I just did a perfect job. Awesome. And I'm just going
to zoom in a little bit. We have a lit up and shadows. Casting shadows is fine. This area back being capacity doesn't make
sense. Let's Control 0. This is the cast shadows on behalf of some
recollection of this. Let's bring down the opacity
of the boron little bit. It can blend in. This area should be
darker or brighter. Zoom in this part. In this part has a little
issue because the guy, the guy, the guy is
actually as it is. Okay. Alright, This is perfect. You added the lake. Everything is
perfect. Right now. Select layer, which is the lake. Deflection press
Control or Command E to combine this reflection. Right now, our edges,
It's very sharp. Select this, press Control J. This off for now. Pick up your blurred to make this letter larger and
go around the edges. If you go around the edges, you can see that you're
combining these two. I think this is perfect.
It's not sharp anymore. Press Control 0. Yes. Now it's
more realistic look to it.
18. Use Channels to Add the trees: For now, we're done with the leg and we are
done with the reflection. We don't need this lake, so I'm just going to remove it, drag it and drop it here. We need to remove this area
from this image that I have. We just needed trees
like an interest is like the eagle
is going through this area and flying through the castle and from
top of the mountain. I'm just going to click
on this to unlock it. Let's go to channel here. And we need to find, find a difference
between black and white. Seaweed channel has more
black and white to it. Blue has more black
and better white. So it's different. Right now. We need to make a
copy of blue channel, drag it and just
drop it to copy it. Press Control L. Bring down to me. They'll handle to the right. Right hand down to the left. Make the area
Chilton, you whites. We see that right now. Thank you. So let it darker. Now press OK. Click in this area, we get the white selected. I'm going to pick
up my lasso tool. I'm going to hold
down my Option. I need to remove the
selection from this area. So I'm holding option
to get the minus sign. I'm going over the
three and over the areas that I might
need for my work. Because the area that
is selected is going to be removal actually. All right, so now I
can go back on RGB, go on my layer and keep
doing the same thing. Hold down Alt. I need this area. Little bit of three
is going to win. Selection. This is the area. Maybe this area as well. This is pretty cool. Maybe this area a little bit. I don't want to be removed. Copy. Delete the copy. I have this one. Now I can press Delete
on my keyboard. So a team to remove
this white area, press Control D, press
V on your keyboard. Before. I'm just going
to fix this mess. Let's add a layer mask to it. Press B on your keyboard. Right-click to mask this out. Some sort of transfer us. Clean. Press V. Right-click, Convert to
Smart Object for now. Drag it to the other
frame and leave it here. Press Control Minus
press Control T or Command T or
Control Command Minus, hold down, Alt Shift. Drag it down. Just
going to fix the frame. Drag these up, like
this, press Okay. I'm just going to press
Command semicolon. Basically this is my area, but that is gonna be the frame. We are going to fix
it in After Effects. Then scale at least down
and mix it with the frame. Now let's save our file for now. Before we add in the
Eagle composition, call it new income. Pressing the Save button. Press. Okay.
19. Use Quick Selection and Seperating Eagle Wings: Drag and drop the eagle
the same way from the top. This one click on lock it. Let's pick up the
Quick Selection Tool and various slowly
go around the weeks following them around until it. Now press, Delete. Press Control D to de-select it. What do we are going to do? It's press Control J to duplicate it. Let's
turn this off. What do we need? We need to animate the
wing in After Effects. I'm just going to
pick up my pen tool. And as you see,
we have to follow these lines around each wing to show that it's
actually connected. You are moving the
wing up and down. Control minus. To go back. Right-click, make
selection, Edit, Cut it. Again, edit, paste,
special paste in place. Go back on this again, that original going side. Good clothes. We can exactly Select
and follow the lines. Last part was a little control minus right-click. Make selection, press OK. Edit, Cut, edit, paste,
special facing please. Ms. Going to rename
these to body. Left wing. Gonna be Genome bird. I'm just going to go to
File and save this as a PSD eagle. New. Now I'm just pressing Save. Okay, for now to fix and
to finish our composition, I'm just going to drag and drop the original birth and
just put it inside here. Press Control T, size alone. Although shift, this
book, the eagle here. Basically the eagle
is just going through the mountain delay
and reach the castle. Cameras following the
birth, the eagle.
20. Adding Extra Clouds: All right, Now at the
end we need to add some cloud in front
of the equal. The Cloud. We wouldn't be below the
tree basically here. More time. Number seven, drag
and just drop. Our composition is finished. To recap, let's see
what you have done. All this off before. Go back for now. I'm just going to fix that. Reflect. The thing is I don't need
I'm just going to drag these right-click and
come into a smart object. Right-click Rasterize
Layer because the Mac doesn't work
in After Effects, right-click Convert
to Smart Object. Right-click Rasterize Layer, descending describe
Smart Object. Click Rasterize Layer. The same right-click
Rasterize Layer, everything as a name and
right-click Rasterize Layer. Here is our three. Let's see what we have done. I'm just going to
turn all these off. We started with the Cloud. This is the moon. The clown to cancel. Brighten up the shadows. Just going to rename
it to Castle. Shadows. Added some clown, which is going to
move it around. And if they're fragmented, then mountain lake water. Legal. We need to add it probably the
Cloud number 71 more time. Here. Now again, I'm just going to press Control S or
Command S to save this. Now let's see how we can animate this amazing
composition. And after frame.
21. Importing All the Layers from photoshop to after effects: Alright, now got
an after effect. And here I'm just going to
move my project panels here. I mean, my project panels. I'm just going to
double-click here to bring my Photoshop PSD file. This is what we have created. We have, I've put so
many PSD files here. This is a new version that
we created in Photoshop. Make sure import it as composition so we can have
access to all the layers. And then press Okay, here, just going to ask you, merged layer style into footage. We just gonna say, okay, alright, so this is
what we have right now. We just imported
as a composition. If you just click on
this or double-click, we're just going to
all show up here. I'm just going to move
this up a little bit. You can see the layers that we created in Photoshop are
just coming here. Perfect.
22. Put all the layers in Z Position in after effects: For now I don't need to see
the info preview and effects. I'm just going to come here to corner and close the panel. And we're just gonna do
the same for preview, close the panel and
also present effect. I have a bigger room
here, this contract, this then if I press the
comma, I can zoom out. If I press the dot,
I can zoom in. The first thing that
I need to do here is to fix my Z position
for each layer. The meaning is, let's
put it on to view. For now. The left view, if you click, you see these bars is just
showing that we are selected. The second view, the first view is going
to be on active camera. This is what we see. Then I'm selecting
the active camera. Make sure you can
put it on full view. You can see it
with high-quality, or you can put it on cortex. It doesn't slow down
our CPU and a computer, so we can work faster. Now I'm selecting the left view. I want to see it on
top from the top. But it doesn't show
anything because we have to put all of
our layers into 3D. You see this box is
going to pull this down and make sure all
of them are on treaty. Just put your mouse
and drag down. Let me turn off everything. Then I can easily
explain how it works. This background, it's
white, we don't need it. I'm just going to select it. I'm just going to press
delete this background. It's our background. What do we need to do is
press comma to zoom back, hold down space bar
to get the hand. If I put my, if I select, if I zoom in, I have z-axis, y-axis, I'm just
going to zoom it for now to explain what I mean. If we zoom in, this
is the z-axis. So we have to change
the position of each layer because the
camera is going through. And based on a distance, we see different
pictures. Each frame. Just going to have z-axis. We have x and we have
y-axis and a z-axis. I'm just going to move it back. Press comma, find the
z-axis again, push it back. So we need to make it very small for now and
find the z-axis. Push it totally back. We're just going to put
it here. We're really going back. They're
really going far. As you see in active
camera, It's very small. Look for Z-axis. I'm just
gonna leave it here. This is our last layer,
which is the background. Right now it's very small. So make sure that the
background is selected. Press S on your keyboard
to get the scale. Put your mouse here, drag to the right. To make it larger. If it's larger than
this space, It's fine. No problem. Then we're going to the moon. Each time I'm doing something, I'm just going to change
that color for now. This is the column. I'm just
going to stick with the sky. The moon, mountain, castle and the shadows
are in the same level. Make sure it's all selected. Make them active. We can see them. Find the z-axis
and pull it back. Just gonna leave it here. Now, I'm just going to press
S again and scale it up. As you've seen the right
side, what's going to happen? I'm just going to
select active camera on the right side and
make sure it's fit. We can see exactly
what's going on. You play around with it. Or we get any of these. So a lot of information here, so it's getting so big. So make sure to select one of the later press
Control a and press U to three times until
all of these go away, you just going to close all the open files at the same time. I select outside. Let's go back. Now. The moon is again is four. Behind the castle. So I'm just going
to select the moon. I'm just going to
pull it back here. I can just select all my layers, the mountain castle, and
just bring it up later. Just going to bring it
closer to my camera. Again, I'm just going
to select the castle. Find is the accidents. Just bring it close
to the castle. This is perfect. Now we're selecting them on
press S on your keyboard. Let's drag it up. Make it a little large. Awesome. Now press U on your
keyboard to close it up. Alright, so far so
good. The next thing we have is the Cloud. But let's be organized. The moon, I'm just going to
change the color to cyan, the mountain castle and copy of the castle and the shadows should
have different color. I'm just going to add here you can see it's
changing and also here. So it's really easy. Later on, we can, when you're working on a camera, Let's active the Cloud. Select the two class. If something like this
happen when you click it, just going to jump to the Cloud. Just go back and decomposition. We're just going to go back. Just click, Find the
z-axis when it's selected. Come here and
z-axis, put it back. Press S on your
keyboard, scale it up. Awesome. And also in a y-axis, just drag it up. This cloud is going to
be moving from left to right behind our mountain, which I can show you right now. Make sure these
two are selected. Press U again, close it down. Select the mountain. This mountain, the Cloud is
exactly behind the mountain, going from left to right. Let's change this cloud to
defend color like green. Awesome. Now we have the mountain. If it jumping again and go
back ten or ten on the lake. The guy, Alright,
this forearm to get, just going to select
them the z-axis. Pull it back. I'm just gonna put it here. I'm just gonna press S on my
keyboard and scale it up. Perfect. Press U on your keyboard
to close them up. Give them a color that it's
easy to find. It's perfectly. Then if you have
another two Cloud in front of the camera, these two clouds are
going to be closed. Fantastic. Press S on your
keyboard to scale them up. First, at first we
don't see anything. Then the eagle is going through the cloud,
passing the guy. A lake after the mountain
we can see the cancel. Press U again. We have the three. The three is going to be big. So I'm just going to
select it and put a letter in front, not much. And press S on your
keyboard and scale it up. Drag this down a little bit. Like Do you like this? Make it a smaller, maybe. We go something like this. Now select it, press. You. Have the non-bird. For now.
23. Start Animating the Eagle's Wing: What I'm gonna do is I'm going
to bring the ego for now. I'm just going to
double-click here. You have the eagle knew that PSD make sure to import it as composition and click open
DS9 into footage, okay? If you double-click on ego, just going to jump to we
just need one view for this. Just fine. As you see, if you have left, right and body can turn
off the original bear. Then I'm just going to work
on the left wing for now. Let's put it on a 3D. Make sure that these active
setting the left wing, press R on your keyboard. We have all the orientation,
especially the z-axis. This is what we are working. Now let's active just
the z-axis. Dc's. When we start, I'm just going
to drag this to the right. You can see the seconds. Then I'm just going
to move forward. Largest 10th frame,
you can say ten frame. Then I'm just going
to drag this down. If I drag it down, see wing just going down the center point
because it's here. You have to fix
the center point. So it just going to, just going
to press Control Z again. Then I'm just going to
come here and select this pan behind which is anchored in selecting
the anchor point, I'm just going to
drag the end point. We just leave it here.
It's zooming with dot. Guys can see. It's just going to put this
anchor point here. Then I'm just going to
rotate from this angle. And let's go back to the right. So you guys get to see. Now if I my timeline is on ten seconds. If I drag the z rotation to the left, you can see
what's happening. Just going down from the
stack, which is great. I'm just gonna go
out and zooming. You see these
little change here. I'm just going to press
V on my keyboard, or I can just select
my selection tool, then I can move it to the right, or I can just nudge it to the right side with
my arrow keys. Let it down until
I get it right. This is perfect.
Now I want to zoom back to see what
happened exactly. To have a better view
of our composition, Let's increase the size
of our composition. Let's go to Composition, composition setting. The width. I'm just going to drag this
to the right. Press Okay? Now I have more space here. Let's play this. Right now. It's just going up
and going down. Very simple. Contract this back. We started from this point. And I'm just going to go back. If you press a key
on your keyboard, just going to jump
to the next frame. Now, I'm just going to
click here and type 20. In 20 frames. I'm just going to select these keyframe Control
C or Command C to copy control V
command we just going to jump to instrument.
Just copy these. The first frame,
20 seconds frame. It's going to be
like this. Awesome. Just going to stay open. Again. Copy this
and paste in front. This is going to happen. Stay up again, repeat,
repeat and repeat. To make it more realistic, select all the keyframes. Then go to Animation
Keyframe Assistant and put it on easy ease for now. If I play C, just going to go down and come
up, which is very simple. Now, the keyframes are selected. I'm just going to
select my graph editor. I'm just going to jump in. I'm just going to check these
frames, how it looked like. What I'm gonna do, I'm just
going to select one of these and just drag
this to the left. What I'm saying is, you select the roller
coaster at firstly, it's just going to slow. Then at the end, which is
the wind is going down, it's just going to be fast
and then slowly going up. So this area is, the connection is going
to be more natural. If I play this. Nice. Gonna stay up for a second, then repeat, I'm just
going to go back. This is fine for now. Press you close it up.
24. How to Animate the Bird Wings: We need to repeat all these
process for the right-wing. So the best thing to do is turn off the
right-wing for now. Make sure the
left-hand is selected, press Control or Command D. To duplicate it. I'm just going to rename
it to right-wing. Just remove this. Press R on your keyboard and
make sure in orientation, the middle one,
they weren't axis, I'm just going to press
182, just rotate it. Then I'm just going to
use my x-value, x-axis. They're just drag it
to the right side. And they can just
play around with my arrow keys to make it level. Now, if I play around and just see what's going to be look
like, it is perfect. This press J to go back
to a, our key-frame. Press K, go to the
next keyframe, press J, come back to
the previous keyframe. I'm just going to zoom in to
see if there's any property. Press Aviana keyboard
to get implant tool or use the arrow keys to fix this, to nudge it to the left side. This is come out to go back and come here. Let's play again. So far so good. But you can see the
problem that it's like diving is another
really attached to the body. Let's fix that problem. Select this, press
U on your keyboard. Jumped into buddy. Get press R to get
this orientation. But the easiest way, just come here and
look for the z-axis. Drag this forward lab. You'll see what I mean. If I drag this back. And for the wing, we're just going to come
here and just going to zoom in to see to make
it more realistic. Push it forward. As I'm dragging down. The body is going
forward and it's like wings is going
into the body. Maybe let him too much. I think this is perfect. I'm just moving it
forward and backwards until it wings is going
like inside the body. Now just totally perfect.
25. How to Repeat an Animation : All right, I'm just
gonna go back. Press U on my keyboard. Select these two left and right. Press U to see all
the keyframes. Select the view and fit it. All right, These
two are selected. Now, if I animate this, we just gonna see it once. If you're going to
repeat all these process for 22nd is gonna take forever. The best way to fix this problem is using a very simple code, which is I'm going to
explain to you how it works. Holding down Alt
on your keyboard and click on this
little icon here. For keyframe. If you select it, there is something
going to pop up here. Perhaps bone desert adaptation. Just delete these
parts and type. Loop. Capital O, loopOut,
open parenthesis, semicolon inside
it to semicolon, I'm just going to type pinpoint out of the semi-colon comma. How many key frames do we have? Let's go up. Here. We
have four keyframes. So trying to number
of key frames you have, close the parentheses. Let's copy this and
go to left keyframe. Again, hold down Alt or Option, click and press Control V. Loop out ping-pong
for keyframe, for four key frame. Click outside to just
see how it works. I'm just going to zoom this
back and click outside. And let's see how it works. Like the buddy press P on your keyboard to
change the position. I'm just going to
move this back. I'm just going to
say When DCS OP position cubed at position two, position should be closer. Linda says optic
position is here. I'm just going to
activate a position. When you are going
to do ten seconds. She is going to move back. Back more. Let's
see. Drag it up. I made up. This is perfect. Now I'm just going
to select this copy, these multivalent next keyframe. Copy. Just going
to stay on Copy. Then I'm just going to
click copy these loopOut. Come to the body. Hold down Alt, click on
position, press Control V. Just going to copy
these as well. I'm just going to move
back and forth like this. Very realistic. But if we
add motion blur to it, it's going to be more realistic. Select all of them.
Press Control, a, press U on your keyboard. Just close up old files. Now let's active motion, but they're activated
for the right, left off, and for the body. We don't need the right-wing
selected press Delete. We don't need to already, just
keep the original format. Make sure it's active and also you have to activate
for the whole scene. Now let's render it
and see how it works. Alright, render preview. You can see that it's
working perfect. Blur is going to eat
so much of my RAM, So we just going
to make it slow. Just going to slow
down my computer. And the whole process of rendering because he's
adding motion blur to it. You can see it's very realistic. Is it exactly like the
eagle is flying today? All right. This is right
now, This is perfect. Now we have an eagle. Let's jump back to
in our composition. Eagle. I'm just going to drag it and
drop it in front of a tree. Not above. Be loaded three. Alright, now press S on your
keyboard, drag it down. But if we do that, make sure the 3D
option is active. Now, keep a scaling down. I want to be look like this. So it's moving, it's just
moving back. Alright, perfect.
26. How to Add Camera to the Scene in after effects: Now is the time to
bring a camera. I'm just going to
sell you the three. Go to Layer New and add
a camera to our scene just to make sure
the prejudice on 35-millimeter it two-node
camera by default is inactive. Make sure to enable depths
of least check off for now, which is just going to slow down our process. Then press Okay. All right, open up the camera and will
promptly transform. Just make sure these two
keyframes are active, a point of interest
and position. You're just going to
zoom in. So you guys can see exactly what I mean. They put up interest is the area that the
camera is looking at. Our point of interest
right now is this and the position
of the camera. It's just going moving
forward or moving backwards. For now, the camera is
STD, he's not moving. So this is the start point. We always fix the start
and finish point. Let's go back and find out
what is the finishing point. If I select the camera. If I zoom in, here, I can see three-axis, X-axis, Z-axis, and the y-axis. So we were working on z-axis. See you when I'm moving,
this is what's happening. The point of interest and the z-axis on
position is changing. So I'm moving up. This is what we
want. Do you want a camera follow the birds
are foreign to equal. What do we do? I'm just going to close it up. Select the eagle and
you see these parts. I'm just going to parent
this to my camera. So anyway, the camera
goes and goes. This point. Let's select the eagle, press S again, make it smaller. I'm just going to
drag this down. Dc's what we see in our scene. Also drag this to the left. So it's exactly in the middle. So this is gonna be the eagle. And I'm now I'm again, I'm just going to
select a camera. Move it forward. So first, let's go back for now. Let's press U again to see
the keyframes. Move it back. And let's move forward. I'm just going to zoom back
to see where I'm going. Make sure the camera select it. Press comma. Come here, look for the z-axis. Moving forward. Don't worry about anything. Just moved forward for now. This is the camera stops. This is our finite C. This is where I
wanted to cameras stops. But I wanted to head of
the bird is it goes let it down because I want to
see the door of the castle. What I'm gonna do is if you
put a C on your keyboard, you have access to
the camera movement. Each time we have different
access to different options. You also have access from here. We can come here and just
undefined camera tool. Or if you press the left side of your mouse to right-click
mouse and the median mouse. You have also access
to these two. But for me it's easier if you
press C on your keyboard. We get these parts. This
part is saying that, all right, I'm just
going to move it up. Let it to the center. All right. This is my bird and this
is the castle that I see. This is the area that I
want for the last frame. So this is the first frame. You see there's a lot of
problem in the middle. Like the ICO is going inside, just coming out of the wall. So it's not realistic.
You have to fix it. But you know, you start from
year, you finish from here. That's the most
important thing for now. I'm just going to go forward. Let's see what are
the properties. The problem is the background. I'm just going to select
my selection tool. I'm just going to go down
and select my background, press S and scale it up. One thing which is fixed, going to move forward and see if anything needs to be a scale.
27. Animating the Clouds in after effects: Alright, let's go back
to the first frame. And the first thing
that we need to do is animate the Cloud. Let's turn off the
camera for now. Let's turn off the camera. This is the first cloud here. Select the first Cloud. For now I'm just going
to use one view. Press P on your keyboard. Make sure the
position is active. These cloud. From here. Just going to move
to the left side. The bird is going
following the camera, but we cannot see it. Here. It's passing. Everything. I want. The position of
this come to left. Stop here. Also. I wanted to opacity of this cloud get
to 0 when I'm passing, because it's just
gonna be really cloud is gonna be
white for a second. I'm just going to keep selecting these hold down Shift and press T. Opacity is active,
here is 100%. When you come to this
position. Opacity. Maybe ten or less Fridays, perfect. One cloud done. You close it up. Go back to another cloud. Press P for position. Make sure you could do trim
line 0, active deposition. Let's see this one as well, Chris, you so we can see
depletion office as well. We are number eight. We move forward. Let's first 60 position. When you were here,
when you are here, the first position, I
want you to be here. When you move to ten seconds. The cloud come to the left side. Also, when you are
in six seconds, this hold down Shift. Press T, acting the
opacity a 100%. When you are on 10 second
window opacity to be just ten. Like fading away. We are done with these
two Cloud acidic. The two press you,
close them up. Another to Cloud, which
right at the back. This one is this cloud. Press P for position activated
when you are coming here. But at end of this disk cloud is just moving totally to the left. I want to keep the
opacity on that one. It's fine. Press P to position. The position at first is here. We can see it. But end of the frames that position
is just move to the right. Fine. Make sure to our selected press. You don't attribute the Cloud. Now I want to
activate the camera. The Cloud are done. If I move these things
so you'll see the cloud are nice for a second. Here. For a second, the
camera is going to white area that the
opacity should go to 0. So I'm just going to
move back to the Cloud, which is this, to select this. Press U to see the area. Here is a 100%. Also here is a 100%. Let's move these two frame, which is opacity to forward. When I'm passing this. Just gradually
getting white here. Because for a second, if I move this back, but I moved here is like just jumping to the
white or just not gradually. I'm just going to
move these back. Maybe opacity, I'm just
going to put it on 0. Also depose opacity.
When I'm here. Let's press and press N. So you can see just this
area on what's happening. All right, this is perfect. It's very gradually,
I'm passing the class. I'm going to my space.
28. Camera Movement or Animating Camera in after effects: Alright, now to
Cloud are perfect. Let's animate the camera. Moving forward or moving
for moving forward, Let's zoom back a little. So make sure disease
33 is better. Going forward. I can see the guy, I
can see a guy here. Now. I'm gonna go up, move
the camera to the AAP. We're just gonna put a C
on my keyboard to get to handle in this position
slowly and gradually, the ego is just flying up. That for now. I need to see if I
passed the cloud. I need to review. I need to check press V.
This is I think Let's see, each one is IT guy lake mountain
at Cloud or this color? This color, the yellow one. It means view of passing. We are passing exactly
over the cloud. So I'm just going to move
a little forward more. Alright, now I'm completely passed the Cloud.
This is perfect. For now I want to do one thing. I want to keep the
camera steel in this frame and the bird
is just flowing over, going through the council
and closing to the moon. This is the idea. What I'm gonna do is I'm just
going to jump to my eagle. And for now, I'm just
going to keep this scale. This also I'm just going to Shift P to add a
position to this. I'm just going to drag
this linear here. So I'm just going to
keep this position. I'm just going to move
into that forward. I'm just going to moving
forward in this area. I'm just going to change
the position of the bird. Is going towards cancel. As you see here. The
camera is getting close to this is the castle. And also I'm just going
to scale it down a bit. I'm just going to move
it forward again. For also scale it down at
the same time. Too much. Just going to keep doing that
until it's getting smaller. Scale downloaded. This is good. In this area. I'm just going to move
a little forward again. What is going to happen now? This is cool. I'm also going to select the ego hold down shift and Paris are to
get their orientation. Right now. I want my orientation change the
direction of the bird. Going to rotate the
bird 90 degree. We can move it here and
you can move it in. I'm just gonna, gonna look like it's gonna look
like it's moving. Zoom in. For now, I'm just going to put it
into one view so we can see zooming one-on-one is this
area right now at this moment, the SBIRT is going
like the castle. I'm just going to
scale it down a bit. Maybe too. Alright, cool. Just going to go
through the castle. And I'm just going to
increase the z-axis. Z is passing the castle
and going through. Now let's see the two of you. If the camera is passing
the castle, almost done. We move forward. Just going to move the position. In this time. We're just going to put
that the orientation at 0. I'm just going to move back. We are passing cloud
and enriching. The bird is going here. Just going to zoom in on this. Do you see is the castle? The camera is not
passing the castle yet. I'm just going to
select the camera, just going to press Z on my
keyboard and move forward. Also, the point of
interest on the camera, it's just going to change. Point of interest is
just going to be Castle. Going to drag these to
the right. The point is just gonna be under cancel, cancel this good is
gonna be in focus. We're going to go back and
fix the point of interest. But because we are at the end, I would explain again
what he's pointing out. Interest. Interest
is the area that will be needed to be in focus right now to cast
that should be in focus. And the ego is going to
come down lift of it. All right, now
we've got perfect. Just going to select the ego
here and just drag it up. But at end equal
to just gonna go through the castle
and just move up. Go back and see how
this is going to be. I'm just going to press B
on my keyboard to area.
29. Rotating the Bird: I think it's fine. But we need a little
rotation here. I'm just going to go back
on eagle, an orientation. Zoom back here. Just going to press K to
jump to the keyframes here. Here. If I go back here, I'm just going to active the
orientation forward here. I'm just going to put
this in 1990 degree. Then at the end, again, I'm just going to
put it back on 0. I'm just going to see again
CDS, what's happening. Here? It's going faraway Here
it is gonna be 98 rotation. And yes, one more time. You have to play
around with this until you get the point. Fantastic. We are not seen in
high-resolution us ending quarter resolution because you have to wait for
a long time for rendering. So let me go back again and
let's see what we have done. Here. We animated the Cloud
from left to right. So the bird is just
going after the Cloud. All right, here we
have some problems. We always check
and we just gonna see varies the problems. I'm just going to go
back and check this out. The castle shadow is off. Yes, is the three let
me see. Various D3. If I zoom in my camera
and this is my tree. The tree here, the camera
is passing the tree, probably above the tree. Why? I moved up with Y
and move up to three. So now it's going to be fine. Again, this is the
tree at the top of the tree we have LET of space. Let's move forward. All right. Let's move forward. Move forward. Passing the Clough
and we see the guy. Somebody's going to go straight. But here a 1D. Let us dive. Here basically
after it, before the Cloud. Need to see a little dive. Select the bird is
going down here. Just going to select my camera. I'm just going to press C
to get this point here. I'm just going to
go down, let a bit. Yes. Add the clouds. I'm
just going to go down. Second. Then again, it
just going to come up. Let's see how it was
gonna be look like. See going down. It's going to come up. Go up. Now we see the
castle gonna go up. Nice. Let's keep going. The cloud is going to
live for right now. Equal to separate
it from the camera. Just rotate. That's it. See one more time.
Bleeding. All of these. It's just gonna be really
natural because for now we turn off the motion blur. Motion blur. I was just
going to eat our RAM and rendering time
it takes forever. But right now, everything is a smooth,
everything's perfect. At the end. Let me explain a what
we did with the eagle. So we added the position scale and orientation
is the last part. First we just going to
fix the orientation. Orientation is just
going to remain at the same position and then I'm just going
to move forward. In this area. The Z position just
going to be changed, It's going to move forward. And also what can just
gonna be a scaled down to B decides because the
equilibrium be so big, the casual is already a big ego. Just reaching the castle, it should be a
smaller and smaller. Then here, adding
orientation 90 degrees, press K, the jump
to this keyframe. So 90 degree rotation than
just gonna move forward again, it just gonna go back to 0. Take a look at it at one view. I'm just going to put
it into one view. A special sign makes sure is VT. Press Spacebar. Start. Remember, we're not
added motion blur, we are an additive snow. And it's gonna be so much
where to stick and at the end be on it added
the color match yet.
30. How to Work on Custome View in after effects: Alright, let's go back. Take a look at this
from the angle. What's really happening
above the camera? I'm just going to put
it on one of you. And active camera, I'm just going to put
it in a custom view. From the angle. You can see an exactly what is happening to the
camera, to the scene. I'm just going to go back. Each scene has different it's
not in the frame for now. If I move this c,
Let's go forward. If I move this, the bird is going inside. The camera is following it. Passing the bird, then
just go into the Cloud. We cannot see the different
thing but we can, we can follow the camera
which is going through. This is the view on. I'm just
going to go to Custom View and put it back
on active camera. So this is what we see exactly. You're just going to
bring back timeline. Let's put it under two views. For this one, Let's select it. You see these blue triangles. I'm just going to put
it on the custom view. I'm just going to
zoom in a bit so I can see what is happening. The camera is going inside. If I select this one and
press on feet, Let's go back. The camera is going inside. The camera is going move forward and passing
these frames. I can see the camera is
moving until the end. These two, these three green are the clouds see that going
to the left and right. Bird is here. Going to the castle and going
to the moon. Go back again. If you're missing any point. Somehow. Know. So far so good.
31. Creating Snow with Particles: Now select the camera,
press Control, a go to layer and put
it on precomposition. It's like the group, all the
files in one composition, then we can add on top of it. So move all attributes
into the new composition. Yes, it's pretty cool. Now all defines our
inside this composition. If I double-click, I
can see all the files. I'm just going to go
back and composition. I didn't get a snow. We just going to
add a new solid, then we can work on top of that. I'm just going to
go to Layer new and solid now and press Okay. Now I'm just going
to close this down. I'm just going to go to the
Window Effects and Presets. Here. I'm just going
to type particular, which is part of
trap code software. All right, I'm just going to
save the particular and just drag and drop it
inside this now, solid, as you can see, something is coming up. We can see that if
I move forward, you can see is
it's still moving. This is gonna be our snow, but we are going to work on next to be really,
really realistic. I'm just going to move forward. I'm just going to drag
this to the left side. We always have the Islam. You just construct
this the right side. When I start, we
already have this now. All right. Here we have emitted
particle physics, visibility and rendering. The mostly working on emitter
particle and physics. All right, for now,
that jump to emitter. Remember, if I open
up the emitter, I'm just going to close it down. Then I'm just going to
Jumping to particles. You can see exactly
what I'm doing because you open
one of these up, it's very hard to
find what you're looking at. Close this up. I'm just going to
jump to a meter. A meter. The first thing
that you need to do is put the point into box. I'm just going to
zoom back a little bit to show you what's
going to happen. To see what's the difference. Let's put it back on point. Now we can see the
immuno size x, y, and z-axis are grayed out so it needs to be
cannot change them. But if I put it back on box, you can see that
they are active now. So I'm just going
to put my mouse, put my cursor on the
x and just drag it to the right and see what's
happening to zoom in. It's what's happening
to my particulars. Alright, I'm just
going to spread it out to the whole scene. I'm just going to do the
same for the y-axis. As you see, you're
getting less and less. Let's increase the size of the
amount of our particulars. This is 200. I'm just going to make
it around one sounds. Now. The other thing that we
must do is the depths. You have to give some depth to. Our snow is right now and all
coming from one direction. So if I play, as you can see, there is
not realistic at all. There's just some
small little dots that just moving around
going up and down. But if I increase the z-axis sun that it looks at coming
towards the camera, and there'll be getting closer
to our camera if I play. Right now this is
more realistic. Steal the absolute must know that they're going
on. What's going on. The problem is the gravity
just going to jump back here. The 0, I'm just going to
close down to the emitter. Let's first fixed the gravity. I'm just going to
jump to physics. Physics, gravity is on 0. This drag it to the right
and see what happened. We can just take a look at now, I'm just going to put it on 100. We can type 100 address into
right now from the top, it just coming down, but
the ego is going fast. It should be a little
windy on the air. This contract is
back. In physics. We have something called air. And the air, we have wind. I'm just going to make the
wind political to the left. You can see the particulars
are moving to left. Also is the axis. If I drag this to the left side, wind coming faster and faster towards the
camera. Let's play this. Alright, maybe a little more. I'm just going to
close the physics. Now. I'm just going
to jump to particle. Right now. The particle type
isn't a sphere. We can change these to glow a sphere when
he's on the air. It's gonna be a little blurry, isn't going to be really sharp. Look. This is makes our
scene let it dreamy look. The other thing we need
to fix is the life of each seats for each
particular runaways. And three, put it on ten. I don't fade in very quickly, so they stay on until
the past the camera. You also can change just
size of the particles. I can make it three. I can make it larger. So this is up to you. I'm just gonna stick
with 44 is realistic. Now we're getting close
steel Vietnam data. Good. The jump back to a meter. Now the other thing
that we must change in emitter is the velocity. The velocity meaning that
how fast a particular can move right now by
default is on 100. What's going to happen if I
put it on 0? Press Enter. Not much difference. Now, what's going to happen
if I put the velocity 600? All right, but adding velocity, you can see where the
particles are coming from. So by default, emitter meetings that each particle is coming
from which direction? This is random. So I can say it, that it's coming
from everywhere. I'm just going to
bring back my velocity to maybe 100 for now. Right now we have this now. Let's fix that up.
Just gonna go back. This is the jungle. I don't want any snow right now. I'm just going to
add a key frame for the emitter at a
keyframe for velocity. Close this down. Particles at a
keyframe for life, at a keyframe for size, and a keyframe for opacity. Closes down. Go to physics. Add a keyframe, add a keyframe. So anything that we
have changed so far, we added a keyframe. For now. I'm just going to press U
to see what we have done. Alright, just going to
drag this up a little bit. Then I'm just going
to copy all of this. Going to move it forward. Maybe in ten seconds. Now. 0, I'm just going to go back. When I'm here. I don't want to
see much of this. Can be just gonna
jump back to emitter, bring down the particulars. Maybe put it on. A few. Snow is coming. Let's see. Then it's just
going to get crazy. Much better. Bundesbank.
32. What is Velocity in after effects: Now let's work on the
velocity for a start. I want to put the velocity on one tau 0 and see what happened. 11000 sinter. Also change the random to 0. Random anymore. Let's
see what happened. I think it's okay, but it's still I feel
instantly realistic. The best way to fixing that is active motion blur
and active this. See, we have these
two are active. We're just going to close
this down. If I previewed. See the upcoming cool
thing about motion. But when you add motion
to most of this, no, I kind of disappearing. This is what I'm gonna
do. I'm gonna go back, press U on my keyboard. I'm just going to
drag all of these. I'm just gonna drag this
up a little bit so I can select all of these
tracked in here. Press J on my
keyboard to jump in. When you are here. I'm just going to
drag this down. What we want is even
more particles for sure. And you also need more depths. Maybe I put it on 7 thousand. I'm just going to
close this down. I'm just gonna go to particle. We can put these on
Cloud LET to get more a small letter
things as well because It's not you
shouldn't be solid. I'm just going to jump back
and I'm just going to preview this study looks like this node, a clown that I'm just
going to put it back on. Glow sphere. Previous again. This is cool and it's up to you. What are you looking
for exactly? If attendees off? I believe it's more cartoonish like
animation that you see, but if I turn it on, it's more cinematic,
is more realistic. So this is exactly up to you. I'm just going to turn
it off for our purposes. Be more cartoonish
or like animation. I'm just going to close this
down jumped emitter and bring down the particles, the amount of particulars
that we have. I'm just going to
play this. I can force until I get this. I don't want too
much particular, so still we can see our scene. Maybe I need more weaned. J. Just make sure you're
exactly under keyframes. I'm just going to close
down to emitter particle. You can include the sides, but I'm just going to stick with the sign as well right now. Opacity random, maybe
you can change this up. Randomly. Opacity is changing. I'm trying to just tweet some, some of the specification
to get better results. And also the gravity
can be little more. Also do wind can be
much higher than this, which is coming towards
the camera is play again. Starts very litter of particles. Then it's definitely,
it's getting more and more going up. Awesome. Now, let's duplicate this now by pressing Control or
Command D on your keyboard. Let's turn on the motion blur. Let's see what happened.
This is the motion blur. I'm just going to
check this off. For now. I'm just going to move forward. So we have a small
little pieces around. Then I'm just going
to attendees on. So it's a combination of both
of these kind of Islam with motion and we'd normal to
get the better result. Now I'm just going to press the space bar to just review it. Now let's take a look,
see how it goes. Now it is snow are
really realistic. I like the feeling the
cloud is going away. And I can see the castle
flying far from the camera. Good and true. And when I get back,
alright, This is perfect.
34. Render final Project in After Effects: Alright, Now's the time
to render this out. For rendering,
there's an easy way. Just gonna go to composition
and add to render queue. Or you can add it to
Adobe Media Encoder. I'm just going to go
Add to Render Queue. Now we're jumping. You
can see the render queue. Now the output module, I'm just going to
press a lossless. And here the format by
default is on QuickTime. I'm just going to change
the format option. Video cord is an animation, but because v1 d is
just four Video, China's like YouTube or Vimeo. I'm just gonna change
the animation to H.264. And I'm pressing. Okay. That's it, makes sure the other
defaults are the same. Nothing has changed. And I'm just going
to put us okay. Also let's choose the place that you want to
save you a file. I'm just going to
type final render. You can see the bottom just going to come
up with that a bit. This is the formularies and QuickTime MOV and I'm
just going to press Save. Then, now it's ready. I'm just going to click
on this button at a corner and to render it. Rendered animation like this, it takes time probably based
on your computer speed. The other stuff, it takes maybe two or three hours
or maybe less, maybe more. So for me, I'm just
going to have to wait five or six seconds. It's just going to tell me how long is it gonna take
the estimated time? Not too long. As you'll see, it's going to be
showing it here. Blue line. The estimated time is two
hours and 46 minutes. I'm just going to pause the
video and just I'm just going to come back when
during the finish, Mr. Gonna shoot the end result. Now that rendering is finished, and you can see that it's
done, status is done. It took one hour, seven minutes. Actually. We have to jump
to output our folder, which is here, final render. Here we go. If I click on this, we can see, make sure it's fit. Let's play it again. All right, So cool. Now we're done with
After Effects. You have to jump to
Adam premiere on Adobe Audition to fix the sound or the
music for our scene, or far our composition to
make it more inspiring. All right, let's get to it.
35. How to Add Soundtrack to your Video: Now we are done rendering
in After Effects. It's time to put a soundtrack
on our motion graphic. I'm going to use two
softwares for that. For rendering the final project. And just combining
the two sounds, I'm going to use
Adobe Premier Pro. But for extracting defined
at 20-second file, I'm going to use Adobe Audition, which if you don't have it, you can download it at least for 30 days, which is for free. Now I'm in Adobe Premiere Pro. Let's go back to your
folder file in AF. So these have to find the render that'd be just
rendering out of after effects. Drag and drop it here. Project file. Again, drag
and drop. I do the top. From here. I can drag it and drop
it to the timeline. Alright, now is the time to
bring our sang out of audio. Let's go to our folder file. In a clip area I have to clip. But the video, we need to extract the audio
from these video. Let's open up your
Adobe Audition. First, let's work
on the mixed music. I'm just going to
select it and drag it to Adobe Audition. It doesn't matter which
version you're using. Is it cc is a new origin, old legend, all do
the same thing. Now it's done. Just
double-click on this audio. You can't see these opening up. You can go through find the 22nd music that you're
really interested gonna play. Here. Maybe. I decided to just pick up the
first 20 seconds. This is up to you. I'm
just going to show you how to copy from here. The first 22nd. I can type here 20. Just going to jump
to 20 seconds. And I'm just gonna select and
drag it to the left side. I need these 20-second. I'm just going to
right-click and save selection as MP3 file. Browse to the location. I'm just going to
save the mixed music and press Save,
which is MP3 five. Replace it. Okay.
Yes, override it. Yes. Now let's go back
to your folder file. And this time, bring
the ego's sound effect. The audience extracted.
Double-click on it. Just going to show up here.
We have so many egos sound. We're just gonna try. 20 is I just need the 22nd IV,
which is gonna be here. Click and drag to the left side. Right-click Save Selection
as browser. Sound effect. And Save replace. Okay? And yes. Now we are done with the U. I'm just going to go
back to my Premier Pro, go back to my folder file
and look for the MPG folder. This is the place
that I saved my file. I'm just going to select these
to drag and drop it here. Select the music mix and
drag it and drop it here. My A1 to audio one, play. Everything is okay.
But the problem is at the end of the project, there is no fade out for
the audio. To fix that. Let's come here to the A1
with the immediate mouth. I'm just gonna make it larger. Select my file. I'm just going to come here. The minute that the voltage
is going to go far away. I'm just going to
add a keyframe. We're just going
to move four more to the point 20-second. Just going to add
another keyframe. I'm just going to
move these opposite of it, median mouse. I'm just going to
select this keyframe and drag this down. And let's see what's
going to happen. Audio is fading out. All right, this is
cool. That was easy. Now let's put the
timeline and at 0. Select the ego's sound effect
and drag and drop it here. But your mouse here
and a2 open it up. His play. As you see if you have too many sounds.
Only need this one. Eagle in this point that is just going to go
towards the castle. Condition. I put
a sound for that. I'm just going to zoom in here. Put this here, and
add a keyframe. Bring it again, illiterate the left side, add
another keyframe. Then select this keyframe
and drag it down. You just going to kill all
the audio in the left side. You have one sound.
Open this up. Move to this point, because we only need these
sounds at a keyframe. This way at another keyframe, select this keyframe
and drag it down. Just gonna kill all the
audio from the right side. Open it up, make it
larger. See what happened. No sound, no sound. You're
going to get something. It's very cool, but if
you see the right side, the audio is going
to the red sign. So it means it's very loud. Bring it down. I'm just going to
select this point. Hold down, Shift,
select another one, and drag it down,
and drag it down. If you double-click,
this is gonna show up. Let's see. All right,
this is perfect. We're just going to click here. And let's see it
in and a BA scale. Now you have successfully added the audio and sound Frank, for our final motion graphic. Now's the time to
render the sounds. Let's go to File,
export and media. Make sure the
format is on H.264, which is a very popular format. Youtube, Vimeo on. All the browser or desktop publishing software
are using this format. The output name, click here. Choose where you
want to save it. Put a name on it. Yes, I'm just gonna save it
as this final gonna be mp4. And let's save it. And you are done with
this. Press Export. Gonna take 22nd maybe. Okay, now let's go
to our folder file. Go to motion graphic. This is our final I'm just going to Mr.
review what the FDA.
 Soli Art, Content Creator | Digital Artist