Transcripts
1. Introduction: Animating is fun, but
knowing what to do before you animate is
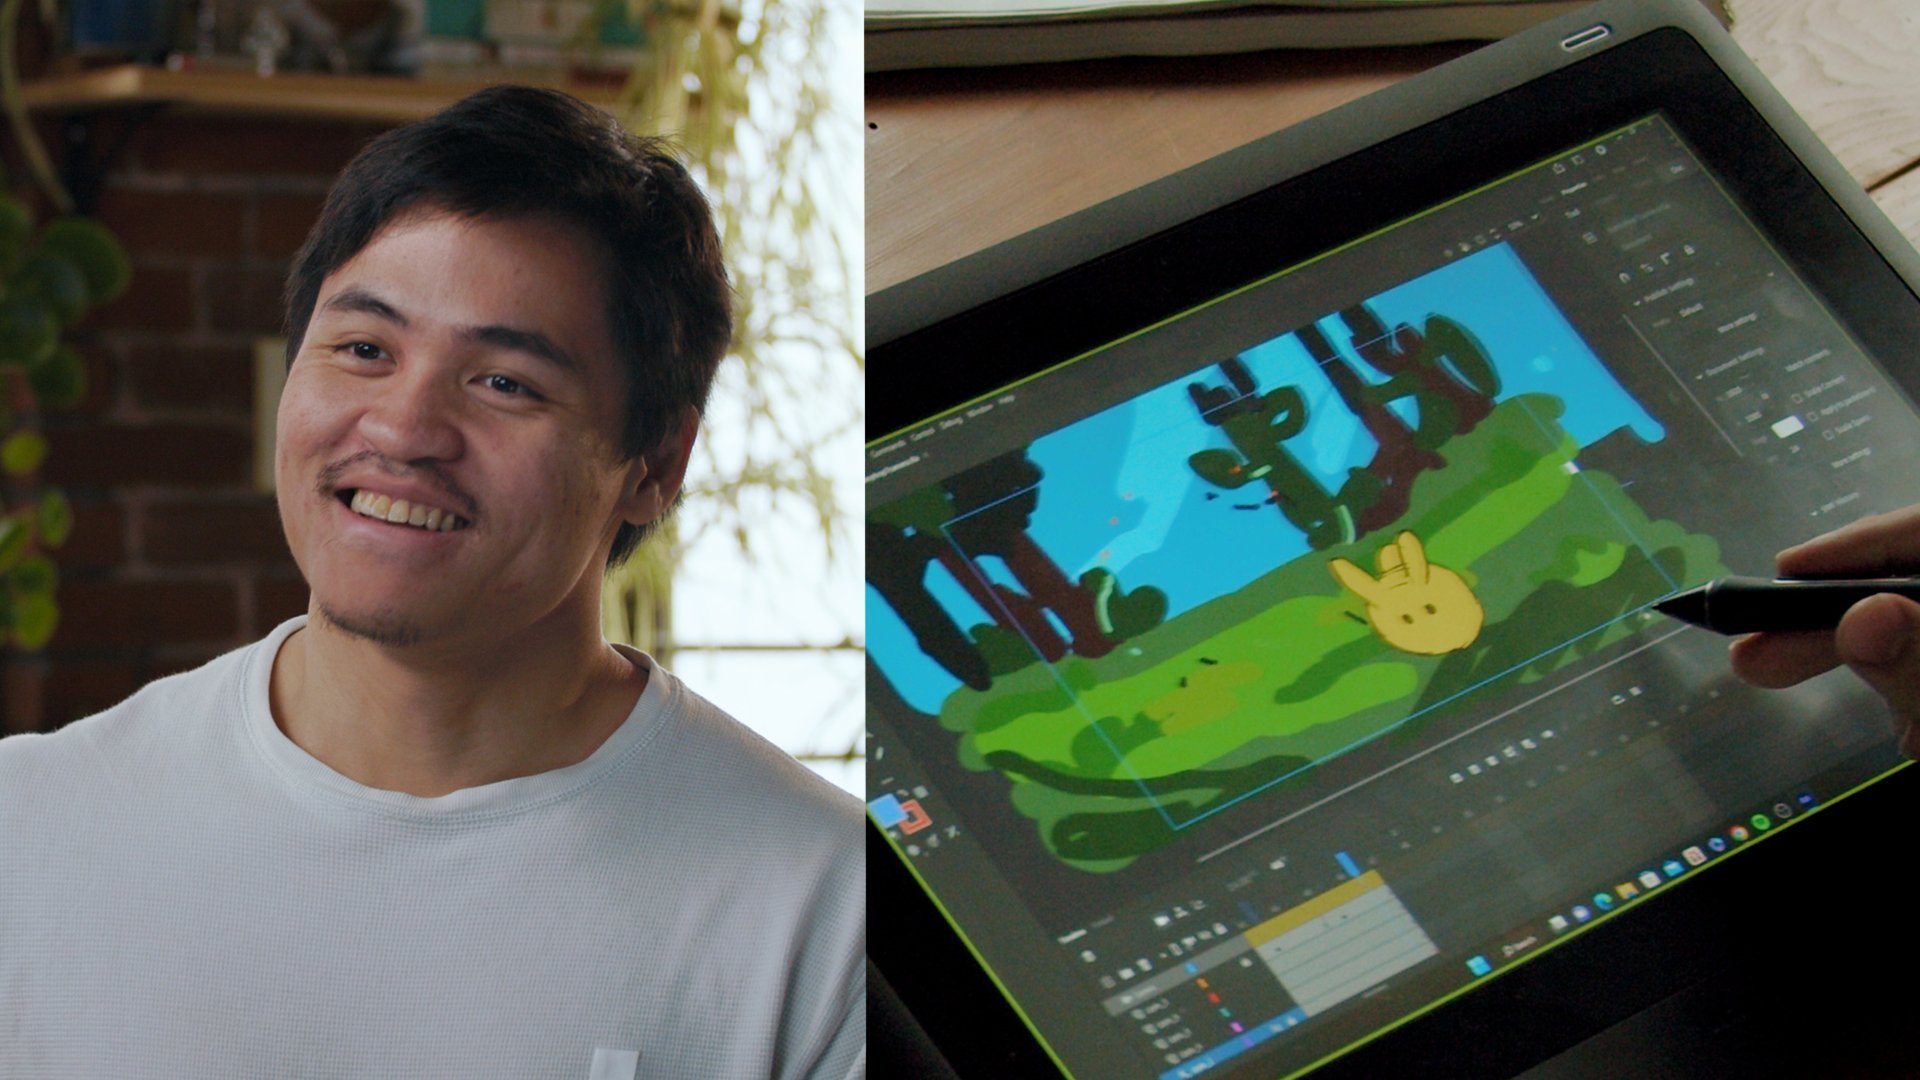
even more important. My name is Toniko Pantoja, and I am an artist within
the animation industry. I worked as a story artist, but I've also done work as an animator and a
character designer. In this class, we're
going to plan out what kind of story or
skit you want to do. We're going to explore
different ideas and we're going to brainstorm. Then after that,
we're going to select one or two ideas and start flushing them out very clearly. We're going to start
putting it into visual imagery shot by
shot with storyboards. At the end, we're going to put our storyboards
into an animatic, which is a timed version
of our storyboards, edited with sound and timing, and probably some voice acting. [NOISE] By the end
of this class, we'll be able to tell a coherent
story with just images. Story is universal. It's found in many different
mediums such as books, comics, even film, and I hope we'll be able to
tell great stories together.
2. Getting Started: Welcome to my class,
in this class, we're going to talk about
coming up with a story idea, and trying to turn that into visual imagery through
storyboard panels. Story boarding is something
that I do for work primarily, I've worked in both feature,
and Television Animation. My job as a story artist
in the industry is that we translate the script
into visual imagery. We can pass that along to other departments
such as design, animation, color, and
even background design. With storyboards, we already
have a foundation for that. Maybe you're not someone
in the industry, but I still think it's quite an essential
skill because again, story is a very
universal language. We can make people cry, we can make people laugh, and if that's something you
want to do with animation, I think being able to tell clear stories just by
its rough foundation, just by its rough base
is quite important. For this class, I'm
going to be using a computer or even
just paper and pencil. The computer is really just for me typing things like outlines, scripts, and all that. But I like to do
things on paper a lot, especially even when I'm just
flashing out ideas or just even writing bits and pieces
of ideas that I have. But then when I storyboard, I'm going to be
using Adobe Animate, but you can even
use other programs like Photoshop just
to draw those panels. Then I'm going to edit that into an animatic
or an edit real. Adobe Animate is an
animation program, it has a timeline, and that's why I can still time my storyboards
into the timeline, so I'm just going
to be using that. I'm also going to be using some sound recorder file just
to record my own voices, if I need the
characters talking. I'm even going to be doing a bit of voice acting for some of these characters
just so the timing is clear and
attitudes are clear. We're going to brainstorm
different ideas, come up with, let's say, 10 of those walk away
for a bit and come back, select a logline that feels really clear to us
or feels right. A logline is just
a simple sentence that summarizes the story, the characters, and the hook, or maybe the conflict
of what will happen. It could start with
something like character a, and character b, discover something wrong
with character c. It's just there to hook the audience in to anticipate what will happen. Then we're actually going to
write that story bit by bit. I'm going to write
it as a paragraph, you can write it
as bullet points, or you can even write
it as a movie script, you following the script format. Then we're going to
thumbnail that idea or that outline on paper
as rough storyboards. Just very rough drawings, very crude drawings just to get an idea of what
that might look visually, I'm also going to
talk about how I plan the staging for that. Then finally, I'm going
to go into digital, I'm going to draw my storyboards digitally using Adobe Animate. Then after that's done, I'm going to put it in an
animatic or an edit real. I'm probably going to
do some voice acting, record my own voices, and put it with the edit. By the end of this class, not only will you be
able to come up with different log lines and ideas for stories and short stories, but you're also going
to be able to have a finished animatic or edit real. For the next lesson grab
something to write with, I'm going to be sticking with a traditional paper and pencil, and we're going to
write log lines. Come up with different ideas
for a little short skit, a little fun idea.
3. Developing a Concept: The way I would describe
the log line is that it summarizes the characters
that we're going to follow, maybe the setting
and the problem. Character A gives a package
to character B and that character has to
deliver that package to character C but
there are obstacles. Like maybe, six people
are trapped in a house, and one of them is a murderer. That's already a nice hook. There's going to be a problem, a conflict and it's
really going to establish a lot of
different routes of how the story could play out. So this is really just an idea, you don't really need to
have it fully fleshed out. You don't really need to
figure out the beginning, the middle, and it's
more of a setup. That stuff will come down later. Right now it was just coming up with something that might sound interesting or might
sound fun to do. In this lesson, we're
going to come up with about 10 different log
lines, 10 different ideas. A cashier guy is getting
robbed at gunpoint. That's a setup. Let's
come up with a hook. But the cashier
guy knows Kung Fu. And if you want to
be more specific, you can, so I'm going to write, and can stop bullets
with his teeth. It's really all
up to you and how you can play out that story. Let's think of another one. Film crew keeps getting distracted by noise and a garbage truck. Director turns into the Hulk because of sound or
because of interruption. So how will that story play out? That's something that
we can figure out much later down the line. Let's think of another one. Tough guy asks random people to slap him really hard
because he's so confident. Little did he know, there's the smallest guy
who has atom bomb hands. So again, these are all
really random log lines. They're just ideas
that I'm whipping out from the top of my head, but I invite you to just
come up with 10 for now. The beautiful thing
about animation is that there's really no
limit to what you can do. You can tell a
story that's out of reality with different
types of characters, with different scenarios, or even out-of-this-world
experiences. You see, I write a lot of
log lines on my spare time. I have one where
it's like a boy and his sister go to find mermaids
to try and hunt them down. But the little
sister is infected, so she's going to
be a mermaid soon. So all of these ideas
that I have for maybe a film or a series idea. It's all down there too. See, I just have a random
one called Tom Cruise Run. I always wanted to
do something based on Tom Cruise sprinting at
people for some reason. Some of them, they is so weird, I don't want to read them out. But you know what, just
get super weird with it. Because sometimes weird is good. You don't have to have
the most perfect idea, so I encourage you
to come up with 10 or even more log lines. Just keep writing, keep
flushing out ideas, and step away from
it for a while, maybe at least an hour
because sometimes you just need a break
from everything. Just write it down and
we'll come back to it. I'm going to take a break from the log lines that
I've written down, and I'm going to choose the idea that is clearest to me and that I can visualize and I feel like I'm going to have
a lot of fun with it. Join me in the next lesson and we'll choose one
log line and we're going to flash out that log line with a more
established outline. We're going to write
it bit by bit, sentence to sentence, or even bullet points
to bullet points. Come join me, in
the next lesson.
4. Outlining and Scripting Your Idea: I've taken my break, I've taken a good two-hour break after writing these loglines
out, I'm all refreshed. So now I can go back and
start looking at my loglines again and I'll select what feels and what
resonates me the most. When I look at my loglines, the thing that feels the
most clear to me right now is the tough guy that asks random people to slap him really hard because he's so
tough, he's so confident. But little does he know, the smallest guy in the room
has Adam bombs for hands. I chose this logline
because for me, I can visually picture it. I can imagine and see
what the gags are. I can see the setup for it. It's the clearest to me and
it's also the most simplest. You can choose to write this on your computer or on paper. I'm going to write
it as bullet points. I can think of each bullet point
representing each storyboard. So it's easy for me to look
at my bullet points and say, this bullet point is going to be storyboard number eight or
storyboard number nine. So it's easier for me to track. I can even describe what
the shot looks like. So I'm going to establish
a random character, or this is not our
main character, the guy getting slapped. This is just a random
character on the screen. Random guy minds
his own business. Main guy shows up, taunts random guy to slap him. I can already picture a
voice for this main guy. Hey bro, slap me hard. I'm probably going to
record myself doing that on the computer
for the animatics. Bullet point number three,
I'm going to actually number these so it's easier to track. Bullet point number three,
maybe that shot number three. We want to show a bit of
clarity with that performance. Random guy shrugs and
then throws a slap. Bullet point number four, main guy gets slapped. But says, nice try. That was nothing. Bullet point number five. Maybe another random
character shows up. Let's call them random
guy two shows up. Main guy taunts him. I like to write a bit of
dialogue just to sort an idea. Hey, you, yeah you. You try slapping me. Bullet point number six, random guy two slaps main guy. Main guy goes or says, bro, that was so much
weaker than the other guy. So basically he's making
fun of that other guy, the random guy that just
slapped him, cries. He's ashamed of his
pity slap random guy two cries in shame
in the next board. Then panel 8. I think it's good that I
have established it twice where this guy is
getting slapped and no one can slap him
to the point of him getting knocked out or dead. I think it's important to
establish that twice where it's like first guy slaps
him, nothing happened. Second guy shows up, slaps him. Nothing really happened. I'm establishing this guy has a pretty dense cheekbone or jaw. Main guy screams to the heavens. Is there anyone worthy of giving the most epic slap with his arms reaching
to the skies, just for performance and funny, a really small dude
shows up, he disappears. Then in the same beat, our main guy walks towards him. Maybe in the next beat, he says, hey, you get to slap me. I'm improvising the dialogue, just letting you guys know,
I'm just improvising. I don't have anything planned. Will you end my torment,
again, very nonsensical. The small guy, I'm
thinking here, should he just turn his
hand and tin atom bomb or should it start with a small hand and then it just
burst into really buff arm. I think the arm
turning into really, really buff arm from a small
guy is a funnier visual. I think when I think
about it that way, it'll read funnier than just
a random atom bomb for hand. I'm changing down the spot. The small guy waves this little arm and actually
just letting you know, these characters are
actually based off, it's going to be based on these cute little
dog characters. I think it's going to
be funny or that way. The small one waves his arm and then it suddenly
becomes super buff. Okay, I'm going to come up with three more bullet points. Close up on our main guy
who notices the arm. He says, well, Abril, I'm just joking. B 13, little guy, it's too late. The little guy launches
himself to the main guy with his super ripped buff arm
about to just slap him. Then the final bullet point. This is going to represent
the final image, shot of the entire earth
we see it split apart. So hinting that that slap
was more than just a slap, maybe we see an explosion. It sounds super weird
when I write it down, but I'm pretty sure
when I start drawing it in storyboards are when
they start to rough it out, it'll be so much more clear. I think the jokes
will land better once I fully put it into visuals. I encourage you to come up with a story without
thinking too hard or without being super
precious about what the story or the skit is about because you can always
revise it later. But I will tell you this. When I was at school, we had this little film festival called the 48 hour Film Fest. During that weekend we
had to make a film. There's no time to second guess. There's no time to really think. The great thing about
this festival is it allows everyone to be an idiot, to have fun without
thinking too hard about being too precious or without trying to
impress people. So I'm letting you know that you should always embrace
the weird part of you, the zany wild side of you and just go with the flow
and see how that goes. Join me in the next
lesson and we'll start translating these bullet
points into visual imagery.
5. Drafting Your Storyboard: Now I'm going to turn
these outlines and these bullet points
into actual drawings, into a very rough
version of storyboards. The reason why I want to
do it rough is so that I can experiment with
different shots or different styles of storytelling visually so we're going to do that using our bullet points
as a guide for each shot. I want to show you examples of my own thumbnails when I
do my own storyboards. I brought with me some very rough drawings of what my rough
storyboards look like. They're very crude,
they're very loose. But you know what, that's okay because this is just me trying to think about the shot, the staging, and just like all the ideas that
I have visually. For this assignment,
I already have characters that I'm going
to use as these characters, and on my computer, I have these designs of these little dog characters
that I'm trying to sort. But now I'm going to put them in a little role of
the storyboards. This dog with a hat is going to be the guy that asks people to slap him and all
these other dogs are just the random guys. The first guy that slaps in, the second guy that slaps him, and the smallest one, the pug, is going to be the one
that starts with like little arms and then
suddenly he becomes Popeye, or his arms just bulge
out into this disgusting, super grotesque ripped arm. We're going to start boarding with those characters in mind. If you don t have
character designs in mind, that's totally fine
because in most cases, especially in animation, the character designs
are not yet final, there are just really
rough templates. You can even just tell the
story in stick figures. I'm going to start thumbnailing, meaning that I'm going
to draw a small, very rough version of what the storyboard can look
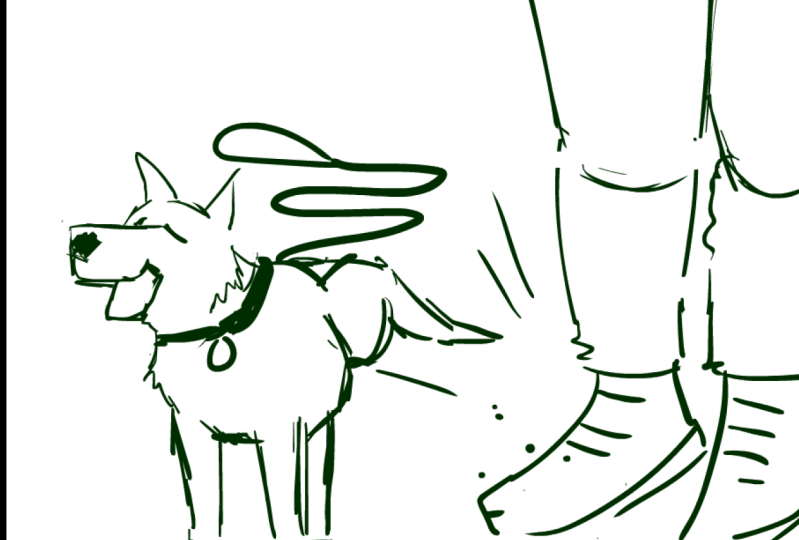
like. Let's begin. The first one, random guy
minds his own business. We have our ground
and then we have random guy one so I've
established as one of the dogs, he's probably playing his
little Gameboy or Switch, but I'm a '90s kids. There we go. He's
playing his Gameboy, minding his own business. It's like a random Dana Street. The reason why I'm
putting him stage left or over this side
is because I want our guy who likes
getting slapped for some reason to show
up on the next shot. Number 2 is the same
shot as Number 1, but now we have the guy who wants to get
slapped walk in so now we have a bit of clarity in terms of establishing who the characters are and I'm keeping things simple, nothing too complicated. This guy walks in and he looks like trouble so I'm
giving him a face, I guess. In this shot, I'm probably
going to indicate an arrow. I like to write little
notes like this, especially when I like pitch
to my director or my bosses, like anything that reads with arrows and indications
and with new strongest, they'll still be
able to understand what I'm trying to communicate. I'm doing that here too. This dog is going to look over while holding his
Gameboy or Switch. This guy walks over
and when I thumbnail, I like to write the
dialogue right below, just so that I know
that in this panel, this is where this
line of dialogue goes. Our main guy wants
to get side goes, hey bro, I want you to slap me. You tough enough? This is just a note for myself. Like that's where
that dialogue lands. Bullet point 3, this is where maybe
I'll punch in with our character on the left
of him looking confused. It's also important
to think about character expressions
and acting. That also sells really good storytelling
because storytelling is, being able to read
emotions and all that. This dog is like,
really confused, like why does this guy
want me to slap him? He's absurd so he's like, you're weird but I'll slap you. That's the acting that
I want so he shrugs, so he's shrugging like that. Let's say if the
same shot requires another drawing just for
storytelling purposes so he shrugs but then I want him to reach back for the slap so
it's just a bit more clear. In this shot, he transitions
to the slapping motion so he's reaching behind so I'm just going to draw a
very rough version of that. The fourth shot is, I punch in closer to the
other guy getting slapped. [NOISE] He gets slapped. Its like, that's
expression I'm going for. I'm just going to just draw one more drawing for
this acting choice. It's still the same
shot where he says, nice try, but that was nothing. I'm going to keep making
more rough thumbnails on the outlines
that I've already written down and I'm just
going to keep going. I encourage you to
do the same thing. I've already numbered
them in order just so that it's
clear and readable. We start with our dog character minding his own business,
playing Gameboy, another dog character
shows up and says, hey bro I want you to slap me. You tough enough?
The dog looks back, he shrugs, he's like this
guy is weird but okay. Winds up for a
slap, hits the guy. [NOISE] Guy turns back, nice try bro, but
that was nothing. Another guy shows up and
now he asks that other guy, hey you, why don't
you try slapping me? The other dog, try stopping him. [NOISE] Then the
guy is like, wow, that was much weaker
than the other guy, you're no man,
you're a weakling. We cut to the guy that just slapped him and now
he's crying in shame, he's ashamed of slapping the other dog because
he's so weak. Now we cut to I made
this a dramatic like high angle where we're looking down on it and he's
like reaching to the heavens. Is there anyone who
can slap me hard, who can knock my shoes off? Then we get this little
pug that walks into the scene in the next shot and now we get a close-up of those two of the guy that
wants to get slapped, go closer to the pug. You think you got this bro? You think can slap me hard? Part 11. We have our little
pug character, wave his little arm and
suddenly it just grows. It just burst into
this super buff arm. We cut to the close-up of our character once
he gets slapped, I was just joking. The pug starts launching
himself forward to our main character and before he punched him or slaps him, we cut to the shot of an Earth, and then suddenly the
Earth exploding and splitting apart in two just to show yeah that's what happens when he gets
slapped by that dog. Now that we've done our super rough
thumbnails, our planning. This is what I would
consider our rough planning. Then we can move on to actual board work or
storyboards and this is where we'll start
having cleaner drawing, drawings that will appear
in the final storyboards, time with the animatic. Take your time without
rough thumbnails, keep exploring and when you feel really confident with it, then join me in the
next class where I'm going to actually turn my rough thumbnails
into storyboards.
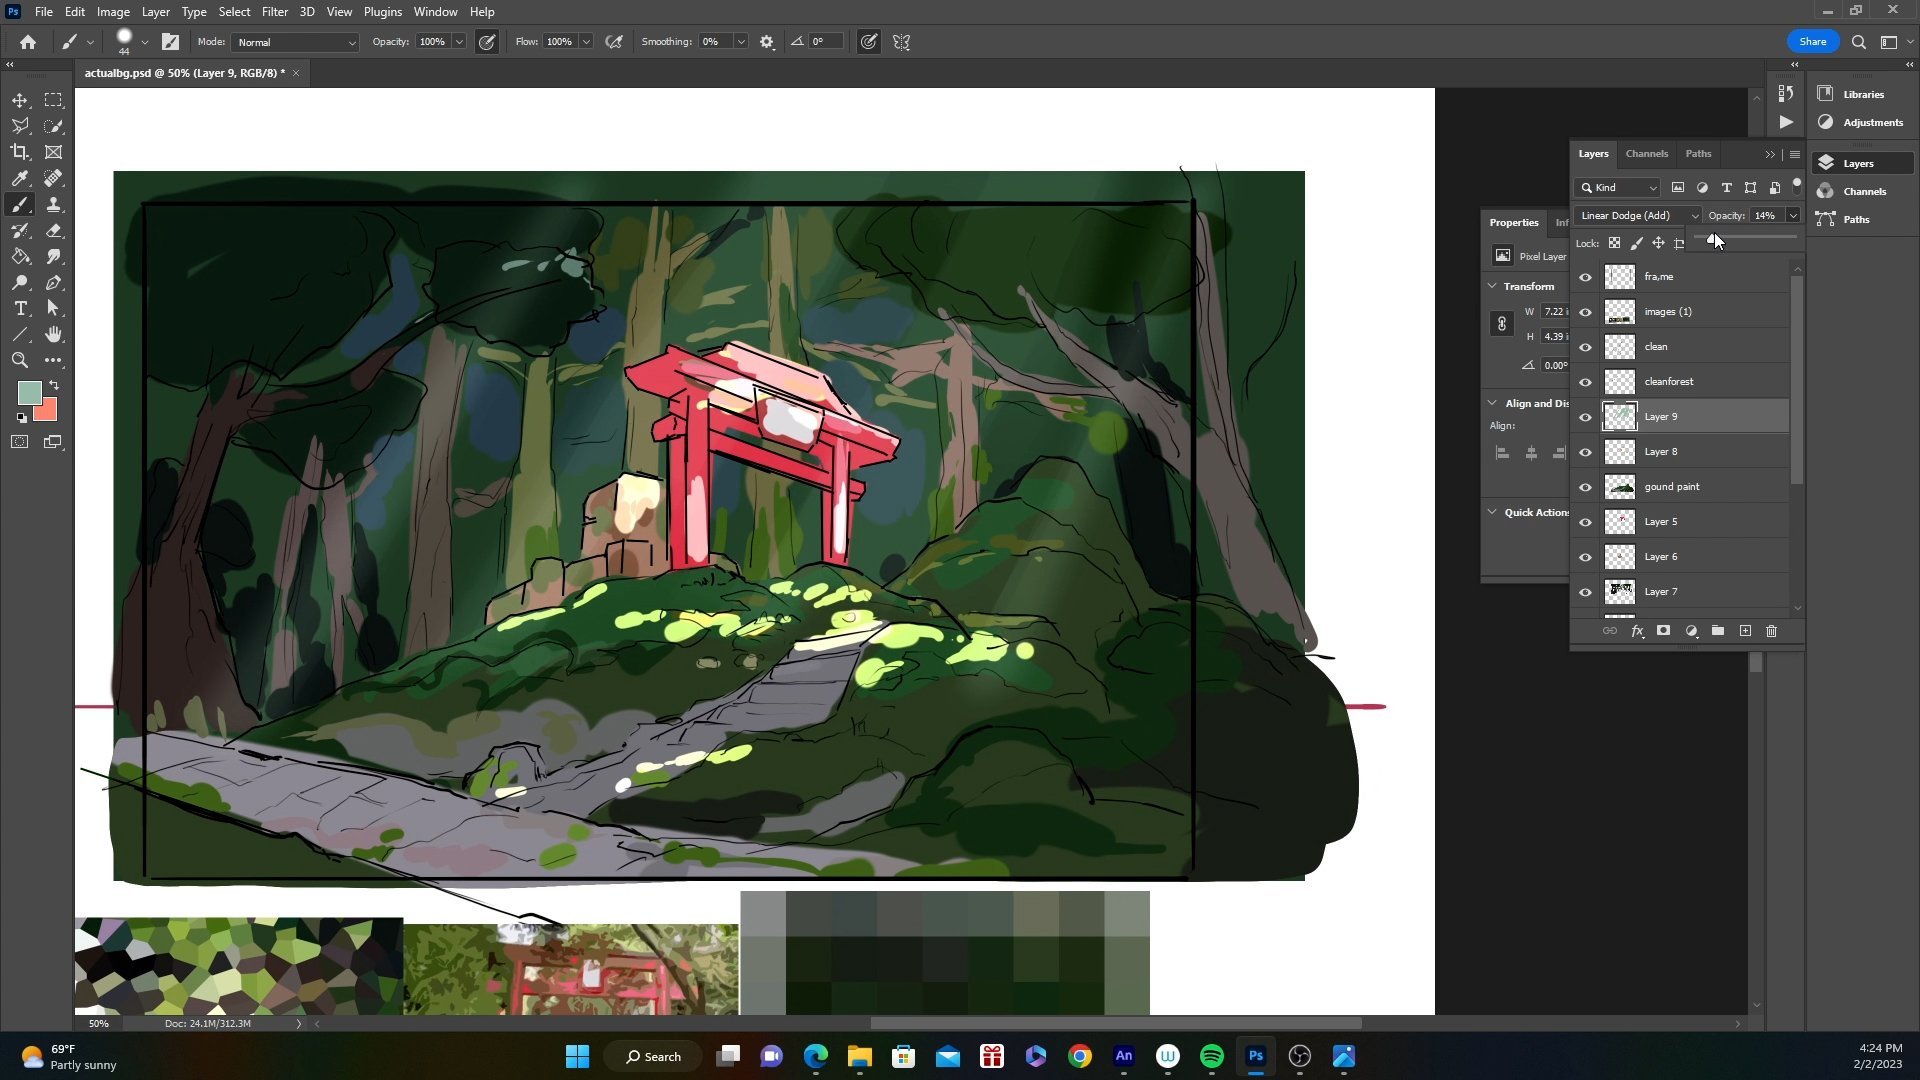
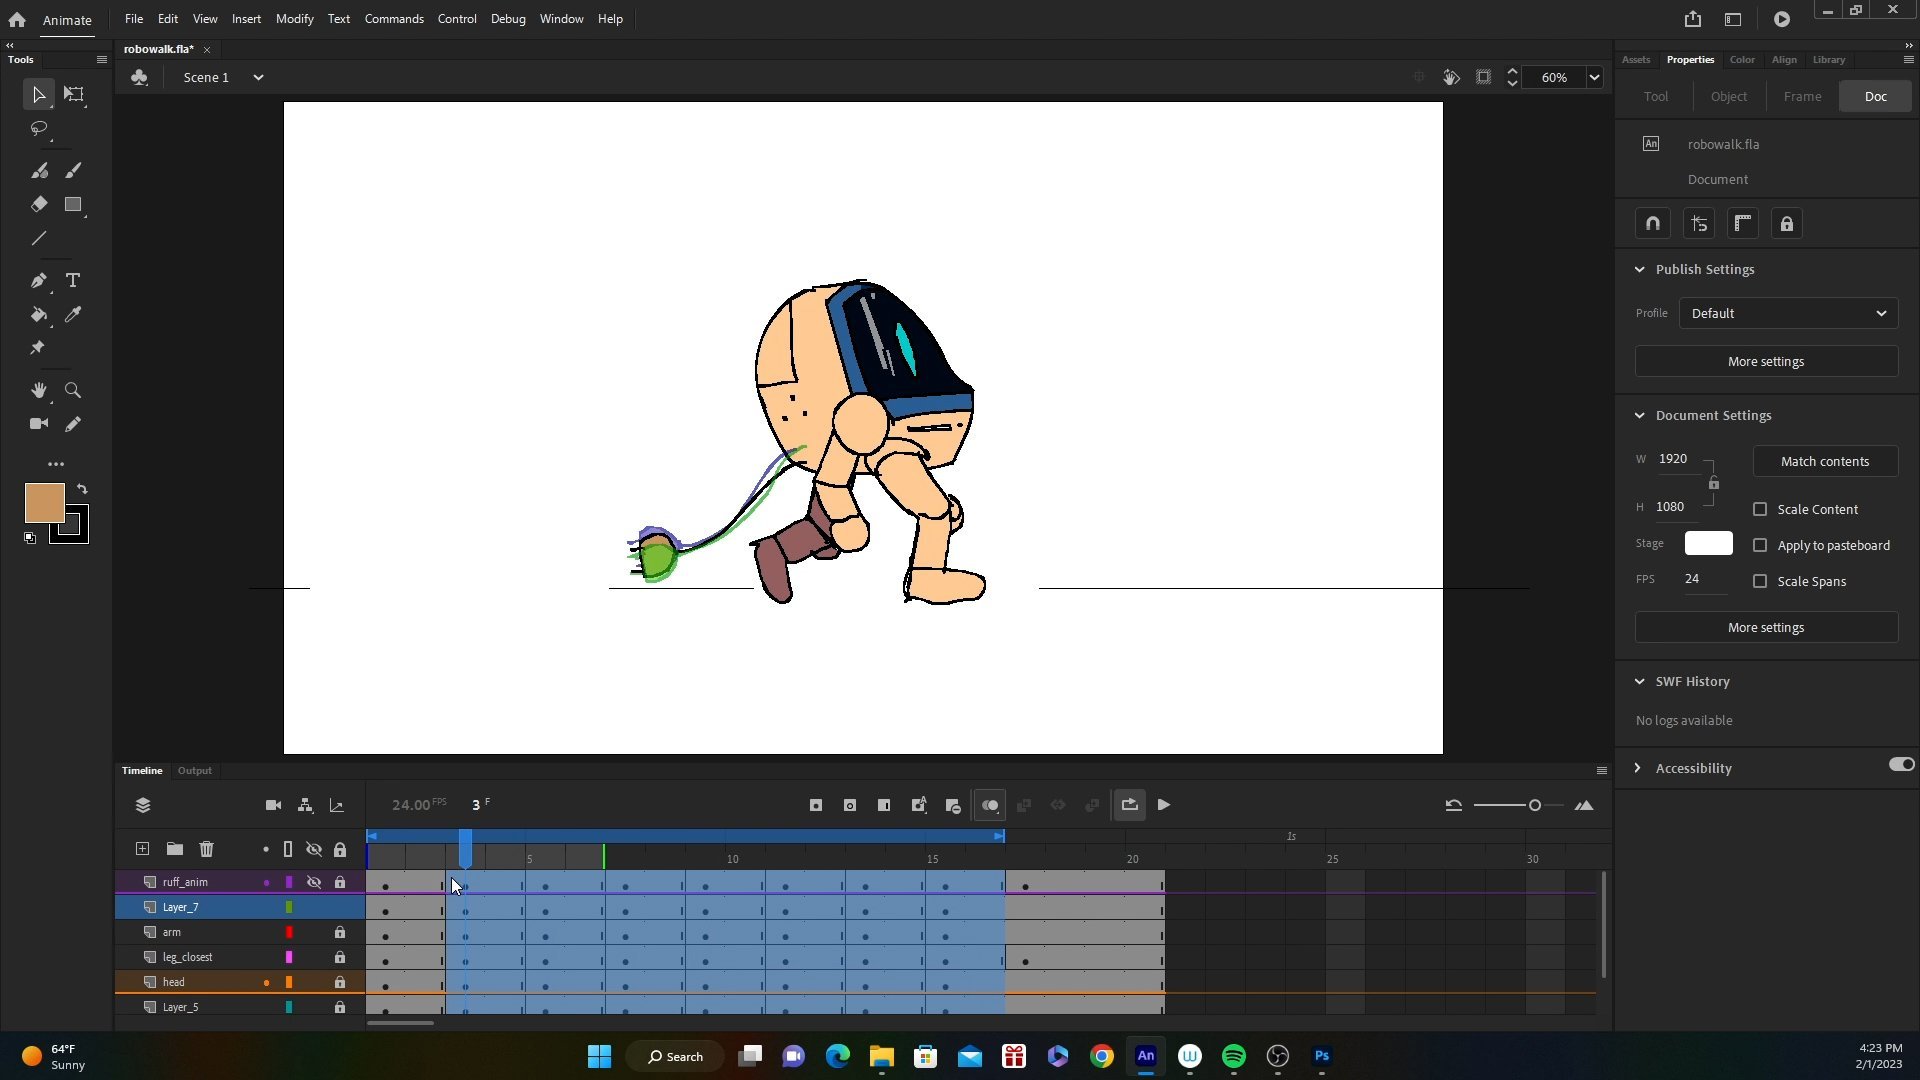
6. Finalizing Your Storyboard: Before I start, I want
to show you an example of what I'm trying to
achieve for today. These characters
playing ball here and this is how loose
I'm going to go. I'm going to go really
simple with these boards. Enough to tell a story, but enough to show
a bit of acting and performance and
some storytelling. I'm going to do something
like this in Adobe Animate. What I'm going to do one at a time is I'm going to translate my storyboards here or my rough thumbnails into
digital storyboards. I'm just going to go through
them panel by panel. I can choose to do everything in a single layer or
separate layers. Let's try that out. Let's
do separate layers, just one layer for any background and another
layer for all the characters. I'm just going to quickly
rename those layers. The first layer being background and the second layer
being characters. I'm going to do the first panel. It's really just
a flat ground and I'm just going to draw
really crudely here. Just a bit of a grid, just to show a bit of depth. Now, I don't know
if I'm going to do a really complicated
backgrounds, but let's add something. Let's just add a tree and a
wastebasket or trash can. That's just going to be a
rough background for now. I'm going to lock
that layer so I don't mess around with it. Now, I'm going to draw
my first character, which is the dogs playing
his little Gameboy. That's our first panel. Then now we're going to
introduce our next panel. I'm just going to hit blank key. Insert blank keyframe, that's going to create
a new keyframe. It's not going to
affect the layer below it because I locked it and I'm working
with the main layer. Now we have our other
character walk in. What I can do to save
time is I can copy this drawing and then
just paste it again, and he's going to react to
the character walking in. I'm going to erase his
head and just have a turn here just to showcase
a bit of storytelling in terms of the changes. Then we have our other
character walk in. The background is
too distracting, I right-click on the background
layer and I turn it down. I go to visibility and
turn it down to 50%, that's fine and I'll just draw the
characters accordingly. Now again, you can work
on a single layer, you don't have to
do what I'm doing. I like to keep things separately just because if I
erase something, I don't have to redraw
it or re-fix it. This character walks in, he's looking pretty smug. Even in this stage, I can just indicate an arrow like that just to
show he's entering the scene. If I flip between these two
drawings, he's coming in. With storyboarding, you
can add more poses, so I can actually insert a keyframe
duplicating that drawing and then
just changing him. I'm just going to hit
the Backspace or Delete, and now I'm going
to draw him going, hey bro, I want you to slap me. He's going to probably lean in. I'm going to move on to
my next shot actually. This is Number 3 now. I'm going to insert a new key, I'm also going to
do the same thing for the layer below me. Now it's a new shot. The background is not there, it's more of a close-up
on the first dog's face. I can have him shrug
like I have it. He's looking really confused. I think that's a very clear
silhouette of a shrug. He goes, mmh, and then I'm going to
insert another blank key. I should number them just
so it's easier to track. This is Pen one and
this is part of 2. I'm just following
my rough thumbnails. Well, I just finished
storyboarding my scene. I'll go through that,
I'll pitch what I have. This is what I'm
going to be using for my edit, for my animatic. We have our first dog just
playing with his Gameboy. Our main guy walks
in, and he's like, hey bro, I want you to
slap me really hard. Dog just shrugs, mmh, and throws a slap. [NOISE] Nice try, but
it's not good enough. Another dog walks in, he's like, hey you, you think you can do better? You think you can
slap me harder? Slap. That was more awesome
than the other bro. The other dog starts to
cry [NOISE] kneels down. Dog who's getting slapped goes, is there no one who
can slap me hard? Then this pug just walks in
awkwardly into the scene, just stands there
and he's like, huh, you think you could
slap me hard, you a little puny man? The pug just lifts it's arm [NOISE] becomes like
the super buff arm. Well, I'm just joking
bro, I'm sorry. He throws himself to the guy. [NOISE] Earth explodes
after that slap. In total there's almost 30. Let me see. There's
about 34 panels. Usually I go more than
that to flesh out the acting but I wanted to
see if I can go for less. The reason why there's
a lot of panels is because I really wanted
to pose things out. This could have been
done in just two panels, but I really wanted to show the pug walking in awkwardly, where he walks in and all that, and I tried to
save my own energy by not redoing every
single drawing. Notice how I would only change this character's head every time I introduced the new panel. Keep working your storyboard, get it close to where
you want it to be. Get it to a place
where you're quite satisfied with and
in the next lesson, I'm going to start putting
this in a timeline. I'm going to start adding
timing to these panels, but at the same time, I'm also going to record my own voices.
7. Creating an Animatic: In this next lesson, we're going to take
our storyboard, and we're going to put it in an animatic with
timing and with sound. With sound, I'm just going
to record my own voices. I'm going to use a free
program called Audacity. You can just download it off
online and it's easy to use. I just hit "Record" on up here and it will just
record my own voice. What I like to do is I scroll through my panels and
see what I wrote. Hey bro, I want you to
slap me really hard. Now I'm going to record that. Now I'm going to hit
"Record" and do the voice. Hey bro, I want you to
slap me really hard. I hit "Spacebar" to stop
it. Let's play that. Hey bro, I want you to
slap me really hard. I feel it can be more obnoxious, but let's go with that for now. I'm going to export
that into a WAV file. Adobe Animate reads WAV files. I'm just going to call this one. There we go. I'm
going to save that. Now I'm going to
record him saying, nice try but it
isn't good enough. Let's try that. I'm
going to hit "Record". Nice try but it
isn't good enough. Nice try but it
isn't good enough. We'll use that for now. The way I'm naming
it is I'm naming it in the order of
when they will appear. What I'm doing is I'm
making scratch voices, and then storyboards you need recorded dialogue to fit with the timing of
your storyboards. It helps timeout
your storyboards and it helps sell the performance. But for now, I'm
just using it to help me timeout my animation. I'm going to start
importing them into Adobe Animate slowly. Now I want to space out
my frames or my keys. But before I do that, I need to make a new
layer in Adobe Animate. This is where our
sound is going to go. First, I'm going to
spread this out. I'm going to select
all the frames after the first frame
and just move it up. Then just do the same thing. If I play it right now, there's a bit of timing now. I want to extend the timing
of this current image. What I do is I select
everything after that and I just drag it out. Now this will have the
length of this match. Next, I'm going to
create a new layer. This is where our
sound is going to go. Because Adobe Animate
works better if you keep the sound and the image is
separate in terms of layers. I'm going to hit
"Insert Keyframe", so I know the sound is
going to start around here, then I'm going to import
my sound to my library. I just imported a file, but where do I find it? The way to input sound in Adobe Animate is just
select the layer, you go to Properties and
you hit under the sound, that's when you
insert the sound. Now you're going to
see this little wave, but you can't hear it. Usually when you drive
the cursor around, you want to be able to
scrub through the sound. To be able to do that, you have to select the
frame with the sound, turn this into stream. [NOISE] Now you can hear
that when I scrub it. I'm going to lock the sound for now because I don't want to affect the changes
I'll make with that. [NOISE] Then I'm going
to keep extending this. [NOISE] This is
just another way to extend frames in Adobe Animate. Instead of constantly pressing this button here
to insert frames, what you can do is drag
out the frames after that. [NOISE] I'm going
to turn this off. We have that. I'm going to keep
dragging it out, making sure the sound ends. You're going to notice that
it will sometimes duplicate, and I always had to
turn it off by clicking that frame with a new sound and making sure
there's nothing there. Our dogs shrugs, let's
just drag it out. I'm not really thinking
about how long it is, I'm just dragging it out just so that there's a bit of timing. Now I'm going to
drag this one out as the Zagreb pairs to slap, and now this dog gets slapped. I'm going to do the
same thing again. I'm going to go to File, Import to library, and then I'm going to
hit my slap sound. I'm going to put
that here, slap. I'm going to make sure it's on stream
too, so I can hear it. The reason why I'm
switching from event to stream is event is used in
an older version of flash, where it uses a very
specific player or it's using functions like
video games or applications, but for this case we're just
dealing with video format, so that's why I'm
selecting stream. I got to put that
slap sound here. That's where it starts. [NOISE] I'm going
to drag that out, making sure there's no sound here because it'll
duplicate that. [NOISE] You can always reuse sounds by hitting
your blank key, going to the sound tab and selecting the sound that
I have already uploaded. Slap is already uploaded. I just finished timing my
enigmatic wall, my storyboards, I added my sound files, I timed each of my drawing, so let's play that to see
what that looks like. Hey bro, I want you to
slap me really hard. Nice try but it
isn't good enough. Hey, you think you
could slap me harder? Well, slap me harder. Bro, that was worse
than the other, bro, you suck. [NOISE] Is it no one in this planet that
can slap me hard? You little shrimp, you
think you can slap me hard, you think you can do the job? Wait, I was joking. I'm sorry. That was it. Now we have a
fully finished animatic, which is a storyboard edited into video with
sound and timing. Now, in the animation process, animation is done before
design is done and colors. An animatic is usually shown in a screening for
the producers, for the directors, for
the higher ups to see if this is a version that they'd like to
move forward with. Because animation is a very
meticulous and hard process, so they want to make sure
everything about the story, the story boarding, and the film itself feels just right even in this very foundational baseline
version of the animation. I want to invite you
to do the same thing, to make a storyboard like this, to make an animatic.
8. Final Thoughts: Hey, we just
finished this class. Now, not only are you an animator by doing
something like this, but you are also a filmmaker. You see, you started
out with nothing and you made all these decisions about coming up with a story, coming up with a bit of writing, and then you moved on to storyboarding and
planning that out. Then after that, you started thinking about
audio production. You're actually
wearing multiple hats for something like this. I want you to upload
your storyboard, AKA, your film, into the gallery and share that with
everyone else. By doing something like this, you know that you're not going to make the
most perfect thing, but you know what, that is fine. We all start somewhere. I think storyboards are a
great way to express an idea, to express a story, and to
express your own voice. You just have to keep doing it. You have to keep
experimenting with it. Keep making more stories
and more storyboards to find your own voice to
problem-solve by yourself. That's the only way
you can find who you are as an artist
and as a filmmaker. You just have to
keep making stuff. I would highly encourage you
guys to be a complete idiot. Be open to making mistakes, be open to goofing off and have fun because when
you have a lot of fun, you have no restrictions and
you're going to be able to do a lot more things
without any fear. When that happens,
you're going to make some really
interesting decisions. If you like what I did here, I have other classes
on Skillshare, ranging from animation
to character design. If you're interested,
please check that out and join me on
those other classes.
 Toniko Pantoja, 2D Animator, Character Designer