Transcripts
1. Introduction: Live Session Recording: Welcome, welcome everybody. We are so excited
to have you here. This is Danny from Skillshare, and I'm here with Lisa
Bardo. Lisa, how you doing? I'm doing great.
I'm so excited for this lesson today to show
people about procreate dreams. Me too. I'm stoked
to get this going. Welcome. Wherever you are. Maybe sharing the chat where
you're joining us from. We're so excited that
you're here to learn about procreate dreams and we're
going to get right into it. But before we do, I
just wanted to share a little bit about what we're
going to be covering today. So just so you know
where you are at. This is animate your illustrations
with Procreate dreams. And we're joined here today with Lisa Bardot who is an amazing
top teacher on skillshare, who's already gotten
a good amount of experience in
procreate dreams, is going to kind of dive into her process and show
us how to get started. Awesome. Thank you so much,
Daniel. Hi everybody. I'm Lisa Bardot and I'm
really excited about today's lesson first. Just
a little bit about me. I am an illustration
artist teacher and I love all things creative. And I've been working in
Procreate dreams now for several months during the development process
as a beta tester. So I've gotten a lot of
experience working in this app. Procreate actually invited
me to do a demo for them in London on the app when they did their big keynote
announcement, which was super exciting
and a lot of fun. It was just really
cool to see everybody excitement about the new app. So I'm really excited to teach you guys all my little
tips and tricks. Today we're going to be learning how to take
our procreate work. Because many of you guys
might be familiar with procreate and have a
lot of work in there. How to take your
procreate work and get it ready to animate
and procreate dreams. And then I'm going to
teach you how to create some really easy
simple animations. And all of this is
going to be really new, but I'm going to try
and explain everything really slow so you guys can follow along and
let it all sink in. Then of course, if you
want to go back and watch the replay, you
can do that as well.
2. Class Resources: So what to expect today? We're going to start
off with downloading an illustration
template and procreate. I'll share a QR code to that in a second so that you
can follow along. And then you're going to
explore the app interface of Procreate Dreams with step by step instructions from Lisa. You can really just
learn the lay of the land and learn how
you might be able to apply some of these
animation tricks to your own creative process. Throughout the session,
we're here live with you, so feel free to drop
your questions and share your excitement and
thoughts in the chat. There are a lot
of us here today. There are almost 1,000 of us right now and
likely more joining. So we may not be able to get
to everybody's questions, but we're going to
keep track of them. We'll get to some of
your questions and also if you have answers to
some folks questions, feel free to share in the chat. We're here as a
creative community, so we'll be able to
learn from one another. And the last thing I'll share is that Lisa has a lot
to get through today. So there may be some
moments where maybe you get stuck or you're falling
behind. Don't worry about it. We're going to share
a recording to this so you can go back
and follow along later on so you can catch
up, go along for the ride. If you get stuck, just know
there's a recording and yeah, you'll have everything
you need to learn after the session as well. Before we get started, want
to make sure that you all download the illustration
file for this session. You can go ahead and use
this QR code now, your ipad, to get the procreate file up or just type in
this short link here. And we'll also drop
this link into the chat for you if you want
to follow along. This is your ticket to do so. Definitely download this link to the procreate file so
you can get right in. Lisa, any specific notes on
getting this up and running. Yeah, so that's a
procreate file, so when you download
it, you should just be able to tap it and it should import into
your procreate app. Not the Procreate Dreams
app, but the procreate app. Because we're going to be, I'm going to be teaching
you how to set it up and import it
into procreate dreams. So you want to get it
into your procreate app. And I think with that,
hopefully you've got it. I will excitedly pass
the mic over to you, Lisa, to take us through
what you have planned today.
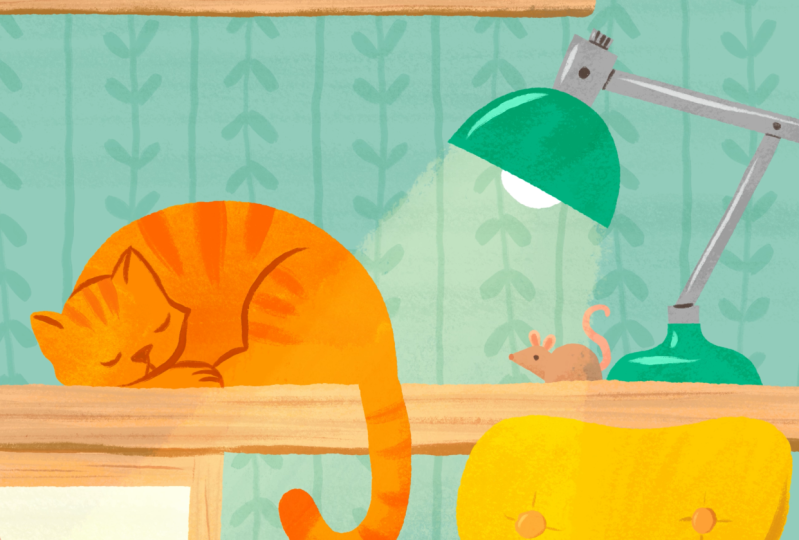
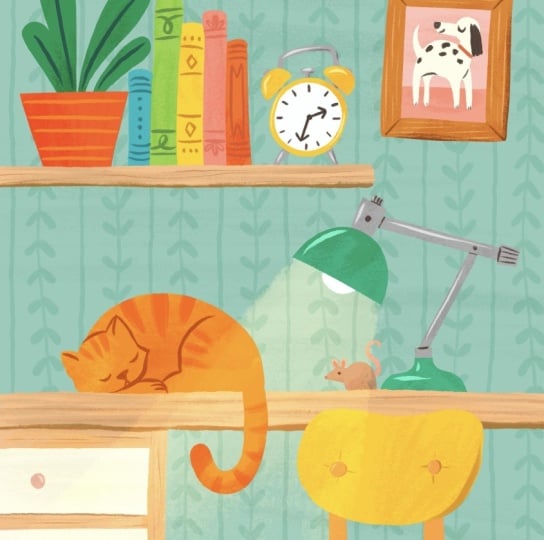
3. Prepping your Procreate Art for Animation: So here I am in procreate and this is the file that
I've given you guys. So I drew this cute
little kind of like desk scene and I made
it all in procreate. So what I'm going to do first, and this first little part,
is not really a follow along. I'm just going to
talk to you a little bit about the process of getting your files ready to bring
into procreate dreams. To animate your guys' files already set up, so
don't worry about that. Um, let me open up
my layers panel. So this is my original file with all my many layers that I
used to create artwork. If you're used to
working in procreate, you might use a lot
of layers to separate out different parts of
your artwork in order to, you know, aid you in the
art creation process. But this is not going
to work for animation, because when we bring this
into procreate dreams, all of these layers are going to become tracks. And
don't worry about that. We'll talk about that
in a little bit, so don't let it
get you confused, but what I want to talk to you about is some of the
things that you're going to want to do to
set your procreate files. Again, not to follow along, but to set your procreate files up for animation.
Procreate Dreams. So the first thing that
you do when you're wanting to get this ready is
go out to the gallery view. And I always make a
duplicate of my file. Before I start changing things, I always have the
original version. I would just swipe to the
left, choose duplicate. And then I would rename the duplicate something like animation or something. Just so I know that's the
one that I've like made all these changes to. Okay. Then I would start to think about what kind of
motions I want to make. Like maybe I want
to make the plants, like little leaves
of my plants move. I can make the clock turn. I'm going to make the
little frame move. I'm going to do some
stuff with the cat. You think through like what kind of stuff do I want to make? Move whatever you want to move independently
of something else, you want to have that
on its own layer. I would start, first of all, just merging things together. All these layers here are all for this
little photo frame. So I could merge
all those together, like I have these
layers for the chair, and I could merge
all those together. Um, I have all these books right here and I can
merge those together. And I'm not going to
go through and do it all, but you get the idea. I'm like starting to
merge anything together that I'm not going to animate separately from other things. And then for something
like the plant which is on this layer right
here, it's really tiny. But that's all these leaves. And if I want them all to move separately
from one another, I would need to put them
on separate layers. So I could always go up to
my selection tool and just start selecting around them and then I can cut and
paste onto a new layer. So I would go through and
just like cut and paste all the leaves onto their own layers and things like that. So those are some things that you would want to do
and I'll show you the finished file so that you can kind of see
the finished version. Okay, So it's this one here. This is the file that
you guys have now. So if you haven't already, go ahead and open that
up and procreate. And your layers should
look something like this. And I've labeled them all. I'm not usually a labeler,
but I did it for you guys. I have a lot of the
things that I'm going to animate separated out. Like here's all my leaves separated out because each one's going to move
by themselves. The cat tail is going
to move by itself. The cat body is also
going to be moving. I'll have to show you the finished version
so you can see. But then I have a little
mouse where, here's my mouse. His head's going to move and
the tail is going to move. So those are all separated out. Okay, So just to kind of and
then, and then the clock. And then for the clock I have the minute hand
and the hour hand. So just kind of look through the layers just to kind of
see that they're there. You don't have to do
anything to them. But this is how I would set up that particular illustration to bring into procreate dreams. So all of that stuff I would do here and procreate just to
get it prepped and ready.
4. Procreate Dreams Interface: So let's go into
Procreate Dreams now. We're going to go into
Procreate Dreams, and you're going to start
by creating a new movie. When you're in Procreate Dreams, the first thing that you're
going to see is the theater. And this is where
all your movies are. If you tap this plus
sign in the upper right, you can create a new movie. You can swipe up and down, and you'll see some
different templates. It doesn't really matter which
one you choose for today, because we're going to end
up changing the size of it. But a couple things I
wanted you to see in here. These three little dots will
give you some options to adjust your default frames per second and duration
of your movie. And this will apply
to all the templates. I don't usually like
to mess with that. I'm going to show you a
different way to change that, so you don't have to worry
about changing that yet. Then if you tap four K, you've got some
different resolutions. We're just going to
stick to four K for now because we're going to
end up changing things. Okay, go ahead and
find one of these. I'm going to choose
the screen size one and then we're going
to tap empty right here. This is going to bring us into the Procreate Dreams interface. And I'm just going to give
you a quick little tour before we import
our procreate file. Procreate Dreams is divided
into three parts up here. This is our stage,
actually this box, the white box is our stage, and the area around
it is our backstage. You can have elements off into the backstage and then
bring them into frame. There's a little time code right right here which
has some options. If you tap it for onion skins, we're not going to
worry about that today. You can also set the
background color again. We're not going to do anything, I'm just going to show you that it's there, That's the stage. And then in the middle,
this is your tool bar. Starting over on the left, we have these a
little rectangles. If you tap that,
that'll take you back out to your gallery view. Sorry, I'm used to saying that
for procreate the theater. That's what it's called in Procreate Dreams
while we're here, we're just going to name
our movie real quick. We're going to tap and hold on the movie that
we just created, which is this blank one here. And then we get a little menu, and we're going
to choose rename. I'm just going to
call it Corner, if I could spell it.
Right, that'd be good. Okay, Cozy corner, and then tab. Done. Okay. There we have it there and then we're just going to tap to
get back into it. Okay. I already have one name, cozy corner, that's why
this one's cozy corner one. Now, the next thing that
I want to show you here, which is what I just pointed
to is the movie name. And there are some options
if you tap on that. So go ahead and tap on that. This is our movie settings. There's different options
here like properties. And you tap through and see, we're not going to worry too much about any of this for now, but I do want to show you your share options which are here. I'll try to show you
that again at the end. But this is where you would
go to export your video. And then there's
preferences and things. But let's go to properties. Go ahead and tap
up to properties. We're going to set our
movie duration here. When we set it here versus where I showed you
in the theater. This just applies to this movie, if you said in the
theater, it applies to all your future
movies that you open. We're going to set our
duration to 15 seconds. You can just tap duration and then tap in 15
seconds like there. Then the other thing that's really important that
we need to do if you're animating
your procreate work is it's helpful to set your width and height
of your movie to match whatever size your
procreate artwork is. I'm going to show
you how to find that and procreate real quick. I'm going to go
back to procreate. If you have your artwork open, you can go to the Actions Menu, Canvas, and go to
Canvas Information. And then go two dimensions. And you can see the
size right here, the pixel width in size. This is a pretty common
size for me to use, 2,800 by 3,500 pixels. That's the size that
I'm going to set up my movie to be that way, it fits within the movie frame. I'm going to go back
to Procreate Dreams. Now I can type in that size, which was 2,800 by 3,500 pixels. Okay, Then once you've set
your duration to 15 and your width to 2,800
and height to 3,500 you can go
ahead and tap done. Now you can see
the size of that, well at least it's the same
ratio as our procreate file. Some other things on
this tool bar over here. This is our play button, so that would do playback. This little circle is
the performing button, which we're going to
use quite a lot in this tutorial that records
your movements in real time. I'll talk more about it
once we get to that stage, but that's performing this
little rectangles here. This is the timeline
edit button. So that lets you select
tracks so that you can group them or duplicate them
and that sort of thing. Then this little squiggle
is your drawing paint mode. You can actually tap that
to see what it does. And this brings you
into drawn paint mode, and you might see some
familiar tools there. We're not going to draw
anything in this tutorial, but it has pretty much like the right
hand side of procreate. So it has all those brushes, eraser layers, things like that. So I'm going to go ahead and
tap done to get out of that. Then we have the plus sign
which is add in there. We can add tracks, photos,
videos, text files. You can also import audio, which I'll show
you at the end how to make this even
better with audio, but just know that that's there. Then this area down here is our timeline and this
is where we're going to be doing all of the setting
up all the animations, and doing all that
kind of stuff.
5. Importing a Procreate File to Procreate Dreams: Now I'm going to show you how to import a procreate file
into Procreate Dreams. I'm going to go
back to procreate. I'm going to exit to
the gallery view. Now I'm going to drag and drop this onto my timeline area. There's a couple
ways to do it, but this is the way that
I like to do it. My pencil down. Okay. You grab your file and drag
it out like this. Then I like to take my
other finger and pull my up and then I can tap on the Procreate Dreams logo and then just drop this into
the time line like that. And then it will import,
it will appear here. You can also use side by
side view to do that. I'll show you that
way too. You can tap these little three
dots right there. You go to Split view, choose Procreate Dreams, and
then you have side by side. If like holding and dragging
isn't working for you, you can just do it this way. Just drag and drop it into
the timeline area like that. Okay, then I'm just
going to close this. All right, Now you'll see in our timeline area,
something has appeared. This is a piece of content which is held
inside of a track. I'll talk more about
that in a second, but let me show you how you
can get all of your layers. Because right now
it's just one thing to do that you're going to tap and hold on this and
you'll get a popover menu. And you'll see an
option that says convert layers to tracks. That's the key here.
Convert layers to tracks from this menu. Now you see instead of
saying drawing right there, it says group, and there's a little carrot icon.
And we can tap that. Inside there we can see
all of our many layers. All of them have
now become tracks. A track is basically these horizontal spaces and we can fill our tracks
with pieces of content. This is a piece of content and it's held
inside of a track. Just a little bit of
terminology for you. Okay, I'm going to open
that back up actually, because I want to explain a couple things about
using gestures you already saw me like move
things around like this and do like
a pinch and zoom. If you use procreate, you're probably really used
to that gesture. But there are a couple other
really important ones. Let me show you those. If you take three
fingers and you scroll, let's see horizontally
like this. This is going to increase
your time scale. This is a little bit of time and then this
is a lot of time. You can also take three
fingers and go vertically. And that's going to adjust
your vertical scale. And that just helps
it be easier to zoom in on a single track to see things a
little bit better. Good practice with going like vertically and horizontally
with three fingers. Then you can also do a
quick pinch and that will zoom out and show your entire timeline and
all your tracks. It's also good to note
that you can also zoom around up here on the
stage in the same way, just pinch and zoom, or do a quick pinch to
zoom all the way back out. All right. I'm going
to go back up to the top where it says
group automatically. It puts it into a group,
your appropriate file, it puts all those
tracks into a group. But I like to just ungroup
them right off the bat. You can ungroup something
by just tapping and holding on the track
here that says group. Just tap and hold
and choose group. Now, everything is just not
contained within that group. I think it just makes
a little bit easier. Now you can see all my layers. We're ready to start animating the different elements
of our scene.
6. Animate: Plant using Anchor Points & Rotation: I'm going to zoom in over here. We're going to start by
animating our little plant here. I'm going to scroll down until I find this track that
has the leaf group. You'll see, you can see
a little thumbnail. We're going to open
up our leaf group. Just tap a little carrot. And inside we have our
four little leaves that I had separated out
onto different layers. Now they're separate tracks so we can animate each
one individually. We're going to do a little
animation where we have the leaves like rotating and
swaying around like that. Let's find leaf number one. The next thing I also want
to show you is if you tap, you'll see this little red shape with a little like one of
those clapboards inside. This is called the playhead. And this is how you would
skim through your animation and create keyframes and do a whole bunch of
different things. But I just want you to
know that that's there. Because we want to place it here at the beginning
of our timeline. Go ahead and place at the
beginning of the timeline on the track that's
called Leaf one. Okay, so like I said, we're
going to rotate this. Let me show you how
to rotate something. You might have seen that
little bounding box. If you don't see it, you
can always tap the artwork. And now I've got this red
bounding box around it. And we use this to apply all kinds of transformations
and things like that. But if you tap one
of the corners here, you'll see this
little curved line. You can tap any of the corners. And you'll see this
little curved line. I referred to it as the noodle, but that's not what
procreate actually calls it. That's just what I call,
it's the rotation node. You would tap the node and then grab your
little rotation node. I'm going too slow here, tap it. And then you can
rotate like that. You'll notice as I'm doing that, it's not rotating in a way that would look
natural for this plant. I'm going to undo that. What we need to do
is we need to edit our anchor point so that I
will rotate around right here because we want it to be attached into the dirt that
we assume is in this pot. Let me tap again on this leaf. And then we see this
little three dots. We're going to tap that,
these little three dots. And you can tap edit, Anchor. Anchor points are super useful for controlling
movement as you're animating. Now you can see this
little plus sign, which is the point that it
was rotating it around. That's why it was doing that. But if we move this
to like right here, like it's stuck there in
the dirt and tap done. Now if I were to rotate
it, I'll do it right here. You can see now that
it's rotating in a more appropriate way for
this particular subject. I'm going to tap undo
to reset that back. Now we're going to
actually animate it. I was just showing
you how it rotates. Now we're going to animate it. We're going to be using the
performing feature to do all the animations
on this plant. Make sure you're all
zoomed up there. Do we need to see the
anchor point thing again? I just want to make sure
people got that part. Okay. Just to review
what we just did. We're working on our
plant over here. We're in the leaf group. We've got the group opened up so we can see all of
our four leaves. And then we're on the
track that says Leaf one. We just edited our acre point, it was again, tap these
three dots, edit, anchor. And then we put this little
plus sign right down here. That's where we're at right now. Now I'm going to show you how to animate this using the
performing feature. I'm going to tap done again, make sure your playhead is at the beginning
of your timeline. This little circle here
is the performing button. If you tap that, you'll
see it changes into a red square like
it's recording. And then it says Ready Now. It's not actually going
to record anything until basically I put my pencil on the screen and start
moving things around. We're going to start
rotating this and we're just going to do little motions and you'll see that
our playhead will start to scroll across as we go, all the way as time passes, essentially it's just
time going across. Okay, I'm going to try to make sure my hand doesn't get in the
way for you guys. I'll tap this node here. Grab the little rotate node,
the little curved line, then just do little
motions like this, Hoping my hands not in
the way for you guys. You can see down here. It's going all the way across. And we're just
going to keep doing little circles like this. Draw little circles until
it gets to the end. Okay. Now if I were to
move my play head back, you can already see the
animation happening. But I'll move it
to the beginning. And then I'll press
Play little circles. Now it's moving,
it just captures whatever movement that you like. Act out, It captures
that in real time. We'll get to the end and
it will keep repeating. But I'm going to go
ahead and tap pause. Because I want to show you
one really important thing when it comes to performing
like right off the bat. And that's here under modify.
Go ahead and tap modify. Up here in the upper right, we have this option for motion filtering,
motion filtering. Basically, it smooths out your motion if this was
turned up really high, whatever motion you just draw would just try and
smooth it out. And if you have it
down all the way, it's going to capture
your movements more accurately to
how you did them. For this I think I'm just going to keep it
all the way down. So I just want to make sure you guys didn't
have it all the way up because then it
might look super weird. Like if I have it, if I have it all the way up,
it barely moves at all. So I'm just going to keep
it all the way down. Okay, then to get out of
this menu, don't tap done. Well, actually you
can go ahead and tap done. Just kidding. Go ahead and tap done. That done takes us out of performing mode. That's why. Yeah, you can see now that this
circle is back to a circle. It's not that little red square. Now we're out of
performing mode. It also doesn't say ready. Just something to keep in
mind, we're getting in and out of performing mode, okay. We have perform an animation
on one of these leaves. And now we're going
to do the same thing for the other three leaves. We're going to go
down to leaf two. Here I am on leaf two and I'm going to put my playhead
at the beginning. Of course, remember
we need to set up our anchor point so that it
rotates from right here. I'm going to tap the
little three dots. Then we're going to
go to edit anchor. And then we can move this little plus sign down into the pot. Right there. It's right there. Now when I have a lot of things that I'm
going to be animating, like I have three of these to do from a workflow perspective, it's easier to just set up all your anchor
points all in one go. I'm going to go down here
in the timeline and just tap onto leaf three,
which is right here. Now you can see there's a
box around that leaf and I can move my anchor
point down for that one. I just did leaf three and
move the anchor point down. Then I can also do leaf four, then I can move that down. It just makes things go faster. So you're not change the anchor. Perform change the
anchor. It's just like assembly line
fashion essentially. Now I've got all my
anchor point set up for these three leaves and I
can start animating them. You'll get some good practice
doing this same animation. We're going to go on
leaf two and move our playhead to the
beginning of the timeline. We need to tap done so
that we can get out of this edit anchor
point mode. Tap done. Now you can see our bounding
box. We're out of that mode. Now we're going to go back into performing mode so that we
can animate this one again. It's this little circle
here. And tap that. Then we're going to tap
one of the corners. Find our rotate node.
This little line. I'm just drawing tiny circles. I'm not, I'm trying to make
it a little different than my other leaf just
for visual interest. I'm just going to
go ahead and draw little tiny circles until I get to the end
of the time line. Now I'm at the end.
I'm going to take three fingers and zoom back up so I can see it
a little bit better. Okay. I think I undid
it accidentally. There we go. I
accidentally undid it. I just did a three
finger tap to redo. Now those are both
moving can play and see. Okay, we're going to do the same thing for
these other two. I'm going to go to leaf three Now since my anchor
points already set up, I can just go ahead and
start rotating that. Put my play head at
the beginning of the time line. Whoops. Put it there. And
then tap the corner. Grab the little rotate
node, this little line. And we're going to draw some circles until our time line gets all the way till the end. I like doing little circles
for this swaying motion. Because it, if you
were to go like this, it might look really choppy,
swaying back and forth. But if you draw little
circles, you get nice, smooth like swaying motion. Okay? I'm going to
zoom back up with three fingers to get
to my next track. Leave four, Move my play
head to the beginning. And then we're going to
tap the corner node again. Grab our rotation node
and animate our last one. And you can already see them
all interacting together. That's what I love
about performing is like you can see what's
happening as you're doing it. So you can like time your
movements to go with other movements or Sound
or other things like that. Now we can go ahead
and play that all back and there's a really quick way that you can do it in. Zoom out so you can
see the whole thing. If you take your
playhead and then just like flick
it back this way, it'll go to the beginning of your timeline and started
playing like that. Now look at our little leaves. I use this type of animation
for so many things, like making things rotate
around an anchor point. It's just a really easy way
to add movement things. We're actually going to use
that same exact type of animation to animate our next little bit of
this illustration.
7. Animate: Wall Art using Rotation: Let's zoom our time line up. Actually zoom our stage over. We're going to focus in on our little wall frame
here with the dog in it. Let's find that. I
think it's up here. Just so just scroll
until you find the one called wall art.
There it is, right there. Let's, so we have
the whole visible. And then I like to
take three fingers. And now it's just
taking up more space. And we're going to
animate that in the exact same way we're going to tap this truck,
this piece of content. And we're going to
change our anchor point. We already know we need to
do that because we want it to rotate around
the little nail. It's going to be like swinging
on the nail by default, the anchor points like
always in the middle. Let's tap the little three dots here and go to edit anchor. Then we've got our little
anchor here and we can put it right on the nail, right there, okay,
edit your anchor. And put your anchor
right there on the nail. And then you can tap done. Now we can animate that in the same way we're going to
tap the performing button. And we're going to
tap the corner, and we're going to grab
this rotation node. And I'm going to try and get
it really slow if I can, little motions back and forth. I'm almost doing like a figure eight motion with my pencil. Really small. Just really
subtle movements. There we go. Okay, got all the way across. Zoom back in with three fingers
going up a little frame, just swaying back and forth. I think when you're animating
like an illustration, it's nice to add really
just like subtle movements. Nothing has to be like crazy. That's a really fun little one. Okay, We've gotten a lot
of practice with editing anchor points and then doing an animation where
we apply a rotation. Next, I'm going to show you how to create animation
through key framing. But before we do that, I
want to just check in, see if any questions
have popped up or anything. How are
we doing, Daniel? Doing good. Yeah. Folks
are really enjoying this. There's been some
questions about like the speed of
your animation. If there are ways to
speed it up or slow it down after you've done the
performing or just in general, how to change the speed
of the animation. Yeah, there's not a way to
speed it up afterwards, but it's really easy. If you didn't like the speed
at which you did something, you can always let me see. I'm trying to see if I can, well, you can just undo it
and try it again faster. Because performing is so in
real time it's just going to capture however however
fast you do the movements. So if you're like, oh, I
don't like how fast that was, I want to do it
faster or slower. Just undo, move your playhead back to the starting position
and perform it again. Maybe speed will be
coming in the future. If you guys ever
you want to give procreate feedback about
features you'd like to see, like definitely hit them
up on their website. They listen to people,
they listen to artists. They want to make it
better for you guys. Okay, people mentioned
changing frame rate too. I don't know if that's something
you've explored as well. Frames per second. Yes. That can be found
here in the movie name. Under Properties, you can tap. Right now it's set to 24 and
you can tap that and choose other frame rates
for general purpose, I like to use 24
frames per second. It's just nice and smooth, but you know you can
play around with other things if you're
familiar with this. If you go down to 12, it'll make it, I'm
not going to do that. If you go down to 12, it'll make it look
like stop motion and it'll be like choppy. But that could be a look, yeah, that's where you can
find that option. But we're going
to keep it at 24.
8. Animate: Clock using Keyframes: I'm going to get out
of performing mode. Now I'm going to tap this little square and now
it's back to a circle. I'm out of performing mode. And we're going to focus
in on our clock here. We're going to be
animating this using key frames we just animated in. There's three main ways to
animate and procreatee dreams. One of them is performing,
which I just showed you. Another way is
through key frames, which I'll talk about
in just a second. And then the third way is
frame by frame animation. If you're familiar
with procreates animation tools, that's all. Frame by frame is where you draw each thing one
frame at a time. But let's talk about key frames. If you're unfamiliar
with key frames, basically key frames, keyframes say what state
your content is in, at different parts
of your time line. Actually, if you look here
at this wall art, we have, we have this track down here and there's all these
little icons in the. These are key frames. Let's just zoom in on these. You don't need to
tap on anything, but I just want to
show you basically at this key frames,
zoom in too far. One moment, sorry guys,
trying to find it now. Okay, so key frames. At this keyframe,
it's saying like, okay, at this point
in the timeline, my content looks like this. Or it's in this position,
it's in this state. And then at this point
in the timeline, it's in this position
or this size, or this state, or whatever
changes have been made. And then the app will
smoothly transition between, between the two keyframes. So that's kind of how keyframes work when you're
doing performing, it automatically makes those keyframes for you,
which is nice, but I'm going to show
you how to create them manually with this clock. So let's go down to
the clock hands group. I'm going to zoom
all the way out. Quick pinch, zoom all the
way out and then tops. And then zoom all the way up. Okay, there's my
clock hands group. I'm going to open that up. When I was setting up
my procreate file, I separated out the
minute hand and the hour hand and then the like little dot
that's in the center. That's not going to move, but the minute hand and the hour
hand are going to move. Let's start with our, our hand. Go ahead and find
the track called our hand and we're
going to tap it, so that's selected and we can have our little
playhead on it. We're going to
move this playhead so that it's at the
end of the time line. Now, place it at the end. I haven't shown
you guys this yet, but you can tap the playhead. And this is going to
bring up the action menu. This is going to help you
create your keyframes. Tap the playhead,
should say action. Then we're going to to move,
but go ahead and to move. Then we're going to
choose move and scale. As soon as I tap
this, you're going to see something pop up right underneath
our little piece of content here, Tap,
move, and scale. Now you can see this like gray bar with these
icons inside of it. And this is a keyframe track
icons are our key frames. This is one key frame and
this is the other key frame. They're both set to
be the same thing, like they're both
exactly the same. We're going to edit this second key frame to do
something different, and then the app will smoothly transition from
this one to this one. We're going to tap
this key frame. If your playhead is on
it, just scoot it over. We're going to tap this
keyframe here at the end. We've got some options here where we can type
some things in, but we're going to
focus in on rotate. Tap right here
where it's a zero. In rotate, we can type in a
number. This is in degrees. I forgot something. Maybe
you guys caught this. Okay, I'm going to keep going. We're going to type in 360. 360 degrees is one,
full rotation. It will end up getting back
to the place that it started. But I have a problem
already what's going on? Okay. You can see my problem. I just realized this
as I was doing it. I forgot to change
the anchor point. I'm glad I messed up
because this shows you, like what happens if you don't
change the anchor point. It just rotates
around the middle. Let me just go
ahead and do that. We can tap three dots at the anchor point
and then move it there and then tape
edit your anchor point. Now, there we go. Now it's
rotating around very slowly. You can actually edit like how if you want
something to go faster. There's a couple ways
that you could do it, but I want to show you one of the ways it takes a
lot of time to get from point A to point
B in our timeline for it to change from
this state to this state. You can move the keyframes closer together and it
will happen faster, so you can just
grab the keyframe. Put it a lot closer
here on the time line. Now, it will happen much faster, it did that full rotation. Another thing that
you might notice, it starts slow, and
then it zoom in here. Play that back,
okay? It start slow, gets fast, and then
starts slow again. If you're doing
manual key framing, there's something to
consider called easing. You can see it start slow
fast, and then slow. You can change that in between our two little keyframes
in our keyframe track, somewhere here in the gray area, you can tap and hold it. Then you can choose set a
easing set all easings. Then we've got
some options here. Right now it's set
to ease in and out. It eases in and then it goes
fast and then it eases out. That's ease in and out, but
we're going to choose linear. Linear is just like a
constant state of motion. It doesn't slow down
or do anything at all. So go ahead and choose linear. Now, if I were to
play this back now, it just goes around
in a constant speed. He, Lisa, a few people were wondering how to make it go
clockwise instead of cones. That's a great question.
I have that on my notes, but that's really
easy to do actually. If you go to your
second keyframe here and tap it, go
to rotate again. We have positive and negative. So you want to just
tap negative now? Correct. Way. There you go. Super. Okay. Thank you. Yeah, no problem. I
was getting to it. Okay. Okay. So now we just
did linear easing, so now it's just going at a steady rate and I'm
going to actually move this keyframe back
to the end because I actually do want this
to go pretty slow. Since it's the hour hand, it's just going to
slowly go around. It will end up right back where it starts, like when
it gets to the end. Watch it cycle. Then
we'll just keep going. But for our minute hand, we want to go a
little bit faster. We're going to do the same exact thing
for the minute hand. You get to repeat all of that. Go ahead and find your
track with the minute hand and tap it so it's selected. We're going to start by
setting our anchor point. This time I can tap
the minute hand. Tap the little three dots
here and go to edit Anchor, Then put it right here in
the middle of the clock. Now it we'll rotate around
that. And then tap done. Then I'm going to
go to the end of my timeline to move the
playhead to the end. Then tap the playhead. Go to move, move and scale. Then I'm just going to move the playhead out
of the way so that I can tap my key frame. Then this time we're going
to type in a higher number. That way it will go faster, it will do multiple rotations. If I type in 10801080 is
actually 360 times three. It's going to do three
full rotations and then finish right where
it started again. We're going to hit negative.
It goes the right way. Okay, Now let's go ahead
and play that back. This is not totally scientifically
accurate for speed, but the minutes moving faster than the hour, which
is what we want to do. Okay? That is manual key framing. You don't have to
follow this part, but I did want to
show you you can also add keyframes by
moving your playhead. And you can add key frames
that way if you need to, but we don't need
to for this one. I just want to show you
that there's plenty more. There's so much more, but that's just like getting you started. Okay, that's our clock. I'm going to go ahead and
just close the clock. Group again, People, if you have a moment to just show again really quickly how to just
get to the key frame, part of the app and set up
the first keyframe for F. I will show you on
this lamp head. I'm not going to end up
animating this lamp head, but I'll just show you
here So you can keyed, put your playhead wherever you want and then tap the playhead. And then you go to move and you can choose whichever
one of these you want. We've been doing move
and scale and then that creates your
keyframes down here. So that's how you can
create a keyframe. Cool. Thank you. No problem.
9. Animate: Cat using Warp: Okay, I want to show
you our little kitty. I'm going to start
with the body. I want to make the
cat's tail rotate. And it's in the same way that we've done all
the other kind of rotates where we
set an acre point and then we just kind
of drawl at doing that. Let's do the body because
this is something different. I'm going to go ahead
and find the body track. Go ahead and find that,
then we can tap it. To select it, we're
in the cat body. We're going to do a
perform for this one, but we're going to do it in
a little bit different way. We're actually going to use
the warp transformation. Let's go ahead and tap our
performing mode right here. Then we're going to move our
playhead to the beginning. Instead of moving
it, we're actually going to tap into our playhead. Tap the playhead, then
we're going to move. This time we're going
to choose Warp. We got that by
tapping the playhead. I'll do it when
we're trying to tap, move and we're going
to choose Warp. Okay, and when you tap Warp, you'll see this grid appears. This is called a mesh grid. You can grab anywhere inside this and move things
around like that, or you can grab the nodes and you can do all
kinds of things. That's not what we want
to do with this cat, so I'm going to undo
until I get back again. I'll put my play head
at the beginning. We're going to make the
cat breathe a little bit. We're going to grab
inside this rectangle, the one that's top, middle, and I'm going to
try and get my hand all the way for
you guys and just do up and down, like
breathing motions. Actually, probably
slower than that. I wanted to show you that
if you lift your pencil off in the middle of a
perform, it just pauses. It just stops. And then
you can just start again. That's an important
thing to know. I'm probably going too
fast, but that's okay. You can always, like I said, you can undo and just try again. But I just want to show you that it's a little wobbly because my hands a little
shaky right now, but you get the idea. You just do like a really subtle up and down motion to make the cat look like it's
breathing so fun. Yeah, that one's
a really fun one. There's so many cool
things you can do with Warp to do these like organic changes in animation.
It's really a lot of fun. Oops, I moved it. Okay, I'm going to do the cattail real quick
just so it's moving. But you guys can always come back and do
that later if you want. I'm on the layer or the
track with the cat tail, then I'm going to tap my corner. Little three dots at anchor. Put it right there where the cat tail
attaches to the body. Then you can perform
it just going back and forth to do all the way across. Well, if I was zoomed
out, you'd see the cat's body breathing
while I'm doing this, but I'll zoom out in a second. Okay, So that's
the same technique that we've done for all
the other kind of rotates. There's a cat. My cat's
having a bad dream. It's breathing
pretty heavy. Okay.
10. Animate: Lamp using Live Filters: All right, I want to show
you a couple other things before we run out of time today. But this right here,
this lamp movements and transformations aren't
the only things that you can animate or perform. I'm going to put my playhead
on this lamp light layer. You might notice that
it's like brown in here. I actually have a
blend mode set up. If you're not familiar
with blend modes, I'm not going to get into it, but that's what makes it
transparent and glow. And I had that set up
in my procreate file. And blend modes actually carry over into procreate dreams,
which is really nice. Don't worry about that if you don't know what
I'm talking about. Okay, we're going to put our
playhead at the beginning. And I'm going to
perform this too, so I'm going to tan, I'm going to tap my playhead. I'm going to go here to filter. We just went to move, now we're going to go to filter. We have all these live
filters that you can apply to your content
to create animations. And you can key frame them, you can perform them, You can
do all kinds of fun stuff. But we're going to
perform, I'm going to go to opacity now, because I'm in performing mode. As soon as I start
moving the slider, it's going to start
recording my movements. Watch my light. Ooh, I can
perform it getting dim. If I want to make it
flicker, I can do that. There we go. That's
another thing that you can play with. That's fun. However, flickering you
want to make your light, you can do that and then
you can go get out of that. Okay, so that's another
thing that you can do. And there's oh question. Yeah, there's a few
people were asking, since the animation
piece is super fun, if it's possible
to copy and paste the movement or the animation to another layer that
people might be working on. Or do you have to just
reperform it or re create it? Yeah, you would need to
reperform it right now. There's not a way to copy
paste keyframes or animation. Okay, But you can duplicate tracks and you
can duplicate layers. So there's a lot of things
that you can duplicate. I'm just not doing that
in this particular piece.
11. Animate: Mouse using Groups: Our last little thing
that we would be animating in this piece
is the little mouse. I'm just going to demo it, so I'm not going to go
super slow for this, but you can always come
back and watch this again. Okay, so I'm going to find
my mouse group. Here it is. I'm going to open that
up. Inside that I've got my mouse by the mouse
tail and the mouse head. For this mouse, I
thought it'd be fun to make the head
bounce up and down, and then the tail go
back and forth again. That's all the same stuff
that we've been doing. I'm telling you I use the anchor point rotation all the time. I use it for so many
different things. I'm just going to put my
anchor point down here at the bottom where the
tail connects to the body. Then I'm also going
to set up the head as well, mouse head. I'm going to have it
rotate from right here where the head
connects to the body. Now that my anchor
points are set up, I can just top done, then I'm going to, I'll
do the tail first. Okay, same thing. I'm
going to tap the corner. And whatever you want
the mouse tail to do, you can make it move big
if you want or little. However, now you can see
I've made a mistake here. I did not get into
performing mode before I started moving that, that's why my playhead
is not going across. Sometimes it's good to see mistakes because that
might happen to you too. We're going to tap
into performing now if I start moving,
it'll capture see. Now it's like going
across. There you go. You would animate your little
mousetail however you want. Big movements. Little
movements, Okay. Then I want to do the head. I'm going to go to that track
and I'll perform the head. I'm going to do
it from this part here. Then maybe here the head. We can do irregular
little movements, like he's just
like, I don't know, looking around, being a little jittery little mouse or
something like that. Maybe stop. Then
he starts again, decide however you
want to do it. Now the thing with the mouse is I want to make my
mouse do all that stuff and also move across
and go past the cat. You might notice I
showed this already. But the mouse is in a group. All these different
tracks are in a group. Because they're in a group, I can animate things
inside the group. Then I can animate
that as a whole. If I go ahead and
close my group. Now I can animate
that as one unit. While there's like
head moving and tail moving inside
groups are really powerful tool in
procreate dreams that give you a lot of control over how things animate for
my mouse moving across, I'm just going to do
some manual keyframing. I'm going to start
at the beginning, actually get out of
performing mode. Get out of performing mode. Move my playhead
to the beginning, tap it, move, move and scale. Now I've got a
starting keyframe. I'm going to start my mouse
off screen like that. That key frame is
set to be there. And then I'm going to
go a couple seconds. I think I have two
keyframes in there. Sorry guys accidentally
didn't have it exactly. The reason this happened
is because I didn't have my playhead exactly
at the beginning. I actually had it over a
little bit by default. Wherever you create
your first key frame, it will place one
at the beginning. By default, I'm going
to tap and hold this bonus one and
choose Delete. Now I just have that
first key frame and it's set to be right here, so you can delete key
frames. That's good to know. Okay, now I'm going to scroll
a couple seconds down. Where's my time? Okay,
a couple seconds down, you can see it's 2
seconds right here. I'm just like a
couple seconds down on my mouse. There we go. I'm going to make
sure my playhead is in the key frame track. See, this is on the content, It's a little clapboard. This is on the key frame track. It's a little
transformation symbol. And then I'm going to tap it
to create a new key frame. Then I'm going to
move my mouse across. I can move it across. If you put another finger
down on the screen, it'll actually snap,
which is pretty cool. Then I'll make it
stop right there. Now it's moving down
like that and stops. Then I'm going to leave m
there for a little bit. Time line, move my play
head down the time line. He's staying there.
Create a new key frame. These are the same, he's
staying in that same spot. And then I'll go down here
and add another key frame. Tap and I'll make him going off. There we go. I've just put a finger down and it's
snapped in a straight line. Now, let's see how that
looks. There he is. He, then he keeps going. He probably could stop longer. I imagine like seeing
the cat and doing, oh no, and then keep on going. You can also adjust your key frames like
I want him to stop. Now he goes, if I want
him to rush off faster, I could make this one closer. You can play with the timing of things by moving
these key frames around on your time line. Okay, that was the
last little bit of animation for this piece. Let me go into full screen view so we
can get the full picture. This is a really good feature. You're going to
take four fingers. I like to use these
41234 and tap. And that's going to go to
full screen view so you can view your movie and
it's all its glory. Then if you tap, you'll get these little controls
down here at the bottom. I'm going to tap to go all the way back and then press play. Then we have all our little
animations going on. We've got our plant, we've
got our clock going around, although I think I accidentally undid that one so it's
not going anymore. But this is swaying. We got our light flickering. Our cat just breathing. And then of course, our little mouse going
across like that. Really fun. This is so fun, Lisa. It looks amazing. Yeah. And it's really
simple things that you can. This was a really nice
static piece of art, but now that I've just added
these subtle movements, it's really something special. And that's what I
love about working in procreate dreams and animating. I get to take my work to that next level,
which is really fun. Yeah, it brings so much life to the illustration of Super. Yeah it does. Somebody was asking how do we
get to full screen? And that's a four finger tap. So I like to do, when I'm holding
my apple pencil, it's easiest to use pinky ring, middle thumb, those four fingers and then tab and to get
back out like that, that's a really handy
feature to know.
12. Taking it Further: Audio, Camera Movements & Exporting: Then I wanted to show you guys just a way that you can take
this whole thing further, just to inspire you. I'm going to go
back to my movies and then I'm going to
open this one here. This one actually
has some audio, so I'm going to turn
my volume up real quick and hopefully
you guys can hear it. I'm going to go to
full screen view. Okay. Let me know we're ready. Okay. So let me go
ahead and play that. So yeah, I really love that one. So for that I just, I did a few different things, but one of the biggest
differences was adding the audio. So I have some music
in the background. I have sound effects. I've got the clock
ticking the car, the little mouse squeaking. You can add audio to your
procreate dreams Works. Which just like the animation
takes it to the next level. And then audio just like takes it to a whole another level. And then the other thing
that I did for this one was I added the
camera movements. Let me turn my volume down now. Okay, I added these
camera movements and all I did was put all my animation tracks into a group and then I just
keyframed that group. Like moving across like that. I think I even
like performed it. I just like dragged this
whole huge thing across to create these camera
movements that way. I was able to take that scene, which is a nice
nice illustration, and really turn it into like a narrative,
like a little story. So that's something
else that you can do. And then the other cool
thing about doing this is I was able to
put it into kind of like social video
friendly format by creating these different
camera movements. So that's another thing that you can do with
pro create dreams. Awesome. So people were super excited to see the sound
and the camera movement. Yeah. If you have a moment
to just kind of high level show how to talk about
doing those two pieces, the sound and yeah,
the camera movement. So this one has a
lot of sound tracks. Not soundtracks,
but sound tracks. So you can drag and drop
sound into your timeline. And then you can
also like adjust the levels and things
like that by adding key frames for levels
so you can have sound fade in and out,
which is how I did that. But I want to show you
the camera movements. I have this group inside, that group is essentially
all of our layers. Here's our thing. I haven't
shown how to make group, so I can show that really quick. This timeline edit mode, which we haven't really
used. You can tap that. When you draw with
this, you'll see like a red line,
which is pretty cool. But this is how you
can select content. If you were to draw
a line over things, now you'll see
they all have like a red border around them and that means
they're all selected. You would essentially just
select all your tracks, tap and hold on one of them, and then you can choose group. Now all of that is one group
that I can just animate. Get out of edit mode. I'll just do it
really quick on this. I would just make it like really big and then start it here. Then I could perform
it, you could key frame it or you
can perform it. And just like go
across like that, whatever's easier for you. Now we have a camera movement pretty simple once you
get the hang of ings. Anything else about that piece? I think what I did there, Yeah. No, it's super cool,
everyone. Yeah, there you go. U for the camera movement. That's how it's set
up and you can go ahead and watch
the recording too. Yeah, for that. So cool, really, really cool to see
and awesome how to perform the camera,
the camera movements. Such a fun. Yeah. I've also done
like camera shake, where you just like perform
like and you can make like the camera shake if something like explodes or, you
know, something like that. There's so much that you guys, there's so much that you could
do with procreate dreams. The possibilities are endless. But it's good to
start out with like simple things and
then you'll just find like your creativity
grows and grows. The more you learn
about this, you learn about a new
way to animate. And you're like, oh, I could do that, and
now I can do this. And you just kind of like
slowly build over time. And it's so much fun. It is amazing. Cool. So I wanted to
show you real quick, if you wanted to export your
animation before we wrap up, we go and open it back up again. So to do that,
you're going to tap here where it says
your movie name. And then you're going
to go to Share. And then you can choose Video. Video, right there.
There are other options, but we're going to choose
Video. And then we'll export. And then we'll get that
little pop up where you can like airdrop
it to your phone, save it to your files, do whatever you want
with it after that. But that's how you would export your video if you'd
like to share it. Cool, yeah, cool. I wanted to share this real
quick. Sorry, go ahead. Yeah, yeah, yeah, totally. This is I'm putting the finishing touches on my
Procreate Dreams course, which should be
coming to Skillshare maybe today or tomorrow. I'm like, I'm right
at the finish line. You guys, it's been
a lot of work. I've been working on
this for well, months. Really planning it in production
for several weeks now. So you can always follow me on skillshare and you'll get notified when I publish a class. So that's probably
the easiest way to like know right away
when this comes. We are so excited for this
class to come out. Awesome.
13. Q & A: Yeah, let me know. What
question do you have? Yeah. So a few people asked about easing that's
come up a bunch. Just like going over how you
did easing in the animation. Yeah, I'm going to show you with a new thing because it's
easier to demonstrate. Oh, not that brush.
Hold on, sorry. Well, now everyone,
you'll get to see something from scratch
which is funny. Yeah. So yeah, I'm in
drawing paint mode now. Okay. Blackburn, I'm in drawing paint mode and
so I'm just going to draw a little dot and then
I'm going to add a key frame. Well, this is a
really long project. This is like 30 seconds, so I'm going to go to like 2 seconds, Tap, move, move, and scale. So now I've got
my two keyframes, they're both in
the same position, so I'm going to move this one, put my playhead over it, and then I'm going to
put it over there. Now it's going across
and you'll notice that it let me zoom in,
so it'll repeat. The cool thing about
the timeline is if you zoom into a section, it'll just repeat that section. See, you can see it starts out slow and then it
goes fast and slow. If you wanted to edit that
easing, that amount of easing, you can tap in between two keyframes on a key frame
track in the gray area, set all easings and then you can choose
one of the options. Linear is just a
steady rate of motion. Ease in, we'll start slow
and then go steady out. We'll start steady and
then slow and then ease in and out, we'll do both. Now my ball is
steady and then it just stops abruptly because it's not like slowing
down to a stop. That's easing, cool. There's easing everyone. That's a great, yeah. It's, if you're
new to animation, there's a lot of new
things to learn. Easing is one of them totally. Then someone asks if it's possible to
perform two different, uh, like actions
on the same item. So like it is, it is okay,
like the tail of the cat. Could you have two
different things happening via performing? Yeah, like I could do
that and then well, actually here it's easier
I can make this scale. Okay. So I made it scale and then I can go back
and I can make it move. So it's now moving and
scaling at the same time. So you can apply
multiple things at once. Just as long as it's
not like two moves. Like if I were to
move this again, go back and move it again, it's just going to obey that now because they're
the same exact thing. Like I can't move it
in two different ways. But you can apply
different things. Yes. Awesome. That's very cool. So you can add lots of different elements to your
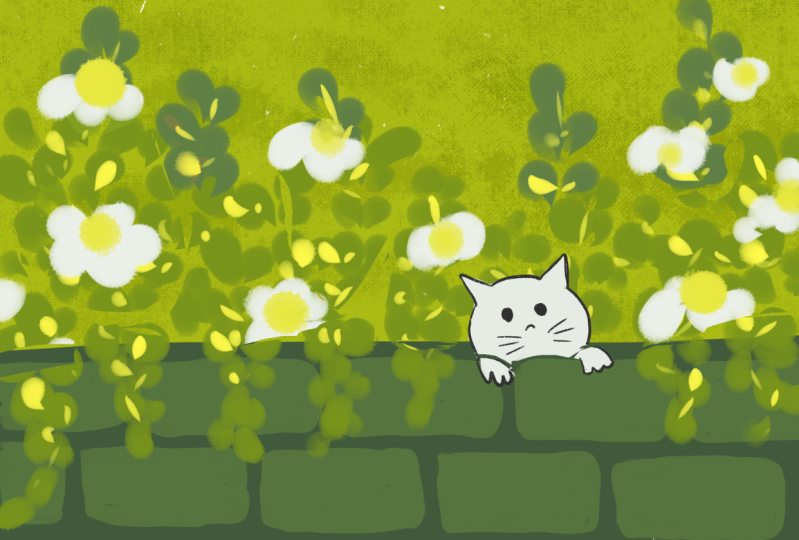
performing for one item. Yeah. Yeah. And I have, I have other examples of my work like this
was from my course, this little breezy palm tree. So the leaves, we've got a bird flying across these
little palm fronds. They have a warp applied to them and they actually
have two warps. So I did one warp and then I went back
and did another warp. So they're really like
and then I applied to rotate over that, so
that's how I did that. And then we at one
bird flying across. So this one is in my course, and you'll learn how to
animate this little scene. Awesome. So everyone, Lisa's class is going
to have that one if you want to go into
details on that one. Yeah. And then here's another one that we're doing in the class. Leaves falling down, tumbling. So this is a rotate and then move exactly with the ball that I just showed you. That's
how I made those leaves. Cool, rotate, end movement
at the same time. Wow, it's so cool. It
looks so realistic. Yeah. And then I do have some other procreate
artwork that I brought like once I
learned how to use dreams. I like went through my whole
procreate library and just like found things that I thought could use a
little bit of motion. This one was just like I did
a little frame by frame to kind of make the
water kind of wiggle, but then it was
just like a frame back and forth kind of movement. So let me see what else I have. This little spaceman
is really fun. All the legs and
this little tube, they're all the anchor point
rotate, that's what it is. And then I have
this like sky, kind of like moving around
in the background. That was a really
fun one. Wow, this is another anchor
point rotation. And I performed his
little troppy claws and the eyes moving
back and forth. These are so fun. Yeah,
someone asked a few times about the shadows
with the animation like I guess I just saw some
shadows in the pool lady. Like how does, can you add shadows that like
come and go as they. Yeah, so I have the shadow
is like a blend mode, so that's why it's
kind of transparent. But they're all together
as kind of one thing, like remember how I said you
could group things together. So it's grouped together, so it rotates kind of
at the same rate, this is probably
not realistically how a shadow would move. But it works. It works for this. Yeah. I think it looks great. Yeah. And let me just check if there's any other there's a lot of
small questions, but I'm going to save those and encourage
everyone to watch the recording because a lot of the little more technical
questions were covered. And we're going
to send out a lot of resources that should cover your more specific questions. And then my course
like I do go really slow and I explain the
concepts of things and just kind of like
really giving you like a high level of
what all these different kind of like terms and
concepts and features. And there's so much that
you can do with it, so I cover lots and lots
of stuff in that course. Yes. So definitely
come to skill share for Lisa's recorded
for the filmed class. It's going to be awesome.
We're super excited. It's going to answer more
of your questions and yeah, it's going to be a learning
process for everyone. But hopefully you're feeling inspired about what's
possible now. Great dreams. And before I do our
closing slides, Lisa, last question for you is, what would you say you're most excited about for this app? Like how will this app change your workflow as an
artist and a creator? Well, I feel like it already
has in so many ways. Like whenever I
draw anything now, I always kind of have in the
back of my mind like, oh, how can I make this move like, and then I kind of like cater what I create to kind
of like support that. But yeah, it already really has. And it's allowing me to create artwork that's just so much more engaging than just
like a static piece. So that's really exciting to me. And then the other
really exciting thing to me, because I'm a teacher, is like I just can't
wait to see what people start creating
once they kind of like get over that first
little hump of like learning that
what this stuff does and what it is and just seeing all the amazing creations people are going to make. I feel like it's
just going to change the landscape. So,
really exciting.
 Lisa Bardot, Happy Art-Making!