Transcripts
1. Introduction: Have you been wanting to
take your illustrations to the next level and bring them
to life through animation? If you're like me, the
answer is yes, of course, but for many of
us, animation can seem overwhelming
or intimidating. Well, Procreate Dreams opens
up a whole new world of possibilities to finally
animate your illustrations, all from the comfort
of your iPad. Procreate Dreams is
an incredible new app that combines the
power of Procreate, a popular digital
painting app with animation features to create
stunning animated artwork. And while, of course,
it takes time, I promise it's not as
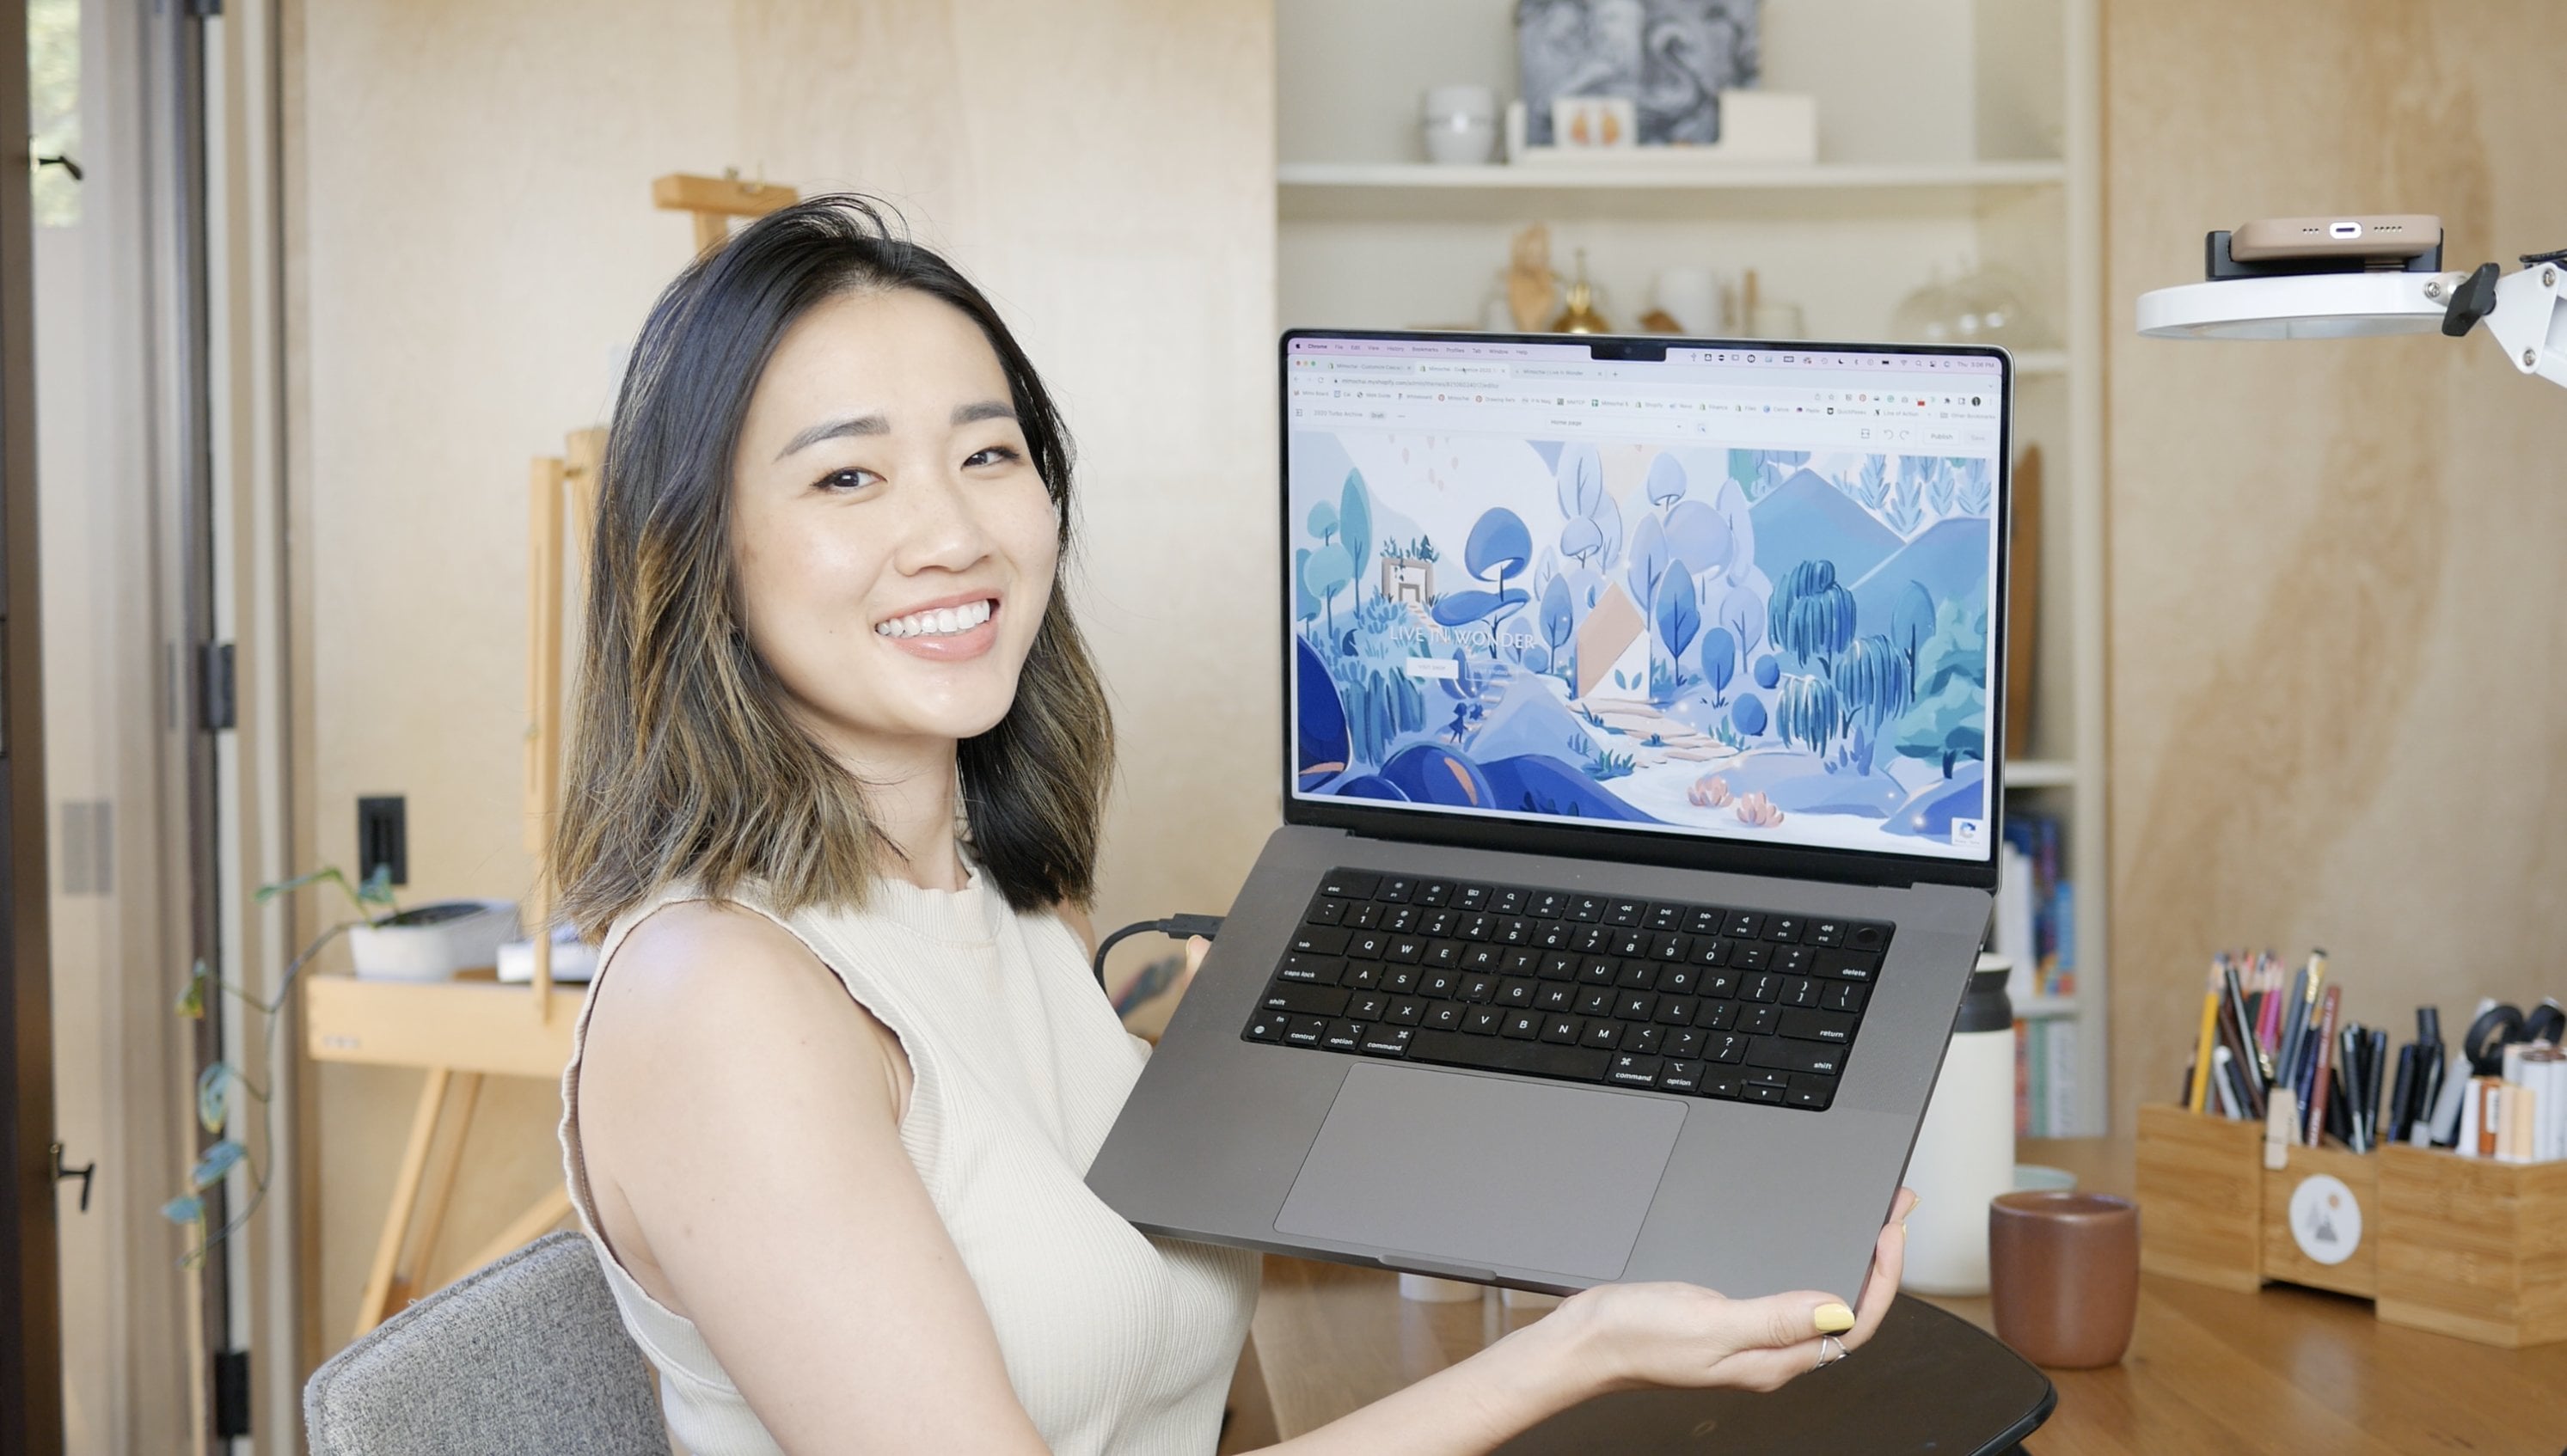
scary as it seems. My name is Mimi, and
I'm the owner and artist of an independent
studio called Mimo Chai, making illustrated books,
products, and classes. I've always wanted to add animation to my
digital illustrations, but generally found
it way too tedious. Procreate Dreams has finally put animation
within reach for me through its
streamlined design and unique features
such as performing. I met this class to share
what I've learned and be an approachable introduction to other illustrators who are also not traditional animators. In this class, I'll show you how to use Procreate Dreams through a fun and approachable
class demo that builds upon each step to make a final beautiful
looping animation. Together, we'll explore
the three powerful methods of animation in
Procreate Dreams, frame-by-frame animation,
keyframing and performing. I'll provide everything that
you need and also cover tips and workarounds for common issues that beginners
face with the app. By the end of this class, you'll have the fundamental
skills and knowledge to start creating your own looping
animation illustrations. There are so many ways that
you can use these skills. Share your work on
social media platforms, send them as gifts, expand
your portfolio, and much more. Just imagine your
artwork coming to life, telling stories, and
captivating your audience. So if that's what
you've been looking for, let's get started.
2. What We'll Learn: I'm so glad that you've
joined this class. Let's go over what
we'll create in this class together and
what tools you'll need. We're going to start with an illustration and turn it into a looping animation that we'll export as a video and a Jif. I've designed the
class demo to be based on the four count
breeding loop to give us an easy structure to work with because there's
a clear pattern of going in for accounts and then coming back
out for accounts. I think this is a
great structure for a beginner to time
their illustrations to, and it's a meaningful way to create an animated
illustration. Provide all of my
working files in the class material
so that you can follow along step by step. But of course,
you're also welcome to work on your own files. My approach for this
class is to focus on the basics and most helpful
tools and tips that I found as I was learning Procreate Dreams
as an illustrator that is not an animator. So this is not an advanced technical animation
class, rather, how you can use the power of this new application
to really breathe life into your illustrations in an approachable and
manageable way. All you'll need is your
iPad, your pencil, the Procreate Dreams app, and our class working files. So I'm going to be providing
you with the Procreate files an illustration that I
created that will call peace. I'll be including both the
Procreate file as well as a Procreate Dreams
file so that you can see how it starts
and how it ends. So you just download
the files onto your computer and send or
airdrop it to your iPad. For the Procreate file, when you airdrop
it to your iPad, it should be under
your resents folder. If you go ahead and just click on that after it
finishes downloading, it should just automatically
open up into your Procreate. Later on the class
demonstration, I'll show you how
we'll work with that in our Procreate
Dreams app. For the Dreams file, I
provided it so that you can see how the final
animation turns out. It is a large file and it
will take a while to load. So once it's finished
downloading, the most seamless way
that I've found to import it into Dreams is to actually
click and hold on the file. Click on move, and
then on my iPad, Navigate to Procreate Dreams, enter the theater subfolder, and then save it into here. Then when you open
up your Dreams app, it should automatically appear. I'll be using this file to show you around the app
and how it works. But if you just like
to jump in and not deal with the downloads
at this point, you can either just follow along just watching the video or open up one of the existing demos that Procreate
Dreams comes with, and you can follow
along in here. Last thing I want to highlight is that I recommend keeping the link to the Procreate
Dreams official handbook handy. It has all of the
main terminology in there and is constantly being updated as the app
has new versions released. Once you have all of your
tools and materials collected, let's continue by talking
a little bit about the difference between
Procreate and Procreate Dreams.
3. Procreate vs Procreate Dreams: Because this class
is designed for illustrators who are already pretty familiar with Procreate, I want to spend some
time talking about the difference between
Procreate and Procreate Dreams, because I'm sure many of you have questions on
whether you really need both apps or what exactly one is for
compared to the other. So Procreate is perfect for digital painting
and illustration. I've used it for
about ten years now, created entire books with it. I absolutely love the program, and I assume you do, too, if you're
watching this class. Procreate is best for drawing
and painting still images. It also has the brush studio, which is currently not
in Procreate Dreams, and this is where
you can customize your digital painting brushes. And critically, Procreate
is where you're able to export the formats that are important for digital
illustrators and painters, such as Photoshop PSDs. I animate illustrations that
I also need to turn into other works such as prints
and books and products. So it's essential for me to start the illustrations
in Procreate. I really think of them as
working hand in hand together, creating my artwork in Procreate and bringing them to life
in Procreate Dreams. Now, I just want to give a high level overview of how you can animate in Procreate Dreams and how that's different
from Procreate. There are three
main ways that you can animate in Procreate Dreams. There's frame-by-frame
animation, which is, like, the traditional type of
animation you have in mind. When you think of
classic Disney movies, you're just drawing one
frame by one frame, and when you put them
all together and play them back at
a fast frame rate, it looks like it's moving. And there are a lot
of helpful features in the Procreate Dreams app, such as onion skins
that will allow you to experience this
in a much smoother way. Now, Procreate does
have some level of this through their
animation assist feature, but it is a much more robust and seamless experience
in Procreate Dreams. The two other ways of animating
and Procreate Dreams are related and totally different from how you can
animate and Procreate. Procreate Dreams
introduces performing, which is this totally
unique feature I've never seen anywhere else, and it's really exciting, especially for somebody like me who is not
really an animator. Performing uses the
technology of keyframes, which exists in apps
such as after effects, if you've ever used
a program like that. If you have never touched anything like that, don't worry. I will cover all of it in
this class demo together. For now, it's just helpful to know that Procreate
Dreams brings in this technology that used
to require a desktop, computer, all of
these different apps, and now it brings all of it to your iPad in one
simple application. With keyframes and performing, you're able to do all these different types of animation to your illustration
that do not require drawing your work
over and over again. But there is a learning
curve when it comes to figuring out how to apply it
and make it work for you. And that's where this class
is going to come in handy. Don't be intimidated,
overwhelmed or frustrated by any of this. I know it can feel like a lot when you're
just getting started, but this class is going
to go step by step, little baby steps through an illustration that is
already provided so that you can see how it all comes together and really do hands on exercise yourself
so that you can get familiar with all of these different
types of animation. You'll see what I mean as we
get into the demo together. Another note is
that this class is filmed using Procreate
Dreams, too. They are constantly releasing
new updates and features. So just keep in mind
that if you're watching this class a few months from now or even a few years from now, your interface might have a
lot more robust functions. For now, you have
everything you need between Procreate and Procreate Dreams to join this class. So with that, why
don't we open up Procreate Dreams
and get started?
4. Interface: So let's open up
Procreate Dreams on our iPads and
take a look around. All of this is going to
make a lot more sense as we get into the class demo. For now, I just want to give you a high level overview so you can get an understanding of
the lay of the land. If this is your first time
using the app, of course, you'll have a lot
fewer files than I do, and you'll likely
just see the demos that Procreate Dreams
automatically comes with. Now, these are helpful and
fun to look at because you get to see all
the different layers that the artists used
and how they set it up. And when you hit
the play button, you can preview The animation. And you're welcome to take
some time to look at them. No. But keep in mind that these demo animations
are really advanced. So on the one hand,
don't be intimidated by thinking that this is what you're expected to
create right away. And on the other hand, don't think that these are super easy, and this is a magical app
that's going to allow you to create animations at
this level right away. They're really here to show
you what the app can do and provide inspiration
and good reference. Here, I just want to
quickly point out there's a small icon that opens
up into a sidebar, and you can decide whether
your Dreams files are saved onto your iPad
or your ICloudDrive. If you save onto your
ICloud Drive, one, it helps with freeing up
storage on your iPad, and it also helps you be able to work on Dreams
files across devices. Save all of my files on my iPad because those are not functions
that I need right now. Just know that that's
there. So I just hit it by tapping
on the same icon. Now let's look at
these icons up here. So select just allows you
to select multiple files, and that allows you
to do some bulk edits such as putting them
together in a new folder, deleting them, or
duplicating them. The little checkbox to
exit out of that mode. And the next thing we'll
look at is this ad button. So this is where you'll
go to start a new file, and Procreate Dreams comes with some pre loaded templates
of commonly used sizes. But you'll always be able
to customize and specify a specific resolution within
the file settings itself. One last note before we dive in. Within the theater itself, you'll have many options
of rearranging your files. And if you click and
hold, you'll also see some typical
options come up. For now, let's get
into the interface and open up our class demo. Remember, you can also
follow along with one of the existing animations
if you prefer. So the latest Procreate Dreams has a really
streamlined interface. We have our working
stage on top, our timeline here at the bottom, along with our three
different modes, and then we have our functions and settings in the middle. So the stage is where
you're going to draw and paint and perform. And the timeline is
where you can compose, keyframes and edit content. You can think of these as
your layers and almost like the strings of the puppet while the puppet
itself is up here. Now, down here are
the three modes. So there's compose mode, which is how you'll be able
to edit tracks and move things around and do
various adjustments. Perform mode we'll get
into more in a bit, but that is the animation method that I mentioned earlier. And keyframe mode is
where you'll be able to manipulate keyframes
on an individual level. We'll get into these
a lot more later. For now, let's focus on the icons going
from left to right. So the theater button will
take you back to the theater, and then we have our
settings button right here. So let's start at left to right. Under project, you
can set your name and your profile picture
for about this artwork, and this actually
saves with the file, so if it ever gets
transferred somewhere else, someone else looking at your file will be able to see that. This is where you'll set
your frames per second. And if you're
unfamiliar with this, I'll include a link to somewhere that has
a good explanation. But basically, it's how
many frames or images. Still images are
in every second. So frame-by-frame
animation tends to be 12 frames per second, which is what we'll
be working in, and it gets higher and higher
as you get into cinema, television, and other formats. For now, let's just
focus on frame by frame. Duration is the time
of your animation, which you'll also be able
to set on the timeline itself by clicking and dragging on this little
handle right here. History gives you some options on how many undo steps
you would like to have. I think 100 to 250 is plenty, but you can go all
the way up to 1,000. But this does affect how
big your file size is, so just keep that in mind. You can also set your
recent undo steps, and there's different recovery
points for your file. These are automatically
generated, and you can use these
to revert to pre existing points in your work
in case you need to go back. Resolution is where
you'll be able to set the size of your animation. As I mentioned earlier,
Procreate Dreams comes with some preset
commonly used sizes, but you'll be able to create custom and specific sizes here. Now going into stage, the background color
is where you'll be able to set the
background color of your draw and paint mode. I'll go more into that in a second when we talk about
the draw and paint mode, but just know that that is here. You can also set a
transparent background, save if you're working to make a Jiff or a transparent
video overlay. Onion skins are also for
the draw and paint mode, and this is when we get into our frame-by-frame
animation. We can set what color
our onion skins are. If you're unfamiliar
with what that is, I'll be getting
into that more in a second when we talk about the drawing mode
and the flipbook. You'll also be able to adjust the setting from
within that area. Time code is this little
time code right here, and you can turn that
on and off whether you find that helpful
or distracting. The timeline lets
you set whether you want to have it loop ping
pong or be a one shot. So, for example,
a ping pong would look like going forward, and then when it reaches
the end of the timeline, it'll go backwards, actually.
So you can play with those. For now, we can leave
it in loop or one shot, and adding a keyframes at the
start automatically places a start in keyframe
at the beginning of your content when you create
another keyframe later. We'll get into that more in
the keyframes demo section, but just know that
that option is there. Share is where all of
your export settings are, and we'll have a dedicated
export class section, but know that you
can export as video, animated Jib, frames as images, the current frame
just as a still JPEG, the Procreate
Dreams file itself, and different advanced
export settings. So you can go in here and change the format and get really specific on all the
different settings that you might be used to if
you do video exporting. Finally, under preferences, you can set your
rapid undue delay. I keep mine around 0.6 seconds, and that just means that when you hold down with two fingers, how long it will take before it registers
that you want to quickly undo a lot of steps. And I keep it at a slightly longer
time just so I don't accidentally undo a lot of work. So keeping that too low to me often triggers
it unexpectedly. But you also don't want
to do it too high where you feel like it's slowly
down your workflow. So you can adjust that there. Undo and redo buttons are
also just a preference. You can have these little
undo redo buttons down here, but I always use two finger tap and three
finger tap for that, so I hardly ever use those. But if you find that you're
not used to tapping on the screen to undo and redo or you feel that
messes up your flow, just know that you can
have those options there. And then keyboard shortcuts are for if you're working with
an external keyboard, and this is more for
an advanced user to help speed up workflows. So for now, we're not going
to worry about those. And then gestures gives you
a few different options, mostly having to do with your Apple Pencil on how it interacts with
Procreate Dreams. I have left them all in default, and so I'm not going to worry too much about those right now. One thing that might be helpful
to know is that there is this option to squeeze
your Apple Pencil to preview your timeline. So that is nice and just
squeeze it again to pause. Okay. Now moving on. This is the multi select button. And when it's red, it
means it's turned on, and it basically turns
your Apple Pencil into this magic one slash
Lightsaber where you can multi select different
tracks and organize them, group them, move them
around as needed. So I'm just clicking and holding and dragging around a group. So that's really helpful
for when you need to make edits to multiple tracks. There's also different
options that show up depending on whether
this is turned on or not. So this is turned on
and I click and hold. You'll see that I have
these various options. I can duplicate it, flip it, group it,
convert it to flipbook. But if I turn it off, you'll see that there are more options. So sometimes, if you're not seeing an option
that you're expecting, just make sure that
you are clicked out of this multi select tool. Besides that, we have our
timeline play button, and that's very straightforward. There's a few ways to do that. There's clicking on this icon. There's squeezing
your Apple Pencil. And also, if you use
the four finger tap to have a full screen
preview and tap the screen, there's another play button
that comes up down here. So there's a few different
ways to play your timeline. Now let's move over to
the right hand side, and this is where you'll
add all of your content. This is how you can
add a new photo, video or file into
your workspace, and also add your flipbook, drawing, text, and track. So let's quickly
explore each of those. Let's start with drawing. You can either click
on drawing and a new drawing track will open up or you can pick one of the drawings that we have
in our existing animation. So if you click on, for example, this Moss track right here, you might need to expand
the group that's called character and Moss and
then hit Edit Drawing, it'll take you to an
existing drawing content in the draw and paint mode. This is going to look very
familiar to Procreate. You have your brushes,
your sludge tool, your eraser, layers and color picker on the
right hand side. And on the left hand side is a major upgrade to the
latest Procreate Dreams. And here you'll have settings, which we'll get
into more in a bit, filters, which has
all of the hue, saturation brightness, blurs,
noise and sharpen filters. And very importantly, to me, is the select and
transform tools, also known as Lasso tools. So now, you'll be able to select your drawings and
manipulate them just like you are comfortable
in doing in Procreate, which makes it a lot easier
to create your drawings in dreams instead of having to draw them and Procreate
and then move them over, like in the older version. So you have all your selection
tools here, rectangle, ellipse, and you can select part of the drawing
and, of course, transform it. So there's uniform,
freeform, distort and warp, you can flip parts
of your drawings, rotate them, and reset as well. Another thing that
I want to show you is that in the brush library, Procreate Dreams
comes with a lot of brand new animation
friendly brushes, which are really fun
to explore with. For purposes of this class, I'm providing the class brushes, and I'm going to quickly show
you how to drop that over. Let me show you quickly how
to import those brushes. So you want to open up
your Procreate Dreams and procreate side by side. And then in your brush
library in both apps, click and drag the
folder you would like or the individual brush
you would like, both work, and just drag it over
to Procreate Dreams, and it will automatically
load in perfectly. So now you have your brushes. And this is also really important because
Procreate Dreams doesn't have the brush
studio that Procreate does, so you'll be able to easily move brushes over and
not worry about them. Last thing I want to show
you are these settings. So within the draw
and paint mode, there are more settings that are overlapped and different
from the timeline settings. So here, you can insert a photo and file into
the drawing itself. So this is not a new track. You can adjust the canvas, and each drawing has its
own dedicated canvas. You can set the onion skins, which we'll talk
about in a second when we get into the fbok mode. And there's different preferences
that you can set here. For now, these are pretty
advanced settings, so I would just leave
them as a default. It already works great, as is. I do tend to enable
painting with finger off, and that's how it
comes by default, because if you keep it on, I use so many tap
gestures that it's almost impossible to not
make some strain marks, which will be a pain to
clean up in your animation. So I tend to do everything with the Apple Pencil and keep
this setting turned off. That is our draw and paint mode. It works just like in Procreate. You can add different
drawing layers. The drawing layers
themselves can be turned into masks
and clipping masks, and they can also be grouped. So now let's exit out
of this drawing mode. You can do that by
clicking on drawing and finish drawing or
just double tapping. And now let's turn to flipbook, which is very similar, but has one very
important difference. So again, you can either go
to add and hit flipbook, which will open up a brand
new flipbook on a new track. I want to show you the flipbook that is already in
the class demo, so there's some existing
drawings for you to so the main difference is that there is this
flickbook module down here, and you can think of the
difference as in drawing mode, you're working on a
background painting or a key frameable object that doesn't need to be animated in a frame-by-frame animation. And flipbook is where you'll want to do
your frame-by-frame animation and not be working on one static, super
detailed piece. Within the flipbook setting, all of the UI is
exactly the same. You're still in draw
and paint mode. Main difference is this
new flipbook window. So right now this is set, you can't move this around. It's just down here. And there's a few different icons here that help you organize and
clean up your frames. So first of all, you can
have multiple tracks, which is handy when
you want to work on two different frame-by-frame animation at the same time. I also have found it to be handy for when I want
to experiment with different animations
and be able to turn them on and off
without having to erase my work. So
what does that mean? This is the first light
swoosh that I did. And I didn't really
like how it turned out. Instead of erasing it and
starting over, I just hit it, started a new track,
and redid my animation, and I'm happy with
how that turned out. The multi select tool allows you to select different frames, similar to how I showed
you on the timeline. It's just a way to select
different content and then be able to flip them, duplicate them, paste, copy
cut on a collective level. You can also, of course, do that on individual frames as well. And there are a few more
options here such as setting a specific frame
duration and having different track options such as setting the blend mode
and the mask mode. Clicking on this
bar icon here just adds another track
to your flip book. And this plus sign here
just adds more frames. So if it reaches the
end and you say, try to duplicate one of these, it will say this
action cannot be completed because you
have no more frames left. So all you have to do is
just keep adding more, and then you can now
duplicate that frame. The other way that you can
expand your frame count is actually to go back
out into the timeline. And hold on the
flipbook content piece on the track and then
just bring that out. If I go back in,
now you'll see that all these new empty
frames have been added. So that's flipbook. Text is exactly what
it sounds like. You can add in text. So let's just do the text. And then if you click on this little A button here on
the right hand side, you'll be able to
change the font, and Procreate Dreams
automatically comes with these fonts. You can change the color, and you can change the format. So the size, the kerning. If you're into typography, you'll know all of these
different options. So be able to adjust
the font to how you like it and get really granular and nerdy about it
if you would like. You can also change the
alignment over here, all caps, outline, underline, strike through,
vertical, everything. Adding a track just gives you a blank track in your timeline. And I also want to note that if you want your track to go into
a specific position, make sure you have the track beneath selected because
it will go above it. So sometimes you'll add
a track and you're like, Where did it go? It's because it might have
gone at the very top or somewhere else because
another track was selected. So just make sure that
you have the right track selected before you add content. And, of course, you can add
a photo, video, and file, and we'll be using
the file to import our Procreate Dreams to
start our animation. The last thing I want
to talk about in this interface section is
just the stage itself. So note that this frame will
show you what you'll export, but there's an entire backstage where your content can live. And Procreate Dreams supports 1 million by 1 million
pixels, which is incredible. So you can actually have
this huge illustration, and the entire animation
is actually just moving around that illustration. So just know that
what you see in this box is what you'll
get in your export. You have all this
room to play with, and that is a very different feature compared to Procreate, where if you move
anything outside of your canvas and Procreate
it, it gets deleted. Those pixels just
aren't there anymore. And that, of course, isn't
the case in Procreate Dreams, which is very critical
for animation. So that's the basics of the interface and the
settings of Procreate Dreams. Now let's get a
little deeper into the timeline and talk about
how we navigate around, manipulate our content,
and get things organized.
5. Timeline Navigation: Now that we have a
lay of the land, let's get to know the timeline a little bit better
because I know it can be a little intimidating when you're totally new to
this kind of format. As I mentioned, a timeline
is made up by tracks. So the tracks refer
to the entire bar, and they can be empty or
they can have content. You can think of tracks like
layers in your drawing with the ability to edit actions
and animations on each track. If you've ever edited
a movie even in a basic program such as I
movie, this will look familiar. As you'll recall, when
we hit the plus button, we can add new content
pieces and different tracks. And when we have a blank track, we'll be able to see
different options when we click and hold. So when your track is blank, you'll only see these
few basic options. And when your track has content, you want to make sure that
you're clicking and holding on the content piece to get all
of these different options. So if you're not seeing these options come up
when you click and hold, just make sure that you're
clicking on a content piece, not a blank part of the
within a content track, you'll be able to change
the opacity of that track. So right now I'm on
these light orbs. Instead of just dragging
it back and forth, you'll be able to see that I'm adjusting the transparency, and that can be very handy. You can rename them. You can
highlight it with a color, and this helps
with organization. So right now I have
yellow highlighted. And so when I zoom all the
way out on my timeline, I'm just using my three
fingers to pull and expand. I'll be able to quickly see
where my light orb layer is. Also be able to select the blend bode of
that content track, so how that blends with
the tracks beneath it. You can also set this
track to be a mask, so it could be a clipping mask, an Alpha mask, or luminins mask, and we'll get into that more in the class demo. You can ungroup. So right now, you'll see if you expand on this
little carat right here that this is a folder group that has all of my little
light orbs in it. And if I clicked and held
and selected ungroup, the group would go
away, and then I would just have all of these
light orbs individually. You'll also be able to
convert to flipbook. So I'm not going to do this
right now, but basically, if my tracks were
set up to also work just as well as a
frame-by-frame animation, then that would be handy. You can split content. So say I went into
this track of one of these orbs and I just
hit split content. Now you'll see there are two
different content pieces and I can manipulate
them independently. I can also duplicate after,
which I use all the time. So you'll see that
these two light orbs are actually exactly the same. And I did just click on
the first one and hit Duplicate after to
create another copy. You can also fill duration. So this is really handy for when you say have a small
frame of a drawing, and I wanted to go all
the way until the end. So if I hit Fluration, you'll see that that bar
extended to the end of my track. Under track options, those are actually the exact same options as when you click on a
blank part of the track. This preview of what you see in your content piece is called
the content thumbnail, and you can use the three
finger swipe, as I mentioned, to expand it and contract it, and that will help you find the piece that you
are looking for. So just to be clear,
content versus tracks, the track is the entire bar, and some parts of
it can be empty, such as here, and the content
is the individual piece. It can be any of these
things. It can be text. It can be a photo,
it can be a video, a file, a drawing,
or a flipbook. Now note that this entire time. I've been in the composed mode. If you're in the perform
or keyframes mode, you'll still be able to get some of these
options to come up, but it's best to do the organization and
the manipulation of content pieces in compose mode because sometimes the settings won't always
show up in these modes, and in these modes, you might accidentally adjust a keyframe that you
didn't mean to. So for example, say I wanted to adjust the rock
layer right here. If I'm in perform mode
and I try to adjust it, that actually gets
recorded as an animation, which is great if
that's what I intended. But if I just wanted
to resize it, then I don't want to
be in perform mode. And similarly, with keyframes, it would also create a keyframe and cause it to
turn into an animation. Just wanted to resize it
and have it stay that way, I want to make sure that
I'm in composed mode. So on each content piece, you can think of it as
a single tap opening up this box to resize or rotate. Tapping and holding gives you all of these
different options. If I click and hold at the end, either end, I'll be able to adjust its duration
on the track. To rearrange, all
you have to do is click and hold the
content piece. And one of the more hidden
gestures is actually, if say you had two content
pieces side by side like this, if I just click and hold
and push it back and forth, you'll see that
this gap is formed. But if I click and hold and then put my other finger down, you'll see that one I push and pull it brings its neighboring
piece along with it. So those are the different
ways that you can manipulate content in
the composed mode. Now let's talk about
this playhead. So this line is going to tell you where your playback
is going to start. It's also important
to know that this is where a lot of
things can be set, such as when you
hit split content, it depends on where
your playhead is. And when you hit
perform, for example, that is where you're going to
be starting the recording. And when you go into
keyframes mode that actually turns into this
little action icon, and that's where
you'll be able to set the keyframes adjustment
that you'll want to work on, which we'll talk about
a lot more in the demo. But basically, you
can move in scale, warp, distort, and
also in filters, change the opacity, the blur, sharpen noise, hue
saturation brightness, and now lens blur. So if you're ever looking for something that doesn't
seem to be appearing, such as if you're in the composed mode and
you're trying to add a keyframes and you're wondering where that little
action playhead went, just make sure you're in the
right mode because each mode gives you a different
playhead functionality. And just remember that
for the playback itself, you can always go back into
settings here under timeline and set whether you
want it to loop ping pong or just be a
one shot play through. One other important
playback feature that I think is really cool
about Procreate Dreams is if you're just zoomed out, you can preview, of course,
the entire animation. But sometimes you're working on a really specific part, say, I just want to keep looking
at the part where her hand goes up and see if
that's working. The playback will only show the part of the timeline
that is visible to you. So right now I'm
zoomed all the way in, and you'll see that
it just keeps looping on that particular animation
that I want to focus on. And that's because I've zoomed in all the way on my timeline. You'll also notice
all these numbers up here on your timeline, and we call that the ruler. And that just shows you where in the duration of your
animation you're at. So right now I'm at 3 seconds, 6 seconds, 7 seconds, and you can get really specific. And this will become very important for when you're
working on timing, and that actually is a good
time to talk about keyframes. So within the keyframes mode, you probably notice that this additional little track appears underneath every
single main track. And that is your keyframe track, and that shows you all the different keyframes
in your animation. Now, when we get
into the class demo, you'll see that I use the ruler to time when certain
animations happen. So that's where you'll
really want to use the ruler to accurately
set your keyframes, your content, and get the
timing just how you like it. Finally, I just
want to remind you that we have the multi select
tool that's really handy for when you want
to organize content and tracks in your animation. So, for example, say, I wanted to group the rock
and the character moss. So right now they
are both groups already with the
individual drawings. But say I wanted to manipulate
the two of them together. So I'm going to group them just by selecting the
multiselect tool, drawing a quick
line through them, pressing and holding on either one, and
then hitting group. So that's how you can group
and organize your content. The multi select tool
can be used in any of the modes to perform
actions on multiple tracks, pieces of content,
or even keyframes. So you can go in
and select all of these keyframes and
duplicate them, for example. Basically, whenever you want to do something to multiple tracks, contents or keyframes, use
the multi select wand. One small thing that sometimes trips people up is
that if they have multiple content pieces selected with the Multiselect tool
and they click and hold, you'll see a lot fewer
options than if you're out of the multi select tool and click on an individual content track. So if you're not seeing
what you're looking for in the content
track adjustments, just make sure you're not having multiple tracks selected. And the last thing
that I want to show is just that you can take
your pencil and just pull on your timeline
to make it taller or shorter depending on which area you would like to focus on. So say you want to really get granular in here and have a larger stage, you
can pull it down. Or if you're trying to organize all your tracks and see
where all your content is, you'll have a lot more space by pulling that all the way up. Now that we have a good
sense of the timeline, let's turn to gestures.
6. Gestures: That we've touched
on many of the gestures in previous sections, but I want to have
one dedicated class on all the main gestures
that you should know. We'll be going over these
again and again in the demo, so it don't feel
like you need to memorize everything right now. It'll just be nice to have one video that you can
refer back to later on. Let's start with just
basic navigating around. With our two fingers, we can slide our timeline and
our content on our stage. We can pinch to zoom out, and then zoom in. Same thing on our stage. Also quick pinch on both to
get zoomed back out quickly. And then we'll use our
three finger scrub to expand our timeline. So going up and down
makes the content and the tracks taller vertically so we can better
see our thumbnails, and scrubbing left to right expands the length
of the tracks. To move content, you can tap
and hold with the finger, just like with the Apple Pencil. Of course, two and
three fingers are also your undo buttons and
your redo buttons. And if you press and hold
with your two fingers, you'll trigger rapid undo and
same thing with rapid redo. Remember, you can go under your settings under
preferences to adjust how long you have
to press and hold before the rapid undo starts. For me, it's set to 0.6 seconds. So just keep an eye out for when you're using your gestures, say you're pinching and
zooming that you don't accidentally undo or redo. And that's where setting this rapid undo delay
is going to help. And also, thankfully,
now there's these history recovery
points if you need. You find that you don't want to have the undo and redo
triggered by your fingers, remember that under
preferences and gestures, you can turn that off under
undo and redo gestures, and then just make sure that your undo and redo
buttons are shown there. Now let's get into the
timeline maneuvering with one finger X very similar
to the Apple Pencil, so you'll be able to pull up and down on the timeline to resize. You can tap on individual
content pieces, click and hold to
bring up the settings, tap and hold to move
content around, as well as on the track itself. If you tap and then
go on the edge, you'll also be able
to readjust it. You'll see that this little
red handle shows up. And you can also double tap with your finger on any
content piece to zoom in. And when you're zoomed in,
another helpful gesture is that with one finger, you can hold the
playhead right here. And if you just click and hold and flick it quickly
to the left, it'll actually zoom all
the way back out and give you an automatic playback
of your entire animation. That's handy for
when you're really zoomed in trying to focus on a particular part
of your animation. And if you feel like
that's looking good, you just click and hold and flick out to see how
it all comes together. Another helpful thing
for playback is using your four fingers
to touch the stage, and then you'll get this
full screen preview of your animation with its
own dedicated playhead right here and just
tap again with your forefingers to return to your main stage and timeline. Now let's talk about using the pencil and the
finger together. This is one of the
hardest gestures to just figure out on your own,
but it's really helpful. So as I mentioned
earlier, for example, if you have two content pieces together and you just move
it around with your pencil, then you have this
gap that shows up. But if you do the same thing, but click and hold
on an empty part of a track and drag back and forth, then the content
pieces move together, which can be very handy. There's also a functionality of using the other
finger on the stage. So this is how you
actually enable snapping. You need to be in the
perform or keyframes mode. But say I have this
bounding box on my content, and I want to rotate it. To turn on snapping, I just
place my other finger. And now snapping is enabled. You have to be a
performer keyframes mode. If you're in the compose mode, for example, and
you want to say, rotate these leaves
with snapping, you'll notice that tapping
and holding does nothing. So you want to make sure that you're in the keyframes mode, and now with this anchor, you're able to turn on snapping. So those are two fun, hidden gestures by using the other finger along
with your Apple Pencil. Of the Apple Pencil,
you'll have your own range of gestures and functionalities
that you can customize. So as I showed you earlier, when you just
squeeze your pencil, it can be used as another way to start the playback
and squeezing again, we'll pause it and you can
adjust the barrel roll, the pressure
sensitivity, smoothing, and even the hover functions. So that's a little bit more
advanced than we'll get into, for now just leave it with
its default settings. So that's an overview of the main gestures we'll be
using in Procreate Dreams. Now, let's get into our demo.
7. Prepping & Importing Files: Now that we have
an understanding of the basic layout
of Procreate Dreams, ready to turn to the demo
portion of this class. Now, the first thing I want
to show you is actually how I prepare my illustration
files for animation. So I've gone into Procreate, and I have our class demo
Illustration file here. This is the main file that I use to create
the illustration, and I'm going to show
you the considerations that I did and how differently they are set up between the
Illustration file versus the Procreate Dreams
file that I provided. Just for clarity's
sake, let's first call them Illustration file. And then I tend to create a copy because I still want to keep my
illustration version, and then I'll add the
Dreams cut label to it. So when I go to the
Illustration file, I tend to be pretty
organized in how I set up my digital files. I'll have them grouped and labeled and have a general
sense of where everything is. Now, you'll see that I organize my illustration by
textures and object. I'm just going to turn
on and off some layers so that you can see
what I'm working with. And I keep these textures on separate layers because
sometimes I still like to manipulate the color or
the amount of the opacity. And so having them on
separate layers is really important for my
illustration purposes. The character in the middle
is all on one layer. I just have two
copies because I was experimenting with
a smaller person versus a larger person, and I want to go with this
slightly larger version here. And I have this little
signature logo that I add to my illustrations when I post them on social
media, for example. And finally, I have
this texture layer set to an overlay adjustment. I just want to go over
a few things that I'm thinking about in
terms of storytelling as I'm going through my
illustrations and thinking about how animation might be
able to bring it to life, but in a really simple
yet effective way. So looking at this
particular illustration, I could have chosen to have
her get up and move around, for example, and do
more frame-by-frame animation around the character, but I really felt
like the light orbs just going across
the screen would, one be quite simple to both do and to teach and also
just be really effective. As you go along and go through these Procreate
Dreams tutorials, I recommend making
a reference list of easy animations and
think about how to incorporate them into
your illustrations. As you work more with
Procreate Dreams, you'll get the hang of which animations are really
easy to do and which ones are a lot more time
consuming and can kind of design your illustrations
around that plan. I'll include a list to start you off with in the class handbook. Now, when I'm finished with the illustration and ready
to start on the animation, there are a few things
that I like to do. So first of all, I just
start by taking some notes, whether mentally or on
a new layer on top of my illustration to start to go through what possible
animations I can make. So I have an idea of what I want to do with the animation. So now I can start
to organize and cut the illustration
file accordingly. With this character right here, I know I want to have their
head moving up and down, just kind of looking up gently and then
looking back down. So I just need the head to
move, not the entire body. And so a very simple
thing to do for that is just to select the
cut and paste, and now they're on
separate layers. Now, with the rock, for example, there's not really any
animation that I have in mind, where I want to manipulate
these textures separately. I might add just a little bit of subtle ambient
movement just to add some interest there that might be not very noticeable,
but as atmosphere. So that's the only thing I'm thinking about animating
for the rocks. Similarly, for the moss, I can imagine maybe keeping
some of the texture layers separate if I wanted to have a little subtle movement there. But overall, it's the ground, and I just want to have a
very gentle manipulation of it almost like breathing
with the character. So I'm also going to
put that all together, and I would just flatten it. Now, with these
leaves, I, of course, can separate out
every single stem and every single leaf to have
individual stems moving. For purposes of
this demonstration, I want to keep things simple. We'll get to learn all
the tools that you need to understand by
keeping them together. And I think you'll still have a really cool,
kind of, like, seagrass feeling if
they all move together. Maybe technically a
little bit unnatural, but we'll be able
to still manipulate some of the leaves separately. And I think that's
a good balance. With these animations
for illustration, you also kind of
want to think about the balance of the
payoff of the effect. So you can go crazy and animate every single little thing as
much as you want. Or you can think about out of all the effects that
you're working on, which is going to
have the most impact. So the leaves aren't
meant to have a very noticeable presence
in my illustration. The focus is really
on these light orbs. Right now for
illustration purposes, I have all the light orbs on one layer, which makes sense. For animation purposes,
I want to separate out every single one of these to be able to manipulate
them separately. Now, while I can do
that here in Procreate, this is actually
something that I feel is easier to do within
Procreate Dreams. So I'll just draw
them directly in the Procreate Dreams app and
manipulate them from there. So I'm just going to
leave that there for reference right now
and not cut that up. The last thing I
want to point out is that I have background
color here. Now, of course, I can have
this dark green colors in my background color section here on every single illustration
file we have in Procreate. However, when you import
that into Procreate Dreams, that is not transferred over. So what you do want to do is
pull whichever color you've used back there and create
its own layer for that. That way, when you import the
file, it'll all be there. Okay, so let's go
into our Dreams cut file and take a look
on how that turns out. I have my texture layer
here still separate. I have my animation notes
that I showed you earlier, and I have the lights. The character, I tried a
few different versions. I was considering having
them look up and look back, but most importantly, I just need to have the
head separated out. So I'm going to delete some
of these extraneous files, and you'll see that this
is actually all we need. I have the rock here in
its own flattened layer. And the moss is
on its own layer. And you'll see that I have
merged part of the leaves. For now, I've kept this leaves, translucent layer
on separate area so that I can manipulate
those separately. And actually, you can go into
the adjustments here and already get a preview of
what that might look like. So I'm imagining that the
stems will back and forth. And then if there's
a little bit of a delay with the
background leaves, that might create a
nice parallax effect. Lastly, I have the back texture, and like I mentioned,
the background color. Everything nicely labeled
because all of that is going to drop in very cleanly
to Procreate Dreams. So the more organization
that you can have here, the easier your life will be when you import it
into Procreate Dreams. The last thing I did was just shrink the illustration a little bit so that I have more space
around the illustration. Like I mentioned,
Procreate Dreams, you can go off frame and still
save some of that space. So I wanted to give
myself the space to maybe pan back and forth across the illustration
if I wanted to. Now let's save this into our file so that we can
open and Procreate Dreams. We're just going to hit Share. We're going to save it
as a Procreate file. And once it's done exporting, hit the save to files option. And you'll see that I
already have it saved here in my files as I was
doing my preparation. So now it's saved into
our files on our iPad, and we can go into
Procreate Dreams and import it into
our animation file. So pull up Procreate Dreams, and we'll go ahead and add
a new project under social. And there are two ways that
we can bring this over. One is by adding a file. And navigating to that Procreate
file that we just saved, and it'll impart very nicely. You'll see if I click
on Edit Drawing. All of my layers have been
preserved, which is perfect. I can also actually just
drag and drop the file from Procreate and
drop it into Dreams. So let me show you
how that would look. I'm just going to grab
this file and drop it in. Now it's done the
exact same thing. If I go into Edit drawing, again, everything has been
brought in perfectly. So it depends on just
how you want to work. And sometimes what's really
nice is that you can also just drag and drop
individual layers. Say you've made an update in your Procreate file
and just want to import that one
particular layer, you can do the same drag and
drop into Procreate Dreams. Sn less focus on setting up our file and
Procreate Dreams. I cleaned up our tracks, and we have our
drawing here with all of our layers
in this one track. Now, first, let's just make sure that the animation itself
is set up as we would like. So we want our animation to
last for 8 seconds long, and there are two
different ways that we can customize that. It comes default at 3 seconds. So we just want to drag this handlebar, which
is gray at first, but when you click
on it, it turns red and drag it to 8 seconds. Another place you can change the duration
is actually under the settings icon and then going to project and hitting
the duration here. Now, first, we'll actually
want to make sure that our frames per second is
12 frames per second. Then we're going
to want to change our duration to 8 seconds. And I want to point
out that if you set the duration first and then change your
frames per second, you'll notice that the
duration changes accordingly. It's just proportional to how many frames
you want it to be, so it's best to change
the frames for a second first and then set
your duration. So now our animation
file is set. Let's resize our drawing because it imports at this
rather zoomed in size. In composed mode, you should get this blue bounding box
that appears around your drawing and just bring
it in to about that size. It doesn't have to be perfect. Just match it to the class
example as best as you can. And then we're going to want to make sure that all of our different drawings
are on different tracks. So right now, in my drawing, all of my Procreate layers have been imported on this
one drawing track. And so I'm able to edit
it as a static drawing, but not independently manipulate or animate my different pieces. So in order to do that, I'm going to want to click and hold anywhere on
this content track, and then select convert
drawing layers to tracks. You'll see that this has now turned into a group
with the little carat. And if I open up that group, now all of those procrete
layers are in tracks. And the groups
might be collapsed. So if you can't see something
that you're expecting, just make sure you click on the little carat to find those. And now each of
these tracks can be independently manipulated
and animated. The last thing that
we can touch on is just starting to
think about audio. Now, many beginning
animators don't think about the music or audio
until the very end, which is just like what I did. However, if you've ever created an Instagram reel or Tik Tok, you'll know that it can
be really effective to time your animations
to your song or audio. So if you're creating a video or an animation that's really
important to be time to music, you'll want to set that
up now so that you don't have to go back and
fix things after the fact. In order to do that, you
would just go and add a file and take the
music you would like. I provided some examples in the class materials
that I've saved here, open it, and it'll import
it as its own track. So my track is much
longer than my animation, which is why you
got this long bar, but I can easily just
zoom back in and then keep it that way so I can
rearrange the placement. So this is where you'll want to set the audio if you would like. But for my purposes, since almost all of my animations
go on Instagram, I now skip this
step and just add the music and audio from
the Instagram app itself. I will say that when I time it to about four counts
or eight counts, there's almost always a track that matches really well
with the animation. So I don't have to find
the track ahead of time and then plan my
animation around it. Actually, just animate first
and then add the track. But if you want to be
more specific about that, I recommend starting with
the audio already setup. For our purposes, I am going to do the animation
without the audio file. Okay, we're all set up and
ready to get animating. Let's start with frame by frame draw and paint
in the ninth class.
8. Draw & Paint Frame by Frame: Now I'm going to walk through each type of animation step by step and dive a little deeper into the modes
within the app. We're going to start with
a draw and paint mode doing frame-by-frame animation. I'll be starting from scratch alongside you so that
you can see how I bring the illustration file from Procreate into Procreate
Dreams and animate it. So go and add a new file. We'll navigate to social, click on empty, and
this will come up. The first thing that you can do is set the duration of the file. So that's actually
very easy to do. You'll see there's
this little gray tab, and right now it automatically
sets to 3 seconds, and we just want to
bring that out to eight, and we can go into our settings and just make sure that our frames per
second is set to 12. This will affect our
flipbook animation. And actually, when we did that, you'll notice that the
duration changed to 16. So this is a good place to also note that you can
change the duration here. The reason it changed
to 16 is because it was at 8 seconds with 24
frames per second. And when we changed it to 12, it thought we wanted to
double that duration. So just make sure that that
duration is set to eight. And everything else for now, we can leave as is and change it later in
the demo if needed. Now let's bring in
our Procreate file. So we just hit ad
and went to File, click on the class working file that you sent to yourself. And you'll see that
it's now been imported. The first thing we
can do is just tab on the stage and
this bounding box will come up and we can just
quickly resize our artwork. To fit better within our stage. So it should be
right around there. It doesn't have to be perfect, just approximately that size. And then right now, this is just one drawing. So actually, if I went
into Edit drawing, you'll see that it's been imported just like how it
looks like in Procreate. What we want is to turn all
of our layers into tracks. And to do that, all we
have to do is tap and hold and click Convert
drawing layers to tracks. You'll see that now
it's become a group, and if we tap on this
little carat right here, you'll see that now
all those layers have become tracks that we can
independently animate. Great. Now we're ready to start on our frame-by-frame animation. The first thing that
we'll start with is the little light
swoosh that comes in. So to do that, we're
going to click on our ad, open up a flipbook, and now you're in a
brand new flipbook. So just a reminder,
this UI looks very similar to Procreate with
our settings, filters, select and transform
tools on this side, and our brush, smudge, eraser layers and color
tools on this side. Now, we'll only need a few
brushes for this class demo, and in case you do not have them in your default
Procreate Dreams app, I have provided them
in the class settings. To import them, all you have to do is bring them into Procreate, open up dreams and
Procreate side by side, like I just did. And in your brushes
in Procreate, just click and hold
the class brushes and drag it over to
Procreate Dreams. And you'll see that they've
been imported perfectly. Another thing I want
to note is that you'll remember that there's this
canvas background here, and right now it's white,
and I would like to bring that a little closer
to our dark green color. So I just exited
back out to theater, went to settings, went to stage. Brought it closer
to a dark green. Doesn't have to be
an exact match. It's something for
me to be able to better visualize the setting. I have a feeling that this background color
adjustment will be added to the draw and
paint mode in the future. But for now, you want to do
it in your main settings. Okay, so now we have our
flick boook all set up, and we can go ahead and
select our light pen. Pick a light yellow color. It doesn't have to
be an exact match. If you would like, you can also go in and just use
your finger and tap and hold on one of the
colors in the artwork itself. So one of these light
yellow colors, for example. And remember, the suis just kind of comes
in and goes out. If you would like,
you can create a drawing reference layer, but we can just dive in
and see what happens. So this is a fun
way to play with short and long strokes to see how it affects the
animation of the light. We're going to want to
start out of frame. And you'll see that when
I go to my next frame, the brush stroke
that I just made turns into a purple color. The dark purple is a little bit hard to read on my
canvas right now. So to change the
onion skin color, we're going to go into settings, onions and change the
colour tint just slightly. You can get a
preview if you move your canvas so that
your stroke is visible. You can also change the
opacity of that stroke. So I bring that up, it'll
become more obvious. And the frames just show you the frame count of how
many back it will show. So you'll see how in
a few more steps, four different frames will
show up if I keep it at four. I also want to have the
color tint for the forwards, maybe set to a light blue to not confuse myself with the existing yellow
lights that I have. And let's just go from there. I'm just going to follow along starting with
some short strokes. And I'm just using
my two fingers to tap to undo as necessary. And you'll see how now I can see four frames behind
in that purple. So I can see the overall
movement of my stroke. So this is where I
might want to do a slightly longer stroke
because as it swooshes down, it will suggest a
quicker movement. And to add more frames, I'll just click the Plus button here. Now, as it starts
to turn upwards, I'm going to create
slightly shorter strokes. You kind of imagine it like a ball that's going down
a hill and up a hill. So, of course, it's going
to go faster as it goes downhill and then a little
slower as it goes up. It doesn't have to
be perfect. This is just a place where you
can play and experiment. Let's just see how
that turned out. So we can actually just
scrub back and forth, taking our pencil, putting
it on the flipbook truck, and moving it back and forth. And you'll see how I can see
the light turquoise frames going forward and the magenta purple frames
going backwards. So what I'm noticing
is that it feels a little bit short and almost like the light is more like a fish. And what I want it
to feel like is just maybe one strong movement and quicker and more fluid. What I can do is just turn that entire track
off so I can save my work, but create a new track to try something a
little different. So I've just created
a new track. And this time, I'm going
to try longer strokes. I kind of cut through
my character. Maybe even a little deeper. Okay. Let's see
how that compares. So that feels a lot closer to how I wanted to
end up looking. So I'm going to keep that one. I'm noticing a kind of funny transition
right around here. And so you can go in
and edit as you need. I think the thing is that this needs to be slightly longer. So to see a slight
adjustment like that can change the overall feeling
and flow of your animation. And this is something that
you're going to play with, and you can watch different animation tutorials
to think about, like, squash and stretch and
different techniques they use to create more of a
bounce and sense of movement. But it's a fun way to just get started. So I'm going
to keep that one. And just keep the other
one turned off for now. Now, we're already done with our first frame-by-frame animation, which is this light swoosh. So to get back to
our timeline mode, I'm just going to
double tap on flipbook. And you'll see that
the whole swoosh lasts for about 2 seconds. I'm actually going to
want it to come in twice. And instead of redoing
that entire sequence, all I have to do is click
and hold on the content in my track and select
duplicate after. I'm just going to move it
a little bit further down the track so that it can come
in later in the sequence. And you'll see how I've
created what seems like two different animations
just by duplicating them. So that's enough
for me right now. I can play with it
as I move along, but let's move on to the next frame-by-frame
animation demo. We can experiment
next with lettering. So I would like to see how it feels to just have the
word breathe come in. And there's a couple
of different ways I can imagine that happening. The first thing I'm going to
want to do is just to create a reference layer that I can trace to do my
frame-by-frame animation. I'll show you what that
means. So I'm going to go in and just hit the plus
sign, create a new drawing. And this time, I'm going
to use the dry ink brush. Pick a light yellow color. It could be, for example, this light yellow in
the leaves right here. So I just use my finger tap
and hold to color drop, and I'm just going
to letter in here. So you can letter it
however you like. And if you prefer it, I'll also include my final
lettering reference layer for you if you would like
to just start with that. So what's great about the
latest Dreams update is that I can now edit
this as needed. For example, say I want the B to just be a
little bit higher. I can just go in,
select and transform. Keep it rotate it just a
little bit more just by clicking on the
green handle here. Maybe I will also bring
this down a little bit. And then maybe I want
the entire lettering to sit a little bit
closer to down here. I actually looks nice
right here because there is that darker space. Okay, so this is going to
be our reference layer. What I can then do is now that I like
how it overall looks, I'm actually going to go into filters and adjust
the color so it stands out kind of like
the onion skin color. When we were working
in the flipbook. Now, we're going to go
back out to our timeline, and now we're going to create
a new flipbook to have the lettering look
like it's being written in or wiggling. I'll show you how to do
that. So we're going to go in and add a
new flipbook track. And now we're just
going to trace this lettering so that it looks like it's
being written in. We're going to be
using the same brush, same light yellow color, maybe actually even
just a little brighter. And let's go in and start. This is going to differ slightly from the light
swoosh in that we're going to want to copy and paste every single frame so
that it continues on. Let me show you what that means. To start, I'm just going in with a stroke
to follow the B. And instead of just clicking to the next frame to
draw in the next one, I'm going to actually
duplicate this frame. So I just clicked and held on this frame. And hit Duplicate. What that does is it will
look more seamless because it'll be an exact match versus if I just trace the
word again and again, it will look more wiggly, which is also an effect that we will explore right after this. So all you have to do is just
continue to click and hold, duplicate, and on each
consecutive frame, just extend it a
little bit more. So I have slightly
shorter strokes whenever it's starting to take a curve and then
slightly longer strokes whenever it's going down. As we move on to
the next letter, we just want to
keep duplicating, so I'm starting my R. And I want to
simulate the movement of it going down and then up. So actually, here,
I'm just going to create another stroke like that. Not very noticeable, but it will be important
for the timing. Again, a shorter stroke to
come over this crest and then a longer stroke
coming down here. And what I found is having
a short stroke at the end of these little tapers
creates a nice effect. So if you run into a
situation where it says it can't continue to
duplicate the frames, you can go back out to
your timeline and just extend this flipbook so
that you have more space. So I'm gonna go back in, and you'll see a lot more
frames were created. So I'm just going
to go ahead and do the rest of the lettering
all exactly the same way. In addition to going
out to the timeline to extend your content
track to get more frames, you can also just click
the Add button here. Now let's go back
out to our timeline and just get a preview
of what that looks like. We can turn off our
drawing reference layer so that it's a
little more clear. So this feels a little
bit slow to me, and let me show you how I can experiment with fixing that. Going back into my flipbook. The reason I look
slow is because we're using 12 frames per
second in our setting. And when we have more
strokes in our lettering, it will appear slower. So the way that I can
fix it is to have fewer strokes and have
the frames go by quicker. So instead of having one, two, three, four, five, six, six frames to bring in the B, which would take half a second
if you do the calculation, I can have maybe three or four. So let's see how
that would look. I'm going to turn
this track off, create a new layer,
and let's start over. I'm gonna need to make sure my drawing reference
layer is turned on. And let's do one, two, three, four. That feels better. So I'm going to redraw all the letters with about
three to four frames each. Okay, so let's see
how that looks. Great. So that's still
feeling a little slow. It could be fine, but I want to see how it might look if it
was even faster. One way to do that is actually just to delete some frames. So, for example,
instead of taking this frame to get to this next frame, I can
just delete this one. And you'll see that it will
now go immediately over. Same thing with this E. Let me just delete this middle step. Okay. Let's go back
out to our timeline, turn off our reference layer, and see how that looks together. Okay. So that is one way to have the
lettering animate in. Let's explore the second
method that I talked about, which will look more
like it's wiggling. So I'm turning the reference
drawing back on turning off that first flipbook and
creating a new flipbook track. This time, instead of tracing the lettering
stroke by stroke, what I'm going to do is write it about four to five times. But So I'm not doing anything special here other than just lightly
tracing the word. And when I mentioned
in the last version that we want to duplicate each frame to make it look seamless, because if we just create a new frame and trace it
again, it'll look wiggly. This time we want that effect. So just trace it four to five
times. Don't overthink it. I'll actually look
better because it's a little bit imperfect. So let's see how that looks. I'll see it has this really
great wiggly effect. And I'm liking the
overall beats. But if I wanted to wiggle
a little bit slower, let me show you how
I could do that. I'll take this multi
select tool here, draw a line through my frames. Click on the last one so that these two little
handlebars come up. And if I extend that, now each trim has become double
the length for all five. So let me just show you, you'll see that it wiggles
twice as slow. It actually feels a little calmer that way,
so let me do that. Now, if we exit back out here, you'll see that the sequence only lasts about a second
before it goes away, and I actually want it to
last for the entire duration. So instead of drawing
that over and over again, what I can do is just extend the track all
the way through. Go back into Edit flipbook, and then using the multi
select tool again, I'm just going to select all of them and just duplicate them. I'm just going to
duplicate it until I reach the end of that track. Okay. So here's what
that looks like. Now it's wiggling for the entire duration
of the animation, and I didn't have to do
it over and over again. I just did five frames and
duplicated them. Okay. So now I have my
lettering in place. You can also at this point, go to the compose mode and move the entire flipbook
around if you wanted it to be in a slightly better
position or maybe be a little bit smaller
or a little bit bigger. This is what's great
about being able to do the animations and then adjust them afterwards
to make it perfect. So let's quickly recap
what we learned. We learned how to
use the flipbook frame-by-frame animation to
bring the light swish in. We learned how to duplicate an animation so that it can repeat without
repeating the work. We learned how to create a
lettering reference layer so that we can explore two different methods
of lettering. One, so it looks like
it's being written in and another one where it looks like
the word is wiggling. So those are two very easy
frame-by-frame animation styles that actually have a really great and
effective outcome. Hey, now that we have a taste of frame-by-frame animation, let's get into a
second method of animation within Procreate
Dreams performing.
9. Performing: Now let's get into performing, which I think is the coolest and most unique feature
of Procreate Dreams. Performing records keyframes
in real time using gestures. So any action you perform to
a piece of your content is recorded and appears underneath your content on a
keyframe track. Now, performing is really
related to keyframes, which we'll cover in much more detail in the next section. But I think that
especially for beginners, it's good to start
with performing so that you can see
something really intuitive and exciting and then learn the underlying
structure through keyframes. You can also learn it
the other way around by starting with the next lesson first and then coming back here. But in general, I recommend just watching both
of them together. So to get into perform mode, we're going to go down here
and select the perform mode, and you'll know that you're in the right mode if one
perform is highlighted. But also there'll
be this recording icon flashing up here. Playhead will also
turn into this circle. And now, anything that you
manipulate on your canvas, your stage is going to be recorded automatically
as keyframes. A few things before we dive
into performing our first little light orb is that when
you click on perform here, you'll have a few modifications
that you can adjust. So motion filtering is going
to be important if you want a more smooth effect
versus if you're making a lot of tiny little movements that you want to
record accurately. Going to leave it at the default and see
how that turns out. Now, to get started, I'm just going to
click out of here, create a new drawing layer. Go into my brushes, and now we're working with
the light pen. So we can stick with the light yellow color
that we've been using. And you'll recall
in the animation, what I want is to have all of the orbs start out of
frame on the left, move through, and end up
out frame on the right. Now, we do these one by one. And so to start, I have this little light
orb, and actually, it's looking a little
light, so I'm going to bring it down into
a more yellow color. Now we'll go back out
into the timeline to animate our little Light orb. The first thing that we
can do actually is to turn off the static illustration of the light orbs from
our Procreate file. I just navigated to the
correct content track and turned off the checkbox. Now, going back to our
drawing in perform mode, let's just dive in and see
how easy it is to perform. All I'm doing is taking my
pencil and I'm going to not click on the actual
bounding box itself, but just keep it nearby and bring it through
the illustration. Okay. That's it. Now, you'll see all
these keyframes automatically populated in, and to see how that
looked, I'm just going to grab the playhead
and play it through. So now it's reached the
outside of our stage, and it's no longer visible, and I want to create
a few more orbs in the exact same way. Of course, I can duplicate
this one again and again, and I'll show you what
that might look like. But if you do this exclusively, it will feel a little
bit inorganic. So for now, let's just
see how that looks. I think it's safe
to leave this here, but we can always turn
them off or delete them if we find that
it doesn't look good. So let's create another orb. We'll click Add a drawing layer. And there's no exact science on where you're
placing these orbs. Just keep them out of frame to begin with and
have some variety. Think about how the
final animation turned out and how you might
want to make it your own and have it
just move organically through this environment to create this magical atmosphere. So we'll just repeat
these steps a few times. We're going to draw an orb
in our draw and paint mode, go back out to our timeline
and perform animation mode, and move it across the screen. So that time, I create a little loop around the
character just to see how that might feel that feels nice, and I'll just repeat
that a few more times. One thing you can
play with is having bigger or smaller orbs. So you can adjust the
brush size, for example, here and create a
different larger orb. Again, we're performing
it. This time, I used a slower movement. Think of it like the
grandpa light orb. And you'll see already
how that variety just feels really good. So, of course, we have all
the same size light orbs. They can all be moving
at the same pace, but it really feels nice for this particular
animation to just play around with all sorts of different sizes and
movements and speeds, and it'll also give you
a chance to really get a sense of how performing works and how you
like it to work. This time I'm going
to start one that's a little bit lower down here. Maybe I'll show you
what the difference is if we change the
motion filtering. So let me bring that
all the way down to zero and perform. So if I'm going to do say I'm really shaky and I'm kind
of, like, shaking like this, You'll see that the
perform captured almost exactly the
way that I moved it, which could be great if
that's what you want, but not if you would like
it to be a little smoother. So it really depends on
what effect you want. Sometimes I'm making that
very, very tiny movement. And when I see
that the keyframes didn't turn out the
way that I expected, like, it's too much smoothing, I'll go in here and turn
the motion filtering down. Same thing is true
the other way. If I want it to have it be
smoother than it turned out, then I can adjust it going up. And what's really
amazing, actually, is that you can actually
adjust this after the fact. So let's just move
all the way up. And now it's super smooth. And if I move it
all the way down, it's really captured every
single little tiny movement. So that's a really amazing
aspect of performing as well. For now, what I'm actually
going to do is just re record over that so that
it's how I wanted it to be. So instead of deleting
it, which you could, you can click on the keyframes track and delete moving scale, or you can just rerecord. And what it'll do is
repopulate keyframes over your existing track. So I want to try maybe
going upwards movement, maybe going out that way. Can be just bringing
that over here. That feels nice.
Maybe I'll duplicate that. So I have a few of those. So I just moved it to have further a bigger space in between and move this up
a little to start sooner. Great. So you can already see
it coming together. Now, in the animation with
the four count breath, I really want a concentration
of orbs coming in in the middle around the 2.5
to say, 5.5 second mark. So I'm going to just spend some time creating a
bunch of different orbs, and this is a great time for
you to experiment, as well. Okay. That's feeling
pretty good to me. I'm gonna get out of
the perform mode. And going back to the very first trio that
we did, remember, I said that we can always
go back and see if we feel that it doesn't
look quite right. We can turn certain
ones on or off. And so I actually think this
last one is unnecessary. I'm going to shift these over just a little bit.
See how that feels. So I feel that
that's a good place for me to stop on
the light orbs. Now, one thing I want to
show you is just how to organize all these little
dots that you've now created. I've taken the
multi select tool, and I'm just going
to draw through all of those content pieces, and now I can just click and hold anywhere and group them. So now they've become all
on one layer in this group, and I can always open
it here as needed. Now let me go ahead and
rename and color that, so I'll need to exit out
of my multiselect tool, click and hold, and then I can first rename it to Light orbs. And then I will apply
a yellow color. So that it's easy
for me to find. So now you know how to perform
a really easy movement. But there are actually many
things that you can perform. So anything that you can
keyframes, you can perform. So when you think about
within move and filter, you can warp, you can distort. You can make things bigger and smaller. You can go into filter. You can change the opacity, which means it can fade in and out by adjusting
the transparency. You can change all of
these things, blur, sharpen noise, hue, saturation, and brightness, and lens blur. So let's explore
that really quickly by performing the waving of
the plants in the background. It'll also be a great segue into keyframing
because I'll show you why sometimes you
want to be in the keyframes mode to do
that versus performing. Now I'm going to our stems here. This layer affects all of
those plants back there. I want to first
try warping them. So warping them gets them
this nice fluid look. So all I have to do
is going to move, warp and start with
the keyframe there. Now, before I do anything else, I'm going to want to
create the same keyframes at the end so that it ends
up at the same place. I can do that by either bringing the playhead
all the way to the end and just creating another one before
I do anything else. So that means, it's not moving or I can just take
this first one, click and hold, copy, go to the end, and hit Paste. So those are two different
ways to do the same thing. Now, in between, I'm going
to have the perform on, and I'm just going to experiment with moving it back and forth. So what I wanted to do
is sway one way for four counts and sway back to the original position
for the other four counts. Let's see how that turned out. I would say that it feels a little bit unnatural,
and I could, of course, change the motion
filtering and keep experimenting and
continue to re record. But I just wanted
to actually use this demo more as a comparison to show you why keyframing
might sometimes be better. So this is a good
example of some of the limitations
with performing. I can only have my pencil, have it move, and of course, there are some gestures
that I can include to make it adjust even
more in performing. But with keyframes, I can have multiple things going on
and really manipulate the accuracy of how my content
piece is being animated. Let me show you what I
mean in our next class. We'll explore keyframing.
10. Keyframes: Alright, let's talk about the third and final
way to animate and procreate dreams,
which is keyframing. Now, like I mentioned earlier, keyframing and performing
are really interrelated. So you might be
wondering, why would I want to keyframe when
I can just perform? For me, the reason
usually comes down to the fact that keyframing
is really precise, accurate, and honestly,
sometimes more efficient. You'll see what I mean
in just a second. It's also just
really important to know so that you
have the knowledge to manipulate and adjust your performing keyframes
to suit your needs. Now, as a refresher, here are the different
keyframes that you can do. And actually, let's navigate
to our breath lettering because I think it'll be a really nice way to see how
they all come into play. So when we are in
our keyframes mode, our playhead now has these action options
when you click on it, and so you can move and scale. Let me just show you what
that could look like. See, I want the
breathe to get bigger, for example, and
maybe even rotate. So just by adjusting on
that particular keyframes, now, it's going to
animate that way. And you can see that it can get really specific and accurate by manipulating the keyframes directly through the keyframes
mode instead of perform. So let's go ahead
and delete that. Now, sometimes the
options that appear under the keyframes actions are
not applicable to groups. So say I wanted to warp, you'll get a
notification that says warp cannot be applied
to this content. So if you really wanted to warp the lettering, for example, you would have to just create
one drawing track that didn't have a group of different drawings
and w from there. Same thing with distort. But you can do several
keyframes manipulations on groups under filters. So, for example, say, I wanted the breathe to fade in
and then fade back out, which is a really
beautiful and easy effect. So by using the opacity option, I just set up three keyframes, and then I'm going to
actually start it at zero and end it at zero. And you'll see how
now it has really nice fading in and this
really nice fading out. So that is actually one of my favorite keyframes
functionalities to use. You can play with all these
different live filters and apply it to many different types of
content and just see how you like to
manipulate your content. Now you understand the
different adjustments that we can do with keyframing. Okay, now let's get into our demo portion where we're
going to use keyframes to adjust the swing
of the leaves and also the little zoom
and movement effects that you saw in the
final animation. So we'll go to stems first. And let's just remember what it looked like when we
used performing. So not bad, but it doesn't look exactly like how
I would like it too. So what I'm going to do
is just delete this warp, and then I'm going to manually
put in some warp options. So I wanted to go to the right, and then I wanted
to go to the left before ending up
in the same place. So I'm going to have
four keyframes. And with the first one, I'm just going to manipulate the warp net to get it exactly in the
place I want it to be. Let's see how that
looks. Okay, I'm going to collapse the warp. And then on this one, I'm going to move it
in the other way. And I mostly want the
top leaves to be moving, not the stems at their roots, 'cause I feel like that's
a more organic sway. Let's see how that turns out. Okay. That feels better. I would say, at this
initial keyframes, I want these leaves to move a little bit
more to the side, so you can see how
I can just take that anchor point and
just move it over. So that's how specific I
can manipulate my warp. I'm actually just going to make that a little more subtle. So it's not too distracting. Okay, those look like
they're in a good place. And now I also want to
animate these leaves in the background so that they're following that
movement a little bit. So, again, I can either move it, so let me just explore how
maybe rotating it might look. So to rotate, it's under
the move and scale option. And when you get
the bounding box, you can click on these
little three dots. And first, you might want
to edit what the anchor is. So what the anchor
means is that's the center of where the
rotation is coming from. So you can think of it as the center of the steering wheel. And so if I want to rotate from the center point, I
can leave it as it is, or if I want to rotate
more in a believable way, I would put the anchor
closer to the roots. I'll click this
little checkmark to show that I'm done
moving the anchor. And now to rotate it, I have the bounding box come up and there's this
tiny little handle. You'll see it right here,
tiny little handle that I'm going to grab with my
pencil and rotate it. Okay? Same thing going the other way. Let's see
how that turned out. Now, it's very subtle, but that's what I like
about keyframing. I can just make it exactly
the way that I want it to be. So I feel that that's
looking pretty good. I'm actually going to experiment with expanding it a little bit, making it a little bit bigger. So it kind of looks like it's breathing. That's feeling good. Now, let's move on to
keyframing the crown and the overall
illustration to give that slight zooming
and panning effect. So the first thing I
want to do is actually have the moss to
move very slightly. So I'm actually going to go into perform to show you what
I could do with that. So I'm going to start
with the moving scale, and let's just see
how that looks. So it's not bad, but it's a little bit too extreme
for what I want. I want it to be
very, very subtle. So again, I'm going to use keyframes instead of performing. I'm going to go ahead
and delete that track, go into keyframes and manually put in the
positions that I want the moss layer to end up. So what I wanted to do is maybe go up a little
bit, and that's it. So it's extremely,
extremely subtle. Now let's do the
same with the rock. But This will actually make the movement
seem more obvious. Okay? So I think this one actually just needs
to move a little bit more. What's nice is that
it's very subtle, but it actually looks like the
body breathing in and out. So I'm liking that effect. We can go in and adjust it further when we do our
final refinements. But for now, I
actually want to do our final keyframing animation, which is this little character. So we're going to navigate
to the character content timeline and click on the carat, and you'll see that I have the two content pieces
already separated out. So we want to have the person looking up
to the count of four, like she's breathing in
and then looking down. So again, we're going to place our move and scale. Keyframes. And in the middle, we're
going to have her rotate up. So let me actually use this
opportunity to show you what it looks like when the anchor point isn't
in the right place. So right now, the anchor is
in the middle of her head. That's how it comes by
default, just centered. And when I try to
shift her head, that's not how a head moves. We want to have the anchor
closer to her neck, where the neck meets the head. So we will just move that
down to maybe around here. And I want her to actually
end up looking up, so I'm going to have
her start looking down. And copying and pasting that So let's see how
that turned out. We have the animation
of her head going up and then
going back down. Now, I feel like it's a
little bit too of a TikTok. I want her to actually raise her head slightly faster
and then keep it there. So again, what I can do
is just copy and paste her final raised position
and then paste it so that there's this
about two second period where she holds
her head up high. So now it's being held there. And then as she exhales,
bringing it back down. That looks good to me. You'll see there was this really
weird glitch at the end. So let's troubleshoot that. You'll see that when we zoom in, there's actually these
two keyframes here. So we'll just go in
and delete that. And now that weird
little twitch is gone. You might have
that happen to you where something doesn't look
the way that it should. And so you'll just want to
know how to troubleshoot. And usually it's just a matter of going to the point
in the timeline where that weird glitch
happens and then seeing if you have any
extraneous keyframes. Now, one thing I
actually want to play with here is I want
to see what it might look like if I have
her hands raised into a prayer as she's looking up and then bringing that back down. And that could be
actually really easy. Of course, we can use
frame-by-frame animation, but a simpler way to do it is
actually through keyframes. And let me show you
how that might look. So the first thing
I want to do is actually go into the drawing, and I can go ahead
and go to my brushes, select hail brush and
create a layer mask. So a mask basically is like covering up
the drawing below. And because I want to draw
a new hand to animate, I'm going to just mask
out this hand below. And so that makes
it non destructive. If I decide to change my mind, I can just turn off the mask, and the hand is
still there, hidden. So just think of the
drawing layer mask, which you'll need to do in
black as just covering it up, like putting a piece
of paper over it. So I'm going to
turn that back on. What shall I use this
opportunity to clean this up a little bit. Okay. Now I'm going to go back out and create a
new drawing layer. Of an arm. So I'm just going to color drop. Make sure I'm on she brush, use the same color as my original drawing and
just draw in an arm. Now, just in case that's
kind of hard to see, I'm going to use a lighter green color so you can
see what I'm doing. And then adding a hand. I'm going to do it on a
different layer just so I can make sure that I can
edit it independently. So now I have my
arm resting there, and to make it look like
she's bringing her hand up, all I have to do is
go to my keyframes, move and scale, and we'll
use our rotate effect. So remember we're going to
want to bring the anchor to her elbow because
that's where the joint is. So that's another way to think about where to
put your anchor points. So instead of the center
of a steering wheel, also the joints of something
that you want to move. And then click Done and create the same setup as her head because
we wanted to match. We're just going to go
ahead and rotate that up, and it's not perfect right now, but don't worry about that. We can always adjust
the placement. Now, one little maybe glitch
that I'm noticing that hopefully they'll fix is that when I duplicate
the keyframes, it puts me into the
multi select tool. So if that happens
to you and you can't find the options
that you're looking for, just make sure that
you exit out of there. So now I have the two keyframes. They're a little bit off. And so all I'm going
to do is actually just move this forward and adjust this from there. Okay. So let's see how
that looks together. I think it could be even higher and maybe
closer to her body. Okay, that's looking
pretty good. I'm just going to do a
little bit of cleanup on the drawing below so
that it matches better. So I'm going to fill in
our body a bit here. And actually, I want to add
a little bit of a foot. I can do that easily that way. And I'm going to clean up the
arm a little bit, as well. So the hand looks
a little bit more the right shape and maybe
making this slightly longer. At this point, since you've
also been able to see hoops, you'll see that I actually made those brushstrokes
on the hand layer. And now, instead of
undoing all of that, I can just select those
pixels, cut and paste. And right now, unfortunately, it gets pasted into the
center of your canvas. And so you just need to
bring that back down. I actually wanted
to show you that because there is
that little cork, which I believe
they're updating soon, but you just need
to bring it down to where it needs to be. And just like in Procreate,
you can merge layers. So you can just bring
these two together. And I'm going to
go ahead and bring that color closer to her body. Okay. Let's see how
that looks now. Okay, I feel like
that's looking good. I feel like the timing we can play around with
it, for example, maybe bring it out
a little more, have our hands come down to the final position
a little sooner. But overall, that was a really simple animation that adds a lot more interest
to the character. One more troubleshooting
item that I want to fix is that you'll see that
the moss layer is moving up. But the character is not,
so it looks a little unnatural because it feels like it should be
moving with her. So that is an easy fix. All I'm going to do is move my character group
with the moss layer, take my multi select and
group those together. I'm going to remove
that animation from the moss layer so that it now affects the entire
group together. So exit out of multi select. I'm going to move and scale. I'm going to do the
exact same setup as what I had before. But now you'll see that it moves the moss layer and the character together
at the same time, while the animations
that I just applied to the character exclusively
also still exist. So now we don't have that
weird little overlap. And just to make it a
little more obvious, I'm going to bring
it up even higher. And now that feels good. You notice that there's
this weird little glitch again where she
flashes in and out. Anytime something disappears
when it shouldn't, it just means that
that content piece is not filling the duration. So I'm gonna go into
group, and there it is. That little gap means that when it reaches this
final second, she disappears. So all I want to do is
just drag that over. So that she stays in
there the whole time. Now, when you have a
group of content pieces, you'll have to go
in and manually drag each layer or each track. That is a common glitch, so I'm glad it happened so I can show you how to catch it. Now, the final final thing
that we can do that adds some atmosphere and is really
simple is actually to suit, manipulate the entire group. There's a stray light orb. Let's bring him
down here. Put him in with his light orb, friends. The final thing we'll do is
go back to our entire group, and what we're going to do
is add another moving scale. And this time, we're going
to take that bounding box of the entire group
and just drag it out a little bit so
it's zooming in. And we can go ahead
and duplicate that. See how that feels. Okay, it's getting so close. I think I'm going
to go in and adjust this moss layer a little bit so that the
movement isn't as extreme and expand
this moving scale a little bit more so
it's more obvious. But otherwise,
feeling good to me. Now we've done all three
animation methods. And just to recap, we started with the
frame-by-frame animation to have the light switch come in and
then the wiggly lettering. We then use performing
to create all of our little light orbs and experimented with how that
might work on the plants. We then moved on to
keyframing to get a more accurate modification
of the plant swinging, the rocks moving, the character moving her head and her hand. And finally, just the entire setting zooming in a little bit and creating that nice cinematic
zooming in atmosphere. One more keyframes technique I want to show you is masking, and we'll demonstrate that through orb or a
glow that's going to come in around her
as she breathes in and disappear as
she breathes out. And let me show you where
the masking comes into play. So first, we're going to
navigate to the group, and I'm going to create a new drawing layer above the group, and I'm just going to
use any let's see. Let's go to airbrush, and
you can pick anything. I'll use a soft airbrush. I'm going to use a light
yellow, glowy color, and I'm just going
to create this glow. So now I'm going to go back out and show you what
I would like it to do. The first thing I'm going
to do is just apply the key frame filter of opacity so that it comes
in and disappears. So we're going to have our
opacity keyframes setup, so it's at 0% here, 100% here, maybe holding
it a little bit. And then returning back to zero. So that's how it
looks right now. It looks a little
artificial because it feels like it shouldn't be covering this mound
in front of her. Now, I can't quite just put it behind that mound because I don't have the illustration
set up that way. And what I can do instead
is just use a mask. So let me show you
what that looks like. Earlier, we already used the
mask to mask out her leg, and that was in the
drawing paint mode, and this is a very similar idea, but will help us
mask the animation. So what I'm going to do is
create a new drawing layer. I'm going to take you can actually use the
same soft airbrush. We can use black. And I'm going to create again, imagine I'm trying to
put a paper over it. I'm going to create a layer that looks like that
over the mound. I just trace the mound. And then I'm going to turn
this into a mask. And I'll use the Alpha mask. And actually, I'm
going to invert it. You'll see that the
glow is coming in, but not in the part
where I had the mask. Now my only issue is that it's not moving with the background. So to fix that, all I have to do is drag those two
layers tracks into my group that I
created earlier with the character and the ground
so they all move together. So now no, it is
looking almost right. I just didn't put it
in the right spot. Let's see how that
looks altogether. Great. I'm gonna adjust
the opacity of the globe. It's a little bit too intense. All I want to do
is just bring it down slightly so I can
still see the figure. Let's see how that looks. So it's coming in. It's
going over the mound. I could clean that
up if I want to, but it also kind of looks
like a little highlight on the hill. So that's nice. Okay, now you know how to create a mask for your
animation, as well. So now I'm just
going to go in and finish up my final
detailing and cleanups. I welcome you to continue to experiment and play
around with everything. You don't have to animate it the exact same way that I did. For example, you can
change different colors, maybe try a different
type of warping, maybe change how
the balls and light are moving around.
It's really up to you. Now's your chance to play. And when you're ready to export, we'll meet in the next section.
11. Exporting: I hope you had fun playing
with the animation and just trying and experimenting
with different things. This is how my final
animation turned out. Now we're ready to export. So I'm going to go
ahead and export the class version first,
and it's super easy. Under settings, you'll have all your different export
options under share. Video is the most basic. So that is the example that I've been showing in
class and you can save it to your iPad or
airdrop it to yourself. There is now also the option of animated Jif,
which is really fun. And so there are some default settings
that it comes with. Let's see how that turns out. I just save the image
for now into my photos, and that's how it looks
like as a looping Jif. So you'll see that, of course, the quality of a Jif versus a video movie file is different, but sometimes you
might want this look and feel or use
it for JIF purposes. And so that's such a nice, handy feature to have. And you can actually go
into Advanced Export. And go to format JIF, and make a lot more
specific adjustments. You can basically change the resolution, the frame duration, the playback loop,
the dithering, the smoothest, all your
standard JIF adjustments. And that affects the
quality, but of course, the better the quality, the bigger the file
size is going to be. So play around with
different exports and how you would
like it to work. And you can also export
frames as images. Say, for example, you're
working on animation and you need to import all the frames
into a different program. That is very handy.
You can export the current frame
just as a JPEG. And so that's really
handy if you want to say, do a mock up or use it for
just a still illustration. And, of course,
you can export as a Procreate Dreams file, which is going to be the class working
file that I provide, so you can see it as an example. And all of those
different options are again under the
settings right here. From the theater itself, if we just exit back out here, you click and hold on the file, you'll be able to share
a few of those options. So just a quick share
option with videos, frames as images or Procreate
Dreams files are here. If you want to export as GIF or any of those other more
advanced export options, remember where you need to
go within the file itself. So when you're ready, export the files that you
want to work with, and I hope that you'll
share it with the class.
12. Final Thoughts: Congratulations on making it
to the end of this class. We learned so much together
and covered so much ground, and I hope you're inspired
and excited to continue to learn how to breathe life
into your illustrations. Just to recap, we learned the three different
ways that you can animate and procreate dreams frame by frame,
keyframing and performing. As you continue to practice, you'll really start to
get the hang of when to use which method for the
effect that you want. The meantime, this class is
organized so that you can easily refer back to
information that you need, and I highly recommend
checking out the additional resources that I provided in the class materials. Definitely keep an eye on
Procreate Dreams own handbook. They're constantly adding
new features and functions. And, of course, check out all
the other great tutorials available on Skillshare
and YouTube. There are so many
amazing creators and guidance out there. You definitely don't need to go on this learning
journey alone. Hope you'll share whatever
it is that you come up with. I'm so excited to see
what you'll create. And if you'd like
to keep in touch, I welcome you to check
out my other classes. Follow me on social media, and you can find me
wherever Mimo Chai is. Until next time, thank you so much for joining
me in this class. I hope you'll keep creating
and take care. Bye.
 Mimi Chao, Owner & Illustrator | Mimochai