Transcripts
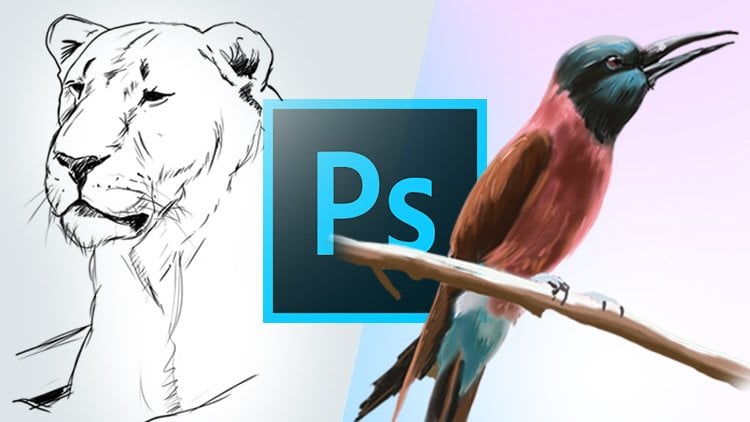
1. Ai Tools for Concept Art: In the world of design, illustration, and Digital Art, there are some exciting
new developments and new opportunities being
created right now, Ai is upon us and
there's so much to learn and to explore
with these brand new tools, you have the opportunity
to see your visions come to live faster
than ever before. And the possibilities
for creating Digital Art just got
infinitely more exciting. Hi there. My name is Siobhan. I'm an artist, illustrator and a top teacher
here on Skillshare. I have over 15 years experience working as an artist in
the animation industry. And this class is
a complete guide on using Ai Tools
for Concept Art. In this class, I will
guide you through the complexities of the latest
technologies such as Chat, GPT, and Midjourney in order to create stunning
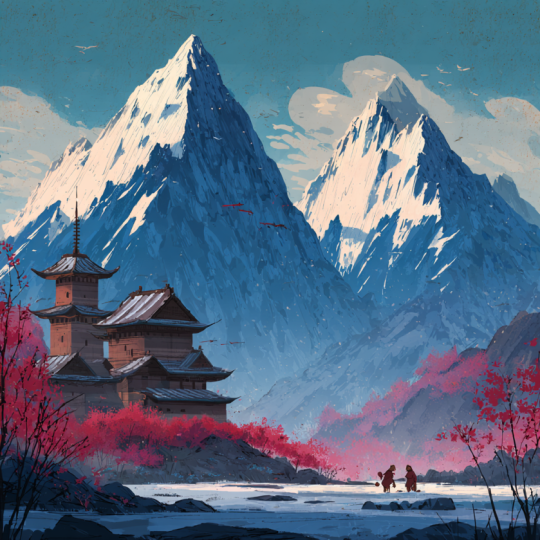
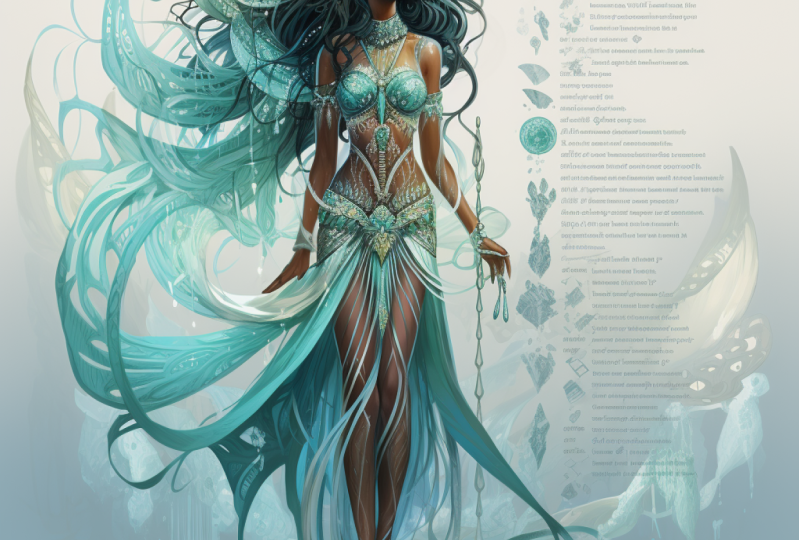
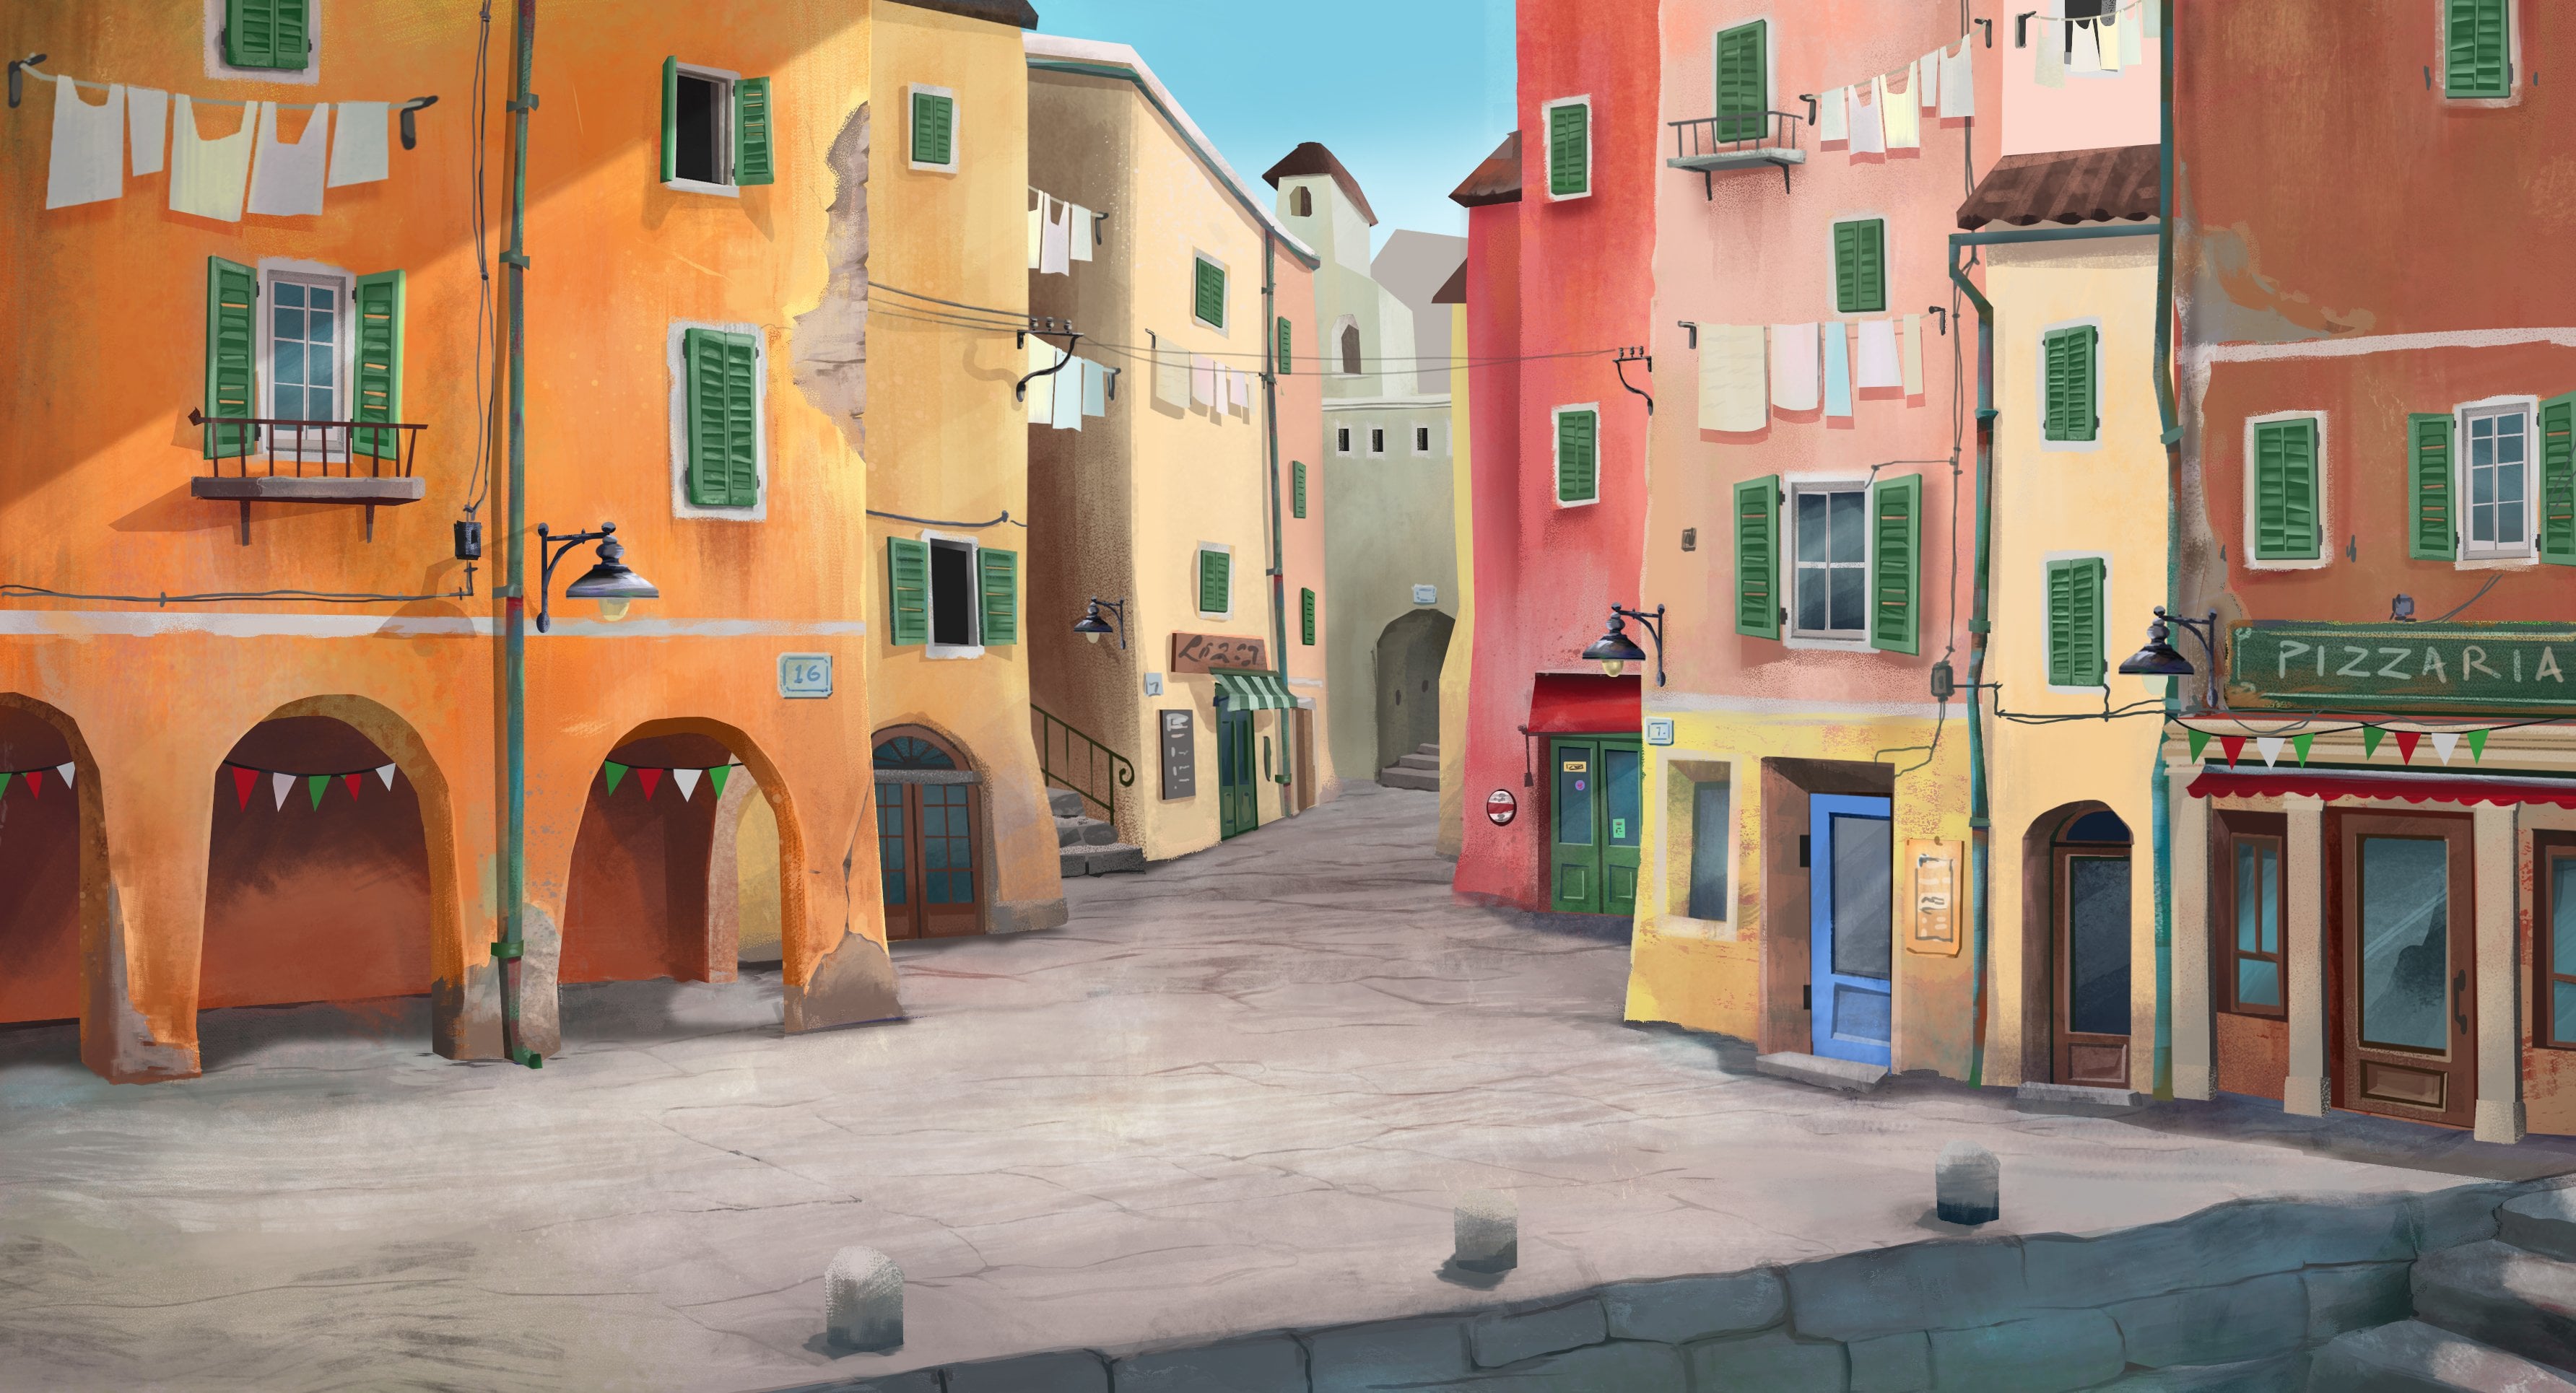
digital artwork like this. These are just some of
the countless images created during the
lessons in this class. You're going to
learn how to set up an image diffusion apps
such as Midjourney, how to run it on
your own Discord. And I'll walk you through how to create your first prompts. I'll show you how to enhance
or modify the results. How to upscale your artwork
in order to renderers, and how to save it out. All of those processes are
fairly straightforward and easy for what might be a
little bit more complex, or the myriad ways
that you can engineer your prompts to get
exceptional images and how to iterate those
images to create a coherent Concept Art piece for your portfolio or
for a client brief. Prompt engineering
is fast becoming the hottest job in the
digital landscape right now. And today, you'll
learn how to really refine the way that you interact
with the Midjourney Bot. You'll learn how
to blend images, how to create a prompt template, and how to get the Bot to
describe images to you. You'll also learn how to
leverage the power of Chat GPT. This will be like having your
own prompt engineer to help you craft the language in order to get the
images you want. If you were all interested
in digital arts, Concept Art or Art for
animation and games, then learning how to
interact with Ai tools such as Midjourney and Chat
GPT is essential. By the end of this class, you'll be creating
stunning artwork with just a few prompts
that you can use to build out your
portfolio or as a calling card for
clients from Studios. I hope you're excited to explore this brave new
world with me today. So if you're ready,
let's dive in
2. Introduction to the Class: In this introduction lesson, I want to explain how the class is structured so that you know what to expect and so that you know how to get
the best out of it. You might have some
experience already abusing discord or majority. So if you do, you can
skip the next lesson. But if you're brand new, the first couple of lessons, we'll walk you through
the setup phase. I'll show you
step-by-step how to download and install discord, as well as how to set up
my journey within discord. You'll need discord in order to get my journey
up and running. But once it's all set up, the images can start flowing. In the second section
of the class, you'll learn the basics of writing prompts
to create images. And we'll go through all
the processes around making variations of images
and up-scaling them. In the next section,
I want to show you some advanced techniques for
making exceptional images. I'll share the top tips and
tags for better prompts. How to apply those tags. And I'll explain why
they work so that you can tweak them for
your own purposes. In the last section, you'll learn all
about how to set up chat GPT to become your
own prompt engineer. I'll show you how
to train chat GPT to consistently get the
prompts that you want so that you can generate the highest standard quality
of images repeatedly without feeling like
you're approaching the task like looking for
a needle in a haystack. I'll also share with
you a curated list of resources that I put together specifically for this class. There's currently a sea of information out there
about how to use MC, journey and AI tools
in general and navigating through it all to find the tips and
the techniques. Sue you and serve your needs is time-consuming and it
can be overwhelming. I've worked really
hard to distill all the information down into
the essential points that I think are specifically
useful for concept artists and anyone
who wants to start using mid journey to
build visual worlds that currently only exist
in your imagination. In the resources section, you'll find a list of all
of the medium articles, the YouTube videos
that I found useful. Plus I put together some really excellent
Skillshare classes that you can look into
after taking this one. I'm also here to help you along the way to answer any
questions that you have. So feel free to leave a
post in the discussion tab if you have a question or if you want to share some
insights of your own. In the next lesson,
I'm going to talk about the project for this class
3. Your Project for this Class: For this class, I want you to create a Concept
Art piece that will include a landscape plus a character design that
matches that look. Now, that could be
as simple as just typing in a prompt and
leaving it at that. But as I mentioned,
I also want you to become a master at
prompt engineering for images and to possibly
use this new skill set as an exciting new career
opportunity or as a way to build up your artwork with a view
to creating Art for clients. So with that, the ultimate goal, I would encourage you
to watch the lessons through and maybe
stop every once in awhile and experiment with
the prompts as you learn the progressively more
nuanced ways of writing them, you can post any of these works. Are these experiments in the project section
as works in progress? And then when you get
to the final project, I'd love if you could post
that up in the gallery and share a little bit about how
you arrived at that image. If you like, you can share your prompt or any insights
that you had along the way. Now we're worried
about my project. You don't have to follow
along my prompt exactly. You can certainly use any
prompt that you like. One of the reasons why I chose to create this
piece in particular, not just because I'm a huge
fan of the movie June, but it's mostly because
I have a class on Skillshare on how to paint
a Concept Art in Photoshop. And honestly, I wanted to see
what would happen if I use the same concept as a starting point here
for a Midjourney piece. I think there's
clearly no comparison. Midjourney wins. But I would argue
that it's also very, very FUN and very satisfying to hand paint Digital Art piece. If you're interested
in learning how to do that in Photoshop, you can check out
that class later. But for now, let's
get started writing prompts and interacting
with the Midjourney Bot. So when you're ready, meet me in the next lesson and we'll
get Set Up with Discord
4. Getting Set Up with Discord and Midjourney: In this lesson, I'm going to
walk you through getting Set Up with both Midjourney
and Discord. If you haven't started
with either of these apps, then I'll show you
exactly what's involved in creating
your accounts. And if you already have
both of these setup, then you can just skip this lesson and skip
ahead to the next one. Let's start off at the Midjourney website,
which looks like this. Now you count, actually use the website to
create your work. What you're going to need to
do is launched their app. And that app works inside of
something called Discord. So the first thing that you need to do before even launching midjourney is installed
Discord onto your computer. It's basically an app where you can create Chat
rooms and groups. And these are called servers. So go over to discord.com,
download it there. You don't have to actually download it if you
don't want to, you can still create an
account here and simply use, use the web browser. But personally, I
prefer to have us downloaded and use the
app on my, on my laptop. Open it up and you can then
create your own profile. And then you're brand new. Discord is going
to look like this. Now what you wanna do
is pop back over to the website of midst
of Midjourney. You're going to look for
a button that says beta. Now, I'm presuming that in the near future they're
actually going to launch an app themselves so that you
don't have to actually go through having to use the
tool inside of Discord. For now, that's where
the app is running. So you have to be
able to join us. And to do that, you've got to click
this patient button. And then click Join again. Okay, and now you're in. So welcome to the random
and seeming chaos that is Discord in action and
Midjourney in particular. Let's just take a really
brief look around this middle section here is where all the
messages get loaded. The chats and things like dash. On the left-hand side would be the various sections inside
of the Midjourney app. On the extreme left is a list of the other Discord channels
that you might have joined. Or if you proceed to join any other Discord
channel or servers, I should say those servers
will be listed there. I just have Midjourney at
the moment on this account. Down here, on this setting here, this icon, this icon, you can click that and go
into your own account and change things around
like your emergent, your avatar and customize
it up a little bit. So feel free to click through
all of these sections here. If you're new to all of this, this might seem pretty overwhelming and a bit
hard to figure out. And really, instead of going through each
and every single one, what I'm gonna do
is just focus on the actual sort of the, the main channel or one of
the channels that you can use in order to just
start making images. The way most people
do that is by simply Clicking into one of
the new beat sections. And then this is where
you generate your images. Now later on, I will be
showing you how to generate images without having to be inside of this
random noise tunnel. But it is interesting
to see what other people are creating and to see it all happen in real time. All of these are, this is literally everybody
around the world interacting with the app and using it to create
images themselves. Make sure you've
gotten this far, that you're all set
up and you've got Midjourney up and running
on your own Discord. And then when you're ready, meet me in the next lesson. And we'll start with the very
first Prompts of this class
5. Defining Concept Art : Now before we start making
images for this course, I wanted to quickly talk about Concept Art versus
a general image. Obviously, getting to know
how to work with Midjourney. That's a topic that's
wide open to any image. And all you really need to
do is have a clear prompt. But in making this course, I really wanted
to keep the focus narrow in terms of the project that you want,
that I want you to make. Because I feel like it is much better to learn
this tool by having something to work on rather than just
making random images. In this lesson, I'm
gonna talk about how Concept Art image needs
to be a coherent image. And I'll explain
what I mean by that. I feel like that's where you are going to become
really skilled at refining prompts
when you try to aim for a coherent look and
feel in your image. So if we just scroll through
the feed and anyone of these new comer
rooms in Discord, you'll see some really
stunning images. But what I want you to
take note of is the fact that many of these images
are simply of one subject, either a person or an object. While it might be
really eye-catching, really complex, with
super realistic detail. And it is incredible
to think that these images are
generation by just words. Very few of these images are
actually telling a story or very few of them
are what I would describe as being Concept Art. Okay, so let's define
at the very beginning what Concept Art
is. Simply push. It has artwork that supports a narrative or an
idea or a story. In other words, it's Art that helps the producers
figure out what the look of a film or a game or
TV show is going to be. So Concept Art
defines the look and feel of an entire story
or an entire world, and not the key aspect
of Concept Art. It is story-driven and image of a single-subject doesn't
necessarily tell us a story, but an image with a
landscape that includes a character and has a definite theme that tells
us that there's a story here. And hopefully the image is
compelling enough that we want to stick around and find
out more about that story. So to sum up, Concept Art is a reference for
the production of a film and it includes environments,
characters, and Prompts. A really good Concept Art will convey the idea of the
story within the film. And usually what is implied
in visual representation of narrative has either a
conflict or a journey. Now, we could spend an
entire course just learning about what goes into
making strong Concept Art. We could talk for hours about things like rules
of composition. How to lead the viewer's
eye into the composition, how to frame you are seeing, and overall, how to create believable worlds
that the viewer feels like they can step into. So an image of a cat
taking a selfie is not exactly an image that entices the viewer to step
into and explore that world. Although I think
that might be quite interesting to hang out
with a selfie taking cash. But you get the idea. Think about how you can create an image that draws your viewers in and makes them feel that there is not
only a story here, but a whole world
waiting for them. A really good way
to do this is to imply a character on a journey. So I'm going to hop over
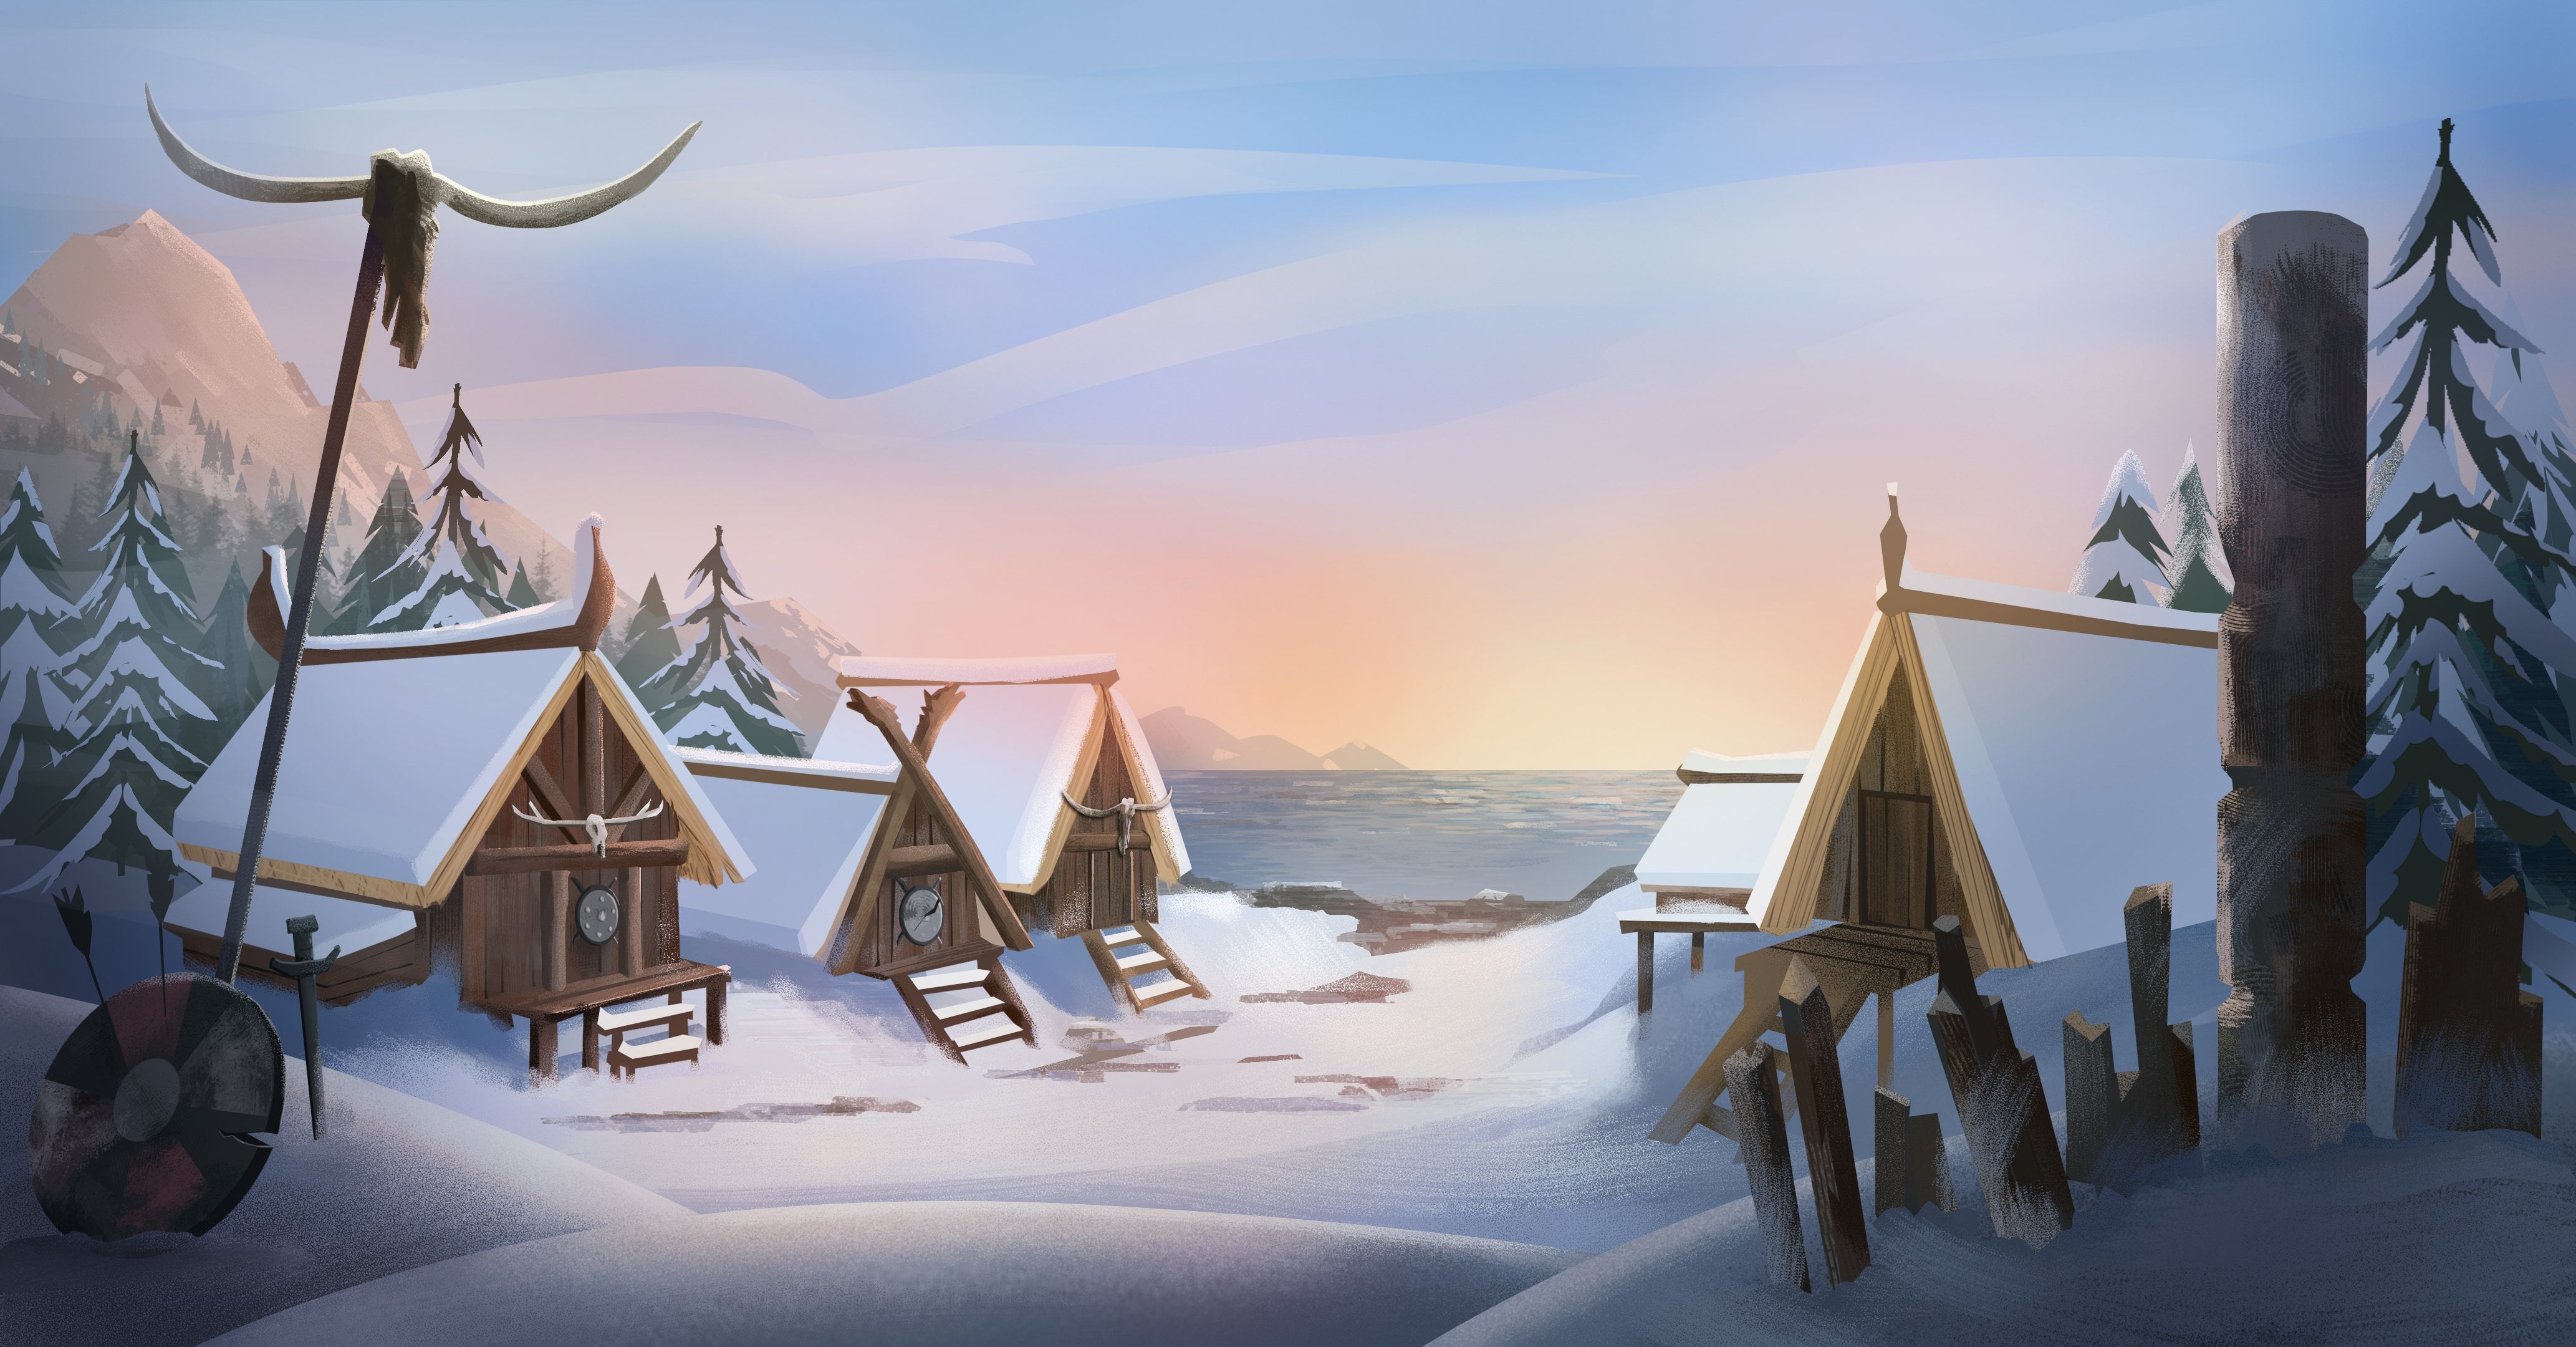
to Photoshop quickly. Talk about this image here. What we have going on here is an implied story
of this character. So very often in Concept Art, what you will see
is a character in the foreground are looking
into the landscape. Then further off, there's
often no an area of interests. And this implies that the
character has to travel through the landscape and go on some sort of journey to get
to that area of interest. So little visual tricks
like that or what you should be keeping in
mind when you're create, when you're thinking about
your Concept Art piece. Don't just have one
subject in mind. Try to really feel how that one subject without
one idea conversion to our whole world. So that is just
something to bear in mind as we move forward
in this course. In the next lesson, we're
going to start off with some very basic prompts and get used to working with
the Midjourney Bosch. But as we move through
the next essence, what you to begin thinking about your final project and thinking about what kinds of elements you want to have in
your final piece.
6. How to Create a Basic Prompt in Midjourney: Now that you've set up both
Midjourney and Discord, you can start making artwork. And actually the mechanics of doing that is very, very simple. It's just the setup
that might take a while and getting used to Discord if you haven't
used it before, you really now have access to creating any images that you specifically want on
your terms and you get to work with this
program the way you want to. Here's how the Prompts work. You simply click into the
message bar at the bottom. And the first thing
you wanna do is type forward slash imagine. Don't leave a space
between for sash. Imagine. And when you do that, when you start typing, it's actually going to
prompt you as well. It'll pop up like this saying prompt and you
can click on Nash. And then you can start typing anything
that you can imagine. I'm going to type in the first
thing that comes to mind. Since the project in
this class is going to be as specific
Concept Art piece, I'll start typing some
generic Concept Art ideas. I just typed in a bunch of words relating to a vague
Concept Art idea. Dragon, fire in the sky, explosions, etcetera,
and then hit Enter. By the way, you can see
all of these images populating here at
a fairly fast clip. And that's because
other people are currently generating
images themselves. Then you'll see that
your message just gets fed into the
sea of messages. But what you wanna do is
try and keep an eye on it. So scroll back up and you'll see it stand
out from the rest, really only by virtue of this
yellow line on the side. That's the highlight. The way Midjourney works
is that it will generate for images based on a
prompt that you give us. That's the most it will
output per prompt. So that's why you'll see
for Images in a grid. And up here it'll tell you the percentage of the job
as it gets processed. And you can start to see
the results coming through. Once it hits 100 per cent. What happens now might seem
like it has disappeared essentially Midjourney
does all of its jobs in a
chronological order, so it'll be backed
down in the list. What you need to do is
scroll back down through the chat and look out for
that yellow highlight again. And Okay, Here it is. And really that looks very impressive for a very random
first Prompt, I must say. That's quite mad,
that an image of this complexity is created
with just a few words. So just click on the thumbnail
to see the larger image. If you want to see it up close, what you can do is
click open in browser. This will open it up
where you can see. You can see it in much
more detail and you can even click in and zoom in
to see it a bit better. So yeah, you can really
see how much detail and how much incredible complexity is going on here in
this really simple, straightforward prompt
that we gave us. At first glance. These look good to me. I think this area here, it looks a little bit confused. It's not very clear. This image has much more clarity in terms of the composition. I think that Dragon is
really nicely rendered. But for example,
this element here, I don't know what that is. It looks very random. But I like these bottom two images because
I think there's more color to blues
really enhance the image. And I think the city
is more defined. So overall, for me, there's a more of a sense
of story in this image. The next thing to note
is that underneath your for images there
are two sets of corresponding buttons which
will allow you to either refine and change the given
images or to save them. So those two sets are you
for upscale or enhancing, and V for varying or
creating new versions. The V will let you create for brand new images based
on one of these. And each of these numbers, you, 123.4, corresponds to each
of the images, 123.4. So obviously you
can upscale one, you could upscale two, etcetera. So I think I'll go ahead and
just upscale number four. Click on that and then scroll
back down to find where the job is and
then wait an okay, so I'm gonna open
that in a browser. Then from here,
just right-click on the image and choose
Save, Save Image As. And that is your first
Concept Art piece created and rendered. It's literally as simple
as that to get started. Now of course,
there's a whole lot more to generating
Art in Midjourney. But if you've never
used it before, then have a go at creating
your first image. Prompts. Get used to the process. Save out some, some pieces and experiment with variations. And so when you're ready, meet me in the next lesson.
7. Variation vs Iteration - How to Change Images in Midjourney: In this lesson,
what I want to show you are some of the limitations that you might face when it
comes to iterating or Images. And to do that, we're going to take
a walk through some of the options for making variations of your images or
changing them up slightly. Now first off, the first
thing that you need to be aware of is that at the
moment in Midjourney, the tools aren't
that great at making exact duplicates of images. That's what I mean when I
say Iteration your images, like very often in Concept
Art for film or game design. You're going to
have to produce or make several images
of one scene. When it comes to doing
that in Midjourney, you don't get great results. I will be honest. So that will
no doubt change over time. But as of right now, we're on version
five of the app, and it's difficult enough to get the same image generation twice. To show you what I mean, what I'm gonna do is
take the exact wording that I used for that
initial prompts, the fire Dragon prompt. And I'm going to
re-enter it here. I'm just going to type forward
slash, imagine, hit Enter. Now it's going to generate a new prompt based on or new
images based on that prompt. Again. Now that it's generated,
Let's take a look. So yeah, you can
see that each of the four images
here are different. Not like completely different, but ever so slightly different. I would say there it looks better rendered the
new original one. But I wanted to point that
point out that that's simply what we're working with here
in Midjourney at the moment. Be prepared for that. You might get similar
images that you can work with within
the same theme as your Project and
use images that are similar to make a
cohesive theme. And I think that
that worked great. That's exactly what I want to
see in your class project. But just be aware in
terms of getting, let's say an exact duplicate. It's going to be challenging. However, there are some interesting ways
to work around this. Now, I'm going to start a new
prompts for this example. I want to create
something a bit different because to be honest that Dragon images a bit too chaotic. I feel like trying to iterate that particular image as
an example is not great. Yeah, it's just not
great visually. So I'll start a new Prompt. I'm gonna go forward
slash, imagine. And then let's type in. There are for something
completely opposite he lovely, tranquil, beautiful
scene in the mountains. Lush forest D, Asian inspired. I'm thinking here along
the lines of some of the beautiful background
images from Kung Fu Panda. Let's type in something like
that and just hit Enter. And that's going to render out. It's going to take
it's time to render. And that's done, and
that looks really nice. Let's click on that. I'm going
to click open in browser. So we have our four images. Not so sure about the first two. But I think I like
that last one a lot. So at this stage, what you
really liked, that fourth one, you could then click V4
and Midjourney would create for new images based
on that fourth image. They wouldn't be the
exact same as an image. There will be
variations on that. But what I'm gonna
do now instead is just click upscale
image number four. Now, from here, I
could click variation strong or variation subtle if I wanted to
change that image. But what I'm trying to do is
make an image similar to it. I don't necessarily want to
change the actual image. I just want to be able to make the same image
slightly different. And what I found useful
words, these Zoom buttons. So if what you can
do is click Zoom to. These buttons are gonna give you options to create a new image, which will be the exact
same as the original one, but the framing and composition will be ever
so slightly different So here we can see Midjourney
is building out the image. It's using that same the original image
as a starting point. And it's zooming
out and building, the pixels are building the
visual frame around it. So let's see what we've got. Awesome, Let's take
a closer look. This was the original where we this fourth one
was the original one that we chose to make a
wider see a wider shot. And it's done, it's
done it very well. I think it's given
us four options. I feel like it's just
repeated the elements, but you can see that the
original one had, say, let's say these two, this mountain in the
middle as a focal point. And that's definitely maintained
in this new iteration. So I think that's really
important button to know about. If you're creating Concept
Art and you want to make iterations of an image
rather than variations. My personal favorite to iterate on an image
is to use the pan, but buttons, so pan left will make our camera view
wider towards the left. And obviously pan
rise would make the camera view
wider to the right. So let's click on pan left. Once again, you can see how
that's being built out. So it's keeping the
original artwork that we want on the
right-hand side and it's just building out the
left part of the frame. Okay. Let's go find it. Where is it? There we go. That looks really nice. It's created a
widescreen version, essentially of the
original image. Let's open it up. Take a closer look. Very successful,
really, really good. I think it's even added
in lovely temple here, which can provide a
really cool point of interests within
this, this piece. And that's just kept
the exact image the way we had in the
very first prompt and just extended it out without breaking the image or without making
it look too weird. This one is, okay. I'm not crazy about it, but I think this is very good. This one here would
probably work. That's not, that's a bit random, that structure in the back. And then this doesn't look as compelling. This is perfect. It's got a really nice
rule of thirds going on. It's got lovely framing. You could do a really nice paint over up this piece actually, if you just wanted to add a
character in the foreground. Okay, so that is a
really radical tip when it comes to
creating Concept Art. And if you want to
iterate an image or a scene that you think is
working and you own a build up. That visual. Don't click variation. It will only give you different
images based on that one. Click either zoom out
or the pan left and pan right buttons to get a
wider shot of your scene. Now, as you've
seen up until now, we've been creating images
in the general chat area. And there's a lot of scrolling
back-and-forth to find our jobs and you start to make multiple images or
multiple prompts. It can get a bit crazy
with all the going back-and-forth and getting
lost in the general Chat. So in the next lesson, I'm going to show you
how you can set up Midjourney so that you can have a private chat window with the Midjourney Bosch and create images there
when you're ready. I'll see you in the next lesson.
8. Upscaling Images and Comparing a Photo: In this lesson, I want
to show you how to upscale an image once
you've created us, then I want to compare a basic mid journey
generated image with a photograph to show you exactly where you might want to
refine your prompts. So what I'm gonna do
is head back over to MIT journey and inside discord, I'm going to start a new prompt. I want to create an image of a very simple subject
so that you can see exactly how the details of that image compares
to a photograph. And I'm gonna go
with an image of a bird, lilac breasted roller. It's a really cool
Bird, very colorful. And because I want this
to be hyper-realistic, I'm going to mention
in the prompt, a camera lens so that the image looks as though it was
captured by a camera. Now, I'm gonna be talking
a lot about how to use certain phrases and words
in prompts later on. But let's go with this for now. Okay, so you can see
it's starting to degenerate and it's
looking very good so far. There you have it that
looks super detailed. It looks really good. I'm going to choose the
second one here and upscale it by clicking
YouTube underneath. And then once I do that, it's going to obviously arrived
down at the bottom again. Now, I'm going to open
this up in a browser. This is a really good image, but as I said, it was generated with quite a basic prompt. And as such, you can probably see that it
looks slightly unreal. It doesn't quite look like
a photo of a real bird. And so to illustrate this, I'm going to hop over to Google and do an
image search for the exact same subject
just to get a comparison. So I'm going to type in
here and go to images. And then let's just
click on Wikipedia. And the thing about
Wikipedia is that often you can get
royalty-free images there. As you can see here. This image that says the work is free and may be used by
anyone for any purpose. And if I click on
More details here, it actually gives
you options under the image for really
high resolutions. So what we've got is an
actual photo of the bird. Let's take another look
at our mid journey image. You can see there's
quite a difference. This doesn't look
real necessarily. Um, maybe it looks like
a very, very good, hyper-realistic painting, but it certainly doesn't
look like a photo. I think it's possibly because
the background looks weird. But the point is that a simple basic
prompt is going to yield an incredibly
complex image, but might not be as
nuanced or as realistic as you would like your
image to be if you wanted something
very photorealistic. I think by going through
this practice exercise, you can see now that getting the right prompt
is so essential. And that's why right now, this is the dawn of this
new era of technology. We're starting to see a lot of job postings for
prompt engineers. In order to get good images, people are going to want
to have good prompts. I think that's an
interesting niche that's starting to emerge for digital artists is how to really uniquely craft a prompt. So as we dive deeper
into imaging, keep in mind that input
will equal output in order to keep working with mud
journey and get more nuanced. What I'm gonna do
next is actually create a subscription
to my journey. And that's going to
allow me to create images in a private window. Now this is this next step. You don't have to do this. You can continue to work
in the free version. But if you want to
see the process, then meet me in the
next lesson and I'll walk you through
that setup process.
9. Creating a Subscription in Midjourney: In this lesson, I
want to show you how to create a Subscription
to Midjourney. As I said before, this is not necessary at all in
order to create images. And you're certainly
not going to be creating any better
quality images. By having a Subscription. You stick with the free option
and just work that as is, then you're still getting
the same quality of output. The Subscription
though it does affect the number of images that
you can create in a month. And also how faster
generation for you. Plus, it also gives you the option to create
images inside of a private chat rather than in that channel with
everybody else's images. So if this is something that you think you really
want to get good at and you possibly want to
start earning an income from. Or especially if you want to start generating
images for a client, then you would
definitely want to consider one of the
subscription plans. As I said, the other
consideration for me, it's a big deal that
with the subscription, I get to be able to work in
a separate message window with the Midjourney
bars and not in that noisy chaos of
the general Chat. So totally up to you. But as I said, you don't have
to pay to use Midjourney. Just want to be
clear about that. And certainly the kinds
of images that you can create are the exact same. So let's go over to the
Midjourney homepage. You should be brought
up to your dashboard. And this is where on
the left-hand side you can click on
Manage Subscription. Once you do that,
you'll see that there are a few different plans
that you can choose from. The very basic
plan is ten bucks. And as I said, that's gonna give me all of the flexibility that
I think I need. So I'm gonna do that
and go with that. And then once that
plan is active, you can go back into
the Discord server. But now you'll see that you
can go over to your messages. And there'll be a direct message
from the Midjourney Bot. And inside here is where you can start typing
all your prompts. Okay, great. So let me know if you've
got any questions, but I think it's fairly
straightforward. And when you're ready, meet in the next lesson. And I'm gonna give you the
top Tips and tags to start working with much more
nuanced and refined Prompts
10. Top Tips for Better Prompts: So as I've explained already, input equals output with
many of these AI tools. And in this lesson, I want to go over some of the best tips that I came across that I think are essential for Generation good concept art. In creating this class, I did extensive research into
tips and tags and prompts. This lesson really is a coalition of all
of that research. And I wanted to let you
know that I've left a list of my resources
for you to download. So if you want to follow
up my bread crumb trail through the vast maze
of YouTube videos, medium articles,
countless blog posts. I've left all of that for you to follow, to follow up with. So go over to the projects and resources tab and you can
download that list there. Here are the top tips that I think are absolutely essential. The first one is to
adjust your settings, type in the message
box for its settings. And hit Enter that allows you to view the current settings that you're
working with. And here you can adjust
for low stylization, medium or high stylization, or even very high. I keep mine on medium, but I'd suggest that you could probably go with a
high stylization. You can also click into
fast mode or relaxed mode. And I'm going to talk about the remixed mode in
the next lesson. But those are some
immediate settings that you can play around with. You can also click on this
drop-down menu and choose which version of my journey
you want to work with. Another really good
tip that I've come across that I use now in all of my plants is using the
dash, dash AR parameter. And AR stands for aspect ratio. So as you've probably seen, a lot of the images that are outputted come out
as a square image. And if you wanted to
have a widescreen image, which is very typical and very common for concept
art in particular. Then I would put
in dash, dash AR, and then choose an
aspect ratio of 169. Another tip is to use forward
slash blend in order to have the capability
or the possibility of uploading images
to mix together. And I'm going to show
you later in this, in this class exactly
how uploading images in majority works and the best way to the best practices
around dash. And probably one of
the best tips is to use a formula
for your prompt. I found that working with a specific formula meant that
I got consistent results. And it meant that I was
able to be really concise and direct about the kind of image that I
wanted to be created. I found that starting with the type of image
first was good. That really solved a lot of problems that I was
coming up against. So I used the term concept
art or matte painting because that's the project in this class is to
create some concept art. And by the way, that
painting is a type of digital composite that
is used in gaming, film, and concept
art in general. After that, I specified the
subject following dash. I said a couple of details. And then at the end, I put in the parameters like
aspect ratio or stylization. So I ended up with this
formula, type of image, the subject matter, description
of the scene and details. Plus I added in the style of and I added aspect ratio to me. I found that if I was
to distill everything down that I researched
into my main takeaway. It will basically be
using a prompt that specifies in the
style of that to me, made the most amount
of difference between getting a
terrible image, getting very, very good image. So let's talk a little bit about in the style
of as an artist, one of your main jobs, your first task really
is always research, research, research whatever
image you want to create. It sounds very nice
to think that it might just come from
your imagination. But the best artists
out there know that good images come
from good research. And what I've come
to see as being such a powerful aspect of
interacting with my journey is that it really opens you
up to researching and doing creative research to look
at images that really inspire you to discover artists that you would
never know about. So research is really where
you will start to broaden your horizons and make the most of what it is
you actually imagine. I want you to start
thinking of art-making as a way that you take something that already exists and you re-interpret it in
your own unique way. So let's do an example of this formula that
I put together. I'm going to pop over into the chatbox and
I'm going to type in along those lines of type subject description of
scene and in the style of So I imagine prompts and I'm going to start
typing out this formula. So I'll start with the type
of subject that I want. To start with the type
of image that I want. Concept art or matte painting. And then I'll type a few words about the
subject in particular, and a little bit of details
about what I imagined there. And then lastly, I'm going
to put in the style. So let's just go with something very obvious and
straightforward. I'm going to put it in
the style of Star Wars. And I want the aspect
ratio to be 169. Enter and it's
beginning to generate. Okay, So I've already spotted
that I made a mistake. If you can see it's
generating square images. And that's because I
put a space between AR, between dash, dash and AR. So it didn't read it as a
parameter to take note off, so we can fix that
in the next round. But let's see what this created. That looks really cool. There's beautiful colors there. I loved the colors. It's great composition. I'm going to open it
up in the browser, take a closer look and zoom in. What you can see
here is some very, very highly detailed images. These are grayish. First one's a little bit weird. I don't know if
that spaceship is taking off or landing
or what it's doing. The second one is awesome. These last two are really good. I think they're very,
very successful. So for sure that prompt
structure works great. But let me redo it with the proper aspect ratio to
show you what that dash, dash AR tag does. I'm going to copy
the prompt again. Make sure that I get
my aspect ratio right. So that, that looks awesome. It looks very cool. This is way more
like concept art. And I feel like it's
inspired by Star Wars, but it's not overly derivative. It doesn't look like
a total Star Wars were both in terms
of the aesthetic. So that's pretty cool. I'll save those out. Now the next thing that
I want to show you is how to weight your prompts. Because this is a
very useful tip. Sometimes maturity
might ignore part of your prompts and you want to make sure that it's
flagged as being important. The way to do that is to
use a double colon and a number that signifies its wage or its
importance in the prompt. So let's do a weighting
system of something 0-1. So the prompt is the main prompt is the
most important thing. But then after that,
I'm going to emphasize the armored vehicles on the ground or
spacecraft in the sky. And I'll give those
awakening of 30.3 and 0.5. And let's see how we
get on with dash. So you tonight, try
this out and see if you can craft prompts
that are structured, that have tags and then another wagered for
importance of elements. So have a go at practicing nurse and then
when you're ready, meet me in the next lesson, I'm going to show you how
I use the re-mix function
11. Using the Remix Function: In this lesson, I'm gonna
show you how to make variations of an image
that you've created. There's a few ways to do this. The first is obviously
to click any of the V buttons with the
corresponding term number. So that's going to generate for new variations of
that specific image. The other way to do it, which I really like is to use the Remix Function
to access that, go back to settings. So first of all, type forward slash settings
in the dialog box. Hit Enter. Then just make sure that you turn
on Remix mode. Now let's go back up
to our for Images and let's say we
liked this first one. What you can do now is click on V1 and inside here it
actually gives you the prompt again so
that you can editors or tweak it for that
one specific image. I'll make a few changes here. I want maybe maybe I
spelled armored wrong. I'm not sure. I'll
change that up. I think tanks, I'm going to leave
everything else as it is. See what, what X gives
us and I'll hit Submit. Okay, That's pretty awesome. I think that's phenomenal
image generation. I really loved the composition. I loved the details
on this structure. I personally think this would be awesome to use a be a
great starting point. None of these really stand out for me as strong Concept Art other than the crazy detailed Mac structures
that we're getting. Those are really good
and really impressive. But I feel like in my mind, for the project that
I want to create, this is just missing the mark. So as I, as I said before, this is all part of the process. And having images generate
that aren't quite right, is just a matter of getting you closer to what you
really, really want. Let's do one more Remix. I really liked this
function because you get to see what part of your
prompt is not working. So let me just play around
with it a bit more, added, a few, few more ideas here. I'm going to take
out spacecraft, maybe put in spaceships, see if that works. So I did a few more
experiments on this theme, working with the Remix Function. And I finally got this image, which I think for me is the best so far, this
is mind-blowing. This is really, really awesome. I'm not entirely sure,
but the mountains, but I do think that they
make it look very alien, very hot system era. I really loved this image. I'm going to save this
one out and go with dash. I'd love to see what
you're coming up with. If you've got images
at this stage, it doesn't necessarily
have to be the final project image. But if you're experimenting with your prompts and with the Remix Function and
you get something very, very cool that you save
out, do let me know, post it up in the
project section anyway, as a work in progress or as
Concept Art research piece, share your prompt as well and how you got the final image. And then when you're ready, meet me in the next
lesson because now we're going to go a
little bit further. We're going to start working
on more advanced prompts. I want to show you how I use
images to create prompts. I also want to show
you how I Train Chat GPT to be a
prompt generator. So once you're
done experimenting and practicing with the Remix, meet me in the next lesson.
12. How to Use Images as Prompts: In the last S and
we were trying to tweak our Concept Art prompts. And we were having some success with the re-mixing prompt. But in this lesson, I want to show you how you can actually use an image to
generate the prompt. Sort of like saying in the style of but actually
showing the style. And it does have a
dramatically different effect. So there are a couple of ways to show Midjourney of
photo that you like. One way is to copy the URL of
that image into the prompt. So in other words, you
need to find the image online first and
copy that address. For example, let's
go into the message and type for sash,
imagine and prompt. Then what I did was I
found this image here. I right-clicked on it and
opened it in a new tab. Then you can go up
and copy that URL. Just note that it must have the dot JPEG
extension or dot PNG. But essentially, this is
where the image lives online. So just copy that address, go back into Discord and
paste that into the prompt, then hit space, and now you can type your prompt out again. So in other words, saying that I want this Concept Art piece and I want it to look
like this picture that I just showed you. Another way to send an image to midjourney is to upload
from your hard drive. So for example, if we
upload this image of tattooing his entered
to submitters. Now I'm going to stop my prompt. So just starting to
prompt as before. But now I'm gonna give
Midjourney the link to that image that I just centers. I hope
that makes sense. What you do it, you just right-click the
image and copy it into there, or drag the image into
the message box itself. But as you can see, it can get fairly accurate
in terms of the style. These are pretty awful images, but they do look remarkably like the Star Wars
reference that I gave it. The third way to use an
image in your initial prompt is to get Midjourney to
describe an image first. And that way you are getting a prompt that Midjourney
makes for you. The way to do that is to use the command forward
slash describe. You type in forward
slash describe, and then you paste the image
in or attach the file. So just grab this
image from my desktop. Enter and then Midjourney just gives you
instead of before, where it will give
you for images. It now gives you
for descriptions. I'm going to now
just simply create a new prompt based on one
of these descriptions. Start off as usual and then paste that description
into the prompt. I might change it up
ever so slightly for my own specific Art piece
that I want to create. And then hit Enter. This describe prompt is probably the most successful one
that I've used so far. This is way beyond what
I was even imagining. I'm really happy
with these images. Each and every one of
these is incredible. And I could easily use these to present your
client or to start, or to use as a starting point. Okay, So now give this a go. I'd love to see what
your images look like when you are able to either use the Remix Function or
use the describe image as Function and then see what kind of Concept Art you
get from this. Please start posting
your projects into the project section and give us a bit of detail on how you
arrived at your prompts. If you're happy enough to share your prompt
with us as well. But definitely let me
know how you get on. I'm really super excited to see what you can come up with. In the next lesson, we're going to start looking
at using Chat GPT to help us craft really
advanced prompts. Plus I'm going to show
you how to Train Chat, BCCI, Chat, GPT to make
consistent prompts. When you're ready, I'll see
you in the next lesson.
13. How to Train Your Dragon (aka Chat GPT): So as you can see, prompt engineering is
the biggest challenge that you faced when
it comes to getting artwork that you really like and artwork that you can actually
use as a concept artist. Now you could sit here all
day and Remix your prompts. Tweak some of the
commands, add tags. But it really feels
at some point like you are just looking for
a needle in a haystack. So in this lesson, we're going to
turn to our friend Chat GPT and ask for help. Because what better way to get advice on how to
talk to you Bhavesh, than to ask about
the thing about Chat GPT is that it's
not like Google. Essentially. You have to actually
train it first in order to get it to give you the
results that you want. First of all, if you
don't have Chat GPT, go over to the website and
simply creating an account. It's totally free. You don't have to pay
in order to use it. Once you've created account, you can now start interacting with it and asking questions. And as I said before, it's a language model. So it does take awhile
to get up to speed. Very often you'll
find that the more you ask the question, the more varied
and even the more nuanced the answers become. So just be aware of that the first response
that you get is not necessarily going to be the
best or the most detailed. And it might take a little
bit of encouraging. What I tend to do is
I'll first of all tell Chat GPT what I want
us to do in this case. I want it to help
me create prompts. So I'll say something
like you are going to be an image
prompt generator. You're going to generate
prompts for, for me. And the Prompts need to have
the following for mash. The type of image, the subject, details, features, and mood in the style
of an aspect ratio. Then I'm going to unpack
that a little bit and I'll explain
that the type can be a painting or a Photo. Subject will be provided. The details and the features
will enhance the subject. I'll say the style will be
provided and the command dash, dash AR will define
the aspect ratio. Okay, so once you've
unpacked it unexplained that the next thing I'll do is
I'll say here is an example. And then I'll literally
like give an example to Chat GPT of a
prompt that I like. Now, I'm going to move away
from the Star Wars theme and stick with the dune inspired images for now.
I'm going to enter that. And Chat GPT seizes Chat. Gpt says, understood, based
on the format you provided, I'll generate some prompts
for the Ai image generator. And here they are. And just like that,
It's given me ten prompts that I
could experiment with. So as I said, you can always nuances a
little bit and tell Chat GPT if you want to refine or tweak any
aspect of the prompt. And the more information
you give us, the more it will be able to work on making a
detailed prompt. So as I said, I'm moving my Concept Art
piece more towards the theme or style of dun
based on the image that I got. So I'm going to ask
Chat GPT to give me five prompts based on Space Station theme in the
style of the movie Dune. So that's pretty awesome. So I'm going to copy one
of them and pasted in. And these are the results
which are phenomenal. They are outstanding. This looks like super
high-end Concept Art for a movie or a game for sure, without a doubt, these
images are stunning. So I just want you
to be aware that there are absolutely
millions of resources online to help you
craft the perfect Chat GPT prompt for Midjourney. So if your instructions
are not working, consider research
in Better Prompts. And again, as I said, I will leave a list of
some of the resources that I've used and that I have
found really helpful. So check that out in the
Projects and Resources tab. But I think I've gotten to
a point where I feel like my Concept Art piece or project is really
coming together. I love, love, love. These images that
were generated. I think I'm gonna go with these. And in the next lesson, based on these, I'm going to try and generate
some characters. Because any Concept
Art piece has to have landscape or environment and it has to have
character designs. So when you're ready, join me in the next lesson and we'll generate some really cool
characters for this, for this imaginary worlds
that we're building.
14. Creating Characters for Concept Art: In this last lesson, I'm going to generate a
few character designs to go along with our environment so that the whole
Concept Art project looks cohesive and professional. With character designs
added into the mix, you will have a fully rounded
portfolio piece as well as a solid Art packed
begin building out the entire world
that you imagine. Okay, so let's go
back into Chat GPT. I asked Chat GPT to describe a hero that
could inhabit our world. And it came back with this
really long response. So what I did was I asked her to make it a bit more concise. I found that I think
some people have said using a really long
prompt works very well. In Midjourney, I
found that when I condensed my prompts down
to the essential language, that gave me much
better results. So copying this concise prompt, I then went back over to Midjourney tweaked
prompt a little bit. What I will say is be
sure that you include the words character pose sheet
or character model sheets. So those are technical
Concept Art terms that will give you a full body image
with a lot of details. And that's what you want. You want to be able to see the character
from head to toe. So we'll hit Enter and wait
for the results to generate. Hair starting to look
incredibly cool. Really interesting stuff. That's rendering. Almost done. Wow, That is amazing. That looks absolutely
incredible. It's suits and matches the environment that
we've generated. Almost exactly. I would say, Open it up in a new browser window just
to have a closer look. And that is truly phenomenal. I really love it. It's
not hyper photorealistic. It's still got a bit of artistic painterly qualities to it. Stylized, which is very cool. And I love that Midjourney
included all of these motifs. I don't think any of
these mean anything. I think there's no
actual words written. It just looks like
sort of made up text. But the effect is
very, very cool. And that's exactly the type
of thing that you want to see in a Concept Art presentation. So I'm definitely going to
save each of these images out. I don't think I want to change or experiment
with it too much, but I'm very happy with that. And now it's over to you. I want to see your
Concept Art piece. I would very excited to
see what you come up with. You don't have to follow my prompts are my
ideas whatsoever. The project brief for
you is wide-open. Use whatever
inspiration you like. Try and follow the prompt, the prompt structures that
I gave you and use any of the settings that you think is going to give
you the best image. And when you're ready, post your work up in the
Projects and Resources tab. And let's all get
inspired by what, by what you were able to
create in Midjourney. So thank you very
much for being with me on in this class today. Please stay tuned to this Class. Hit follow on my profile
so that you can be kept up-to-date as soon as there's
new updates in Midjourney, I will add them to this class. Make sure that you're
following me so that you get those notifications if any
new lessons are added. Because we are really at the very beginning of this incredible new
digital art-making tool. And no doubt, there's
absolutely no doubt that it's going to change and grow
exponentially from here on out. I'm very excited to see what the future holds and
I'm really excited to see your artwork and
to see your work develop. So thank you so much
for being here. I really appreciate it. I'll look up proving the
project section and I'll definitely look out for
you in the next class.
 Siobhan Twomey, Artist, Illustrator, Instructor