Transcripts
1. Welcome to this Notion AI Course!: Welcome to this Skillshare
clash on Notion AI. My name is Julian Melenson and I'm super excited to
be here today teaching you all of the tips and
techniques that I've learned over years of
using different AI tools, and specifically today for
Notion AI, which is an incredibly powerful tool for
productivity, organization, and overall writing
that we'll be diving into inside this class. But before we do that, I just want to give
a little bit of a background on myself so we
can get to know each other, and then we'll be diving right
into the course content. So like I mentioned, I've been
an expert in the AI field for years and have actually helped companies
like Capital One, Aflac, Event Prt,
NASTgFolks wagon, introduce AI workflows
into their companies. This has led to me not only
helping companies directly, but also growing an
online audience of over 385,000 students
who have watched over 25 million minutes of course content and have left over 40,000 positive reviews. So I'm really excited
to be sharing all of my expertise
inside this class. And if you want to follow me online to see the latest
AI content I've released, what kind of workshops
I'm offering and get a little look into my
life on a personal level, you can follow me at
Julian discovers. With that said, let's get
this journey started, and I will see you
in the next lesson.
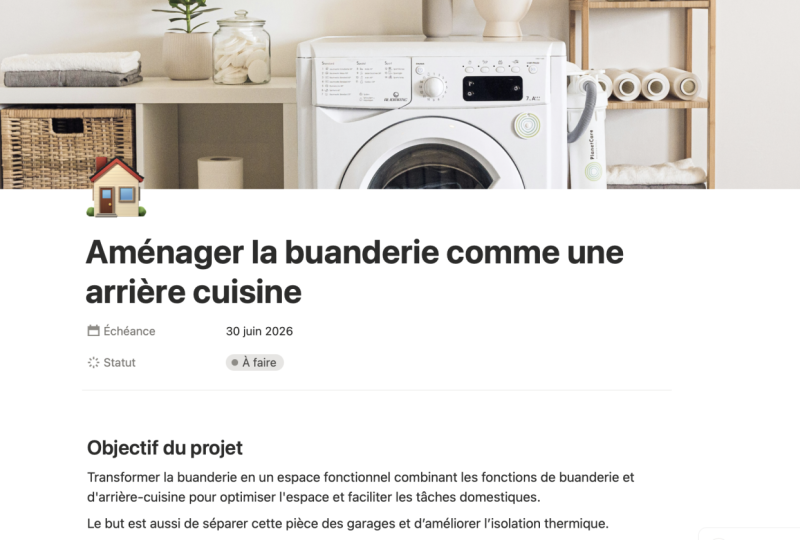
2. Your Class Project Details: Before we start getting our
hands on using Notion AI, I wanted to go over
the class project that you'll be completing
at the end of this course. By the end of this class, I want you to take all of the notion AI techniques that we've learned in these
different lessons and create a home run
notion document using the AI functionality that we're going to be covering. The main steps for you
to accomplish this include signing up for
your notion account, making an organized
notion workspace and creating a notion document
with the AI functionality. While you're going
through these lessons and creating your own notion
documents, this should be fun, interactive, and the documents
that you create should be helpful for your personal
and professional projects. So that does it for the introductory
portion of this class, and all of the following lessons we'll be diving into notion AI. So have your laptop
or computer ready, and let's get to work in
the following lessons.
3. Let's Setup Your Notion: Lesson is going to be about. It's just an overall
introductory to notion, and an overall look at the
layout of where things are, and then we're
going to dive right into using the AI functionality. So if you navigate
to notion dot SO, Notion is a web based platform that is a little bit
similar to Google Docs, Mets, Dropbox, and it allows for you to really organize
different documents in a very, very categorized and overall
aesthetically pleasing way. And there is a free
option, an $8 option, $115 option, and an enterprise, option, which you
probably won't be using. But I will drop a link to this page so you can
look at the pricing. And if you would choose to, you can go ahead and
purchase a membership. It is well worth the money and
with the notion AI add on. It is an extra $8 per month. But as you'll see in
these upcoming lessons, it is so worth it.
4. Layout, Interface, Workspaces, and Overview: Once you go through
the sign up process, you add your e mail,
you create a password, and you've chosen the type of subscription you want to have, this is going to be
your home screen. So this sidebar really has all of the most important
information that you need. You can have multiple workspaces
that contain, you know, really an entire company set of documents or an entire project
can live in a workspace. But most of the time, you can probably keep all your
stuff in one workspace unless you have very
specific different projects or clients that you work with. Underneath that is a search
function that you can use to jump to all
of your documents. So it's going to find
any keywords that you search up when you're
looking for different items. You can also see updates from yourself or other co
workers or people that you're collaborating
that are also attached to the same work space. You can search up
just specifically in your team space content, which are shared documents with, like I said, other
people that you're collaborating with
inside of Notion. And then you have the different settings
and functionality that you can go through and
change for your account, your billing, your
password, all that stuff. Below that is going
to be your main team spaces folder if you've
joined a team space. And like I said, this is
where shared documents go across multiple people, and you can create
a new team space, which is essentially a shared
mega folder of content. You can change the icon, the description, the
title, the function of, you know, what
it's designed for, and the permissions of the security function
of who can see it? Is it open? Is it closed, and all those details. Below that, you have
your private documents. So these are not available
for anyone else on notion, and these are just documents that only you have access to. So you'll want to
keep your important information that you don't want other people seeing in
the private folder. And you can create a new page inside either your team space or your private folder by
hitting the plus icon. The cool thing is
that you can do this completely from
scratch by making a empty template
that essentially has no pre organized format that you can just start
writing whatever you need. This is going to
be my to do list for the filmmaking course. Then I can go and hit this plus icon when
you hover over to the left and you can add in a to do list where you
can add to list. Let's say pack gear charge
battery charge batteries, and you can see how
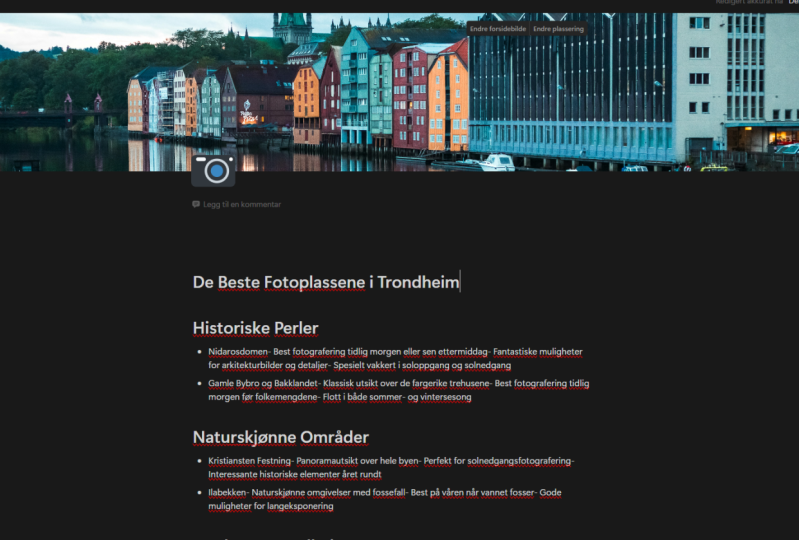
you can start to build out simple looking templates. You can add an icon to the
page, which is kind of cool. Let's go for the elephant, and then you can add even add a cover image
to the background, so we can reposition
it and change our cover image,
which is pretty cool. You can actually go and
go through Unsplash. So I think that's a pretty
cool integration on that. So the next cool thing about the sidebar is the templates. And this is really where I
think Notion excels far beyond Google Docs and any
of those kind of productivity text based
services or platform. So we can go and scroll through so many different types of templates for students, product management, design,
engineering, marketing, human resources, sales
and customer support. So I would highly recommend if you are not familiar
with Notan yet, going through and just exploring all the
different functionality. There's just so much you can do with this. It's really cool. In these upcoming lessons, I don't want to focus too
much on the ins and outs and all the intricacies of
notion because that is an entire course in itself. But what I do want
to focus on is how you can take
texts that you have written and use the
new AI capability inside of notation to massively upgrade and increase your output while saving time and just creating
content like never before, in a way that I feel
like I mentioned, is so much more organized
than Cat GPTs current layout. Like all my stuff here
is saved in folders, organized in documents with little mgs that
make it easier for, you know, my mind to
categorize things, and it's permanently there. I don't have to scroll through a little chat history
on the left hand bar, and it really offers a lot
of the same functionality, if not more than Cha GPT. So this is going to
be a really exciting section of this course. And in the next lessons, we'll be diving into
how you can truly maximize and upgrade your
projects using Notion AI.
5. Two Main Ways to Write with AI: So now that we've gotten
the fundamentals and the overall layout of
notion out of the way, this is where it gets
really interesting. So in these lessons, what we're going to
be talking about is generating editing and reviewing writing that
you've already created. And there's going to
be two fundamental ways that we're
going to do this. So here we have a previous online course
proposal doc that I put together for a three
day workshop for a client. Now, all this is written by
hand, you know, by myself. I didn't use AI to write this, but we're going to go ahead and explore the functionality
of notion AI. And like I just mentioned, there's two main
ways to do this. The first way, you can click anywhere that's empty
on your document, and you can hit space. This is going to bring up
this new prompting window with a lot of things
to choose from. The second option
is to highlight specific text and click Ask AI. So the difference between
these two is if I go and I go ahead and let's say I go to the
bottom of the document, I hit space, and then I say, I want to translate into German
with nothing highlighted. What the AI is going to
do is it's going to go ahead and take into account
the entire document, and it's going to translate it, as you can see that it's
doing that right now. So I'm going to go ahead
and let this continue, but I'm going to scroll up. And let's say we go
to the very top, and I'm just going to highlight this opening paragraph
that's really just an overview of the nine sessions that are going to be going on
in this workshop. There are 2 hours each, followed
by homework assignments, pre recorded lectures
and written PDF. So I'm going to highlight it, and I'm going to click ask AI, and then I'm going to go to translate and we'll
do the same thing. Let's translate this
again into German. And it's just going to
do this one paragraph. And what it allows
for you to do after that is you can
replace the selection, AKA, if I click that, it's going to take this translation and delete
what I previously had, or you can click Insert below, which is going to keep your
original highlaighted text. And place the
translated one below, or you continue
writing where it's going to really pick up
on the final thoughts of your highlighted text and continue writing beyond
where you stopped or make longer where it's going
to take into account all of the text and add more words and details throughout
all of the text. Lastly, you can
try again in case, it's not really the perfect
example for translations, but we'll go through try
again on a different example, or you can discard. So for now, I'm going
to go ahead and replace and I'm actually
going to insert below. So this is going
to leave us with the brand new translated
text and my original text. So you can see the capability of this is just absolutely bananas. And at the bottom
of our document, we have the entire thing
translated into German, and we can do Japanese,
Portuguese Spanish, French, whatever we
want instantaneously. So what I wanted to teach from just this
small section so far is just the difference between clicking a blank part of the
document, hitting space, it's going to take everything
into account versus highlighting a specific
part of your text and just wanting the AI to do some type of functionality or
action with that text. Let's go ahead and undo
what we've done so far. I want to get rid
of our changes, and let's go into another
style of AI editing.
6. Fix Grammar, Shorten, and Lengthen Your Writing: Let's go to our
introductory paragraph, and let's just take a second
to read through this. So we have just a comparison of what the original
font or not font. But the original text
is written by me, a human versus the AI upgrade. So this overview is made up of nine live sessions
at 2 hours each, followed by homework in
between those sessions that is made up of pre
recorded lectures and written PDF assignments. The goal of this
training slash course is to supply graphy students. That's the client with all of the information
and techniques that they need to take their
cinematography to the next level. The experience for the students is designed to be
fun, interactive, and feel like an engaging
worldwide classroom experience in the comfort of
their own home. So not bad. I'm going to go ahead and
highlight it, ask AI, and we're going to go down these additions that we can make and go through each
one of them individually. So let's go ahead and
click Improve writing. Again, I'm highlighting
just the text I want to improve versus hitting space and doing to the
entire document. So we just read through
what we originally had, and let's go ahead and let's go ahead and insert
it below, actually. And let's see the
difference here. So it looks like it didn't massively rewrite
this paragraph, but there are a few punctuality things that it did change. Let me go ahead and
see what happens if we highlight a different
style of text. So this is basically
what day one would be or the first
module of the course. Firsthand film set
experience, day one. To begin, you'll join
me on the set of a high end client shoot to
see the behind the scenes look at how the video production
process really works. These lessons are packed with
key filmmaking fundamentals and concepts for the rest of the course material
to build on top of. And then we go into some
bullet points of setting up and choosing the best way to
shoot your specific video, main steps to film a cooler looking and
cinematic project, cinematography, composition, and fundamentals
techniques to maximize your location and time while
shooting and then creatively using creatively
use your lenses, surroundings and camera. Now, let's see if it
does a little bit of a better job on this example
of improving the writing. Okay, so let's go ahead
and insert this below. It didn't change the headline,
which is totally fine. And it kind of changed
the beginning here. So to start, you'll join me
on the set of a high end. So it also I'm seeing it fix some punctuality here. High end. It added the hyphen,
behind the scenes. I added in the hyphens as well. Behind the scenes, look at how the video production
process works. These lessons cover the key
filmmaking fundamentals and provide a foundation for the rest of the course
material to build on top of. So this specific
function is not going to completely rewrite your text. There's a few changes here. I added the word apply. Of course, it fixed some
of the punctuation. It's not going to
completely rewrite it, but it's going to just upgrade it just that
little extra bit so that your text is just slightly a little bit
more professional. And let's go to the
next functionality. So if we highlight our
text, click Ask AI. The next one is fixing
spelling and grammar, and I think that this would be best once you're done
with your document, just like you're writing it in, let's say, a Word doc, to go ahead and highlight
everything and click Ask AI and fix
spelling and grammar. That way, this is kind
of a final polish on once you have
everything written. That's not anything new
and groundbreaking. We've had, you know, spelling and grammar correction
for quite a while. So this is pretty standard, but let's go ahead and
let this finish up. And now we have a updated copy with all the spelling and
grammar changes made. And the other thing I
noticed is that it retained the bold and italicize
with this function, which is really nice because
I did notice that on these previous functions that
we did, it removed that. So let's go through
one more example in this video lesson before we
move to the next lecture. Now, if I go to the introductory paragraph
that's overviewing this entire online course
or this entire workshop, can go to ask AI, and
this is really cool. We can make things
shorter or longer. So let's go ahead and
click shorter and see that we're getting
a more concise, you know, a few, maybe two
sentences less. Option. And if we don't like
what it generated, we can click try again, which is kind of nice so that we can read through it,
see the changes. And you can also toggle back and forth between the changes that were made, which
is kind of nice. So let's go ahead and
insert that below, and let's highlight
again what we have, click ACA and then ask it
to make our intro longer. So if you're wanting
to expand or minimize or simplify texts that you've written or text
that the AI is written. This is a really cool
functionality to do so. Sometimes there's,
like, you know, applications or things
you have where you need to have a certain amount of words or there's a word limit, and you want to hit that maxmoun of words or the minimum
amount of words, and this is a really cool way inside of notion to do that. So let's go ahead
and insert it below. We can see if we just read we already read through
the original one briefly, so let's go ahead and read the longer version and
see what it added. This training slash course is designed to equip
graphy students with the necessary information
and techniques for elevating their
cinematography skills. It consists of
nine live sessions each spanning 2 hours
and followed by homework compromising of
pre recorded lectures and written PDF PDF assignments. By participating in this
training slash course, students will gain a
comprehensive knowledge and hands on experience
in cinematography, which will enable them to create compelling and visually
stunning films. I think around there is where
the original one stopped. So they will also have access to a virtual classroom where they can interact with other
students from around the world, share ideas and learn
from each other. This unique opportunity
provides students with an engaging and interactive
learning experience that is both fun and convenient, allowing them to learn from the comfort of their own home. So that honestly sounded pretty
organic and pretty human. It didn't sound force
or anything like that, and that would be a great introductory explanation if we wanted to have it longer. The shorter one, let's
go ahead and read it briefly before
ending this lesson. So this course consists of nine live sessions
each lasting 2 hours. In between the sessions, students will complete
homework that includes pre recorded lectures and
written PDF assignments. The goal of the course is to provide graphic
students with the information and
techniques needed to improve their
cinematography skills. This course is designed to
be fun and interactive with a classroom experience from
the comfort of your own home. So these two functionalities, the shorter version kind of
dialed back the explanation, made it feel a little
bit more cold, a little bit more direct
into the where making the text longer made it feel
a little bit more humanized, a little bit more have a little bit more character and a little bit more
warmth to the text. But let's continue in
the following lessons, really diving into what else
we can do with Notion AI.
7. Change Your Writing Tone and Simply Language: Let's go ahead and
scroll down to the bottom of our document here. Let's highlight the last point. And let's go to
the next thing we can do so we can
change the tone. So let's go ahead and
see what happens here. Let's go with professional. And we're going to add
this inserted below. And let's highlight this again and we can go
ahead and ask it to change the tone to let's
say more friendly. We'll go ahead and by the
way, while it's generating, you can hit R to try again or escape for it
to stop generating. If you're seeing that
it's doing something that you don't want it to do. Let's go ahead and
insert this one below. We have our original here, our friendly version here, and our more professional
version on the bottom. Let's go ahead and
create a space here. And let's go ahead and
read our original. So final assignment
feedback and Q&A day nine. After this incredible
crash course and upgrading your cinematography
lighting and sound, you'll apply everything
you've learned into one epic video for feedback from myself and
your fellow students. So synthesizing the new skill set, understanding
the techniques, learned throughout the
course, getting live and in depth feedback from teacher
and fellow students, deepening your
understanding by watching the other students,
final video projects, feeling inspired
and well equipped to continue your progress
beyond this training. For both of the change
in tone versions. It kept the headline the
same, which is interesting. And now let's go into
the friendly one. So, Hey, there, it's time
for some awesome stuff. You've just completed an
incredible crash course in cinematography
lighting and sound. Now it's time to put
everything you've learned into practice and
create one epic video. You'll get feedback from me and fellow students,
so don't be shy. Here's what you can expect. Let's see if it changed
any of the wording here. I'm just going to scan it with my eyes, get live feedback, fellow students, deepen
your understanding, by watching and feel inspired. Let's do this. So it looks
like it changed the paragraph. It made it more friendly
by adding hey there. Don't be shy and all
those little changes. And then it didn't change
anything in the bullet points. So I'd be interested to see
if it did the same down here. And then added, let's
do this. A friendly. Let's do this at the end
of the bullet points. So now let's go to the more
professional change in tone. After this intensive course. Okay, intensive on upgrading your cinematography
lighting and sound, you'll have the
opportunity to apply everything you've learned
to create one epic video. You'll receive feedback from me, as well as your fellow students. So, a little bit more tight straight to the
point writing style, and it looks like it did change something in the
bullet point here. It's synthesize
the new skill set, understandings and
techniques that you've learned
throughout the course, receive live and in depth feedback from both your
teacher and your peers. It looks like it
changed the word fellow students from peers, which is a slightly more
proper term to use, which doesn't surprise me there. It looks like it replaced from other students with your
classmates, And then lastly, feel inspired and
well equipped to continue your progress beyond this training versus feeling inspired and equipped to
continue your progress. So well eqipp just slightly
a little bit more proper. So this is great for really speaking directly
to your audience, and this is where the AI
tools have the most benefit. But really, the
cool thing is that you're able to just
save so much time. Like, I could do
this entire document for a certain client. Boom, write it, it's done. It's perfect. It's ready to go. And then I want to send this as a proposal to
ten other clients. But I want to make it feel
like I'm not just spamming and sending the same content
to a bunch of people. I can make it so much more personalized like the speed of light with
something like this. So it's really interesting being able to change
the tonality. Now let's look at the simplifying
the language function. I have our professional
text highlighted. This was the third
example that we did. I'm going to click as AI and I'm going to go to
simplify language. Okay. And one thing
I really like about this notion, is pretty quick. I mean, it does this so rapidly. Let's go ahead and
insert this below. And let's see the
changes that it made. So after this
intensive course on improving your video making
skills. So interesting. I said instead of after this intensive course on
upgrading your cinematography, It decided to put
more simple words. So improving your
video making skills, so less detail and more of a broad term for the
simplified language. You'll get to use what you
learned to make a great video, and you'll get feedback from
me and your classmates. So super bare
bones, very simple. It took out the word epic. It took out about opportunity. And just overall
really simplified it. And it looks like it did
the same exact thing for the bullet points. So rather than synthesizing your new skill set,
understandings and techniques. It said, Use what you
learned to make your video. So very much like third grade, second grade learning level
or comprehension level is looking like what this
specific function does. Get feedback from your
teacher and classmates versus receive live and in depth feedback from both your
teacher and your peers. Watch your classmates,
final videos, versus deepen your understanding by watching the final
video projects. It still does a good job of keeping the essence of what's
actually being said and does a great job of remixing it to be more appropriate
for what you're looking for, depending on which AI
functionality you're clicking on. So in the next lesson, we're going to dive even deeper into these different
functionalities.
8. Summarize and Translate Your Text: Let's move right on to
the next functionality. So we just went through all of the edit and review options. Now, this is going to take what you've already written and slightly change it of
what's already there. Now, they generate from selection is really cool because we're going to
be able to summarize, translate, explain the text, and even find action items. So let's go ahead and let's
go to the bottom actually. Let's hit space, and
let's go to summarize. And what it's going to do
is it's going to generate a summary from the entire page, which could potentially turn into the introductory paragraph
that we have at the top. So why don't we
go ahead and copy this and paste it at the top, and let's see how
good of a job it did in reading all
the contents of this page and putting it into a summary versus the one
that me, the human wrote. So this online course
proposal consists of nine live sessions and pre recorded lectures with PDF
assignments in between. The course aims to provide students with the
information and techniques they need to improve their
cinematography skills. Topics covered include
camera settings, lighting, audio, camera movement,
shotlists and more. The course concludes with a final assignment
and feedback session. Expert guest speakers also provide insights
and inspiration. The course is designed
to be fun, interactive, and engaging with a worldwide
classroom experience from the comfort
of your own home. So I did a good job. Honestly, it looks like
it grabbed the same pretty close to the
same outro sentence, a little bit of the
same intro sentence from this intro paragraph. But overall, added in
even more detail that I didn't take the time to add
in the original summary. So A plus on summarizing
this entire document. So let's go ahead
and do what we did. And of course, you can
go through and highlight specific parts and summarize those specific parts as well. So if you're writing
a podcast script or a audio book or
whatever it is, you can do all that
work and then summarize the text of specific parts
to create a synopsis. So the next functionality
is the translation. Now, this is pretty
straightforward, but pretty dang, cool, that in one document, there's no copying and
pasting, moving things around. I could instantly send this
to an English client, Korean, Japanese, Spanish,
Russian French, Portuguese, German,
Italian Dutch. Let's go ahead and
translate this to Dutch. Okay. Perfect. I'm not going to be able to
proof read that. I don't speak Dutch,
but we can go ahead and insert it below
and then instantly highlight and
translate this section or the whole thing
into Filipino. And it does it so quickly. It's insane, how
quickly it does it. And this is an interesting
thing, actually. We can then continue writing after what the
original text was. I could say, Okay, translate this into a brand new language, and I want you to actually expand on the original
text and make it longer, which is a pretty
cool functionality. So I went through. It looks like it did our intro paragraph, our bullet points, and then
a summary of some kind. So let's go ahead and insert that to find out what
it said in the summary, I want to go ahead and
highlight and translate it back into English
to see what it did. So you'll also work with other students in the course to gain a wider knowledge of the
world of video production. On this day of the course, I will ensure that you become a better making
films and that you acquire knowledge that you can use in all your
future course sessions. So I would say that's
pretty dan accurate, and it didn't just, you know, randomly make up words. It didn't have to do
with our base text, but kind of cool that it
went and made it longer. And the interesting thing is
you can kind of stack these. So let's say that
yeah, okay, perfect. It expanded on what I wanted. Now I can add it in. And then I can then add more. I could change the tone again. I could simplify it,
make it shorter, make it longer, improve the writing, summarize
it translate. And you wouldn't really
translate it multiple times, but you could continue to stack these multiple times to
refine and refine your text.
9. Explain Text and Generate Action Items: Now, let's go to the middle
of our three day workshop, and this is about getting a cinematic look through
the use of camera movement, and I talk about
how this is one of my favorite parts of the course, creating cinematic movement. And there's a reason
why it's called motion picture
because movement with your camera has a huge
effect on creating a cinematic looking video and
talks about focal length, movement, frame rate, all
things cinematography related. Now, if I highlight
this text, click, and let's go down
to explain this. So I'm going to go
ahead and click. And it's interesting. It says, This section of the course discusses how to use camera movement to
create cinematic shots. The tutorial covers
different camera movements and when to use them to
create high quality videos. You'll learn about focal
length, frame rate, and composition choices to create the ideal shot
for your project. The course will
teach you how to use camera movements that are
commonly used in feature films. You'll also learn how movement, direction, quality, and
speed affect your audience. By using these techniques, you can bring an
overall filmmaking look and style to your videos. That's pretty cool. So it's not the best example. If we had something that
was more complex text, this is already kind of explaining a section
of this course, and then this is
explaining in more detail, you know, what this
explanation is. So, like I said, not the best, best best example, but honestly, does a pretty good job
of breaking it down. I know exactly what all this
stuff is because I wrote it. But this is a cool way
to understand something. But this explain function did a really excellent job of breaking down what
this whole part is, and it even gave it context that this is a section of
an overall course. So it's really doing
a good job of keeping the context of the text
that it's reading. Now, I'm going to go ahead
and undo what we just did. I'm going to scold
to the bottom, and we're going to look at our last functionality for
generating text from the page, which is finding action items. So I'm really curious to
see what action items it comes up with for
the entire document. Wow. Okay, so it's putting a bullet point list
together of what's looking like all
the different days and modules of this course. So let me go ahead and hit Done so that it goes
and pastes it in. Wow, that's really fascinating. So set up and
choose the best way to shoot your specific video, main steps for filming a cooler looking and
cinematic project, cinematography and
composition fundamentals. So if you're creating
homework assignments, writing a brief
for your client or something for co workers or a specific project that
you're putting together, you can write all your
text out and then generate action items or to do list from the base text
that you're working with, which is a really
cool time saver. And one of the cool
functionalities I do like in notions
specifically is that It acts actually as a to do list when you have
this type of text. You can cross it off,
which actually makes it feel like an
actual to do list. So again, I can use this
as now a handout for the students to make sure that they're keeping up on
the different modules. I didn't have to go
through and take the time to create
this to do list. All I had to do was create
what I wanted to write down, which was an overview
for the client. And then now I instantly have a downloadable PDF for
students to go through. I then could even
highlight this, go and ask for it to be
explained and it says, this is a comprehensive
list that covers the video
production course. This course explains
all this stuff. And then I can ask for notion to rewrite this explanation. So explain to students
that they will fill out this to do list
during the workshop. And then, during this
production workshop, you'll be provided with
a comprehensive to do list to track your progress. This list includes various tasks related to the topics
covered in the course, such as setting up
the setting up, choosing the best way to
shoot your specific videos, and you will fill out this to do list during the workshop
to complete your tests. Perfect. Let's go
ahead and insert that. There's a few things I
would want to change. But now we have our to do list created from Ada Fin
Air, essentially. And then we have an explanation of what this document
is going to be. And now we could go ahead and print out these copies
for our students, and that sums up all the
ways we can rewrite, remix, and improve on our text
through using Notion AI. In the next lesson,
we're going to go through the functionality of generating text completely
from scratch with prompting.
10. Instantly Write New Ideas with AI: Let's talk about using
prompts to generate content from scratch in notion. So what we're going to do
is we're going to click anywhere on our
document that's empty. We're going to hit
space that's going to bring up our prompting window. We just went through
all these examples, and we're going to scroll
down to draft with AI. So we're going to be able
to brainstorm ideas, create a blog post, outlines, social media posts,
press releases, stories, essays, and even more. So the first one
that I want to do is start with brainstorming ideas. And the prompt that I want to
use is brainstorm ideas on what questions students might
have about the above text. So we're going to continue to
use our workshop document. And this is so cool. So let's go ahead and add
this in and by the way, of course, we can
continue writing it, make it longer or regenerate the answer if we didn't
like it for some reason. So, let's say, okay, these
bullet points are great. Let's actually make it longer so we can get more
bullet points. So Boom, it's going
to go through and add more detail
on the bullet points themselves and add
more bullet points with a summary at the bottom? So let's say that
this is perfect. Let's go ahead and hit done. Student, and then let's
read what it created. So students may have
several questions about the online
proposal outlined above. Some possible questions
that may come to mind include how many live sessions are included in the training? What is the duration
of each live session? Are the pre recorded
lectures mandatory? Or can students skip
them if they prefer, how long are the written
PDF assignments and how much time should students set aside before
completing them. What is the main
goal of the training and what specific skills
were students learn. And let's see, who are the
expert guest speakers and what topics will they cover
in their presentations? So I now have an FAQ
page essentially that rather than me going through
and taking the time to think of what questions
will students have? This analyzes the
document that I created and just
gave me an FAQ so that I'm further creating a better experience for my
audience and saving time. It's just like it's
so mind blowing. It's so cool that we
have these tools. It really blows my mind. So let's go ahead and hit space. And I want to brainstorm
one other set of ideas. So the prompt I'm
going to use is brainstorm ideas on learning activities for students
learning about cinematography. I'm
going to hit Enter. And this is so cool. We can do a shot list, a storyboarding exercise, lighting practice, camera
movement exercise, shot analysis of
analyzing other students shots from their favorite
movies and TV shows, lens choice exercise on choosing different lenses
with focal lengths, and understanding the choices of perspective and composition, location scouting,
editing practices, sound design exercises, and
collaborative projects. So go ahead and hit Enter. So now I just generated
FAQ for the students. And then I also just
generated in seconds, potential learning
exercises that can go along with my workshop,
which is so cool. So now in the next lesson, let's go into the next prompt.
11. Instantly Write Blog Posts with AI: Now we're going to
go to the write a blog post functionality. Now, let's go ahead
and hit space. And let's say that, you know, we did the work for a project, and we want to
generate some buzz, and we want to
generate some interest from our online audience
for our upcoming workshop. So just as an example, let's go ahead and look
at one of our modules. Let's choose one. So let's say what have we not
talked about yet. Okay, recording crystal
clear sounding audio. So what I want to
do is let's say, write a blog post on
about the importance of audio in movies and films. Okay. So just in seconds. It's going through. It's
creating an outline. So we have our main headings, the importance of audio
in movies and films. Audio sets the mood. Audio tells the story, and audio enhances the visuals. So let's go ahead and let's
say we didn't want to make this longer or
continue writing it. We want to hit done. We
have our little blog post, and let's see what we have. Let's read one of these.
So audio tells the story. The audio in a movie or film can also help
tell the story. The dialogue is a crucial part of the audio as it conveys
information about the plot, characters, and
the relationships. The sound effects also
can help tell the story. For example, the sound
of a door closing can indicate that a
character is leaving a room. The audio can also be used to foreshadow events
to create suspense. So I could take
this mini blog post about one of my modules and make that a post on social
media or my website. I could then go to the
next module that I have. Let's choose another one we
haven't gone through yet. So making a shot list,
expert guest speaker. Let's go with shot list. Okay. So let's go and to a next module and make another blog post about
it in just a second. Blog post on how creating an effective shot list can make your video montages
more impactful. Okay? Okay. And boom. How creating an
effective shot list can make your video montage
is more impactful. We have our intro paragraph. If you're a video
creator and you know how important it is
to have a shot list. A shot list is a list
of all the shots you plan to capture for your video. And it's an essential
tool for organizing your shoot and ensuring that you get all the
footage you need. And then it goes into
creating a narrative, capturing the right shots, and saving time and money
through using the shot list. So have another post, or I mean, this could even turn into an expansion on the module that I outlined, so
I could copy this. Could go to the shotlist module. And now I have more
in depth three part texts that I could use as a teaching resource for myself
or a handout for students. Really, the possibilities
here are just so endless.
12. Instantly Write an Outline, Social Media Post, and Press Release: So let's now talk
about generating an outline from scratch. So if we go and hit space
and go down to outline. What I want to do is ask it to write an outline about
the top three reasons, films succeed or fail. So this would be in
line with my audience, and this would be
something that they would find interesting. And I can use this as a jumping off point to
create another workshop on, or I can use this to further explain something that
I'm already talking about. So let's go ahead
and hit done here. And it goes into the
importance of story, marketing and promotion and execution of the
overall quality acting, directing, editing,
and cinematography. So let's now say I want to
create an outline about why video workshops are so important for
filmmaking students. Boom. And let's go
ahead and hit Done. So we have this
beautiful little outline of the hands on experience,
the networking opportunities, the access to industry
professionals, learning the latest
about technology and techniques and building
the students portfolio. So I have my workshop, and I want to pitch it
to different clients. I go through, I create, or I use this outline function, and now I have a bit of a pitch that I can do to
try and generate more companies and schools wanting to hire me for
doing these workshops. And let's take this
a step further. What I want to do now is highlight the outline
that we just generated, and I want to go ahead and
go to our next option, which is generating
a social media post. So I'm going to go
ahead and click that. I want to ask you to write
a social media post about the highlighted text above. And I'm going to go ahead and
insert it. And here we go. Are you a filmmaking
student looking to improve your skills and
excel in your industry? Video workshops are essential to provide hands on experience,
networking opportunities, access to industry
professionals, learning the latest
about skills and technology and
portfolio building. By participating in
video workshops, you gain the skills, experience, and connections you need to succeed in the industry
and take care, take your craft to
the next level, and we even have some
hashtags here at the end. So I've generated
kind of my pitch. And then I generated a
social media post text for the description of an
upcoming social media post. And you can kind of
start to see how you can instantly build out
media campaigns, marketing campaigns, and
different documents for different clients instantly
with this type of tool. And as a last example, before moving to
the next lesson, let's go ahead and
generate a press release. And what I want the
prompt to be is write a press release about my
upcoming film workshop in media, which is actually
where it happened. I'll be teaching pre production production and
post production to over 50 filmmaking students over the course of three days. G to go ahead and enter. And this is really cool. It outlines the different days. It goes into detail about the
information that I gave it. And it also did something cool about adding in a section
for instructor bio, workshop details,
inserting the dates, times, the venue, and the cost, and then also a space at the
end of this press release for contact details
and a website.
13. Instantly Write Creative Stories: Now, let's talk about
creative writing. So, let's say we want to
build an entire brand in a variety of offerings
for our product. We have this
filmmaking workshop. We've done our press releases, our social media posts. And let's say we want to
create a story around, you know, the type of
product we want to offer to appeal to
a wider audience. So what I want to
ask is to write a creative story about a film student that
finds a magical camera. Wherever he points this
camera and then hits record, a portal to another
dimension opens up. The camera turns normal life
scenarios into magical ones. So kind of a broad prompt. Let's see how well this tool
does at crafting a story. So, we have the magic camera. Peter was a film student
with a passion for catturing the beauty of
the world around him. He had been searching for the
perfect camera for years. And finally, he found
an old antique shop. It was a beautiful
vintage camera with intricate designs and
a mysterious aura. As soon as he picked it up, he felt a strange energy
emanating. From it. He decided to take it for
a test run and pointed it and pointed it at
a tree in the park. He hit record. And
to his amazement, a portal opened up revealing a magical forest
on the other side. Peter couldn't believe his eyes, and he stepped through
the portal and found himself in a world filled
with talking animals, glittering flowers and
sparkling streams. He realized that wherever he pointed the camera
and hit record, a portal to another
dimensioned opened up, and it goes on to explain more about his experience
in this story. So we could make it longer, edit it, change a few
things about the writing. We can say, let's now
change this story so that the camera
is named Nikon. So Peter couldn't
believe his eyes. He stepped through the
portal and found himself in a world filled with
talking animals of flowers, a sparkling streams. He realized that
wherever he pointed the Nikon camera and hit
record, another dimension open. So we can rephrase things, change it to better match
what we want to do, but at the end of the day, create a whole story around a product or idea or really anything
that you can imagine.
14. Instantly Create a Pro's and Con's List: And moving down the different prompts
that we can do here. I just want to go over one more. So we can do to do
list, a meeting agenda, a job description,
a sales e mail, recruiting e mail, even a poem. But what I wanted to
show as a last example is the pros and cons list because this is
kind of interesting. So what I want to
ask it is to write a pros and cons list
about the text above, so a super broad prompt, but let's see what
it comes up with. And the reason I want to do this is because I think this is a good example of the
AI tool being able to uncover things we may
not be thinking of. So there's actually some
practical use to this. So let's go ahead and
read through the pros, which is probably
already what we have in mind as we're going
through and creating this. So the course includes
a variety of topics. We know that the combination
of live sessions and pre recorded may make it easy for students to
learn at their own pace. The homework assignments
provide hands on experience and reinforce the concept
that they were taught. It's a good thing that
it's designed to be fun and interactive
and engaging, and there's expert
guest speakers to provide valuable insights. Now, this is where it's interesting where
it's almost like a personal coach that's
critiquing what you've written, which I think has a lot of
real world applications. So it might be things that we didn't think of because we're
so involved in our project, we're right up to
it and we don't have a objective perspective. So this course may be too
intensive for some students, particularly those new
to video production. When I read that, that
makes me think, well, huh, maybe we need more of an
introductory section, or maybe I need to
be more specific about who the ideal student
is for this course. The course may not
provide enough in depth coverage on
certain topics, leave some leaving some students feeling under prepared
or unprepared. So that's another thing I have to think
about when I'm going through before I teach cause
the goal here is to find out how you can improve from an objective perspective
before going in, and then it's the
time to perform. So this course is quite lengthy, spanning over three days, may be difficult for some
students to commit to. It's a very valid point. It may not be accessible
for students with limited resources as it requires access to expensive
video equipment. So I want to make sure for this specific example that
we have that equipment available for students that they can rent or borrow
going into it. The feedback and
the Q&A session on the final day of the
course may not provide enough info for enough
time for students to receive personalized
feedback on their projects. That's a great point.
I may want to have the final Q&A session
feedback be twice the length after hearing this AI tools
opinion on what I've written. That does it for these
lessons on creating rewriting and generating
text using AI. In the next few lessons, we're going to talk
about creating an entire AI page templates.
15. Create Template Docs Using AI: So we've gone through and
we've revised and created almost a whole marketing
media campaign inside notion. Now let's dive into
what it's like creating a brand new page that doesn't have any
information on it yet, but using an AI based template. So if we go over
here to the sidebar, and let's say we want
to start adding in new pages with information around the example
we've been using. So we'd hit this plus icon, And you can either start with
an empty page from scratch, write your own headline here. There are a few views
that you can add to the template or
the new function, which is start writing with AI, and this is where
things get interesting. So let's say we want
to create a new page, and let's make a to do list. And because we're on
this topic of workshop, let's write a to do
list about preparing all the things I need to teach a three day in person workshop. I'm going to hit Enter. And I'm going to hit done to
add it to the page. And I'm going to go ahead
and click this expand icon so that we get a full screen
view of this new document. So this is our to do list for preparing for a three
day in person workshop. We want to plan and
outline and schedule, create a presentation
slides and handout, prepare the necessary
materials and supplies, reserve the workshop venue, arrange catering
and refreshments. So it's talking about
all the practicalities and logistics of
pulling this off. We want to promote through
our marketing channels, confirm attendees and
manage registrations, print and organize
the materials, test the equipment, rehearse, pack all the necessary items. So just a little
something of, yeah, we can go through
and do this ourself, but I think it's
a really cool bit of a boost to have the AI, go ahead and start the work for us and potentially add in things that we would
not even think of. So that's really cool. Now let's go to
our next example. So I'm going to go ahead and navigate to adding a new page, start writing with
an AI template. And let's scroll down and let's
choose a job description. So what I want to say is write a job description about a personal assistant
that can help me plan, organize, and host an in person
workshop internationally. The candidate should
have five plus years of experience in the film
industry and creating events. Now we have an overview the responsibilities
and qualifications. But let's say this
isn't that in depth. You know, I can add
more into it manually. But let's say that
this is not a good enough jumping off point
for me to re edit. I want it to be more in depth. So I'm going to go ahead
and click Make Longer, and this is going to expand
on the bullet points, the responsibilities
and qualifications. And now, if I full screen this, we have a very
official looking and feeling job description for hiring more people on our team. And I would go through,
I'd re edit it, make it applicable just to
what I'm really looking for, but this is a great
starting point. And let's go to one more example for creating a
template from scratch. And let's go to
brainstorm ideas. And what I want to prompt is brainstorm ideas on
how I can live as a digital nomad selling online products and enjoy traveling the world on a budget. Okay, I'm going to hit done. Let's go ahead and full screen. So develop a niche
product that can be sold online and requires
minimal storage, space, create drop
shipping business, utilize social media platforms, use free or affordable
online tools for web development marketing
and customer service, participate in
affiliate programs, partner with other
digital nomads, take advantage of low
cost travel options. So this is stuff that we can
find from a Google search. It's nothing
groundbreaking here. But what I can then
do from this template is start stacking multiple
prompts or requests. So I can go to the
first bullet point and expand on it more. So I can go to
generate our draft and create a to do list about
this item, about this task. Okay. And then now
we have micro steps, which I'm going to add in below. And let's see if we can indent. So we have developed our niche product that can be sold online. So we want to research
potential products, determine the feasibility, develop a prototype or
sample of the product, find and establish relationships
with reliable suppliers, create an online store. All the sub steps
for this main step. And we can continue to do that, for all of these steps or write a blog post about each
one of these steps and offer it online and position ourselves as a teacher
or a consultant, you know, to be hired to
help other people do this. The options are really endless. And of course, you don't
want to just blindly set up these different online
websites and just have, you know, AI blog posts
and all this stuff. You want to use it as a creative
tool for you to focus on the refinement and the ability to create more content
that's higher quality, with your final touch and using this as a
jumping off point. So if you start to really do that and using this to rewrite, generate and even create
entire page templates from scratch will really help you in your personal and
professional projects. So that sums it up for this
section on Notion, AI, and I truly hope
that you were able to gather some
great insights and techniques to really
accelerate your growth and level of success in all
the projects that you do.
 Future Skills, Uplevel Your Future Self