Transcripts
1. Welcome to the AI Video Era!: AI video era is here, not to replace
artists and workers, but to supercharge
our imaginations, to make the art of
our wildest dreams. Hi Hi Hi. I'm Jamie Dougherty. And together with the team
at Future Skills Learning, we have taught over 300,000
students how to use AI tools, including custom
corporate trainings for companies like Samsung. We have developed a simple, straightforward approach
to teaching AI tools, and I can't wait to share all
of this knowledge with you. This class was designed for
learners of all levels. So whether you are a total
beginner or an AI pro, looking to take your
skills to the next level, this is the class for
you. And don't worry. This class is designed
to be beginner friendly. I'll break down everything
into simple steps, and by the end, you
will be surprised at how much you've learned and what you're able to create. Let's unlock the world of
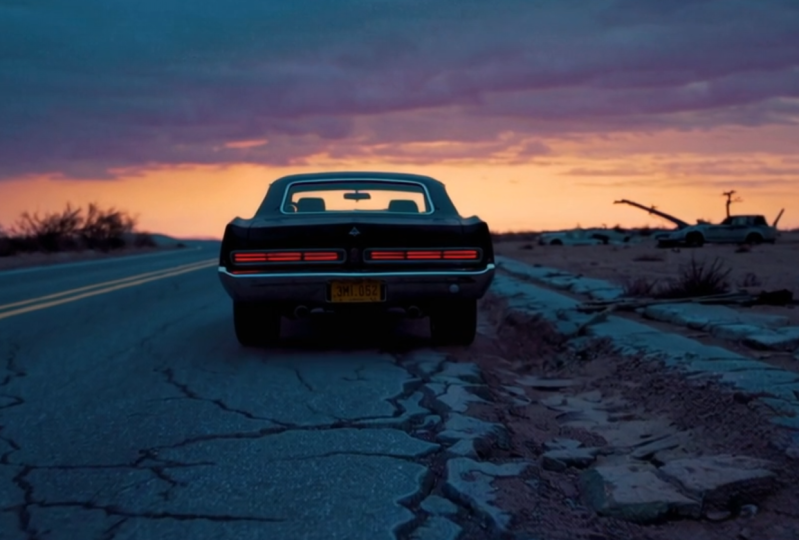
AI generated art together. Sora is the leading
edge AI video engine. This is just the beginning, but soon you will be
able to make Netflix level videos from
just a simple prompt. So if you're ready to dive
into the magical world of Sora and make your very own
AI generated videos, then let's get started, and I'll see you in
the first lesson.
2. Class Project: I can't believe that we
live in the AI video era. SA is truly incredible, and I cannot wait to
show you how it works. The class project
for this class is to create your very own
AI generated video. So please follow along and apply the different
techniques we cover in the course to an
AI video of your very own. And when you're done, be sure to upload it to the
Class Projects tab. Without further ado, let's
get started with SA.
3. Getting Started with Sora: Let's get started with SA. In this lesson, we will go over the basic settings and
how to get all set up. Alright, let's get started. First, you want to
head to sora.com. Then you'll have to log
into your chat GPT account. Once you log in, your
screen will look like this. On the top right, you
can click your name. In this tab, you will
see your settings, help, video tutorials,
and your current plan. It will also tell you how
many credits you have. Now, on the left
hand of the screen, you have recent
featured and saved. If you click on recent, you will see some recent generations from
the SA community. If you click on Featured, you will see some
featured videos. These are just some really good looking videos made with SRA. If you find a video
that you really love, you can go ahead and click Save. Then it will appear
in the saved tab. Below, you can find the
library of all your videos. Under all videos,
you will be able to see all the videos that
you created with A. If you click on
the Favorites tab, you will be able to see all the videos that you favorited. And in uploads, you can see any videos or pictures that
you have uploaded to SRA. You can even make your
own custom folders so that you can stay organized. So to stay organized, I clicked on New folder. I named it SRA Test Video. I went into my favorites. I click on the upper three dots, and I added it to my New
folder, SRA Test Video. Way, you can stay organized, even when you have lots
of different videos. To recap, we went
through setting up your SRA account and the different features
in the bar on the left. There's so much to cover, and I can't wait to see
you in the next lesson.
4. Community Generations: This lesson, we will explore the best SA videos out there. There's an amazing community of people making incredible videos. So let's dive in and I'll show you how we can
learn from the best. In the recent and featured tabs, you can see videos that
other people have generated. Wow. Look at these AI
videos made by Sra. They are so realistic
and there's so many different prompts that you can use to make videos. It's truly incredible. The technology and AI
that's out right now. Find a video that you like, you can click on it to see
what prompt they used. There at the bottom, you
will see the prompt. If you want to use the
same prompt yourself, you can go ahead and
click Edit Prompt. Here, you can tweak
the prompt if you want to and generate
your own video. So let's change the porcupine in this video into a CAT
and go ahead and click. You're done with the prompt, it gets added to
the queue and you can check its progress
on the top right. Then you go to your library where you can see the
video that you just made. So I suggest spending some
time in the featured videos, clicking on the videos that you like and study the
prompts that they use. Occasionally, you're
going to find one that says storyboard
instead of prom. We're going to dive
into storyboards and all the other features at the bottom in the
coming lessons. If you scroll over to
a video that you like, you will see these four options at the bottom right
of the video. There's remix if you want
to remix this prompt. Loop if you want to
loop this video, save if you want to
save this video, and search if you want to
search for similar videos. You can learn so much by just reading other
people's prompts. So just spend some time in
the recent and featured tabs, and I'll catch you
in the next lesson.
5. Prompt Engineering Guide: Now we're going to go over this amazing SRA Prompt
Engineering guide. This amazing guide was
made by Curious Refuge, and I highly recommend
that you check out his YouTube
for All Things AI. This is a great guide for learning the SRA
prompting basics. Here is a table of contents of everything that is
covered in the guide. Let's get started with
some SRA prompts. It says, start your prompt
with a cinematic video of then describe your
characters action and setting, describe shot type
and composition, and describe the
style or atmosphere. So for example, this one
says a cinematic video of a woman walking along a
deserted beach at sunrise, wide angle shot in the style
of an epic fantasy film. The golden sunlight
reflects on the water and soft waves gently
crash against the shore. Less you write, the more Sora
will fill in the details. The more you write,
the more Sora will try to adhere
to your direction. It's about finding balance
and clarity in your prompts. Next, avoid overly
abstract requests. Bad prompts often
describe ideas that are difficult to visualize
or overly complex. An example of a bad prompt could be giraffe flamingo,
hybrid creaturize. So remember to stay grounded in plausible and easily
depictable scenarios. Next, incorporate emotional
or atmospheric cues. Strong prompts convey
mood or atmosphere. For example, a serene
desert landscape at sunset, peaceful and calming at adding emotional depth helps Sra create videos
that resonate better. Also, adding lighting helps similarly to understand the
environment and atmosphere. Below are some ideas for
different types of lighting to help you when prompting
for specific environments. Now let's get into lighting. Here are some examples of different kinds of
lighting you can use. For example, if you like
the moonlight lighting, you can use moonlight as a description in your
prompt for your Sora video. Here we have more
examples of light. Go ahead and experiment with these different lighting
styles in your prompts. Be specific with visual details. Good prompts include
precise descriptions of shot type and
composition settings, characters, and actions. For instance, depict a
medieval battlefield at dawn with a lone warrior emerging through a
thick, low hanging mist. Use Panavision
anamorphic lenses. Use terms like cinematic. Hyper realistic and specific
lighting conditions. For example, golden sunlight or soft golden light to shape
the videos aesthetic. Next, we have shot
type and composition. Here are some examples of
different shots you can use. You can go ahead and use the camera shot that you like in the description
in your prompt. For example, if you
like the aerial view, you can use Drone
Shot in your prompt. Here's a list of some other
shot types you can use. Use moderate complexity. Avoid overwhelming the AI
with excessive detail, but include enough
or clear direction. For example, you might
want to use a prompt like a majestic albino Jaguar drinks from a crystal clear
stream in a snowy forest. Use cinematic language. Good prompts often employ film terminology such as
shot on 35 millimeter film, cinema quality or
dramatic lens flares. Incorporating camera
angles, lens types, or movements can guide the system toward
better adherence. Check out some
different camera types below to help become more educated with common
cinematography terms. Now let's go over came here's a list of different
cameras you can use. Just like before,
you would include Super eight if you wanted
that look into your prompt. Specify actions. Including actions like walking, drinking or swaying clarifies what should happen in the video. For instance, gentle
swaying of plants in a light breeze as
the sunset progresses. Experiment with styles. Use specific art or film styles. For example, clamation or black and white silent
style for a distinct. The terms guide Sa to apply
stylistic consistency. Check out some
recommended styles below to help spark some ideas. So you can choose
a style that you like and include
that in your prompt. Here's a list of
additional styles you can use. Test and refine. Experiment by modifying
prompts based on outputs. Start with a detailed
description and simplify or adjust as needed
if results aren't ideal. Just like other AI tools, you won't often get what you're looking for on the first try. Keep experimenting and keep now that we covered
some film terminology, you can use these words to
better communicate with Sra. In the next lesson,
we will prompt our own videos. See you there.
6. Generate Videos with Sora: Now it's time to make
our own videos with Sra. So let's dive right
in. Now let's click on the bar at the bottom of your
screen and start prompting. So let's go ahead and
try a prompt of our own. I wrote a dragon
flying over a castle in the sky at sunset
in animation style, natural lighting, low
angle shot, phantom flex. Then hit Create Video. After you hit Generate, your video will go into the
queue on the top right. When it's done, you'll
see this notification. So there you have it. Here's our dragon
flying through the sky. So now let's talk about
the options at the bottom. The Plus button is for
uploading images and videos. We will cover that in
detail in a different next, we have style presets. If you want your video to be in any of these specific styles, you would simply click on it. So if you wanted to make
a Stop Motion video, you would click Stop Motion. Balloon world is pretty wild. You're probably not
going to use it too often, but it's pretty fun. Stop Motion is always a classic. Archival is meant to
have nostalgic look. It doesn't nail it every time, but this one is honestly
my favorite preset. If you want that classic
black and white look, then you would use film noir. Cardboard and papercraft is cute if you want to
use that specific. Can also click on Manage
to make your own presets. Here you can read the prompts that create the current presets. If you want to make
your own preset, you can go ahead and
click the plus sign. But I would suggest duplicating one of the existing
presets instead. Now I'm going to hit
Duplicate preset. The reason I like to
duplicate is because you can use this template when you want to create
your own preset. You can write your own theme, color, film stock, et cetera, but I like to copy
this and put it into Chachi bite to get
some unique ideas. So I use Chachi Bit to fill out the template to make
a crystal world, and I'm going to hit Save. So now if I want my video to
live in the crystal world, I would choose this preset. Next, we have aspect
can choose 16 by nine, which is the horizontal
YouTube style one by one for a perfect square or nine by 16 if you want to make
some vertical videos. Here you have different
resolution options. If you pay for the
pro subscription, you can get your
resolution in 1080 P, but if not, 720 P is
the highest you can go. You'll also notice
that on the right, the higher the quality, the slower the generation. Using higher resolutions
also take up more credits. Suggest creating in four ADP until you find a generation
that you really like. From there, you can remix
it in a higher resolution. Here you can choose how long
you want your video to be. If you pay for the P tier, you will have access
to longer durations. Next, you can choose how many variations you want
SA to generate. For example, if you want SA to make two generations,
you would click two. Last, we have this
question mark, which will tell us how many credits this
generation will take. So if I up the
resolution to 720, notice that it will take
more credits to generate. So let's try this prompt. A very ultra real sunny
corner of Paris, Gaston, the snowshoe Phoenix
cat is wearing a beret and enjoying an espresso
and reading a newspaper. Let's see what it comes up with. It can take a few
generations to get it right. Once you're happy
with the result, you can recreate the video
using a higher resolution. Now that the
generation is ready, let's go ahead and click on it. And perfect. There you have it. Prompting Isa is really
straightforward. You just put what you want
to see in the prompt bar, add your descriptive words, and let Sora work its magic.
7. Animate Your Images: This lesson, we will bring your images to life using Sora. In the composer
bar at the bottom, go ahead and click the plus
sign to upload your image. Here you can also upload videos from your computer
or the SA library. But for this lesson, we're
going to start with an image. Here you can describe
your prompt. You could leave it blank, but I recommend typing something in to give
Sra some direction. Now I'm going to change the
aspect ratio to nine by 16. I want the astronaut to move, so now I'm telling
Sora to make it dance. Alright, so here we have two variations of my
dancing astronaut. This is pretty funny.
I think I'm liking the one on the right a little bit better than
the one on the left. Of course, you can keep
tweaking to get it just right. For this lesson, I wanted
to show you how to start with an image rather than
starting with a text prompt. So that's how you can turn an image into a
video using Sora. Obviously, it might take a couple generations
to get it just right, but with a little
bit of patience, you can create something
truly incredible.
8. The Composer Bar: This lesson, we're
going to learn about the special features
in the composer bar. The bar at the bottom
where you enter your prompt is
called the Composer. If you click Edit Story, you may have noticed these
four tools at the bottom here. So in this lesson, we're
going to cover recut, remix, blend, and loop. Recut is one of the most
powerful editing tools in Sra. And it lets me trim
down and extend any segment of an
existing video. We'd like to show you how it. Sa has given me
three distinct cuts of a robot on a remote hillside. Now, I really love
this first second. But once it cuts
into a close up, that's just not
what I had in mind. So I'll use recut to extend this first part into a
new five second video. Recut has now taken my existing clip and imported
it into a storyboard. I can see and play back
my clip in the timeline, or I can take this and trim my clip down to just
the segment I like. Now here's the segment
I want to extend, and I'll leave the rest
of the timeline empty to give Sa the ability to
imagine the extension. So let's hit Create and see what it makes.
Here's the result. Sra has now taken my 1
second of the video and seamlessly extended it into
a new five second video. So instead of the
three distinct cuts, I now have one continuous shot of my robot on a
remote hillside, where they've always
belonged Remix is a powerful iteration tool that lets me use natural
language to add, remove or edit objects
in an existing video. Here I have a white shot of a Brutalist home set
along the coast. After seeing it, I'm
curious what this would look like if it
were a mid century home. So let me use Remix
to achieve that. Clicking Remix opens the
remix editor where I can simply describe the change that I want to see in the video. Replace the cement building
with a mid century home, and that change is
pretty significant. So using the remix strength strong makes a lot
of sense here. If I wanted to maybe
add a few trees, I could use mild, and it would preserve more
of my original video. And now, if I wanted to do
something even smaller, like, maybe just remove the
windows from my building, then I could use
something subtle here. But for now, I'll
keep it strong. We'll hit remix and see how it does. And here's
what it made. You can see that through
remixing that video, I've maintained the camera
motion and the setting, but it's replaced my
Brutalist structure with a mid century home on the
coast, and there you have it. Blend is an experimental
editing tool that allows you to transform and
influence the contents of one video with
that of another. Kind of like smashing
two videos together, and the results can
be exhilarting. Here I have a close up
of a monarch butterfly. When I saw this video, I noticed that it's a bit still, and it looked a tiny
bit like an orchid. I thought I'd generate
a few videos of orchids and blend them together
to see what would happen. So I'll come down to blend and choose a video
from my library. I can see a handful of
blends and orchids, so I'll pick them. This will take me to the
blend editor where I can see both my butterfly clip and
my orchid clip side by side. I can also see that in the middle of both
clips is a curve, which lets me know how
strong the influence of each video is at a
given point in time. The higher up the curve, the more influence the top clip will lower down the curve, the more influence the
bottom clip will have. If I scrub through the timeline, I can review exactly what
both of my videos show. And I can also grab
either handle to trim in or expand how much of each clip I want in
this resulting blend. So let's go ahead and blend these two clips and
see what we get. Wow. Blend was able to seamlessly
transform my butterfly. In the light box at the bottom, you can see each video that
was used to create the blend. If I'm unhappy with this result or I want to try a
different curve setting, I can always edit my blend and
try again. Happy blending. Loop is an exciting new part
of our editing suite that lets you seamlessly repeat any section of an
existing video. I have a herd of
sheep running across a foggy field in
Ireland, so pastoral. And I want it to repeat forever. So we're going to do just that. Clicking loop will take me into the editor at the
bottom of the screen. I can see my video, and I can also see two
handles that let me adjust the section of the
video that I will be looping. Dragging the handle on the right will adjust
the end frame, and dragging the
handle on the left will adjust the start
frame. Looks pretty good. In this example, the
first and last frames of my video are fairly similar. So the short loop should work
great by default because SA doesn't have to add too many frames to
make it make sense. But if the first and last frames of the video are
really different, it might be best to use
normal or long loops to give Sra some extra time to connect those frames
more seamlessly. Now, I'll use normal, and it should work pretty well. Let's see how it goes.
You can see that Sra took the middle section
and created a perfect, seamless loop of the sheep
running across the field. That worked really well. We can't wait to see
the endless cycles of aesthetics that you create. So that's how you use recut, remix, blend, and loop. In the next lesson, we'll cover the storyboard.
See you there.
9. Storyboard: Now we're going to
cover the storyboard. I love this feature, and for me, this really sets Sa apart from
other AI video generators. Storyboard is our most advanced editing creation
tool that gives you the control to direct actions in a sequence across a
familiar timeline. You can reach it by clicking the storyboard button
in the composer. At the top of the storyboard, you'll see caption cards. This is where you'll
describe the setting, characters and action
that you want to occur at a particular
point in the clip. Below that lies a timeline where you can sequence
your actions in time. Below are the same
creation settings from the simple composer. Let's start by
setting our scene. I want a red crane with a yellow tail to
stand in a stream. And then about halfway through, I wanted to dip its
head into the water. So I'll come down to my
timeline and click to create a new storyboard
card about halfway through. In this card, I'm just going
to describe the next action. The crane dips its
head. Perfect. Now, looking back
at the timeline, you'll notice that there's space between my first card
and my second card. The space is important to
preserve because it gives SA time to connect the first set of actions
with the second set. Moving the cards too close together might make
SA create hard cuts as it doesn't have the chance to smoothly combine
these two scenes. Moving the cards
too far away will make Sa have more
time to imagine, and it might fill in more details than you
want between these two. So it's really about finding
the right pacing for your story to make the results
as refined as possible. My settings. I actually
want this to be landscape. Great. So I'll go ahead
and create my video. And here's what the
storyboard made. You can see my crane
standing in the water, and then about halfway
through, it dips its head in. In the light box, I can always review the exact cards
from my storyboard, and I can see where I had
placed them along the timeline. If I want, I can always revise the storyboard and
create new videos, tweaking the descriptions
and the storyboard cards or the placement and
sequencing of the actions. And that's how you storyboard. Hope you've enjoyed learning
about the storyboard, and I cannot wait to see
what you come up with.
10. Exporting and Sharing: Now we're going
to go over how to export and share your
masterpiece with the class. Click on a video that you like, and on the top right bar, you can click on this button if you want to copy the link. If you want to
download your video, you need to click
the Down arrow. If you pay for the Pro tier, you will be able to download the video without the Watermark. If you just pay
for the plus plan, you will have to download your
video with the Watermark. So go ahead and download
your video so you can upload it to the Class
Project in Skill Share. And there you go. Please
upload your videos into the Class Project
tab in Skill Share. I would love to see
what you come up with.
11. Subscription Plans: Two different subscription
tiers to SRA. In this lesson, we will
cover what each of them are so you can see
what is best for you. Scroll up to your profile
on the top right. Next, click on my plan to see the different
plans available. Currently, I'm using
the Plus plan. The plus plan is great, but you only get 100
credits a month. Maximum video duration
is 5 seconds, and the maximum
resolution is going to be 720 P. If you click
on Managed Plan, you can consider the P plan, which is significantly
more expensive. But you get ten
times the credits, unlimited relax videos,
up to 1020 P resolution, 20 seconds of duration, and five concurrent generations, as well as being able to download the video
without the watermark. Well, there are some
benefits to the P plan. I think the plus plan is plenty for most people
just starting out.
12. Congrats: Congratulations. That's
it for the AI SRA class. Thank you so much
for being here. And if you haven't already, you can check out my other
classes on Mit Journey, creating your AI Avatar and Me. Please remember to upload your videos to the
Class Projects tab. I cannot wait to see the incredible AI videos
you create using Sra. I'll see you in the next class.
 Future Skills, Uplevel Your Future Self