Transcripts
1. AI For Creatives, Content Creators + Marketers: You already to transform your content creation process
with the power of AI. If so, let's step into the
fascinating world of AI and Discover how technology
can boost your creativity. Hi, I'm Jake, and I'm a digital artist and
content creator. I love this intersection of
creativity and technology, and I'm thrilled to
share with you some of my favorite AI tools that I use in my everyday work as
a digital content creator. So much noise around in
the AI space in a minute. This is a summary of all the AI tools that you can actually start using today to optimize
your YouTube videos, convert videos into blog posts, generate realistic AI voices, and even in heart show images. We'll dive into integrating
voice control with ChatGPT, explore generative
capabilities in Photoshop and so much more. I'm extremely
passionate about how technology can enhance
our creative processes. I've seen firsthand the
incredible efficiency and quality improvements
these AI tools can provide. And I can't wait to help you
harness the same advantages. Whether you're a content
creator or a marketer, or just someone
curious about AI, then this course is for you. There's no prerequisites
for this course. I'll guide you through
everything you need to know step-by-step. I know you need is a hunger to learn and a computer
with Internet access. Throughout this course,
we'll be covering KAI tools one-by-one with
practical applications and projects for each. After walking through
each AI tool, you'll get chance to
use these AI tools in real life applications
like creating a blog post from
your YouTube videos or designing an image using AI. I can't wait to see what you
create with the power of AI. So let's get started.
2. Your AI Projects: Again, in this course
we're going to embrace the power of AI to optimize
our content creation. I'm thrilled to introduce
our class project. The final project of this class
gives you the opportunity to apply the AI in
a practical way. And you can choose
from several tasks. Converting a YouTube
video into a blog post, editing an image using AI, generate an AI voice-over. I'm creating a
presentation with Gamma. These tasks are
designed to give you a first-hand experience of
using AI in different aspects of content creation of chosen these project Options
because they allow you to apply the AI tools and techniques we'll be
covering in the lessons. And these tasks reflect the
real-world applications of these tools in
content creation. Once we dive into
the lessons and start exploring different tools, you can choose the
project that aligns best with your interests or
professional goals. And you will then
apply these skills you've learned through
your chosen task. After you complete the project, you'll be sharing
it with the class in our Project Gallery. So it could be sharing
a blog post link, a before-and-after
image and audio file or screenshots
of your presentation. And I encourage
everyone to share their processes,
challenges, and insights. And it's going to
be a great learning experience for all of us. Now you know what's in store. I hope you're as excited as in darkness AI journey to keep
these projects in mind as we dive into the lessons and
less embrace the power of AI and transform our content
creation process together. And I can't wait to
see what you create
3. The Fastest Way to Edit Video (Descript): Let's take a look at
the script and this is decrease my editing time. I can't even begin to
tell you by how much, but let's take a look at it. If you haven't gotten account
and sign up, download it. I'm going to use the
desktop version, but I believe you can
also use it online. And once you've got to set up, you can just go to New Project. And then I'm just going to
drag and drop a video file in. This is a video from a
tutorial making it a minute. So I'm going to hit Done
and let this prepare. And what this is going
to do is transcribed the video and already
getting your videos transcribed use because loads
of money and I use this as well now for my transcription
stuff. So I like this. Let's just let
this do its thing. Just like that. The whole
video has been transcribed. And just for this video, what I'm gonna do is
just delete all of this because we're only going to
edit this first little bit. Would take ages. Todd is spending
countless hours in post-production wrestling
with God raise, and waiting for fog to render what today's your lucky day. We're going to so
we can see that there's a few transcript errors. So what I'm gonna do is go to detect transcript
errors and we can submit this and
waste gonna do is find any words that
it doesn't feel. Look right in here. So rather than
having to proofread, this gets done automatically. While we wait for
that and it 3D, this would take ages. So what we can do is press
Enter and if we press Slash, it starts another frame here. Spending countless hours in post-production wrestling
with God, raise and waiting. Alright, so God rates. Thus, Let's add some
B-roll to that. So we have to do is go up here, go to videos, and
let's search for sun. Just such a sudden
see what comes up. Alright, and we can just
drag and drop this in here. And it would take ages tied to spending countless
hours in post-production, wrestling with God, raise and
waiting for fog to render. Okay, let's add some fog
into this next frame. So you can see we can really
quickly add B-roll in here. Folk. That looks cool, so we're
just drag and drop that. And then lucky day as well. Let's do one now. Just type lucky. So this is overall
if free videos. So you can just throw
it in your scenes, in your videos and not
worry too much about searching for video
and even niche Used to take me so long. And in 3D, this would take ages tied to spending countless
hours in post-production, wrestling with God, raise
and waiting for fog to render what today's
your lucky day. We're going to explore
how AI can optimize your editing process
and help you achieve stunning results in a
fraction at the time. Alright, so we've got
some Biro in there. So other stuff we
can add is music. So jump back to the beginning of our scene and you notice that we're
not editing down here, we're just using the texts
was really nice way to Edit. And if they're saying that
we don't want in here, we want to remove, essentially remove a section in the middle. Let's just end it on
stunning results. Stunning results. And the first thing we can
do, standard name results. And the first thing we can do, and you can see it takes it
out without too much trouble. Standing results. And the first thing we
can do is go down to the and we've been building
up our scene using texts. We'll jump back to the start
and let's add some audio. We can add in any of
their she can search it. And let's just use this for now. But obviously you'd
spent a bit more time choosing your music. I'm sure. I've added
this very day. This would take ages tied to spending countless
hours in post-production, wrestling with God
raised and white folk the render or today's
your lucky day, we're going to explore
how AI can optimize your editing process and help you achieve
stunning results. And the first thing we can
do is go down to barbell up. Alright, so let's get rid
of that and bear as well. We're just going
to hit this intro, but you could edit
your whole video. And that's actually
what I tend to do is do the whole thing at once. Have I here? Why don't we
add some overlays, Sarah? And let's check out
the annotations. And let's say we want
to put one on top here. So we're going to explore. And then we're gonna, we're gonna point at some
ink. So let's Frodo M. We're going to explore how AI. Maybe we're pointing at
something on the UI. We're going to explore
how AI can optimize your editing process and
help you achieve stunning. Something that I
really like about this is captions and it's
low pre-made ones. So let's actually start
at the beginning. You can customize these as well. 3d would take ages tied to spending countless
hours in Postman. Let's actually
have the captions. They say we have it on here. Select that text Let's put, this is
tied to spending countless hours in
post-production wrestling with God raised and
white folk to render, or today's your lucky day. Alright, so we can
edit this text. Let's make it smaller. Something like 60. Match this orientation.
Okay, that's for, for shorts will have a
look at it in a minute. But let's just say we
have one line here. You can also go in. All of this is customizable. We can turn that
border on and off. And notice it's
worth just spending countless hours in
post-production. Recipe highlights the
word I'm talking about. Detect transcript errors
didn't really work too well, but we can do, oh, it did. Sorry. These green
words are ones that doesn't believe a right and it's quite right
tied to spending. So this should be tired. I think that's my
accent. So we just hit? Correct. And we'll write tired, tired, tired, tired,
and we'll hit correct. Tied to spending
countless hours in post-production
wrestling with God, raised up the render. Today's your lucky day. We're going to explore how
AI can optimize your head. So I'm going to change
that one or per say on the keyboard and put, well, part of spending
countless hours in post-production,
wrestling with God, raised up the render for
today's your lucky day, we're going to explore
how AI can optimize your editing process and help you achieve
stunning results. All right, We're
looking good any free now onto something
that I really like. If we go back to projects, we go to voices. You're seeing here,
I've got some voices and we can go create new voice. And let's just say Jake free
because I'm going to demo. What I'm gonna do is just upload some voice and
it's just my narration. And what this is going
to do is clone my voice. I'm gonna hit Done. That's
going to transcribe. And when that's done, you can
hit once that's uploaded, you can hit Submit
for training and I think it takes around 24 h. It will tell you exactly how
to do it all over here. But once that's done,
you're going to have your own unique voice. If we jump back into
our project and say, we want to change
some of this to say we want to change
God raised to sunrise. Or we can do select the speaker. And let's just put Jake
and AML select God. And we will change
this to sunrise. And I'll click overdub and we'll let descriptor its thing. But nice Already the
captions are up-to-date. And what's going to do is use the voice that I've uploaded
to make corrections. Post-production,
wrestling with Sunrise and wet bulb to render. You can see that it's
replaced with some rays. So that's a quick
overview of Descript. And this is how I've really
sped up my video editing, production and adding
all of these effects. This would take ages to
spending countless hours in post-production wrestling
with Sunrise and white folk to render what
today's your lucky day, we're going to explore
how AI can optimize your editing process and help you achieve
stunning results. Then we can hit Publish. Just go to Export, and you can export a video
and do as you please with it. It's also really
easy to swap this. Say you wanted to make
sure you can do that. You will need to risk our
some of your objects. But again, you can make
sure it's really quickly. But I really feel that this is going to change
game for Edit. And rather than
editing on a timeline, we can actually
edit using texts, which I think is fascinating.
4. Eyes Contact when Reading a Script (Descript): Alright, so another feature
we need to talk about in Descript is
called eye contact. And this allows you to read
the script of your screen and then your eyes are going
to look at the camera. So let's take a look
at how this works. Alright, so here
we are in Descript and this is the recording
I just recorded, right? So another feature we
need to talk about in Descript is called eye contact. And this allows you to read
the script of your screen and then your eyes are going
to look at the camera. So let's take a look
at how this works. Cool. So all we need to do is select the part of
the recording that we want our eye contact
to be working on and we can just
select eye contact. This does take a little while depending on the length
of your recording. So let's wait a minute. It just takes a little while, then I'll speed up the process. Alright, so that
didn't take too long. And when we have a
feature we need to talk about in Descript is
called eye contact, and this allows you to read
the script of your screen and then your eyes are going
to look at the cameras. So let's take a look
at how this works. Alright, so let's see
those side-by-side. Alright, so another feature
we need to talk about in Descript is
called eye contact. And this allows you to read
the script of your screen and then your eyes are going
to look at the camera. So let's take a look
at how this works. You can see how useful this is. If you're not using
a teleprompter, then you can just talk off of screen without actually
having to make eye contact. So this is a really
handy feature, super simple to use. So hopefully you can use
it in your projects too.
5. Generating and Customizing AI Voiceovers (Elevenlabs): Alright, so this is 11 Labs
and this is fantastic. If you need voice-over for your videos or any
kind of narration, there is a paid version and
you can clone your voice. But today we're just going
to add a voice that we make. And we can choose Mao, you
can choose what you want. Let's go middle age, British accent,
that sounds fine. Let's generate that and
see what that sounds like. First, we thought the
PC was a calculator. Then we found out how to
turn numbers into letters. And we thought it
was a typewriter. Alright, so I think that's
too much of an accent, so let's try that again. First we thought the
PC was a calculator. Then we found out how to
turn numbers into letters. And we thought it
was a typewriter. Alright, let's use this voice
that sounds pretty good. So hit used voice. And let's just call
this male British. And we will create the voice. And once that's created,
we can go to use. And I've got a
script from a video, I'm making it the minute, and I'm just going to paste
a little piece of that end. Let's just check for this
organelle sound, right? Let's change that to in
a fraction of the time. And then Donnie landscape, we can put it a go now. Okay, That sounds good. So now if we hit Generate in 3D, this would have taken ages. Tired of spending
countless hours in post-production
wrestling with Sunrise and waiting for fog to render. Today we're going to use AI
in Neo to optimize editing your renders and achieve stunning results in a
fraction of the time. Yeah, it sounds a bit monotone, so we've got stability here. And we can do is increase
the variability. But if voice is going to sound
a little bit less stable, you might get a few
weird sounding bits. And then you've got clarity
and similarity Enhancement. So low values are recommended if background artifacts are
present in a generate speech, it was a AI-generated, so we
didn't need to change that. So let's try that again. This is with less
stability in 3D. This would have taken ages, tired of spending
countless hours in post-production
wrestling with Sunrise and waiting for fog to render. Well, today, we're going to
use AI in Neo to optimize editing your renders and achieve stunning results in a
fraction of the time. And then down in the landscape we can play with
the golden hour. But what I really
like about this as the foliage enhancer, and it really pumps
up the foliage. That sounds like it's got
a lot more emotion in it. So what You can do if you don't like the
sound of one of them, you can just regenerate
it and it's going to generate and it will
sound different, especially if you've
loved the stability. And then all you
gotta do is go to history and you can
download selected. And then you can add
it to your video, your voiceover, or
wherever you need. So I mean, if you don't like
speaking into a microphone, you could use this. And there are plenty
of uses for this. So I'm keen to see how you
guys go about using it.
6. Clean Up Poor Audio with AI (Adobe Enhance): Hi guys. In this video we're
going to be talking about Adobe's Speech
Enhancement feature. And it's designed to make
voice recording sound as if they were recorded in
a professional studio. And it's a game changer
for podcasts, Creators, Content creators,
and especially those recording in less than
ideal conditions. And to demonstrate,
let's check out a sample video I
took on my iPhone. Alright, so this is
me in front of a fan. And I've got some music playing in the background,
my windows open. So we're going to see
if we can enhance this. But I've sent now
over to my computer. Now this one takes audio files. So what we can do is
if you use VLC player, for example, we can go to
media and convert and save. And then I'm going to drag
and drop our file onto here, convert, make sure
there's an MP3. And then in my output, I'm just going to change
the name to audio only and hit Save and start. Once that's done,
we can drag and drop that into Adobe enhancer. So with this Speech Enhancement, the listeners can focus on your content without
being distracted by fan noise music or
having your window open. Especially good,
perhaps if you've login from your phone and nice, this is now done. So let's have a listen. Alright, I'm going to
turn it on and off. Alright, so this is
me in front of a fan. And I've got some music playing in the background,
my windows open. And so we're going to see if
we can enhance this page. I think that's pretty incredible considering we started alright, so this is me in front of a fan. And I boost some music
playing in the background. I'm a windows open. So we're going to see
if we can enhance this. So you can sign up for this
with your Adobe account. It's free to use in a moment. It's still in beta, and
it's a powerful tool. It's going to really
help improve your audio. So definitely give it a go. I know there's an hour maximum limit on it and you
can do free hours a day.
7. Create an AI-Assisted Presentation (Gamma): Now we're gonna take a look
at a free tool called Gamma, and we can use this to create wonderful presentations with AI. So sign up for free here. And then you're going to
come to a page like this. And today we want
to presentation. So what I'm gonna do is I say, I want to create a pitch
deck for sponsors. Of my e-mail. Newsletter is about 3D rendering and emerging AI for Creators. And then it's going
to come up with some ideas for our pitch deck. So we're going to
have an overview of the e-mail, newsletter,
emerging trends. Target audience benefits
are sponsoring advertising. Okay, so we actually
need to go try again, and I need to change that to
AI. Let's try that again. Okay, That makes more sense. So I'm gonna hit Continue. And now we can pick a fame. They've got tons
in here and we can actually change this
later on as well. So go through the
exciting, That's cool. Quite like this one, and we're going to hit Continue. Now, the AI is going to generate a pitch deck or whatever presentation
you wanted to present. And this does a great job. I mean, all I fed it is
that initial prompt. You see even coming
out with stuff that I wouldn't have even thought
about putting in there. To say taking the
hard workout of me coming up with the
sponsorship options. Alright, so the AI is
done generating that. And let's just take a
look at what we've got. This all looks
really, really nice. What I like about this
is this Edit with AI, so I can say find some images
related to 3D rendering. Alright, so that looks
pretty cool. We use that. Then we just drag and drop
that into their plenty of other stuff you can
do by asking the AI. But obviously as well,
you can use any of these blocks and edit
the presentation. Now we can hit present
and he's any Up Knight, the left and right arrows. We can go through and
see our presentation. And this is easiest
hitting share. And then you can share your presentation
with anyone you want. So that is an extremely quick
way if you compare that, if you were going to
make a PowerPoint or even a Google Slides duck. This is a really quick way to get your presentations together.
8. AI for Optimized YouTube Video Titles and Descriptions (Chat GPT): In this video, we're
gonna talk about Crane Optimized Video Titles and Descriptions based on the
latest info on the Internet. So most people use
prompts in chat, but now we can
actually use plugins. This is on the paid
version of Chat. I think it's about
20 bucks a month. And if you go down to here
and you go to Settings, you're going to see beta
features and you can turn on plugins and browse with Bing. And once I stand on, if you click on ChatGPT before, we can go to Plugins. And I have video
insights and sold, but you can go to
the plugin store. In here. They've got the
most popular New or, and once you've gotten stored. And for this video we're
going to use Video insights. So click Install and
when that's installed, you click on Chat, go to Plugins and just make sure you've selected video insights. But the first thing we're
gonna do is browse with Bing. And I'm going to ask Chat
to search the web to find the best structure
for educational tech. Youtube video Titles. And now this is going to
search the web using Bing, and hopefully it's going to
return some research for us. You can see that as clicking on stuff and it's doing research. You can actually use
this drop-down to see where it's going,
where it's looking. And then you can see
now it's thinking. So we'll give it some time. I'm sure this is going to
speed up in the future. But the fact that Chat can now browse the Internet is huge. Okay, so it says it can't read
the 15th tip in the list, but it's gathered quite
a bit of information, probably enough
for what we need. Alright, so we've got 14 key
points of how to structure a title on YouTube for
educational videos. Alright, so I'm gonna grab this information and then
we're gonna go to a new Chat. And we're gonna go to
Chat for and plugins. And we're going to make sure
video insights is enabled. And I'm going to paste this in, scroll back to the top, holding Shift and Enter so
we don't send a command. We can write it based
on the following. Come up with free
tools for this video. Then I'll jump into
YouTube and grab the URL. And let's paste that N, and I'll hit Enter. So now it's going to
analyze the video and using the points they grabbed
from the Internet earlier. We have free, great title
ideas for the video. And then I'm going to ask
what would be great for SEO? So this is going to come up with probably about 20 key words. And then I'm gonna write
taken into account. Can you write a
description for the video? And that looks
pretty good to me, and it even includes
the tags TAs. So now that is done. We probably don't want
that last bracket. We can copy the description. And let's update
it in the video. And I'm also going
to grab unlocking. I really liked that title. So let's put that in. And we could also add the tags
they suggested down here. So that is how we
can come up with great Video Titles
and Descriptions for our YouTube
videos using Chat
9. Talking with Chat GPT: Alright, so this is gonna
be quite quick video, but it's a good one. Nonetheless, as soon as I started using Chat,
I was thinking, wouldn't it be great
if I can just talk to it and it would
talk back to me. So we can't do that. There is an extension called
voice control for ChatGPT. And you can just
search, Google for that and install it in Chrome, and then back over in chat, you can just click this button. And I can ask, how do you think AI is going to affect
Content creators in future? Please give a brief
five sentence answer. It is likely to
become a valuable tool for content creators, enabling faster and more
efficient production by automating certain tasks, like video editing or
content transcription. It may also are not new
creative avenues through technologies like deep fakes
or AI-generated music, empowering Creators
with a broader range of expressive tools. It also poses
challenges in terms of potential job displacement and the risk of over saturating
content markets, a AI-generated content could blur the lines
of authorship, raising important ethical
and legal questions. Lastly, while there I can help with certain creative tasks, is unlikely to fully replace human creativity and intuition, which remains central
to compelling, emotionally resonant content. That's really interesting. What jobs do you think
are at risk? Most? Jobs that involve
repetitive tasks or pattern recognition are most
at risk for automation. This includes certain
roles in manufacturing, data entry, retail
services, transportation, particularly with
the advancement of autonomous vehicles and certain types of
customer service roles which can be automated with increasingly
sophisticated chatbots in the creative fields, tasks that involve
repetitive editing, like basic video
or photo editing, content curation,
or simple writing, like generating
financial reports or sports summaries, but
also be threatened. However, it's worth
noting that while automation may replace
certain tasks within jobs, it doesn't always mean the
entire job will disappear. In many cases, the
role of humans may shift work in
conjunction with AI, Supervising its
operations and applying critical thinking where
the AI fall short. So you can basically
have a chat. With Chat, you might
notice that he was speaking really quick there
years, plenty of languages. And you can also
change the speed here. So that's a really
cool little tool that I think is
quite foreign to use
10. Repurpose Video Content: Streamline Content Creation (Chat GPT): In this video, we're
going to use AI to create a blog
post from a video. So if you haven't already, again, this is on the
paid plan of Chat. Go to Settings, beta features, and make sure you have
plugins and browse being on. And we'll go to Plugins. And if you haven't got
Video insights in store, then go to the plugin
store and install it. And then we're going
to ask it to write a blog post based on this video. And I'm going to grab
the URL from here. Let's paste it in, hit Enter, and let's see what
it comes up with. Unlocking the hidden
toolbox in 3D is Max. I'm going to turn
off the tilt to function if you want an add ease that we've covered it
in another lecture. Alright, so that is
super impressive and is going to save me
a whole lot of time. I used to just grab
the transcriptions and try and work from there. But this is huge. It's even include a link to the original video
which is great. And give a little bit of
a bio about me as well. Now, I can just copy. Let's start with a title. That's a pretty good title. And I use Squarespace
from our plugin. So I'm going to start a
new blog post title him. Let's grab this text. Paste that in. We will
come in in italics. There will turn that off and
would turn the bolt off. And now all that's left to
do is grab some images. So this is the original video. And I'm just going
to scrub through and grab some of the key moments. I'm using VLC player,
which is free. And I like this because you
can go to video and just take a snapshot and it's gonna
be saved to my pitchers. So scroll through and grab a couple of frames that
I nights talking about. I think the last point and it
was talking about cloning. So here's good. And I'm gonna go to
Video, Take Snapshot. And then I can go
back to Squarespace. And let's add an image. And we're going to
upload. And first up, I'm going to add the thumbnail. So these are all the
images we just took. And obviously the firm now
has come from YouTube video. Then we're talking about
the transform tool box. I'm going to add an image. And finally we'll add that
last image M. And that is a super quick way to turn your videos into blog
posts really quickly. And it's even got the
link at the bottom there. I hope you found that useful
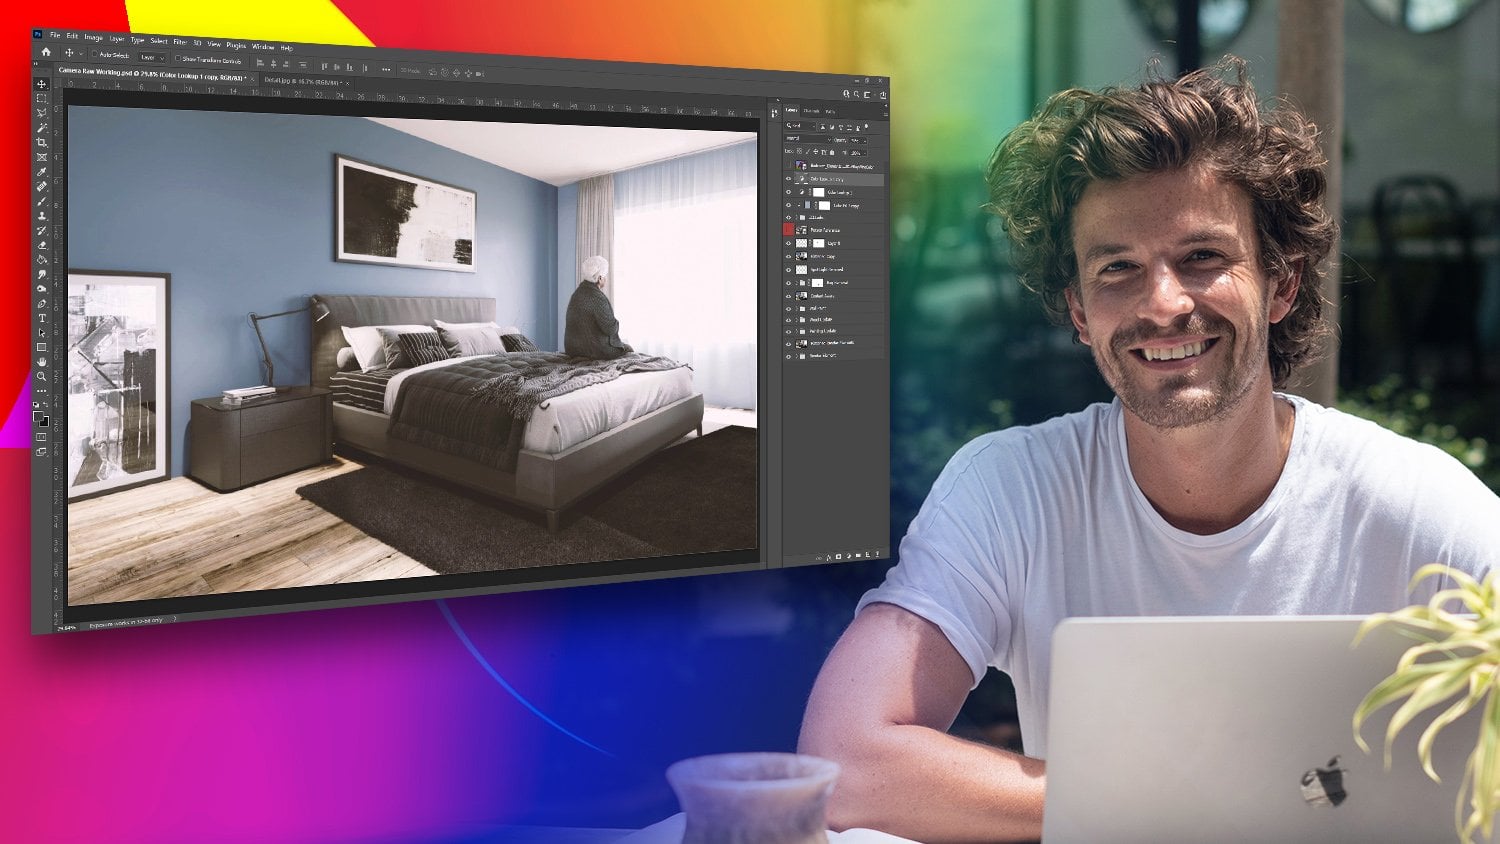
11. An Introduction to AI in Photoshop: This is a big one and if
it's not in Photoshop yet, then you can go two
Creative Cloud and go to beta apps and download the
Beta and then open it up. By the time you're
watching this, it might be in Photoshop. So let's talk about
generated fill in Photoshop. So let's demonstrate
what this can do. We can extend the
size of the image. And then if we select
this empty area, we need generate a
field and hit Generate. Let Photoshop do its thing. Now that looks
pretty good to me, and it comes up with
different variations. So you can choose
you when you like, or you can always
hit Generate again. And it's going to come up
with three more options. Now let's see what
it can really do. Let's see we can get
rid of this car. So I'm going to hit
Generate again. They have, it's gone and this is incredible
how it's built. The rest of the door there, we've got a few to choose from. We can hit Generate again.
Let's see what happens. Alright, That one looks
pretty cool and you can see that we've now got six
options down here. I quite like this first one, we can always just jump
back down to this layer, maybe choose a different
version we can generate again. So unlike Dolly or mid journey, we're actually interacting
with the images, choosing what parts to change. We haven't even started
with the prompts yet. Obviously, we can continue
to go through and remove any signage or lampposts. And if we zoom in,
check this out. And because this is layered, we need to bring
this layer on top. If I zoom out, you can see that we've
extended this image. Now let's look at someone to
prompt me, select an area. And we'll go to generate a fill. And now let's put a man on
a bike with motion blur. And the size of the
area we selected is gonna dictate the
size of what's created. Alright, that's not
looking to heart. That's looking a lot better. And that is perfect. But I don't actually
like this person here. Again, because this is layered. We can just select that layer. Let's grab the brush and
we can just brush them. And let's select a soft brush
and just paint back in. Some of the areas
we want to keep. What we've done is we've gone
from this image to this. Maybe are men on
the bikes too big? Just remember as well,
this is in beta and this is the worst this
is ever going to be. I think this is incredible
and I think that this is going to have massive
impacts on our workflow. Next up, let's take a
look at a portrait. What we can do is
select the subject. And you can see it's
going to select that guy. And what we can do is
invert the selection. Let's hit Generate. And this time I'm
going to put barley. Let's see if we can
transport this guy to Bali. Nice, this ash. Wow. How about that? And it actually keeps the blur and the camera
lens from the background. The lighting looks good. That works for me. That's great. Now let's try a few other bits. Let's try and interiors seen. And what we can do here
is let's get rid of this guy and see if it can
rebuild the background there. Wow. Take a look at these
networks perfectly. That works perfect as well. I didn't ask for a chat, but I will take it. And let's see what
else we can add. Maybe we can put a lamp in here. So add a lamp. This is a really
FUN way as well. If generating images. I can see this having
a massive impact on interior designers,
architects. How about that? Wow. Let's add a mirror on this wall. Just thinking about having
to do this in Photoshop. I love Photoshop. I think I'm pretty
good at Photoshop. But the time this would normally take compared to what
this is incredible. How about that? And even imagines the
rest of the room. Wow, I think that first
one looks pretty good. Let's see if we
can add in a rug. I'll just write rug. That is super impressive. So we've gone from there. It's right, we've gone
from this to this. And that was pretty painless. Alright, let's
take a look at one last big cityscape here. And let's see how it fares
with filling some of this. I'm going to overlap
it a little bit. Let's just hit generate and
will let us do its thing. Now I will be super
impressed if this works. Wow, this looks great. Maybe we can add some something
in the foreground here, like add high-rise buildings. Now that is really impressive. So we started out with this
and ended up with this. This interior scenes
started like this. And then they'd like this. This guy was here and
ended up in Bali. And this image started out like this and came out like this. The impacts of this is
going to be massive. I can see this being used. I mean, you could hook up your microphone and just
start talking to Photoshop, selecting areas,
change this window, put changed the door to read. This is definitely a
tool you need to be aware of and start to use
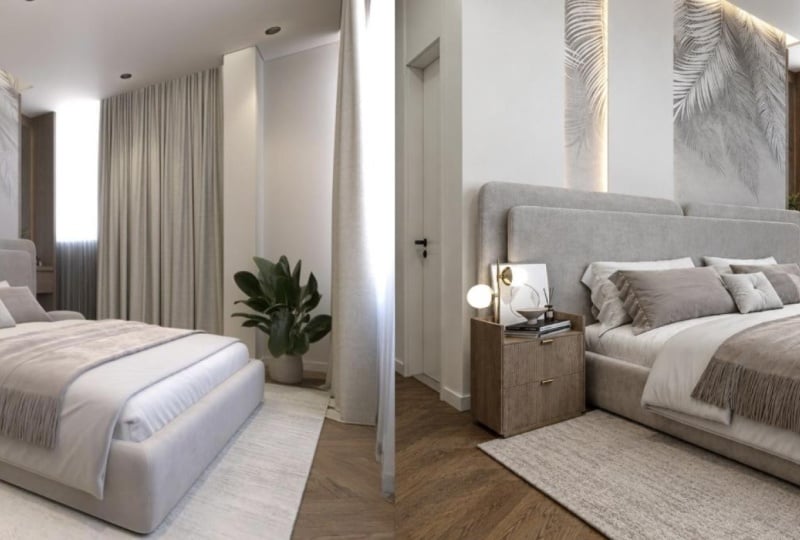
12. Editing Images with AI (Luminar Neo): We're going to explore
how AI can optimize your editing process
and help you achieve stunning
results in a fraction. At the time, I've
got the images from the exterior course opening Neo. And the first thing we can
do is go down to develop. And if we hit
masking and AI mask, this is going to
analyze the image and then it's going to
show where it's found. And then we can just
make a selection. So say we want the ground and flora and we can also edit these using the brush so we can paint in areas they might have missed. And then we can go
to adjustments. And the smart
contrast, for example, can always go back in and erase certain sections
that we don't want. And down in the
landscape filled. We can play with
the golden hour. But what I do like is
this foliage Enhance, say, really pumps up
obviously the foliage. And then we can
change this to say, a more autumn tone. And something like that
looks pretty cool. And we can see to
before-and-after already. And now let's get onto rely AI. And this allows us to add
some depth to the image. So you can see like we
can add the brightness to differ and we can darken up the areas closer and you
can change the depth of this. Something else I
love is the sunrise. So if we pump this up, you can see what this does. It adds a son and
then we can just move this to where we want it. There's tons of things
we can edit in here. We can edit the number of Some, raise the amount that
lamb, the penetration. So tons of stuff we can
do an air and in 3D, this would take ages. You can always turn
things on an off in here. We'll close that. And next let's go
to atmosphere AI, and we can add fog. And again, the render times I'll fogging freely
a ridiculous, and this is going to save us tons of time.
We've got layered fog. We can begin to see down here. We can add more depth to it. And again, if you remember the render times
from the course, this is gonna be a
huge time-saver. And all of this works
just like Photoshop. So we can go back in and
we can change things, so we can go back and it's
all layered so you can turn things on and off and
hanging there, guys, because my favorite
features coming up next up, we can use mood to
add lookup tables. And as you hover over these, you can obviously
see what I'm doing, which is a really nice feature. And we can turn them on and off, backup the top, we've
got magic light API. If we crank that up, we can see it's adding some glow down here. So if you want to play
with that interior light, we can and tons of
options in here. Super sharp is going to analyze the image and
sharpen it for us. So now if we zoom in
about 100 per cent, we can turn this on
and off and we can see what that's
doing to our image. We don't have a lot of
noise in our image. Be conceded, analyzes it and actually tells you
which Satan will work best. And then we've got Enhance AI. If we zoom back out
and we crank this up, we can see what that's doing. We can also add a vignette to our image and I run develop. We can also add
slight lens effect. Now, look at some more
of my favorite parts. If we go back to our catalog, what's great is we can
just right-click on here and copy the adjustments. And then we can just paste this onto any other
images in the set. And then when we go
into this and hit Edit, we can now see that all of our adjustments have been
added to this image. And you can see some of the
masculine has come through. So we can just go to Edit and
we'll go down to develop, and it's on this mass. So we have to do is go to brush arrays and we'll just erase that section and
that's looking fine. Now, you've stayed this long. So here's my favorite part. If we go to Tools
and we go to sky, you can see it's
pretty overblown here. And what we wanna do is choose one of these
guys that come. So there's tons in here. If we get to Starry Night
and add galaxy wife think is one of the best features
of this is the reflection. Now I've tried Photoshop and I don't think it does
as good a job. If I turn this on and off, you can see obviously discard changes but the
reflections down here, so it just sits in the
image really well. Let's go to dramatic sky
and that it's really nice. And again, there's tons of
things we can do in here. We can move the sky around, can move the position. And you can get your image, look in just how you'd like.
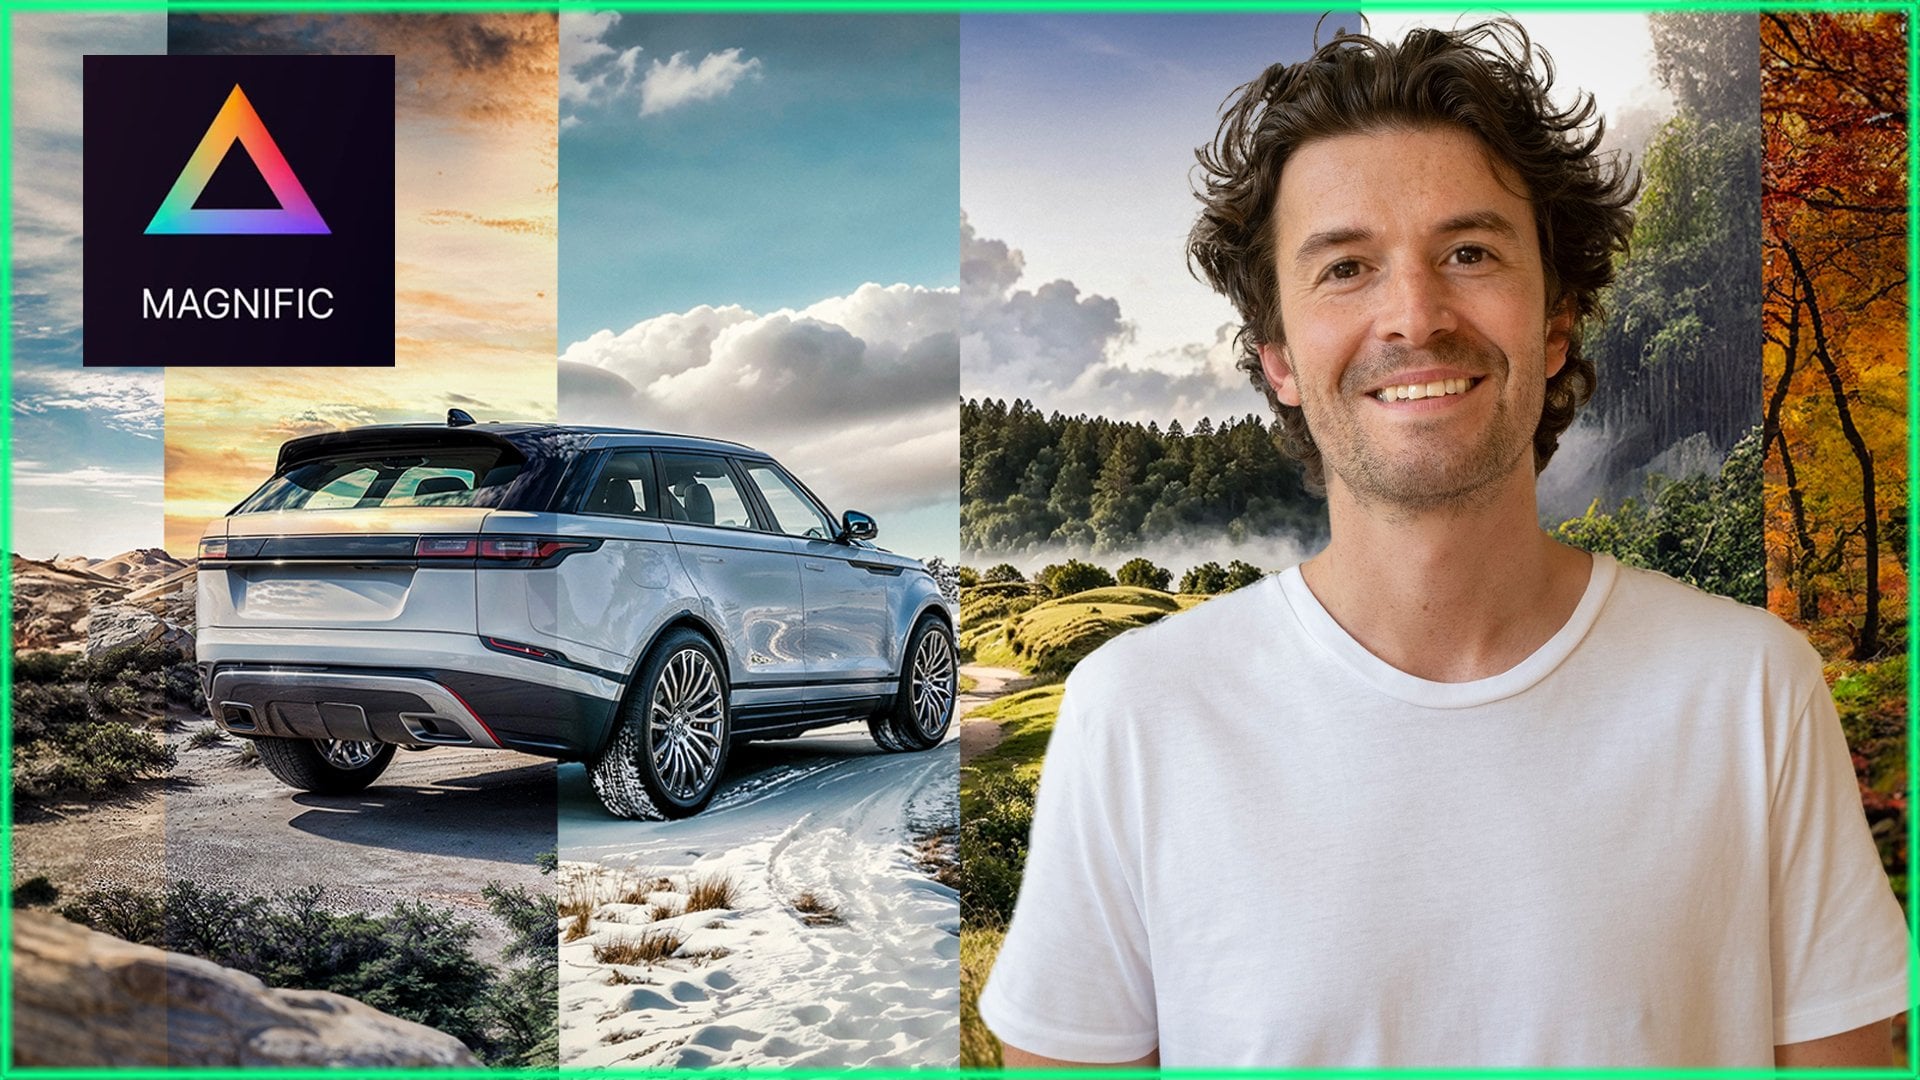
13. Upscaling Images with Magnific AI: So you may have
seen this image of Lara Croft from the PS one. Get up scaled to this. As soon as I saw it, I knew
we had to get involved. So let's start off by uploading a pretty standard Arcs
image and I'm going to leave everything at the
defaults and hit up scale. This is the image with
just the defaults on and we can see the
upscaling in action. The leaves start
looking more crisp and you can see the weathering
on the building itself. Which in three D is a pretty
drawn out process where you'd need to use dirt maps
and complex materials. This black wooden material
looks a lot more realistic. I really like the
detailing and weathering. It's added over here
on this garage. This is the before and this is the after with
just the defaults on. Now let's take a look
at some other examples. This was an image for a
kitchen appliance manufacturer and the upscaling looks great, but if you take a look
at some of the details, it does do some funky stuff. It's not perfect, but something we can
improve with prompts, which we're going to
have a look at shortly. But overall, it has attempted to make the image look
more realistic. The guy has aged pretty heavily, but take a look at the
bottles down there, even the outside and
the plants look better. So we also have sliders over
here like resemblance and creativity that you can
play with to try and keep hold of this guy's
resemblance if you wanted to, or you could always
just Photoshop in the original if you wanted
to keep him exactly as is. And you might recognize
this image from the course and take a
look at the detail. It's added quite
the improvement. So here's the before
and the after. And on a standard studio render, it makes the image
look a lot crisper. I'm really impressed, and I see this becoming a solid part of my post production
workflow onto the sliders. This was with the
default settings, and then this one has
a resemblance of five, it's trying to keep the image more similar to the original. And this was with
Creative. A ten. So it let the AI go world. It's changed the
chicken to bread. It's changed these
bottles and it's added some books and all sorts of stuff up here
that's not ideal. And you can see that
all of this AI stuff isn't exactly perfect
to use as is. Now, this was an illustration
I recently did for a travel company and it even
does the hands really well, which we know AI is
generally not too good at. But this really does give that extra photo
realism to the image. The prompt tool has
proved to be super handy. Now I'm going to write
a lever chair with a fabric throw for creativity. Let's plump that up to three
and I'll put one on for HDR. This gives it more
definition and detail and the creativity lets the AI hallucinate
what should be there and I'm going to leave
the resemblance as is. And we've got options to
use different engines, but I haven't personally
explored them yet. And we do have these different
versions, but so far, the standard version seems to be working just great for all
these three D renders. Let's upscale that
and see how it looks. And it's really made
that lever look nice. The throw, not so much, the flowers have
completely changed, but all in all, I think
the image looks better. But this is where
the prompts come in. So now we can write
white orchids and we'll give that another go. And we've got much of
the same on the chair, but can you see the orchids
are now just as we want them. I'm still refining the parameters
to use with this tool, but it's become a solid
part of my workflow before I hit Publish
or send images out. And this tool is
called Magnifique AI, and its simplicity and
power is Magnifique.
 Jake Denham ⭐, 3D Artist | Official V-Ray Mentor