Transcripts
1. Affinity Trailer: Hello, everyone. So welcome to All of you in my full Master series
on Affinity by Canva. From the NOW, you don't need to use different software
for different work. With the help of Affinity, you can create illustration, you can do proper
graphic designing. You can do photo editing, you can do pixel art work. You can perform all of this
activity in a single place. This is a very brand
new lecture series. So this lecture series is ultimate guide for
graphic designer, and this lecture series will start from the
very beginner level. After that, we will
achieve pro level things. I have covered every tool
in a very detailed manner. From the NOW say
goodbye to adopt Photosop and start your
new journey with Affinity. So no matter what you are a digner or pro
graphics designer, this lecture series is
designed for everyone. Okay, I will see you in the
lecture. Okay, bye bye.
2. Basic Interface of affinity : Hey Hello, everyone. So welcome to all of you in my full Master series
on Affinity by Canva. Recently, Affinity is
acquired by Canva. And finally, we have a
new version of Affinity. It has combined three different environment
in a single place, which includes Photosop
vector, pixels. Now you can perform
different kind of task in a single place. From now, you don't need to
switch to another software. And also Affinity
is totally free. So in this particular video, I'm going to show
you its interface. So let's see Affinity interface, and let's learn what we can do. So now let's start Affinity. And this would be very
basic lecture where I will teach you about
its basic interface. And layout. Okay. So whenever
you will open Affinity, this video will pop up. Okay. So here you
will see many options like start creating
A three size, A four size, A five. So this is nothing but a canvas. Okay. Also, if you will click on Smur then you will
see it's detail. From here, you can
set page width, page height, from
here, you can decide. Also, you can change
document unit from here, millimeters, pixels. Okay, so if you will
click on Pixel, it will ask you to
enter some detail. Okay. So let's say
page width should be 1080 and page
height should be 720. Okay, so this is how you
can create your own page. Okay. Also, here we
have some presets. Like if you will click
on present orientation. So currently it is
in portrait mode. But if you will
click on Landscape, then it will show you predefined template for landscape mode. Okay, so you can
choose any of them. So we have a different size, so let's choose anyone. So this is our basic Canvas. Also, if you want to change
your canvas setting, then you can do it
anytime from here. Here you have option
of document setup. So if you will click
on Document Setup, then it will again ask
you same details to fill. Okay. So let's select pixel, and here we can set tenet
width and 720 is height. And let's click on Okay. Okay, fine. So this is a very basic interface
of Affinity. Affinity is offering you
three different services like vector, pixel layout. Okay. So if you will
click on vector, then interface will change
according to vector. If you will click on Pixel, then also interface will change, and same for layout. But if I talk about Adob
then for Photosop work, you need to open Addo
Photosop and for vector work, you have to open illustration, but here you don't
need to switch. Suppose if you have
created something. Suppose if you have
created rectangle, then you can do three
different operation at the same place vector,
pixel, and layout. Okay, so you can perform all of this activity in
the single place. You don't need to switch. In the next video,
I will teach you about right hand side panel. Okay, I will teach
you this thing. So I am teaching from
the very beginning. So I hope you enjoyed
this lecture. And if you like this lecture, then don't forget to give me
good positive rating and co
3. Right hand side panel Tools (neew): Hello, everyone. In
this particular video, I'm going to teach you about right hand side
panel of Affinity. And obviously, this is
a very basic lecture. My lecture series, first of all, I will clear your basic concept related to designing software, and after that, we will
jump to the advanced thing. So let's learn color wheel and right hand side
panel in Affinity. Now let's understand about
the right hand side panel. Okay, so let's zoom. Okay. So here you
will see color wheel. So obviously, with the
help of color wheel, you can choose the
color of object. So let's select but you will notice that color is
not changing of our object. The reason is very
simple because we have not selected
our object yet. If you have to change
the color of rectangle, then you have to
click on rectangle. Now you can see these dots, which means our object have
been selected successfully. Now you can change
the color of object. Now you can change
the color of object. Also, you will see another
another wheel behind this. Okay, so this is a stroke. This is a stroke. So if
you will click on this, now you can change
the color of Etroke. But before that, we
have to increase the stroke thickness so that you can see it
from your small eye. Okay, we have increased
the stroke width. Okay. Okay, fine. Hmm. So now let's change
the stroke color. So let's select on this circle. First of all, let's
select object, and after that, you have
to select this circle. Okay. Now you can see that you
can change the color. Okay. This is how you
can change the color. Fine. From here, you
can set opacity. Okay. And if you have to
change the color of rectangle, then again, click on
this small circle. Okay. So this is how you
can change the color. And if you are familiar
with Adobe Photosop, then you may know
about Layers option. So whenever you will
create anything, you will see its
icon right here. Okay. Now let's jump
to the other folder. Okay. So here we have a most important
option, which is stroke. Okay, so let's
talk about stroke. Let's talk about Stroke. Okay. So this is a width. So from here, you
can increase or decrease the width
of your object. Okay. And here we have a cap option. So I will discuss about
it later on our video. But before that, let's
understand about the join. Okay. So Join is nothing
but your corner. Okay, so let's select our object and you have
to see its corner. So currently it is
selected on round join. So let's click on Bevel join. Okay, you can see
the difference. And let's click on Mitre Join, which means SAP Corner. Okay. And here we have a
three different opson a line stroke to the center, which means here you
can see blue line. So blue line is a
reference line. Currently, it is in
center of our object. Okay, currently it is in
center of our object. But if you will click on
a line stroke inside, then you can see blue line is situated at outside
of our object. If you will click on a line
stroke to the outside, then you can see the difference. Now let's use this feature. Let's use. First of all, let's
select our object, and let's select line
stroke to the center. Okay. Now, let's
increase the width. Okay. Now, let's select
align stroke to the inside. Now, let's increase the so now the direction of stroke have been changed successfully towards the inside. Now let's select stroke
aligned to the outside. Then the direction of stroke is transferred
towards the outside. Okay, so this was
the stroke feature. Okay. Now let's delete
this object. Okay. Now, let's use pain tool. Don't worry about that. I
will teach you everything. Suppose I have draw this line. Okay? You can change the width. Okay. And here you
have a option of cap. Okay. Here you have
option of cap. So currently it is in round cap. But if you will
click on butt cap, then you can see its shape have been changed successfully. If you will click on square cap, then it will use square cap. So now let's click on Round Cap. Okay. So this is the main
thing which you can do. Okay. Also, here we have another
option. Let's zoom it. Here we have a tart curved. Okay? Let's select barbed. Okay. Let's select simple. Okay? This is a start point. Now let's change
setting to the hour. Okay. So let's
click on triangle, Trangle tall, tringle wide. Simple. Okay. So this is how you can
manipulate your artwork. Okay? If you will click
on dash line style, then it will sew your
design like this. And now let's talk
about opacity. Okay, or transparency. So let's select our object. So from here, you
can manually adjust its opacity or instead of that, what you can do, you can press any number
from the keyboard. Suppose if you have to set
your opacity to the 30%, then you have to click
on your keyboard three. Okay. And for Undo let's
press Control plus JD. Suppose if you have to
set opacity to the 60%, then you need to click six. Okay. So let's zoom it. Okay. Currently,
opacity is in 100%. Okay. If you have to set
your opacity to the 70%, then you have to type seven. You can see it is working fine. Now let's delete this. Let's draw another
rectangle. Okay. So whenever you will switch from the vector to the pixel
or pixel to the vector, all the interface will change
according to your need. Okay. And you will
find some option is same in all interface. Like if I talk about vector, then you will see this
color will this interface. Okay. But now let's
switch to the layout. Then again, you will
see same Color reveal. Okay. So at some point, you will see same tool exactly in vector,
pixel and layout. In the next video, we will learn about left hand side tool. Okay. From the next video, we will learn these tools. Okay. So if you
like this lecture, then don't forget to give me good positive rating in
comment. Okay, bye bye.
4. Basic Common Properties In Affinity: So now, let's
create rectangle so that I can teach you about its
basic interface and tools. Okay. So first of all,
let's create rectangle. So if you have to
create rectangle, then you have to click
on this shape icon. So if you will click
on this shape icon, here you will get many shapes. Here you have a many shape, but I will click on rectangle. Okay? Now let's draw. So whenever you will
create anything, you will see property of those objects at
the top section. Okay. Suppose if you have to change
the color of rectangle, then you have to
click on rectangle, and at the top hand side, you have many option. From here, you can change
the color anytime. From this stroke section, from this stroke section, you can change the
color of stroke. From here, you can
increase or decrease the thickness of
your stroke. Okay? And also, here we have some
cool option, which is corner. Okay. So let's click on Corner. And if you will
click on rounded, then you will see your corner have converted to the rounded. If you will click on straight, then it will look like this. If you click on CK, it
will look like this. Okay? If you will
click on cut out, it will look like this. Okay. So this is how you can manipulate your design anytime. Here, you will notice that you have a single radius option. Okay, so single radius means here you will
see another dot. If you will drag it
towards the outside, it will transform itself. Okay. This is a radius by which
you can manipulate this. Let's change the corner
to the straight. This is how you can
manipulate your design. Let's change to the concave. Let's change to the cutout. Okay. So this is how you
can manipulate your design. But I was talking
about single radius. Currently, single
radius is selected, but if I will deselect it, then it will ask me to type
the radius of four side. Okay. So this is like we are
changing radius individually. I think you got my point, right? But if your radius is single, then you have to check
this box single radius. Okay. Now, here we have
another option, Convert to the curves. So if you will click on
convert to the curve, then you can give many notes. And with the help of that notes, you can transform your
object into the curve. You can create graph, you can give any point. Okay. So this is the beauty of
convert object to the curve. Okay. So this is a very cool feature. And whenever you will create
your object in curve format, then you may see
these three options. Convert to the SRP, convert to the smooth, convert to the smart.
So what is this? So suppose if you have
to create your object, very sharp, then you
have to click here, ok? Now, you have to
select two corner. Actually, it is already SAP. Now let's create it very smooth. So let's select our object, and let's select on
convert to this smooth. Okay, so you have to
select two point. So for multiple
selection of point, you have to press Shift key. And while selecting Shift key, you have to identify two points. Now, you can see
first point is this, and this is second point. I have already selected
this two point. Now, I will make
a smooth surface. So let's click on
Convert to the smooth. Okay. Now I can
manipulate my design. Now I can manipulate my design. You can see that I
have been so smooth. Suppose I have to make it SAP. Then what I will
do, I will again press Shift key and
select these two points. Now these two points have
been selected successfully. Now I will simply click
on Convert to this SAP. So let's click on Convert
to the SAP and you can see the surface
have been very SRP. Similarly, if you will click
on convert to the IMAT, then let's see what will happen. Convert to this smart. Okay. Now you can manipulate
your design like this. So this is a very cool feature. This is how you can
transform any object. Okay. Now, let's
create another shape. So let's click on Trangle. Let's click on Trangle. And again, you have to convert
your object to the curves. So let's create curve. Okay. Now suppose if you have to make this point very smooth. So you have to
select sift Shift. For multiple
selection of a point, you have to press Shift key while clicking this two point. So suppose I have to select
this point and this point. Then what I will do, I
will press Shift key, and this is how I can
select multiple nodes. And from here, I can
convert my object to the smooth Okay. And this is how you can
manipulate your design. So I hope you like this lecture. And if you like this, then
don't forget to give me good positive rating in
comment. Okay, bye bye.
5. Artboard Tool: Now let's understand
about artboard tool. So Artboard Tool is nothing
but a frame canvas. Okay. So this is our artboard. You can say it frame, it is very similar. Okay. So you will use Artboard tool in order to create frame
in different size. Okay. So whenever you
will activate this tool, you will see this option
iPad pro 13 portrait, so you can change from here. Suppose if you have
selected iPhone 17. Okay, then you have to click
on Insert Artboard. Okay. See. This is how it works. Suppose if you will
click on Galaxy 24. And click on Insert. It
will look like this. This is how you can
insert your artboard. Inside your artboard, you
will see this plus icon. So if you will click
on this plus icon, it will replicate itself. If you will click on plus icon, it will replicate itself. Okay. So this is how you can
generate multiple frame. Okay? This is how you can replicate
your frame anytime. Also, you can change the
setting of your frame anytime. So with the help of plus button, you can easily create
many artboard or frame. Okay. This will save
lots of amount of time. Okay. See. It is very amazing. Inside each frame, you
can draw anything. Suppose if you have
created rectangle. Okay. Suppose if you have to copy your rectangle from the first
frame to the second frame, then for copy, just
what you have to do, you have to press Alt button and you have to drag
your rectangle. So this is how you
can make a number of copies while
pressing Alt button. So this is a shortcut
key to copy. Okay. So art boot is not
a rocket science. It is just your frame.
6. Node Tool: Now let's use Node tool. So we generally use
node tool in order to edit existing curves,
lines and shapes. So this is a manipulation
tool in which you can add multiple point by which you can drag your object in
different direction. Basically, you can
manipulate your shape. Okay. So before using this tool, let's draw straight line. So here I am using pencil tool. But if I will use pencil
to draw straight line, then you can see that it is
not looking straight anymore. So let's delete. If you have
to create a straight line, then you have to
press Shift key. Then you have to move your mouse cursor towards
the right hand side. Okay, now it is
looking straight. Suppose if you have to click, suppose if you have to create
straight vertical line, then you have to press
Shift button and you have to use your mouse towards the upward or
downward direction. So if you have to create your
object in straight manner, then you have to press Sift key. Okay. So suppose we have
created Straight line. Now we have to use node tool. Okay. So let's
click on Node tool. Okay. Now, let's zoom. With the help of node tool, you can give multiple points. And this is those point by which you can
manipulate your design. With the help of these points, you can manipulate your design. Okay. This is how you can manipulate
your design, right? Suppose if you have
to create a graph, then how you will
create? So let's delete. So let's create graph. Again, go on pencil tool and let's draw horizontal line by pressing Shift key
straight vertical line by pressing Shift key. Okay. And let's
draw another line, and let's change the color. Let's change the color purple. Dark purple. Okay. Fine. Now, again, we will
use Node tool. So let's activate this tool. And now let's give
multiple points. So suppose suppose if you
have to enter many data, then you can provide
multiple points so that you can easily
manipulate your design. Okay. So with the
help of this point, we can manipulate our design. Okay, so first of all,
let's do manipulation. Also, you can add color. Here you can see that
white cross button, which means there
is a empty space. But if you have to add color, then you have to click
here and let's add Okay. This is how you can
create graph, okay? And if you have to make
your point very smooth, then I have explained this
tool in previous lecture. Convert to this smooth. So let's again use same feature. So suppose if we have to
make this surface smooth, then what I will do, I will
select multiple points. So in order to select
multiple points, you have to press Sift button. This point have been
selected and similar for these two points have
been selected successfully. Now let's click on Smooth. So our curve have been
very smooth. Okay. So this is how you can
generate any kind of graph with the
help of node tool. Now let's create rectangle. This is our rectangle. Okay. Now let's use Node Tool. Okay. But if you have
to use Node tool here, then you have to convert
this object into the curse. Click on it and click on
Convert to the curve. Otherwise, you can't
use Node Tool here. If you want to use Node
tool in rectangle, then you must click on
Convert to the curse. So click on Convert
to the curse. Now, you can provide
multiple points. You can provide multiple points. Okay. Now you can
manipulate these points. This is how you can
create graphals. Okay. And suppose if you have
to make it smooth, then select multiple
points by pressing Shift key and click on I Smooth. Then our graph will become
smooth like this. Okay. Shift key and make it smooth. This is how you can
manipulate your design. I think you got my point. This is how you
can use node tool. So now let's make a graph. So let's use Pentool
create straight line. Okay. Now I'm changing its color. Basically, I have
changed its thickness. Okay. Here I'm creating graph. Let's create another line
by pressing straight. Okay. Now let's change
the color purple. Now we will use Node tool in order to assign
multiple points. Okay. Now let's manipulate them. Yeah. Okay, so this is how you
can create graph anytime. And if you want
that, all corner, all surface should be smooth. Then you have to select
all the objects, and you have to click on. Convert to the smooth. So this is how you can
convert your object into the curve surface. If you like this lecture, then don't forget to give me good positive rating and
comment. Okay, bye bye.
7. Corner Tool: Now let's understand
about Corner tool. So with the help of Corner
Tool, what you can do, you can easily create round or SAR corner
according to your need. Okay, so let's use this feature. So let's create rectangle. I have created rectangle. Okay? Now, you have to activate Corner tool
by clicking on it. Okay? Now Corner tool have
been activated successfully. Now you have to select those corner which you
have to make round or SAP. Okay. So corner tool have
been activated successfully. Now I have to make this corner round,
so I will click here. Okay. After clicking here, I can drag it towards
the right side, and you can see my age
have become round. Okay. So this is how you can make round corner. Okay. And here at
the top section, we have a multiple option
like none rounded, straight, concave, and cut out. So let's use all of them. So let's click on straight. Then you can see change. Let's click on Concave. Okay, it is looking like this. Let's click on cut out. So it will look like this. So with the help of corner tool, you can create design like this. Okay, so it is very simple tool. Okay, I will see you in the
next lecture. Okay, bye bye.
8. Contour Tool: Now we will learn counter tool. This is nothing but offset the stroke of a curve or shape. Okay, so it is a offset. So let's use this tool. Okay, so let's create
different shapes like rectangle, star, and this. Let's use ContoTol. Let's select our object
and click on Contour. This is a offset. In screen, you can
see the blue line. Blue line is a reference line. This is a shape of
previous design. This blue line represents
shape of previous design. So you can use Cont
tool like this. Okay. Also from here, you can switch edges. From here, you can
make your age round. You can click on BevalO Mithra. This is how you can
use Quanto tool. So it is very super easy, okay? So this was a very simple tool. Okay. I will see you
in the next lecture.
9. Pen Tool: So in this particular video, I'm going to teach
you about Pen Tool. So with the help of Pen Tool, you can draw curve close
shave and straight line. So let's see how you can use it. Okay. So first of all, you have to activate Pen Tool. Okay? And here I'm
increasing the thickness of pen so that you can
easily see its output. Okay. Okay, fine. So simply you have to press left key button from the mouse. You have to assign many points, and it will join all the points. So it is very simple. You have to assign many points, and it will join automatically. Suppose you have to make animal. Suppose you have to make a dog. So let's create dog. Just you have to
assign many points. It is very simple. Now, let's create tale of Dog. And let's simply
join these points. Okay. And let's
manipulate our design. Okay, so this is
here. Okay, fine. Now you will notice
that there is a sharp edge in entire drawing. Okay, so we have
to make it smooth. So in previous video, we have already
learned that how can we make our surface smooth? So first of all, let's click
here. Let's click here. Okay. And after that, you will get this option. Convert to smooth. So basically what
you have to do, you have to select each point from where you have to make
your surface smooth. Okay. So first of all, let's
activate this tool. Okay. And after that, suppose this is a point which
you have to make smooth, so you have to select here. Okay. And with the help
of this tool, let's zoom. With the help of this tool, you can easily manipulate
its smoothness. Okay. So surface have
been very smooth. Okay. Now here we have
to make it smooth. Okay. So again, let's
activate our tool. 1 minute. Now let's select our drawing, select smooth and click here. Now you can easily
manipulate its setting. You can make it very smooth. Okay. Suppose here we have
to make our surface smooth. So let's select on convert
to the smooth. Okay. Okay. So this is how you can
make your surface smooth. So you have to apply this
setting in every design. Okay. After clicking whole
thing, we have done this. So, guys, this is how you
can make your vector art. Okay, so this is the
best use of Pen Tool. If you like this lecture,
then don't forget to give me good positive
rating and comment.
10. Pencil Tool & Brush TOOL: In this particular video, we will learn Pencil Tool
and also Path Brush Tool. So we will cover both
things in a single video. So first of all, let's
activate Pencil Tool. And I have increased
the thickness of paint so that you can
easily see output. Okay. So with the
help of Pencil tool, you can easily create
any kind of art. Suppose if you are an artist, then this is a very
best tool for you. Okay. As you can see that I
am creating art very easily. So this is how you can create any kind of art very easily. Okay, so this is a
beauty of paint tool. You can create anything
which you want. So let's create an drawing. So this is how you can
use Pen Tool very easily, and you can create
any kind of art. Just you need a
creative mindset, and you can create anything. Okay. Let's create ice. Okay. So this is not a rocket science. You can easily use Pen tool. You can easily create anything. You can create mountains.
You can create sun. Okay, so pencil tool is
not a rocket science. You can create anything
what you want. Now let's understand
about Path Brush Tool. Okay. So first of all,
let's open new page. Let's activate Path
Brush Tool. Okay. So from the right hand side, you will see Path Brush options. So let's click here. And here you will see
many kind of brush. You can select any of them. Suppose if you have selected this, it
will draw like this. So here we have a
different kind of brush. We have a brass in
different texture form like oil watercolor acrylics. So we have a different option. Now suppose we have
to create grass here. Okay, so what we will
do we will go on same folder path brrass option, and inside Path brrass option, we have to look
for grass texture. Okay. So let's uh so inside pencil, inside Pencil folder, I
got following things. Okay, so with the help of that, we can easily create
grass. So let's select. And also, if you want to change the color, you can
easily change. But I'm creating
black and white art. That's why I'm not
changing color. But if you want to change color, you can easily change from here. This is a grass. So this is how you can use
pencil tool and Brush Tool.
11. Stroke width tool: In this particular video, I'm going to show you what is Stroke width tool and
how you can use it. Okay. So first of all, before using this tool, let's create straight line
for demonstration purpose. Okay, so this is
a straight line. Here you can see that stroke
is equal in both point. Okay, Estros is equal in
both the point. Okay. But if you want
that, this person should be wider than
the this person, then you can use
Stroke width tool. Okay. So let's use Stroke width
tool and let's activate this. So you can see that there is a thickness difference
between both the points. So in such situation, you can use Stroke width tool. So whenever you have
created anything, you can easily manipulate
Stroke from the AI point. Okay, you can easily manipulate Stroke by clicking on AI Point. Okay? I think you are
getting my point. So for demonstration purpose, let's write my name. Hang AN, this is
my name ng Keith. Suppose I have to make a
poster for my wall. Okay? Then how I will
decorate this thing. Okay. So here I will
use Stroke width tool. So basically what
I'm going to do, I will increase the
thickness like this. Now it will look fancy, right? So it totally depends
upon your creativity. It is super easy. This is how you can increase
the width of any point. Firstly, you can
assign any point and you can increase its width. You can easily manipulate
it from the any point. This is the beauty of
Stroke width width. Okay. Let's increase the thickness. See. It is looking nice. Let's create a man.
This is a head, and this is a leg. Okay. Let's use same tool. Stroke width. This is how you can manipulate your artwork. So if you like this lecture, then don't forget to give me good positive rating and
comment. Okay, bye bye.
12. Fill Tool: Hello, everyone. So welcome to all of you
in my full Master series. In this particular lecture, I will teach you that how
can you use Fill Tool. So with the help of Fill Tool, you can easily add gradient effect or color
effect in any shape. So without wasting any time, let's start our video. Okay. So first of all, let's draw any shape. Okay. So first of all, let's go on sap and here, you can choose any
kind of shape. So let's select this let's create sap and let's rotate it. Okay. Now let's
change the color. So in order to change its
color, you can go here. You can select Es. Okay. Fine. Now suppose we have
to add gradient effect. So what we will do, we will go on Fill Tool.
Let's activate it. Fill Tool have been
activated successfully. Now, you have to assign
minimum two point. You can assign many points, but minimum, you should assign two point
for gradient. Okay. So let's assign points. Now let's make gradient,
so let's drag. But you will notice
that it is not working. Can you tell me about
why it is not working? The reason is very simple. Our object is not selected yet. So make sure to select
your object properly. Otherwise, it will not work. Otherwise, you will
add gradient effect, but it will not appear. So you have to select
your object, okay? You have to select this one, select because currently
here only have one layer. But what if we have
more than ten layers, then how Affinity will know in which layer you
want to make change? Okay, that's why it is important to select a specific layer. So now we can add gradient
effect like this. So this is two point. This is a first point,
which is brighter one, and this is another point
which is darker one. Okay. Suppose you have to change the color
of lighter person. Then what you have
to do, you have to double click on this point. Now at the right hand side, you will see setFllon
set fill Opson. So suppose you have
to change its color, you have to simply click here. And you can change the
color of lighter person. Okay. Fine. Now suppose you have to change the color of this portion,
right side portion. Suppose you have to change
the color of this person, then you have to
double click here. So once you double click here, you will again get the
option of set fill. So click here. And from here, you can, again, change color. Also, you can
assign many points. And with the help
of many points, you can add another color too. Okay. So you can
assign many point. Okay, I think you
got my point. Okay. And, uh, Here you will notice that we have
some option like linear. Linear means linear
term used for gradient. Okay, so it is a gradient
effect in linear form. Here we have a solid option. Obviously, solid
means single color. We call gradient when there
is a two different color. Two or more than two color, then we call it gradient. But if there is a single color, then we call it solid. Linear, elliptical. Radial. This is a type
of radial gradient. Conical. So you can
explore these settings. Mass. Okay. Bitmap. So
now what is Bitmap? In Bitmap, you can upload any file A image file like this. So in Bitmap, you can
add any kind of image, and it will look very cool. See. Okay. So, okay, guys, this was a failed tool. And if you like this lecture, then don't forget to give me a good positive rating in
command. Okay, bye bye.
13. Transparent tool: Hello, everyone. So welcome to all of you in my full Master
series on Affinity. So here I will teach you what is Transparent tool and
how you can use it. Now the question is how you
can activate this tool, so you will find this tool
inside the field tool. Okay. So with the help of
transparency tool, you can make any
object transparent. Okay. So it is a
very simple tool. This is not a rocket science. Let's create black
rectangle here. Okay. And behind this rectangle,
there is nothing. Nothing means nothing. So in this canvas, there is a single rectangle box. Behind it, there is nothing. So now let's use
transparency tool. Let's activate this wine glass. And you have to make sure that your layer is
selected successfully, otherwise it will not work. You have to select those layer in which you want
to apply effect. Okay. Currently, here
we have only one layer. That's why it became
very easy to reach out. But what if we have more
than ten or 15 layer? Then how Affinity will know in which layer you
have to apply effect. Okay. That's why you have to select a specific layer
in which you want to change. Otherwise, how
Affinity will know. Let's select this layer. Okay. And tool is already activated. Now let's drag my mouse cursor
from the left to right. Okay, so lighter portion
of object is showing that this area have
become transparent. Okay. So this is how you can manipulate transparency
level, okay. So this is how you can
use transparency tool. You can use this tool for thumbnail designing where you have to write
something, okay? So you can highlight or you can dark some area by
doing this stuff. Okay. So if you
like this lecture, then don't forget to give me good positive rating and
comment. Okay, bye bye.
14. Shape Builder Tool: Hello, everyone. So welcome to all of you in my full Master
series on Affinity. In this particular lecture, I will teach you about
Shape Builder Tool. So obviously, with the help
of Shape Builder Tool, you can create different
kind of shape by adding or removing any shape. Okay, fine. So for demonstration purpose,
let's create rectangle. Let's create this
blue rectangle. And let's create another
rectangle of pink color. Okay? So I have created
here two rectangle, right? Two rectangle. Okay, fine. So finally, we have a two layer. You can see at the
left hand side, we have a two different layer. So suppose I have to
merge the two layer, then how I will do? First of all, I will
activate Save Builder Tool. Okay, I will activate
Sa Builder Tool, and I will select both of them. I have selected both the object. Okay. Now, when two is activated and both the
object are selected, then you will see this
option at the top side. Plus means by using plus
symbol, what you can do, you can merge two
different sap similarly, when you will click
on minus or negative, which means you can remove or subtract any sap
from the object. Okay, so let's use
it one by one. So suppose I have selected
plus, plus means Addison. Okay, so this is a sap. Okay. Now what do I have to do? I will draw my mouse like this. Okay. And also, I can
draw it like this. So new shape have become. Okay. So this was a Addison. So this is how you can
merge many shapes. Suppose suppose suppose
let's create another shape. Let's create another
shape, triangle. Okay. And, mm, mm, mm. Tar. And let's change the
color of atar Yellow. Okay. Now I will
merge them like this. I will merge them
like this. Okay? Okay. So if I have to merge this, then what I will
do, I will activate my tool and I will
select both the object, and I will click on Picon plus icon and simply
draw my mouse like this. So it is looking like this. Okay. So this was Addison. Okay, now we will subtract
a shape from another shape. Okay, so let's
follow same process. First of all, let's delete. Okay. Let's create a rectangle. And again, let's create
another rectangle. Okay. Now let's activate Se Builder tool and
select both the object. You have to make sure
that both the object is selected successfully. Otherwise, it will not work. Now, let's go on delete selected area
object, which means minus. Now, suppose if you will
draw your mouse here, it will subtract this object. Let's undo Control plus Z. Suppose if you will
draw your mouse here. 1 minute. It will
subtract object. Suppose you will draw
your mouse here. I will substract object. Okay, so it is nothing
but a subtraction. Okay. Also, instead of draw
what you can do, you can click on Minus button. And suppose if I have
to remove this part, suppose if I have to
remove this part, then I will simply click here and it has been
removed successfully. This is how you can
manipulate your design. Okay. So if you
like this lecture, then don't forget to give me good positive rating and comments so that I
can motivate myself. Okay, bye bye.
15. Vector Flood Fill Tool: Hello, everyone. So welcome to all of you in my full Master
series on affinity. So in this particular lecture, I will teach you that what
is vector flood field tool, and how you can use it. Okay, so with the help of
vector flood field tool, you can instantly
feel any kind of color gradient or
beatmp in many sips. Okay, suppose for an example, if you have created
many Sep if you have created many
Seb here like this. Then if you want to feel
color very instantly, then you can activate this
vector flood fill tool. And you will find this tool
inside Save Builder tool. Okay, so let's activate this. And suppose I have to
make everything blue. Then I will simply click Okay, so you can instantly
add any kind of color with the help of
vector flood tool. So this is a super easy tool, but it is not limited to that. We can do more advanced thing. Okay. So in previous video, I have teach you that how you can create
different kind of shape. Okay. So first of all, let's create very
unique sap. Okay. So first of all, let's make
a black rectangle. Okay. And this lecture is
very interesting, so you don't have to
eskip this. Okay. Now, let's create
another shape circle. So let's create
circle of red color. Okay. And let's add like this. Let's create another
shape of Diamond. Okay. So add diamond here. Okay, fine. Fine.
Let's add another sip. Let's Let's Let's add segment. And let's add another sap. Tripzoidl. Okay. Okay, fine. So now, interesting thing is you
can merge all of them, you can manipulate
according to your need. Okay, so first of all, let's
go on Shape Builder tool. Okay. Let's select
all the shapes. And here you will
see minus option, which means delete selected
areas from the object. So let's activate this and
let's delete following areas. Just you have to simply click here and it will
delete automatically. Okay. So finally,
we have a new sap. Now, what we can do, we can use vector
flood field tool here. So let's activate this tool. So tool have been
activated successfully. Now I can instantly change
the color of any object. Okay, you have to play with color wheel and you
can add any color. Okay, so it is looking
very nice. Okay. But now I will teach
you interesting thing. Okay. Now we will add Bitmap. So what is Bitmap, you can add your own image or any kind of texture
in any shape. Okay. So first of all, let's
select on set Bitmap fill. Okay. Now it will ask
you to add image. Okay? So let's add an image. Let's add this image
and simply click here. C, it is looking very nice. Let's zoom it. Okay? Or you can change you can
add anything you want. You can add anything. So this is how you
can create any kind of poster for wall. Okay. Let's say Bitmap. Let's add another image. Let's add this one. Here,
you can easily rotate. Zoom in Zoom out. Okay, you can manipulate
with design. Okay? Again, select all of these Setbtmp And this is how you can play
with these settings. This is how you can
create amazing shapes. Okay, fine. So this is how
you can create artistic work. As you can set bitmap,
here, here also. Okay. Let's select all of them. Let's select whole Object. Let's activate
VtorFloodFel tool, stbtmp. Okay. Now choose this one here. Also use set Bt map fill. Let's edit here. Okay. So you can apply all the
image in every position. Okay. So I hope you
enjoyed this lecture, and this is how you can create
amazing poster or artwork. Okay, so I will see you
in the next lecture, and if you got any
help by this video, then don't forget to give
me good positive rating and comments so
that I can motivate myself. Okay, bye bye.
16. Text Followed by Specific path or Shape: Hello, everyone. If you want that your text should
follow your desired path, then this videos for you. You can type your text according to unique shape
or unique direction, which means you will draw
any sap or any path. And your text will follow
that particular path. So now let's understand
how you will do that. So first of all, let's activate Pintol and let's draw a path. So this is a path.
Suppose if I have to add a text in this
particular path, then how I will do it? I will simply go on Text
tool and I will activate it. Now you have to hover the
mouse cursor over your shape, and you will see this icon. You will see this icon, T. So when you will
see this icon, you have to simply
click on your shape. Now, it will ask you to type
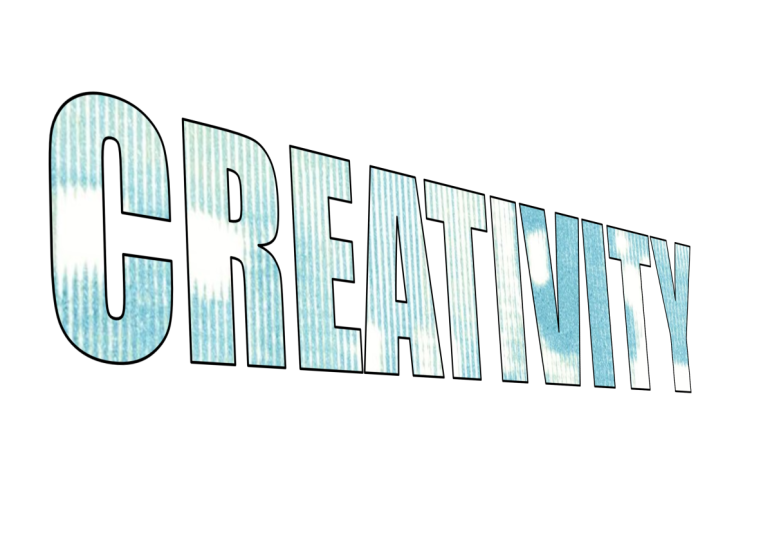
anything. So let's type. Let's type creative
witty is my power. Creativity is my power. Now let's increase the size. Let's increase the size. And let's change the font. Let's change the
color of creativity. Okay. Now here you will see green icon and red icon. So what does it means? So green icon is a starting
point of your text. So you can manipulate
it like this. And red icon is a end
portion of your text. So suppose you at
just red point here. So it will not
exceed this point. C. I can't exceed endpoint. So you can extend the
endpoint duration. Now let's increase the size. So it will not exceed
your end point. Red point is your endpoint. So this is how you can create
a missing text effect. You can also do same thing
with the circle too. So let's delete it.
Let's draw a circle. This is a circle. Now similarly, you
have to go on text, and let's hover the
circle 1 minute. Let's activate text and whenever
you are using this tool, make sure that your sap is selected from
the layer Sexton. So if I have to draw
text in circle, then circles would be
selected properly. Otherwise, it will
not work. Okay. So let's type. Okay, so you can type
inside the circle. Or if you have to type outside, then simply click
on Enter button. So with the help
of Enter button, you can switch, or you can
use Mouse cursor. Okay. So let's type Create creativity is my power. Okay. Let's change
the font color. You can select its first
point and end point. Okay. So this is how
you can manipulate the shape or path of your text. Let's draw something here. Let's draw. Pin tool. Let's create a path and type. First of all, let's
activate this tool. And you can see that
font is too small, so let's increase this size. Let's change the color white. Nikki. Be. You can change the font. So this is how you can
manipulate your text. Okay? So, guys, if you
like this lecture, then don't forget to give me
good positive writing and comments so that I can motivate
myself. Okay, bye bye.
17. Create Transparent Text Effect: Hey, hello, everyone. So welcome to Aa you in my full master
series on affinity. So in this particular lecture, I'm going to teach you that, how can you create this kind of amazing art with
the help of text. So without wasting any time, let's just start our video. Okay, so first of all,
let's delete everything. Okay. Now, first of all,
you have to open those image in which you
want to apply this effect. Okay, so let's import image. So this is image where I
have to apply my effect. Okay. First of all, we will create any shape in
which we will write our text. So let's create rectangle
and you can choose color. You can choose the color
of rectangle very easily. Okay? Let's create
rectangle. Okay. You can change its position. Okay. Fine. Now you
have to go on text tab. Artistic text tool. So let's activate this tool. Okay. Now let's type Workout. Workout. Let's
decrease the size. Adjust it. Work out. Now you have to make
your font bold, select all the text, and from here, you
can change your font. Okay, so make sure
to select font. Okay, so I'm selecting impact. So this effect will
look good when you will select thicker font. It will not look
good in thin font. Okay. So let's adjust Okay, fine. Now what do
you have to do? You have to look at towards the right hand side
layer sections. This is a layer of my text. This is a layer of my rectangle, and this is a layer of my original image,
which is background. Okay. Now you have to go on your text, and here you will
see many effect, normal, dark and
multiply, color burn. Okay, so you can explore
this setting one by one. But here we have to
create it transparent. That's why I scroll down. And here you will
see eras Opson. So our text have been
erased successfully. You can see on the screen. See. Now this is a
very tricky person. You don't have to skip this. You have to drag your text layer just above the
rectangle like this. Drag your text layer
over the rectangle. You have to paste inside it. Okay, and see the effect. If you don't get
it, I'm repeating myself. What do you have to do? You have to drag your text
over the rectangle layer. So if you will expand
rectangle layer, you can see our text is
inside rectangle layer. Okay. So this is a very tricky thing. Now suppose you have
to change the color of rectangle, then what
do you have to do? Firstly, you have to
select your rectangle. If you will not
select it properly, then you can't change the
color, select it properly. Now you can easily change the
color from the color wheel. Okay? Now let's apply same effect
here too for practice. Okay. So firstly, let's create
rectangle or any shape. Let's create rectangle. Make it proper aligned. Okay? Make it proper aligned. Now you have to
type what you want. Okay. So let's type
podcast. 1 minute. Pod cast. Okay. Let's adjust. Now, let's change the font. Let's change the font. Make it thicker, podcast, let's adjust its size, make it center aligned. Okay, fine. Now, again, go on
right hand side panel, and first of all, you have to make your
text transparent. Okay. So what do you have to do, you have to select your text, and after that, go on
filters you scroll down, and here you will see erase. So this will erase your text. This will erase your text. Now what do you have
to do you have to drag your text layer inside the
rectangle layer like this. Then this effect will
apply successfully, and it is looking
so professional. Now you can change the
color of rectangle. So if you have to
change the color, then you have to select
rectangle properly. And after that, you can
easily change the color. Just go on vector,
and inside vector, you can change the color. But I think this
color will look good. So it is totally depends
upon your creativity, which color you choose. Okay? So I think white
color will look good. Okay. In previous videos, I have covered many tools, so you can apply that tool too. Like in previous video, you have covered
that you can make your rectangle
convert to curves, and now you can easily
change its shape. So you have to remind
your previous lecture and you can manipulate
with setting, and it will look awesome. Just explore it by yourself. So I have covered the text tool and I have
covered the advanced thing. So if you like this lecture, then don't forget to give
me good positive rating and comment so that I can motivate
myself. Okay, bye bye.
18. Remove Background in Affinity using pixel tab: Hello, everyone. So welcome to all of you in my full master
series on affinity. So in this particular lecture,
I will teach you that, how can you remove the
background using the Pixel tab. So without wasting any time, let's start our video. So suppose you have to
remove the background. Okay, and you have to convert
this image into the PNG. Then how you will do that? Okay. So let's understand. So first of all, what
do you have to do? You have to switch the mode. Okay. So we have already
learned about vector setting. Okay, so vector means whenever you have to create or
edit any graphic work, you have to go on vector tab. But whenever you have
to edit your photo, basically, photos of things, okay, you have to
go on Pixel Studio. So for photosop work, you have to go on Pixel, and for graphic work, you have to go on vector. So let's go on Pixel time. Okay. So when you will activate
Pixel Studio in affinity, then here you will
see many tools. And some tools are similar
to the previous one. And here we have a option
of Object Selection tool. So with the help of
Object Selection tool, we can easily remove
the background. So first of all, let's
activate this tool. So when you will activate
this tool first time, then you will see this pop up. Machine learning model, the object selection
tool require the segmentation model
to be installed, which means you have to install some plugin before
using this setting. So let's click on settings. It will ask you only first time. Okay. So this is a segment plugin which
you have to download. It is 290 MB. Okay. This segmentation
model allow the creation of precise
detail Pixel selection. Okay, so it is for
Pixel selection. So now let's download our model. So now it have been
downloaded successfully. Okay. Now what do
you have to do? You have to again
activate Same tool. So let's activate
Object Selection tool. And now, if you will hover your mouse cursor
over the object, then it will look like this. Okay. It has auto
detected all the edges, all the round corners in image. Okay. So this is how you can
select anything very easily. It will not take so much time. Okay. So let's select our
main actor. Simply select. Now we have to
select mouse, too. Let's understand this
from the very basic. Suppose you have activated
this tool, Object SelexonTol. Okay. Now suppose you are
using first oponFOpson. Okay. So when you will select
your object like this, let's click then you will notice that only Nikki
Bella body structure have been selected successfully. But here we have
to select MC too. Then how we will do that? So here we have option of Edd. Let's click on Add and
click on MC simply. L now Mc have been
selected successfully. Okay. Suppose if you have
to deselect the selection, then you have to
use subtract tool. If you will subtract tool, and if you have to
remove the mic, then you will click
on MC Double click, and it will deselect. But we have to
select McTo then we will use Adopson because
we have to select mouse. So let's double click. Mouse have been
selected successfully. Now what do you have to do
inside the layer section, inside the layer section, you will see the
option of mask layer. Click on it. So it will
look like this. Okay. And suppose you have
to refine your edges. So let's click on Refine Age. So with the help
of this setting, you can manipulate some thing. You can make your
breast smoother. So let's draw your
mouse like this, and it will make surface smooth. If you found any rough
corner or edges, you have to simply draw
your mouse like this. It will make it smoother. This is how you can
refine your edges. Okay. Now finally, we
have the PNG of Nikkib. We don't have background here. So now let's go on export, pile, export export as PNG. Okay, let's export. Now, let's open output. So we have successfully created
the PNG of Nikki Bella. Okay. This is how you
can select any kind of object or you can
remove from the canvas. Okay. So I hope you
enjoyed this lecture. And if you got any
help by this studio, then don't forget to give me good positive rating and comment so that I
can motivate myself. Okay, bye bye.
19. Change Colour of Anything ( Brush selection tool ): Hey, Hello, everyone. So welcome to all of you in my full master
series on affinity. So in this particular lecture, I will teach you that,
how can you change the color of anything
in your canvas? Suppose you have to change
the color of dress, you can easily change it. Suppose you have to
change the color of lips, you can easily change it. Suppose you have to
change the color of mic, you can easily change it. So now let's understand
how you will achieve that. Okay. So let's start our video. In previous video,
I have already told you that you
will use vector tab whenever you have to draw or
edit graphic related things. Okay. But whenever you have
to do Photosop activity, then you have to switch
to the Pixel studio. And here we have to
do photosop work. That's why we are switching into the Pixel because we have to
do Photosop related work. Okay. So now, you have to go on Pixel. And inside Pixel, you
will see many tool. In previous lecture,
I have already told you about the SeleconTol. So here you have
to go on selection Brush Tool because if we
select Object Selection tool, then it will select whole
object at the same time. So if we will use
Object Selection Tool, then it will select whole
object, but we don't want that. Suppose we have to change
the color of dress, then we have to select
a specific part. That's why here we will not
use Object Selection tool. So let's right
click on it and go on Selection Brush Tool. So here we have a brass. With the help of brass, we can select anything
which we want. So first of all, let's increase the size of brass
according to our need. I think 83 would be good. Suppose we have to change
the color of dress, then we have to simply
select over here. Now you can see that this part have been selected successfully. Now we have to select
this part. Okay. So this is how you can
quickly select desire person. Now, you will notice
that there is a mistake. We have selected
unnecessary part, so we have to remove this. So for that, what we
will do, firstly, we will decrease the size
of bras because we have to do refine work. That's why brush size
should be small. And here we have to
go on substract. Here we have to
select substract. Okay. So with the help
of subtract tool, you can adjust
unnecessary portion which have been selected. Okay. This is a reverse
of previous tool. So this is a portion
which I have to settle. C. 1 minute. Okay, fine. So dress have been
selected successfully. Oh, I have to select
this part too. Let's select like this. Select Okay. Now let's click on Subtract
tool and let's zoom. I don't want to change
the color of bottle. That's why I will deselect it. Okay. And here we
have to adjust. Okay. Basically, you have to
take time to fix it. Okay? And this is
a portion of here. So this is selected by
mystically, so delete it. Okay. Okay, fine. So I think we have done. Okay. Now, when object is selected successfully, then
what do you have to do? You have to go on
right hand side panel, and here you will see
small circle adjustment. So let's activate it.
And here you will see the option of recolor. Let's activate recolor. And now you can change
the color very easily. You can change Color. So let's select this one. Now let's press Escape button. This is how it will work. I think it is looking nice. Okay, this is how you can
change the color of anything. Suppose you have to
change the color of lips, then again, go on same tool. Again, go on same
tool and make sure that your image should
be selected from here. Otherwise, any tool
will not work. So firstly, select this image and after that,
activate any tool. Now let's go on selection
Brush tool. Now let's zoom it. I think brush size
should be small. So let's decrease the
size of brass 18. Now let's zoom. So it has auto selected, but I have to deselect
the area of teeth, so I will use subtract. So basically, you have to use substract tool
according to your use. Now lips have been
selected successfully. Now we have to again
go on this option, and here we will see recolor. Now you can change
the color of lips. Let's make it black. So this is how you can change
the color of anything. So if you like this video, then don't forget to give
me good positive rating and comment so that I can motivate
myself. Okay, bye bye.
20. How to Create Vector illustration art ( part 1): Hello, everyone. So welcome to all of you in my full master
series on Affinity. So in this particular lecture, I'm going to teach you
about how can you create your own illustration
art in Affinity. Okay. So either you can
create your sketch from the very scratch or you can use any reference image
for creating vector art. So process is same in both devs. Okay. So you don't have
to worry about that. For proper
demonstration purpose, here I'm using Niki
Bella's image, and I want to convert her into the illustration or
vector art. Okay. So I'm using this
image for reference so that I can explain
each tool one by one. Okay. So first of all, you have to make
sure that vector tab is activated successfully. So here we are doing graphic related work,
illustration related work. That's why you have
to go on vector tab. Okay. Now, here what
do you have to do? We have to draw many shapes
in Niki Bella's face. Okay. And after that,
we will feel color. Okay? So in order to
create Niki Bella's face, either we can use Pentool
or we can use pencil tool. So if you will use pencil tool, then you can draw
eyebrow like this. This is how you have
to draw Niki Bela. This is how you have
to draw Nikki Bella. Okay? So this is the way by which you
can create her face. But here I will not
use pencil tool. Here I will use Pin tool. So just you have to assign many point and it will
join automatically. But when you will
activate Pentool, you have to make sure that it
is selected in Smart mode. It should not be on
polygon or any other mode. It should be in Smart mode. So it will provide a
smooth curvature surface. Okay, so first of all, let's create outside area
of Nikki Blas head. Okay. So first of all, um, let's start from the here. I you have to
assign many points, you have to draw, and
you have to make sure that all the shapes should
be closed properly. Suppose I'm creating
the layer of hair, so it should be closed properly. It should not be open. Otherwise, we can't add color. Okay? So we have selected
this much area. Okay. Now let's cover. Let's zoom it. You can watch this video
in fast forward mode, but my recommendation is
not to escape this video. Okay. And if you have
to keep it alone, keep this point alone, then you have to press Escape
button to close Pentool. Now you can continue from here. You have to close her face. Okay, I should not be
open. Just joined this. Okay. Okay, fine. Now again, activate pain
tool and cover rest things. It should not be
open from any point. Okay? Now we have created
her head structure. Okay? Now let's create here. Just you have to
assign many points. And it should not be
open from any point. Okay. Close this pencil tool
by clicking Escape button. Okay? Now it's time to
create her eyebrows. Okay, so let's zoom it. Let's zoom. The main advantage
of paint tools, it will create accurate shape. And also with the
help of Node Tool, you can manipulate
its structure. You have to press
Escape button when you want to create new point. Okay. Otherwise,
it will disturb. Now, it has been
selected successfully. If you will not
close your pin tool, then it will merge like this. Then press Escape button and
press Control Z for Undo. Okay. You have to close
your pain tool properly. Otherwise, it will disturb
your other design. Now let's create
another eyebrow. All the shapes should
be closed properly. Suppose I am creating eyes, then I have to make sure
that it is closed properly. Okay? Fine. Also, you can manipulate any
points location by pressing Control button on
your keyboard like this. Okay. So we have finally done. Now we have to create nose. So whenever you will start any different point in
different location, make sure to press
escape button otherwise, your paint tool will
irritate you like this. Press Escape button. Okay, fine. Now, let's draw you have to focus
on each detail. Now, let's create lipstick. Lips, sorry. Let's create. It should not be
open from anywhere. You have to close it properly. Press button to
close, pain tool. Press ace button to
close, pain tool. Press aka button. Okay, fine. Press ca button too close. Now let's create Nick. So I have selected
hand properly. Okay. Now, let's draw the mic. Close it. Press c button.
Press key button. Press ski button. Close it properly.
Press ski button. Now suppose you have to check
which part have you missed. Okay, so you have to go on right side panel and you have to hide
your original image. Then you will see sketch. And here you will see
some missing person which you have
missed by mistake, like her hair style or
right hand side, solder. Okay, so you have to cover this. So let's again create. Let's create solder. Okay, fine. Now, let's hide it. So we have created solder. And here, we have to create
some outline for her hair. Okay, so let's create outline. Let's press Escape button
and create another outline. This is Outline.
Press Escape button. This is how you can give detail and Okay. Now let's hide our track, and it is looking
actually awesome, right? Now, in the next video, we will learn how
to color our art.
21. How to Create Vector illustration art ( part 2): So in the previous video, we have already covered how to create vector
illustration outline. Okay. And in this
particular video, we will feel the
color in our outline. Okay. So first of all,
what do you have to do, you have to select all
the layers properly. Okay? You have to make
sure from the right side, all the layers have been
selected successfully. Okay? Now let's
right click on it, and here you will see
the option of group. And at the right
hand side section, you have to make sure that you have grouped all the layers. Okay? Now, what do you have to do? You have to understand that what is the advantage
of grouping. So if you will expand
the group folder, you will see many
curves of our drawing. So main advantage of
grouping is you can edit your drawing very easily. With a few clicks, you can change the color of all the curves present
inside this drawing. Okay, so this is the main advantage of grouping. Now what
do you have to do? Here, you will see
pixel layer Opson. Here, you will see
pixel layer Opson. So let's click on Pixel Layer. Now at the right hand side, you will see new layer
have been created, which is pixel layer. So you have to rename it.
You have to type color. COO, R color because
this is our color layer. With the help of this layer, we can draw color. Now you have to click on color. This is a pixel layer, and we have renamed
it to the color. Okay, now you have to
select this layer. And after that, you have
to go on pixel tab. Now you have to switch
to the pixel tab. Go on pixel tab and here you have to find
Flood field tool. Here you have to find
Flood field tool. So let's activate this
tool and make sure that and make sure
that inside source, you have to select
current layer and below. If you will not select
this, it will not work. Then don't forget to
select this option, current layer and below. Now you can put any
color in the vector art. Now let's fill black
color in here. So simply click on here. Let's click on eyebrow eyes. Okay. But here, there is a mistake. It is opened, I
should not be open. It should be closed properly. So in order to fix that, we will again go on vector tab. We will go on pencil or pen. We will join everything. But you don't have to forget to drag this new
curve inside group. Whenever you draw anything here, you have to make sure that you drag it inside group folder. Okay. Now let's go on pixel, select color field
tool, select color. And this is how it works. Now let's put color in phase. So let's select orange color. Oh little bit darker. No, no, no, no. Which color should I put here? No. No. So you can choose any color. Okay. Ears, neck, hand. Okay, so this is how you
have to apply color. Now, let's choose white
color inside eye. Inside teeth. And Make lips color red. This area should be black. Fine. Now, let's change
the color of mice. Mike should be this color. Low Make it dark. Make it black. Okay. This is how you can create amazing art. Okay. Also, you can select a very bright color like this and it is actually looking nice. So this is how you can
create amazing art. And if you want to
export it as PNG, then go on file, and here you will see the
option of Export. Click on Export, PNG,
and let's Export. Now let's see final output. So this is how you can
create vector art. And if you like this lecture, then don't forget to give
me good positive rating and comment so that I can motivate
myself. Okay, bye bye.
22. How to Create your own MOCKUP in Affinity: Hello, everyone. So welcome to all of you in my
full Master series. In this particular lecture, I will teach you
that how can you create mockup for any device? So if you don't
know about mockup, so with the help of mockup, you can change any image
in laptop or mobile. Okay, suppose I have
to change image, then I can simply
change it like this. Okay. So this is how you can
automate your daily task, you can replace your image. You can create your own
template in which you can change any image anytime. So this is called mockup. Okay. So let's see how to create it. Now, first of all,
you have to import those image in which you
want to create mockup. Okay, so I have downloaded
this particular image, and you have to make sure that image quality
should be high. So if I will zoom it, then here you will
see a smooth corner. But if your image is pixeltd, then here also you
will see pixels. So during the object
selection process, it will not look accurate. Okay. So first of all, you have to make sure that
you are using four K image. Okay. Image should not be blurry and it should
have sharp edges. Also, you can use
some website like image up scaler to enhance
the quality of image. And sometimes I will talk too much to clear your
design concepts. So kindly listen
it very carefully, otherwise you will not
understand anything. So I have divided the steps in very simple manner so that anyone can understand
it very easily. So first of all,
what you have to do, you have to select
is green area. You have to select this
white box sex sun. Okay. Basically,
you have to select screen area in which you
want to display your image. Okay, so this is our screen. So we have many tools by which we can select
desired person. So no matter what you
are using Pencil Tool, pen tool, or quick
select Sun tool, no matter what you are using. You can choose any tool
to select is green area. Okay. So first of all, let's go on Pixel. Let's go on Pixel. And here you will see first tool by which you can easily
select your screen area, which is Flood selection tool. Flood select tool. Okay, so let's activate it. And let's move our mouse and
click Left click button. Okay, so our screen area have been selected
automatically. So this was the first way by which you can select
your screen area. Okay. And don't
worry about that. I will cover all the methods. So whenever you have to
create mockup of anything, you have to select those area in which you want to display
your image simple. So no matter what you
are using which tool. Now after proper
selection of screen, just what you have
to do, you have to press Control plus Z button. Then at right hand side, you will see the duplication
of original layer. Okay, you should see this layer. So if I will hide
my previous image, then you can see that this is the duplicate image
of selection area. Okay. Fine. So we have a
two layer of I screen. Now what do you have
to do, you have to select first layer. You have to select first layer, which we have recently created, and you have to go on file, and here you will
see Place Opson. Here, you will see Place Opson. So with the help of Place, you can easily add
any image inside it. Okay. So let's click on Place, and let's select
any image. Okay. Now, let's click here. Okay. Now let's
drag and drop here. But now you will notice that it is not looking
good, actually. It should be inside the screen, but it comes outside. Okay, so we have to put it
inside our laptop screen. Then what we will do
just go on right side. And here you have two
different layers. This is a layer of image, and this is a layer of previous background which
we have recently created. Now what do you have
to do, you have to merge these two layer. So drag first layer
inside the background. After doing this, you will see that it is moving
inside the screen. Okay. Now, we have
to adjust the image. Okay. It is moving
inside the screen, but now we have to adjust it. It is not looking good. Okay. So now what we will do, we will rename this layer, first of all, screen. Okay, so this is a screen layer. If I will hide this, then
you can see the difference. This is a screen layer. Now you have to go
on filter section. Let's select screen layer
and go on filter section. Inside filter, you have to look for perspective
perspective. So with the help of perspective, you can easily
manipulate its shape. Okay, so let's
manipulate our shape. So here you will
get four point and you can adjust
these four points. Okay. Let's adjust four points. Okay. Okay, nice. Now let's press Escape button
to deselect the selection. So with the help of
some adjustment, with the help of
some adjustment, you can easily set it. By using perspective mode, you can make it more realistic. It is looking nice, right? Now, suppose if you have to
change the image, of Screen. Then what can you
do? First of all, you have to understand
that layer concept. Okay. So this is a previous layer. This is a original image, and this is acreenimage. Okay. Now you have to expand it, and here you will see two things image and
perspective effect. So you don't have to
touch perspective mode. You have to focus on image. So let's click on image. And whenever you
will click on image, here you will see the
option of replace image. Let's click on Replace Image. Now you can choose anything. Okay. You can manipulate
its save like this. Suppose if you have to
change the image again, then you will click
on Replace image. Let's select anything. And you can adjust
its size like this. Okay. So this is how you
can change image anytime. This was a shortcut method
to perform this activity, but there is one drawback of
doing this selection tool, which is, if you will zoom it, then you will see a
small pixelated layer. Okay, so if you
want to avoid that, then you have to use Pen tool to make selection
very accurately. Otherwise, it is looking fine. So no matter what you are using, which kind of selection tool, just you have to select
this Icrene area. So after selection
of Icrene area, the rest process is same. So I hope you enjoyed
this lecture. And if you like this lecture, then don't forget to give
me good positive rating and comment so that I
can motivate myself. Okay, bye bye. Don't forget
to give me good rating.
23. How to apply blur effect ( Depth of field ): In this particular video, I'm going to teach
you about how can you apply cinematic blur
effect in your image. So if you like bouquet effect, portrait effect, then
this videos for you. With the help of
professional blur effect, you can get stunning output. So firstly, I will teach you how can you select
your object and how can you apply blur effect. Okay, so let's start our video. Just you have to go
inside the pixel tab, and inside pixel, you will
see Object Selection tool. This is Object Selection tool, so let's activate it. Click on Object Selection Tool. After that, from the
right hand side, you have to select
those layer in which you want to
make any change. So let's click on background. And now you can see that it is automatically detecting
our character. It is automatically detecting
our character. You can see. From the now we don't need to
select any person manually. Okay, if I will hover
my mouse over this guy, you can see that it has
automatically detected its layer. Also, we can choose any
face from the public. You can see on screen, it is super easy to use. So this is a beauty of
quick selection tool. It will automatically
detect all the edges. And once you will select any
person, you can make change. You can easily make change. You can create a mask. You can
change brightness setting. You can crop this
person like this. Okay, so you have a
endless possibility. So whenever you have to
select anything in image, simply go on Object
Selection tool and click on that layer in
which you want to make change, and just hover your
mouse over the image. Okay. So now you can see that we can easily
hover over our image. So suppose if I have
to select Nikki Bella, then I will click on Niki Bella, and if I have to
select her background, then I can also select. Now you will ask me what is the advantage of
selecting background. So you can easily blur your background by
doing this step. Suppose you have to
blur her background, then how you will achieve that? Firstly, you have to select those area which
you want to blur. So we have already
selected our background. Okay. Now, if you want to apply the blur effect, then
what do you have to do? You have to select
this particular layer, and here you will
see filter Opson. So just go on filter, and here you will
see depth of field. So with the help
of depth of field, we can decide the
amount of blur. So currently it is
in elliptical mode. Okay, so let's
increase the radius. And you can see the
intensity of blur. With the help of this dot, you can manipulate its setting. Okay, so here you
will see two circle, here you will see two circle. One circle is outside, and one circle is inside. Okay. So with the help
of inside circle, you can set main focus area. And with the help
of outer circle, you can identify blur person. Okay. This is how it will work. So suppose I have to
make focus on her face, then it should be
under a small circle. Okay. Let's press Escape button and see it is looking
professional than previous one. If you want to change
anything, then again, you have to go on
this layer section. You have to expand it, and this is your setting
of depth of field. So simply double click here. And here you will
see some option. Like if you will
increase clarity, then let's see what will happen. Also you can apply blur
effect in straight line. Okay, so let's delete
this blur effect. Let's delete everything. Okay. Now again, go on filter. Again, go on filter, and
here go on depth of field. Okay. And from here, you can select mode, tilt shift. Now our blur effect is transferred into
the straight line. Now let's increase the radius. You can see it is looking more natural than the elliptical. That's why whenever you
have to use blur effect, you should use
tilt shift effect. Okay. Now, let's adjust the blur intensity
and its duration. You have to simply
manipulate its setting. Mm. So after some setting,
it is looking like this. Let's preview previous one. Let's unhide let's
hide the blur effect. So this was our original image, and let's enable
blur visibility. Then it is looking nice, right? Actually, you can
compare both the images. Now let's apply same
blur effect here also. So again, go on Object
Selection tool. Let's activate it and
select our image. And after that, we will
select our background. Okay. Now we have to select our background,
so let's select Okay. Now simply blur this. Go on. Depth of field.
Increased radius. So this is how you can add cinematic effect in your image. Let's use it again, again. Let's go on Object
Selection tool and let's click on image. And here you will notice that it is not selecting
whole background. Okay, so if you want to
select whole background, you have to Shift Key button
press Shift Key button and click on everywhere
in your screen. So it will select
all the portion. Jeff, you have to press Shift key button while
doing all of this stuff. Now let's go on filter
and depth of field, and you have to
apply same method. Okay. Also, you can
use tilt shift. Okay. Let's rotate this. And you have to make
sure that you are not using blur effect too much. Otherwise, it will look so bad. You have to use blur
effect in a small amount. Otherwise, it will
look unnatural. Similarly, I have selected
this woman image, and I'm applying radial
effect like this. So if quality of
image is very clear, then you will see
amazing result. See. It is looking amazing. In similar way, you can create many blur
effect. Same thing. Let's apply here, go on Object Selection tool and let's click on image and or the mouse. Simply select the
background area. It will not take too much time. Then go on filter, go on depth of field, adjust the focus point, adjust all point
according to your need, and increase the radius. You can see it is
looking very nice, and we have applied blur
effect within a 32nd. So it is very easy. Also, you can use tilt
shift if you want, and you can rotate. You can rotate it like this. Okay. And it is
actually looking nice. And you have to
make sure that you are not applying blur
effect too much. Otherwise, it will
look unnatural. Okay. Let's press the c
button and see the output. And if you want to
see previous one, then you have to go on
layer sexonEpand it, and this is a blur effect. So if you will hide this effect, you will see previous verson. So let's hide. So this
was our previous image, and this image is
after blurring. So this is how you can apply cinematic blurry effect
in your image and make sure that your image
should have high quality. If you are using blurry image, then you will not
see any difference. So if you like this lecture, then don't forget to give
me good positive rating and comments so that I can motivate
myself. Okay, bye bye.
24. How to Create Stunning Comic art from any picture: Hello, everyone. So welcome to all of you
in my full Master series. In this particular lecture, I'm going to teach
you how can you transform your image into this? So without wasting any time, let's start our video. And this video is going
to be very interesting, so you have to
watch till the end. So now let's start. First of all, open your image. Okay, so this is a
reference image. Now, I will activate Pain tool. And with the help of Pain tool, I will draw over the face. Okay, so you have to zoom. You have to zoom in screen. Okay. And after that, you have to draw each line
with the help of pain tool. This process can take too
much time, so keep patience. And trust me, you will
enjoy this process. You have to make it very slowly. Simply draw eyebrow.
Let's zoom it. This is how you can make
it more accurately. And trust me, this
is so satisfying. No matter what you
are an artist or not, you will enjoy this process a lot and you will thank me soon. If you are enjoying
this lecture, then don't forget to give me good positive
rating and comment. Trust me, guys, it
is so satisfying. Now let's create ice. Let's zoom it and
draw very slowly. So you have to focus
on each details. So it can be more
time consuming, but end result will
satisfy you a lot. Not only end result, you will satisfy with
the process too. If you are not an artist, then also you will enjoy
this process because here, creativity is not required. Just you have to draw
each line over the face. So we have created
eyebrows and eyes. Now we have to create nose. You can adjust the brush
size according to your need. It should not be too much
thin or too much thick. You have to adjust it
according to your need. And there is no boundaries, and there is no thumb rule
that you have to do like this. You are free to create anything. Now let's create lips. Okay, you can adjust
the thickness. It should not be too much thick. Actually, here you have
to use your common sense. If it would be too much thick, then it will look dirty. Okay. You have to draw
each line very carefully. Okay? Simply draw each line. Okay? You can hide the background so that
you can see a sketch. You can hide your background. Okay. Now let's draw here. Now let's create small
details like face lines. This is necessary for realism. Okay? So simply make it thin. Your lines should not be thick. Okay. So this is how you have to draw any kind of face line. Now we have successfully
created our E sketch. Now we will hide our background. Now you can see that our
E sketch have been ready. Now you have to
make sure that it should be closed
from everywhere, otherwise you can't feel color. So make sure that it is
closed from every part. Okay? It should be properly closed, otherwise you can't feel color. Now sketch have been
created successfully. Now it's time to feel a color. I have already shown you in previous lecture
how to feel color. So you have to
apply same method. What do you have
to do, you have to firstly lock your background, which is original image, you have to lock its
position because you have to select all the curves which
you have recently created. So we are locking our background so that
background will not move. Now let's drag our mouse
and select all the curves. If you will not lock background, then maybe your background
can move. Okay. You have to make sure
that all the curve have selected properly. You have to make
sure that everything are selected properly. Now you have to make a group. So in previous lectures, we have already discussed
about the group. With the help of group, you
can do editing in bulk. Just rename it sketch. You can rename it anything. Okay, so this is a sketch layer. Okay, this is a sketch layer. Now, from here, you have
to click on Pixel layer. You have to create pixel layer and you have to rename it color. You have to rename it color. So with the help of color pixel
layer, we can feel color. Now just what you have to do, you have to open field Color tool and you can
select any kind of color. Okay? Let's choose this color, and let's try to fill. But you will notice that it
is not working properly. Okay. So if it is not
working properly, then you have to select your sketch layer from the
right hand side panel. You have to select
your sketch layer and you have to click on convert it into the curves. Don't forget to convert
it into the curves. Okay. After that, you
can easily feel color. Now let's choose any color, and let's hide the background
so that you can easily see. Make sure that you have
selected color layer. Okay? So kindly
select color layer first and after that,
try to feel color. Otherwise, it will not work. Okay? So you have to make sure that you have
selected color layer. Okay. Now you can
feel any color. Okay? This is your creativity. You can feel color
according to your needs. Now, after filling colors,
it is looking like this. Okay. Now what do we have to do? We will enable background. So now let's unhide the background so that
we can see it properly. Okay? And it is
looking like this. Okay. Now we will apply
some filter effect. So scroll up and you will
see at the right hand side, this is a color fill layer. Now, this is a magic section. You have to select color layer, and from the filter tab, you will see many filter. You can apply any filtered, and it will look very awesome. You can choose anyone. From here, you can
apply filter. Okay. So this is how you will get cartoonist or comic look, okay? If you will use this method
to create your artwork, then you don't have to feel
gradient color in phase. It will automatically detect gradient section
like at some part, you will see shadows. At some part, you
will see dark skin. Okay, so it will auto detect. You don't have to
feel it manually. Just select any
filter from the here. And this is a final output, you can see the quality. If you like this lecture, then don't forget to give
me good positive rating and comment so that I can motivate
myself. Okay, bye bye.
25. Create Attractive Thumbnail, Poster or Banner ( Affinity Pixel ): Hello, everyone. So
welcome to all of you in my full Master series
on Affinity B Kanva. From this video, I will cover each and every tools of pixel. I have already covered
the all tool of vector, and from the NA I will cover
all the tools of pixel. So now let's talk about
what would be my approach. So in each videos, I will create something
new in which you will learn the proper
use of each tools. So let's create random things and explore all the
tools of pixel. So first of all, what
do you have to do, you have to open new Canvas. So simply go on files and select new document
and select any size. And from the Now I will cover each and every
tool of pixel. So first of all, for
demonstration purpose, let's create a rectangle. So with the help of my lecture, I will teach you each
and every tool of pixel. So let's create a rectangle. Now let's go on pixel. And here you will see Move tool. So with the help of Move tool, you can easily move the
position of your object. Also, you can rotate
your object and you can resize its width and size. So this is a very basic
feature of Move tool. This is not a rocket science. Now inside Move Tool, we have many tools
like perspective tool. So let's activate it. And with the help of perspective tool, you can easily
distort your shapes, and it is not limited
to shape only. You can apply same
effect in text also. So let's adjust its position. Now I will use Text tool. So let's write something here. That's type creativity. Basically, I want to type. Creativity is my power. I'm going to create banner. So, first of all, let's
change the Fonte style. Let's change font style
bold, and from here, you can select impact
or any other font. Now let'ssize it. Before doing anything,
let's change the color. So let's go on vector. And from here, you
can select your text and you can now go on pixel. And here we are going to apply
same effect in our text. So let's go on Move tool. You have to write,
click on Move Tool and click on Perspective Tool. Now we have different nodes, so you can move it and
manipulate your design. Is very simple. So it is
actually looking nice. You can apply this effect while creating thumbnail
or poster design. So this was a perspective tool. So with the help of
perspective tool, you can distort your
shapes, text or anything. So let us create another
rectangle and again, go on perspective tool. This is how you can play
with all the tools. Now again, go on text Tool and simply type E. I want to type. Creativity is my power. So let's type. Let's select Move Tool and drag it
inside this black box. Now, again, we will
activate perspective Tool, and this is how you can
play with your design. It is actually
looking nice, right? Now let's open new canvas
and create rectangle. And here I will teach
you different tool. After that, we will again
go on our previous design. So first of all, let's create
rectangle and go on pixel. And here you have
a mass War tool. So this tool is a little
bit like perspective tool, but it is more flexible
than perspective tool. So your perspective tool
move in linear direction, but it will provide
you flexibility. So whenever you have to
design flexible things, you should use mass Warp tool. Suppose if you have
to create a flag, then you can use mass Warp tool. So perspective tool moves
in linear direction only, but mess work tool is a little
bit flexible than this. So now, similarly, let's
type anything here. Let's activate text.
Let's activate text, and type is now make it large. Now, let's use
perspective tool first. So as you can see that,
you can distort your text, but in linear direction. But if you have to
manipulate it more flexible, then you have to
use mess W Tool. So with the help of this design, you can create poster, banner, or thumnil and it
will look so creative. So mess W tool is
a little bit more advanced than the
perspective tool. Now, what we can do,
we can copy this, and let's go on our previous
design and paste it here. So let's adjust its position. And if you like this lecture, then don't forget to give
me good positive rating and comments so that I can motivate
myself. Creativity is my. Again, go on pixel and
activate mesh tool. That's activate mess Warp tool. So this is how you can
manipulate with your design. So whenever you
will use Affinity, you have to think very openly. So after adjusting, it
is looking like this. Now let's type power. Creativity is my power.
Let's select the color. Creativity is my power. Let's move it, make it large. And from the filter
or effect panel, you can change its look. So first of all, let's
adjust its size, and after that, from the here, you can make it soft light,
difference, average. So you can apply any filter, and it is not necessary. So after the proper
adjustment of text, now let's open new image, now here you have
to cut Niki bell. So you have to click on Object SelexonTol and I have already covered what
is Objectslex and Tool. So with the help of that tool, you can easily identify all the edges of your character
and you can cut it out. So now let's click on Refine
with the help of Refine. You can refine all the edges of your character.
So let's refine. You have to drag your mouse by clicking left
button on mouse. You have to move your mouse over all the edges of your
character like this. So after applying refine,
click on Apply button, and now we can use Move tool, right click and copy and paste
it in our previous design. Press Control plus T
button or activate move tool to adjust its size. You can adjust it like this. So after the proper adjustment of everything, it is
looking like this. And from this layer, you can change its effect. So simply go on adjustment
and go on recolor. And this is how you can
create amazing design. This is how you
can create poster. Now you can play
with all the tools. Basically, you have to explore some tools or filter
effects by yourself. Just do some experiment, otherwise, how you will
get re creative result. Okay, you have to apply each and every filter.
You have to taste it. I'm randomly applying
filter effect from here. So let's go on glitch. So you have to explore each
tool in experimental manner. So let's apply glitch effect. And it is currently applying
on Nikibla layer only. But if you want to
apply in whole layer, then you don't have to
select any specific layer. So simply click on Glitch. Now it is looking nice. So you have to do some
experiment by yourself.
26. How to Add Texture or image inside the Text in Affinity: Hell, Hello, everyone. So welcome to all of you in my full Master
series on affinity. So in this particular lecture,
I will teach you that, how can you create amazing
text effect like this. Okay? Also, you can change
its texture anytime. Just go on replace
button and you can simply change its texture. So in this particular video, I will teach you how
can you achieve that. So without resting anytime, let's start our video. So first of all,
let's open new tab. And let's type something, go on Text tool. Just go on Text tool, activate your text tool, and type something.
Make it large. Creativity. Let's
type creativity. Okay. Now you can
change its font. Okay, fine. Now let's
click on creativity layer. So let's click on
creativity layer. Then here you will
see two small circle. At the top right side, you will see two small circle. So black circle represents
the color of text, and white circle is stroke. Okay. So suppose if you have
to change the color fill, you can change the color. But if you want to
make it transparent, then you can click
on set fill Nun. So click on set fill Nun. So it had been
transparent, okay? And if you want to set a stroke, then you have to
select this circle. Okay. Now you can easily
select the stroke. Okay? And from here, you can set its creativity. Okay, fine. Now suppose here
you have to apply texture. Okay, then how you will do that? So first of all, what
do you have to do? You have to go on vector. You have to make sure that
you are in vector tab, and here you will
see one option, which is place tool. So let's activate Place tool. Let's activate Place tool, and you have to download any kind of
texture which you want. So suppose let's use this one. And use mouse click to drop it. Let's adjust its size. Okay? Let's adjust its size. Okay. Now you have to look
towards the layer section. Here you will see
two different layer. First layer is our Earth image, and second layer is creativity. Okay, so just what do
you have to do you have to drag your first layer
inside the creativity layer, which is our original one. So let's drag and drop
towards the creativity. Okay. You have to put it
inside the previous layer. Okay. Now it is
looking like this. Now suppose you have
to adjust Okay. Suppose you have to adjust
texture inside the text, then how you will do that? Here, you have to expand it. After that, you
will see UR image. So suppose you have to
adjust its position, so simply select
your texture image, and now you can resize it
according to your need. Okay, you can resize it. And suppose if you
have to change the texture, then how
you will do that. Again, you have to expand creativity tab and here
you will see your image. And at the top side, you will see replace
image Opson. Let's click on Replace Image. Now choose any texture. See. Now you can
easily adjust it. Okay. You can adjust
it like this. Okay. Okay, fine. You can again replace it. You can choose any texture. You can choose any
texture like this. It is looking amazing. Let's use another one. Click on Replace image,
and add anything. Let's use my wallpaper. Oh, wow. It is looking so amazing. Okay, so this is how you can
create amazing text effect. You can use this effect while creating thumbnail
for your project, or you can create poster
with the help of that. Okay. So also, you
can change the font. So if you have to
change the font, then you will click
on creativity layer. Okay. Just to have to
play around the layers. Okay. Suppose if you
have to change the text, then you will click
on text layer. Suppose you have to
change the texture, then you will click
on texture layer, simple. It is very simple. Whenever you have to
apply any kind of change, you have to make sure that you have selected respected layer. Suppose if I have to change
anything related to the text, then I will make sure that my text layer is selected
properly from the here. Okay. And suppose I have to
change the texture or image, then I will make sure that my
image is properly selected. Okay. So now, suppose you have
to change the font style, then how you will do that, you will click on
creativity because this layer is our font. Okay. Now here you
will see many options. You can change your
font from here. Okay. You can use any font. This one is also looking good. Okay? With the help
of same method, I will teach you how can
you create thumbnail. Okay. You can use this also. Okay. And let's use impact
because it is very bold. Okay. And in previous lectures, I have already discussed
about the pixel tool. So let's go on Pixel tool. And here you will see
perspective tool. I have already covered that. So let's use it and
make it like this. Okay. Creativity,
creative, witty. So, guys, if you
like this lecture, then don't forget to give me good positive
rating and comments so that I can motivate
myself. Okay. So I have designed each
lecture in such a way by which I can introduce you all the features
of each tools. So for better practice,
what do you have to do, you have to follow
each lecture as it is. Just you have to use
some different image, you have to use some
different font or text size. Just you have to follow
each lecture as it is. I don't know if you like my teaching style or not,
but this is my style. My approach is very simple. I will simply teach you everything while creating
any kind of project. So, guys, if you really
enjoyed this lecture, then don't forget to give me good positive rating and
comment. Okay, bye bye.
27. How to Transform any simple image into the poster ( part 1 ): Hello, everyone. So
welcome to all of you in my full Master series
on Affinity B Canva. So in this particular lecture, I will teach you that
how can you transform any simple image into
the poster like this. So without wasting any time, let's start our video. So first of all, let's open affinity and let's go on file, click on NU, and select
any Canvas which you want. You can choose any
resolution for your poster. So this is a blank vas. Now we have to add image. For demonstration purpose,
I'm using this image. You can use any image
for poster making. You can use your own image. Now, first of all, what
do you have to do? We have to remove the
background of the character. So we have many ways by which we can easily remove background. In my previous
lecture of affinity, I have already teach you how can you remove the background
of your character. I'm not going to
repeat it again. Instead of doing it manually, you can use any kind of website which can
remove background. So no matter what you are manually removing
your background, or you are using any
website to remove it. Okay, so here we're going to use website to remove
our background. So let's select Nikki B. And finally, our background have been removed successfully,
you can see that. Okay. Now you can download it. Okay. So image have been
downloaded successfully now. Now let's go back
to the affinity. Now we have to add
image in Canvas. So here you will see
one option Place tool. So let's click on Place tool. Simply select your
image and let's click with the help of mouse and you can
adjust its position. Okay, let's adjust. Okay. And you can watch
this video at the 1.5 X speed because my teaching
speed is little bit slow, so you can use 1.5 X in speed. And if you want to edit your
image very systematically, then you must rename
your H files. So let's rename this
file Nikki pace. Okay. Now we will easily
understand it. Now, first of all, we have to transform it into the
black and white image. So let's select Niki Bella layer from the right hand side, and after that, here we will get one option, which is adjustment. So inside the adjustment, we will see black and white. So let's activate it. Okay. Now you will get this bar. Okay. Now what do
you have to do? You have to reduce
red color like this. It should look natural. Okay? So you can increase or decrease it
according to your need. I think this is looking good. Okay? So Okay. Now here you can see that we
have two different layer. First layer is Nib face, which was original image, and this layer is black
and white effect. Okay. Now what do
you have to do? We have to drag black and white adjustment layer inside the Nkibela face layer. Okay. Now, it will look like this
if you will expand it. Okay. Okay. Basically, we have
combined both the layers, Effect and Nikibfas. Okay. Now let's select this
layer, Nikibafas. Let's select this
layer and go on pixels new live filter layer. And here you will see colors. And inside the colors, you have to go with this option. Woro War on OI. I don't know how
to pronunciate it, so you have to go on Voronoi. Okay. Now, you have to
decrease the line width like this and you can
choose the cell color. So let's keep it two. Okay. You can adjust
according to your need. So if you will zoom, it
will look like this. Okay. Okay, fine. Now
what do you have to do? We have to add text. So simply go on Text tool
and let's activate it. Okay? And let's type creativity. Creativity. You can change its font. You can change its font. So let's make it impact. You can download any new font. Okay. Okay, fine. So let's adjust it. Now, with the help
of rotate tool, you can rotate your text like
this and let's resize it. Let's resize. And let's cover half of her face. Okay. Okay, fine. Okay. Now finally, we have
two different layer. First layer is Nikki Bella face, which was our original image
with black and white effect. Okay, so this is a first layer with black and white effect. And this is a brand new layer, which is a text layer. Okay, so this is a
creativity layer. You can see that. Okay. Now
what do you have to do? You have to make the
duplicate version of Niki Bela layer. Okay, so simply right click on Niki Bela
layer and duplicate it. Okay. So this is a new layer
and this was a original one. Okay. So now let's rename
this Nikki Bela New. You can type anything. Okay. Now let's drag it
above the sorry, drag it above the
creativity layer. Okay. So now, your layer structure
should look like this. Okay. Okay. Now what do
you have to do? You have to hide first layer. You will understand
this after some time. Okay? So first of all, let's hide this layer. Let's hide this layer. Okay. You will get it while
I'm doing this. Don't worry about that.
You will get whole point. Okay. So first of all, let's hide first layer. Okay. And this part is
a little bit tricky. That's why you have
to pay attention. And if you don't
understand this, then you can ask me or you
can watch this video again. Now, what do you have
to do? You have to select original Nikki
Bela face layer. You have to select
that layer. Okay. And after the selection
of this layer, you have to activate
Path Brush tool. Okay? And if you have to
change your brush, you can go on Path
brass and you can select any round
pastel brush layer. So let's select anyone. Okay? And you can
choose any color, no matter which
color you are using. Okay? Now, what do
you have to do? This is a main important
part. So let's zoom it. And now you have to cover Nkibla here like this. So basically, with the
help of brush tool, you have to cover half portion
of your image like this. Okay? I think you got my point. Now, at the layer section, you will see that I have created three curve layer
to cover her face. This is first layer, this is second layer,
and this is third layer. So I have used three
different curve layer. Now, for demonstration purpose, I will make its group. This is a bras layer, let's rename it brass. Okay? And now you
have to make sure that breast layer should be
about the Nkibla phase layer. Okay? Because we have to
apply effect in breast layer. Okay? That's why it should
be about the Nikibe layer. Okay. So this is a breast layer which contains
three different curve. And maybe in your case, there could be eight
to nine curves. Just you have to cover
half of the portion. Okay. Okay, fine. Now what you have to do,
you have to apply effect. So let's click on Bass effect, and you have to make
sure that brass layer should be above the
Nikiblahas layer. Now what do you have
to do, you have to go on here and scroll down. Scroll down, scroll down, and here at the end, you will see eras option. So with the help of eras option, you can remove those area which you have covered with
the help of brass. It is a little bit mask. It is a little bit like masking, but we are doing in a
very different way. So let's click on eras. Okay. So finally, our effect have been
applied successfully. Okay.
28. How to Transform any simple image into the poster ( part 2 ): Now you will think about that. Why we have duplicate
this layer. Okay. So now what
do you have to do? You have to unhide this layer. Okay? Now you will get my point, why we have duplicate this. So first of all, what
do you have to do? You have to unhide first layer. Okay, so let's click on Unhide. Okay. Now our current image is looking like this. Now
what do you have to do? We have to drag Nikki Bella
face inside the text. So what we will do, we will drag first layer
inside the text layer. Now it will look like this. Okay? So basically,
what we have done here, we have drop our image
inside the text layer. You can see that. Okay. Fine. Now, this is a creativity layer, which is a text layer. You can hide or and this. Okay. Now we have to
apply some effects. So let's click on
it and go on FX. And inside the ec, you will see outline
Opson you can increase the outline and
you will see outline. Okay? Now you can
use three defect, outer glow, so you can
play with settings. Okay. So it is looking like this. Okay, fine. Now let's select all the piles and
make it in center. Okay. Now we will create
rectangle in her eyes. Okay? Let's choose
the color pink. H. Now you have to
click on rectangle, and here you will apply some effect like
multiply color bun. Okay, so basically, you
have to apply some effect. So let's choose darken. I think it is looking good. Okay. Let's choose
this one. Okay. Now let's use paint tool. You can also change the color of lines and make it a
little bit thicker. Okay. Now you have to select
Niki Bela phase layer. Now you have to select
Niki Bela pace layer like this and go
on filter effect. And here you will see color. Let's scroll down. And here you will see color. So let's select on color. Okay. Now what do
you have to do, you have to use Brush tool
to add some color effect. Okay, so let's go on Path Brush tool and
let's adjust the size of brush a little bit larger and choose any
color which you want. So we will use same color, same purple color, okay? So let's fill this. Okay. Now let's go on
effect and choose it, uh multiply or darken. Okay. Now we have to make we have to add color
in a text part also. So let's go on creativity layer. Let's click on creativity
layer from the layer section. And again, we will go on effect, and here we will choose color. And again, we will
add same color here. H. Okay, fine. Now we have to
apply darken effect like this, and it is looking like this. So finally, we have
created this image, and it is looking nice. Okay? And you have to create your own project like
this and you have to send me in project submission
section so that I can review you are working
on your self or not. Okay? Now let's export our file. So let's go and export, select PNG and export our file. But Okay. So finally, we have created amazing image with the
help of affinity by KvA. And if you have any doubt, so you can leave a comment. And also, you can rewatch whole lecture because this
was a tricky lecture. So it will clear your concept
related to photo editing. Okay? So I will
recommend you to watch this lecture again
for better practice. Okay, and don't forget to create your own project on
the basis of this lecture. Okay, and you have to
submit your project. Okay. So, Okay, guys, if you enjoy this lecture, then don't forget to give
me good positive rating and comments so that I can motivate
myself. Okay, bye bye.
29. How to do Color correction In Affinity: Hello, everyone. So
welcome to all of you in my full master
series on Affinity. So in this particular lecture, I will explain you what is color correction and
what is color grading. So if you are new in
photo editing field, then you don't have
to worry about it. I will clear your all
concept very easily. Okay, so let's start our video. So first of all, let's understand
about color correction. So whenever you will
take any picture from your DSLR or phone camera, either it will look like
little bit warmy or cold side. In my background, you can see the mountain image first image is looking like cold and another one is
looking like warm. But we don't want too much
cold or too much warm side. In a color correction, we edit our photo in such a way so that it can
achieve more natural look. So color correction
is a process where we correct all the colors, tones, brightness,
contrast, levels. We edit all of them so that we can achieve
more natural look. Here, you will see
two different image. First image is raw footage, and second image is our
color corrected image. Actually, you can compare both the image before and after. This is a before image, and this is a after
color correction image. Okay. It is a little bit inclined towards the
warm side, okay? And it is a little bit fed. You can see. You will notice one thing that
color is looking awesome. So in sort, color correction
is a process where we edit our photo in such a way so that we can achieve
more natural look. So now let's understand
quickly how to do that. So, guys, behind me,
you will see one image, and it is looking like little bit worms and
too much brighter. Okay, so we have to fix it. So first of all, what
do you have to do? We have to select
our image layer, and we have to go on adjustment. And after that, we
have to go on levels. Okay, so here you
will see graph. Let's click on red. And here you will see one thing. This is a gap which
we have to fill. So this is an empty area. This is a empty area
which we have to fill. Okay, so you have to drag black level towards
the right side, like this. Okay. You have to apply
same thing with all colors. So let's click on green color. Again, here you
will see a big gap. Okay, so you have to cover this gap with the
help of black level. Just move your black level towards the right
side like this. Again, go on blue color, and here you will see small gap. Here you will see small gap. Okay. So let's increase
black level a little bit. Okay. Now, you have
to click on Master, and here you will see small gap. So let's increase it
little bit. Okay. So we have applied all
the effects successfully, and it is looking like this. So let's hide effect layer. This is a effect layer. This is a effect layer. So let's hide this to see previous one. Okay, so let's hide this, and you can see the
enhancement in our new image. Let's hide and hide it. Okay. And you will see
you will clearly see the quality that we have
achieved after editing. Okay. If we look towards
the previous image, then you will see it is
looking like too much FD. Okay. And finally, we
have fixed FD tone here. Okay. Now let's apply same
setting with another images. Okay, so let's
select this image. Okay. Here we have
to apply same thing. Let's click on background, go on adjustment, and
go on levels. Fine. Let's go on red color and
you have to fill this gap. So let's increase black level
towards the right side. Similarly, go on green color. Again, you have to
avoid this gap. Drag your black level
towards the right side. Okay. Go on blue color. And here you will again
see the small gap, so increase black level. Okay. Now go on master, and here you will see small gap. So again, increase black level. So after applying
all the effects, our image is looking like this. Okay. And here you can
see the quality of color. It is looking like proper black. Okay. But if I will
hide my effect layer, then you will see
previous version, and here you will see
dullness in our image. Here you will see
dullness in our image. Let's anhyde and here you will see the quality of a color. This is a part of
color correction. Same thing we have
to apply here. Okay? So let's click on image, go on adjustment,
again, go on layers. Sorry, levels. Now we have to
click on red color. We have to cover this
small gap, okay. So let's increase it. Okay. Similarly for green color, let's cover this gap. Similar for black color, blue colour, increase it. Go on master,
increase black level. Okay. So if you will
compare with original one, you will see clear difference. Our new image is looking
like more vibrant. Okay. In previous image, you can clearly
see the dullness, which we have removed
after editing. Okay, guys, now I will
teach you how can you do color correcton
with the help of car. Previously, we have
learned about how can we do color correcton
with the help of levels. But now we will learn same
thing with the help of curve. Okay, so let's open Affinity. Okay, and let's
delete this effect. Okay. Okay, fine. Now you have to select image, go on adjustment,
and at this time, you have to go on curve. Okay. And here you have
to follow same thing. You have to avoid the gap. Okay. So first of all, let's click on red color. Okay. And here you will
see a small gap. Here, you will see a small gap. You have to cover this gap
with the help of this point. Okay. So let's drag this point towards the
right side like this. Now similarly go on green color. Here again, you
will see small gap. You have to move your green
dot towards the right side. Similarly, go on blue color. Again, here you will
see a small gap. So you have to drag blue
color towards the right side. Now, Go on master, and here you will
again see small gap. So increase it. Okay. And last but
not the least, you have to make a design. You have to make a
design in master carve. So let's increase it little bit and let's decrease
it little bit. It is looking like S. It
is looking like S. Okay. It is looking awesome. Okay. Let's compare color corrected image
with original one. So let's hide this effect, and you can clearly
see the quality. So this is how you can
apply color correction. Okay. So let's
repeat same process. Click on image, go on
adjustment, go on curve. Okay. And here you
will see small gaps. So let's increase the red
color to fill the gap. Let's increase the green dot. Let's increase blue dot. Let's go on Master, increase it and make a little
bit increase it, and little bit decrease it. Okay. Now you will see the
color corrected image. You can hide or unhid. You can clearly see the quality. You can clearly see
before and after image quality. Okay, guys. Okay, guys, so if you
enjoy this lecture, then don't forget to give
me good positive rating and comments so that I
can motivate myself. Okay, so in the next video, we will learn about
color grading. Okay. Bye bye. Don't forget to give me
good positive rating. Okay.
30. How to do Colour grading with reference image: Hello, everyone. So
welcome to all of you in my full Master
series on affinity. So in this particular lecture,
I will teach you that, how can you do
color grading with the help of any reference image? Okay. So let's open affinity. Okay. So first of all, I will tell you
what does it mean. Suppose you have to
edit this image, okay? And if you have to copy the color set used
in any other image, suppose if you like the
color combination of this image and if you have
to apply same filter, same effect over your project. Okay, so what you will do? First of all, you have to copy those image from which
you have to take effect. Okay. So let's copy this image, and let's go on our project
and paste it over here. Okay. Okay. Now, let's increase the size and
adjust in our frame. Okay, fine. Okay. I renamed both the layers so that you can understand it easily. Okay. So here I have renamed
original and reference image. Okay. So original layer
is image which I have to edit and reference images from which I have to
copy color effect. Okay. So first of all, you have to decrease the opacity of reference image a little bit. So let's decrease it slightly. Okay. Now what do
you have to do? We have to merge the pogison of sunlight from
both the images. Suppose this is my
original image, and above this, we have another
layer of reference image. So we have both the layers. Okay. So basically,
what do you have to do? We have to merge the pogison of sunlight of both the images. Okay, we have to
merge the pogison of sunlight of both the images. Okay, so let's increase the
opacity of reference image. Okay. Firstly,
let's decrease it. Okay. So in our original image, you can see the position of sun. This is a position of sun. This is a position of sun. Okay. So what do you have to do? We have to move our reference image so that
it can achieve same position. So let's move it over
the sun posison. Okay. Now let's decrease the opacity and now
you can see that you can see that the position of sun in the both
image is same. Okay. Now let's
increase the opacity. Okay. Now we have a two layer, reference image layer is
about the original layer. Okay, fine. Now what
do you have to do? You have to apply filter
in reference image. So let's go on filter, and here you will
see Gaussian Blur. Gazian blur. Okay. And you have to increase it's radius. Okay. Fine. Let's increase the radius. Now you will see this
layer. Here you will see. If you will expand it, you will see reference image, and inside reference image, there is a Gaussian blur effect. Okay, so this is a single layer. Okay. Now you have to click on reference image and you have to apply some overlay soft light, hard light, vivid light. Okay, so let's select hard light and just
decrease the opacity. And you can see effect have
been applied successfully, you can see the quality. Okay. So if you will
hide reference image, you will see this is
a previous image. Okay. And you can clearly see
the quality of a new image. Let's apply another effect. Let's go on vivid light. It is also looking nice. Let's decrease the opacity. Okay. So basically,
what you have to do, you have to play with
all the settings. You have to play with opacity. You have to play with
filters so that you will get new picture. Okay. So let's hide this. This was a previous one. And this is a edited image, and it is looking awesome. Again, go on vivid
light, soft light. Okay. So I will mention the image quality
in all filter. Okay. And you can clearly
see the quality, how you will get the quality
after doing this step. So, guys, if you
enjoyed this lecture, then don't forget to give
me good positive rating and command so that I can motivate
myself. Okay, bye bye.
31. How to create a Shin Chan using pen tool ?: Hello, everyone. So welcome to all of you
in my full master series. In this particular lecture, I will teach you
how can you make your own cartoon in Affinity. So without wasting any time, let's start our video. So here I will teach you how can you create Shin Chan
in your Affinity. So for reference, I
will use this image. So I will copy this image. Let's copy and go on Affinity. And here I will paste with the help of Control
plus B button. Now, what I can do, I can use Move Tool and
resize it like this. Okay. Okay, fine. And here we will use pain
tool or creating He elements. Okay? So first of all, let's reduce the
opacity of a Ikech. Okay. So let's reduce this. I think 30% is good. Okay. With the help of Control button and your
mouse scroll button, you can zoom in or zoom out. While pressing Control button, you can zoom in or
zoom out with the help of mouse scroll button. Okay. Now here we
will use Pen Tool. So first of all, let's
activate Pen Tool, and here you will
see first thing, which is pain mode. Okay. So let's activate this. And let's zoom it. Okay. Now what do
you have to do? You have to draw your pain
over the inchin sketch. Okay, so I will
assign first point, and I will assign second point. Now, you can see that it has
created a straight line. Okay, but we don't want that. So we have created a straight line with
the help of two point. Okay. Now I have to
make a curvature. So what I will do, I will press Control button
on my keyboard, and now you will drag
your line like this. Okay. Similarly, what I will do, this is my first point, and this is my second point. Again, I have created
a straight line. With the help of Control button, I can make curvature like this. Okay. You have to
follow same path. This is your first point, this is your second point. So just click here and with
the help of Control button, make little bit curvature. Let's zoom here. This
is your first point. This is your second point. With the help of Control button, you can make a curvature. Okay, so you have to
follow same thing. You have to follow same thing until you created whole diagram. Okay. So you have to
follow same thing. In whatever element
you will create, it should not be open
from the any end. So for an example, I have started drawing
from this point, so I will end my drawing
at this point too. Okay, it should be
closed properly. Otherwise, we can't feel color. Okay. So let's create
multiple points. C, you have to assign
multiple points and you can give curvature with
the help of Control button. This is a whole
process. You have to repeat process every time. Okay. Now I'm going
to close this. You have to click here. You can see that here we
have a gap, small gap. Okay, so if we will
not cover this gap, then whenever we
will feel color, it will not apply correctly. So for better practice, you have to press
Control button and you have to join
both the points. Okay? Now, this is your drawing. Now what do you have
to do? You have to select all the elements
which you have created. Okay? All the elements have
been selected properly. Now you have to go on
Shape Builder Tool. This is a Shape Builder Tool. So you have to activate this and you have to click
on Plus button. And after that, when you will hover your mouse
over the drawing, then it will show hatching line. You have to use Plus button. Okay, hit the entire button. So this will assign
all the saps. Okay? So when you will
assign all the saves, you can easily feel color. Okay. So if you will
do any mistake, like, suppose you haven't
closed your shape properly, then it will not work. Okay? So you have to
notice one thing. You shape should be
closed properly. Otherwise, it will
not work. Okay. Now it's time to field color. So now let's press
Escape button. Okay. Okay. So I
selected this one. I will select this one with the help of Bob button.
I will select this. And here at the top
right hand side, you can see set fill options. So currently, there
are no color. So if you will go
inside set fill, then you can feel
any desired color. So let's feel color
orange, red, sorry. Now, let's feel color here. Similarly, you have to
use move tool, paint. You can assign any color. Okay. So you can feel any color. So similarly, you have to
feel color in every place. Okay. And suppose if you have to add a
black stroke effect, then what you can do, you
can select this ESRT. And suppose if you
have to add a stroke, then here you will
see at stroke option, so you have to click
on that circle. Okay. And with the
help of stroke, you can increase the width. You can increase the width. Okay. And you can set a color. So I think it should be black. So similarly, you have to apply Stroke in each
and every element. Suppose you have to
apply Stroke in lag. So you have to select those area and you have
to go on Color sexon. And here you will
click on set Stroke. Then you can increase the width. Similarly, you have
to add a stroke, and this is how you
can feel a color. Okay. Suppose if you have
to add a gradient effect, then what you can do,
you can go on Fill Tool, and now you can assign
two different point. And between these points, you will enter gradient color. Okay. So if you will
click on color, then you have a two different
point, two different point. You can change the
color of each point. Suppose, at this point, if you will select black color, then it will look like this. At this point, if you will select yellow color, then
it will look like this. So this is how you can add
a gradient effect also. Okay. So now let's fill the
color in all the element, and let's see how
it will look like. And finally, after a
small amount of effort, I have created this one. Okay. So here you can add
sado gradient effect. Okay. But this is how you
can create your own cartoon. With the help of Affinity. Okay. And you can use same
method or creating logos. Okay. So if you
enjoyed this lecture, then don't forget to give
me good positive rating and comment so that I
can motivate myself. Okay. Okay, guys. Bye bye. Don't forget to give me good
positive rating. Bye bye.
32. How to use Vector Blub Brush tool in Affinity ?: So finally, guys, we
are in blank space of affinity and we have a new tool called vector Blob Brush Tool. With the help of this
tool, what you can do, you can create any
straight line curvature. Basically, you can
create any shape, and it will convert into
the single vector format, which you can edit very easily. You can add a color, you can feel a color,
you can change a shape. So it will treat it like
single file or single object. So let's activate
vector blob tool. Okay, let's try to
draw something. Okay. Let's try to
draw something. Now you can see
that it is treated as single vector image
because we can resize it. We can resize it. Also, if you have to change the
shape of any area, then with the help
of Control button, with the help of control button, you can easily manipulate it. Just you have to
press Control button on your keyboard and you can give a proper curvature
which you want to. Also, you can change the
color of this vector. Let's select all of them, go on color, and from here,
you can change the color. Now let's create something.
Let's create something. Again, I will activate vector blood tool
and let's zoom out. What should I create? Mm You can draw anything, and it will convert into
this single vector file. Obviously, if it will convert into the
single vector file, you can feel a color
in any specific area. Okay. H. At the right hand side,
you can see that it is converted into the single layer. You can see the detail. Suppose if you did any
mistake like this. Then also we have a vector blob eraser tool by which you can erase
the defective part. Okay. So suppose we have
to delete this part. Okay? So what we will do, we will again go on
vector blob brush tool. And here, if you
will right click, then you will see vector
erase brush tool. So let's select that area. Okay? Or from here, you can select a SAP. Okay, so if you
will select round, then your sap will look round. Okay. But I think we
should sell it square. Now it is working fine. This is how you can
delete a defective area. Again, activate vector
blood Brush tool. Okay. So actually, I'm trying to create a scene chan Ooh. Okay. Now I can feel a color. As I have already told you that our design have been converted into the single vector file, which means I can feel
a color in any place. For that, just what
do I have to do? I have to select my
whole area and I will go on vector flood field tool. Let's activate this tool. And from here, you
can choose any color, and you can simply drop
your desired color. So let's select
little bit orange. Drop. No, no, I think it
should be a little bit light. Little bit light color. Okay. Okay. So this is how you can create
a vector image by yourself. Okay? This is a beauty
of vector blob tool. So the main benefit
of vector blob tool is whenever you will create anything with
vector blob tool, then it will consider your whole design as
a single vector file. So that means you can
feel any desired color, you can change the shape. Okay, you can edit
required part. Okay, we can easily
manipulate it. And whenever we have
to change the color, we will simply go on
vector flood fill tool and whatever color
we have to add, we can easily add
Okay. See. Okay. So this is how it will work. Okay. So if you
enjoyed this lecture, then don't forget to give
me good positive rating in comment so that I can motivate myself.
Okay, guys. Bye bye.
33. How I Create LOGO for my Own Software ?: Hello, everyone. So welcome to all of you in my full Master
series on affinity. In this particular lecture, I'm going to create a
logo for my own Ic app. Basically, I have created my own screen recorder
app for my personal use. So I need to create a logo
for that particular software. And before starting our video, I would like to
say you something. If you want to create
your own app or software or AI tools
with the help of prompt, then you can visit
this lecture series. After watching this
lecture series, you will be able to create or publish your own
app or software. Okay, guys. So right now, I'm going to create a logo for that particular
screen recorder. So my screen recorder name
is Anki recorder. Okay? So first of all, let's go
on Text tool and let's type anything Anki k. Now, I will double click on it, and from here, I can
change its font. Okay. So I can choose any font. From here, I can make it bold. Okay, guys, and
let's make it black. Okay. Close it. Okay. K recorder. Now I will type second
text, which is recorder. Let's reduce the size of text. Let's make it thin. So, guys, I'm using this text, and let's reduce
the color opacity so that it will look aesthetic. Okay. Let's adjust its position. Okay. And now let's go on Google and I will
download icons. Okay. Okay. Now I
will copy this image. I will paste it here, and I
will adjust its size. Okay. Let's make a circle. You can change the
color of circle, but I think we should use
red color here. Okay. If you have to change
the color of circle, then what you will do you
will click on Circle, and from here, you
can change its color, but it should be red. Okay. So this is a recorder. Now, I will combine all of
them into the single group. I will select all the layers
with the help of Shift key and I will click on group. Okay. Now our file has
been created successfully. Now it's time to
export our logo. So whenever you are going
to export your logo, you have to make
sure that you are saving this file
into the SVG format. Because with the
help of SVG format, you can export your image
in high quality, okay? And also, whenever whenever you will increase or decrease, the size of your logo, quality will not reduce. So this is a beauty of SVG file. So that's why if you are creating logo for
your app or website, then you need to export
your file as PNG or SVG. Okay. But if you will export
your file in JPG format, then you will lose your quality. Okay, guys, finally, we
have created our image. So let's open this Okay. And if you are not satisfied with font, then
you can change it. Okay? So I also
change font style. Now it is looking aesthetic. Now I will use this particular logo into
my own screen recorder app. And with the help of
Google antigravity, I have already attached
my logo to my recorder, and you can see that
it is looking awesome. Okay, guys. Okay, so if you are interested to learn how can you
build your own SAS app, then you can watch
this lecture series. I will see you in
the next lecture. And if you enjoy this lecture, then don't forget to give me good positive rating and comments so that I
can motivate myself. Okay, guys. Bye bye.
34. Everything You need to know about: Typography: Hello, everyone. So welcome to all of you in
my full masters. In this particular lecture, I will discuss you everything
related to the typograph. So no matter which
software you are using. Okay? You can use Filmora, you can use Figma, affinity, adopt photo soap, cap card, whatever
software you are using. No matter what it is graphic designing software or
video editing software. Typography is a one term which is common in
all platform, right? So you must think about
what is typograph. This lecture is not directly
related to the soft. It is related to the
fundamentals of typograph. If you will see this
particular lecture, then you will understand the science behind
the typography. After this lecture,
your perspective will be changed
towards the fonts. At the end of this lecture, you will be able to select your custom font
according to your need. So first of all, let's start
with basic definition. Typography is the art and technique of
arranging the type, letters, number, and symbols. Make written language legible, readable, and
visually appealing. Obviously, whatever kind of font you are using, it
should be readable. Or an example, if
you are creating eBook or if you are
writing a book, then you must select those
font which is readable. So if you write something
in your content, then if it is not readable, that means you are not using
typography in a proper way. So whatever thing
you have written, it should be readable properly. It should also
visually appealing, which means the combination of your text and font
should look aesthetic. It should not look ugly. Basically, you can decorate your design with the
help of proper font, no matter what you are doing graphic designing work
or video editing work. So whatever text you are using, it should be adiable
and aesthetic. Now, let's understand the
importance of typography. So typography is
a tone of voice, which means with the help
of proper typography, you can easily communicate
with your user. Actually, typography
delivers the tone of voice. An example, if you
are using Serif font, then it is looking
professional. Okay? It is looking classic,
traditional, timeless. But on the other hand, if you will use this clown font, then this font will deliver
playful or joyful tone. Now the thing is, if lawyer
will use clown font, then it would be wrong because the work of lawyer
is too professional. So if they will use clown
font or funny font, then it would be mismatch. And similarly, if Joker
will use seri font, then also it will look ugly. So choosing a font is identical to choosing
a tone of voice. We commit most of our
visual attention to text. So from the Now, you have
to select a text for your content according to
the tone of surrounding. If tone of surrounding is funny, joyful, then you
should use funny text. If tone of surrounding
is serious, traditional, classic,
authentic, ancient, then you should use serif font. Okay. Now let's talk about type of different
kind of font. So one of the most popular
and common font is serifon and not only
serifont sins serifon. So let's discuss the font. First of all, let's
talk about serifon. So serif means
decorative floris. If you will look
towards the serifont, then you will notice that
it has decorative food, decorative round
decorative edges. This is a basis of
time's new Roman font. So now let's talk about
where you can use serifon. Since serifont is
traditional classic, that's why you can use or books. If you are writing
a book or e book, then you can use Serifont
because it is a timeless font. Also, this font is used by
Supreme Court high court. So if you are doing any
kind of professional work, you are creating a thesis, you are creating a
documentation for something, then you can use Serifont. So Serifont is
traditional, classic cent. Okay, now let's talk
about sens Serif. So in French, sense
means without. So Sans Serif means
without Serif. Without Serif means
without decoration. Okay, so sense means
without. Okay? Senerf means without decoration. Okay, if you will see this text, then there is no
decoration, right? This font looks too modern, but historically, it is older. So you can use this
font anywhere because you can customize it
with custom size, thickness combination
within one typeface. Okay, which means you can
create a different variation of this particular
font on the basis of their thickness,
size, gapping. Okay, this looks modern, but it is older
than the serifon. You can use it on Excel seat, ab designing, graphic
designing, video editing. Since it doesn't have
any decorative edges, that's why this font
can fit anywhere. You can create thousands
of variation of this particular font by changing the thickness,
weight, everything. It is fully customizable. Now let's talk
about display font. So this font is very
expressive, bold. This font is extremely big. So you can use this
font in thumbnail, banner, poster, book cover. Okay. But I have a
question for you. Will you use this font
for writing a book? Okay, suppose if you are
creating a novel or ebook, then will you use this
particular font as a paragraph? Obviously, no. Okay, because
this is a very bold font. Okay. If you create any paragraph
using the display font, then it would be not readable. But display font is readable only if you are using
it as a heading, no matter what you are
using it for book cover, rminal in title, Okay, poster designing,
graphic designing. Okay, so it should be at the
front page of your content. Okay. This is a beauty
of display font. Now let's talk
about script font. This is a very stylish
font I have seen use this font for
marriage invitations or some classic works. This particular
fonts luke premium. And here we have some
example of script font. Obviously, if you
are writing a book, then you should not use I script font because if
you are reading a book, then it should be readable. Okay? But if you are using
script font or book writing, then it would become
not but you can also use it for book
cover thumbnail also. You can use it for cover. Now let's talk about last font, which is monospace font. Space taken by each
letter is equal. That's why we call
it monospace font. If you will look
towards any other font, then you will notice
that each letters are using different space. Generally, coders use
this particular font. Now let's quickly revise
all the users of of all, let's talk about serif font. It is traditional and timeless. Sensory modern,
versatile, display font, unique and loud, script,
elegant and classic. So script font
looks very premium. Okay. And lastly, monospace, which is used by poders. Now let's talk about the
thickness of the font. Just you have to use
one golden rule, which is if you are
creating a heading, then it should be bold. If you are creating a paragraph, then it should be thinner. Your heading should be thick, your paragraph should be thin because if you will
use thin heading, then it will look ugly. Okay? And if you will use
thick paragraph, then also it will look ugly. So the main thing is
heading should be bold and paragraph
should be thin. Now let's talk about is
passing between each letters. So now let's understand when we have to increase
the gap between each letter and when we have to decrease the gap between
each letters, okay? So if you are
creating a heading, main title of your content, then the space between each
letter should be minimum. Okay? If you will
increase the gap between each letter in
the title or heading, then it will look ugly. If you will increase the gap between each letters of heading, then it will not look readable. Okay, on the other hand, if you are creating a paragraph, then the space between each letter of paragraph
must be slightly increased because if
you will not give proper E space between
each letter of paragraph, then it will look ugly. And obviously, it is not
readable if you will zoom out. So whenever you are going
to create a heading, then it should look like this. And whenever you are going
to create a paragraph, it should look like this. Now let's talk
about the buttons. Okay. Actually, this
thing is important for UIUX designer, but
you must know also. Okay? So if you are
creating a button, then text under the
button should be bold. And also, there should be a sufficient space
between the text. Since our text is bold, that's why it needs some
extra space to breathe. Okay. And if you're using a thin font, then you can combine it. If you are creating a
label like click here, haven't created account
now, forget password. If you are creating a label, then it should be
light and thin, and it should be
smaller than anything. Now, let's talk about
the proper contrast. So whatever text you are using, you have to choose a color
of text and background in such a way that should
create proper contrast. Okay? If you are using
black background, then your text should dark
and if you are using. Basically, you have to
create a proper contrast. Or an example, if you are
using a white background, then your text should be proper black so that it can
create proper contrast. On the other hand, if you
are using black background, then your text should be just opposite to the background
color, which is white. That's why it can
create proper contrast. If your background color is
similar to the text color, then it will look
ugly and it is not readiable Because it is not
creating a proper contrast, that's why it is not readable. Here we have another
example of contrast, okay? You have to separate your
text from the background. If your background is black, then text should be white. If your background is white, then text should be black. Okay? You have to
create proper contrast so that it can differentiate
with its background. Otherwise, it will
merge in background, and it is not readable. Lastly, there should be a proper hierarchy
while using typography. Okay? So heading should be at the top position
after that paragraph, then the button, then the label. So there should be a
proper hierarchy for your can't start your
content with paragraph. Okay. You have to
start with heading, then paragraph, then button, then. Okay, guys. Okay, guys. So if you enjoyed this lecture, then don't forget to give
me good positive rating and comment so that I
can motivate myself. And this lecture is very useful, no matter what you are a graphic designer or video editor. And no matter which kind
of software you are using, you can use Figma, affinity, Adopt Photoshop,
Wilmore Ada C resol. Whatever software you are using, you must aware about
the type of graph. So Okay, guys, that's it for today's video.
Okay. Bye bye.
35. How I Created GTA 6 Gaming Thumbnail in Affinity ( Easy way ): Hello, everyone. So in
this particular lecture, I will teach you how I created my YouTube
gaming thumbnail. So without wasting any time, let's start our video, and it is not necessary that you have to follow same method. You are free to create your own thumbnail
in your own way. I have covered each and
every feature of Affinity, and if you have watched
my previous lectures, then you should be able to
create your first thumbnail. So you can create thumbnail
in your own unique way. Now I have already opened blank Canvas and
let's open my image. I have to remove its background, so I can remove background in Affinity or instead of that, I can use any AI tool
called background removal. You can use any website to
remove your background. So let's upload our image and you can remove background
in Affinity tool also. Okay? So background have
been removed successfully. Let's download it.
It is looking nice. Now let's open Affinity and
open our PNG inside Affinity. Now it is opened in New tab. Now what I will do, I will copy it Control plus C, and I will go on my blank Canvas and paste it here, Control plus. Now I can resize it
according to my need. Now I need a background. Okay? So let's download GTA 6 image because I'm creating
terminal for GTA 6. Okay. Now what I will do, I will go on Google Banana
and I will refine it. I will upscale image, and also I will remove
the text from the image. Okay? So this is my prompt. Remove all text, increase
the quality of image, make it in four k quality. Okay. And boom, finally, we have a good quality
image, so let's download it. Whenever you will
open it in Affinity, it will open a new tab, you have to copy it and paste it in your
original timeline. Okay. Let's go on our timeline, paste it here, and resize it. And since GTA 6 layer
is our topmost layer, that's why my PNG image
have been disappeared. So because of GTA 6 image, my PNG have been disappeared. So in order to fix this, just I have to drag my PNG
image about the GTA 6 image. So let's select it and drag
it about the background. Now it is visible properly. Now I need a logo of GTA 6. So I will search for
GTA 6 PNG logo. Okay? And I will download this, and I will open it here. Again, it is opened in new type, so I will copy this and
I will paste it here. Now let's resize it
according to our need. Now it's time to select
a proper location. Now let's make it behind my PNG. You can see on layer sexon. I placed logo behind my PNG. Now let's select GTA 6 and
make it a little bit blur. You don't have to make
it too much blur. Basically, I want to separate
myself from the background. Otherwise, thumbnail
will look cluttered. Now let's select my PNG file, and let's increase
the brightness. Okay? So by doing this method, I can separate myself
from the background. So this will create
proper contrast between me and background. Now I will download
another background. So let's copy this image
and let's paste it here. Okay? Now, basically, I
don't need full image. I need buildings. So I will adjust it like this. Now from the layer sexon
I can drop it down. Now it is looking awesome. Now, my PNG image have been separated from the GTA
6 background like this. This is how you can
explore your creativity. So now let's see
our final output, and it is looking
really awesome. And here I didn't add any kind of long text because
without any text, it is looking already good. So this is how you can
explore your creativity. It is not necessary
that you have to follow exact same method. This lecture is about
to teach you how you can play with different
kind of tool in Affinity. If you enjoy this lecture, then don't forget to give me good positive rating and comments so that I
can motivate myself. Okay, guys, bye bye.
 Ankit Shrivastava