Transcripts
1. Introduction: In this busy life, sometimes we forget to enjoy
the little joys of life. For me, little joys are
an evening on swing. My time with my cats. Having a cup of tea, or as simple as admiring
need to, trees and flowers. Nature is my biggest
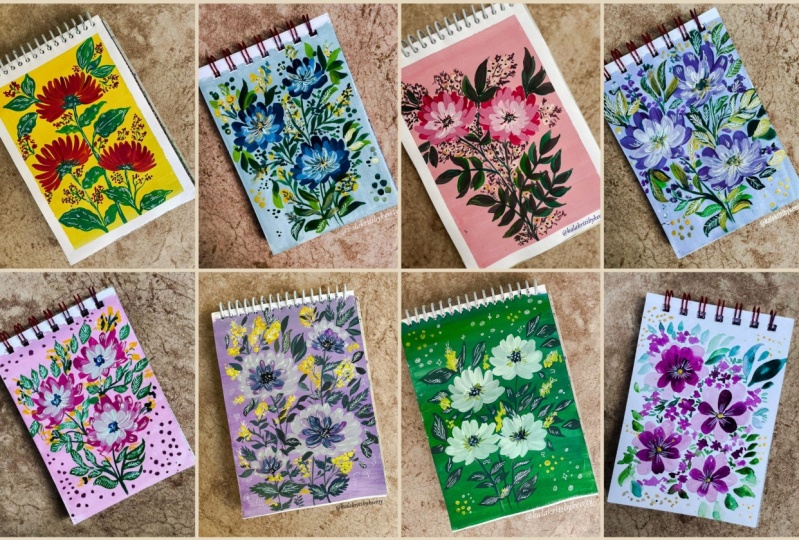
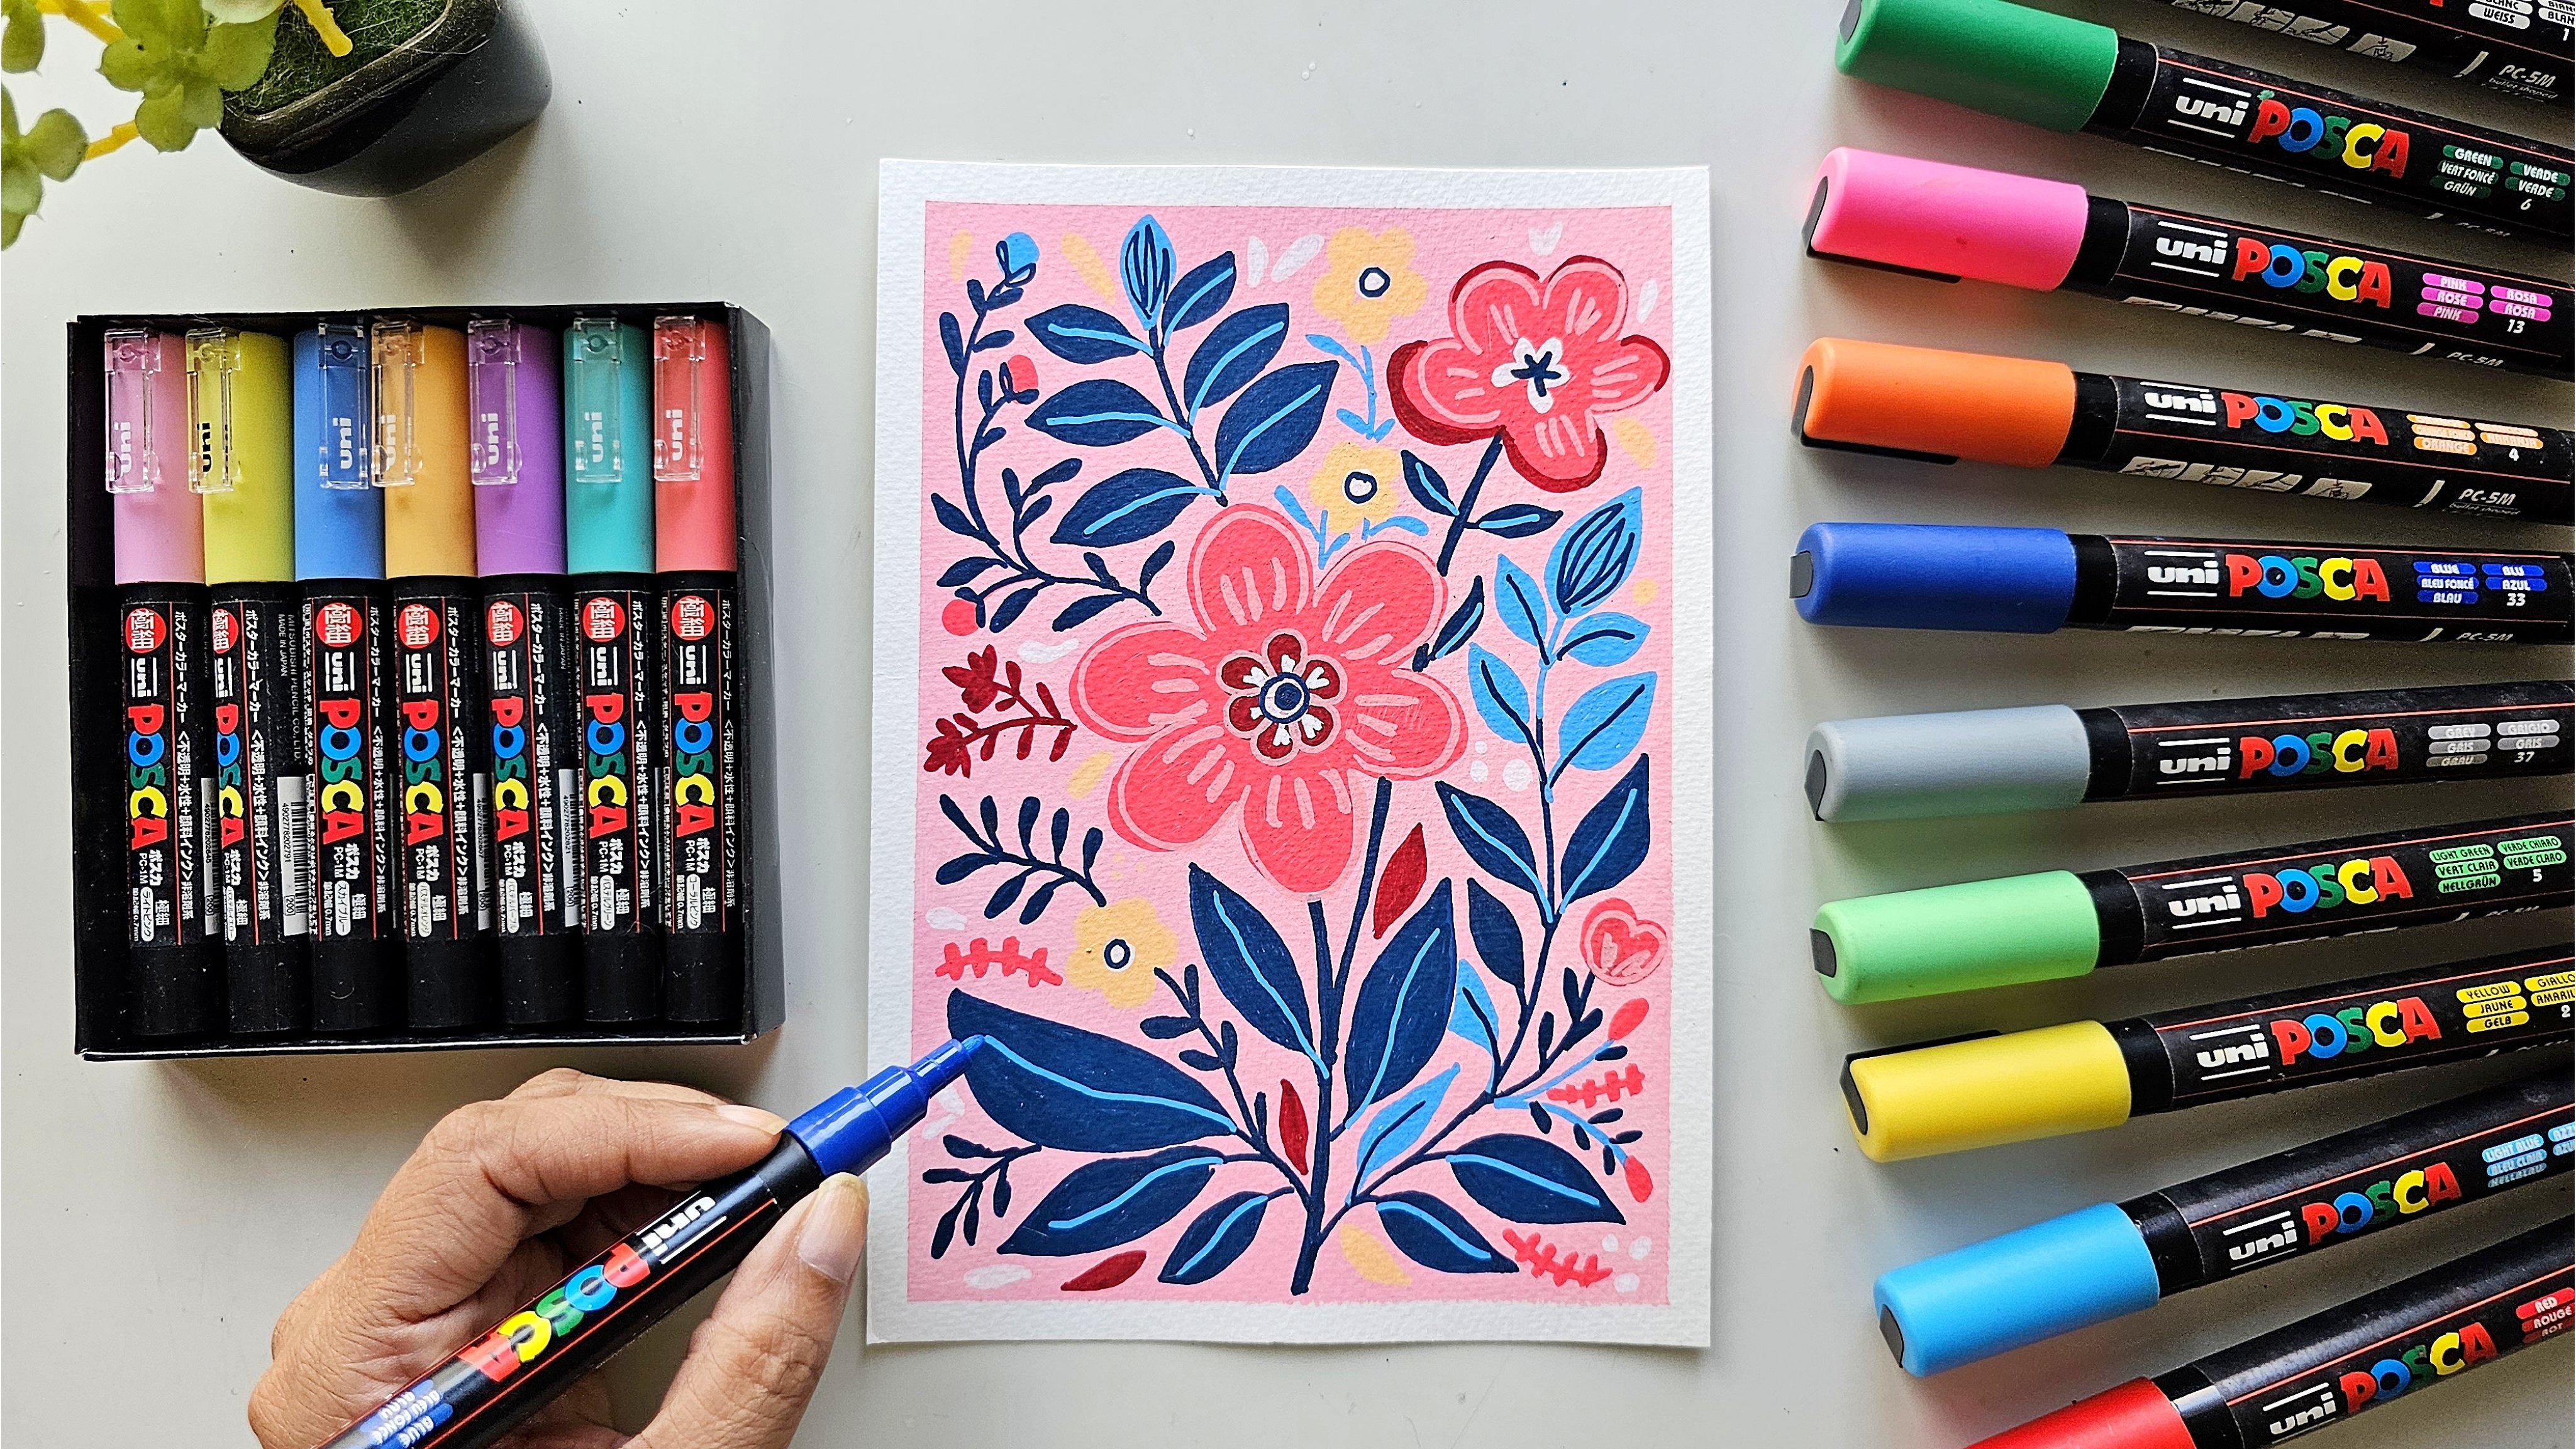
source of inspiration. In this class, we will be creating a beautiful
floral arrangement, which can be used as
pattern using cosh colors. Gosh is a very dynamic medium, and it shares a lot
of its properties with both watercolor
and acrylic. It's creamy consistency gives a beautiful matte and opaque finish and makes
it a dream to work with. Hello everyone,
Welcome to my class. I'm really happy with
a textile designer and a mixed media artist. And I'm from Mumbai, India. In this class, we
will start with a brief overview about
gouache and how it works. If you are a beginner, then this will get you started
with using gouache colors. In the class. We will cover what to control on how to get the right
consistency of the paint. Also, how to layer your paints. We will also learn
different brushes and how to use them to make florals. And finally, we will paint a beautiful floral arrangement using the knowledge
we have learned. So come join me on this beautiful floral
journey with gouache. By end of this class, you will have a much
better understanding of gosh and how to use it. Also confidence to make and compose your own floral
arrangement or patterns. So for you in the class.
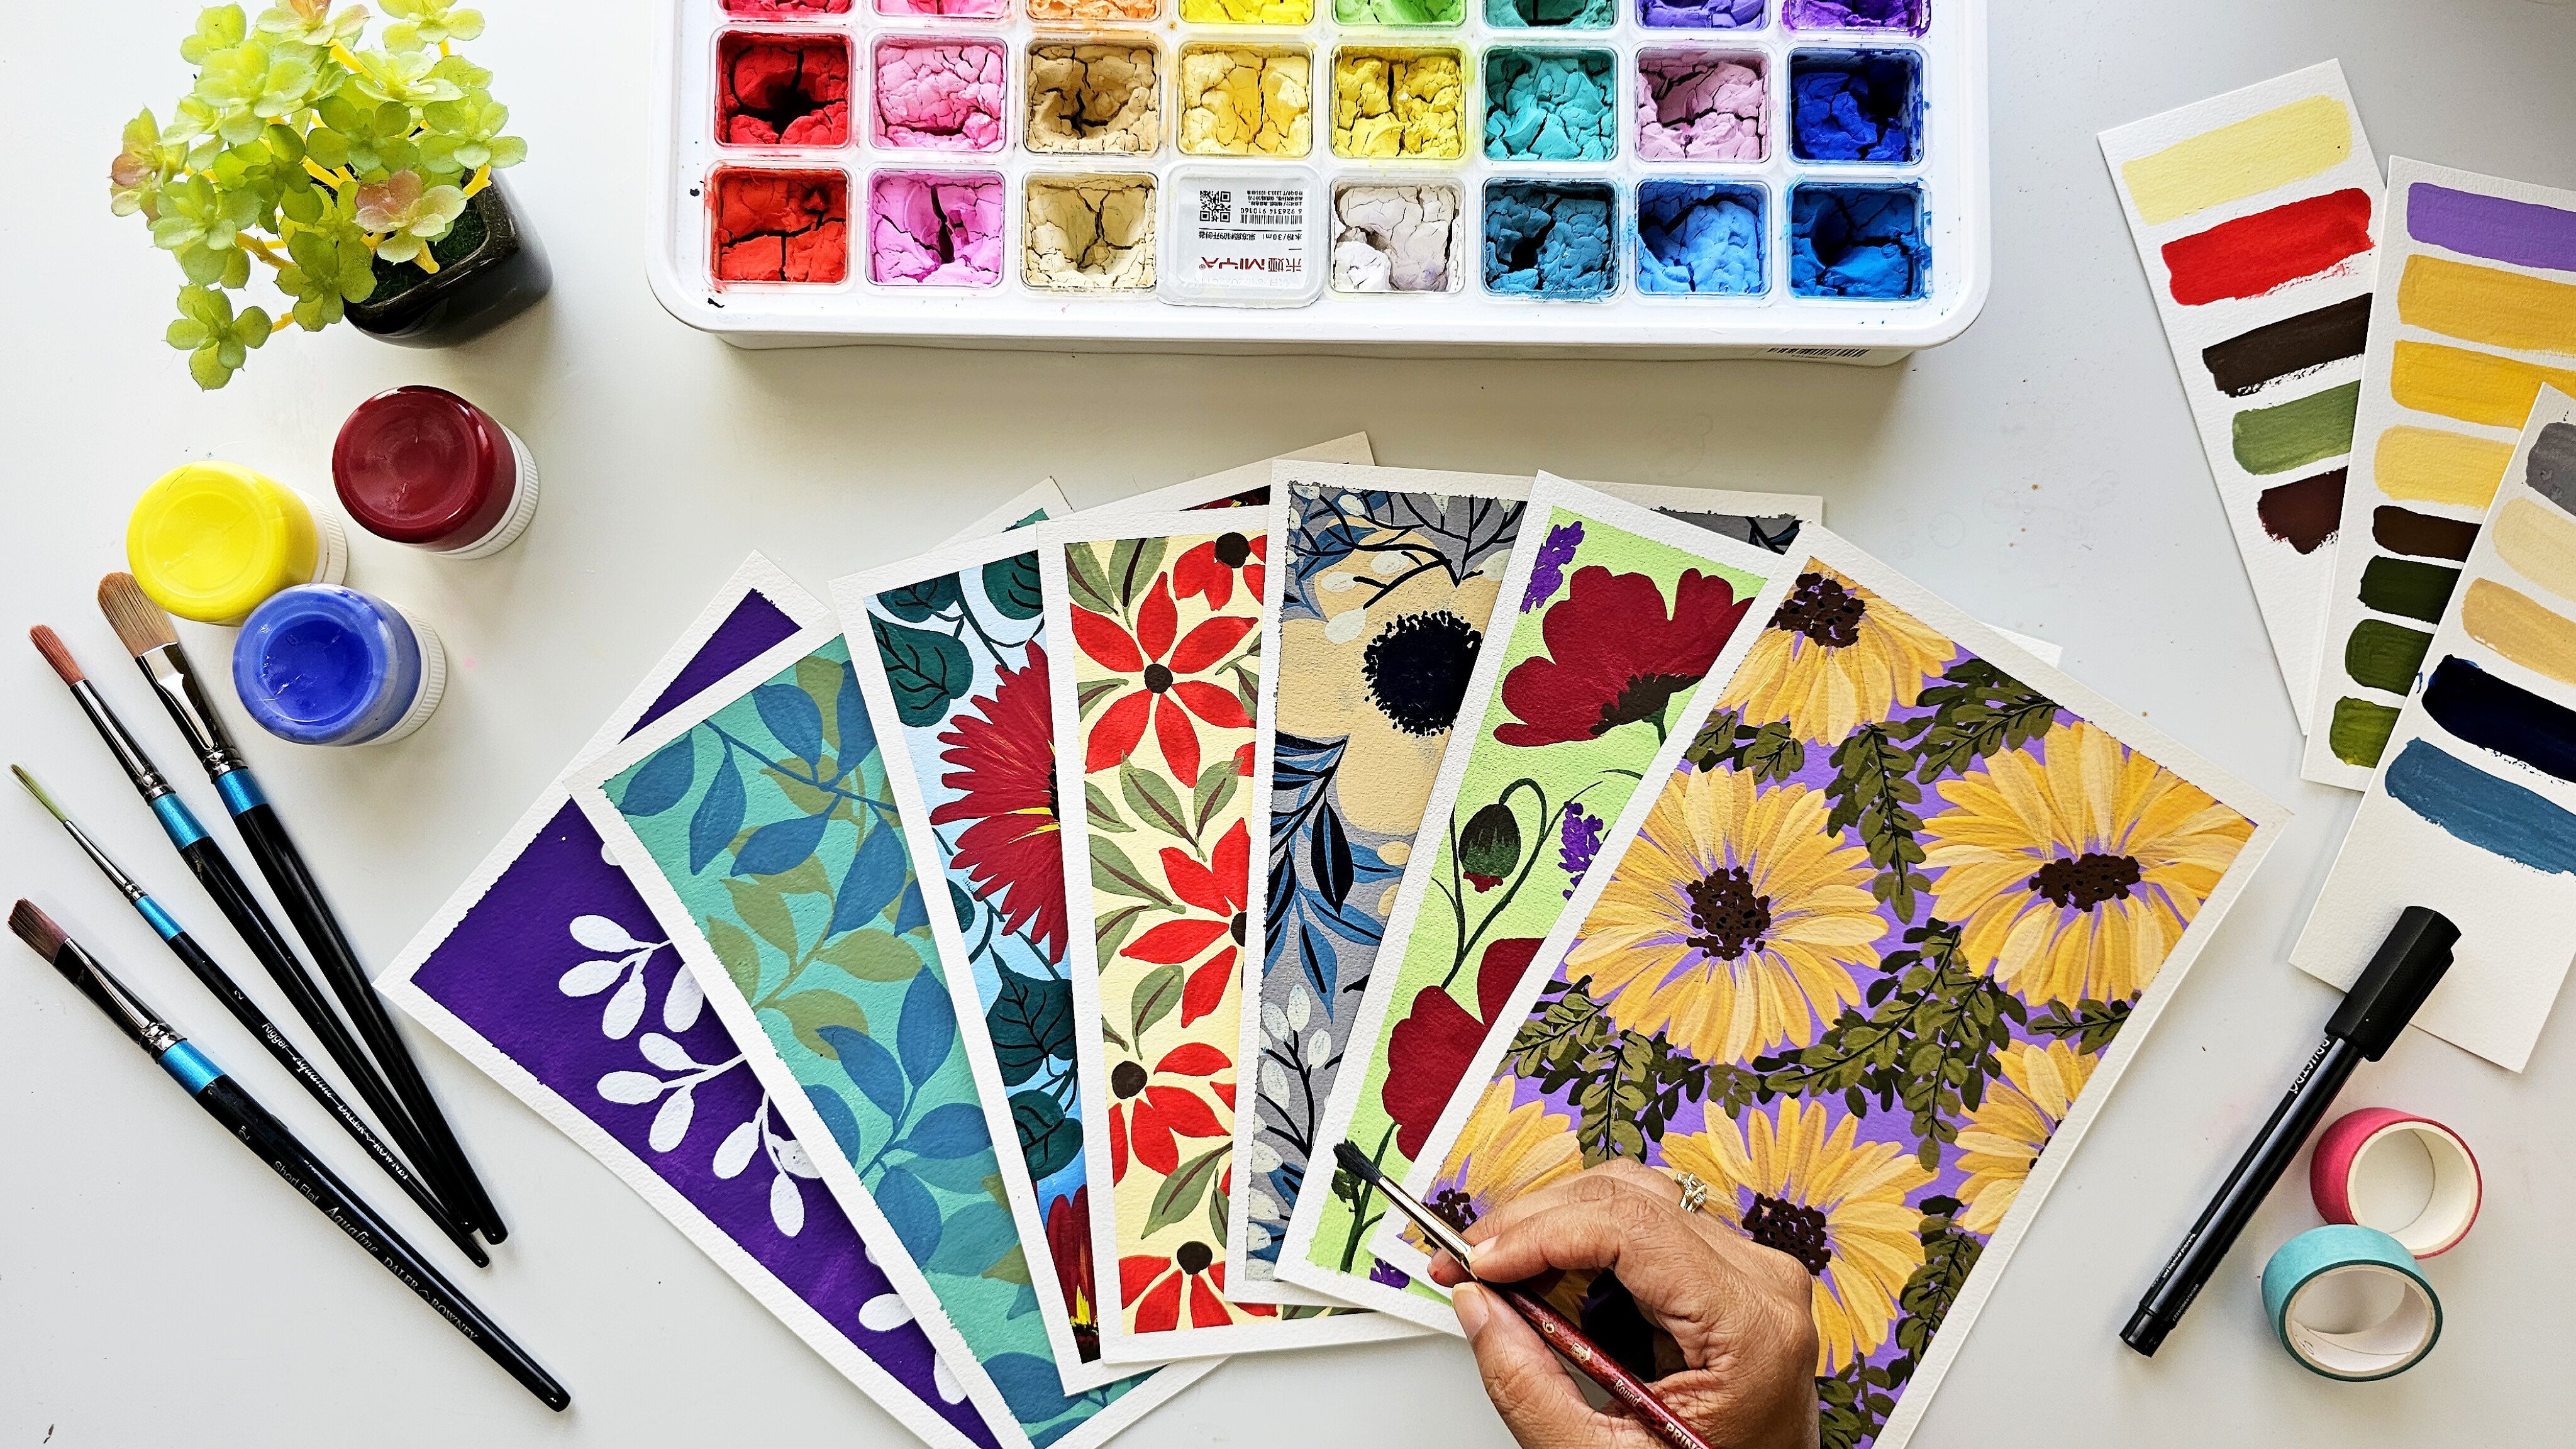
2. Materials Required: So now let's move on to the supplies that is
needed for this project. I'm using a 300 GSM, a 100% cotton watercolor sheet. And this is the size. If phi will be working
on the E5 sheet and Branded I'm using
is at essentials and at present is not
required for gouache. You can also go for
some other people. There are other
brands like minora. You can go for archers. So Bruce roles who has
a really nice paper, can go for these brands. So for this project you will
be requiring palate as well. And I'm using this blue stroke
palette and tight palette, but I'm just using it for mixing my colors as I like to make. So not in the whales are, but I like them Plains offers. So that's why I'm
using this one. You can go for something which is wells or you can use a blade. Anything which works for you. For this project you do not require a lot of brushes
I've just used for. And this is a size
eight flat brush. You can use any flat brush. And then for the petals part, we require one filbert brush. And this is from the
brand Bruce rule. And this is a size six. It's like a flat brush, but with a rounded tip. You can even paint the
background with this. This is one of the most
important element for this. So you require a filbert brush, of course, one round brush. This is a round brush
number 11 rigger brush. So this can be sized
one minus three by 0. So one rigger brush you require, or even a mini
liner will also do. I use these paper tapes,
these washi tapes. You can also go and use these
mostly for my paintings, but you can use
scotch tape as well. They give out very
good clean edges and people also
does not tear off. So you can use a scotch tape. 3m can also go for masking tape, but for some reason, masking tape does not
work so well for me. We require some kitchen
towels or tissue papers or even a clot you can keep biocides to wipe out
for your brushes. You also require two
glasses of water. And I use this one
from Minnesota as these are toothbrush
and toothpaste holder. And these come quite
handy as my jars. They don't shake or
less likely to spell. So I use these for the colors. I'm using. Goddess, who me, me
out, gosh, color. This is a 56 colors that I'll be using this
one for this project. In case you do not have these colors, don't
worry, please. You can go for any, any
wash colors that you have or even acrylic
colors for this project.
3. Types of Gouaches: Gouache, it comes in
different type of packaging, but generally all galoshes are quite similar to each other, except for the acrylic wash. I will tell you about
it in a moment. As you can see from these
swatches, like gosh, they are mad and they
are pretty opaque. This one are the tubes. This is from the
brand Ruth's true. And it is available in India, but you can, you can
use any brand as well. Other one, this is
from our Granger, and these are
Gospels to tempera. So gosh, a lot like the paints and even like thick watercolor. So these are all to the tube. So the common tubes different
use any brand is okay. Then this is another one. This is from the
scalp at a trunk. I hope I'm pronouncing
the name right? But these are in sub
forms and you can see they're very cute
and very handy. Also. You can, if you have these, you can use this one as well. In this class, I'll
be using this. He made me oh gosh,
set of 56 colors. And these are like
cute little tabs, and they come in so
many variety of colors. Another type of gosh is
this acrylic gouache. I have just this
one from Holbein. It is the pistol set. And this is definitely
a dream to work with. These are a bit expensive than the regular
washes, so that is why. But this has the
property of acrylic, which is that once dried, it cannot be reactivated. And just look at the colors. They come out Matt and
they are very big. So I will definitely tell you
that in case you have this, then you can go ahead and use
this also for the project.
4. Water Control: Now we are going to learn
about water control. I'm going to explain what a control with these
goose stroke. Watch that. And also I will show you using
goddess see me Mia wash, which I will also be
using for the project. So I'll show you
that both of these. So I have my palette ready, and I'm going to use
this flat brush. This is a blending brush. So I'm going to use this next doctor with
these two bonds. So it gives you have two vans. I'll just show you how
to take the consistency. First, we'll put
some on the ballot. And for me there are three
stages of water control. So this one, I've not I've just dip my
brush and dried it. So this one is the dry stage. So this has no water. And as you can see from here, that this is quite dry. So this is definitely not the consistency that
we're looking for. So I'll just put a little drops of water in this and
make it look creamy. We can see how creamy
this has become. So a little bit more, just one drop or two drops
of water is required, and then just mix
it on the ballot. And then we go again. This is the consistency
that I work with mostly. And so now what happens
when we put more water? So I just show you when, what happens when
we put more water. This is very diluted and this is quite
watery as you can see. You can also see
the page beneath. You can see the whiteness
of the beach with this. So all three have the users. So there's no right or wrong, but I mostly try and work with
this middle one and gives you using something
directly from the top. So as you can see,
it is pretty dry. Sadly coming onto the brush. So this is the first stage. So this is the dry states. You can see the
dryness on the people. So this is the dry stage. Now. Some on the ballot, and I've put some water in it. This has come to the
creamy consistency. Now, how to determine whether
it's creamy or it's watery. So when mixing, you will just understand
the consistency if it's not running around in
your palette. Like this one. See this one is, this
one is quite watery. So, yeah. And then this seems to be right. Now Let's try this one. There. You see, it's very opaque. And in case you feel that
something is not opaque, you can go back
on it again also. What happens when we put
some more water in this? If you put more water. Now I've put more water. You can see that
how we're running it is on the ballot now. So now this, this is
giving those very liquid. So this is something which
we don't generally use. But as I said that
all three stages, they have their own users. Like you can use this one for your backgrounds
in case you want to, colors to be mixed and
strokes to be seen, then this is something which
you can definitely go for. I sometimes go for
a light background or a transparent background. So I use this and these strokes, they come in handy when I'm layering on gouache
on top of each other. So then this one comes in handy. And this is the
right consistency that I generally work with. So there are stages in
between these also, like there could be one stage over here and one-stage away, or maybe you are comfortable
working with this stage. So it depends upon you entirely.
5. Layering of Gouache: In this example, you can
see that how gosh gives a translucency effect and it takes the background
color as well. So quash can be
led multiple times from deep to light as well
as from light too deep. This is all to one
of the properties which costs shares
with acrylics. Acrylics also you can go about from deep to light as well
as from light too deep. So, but we have to remember
the point that gosh, can be prevented once I apply a tiny bit of
water also on this, it will lose its shape. So we have to be
careful of that. Now, let's do another exercise
in which you will use a deep background as well as a light background and show
you how to let them up. Let me first start with
this light background. As you can see, the
color has almost dried up and it's not even
coming on my fingers. So I will just
spray this a little bit and then try to take some color out of it. So some of my green
as the end on the brush and probably it's just showing
quite a little bit. So remember the consistency
we're looking for as creamy. In this, you can even
go in this exercise, since I generally go for this, but for background,
you can go for something which is
in-between this. So it does not do what tree as well as it does not
really take also. Because if it is too thick, then it is quite possible
that when we're layering up, then probably some more, some color from
blue can lift off. Let's start layering. And this is the base layer
that I'm putting. This is the first one. Just observe how I'm
putting the colors. Then I'm just
smoothing that out. Now, the main thing is
that I have to let it dry. Let's wait for it to dry, dull then let's put this color since this was pretty watery. So I'm just trying to put a little bit of
more color in it. It has dried out. After drying, it
becomes a little thick. But still I just check. Yes, this seems to be
a good consistency. And just put in a drop
of water in this. I love the sound. Now,
let's paint this. So this is a bit, as you can see,
there's more diluted, so I'm just putting
in some more paint. Yes. It's fine now. Now smoothen it out. Right? Now, Let's
wait for this to dry. So now this is almost dry. So always remember the
property that gosh, the lighter color will
always drive and she depot, a deeper color will always
dry one shade lighter. So you will see the difference once both are completely dry. I'm using a scarlet
know to leave this just making
a tiny, tiny bit. Let's mix the consistency. Since I only had
water on my brush. So I don't need to
put more in it. So since this yellow
one is now dry, Let's let this up. So. Single stroke. And now I've
laid it with a red one. You can see I show
you this again. I'll just take this green
that I have in my palette. And I'm going to
put it over here. Can you see the publicity? It gives you feel that it
requires another layer, give it another name. Data. So you have to make sure that when you're
putting another layer, we don't scrape off
the layer beneath it. So if I keep on repeating, repeating this
movement like this, and what will happen? I will reactivate the
color which is beneath it. So I will reactivate the yellow. You can see how some
yellows over here. Then, you can see now you will reactivate
the color below. It is extremely important
that layering up, you use this consistency. Or if you have to show
some dry or take strokes, you can go for this one as well. Now this one is pretty much dry. I'll just let this
up and show how you can go about letting light colors on the
background as well. So for this one, since this is, this was a lighter
layer and since this is a creamy yellow sheet, so what happens is
that even if it gets mixed up a little bit
or it will not matter much. But since this is a deep
color and we are putting, let me try and put some
creamish color than this. My brush has a bit
of green on it. So I'm just putting
in some more color. So now let's layer this up. So just remember,
the minimum stroke they do use is bad,
don't see almost. So if I do few more times over here, this
will reactivate. So what I will do, I'll just
put it like this and maybe I can come back a
little later on this, or I can even put
a little thicker, put off the color on this. So as you can see, it is a bit difficult
to see. This is nice. So just remember
like how I paint, I generally tend to use the background color
to my advantage. So it kind of gives
this translucency when I'm putting a lighter color
on top of a deep color. So it just gives me
this translucency, which I actually want
for my flowers or petals with some
white color as well. So let's put some
light on the ballot. I think in some water. Okay, my water is
becoming in green, tablet green, but it's okay, Let's do this exercise. And then I will add this up. So I've loaded my
brush quite a bit. Yeah, so this looks good. So now let's see. So you can see how this
one has become lighter. This is reactivating
the layer below, and so it will mix
with the color. In case you're going
for that kind of look. You can definitely use this
as a tool to your advantage. So I'll also show you how white, but look over here. Since this is a lighter base, as you can see, the
white is coming on more. You can see more
thickness in this. And in case you want to
layer this red went up more. We can also do that over here as a little light, but you can do more on this. Still a bit wet, but still you can see
the layering ovale. So the things to remember
in letting up is that it's better to have fewer strokes so that you do not activate
the layer within. And also that you can layer
on top of each other. And also once when
the layer is dry, if you want to have more
thickness in the layer, you can just give
it one more cotton.
6. Brush Control: In this section of the class, we are going to learn how to make different strokes
for different brushes. So this exercise is important so that you get a hang about
how your brush works. Let's start with a round
brush number three. Okay. And I'll just did the parent do water and let's go for
the good red color. Let's start with this. So you already now know how to mix your colors and what
is the right consistency. And also about layering up. So here we're just
going to get a hang off of how to use these brushes. So there are simple exercises that we are going to follow, like how to make these lines. You just have to use
the tip of your brush. I'm sorry, that is out of focus, so I'll just do it again. So you have to practice
how to make line. These lines. I'm just
using very light pressure, very light pressure on, and just using the
tip of the brush. So this comes in handy
when we are making any twigs, little stems. So this comes in handy. And also we have to know
always that you should always see how the dots come
with that particular brush. As you can then use those dots. Some small dots, some big dots. As they, these doors, they always come in handy. And now something which is very important to the
lesson that we will be doing is I call it the
tip and the belly. So we are going to
use the tip and then we're going to do
the belly lift off. And then belly. This exercise is very handy
for leaves and petals and this is something which it's
important that you practice. Again tip, belly, liftoff, dip belly, and show
it to you again. Dip, belly, dip. So let's make a
flower center now. And again tip, barely dip. So it comes very
handy and making flowers then leaves petals, so definitely evoke
more on this. This is extremely important. Again, you can see this is
pointed along pointed brush, so I'll just use the tip. Then you can use the belly. Then again. Then you can
also use it like a stem. You can also did this one
into handy and make a stem. So let's do it. Full belly. Then again, practice the dots. Revealing different brush
makes different dots. You can use it for
different types of flowers and affects
that you want to give. So now I'm going to use
this filbert brush. I love this brush as I feel that it is a very
versatile brush. So this is a flat brush
and it has a rounded tip. And I believe that it makes the most beautiful
petals and leaves. So I'll just show you
how to use this one. So again, we have to do the same exercise
that we did here. The brush sideways. We'll take it like
this so that we know how to make lines with this. You can practice
this quite a bit. Then also see how you will make some pig and then thin lines. And see how thin
and thick it goes. So you have to
make sure that you plan and you practice this. And then let's see what
happens when we use it flat. So I'm going to use it
like a flat brush. This. So you can see how
it gives strokes. Just using the tip and
then slightly the belly. Because this is the tip
and the belly then lift. So this is one way to use this. This is the flat way to users. Then you can also use
this in this manner. You can use it the
sideways also. So do use it sideways. Again, you just do a tip. Remember the tip and the belly. So tip, then belly
the left. Today. You see how it gives very
organic looking leaf. So in case you want to go, you can do more. So then again, let's
do this one more time. The belly lift. The belly lift. Also you can see how this gives small strokes on so for once when we do that spot exercise, so this brush, it can give
you something like this. How it gives different,
different strokes. You can use it sideways
as well as even use it. The front, the wider part of it. So just see how
your brush works. It's very important to know your brush and to
control your brush when. And as you can see, these
are the bigger strokes. The best thing about these
brushes that it gives you smaller and elongated strokes as when you can see how it gives. Just taking it sideways
and doing a flip. I'm putting more pressure on the tip and then lifting it off. So the next brush is a
round brush number one. So this is a miniature
brush. As you can see. You can use like miniature
brushes for your fine lines. We believe that
the other brushes, that one's bigger,
better, fine lines. But as you can see, this is also giving
you a very nice controlled all the water
is very less than this. So you, as you can see, this dotted outdoor
really taken over. The paint has faded a bit. Try out, then a
little thin click. And then you can also see how that tip and daily
exercise works. Belly to belly. Small miniature leaves can be done from the right. And one of the best uses that
I do with this is the spot. You can just give
like pretty spots. The center of the
flowers are some, some other flowers that we do, the smaller ones, something
you can just give some stem. So some flowers like this. So just practice the
spots with this as this, as this comes in,
very, very handy. So I would recommend that you
do this with this exercise, with all your brushes. So the three things that you
have to do is make lines, then this tip and
belly exercise, and of course the spots.
7. Taping the Paper: So now we're going
to take our paper and I'll just show you
how to tape your paper. So I am using of the epidemic. You can use a masking
tape as well. Like to keep like 0.5
centimeter on all sides. Press it down and take
out all the bubbles. And I do it for
every side. Again. Just put the tape on the paper lightly and
then press it along. Alright. That's it. So just do it one final time. Present it with the tip of your fingertip and
you're good to go.
8. Let's Get Started - Background: So now let's start painting. I'll be using this lilac
color from the human Mia gosh set and also the flat brush eat. So we have to make sure
that the consistency of the water is nice and creamy. It should match, should
not be very watery. And it's short. It should not be very thick. Awesome. So yes, that seems nice. Weekend. Go ahead with this. So now let's being the
overall background with this. Nice and good long strokes. You can smoothen out
bent as you go along. I generally like to
take one direction. And it can be either you can start horizontally
like I have done, or you can also
take it vertically. Just take some more paint, add a little bit of water to it. Even smaller than adult. We are almost done with
the background now. In case you feel that there
are places which seems light, you can just paint
over them as we are not using two colors in this. So you can paint on it and
flatten out your background. So that's it. So now we will wait
for this to dry. And then we will start
with the flowers.
9. Flower Petals - 1st Layer: So I already have the
colors swatch with me. We have used this lilac. So now I think we
can go ahead and use this magenta pink for the
base layer of the flower. Then we lose a little lighter, maybe a little bit
of this light. Pink over your,
you can use this. Now, Let's start though
with this thing. Go, we put this a little
bit on our ballot. Well, let's look. So pretty amount of water
since this is the base layer, you can make it a tad
bit lighter also. You can dilute it
more and use it and then you can put more
layers on top of this. So for this, I'm using
my filbert brush six, and it is from the
brand Bruce through. So now let's start making
the base of the flower. So I'm planning to do, to floss and this
lets give up petals. So just think of where
you want to send it to be. Your petals. Overlap them, some smaller ones. Let's make this one
a little bigger. Since I have made
a lot of flowers. So I generally don't
require to make a circle, but in case a circular
oval works for you, then definitely go for it. Make us feel good. And then I'll make
a smaller so glows depicting your center and
make your flowers around it. Just place your flowers
and keep some space. You can put in small,
small petals as well. I think this one is busy, so let me do one, also. Small petals. Let's add some small
beckons here and there. That all we have to wait
for this layer to dry up. And then we'll put the
lighter tones on above it. Till then let's do the stems and some other flowers as well.
10. Stems and Leaves - 1st Layer: I am now taking some
olive green color. And I'm putting
it on my palette. So this looks like the
right consistency. Now, I am going to
take my rigger brush. Now. There's a rigger
brush three by 0. But you can have
any liner for this. So the state get
onto your brush, just eat the color on your brush and make the stem. So you don't have to follow
me or you can just do can they can be attached
to each other as well. So like I'm doing it separately. Just take out some stems so that we can put
the leaves on these. Now with the same
or filbert brush, you can go for the threshold. So let's make some leaves. The leaves, just the tip
of your favorite brush. And I can just use them
from tip to belly sideways. Right? Let's do one here. What I'm doing is I'm
just taking the brush sideways and I'm first
taking the dip very likely. Then I'm putting the
belly, then lifting. Again, we'll do the same thing. So just notice I'm still going for the creamy
consistency over here. Just maybe a little
bit more of water. But you can see the
translucency in the leaves, how they give a
beautiful effect. The color in my palette
is now very less So. I'm adding a little bit water, but I'm also adding some color to it so that I don't
ruin my consistency. Given leaves some shade, maybe some ongoing
lives I'm going right. It's more like, you know, your brush control is
quite important in live. There. Let's see what other
flowers we can give and those bees
that is there. And later on we'll put some more lighter leaves
on top of these ones. So now I will just take
some brown and I'm going to mix this with the green which is already
there on my palette. I'm doing this so that the twigs which I'm
going to make for this, it doesn't look very different from the leaves
that is already there. I think it requires a
little bit more green. Yes, this is a good mixture. Let's use this. Let's make some very
thin twigs with this, I'm using a mini liner brush. You can use any
brush that you want. So just make some
thin lines with this. There's no actual rule to
how you can make a twig, but just some crooked lines which you can just
paint together. And that's it. You're good to go. So now let's just jump
ahead a little bit and make some more
twigs all around. I think now this balances
the twig but quite a bit. But it's still a little wet. So I don't want to go into that. Let's finish the buds first. Four bytes, I'm thinking of giving entirely new
Carlo to introduce.
11. Small Flowers - 1st Layer: Now let's introduce
a little pop color, a little orange or
yellow, orange. In this. You can also use a white
light bill of goods, white or an off-white. I'm now using a round
brush number one. What we're going to do is
just put some tiny dots. We'll put some tiny dots. And just randomly
digging the stems. You can leave some space
between the dots as well. I'm going to put some
more in case you feel that it requires more so that you can easily
give that the brown part. You can just do it a
little later also. How the colors, they're just
complementing each other and just giving such write log. Let's do some not going
to leave it like this. Later on we'll come and
put another layer on this. Little lighter, yellow
or maybe a little white. I think that's it for now.
12. Flower Petals - 2nd Layer: Now the pink layer, so pretty much dried. So let's make the next layer. So I'm thinking of for
this light pink to, for the next layer on the fly. And in case we require
a third layer, we can even go for that. So let's try this. I'm using the same brush
that I've used earlier, my filbert brush number six. This time, what we can do with the pain should
be a little thicker. It should not be
watery or runny. Make sure let's
load up your brush. And you're not going to give these big strokes
and not so many, probably going to give like just 50% or even 40 per
cent of the strokes. Some places being
does not dry it. So just to give a good
thick coat, single strokes. We'll do the same over
here in overlap them. So have some fun in outside. I'm liking it and I don't know. I feel like I can give few white strokes are for
free white strokes as well on top of this. So we'll do that a bit later. Let's wait for it to dry first. They'll then we'll
do other detailing.
13. Leaves - 2nd layer: So now let's do the leaves. I told you that we'll be
doing a little lighter shade. So I'm going with the lighter, olive green for this. This is all gray. And now let's use this and
all the leaves and they countered percent
probably will give 50 per cent less of
the lighter color. Just take someone the palette. Make sure that
consistency is nice and good in case you're using
from a tube someday. So it makes it to the right consistency
when this was right. But I have put some water in it and I'm taking
using it directly now. I think this is nice. Now what we will
do for this is we will put the leaves on the
existing gold leaves itself. So we will give some
just in the middle, overlapping the others
just gives an in depth, a little dimension to the
overall leaves and painting. That's it. So now let's do some other thing like we can now concentrate
on the flowers. As I said, we'll give it another color so that it
also gets some depth.
14. Small Flowers - 2nd Layer: So I'm using this color now and the name of the color
is yellow teeth. So yeah, it's funny. But let's use this. It was a white for this one. So let's use this a little
bit. Let's put a two. I will be using my size
one round brush will require the consistency to be a little thick
and not watery. These makes sure that it does take I be using on
top of these yellow, not exactly covering them, making some flowers
on top of it. So as you can see how
I'm making the flower, I'm just putting
fuel round blobs together and the center
is left in the middle. See how these
clouds are forming. Just remember, you can lay them up as many times as you want. If you want to go for
a white after this, you can also do that. They're there. I think it looks quite nice.
15. Finishing Touches: Well, we can just give
small leaves also video. So taking the theme green, that lighter green that we, I have used this as, the olive green one, will just give some leaves on these brown stems. I just wanted to finish
off these flowers. First battles, they were a 100%. Then these were 50 per cent. So now I'm going to put this one as maybe
like five per cent. So just a few
buttons, That's it. Since there'll be
slanted, still not dry. Bankers mixing and my wife, I think that's it. We're done for the same dough. Now we'll finish off the center. Shabby, good the brown, or let go for this yellow one. Now using this brush number one, round brush number one. And I think that maybe
requires a little bit of brown mixed with
this yellow, orange. But the slight disperse it. So we have to make sure
that the base layer, which is this pink, is not seen. And we go about
giving it a shape. They call me giving the
sheep to the petals. So that's it. And I think we can now give a little bit of brown
also in the middle. Does Brown has become the
war treat and a want? I'm old brown, green and let's give a center. And now the center so that it has a depth
and it feels like, as it's not all the same color. It's kind of cute now. So in case you want to give
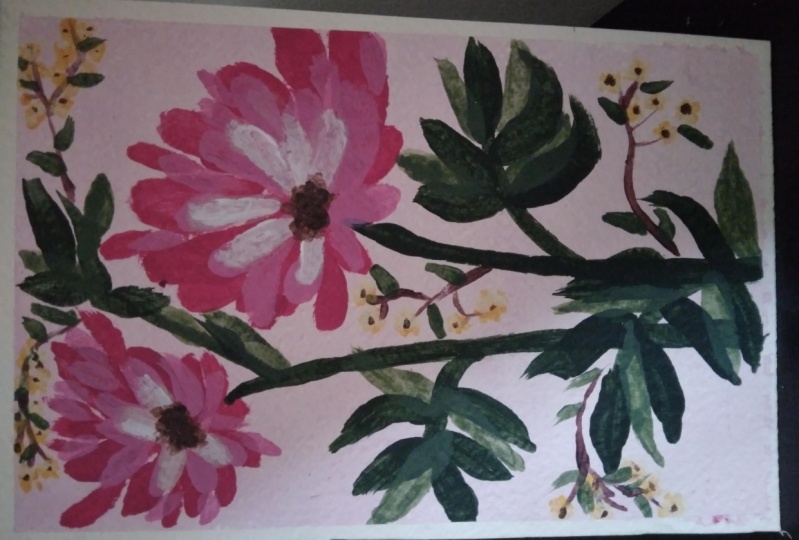
a center to your flowers, these small, tiny ones, you can do that also. I'll just give these tiny, tiny brown in the center. Even if you leave it like that. I think that's okay. So now we're done with this. Let's be the deep end. Let's see how the pink
painting has gone. This is one of my favorite, but it's better to peel it
at an angle like this. So this is a false been doing. I hope you loved it. See you guys in the next class.
 Neha Poddar (The Doodle Keeper), The Doodle Keeper