Transcripts
1. Welcome to Our Advanced Videography Course: Welcome to our Advanced
Videography course. We are so excited
to have you here. In this class, you're
going to learn how to make your videos look better.
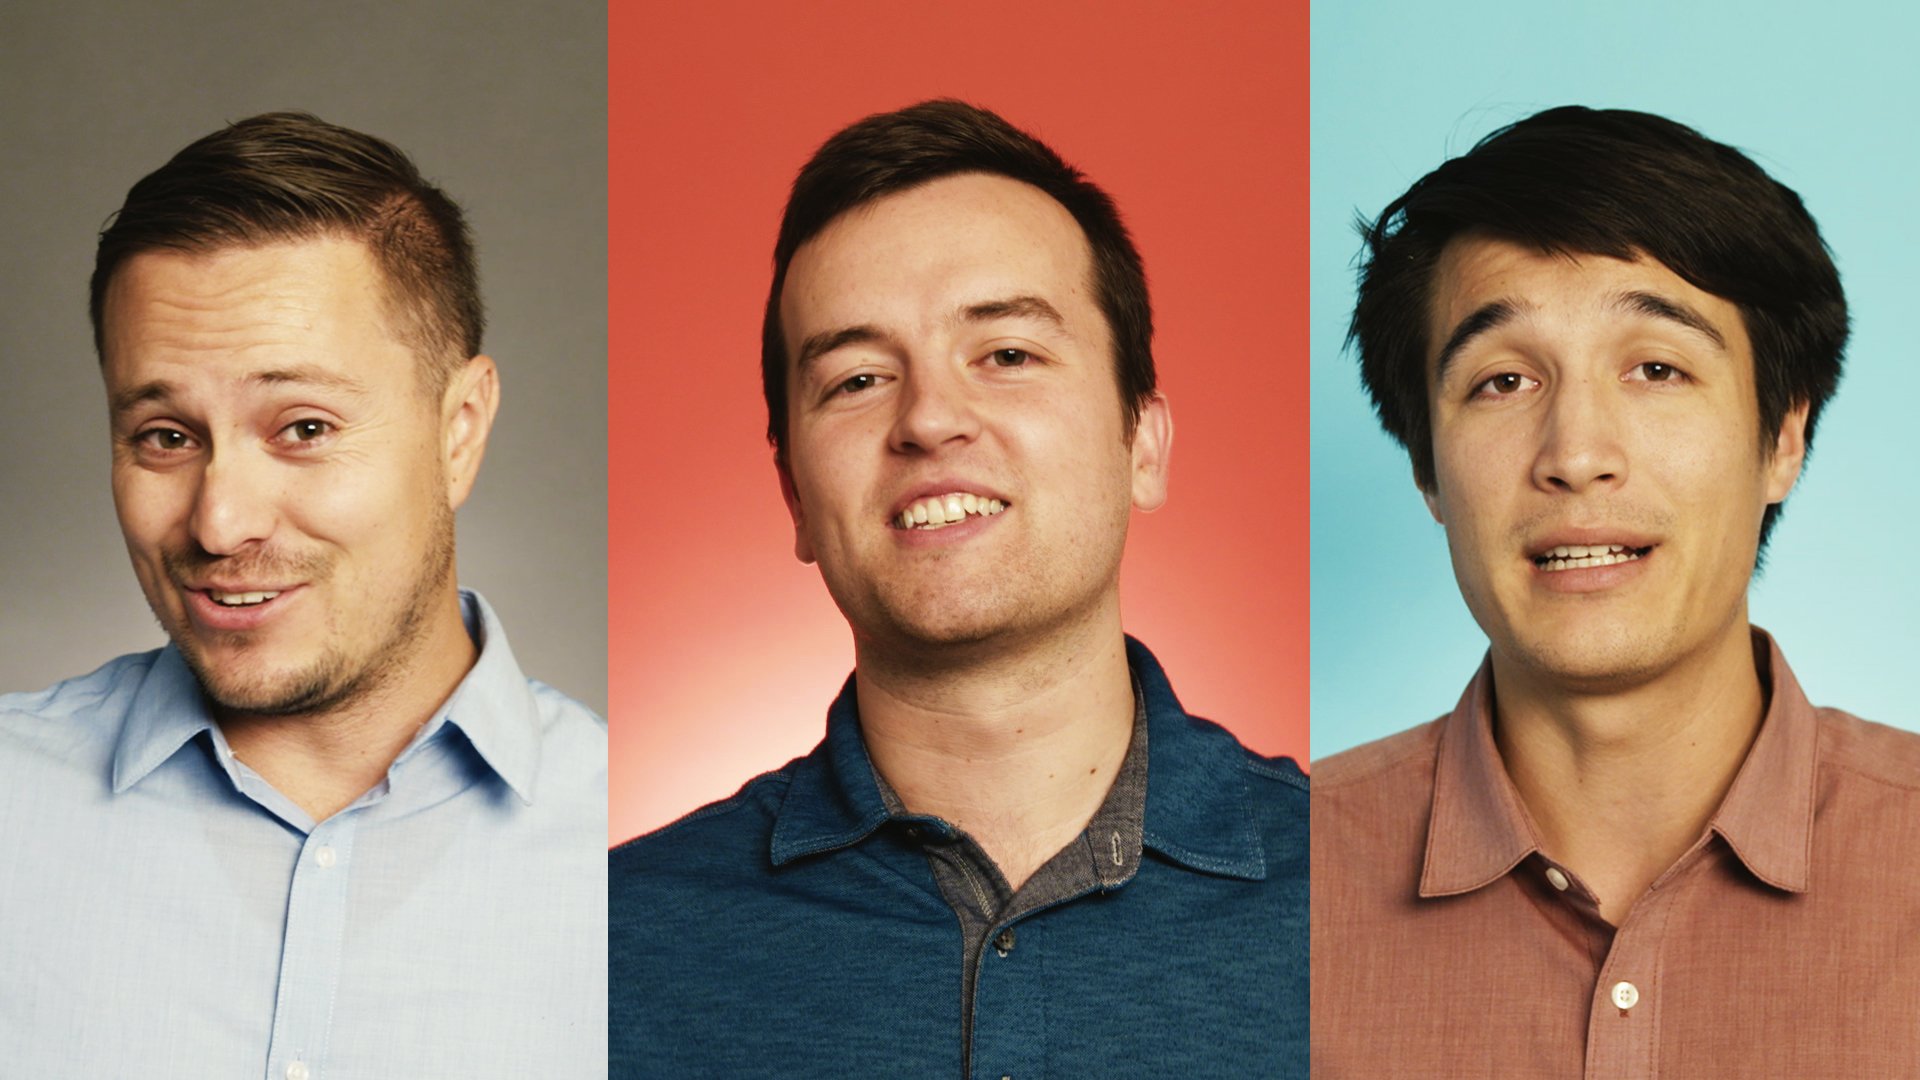
My name is Phil. I'm here with Will and Sam. Just thank you for being here. Will, what's this
class all about? So this class for us is about moving your videography
to the next levels. We want to teach you
some tips and tricks to basically take what you know
now and make it even better. So we're going to show
you some examples of what you can do to make your videography look incredibly professional and make it
look like a million bucks. Sam, how have we set up
this course in terms of the sections and the
projects that we're going to be actually
doing in the class? Each of us is taking on a different type of video
that we're going to make. We're going to each individually take the students through and go through the various ways that you can really
take that videography. Really the cinematography
of the types of shots you're getting
to the next level. So Will is going to be tackling a documentary
corporate video, Phil, you're doing
the commercial, I'm doing a travel blog. Really, all these shots
that we're doing, they can be applied
to any type of video but we're just going to go
through in these projects, make them the best we
can to show you really, where can you start
with a good shot, but how do you really
take it to the next level and really make
something that's epic. The goal is for you to come away with this course knowing, at this point, you
might already know how to set up a basic shot, but how can I take it
to that next level? When you see a
documentary on Netflix or you see a film
in the theaters, how are they able to get those shots that
just look better? That's what this
course is all about. One thing we always say is, it doesn't matter
what camera you have, you can capture a great video with the camera that
you already own. While we will be using
some more advanced tools such as gimbals and drones to get different types of shots, what we want you to
do and believe is that whatever camera you have, if you think about composition, if you're thinking about
the story elements of your project, if you're looking at lighting and all these other elements, you're going to be able to
get the shot that you want. Lastly, before we jump right in, if you ever have any
questions, we're here to help. If you have feedback, if there's things
that we didn't cover that you want us to
cover, let us know. We're happy to continue to update this class to make it the best one for anyone wanting
to improve their videography. Will, Sam, you're ready to go? All right. All right. We're
going to jump into Project 1, starting next.
2. 15+ Quick Ways to Make Your Videos Better: Here are over 15 ways you
can improve your videos. This lesson includes a downloadable and
mobile-friendly inspiration guide to help you think more creatively whenever you
are out on a shoot. We'll dive deeper into all of these concepts
throughout the course. We hope this video will give you a jump-start on the
core concepts you'll be learning and a great
refresher if you ever need to come
back for inspiration. [NOISE] Tip 1. Add motion. Static shots have
their purpose and are a great way to
establish a scene. But oftentimes, adding motion can take your
video to a higher-level. Be thoughtful in the
way you add movement. Do you want shaky
handheld footage? Do you want smooth,
subtle motion? Tools like gimbals and dollies can help
achieve this look. Or try shooting in a higher frame rate to be able to slow down in post-production. If you need to be
shooting handheld, shoot at a higher resolution
than your desired output so you can add subtle zooms
or pans while editing. [NOISE] Tip 2. Use foreground elements. Try framing your composition with elements in the foreground. Shoot through things,
or around things, or perhaps even focus on the foreground element while the action takes place
in the background. Try to add a slow
rack focus from the foreground element to the
action in the background. [NOISE] Tip 3. Switch up focal lengths. Your kit zoom lens is great
for general shooting. To be honest, we
could get away with a 24-70 millimeter
lens for most shoots. But using a longer
telephoto lens, adds a professional look with its compressed background
and beautiful boca. This style of shot also lets the viewer focus in on a subject
with fewer distractions. Conversely, if you're
shooting something where you really want to show your
subject in their environment, pop on a wide lens. [NOISE] Tip 4. Film at a different time. Try shooting the same
shot at sunrise, high noon, and sunset. You'll notice dramatically
different shots with naturally
different lighting. Golden hour, the hour after
sunrise and before sunset, and magic hour, the
hour before sunrise and after sunset are
great times to shoot. Skies get more dramatic, full of color and life. Well, it may take getting
up a bit earlier than normal or coordination with
your crew if you have one. This is one of the best ways
to instantly improve a shot. [NOISE] Tip 5. Use proper lighting. Speaking of light, we
love natural light, but there's also
a time for using artificial light kits and trying to control natural light. Study up on three-point
lighting and other common portrait
photography lighting styles to really give a
mood to your story. Lighting can instantly
make your video feel happier, sadder, scarier. It can give a dreaming
or clean corporate vibe. Well, lighting is an
entire art form in itself. LED panels are cheaper and easier to use than
ever and is likely going to be a worthwhile
investment if you plan on doing
professional video work. [NOISE] Tip 6. Capture the scene
at multiple angles. One of the best ways to make
your videos more visually dynamic is to capture
scenes in multiple angles. For those of us
who are typically solo videographers or vloggers, the extra effort of shooting something in different
wide, medium, and close-up shots may
seem like a lot of work, but it will pay off in the edit. Get creative with your
angles, break the rules. Your viewers will
appreciate the effort. [NOISE] Tip 7. Track motion. If you're trying to video
something in motion like a person walking down the
street or a car racing by, the easiest way to
capture this is by panning your camera
with the subject. Take this to a more
advanced level by tracking the motion. Tracking means
moving your camera along with the
subject in motion. This may mean practicing your walking and
shooting skills, using a gimbal or dolly, or even getting a buddy to drive a car while you shoot
out the window. Tracking shots are some of
the most iconic shots in film history and add a higher-quality to
your cinematography. [NOISE] Tip 8. Capture for slow motion. Shooting at higher frame
rates like 60, 120, or even 240 frames per second has become
synonymous with many of the most popular
cinematic YouTubers and video creators
out there today. There's a reason for it. It's beautiful. There's something about
seeing movement slowed down that is captivating
for your audience. But the tip should really be, don't capture everything
in slow motion. There's a time and place for it. Use it when you
want to slow down fast motion like action sports, or when you want to
show off the details of a moving subject like a product or when you want
to add motion to your shot, but don't have stabilization
like a gimbal. [NOISE] Tip 9. Set your scene with aerials. Is this a cop-out? Maybe. I know drones aren't
available to everyone, but it's never been
more affordable to up your video game with the
epicness of an aerial shot. Aerials are perfect for setting the location and
scenery of your video. They're also good for getting tracking shots
that would be hard or impossible to do
so without a drone. Just because you have a drone
doesn't mean you can forget your principles
like composition, lighting, and storytelling. You can take your drone
shots to the next level with neutral density filters
that allow you to shoot at a lower F-stop with a
shallow depth of field. Remember to test at
different times of the day, the light and color
of the sky will dramatically change the
way your shots come out. [NOISE] Tip 10. Compress time with a
timelapse or hyperlapse. Another visually
creative technique to add to your videography
tool belt is the timelapse. You can do this
the proper way by capturing photos at
regular intervals. Many modern cameras have the capabilities of
doing this internally. You would then take
all of the photos into your editing software and edit them together sequentially, usually one frame at a time, or you can simply shoot a longer video and
speed it up and post. Timelapses are a
great way to help transition time in your video like from one day to the next. It's also a great
way to quickly show the progression of something
that takes a long time. Add motion to your timelapse
to make it a hyperlapse. It'll take lots of practice
to do this smoothly. If you want an easy way
to get this effect, you can add subtle
Zooms or pans in post-production if your
resolution is high enough. [NOISE] Tip 11. Add an ND filter to your kit. If there's one piece of affordable equipment
that you should add to your camera bag is the variable neutral
density or ND filter. These typically screw onto the end of your lens and you'll need to get one that matches
the diameter of your lens. ND filters cut down light
entering your lens, and that helps you get cinematic
shallow depth of field with a wide open aperture even during the bright daylight. [NOISE] Tip 12. Pay attention to
your background. While your subject is
the star of the show, your background is just as important for
telling their story. The background should always add to your story not to track. Sometimes this means
getting the cleanest, most abstract
background possible so your subject can stand out. A shallow depth of
field achieved with a wide open aperture and or a telephoto lens
is a great way to do this with your camera or
it might mean trying to find an environment where there's not many distractions
in the background. Other times, your
background should be a character of
the video itself. Notice how most of your
favorite YouTubers likely put a lot of time and effort into designing their backdrop. It's not something to skimp on. Also, when out in the
field, look around. Sometimes simply
moving your camera and 90 degrees can result in a
completely different shot. [NOISE] Tip 13. Add a second camera. Shooting with two cameras gives you more
options for the edit. This is really important for an interview or talking
head based videos. Having a second shot gives
you something to cut two, which will help
cover any mistakes or when trying to condense
what is being said. It also keeps your videos
visually interesting for the viewer instead of
watching one long shot. [NOISE] Tip 14. Think photo composition
techniques. Studying photography
is a great way to improve your videography eye. Several common rules
include the rule of thirds, which is placing subjects
at the intersection of the thirds lines,
leading lines, using natural lines in your
videos frame that lead the viewer's eyes to the subject and framing
within a frame, finding natural frames
to put your subject in. These composition
techniques will naturally give your video a balanced
and interesting look. But there's also a time
to break these rules. Centering your subject is
also a common composition nowadays and is often done when speaking
directly to the camera. This is an engaging
composition that helps build a direct connection
with your viewer. [NOISE] Tip 15. Storyboard your project. Do your homework before
the shoot starts. This includes, at
the very least, writing out a shot list. Take this to the next
level by coming up with a storyboard that can help you pre-visualize what
shots you want to get. It will also help any
crew members working with you know exactly what
you're trying to achieve. It doesn't have to
be anything fancy. A scrap of paper with your
best doodles is just fine. [NOISE] Tip 16. Remember your story. At the end of the day
we can throw out all of the previous tips if we
don't think about story. Every video has a story, whether it's a
promotional commercial, a travel blog, a
documentary or music video, or a narrative short film. Every shot moves your story forward and helps
to tell that story. Whenever you plan a shot, always think to yourself, how can that shot better tell
your story? That's a wrap. I hope you've enjoyed these tips and that
this video provides an actionable and
inspirational list to fall back on if you ever feel in
a creative [inaudible] . Now, keep going and enjoy
the full course. Cheers.
3. Project 1 Overview: Commercial: Welcome to another project. This one is a commercial project that we're going to be doing. What I've come up
with for this is a spec commercial that
we're going to be doing for a local mountain
biking trail system that's actually going
to be used for, at this point, the upcoming 2028 Los Angeles
Summer Olympics. It's the location for
the Summer Olympics. What's going to be interesting
and it's going to be fun is you guys, we're all going to be
tasked with how can we make ourselves look cool riding
these mountain bikes, being not pro mountain bikers. That's one aspect of
it, but a lot of it, I think is going to come down to the cinematography of it. The other aspect is while
this is going to be the 2028 Olympic
mountain bike place, [LAUGHTER] it's not necessarily the best looking place for shooting mountain
bike footage. They're going to be building
a whole new trail system. It's going to be epic by
the time this happens, but how do we take an okay situation and make it look awesome?
That's the goal. With the commercial
aspect of it, I've done a lot of prep to think about what shots do we need? How can we set up these shots? It could be applicable
to narrative film. It's going to be
documentary style footage, but, yeah, I'm excited
about this one. When coming up with
this commercial, the first thing I did was actually script out
a little piece. The story, and I'll have the actual script up on the
screen for you to read, is basically showing
Los Angeles is this place known as
this concrete jungle, Hollywood, the beaches, but behind the traffic and
the smog is actual nature. That's what we're showcasing. There's some shots that
we're not going to be covering in this class. We might actually be using
some footage that I find and that's part of the
storytelling element we have to get into
and the editing, we need shots to cover, but today we're going
to be just filming the mountain biking footage. In terms of storyboarding, I just have a variety of different types of shots
you might want to get, such as an aerial shot, showing the location, a few different types of
just general mountain biking shots from pans to
tracking shots, to close up, slow motion shots. We're going to be doing some product and beauty shots of the actual mountain bike. This might not be as
applicable to this commercial, but it's just going to be
a fun shot to get into. Then also, I'm going to be doing a POV action cam shot as well. It'll be fun. You can see here that I did a couple of different
storyboards. One is just the storyboard for the types of shots
that I just drew. You don't have to
be a great artist to be doing storyboards, [LAUGHTER] but it
helps you come up with a plan of action. Then here's the
actual storyboard for the commercial itself, going from some maybe
cityscapes shots of LA, showing the traffic, to more of the nature
mountain biking shots that we're going to be going at. This was all done in Canva. I just use the free
photos that Canva had and a couple of shots that I took as well doing
some location scouting. We're going to talk
about location scouting in the next video, but any thoughts about
the commercial aspect, what people should
keep in mind in terms of going out there,
doing a commercial, whether it's a product,
whether it's like this for more of an event, what types of shots should
people be intending to get? [OVERLAPPING] I think
based on your storyboards and the pictures
that you've chosen, there's a tone of the sunset
in California colors, the blues against the warm sun. I think there's something
to be cognizant of. Then thinking about
advanced videography, especially with yours, Phil, is what is the
professional aesthetic? A lot of that is aerial stuff. That looks professional because not a lot of people can get that and that looks professional or shallow depth of field. I imagine we'll be shooting
with longer lenses. We're going to be
shooting 2.8 wide open as much as we can to create
that professional aesthetic. Then movement, which is huge. [OVERLAPPING] Yeah. Capturing
movement, camera movement. I think this is
going to be great if you're doing even sports or any action stuff or even events. The stuff that you're
going to learn in this project can be applied
to all of that as well. This is so important to also
how much you're planned out, especially with your
scripts that you have. You have the timing, you know exactly
what you need to be, how long your clips need to be. Yeah. That's crucial, especially
when you're doing such complicated
movement type shots. Yeah. The storyboards
really show that movement of LA's cityscapes and
this urban jungle. Then also there's
these nature shots. You see an LA mountain
biking commercial, and I don't know, for me, at least I think
of mountain bikers in streets and stuff, but then you have these nature
shots and the storyboard. It helps, I think, a huge part with commercial
work because it's precise. You're selling something, each thing is very focused. You painted the
picture really well, we're going to move from these big cities
and then we have details of bikes and then
we have these trails. It starts to paint a visual in my head of what we're
trying to achieve with it. That's exactly what a
storyboard is all about. Another aspect is
location scouting. Compared to what Sam is going to be doing with
his travel Vlog, I wanted to go out ahead of
time and make sure that, we have a shoot date on X date, we have a couple
of hours to do it. We need to know exactly where we're going to be
and have it all planned out ahead
of time rather than just going out running gun, trying to figure
it out on the fly. In the next video, I'm
going to be looking at some locations that I scouted. I'm going to show it to you
too and we'll come up with a plan of action for where we're actually going to be
shooting. Sound good? Sweet. See you there.
4. How Location Scouting Can Improve Your Videos: If you're doing a commercial, documentary, narrative film, location scouting is probably an important step before you
actually go out and film. This is going to look
different in different cities, you might need to go
out and get permits, you might have to run
out a house or a space. For us, we're shooting
out in a park and it's just commercial project for fun, so we're going to be able
to go out and do it. But what I was trying to look for and you can see some
photos that I have up here are some different spots where we can set up our shot, set up our scenes
that look cinematic. As I touched on this park, when I watched the mountain
bike films and videos, I watch a lot that are
like these epic in the middle of the forest
up in Canada or Utah, flying down these red mountains. How can we try to get some
interesting looking setup? Because it's not
just about the bike, it's about the trail, it's about how the trail flows. It's about how we're going
to be going down the trail. How you shoot the trail. [LAUGHTER]. Like I said, how can we make us just regular people
look cool on a bike? Here's a couple of
ideas that I have. You can see there's trails that are going
along the hill, there's trails going
down the hill, there's scenes
where we can set up with the lake and the
mountains in the background. Here's a couple of
ideas for spots where you can go through the trees or go through the brush and the
trail winds through. I don't know if any of
this call out to you guys, there's other options as well in terms of just looking
at these photos, how would we go about
shooting these? What's your first take? Just seeing these photos and the fact that
you've been there, if you can location scalp before commercial or
for any type of shoot, it's so helpful in certain envisioning
what you're going to do this little S-curve
into the trees. I think with making staphylococcus iMac, having
things in the foreground, having things in the
background, having that, it adds a movement
of life to it. That is really
appealing to me like someone whizzing around through the trees, breaking through. It wanted to be from this angle, I probably come over, get some more trees
in the background. I was looking for
that. I was looking for stumps on the
ground that might be a foreground
element that you've come out from with movement. Or you might even
just be focused on that foreground element and see the bikers go by in the background out of focus
or something like that. Or then being in that tall grass and just having that grass in the foreground and
someone goes zipping by, there's a lot. It's so funny that that's what you guys think of automatically. In that same photo, what I thought automatically, was being on in
that position that you're in on a 200
millimeter lens. Having very little and
focus and just trying to follow the close-up
action of the tires, the gears, the hands, the face, and it just
going for like by you. All you need is
like, I don't know, two seconds of clip, because it's going to be having a lot of energy in the edit, and that's something
you'd be thinking about two of the
location is like, I need to hit a lot
of these locations, but I can shoot a
differently to add all that different timing
in the edit later. Well, and going back to this location right
here on the right, you can see this trail
going down to the mountain. Now, this is actually one of the steepest trails in the park. It's a bad at 20 percent grade, but is it going to be
interesting to shoot that? Cameras takeaway, like they say, it takes away how
epic a trail is, it slows it down, it's not as steep, it's not as efficacy
actually writing it. So can we shoot this
so it's interesting? Maybe we're off to the side, we're seeing the
grade of the hill. Or maybe it's just not something that's going
to look that great and something that's a
little bit flatter might actually look
more interesting, even though it's not as epic for a mountain biker
to be [OVERLAPPING]. Right. I think a big
thing with this an edit and with commercial is like,
well, I was talking about. We have these quick
cuts and we're just getting these
quick details, and that we'll still find
a good location for that. But what are those moments after going through
the quick things? We're focused on
some photography and videography right now. That's what this
course is about. But I think to be a
great videographer, you have to be thinking
about the edit. What is that shot that is
going to be that aerial shot? What is that big reveal shot? Yeah, maybe this is great
because we can get a lot of speed and we can get details of the dirt flying off the wheels and we
can get that energy. But is that a good shot
to serve open up for? Probably not. Because it's not going to look that exciting. Yeah. Whereas maybe a more
interesting wide shot will be in while
these other photos that is a better time to serve like show a bit more
of the landscape. Another thing you can do with this area of the downhill
thing is if it doesn't look that great is that
can be where we put the action cameras
on the bike itself, and you get the fixed shot of the handlebars or
like you or like down at the tire because
then it'll give you all that movement in it,and
it won't just be flat. Speaking of trying
to find a spot like a good place to pull
out and do an aerial, something that's super helpful is Google Earth or Google Maps. But go to earth.google.com
and you can see aerial shots of the
whole world now. Here you can see the park
where we're going to be at. I was looking at
this, I'm like, man, there's some trails
that I haven't been on. This is dope. If the sun is setting, I think there's a
couple of options for a last epic shot
of [OVERLAPPING]. There's a trail that's
going through these trees that we might be able to shoot with the sun in the background. There's also this hill over here where there's
not as many trees, but it might be a little bit
cleaner shot with a somewhat silhouetted bikers going down here with the sun
in the background. That's one idea, so just using Google Maps, I was able to see
those two options. It's such a big thing to be able to scout answers see this beforehand and Google with is such a powerful tool to do so. Yeah. I think if you do get the
opportunity to location scout, we or I use app
called photo pills, and you can see where the sun is going to be at
different times. Because a lot of this is when
is that sunset beauty shot? We're in LA typically,
it's sunny here. Yeah. It might be a cloudy day, but still it's good
to know where are we shooting? At what time? You can plan out your whole
day and where you need to be, what gear you're going to need in those different locations? It just makes a day
runs so much smoother. If you have a client, you're not posting around to
figure out what's next. We're going to go here first
and then we'll go here, we're going to be
at this location. We can pin drop it, know
everything exactly. In the details, we're like, okay, where are
we going to park? There's some of these
trails that are a little bit farther for us
to hike in with our gear, but, okay, there's
this spot that looks okay and there's a
parking spot right there. We can just easily
grab that shot or that we're going to
be doing a shot where we're tracking through trees. I wanted to find a
spot where we could be driving along,
getting that shot. We need a space to be able
to drive the car or if you have some other dolly or gimbal or something like that, but all that is great to
do in pre-production. It'll save your production
because you really want to get there and you want to
be creative and having fun and focused on that, not stressing out because
you don't know where to go to get the shot that you
thought you were going to get. Hopefully, I've prepared enough we're going to see
with this project, but we're going to
dive right into getting our shots
coming up next, so let's go do it. Let's do it.
5. How Adding Motion & Shooting at Multiple Angles Improve Your Video: We're here at a setup. We've got a cool little S curve coming through some trees. In this scene, we're
trying to build a story, build out a scene. We're going to work our
way up from a basic shot, something that you might just go grab if you're shooting
a documentary, a promo, you just grab
the shot, you leave. No, we don't want to do that. We want to take our time, build an actual scene
with several shots. Well, how are we
going to do that? The first shot is going to be, like you said, just locked off. We're going to let you
guys pass right through. It looks great because
they're coming really close to camera. That's awesome. The next shot we're going to do is we're going to
punch in a little bit with the lens not digitally, we want to do it optically
because it'll add that shallow depth to feel
that really awesome aesthetic. The next shot we're going to
do is we're going to slow everything down,
frames per second. We're going to shoot at
120 frames per second, remembering to
change our shutter. With a little bit of
motion, with a little pan. That's right. We're going
to do some panning. You want to add that
pan and movement in before we add the
frames per second, and then we're going
to do a moving shot. With my hand, we're going to come
off some foreground, then focus to you guys
at a high frame rate, which will add a lot
more energy and a lot more fun and
interest in this. I think being able to capture all these shots
allows whoever is editing the video to have different options in case one looks better than the other, but also to be able to cut
between the shots and actually have a more interesting
scene to look at. We're also going to to flip around and get
another shot from a completely different
angle of us entering the trail and we'll see if that adds to the story as well. I think when you're
looking at him, when you look at the wide shot, when it's locked off, you guys are going through
and you compare it to the moving shot of us
moving across a foreground. Look at the difference between the energy, the aesthetic
professionally. When you start to add more variables to what
your shot looks like, it's not just locked
off, it can really add a lot of production value. Also with our camera, we've got the ND filter on our lens which is cutting
down the light so that we can open up that f-stop wider so we have that
shallower depth of field. That's one thing.
If you don't have an ND filter they're
not that expensive and it's a great tool to have
if you're shooting out in the middle of the day like this when it's bright and sunny, you just don't have any
option to keep that F-stop wide open to get that
shallow depth of field, so the ND filter is a great one. This is a variable ND. This is a variable.
I really honestly think that if you're going
to advance your videography, if you're going to push yourself into professionalism
when you're outside, you want that shallow
depth of field, that aesthetic you need
to shoot at a 2.8, you need to use an ND filter. It's helpful to have a
variable one because you can change it depending
on your situation. But they do make solid ND3, ND6, ND9 steps. But you could also have a map
box with filters on it but variable screw on ND for your specific lens.
Super helpful. We're also going to
have Sam riding with me just having both of us for the commercials
that we're putting together adds to that story
but also just for the shot, I think it's going to make
it more interesting to have both of us in the shot. Something also helps too, we're talking about
advanced videography, this cage on this
camera. Huge help. I was able to grab onto
this and you can create some movement instead of
having to finagle it. Helpful, also your flip
out screen. Super great. Cool, I guess. Here you can see in
this first shot Will just set up on the side. We rode past him. As always, the first
shot is a test shot. We're going to [NOISE] two of these shots that
was just me going by and then he re-framed
just a little bit. He was shooting in 4K, So we wouldn't be
able to punch in just a little bit but still not that
interesting of a shot. Next, Will did a
similar framing, but added a little bit
of a pan at the end. Just adding that little bit
of motion just to attract us. Going by, I think helps. Although at the
end of that shot, that tripod's sitting there, so that's not going to work. Here was another one,
another attempt, and this was shot in the higher
frames per second at 120. This is actually five times
slower than normal speed, or about five times. Here you see he punched
in quite a bit. You can see the expressions of our faces just a little bit. The autofocus was actually
pretty good on this shot. It's a nice combination of different elements
that he was able to capture from me going
down to the bike, that same as riding, getting close up and punching in allowed him to get
a decent shot of us riding away there as well instead of seeing
that tripod on the side. So 120 frames definitely smooths it out,
punching in was good. Then finally, here's the shot
with him hand-held going behind that branch putting
that foreground element. Now I liked the shot. There's definitely some
elements that I like about it. It was on auto-focus, so it's trying to find
focus here and there. Right about there
I am happy that it locks onto focus on to us and actually having some of
that stuff earlier on where it's focusing on the
branches is nice to use. Although if I were
to do this again, I would lock focus either
on the branches and just get that shot with the
foreground element in focus. Then also get the same
shot locked onto us in the background or manually focus where it starts off on the branches and
then right around here it racks to us and is a little bit slower
because the autofocus, even though it did a
decent job getting onto us it was a little bit abrupt and the slow motion
helped it a little bit. There's actually settings
depending on your camera, you can adjust how
fast autofocus changes from focusing on one thing to the next and you can
actually slow that down. That might be a
setting that when I'm filming this action footage, I might change in the future. Something that we notice as
soon as we came to this spot, because we're shooting, the
sun's right in the middle of the sky and there's trees here. We've got bright sunny spots, and then we have
dark shady spots. You have to make a decision. Are you going to expose for the brighter area of
the trail or whatever you're shooting or
are you going to expose for what's
in the shadows? It might take
playing around with, testing out the shot if you
are exposing for the shadows, maybe it's going to be
completely blown out in the sunlight and you
don't want that. Generally you don't want to be overexposing your highlights. If you're shooting
raw log footage, you can sometimes pull up some of those shadows to
have enough information to make it look good even if you are shooting at a
lower exposure, but you generally don't want to overexpose
your highlights. Now with this shot just
walking around it, looking this way up the
hill which you can see now, we're going to see
the bikes coming down right in the
sunlight and we're going to expose to us coming
down in the sunlight. Now flipping around, we're going to walk up there and there's a nice shot
where you could see the trail and you
can see the trees. Again, I think we're
going to going to still expose for the sunlight, even though we're going to be in the shadows at the
beginning of the shot. We're going to test it out. We'll see what it looks like and maybe play around with it. But just another
thing to think about. This might also make
you think well, I went to film maybe
later in the day or when it's trying to
shoot on a cloudy day or some time when the
shadows aren't as harsh that can up your
video quality as well. Here we see the hard work of filming mountain
biking sequences. Here is more of that
storytelling element. You see Sam and I, this is going to be a shot, just part of the commercial. Two buds meeting up to
get on a ride together. Will had us do it
a couple of times. This last one I thought
was the best one. Then Will got behind us
and he did a couple of different shots
that can hopefully pair together with us going down that next part which
we filmed previously. I like this one where we
both went around him. Now this one is the one where he exposed to us in the shadow. It's not going to work with us down there on the trail below. Here is where he exposed
to us down in the sun, and that one is going to work if we want to use that part of the
shot from down there. Here you can see well, running
after us in that shot. Are you ready? Action. That reverse shot, the full thing basically. Having all of these different
shots to be able to piece together is going to be
awesome for our edit.
6. Capturing Motion with Panning & Tracking Shots: We're out here on the
trail and I'm going to be biking down this path behind us. One way to capture motion is to pan with motion or to
track that motion. We're going to be doing both. If you're shooting
action footage, sports, or even if it's a
narrative film and you're filming someone
walking across a scene, a pan is a basic camera move that allows you to
capture that motion. On our camera, we have a
100-400 millimeter zoom lens. It's a mirrorless camera,
so it's even tighter. Using that telephoto lens, it's going to make
the action faster, a little bit more dynamic
than using a wide lens. The first thing you can do to make your shots look better, or at least more dynamic, I think is to zoom in or
use a more telephoto lens. First, Sam's going to
get this panning shot, and then we're going
to hop in the car and do the tracking
shot and you'll be able to see the difference between these two
types of shots. Go for it. I'm just going to talk over the shots that Sam is getting of me and you'll notice
in this very first one that it was more of
just a test run. Sam is getting used
to the speed that I'm cycling [OVERLAPPING]
and the focus and everything like that. Here's take 2, you'll see is a
little bit better. This is in full speed shot
at 59 frames per second. Sam's a little bit tight and we're going to
change the setup in a second [OVERLAPPING]
but here you can see in the slowed-down speed, which with shooting at 59
frames or 5994 technically, you can slow it down about
half speed and still get buttery smooth video
without any jitteriness. There's parts of this
where there might be a moment or two where I could use that bit of the
shot in an edit. I'm not necessarily
looking for the entire shot to be
perfectly in focus, perfectly framed, but
it would be nice. We move Sam back so
that he was shooting a little bit further away
with this telephoto lens, I think it's going to help. Here's the third
take at full speed. We'll do a last one. Being on the tripod is crucial for Sam to get a steady shot. Here I am, and
he's starting with me and right about here when I peek out
through this tree, I think is where there's a bit
of the shot that can help. This is on autofocus and it does a decent job at sticking
with me as I go across. Here is our fourth shot again
at full speed to start out. You see Sam is actually
zooming out a bit with the lens at the
very beginning of the shot and that one
is the best one by far, he stayed with me, my head wasn't getting
cut off in the frame, here it is slowed down. You can see Sam
punches in just a little bit with the lens. This one, he might have moved because a lot
more of this is usable. What I was really going
for was trying to get that movement of me
going through the trees. I think that shot was decent. Speeding. Here's our fifth
shot at full speed. You can see Sam zoomed
out just a little bit. Starting out zoomed out
seemed to help as I went by. I'm getting closer
to the camera, so by the time I go towards
the left of the frame, being a little bit wider at
the beginning, helped out. Some of this was very usable and remember I'm shooting at 4K, so I can punch in
if I'm going to be exporting at a 1920
by 1080 sequence, I can punch in 200 percent and still be full quality or full resolution and
not lose any quality. A bit of that was actually
pretty good for this shot. Now we're going to see the
tracking shot with Will in the car this first
time at full speed. This was shot at 5994 frames. Definitely faster, definitely a rough first attempt
but pretty solid job, pretty solid camera work. This is all handheld and so the internal in-body stabilization
helps quite a bit to smooth a little bit of
those jerks but slowing it down is going to
help and also adding some stabilization in post
is going to be necessary. Here is that same
shot slowed down. You can see what that
looks like and again, I'm not looking for the
entire shot to be perfect, I'm looking for a
second here and there. One of the issues with
this shot is the exposure is pretty wild going
from sun to shade. I told Will to expose
to the shadows so that the parts here
look better than where I'm in the full sun although I don't
like how some of this is being overexposed. Really, some of this stuff at the end is not what
I was looking for is really more of those bits in the beginning that I might use. Completely overexposed here, and unless you're
on auto exposure, that's just going to
happen when you set yourself to one exposure. Now here is the next
shot, the next attempt. We punched in, I
told Will to punch in and I'm shooting at
120 frames per second. This is basically five
times slow speed. Five times slower
than normal speed. Here you're going
to be able to get some just individual parts
of the shot that are usable. You can see that the
tracking option, it's a different type of shot. I think it's a much
more advanced type of shot compared to the pan, but it did take having a car, having someone driving that car, having Will shooting
with the camera. I think some of those earlier
bits were more usable than this part where the focus
wasn't as sharp on me, but more of it was a little bit shallow focusing on the trees. Now, when we see this video cut with
the other wider shot, I think that edit is going
to look pretty cool. I'm going to show
you what that looks like right now just so
you can get a sense of what we were going
for with capturing the shot both the wider
and also the close-up. [MUSIC] There you saw just a
very very quick edit with a little bit
of color correction and you can see how I might put these two or this
variety of shots together, cutting from full scale to cropping in with that
4K footage using the 5994 full speed to slow motion using the 120 frames
per second slow motion, also cutting together
as you just saw there, the tracking shot to
the panning shot. The panning shot
is not a bad shot. That's not what this course or this lesson is
supposed to tell you. It's just a different shot. I actually think that we
could go back and get a smoother tracking shot and maybe even in a
different location or with different lighting
when it's cloudy out and it would be a
lot better shot where I was actually exposed better
for the entire shot. Because it was so bright out, I think that wasn't as good
as I was hoping it to get. Although as you can see, there are bits and
pieces here where I can cut it together
in a sequence. For this shot action
style footage, it's great to be able to cut
short quick bits together. If it was a different
type of shot, if I was tracking
a person walking down a street or
something like that, I would want it to be a lot
smoother and better lighting in general and better exposure. But as you can see with these two shots that we
got today in this scene, you can cut them together
and come up with a pretty solid edit
that's going to be in my actual
bike promo video, which you'll see later on. Thank you so much for watching, and I hope you enjoyed
this lesson and it gives you some ideas for
what you can do. Cheers.
7. How Changing Your Background & Focal Length (Lens) Can Improve Your Video: We just got back
from shooting one of our setups and
what we were aiming to achieve is we started with
a general wide shot and we had Sam and I coming down the
trail towards the camera. You had framed it
up pretty well, nice trees using us coming down on the lower
third of the frame. Look. But then we were trying to think
of how could we take, if we're stuck with this camera, stuck with this lens, what would we do to switch
it up and make it better? I think the first thing
we came up with was just panning over and changing the background
[NOISE] for this shot and for this series of shots that we're doing
for this project, I think panning over
getting the shot of us profile going across the frame with [BACKGROUND] the mountains in the background, created a much more
different setup or scene than what
we've shot before, which I think might
work well for the edit. We'll see if it
actually cuts together because it's a static shot, [NOISE] but it just gives a completely different
feel and it looks like a different place
or location gives it a little broader
appeal to the video. I think normally when you're
in a situation like that, just simply panning or looking in a different
direction or moving into a different
composition can add a lot. Don't get fixated on
what is in front of you. I think that's a basic, I don't want to
say beginner move is just like, this is
what's in front of me. No, get up, move your feet, pan over, look to the right,
look to look behind you. Look up, look down change up the composition because you never know what can
be around the corner. One of the things we
ran into with this shot again with the others
is just the lighting. Being actually out in
the middle of the day, lots of shadows with the trees. Finding a space where
[NOISE] both the cyclists, we were riding in
the sun so that we weren't too dark looking at the background which is
completely in the sun as well. That was, I think, something just to keep in mind, lighting [BACKGROUND]
so important even if you're out shooting
with natural light. The next thing we
did to try to make the shot look better
is swapping lenses. This is something that
is a little bit more advanced if you don't
have different lens. If you're shooting
with one lens, you might not be
able to do this. But we put on the
100 to 400 lens, which is super telephoto. You cranked it up. Was it at 400 or so? Yeah, I started at 400 and
had you guys come down. I think I bumped
out a little bit. But the main thing to
think about here is that we're not lens specific, but we are millimeters specific,
focal lengths specific. We jumped from fills like mid-range wide lens
to a telephoto lens. If you're trying to do
advance here videography, you need to think about
getting those long lens because it created that
crazy depth of field. Look at that shot and how things are very out of focus and vary in focus but it
looks like a commercial. This is what we do as a cinematographer in
big time commercials. We shoot long lenses at high frame rates and
manner just look so pro. We needed a lot of space for
you to backup. [OVERLAPPING] Way the heck back there. Seeing us coming down the hill. That lens, I personally use
mostly for photography. I don't know if I've
really used it at all for a video myself maybe out
shooting some wildlife photos. I snapped at it over the video, but it looks good. [OVERLAPPING] Honestly it has the same look as a pro prime 400 millimeter
lens or something like that. It just adds that shallow depth of field and the compression. Because the longer the lens, the more compressed your
subjects look versus a wide, it looks a little
bit more spaced. Yeah. That adds so much to
the production value. Just simply changing your lens, which is like such
a simple thing that we can just tweet or
tell someone but until you see it and then until
you take the action to pony up the money
or rent a lens, you're just going to be stuck
in this wide angle world. Talking about focus with
the telephoto lens. We initially had
it on auto focus, and [LAUGHTER] it's
going to depend on what camera you're using. Some are better, some
have settings within that you could change how it's
trying to track objects. You could change as an object
coming towards the camera, is it going all over the place? Is it going across? You can sometimes set
that within your camera. Definitely look at that
if you have autofocus. We found that it was a
little spotty though. [BACKGROUND] We were shooting
at 120 frames per second, so it's super slow mo and so
for actual usable footage, there's going to be
a lot of moments that are in focus. [OVERLAPPING] We going to need a
couple of seconds. Even in those first
autofocus shots and then we switched over to manual focus just to get a
couple of where you were controlling the focus yourself. At home, I brought out
the telephoto lens, the 100 to 400 to get a
couple others sample shots. I just wanted to play around
with the focus settings. I changed the tracking
sensitivity on my camera, which might be an
option for you. Here I can tell, I think it did a
little bit better of a job tracking both my pup, Ashdy and one of my sons on
the scooter coming at me. Then here are a
couple of examples of just straight on still shots. You just see that compression
versus a wide lens. A completely different
style of shot. Not necessarily one
being that much better, or you only have to use a telephoto shot but
I just want to show you the difference in what a telephoto and a wide
lens could look like. You can see that
the telephoto lens, it just compresses everything and the background
gets blurrier, and it does have that more
cinematic quality to it. Even though with the wide
lens on this particular one, I am able to open it up to an F 1.4 which allows a fairly
blurry background. Still is just a
different type of shot. Something to know about high-level cinematography
in commercials and narratives and stuff
like that in Hollywood, a lot of lenses that they
use are manual focus. Not very many of
them are auto-focus. You actually have a human
dedicated to pulling focus. That's their sole job on a commercial or
something like that. You as a videographer,
if you're by yourself, autofocus is great if your
camera can keep up with it, but keep in mind you can also
do it manually yourself, but then you have to also pan, tilt, zoom, takes practice. Don't get frustrated right
away if you're using manual. Also, a lot of these
lenses are autofocus, which means when you try
and pull focus with them, it's an electronic system that's trying to move the focus. It's not always as precise as these big time budgeted
commercials where you literally have a person there manual pulling the barrel while someone else
operates the camera. Practice takes a
lot of practice. I mess up a couple of times the autofocus messes
up a couple of times. It takes repetition and
it takes Phil and Sam, walking their bike up and
down [LAUGHTER] all day. The takeaways from
this setup was, one, if you're stuck on one lens, the background can
make a huge difference in the story you're
telling with your shot. Then second, putting on
a more telephoto lens also is something that can make your video look
completely different, basically same exact setup, same line that we
are coming down, but a completely
different type of shot. This is great. Get out there, and I'd say do all those
things but practice. You probably not going to
get this on the first try, but that's how you become a pro. See you in the next one. Cheers.
8. Add Aerial / Drone Video to Improve Your Videography: Let's talk about one
of our other setups, and this is our drone setup. Drones can add a completely different
production value to your videos. The beautiful thing
now is that drones are rather affordable
to get yourself, it can be a great investment for you as a videographer if you're starting a
production company, especially for certain
types of videos. If you're doing business videos, if you're doing wedding films, if you're doing documentaries, pretty much any video, you can use a drone shot and it makes it look like
a million bucks. But there's a lot
that goes in with flying drones and not
only how to fly them, but how to get an
actual good shot. Flying the drones themselves, there's a lot of things you
have to take into account. You have rules, like
some countries, you might not be
able to fly drones, some areas you might not
be able to fly them. Some places you need to get
advanced authorization. All of that, you have
to do the research yourself ahead of time to know there's different
weights in drones. Some they make micro
drones that are under the weight limits in different places that
you could fly anywhere. There's lots of
things so drones, you do have to do your
research to know if you can fly them where
you want to fly them. Make sure that's probably
the number one rule. Then the second rule
is just safety drones. Can fall, they got blades that are spinning and so you've got to be super careful with them. I would say do not even
go out to fly a drone until you've done
the proper research for your specific area. Not just for safety, but you can get fined
and a lot of places or get ticketed
and that's no fun because then you'll just
be paying money for the cost of buying some other equipment
that you could be using. You look specifically up for
where you're about to fly, know the rules,
be safe about it. Make sure everyone
else around you knows. Practice again in a safe area. They can be very dangerous. Now I say, we do this because
we've all been flying drones for the past almost
decade now at this point. As they came out. As they came out off and on so we're pretty seasoned at it. Phil checked in with the local authority about how we can fly, where we can fly, what
our limits we're flying. We are allowed to do that. I think just knowing that
stuff before you even get into the creativity
is really important. I think one reason to
use a drone because it's like a drone shot
is going to look awesome so let's just
use it. That's great. But I think a good reason to use a drone is to
set the location a little bit better
than what you can do with just another
type of shot. That storytelling element of being able to
backup and actually showcase the location
of where you're at, I think is a great
reason to use a drone. In terms of different types of shots you can
get with the drone, it's pretty much anything
you could follow people, you could track people, you could be shooting
straight down having people or whatever
it is you're shooting. People go across
the frame and we're trying a variety of shots while we were
at out filming today. Yeah, it's endless. That's
the idea behind the drone is that you can get shots
that most people can't. I think that's where drones hit advanced videography
in the sense that if you go through
the work to do it, you go through the
practice of doing it, your video will stand so much higher in quality above
other people who have not taken the time to practice, do the prep work, do the shots. Now some of the
shots I was doing the Phil and Sam are really cool in the sense that I
was trying to track them, follow them parallel
so they'd be crossing frame. That
was really fun. I was trying to follow and chase you guys as if it's
an aerial view. There is another one where they were walking
their bikes up a hill, they looked exhausted and I was just creeping behind them. I was just slowly pushing in like you would on
a gimbal or a slider, but I don't have to be out there running. I can just
use the drone. In that sense, that shot wasn't even up really that high, it was very low, but still creating
a nice look to it. Drones have this
huge versatility in different types
of shots that will add this production value
to what you're doing. In terms of different drones. Some will have a camera with a little gimbal on it
that you could rotate, tilt up till down some. The cameras are more attached to just the body of the drone and you can maybe do
a tilt up or down. In terms of just quick tips
for movement of the drone, the first thing that comes
to mind is don't move. Try not to move the
camera too much. Certain drone with
a gimbal and stuff, you can do subtle
pans and tilts, but I think it's
better to just set up your composition and
then use the drones movement itself to get the movement so the
drone can lift up, it can go forward,
goes side to side, but not so much the rotation, I feel like it
doesn't work as well. It depends as you start to
get practice, you can do it. But if you think about it, like if your face is a drone, you're moving your
body or the drone like this, sideways. That's how you
basically do the moves. I will tilt every so
often, but again, you have so many axial and tilting up and down and making sure you're keeping
your subject and frame, it takes so much practice
to get complicated moves. I think starting out if you're pushing yourself is
just doing, like you said, lateral moves or push
in or up and down using the body of the drone more so than the camera itself. I think another thing, just more advanced drone shots will include foreground elements that you're coming around, coming between,
flying through it. One of the shots we got
going through the trees, I think this looks pretty cool
compared to just if we got that same shot following us with an open field or whatever, having things flying past
the shot looks pretty cool. Yeah, so everything else
that we've talked about in this class applies to the
same camera on the drone. Like elements in the foreground, like Phil saying passing through like we did
with the gimbal. Also having flares
that look really nice. Then on top of it
shooting with an open f-stop so that things
can fall out of focus. I put an ND filter on the
drone so that it would bring down the lights so that
we're able to shoot at a two-way or four out there. Again, everything applies
to the camera, same rules, but you're just in the air and operating a dangerous thing. We got some great shots at that one location
and then we took the time and we waited for sunset or at least
closer to a sunset, we got some better lighting
and we were trying to think, how can we use
this drone to tell the story of the
commercial we're creating, which is about the juxtaposition
of LA traffic to nature, mountain biking and luckily, there's a spot at the park where right next to the
trails is the freeway. What we did is we
went to that spot, took the drone out, was on the traffic
on the freeway, pulled back to reveal, Sam and I cruising
down the hill, that's the money
shot right there in terms of thinking
about other things, lighting and
storytelling not just how do we compose a
great drone shot, but how do we use
the other skills like lighting and storytelling
to make it better. It's only one shot, but it
adds so much to this piece. Really we put a lot
of effort into this, like what you used it for like a second or two
seconds or whatever. We looked at Google Maps, so we looked where
we wanted to fly, we waited for the
right time of day, we had Sam and Phil get
ready to roll down the hill, I was prepped, I
formatted the card, we check the drone policy
and it's two seconds. But that shot itself is what
adds so much to that piece and this is where you really become an advanced filmmaker. Videographer is doing all
that work just for two shots, but it makes a piece I think. That's a lot about drone
footage, about getting aerials. If you have questions,
let us know. But hopefully just some
of these ideas help you get better drone shots
when you go out and shoot, thanks so much for
watching. See you.
9. Changing Your Lighting to Improve Product ' Beauty' Shots: Here we are in our product
shot demonstration. What we're going to
be doing is getting some product beauty
shots of the bike here, and this is our example
of an object that we're going to try to film
to make look beautiful. We're going to do it
in two scenarios. One is out here in the daylight. It's getting closer
to golden hour. The sun is pretty
close to the horizon, so it's pretty dramatic
lighting on the bike here. But we're also going to be
taking it inside our garage, and doing some actual
artificial light to have more control, and show you the two
different styles. Both, we're going to
try to make look good, just completely
different styles. Now, in terms of what
I'm shooting with, I'm shooting with
my Fuji camera. This is a crop sensor camera
with an 80 millimeter lens. Because it's crop sensor
and an 80 millimeter lens, it's going to be super tight. I'm not getting a whole
shot of the bike. I'm getting shots
of the components, getting shots of the branding, just different
elements on the bike. Now, because I'm shooting
with such a long lens, if I was doing this completely
handheld at normal speed, you're going to see
a lot of motion. Some cameras do have some internal stabilization
inside the camera itself, and this camera does have it. A lot of modern mirrorless
cameras do have some in-body stabilization, and that's going to
help with a little bit of the jitters that you
have in your hands. But on top of that, what I'm going to do to try
to smooth out the motion without using a gimbal
or a tripod is, one, I'm going to be using this rig that I
have set up here. This gives me a little
bit more control. If I'm holding it like this
lower, I can hold this, and be a little bit more stable than trying to shoot like this. Just a preference,
these cages are awesome because you can change the
way that the grips are. You can put it on the
side, on the left, right, top, and it just gives you
a little bit more control. The other thing I'm
going to be doing is shooting in slow motion. I'm actually going
to push it all the way up to 120
frames per second, which is four times slow motion. Compared to normal speed, we're slowing it
down four times. By shooting at a
high frame rate, it's going to allow that motion to be even smoother
when it's slowed down. Even if I have little motions back and forth, up and down, it's going to look pretty smooth when we're playing it back. I'm just going to
go around the bike, get a few different shots. I'm going to have
Will coming in here, spin our pedals to
get some motion. Then, we're going to
take it into the studio, and show you what
it's going to look with proper lighting too. [MUSIC] The one thing I'm doing
right now is I'm just doing a sway in and out. This is a cool move if you
want to have not a rack focus, but have an element come into focus and/or
come out of focus. I'm focusing on the
logo right here, specialized right there, and I'm just starting from
a little bit farther away. Because of this
lens is so tight, I'm shooting at a F5.6 because there's so
much light out here, and I don't have an ND
filter for this lens, I have to bump up that F dot, but still, depth of
view is pretty shallow. It makes a little bit more dynamic than just
having a static shot. [MUSIC] I'm trying to get a good shot of this chain here going around. It's just in the
shadow right now, so I'm going to try to position the bike where the sunlight is actually hitting that chain just to give it a little
bit of sparkle. Because we're so tight
on these components, even though I've moved the bike completely into a
different spot, it's still going to be
able to cut together. Go ahead and spin that. [NOISE] That's fine, but I'm shooting with
the sun facing on it. I'm going to come
around and shoot from the other side so that the
sun is more of a back-light. Yeah, go ahead. [NOISE] Good. I think it helps
having a buddy here to help just add that
little bit of movement. I think you can tell from me
hopping on the other side, with the sun as a backlight
to the subject of our shot, which is the chain
and the gears, I think that looked
a lot better. Now, we're going to basically
take the bike inside, and do the same exact shots, and do just a completely
different style with actual lighting. Let's head into the
garage and do that. We're inside, and
what we've done is we've turned
off all the lights except for right now we have this one LED panel that is
currently being a backlight. We have another one
that's going to be in front shining
directly on the bike. Right now we have
just a light for me. But once we turn that off, the light is going
to be focused on our product, on our subject. What we're trying to do is get the background as
dark as possible, so it's almost like we
have a black backdrop. We're in a black void
with just the product, and so we're trying to focus the light as bright as
possible on the subjects. We brought the lights close. But the camera
settings were actually similar to what we were outside. We're shooting at 120
frames per second, and 1-40th shutter speed, so that leaves our
F-stop and our ISO to control our lighting
and our exposure. The first thing I'm
going to do is get the same exact shots just with
the lights sitting still, and then we're going to
take it to the next level with some actual
movement of the light. We're going to enroll Sam and
Will to help me with that. We're going to turn
off this light, and we're just going to
keep rolling though, and you'll see
what we're working on as we get these shots. [MUSIC] While we're here, I guess l get on with it moving. Let set on three, 1, 2, 3. Let's do that again. Same speed? Yeah. Same speed. One, two, three go.
Go ahead from here. There you can see a variety
of shots that we got. In here, I started with
the 80 millimeter lens. We got the same similar
shots with the lighting. Some of them we had
the light in the back, so you can see that light coming through the different
components of the bike, and you could just see the
totally different style. Sam had a great idea
of moving the light. It cast a shadow on the logo and the
different components as we move the camera as well. All that motion combined, I thought, made it
look really awesome. Then, Will and Sam had
a great idea of getting a hero shot of the whole bike. We were able to prop it up. We have the light
coming overhead. It was just one light panel, Sam was holding it up. I thought that shot
came out really cool. Then, we did the
same light movement to make it even more dynamic. For that shot, l switched over to the 16 millimeter lens. I was a lot wider, but still handheld
shooting in slow motion, and all in all, a pretty simple setup to
get some pretty cool shots. I can't wait to take those shots into the editing
room to see what some color correction can do to make them
look even better. I hope you enjoyed this
product shot setup, and it gives you some
ideas for what you can do at your home to
get some great shots. Cheers. [MUSIC]
10. Project 1 Recap: Watch the Commercial: I hope you've enjoyed this section and this
project of the course. I had a lot of fun
going out shooting, riding my mountain bike, something that I'm
passionate about, and really looking at it from
a different perspective. I hadn't really shot any mountain bike footage before and so
working with Sam and Will to make sure we got enough shots and enough
creative shots to put together, what I think is going to be a really awesome-looking promo
commercial was really fun. Here I'm going to show you what our final product looks like. This is put together
over a couple of weeks after shooting
all the footage. You'll notice a couple
of things that I want you to keep in mind that have helped make this
video what it is. One is because of the
storyline of the project, we actually use
some stock footage. Now, there's lots of great stock footage
websites out there. These come from storyblocks.com. I am not affiliated with
them or sponsored by them, but I do appreciate that website for all the
stock footage that they have. There's other ones out
there like artgrid.com, there's so many out there. But I did use a premium
service rather than try to find free footage out there. Also, this is something
that maybe you potentially we could have gone
out and filmed ourselves, but there are some shots
in there that are pretty epic that I think pose a great introduction
to this piece that would've taken
a lot more effort than just purchasing it or downloading it with the
license that Storyblocks has. Anyways, you'll see some
stock footage to introduce it that runs into the
footage that we shot. I tried to blend it together with color
correction and things like that, so that the shots look somewhat similar in
terms of style and look. The other thing we
did is we hired a professional voice-over
actor to read the script. It would've been one thing
to have myself, Sam, or Will take a stab at reading through this
script but I was going for a specific tone and
style of voice for this project and so I think the voice-over artist
did a really good job. Lastly, we added some
music which was downloaded from Epidemic Sound and another service that I
do use and recommend. There's again, lots of other
stock music sites out there, but I found a great
song that I thought, again, match the vibe
that I was going for. Without further ado, you'll see how I edited together
the shot that we got which when you are just shooting it and you're
seeing it play back, it's like this sounds are okay. Maybe they're good,
maybe they're not so great, but put together, I think it comes out as a really great piece
that I'm excited to put out live and see how it does for the public
viewing as well. Here you go. I'll finish
it off with the video, enjoy, and I hope you enjoyed this project.
See you in the next one. [MUSIC] Los Angeles, land
of concrete and pavement. You might come for
the glitz and glam, but if you stay long enough, you'll need an escape. Peak between the cracks
and the pavement, and you might just
find that even in LA, we've got nature
in our backyard. Ready to play? [MUSIC]
11. Project 2 Overview: Cinematic Travel Vlog: Hi everyone, now we're
going to get into my project and what I'm going
to be doing is travel Vlog. The idea is that when I
have a trip coming up here and we're going to go up to June Mountain to go
on snowboarding trip. We're actually going up
near a place that we've gone to work with a
client, Hunewill Ranch. All right. My plan is that
we'll go up stand by his cabin and we'll just
do a little trip going, from June Lake up to the Hunewill Ranch in
Bridgeport, California. Now, Eastern Sierra is one of my favorite places
in this world and I think doing a travel Vlog around exploring that
area will be really fun. There's a lot of beautiful
shots in the wintertime, yourself in the valley
floor and then you get to big mountains and there's a
lot of shoot around there. The idea around this is to do
both A-roll and the B-roll. I think for love Vloggers, it's figuring out the best
way to talk to camera, whether it's doing it in a studio beforehand
or after your trip, instead of doing this
setup and then you put the footage over it or it's out in the streets
in the moment where you're walking around with your camera and
talking to the camera. With this, there's a lot of different things we've
been thinking about. I've been doing a
lot of planning of what's best way
to approach that? How do you get the
audio in those moments? A lot of this is
reacting to the moment. Yeah. Because you're
traveling, you have no control [LAUGHTER] over
what actually happens. You don't get to say, it might be that you want
to get sunrise shots, but you have to leave that morning and get
to the next place, so you get that one sunrise
and then you're onto the next thing and I'm
coming opposed shot. It's a different
type of project, so I'm excited to see how you go about being out on the field, coming up with a shot, you might have an idea of
what the shot is going to be, but you're going to
be in a new location, different compared
to our projects where ours were a
lot more controlled, a lot more planned
out, so I'm excited. Different equipment too, because you'll be
out in the field. You may be using different
types of cameras, different lenses,
filters, right? Well, and it's what
can I travel with. Right. I'm trying to pare that
down a little bit, not have all the toys,
not have lights, it's going to be a
little bit more minimal. Now thankfully, I'll have you, which is going to
help a lot because at least we'll have
extra set of hands. But it will be [LAUGHTER], it will be a lot of that. The shot ideas that I have
initially planned out at least is so first-off
that classic Vlog, go and talk a lot
about how to get that shot both in the
moment or after the fact, having your audio setup, monitoring all on your own to make sure
you get that shot. The second one is that B-roll. You're traveling,
you're in a car, you get to location, how do you get dynamic shots
of the locations you get to and really getting
the detail shots, but then also the wide shots. That's always my big thing when I'm doing these
types of shoots, is you can get to a place
like, here's the ranch. You see the ranch,
then and you are done. [LAUGHTER] But to get the ranch and then to get the details and
really good things that can build in the edit that can really make it look
that much better, that much more like a professional travel
documentary in a way. From there, I'm going to talk a little bit about action cams. I think that they
are awesome tool and they've gone so incredibly
advanced at this point. It is an extra piece of gear, but it's compact,
it's lightweight, easy to travel with. Going up into the
snow. Who knows? Maybe take a snowboarding or maybe take it into situations where a bigger camera
wouldn't be able to be used. Then going to talk
about time-lapses. I think I always have, since my early days, traveling and backpacking, I have enjoyed
doing time-lapses. I think they're
great way to show the passage of time
or to just be used in a travel Vlog edit to really showcase the beauty of a
place that you're getting to. I think a lot of traveling is to beautify these places
you're traveling. Make it look like,
I want to go to Iceland or I want to go
to the Eastern Sierras, I think time-lapse is
a great tool there. It's something that I have done a lot of bad time-lapses, and I've screwed up
a lot of time-lapses and so going through
the tips of how to make that really a powerful piece or a powerful
addition to your video. Then the last one
and the one I'm most excited for but also a little terrified of is the hyper-lapse. Because hyper-lapses
take a lot of work and I've done
them in the past and definitely even more than time-lapses have had my
good ones and bad ones. What is a hyper-lapse for
people who don't know? Yeah, what's a
hyper-lapse? [LAUGHTER] Hyper lapse is essentially
a moving time-lapse. Whether it's video or photo, which hopefully I'll
do both of those. You take a video really is
just a bunch of photos, but anyways [LAUGHTER], you take a time-lapse, but you're moving the
camera throughout it. You have to move the camera slow enough or fast
enough to then move with a time-lapse you're
doing and it's a really fun trick if you
can learn to master it, because it adds this
dynamic side to your video. It really brings up the
production value I guess. Yeah. Those are just running
through these. These are my ideas they want to want to achieve
while I'm out there, I know that the
key is talking to the camera and the rest is
just to document the trip. I'll get these cool shots
setup in a few locations. But really being open deserve
what happens on the road. How long are you aiming
to have your video? I'm thinking around
two or three minutes. I think what I learned, at least when I was doing a lot more of this type
of work is that [LAUGHTER] what happens is
going to take the length. Sure. Depending on if there's
like a big moment and also I'm talking to
the camera for 10 minutes. Maybe that's what it wants. I think a lot from me, like with traveling is if you try and control
it too tightly, it's going to fall apart, so you just go with the flow. Drive me crazy too. Always have the
camera, keep filming. Just document all
the things that happen and find the story. I do think a big part of it as well is the after the fact. I think a lot of times talking to the camera at
the moment is really great. I also think talking to the
camera after the fact can be really powerful tool
to fill in the gaps. Maybe you missed a moment filming and so you
can fill it in later. Yeah. I think like we've talked about the different
shots you're going to be getting are going to be applicable to other
types of projects. Time lapses, hyper-lapses
can be used for documentary, they can be used
for music videos, they can be used for
a narrative film. Just keep that in mind while you're watching this section. It's not purely for Vloggers, it's for all shootings. Absolutely. I think
the purely Vlog thing is when I'm walking around with talking to the
camera like this. I think that's the Vlog thing. Yeah. Everything else, these
are all tools I've used in numerous other videos. They're just things that I
think will be cool for Vlog. I mean, I could
probably use a lot of shots that you guys are
talking about as well, but these are just the ones that I came up
with for this one. My favorite thing about yours is how technical
it's going to be. It's like there's a lot
of technical techniques that you're going
to be able to use, you can feel sad if you
don't apply to anything and any situation because you're just being
thrown into like, here's the light, [inaudible]
this is what we can do. Yeah. I think it's going
to be a big part of it, I got to this location, it's
midday, the sun's whatever. There's a bunch of
snow around us. I mean, I don't
know if you've ever done this on the
snow, it's the thing. It's hard, isn't it? Yes. [LAUGHTER] I'm sure we're going to
get in some situations that will be fun, but we'll get there. [LAUGHTER] We'll take you
along for the ride. That's my project for
this one and can't wait to get on the road and start
making this thing a reality. Cool, I'm going to go get
my beanie. [LAUGHTER].
12. A Complete Vlogging Setup Breakdown & Tips: Hi everyone. We are now out at June Lake and we're just having a nice
little early morning. Made some coffee, did
time-lapse which we'll get to. But to start off, we wanted to talk
about vlogging. This setup that I have here
to talk to the camera, share a bit about the
story. What's the setup? What we're doing to make
sure that we get the shot to really share this
part because this is where the storytelling
element comes. Whether you're doing it out in the field or if you're
doing it at home, this setup is really going
to help you tell that story, talk to the camera by yourself. I'm lucky enough because
I have Will here with me. Well, camera is focused
on me, not him. But we're just going to talk about what the setup is, how we're doing this stuff and get some tips and tricks in
there. Let's dive into it. Wow, it is cold. Good
morning everyone. We are here in the
beautiful June Lakes. We're lucky enough to be
staying at my friend's house. What we're talking
about right now is this setup that
l'm talking to, which you can see
in most cameras. Really, this is all around
vlogging and what I consider the A-roll of vlogging. Opposed to B-roll, which is all the beauty
shots and all the things that you put over to
see yourself talking, this A-roll is whether you
consider the interview setup or the you talking to the
people, to the audience. This can really be achieved
in a number of ways. I think a lot of people nowadays have their homes setups in which they're talking
to the cameras. But they also have
someone coming along with them to
film their adventures. Or you just have your own
setup and you're by yourself, but you want to be out traveling wherever you are,
talking to camera. This is a great setup for that. Now, I will preface this with if I were exclusively
doing vlogging, if I was going to
go on a big trip and want to be doing
this type of stuff, this I think it's
amazing video rig. I think it's excellent for this type of talking with
a tripod and whatnot. But I do think there
are smaller rigs. You can see that this is
a rather large setup, especially that's
walking and talking. Build, this camera
it gets heavy. There are cameras where you
don't need the top monitor, you just have your
flip out screen. But I think essentially
this is a great setup. This is my at home
talking to camera setup. This is a setup that
we make our classes on and I think it's
really great quality. To go over the gear aspect I think with a lot of
this vlogging stuff, is really important
to have a tripod. Now when you're traveling,
you might not want a tripod, but having even a gorilla pod or some thing that
you can hold onto here underneath the
camera so that you have a grip as you move around
with it is really important. They make some
great small tripods now that can do that quite well. You could even take
the center column of your tripod and just use
that to walk around with. You don't even need to bring
the legs at that point. Beyond that, having your camera here, which whatever brand or
make model you want, they can all do
really good jobs. I think the one thing with the Leica SLs is that
they are quite heavy. There's other mirrorlesses
that are lighter. You really don't need your big professional one for
the vlogging work. You just need something
that has auto-focus and that has some audio input. Just an eighth inch jack is
really the essentials of it. Now, alongside this,
it's getting brighter. We still are in the shade, but I do have a variable
ND filter on here. That enables me
to shoot at F2.8, F4 maybe and get this
blurred background. It looks really
nice and cinematic. That's really
important. Most cameras nowadays will have some
form of face detect, and that's what I have on
right now and it's checking my face to make sure
I stay in focus. Beyond that, some monitor or if you have a camera
with a flip out screen, it's so important
to be able to see yourself and know that
you are recording, you're in focus,
what's the framing, you're not getting some
weird framing because you can't tell where you are in it. That's a really important thing. The last piece to all
of this is audio. I think a lot of people when
it comes to making videos, don't think too much about audio because it's of a
different part of the brain, but it's hugely important for capturing these
types of videos. What we have set up
right now is we have these road Wireless
GO II mics through these little packs that plug-in with an eighth
inch into your camera. I have one of these
little packs in my pocket and the lavalier
coming up to my jacket here. That enables me, even if I were to walk away from the camera, I still get good audio. It's just regardless of what
the camera's looking at, I can be talking and the camera's going to be
recording that audio. Now the other setup is what we have on Will's
camera right now, which is a Rode shotgun mic and that just goes right
on top of the camera. This is audio from that and
it's still pretty good. It's just not as
close as the lav, and sometimes if there
is other audio going on, it can be just not
quite as clean. Now, a lot of
professionals would say to have both a shotgun
and a lav is the best. But when plugging into a camera, that's not always possible. You might only have, and most likely only have one eighth inch jack
into your camera. Now we've used all
sorts of audio setups. For a long time what
we would use is a Zoom recorder and we'd put all the audio
inputs into that. The thing with that is that
you have to sync it later. Now this is really great because once we
download the footage, it has the audio
already in there. It's quick, it's
easy and I think it's really the best way
to go about doing this. Rode wireless mics
aren't the only ones. There's tons of other
options out there. These are just the ones that
at the time of this filming, I think are really great. They're affordable,
there's small, compact, and they have
a lot of cool features. Will, if I could have you just unplug the Rode shotgun mic. I just want to show
you really quick what it sounds like just recording to the internal microphone
of a camera. Now, I'm about six feet away. It's a fairly quiet morning but you can tell the
difference between that and then this lav
mic and how much fuller, how much more rich the sound is. It's just going to
make a huge difference when recording on the Rode. Maybe there's other
people around, maybe you're in
noisier settings. It's just going to
make a big difference. Right now there's
a car passing by and I'm going to keep talking. I'm sure you're hearing
the background. But compared to that
of Will's camera, right now there's
a car passing by and I'm going to keep talking. I'm sure you're hearing
the background, but compared to that, it's night and day difference,
it's so much better. Ultimately what this
is all about is getting that you
talking to the camera. This is where the storytelling really comes to play in a vlog. I just want to touch on that because everything else
we're going to be talking about for this is really around getting cool shots and making
your videos stand out. Advanced videography
in the sense of getting amazing B-roll, getting those amazing shots that are going to help you make incredible videos that
really stand out. But I think a lot of people
would say that one of the most important
things to any video or film or movie is the story. That is what comes
through this aspect. The talking to camera, sharing your travels, sharing
the adventure you're on. Whether it's sharing your own
story or bringing someone else in and interviewing them, it can be in the moment on the road or it can
be after the fact, but it's the story that is good to really help
your video stand out. Yes, having epic visuals
is going to go a long way, but without meaningful story, without sharing some
background or some storyline, it's just going to fall flat. Making sure A, that you have the setup so
that you can tell that story. It just turns into second
nature and you can focus on the fun stuff of talking
about where you are, where you're going, all
that type of stuff. Now, we are at June
Lake right now, this is our starting
point for this trip, since being at Phil's house, and what we're
getting into now is, that road trip mentality. What you would do is
you'd have this setup and do little like morning. Talking to camera, hop in
the car, shoots in B-roll, and then just along the way, keep filming yourself
talking to camera. Now, that's one
style of it and I think it's fun to be
out in the field. It's definitely
something I enjoy doing to help your audience really
feel they're with you. Having a self where you don't have to think about
that too much. I just leave this live mic on, check all the batteries
because there are the live mic
can run on battery, the monitor can run on battery, and you've just got to be
monitoring these things. But as you go along, the battery just slow down. But as you get going along, all you have to
do is turn it on, hit record and you know the
setup is there, it's good. It's not going to distract
from everything else you're trying to do which
is make this video. Really having a setup that
you're comfortable with, that you've had time
to practice with, to really get used to kneel. There are some cameras
that will have better face detection
with auto-focus, and so knowing if I move
too quick with this camera, it's not as good as like
the Sony's or the Canons. I think those do have
better auto focus. I know the limitations of
my camera to some extent. Now, what's really cool though, is that as you get more comfortable with these things,
it's just second nature. These are just tools
to tell your story. I think that's what
it really comes down to is knowing what you're doing. See, now getting in focus.
I have to click it. Soft tap, gets in focus,
we're good to go. Making sure the audio
levels on this monitor, I can see the audio levels. If you have a flip out screen, you'd be able to see those. You have to always be
monitoring these things and it's a lot to take in, while you're also
trying to be creative. I think it's for this reason
that a lot of people have this setup at their
home office or at their home studio where they're going to be doing
this type of filming. Because it's really easy
to just enter or cut of that voice over or that storytelling aspect
after the fact. I'll highly recommend as you do these types
of videos that you go out there and you
attempt this, you try this. But at the same time, know that you can
always go home, see what the story line was, see what shots you got, and do that voice over
after the fact and really dial it into exactly
what you're trying to tell. Now, obviously we're out here just in our
friends driveway, so the world is
starting to wake up. We have trash cans, we have people working
on things, and again, this is a huge aspect where having the live mic
is going to help a lot opposed to just shotgun mic or
even just internal mic. It's just going to pick
up a lot more noise. I'm just going talk through
this because there's a trash truck going by, it's noisy and I just
want to show you. It's just going to pick
up a lot more noise. I'm just going to talk
through it because; that's a trash truck going by, it's noisy, and I
just want to show you having this microphone is going to make
a big difference. It's going to catch less
of that ambient sound. Now, another thing I want
to bring up in terms of gear and serve these setups. There's so many setups out there and I suggest that you go onto YouTube and maybe your favorite You Tuber go and
see what their setup are, everyone does videos on
what's my gear this year, how am I shooting these videos? I think this is a great
setup for at home. But what I think is also
really cool thing is that using action cams like go pros or the Osmo action cams. Those are so much lighter, so easy, they're
super wide angle. This is a 28 millimeter, and I think that's right
on the edge of being; just almost too, not wide-angle enough to
really do the walk and talks. You can do it, but having something a bit more wide
angled really helps with that. Now, when you're doing that
with a GoPro and stuff, the hard part then
becomes audio. Now, they've gotten a lot better with their audio inputs. But what it might turn
into is that you have a audio recorder in your pocket and you attach
this live to that, and then you have
the GoPro and you sync the audio after the fact. You'd have an audio unit that's separate from your camera and you just have to
sync it afterwards. Which it works. It's totally something that works really well and
plenty of people do it. I just really liked
this setup because I don't have to do
that after the fact. But what I'm sacrificing
is the size and weight versus the ease of use. Pick your poison in that case. Let's just do a quick
little walk and talk, show what this is all about. I personally think that
when you're by yourself, it's a little bit easier to have the tripod be talking
to the camera. You can see yourself,
it's easier. But, what we're going to talk about with a lot of the
B-roll stuff in live. The other footage is that, that movement, that
walking and talking, adds a lot of energy, adds a little bit of life to it, and it's a Travel vlog. We're talking about making something showing you
going from A to B to C to D. Let's quickly
show you that. Basically, I'm just going
to use the center column of my tripod here as
my selfie stick, and then walk around like that. Again, just the size, it's little bit big, but let's see what we can do. Pop this off. Everything will a bit more
difficult with gloves on. If I were to just have
a straight stick, I can do that, but it's
just a bit harder, it's necessary
hold it down here. Having this ball head, you could also just
have a video head, but be able to tilt it. This is where I think
gorilla pods really shine as well because
you can curve them. There we go. Now in
selfie mode, get focus. What I think is really
cool with this is that it's a bit more one-on-one, and it just adds this
cool aspect when you're on the road that if you're walking
around somewhere, you can walk and talk. Now, I'm walking on
gravel right now, so you probably hear
a little bit of that and that is
something to be aware of. Another thing is,
getting to that under angle just not
nearly as flattering, so holding it a
little bit up and above is going to be
far more flattering. Lets get focus here. Holding it a little higher than your eyeline is going to
look a bit more flattering. This has a great element
of that movement, that thing that with
a lot of the B-roll in the time lapses
and just traveling. It's that movement and that
personal space that you're creating along your travels. I think this is a really
great thing to have. Now as I'm doing this,
mom is getting heavy. This is a really large setup
ultimately. It's great. It's high-quality, I'm
shooting at I think at 2.8, has a variable ND, so it's shallow depth of field
and it looks really good. But ultimately there are larger cameras that are
going to do the same job. The main thing is, I think
the audio in here is really nice because I've loved setup, going stranded camera. I'm able to also to jump
between Will's camera over here and my personal
camera here, which if you're
traveling with people, can be really cool effect in a cool look to switch
between the two. Now, there are other cameras
with a flip out screen. You wouldn't need the
monitor that saves some way. This is a 20 millimeter
rather large autofocus lens. Most of them are
bigger these days. But maybe I just need
to work out some more. This is also a photo ball head, it's a little bit
heavier than this some ways to cut down on weight. But I think that this is such a cool look for
travel blogging setup. Now, as I'm going around, I'm talking to camera and
I'm sharing with you, Hey guys here in June Lake going to hit the
road soon, just packing up. You do all this other stuff.
It's fun, it's interactive. At the same time, I
know in the back of my mind I can get back home. I'm going to use the same setup and I can continue to
tell the story there. It doesn't all need to be
captured out here necessarily. I just think it's f
fun to be like we're here and I'm filming
with Will well, we're having a good time. It's a bit more personal than talking to a tripod
in static and still you can get the perfect composition and it's still can be a good shot, but there's just
something about this. Being able to go off. Will can't keep up with me now. It just has a great
personal side to it. I would really recommend if
you're going to do travel blogging take find a setup in, play with it, mess around with it before you go on your trip. Figure out what pieces
you might be missing. I'm just going to put
this back on here. I really think that
you can travel with just your mirrorless
camera and it can be a great setup for
this kind of thing. I also think that
there are plenty of smaller point shoots, go pros action cams. They'll do a great job as well. The main thing is
figuring out audio. I think Sony and I think
Canon and all the brands have smallest mirrorless
cameras these days that do a great job of this. They have flip out there
making cameras for vlogging. You really don't need the 4K120 or the 10 bit necessarily
for this aspect. Now, the rest of the stuff
we're talking about, getting time-lapses, hyper
lapses is really cool B-roll. Having the more professional or just a nice to mirrorless
will go a long way. Because they'll
enable you to get certain shots that you couldn't
get with other cameras. Another thing I will say is that I'm shooting
all this in 4K, which I think goes a really long way when it comes to
editing in whatnot, especially when it's
just myself now I could jump cut and that'll
work just as well. But if I move a little bit, it's like little jump cuts fun. But what you can do with
4K is that I can be talking and I do
something weird. I can then cut that out and just a jump cut to this point. It just adds a lot
to the additive. You'll be able to punch in, make it feel a slightly
different shot. I think they can help
also when walking around, you can stabilize a little bit. Say you don't have the
steadiness of hands, you can do sites stabilization. But with that, you're going
to watch you a little bit wider so that when
you stabilize, which is essentially
going to crop it in, you're not cropping in, so
it's just on your face. Ultimately, this is
more or less what I'd recommend as an overall setup. Some form of mirrorless camera, and autofocus lens that
is probably maybe 35, I'd say 28 millimeters or wider. A variable ND can help
a lot being able to get that shallow depth of field while you're talking to camera. Some form of monitoring so that you can see
yourself while talking. Whether that's on your camera
that you're screened can flip out or getting
external monitor here. Then the microphone setup, I just really think that
laves can go a long way. The shotgun microphone
is great as well, especially when you're
out in quiet places. But there's just
times where it's going to be beneficial to have that lav mic tripod of sorts. If you're going to be talking
to the camera like this, you will need a larger
camera or a larger tripod. But if you're going to
do the walk and talks, a gorilla pod or some form of just smaller tripod will go really long way just to
be able to walk around with. Beyond that though, it really comes down to your creativity. This is such an important aspect of the vlog because
this is really a rule. This is really storytelling, this is where all of the information is
going to come from. Whether you're doing
this out in the field, which I personally
think is really cool. Or doing it back at
home in your studio, it's just such an essential
piece to then take all the B-roll you get on
your trip to put over that. You can do the montages with an epic time lapses and hyper lapses and all the
beautiful B-roll you get. But ultimately, and
I think a lot of people will tell you
this, like I said before, the story and what you share
is such an important aspect. Getting a clean shot where
you can tell that story, having good audio so that
people can hear you well. That it's also not going to take away from your
creative process. You don't want this
to be too complicated , it's getting convoluted, or just taking more time
to get the shot than it is to just talk to the camera
and share the story. This is such important piece of the puzzle for all this
type of logging stuff. That is the last
piece of all of this. This is sharing that
blogging aspects. We're now going to pack
up the car, get going, get some of these B-roll shots along the way and just document this little chip that we're
doing from June Lake up to a Hunewill Ranch in
Bridgeport along the 395
13. Capturing Great B-roll Video for Your Vlog: Everyone, we have now
made it up to Bridgeport. This is actually a
place, Hunewill ranch, that Will and I have
shot with several times. He's been coming here since
he was a kid actually. We figured on our
way up from June, we would swing by here
and just do a walk. We've never seen this landscape in the snow, so it's exciting. But in this video, we want to talk about B-roll. Like we talked about earlier, you still have that
A-roll which is the vlog and talking to camera. As you're doing that,
you want to have videos to put over whatever
you're talking about, so that's where the
B-roll comes in. Now the entire drive up here, I was getting very
shots of the journey, the traveling and
that was all out the car just filming
the road filming Will while he's driving,
we got some gas. A big thing that really
helps with that, or I think just
makes your edits for this vlog or the travel
vlog more interesting is to have match
cuts or having a way that they seamlessly in a cut and show
progression of the trip. For that while we were driving, at least I was filming
outside the window and had the rear view mirror in
there and just have matched that same shot multiple times and that way it can go boom, boom, boom, and inner
cut those various shots. Also looking straight
out the window, this is personal preference. If you want to show the car, I always trying to get as
clean of a shot as possible so as moving the camera really
close to the windshield. As lining up the white line of the side of the road in
the bottom right of my frame. That way I knew every time is
going to be a similar shot. I could again match cut of these various things and show progression in the road trip. I think this is a really
important thing that's really easy to show that you're
moving, that you're traveling. Whether you're in a plane, a train, a car, it's easy to just
find those things and just match cut them as
you go along in your trip. Now of course, once
you get somewhere, there's another type of B-roll. This is the other thing
that we're going to do is just we got
here to Hunewill, go and walk around and get different types of B-roll shots. Now, going into this, I know there's a couple of things I'm already thinking of. We stopped at this pit stop and I was just going
through it in my mind of you want to have
a variety of shots. By that I mean, not only wide shots and also
close-up shots, but also maybe slow motion
and non-slow motion. Shooting both either 2398
or 2997 or if you shoot 25, if you're in Europe,
different frame rates. Those are good things
to do normal motion, but then also shoot some
slow motion and that way you can serve mix up the
why to the close-ups, but also then have
different types of frame rates if you have
different types of motion. The other really
important thing is to always have motion
in your shots. I think especially with travel videos it's
more energetic. It adds a certain life to it and it's like you're going
somewhere, you're moving, you're not just static wide
shot of these mountains, and then a static wide
shot of a building. It gets repetitive and
old after so long. Having that variety is really important and so always
have paying attention to, I'm going to move left to
right as I shoot the shot or I'm going to tilt downs or
tilt ups to reveal things. You keep that movement going and it has a lot of
life to your video. Now, if you want to
get really creative, you start match cutting those. That's when the foresight
as you shoot of having those rules
that you put on yourself can be really
beneficial for the edit. Now, another thing to
also turn here though, is when you come and
talk to the camera, you're doing a travel vlogs. You might do a couple
of shots where you're walking around and
talking and you just think of how
you're approaching that because there are
times it can be fun to all of a sudden cut
too and it's a static shot. That will typically be
something more impactful. Like arriving here to
the Hunewill ranch, I'm going to get some
shots of the signage here, we're going to walk down
and just get a variety of shots and all those things I'm thinking about
while shootings. Now I just wanted to touch
really quickly on gear. I know that we've
talked about gear in the various videos and we'll probably talk about
gear every time. Just so you know what I'm using, what I'm thinking about, what are the reasons. Really I think when shooting
B-roll, it's really, really useful to have ND
filter or variable ND filter. Mirrorless camera fixed prime
lens, 28 millimeter F1.4. When I'm shooting this
various B-roll and stuff, I want to have the ability at
least to shoot at an F2 or F4 and that would not be possible without
a variable ND filter. I'm shooting mostly at 2398, so my shutter speed is
going to be 1/50th. But sometimes they'll shoot slow mo and so it'll
go up to my shutter being 1/125 when I'm shooting
60 frames per second. Now, I'm glossing over this. Most of the stuff
you can look up and figure out on your own in
terms of the settings. But the main thing
is that I'm using a variable ND filter so that I can get
those cinematic shots. I can get showered up the field, I can make things disappear
in the background. Now with this though, I'm going to shoot this sign and you have this beautiful
mountains in the background. For that, I want to
probably have a higher f-stop just so that I can see that but still
have some depth there. Now, as we go on this walk,
bringing my backpack, I have various
lenses are probably mainly go between
my 28 millimeter, which is nice wide-angle lens, and my 75 millimeter just
to punch it on things. But what I love about
this lens is that you can get the wide shot and then if you can walk up close enough, you can get really
shallow depth of field, really up-close shots there, those great detail videos. Now, one thing that is
coming up and even setting up this shot to film me here, we're in the snow. It's afternoon, so there's
a lot of sunlight, there's not really
cloud coverage, and the snow reflects
so much light. We're having to really
stop down because there's just so much ambient
light out here. Now, this is just
something you run into. This is another reason, it's great to have
that ND filters because if I want to get
details of the snow, I'm going to need to have
probably a higher f-stop have that ND on there to really stop down and still gets somewhat shallow
depth of field. I'm going to line
up the shot now and just talk you through
what I'm thinking. The main thing and I
want to just reiterate this is keeping the
movement alive. Whether it's little swaying, whether it's tilting,
whatever it is. For me, travel photography
doesn't do great on a tripod. The main time photo tripod
would be in the time lapses. But outside of that,
I like being handled. Let's just take a
look at the shot. Pretty sure you'll be able to
see me as I walk over here. Let's see. Walk
up onto the snow. Now, this is another thing
where talking to camera, having this law of if I were
to set up the shot and say, well, it's not here, I don't have this lavalier. There's no way I could
get the shot and you still be able
to hear me well. The internal mic on here,
it just went too well. Now there's certain
point in case of the lavalier being
a great thing to have for travel blogging. Just looking at
this highest snow, we have these
barbed wire fences, this looks really cool. Right off the back,
take off my glasses. Have to backup a little bit. Cool. Wow, it is so bright out here. I'm shooting log footage, meaning my base eye, so on this camera
at least is 400. I'm at an F4, 1/50th
shutter speed. I'm just going to roll on this. I have the ND filter in here. But it is so bright out here. Now, I could walk up, get that wide shot,
just static. Got it. It's nice composition,
but that's it. It's just that wide shot. Now I won't get a little
bit of motion in there, so go up to the sky. Just gently tilt down. Now, I pause there at the
end just because they have a little bit of footage there on the end so that if I do edit, if I do cross-dissolves, I have some of that
extra information. I also shot the sky
for a little bit with nothing in frame
so that as I came down, it really revealed what it
was that I was looking at. Now that as a wide shot is fine, it sets it up. But how do we do
something beyond that? I think when doing all this, it's just good to get options. I just try and shoot
as much as I can. I'm going to hop down
here now and just get a nice different
angle on this sign. I just wanted to get a
slightly different shot. With wide-angle lenses, I think it's sometimes cool
to really get up close, 28 is not that wide, but it's wide enough. I'll try this out. Always standing in this height, isn't always the best thing. Actually, there's
barbed wire fence here. This is a cool detail shot. I'm just going to crouch down. What I'm going to do
here is just slowly move the camera along
this barbed wire fence. Now, this has nothing
to do with the sign, but it's part of this atmosphere and
it's going to help to edit, all come together. I'm just pulling out, pause, and I'm just going
to slowly do a push in. This is really just to have options for the
edit. That's cool. Now I'm going to
get the sign again, and this time what I'm going
to do is a rack focus. Now, rack focus is
a way where you can be static but still add some
life, movement to the shot. That's basically, I'm
in manual focus mode. I'm going to close focus, so everything's out of focus, then I'm going to slowly rack the focus so that the
sign is in focus, so to go out-of-focus and slowly into focus. Try that again. This time
I'm going to add the tilt down, rack focus. Nice. Now you can see it
just adds a bit of dynamicness to the shot. Now, if I do a tilt, the other option would be
if I move left to right in the wide shot and
then I could enter cut with a tighter
lens left to right. This again, it's just all
options for the edit room. The more you think
about this stuff, the more it's going to help you shoot less and be more
precise with what you're getting. Compare the sunglasses. The sun is so bright right now, it's causing my eyes
to water a little bit. We're just going to
walk around now, I'm going to get
some various shots. Again, thinking about when
do I want to go slow-mo? If you don't have
really steady hands, I think it's beneficial to
shoot a lot of slow-mo stuff, but at the same time, having your entire edit be slow motion
can get a little boring. Switching up is good, but I do think if you're
just walking around, shooting your B-roll in
slow-mo can really help it. Even if you have an ND filter and if you have enough light, it's a way to increase that shutter speed so that you can have less light coming in. Once you are into low-light, shooting someone is
going to be a bit harder unless you have a camera that does really well with
low-light situations. One more thing I
wanted to talk about, I threw on my other lens here, it's a 75 millimeter. I've just gotten used to
shooting with prime lenses. I think primes can
be great for travel. They're lightweight, this is a tiny lens compared to a 24/70, but it's also manual focus. Now, I prefer that even
for my photo work. This 28 millimeter being autofocus is really nice
to have the option. Like we talked about
with taking the camera, that autofocus will
be a huge help. But when it's getting
the shot, just want to bring up one last thing. I am shooting in 4K, and I think if you have
the hard drive space, if you have the computer power, if you have the memory
cards, when traveling, it can be beneficial to
shoot 1080 simply for the fact that you don't use up so much
storage so quickly. If you're going on a long trip,
that can be a big factor. Now, we're just doing
this shorter trip, and I know I have the space, I know have the
power to edit 4K, and I think it makes a big difference in the editing room, either because to some extent, future proofing down the road, it's cool to see a
4K video online. But also because 75
millimeter to get that sign, I won't be a little
bit closer and I know that if I punch in, I'll be able to do that, 4K and then exporting in 1080
it's a really powerful tool. We're not getting too much
into editing in this course, but something I
wanted to bring up of choosing your resolution. This is one point
where I think having that flexibility to punch in
later can be really helpful. Now the other option
for extending that shot would be that I
could go to APS-C mode. Instead of 35-millimeter mode, this is a full-frame camera, so I can switch to APS-C, which effectively punches
us in times and a half, so this 75 becomes
closer to a 1/10. Another option, just something
to think about in terms of diversity of shots, I just really liked really
wide to the really tight, so just thinking
of those things. But enough with a sign, we're going to continue on
and get some other shots. Well, because I can't get close
to that, Hunewill sign. For this one, super fun
shooting in the snow. It makes everything harder. Just looking at the composition, got this long road here. Have the sun behind,
take off the sunglasses. Now, I'm personally a big fan of manual focusing
when I shoot video, but cameras are getting
so good these days, you don't really need to. I'm going to start out here. Just slowly creep in. You can do more extreme
movements like that. I am shooting in slow-mo, so having a bit more
movement is good there. It doesn't have to be
anything that crazy though. It's just a little swaying
while you're going, making sure you keep in focus, because as you move, things are going to
fall out of focus. Now, here out at the ranch. It's just cool, this
building from 1880 and living out here. There's something very romantic about being out here
in the snow time. We had to walk
through this snowy hill to get out here. It's just some
beautiful imagery. We're just going to walk around and just wanted to drive home
these points of, really, what this class is
all about and what this particular one is all about is making your
videography better. I know I've been going through all the different ways that you can shoot in all these
different things. But that's really what
it takes. It's about being active in your filming. It's not getting here, taking the wide shot
and then you're done. You saw the place, you
got a shot, you're done. It's building the elements. It's getting close-up
detailed shots. It's getting the
wide shot and then also punching in and
getting the closer shots. It's having that movement, always being a little bit
moving which is a style. You can do an all static piece, but I just think that
for the movement of traveling, it just fits. Doing that little swaying,
doing those little push pins. Really when you're at home, when you're doing this class, figure out how your camera, because every camera is
going to be different, but how you can achieve
those shots and not be missing focus or exposure
or whatever it is. Whether it's needing to
get a variable ND filter, if it's learning how to set up continuous autofocus
and setting a point so that that point
stays in focus as you move or manual focusing, practicing how to move from something up close
to something far away. It takes time to learn these skills and to
get good at them to then also be out here in the field and making
a good product, making a good video. Really at the end of the day, the idea with advanced videography
is that you're wanting to push yourself in
your video making, and that the biggest
thing is that you take that element of you talking to camera or
talking to a microphone, and you're building
all the imagery that people are going
to see over that. It's not just a talking head. If you show up and
you just get shot of the location and
then that's it, that's not going to be
able to build enough. Getting all these
little elements, shooting in slow motion, shooting in normal speed, getting detailed
shots of the trees, getting detailed
shots of the building while also getting
the wide shot, they're all going to add
into a better video.
14. Reviewing My B-Roll Videos: Just to really quickly go
through some of these shots, just wanted to share with you a couple of things that
were going through my mind in this
sequence of events. These are just the
raw audio clips and you can see that I was
just thinking, okay, we stop at a gas station, let's just get each of the little things
so that we can put together an edit later of
a quick gas station stop. Now, each of these shots, I've trimmed a little bit but
there, you can see myself. These would all be super quick, maybe a 10-second edit
but it's just okay. We stop here, we get this, that. Really is just in the
time of stopping to get gas that we went and got
all these shots here, how the door close so
I open it and close it. That's really it. That was building a sequence
right there of just being at the gas station and then we're on
the road again. One thing with this,
with the highlights of the bright snow and
we had this fog come in. Just wanted to note
that I do expose. I look at my histogram
and I expose it so that it's right on the
edge of being overexposed. Now, this is all log
footage that you're seeing. It hasn't been colored yet. It doesn't have that
saturation or contrast yet. But for exposing,
I'm really trying to make it so that the
highlights don't blow out. Now we got to this
spot right here. That's beautiful
overlook of Mono Lake. Again, the snow was so bright. You can see the contrast
just in the log footage. But again, just trying to build out service sequence of events. I got that initial sign and
then there's this plaque. That wide jaw was not doing
it for me so I went in close. I've tried to do
these tracking shots. This is at 2398 and
they went to 60. You can see just how much smoother and cinematic it looks. I really think shooting slow-mo for this stuff really helps. I then went and did a wide shot. I got those details of the signs like something
people hanging out. Then here's that
opening wide shot. I'd probably start
the edit with that. Maybe end it with
that, I'm not sure. Then I serve that first one, but I came back to the sign. The nice thing here
is that there's no people in it so I
could actually reverse this shot as well to start up top and then move
down if I wanted. But just wanted to
get the opening shot. I could also go from this
shot coming up and then cut to that earlier one with the son that was cool-looking. It's all about using those
movements and transitions. Then some of that
other stuff with just Will hanging out here. Just other B-roll
that can fit into the whole edit and just make
it a bit more interesting. Now, just a server transition, I then went back out to the
landscape and started there. Then I shot this 60
frames a second, just to have a nice slow-mo. But then I move over
and reveal Will. That's just instead of just having the cut go straight
to a shot of him, it's now something that's moving where it's like that
landscape and we move over to see him
looking at the camera. He caught me stealing that shot. Then after going from him, I go back out to landscape
because who knows, maybe I want to start
with them and then go landscape or start landscape
and then go to him. I don't have a set notion
of what the edit is going to be so it's just
getting as many shots, as many transitions, movement,
all that type of stuff. Again, came back
to this placard. I didn't really
like that initial wide shot and I knew that. Instead of just that
tight initial close up, I moved and did something
a bit tighter that I think it's just a bit more
interesting here. Then did a little tilt down just to reveal
the rest of it. Here again, just a
couple more shots. Got Will taking a picture
with our buddy's camera. A little wobbly there, but again, just
some filler stuff. How many times can we look
out without that vista? Probably not that many times
in the edit, but it's okay. Now here we are at
the Honeywell Ranch. This was served after going through and getting
the shots of the sign. You can see here just the
close-up details of the snow. Again, none of those
highlights are blown out and we're looking at
very bright white snow with direct sun on it. The second we go in and
color this log footage, it's going to pop a lot more. But again, it is log footage. It can be a little boring to
look at but it's important, I think, for the
coloring process because you retain so
much more information. I'm just doing little push ins of moving back and
forth on the snow, try and get some
interesting shots. Here we had a little
bush and again, it's not necessarily
that this is anything that important
to Honeywell Ranch, but it's just good
B-roll to have and all I'm doing here is, again, all at 60 frames
a second and I'm just doing side-to-side swaying. This is something that
would probably cut in for just a few seconds ultimately. We then made it over
to the ranch house. Here you can see just the
standards of static wide shot. Nothing too fancy there. Then moving to this
low tracking shot that I think is far
more interesting. Ultimately, just got
down on one knee a little bit lower and just move the camera
left to right. I also moved it
back the other way. I think I opened up the exposure a little bit
just to hold those shadows. Then just went around and got some shots of the
trees just again, slow movements left and right, right and left, up and down. Just getting as many
different movements in there that could
build the scenery, build the setting of this place, and then reveal the house. This is all about building that sequence for the edit later on and getting a bunch
of footage for that. Then I knew I wanted to
come in and get the 1880, established in 1880 and
come down on the house. This could even be where it starts and then it pulls
out to the wide shot. Start on the wide
shot come down. Now one thing you can see,
there's some mirroring off the screen which I didn't
see while shooting, but kind of inevitable there. Here, just various buildings
throughout the property. I wanted to get some
different looking shots here. Tilt down from
those trees. Again, I got those details of the trees and then I could come
here and this is where their front office building that could use our first shot. Then here, I wanted to play with some
rack focusing so starting the focus on the tree and then coming over to reveal the house. You saw this shot earlier on, but here's the entire clip
and you hold there for a few seconds just to have
those handles on either side. Came back to the main
house here and just wanted to do a little tilt
down somewhere between that really wide shot and
that board close-up shot. The other nice thing
is that this is on 4k. Now if I want output in 4k, obviously I won't be cropping
in not only on these, but if I'm ultimately
going to output at 1080, I can punch into a
lot of these shots. You can see I've really hold both in the
beginning and ending to have those handles to
move into the edit. If I'm going to
do cross resolve, if I'm going to do
anything different. Always good to
shoot a little bit more than you actually
think you'll need. Here's just a perspective shot
walking through the snow. This was such a big
part of this day, was trudging through the snow. I wanted to make sure to get that perspective of myself
walking through it. Then ultimately on our way out, I had seen this sign when
we came in and I was like, I really want to get this
shot of the bridge port sign. That was just, I'm just
going to stand here and get this boring shot and
then I was like, okay, what else can I can do. I got up really close. I was like, okay, let's
do a little tilt down, a little bit closer up. But then when I did
that, I was like, I can't get the whole side in there quiet and I
want the whole thing. I just took a few steps back, obviously over zoom lens you
wouldn't need to do that, but I just took a few steps back then did a
little tilt down, reveal the sign probably
a little wobbly there. Could have done
this in 60 frames, but this was just a quick
thing I wanted to grab. I can definitely use
Warp Stabilizer. Then just instead of
just doing the top-down, I wanted to come over
and pain from the road. All these movement points
can be transition edits. I'm not going to probably use when I'm looking
at the road, I would use that movement of coming to the
sign in the edit, and then just a little push
in on the bridge port there. That is more or less it. This is, I think in
terms of travel vlog, it's always good to serve these more random moments
of just walking to the car, who you're traveling with. All of this stuff is a bit more of the personal fun stuff. The main thing is just being
consistent with it and trying to get similar
shots throughout the edit. But I hope this has
been helpful for you and I'll see you
in the next section.
15. Drone B-roll: Reviewing My Aerial Videos: Just to add one last thing, I want to talk about drones. Because ultimately, in
today's day and age, I think a lot of people
are using drones for all types of videos but
especially travel videos. We have the DJI Mavic Pro 2. It's a little bit larger
than the spark and some of the newer ones coming out these
days but these are great, compact, little, incredible
cameras that can fly. We've had a lot of fun using them on various
projects and whatnot. First thing first, there's a lot of rules and
regulations around drones, where you fly them. We're at the Hunewill Ranch, we have permission to be
here and to be flying, and so I'm not too worried
about putting it up, it's to your own
discretion but DJI at least has gotten really good about putting those maps in
where you're allowed to fly, where you're not
allowed to fly, and letting you know those things. Just a little thing to do
in there at the beginning. The great thing
about drone though, is with the style
of [inaudible], was talking about
earlier, of always moving and having them that
little bit of movement. Drones just compliment that because you can do
those long push-ins, you can do those
tilts, those pans, all sorts of different
movements that match that energetic
travel vlog style, and that's what we're
going after here. This is just another
great tool to have. Obviously, not
everyone has a drone, but you'll see in the
edit how much it can add. Even just establishing
first shot of like, we're here in the beautiful Eastern
Sierras in wintertime. You'll get that all
from this one shot, and I think it's a really
powerful tool for that. If you're really wanting to be more advanced in
your videography, this is one of those tools that does go a long way and can really add to your
overall production value. It's something that
a lot of people look for nowadays in shots. The entire video is not
going to be used on this, you can pop it up once or twice and it will go a long
way these shots. Let's pop this thing up, we're going to get some shots. I'm going to fly
down to the ranch, fly around it, the sun serve going behind
the mountains over there, so exposure is probably
going to be a little tricky. That is one thing these
cameras, while amazing, they are smaller,
they're dynamic range, isn't that of a
mirrorless camera. So you just got to
be aware of where the sun is and what
the exposure is. This is another huge time where time of day
really matters. Now, I think looking this way is going to
be really beautiful, but it's something if you really want to
get a certain shot, know where the sun
is going to be, and that's going to
determine when you want to go to that place to put the
drone up to get that shot. Let's get up there and take
a look at a couple of shots, and then ultimately this
will go in there and edit. Here we're just going to take a look at a couple
of drone shots, serve talk through at least
my process when doing this. Now, sometimes when
you put up the drone, even if you set the settings
while on the ground, you pop it up and the exposure, different things
aren't quite right. So initially I
like to pop it up, look in the direction
I'm going to be going, and so I set the
settings accordingly. We're shooting 4K2398. There's pretty limited
in terms of shutter, I tried to keep it around 150, we actually have a polarizer
on our drone that enables us to keep it at that
slower shutter speed. Then, we typically have
to crank up the f-stop, which for this, is totally fine, I've rarely needed
a shallow depth of field when it
comes to drone work. Now, as you can see, I just had that
little pause there. I think something that is really important when
it comes to drone work, it serves setting up the
shot and then trying to hold it for at
least 10 seconds, to really allow it to live. You can see right there
are a couple of shakes, like getting the serve, just coming around the barn. But now, I'm just
holding the position, really letting it be
one continuous motion, and I think that's
a really nice shot that can be used in the edit. Now, right there again, I wiggled my fingers just a
little bit and it creates a little stutter that when
you're flying you don't notice as much as after
the fact upon watching. Now, you can see here
I'm adjusting it again, and this is where I think where drone videography really shines, is when you just allow
the shot to really move. I went around the farm a
couple of times and then as I came down to that
opening shot, I was like, I'm just from this point
just going to pull back, and same speed going back, same speed going up, and I just held it there
for so many seconds. Now, because it's relatively
low movement in the shot, in terms of people or
cars on the street, I could speed this
up and it can be a really nice frame ramp that would show you really
quickly this big pullout, and this serve
reveal of the space. It can also be used
for service slower, maybe narration
point or something. But it's really nice
because it just keeps revealing more
and more and more, and it's just such a cool
effect to have in your video, whether you're starting it off, taking a break from them were on the ground stuff or ending it. For credits and stuff, you
can put that over this. Now, all this has been
focused around the barn, but I also want to share
this landscape where we are. This could be served
intercut with the footage on the road
or different things, and the barn is directly behind us now and we're
actually hanging out right where these
three roads come together. But we're so small and frame, it's such a big vista that
you can't actually see that, which is a nice effect. Again, this is just a slow, consistent moving, not changing too much in terms of positioning
and whatnot. One thing I will
say because you can do so much with drones, is that there's so
many settings now, and especially with the DJI
ones, along with others. See that low
corrections have ruined that shot right
there [LAUGHTER]. But all these things have smart tracking and you can
do hyper lapses with them, you can do so much with this. This is really just us flying around to get a couple of shots. Right there you can see our car, and now we're out of frame. So I would probably use
this shot again just to have a pause in the video, just showing the expansive
barren landscape, it's just a really nice moment. But you can get into a lot of the features that
these drones own these days, and it'll add so much
production value to what you are doing. Now, another really cool thing, and we were able to do this because there's
relatively no one around, I brought the drone down really low and then flew
along the snow, and then slowly
started coming up, and I think it adds
this great dynamics of nature to the shot that, I will say, it needs to be lower when there needs to
not be people around. If you're doing it over water, make sure it's calm water, you don't want
water splashing up. But it's such a cool way to go from that lower thing,
and then we can speed up, and then come up
to this shot here, which I think is just a cool
surf perspective change. Something that is really
cool with drones, is that vertical change that
you can have when shooting. I think it's really cool
to again, start lower, I could've been held that
shallow little longer, and maybe you don't
know it's a drone shot and then starts to pick up and you can come
up to the larger view. That's a really important
key I think to join shots. Again, you can just
get the big wide shot, and it looks really cool. But it's that movement and it's that dynamicness of
moving from high to low, you can do those orbitals
tracking around an object. That just really serve
higher production value, more dynamic energy, and just looks cool. [LAUGHTER] I'll say that throughout all this,
looking this way, the sun is almost indirectly
in front of a camera, and these drones, their dynamic range is so good. I mean, this snow is so bright, and you can see it clipping
in some parts there, but looking towards the
sun, it looks so good. Now, if you get this thing
up at sunrise or at sunset, it's going to do
amazing things for your video and really just
up that production value. Hope this has been
helpful for all of you, and I will see you
in the next section.
16. Building Sequences in Your Video to Tell Better Stories: [MUSIC] Hi everyone. We are now here
lakeside next to June Lake, which is actually frozen. It's really pretty. We are going to be doing
some other stuff later on, but really quick we wanted to do a little just addition
to the B-roll section, talking about making
those segments. I was talking about
match cutting of in different things as you
go down your journey. But there can also
be this fun way of when you get to a
place or if you just want a little break in
your vlog of doing these really fun
high-energy montages. What we're going to do
here is make some coffee. Will is going to
make the coffee. I'm going to film it and we're just going to play
around with it. But the idea here is again, lots of movement, we're going to shoot it with
a higher frame rate. We can do some speed ramping, some slow-mo to fast motion, all that stuff, and just entire time moving. Now, while we do in our
very ready frozen coffee, I'm going to have Will take it step-by-step and
we're going to really make sure we nail the shot. I'm shooting with my SL2
with a 28 millimeter. I'm going to do manual focus just because I
really want to get precise shots and don't want the autofocus going where
it's not supposed to go. Then because we have
all the sun out, I do have a variable
ND filter on here to get that nice
shallow depth of field. Now, I'm choosing
a 20 millimeter, I guess for some of the
stuff maybe you'd want to go a longer focal length, but I really like
this lens and you can get really close at
really close focus, which I think will look cool. Let's hop into it. [MUSIC] Now we're going to wait and
watch some water boil. But while we do that
just wanted to quickly mention what was just
going through the motions. I think some of the most
interesting things like, while I'm moving or
pushing in or going around is when there's an
action he's doing as well, so the pouring of the
water looks really nice, spinning it on
looks really cool. All those little things
I think add a lot of the life to these
types of shots. Now the one thing that takes some practice and
getting used to is pulling that manual focus. I'm shooting at a F2, so it's very shallow
depth of field, I'm really close, so I'm
just searching for that. Now, this is one point
where I do think having a larger external monitor might be nice for some
people when shooting video. I think it helps you
really nail that focus. But yeah, so just going to
keep going waiting for this and continue to get some shots [NOISE]. [MUSIC] That's really
all there is to it. I think building these types of sequences or thinking
about them beforehand is a really great tool to have when doing
these travel vlogs, whether it's making coffee, getting gas, getting food,
just whatever it is. If you have something where
you can film each detail, you can do these
really fun edits. But it is something you have
to think of in advance. It really is, I think a powerful tool of
advanced videography or being a great videographer is that you're thinking about
the edit while you shoot. It's a really important
piece of the puzzle. With this B-roll
type of stuff is a huge thing to
pay attention to. We got some coffee now and
we're feeling pretty good, but [LAUGHTER] we'll see you in the next section and hope this
has been helpful for you.
17. Action Cameras: Capturing Great Video with GoPros and Similar Action Cameras: Hi everyone. In this video, we are talking
about these little cameras, action cams because these are a wonderful tool especially when traveling and doing this type
of work, travel blogging. Now, we talked about
doing the actual talking to camera vlogging aspect
with a mirrorless camera, we had the monitor, we had the lava of
all the bells and whistles and obviously
you can tell the massive size difference that comes with these
smaller cameras. I think really that's the biggest selling point just a usability of these because when
you're traveling around, when you're going to
maybe a national park or different places, bringing these can be
a bit more cumbersome, they are lot heavier, it's very clear you're filming something when you
have one of these. Some people nowadays
might be used to that, but these are just you
can turn your backpack, you don't have to worry
about it they're waterproof, you can shoot all sorts
resolutions these days. This is an Osmo action cam but
the newer go pros as well. You can do 4K, you can
shoot slow motion, you can shoot time
lapses with them, almost everything you
can do with this camera, just in a smaller form factor. Now, there are
obviously limitations. The quality of video you're going to get from
these larger cameras is going to be better but you can do so much
with these little cameras. We're here at June Lake today and before hitting the road, we're going to get
up onto the mountain , do some snowboarding, going to walk through town,
just do different things to showcase how well these
cameras work alongside. This is all about creating that great travel vlog alongside these larger
mirrorless cameras. This is really all
part of the toolkit, so you have a large
mirrorless camera, you have a drone, you have
an action cam and these are all different tools to
make that video for you. There's not really a need
for just one of these, but rather they all
complement each other. Now, that being said, maybe you want to just be at
home talk to this camera, but not bring this on your trip, you can use just
these little cameras. Now as we go out into the field, we are going to field tests, not only the video quality,
but also the audio quality. Because I do see
some people vlogging with just using the audio
from these cameras, the other set that you
can do, of course, is loving yourself having
a audio recorder in your pocket and then
talking just to the action cam and then you
synch that too later in post. Now, what I'm most excited for is we're going to go
from the mountain, I can throw this in my backpack, I'm not worried about falling or anything
with my big camera, these are really durable
low guys, really quick. Wanted to do a quick
audio demonstration. I'm going to do this
up on the mountains where it's a lot louder, but right here
it's really quiet. Best-case scenario, if you
can find a good quiet spot. The difference between talking
to this camera and this is the Osmo Action Cam audio and what's really nice
is that it's just this. You can see in the other camera that this is a very
minimal setup. But the audio
compared to the love, which is sync to our mirrorless camera is a lot different. We're going to test this
throughout the day, see in louder scenarios, but what I do think is interesting and we're
going to find this out, but I think that this camera, the microphone's have gone
exponentially better. Obviously you can see this setup is much more minimal than when I was walking around
with this on the tripod arm. Both were great, both
have different functions, but this is really easy to do. They've gotten the
quality is just so good. You don't have to
do crazy fish eye, you can do different
things but anyways, let's get onto the mountain, get that B-roll, and we'll
get back to you later. [MUSIC] Hi everyone. We are now
up on June Mountain, headed up the lift to get
up to the top and again, relatively quiet here
so just so showing what's possible with these
little action cameras. Again, there's probably with
each reiteration of these, they're just going to
get better and better. But what I love about
this, for example, I was just in the shade,
non direct sunlight , it's all auto. You don't have to
worry or think too much when using these
they are self-sufficient. You can get into
more manual settings but outside of setting, I said 4K 24 frames a second, everything else is just
automatic in terms of shutter and I've stop
and all that stuff. It's really easy, just got on this little selfie stick here
and go in and take it up. I probably would never bring
my big camera up here, that's a main reason
to use one of these is that they're more discrete,
they're easy to use up here, like I said earlier and just excited to see what
we can do with this. Obviously, the audio is
going to be a little different during this when I talk to you but later on we'll do an audio comparison to
show you the difference. Really the main thing
with this camera, I think having a selfie stick at least while snowboarding
or doing action stuff or even just walking
around is really useful because instead
of having my arm here, it's just on the pole and I
can talk to you like this. But getting creative with this, trying different frame rates, getting some
high-speed stuff so we can slow it down later in post, getting it low to the ground
it's wide-angle so really playing with that depth and stuff is a really
fun thing to do. Let's see how it goes and
got we'll back there. Yeah. Just going to
have a fun day today. [MUSIC] Hi everyone. Well, we're up on the mountain just having
some fun getting some shots, trying some different frame
rates and resolutions did 4K 24 which is this just
a standard normal talking. Depending on how you
output your videos maybe you shoot 25
if you're in Europe, or maybe shoot 30 because a
lot of people are switching to that in the digital age. But also shooting some
60 frames a second in 4K and then also did
a little 1080 in 240, which is crazy so much. Love fun to just play
with these things, what's fun about these
cameras just on the lift I saw change settings and try something different each time. But again, it's just a fun
tool to use quick and easy. We'll see how the
shots stack up, but just trying to get as much, not only at the snowboarding, but also the scenery, the signage, different things
that can go into the edit. It's all about creating
those sequences, like I talked about with
the B-roll section. Just going to keep having
some fun here on the mountain and we'll be back
with you shortly. See you. Just really quickly wanted to go through
some of these shots. I think a really cool
part of the action cam is being able to get those
more unique angles. Here I am snowboarding
you can see actually in my shadow the poll that I
have the camera attached to. What's really cool
with this is just getting it unique angles, getting really close
to the ground. I was trying to put the
camera right in the spray of my snowboard really
get that action shot. You can see right there, just covering it in snow and that's what's so
cool about these, they're waterproof you can
throw them into the elements. Then trying to get some sort of diversity of
shots and for the edit, this would probably be a much quicker clip but wanting to see myself in the edit to some
degree just going along, you don't get the full sense. Maybe I could go a little
farther out in that shot. Then just getting
the other footage, filming friends there I served tried to do a tilt
down just to get it to reveal well
there but going along and one thing has
focused on the shot, which I think looks good, but I ended up falling. Then switched over to the
240 frames per second. Again, a big part of these action cameras is
to put it down there into the action and really
get that cool unique angle. Now, clearly low much there. But it's all about finding those moments of
like right there. The piece of snow goes
flying at the lens, that'd be such a
great edit point. Now another thing that I will say that you
got to be really careful with these is
whether it's snow or water. You can see now how the
lens got covered in snow and it's dirty is the shot
which isn't always great. You can be going
along thinking again, great shot and then realize, oh, there's a water
droplet or snow on there can be really frustrating. Then just going around wanting
to get some other shots, this is all shot
in 2398 and it's just I want to get something in slow mode just to make
it really smooth. There you can see that
push onto the map at 60 frames a second just really made it that
much smoother, made it that much more, I think cool looking in right there, I
could've gone farther. You just get all sky but coming down straight at the June logo. This is all that B-roll, that's our filler stuff, it's not just about the snowboarding, but
it's about this stuff. It's about getting the signage, getting the time on
the lift with friends, just trying different
things to have some fun with it, pop it behind. This is where that selfie pull. Those cameras are so
incredibly powerful. You can get, this is on 4K
really, nice exposures, don't have to think too
much and can just mess around and try getting different
unique angles with it. This is obviously something I couldn't do with a
mirrorless camera. It was fun to just mess around trying different
angles, different shots. I will say getting that poll for the action cam is really useful. It has really impressed
with the law of the audio actually was pretty useful. But also sometimes you just get shots that
don't really work out. Then finally just going up the lift again and
you've seen some of the shots throughout
this but the main thing is to just get coverage. Not only shooting
this snowboarding, but also showing the
time on the lift, time with friends
looking outwards during the travel or the follow camera and then also looking
back at myself. I hope this was helpful, see you in the next lesson.
18. Timelapses: How to Shoot a Timelapse for Your Video: Good morning, everyone. It is a very brisk morning
here at June Lake. Our starting point
of this adventure, we're staying at a
friend's cabin here. We just want to wake
up this morning. I think something that's
really powerful for travel Vlogs and maybe
it's something you're already doing is time-lapses. Now, why I think is really cool about time
lapses is that, A, it's a good transition moment when you're moving from
one place to the next, it's a good moment to
say, I don't know, it's a good thing that's
fulfilling that people enjoy watching and it shows the
passage of time really well. In a lot of these things that
we're doing in this course, it's all about
showing your story. Building on that story,
but also showing the movement or the passage of time from one
place to the next. It's traveling. Time-lapses are a great embodiment of that. Now, we've woken up really
early because I think there's a few ways you can
do a time-lapse poorly, and a few ways you can
do it really well. I think along the way
you might just get time-lapses that are throughout the day and you
get clouds moving, or you get cars moving, people moving, which
are all really cool. But there's something about
waking up for sunrise. If you have a vista,or
getting to a vista, setting up a camera and getting that first breakthrough
of sunlight, and seeing it really
moving across the land. It's seamless sunsets. Sunsets
you can get this as well. If it's at the end of the day or in the beginning of the day, and they are great tools to
use in a video to really showcase that change of
day or the beginning. We're going to do
this time-lapse, so we'd start the
vlog off with we're going hang the road this morning and maybe
we make a little coffee. Then you see a time-lapse
and the days starting, and then you get in the car
and you continue on the road. This is probably one of the few time-lapses I'm going to do just to show different things
that we're looking for. One thing here, we have
a completely blue sky. With time-lapses a lot of times, seeing cloud movement
is really cool. It adds a lot of
life to your video, or to your time-lapse. Just the one we've set up here we're looking at Carson's
peak here in June Lake, and in the early morning the sun hits that peak
before it hits here. We want to just get
that sun first hitting the mountain and then as it
cascades down the mountain, showing the day has started. Now a few just technical things really quick about time lapses. Tripod, 100 percent necessary. Now, we're on icy snow
and even stepping around this little vibrations can
be picked up in your camera. It's best to serve
stay away from the tripod or at least
give it some space, make sure it's secure, that it's not shifting because people are walking
or whatever it is. The other tip that
I have I guess, especially with this one. We'll see how this goes. But we started filming
before the sun hit, because there's really
to get the idea of the sun moving
down the mountain. I just guessed what the exposure was going to be
as the sun hit the mountain. This is a gamble when you're
doing sunset or sunrise. Because there's going to be huge exposure shift in your image. Now, maybe I'm getting a
little ahead of myself. At the very core of it
what is the time-lapse? What are we talking about here? A time-lapse, it's the passage of time being
captured by your camera. This is done in two different
ways for the most part. One is that you
shoot video and you more or less going to
spend 20, 30 minutes. I recommend at least, I think 20 minutes
as a great point to show that movement. But you're just allowing
the camera to sit still and capture the changes in light, the changes in clouds, the
movement of cars or people. Then you bring that into
your editing software and you speed it up a bunch. That 20 minute-long clip becomes five seconds
or 10 seconds, and it's just really
quickly going through it. You can also do this and at
the core is the same thing, but you can also do this
with a photo interferometer. Some cameras have that built-in. We will take a
photo every so many seconds or every
so many minutes, and you show the passage
of time to photo. Now, this is doing
24 frames a second, and I'm going to
do for 20 minutes. There's a lot more range
I could go from that, sped up time-lapse to real-time. You can use all that
video footage in real-time or sped up,
which I really like. With photos, it's
typically you're trying to show a much longer
passage of time, so you need less
photos per second, not 24 frames per second. Maybe you'll take
two photos a second. What that means is that, you're going to have
a lot less frames, but you can do it
over the course of the entire day or over the
course of the entire night. That's how you get star lapses. When you get the whole sky
moving with the stars. That's when photos
can be really good. You need a lot more
photos though. That can be a bit
more time-consuming. If you wanted to play
in real-time as 2398, it's just an absurd
amount photos you'll need to get that video movement. It depends what you're doing. I think for this type of stuff, doing a video is great. One thing I do, and this is another benefit
of photo I guess. I shouldn't 4K, which enables me to
be able to punch in, maybe do a little digital
move with the footage. If you shoot 1080, wherever your shot
is, is what you get. Obviously, the benefit is you're doing a 20-minute long clip, 1080 is going to be
a lot less data. It's going to take a lot
less room on your card. Whereas the 4K one
is going to take up a lot of memory space. It might be harder
for your computer to process once you bring it
in and you speed it up, It's a lot of computing process. That's where at times the photo one can be beneficial because if you
bring in all those photos, you edit them, you
convert them down, you put them into
your video editing. That can essentially
be an AK file, but you can export it
from your photo editor to any size and make it a little less heavy on your
computer processing. Now that's a lot of
technical stuff. But really at the
core of it is that, if you shoot 1080
less memory space, but you're going
to be stuck with the shot that you can
post, not a bad thing. Or if you shoot 4K, you get a bit more flexibility
in being able to do maybe a digital zoom or have a little movement
crop after the fact. But it is going to
take up more space. You really do need a computer
that can process that. Because if you put
a 4K time-lapse in with a whole sequence
of you talking, and traveling, and doing
all the other things, it's going to get
a little tricky. Really we're just going to
sit here with 20 minutes. I'm just watching as the sun comes out and hits
the mountain here. We're getting some clouds coming over so that's what I
really love about this. We're just going to hang out, wait for the surf
morning to get started, and I really don't
have to do anything, I just sit here and
watch the camera, make sure it doesn't fall over. It's still in focus, the exposure since we've
started has increased one full stop of light so
we'll see how far that goes. Now another important
thing to know is that when
shooting time-lapse, as I highly recommend shooting, your white balance
as a set thing, not using auto white balance. Auto white balance has come a long way and it's really good but when shooting a time-lapse, the color of the light is
going to change, most likely. You might have clouds moving, you might get direct sunlight, you might go from
direct sunlight to shady and the auto white balance is going to be correcting
along the way. If you have auto
white balance on, you'll see service shifting colors as your
time-lapse continuous, and I've had to try
and color this. It is so difficult to
make it all look normal. It can be a huge
pain in the butt. Now that being said, some cameras will react differently with
auto white balance. They might not shift
once you hit record. Also, if you're shooting in log technically
that shouldn't make a difference because log you're changing the
color after the fact. But still, something that
I've just run into that I would recommend
staying away from. Just even if you shoot it
at daylight or at cloudy, you'll be able to shift it in post when you do your coloring. Another tip, if you are
doing photo time lapses, you can use aperture
priority and with that, what you're essentially doing is the shutter speed will change, but it makes it so that
your overall exposure is going to stay the same
for every single photo. That way over the course of a long day when you're
going from day to night, these cameras have
gotten so good. It's a subtle change
because it's only happening every couple of
seconds, every second really. But it's enough to serve keep your exposures similar
and then that way you can fade in and show that revealing of the daylight or
as it goes out. You're actually having
all that information in your photo and your cameras just changing the shutter
speed so maybe it's doing longer shutters and then
really fast shutters, but it's keeping the
same image more or less, at least the same exposure as the light changes
in your image. That can be really beneficial
tool when doing photo-ones. I personally think when
shooting video ones, I like shooting with
just in manual mode. I'm currently at ISO 400, which is the base ISO
for these cameras. I'm at 1/50th shutter speed just because that's what
I shoot video at. I'm at an F/16 because this
morning with an ND filter is a little too dark and I wasn't sure
once the sun came up. I remembered yesterday I was
shooting with the ND filter, but I was still able to shoot at a pretty high F/stop
when I wanted to. This again is something that maybe when you first get there, just look at what the
exposure is, take notes, and then come the morning
time or come sunset, you can self set those
numbers to reflect that. Because it is ultimately,
the goal is to seek, go from pretty dark to light, at least for a sunrise
like we wanted it to feel early morning and then the sun comes out
and it's bright and beautiful but it's still
exposed correctly. It's not overexposing
in that moment. Now, there's a lot
that you can do with time-lapses and we will be
getting into hyper lapses, which is essentially
a moving time-lapse, but I think the important
thing with time lapses, especially for when
you're vlogging, is that once you get somewhere or if there's
a beautiful vista, just pullover, set
up your camera, it doesn't have
to be for sunrise it can be middle of the day, it can be whatever time of day, and just let your camera
find a composition that you like that showcases
where you are. This is really to
show the landscape, to show maybe the view
from your hotel room, maybe to show you
doing something. But just set it up and
let it go for 20 minutes. Obviously, stay nearby, but not so close that you're
going to cause it to shift, and just surf stack these. I think they're
really beneficial for any edit and
you can use them at any point serve as a break of the talking as just
have a moment of pause. That's more or
less time-lapse in photography or
videography, I guess, is really just allowing
your camera to do its thing to find
a good composition where you can really showcase landscape or just the
movement of something, whether it's you doing chores in your room or loading up the car, a busy intersection,
clouds moving in the sky, suns moving across a mountain. It's just to show progression or movement in some way and it's a great tool alongside the
rest of the things we'll be talking about in this
travel vlogging section. Because it's all about
having that movement, having that energetic excitement of travel and going
from A to B to C to D. This is something
that although this is static, you get the movement through
whatever sending a frame, whether it's nature or
yourself doing something. It's really easy you don't
have to do too much outside of figuring out your exposure, what's going to work as it
gets lighter or darker, or if you're just in a place where the exposure is
not going to change, you don't even need
to worry about it. You had just being mindful of it's going to
take 20 minutes, so get comfortable or find
a nice place to sit to do it and make sure your
battery is charged. Another thing is to make
sure your memory card has enough space for
that time-lapse. Now, a 20-minute 4k time-lapse is going to take
up a lot of space. Most cameras will tell you how much recording
time you have left and just be
mindful of that. Also, if you're going to do
a time-lapse in the morning, maybe dump your cards, back them up on your computer before you get going on
your road trip or on your travel because you will run out of space very quickly when
doing time-lapses. But I'll say that I think
they're great tool to have. I'll see you in
the next section.
19. Project 2 Recap: Watch the Cinematic Travel Vlog: [MUSIC] That's a wrap on the
travel vlog section. I hope that you enjoyed
Sam's teachings. I think that being
able to see Sam out in the field on in actual
travel shoot on location was really interesting and to see that real
behind the scenes process. What Sam is thinking about throughout all
of these shoots, I hope was really interesting
and educational for you. I'm excited to share with you the final product of that travel vlog because
there's a lot of shots and footage that
you didn't get to see in the actual
lessons of the section, so I'm going to pass
it over to Sam. It's a little bit of
a longer travel vlog compared to the other projects that we're doing in this class, and so enjoy it. Most importantly just
take in the beauty of the shots that Sam
was able to get and just try to remember from the lessons that you
just watched from him whether it's talking
about different ways that he adds subtle
motion to a video, to composing and framing a shot, depth of field, and
things like that. Try to remember those things
as you watch this video. Anyways enjoy, and we'll see you in the next project
afterwards. Cheers. [NOISE] All right everyone. Just got to Will's house and got everything loaded up in his car, so we are now going to
hit the road but really quickly I just want to say how
excited I'm for this trip. We've been talking
about getting up into this part of the world
for a minute now. While there isn't any
fresh know forecasted, I still think we're going to get some awesome landscapes and just a fun road
trip with a friend, see some beautiful scenery, and get up to the
Hunewill Ranch in the snow which I've never seen. I don't think Will's
ever seen in the snow. We've only been up there
in the summertime, so very excited to see that. Let's not delay any
longer. Let's go. [MUSIC] All right, everyone. We are now out at June Lake, and we're just having a
nice little early morning. I made some coffee, the time-lapse
switch will get to; but we're now going to pack
up the car, get going, get some of these B-roll
shots along the way, and just document
this little chip that we're doing
from June Lake up to a Honeywell Ranch in
Bridgeport along the 395. [MUSIC]
20. Project 3 Overview: Documentary Promo: Welcome to my video. I'm going to be doing
a promotional video or a promotional documentary
is what I like to call it. Basically, this kind of video is something where you'd
find a company and you create a video to promote the company whether that means showing what they do, trying to find new followers, trying to find new clients, anything that you can do to basically promote the company. Now we've chosen
Photography and Friends, which you guys may
know is a group. Would you call it
group or community? It's like our community for
our photography students. We want to create a 30-second, two-minute-long
promotional video that will attract new
users and followers. Now, typically what
you would do for that would be to interview someone talking
about the project or talking about what
they are doing exactly, and then you would show
exactly what they're doing. For Photography and Friends, it's an online community so we're making it
difficult for ourselves. It's not like we're
shooting a baker or a woodworker or something. Someone that's doing stuff with their hands, which is easy. It's easy, you can
just see something. But everything we
talk about in this, you can apply to
almost any business. But basically, I've built a little shot list
that we're going to go through and we're going to try and push ourselves
as far as that goes. Are you guys ready
to hear what I got? Yeah. Yeah, let's hear it. In creating this, there are two things that I want to
talk to you about first, and that's A-roll versus B-roll. Now in advanced videography, we want to make sure that
we're planning this stuff out. A-roll is basically
going to be the spine or the video that is going to take you all the way
through your video. In our sense, it's going to be an interview. A-roll is going to
be an interview with the person that is in
charge of the company or the person that is the front-facing face
of the company. In our case, it's
going to be Phil. Oh, man, I have to
do that. [LAUGHTER] Yeah. We're going to set up an interview and we're
going to interview Phil. We're going to talk more about the interview
in a little bit, but that will be our A-roll. Now he's going to
guide us through what is Photography and
Friends, what do they do? How do they do it? We're going to use that
voiceover in the interview to guide us through this
30-second, two-minute video. Now, after that, we're
going to shoot some B-roll. Now you've probably heard
this a lot like B-roll is basically just beautiful shots that's going to go
over the A-roll. Now typically when you're
interviewing someone, my style in promotional
documentaries is to not hear the interviewer, you just want to hear
the interviewee. Now that means there's going
to be a lot of cutting, we're going to need
to cover some stuff. It's boring just seeing
someone sit there and talk so the
B-roll is going to cover those edits so we
can hide it and make it seem more seamless
and professional. We're also going to be able
to show pretty things and not just look at Phil's
face the entire time. Which is a pretty thing too. Not pretty enough for a whole [LAUGHTER] 30-second
promo though. But typically you
see this when you're watching commercials on TV or you go to a website and
you're looking at non-profits. Really any company has a promotional video
where there's someone talking and then
they cut to what they're doing or
what they're about with the beautiful B-roll. I mean, I think just to add onto what this project could
be applicable to, it's really any
non-narrative type film. Even if you're a YouTuber
and you're making videos yourself or if you're
doing vlogs or anything, this is going to take your video to the next level compared to just shooting yourself at your computer talking
to your webcam. Adding the B-roll,
nice-looking B-roll. YouTube is a really good
example of this like when someone is talking and then they cover it with what
they're talking about. But our goal is to make it look better than just a normal setup. We're going to do
five different setups and I'm going to show
you some tips and tricks to make those better than they would
just be normally. We're going to show you
just a basic version of each one of those
scenarios would be and then I'm going to show you
how to push yourself and make those even better
and look professional. Because there are certain
aesthetics that we can do to make things look more professional and that's
what we want to teach you. So what are the five
things we're going to do? One, the interview, the A-roll. I'm going to show you
a basic interview shot which is fine and we're going to add a second camera to the interview shot to make it a little bit
more interesting. You see this a lot in
Netflix documentaries where there's multiple
shots of an interview, one of them is profile or lower or different angle
and that helps us a lot. You can see in our
storyboards that the first two frames are the normal shot as in shot 1 and then I have under shot 1, which I've labeled number 1C, is a profile shot
of my little head, sorry, the chicken scratches. But you'll see that there's
two different ways of shooting the interview
that we'll be able to edit back and forth. Our second shot is going
to be a video portrait. Now, that's been a
new thing developing. Basically, we want to see the person who we're
talking about, which is Phil, and he's
going to look all proper. Normally you can
just shoot that, just normally just
like a photo portrait. But we're going to push you to do something else and
that means pushing in. We're going to try and
push in on someone which is a little bit
more of a cinematic move. It's such a simple
thing that you can do that'll make it look so good. We're going to use
a gimbal for that, but you can use a dolly, you can push a tripod
if it's smooth enough. You can see in my
storyboard I've put arrows from the wide
frame down to the, the smaller circle
is the second frame. The cool thing about
that too is we're going to talk about frame rates. Because at that
point we're going to shoot a little bit
of slow-mo and it'll add this really beautiful crisp commercial-looking
push-in. That aesthetic is what
I'm talking about as far as it looking
professional, that can really add
to what you're doing. Shot 3 is going to be Phil
working at his computer. He's going to be
talking to people on the Facebook group
or he's going to be working on blogs
or setting up Photography and Friends
doing the lessons. Very exciting stuff. Typically that's
boring. [LAUGHTER] How do I make that look good? How do you make that look good? Well, we're going to
add movement to it. Now you can see in
the storyboard, we're going to come across the computer in front
of it on Phil's face. That simple act of adding
movement is going to make everything look so
much more professional. It doesn't take a ton of work to do and it doesn't take a
ton of equipment to do. We're also in that same
setup going to shoot a bunch of inserts
of Phil's hands, of the computer, of
things in foreground. We'll dive more deeply into
this but that's going to be like cool-looking B-roll. Yeah. I think one thing you're thinking about is a
lot about editing. As a video creator, you have to think about what shots do I need for the edit? You already talked about
how with the A-roll with the different shots or
B-roll covering the A-roll, you can cut out mistakes, you can cut out the
interviewer asking questions, and things like that. It takes practice and it takes practice actually
editing to know, with this I need
that kind of shot. But when you're in a setup
like you're talking about, if I'm working on my computer, I might as well get a few different shots in
that one setup. Exactly. Knock things
off pretty quickly. We'll dive deeply into that
one when we get there. To continue with the movement, the next shot is going to be Phil doing a podcast
with someone. Now we have a podcast
on Photography and Friends although we
don't keep up with it often. That is going to build off of the movement that
we've already created in the video portrait and moving off the foreground and we're
going to do a podcast. These two are going to
make a mock podcast or they're going to be
talking to each other and we'll add that same movement
and show you how you can edit within moving and keep up the momentum of your video. Because we want to
create excitement, we want users to be engaged, we want to show
them how exciting it is to be part of
Photography and Friends. The last shot is going
to be of a camera or hopefully of Phil or Sam holding up a
camera and shooting, and we're going to make
it look like a movie. My goal with that is to
make it look cinematic. I want flares, I want depth
of focus to be shallow. I want movement, I want all these
things that are going to make it look professional. We'll talk about those
aesthetics that are really pushing yourself
as a videographer. I think in a basic video sense, just having a camera,
everything in focus, and locked off is boring. The aesthetics of making
things look professional, big movies and commercials have very little
things in focus, they have movement, they have
flares, and slow motion. All these things are what makes a video look more
professional, more advanced. You can do that with
what you've got. It's really not that
hard you just have to set yourself up for
success and do that. Those are our five shots. In the meantime, I'm
also going to be talking about some quick lighting
techniques for those. Because of all the three
videos that we're doing, I think I have a lot of
control over the lighting. That being said, if you're put in a situation
where you're in a place where you don't have
control of the lighting, there are some things
that you can do to kick up what looks like a professional
lighting setup very easily with minimal lights. All this being said, this is one of my favorite
projects to be doing. Sam and I actually have a
video production company and doing this type of video is basically what
we get paid to do. This is a tried and
true process and the term talking head where it would just
be Phil talking, gets boring and that's not
fun, that's not advanced. We actually don't
want to see that much of Phil in the
interview at all, but we want his voice to cover beautiful,
wonderful shots. I think people end up
just getting lazy. If you're out there you're
trying to make your, I'm talking to YouTubers
out there because that's what a lot of people are now. You've got a YouTube channel and you want to make it better, it's just taking the extra
effort to get B-roll for whatever video you're doing. I think it's easy to say, I'm just going to put out
another piece of content, just film it really quickly, it's just going
to be me talking. But spending the time
to think about B-roll is super important and will
take you to the next level. Planning it out like this. I mean, having a shot list is
something that Sam and I do all the time when we're doing documentaries or promo videos. Pre-production is such
a big part of it. Also, what I love
about this as well is that seeing both these
are documentary side, like here's Phil working on his computer, we're
going to get that stuff. But then it's also
the commercial side, it's also more like, let's set up a situation
where he's out taking photos. Yes, it's staged, but we're going to
make it feel natural, we're going to make it
fit within this context. It's something that if you are working with a client
or you work in a company and you're
working this kind of thing, it takes that
creativity of both he's just doing the actual thing
but also, let's get creative. Let's have some fun
with this. Let's set up something that's
going to be more engaging to look at than
us sitting here talking. The last thing I'll
add too is if you're out there watching
this and you want a career in video creation
like you just talked about, this is one of the best ways to start getting paid
to make videos. Every town wherever you
live is going to have a variety of businesses that
want video content now. I need it. So get out there, literally just go out
and talk to people. What I've done here
where I live is in conjunction with my wife who started a local newspaper, we started just profiling local businesses and
this was for free. We started making videos just showcasing businesses
exactly what we're doing, we're talking about these
corporate documentaries. But from that, I get people
asking me to do all kinds of videos from their business to their campaign videos,
to all kinds of things. This is a great type
of video to learn and to actually get paid
to do what you love. The concepts from the
non-profits we've worked with to big multinational
corporations to small mom-and-pop shops,
we've done the same. Same formula. Same formula. A lot of this is pre-production
that we're talking about now so that when you go out
and shoot, you're effective. It's all the things that
we've done for what? The last decade? Decade, probably, yeah. [LAUGHTER] It's the
same thing we've been doing and we're just
going to give you all that information right now. Are you guys
ready to do it? Let's do it. I'm excited. Let's go.
21. Tips for Interviewing on Video: Before we get into
our first shot, which is our interview shot, something to be prepared
with is the questions. We're going to be
interviewing Phil about Photography and Friends. Now the goal with the
A role is to make sure that Phil talks deeply about the journey of Photography and Friends and what it is and what it's about. We need to be asking him
questions that prompt that, but we also don't
want to be too pushy. We want to make it
sound conversational because when someone's just answering robotic
questions in one word, it's not very fun. Another thing to be
telling Phil to do is to try and rephrase the
question in his answer. If he doesn't do that, it would sound something
like, what's your dog's name? Ashby. If we just cut me out and we just cut to Phil going Ashby, there's no context. [LAUGHTER] You have to say my
dog's name is Ashby. We want to have people trying
to repeat the question. Sometimes it's very hard because a lot of
people that you're interviewing aren't used
to being interviewed. You have to calmly work your way into
that and prompt them. It helps to have
questions ready to go. Now I have a list of
questions here that I've made that will
help with that. They're simple, they're
not too complicated, but they should prompt Phil
in talking about his company. Some of the questions are, what is Photography and
Friends? Basically, what is it? What is Photography and
Friends? What is the website? That's going to be a
great question for him. What does it provide? We want to know exactly
what he's doing and he'll answer with Photography
and Friends provides blah-blah-blah. Another one is, who is
it targeted towards? Why is it so great? Now these questions are
going from the specific to more of the ethereal
big general questions, which is good because
we want to be able to hone in on exactly
what Photography and Friends is and we also
want to make it broad enough that it will include
a lot of people in it. It's good to get as
much information in your A roll interviewee as possible because we
can always cut it out. We can't add to it, but we can cut it out. From interviewing
a lot of people, making videos, a
couple of things that I always keep in mind, one good piece of advice
is sometimes just let them answer the question and just wait and you don't have to, one for audio, just try not to talk over who
you're interviewing, but in another sense, sometimes just not
talking right away. They might come up
with more things, corporate documentary
is one thing. But if you're doing more of a
personal story documentary, just let them talk. Sometimes just pause,
let them talk. The other thing, maybe more
with the corporate side is, and you're going
to learn how to do this as you edit videos. Sometimes you hear the way someone says something and it's okay to ask them to say it again or say it in
a different way. What I find a lot is
people actually talk too much and you know you just need that 10 seconds soundbite. I feel comfortable with
asking the person to say, oh, can you just
say it this way? It depends on the project, but if it's a short
30-second spot, sometimes you just need
that short soundbite. I would say it's okay
to just ask them. Because you're looking
for those soundbites. That's such an important piece of especially I think
with interviews is that, you're sitting down
with a person that you're ultimately
making this video for. You're here to tell their story. They've entrusted you to do what you do, make this video. If you're saying," hey, that's not really great, could you say it again and
focus in on this one piece because we're here to do a
video on Photo and Friends. You just spent 10 minutes
talking about your dog. But you said this great thing
about Photo and Friends, let's focus in on that". I think that's such
an important thing and leaving that space. Many times I've been
in interviews and there's a camera,
there's lights. I've never been in
front of a camera. I'm sweating and this
person is talking to me, but I don't remember
what I just said. But sometimes if
you just give them that time and that space, they'll just keep
talking all of a sudden. They're like, actually
there's this other thing and really you don't need
to be pushing too much. Let them say what they're
going to say and then just, "do you have anything
else you want to say or is there more
you'd want to share?" Sometimes they just
need that moment of pause to really find what
they're trying to say. Interviewing is an art
form in its own way. Tying it back to
the cinematography of actually being able to
video and get an interview. It's best if you can have either a second shooter who is helping you with the camera, who's paying attention to the camera and the audio so that you can just be
focused on the person. Those interviews are just
going to come out better. Then I have a question because I watch a lot of documentaries now and when we went
to film school, you don't look at
the camera and you don't center the subject. This might be saying you talk
a little bit more about in the next lessons
where we're setting up our interview shot. But what are your thoughts about how do someone get
that interview shot where they're looking at the
camera and then also framing or any quick tips
before we dive into it? I think it depends on the style of what
you're going with. I think in an odd von
guard documentary where there's a lot
of intense drama, talking straight into camera in a interview can be
really effective. But that's a tool
that you're using as a filmmaker and
people do that where they put a
camera and they have a video screen and
fry and they're basically zooming with you
on the other side or like framing and you just
see their head or you just see the back of their head or something like that. It's a stylistic choice. I don't think that
that's great for a promo commercial because it's not speaking to
general amount of people, It's making a statement
or something. But there are tools. I completely agree. There's so many documentaries
out there that we watch these days and people
are getting real fancy. Their second shots are low
and behind them it's like you can't even see their face or it's showing the whole
interview setup. There's always the good style. [OVERLAPPING] There's all
these cool different ways, but the traditional 2011
we are getting the shots. But to have that moment where the person
looks to a camera, even if it's just
for the final shot, all of a sudden you cut
to and then they're centered and they're
looking straight on camera. It can be an effective tool. That's what all
these things are. There's learning these
different techniques and then thinking about them beforehand while you're shooting to then make the edit
that much more powerful. That's such a big part of
all this storytelling, the creative process
of interviewing. You can see we started talking about what the questions
are and it led to another conversation and that's the whole point of
having the list of questions is you want to have it as a road-map
so that you can create a conversation in your interview and that's what's going
to be most natural, which is literally what just
happened here what you saw. My last few questions
are more of getting people to basically give
you that soundbite. Specifically the last one, what are your hopes
and dreams for the future of
Photography and Friends? He just heard that question now so he's going to
be thinking about it. But typically the first time someone hears that
they're like," oh my gosh, the hopes and dreams of my
company I want them to be", and that is going to create such a good sound bite for you. Keeping in mind these
questions are a road-map. Let the conversation
breathe, let people talk. I've seen Sam so many times after they
answer a question, he just smiles and
looks at the person. [LAUGHTER] Then they
say something else and it's wonderful and
he's really good at that. That takes a lot of practice, which I think is really good. Quick question
though, do we send our people questions
ahead of time? I do. I've done both. It depends on who
you're interviewing. I only do it if they ask. I never have. I
almost refuse to. [OVERLAPPING] Even if I do, I don't actually send them
all the questions I'll ask. If someone asked for it,
I will send it to them. But typically what just happen is you won't even get
to all the questions. You'll just start having a conversation which
is going make for a better interview for
this type of video. I will say on the document is broad term that I've done both
the corporate side and the other side, but with this, when you're making
those questions, such a big part is, at the beginning of all
this we said we're making a 30 to one-minute video
on Photo and Friends. You've agreed with your client, what are we making a video for? What is the purpose of this? Those questions should reflect that because at the
end of the day, this is to make that video. If we're going to do promo on
2021 for Photo and Friends. Then all of a sudden
we're talking about 1983, it needs to have the context to really
make sense for the video. That's such an important
part of creating those questions is to
be focused on that. I think the last tip
that I would give is something I was saying with Sam, listening to someone talk is being present with
your interviewee. You don't want to
necessarily have a laptop in front of you unless you're looking
at questions, but maybe you want
it off to the side. Maybe a piece of paper
that's not making noise. But being engaged with your interviewee
is going to create such a better environment,
such better answers. You really want to be focused. Like Phil said, if
you have someone else that can be looking
at the camera, watching the sound, you can
do this all by yourself. It's incredibly
difficult and it takes a lot of juggling many things. But having someone
to help look at all that stuff is super-helpful. I'd highly recommend not having the questions
on your phone. I've done that and even
though I tell them before, it's like you were talking and also I'm
looking at my phone to look at the next
question and it breaks it. It's so bad. [OVERLAPPING]. All right. Let's get into it. Let's do an interview. Oh, man.
22. 2-Camera Interview Setup with Lighting & Audio Tips: We're here in Phil's garage, and we're about to
do our first shot. Now we're going to shoot
on this mirrorless camera. I have myself lit right now
so you guys can see me, and we want to compose a
nice shot to start with. I'm going to run you
through three things. We're going to run through
the camera settings, we're going to run through
the audio settings, and we're going to talk
about the lighting, not necessarily in that order. Let's cut to this camera first, so we see that we're
in a wide boring shot we have my hand is in front, the booms in shot, and also we're seeing the house lights. Let's start by
composing a nice shot, so we're going to go ahead
and zoom in a little bit. I have this camera, our A-roll main camera on a 24-70 zoom so that I can adjust in camera as we see fit. You never know what situation
you're going to be in, so you want to be
able to adjust on the fly if you had a
prime lens you can move the camera
itself and that will also allow some more depth of field, but we'll
get into that. I actually want to shoot closer
to 70 millimeters because of that aesthetically
professional look of shallow depth of field. I want less in focus and more out of focus because that's the aesthetic that
looks professional, and that's the first thing
you can do to up your game. How do we achieve that? Well, we shoot wide
open at a 2.8, or we shoot it a
long lens like a 70, or we shoot on a
prime lens wide open. Now, that's going to add that cool shallow
depth of field. Let's go to 70, we've adjusted the
camera to a 2.8, and now we see Phil dead center. That's okay, but when we talk to Phil we're going
to be interviewing him. Phil, look at me. It looks
a little off kilter. Now remember the rule of thirds that we talked
about composition. We're going to move it a
little bit to the left here. Now, Phil is looking in this direction and there's
more space on the right side, so it's leading room. We can also if we ever wanted to throw up graphics next to him, or we can punch in. We're shooting 4K so
that we can punch in. If we're going to
deliver in 1080, we will not lose any resolution. Now, if we're going
to deliver in 4K, we can't necessarily
do that shooting at 4K because the resolution
will be the same. Let's look at Phil. Phil, let's go ahead
and look at me. Hi, Phil. How is it going? I know that we're going
to deliver in 1080, so I'm going to back out a
little bit so that I have room to punch in on 4K since
I'm recording at that. Now that our composition's
good, let's check focus. I like to focus in manual
mode on interviews like this, you can do autofocus
if you like, but sometimes I don't
necessarily trust the cameras so personally because I know Phil is not going to be
moving around a lot, and I'm going to
ask him, hey Phil, don't move around a lot. I know that the focus will stay the same on him
the whole entire time. I'm going to go ahead and
check my manual focus, see that he's in focus, having an external
monitor like I have here, is super helpful for that. Typically, you'd be using
a small screen and stuff. If you start to use this as a job, they're
going to get paid for, you need to show clients onset what you're
shooting it's really helpful to have a
nice external monitor that you can show your clients, and it's just easier
on your eyes. I can get focused a
little bit better. I can also spin this
around and have Phil look at it if
I needed him to. That's our main composition
for our main A-camera. This is like our hero shot that's going to be throughout
the whole entire thing. Composition is looking fine, the lighting however
does not look great. We just have overhead
lights you can see we lose his shirt a
little bit in the darkness, we can't even tell what those
objects are in the back. Basically what I'm going to do, is my way of lighting interviews is to have one key light, one nice key light which
I'm lit by right now. We're going to give Phil that, and I want to have
on the opposite side a backlight to break up
him from the background. Now, it'll give
him a ring light, and it'll give him a highlight that pops him out
from the background. Let's start by turning
off the house lights. Now, it probably doesn't look
all that great right now because our light
that I'm lighting myself looks like a spotty
light, and we don't see Phil. I'm going to start by turning
on the key light for him , there we go. You can see now that Phil
is lit by one big light. Now, these are LED lights and they are daylight balanced. My camera right here
is shooting log, which means I'm going
to color it later. Now, you can see because it's showing us not
necessarily the log, it's showing us the white
balance that is doing. It's an auto white balance. You can watch it as
it just went from balancing itself to
those overhead lights to now balancing itself
to these daylights, and it's creating actual white. This light itself is being shot through two pieces of diffusion. That to me is beautiful
on Phil's skin, and now we can see the color in his shirt it's a soft light
that's falling on him, it's actually giving them a
reflection in his eyeball, which is called an eye light, which looks really nice. Again, this is the aesthetic
that looks professional. Now, we've also lit up the
background a little bit. I still feel like he's just
falling into the background. Let's turn on a backlight and show that
highlight behind him. Can you see the
difference between the backlight this is on, this is off, this is on, and it's getting his hair
light and inside of his light. Now, I like to do opposites. I have the key light
on that side and opposite of that
is the backlight. If I had the backlight
on this side, it would be fighting
with the key light. The advanced way to do this
is to have an opposed side, key light, backlight, and you can see what it's doing here if I move my
hand up and down. That looks great. Now, we've brought some
shape to this side of Phil's face, we
have the key light. This looks like a
professionally lit interview. Now let's compare this to what it was with
the house lights. Huge advancement and we're
only using two lights, just two lights and
some diffusion, this one's a
one-by-one LED panel and that one is half that, and I have it closed
down, so it's only hitting this side of Phil. I think it looks great.
Phil, you look amazing. Thank you. Let's talk about audio. Now for an interview, I
like to have backups. I'm using a wireless system. There's plenty of mics that you can connect that have a wired. I prefer the wireless system because it keeps
wires off the ground. People are moving around. You don't want to be
tripping on things. You don't want to pull
something out on accident. Now, I'm using a
Wireless Go II by RODE. The cool thing about
this one is it has two transmitters
to one receiver. To make it easier
on me in editing, I have both my channels
going into my camera, so I don't have to
record it separately. The cool thing is I have one transmitter on a
lavalier for Phil, and I have one transmitter
above him on a boom. This way I get two nice
sounding channels. I could use either one or I can use a combination
of those in editing, that's more of a post thing, but I'm trying to set
myself up for success. If the lav is there and
for some reason he moves around and start
scratching or he starts touching his chest, like I'm doing, I can use the boom as a backup
to make it sound good. Or adversely if the
boom mic fails, or it's picking up
some outdoor sound, I can use the lav, that'll be a clean audio. It's great to have a backup. This is something that
you should think about, especially if you're
going to be out making money for
corporate clients, you want to make sure
you get good audio. If you don't have
an audio person that's specifically doing audio, this is the best way
to do it by yourself. Now it's plugged
into the camera. I plugged headphones in
so I can listen to it. I had Phil talk. Let's do that again. Phil, just let me know what
you had for breakfast. Yeah. This morning I actually had a pretty
good breakfast. I made myself an egg and
bagel half sandwich. Let's have him say that again, and I'll switch between
the boom and the lav. This morning for breakfast I had an egg and bagel sandwich, even with some avocado on it. That's awesome. It
sounds good to me. You can tell the
difference between the two style of mics. This is a great little kit
that you can put together. The boom is faced right at him. It's just out of our frame, you can see and the lav
is hidden in his buttons, which is good if
you're subject has a button shirt like I'm wearing. An advanced step here is if
you're doing audio yourself, if you don't have someone dedicated to running
your audio recording, keep in mind that external noises will
mess up your interviews. While you're
interviewing someone, you have to be cognizant
of outdoor train noises, or an airplane,
or a leaf blower, or anything like that. You have to remember
keep an eye on that, keep an ear on that more likely. Maybe wearing your headphones during the interview would help, or just thinking about
being cognizant. Also, your cameras
can do auto gain. Now, what that means
is it will auto adjust the levels of what is happening, and that could mess you up too. Typically, I like to do manual control just
like the autofocus. We don't want to give the camera the option to mess with you. Setting your audio
to a manual mode, checking your levels, and you can see here
on the close-up. Phil, can you talk a little bit? We can see the levels
on the actual camera, making sure they're not peaking. Yeah, here's what I'm
going to be saying. Yeah, it's a good idea to
have your talent talk. Talk a little bit louder and quieter than they might talk
just so you're not peaking. We already done that
and we've made sure that that little meter
isn't pushing into the red. On other camera devices and
other recording devices, you can actually see the
numbers and checking it back. Then in post we
can take a look at that and we can raise it or
we can lower it depending, as long as it's not
being destroyed. Very similar to the shadows in the highlights when
you're shooting, audio has lows and
highs as well. Now that we have our audio
set, our lighting set, our A-camera set as our good A-roll composition,
we're going to up our game. Now, let's advance to adding a second camera just over
my left shoulder here. We have the same
mirrorless cameras set up, shooting Phil from
a profile position. Now this is a little more icy, a little bit more avant-garde, but it gives us a
second thing to cut to. Honestly, it gives us a
third thing that cut to. If we consider
delivering in 1,080, we have a 4K file here
that we can punch in on. Now we have three
different A-roll camera positions
that we can cut to, to hide over our B-roll or hide over any
mistakes Phil makes. Or we can also use
these to cut out my question asking,
which is really great. Let's go over and
look at the camera and make sure it's okay. We got Phil here and we're going to make
sure he's in focus. Phil go ahead and talk to the camera in front of
you as if I was there. I'm going to be talking, looking around in
this direction. I probably won't be
moving my head too much. Something like this
feels more natural. Yeah. This is really
cool because we have a second camera setup
that we can cut to. It looks cool. This can
really be anything you want. We could move it over
here so it's behind him. The background is not as good
as what it was over here. Or if you just want to have
a better close-up shot, you can have that too. Just got to keep in mind
your screen direction, and how that will work. In thinking about the edit, this position is great, but the screen direction
isn't the same. If we cut between
these two shots, Phil is on the left
in our main camera, but he's on the right
in this camera. When we cut between the two, it might not make
a lot of sense. While this shot is great, I think we're going
to need to move it to the other side or we
can flip it in post. Now that will get
you some issues potentially with wordage
if that was on a shirt, or if he has certain
takes or he moves a hand up or down,
they'll be opposites. You want to try and minimize the work you
need to do in post, minimize the problems
you might end with. Let's just off the bat, go
ahead and move this camera to that side of our setup so that the screen direction is correct and Phil is on
the left in both shots. Now, Phil is looking left to
right in both of our shots. The background isn't
as great over here. I'm actually going to move this, and add a laptop that's
out of focus in this shot. You can see now that Phil can be talking to camera and we can cut
between the two and the background is completely
out of focus in that shot, and it looks a little different. This lighting setup and
this compositional setup is way more of a traditional
documentary commercial style. Now, if you want it to be
a more darker documentary, or you felt like it needed
to be a little bit moodier, you can build off of this. This is really the
building blocks of what an interview may be. We can turn off this
front light and have it be very dark and
a little bit more spooky. Or maybe you've seen those
videos where they're doing unsolved mysteries
or something like that, where they can't show the face of the person and the
voice is all changed. These are really just
the building blocks for you to build out the style of whatever
you're shooting as far as documentary
or commercial. Now, I'm going to go
ahead and sit down, and I'm going to
ask Phil a bunch of questions that we
talked about earlier, and start to build out this really awesome
A-roll for the video.
23. Video Portrait: Shooting a Beautiful Shot for Promo & Documentary Projects: For this shot, we're going
to do a video portrait. Well, I guess there's three
things I want to talk to you about as far as
video portrait goes. We're going to talk
about lighting, we're going to talk
about movement, and we're going to talk
about frames per second. Now to start with, let's
talk about lighting. Now, this is our main
lighting commercial setup. We've got a nice even
bright light on Phil. I don't have the camera up yet, but let's just with
our eye look at Phil. He's got a key light, he's got a fill light, and he's got a backlight, and we can see all
three of those. Now, that's a really nice setup if you're going to start
carrying lights with you, having a three-point lighting
system is wonderful. Here's the nice
commercial light. Now I think I'd like to add
a little bit of drama to it. Let's kill his fill light and
see what that looks like. Just with our eyes, we can see that Phil now has
a nice shadow right here. He's got a backlight
from this side, and he's got his key
light from his left side. That's definitely a
little bit more dramatic, and I think that that's
a little bit more intense and awesome
for our shoot. We'll shoot all three, and we'll compare
here in a second. Let's make it even
more dramatic. We're going to kill
the key light on him, which is the light
on his left side, and see how dramatic that looks. [NOISE] Definitely
more dramatic. You're still getting
some spill light from the light that we're
using to light me. You can see how if
I block that light, all he's getting is his backlight and that's a
little bit more dramatic. Now, let's go ahead and shoot all three in just a static shot, and we can compare all
three to each other. [MUSIC] Let's go with the
dramatic first. I'm going to kill the fill light because I
think that that's a little bit more
interesting and honestly that matches our
A-roll interview. Remember we did a key light and a backlight and that was it. We're back to Phil in
our lighting setup, and now we want to do a
video portrait of him. Now we can do a static
video where it's just him, just nothing moving, and
we'll give him some action, and let's see what
that looks like and see how we feel about it. Phil, we're going to shoot you. If you can just
smile into camera, bring up your camera that you have and
take a picture of us. Awesome. Then smile
into camera, awesome. If you'd look down at your
camera and then back up at us. Awesome. Thanks. I just had Phil run through a couple of actions
in a static video mode. I use the gimbal, but we're just staying static. There's no movement. Now we
gave them some action to do which is always good
to direct your subjects, especially with
what they're doing. Depending on what they are, they can fold their arms, they can put their
hands in the pockets. He's got a camera because it's about cameras, so
he held up the camera. Giving your person some
direction is really great. That was good enough. But now let's add some movement to it. I think doing a push-in with the gimbal will add a little bit
more kinetic energy, and it'll be a little
bit more interesting. It's also again that aesthetic
that I keep talking about. It's much more Hollywood
cinema when you're pushing in. Think about big movies like Spielberg movies where
there's a dramatic pushing. That's what we're
going to try and achieve with the gimbal. Let's have Phil do
the same action and we'll do the same framing, but we'll push in as we go. Ready. [NOISE] We're going to start
a little bit wide and when I say action Phil, you're going to pick
up your camera, take a picture and then pull it down and look into
the camera and smile. Am I looking at the
camera right now? Always looking at a camera.
Yeah. Get ready and 3, 2, 1, action. [NOISE] Awesome. Let's do it one more time, 3, 2, 1, action. [NOISE] Very cool. We're using the gimbal
as movement towards it. Now, I'm remembering to
stay very still because the gimbal does
stabilize like that, but it doesn't
stabilize my steps. You can still be
moving it up and down, so you have to
still give yourself a little bit of make sure
you're straight movement. Otherwise, you'll start
to see this bump. It also helps to have
it on autofocus. Again, we're moving, and we can't adjust the focus because we'll mess
with the framing, and sometimes you don't want to use your
other hand to do it. Having autofocus on
and face recognition is almost crucial when you're
doing a push-in like that. Phil look great, and we use sort of a wider angle
on our zoom lens. Now, I'm going to punch in a little bit on the
zoom lens to add more of that shallow depth of field and make it look a
little bit more professional. This is going to cause
the camera's autofocus to potentially struggle
a little bit depending on the type
of camera you have, but it won't be
moving slow enough that hopefully it'll catch it, and we'll have Phil do
the same direction. Here we illustrate. Phil.
Now we're at 55 millimeter, and we're going to
start lowing out, and we're going to do
Phil the same direction, ready, and 3, 2, 1, action. [NOISE] Awesome. We're going to back out
just so we have it 3, 2, 1, action. [NOISE] Cool. You can see how this adds a little bit
more shallow depth. It's upping our game. It looks a little bit
more professional, a little bit more
Hollywood aesthetic. Now, I want to do
one more thing. I want to shoot at a
higher frame rate. Now, we're going to change
our frames per second. Now what that does is
we're going to slow down what we're shooting
and by doing that, we need to shoot at a higher
frame rate in the camera. What you're seeing, what
we just shot was at 23.98 and now to add
more frames to it, so we can slow it down
in a 23.98 time-based, we're going to shoot a 59.94. Because we're
running more frames through the camera in
order to slow it down, it means that the frames
are going to be in front of the light for
less amount of time, which means we're
going to lose light, so we need to adjust the variable in upping
our frames per second. I'm going to up the frames
per second to 59.94, but I'm actually going
to bump my ISO up, so I can compensate
for losing that light. You got to remember to do
this because if you don't, you'll start to lose light. Something to think
about too, when you're shooting in dark areas that you won't always be able
to get more light. Just remember you're going
to lose about half the light when you start shooting
at a higher frame rate. We also need to remember to
adjust our shutter speed. If we're going to
up our frame rate, you need to match your
shutter to that frame rate. A good rule of thumb is doubling your frame rate to
get to your shutter, so for shooting a 23.98, you want to aim for getting a one over 48th-second shutter. Not all cameras can
do exactly one over 48 so 1/50 would be good, 1/55. If we're doubling
our frame rate to do a slow-motion at 59.94, we want to be aiming for
close to 100 or one over 120 or if your camera can only do one over 125,
that'll work too. This is very crucial. There have been times
where I've shot 59.94, and I've forgotten to
change the shutter, and it causes a flicker
in your footage, which makes it
completely unusable so remember to do this, it's very good to get
into the practice of as soon as you go to
a higher frame rate, double-check all your settings, your exposure, and your
shutter, very important. I've changed our
frame rate to 59.94. I've adjusted my shutter
to one over 125, I've up my ISO to 1600, I'm staying at a 55 millimeter on my lens because
I liked that look, we're keeping our
lights the same, we've got all our
variables dialed in. Now, remember when
we do this on Phil, we're doing twice the
amount of time in camera. You don't want to be quick, but you don't want
to be too slow because you'll start
to eat up footage. Same reason is I don't want
to roll this until right, we're going to go because
you'll start to eat up data. Just keep that in mind. Here
we go. You're ready, Phil? I'm ready. Let me make sure the
camera is focus. I'm rolling and 3, 2, 1 action. [NOISE] Awesome. Let's compare the two. You can see on the right
side of your screen, the higher frame per second push-in is a
little bit more smooth, a little bit more ethereal
like a nice buttery push-in, and on the left side
of your screen is our normal real-time push in. I really like doing
video portraits, especially in some of
these promo doc works because you can really see the
personality of the person. It also gives you a really good introduction or an end cap. It really gives you
more opportunity to use it in post-editing. Now, just remember,
select your lighting, select your composition,
select your movements, select your frames per second. There's a lot of variables
that you can do here. It's up to you to figure out your style and what
you're trying to do. Let's move on to our next shot.
24. Cinematic B-roll: Adding Movement & Focus Pulls to Your Video Shots: For this shot, we're going to be focusing on Phil
at his computer, which isn't necessarily the most interesting
thing, no offense, Phil. [LAUGHTER] But photography and friends is an online community, it's an online website. We need to feature it somehow, we need to show that we are on the computer somehow thinking and talking about photography. Now I don't want to necessarily
have a static shot. This is what a static
shot would look like on sticks with him just
looking at the computer. Pretty boring. Not
that exciting. We're going to use the gimbal here to basically
add some movement. Again, it's about working our foreground into our subject. We're going to do
two different types of shots on the gimbal, and then we're going
to switch over to the tripod and get some really interesting close-up,
B-roll, lock-off shots. Let's start with the gimbal, since we got on the
gimbal already, and add some movement. The great thing about the gimbal is that we're going to
be able to add movement. It'll look even more interesting
if we have something in the foreground while
we are moving past it. Now, Phil can just go ahead
and continue to work on his computer but I want him
to have a happy disposition. Just love my work. [LAUGHTER] We'll go ahead and do two
different gimbal shots with it. Let's turn on the camera. We'll start rolling, and we're going to do a boom upshot, which I think is
really interesting. Big tip with a gimbal. Again, I can't say this enough, when you're on a
gimbal auto-focus is probably the best thing for you to do because you cannot adjust it while you're
manually doing it. We're going to start down
on his laptop because look, there is a Photography
and Friends logo. We're going to adjust this
a little bit, sorry Phil. All right. We're going to start there and we're just going to boom up, and booming up means just
moving up laterally. We're going to start
here and go to his face. Boom, look at that. You
see our auto-focus went right to his face and we use some foreground
to come off of. I can be a little bit smoother. I'm trying to talk to you but
I'll book you right here, we're going to start on
Photography and Friends. Let the camera get focus, and very slowly move up. Ready, 1, 2, 3, smile, Phil. Great, look at that. That's
a really nice movement. We had some foreground,
we had some movement. Maybe we'll go a little
bit slower this time. Cool. You see the auto-focus on my cameras struggled
just a little bit there. I'll probably use one
of the earlier takes. But you can see how
cool that movement is while he's just
working on a computer, it gives us some movement. Now let's do a lateral move
from the left side here, and we're going do the same
thing. Tilt up a little bit. We're going to use the
computer to come off of the logo. Here we go. Auto-focus is a little slow but it got what we wanted to do. We came off the logo onto Phil. I've brought this
up because I want the laptop to be on level with his eyes
when I come around, and I'm going to
zoom in a little bit on the actual camera. I don't need to see these books. Remember, the people watching your video only
see what you show them, so I'm going to avoid looking at these books and
I'm just going to have a nice move from
right to left on Phil. I can use both those shots
somewhere in the video. Same thing. We're going
to start this way. We're going to zoom in until
around a 55 millimeter. I'm going to start
on the computer. Looks like we're still
going to have to boom up a little bit as we're moving. Man. How buttery is that? That looks so good. We got a really
cool movement shot, we get two of them
actually where the auto-focus adjusts
from here to there, we moved around his
computer and we boomed up. Those are really
two great shots. But now again, since Photography
and Friends is online, I want to get some more
B-roll shots of him on his computer doing stuff on
Photography and Friends. I want those to be locked
off and I want to make those compositions
really interesting. Let's get onto the tripod with the camera and shoot
a couple of those. We're off the gimbal now
and we're onto a tripod. Now something to think about
is using a video tripod. Now, you can have photography
ball head tripods that will statically lock off shots
but it's good to be able to move your head around. This is a fluid head, so I can tilt, I can pan. If we roll, you
can see the cool, nice smooth movement that we would use in a
pan and a tilt. We're going to be using that in some of these B-roll shots. Again, with the movement
but it's smooth. It's got resistance in the head and it's letting it be
a really smooth shot. Let's do some B-roll
shots of Phil. I've got my camera here,
I've got the fluid head. We're at a wide-angle lens
on the zoom and I think it helps to be on a zoom
angle lens sometimes, so you can move a little
quicker with your subject. I can zoom in, and we can avoid the
background and we can also have some more
interesting shots. Now, I've also
moved my camera to manual focus because
I want to be able to adjust the focus
myself on the fly. Now, I want to be able to pull focus from one
section to the other. Again, with the aesthetic
being that there's very little in-focus and more out-of-focus because that looks a little
bit more professional. Let's start by getting
a really tight shot of the Photography
and Friends logo, and we're going to
start out-of-focus. We'll roll and we're
going to come into focus, just like that, and that adds a really cool, fun movement aesthetic that
we can use in the video. We'll start the other direction. It will be really out-of-focus. I'll make it really interesting, and then we'll slowly focus in on the Photography and
Friends. That's really cool. That's an awesome shot. Let's talk about shooting
Phil's hands on the keyboard. Photography and
Friends is a website, and he's working
on his computer. We want to get that a lot. I'm shooting on
this side because the back-light looks really
cool against his hands. I'm going to punch in
a little bit here, [NOISE] and we're going
to focus on his hands. Cool. We'll stick there, and because I'm on
the fluid head, I'm going to add a pan. We're going to pan
from left to right. This gives you a little
bit of movement. It's smooth, it's nice. Then I'm going to
add a focus rack to the photography friends in
the background on his shirt. Let's try that one more time. We can add a lot of
focus pulls in this. This is a lot to think about in your advanced videography. Panning, tilting, and changing focus all at the same time takes practice but it
looks really cool. We're going to
start on the logo. We're going to pan right. We're going to send
focus to his hands, and then up to his shirt, and we're going to land on Photography and Friends t-shirt. That'll be a really great
B-roll shot that we can use amongst our
other B-roll shots. Let's do another one
where we're on his face because he looks so
focused; right Phil? Again, I can start out of
focus because it's really interesting to go from
out-of-focus into focus. This is a very cool aesthetic and it looks very
Hollywood cinematic. We're going to have Phil smile. Go on and smile Phil like you're working on
something good, right into focus,
and it looks good. I like this type of framing. I think it's a little bit
more interesting where you can put his face towards the end of the frame and leave some negative
space on the right. We can also do this by
just being in a wide shot, and putting him on one side of the frame and making
sure it's focused. It's a little bit
more interesting than your typical shot, and we can also end up adding more things to the right of the frame if we ever wanted to. Now let's go on
the other side of him, and see what he's doing. I'm behind Phil's
shoulder now and we're shooting what he's looking
at on his computer. But I want to add
more movement to again without using a gimbal, we're on the fluid head, I'm going to add a
pan in. Let's start. It doesn't matter
that we're starting over here and we're seeing behind his back because
I know in the edit, the editor will cut in when
we see what we want to see. We're giving some handles,
so let's pan left. We're slowly moving. We've already checked
focus on the computer, and bam, look at that. What a nice, pretty shot
of what he's doing. He's editing on his computer for Photography and
Friends. Really cool. Now if you want to
get super interesting with this and a little
bit more artsy, let's have him pull up
the Photography and Friends site like
he already has, [LAUGHTER] and we'll
get really close. [NOISE] We're just
going to shoot a little bit of the keyboard, a little bit of the table, and a lot of bit of the
Photography and Friends. Improve your photography
and have him roll through the
site a little bit. Oh man, there's a picture of me. We'll just have him
scroll through this. Now I think that's pretty cool. I think that this is also
a way to be capturing a screenshot or a
screen recording of the actual website itself. But this is also really
cool way to show a website, especially on a
laptop with a user, much more interesting
and kinetic. Those are some examples
of some nice, tight, interesting B-roll shots with some movement,
with some tilting, with some panning, and
also pulling focus. Now I think that adding
these focused poles, adding these
movements, and tilts, and pans, really adds to the production value
of your piece. Having the movement of the tilt, and how smooth the movement of the gimbal really
makes it look more professional than
shakiness or just static shots. I think static shots
will go a long way if the compositions
are interesting but movement and focus
pulling looks really good.
25. Steadicam Video with a Gimbal: Welcome, to our next shot. One of the things that
Photography and Friends does is they like to do podcasts. One of the things
that we want to shoot is them doing a podcast. Now, this isn't
necessarily all that active or interesting because
they're just sitting there. How do we make it
more interesting? Well, we're going to add
movement to our shot. We have a gimbal here. Our mirrorless camera is on the gimbal and
what the gimbal does is it stabilizes the camera so it's
a very smooth shot. Now, what I want to do is
use some foreground off of Sam shoulder so I can see Phil and we're going
to move around. Now again that's not
professional aesthetic. We could just shoot it
like this where it's just the two of
them right there. But it's not as interesting, it doesn't create a lot
of motion or energy, so movement will do that. Let's go ahead and
pick up the gimbal. You can see here how this gimbal will respond
to my movements like this, and it keeps the camera
totally steady like so. Now the idea behind
this is to basically we're just going to coast
along and create movement. Now, you can do that in a wide shot but having
something closer to the camera you'll be able to see the movement even more
because there's something prospectively very
close to the camera. I'm going to turn this
on so you can see it, and we're going to go behind
Sam shoulder and we're going to ask them to pretend
like they're in a podcast. We're not recording
sound, let's just raw. You guys can talk quietly
or mimic talking. [LAUGHTER] Hi, welcome to the
Photography and Friends Podcast [inaudible] 372. We've been doing this
consistently every week for the past few years. We've got a static
shot here of Phil and Sam laughing and it's
fun, it's interesting. But look as soon as I
add some movement here. I'm cruising behind Sam, [BACKGROUND] over his shoulder as [BACKGROUND]
they're talking, and look how cool that looks. It looks really interesting. There's a lot more movement
and kinetic energy, as they're pretending to talk. We're only going
to use this shot for a couple of seconds. But look how fun and
excited they are, and it's so much
more interesting than just a static shot. Now, we can also
come out here and do a push-in of the two of them. [BACKGROUND] Which is also an interesting shot but it doesn't give you
as much movement because there's no foreground to see that it's moving as much. I'd rather preserve the pushing
for that video portrait. Again, let's do
it one more time. Let's have them have
some energy, laugh, maybe let's just see if we can
have Sam tell Phil a joke. Knock, knock. Who is it? Banana. Banana. [LAUGHTER]
Banana, you love me. You can see how I tried to nail Phil's laughing with me coming
right off of Sam shoulder. This is a really easy
and efficient way to get some movement and
make your video interesting. Now, you could do
this with a slider, and those are the little rails that your camera would move on. But how fun is it
to do with this? It does get a little heavy and
I would recommend that you practice with your
gimbal before showing up to a job with it. You're going to
have to balance it, there's a lot of things
that go into it. Every gimbal is different, it can hold different
weight it depends on your camera and your lens. But practice makes
perfect with it and there's so many
applications that can use this tool that will really up your videography and it will really make it look
like a million bucks. Another thing to keep into
consideration is that, because you're moving this and touching the
camera itself will offset the stabilization
it's doing. You're probably going
to want to have a camera and a lens
that will do autofocus. Right now we have
it set to be on facial focus so that
it stays on Phil. [BACKGROUND] Because
you're moving around, you don't have another
hand to adjust the focus, and even if you did you'd be messing and bumping
up the camera. Autofocus on a
mirrorless camera or a bigger camera on a gimbal is crucial, so you
need to have that. Something to think
about when you're doing gimbal is to think
about your lens choice. Now, let's look at as
a wide-angle lens, this is a 24. You can see that there's
movement but we're seeing on the other side of Sam. We're focused on
Phil, we're moving, we're practicing, we're
panning with him. It's cool looking
but imagine if we went and did like
a 50 or even a 70. Now, doing this will create a more shallow depth of field
but it'll also will create more movement
because your lens is longer the perspective is going to look like you're
moving faster. [BACKGROUND] [LAUGHTER] You can see how just
that slight movement it was making it look a lot
quicker and a lot faster, and that will even up your
speed of what you're shooting.
26. Naturally Lit Beauty Shot: We're at our last shot. Now, this shot is going to be the cherry on the top
of all our shots. For me it's always good
about doing a shot where you can have something really
beautiful to show. Now, I was waiting all
day for the sun to get in the right spot so that
we can get some flares. I'm going to add
in everything that we've talked about and flares. Again, aesthetic of
very little in focus, lots out of focus, shallow depth of field, movement in our camera and flares. We're also going to
do that with Phil in his wonderful Hawaiian shirt and our new camera here he's
going to be holding up. What I'm going to do
is I'm going to move around Phil as he holds up the camera because we want
to focus on photography. That's what his business is about; it's about photography. We're going to add in the
flares from behind him. I've put him so the
sun is behind us. See how it's backlighting us? I'm going to try and
expose more for his face while maintaining
the highlights in the back so we can color
it later and post. I'm on the Gimbal, I also have a variable
ND filter on the lens. I set it at 50 millimeters and per our frame per
second talk earlier, I'm at a higher frame rate; I'm at 59.94 frame rate. I've changed my shutter to 1/125 and we're
shooting at a 2:8 so we can get the
shallow depth of field. Is there any more settings I can think of? I don't think so. Let's go ahead and do a shot. I'm going to move around Phil. I'm going to have them hold his camera up like
he did before. I'm going to ask him, don't
look into the camera. Don't look into camera and have him smile
because this shot, to me, is something
that it can be at the head or the
end of your video, it can be a preview,
it can be a thumbnail. Something beautiful; something
that just looks awesome. Let's try it. I'm going
to roll my camera here. Phil, why don't you start by with your camera down and looking at the
back of the camera, and then go ahead and hold
up the camera when I say to. Three, 2 1, go ahead. Cool. Here's what I'm doing; I am moving the camera on him at an angle up into the sun and having Phil move the camera up. He's a little
squinty-eyed though, so I asked him to just hold his eyes up
when we get there. Close your eyes for now, you don't have to
squint right now. But this movement
with the flare in the background focus on
the beautiful camera. Cherry on top. Here we go. Let's
try this again. No squinty eyes. No squinty eyes. Hold on. Let me make sure we got focus. When you're ready, and 3, 2, 1. When you pull the camera
down, go ahead and smile when you're looking at it. Exactly. Let's see
that one more time. Ready, 3, 2, 1. Pull your camera down,
smile. There it is. Cool. That's the shot. I'm going to end up using that
shot for a lot of things. It's pretty blown out in the background because
we're looking right into the sun but it's going to look really beautiful as
a really quick clip. We're shooting at a
higher frame rate, so we can slow it
down a little bit.
27. Project 3 Recap: Watch the Promo Doc: Well, we've finished
up this project. Will went out and he
edited it together. All in all, I think
it came out as a pretty good little
documentary promotional piece. We'll talk about this is
a style of video that pretty much any business
or brand could use. It's a style that really
personalizes a business, showing the face
of the business. In just literally like
five different setups, we were able to get enough shots to put together a
nice little piece. You'll notice that in the edit, Will also added a couple
of other screen casts, or shots recorded of the
computer screen to fill it out because we did find that it was a little bit slow without it with more of the
talking head video. That helps fill it out. He added music, added
a couple of graphics. I think when we get into
the post-production course, which is going to
follow this one, we're going to dive even
deeper into other ways we can make the graphics
look more engaging, better, and also maybe some
editing techniques as well. This is the first pass, the fine cut or the
rough to find cut, which is in the middle
of the process. We'll put some final touches later on in the editing course. I hope you enjoy the video and now you can see what we were all working towards when we were getting all of
our different shots. Enjoy. I'm Phil Ebiner. I helped start
Photography and Friends. It's a community for anybody wanting to learn
how to take better photos. [MUSIC] Photography and Friends is our community where we teach people how to be a
better photographer. We created it for beginners who are just
getting started with photography or people who know a little bit but want
to advance their skills. What separates us is it's a
place for complete beginners. We don't want you to feel like there's pressure to be a
certain type of photographer. It's really there for you
to learn in your own way. The main aspect is a
group where you join thousands of other students
learning photography, is a place where you
can post photos. You can ask questions. We do live streams,
contest, giveaways, we share resources, is just sort one-stop shop for you to learn to be
a better photographer. There is now tens of
thousands of people in this group that
we've created, and how can we use that power to just make the world a
better, more creative place. That's what I hope we can do.
 Phil Ebiner, Video | Photo | Design