Transcripts
1. Intro: Throughout this class, we will discover ways to represent a place, drawing inspiration from your specific environments and transmit MOOC through that representation of a place. Find connections between 3D inspirations or imaginary places to create a new space you've never seen before. We will see how to assimilate our creativity, be inspired in the five concepts to transfer them to our composition. Hi, I'm Eveling Salazar. I'm a graphic designer and 3D artist from Peru. [MUSIC] This class is for graphic designers and in-house professionals with an intermediate level of skills with Adobe Dimension. I want to spur new ways to create expressed under presented new trends in 3D. We will start by looking at our environment for inspiration-defined concept, and talk about some ways to explore our creativity. We will reveal some examples of artists who use as basis as a reference to create their artworks. Then we will start working with Adobe Illustrator and Adobe Photoshop to interact and create with Adobe Dimension. We will see how to work with assets, lighting techniques, composition, materials, and more. By the end of the class, you will connect with your creativity and explore 3D as a tool for expression. Get a new perfect place or inspiration based on your environment, thus find your creativity and transfer it to 3D. [MUSIC] Now these five are rendered 3D scene which elevates dimension. Let's get started.
2. Class Project: Create a 3D scenario with Adobe Dimension that express your inspiration about a particular place. The project you will do in this class will be to represent a place. I'll be inspired by its environment or use an experience lived in that space to move it to our new 3D scenario. This exercise, we allowed you to create new forms of expression and raise your creativity and take advantage of it to create design with a vast and instance application to give shape to your ideas in the third dimension. Of course, with Adobe Dimension. To start your project, it is necessary to create a connection with your environment. Be observant and arrange the important elements and attributes for the design. During the following lesson, we will review some points to consider for the creation of concepts and relate them to 3D. Throughout the class, feel free to add ideas and write them down in the discussion section. It will also be valuable if you share your concepts and ideas of how you look for inspiration and what are the new ways to get inspired to design in 3D. Share with everyone in the break section of the class, please, your final project, and inspire us to develop creativity by getting to know your 3D work through a scenario designed with Adobe Dimension. Finally, tell us what specific places help and motivate you to create, and what concepts facilitate your exploration and creativity process. See you in the next lesson.
3. Places & Spaces: Take Inspiration From the Environment: As in-house creative designers professionals, we find ourselves continually producing work and looking for innovative ways to create and design, especially since we continually have deadlines, and perhaps hectic schedule, and clients to please, but we have different tools available to help us with our daily creative tasks. A very essential [inaudible] one for me is Dimension. The ease that this tool offer help us to be able to fuel our creativity as a highly powerful design in no time. This application can help us to free our creative mind. Let's try playing with Adobe Dimension tool to suspend our ever-present critical judgment, get inspired, and approach ideas for a new perspective. Here are some ideas to inspire us and create great 3D design. To start, I want to ask you a question. What did you do when you are struggling to come up with an idea or something clever and perhaps a deadline is coming up? As a creative, we know that fresh ideas and divergent thinking are our allies, but sometimes it's not an easy task. Our brain needs time to relax and distract itself in order to formulate new ideas. You may have to also come to the conclusion that assimilating the mind with new environments helps the production and realization of ideas. One of the ways we can do that is to look for inspiration away from the computer. In this course, we will create a project based on the inspiration of a place or a space, mix our ideas and transfer them to a 3D design. There are two points I'd like to share with you that I think are great to start designing this project. First, the lived experience or visit to a place you loved. For the creative process, we need to think about making 3D art based on a personal experience. Start exploring our memories, maybe personal dreams, to finally be represented in the final design. One way to do this is through symbolism. We can add to our creative work something immaterial, for example, an emotion. With Adobe Dimension, I think we have the convenience of being able to express it through material as textures that are ready to use and easily experiment with this 3D medium. As creators, we spend a lot of time in front of the computer screen. Maybe we'll look for inspiration digitally, but sometimes what can help us the most is to go back to basics because inspiration can be found everywhere. For example, go in search of new sources of inspiration. There is always some way to awaken our senses like looking closely at the work of other artists can be incredible inspiring. The last is look and design. Let's look at some examples of how artists like Van Gogh and Piet Mondrian were inspired by place for the creation of their artworks. Vincent Van Gogh. Produced in this share of distinct life a variety of moving paintings, but he instead of faithfully representing his surroundings, painting landscapes altering reality. The Starry Night, for example, referred the memories and emotions evoked by that St. Paul Mausole insane asylum where he was living for some years. This place was nice, full of trees and gardens. He began experimenting with his surroundings, painted scenes of the war around him, and combining many views he had around him such as mountains and cypresses. The Starry Night became the result of the vision he had from his window. It was also inspired by his imagination, adding life and saturate and bright colors to the night. We also see the representation of stars, a peculiar wave or radiating light concentrically, as well as using his memory to create the bell tower of The Starry Night, for example, reflect something very common in his native country. Piet Mondrian. In his artwork, Broadway Boogie-Woogie, Mondrian was inspired by a special place, New York City, where he took refuge to escape the Nazi takeover of France. He captured the building of the city, the traffic, the lights, in his awestruck languish painting full of colors that reflect his narration of his surrounding and his new city, New York. This property of finding inspiration in the environment and its memory as Van Gogh and Mondrian did is super interesting and we can also take it as an example to create. In the next lesson, we will define the concepts that will lead us to form the 3D composition in Dimension.
4. Concepts & 3D: Define Keywords And Connect With Adobe Dimension: Now this forms inspiration. Let's go to the next step of defining the concept on which truth decomposition will be based. We know that usually in a creative brief for a client, we must stick to the attributes of the product or service, as well as the target, among other components. But this [inaudible] project is an opportunity to awaken their senses and find a different shape to have a new sources of inspiration. The brief we will use will focus on finding the concept in our aspirants, places, and emotions. To do this thing about a place, you visit in the last few months, weeks or days, or maybe a place that is linked to good memories. Think about the visual filters it had that caught your attention and the effect it had on you. What the mood awaken it in you, and why, what was in the environment. Think about its color, textures, styles, and more. After you have discovered this idea, define and decide the key or concepts that you would like to transfer to the truth decomposition. Now it's time to create an image that explains the place, adding the touch of imagination that can be boosted by creating with 3D tools. Let's start creating in the next lesson.
5. Working With Illustrator and Photoshop : To release ideas, and apply the chosen concepts, we will use two well-known tools, Adobe Illustrator and Adobe Photoshop. With both programs, we will create 3D objects from 2D images. Depending on the objects and elements that we have in mind, we will choose the techniques that can facilitate the creation of each of the elements. In Adobe Illustrator, we will create the shapes with vectors, and then we will use Adobe Photoshop on each 3D tool. Based on my composition, I will create an arc in vectors with Illustrator. You can use this technique for any other objects you want to add to the final composition in other dimension. For example, the arc is a basic shape that we can create. According to our chosen concept for the design, we will create in vectors what we need. Let's start. We copy the vector and paste into Photoshop as a Smart Object. Then select 3D, New 3D Extrusion from select part, top properties shape preset. There are many options to create the 3D object. In this case, we will use the first option, extrude. We shade the depth of the extrude. Now we have the 3D shape and we will save it to add it to Adobe Dimension. To this, we go again to menu. 3D, Export 3D. In format, we at OBJ. This session is very common and allow us to open the objects in 3D dimension in different programs. This far is massive, but in case we need another object we can also create it here with the vectors. In this example, I am making a cup. The idea is to be able to make the silhouette of the object and then transfer it to 3D with the help of Photoshop. After we have the silhouette ready, we copy and paste it as a Smart Object in Photoshop. We will go to the 3D menu asset, and in settings we will choose the extrusion we need. In this case, bend 360. Now that we have the object created with the help of Illustrator and Photoshop, we will start working in Adobe Dimension.
6. Increase Your Productivity - Use Keyboard Shortcuts: I usually work with cinema 3D, and I am [inaudible]. It is unusual sometimes I have to get deals to Adobe Dimension shortcuts because some are different, but knowing well this shortcuts help a lot in the fluidity of the work. Let's remember the main glands to keep in mind. Select model. Activate the Select tool with the V key. Click on a module on the canvas to select it under the cursor. Select a material. Activate the Select tool by pressing the V key, and then double-click on a model in the canvas to select the material under the cursor. Find selection. Select an object, then use a find selection action with the F key to automatically move the camera to the object. I love the next one. Move to ground. Select an object, then use a Command or Control Plus key to move the object to the ground plane. Next, Move tool is with E, Rotate tool with R, and Scale tool with S. Orbit tool with one, Move tool with two, and Dolly tool with three. The last one, we already know very well. Colored sampler tool, activate it with I. To Duplicate tool Command or Control plus D. To change the size of the canvas, Control or Command plus Alt C. Finally to Lock or Unlock, Control L. With these shortcuts in mind, let's start working on the next lesson in Adobe Dimension.
7. Working With Backgrounds: Before we get started working, let's set up the canvas. We can do it from a dynamic option. Double-click on the top right corner and move the handles. Or we can also change it here. I will use dimension of full HD. To start, we can use an image as a background. With Adobe Dimension, it is very practical to be able to make backgrounds quickly and look great. To do this, click on "Environment" in the same panel and add the sky image to the background. In my composition, I will add this ball-like domain image. If it's useful for you, I'll leave this image in the project and resources section of the class. Then we add it in the background option. We look for where it is saved. Then we can change the intensity depending on the image we have. In this case, I will change the global intensity to 64 percent. Now that we have added that background, we will begin the best part, composition. See you in the next lesson.
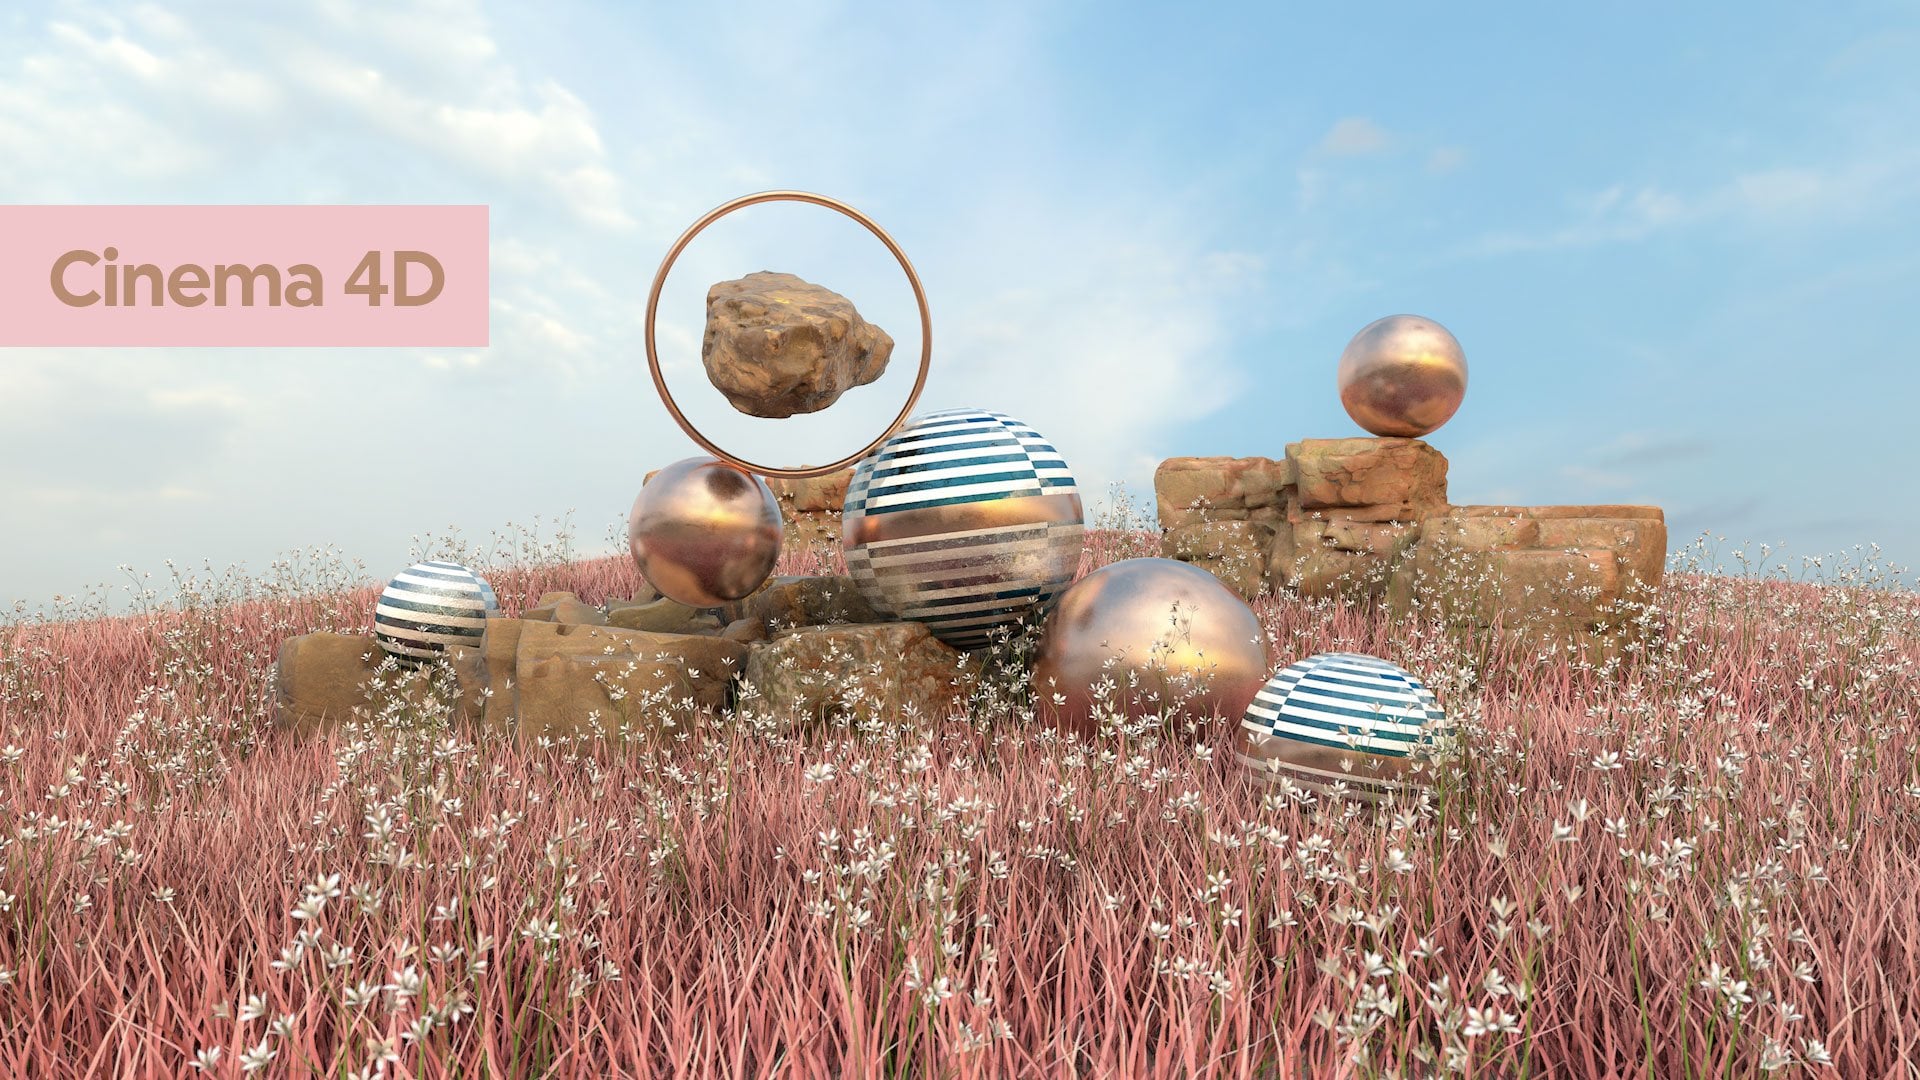
8. Adobe Dimension Technique: Assets: One of the benefits of us trying to use dimension was that I discovered a very fast way to work through the scene. One of the components to take into account to work in a super simple and dynamic way, are the options offered by the use of a Starter Asset within the interface. In addition to this, there are other ways to add element to our scene. We'll look at it next. First, the Starter Asset that we just mentioned it, which we can use an art to the project. The second option is through the library. Here we see the asset that we have downloaded from Adobe Stock. For example, I have this that I have already done it briefly. The third option is through this option of more. Here we can do directly to Adobe Stock website. Once logged in, the files you purchase the lines from will be signed to the library. We'll use this option to add some asset to our scene. I will leave in the resources section the links, to this collection of 3D models, so that you can explore and use the ones that you find interesting for your design. Some element of this collection will be useful for my project. I would use the wall with our collection, which will form much of the composition. I will also use the explore is far. Finally, swimming pool with handrail. The letter we only use the pool letter. Now there are elements I will remove from that composition. Let's check the library automatically appeared the 3D models that we have downloaded from Adobe Stock. Now, the third option is through from our local unit. For my composition, I will use some element that I have already downloaded. This asset I will leave in the resources section of the class, in case you interesting in also using them. Lateral view sounds supported model formats for import and export in Adobe Dimension. To import we have this option. If we have created some new shape or object we can explore it in the following option, to then be used in other 3D programs. For my composition, I will add these terrains 3D model. The downloaded link will be also available in the resources section. Now that we see all the options available with dimension for working with models, let's look at the composition process in the next lesson.
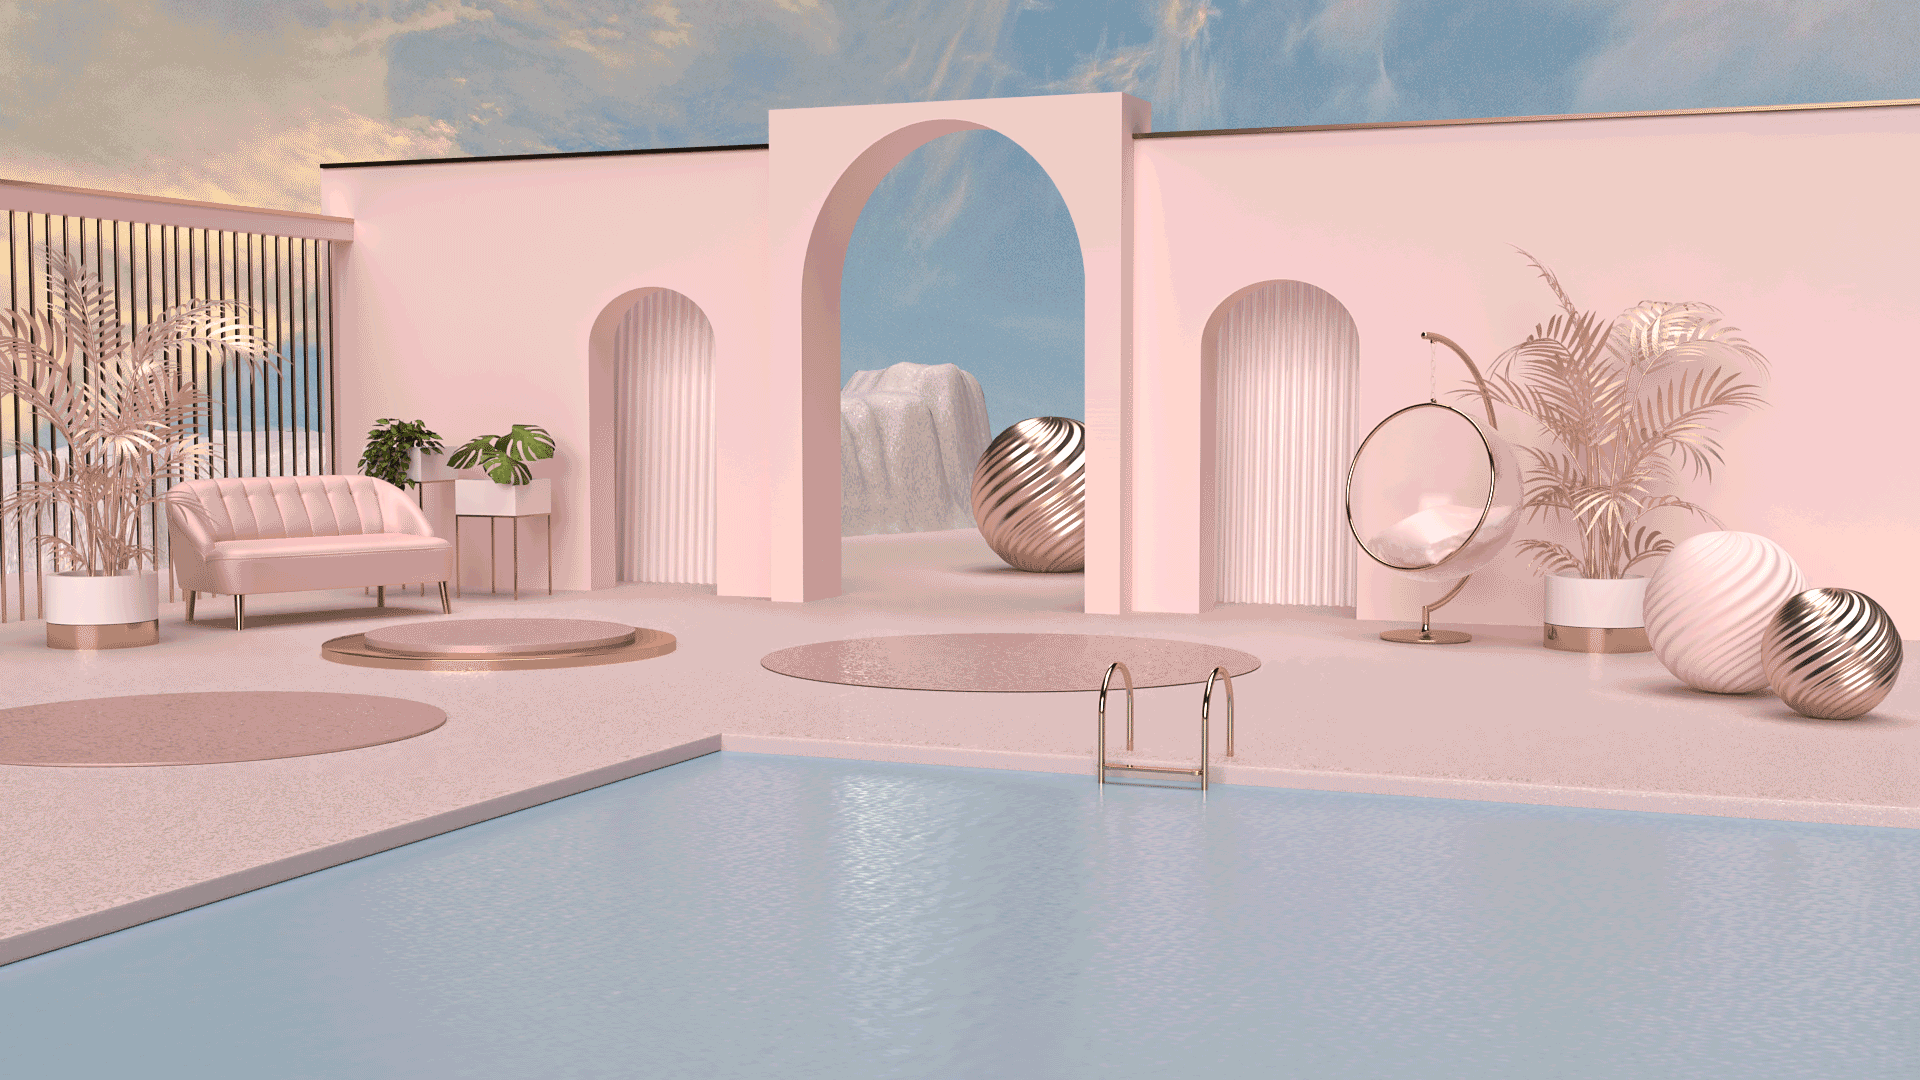
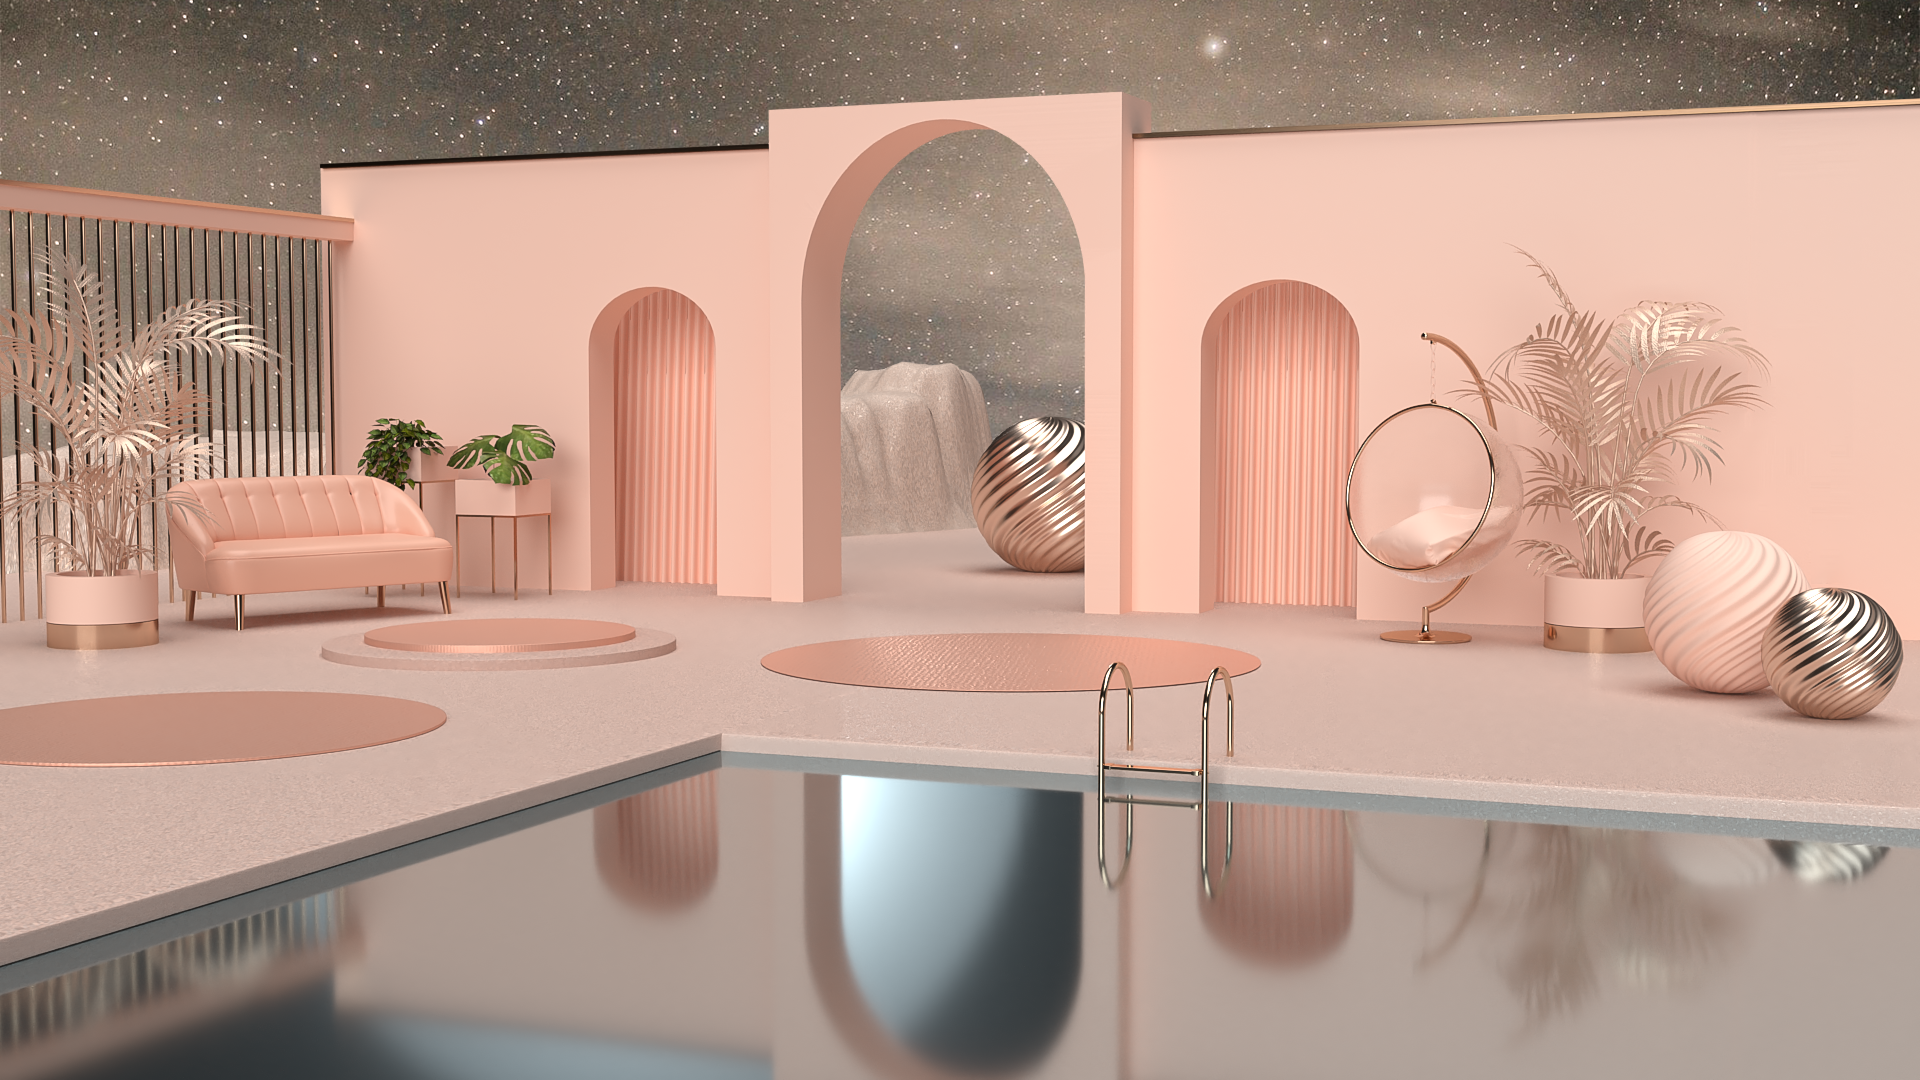
9. Adobe Dimension Technique: Composition: Inspiration is everywhere. As we have seen in previous lesson, one of the ways we can connect to immerse ourselves in finding ways to be inspired is through memories, places, and more. Therefore, in my composition, I have decide to gather inspiration from a place where I lived a few years ago. This place was special for me. It was very warm place. I started working here as a freelancer and I love it because it was a very relaxing place. I have taken as inspiration, a little the style, and the pink color that always illuminates me. This place was like a dichotomy because one side of the apartment was all the madness of traffic and bustle of an avenue, principle of Lima. But at the same time, on the opposite side of the apartment they had a very calming, relaxing, free space. I interviewing these concepts and create a new scene with dimension. To get started I add the asset that we have already collected it in OBJ format, or created with Illustrator for the top. I start by adding the 3D derived to do this. Let's go to File, Import, 3D Model. Then I'll add dark, we got from Adobe Stock. I'll duplicate this arc with Control and D, and send it to the other end. I add a cube to cover this part of the design. In the mirror, I will incorporate the arc that I create in Photoshop. I add a cartoon to add texture to the part of the composition. I duplicate it, Control and D, and move it back from the other door. Now I want to create a dichotomy in the space because it's very rare, to see open space in conjunction with pieces of land added to a flirt. I add around the cube, flirt model from the Starter Assets. I shell its dimensions. I place it in this direction. I add another floor to fill the designs, fill of view space. Then I add a pole to the fire of the composition. I do it with a basic champs plane. The conversation is taking shape. Now, I will add a little wall with cylinders. Digital will make that terrain, we have other visible but at the same time, it will close the space and create an unexpected and more of an unconventional space. We will use the align and copy tool to add this detail. [inaudible] in this aligns of automatically. It is a great help. Now, I add a cube at the top. Now I add some assets that we've downloaded from Adobe Stock. These two first will go to the sides. I also add to the pole back, remove the paths that aren't useful to me. I will locate the 100 on this side of the bowl. Now I add some vegetation and for that I'll create a pot. I do that way that tube model option. I used to with different height to grade a small detail after texture in the flower pot. I add to that pot an asset OBJ with lifts. I locate it. I think it's going well. I have create this element. I will duplicate it and create a new one for the other end. Now, it's time to add more asset, in this case, some furniture that inspired me from the memory I told you about. I will add this tar that I love. I will place it on the side of the composition. I also add another one from a more commercial style. I will change its scale to place is a size according to the same. The next thing is to add more vegetation. In this case to create a different environment and create contrast between the other plants. I will add this asset. I will change a little bit its dimensions. That's it. I will add some last details on the flower with this model. I will resize and duplicate, Control plus D. That's right. I finally duplicate a sphere and add it to the side to compensate for the composition. I have my composition ready. In the next lesson, I will bring this space with color and materials.
10. Adobe Dimension Technique: Materials: In this lesson, I start the funnest part for me of creating with dimension at colors and the variance. The broader make this topic very easy, so let's get started. For the terrain, I will add this material, metal flakers filled plastic. But with a difference of increasing the repetition so that it adds a special texture, I add this neutral color code too. Then I will add color to the walls and pots, I add a matte pink material with a dropper. I would also add this material to the arc as far and below, also the buck. For the quartiles, I will also use the same materials, but I will change the color tone. For the perimeter area, I will use the same tech store as a terrain but with a different shade of color. For this, I will use this material with this color code to create contrast with the ground, and I will change its properties a little bit. Now, I add a touch of contrast to this Effect with a foreign material that I always use brush, I will vary the roughness and its variation to create a less bright and spit. The overall oxidation and rinse it, and also vary the scratch it a bit. Action is color tone, so that it goes according to their color palettes already added. I also add it to the board hand drive. Now, I add this same material lead to the pots at the bottom and also to the back parts. Now, I add this material to down their assets at it, I'll start with a bland as it is an imaginary space. Everything is, although it does not have to look like the real world. This is really what I love about creating, do not imitate reality the same material to the leaves. Do not enter in reality at all and give a space to something different not seen before. Then I add this same material to the leaves. Now, I will use the same material from this first for the pots and the flash disc also for the less of the frontier and back pot, I will also on the farm the scene with these material to give the tile of the chair. For the [inaudible] I will use this material, I love dimension because just by double-clicking, your concrete materials are very dim. Now, for the sofa, I will modify it's property solider. Finally the pool, the water Effect will be created with the following material modified. What did you think? I love the null-space I've create. Enjoying creating dimension are very pleasant wrestle with dark, double-click and edit. See you in the next lesson, we will review with additional example the light techniques with dimension.
11. Adobe Dimension Technique: Lighting: Now we will review in our modern world the tile and important part of our composition lighting. In another video I mentioned we find different type of lighting. It is a key to be able to understand how they work in order to apply according to what we are looking for a restored with our composition. Within the process of correcting that USD, it is usually first started with the light before applying the materials. In this example, we will see the different light-technique that can be applied. The first option is directional light, this light emit light only from one direction. We can use it the same way as our traditional photography, controlling each light that is added independently. Like the three-point lighting technique in photography. Dimension arranges this light in a very practical way we will see now. For this new composition, I will use three-point lighting, we will use the key light, fill light, and backlight. The key light is the main resource of light, let's try rotating. Modify the height. Then we will add the rim light. Light that will help us create a little more data. Finally, the filler light this is often the harsh shadows that bounces the main light and we can also change our light tong to give it a different atmosphere. We will now look at the next option, sunlight. This is a very easy way to light the scene, it also works in a similar way as our directional light sun. It is based on a single light source. This light is very effective because it naturally highlights the shadows but in a slightly harsher or more pronounced way. Finally, let's reveal the ambient lighting. This lighting is based on an X16 image. For this, we need a high dynamic range image. For example, 32 bit like HDRI. As we know, these images help us to emulate our real environment. Ambient light is great in dimension by default, we can also share it in impulse asset. Hear we find a certain number of ambient lights, but we can also use one that we decide or have in a part image, and switch it to our new HDR-ready. I love the light because it allows you to have more realistic result in that scene and create a different environment depending on the HDRI would use. Quite more lightning option that we can try in Adobe Dimension is the light based on objects. This technique allows you to have control over the appearance of the object and its light emission toward the scene. To do this, we activate the glow or show in material. This way we have more control also to offer the channels. We [inaudible] this by increasing this object. On a lager sky, we will get much softer shadows. Now that we've seen these important lighting the consideration to take into account in filter design. Let's move on to the next lesson to finally render the audit sign.
12. Render: Once the design is finished we are ready to process that 3D design into a 2D image. But before that, we'll use the render preview to improve the quality of the preview in the same mode before going to the render remote tab and see if all the final design is okay, and see the rest of the materials. For me is fine. Now we use the render remote. In this part of the process dimension also relieve us of working with a practical option it offers. We have the option to render it in PSD or PNG format. As for the view to render, we can choose the current view that has the design mode, or also render or select a marker of the camera that has been saved. Note that we can add multiple camera views and align multiple renders. Now, we add a name and to the render quality we need. I've used the high-quality one and render it. We can choose during the rendering process the option to make a copy of the rendering during the scoring process.
13. Post Processing With Adobe Photoshop: The rainbow is over, now let's open the Photoshop 5 from the Window and make some modifications to the color. Let's use Camera Raw to make adjustment. We turn the layer into a smart filter. I'll go to filters and Camera Raw. In this first task basic we can raise the intensity of textures vibrance a little bit. In this next task detail, we will modify the tapering a bit to give more detail. I will lower the noise to balance. In the next label, we will change, there's a duration of reds and purples and either. Also in hue, we will lower the range of purples for the color of the pool. Finally, I'll share the highlights and shadows tone of it. That's it. We see the before and after. Great. We have our [inaudible]. It has been found to grade these three, the same very quickly and easily. Now, join me in the last lesson.
14. Conclusion: It is interesting to see some artists who strive to make art based on their own experience and memories of a given space. This form of creative process has been very compatible with developer [inaudible]. The head of adobe Dimension and to be able to experiment with the expressive use of colors, materials, and more. I invite you to upload your composition to the class project section. I would love to see the result of bureaucratic process and becomes a deuce to achieve it. Thank you for following all the lesson and getting this far. I hope you found it helpful and enjoyed. If you liked the course, please leave me a review and follow My Skillshare profile. I also invite you to check out my Instagram profile and the videos I make about [inaudible] on YouTube. Thank you and see you next time.
 Eveling Salazar, 3D Designer - Graphic Designer