Transcripts
1. Intro: One of the most requested Turiel of oil time is definitely about how to work with the speed RAM in amphoteric back after back to speed ramp in January to be credible and beautiful and not comparable to what you'd get with Premier software, discourse M to a, to learn how to professionally managed the speed of your data with the after effects of tends to this course, you will be able to create beautiful fast motion in slow motion to your video. I create this course based on my 14 years of teaching experience in leading information on graphene sanitation university, you will learn how to organize management and setting their work hard at work with a time stretch enable time remapping graph in CC forced motion blur at time. So what are you waiting for? Let's Be mean.
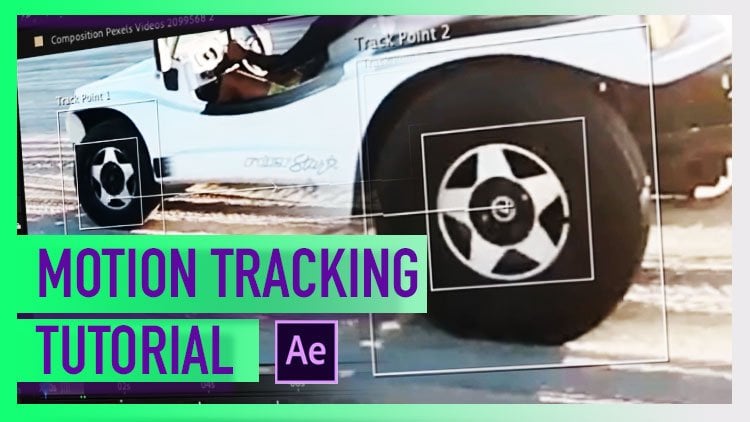
2. Lesson1 - when to use the effect Speed Ramping With After Effect: Welcome to this new tutorial on halftone effect about time remapping. As you know, time remap is one of the most important feature that you should know about after effect because it'll help you to control the speed of your video. You can do like motion, fast motion videos, low motion video. And especially you can emphasize some action moment on your clip. So now I'm going to explain you in detail how to work with the time remapping and then going to show you some example on when you should use it. First of all, remember that with time remapping, it's better to work when you have a video with high frame rate. So 60 frames per second, 90 frames per seconds. So more quality means that you can work more in detail with the speed because you have more keyframe, your clip. So it does allow you to stretch it without losing quality. So let's jump directly to aftereffect and watch some sample. The first example I'm going to show you is this guy which is jumping with a mountain bike. And what I did with the time remapping is to focus the attention on the jump. Just made these in slow motion so that we can all enjoy the moment. Okay, now I'm going to show you the same video, but without the time remapping. So let's drag it here. I switched off the other one. Anyways. This is the normal clip and this is the focus on the jam with the time remapping. As you can see, it's much impact for because we focus just on the detail of the action. Another example, this guy which is doing a trick with a skateboard, focused attention just on the trick. In this same video without the time remapping. The action has always the same speed at constant speed. But thanks to the time remapping with just focus on the trick. So we put our focus on the trick, on the moment action. So let's now try to understand how we should do this. So first of all, when you have a clip, the first thing you have to do is right-click time. With time you have several option with a time stretch, you just control the time on your clip. So under percent is the stretch factor. That means that this video has been suited in this time. So under percent, if you reduce the numbers of, for example, 50 percent, the video goes faster, but the entire video goes faster. Saying, if I increase the numbers, so from 100, if I put the 300 days, you can see my video. It goes very slow. Okay. Let's see it. But in case I want to control the time, how should they do? So, the best way is to use the time remapping, right-click time, enable time remapping. So what we get is that our creep as a starting point and the endpoint at the moment. The video is 300. So the best ways to move it back to a 100 that we will be able to visualize the entire timeline. So once you have your video on your timeline, right-click time enable time remapping. This is what you get to keyframe one in the beginning and one at the end of the clip. If I move this second keyframe closer to the first, my video goes faster. If I move it back, my video goes lower. So the distance between the two keyframes determinate this bead. But in case I want to emphasize the moment of the jump, what should they do? I first play. When I see that the guys starting to jump, I add a keyframe here. And another keyframe. When he finished the jump here, pressing this button which is called add or remove keyframe at current time. Now that I focused attention on the jump, I have just to stretch the moment so that if I increase the difference, the distance between the two keyframes of the jump, for example, like this. I just focused attention on the jump. And this will be very slow in slow motion. Okay, of course it's too much so I can take with Shift, select it to final keyframe and move them closer to the first Tomb 2. Now the action, it's like that. Super nice, but a little bit not smooth. I want a smooth movement. To optimize it. I can do that. I click on this icon which is called the graph editor. The graph editor represent the speed in the graph. As you can see, I have x constant speed between the keyframe. So linear, linear, linear. But I can just, if I want to visualize this, I have to click on time remap or I have to press this icon with Edit Speed Graph. So I just visualize the speed graph. Then I can move every single of these key frame. I can move it down, for example, in drag a little bit these so that they obtained his smooth movement. So, okay, instead of the constant proportion, my speed start very fast and then decrease and then again very fast. So the edit graph, you have to read like that. Here you have the timing. In here, you have the speed. So this peak represents that the speed increase it a lot in this point. So you can control the speed just acting in this action point. In this is what we get. Another way is you can see it at the end. Again. It goes very fast. So what I can do is to bring a little bit back the last keyframe so that when he finished, he just have the time to go outside of the screenshot. Then what we can do to emphasize this moment is also to add an effect, blur effect that emphasize that trick and the jump of the guy. The effect is, you know, in After Effect, we have in effect and preset palette, which you can switch on from here window African preset. And the effort is called CC force. Cc force motion blur. We take the effort, we drag it over the layer. How we can set of course motion blur. The blur made is, as you know, it's bleach effect is a blur effect, but you can increase the shutter angle from here. You can switch on and off narrative motion. Okay, So let's reach it on. We increase the shutter angle. As you can see from here, it's blurry 360. And we can add more sample instead of aid with less boot 16. Okay, So this is the result of what we get. Let's export now the green lines of these entities rendering the video with a blurred. Okay, Let's watch this video. As you can see with the motion blur, it's much more impactful. Another way to make your video looking at a little bit better is to enable the frame blending. So you click this icon and here you press one due time so that the movement is more smooth. So he reconstruct the frame which are MRD. Let's play of course, if we take time to play them mentioned because he has to render the frame, which are misled because we move the frame in the timeline. So he's reconstructing everything so that it a perfectly smooth Let's way that your render everything. So I remind you what we made until now. First we take the clip than we transform with the right-click time enable time remapping. And we focused attention just on the jump of the guy with the skateboarding. Then we enlarge the distance between the two keyframes of the jam so that the movement of the chamber becomes super slow. So slow motion into emphasize this, we add an effect. The effect is called a repeat CC force Motion Blur. You can find on the effect and preset palette, the African preset palette. You can switch on and off under window. And after that, we set up the effect forest motion blur, the shutter angle 360. We switch on the Motion Blur. And we are the 16 for motion blur is centered. When we finish this, we also create able, enabled the frame blending for all the layer. So we can blend more layer or we can just adjust this layer. And we select on the timeline inside the layer that blending icon pressing to time, Daniel will render we are awaiting because of course the computer need a lot of time to render, to optimize every free frame with effect and what we may. But this is also the time to, for us to watch what is going on. We're almost there. Let's stop it here when the job is finished. Okay, and played. So now the movement is perfectly smooth. Saying we did with a mountain biker jam and we focused attention on key. So this is another technique to advertise in use there. Times speed RAM to catch the action and work with the speed.
3. Lesson2 - Second Exercise with Speed Ramping: We have to clip together. So the video starts very slow. And then it go faster. Same for the second. That increase the speed and then again, really slow. So in this video, as you can see, we have the starting which is very fast, and then it slowed down. It became against super-fast. Secondly, fast and slow down again. To do that, I play with the time remapping. I play using the graph editor on the two onto to clear bone. So clip to clip number one. And also I added effect, which is called the SCC forced motion blur. But we'll learn now step-by-step how I did this. So once we watch it, the final result, what we have to do is to create a new composition or just take the first clip and drag it on the composition icon so that we have the composition that fit perfectly on our video. My tip is to shoot the video. You would like to increase or decrease the speed with high food age. So 60 frames per second or 90 frames per second. This will allow you to have a better factor. To play with the speed right-click time. Time is the folder where you can play with the speed that you have several options. Let's start us begin with this time stretch. The time stretch, showing you that these videos should it in stretch factor 100th, so 106 up the speed, how they shoot the video. If I decrease the number, I put 50, for example. Maybe there's shorten on the timeline and it goes faster. If I decrease from 15 to 20. Even faster. Saying if I increase the number time, time stretch, if I put a 100, it grew slower than when it has been shattered. Okay, but if I want in one layer to have different moment of speed and slow, what they should do. First of all, time, enable time remapping. These serve me that my video starts here and finishing this point. So if I take the second keyframe and they put it closer, my video, it goes faster in even faster. So if I want to have my video that start very fast, I should add a keyframe, pressing this icon, add or remove keyframe from currentTime. And if I want that my video in the middle, it's very slow and delete increase again, I add another keyframe here. Then the distance between the keyframe represents the speed. So if I take this keyframe and they put it closer to the first one, this part, it would be faster and then slow again. So as you can see, fast, hello again. Same at the end of my clip. Slow and then fast again. If I want the two key frame at the end to move close to the first two. Maybe there will be not shorted, but the entire video will be faster with these different between the keyframe. So super fast or slow. And then here again we can do the super fast, super fast, slow, super-fast again. If you want more contrast, increase or decrease the distance between the keyframe. So really fast, slow. Really fast again. Okay, So this is what we got. Step number 1. Nice mood, more of a math. If you want to make this movement even better, you can play with the graph editor. So pressing this button, this is the graph editor. To visualize this graph editor, you can press on the time remap or you can press here and be sure that you select Edit Speed Graph is you can see that through the timeline. The speed between the keyframe is a constant speed. If you want the speed to be a little bit smoother, you have to, you can just take one of the data which are called anchor point, drag it down. Take this anchor on the left. This is what you obtain. Its mood, movement, which is better than a straight effect. We can do the same here, so we can drag it down and I can have this hard fact. So what we get is this super fast or slow and fast again, another nice effect that can have it. Let's delete everything with a right-click. Time, time. Enable time remapping is this. Let's make the speed that increase in the center, not in the opposite side. So I put the two different closer. I add two keyframe in the middle and two. Let's put one here, one here. Then I put these keyframes very close to the other. So I would have the maximum point of speed here is there is a very slow Nan, super fast and slow again. So very slow, super-fast. So again, let's watch the graph editor. Slow, fast, slow, increase the sides. And they can also make this movement even more visible. Just dragging these in, creating this kind of curve. There is low superfast and there is no, again, I can add another keyframe here. I can drag this up. When the line it goes down, it means that your video, it will be, it will play back. So you don't have to cross this line about when you want to deviate, to go back like this. Okay, So this is how to go forward. So what we get is slow, very fast. Then back at it, beat and fast again. It's rethink goes here so that we have a really big speed and this part is what we get. So how to read the graph editor? You have the time. And highness means the speed. So if the card go high, it go faster. If the car go down, it goes slower. To have a nice smooth effect. You can also press on this icon which is called enabled frame blending for all layer with a frame glands which sat and press here to blend this layer. So the first time you click, you have this blurry effect. But if you press through time, this will cover the keyframe which are MRD and you feed him. So very slow, of course, it will take time because we are adding key-frame to our video, to brand. And so it would take time for our computer depends on the computer you have across. So let's render when the green line will be here. It means that we will watch the video in real time. So now it's not playing real time. Okay, let us watch the result. Super low, super fast, and slow again, then back and faster game. Okay, so this is how to play. We enable time remapping and nice effect that you can add to visualize whether you or your speed difference is from Africa. Preset variety if you can find on the right or if you don't have it just window effect and preset, you can serve for the SCC forced motion blur. So you select the layer, you drag the effect on it, and you set up the effect CC motion brand. You have to switch on their narrative motion blur. You can decide the angle like this. So if you want 360 and also more or less blur depend of the effect you want. So let's put 360. So really blurry when you have the speed increasing or decreasing. And then you have the simple motion blur. So you can increase the assemble at peace or less. Okay. Let's put 16. Okay, now, of course it's exploiting, so it will take time. So I'm just what I want you to watch from how it looked when the speed increase it in this point. So I stretch, I reduce the work ion so that my computer just focus on this point to mutilate a bit and play. Let's way that my computer render it. Of course, when the green line is not covering the entire timeline, it means that you are not watching the video in real time. So let's wait that he rendered this part. And this is the difference between the video without the CC for motion blur effect. In this case, the video with a CC for motion blur effect. So as you can see, the effect is smooth and nicer. You can set up the angle if it's too much from here. Because as you can see, it's really blurry. But this alone to increase the sense of speed. Okay, quite ready. Let's start. Okay. So the difference, it's visible affect CC for motion blur. The effect that increases the sense of speed. That's enlarge a little bit. This. And then again, slow down at the end. Soon. As you can see the time remapping, it's not difficult to use, but it's something very important that it can change your video. Maybe you know how to use time remapping Premier, but with after the effect that problem, it's, it's much, much better and you can get a really nice effect that it can change your video aspect. What I can suggest you is to add the sound. So even the soundly can emphasize the effect. So when you slow down or increase the speed, tried to add some that remark, this part. So I really hope you liked the lesson. And if you want to discover more about the after effect or post-production in Photoshop, just check my page and you will find a lot of tutorial. Thank you very much and I wish you all the best. Thank you.
 Photoshop Classes By Andrea, Creative Director and Multimedia Teacher