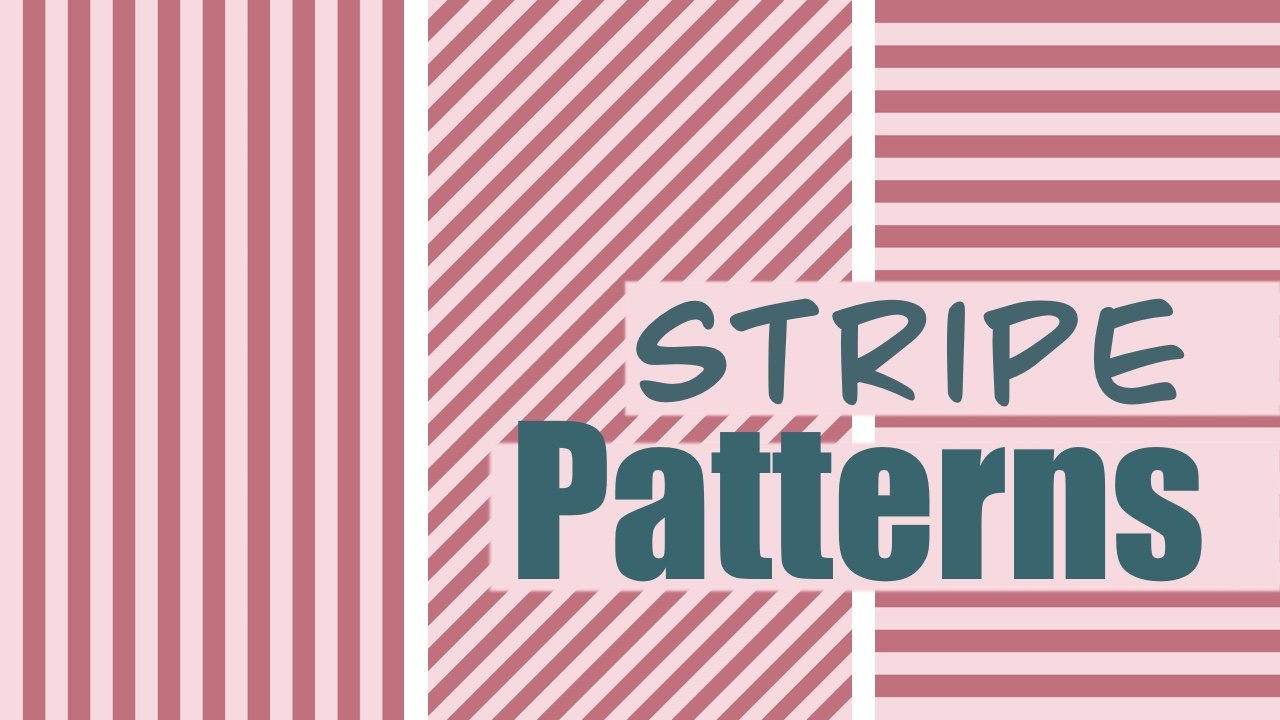
Transcripts
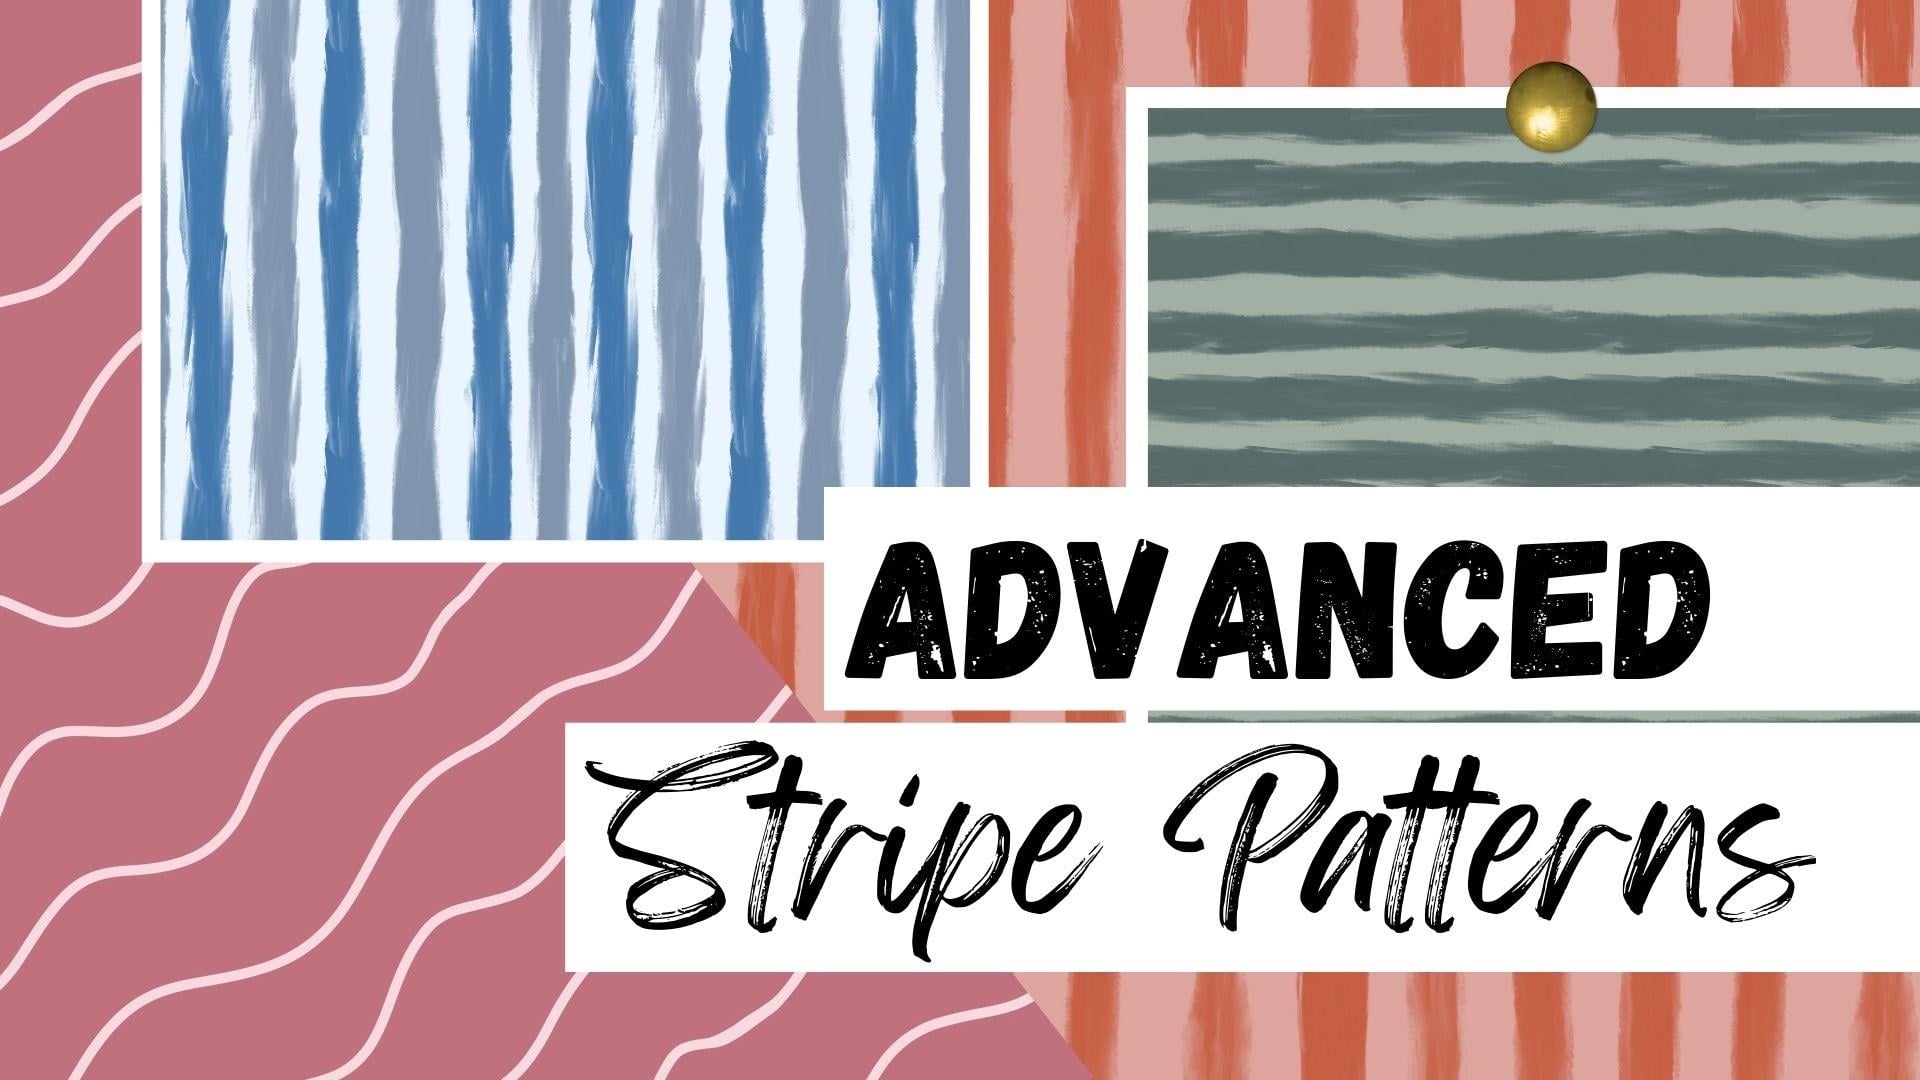
1. Intro: Hi there creative friend. Welcome to class. I'm Sarah. I'm an artist and designer, and if you join me in my
first class on creating easy, seamless stripe
patterns in Procreate, then you already know how much fun and versatile
stripe designs can be. This class, we're going to
take things a step further and explore more advanced ways
to bring stripes to life. I'll walk you through how to create horizontal
textured stripes, vertical textured stripes, and even playful wavy
striped patterns, all seamless and ready to
use in your design projects. Whether you're building
surface pattern collections, creating digital artwork or just looking to expand your
procreate skills, these techniques will give you fresh and unique results you
can use again and again. So grab your iPad,
open up Procreate, and let's dive into creating advanced, seamless
striped patterns.
2. Class Download: Going to show you how to
download the class palette. Something important to know is that you will need to be on a web browser and not the Skillshare app to
access the class download. I'm using Google Chrome. So right below this video, we will go to our project
and Resources tab. Then we will scroll down to our Download resources and
tap on our Swatch file. Now we can tap on
Download, open in, and then we will
tap on Procreate, and our palette
will automatically import into the Procreate app. And it usually places it at the very bottom of
your palette library. So we can just tap and hold and bring it all
the way to the top. Now that we have our palette, we are ready to begin class.
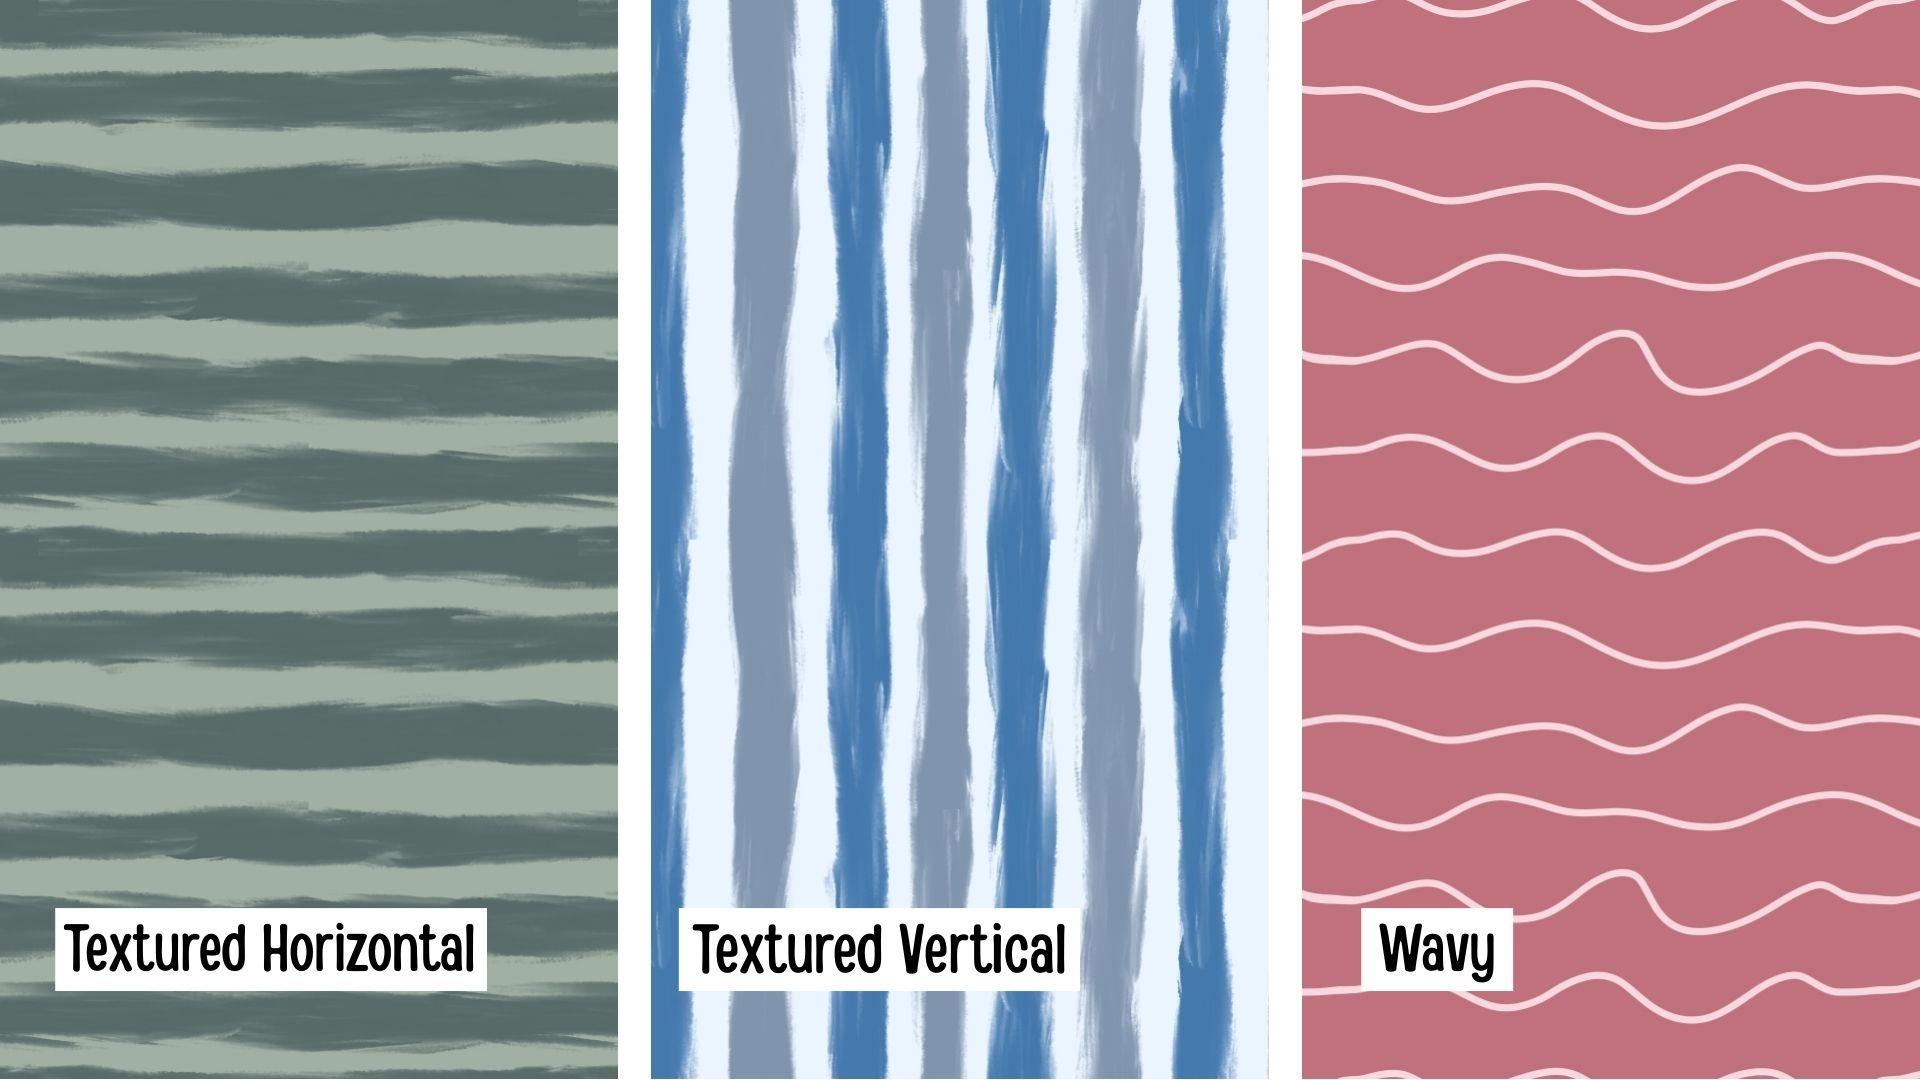
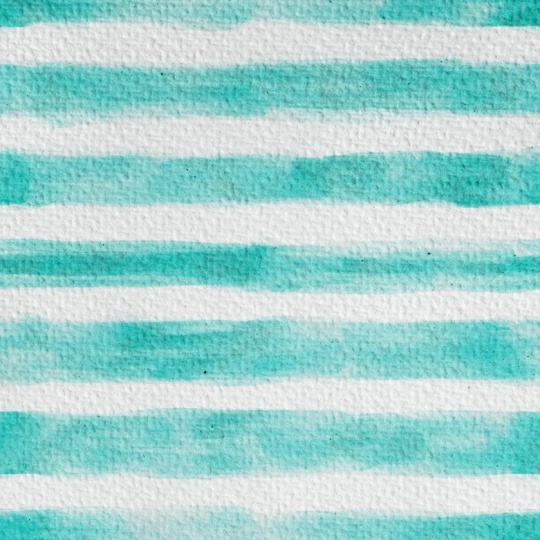
3. Textured Horizontal Stripes: In this class, we will build off our original striped
pattern class. But this time, we will create advanced striped patterns
using texture and wavy lines. So here will be
our class project. We will start off with a
horizontal textured stripe. Then we will move on to a vertical textured
stripe pattern, and we will recolor
our original. And then finally,
we will finish off with a wavy striped pattern. So I'm going to
begin by creating a canvas that is 12 " by 12 " at 300 DPI, and our color
profile will be RGB. So I have created
a color palette for the class if you'd
like to follow along, but please feel free to
use any color you'd like. So I'm going to start off by filling the canvas with
our background color. And I'll just use this
light green color. So I'll make sure
I'm on a new layer. I will drag and
drop the color in. That will be our first layer. Now we will create
a brand new layer and that will be
for our stripes. Next thing that is
very important is to create guides
because this is where we will follow along to
create that seamless file. So I will go up
here to my actions. Under the canvas, I will
turn on drawing guides. Then we will tap on
edit drawing guides, and we want to make our
squares 2 " by 2 ". So they will be two inch by
two inch across and down. So right here on grid size, we will tap on there, select inches and two. And that looks perfect. So now we can tap on done. So this is going to be
the base of our pattern. We're going to use our
guides to draw our stripes. So I'm going to grab my brush, and I'm just going to use brush that comes with
the Procreate app, and it is under the
painting category, and we will be using
the oriental brush. I love the texture
of this brush. So now we can grab
our dark green color. Make sure we're on
our new empty layer, and we will begin drawing our horizontal stripes
across the canvas. But something important
to keep in mind is that we want our
stripes we're going to visually try to
make them even on both sides because it will make the process of smoothing
them out a lot easier. You don't want to create a
line that's skewed like that. You want to try to
stay as steady as possible in width and
placement, like that. So now we'll just begin by drawing our stripes and I'm just varying the pen pressure to create a textured sketchy look. I will do that with
each one of my stripes. I'm just following along
my guides like this. I'm going to do that to
each one of my lines. And we're going to try
to keep the two edges as much as possible for them to look about
roughly the same width. So that looks great. So now we're ready
to start smoothing out the lines where they will cross each other to create
the seamless pattern. So I will go back to my layers panel and I will
duplicate my stripe layer. So you're going to want to
have two stripe layers. So what I'm going to do now
is I'm going to turn on my quadrant guide so it can help me know exactly
where the middle is. So we'll go to symmetry options, and we can either do vertical to know where
our line is or quadrant. I like using quadrant
because we will be testing our pattern after we
create the seamless file, and it's easy to know
where everything goes. That looks good, and we can tap on So now that we have
our layers ready, we can begin our next step. I'm going to make sure to
grab the background color, and I'm going to turn off this top stripe layer
and just grab these two. So we'll want to
have our background selected and our
first stripe layer. And we're going to move
that over to this side, bring it over halfway. So now that they're
both selected, we will make sure our snapping and magnetics are turned on, and we will just slide it over till it snaps right
in the middle and you will see these
yellow cross hairs when it is perfectly cut in half. So it has placed
halfway in the canvas. And now we can deselect it. So now we're going to want
to do the same thing for this other stripe layer. But first, we're
going to make sure to fill in our background because it you want to make sure you have
your boundaries, so it knows exactly
where to snap in half. We'll go to our
background layer. We'll drag and drop the
color to fill in the canvas. We will turn on our
second striped layer. We'll select both of them, and now we can slide it over to the other half of the canvas. We'll make sure it
snaps right in place, you will see the
yellow lines come on and we can deselect it. So now we will fill in our canvas so we
can see our lines. I'm going to merge my
two stripe layers. They're on separate layers. I'm going to merge them
to create one layer. And now we will turn off
our guides so we can see exactly what
we need to adjust. And as you can see, this
is the part we need to work on so it can
seamlessly repeat. So we will grab our
dark green color. I'll just make sure I
have my brush selected. Make sure we're on
the right layer, and we can just zoom weigh in
and start smoothing it out. We can just start smoothing out our stripes so you cannot
see where they join. We're going to do that
to each one of these. Just smooth it out so there's no harsh lines or weird
notches or anything. As long as you stay inside and not touch anything on
these bounding box, it will seamlessly repeat. If you need to erase
some of the bits. That's perfectly fine. You can just get rid of some of the overlap and then
just smooth it out. We can add thickness
to our lines as long as we don't
touch these corners. Now we will just
finish doing that to the rest of our stripes. That looks great. Now we're going to have
to make sure that we get a stripe layer at the top and bottom because right here
right now it's empty. And if we would do a pattern, there would be a big empty
space in the middle. So now that we have our stripes seamlessly repeating
and smoothed out, we can add our last
stripe in our pattern. So we're just going
to make sure we are on our stripe layer. We're going to
duplicate it again. And last time, we moved one of the layers to this side and the other layer
to this side. Now for this next step, we will grab one
layer and bring it to the top and grab the next layer and
bring it to the bottom. So then we can add
our extra stripe. So we're going to
do the same thing. We're going to turn
on our guides. I'm going to grab
my background color and I'm going to turn off
the second stripe layer. I'm going to grab my first
one and my background, and I'm just going
to bring it down to snap it in half to the
bottom of the canvas. So it snaps right in the middle where it
cuts right in half. I can deselect
then we'll fill in our background color
and we'll turn on our next stripe layer
and do the same thing. This time, we'll
place it at the top. So just bring it up
to the top until it snaps perfectly in
place and deselected. I'll just fill in my
background color so we can see exactly what we need to do. And as you can see, that is
where our missing stripe is. So we're just going to fill
that in, smooth it out, and we will have our
pattern file ready. So I'm going to go back and
turn on the grid guide, since we want to
be adding one more stripe we'll go back to
our dark green color. I'm going to bring
these two merge these two stripe
layers together to have one single stripe layer. Make sure I have
my correct brush. And again, we will just
do the same thing, add one more stripe
on the guideline. And something I like
to do before I start is test my brush and
select the size I like, and I set it right
here on my slider. So I always know my original size that I'll be working with. So my brush is at 32%, but you can have it any
size you want your stripes. That looks good. Now the
last step is we need to smooth out our last
line that we added. So we're going to do
the same process again. We know that all of these seamlessly repeat except
for this one line. We're just going to be moving it from this side to this side, and then we will
test our pattern. So we're going to do the
same thing. We're going to duplicate our stripes. We're going to grab
our background and our first stripe layer. I forgot to turn on my
quadrant to make it easier. We have them selected,
and now we can just slide it over to half of the canvas. We're going to fill in
our background color. Now we'll do that
to our last layer, slide it over and deselect it. Just fill in our background
color and turn off our guides so we can see
where we need to adjust it. As you can see, that's the only stripe that
needs some editing. So we'll do the
exact same thing. I'm just going to merge my
two stripe layers together. I'll make sure we have
our brush selected, and we'll grab our
dark green color. And now we can just
come in here and smooth out our last stripe. I'm going to remove some of this bottom portion and
then just fill it in. To zoom out, make
sure everything looks good. That looks great. Now it's time to
test our pattern and see if everything
lines up seamlessly. So I'm going to make
sure I only have my stripe layer and
my background layer. And now with three fingers,
I will swipe down, copy all, swipe down and paste. And this will be our test tile. So I'm going to turn
on my quadrant so we can make sure it snaps
perfectly in place. And now we will just
grab this little node and bring it right
to the center. It will snap perfectly
in place when you see the yellow cross hairs
and we can deselect it. Now we can just duplicate that tile since this
is just our tester and we're going to place it
in each one of the quadrants to make sure everything
lines up seamlessly. Now we can turn
off our guides to check and make sure
everything looks good. I'm going to zoom way
in to make sure there's no hairlines or little
bumps or anything, and this pattern
file looks great. I'm just going to merge all
my test layers into one. We have our test pattern
and our original. That is how you create
vertical, I mean, horizontal textured stripes
using the Procreate app. In the next lesson, we will take this pattern and turn it into a vertical stripe pattern and recolor our whole seamless vile.
4. Textured Vertical Stripes: In this next lesson, we will
take our horizontal stripes, turn them into vertical stripes
and recolor our pattern. So I want to duplicate
my file so I can have a brand new vertical file. So here's my original.
Now I'm going to just open my file. I'm going to erase I'm going
to delete my tester pattern. Now we're just left with our original stripes
and our background. What we're going to do
is we're going to grab these stripes and just turn
them to be vertically. I'll make sure I am
on my stripe layer. I will tap on this
little arrow icon and I'm going to rotate it 45 degrees twice.
And deselect it. And that is it for turning it into a vertical pattern.
It's that simple. We know that these sides repeat seamlessly and so does
the top and bottom. So now we can just
recolor our pattern, and I'm going to be
using this blue palette. So I'll grab my
lightest blue color, and that's going to
be my background. So I'll just go to
my background color, dragon drop and then
for my stripes, I think I want to
do them two tones. So I'll start off with this
dark, brighter blue color. And I'll just drag and drop
it into the first one. And if it's coloring them all, just play with the threshold. So if you go down a bit, it'll just hit that one. Then I'm going to tap
continue filling, and I'll just tap, see,
sometimes it doesn't work. So drag and drop
continue filling, and then I can just tap
on every other one. And this stripe is
half of this stripe, so we need to make sure that
that is the same color. And now I can deselect it. So this stripe is
half of this stripe. Whatever color you
do on this side, you need to do on this side because they're the same
stripe. It's just cut in half. Now for these other ones, we can do this
lighter blue color. It's going to be the same thing. I'll just drag and drop and fill in that color, play
with threshold. If it's doing all
of the stripes, I just want to make sure
it's filling in that one. Tap and continue filling and I can just then
tap on the rest of the stripes. That looks great. Now we can test it
and make sure it all is repeating seamlessly. I'll make sure I have
my two separate layers. Again, with three
fingers wipe down, copy all, swipe down and paste, and I forgot to turn
my drawing guides on, make sure our quadrant
guides are turned on, and we can just snap it
into our first quadrant. We're just going to duplicate it since it's just our tester. We're just seeing
how this works. Now I can turn off my guides, make sure that I don't
see any white hairlines or weird irregularities, make sure everything is
nice and smooth and it should not have any problems since we already had tested
this in its horizontal form, and that looks great. So we can just merge all our
test test layers together. As you can see, here's
our test layer, and then here's our
original stripe and our So that is how
you easily take your textured horizontal
stripes and turn them into vertical stripes
and how to recolor. So you can recolor it
anyway you'd like, or leave it as you originally did for the
horizontal stripes. So in our last lesson, I will show you how
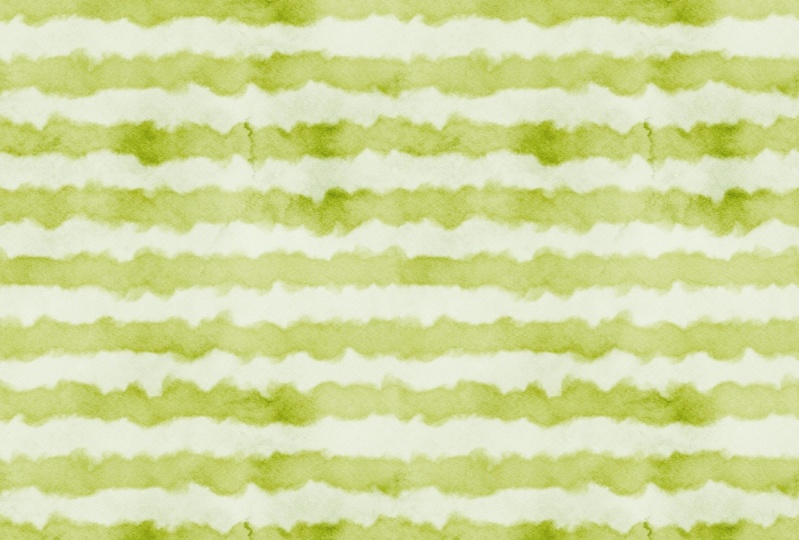
to create some fun, wavy, kind of funky lines.
5. Wavy Stripes: In our final lesson, we will create this wavy, almost wonky kind
of stripe pattern. So we will begin
again with a canvas that is 12 " by 12 ", 300 DPI and RGB. So it's going to be basically
the exact same process. We will begin by filling
our background layer, and I'm going to use
this dark pink color. So we'll just drag
and drop it in. Now we will create a brand
new layer above that, and these will be
for our stripes. And I'm going to grab my light
pink color for my stripes. And for this brush, we'll be using the
monoline brush. And again, it comes
with a Procreate app, and it's under the
calligraphy section. And I like for this canvas, the size of this canvas, I like my brush
size to be at max. I think it looks really nice. So again, we will fix our grid. So we'll turn on
our drawing guides. And then, again,
we're going to make our squares 2 " by 2 ". And now we are ready to begin. So again, we'll make sure
we're on our correct layer, and we're going to
try to match up our two edges as
close as possible. So it just makes our editing
process a lot easier. So I can go wavy, but as I'm getting to the edge, I will really try to match these two up as
best as possible. So we will begin on the
corner of our guide, and we can just draw
a nice wavy line. And we're going to
do that with each one of our guidelines. That looks good. Now we're going to do the exact
same thing where we will bring this half to this side
and this half to this side. We will turn on now our
quadrant guidelines. We will duplicate our wonky
stripes to have two layers. We will just turn
the top one off. I'm going to grab
the background color and our first layer, and we're going to move
it over to this side. So we can just bring it
over till it snaps right in half and deselect it. Now we will fill in
our background color and do the same thing
to the other side. So make sure we grab
our second layer, our background layer, and slide everything over to this half. And deselect it. I'm just going to fill
in my canvas and turn off my guide so we can see
what we're working with. And as you can see,
we came pretty close. Some of these barely
need any editing. Some have a little more, but this looks great. So we'll start at the top. I'm going to merge
my stripe layers together to create
one stripe layer. Make sure I'm on that layer. I'm going to grab my
light pink color. And now we can just begin
smoothing this out. So I'm going to bring down the size of my
brush a little bit. I'm just going to, we need to turn off
our drawing assist. I'm just going to try to stay
with the curved contours. So it just looks like
one smooth line. You won't see any weird
notches or bumpiness. This one is almost perfect. So I'm going to bring
it down real small just to smooth out
that little bump. That looks great. So for some of these that
have a larger notch. We can just delete a little
bit of that portion, and then we can
build up our line. So I'm just going to
remove some of it, and then I can just
smooth it out to match up to the line thickness. Just like that. I'm going
to do that for here. I can zoom out to see
how it's looking, and so far it's looking great. We have one line left. Let's just smooth
this bottom out. Okay. And that looks great.
Now we'll do the same thing. As you remember from our
previous textured line, we need to add one more
line for this top part. We're just going to
do the same thing. We will duplicate
our line layer. Make sure our quadrant
guides are turned on. Now I'm going to turn
off the top layer. We will grab our
background color and our first stripe layer, and we'll move that up to
the top till it snaps. Snap just in place and
we can deselect it. Fill in our background color and do the same
for our top layer. We will bring it
down to the bottom. And now we can add strip, our last stripe in the middle. I'm going to again turn my
guides back on so I can see. Make sure I have
the right brush. We'll get our right color. I'm going to merge my stripe
layer to create one layer, and then just add
in my extra line. So we can just draw
in our wavy line. That looks perfect. Now, all we have left is to adjust where the
seams go together. So these two corners. So one last time, we
will do the same thing. We're going to duplicate it. Going to turn on now
my quadrant guides. We're going to grab
our background and our first layer,
slide it over. F in the background and do
that to our other layer. Now we can turn off our
guides so we can see. As you can see, that's the
only one we need to fix. I'll merge my line
layers together, make sure I have
my brush selected, and my light pink color. I can just come in here and
turn off our drawing assist. Now we can just come in here
and smooth everything out. Bring down my brush size a bit. Let me can fix
bottom right here. That looks great.
Now's the fun part. We get to test our
pattern and make sure it repeats seamlessly. Again, we're going to
make sure we only have one stripe layer and
one background layer. We're going to three
fingers swipe down, copy all and paste. We'll turn our
guides back on for this and just duplicate it, make sure everything
lines up seamlessly. Let me turn off our guides. We can make sure we zoom way in to make sure
there's no hairlines or any weird bumps in our
stripes and that looks great. That, my friends,
is how you create a wavy line pattern
in the Procreate app. If you have any questions
or run into trouble, please don't hesitate to
ask in the discussions tab and you'll find that
located right below this video.
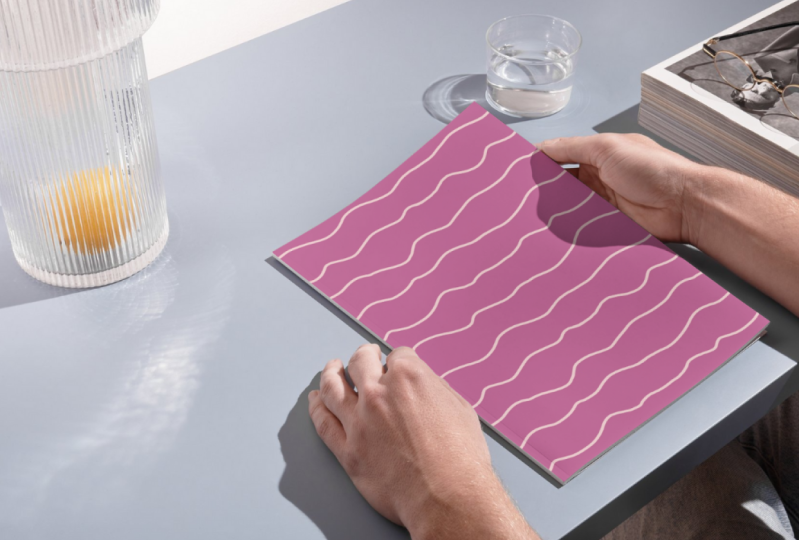
6. Pattern File Uses: Now that you know how to create all kinds of fun
striped patterns, I want to give you
some examples of what you can make with
your seamless files. I have a couple of examples
here and as you can see, you can turn this into
a gorgeous wallpaper, which I think would look
amazing in a baby's nursery. You can create a fabric for
all kinds of fun projects. Gift wrap, which
would be so cute for a holiday mini collection. You can even sell your files as seamless patterns on shops
like Etsy or Creative Market. The possibilities
are truly endless. So go have fun, create
lots of striped patterns, and I can't wait to see
what you will design.
7. Final Thoughts: Thank you so much for
joining me in this class. I hope you have fun exploring these advanced stripe
techniques and that you're excited to use
them in your own designs. Don't forget to share
your class project. I'd love to see the
stripe patterns you create and how you
make them your own. If you have any
questions along the way, feel free to reach out in
the discussion section. I'll be happy to help. And if you enjoyed this class, it would mean so much to me
if you left a kind review. Your feedback not only
supports my work, but it also helps other students
discover the class, too. Thanks again for
learning with me, and I can't wait to see
what you will create.
 Sarah Raquel, Artist & Designer