Transcripts
1. Intro: In order to promote your
business, your products, or even your service, you need
to make videos about them. As video is only
one tool you need. Talking about videos
or video editing. We cannot neglect that Premier Pro is one of the best editing apps
for the whole world. And every videographer,
cinematographer, or even a video editor must
have used this app before and knows that this one is super incredible in editing
high-value videos. Hi, This is Ahmed, a dentist, a teacher,
and a video editor. In this basic class
about Premier Pro, we will discuss everything from scratch up to intermediate
video editing. We really get to know
how to deal with the latest interface
of premier 2022. How to use the tools in the
timeline panel, transitions, and manipulate text with blur motion and lower
slots and titles, videos, and of course, how to deal with templates. Next, we will learn to add supplemental content
that we call Bureau, which really changes
the game in making your video more
valuable and more pro. Also, we will speak
a little bit about basic color correction and color grading and take video
quality from this to this. Finally, we will add an end the screen to our
YouTube videos. I know how to export videos from Premiere and Media Encoder. Most of the players use in
this class will be there. So section, don't forget to download them and
start your trials. I hope. Help you off, is the basic editing skills
to make good videos, to make them get 1's. See you in the class.
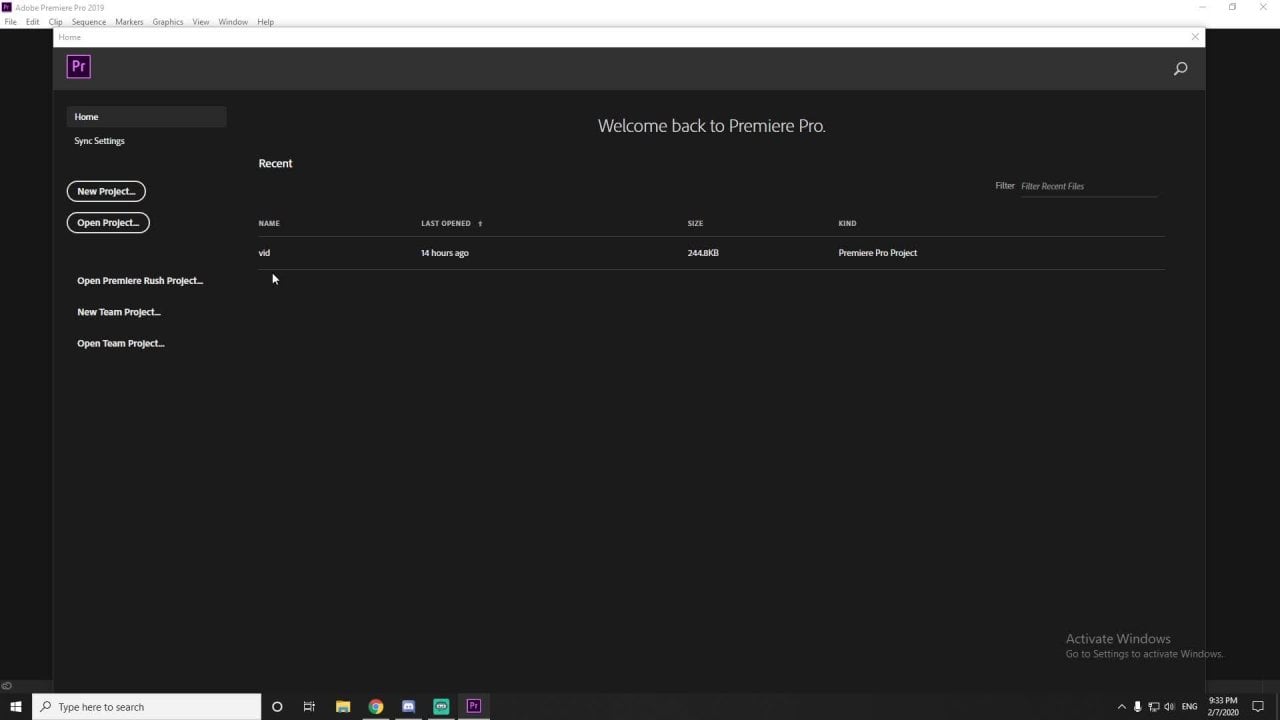
2. Interface: Alright, so this is the first
time we open Premier Pro, the latest version, 2022. And as you can see,
this is gonna be the interface that we're
going to deal with. And in order to make it
shorter and very basic, or just started with the basics. So we need to open
a new project, clicking on your project. And it's going to ask
to give it a name and to select the
location of this project. So just for now,
we're just giving it a name of version one. Okay? Then we move to the project
location and choose location. In that case, I'm just going
to pick a t inside of one. Of course you've
got the footage in the resource section,
you can download them. Okay? So now here we picked
the location of it. And it is only in the
latest version of 2022. It gives you some clips and
samples of media you can use. Regarding the seconds,
like as you can see here, two seconds, two
seconds, 15 seconds. This is a time-lapse of history. I think this is something where this mountain
is very famous. And of course it has
the Adobe logo on it. Dolby shutter cut or Adobe Stock logo.
We're going to use it. I think you need to have a
subscription and it anyway. So we just pick the name of
the project and the location. And in order to import things, It's better to create
the project first. Let's hit Create to the
right bottom corner here. When we click on
create the project, you can see these different
panels in front of you. If this is the
first time for you to deal with this
version or this is the first time for
you to deal with Premier Pro is genuinely, you would feel a bit
confused what is going on. So let's make it clear. So each one of these, this is a panel,
and that's the one. That's a one, and
that's another. Of course, on the side
here you can find all these banners closed.
Why I'm doing this? Because on top of here
you can find file, edit, club and so on. From the option of windows, you can see the
optional workspace. And I'm selecting all panels
for you as a beginner, it's better to select
the option of editing. It's giving you the best
version of editing. And of course you'd go
for Effect Controls. And you bring that one to
this. So what is going on? It's making nonsense. It's messy. So go
back to Windows and you go for reset
to saved layout. And it's giving you
the best version of v and the best layout that
you can have of editing. Alright, so whatever happened, let me just make it clear. We just put this here and
we put it that one here. We just mix things
up and everything is like went horrible. Like you to know
which panel using right now and you have no
idea how to get this back? Yes, probably, you
know the answer. Now, you go to the Windows
option, all the workspace. Make sure you are
selecting the editing one. And you go to reset
to saved layout. Then. And then we bring
this to decide here. Okay, Let's come to our footage. If you downloaded the footage, you can see that we can
import media. To start. Please can see as it says here, you can double-click on this and then you can click
any of your median. So in order to have
the location that you already know
where it is Exactly. So you go to your
folder and go to the, this panel and select Control C, and then go into your
Premiere Pro section. Then here again, Control V. Press enter. Directly, go to the
exact location you want to save or to import
some of your files. So let's put some
of the footage, talking to the camera footage. Let's open this footage
and open imported that. It says here in this panel, which is Timeline panel,
says no sequence. What the heck is a sequence? Let me make it clear. It says drop media here
to create a sequence. So we hold and drag. But before we hold
and drag, Let's, let's do, let's undo this one. Control Z. Control Z. Again. As you can see here, we're hovering over
the footage over DVD. And it gives us the
preview of this video, what is happening in the background and the
foreground and so on. Which is, I'm just hovering, I'm not pressing anything, I'm just hovering over it. And then it gives you the
preview of this video. What is it? What is the content of it? So let's drag it and put
it end the timeline. The timeline is the place that
you caught an O and doing all of your editing skills
according to this timeline. But going back to this panel, the project panel, you have
two videos right up there. One says it is a video used one time and
once as a sequence. So which one are
we dealing with? Okay, So this is the original
one that you did list. It's not going to change. What? This one is
going to change. So if we, for example,
at the text here, let's say text. This text. Let's make it the
whole sequence. Okay? Let's make it bigger. Okay, So in this
text you can see, if we hover over
this one, no text. Why? Because this is the
original one. As we agreed. No change is going to happen to this one. It's
gonna be the same. But this one which
is the sequence, all of your editing would
be added to this sequence. But hey, it's given
the same name. That's why we're going to change the name instead of desk. Maybe we can just
say like this is our first trial sequence. Just to make it shorter
for yourself. Okay? So this has given it musically. And if you want to make
a new sequence to have the second trial and
the set for trial. You can click,
right-click on this video and go for new
sequence from clip. It gives a new sequence and
you can change it and name it the second second
trial sequence. That's it. So you go for the first
trial, second trial. First one has a video,
first one has a text, and second one has
nothing on it. So this now is for important. The footage from your computer to the Premier Pro
reported panel. And in the next few lessons
we can talk more about the editing skills
and how to deal with the sequence and the footage
and the overlap, and so on.
3. Timeline Tools ( Selection Tool, Razor Tool & Type Tool ): Alright, so we're back now with the tools that we're going
to use regarding this panel, which is the sequence panel. Previously, we talked
about how to have two different sequences
from this same video, like this one that we used it. When we said we're open, we're going to hover over it. You can just drag
this tool, okay, this play head, okay, and drag through the
sequence of the main video. But we created a sequence
and we call the sequence, and the other one is another C. First, the first one we call
the first trial sequence, and the second one we call
it second trial sequence. And we differentiate
it between both with a text that is over here. Alright, so what if I
want this text only show in the minute or in the
third seconds of this video. So I'm going to press play
1 second, 2 seconds now. Let's say we're going
to use death one. Okay? So in order to play, in order to control
with this panel, which is the sequence panel, we can actually zoom
in and zoom out regarding the plus and
minus and your keyboard. So when we click
Plus, not this one. Okay, go for it. The plus end top
of your keyboard, which is the one equals
to the equality, which is the one that it's
close to the numbers. Okay? So minus when we zoom out, plus when we zoom in. Okay, so this is
how his own death. And we better use the
rubber band down here, which is to zoom out. Zoom in, which is, which is the thing that
I really liked. And then because you
can drag this one to the rest of your timeline
and move it back. So let's say just
we're actually here. We're in. And I want to go back to the
beginning of the sequence. So when instead of
just pressing minus, minus, minus, I can't
see the beginning. I better do this very short
and go to the beginning. And I drag the indicator, this one, this is what the, what we call this
timeline indicator. Drag it to the beginning. I press play. And what waterway? Distraught got this button. It is the spacebar. So when we click
on the spacebar, it plays like it stops. That's two shortcuts now. The rubber band, okay. Instead of using f, you
don't want to use it. If somebody called a weird, you can use the plus and
minus on your keyboard. Regarding your left side, of course, are better use it. So I'm going to zoom in. And the second one is to use your spacebar to play the video, to play this sequence, to play this timeline, and
stop it as well. Okay. So this is the amount or these are the duration
of the sequence. It says the play
head position yet. Okay? So we can drag it from
here to go back to the 0. Also, we can drag it
from year to take it to the two seconds and how to
go from frame to another. You can use your arrows from the left side,
you can go back. The right side, we can go
forward to the next frame. So this is a frame,
this is another, another, another,
another and so on. So I want to stop,
particularly on two seconds, just two seconds,
not one more frame. So I'm stopping the end and I won't have a cut of this text. So one of the tools
that we have here, we have the razor tool. We can press it and we can come. And as you can see, we
can zoom in a little bit. It gives you a slight
highlight of this. So you can click on it
and zoom out again. Go back to the selection tool, select the spot, press Delete. Done. So when we start a video, we press the space bar. B is only at two seconds. So we can just adjust it here like we can make
it to the middle, can bring it down and see if
it's in the middle exactly. We can actually learn all of these techniques later in the
next few lessons, the work. So here, this is how it would be as I want to add a little
bit of animation to it. We just come press
the plus button. We come to the beginning of it, would press the right-click,
apply default transition. Let's see what is
going to happen. Going back to zoom out. It appears like it fades in. You know what I mean? So it's like there was nothing, then it fades and the image. Okay. This is how we use
the razor tool. With the selection tool. The selection tool is very crucial because we're going
to use it oldest time. That's why it doesn't make any sense to go
back to it all the time and not forgetting
about it. Okay? So if I'm actually using
the lesson reason, the razor tool, I want
to go back, please, in the selection tool, the shortcut of this is to
press V on your keyboard. Press V is just your
selection tool is selected. So if I'm using the pen tool for now,
I'm doing this and that. So regarding the mosque
and think like if I'm doing the nasty thing, okay, that's the one that I
need to show an inverted. So I'm just showing this part. Okay? So that's it. So I'm just creeping things
up like a mess of things. I want to go back,
refresh control Z, Z, Z and Nova. Nova. Keep going until we
get all this back. Okay, so I want to go
to the selection tool, and instead of just
going here with the mouse and select
it, just press V. That's all. Okay. So using the shaft key in your keyboard allows you
to come to the sharpest. A is in your timeline. So here as you can
see, now I'm not pressing on my shaft keyboard. Okay, I'm not pressing on it, but when I click on it, it gives me the
beginning or the end of this transition and the
beginning of this text, the beginning of the video. And of course, if
there is some cuts, like for example, let's do a cut here and another, and another. Go back to the selection tool. Look, if I'm, if I'm not
using the Shift key, it moves forward and
backward back-and-forth. And that's it. If I'm using it comes as a
station and it gives you like, this is a station, would
you like to stop here? That's another that's another. You can see the
little arrow on it. Okay. So let's controls,
ETC, will go back. In case I want to add a like in case I want
to use the shortcut of this razor tool instead of
just doing the razor tool and do this got like to come
closer, like to zoom in. Then finding this
spot and then do this and then they not know,
I don't wanna do this. I would just go to go back. I just want to have
a shortcut of this. So we just press Control K. Boone done. You just
actually cut your video. Why? Because I was
aiming the video. Look at this. You can just actually
enable this by doing this. And you can now cut both at the same time in
case I wanted to drag this, make it closer to decide. This is how we can
make it closer to start from B7 second, and instead of starting
from the second one, start from the
second number seven. So that it is, of course, the end as well. We can drag it and bring it
back just like this one. Okay? And of course the video as well, we can drag it to the spot, but actually I want
it to be longer because we can use this later. How to use the rubber band, the shortcut of the
rubber band is using all clicking the Alt button and then use your
roller in your mouth. The mouth start using, use the roller in it. So to bring it back. This is to zoom out,
bring it in, to zoom in. Okay, you're going to use
this a lot most of the time. Just believe me, how to go from the beginning to
the end of the sequence. You can scroll back. You go to the end. You can scroll forward. You can go to beginning. Okay? So let's try this again. Let's Control Z again, again. And so here we just wrote
everything to the original one. We use when we're actually still in the first
try and sequence. The second one has no
text as you remember. So the first trial sequence, it says that we can
use eraser tool using our shortcut,
which is Control K. But hey, what happened? I'm just actually now
selecting the text. That's why it's only
cutting the text. And instead of the
whole sequence to, in case I want to get both, we can highlight
both by like Dragon. I let them both and then
drove me oh, sorry, Control K. And it has gotten both in case I don't
highlight anything. Both as well. But remember if I'm going
to add another layer. Okay, So in case I didn't tell you how
to add another layer. In case I wanted to
add another layer, we can actually press
Alt and come to highlight the layer that
I want to duplicate. Press Alt, drag, click and drag. That's it. So the tax is dragged,
is duplicated now. So we have two decks now
on top of each other. But I actually want to cut all of these layers and just one sequence
in just one step. So I'm going to click the shortcut to do the
shortcut, which is Control key. What happened to only
cutted the two layers, which is our video
and our main text. Why will happen to that? To the layer that
we just duplicated? It wasn't enabled. Okay, so you need to target
this one by enabling this. Alright. So let me just go
back control Z. Okay, I'm enabling it now. It's all lighted and blue. And now we can
highlight both of them, control K, That's it, the cut Control Z going back, we can highlight any
of them, control K. Okay? So we can go back again. I want to only cut something, but I want the video not
to be touch it anymore. I want the video to stay still. Like I want no changes
happen to this video. So in that case, you can just click this
toggled track lock. You can lock your video. Now we can not selected. If you do Control K
doesn't work on it. But if you work on the, on the other layers without
highlighting any of them. As we said, if we're not
highlighted any ovum, it's going to cut
all the layers. But let's have a look on
what, what's happening here. Says Control K. It's causing only the
two layers on top of the video layer at this case. So we control Z. In case we want to go back, we just unlock the layer and go into lock it again if we want to do some
adjustment to it. Okay? In that case, we just do unlock it. And as we agreed, we click Control K, It's cuts, overlays. Control Z, undo,
old the sequence, all the things that we've done. So now we've got this one. I'm going to delete it. You can just select it and
press Delete on your keyboard. Okay? Going back to the beginning
of it using the Shift key. Alright? And this is how it works. But here's the thing. Sometimes people
are just actually not actually able to drag
the voice of something. Why? Because when
David writing voice, it's like only the video appears and nothing appears was up the video with the video. And this is because this icon
is not the track of the, of the Odeo, Odeo one. It's not selected,
it's not enabled, so we have to enable it. And if the video has a voice, everybody has an audio will be exported as well
to the timeline. This is how it goes. Okay, So here we're talking
about the Selection tool. The shortcut of it was the V, the V key in your keyboard. And we talked about
the razor tool. Okay? And of course we're not going anywhere before we just
mentioned the type tool, which is the text
tool you can write. I lose here. Then we go back to
the selection tool. We select it, we bring
it to the middle. Okay? We save margins, we enabled it. Okay. There we go. We can actually
have this one down. And also we can
delete this for now. And that's it. They go Oh, we can drag
it a little bit down. Okay. Using the facts
effect control panels to play, it fades in. Okay. So that was at
for the selection tool, razor tool, and the type
tool for this lesson. See you in the next one.
4. Text Manipulation: Alright, there we go. So in this lesson we're
actually going to learn how to deal with the text
on the timeline, how to position it, how to pose it in the right one, how to scale and rotate this text according
to our preferences. And also regarding the opacity
and the speed and so on. Okay, so let's say we're actually going
to delete this one. Delete this layer
will go into using the shortcuts Alt antigen that
the rubber and your mouse. So here we're going to
start from the beginning. We're pressing the space
bar. It's 1 second. Now let's go back a few
frames. It's 1 second. Okay, I won't have
a text over here. We use this one okay. To type text. And we press anywhere on this monitor,
anywhere, just anyone. And we can do like
I was here again. We'll go back to the
selection tool because, oh, okay, So here's the thing. You cannot do the shortcut
of the selection tool, because if you
press V right now, while he actually
is tell typing, Premier is not actually differentiating between this
is the shortcut or not, because now we're
using the type tool, which is if you press V, it's going to give
you more of these. Let me show you that to
you if we bring that one. So we've got a lot of key visa. So let me just Control V back. Let me have it again. I was here and I want to
have the selection tool. We just go back to selected manually
without the shortcut. Then we select the text. So I'm going back now
highlighting the text. I'm selecting it from here. And we're not going to
the left side driver. We can use it from
the left side to scale and to position
up and down, up and down, and right
and left and so on. Brother. I'm actually going to use
the right panels here, the essential graphics panel. Okay? So as you can see, we've got many things like Ben
to reframe and so on. It's going to be this
one and that one. Okay? Instead of doing
this, we're actually going to manipulate
the align under Transform tools and
we're going to use them. So in case I want it to the center line, center
vertically, okay? Which is called
back again. Here is aligned to the
center vertically. And I want it to align central, aligned to the center
horizontally as well. Okay? Now it's vertically
and mostly horizontally. So as you can see, something is weird here, which is the anchor point. The anchor point is
why you just moving everything from its
position according to it. So you can just come to this and make it to the
middle of your text. Go back to the selection tool. Yet in this layer, we
select the layer again. The title. Just do this. And this again. To the right, the left. And that's it. Let's redo this one again. Let's have a text. Let's just say, Yeah, go into the selection tool. I want it to be bigger than this without using the left panel. Regarding the effect
controls panel, we're going to use this
central control thing. We're having this one, which is this kale thing. I'm scaling it to 300. Okay, let's type three. Alright. I'm putting it to the center
and to the middle as well. Okay. Vertically and horizontally
from both sides. So I want it to be to
the bottom layer here. Align bottom. Okay. This is for subtitles. For sure. And yes,
we can go back. We manipulate the appearance
of it, the opacity. We can make it like
10%, 50, 1%, 100%. And of course we can rotate it. It's rotating from the side, not rotating from
the middle. Why? Because if the anchor point, I'm just bringing this back. So just bring this back. Okay, It's 0 actually. So we go to the Effect
Controls panel. We can use it. And having the rotation, it's rotating as well
from the same point. Why? Okay, Let's reset
to the parameter and we locate the anchor
point to the middle of it. And if we're going to
use the rotation now, it's rotating from the metal. That's it. Then you can just reset
the parameter again, back again, back again to that. Okay? So there you go. We have this enabled.
You can enable it. This enabled and
enable it again. It's not here anymore. It's back down, wrote
it up a little bit. Okay, so what happens
to the color, what happens to the background, this tile default and so on. This is all in the
Essential Graphics panel. We can go down as
tiles, forget about it. It can use the text
that you like. I really liked this folder. It's called the knee wave one. It's really sketchy alike it. So we can actually
use how to denote, align your text according
to the left of the center, to the right and so on. Preferring to have it to the left because
Brighton English, and you can do this regarding the space
between the letters. So you can drag this to
send 0 again as it was. And you can
manipulate if it was, if you want it to be bolt
more bold than is Italian. I prefer it to be just normal. Okay. And you can change
the color from the appearance here,
which is the fill. You can press on it, click on it, left-click on it. And you can use the
color that you want. We can, we kind of like this
one, most preferred one. We can have a stroke to it. Okay. The stroke could be this one. I'm now on and so on. Like this. You have a minor stroke now. It's eight, it's better. We can also have a background if you're using a
subtitle to it. And the opacity could
be something like that. And that could be all of the parameters
you can play with. And also the, the edges
of this background thing. You can manipulate it by
your own hand as well. Okay? So as you can see, we can just bring this down to scale and then bringing it here. Okay? And yes, Okay, good about scaling
from that one. We can scale it
from here as well. Because we don't want any messages to happen
for you as beginners. Forget about the one that
we just happened to us. So we can scale from
me, as was just said, we don't use the
essential graphics panel. Okay, I want it
to be, to decide. I wanted, actually, I want to have a background
of a lag one. Okay. So here I want to come
to the beginning of it. I'm shifting, Oh, I'm
pressing the shutter button. Lesson. Okay. So I'm
having the beginning, I'm just zooming in
the beginning of it. You select them, right-click, apply default transition.
It's going to fade. And as you can see why
that are managed token, it's going to fade it as it's a smooth transition
happens to us. Later, we can manipulate
the transition itself. The default one was to space, making it smaller,
like this one. The base so fast as
there is no fading them. Like we can make it bigger. Okay. So like appears so
slowly bit by bit. Well, I do not prefer this one. So yes, this is gonna be
totally for this lesson. How to manipulate the text, how to add text, how to change the
color of the stroke. Manipulate the background
of how to have a more corner radius instead of having harsh
corners and so on. We can also use the shadow one. Having a shadow, one case
you're actually using a stroke is not a good one to use the shadow on the stroke
and at the same time, so it's better to use one
of them individually. That was it for this
text tools that we used. And let's see you
in the next lesson.
5. Class Project: Alright, with the class
projects section, we have this club in
the previous one. And we said we added two clubs. We have the speed ramping to it. And now I want you to add
text to each one of them. And the text I want
it to be appear after moving to the next one. This is a place and I won't
have a definition displays. So of course, this the
decks would be a PM. I would add the text here. I would say mountain Haines. I would select this text. Okay, Go to, go to what? Go to the Effects Controls. Think effects. Graphics. Essential thing. Where is it essential
graphics, you can add it here. And you can edit. This was an earlier, we can just make it to the
left and we can select it. I want it to be a
little bit bigger. So I want it to be like 200, intuitively in the middle, vertically and
horizontally as well. And I want the felt
to be maybe okay, I wanted to fell to
stay white because the stroke is they're not
grounded would be in black. And the background
would be very obvious. Alright? And the radius of that
would be outweigh? Yes, I think that would
be in order for the text. We choose the knee wave thing. Okay. There you go. That appears when it's yeah. So moving, speeding
men, mountains. Next clip. I want to
add your text here. I would say we can
add a new text or we can duplicate this one by pressing Alt
and dragging it to the next one and having it
to the rest of the class. And this one, we could change it by double-clicking on it. And let's call it
Green Mountain. And we center it
horizontally and vertically. Here. Yeah, Green Mountain. And also we can add to it. You can see more cinematic. Also this one. Here is your class project. This one is just paid RAM. And then slow down and go back to this
speed ramping again. Then the appearance of the
text speed ramp, extra peers. And that was it for this clip. And this is for
your class project. I hope you can do
the best with it. And if you have any inquiries, any questions about it, just dropped me down in
the discussion below. See you in the next lesson.
6. Transitions& Speed Ramping: Alright, here we are. So in this lesson, we're actually going through the transitions of each video. As the last one, we knew how to add text to our layers and add
different layers, enter the same sequence. And of course, the one
previous we had to go through like having
two sequences. The one that has no text and the one that has the text over it. Actually today we are going
through having a transitions. Like for example, this one. If we're actually looking at, if we're looking to have a, when he stops here, this man who was token
and then he stopped. Yet, we won't have a code. We press Control K. We had the gut and then he started to talk
just right here. What I've just said. Okay. So previously I gave you
the shortcut of playing, stopping plane and stop it. It was the Space bar
on your keyboard. So you go back pressing
the shift key, having the indicator,
your timeline indicator, and then you press
Space and then you keep just saw him here
speaking footage. This video has no Odeo. Was it for the next ones
that we're going to use. The must have a voice. They must have 80 to track. And that's why it's gonna
be easier on this one. We do a Katia and we
come to this one, we want it to be deleted. So we just select it, press Delete on your keyboard, and they go, you go
back and then you drag this video to
the previous one. So if I choose the
arrows and the keyboard, and I go right,
left, right, left. As you can see, he stopped
and he spoke again. This is typically the
thing that you see in TikTok and Instagram. Also an YouTube
shorts of course, because you want to
make it the best, shorten, the better. Because you want to
make it very fast and has no no spaces in-between. So no spaces. He stopped here. And then he's he spoke again. Okay. Stop spoke. And so let's see the next Mark. He stops. E cell speaks and you
stop just right here. Sticking his breath. Go back again. Yeah. Stopped. Make a cut. Then just started to speak here. Maybe. So know yet. So we just go back control Z. As I'm speaking a little bit. I'm moving a little bit fast because all of these are
just practicing for you now. So now we're going
back with the arrows. I'm using the arrows. We can use the indicator
with the mouse. We can indicate low best. But it's better to use the arrows on your
keyboard because you're moving frame by frame bot using the mouse indicator. It's like moving many
frames at one time, so it's not indicated, it's not actually different. It's not defined whether
you've taken frames or not. Okay, so here we
have in this block, we press Delete, and then we
drag this to the other one. Okay, so one more tip. We would press Control Z. If we dragged it from
here to go back again, actually, we wrote down, okay. What brought back the part
that we just deleted. So I'm not encouraging anyone
to drag from the start. When you see this red icon, when you see this red sign, it means that you're
going to drag it to to, to get back the
part that you just deleted the previous clip. So when you click here space, you can see stopped spoke again. Here again, here, again,
again and again and again. Okay. So one more thing. If this clip is far
away from that, and as you can see when
I'm dragging this, you can see a black line. When you're trying to
connect two clips together. This only enabled and
only activated when you have this snap in
timeline enabled. So if I press this, i've, I disabled this one and I'm trying to drag
this to this one. You can't see the black arrow. You can't see the black line. If you do this. If it's, it's like you are
clubbing inside the next clip, inside the previous clip. So I don't know where
exactly to what this club. So I had to zoom in and
then bring this one here. And I'm still unable to know
if this is right or wrong. That's why it's very
important to enable this one. The shortcut of it,
it's like to press the Esc key in your keyboard. As you can see, disabled enabled or
disabled enabled. Because sometimes when you
work on the shortcuts, you press K unexpectedly like you don't know what's happening and you're
trying to drag this line, trying to drag the clip. And unfortunately it seems like, it seems like it doesn't
merge with the previous one. So what is it going on? Check your timeline. Snap n, and it will work again. So after we club in these
ones together, okay. We can just now at
physicians do it. Okay. So we have to let me
make it clear first, transitions what it's added for, it's added to
translate or to have a transition between two clips
like there is a footage. And I want to move
to the next one in a different ONE sat and way. Okay, so first of all,
we're going to use the effects on the Premier Pro. First of all, I
want to make sure that I'm working
on the workspaces. As we just said in
the beginning road, working on editing. Okay, I said that we are
choosing the editing software. And I said we're
going to use it yet. If you're going to
use this one, okay, If he has it at this one, the
ashtray, you don't need it. So I'm going to
close this panel. The markers as well. You don't need it. So this is what
happens sometimes. So you double-click on it again, because if that happens
with you as well, you just double-click
on it again. So I'm going to close
that one again. The info, we don't need
it as well for now. The libraries as well. So we only need the effects
on the project section. Defects. Good about this for now, okay. So effects, as you can see, you have the presets,
the Lumetri Presets, ODU, ODU transitions and video
effects and transitions. You can go for the video
transitions, okay? And you can choose between
all of these transitions. Dissolve one, the
immersive video one, and the other ones. Okay? Most people use the
Zoom one across to let, let's just do our timeline. We have a balanced I
just said the arrows, you can use the arrows to
move one frame backward, another, 345 frames backward. So what's in case I
want to move like five frames at once
was one-click. You press shaft, and then
you move to the right. You move five frames now. So you press Shift,
you move to the left. These are the five frames
moving to the left. Another five frames,
another, and so on. Instead of just moving
one frame by one frame. So you move in five frames, wireframes, Wi-Fi
frame, and so on. Okay, So in case I want
to zoom in as well, and the transition is going to be in the middle
between those two. Of course, you've got two
options to add your transition. The easiest one is to
drag the transition. I'm just plotted in-between. Okay. Let me zoom out. As you can see, it's zooming in and out to the next voltage,
to the next clip. In, out. But it's a little bit slower. So we can select it and
make it faster than this, the duration and instead of
being 1 second long time, it can be like 20,
something like this. And it needs to be a little
bit more faster than this. So we can make it like tan, pink, which is the fastest one. Then we come in. Like you do it again. So we can drag this as
well. Forget about this. We can bring another wonderful
Zoom and we can add it. Go to it selected. Cheers D duration. They get tan Vega. So when you go for it, this
one again, this happens. Okay? This is a basic condition called the cross
zoom transition. Okay? So what happens if we choose
the white transition? This is very popular as well. Let's choose the blend
via the plant wiping. It's like blending both. So it's like taking back
salts, blending both ones. And this is typically very, very unique and very famous was the transitions of landscapes
and mountains and so on. If we bring this one to ten, for example, this
is what happens. You feel like
something was here. Aluminum frame by frame. Can see this one here. You can see it's like this. This is a frame from
the previous one, and this is the next one. This is a frame from
the previous one. So it's like moving frames. Let's tell there's a frame here. One still and still
done the end of it. Because here there
was a frame stop. Here. This is the end of
the transition. So no pixels from the previous
Club, which is this one. Okay, let me just call it a Okay, you can right-click on it. Let's rename it and
call it a clamp. This one we're
going to call it B. And of course, this one
we're going to call it. Those are gonna be
capital a and b and c. So let's give them names. So the previous one here, Let's see how many frames
is taken from the club. A 1234565 clips. If we're making an app. But if you're looking at 20, would take I think
more than this. So it's like present
shaft moving to the left 12 it's taken ten
frames from clump, 810 frames from beam. That's okay. That's all for this transaction. So yes, let me just
go back. Control Z. Sorry. Let's rename that one again. Be cleft. And there's
ones to call it. Alright, so taking this
blending mode over, let's go to the one
that I really like. These old. Okay, So cross dissolve
is the famous one, as you can see,
it's highlighted. So you can drag this added here. And you feel like no
change is happening. It is like dissolving the
two claps club a and it was glut day and making
it just one-click. Look. That was like very
smooth transition happening to two clubs. Okay, let's use one of
them that to white. Let's see how it goes. This is like when we talk
in the cinematic way, it's like a camera
taken off and so on. We can take this
off and we also can use the non-adaptive dissolve. It's really bad. So that goes, was did dancing and Wednesday
instrumental things. It can happen and take
place in a quiet good way. So we can use this
slide as well. Blend sliding and
push and so on. So this is like another
transition, slides, things that could be used with the presentations and
so on, your slides. So it's better with the
slides and then you can bring another one center. It's really different. Okay. Please. So that there was a lag
in the previous one. And that is because we're having a preview of this sequence
in full definition. So we can change the resolution, select the playback
resolution into half, and it's gonna be smoother. Okay? This might happen
with you as well, especially if your computer
is not able to handle this. Of course, these transitions are a little bit heavy computers, so it's better to
have the resolution, the preview resolution
and a halfway. This is another transition
you can use as well. Okay? And we can make it faster. You land. And of course later we can
add a sound effect to this. And it's like, You know
what I mean now? Great. So this is for transitions. And now let's close the transitions panel
and we have a new one. The one that we're going
to do is like having the transitions of the
dissolve and so on. Okay, so now we're
going to import around three clubs and
we're going to call it the transition plan position. Okay? We go inside and we can
double-click on it. We cancel, or we can go
directly to our folder. And these are the collapse. You can find it, of course,
in the project section, go ahead and download
them if you're not, if you did any yet. So and then you select
all of them, drag, go into the Premier
Pro and then drag them here into your Ben folder. We can make a new sequence
of this one, okay? Or we can add it to the same
sequence we have right now. So I prefer to add it to this sequence instead
of having a new one. Okay, there we go. This is our clip
and this is 123. So what we do in this one
image just start from here. Okay? I want to start from this part. You have two options. Now, I'm gonna give
you a new shortcut. Instead of just doing like Control key and the latest pop, you can actually do this. Do like you can go
back again, okay? You can drag the beginning of the clip to the point that
you wanted to have a cut on. There you go. The same result, or you can just go back. And without doing
anything, just press Q What the heck is going on? Okay, let me make it clear. Control Z to go back again. I want to start from
just right here. Okay? So if I want to, okay, we have this indicator. This is our indicator, right? So the timeline indicator says, you can delete, you
can delete everything. The remaining of the video
to the right or to the left. You've got two options. Pressing W is going to take
the whole thing to the right. Going back. Pressing Q is going to take
the whole thing to the left. So your indicator
is your indicator. It takes everything to
the right or to the left. So I'm going to take
this from here because the beds are just
moved from this point, so I'm going to press Q. So it took every thing
remaining to the left side. So this is the beginning
of our club here. So we press Space moves and we can just move
this a little bit. I would like to have a cut here. And I'm going to
clarify why later. And then when it comes here, I won't have another
Here's the thing. There's something called
the speed ramping. Okay. I would like to have
like go back to the speed and duration and I
would like to make this 300. Okay. And it is shorted now. So what is it? It's like doing this and then we club or
drag this one back. So this is what we've got now. It is like speeding this one. Then going back to this, you got what I mean. Okay. And also you can control
Z control Z, control Z. That one. Also you can have in this one. Yeah. Okay. We can have
like this sorry. You can have from
often the beds flight. We can have it from here
until we reach the surface. We go back to normal space. After, just immediately
after leaving his base. We're just trying to have it in a partial speedy way. Okay. So we have two clips now
needed to be speeded. This part is going
to be normal speed. This one. We want to make it
like speed and one. So it's 300. And this one is going
to be still normal. This one is like
to be speedy 1300. I'm going to select this
one to put it back, select all of them to go
to the previous clip. And here what we can and
slow motion as well. And then you move
faster a little bit. It is likely now ramping. Speed, ramping. Okay. So it's like speed this part
up here is what I mean. This is what we call
the speed ramping. Okay. So in case I want to
add the other Glenn, I can drag it here as well. Okay. And let's see which way
exactly we want to start with. Okay? I would like to make this one a little bit faster than this. Then stay still, slow. And then I want to end it here. So I would, I would press W to take the rest
of the right side. Then we're changing
the speed to 300. Then we add in these students, okay, so slow, fast. Then we add this load to it. Right? A little bit faster than that. So you might be like 450. And I would like to add a transition between
these two clips. Because all of this,
just one click. You can see all of this is
about the mountains clip, but this one is the
green mountains clap. I want to add a transition
between this one and this one. We can go to Effects panel. We can use v. Yes, you're right. The cross dissolve
really like it. Especially F. F we have a repeated frames. I want to add a transition
between those two. This clap, Okay, in
this club and this one. So this clip and this one needs to have
a transition between. And if we tried to
flip any of these, you can just add
the cross dissolve. But it says insufficient media. This tradition will
contain repeated frames. Okay, let's see how it goes. Like this is the one
you got what it means. So it is like
deleting the part of having the speed ramp
and then moving again. So we take this one
off and they go. So in that case what we did, we go to the project section. Here is the thing, new item. This one is very
common in Premier Pro. We can use a Adjustment Layer. We can have it here
and we can add it. You top of delays. We can have it like as we said, it's better to have
five frames after. We drag adjustment layer
and five frames before. So we can add the transition layer and go into the effects,
cross dissolve. You go what he says,
this is the result. It's like transiting. Okay. But you can
have this as well. From this side. You've got the transition now. Instead of having it, okay. Instead of having like a sharp cut from this
one to that one, which is quite good because
of the speed ramming. You can have it. If
we enable this one. You can have it like
this one or inches, another one, like
this light one. You've got it right? Okay. And this lighter, we can make
it much faster than this. We can bring that one to
this mining in no time. But we prefer bet. Now it's sliding his resume. And you can add that
slower than this. Alright, so we'll just
make it one more frame. Frame. So it takes the next
layer. There's a result. You can drag this and so on. Okay? So in case I want to make it this way because
of the speed ramping, I want you now to add a
text which is the next one. And it would be your
class project section.
7. Templates& Lower Thirds: Alright, so we're back again to another lesson
about Premier Pro, the latest version
of Premier Pro 2022. This one is recorded today. We're talking about
this templates. You can see on this right panel in the central graphics panel. As you can see this
video desk club that we used in
the previous ones, it is a little bit
different from the one because I added a
color balance to it. If I toggle this effect off, this is the origin one. This is the original
one that we saw before. This is what I did. And actually we're going to
talk about this effect or this theme that is
very popular nowadays. Every people that
anyone is using, and it's very famous. That's why we're
talking about this in a little bit later lessons. But today we're actually
going to talk about templates and how to add lower thirds and actually add in templates and moving
on templates. First of all, you can
just click this on. You have the essential
graphics panel. If it's not available,
if it's not on, we go to the Windows panel and we look for
Essential Graphics, and it is off. It is unstable. That's why. So what happened if I close
this panel, click on see it. So I go to the Windows and then adding these
central graphics. It's back. So we drag this
to make it a bit bigger. And just dragging this as well. And we put some space to Old
Town line and that's it. Typically I'm not working with this sequences and this size. But today I'm just
showing you what the templates look like and how to, you know, to play with. Anyway, let's start by importing the stem blades to Premier Pro because Premier Pro doesn't
come with these templates. These templates
either can be both through Envato
Elements, motion Array, other platforms
like I don't know, maybe Adobe ten blades, that some templates
regarding Adobe, I think so. But I prefer to buy by some of my motion graphics
and designs and templates from motion array or Envato elements because I'm really comfortable
where they're at. I just search for it and
I found it immediately. Anyway. So what if there is a template that I want
to add to my timeline? And I want to add it
first to Premiere Pro. You can come to the
Essential Graphics panel and then you can go down. And this icon says install
motion graphics template. You can click on it. And it takes you to the folder. Just actually preparing the
folder, just right here. Okay. And as I told you, you
come to the site of it. You come to its Application, Control C, Control
C, that location. You go back to Premier Pro. You go to the search
bar, Control V. Press Enter. There you go. You find your templates
that you downloaded, the brush call-outs
templates and the brush lower thirds and
the brush titles that we're talking
about lower thirds. So let's just put
any one of them. Typically you cannot. If we press Control a or it can
not take all of them. You just can only take
one of them dressed or select any one of them that
you like and then click Open. It's going to be
added. But because I added it already before, that's why it's red here. So if I press O, now let's go back to
the lower thirds. And so you can see that
it's number 11, Okay? Lower Third 11. And we imported the number Fed will
lower third 11. Okay, so what if I want to
add all of these templates? Just buy 1-click. I would simply, instead of just going to install
motion graphics, I would simply go to the
edit to these three dots. First we go to the
Essential Graphics panel. Then we press manage
additional folders. As you can see here, I'm adding all my templates
in the form of folders. And instead of adding
them one by one, because it takes a lot of time, much time to waste. So instead of doing this, you know, selecting the
folder and pressing Add. Go to do it. For example, this one. I just select that one and
then select the folder. It's added that so because I added him earlier, I'm
not going to happen. But you would find
all of them here listed in your timeline. And then you can come
here to the local. And then instead of doing this, you press the local one
and you choose the one that you named already
regarding titles. And then you go back to disable this and
you see the titles, the templates, or
to download it. But today we're talking about
the brush lower thirds. So, um. Taking this off, okay, So what we do is this. We just drag the template
to our timeline like this. And it's taken time to download, but that one was quite fast. And then we press the space bar and our keyboard,
which is the shortcut. Pressing the Play
button. It's played. Let me do that again. That was at how to manipulate with Alan. We can manipulate regarding
the graphics parameters. We can regard them doing this
and bringing it to decide. Okay, let me just
disable this one. Bringing it to the slide here. Okay, That's the lowest said. Then replay it again. But instead of doing this, I'm just control Z,
control Z, and that's it. That's it. We can control it from here. The Edit of the template itself. You select the template,
you go to the edit, it takes you to the edit
bodyweight, line one, line two because this
is one is line one. And this one is line
to line one says, there's something
called a lower third. And instead of doing this, we're going to call him Adam
Patti, which is fatiguing. But I would prefer to type
all of them in capital. Or maybe we can just do the capitalisation right
here. That's much better. Then it's giving you the
option of their properties, which is to choose
the text properties regarding the text added
to your Premiere Pro. And this is gonna be splitted
one from this lesson. How to note the ad, dextran, how to manipulate
the text and so on. And from here you can
just go down to the next and control back to go, Control Z to go back
to the original one. Then you can lower it.
It's up to you right away. But I do not prefer
to do it unless it's a little bit
bigger than the frame. The frame that is
surrounding it. Then the tracking a
mountain instead of planes, this one, you can just play with the line itself,
the line position. Josie, go back. The y access controls,
you go back. And the lice can itself, we can bring it down. Bring it up. You can see it's not
freezing, It's not pixelated. But if we make it here
pixelate in a left-handed, That's why I said we're not
doing any any modification, any adjustments regarding
the graphic parameters. And instead we're actually
editing the template itself. So here we can manipulate it and we can
manipulate the brush is K, you can manipulate it. And also you can manipulate the text file if
you wanted to felt, if you want it filled and so on. Then you can bring the
text to the middle. Okay. This is number one. The next line one. Right? Well, I'd prefer it
to bring it back because it's really common
with the second one. Line to we can go to it. Text fell. Oh, maybe. I don't know. I don't know. Maybe we can just
make like Made Easy. We can talk like Made Easy. Okay? So I prefer to type this one as Premier Pro editing. Okay? So in that case we need to lower down the
scale of the text. Whereas it lying
position lines kale, Okay, The next, a
little bit lower. Alright? And needs go. The text itself needs to go up. The y axis. Here is, this is Premium Pro thing. Then we'll go down
to the next one. And instead of
making it unfilled, it's failed now
Made Easy and snip, it needs to be a
little bit smaller. And we can change the
color to make it yellow. We can also change
the brush color. I can make it black
as well. Right? Then we can adjust
the brush scale. The y-axis here is OK. So that was it for the first
line and the second line. We can just be
manipulate the text, the line, the whole thing. Now if I want to manipulate the whole template like the first line and the
second line, both of them. It can just easily
manipulate them from here. Then we can scale this
down to maybe 60. Okay? Then we wrap. Okay, So after we positioned the template
to the lower third side, people might want to bring it to the lower right
side and the bends, but we prefer to have
it to the left side if he's speaking in
English, it's much better. So let's see how it looks like. Okay, this is how it looks like. Then you can drag it from the
end to make it much slower. Okay, well, here's
the thing. Goes away. Boom out any, now without
having any science before it. And he just goes
out of a sudden. Okay, so what to do with this? You can typically do this at
a temple default transition. It fades out, okay? Which is not the thing
that I prefer personally. However, I want to do this. This is a advantage
track a little bit, but I'm giving you because
I want everything to be attached and completed. So I duplicate this
one. How I did this? Control Z and go
back, you select the layer that you
want to duplicate. Press Alt on your keyboard, drag it, take it away, then go back to make it. So what happens? It's re-install him again. Okay, So what is,
what is the point? The point is to take
this back, okay? And to reverse it, this Beethoven limb show you how this goes into the speed. And it's this tell the same 100 per cent,
reverse the speed. Press Okay. And as you can see this little marks as the end
of this layer is decide. At the beginning of
this slide is decided. So no, no, no. I want you to play it
from the beginning. So here is the client was up to clap was
archives template. Templates comes in and it's about to go out. That's it. So it went out the
way that it wins in. Okay. So it went n like it's a brush and it went out like brushing out
as well. The same. Okay. Let me make it more clear
with a cleft, with a voice. Of course, we can just
do this to decide, okay, then we drag this as well to
make to have enough space for our clip that we wagon on. Okay, So this is
how it looks like. And now we want to
clap with a voice. In that case, I'm
going to import another one, birth control. Okay? That would be
existed, of course, in your project section. And we want to add
a video from Alex, I think so his name
is Alex on YouTube. I just downloaded one
because it didn't add any to his video. The first time I
saw it didn't add any any templates,
any lower thirds. So that's why I
wanted to have it. Okay, so we're taking
it out to the version one, taken out x. Okay? Then I'm going back
to the original size. Of course you can manipulate
these, the icon view, all the list view, if you know the names
of them and you don't know and you don't want
to see the view of it. You go with the less. But if you are like me, dislikes to see the view and scroll to hover over the video
and you scroll over the, the clip, the footage
that you imported. It's better to have
them in the icon view. Okay, so let's grab this or maybe let's have
a new sequence. You sequence from this clip. And as you go into
lesson is going to say, is going to introduce
himself, What's up, guys? It's almost like snowmen here. And in this video you're
gonna be learning how to speak and express
yourself on camera. So how to speak on camera, this is the topic of his video. Before just go in
the disclaimer. You can just take
all of these off. And we can work on
this short clip. And instead of
working on the whole, okay, so I can add a view to it. Instead of starting with this, we can just have this, the beginning or the start of the video and apply the
default transition to it. And instead of being that long, Reagan, lower the duration. And it opens. It says cinematic, cinematic opening like that. Alright, so in case his
name is Thomas Alex Norman. We're going to add this template to identify his identity first. Okay? So we can make this a little bit bigger
if you want to. You can see him clearly. Go to the Essential Graphics and have it go to the Windows, search for it, and he
will let go for brands. Then you can choose
multiple of these ones. But I prefer to go with
this one because it's very unique and very simple. Just given the name and
given something about his. Okay. It says, okay, we click
on it, go for line one. We say his name is Tony, Alex, and we capitalize
most of them. Also. We can go to the line two. We can say he is
talking about how old. Guess how to talk on camera. We also it is okay. We can just regarding this, we can do like the
text itself scale, we can lower it down. Comforter token camera. Just affect the brush. And also we can change
the brush color, make it black, and
the fill color. We're going for yellow. So this is how it looked like. But we sell have one move today. We are going for me
this time. Bring it. Why don't we, there's
something called a safe margin. Also. What guides? You can drag this from
this little icon here. It says Watson editor. You can click on it. We search for the
safe margins and also you can drag it because I have it,
it's already here. And he says, Show Guides. Also going to need this one
which is this show rulers. The rule is the one
that he can bring. Let me show you how you bring the lines from the
horizontal line, the vertical line, run
lines from the center line. And you can see exactly where
you don't have your lowest. So if I'm going to
do this like free. Okay. This is the center. This is lowest section. This is the center. 1234 sections. I'm going habits to
the lower third one. Okay. Yeah, it just right here. Okay. So I'm disabling this having this lower third
or the safe margin thing. And then I'm taking
this to maybe FT, bringing it to this layer. Also down here. It's way better than one. Okay, guys, thanks
Alex Norman here. And in this video you're
gonna be learning how to speak and express
yourself on camera. So that was at Thomas norman not adding denomination because
it's a little bit long. And how to talk on
camera this height, all of its video on how
it's open camera and so on. So you can add this like this. And also you can
do the same trick. We can do this. We can take this Alt drag and bring it here
and go to speed. And also you can lower. Okay, you can drag the end. It's not allowed. So you can just do this. Simply bought this
over this one. Okay. So comes in, let me show you what's up guys telling
us, Alex, no one here. And in this video you're
gonna be learning how to speak and express
yourself on camera. And say, I was doing the
clip that we work in pool. And also there are lots of ways you can add these low fat. Some people like to add
it to the right side. She didn't like to
add it to the middle. And it's quite popular
like this one. You can add it like line two. You get the whole thing. Line to where he's
lying to position. You can drag it to the middle. Okay. And people loved to
put it to the middle. Just like this. Okay. Go back. It looks like this. So what happens right now? Because we need to
be made this one? What's up, guys? It's
almost Alex, no one here. And in this video you're
gonna be learning how to speak and express
yourself on camera. It is much better
with the lower third. And that is how to
add Lewis adds to your timeline how to manipulate the lowest cost that tons of, like maybe the brush colab. You can actually
work on it as well. You can have a call-out. This something goes out from this person,
from this point. And it is giving you this person is something his identity and it is identifying the the thing that the
line comes out from. That's why they call it, call out and so on. This is how we deal with the templates regarding
Adobe Premier Pro, the latest version of 2022. Next lesson is going to be mostly about coloring and so on. Let's keep moving.
8. B-Roll Editing: Alright, so there we go. We continue this class. The Premier Pro
2022 and the lat, and the latest one that we did, the transitions and
the lower thirds. And it was about Thomas
Alex Norman here. It was talking about
how to talk on camera because you need this
code in the near future. That's why I wanted to add
such a clip to our class. Of course, basically, today
is all about adding a biro. What is the B-roll
and what is the role? The role is the clip,
the actual clip, the actions that is taking
place in your timeline and your fronted clip as this
one like Alex, no one here. And in this video,
this is in a role. Thomas is talking to the
camera and you can see Thomas. Nothing else to say Thomas. And you're not seeing what
Thomas is talking about. He was saying that he would actually talk about
how to talk on camera, but that doesn't happen. That doesn't happen
on this short clip. I'll get. But let me show you an
example of a B-roll. Because the B-roll is the complete opposite
of an Arab Bureau, is defined as the
supplemental footage N2 or added into
the main footage, which is the main clip. So maybe I'm talking right now about something and then they
show you something else. Okay? So let me give you an example. After though, unless
you would actually get everything about
how your day is, go and add that moment and would recognize that
you need to stop chatting at midnight
and he needs to sleep a little bit
earlier than you would know exactly how
many hours you need on daily basis to finish
your daily tasks. Alright, so this clip
that you saw right now, it is one of the clauses that it is coming
soon, of course. But as you can see, is saying that he was
talking about how to manage your time and
stopped wasting your time. And on the meantime, it shows the preview
of someone hanging up the phone and scroll it on
social media or something. And then the transition of
stop came on to the footage, into the footage and took place. So that was quite good
as a bureau and let us know how to do this
on our Premier Pro. So first of all, we need to before clubbing or before important the club that we need. I would like just to
make it easier for me, just to say like to organize these clips
and these folders on the main panel because this has come in
later how to organize your folders and
Premier Pro and zone. But let me just do
it for now quickly. So this is like how
so-called camera. So it's like was talking
about the transition. No, it was talking
about the lower fence or templates templates lesson. It taken everything like this is the lower third
that we used, okay? Taking it here as
well on how to do it. One camera at the
sequence, and it's clean. Now, let's import the
clip that we needed. I think it's opened
here somewhere. It is here on the folder. You can find it. Okay. I'm going to show
you how to do this. This is the B-roll
that we have in this is the a row of some
of that person. Okay, Let's drag all of
them to our Premiere Pro. Let's give him a new pen and
call it the wrong lesson. Okay? Yes. Let's I'm just selecting all of
them by some control. Click Select, select, select, and drag them all enter
the B-roll lesson. But here's the thing. We can have a B-roll here, okay, I'm going to have a
new sequence was this one. Okay? This is the one that
I'm showing again, okay. Just in case you're
wondering, after doing this, you would actually
get everything about how your day is go. And at that moment, he would recognize that you need to stop chatting at midnight
and he needs to sleep a little bit earlier, you would know exactly
how many hours you need on daily basis to finish
your daily tasks. Okay. Let me just mute
this one because it's dropped in my voice. Here. As you can see, he was token and then another another
thing came in. And it's related to
what he's saying. That's why we said
it's a supplemental. It is adding more
information to do the thing that you're
talking about here. So going back at gladly, I'm using my arrows in
the keyboard by the way, forward and backward, forward
and backward and so on. So forward, the footage came in. And then we added
a templates to it. So it's becoming more
engagement and so on. Okay? Okay, So how to do it is
let me just make it clear. So this is the clap was out. I'm just dragging
the clip was out. Okay. Sorry, let me just unmute desk. After doing this, you
would actually get everything about
how your day is. Go and add that moment. He would recognize that
you need to stop chatting at midnight and he needs to
sleep a little bit earlier, you would know exactly
how many hours you need on daily basis to finish
your daily tasks. Okay, So that was the result, the template without the B-roll. And now it's more clear to you that we need to
do this together. Here's the one. Here's the one is the phone scrolling on the social
media or something? I'm hovering over it to show you that it has nothing over it. So we can open it on
the previous section. Over here. We can
actually add all of it. Okay, We have two
ways right now. Let me show you how to add a bureau into your
a roll footage. So we have the footage here. After doing this, you
would actually get everything about
how your day is. Go cannot have that moment. I would like to add the
B-roll. Just write here. The easiest way to
have a B-Roll into your role is to drag
it the club itself, into the timeline
over your a roll. And of course, if you complain in from not
able to do this, and maybe some times
it's like it drag it and then you put it
over your a roll, your terminate in it. It's okay. But actually it's not having
a good transition over it. Let me show you how in this one. And instead of just doing this, we can actually close. Look, this track, the
main track of our role. We're talking a role
and biro ran out. Okay. So we're adding this
over it just in case you're trying to
add it over the a role. It's not taken place, it's
just coming on top of it. Okay. I want to make it shorter, so I drag from the end. Okay. So now we have more space. Would recognize that you
need to stop chatting at midnight and you need to
sleep a little bit earlier, you would know exactly how
many hours you need it. Another way of shortening
this class is to have a cut. Then delete the remaining
part of the Oakland. Okay. So let me
mute this one again and go back and
listen to it again. After doing this, you
would actually get everything about
how your day is go. And at that moment, it would recognize that you need to stop chatting at midnight and he needs to sleep a
little bit earlier, you would know exactly
how many hours you need on daily basis to finish
your daily tasks. So that was how to add a
transition, how to add, sorry, how to edit template
to what text and so on. We can do this later, but let me give you
the second one how to import your B-roll
into your a roll. So let me just take this off. Okay. That's, that's why I had it
on the previous section. Of course, we can just
unlock this track. So here we can do the
effects and control feet. We can close this panel as well. And if you would like
to open it again, we can double-click,
double-click on it. And now we can import either
the voice or the OD of this club if there was
a clip declared on it. But this globe hat
doesn't have any audio. So we can drag only
the whole clip, or we can actually use the IN and OUT keys
on our keyboard. So I would like to
start from in Ambros and I on the
keyboard playing it. Actually, I don't want
it to start from here. I want it to start
just from here. From the point he
is about to scroll. So this is the end and I
want it to be, That's it. The Spacebar again. And then now if I'm going to drag
it, I'm only dragon. Okay, I'm only
dragging this section. Alright. So I'm dragging it. Okay. But I had no idea
where to put it. So before dragon, I would
just play the video, the club that a
role that I have. After doing this, you
would actually get everything about
how your day is go. And at that moment he wouldn't. I would like to add the
B-roll just right here. So in order to have a mock, it can market as
well using the I, which is the input indicator. Okay? And leave, it just
looks just like this. And then go back to
that previous section. Drag the clip at an ear. Because we're adding, we're enabling the snapping
and timeline, which is after pressing S. Because if you're not
okay, let me drag it. It doesn't snap,
doesn't come to it. So in order to do this, we're actually snapping it. Dragging the, sorry, what
was that are Snipping. Then we drag in the beautiful. This is how it looks like. Recognize that you need
to stop chatting at midnight and he needs to
sleep a little bit earlier, you would know exactly
how many hours you need on daily basis to finish
your daily tasks. I would like to make
it shorter here. Exactly how you would know exactly how many
hours you need on daily basis to finish
your daily tasks. That was it. Okay. If I want to get rid
of this analysis, highlighting the
indicator that I regard to the input and output we can have in
your indicator here. Forget about it for now, just for now because
we were using this in the exporting
settings and so on. And of course we can use
it as we did just run out. Okay, So I would like to add the the transition or the
template that says stop on it. So I will preview or browse some of the templates that
we already have here. I think it's that one, its template lower third, 17. See how it looks like. Okay, It's quiet loading. Okay. So I want to
make it shorter. We can drag the end of it. Okay. It needs to be
tweaked a little bit. So brush pack, I would say it's an instead of this,
we're diving. Stop. Okay? And we would make
it old capitalist. And I would leave it
the same thing, solid. The architects properties. And I need to to bring
it to the middle. We go for effects controls and we can make it a little bit shorter and drag
it to them middle. We can use the safe margins. Okay? This is the safe
margin of the center. This is the safe margin of the center of the middle. Okay. So you haven't this year. So I can put my text next o vertically aligned
with this section. So I'm looking forward
to texts possession. It's the X line. There it is. Okay. But I think the template itself needs to be
a little bit lined. Think it's much better now, if we take off the Safe Margins. As you can see, it's coming in. But as you can see that the
template one to n just after, I had no idea what
is going on to stop. So I just need to
delay this little bit. So what I did, I did
a mistake right now. I made a mistake,
a huge mistake, which is I dragged the
beginning of the clip, the beginning of the assembly, which is actually
the transition, which is actually the animation, the keyframes takes place. So as you can see
here, it's moving. It's taking place, the brush and the paint things and so on. So in order to do this, I could do like, Yeah, then drag the whole
template to the indicator, the timeline indicator, and
then drag the end part of it. So sounds like this. After doing this, you
would actually get everything about
how your day is go. At that moment, it would
recognize that you need to stop chatting at midnight and
image displayed earlier, you would know exactly
how many hours you need on daily basis, definition of daily tasks. After doing this, you would
actually, that was a, that was for adding
B-roll to it. And of course you can do
this same methodology to any B-roll that you want
to add to your footage, whether it's gonna be
like a drone footage. So you want to add a drone
footage to the landscapes or whatever to your footage regarding having a YouTube
video or whatever. So you add it the same way. You have two ways to add it. Either just drag the main clip TO after locking your track, your arrow drag, or you don't have to
attract to look at as well. You can just drag it over it. But in case to make sure
that you're dragging it on over it in. And instead of just
replacing that, you lock your A-roll track. And also you can use
the preview thing. And if you want a
certain clip from this, because this is quite
easy for you to do this using the I and O indicators
in your keyboard. So this is at 40 roles. I hope you can do
something about it in the project section. Let's keep moving.
9. Keyframing & Annimation: Alright, previously we had this template animation
on the previous lesson. And that was quite easy to pop the template on the tone
line and that's it. But today, and instead of
just using the template, it's gonna be totally different. We're going to learn
the keyframes. And instead of just button
down at a template and just get rid of any skills and being like a
copper-based passage. Alright, let's get started. So basically that was
the clip that we did. The template with. Images. Remind you, was it again? What's up, guys telling
us? Alex Norman here. And in this video you're
gonna be learning how to speak and express yourself. And as you can see, the, let me just mute this for
you to be able to hear me. As you can see the
template when n, like it fades in. Okay, Let me just
move frame by frame. Then the lower third, the other lower third
went in as well. Okay, So in order to do this, let me just make a copy
of this clip again. Okay? And I did using, let
me just go back. I just pressed Alt and
then drag the first leg. Then we're having a copy of
that loop in our timeline. Okay. I would like, let me
just make it clear. I would like to add the animation to a text
I'm adding to this clip. So instead of just saying
I'm lagging on a template, I just mentioned the one, the lesson that we talked
about the text and so on, about the brightness, about
the opacity and so on, and how to position your text. And bought today, we're
talking about keyframing. Keyframing is all
about this panel. It's about the motion
graphics panel where you're going to use the toggle animation is scale
toggle animation as well. But instead, we're
just going back. Here we go. Let's go back and go for text. And the shortcut for this
would be to press T in your keyboard and
press anywhere in your image. And let's type. His name was Thomas. Alex. Alex, and we go to the
Essential Graphics. And as you remember, we center this text horizontally and then we'll center it vertically. So if we, if we enable
the safe margins, you can see it's totally
in the middle of the club. It's not taking any position
of the fundamental. Alright. Now, I would like to add a
background to this text before animating it to sound Otis
seem a bit more better. Okay, So we'll go for
the essential graphics, this central graphics panel, and we need to go down, to scroll down and go full
background, enable it. Okay, then we're
choosing the color. I would like to
choose black for it. Or maybe we'll go back to this. I would like to go for white and the text would be in black. Okay. I would go for I'm going
to select the text first. I would go for a
white background. This text itself would be
the fell would be in black. And the background should
be like, you know, covering the text and goes beyond the
borders of this text. While you maybe like 26 inches or maybe something like that. Then the curve, it could be
like COVID from the corners. And also the opacity
should be like 100%. It's much better now, let
me just turn this off. And this is Thomas,
Alex. Both cos d. Let me just make it clear. Okay. The font changes the
game from upside down, so that's why we go. We're going to use the same
fold we used on our template, which is done with Alex,
which is the hock phoned. And then we're going for solid. It's solid but we're making
it o bolt and all caps, okay, gold and gaps. Maybe Italian would be
a little bit dramatic, but I'm not like an unlikely
to be italic in that case. So we're sticking with
being just fixed that side. Alright, so in order
to have this text, we had it on the
Hock text property. Now we're moving to make
it down a little bit down. I want it to be a
little bit bigger. So I'm going for
scope and making it 120 and then bringing it down. And actually I need to maybe
to reposition it again, exact same tunnel. Okay. Then I'm bringing it
down like just as one. And as you can see, it's yeah, maybe we can make it 100 again. Seems a bit thicker
than the other one. So take things again, go
into the middle. Okay. And I'm adding a, another one. So I'm adding this on top of it. To duplicate it, have a
copy or Alt, drag it. That's it. Bringing it down. Scale it down. Maybe like 70. Okay. Ad. Alright. Then bringing it down just, just below it. Alright. For this one, I'm going
for black background. And this is the upper one. Let me just name it. This is the lower one. For the other one,
we're done with it. Well, for the lower
one, we need to work. Yes. Hello would be still in black or the background
would be go with like maybe yellow
goes to l over two. Like forget about what I choose. The one that you like the most. Okay. 14. Okay. To color. The text itself
would be in blue. And the background will be
n. Let me copy this one. Paste it here. And
the background would be n black. That's it. Okay. So that wouldn't be the text. It should be like how
to talk on camera. So let's say we would like to have
this lower third and very smaller size
than the upper FET. Okay? And of course we believe
to be an Center, I will write it
goes just blow it. So the signs was
like maybe I'm maybe 6065 putting into the
set to the center. Little bit, maybe something
like that. It's outlooks. Of course the template would be much better and much
easier for you. But in case you cannot afford such templates to buy
from Envato Elements, motion array or whatever. So you just go with your
skills and learn more skills. Other than thinking about like, I should have this
template to be good, to be perfect and so on. So let's keep going. Let's do our best. Okay, let's be more creative,
ladies and gentlemen. Okay, So let's work
with the animation of the first row or the third, the upper one, it is the
toll miss Alex, think. Okay, First of all,
let me just make it clear regarding the
Toggle animation, so on. There's toggle
animation enables you to animate or manipulate how the text or
how the layer that you icon is going to
appear on the timeline. Okay? So in order to make sure
that this position is the right position that you
want your text to be in. So I would like to make it from the
outside to the inside. Okay. So I would like to
have like maybe a few frames to the front, like I would leave makes sense. I would like 1234567, okay? And I would add a keyframe here. Let me just minimize this. So 1234567, okay,
The first one I wanted to first
keyframe protects to be outside the frame. And then it goes and you
can see it was outside. Went and let me play this one. See how it works. We're going about this one for
now. Let me just turn this off because it
didn't go anywhere. It just doesn't have B
in the timeline here. Okay. Comes in. But in a
very robotic way, like it moves like. So robotic news frame by frame. As you can see, the code doesn't move smoothly or something like that as you can
see in the template. But here, here's the thing. So to work with this animation, we would like to bring it, bring this one to life. And then this as an
ease out going forward, the keyframe that comes into, make it n go for temporal interpolation
and go for a reason. Okay? As you can see, it's
much better now. Let me just make that clear. So those like you said on it is much better than
having just a robotic way. Okay. There's another one like okay, let me just make it this
like it's good now. Okay. Maybe the lower one. Let me just enable it. I want to start not from
the outside the frame. I wanted to stop just from here. I would like it to be
like just from here. I would add a keyframe, go five frames,
mode, two frames. I would add another keyframe. So I would go back to
the first keyframe. I would just go to this side. I want it to start from here, but I want it to be 100% away from the screen, away
from the timeline. So I would dress the Toggle animation
regarding the opacity. I will do the same for
the next frame as well. Okay? I would go back for
this and would make the plastic 0 per cent
so it doesn't exist. But what happens
when we move on? As you can see, I'm
moving frame on frame. It comes in, it appears
slowly and still. It's a little bit robotic. So we're adding the reason
for the opacity as well. Ease out what a feat for the first keyframe and the
same for the position as well. Ease out and ease in. Let's see how it looks like. I see it one more time. So it appears from here
as it was hiding. Okay, masking. These leaves are actually like a professional skills regarding
the masculine and so on. But when instead of
using the muscular, which is a bit
advanced for you now, because this actually class
is all about the basics. So we're just actually
using the opacity and the Toggle animation skills can instead of going
forward to Moscow. Okay. So here's the thing. Like it went in, out of nowhere. It appears we can do the
same with the upper. Said. It's up to you, it's
up to your creativity. This is how it looks. But what if I would like to
add a bluer that has motion? This actually happens
with aftereffect. Regarding adobe, of course, here recently in the latest
version of maybe 202021, I think they added the
transformation effect regarding the text and regarding
the layers that you can manipulate. Stone from. The upper one, I would
like to add go for. In that case, I would
go for effects. So we're looking forward
to transformation. Let's just go forward,
transform, transform. And we'll go for this to drag the effect and add it to
the text, the upper one. Okay? And as you can see, it adds the transformation above
the motion itself. So what is the thing that I would like to add regarding
the transformation? Think Mr. saying that moves n without any bluer
regarding the mission. Okay. It's just y equals alphabet. There's no blurry thing. However, I would like to add a blurry thing regarding this
sum add in a keyframe here. Position, keyframing.
Judge, right here. So if I take those
off to be the same, same keyframing is not
the same position. Okay? So this
diversity of keyframe, we would like to bring it to the twenties when
it comes in. Okay. So we're adding this isn't, and the outcome is the same. What is the ninja track
that we'll do in this one? It is to go forward to the shop tool angle,
the shutter angle. We can manipulate this, maybe to 7073,
something like that. As you can see, scales n nodes, n Thompson is totally
wrong business. Maybe because of the anchor. Things are just see now. It is because of the ANCA. Okay, So forget about it. Okay. We can manipulate this from the, from the beginning as well. Okay. So tan induced off belatedness. Doesn't want to go away. Okay, something is completely
wrong with this one. So let me just fix this
one and then come back. Okay, so that's thought out in the transform effect
to the upper layer. Then we do the keyframe
going seven keyframes. One too, because I'm pressing shift and move to
the right side. That would give you
like five frames. And then adding the keyframe,
the other keyframe, I'm going to bring it to
the output layer. Okay? The full doing anything
we're rocking with shutter angle or making
it like needing 70. Okay. And as you can see, the blower is just right here. This blurriness you can add. It will increase in this. Okay. I regularly go with 150 and it's just
something like that. Who is the ease in and ease out? Ease in. It's completely
different, changes the game. Let me just make it clear.
So you saw that one. It's like racing and then Okay, We can do the same
as the lower third. Or instead I would
like you to add this as a class project. Go for it with the
class project. So this is gonna be the
class project for you. Adding the lower, making the
lowest set as the upper one. Okay? So the upper one
has the animation, bluer animation thing. I would like you to add
it to the lower one. Of course some of you
will do the same length. And instead of just doing this, we can just go for they're not. Then go forward to EPA. I'm copying that the
effect itself by pressing Control C and
go for the other one, and then Control V comes in. Instead of doing anything. This is the thing that I wanted to offer before you go
and do such a thing, because it does have
some pressing Control Z. Okay? So it's out of the way. It doesn't exist anymore. So this is for you
as a class project. Let's listen how it looks like. We're distinguishing. What's up guys telling
us, Alex, no one here. In this video, you're
gonna be learning how to speak and express
yourself on camera. It is quite complex. The last
part here that went away, just one frame like
that was a good, Okay, you can manipulate this forgotten your
class project. Let's get moving using
the keyframing thing. And of course,
we're working West, like manipulating
more keyframes. And also, which is
very important to add sound effects to
this keyframe thing. And it makes it more
cinematic and makes them come to life as well.
Seeing the next lesson.
10. End Screen & Effects: Hello and welcome back to
another lesson of this class. Basically this is Adobe
Premier Pro 2020 to the latest version of
Premiere Pro and 2022. And this is the lesson of having an empty screen
TO youtube videos or maybe to your
Instagram videos, GO anywhere videos, you
can add an empty screen. And what does it, what
does that look like? It looks like this. Alright guys, keep filming. Enjoy this challenge
and goodbye. Alright, there we go. So this is how we made this end screen footage
in our Premier Pro. Let me show you how we did that. Basically the
vending thing here, you can just manipulate
this and have a naval off the back and
boom, nothing spending. Everything is like good. I just muted to
collapse in order to lessen to me and be able
to hear me quite good. Thomas. First of all, I would
like to mention that we got this music
from Adobe stock, from Adobe music itself,
Essential Sound. And then we browsed for
ending and then we have at the end of a song or not, maybe this is just music. So we brought this down
and we just ****** or lowered the volume to
minus five dB, which is good. Later we can talk about how to manipulate the background
music and so on. Okay, So for this end, as Creon, why would you need it? Basically, you would need it to. I'm making progress to your next videos or
maybe the previous ones. Sorry, the previous videos
or maybe the next ones. Because as you can see, I'm just giving you
a hint about it, which is adding the same
footage of the same video. But in your case, you would add another video
or a previous video that, that is coming next or up next. Or maybe you can watch, instead of just having this
up next to you can change it. To seguing. Also watch, or maybe you can
also find out these. Or maybe you can, we can just type anything. It's back to your personality. Like you can type anything, like to shout, shout out
for these do videos. Or maybe you can add
more than two videos in your end screen, of course. But this is one
of the good ones. Okay, So how we made
this end screen, Let's do it together
from scratch. First of all, let's have
a the outro of our video. Make a sequence from it. Says we have a new sequence. Okay, let's forget
about new sequence. We can just drag this
here and we can take this as a copy, right? Alright, so from here, this is the altro of
Thomas Alex. That's it. How to add the indiscreet. First of all, you can do the
end the screen manually. Like you can make your
unscreened from scratchy, add a background paper you're
doing the frames and so on, and you add your logo and so on. But as you can see, there are actually
more than one thing. Like this background is like more cinematic and
more emotional task, much motion than any other
background you might add. That's why you can actually
go for the easiest part, which is to use a template. This template is
actually sponsored. No, there's no sponsor here. This is actually
from Adobe itself. We can go for
Essential Graphics, go for brows, go for Adobe. So it was actually be
like my templates, but you would go
for Adobe stock, then you would
actually look for, and this is how we get this 1. First of all, you can
find this premium of a no match in search results. But we will go for free
on select the premium. And as you can see, it's only a few here. And you can't find your
end screen templates. So you type and press Enter, then you can see
more than one thing, more than the screen. Over here. I actually like this one. Seems really good. It shows you, when you hover over, it shows you how you can
change the colors. As you want. You can change the color
and the theme itself, the gradient to the
one that she like. Of course, once I
liked this one, I would actually
go for download. Okay. Okay. Then I'm going to drag it to
our timeline already here. But in order to make it
like closing the outro, I need to drag it. Few frames before
the entrepreneur. I would like to make
sure that no black. So that means 123455 frames needs to be added to the video. Okay? So I'm moving by frameshift, left arrow, and I'm
bringing this back. So no black thing from
the image background. This is how it looks like. So this is the template. It goes like desk. It's adding a space for
you to add your your VDS. You're up next videos and add your logo use and of course your image, your profile image. And this is how we're
going to do this. Let's do it. So basically, forget about
manipulating this and let's bring the two videos. First of all, I
would like to say that I brought the image here. Let me show you this image here, brought it from
the video itself. I went back to the
beginning of Vienna. I found this one quite good. I went for having a
photo from this one. I one for this
option Export Frame, which where you can download
or you can get from the bottom editor and
go for the camera icon, drag it, would find
it here. Go for it. Okay. Then he can press on it. It says the format is PNG. This is the best. Forget about the JPEG or
the GEF, okay, if you will. Of course, go for it. I'm looking for
PNG, I'm browsing. I'm adding it to the footage. This is the folder. It's that look for it. They just write here. These are both eyes elected to explore. And that's how I got it. Then I added it to
the frame. Okay. I went back and added it
to the frame as a footage. This is how we added it. Right. Let me add it again. Okay. Let me drag it. I
dragged it is the same. But I'm going to delete
that one. I don't need it. After this. I added it to the timeline. But this is how it looks. It doesn't look like a
circle, as in this one. It looks like a
circle. How did it is? This is quite easy
with Premier Pro. This is why we call
me is the best. Okay, you go four
seconds, you go, sorry, you go for effects and
type Circle sacral. Drag this effect to your image. Okay? I'm going to drag
this to make it longer. And we go for this
image effects. Alright, you can find
the Sacco over here. We can go first for
the blending mode and making it denial alpha. As you can see, something
of this photo is obvious. Now. I'm making beggar radius. Okay? We can show that
it's still cycle because if we go beyond this and then we can scale
it down anymore. So control Z, control Z. And I'm making sure
that this is a circle. And of course you
can go up and down. It's up to you from here, from the machine itself. Okay. And regarding the circle itself, you can go for this
center to the left side and center our
friend Thomas, Alex. Okay. And then we can scale
this down to maybe 30. Let's see if it fits that one. Let me just zoom in. I think it needs to
be a bit bigger. So maybe 32. Okay, that's perfect now. Okay? And, um, then adding
the default transition to it, which is the fade and
making it faster than this. So unlike maybe all 15, This is how it looks. This is the logo. Then
we can manipulate the the template itself by going to the essential
graphics but unselect. And of course the template
first, then texts controls. The title, says logo. We can say this is Alex. And scale it down, maybe 250. And then we'll change
the color JSB, next phone to talk and make
it bold. Then we'd go down. For the subtitle thing. We can write down something
like meant to be used. This is the slang that
I do like it amongst. And we can bring this down
to scale this down to sound like we'll just
seem like slang. Then we can position
it just below. So Miss Alex thing. Okay, then go in
for the right text, which is the Up next. I think we can take this down. Okay, So up next maybe
we can change it. Nice. And we can change
the font itself. Make it bold, right? And we're going to change
the color as well. I would like to make
it orange. Orange. Okay. This is how it looks
like the ending coming in. Okay. It's taken time. So this is because we needed to to like to render this selection first to run
smoothly in our timeline. In order to do this,
you can go for selecting your template, okay? What makes sure that you're not going to do any manipulations, any adjustments to it. And then after select the
night you go for sequence, render selection and wait
for it until it is rendered. Alright, so after it's rendered, let's see how it looks like. Harp sounds like how it seems like unmuting those two tracks. Let's see how it looks
like by pressing the spacebar on your keyboard, which is the blade back button. Alright guys, keep filming. Enjoy this challenge
and goodbye. Radius movie. Grade. And the local
component in a circle. Fantastic. Okay, It's messing few tricks
and tweaks. Let's do this. Let's mute this fast. As you can see here. For
the template itself, it says that this is looks
like slowly in the circle. It's loading. And then something should appear here after
the cycle is loaded. Okay, I think we can
drag this somewhere. Here. Maybe, look, it's
making something out of it. So circle loaded. And the image, the
logo comes in. That's it, great. So we can
write it this till the end. We can also do the
same with the other. Watch these videos
we can add here. Basically you can add any of your previous videos
or maybe thumbnails, maybe links to your videos. It's up on YouTube. You can do all of these. You're just doing
this and screen for manipulating and
adjusting it on YouTube. It's not able to, just, if you want to adjust the ear, it's okay, but it's not
gonna be clickable. And in order to be clickable, you would add those two and the Add screen that on YouTube
when you publish your video. Basically, I'm just
showing you something. Maybe we can drag
these two videos. This one is like, okay,
this is the image. So I'm taking those two. I want to take a
copy, now, a coffee. So we're selecting
both Alt then bracket. So we added them. The last sequence. We can make it shorter. Let's do it. Okay,
it's back now. So as you can see, it appears. But after loading
this axial loading, this rectangular,
rectangular is loading. And the other one's supposed
to be here as well. Maybe something like yeah. He has as well. At same time bringing
this to the end of the end of the club as well. Let's see
how it looks like. Both some nails loaded as well. Like this background
is moving and giving us an animation would be great with a
background music, of course, as we showed in the first place
that we discussed. So in that case, I would add the background music to the
end of just right here. So now we go to central
sound, browse in time, something like n. Then we
can take at the end of it, bound to be just right ear. The sound comes in from the
second template is closing, and it gives us a
pretty good one. See how does that work? Let's see how it sounds
like and it seems like, alright guys, keep filming. Enjoy this challenge.
And goodbye. Course, you should
be better if we made it half resolution. And goodbye. That's all really good. Some people tend to eat it for
maybe ten to 15 seconds to carry on with the
background music until a certain point after. It comes like here. So here's a cut. They can make it just like this. And adding default transition
to it goes down like this. You go what I mean right
now is it for today? That was it for the
entire screen thing regarding YouTube and other
platforms and social media. You can do this
by your own self. Adding a default and
screen on YouTube. You can add your own
template of n screen. You can manipulate
this template. As you remember, we said
you can go for edits and edits and manipulate
the background controls. It's tiled text. Even a global controls of the
global size and position. It depends on your desire. It goes back to your
personality and goes back to your fingers
are too like the most. Go for it, keep moving. Don't forget to practice these and act as this is like a
class project for yourself. And practice brings perfect.
See you in the next one.
11. Color Correction & Grading: Alright, so there we go. We're talking colors in this lesson of this
premium class, or maybe we call it
the basic laws of Adobe Premiere Pro 2022 version. Today we're talking colors and we're talking about
color correction. And to be specific,
next move in, we're talking about
color grading, which is completely different from correction and gradient. Both of us knows that, but let's be more practical
and go to the buy board here. Alright, so we have
this voltage here. This is the intro of our class, the latest class that we
uploaded on Skillshare. So as you can see here, we're actually
going to manipulate the color correction and then we're moving
to Color Grading. First of all, let me just
close all the tabs here. As you can see, I'm
going to select the clip that I want
to correct its colors. And then instead of doing this, going for Effect Controls where actually heading into
the Lumetri Scopes. And after that we
go to the panel, to the right side,
the effects panel, and choose the Lumetri Color. And basically would
find it this way. You would choose the
basic Correction and forget about the
creative curves and so on, because this is a
little bit advanced. So let's start with
the basic correction. As you can see from this coped, It's a little bit complicated, but let me just play this one more time for
you to see how it, how it seems like when
you play the video and these colors
starts to go up, up and down and so on. Right, in your
other quad and know which letters have been
used to form this word. So why are you waiting for? It's here in the car. So the one that the soldiers, right yet, this is
actually the flames. These flames on the footage is actually referring
just right here. And this is typically the face. Just make it clear. Let me
just mute this for now. Okay. Where's the face? This is the phase. But it's a little bit
complicated for Adobe to identify the exact
phase or the exact, because the lighting here is
a little bit harsh for it. That's why we're starting
with the basic correction, which is to be more simple. Our 0 line here and 100
line here must be touched, not exceeded, not going
beyond these lines. So 100% represents the watts
and 0 represents the blacks. We go here to the Basic
Correction panel. We can see the blacks. And we can actually see that blacks were actually
beyond the limit. So we're bringing it back
until it touches the 0 button. Let's do a little bit. Maybe just right here. Okay? Yes, this is
the difference. This is before. This is after. As you can see, the shadows of the artificial plants behind
it is quite obvious now. Look shadows quite
obvious now and it's more, it's more cinematic. And instead of being more flat, let me just go for the whites. Whites is actually quite high, so we're lowering down, down, down, as you can see, it's still exceeding
the line of 100, so we're lowering it
down again and again. You made me just write here. Okay. Alright, that's good now
and that's good for me. They seemed a difference. This is the icon that
shows you before. After, before, after. As you can see, the light was
quite harsh on the subject. So that's why we
changed it into this. So it's quite, it's
quite smooth enough. Let's see, not together. Let me just make a close-up. Fft. I'm trying to click before and after
y plane the footage. Now you can see the difference. This is waste moves yet. There's one because
this is really harsh. And you can see it on
the glasses as well. You know what I mean now?
Okay, that's really good. Is just the basic one
for whites and blacks. Also, you can switch between the temperature,
attend and saturation. Okay? So if you feel like your your your footage
is quite bluish, you can bring it to be quiet. Orange. Ok. This is not the case for us. I think we can
double-click this. It goes back to
the original one. I think we can go for
a little bit, orange. Okay. So before this
is after the tenant, I think it could
be good if we go just a little bit
for this because for the mid tones, of course, you now closely, this
is for quite harsh, no color correction at all. This is after. It's a bet, is to go down just a bit. Maybe canvas is quite perfect. Okay, let's play after. Great. Actifed. Okay, So this is the basic one. We can just go for. Saturation. You can do
brand this to saturate it. If it's not saturated. I think it's quite good for us. It doesn't need any
situation may be like goes back to 100, maybe a 110, Maybe.
It's quite good now. Exam. Loves me. Yeah, it's quite good
now let's iteration 110. It's quite perfect. Okay. And for the rest of this, it's all about
lighting and so on. But I think I managed to
diffused lighting quite good. So it was quite good. And of course, you
can see the triangle just right here on
his face because of the lighting from the back. This one, it
actually giving them the triangle that all of this photographer
is talking about. And it's quite unique. Achieve this kinda,
kinda correction. And your lighting. This is, this is it for
the color correction. You can just manipulate
the blacks and whites. Remember, 0 goes for blacks
and 100 goes for whites. And then you can manipulate
the white bands. Of course, Bach, I'm not, I'm not recommending to
do this automatically. Do it manually by doing
the blacks and whites. And also you can manipulate the temperature descend and
the saturation as well. This is for the basic, Let's go for the gradient. For gradient, It's
basically about, given a stylistic
style to your footage, like you want them to be
more grainy or more team, rainy, night, grainy, whatever. This is very common nowadays. Also there is a trendy
theme that, that is cold. Maybe orange teal, maybe
all teal, orange wherever. You can do this by going
for the Creative tab. Some people say
that you can go for a shadow tint and the
highlight and then you can drag them to the orange
11 to the opposite one. And that's it. Let's see, before,
after, before, after. It's quite okay. Go back. Now, this is it. Alright. Now as you can see,
some people will say, This is really good for them as a color gradient because it's color gradient the whole clip, not a set and not a
certain correction for it, its gradient, the whole thing. Alright. Okay. But for grading, as we
just bring this back to 0, as we say, gradient
is all about having any complete color grading
to the whole video. So I'm not actually
working on a clip. I'm just going for having a just meant layer
going forward, the top here, adjustment layer. It's gonna give you the same
settings of your sequence. So you just click, okay. Then you drag this
to your timeline, drag it till the end, and drag it to the
beginning of your click. Okay, great. So we can manipulate
the color grading. Now. I'm just making again,
we can manipulate this. Okay. Great. It doesn't like, okay. So for the adjustment layer, we can go for lots, lots that has been
prepared for you. They can choose
among these ones. It depends on what
camera you're using, on your shooting and what
microphone and so on. So it depends on
your profile picture that you add to your
camera settings. It depends on many,
many, many things. That's why we're
talking roughly here. We're talking basic, can
choose among these lots, among these presets
that you can use here. Maybe we can go for
the gold, orange. As L goes orange. Some people say that
this is quite good. The intensity needs to be
like lower, maybe like 30%. Things. Some people like this. Maybe some people go
for codec, maybe Balin. The codec seek Clean Kodak, see. Okay, some people say
it's quite good as well. And this is how it looks like. Before. This is after. I can see an icon
tell about before is quite better than
the off to one. Because too often one
is like, you know, is attached to
certain settings and satin manipulations and so on. So instead of just roughly
choosing anything, this is gonna be more
advanced it for you. So just be waiting for
an advantage on all. Maybe have a certain course. Oh, maybe go for a specific
course about color gradient. It would be more
beneficial for you. So for now, we're working
on the Adjustment Layer. So anytime we wanted, cancel this, we
can just do this. The icon, toggle the
track output icon until glad, this is, this is it. This is without way. Let me just enable it. And
also we can just press creative down on and so on. So what happens to the
color correction thing? The color correction thing is like when you do
something to a club, okay, So for example, we did the color correction
to this club. We go back control. You can see the Lumetri color
effect is just right here. If we turn this off, it goes back to
your original one. This is on, this is off. This is on this. Okay. So we can have this as a copy. We can press Control key
on our keyboard or command C on Mac, control C. Then we can highlight
the rest of the clips that we want to
give this same lumetri color, the same kind of correction to. And you can see here,
this is a clip, this is another, it can just come to a certain club
and press Control V. This is the mark that
you get once you apply a dozen. Okay? This is the one that you get. Once you apply a certain
setting to the Lumetri color, then the color correction to it, if we go back, goes away. But if we bring it
back, It's comes in. Okay. So if I want to add this
to the rest of the gloves, I can highlight all of
them just like this. Press control V or and
can select the mammal. Like pressing Shift, select one. And then pressing
Control me, go back. We can see all of
them from the end. And also you can choose
the best one that says ripple, edit one. Or maybe the the track forward, track select forward tool. You can just select here. Double-click again. Okay, so let me just
make this clear. So you can choose it,
okay, the tracks. And from here, it's selecting everything from
this clef for one. Well, if we press Shift, Click, it is actually selecting
only the lines, lines in this sequence, this sequence, and so on. As you can see now,
look that old, but we need only this collapse. And I wanted to add
this to all of them. But for sure, because
it's added here already, it's quite different.
Okay, that was it. That was at 40 color correction. And this is also for the color
gradient, is quite simple. This is how to gloss. It's not about more professional and current
gradient or color correction. It is how to start with color correction
and color grading. And this is it for it. The next one we're talking about ODU and how to
export your videos. Let's get moving.
12. Exporting: All right, friends
here we've come to the end of this series of this basic theories
regarding Adobe Premiere Pro 2020 to the latest
version of it. And I am pleased to
show you that we're exporting all of our sequences
today that we've made. We've made first trial sequence, how to talk on camera,
B-roll sequence. All of these sequences
needs to be exported. Yes. Um, to get the outcome
of it. At the end. Basically, it's incredibly
easy to export videos, sequences, and timeline
in Premier Pro, especially the, the
latest version, because as you can see in the top left corner here you can see import and export. It's quite easy. You don't need any
shortcuts for it. It is quite simple for now. But the traditional way
to export videos is to go and press Control
or Command M, Mac. And it takes you to
the export panel. So basically, as you can see, lots of things to
discuss regarding the the options and the availability while before
this leaving the timeline, just like this, it is going to export everything
in the timeline. It's time from the
beginning, from 0.2. The latest point here, which is one minute, 55
seconds, it 58 seconds. So in this case, if I would like to export only this screen, what
would be the case? The case in this thing
would be just to go the beginning
of this clip that I want to export and pet
I for the n indicator. As you remember,
we've done this in the ad in a B-roll and so on. When we added the
second one here, this one maybe like
when we did that one, we said i o and I want to drag this one
and I dragged it bigger. What I mean now, right? Okay, so let's go back here. So in this case, I'm
adding an indicator, indicator, indicator to the end. So when I go to
the export panel, I choose the range,
the entire source. Now I'm choosing the
source in and out. So it's going to export
this sequence only the amount that the sequence
and the timeline between the in and
the out indicator. Alright, that was
it for highlighting that the clip that
you want to export, going back to the
settings are best. It says the file name,
just give it a name. I'll talk on camera. But location, you
just go forward the location and then you
go for the preset. There are lots of
presets are out there. You can just add more presets. It's completely back to you, and it depends on what actually, what type of video
you're shooting on, what type of video
you're exporting. But my case, I
would go for 1080, okay, this is high-quality. This, and any screen
needs only to be 1080, doesn't need to be for k at all. And the format should
be the H dot 64. Okay? This is the traditional
one for videos because it's enhanced and it's very authentic regarding
the blue ray and so on. Okay, move into the
video settings. I recommend to not do anything
to the full-frame thing. Both sides, it just go for it. And you can go for more. And render at maximum depth and also use maximum render quality. So it gives you the
best quality you can get out of this
exporting settings. And then you can
go to the target, going down to the bit rate, where you can find the target
bit rate in megabytes. It says the target data rate allowed by the end
the code and coder. This case, if you find the estimated file size
is a little big for you. Sometimes it goes up
to five gigabyte, gigabyte for longer videos. So you don't need that big much. We can lower that
down to make it like maybe ten can write them. And it's giving you like
34 megabyte instead of 67. So it's giving you
the half of decides. It's completely incredible.
Use this technique. Okay, so after this,
It's all good. Video. The Export. Now,
moving to the OD, it makes sure that this
is a stereo channel. This is the AAC audio
format and so on. Then the caption, if
you haven't captions, this is gonna be in the
next class, of course, regarding the
intermediate settings of Adobe Premiere Pro, because this is already
for the basics. And this is a b, how to glass, as we said, we're not discussing
captions here or subtitles, effects as well. You don't need anything from it. And metadata, nothing general. You can import into
project section. Project section that you
selected from the first place. And use previews and
use proxies as well. Forget about him. Okay, for now. You have two options. Either to export directly
and goes just like this. Okay? It says unlicensed stock
audio for the music, the background
music that we used, just explode for now. It's exporting just
made to time remaining. Like these five seconds. This is the first option
you have for export in your clubs for exporting your
sequence, your timeline. And there's another one
to export your sequences. In case you have things to
export and you want to, you know, continue adding in your Adobe Premier Pro panel. You can go for Control M, and you're going to use the highly efficient
Media Encoder. It says send to Media Encoder to go into Open Media Encoder. Its opening here.
It's taking its time. Once it's opened, is going
to transform all of the data from Premier Pro into Adobe
encoder, Media Encoder. So it's now going to
show us the settings, the outcome of the video
that we have on this panel. We get about these panels. There's one, there's one. Let's talk about this. It is says the format
of this video is gonna be an H dot 264. This is for the video
if you want it and free and before wherever
the custom things. This is the format, the quality in the choose anything
from YouTube, 10802164, K to K, whatever can choose,
whatever you like. It depends. It depends on what type of video you're actually exported. This is very useful, actually the Media Encoder and transporting
more than one clip. Let me show you in case I
would like to export this one. And I would like to
balance both individually. Okay. Alright, so we have
another one dinner. And he says the range,
the sauce in and out. I sent to Media Encoder. We don't do media encoder. And I can see now this
is ready to be exported. This is ready for
export as well. So you can now press Start q. And it is exporting
the first one. When it's done, when it's
finished is the best one. It is moving to the
next one and so right. Okay, so as you can seen
how the media encoder, while we can still edit on
Premiere Pro, work on them. Okay, and we can still lack
in year one and so on. So that was, that was for it. That was it for
this basic glass. This is really basic. Hope you enjoyed it. I hope you can see more. You get more skills from this basic lossless how to glass and wait
for the next one. Yeah, that was it. That was how to export
your videos from Adobe Premier Pro 2020
to the latest version.
 Ahmed Ibrahim, A dentist & Arabic Teacher