Transcripts
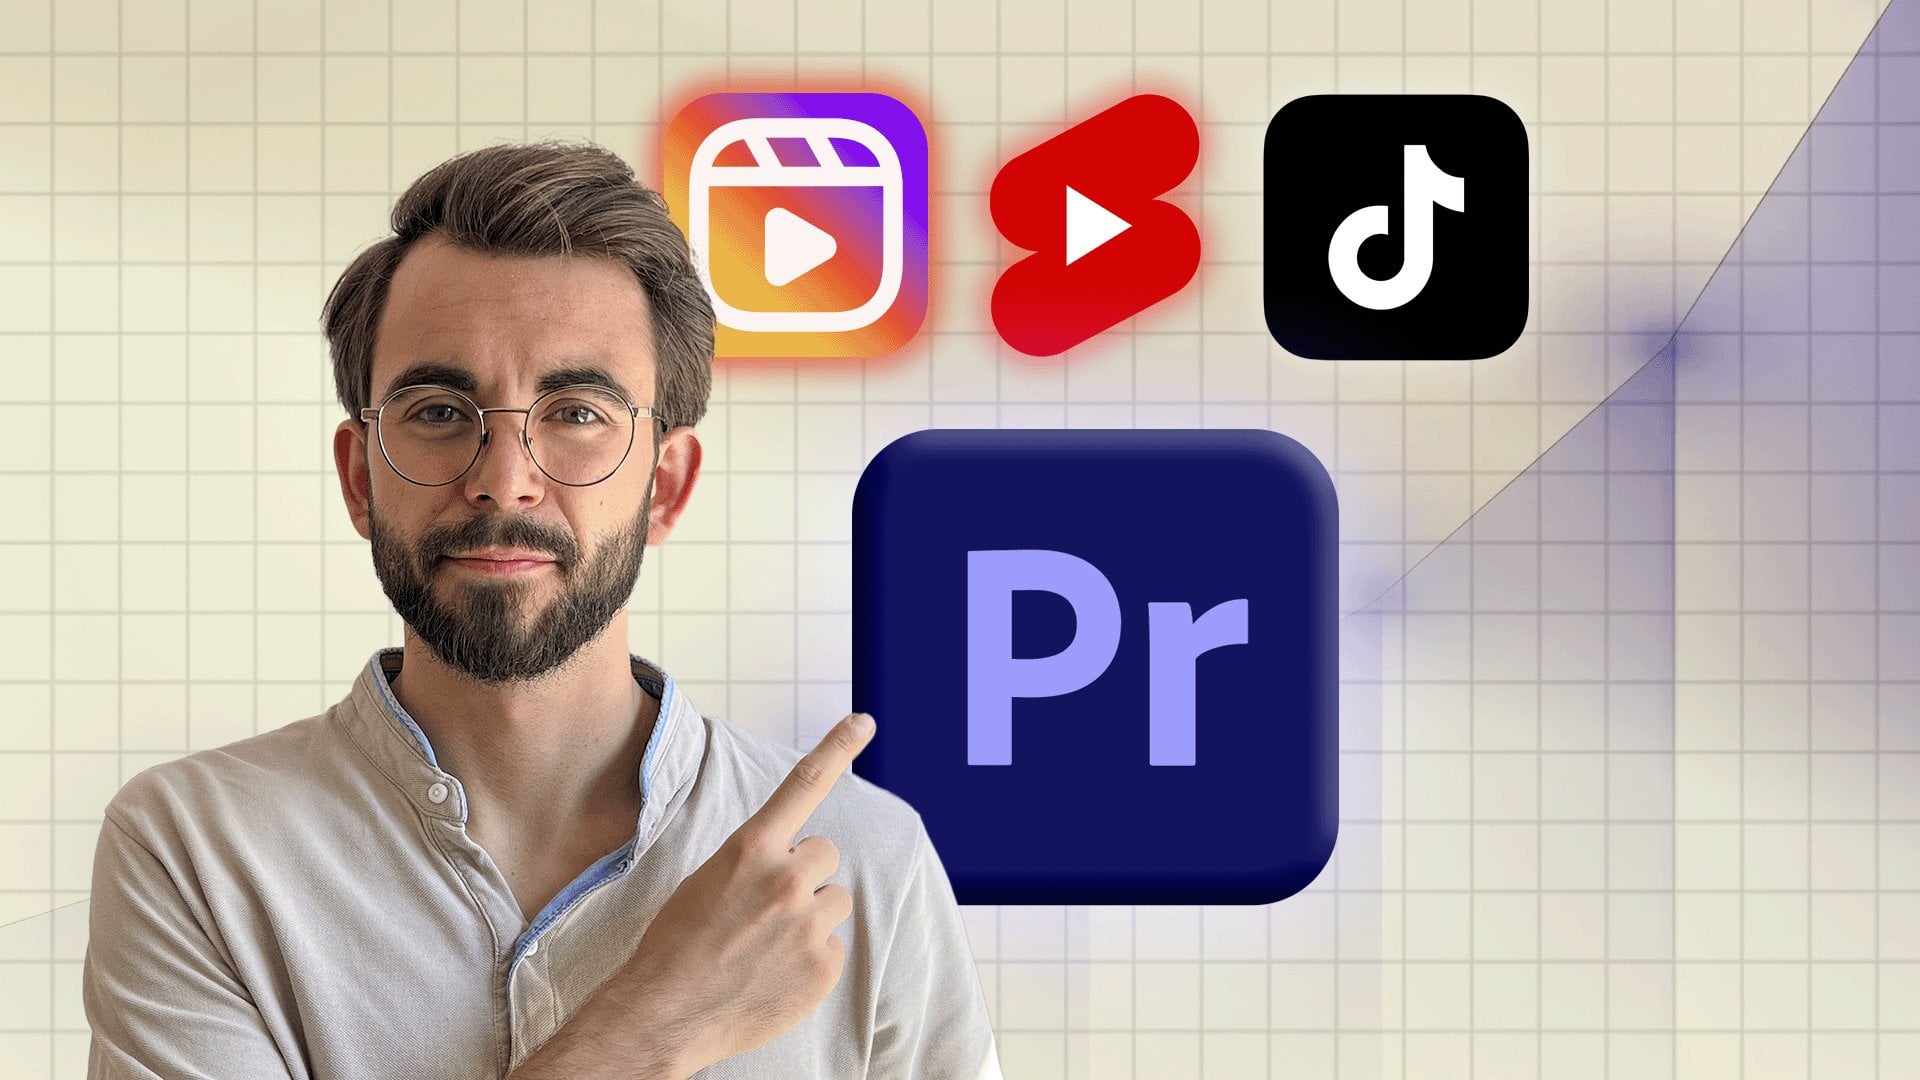
1. Welcome! Start here: Welcome to Adobe Premiere
beginner to advance. The complete course that takes you from a total beginner to confidently editing
professional polish videos from start to finish. This course is for anyone who has ever opened premiere and felt lost or for someone who hasn't opened it yet, but
knows that they need to. If you wanted to create
videos that look professional but didn't know where to start, you're
in the right place. This course is
built differently. Over 1,000 student reviews
were analyzed across top premiere pro courses to find exactly what
people struggle with, what they search for, what's
missing, everywhere else. Every lesson in this course
exists for a reason, and anything that
didn't make the cut was left on purpose. You won't just learn
to click buttons. The techniques here come
from real experience. Years of creating content for
social media and delivering video work for clients
at a level that generated millions of
views and results. The tips you'll pick up
are textbook theory. They're the kind of
things I learned by actually doing the
work professionally. I've had a privilege
of teaching over 10,000 students
across the world. With hundreds of five ser
reviews from people who used these exact skills
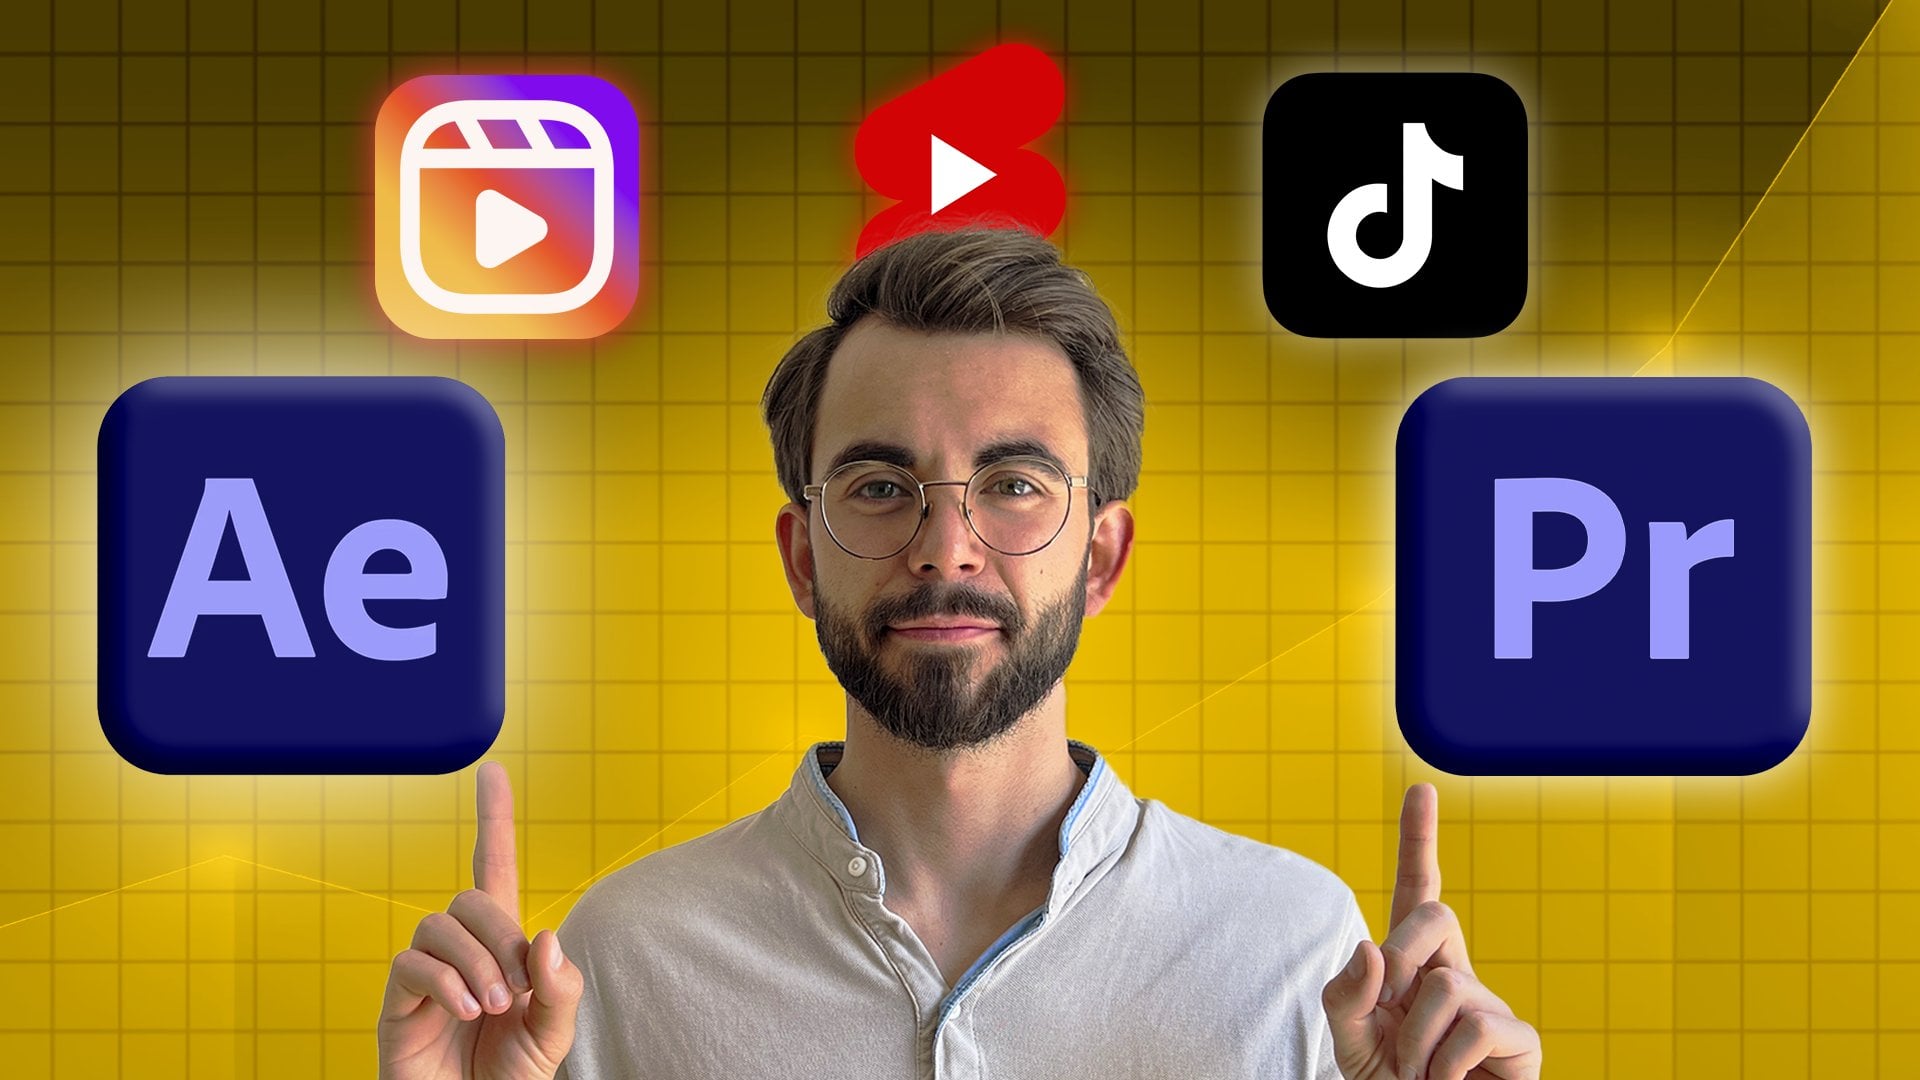
in real projects. Over 27 focus lessons. You'll learn how
Premiere Pro works, how to cut, and
structure and edit, how to calibrate, mix audio, at titles, motion graphics, and how to use AI tools. In the final project,
you'll bring it all. Thing is current and kept
as concise as possible. So you get exactly
what you need without sitting through dozens
of hours of feeler. I recommend watching
videos in order because every lesson builds
into the previous one. You can control the volume and the playback speed
of every video you learn at your own pace. If you get stuck
we need any help, drop your questions below. Just make sure to
check the existing questions first because there's a good chance that the
question you want to ask has already been
answered in detail. At some point, you'll be
asked to leave review. Please wait until
you've had a chance to really experience
the material. You honest feedback
helps improve the course and better serve
you and future students. Thanks again for
joining this class. I'm genuinely
excited to help you build real premier
skills and to give you the confidence
to edit videos for your own projects
or clients based. Let's jump into
the first lesson.
2. Premiere Pro Interface Tour for Beginners: So let's begin by
pressing Option Command N or Control Alt N in order
to create new project. The project name
will be untitled and the location will be
a default location. And we'll talk
about this soon in the next few videos about
how to organize this. But for now, let's
just create new project by clicking Create. We'll be taking to
the Import window, but I prefer to go
into the edit window. Now, what we have in front
of us is called a workspace, and your workspace
might look slightly differently from mine because we have a number of
different workspace. So if you're going into
the top recording, we have the essentials here, but we have also
Sorto, a vertical, learning, and all sorts
of other workspace. What is a workspace.
Workspace is just a bunch of
panels put together. So, for example, like
this panel or window, we can call it, whatever,
it doesn't really matter. So this is like a window. This is a window,
this is a window. And then we can switch between different windows because
they are put together, we can switch here as well. And the good thing about is that we can customize our workspace. Like if I drag my cursor
in between the two panels, I can move the panels around, make them a little bit higher, and I can make it really
weird. I can close something. So let me click on close. Okay. This looks really weird. How do we go well, to go into the essentials and click on Reset to saved layout. So if you ever do
something weird, like customize you don't
know where things went, just come here, click on
Reset to saved layout. Now, let's say we close one
of the windows like that, and it's like the
program monitor is very important because that's going to be the monitor
that's going to visually show us what's
happening on screen. If you close it, you
will not be able to see things. So how
do you get that back? We need to go into Window
and click on Pro monitor. There it is, and
they'll be back. Another great thing
here is that we can drag it by the name
and then drag it, let's say, to the
right or to the left, and we'll have this highlight. It's highlighted in blue. So if I want to put it here, for example, I'll just put it there and it
will be put there. Now, I can put it back, like so and then customize
this to whoever I like. Now, how does this usually work? So on the left, we have
this project panel. This is where we
will add our files. In front of us over here
in the program monitor, we are going to visually
see what's happening. At the bottom, this
is our timeline. This is where we'll
put our clips. This is the place where
we customize them, where we will apply
certain effect. And on the right, this is the place where we will
control the effects, like, for example, controlling
their intensity or controlling the movement
of certain layers. That's where this
is going to happen. You don't have to remember every single thing because as we go, we will learn and
explore new ways to work in certain
workspaces and windows. So for now, I'm just letting
you know what exists, but you don't have to remember every single thing because you will learn this by
practicing doing the work. If you go into the workspaces,
have different workspaces. We have the color, the effects. So if I go into the color, it's going to look
slightly different. If I go into audio, it's going to be
even more different. Each workspace is customized specifically for specific task. So if I once again, go into the color, we
have the metro scopes. So if I add something here, we'll see, we have
the metro scopes. We'll talk about this
a little bit later. We don't have to know every
single thing right now. Just remember that we have
different workspaces. We can customize the workspaces. If you close something,
go into window open here, and if you want to reset
something to the save layout, just click here,
it's going to be reset and you'll
be back to normal. If you have any
questions let me know that let's jump into the next.
3. Setting Up Your First Project & Sequence: Now in this video, we're
going to input the footage, set up your project, and
learn sequence settings. A lot of confusing
wording, I know, but let's jump to premiere. So I have this video
that I will literally just drag and drop into the project and
it's going to appear. In order to influence the
project or work on it, customize it, we need
to create the sequence. A sequence is a place where we have a number of
different files, and we'll basically
have it at the bottom. We have a number of
ways we can create. We can click on this button
here, click on sequence, and we have a number of presets here that we can
use, which is pretty useful. So if you're going to, for
example, HD, open that up, and let's have HD, let's say, 25 frames. We can click on a K and it's
going to create a sequence. And now we have this timeline at the bottom where we
can drag our clip, for example, here,
and start working. But Quid person commands
at two and two. Let's click on sequence
and open that up again. If we go into the
settings, here's where we can put
settings manually. And this is what I prefer to do because I want something
super specific. So I want 1920 by
1080 or 1080 by 1920. It's resolution that works
really well for social media. And in terms of the frame rates, I like to put it to 30. What's the difference?
Well, the difference is how smooth the
video is going to be. 60 frames per second, which is the maximum that
we can set is very smooth. But the problem is that when you upload this video
to social media, social media is going
to compress the video. In other words, make
it way less megabytes or gigabytes because
they want to save as much space as possible. Which means 60 frames per second will come to
30 or even less. So that's why I don't
like to put it to 60. It also looks a little bit too. 30. It's like the
industry average. And then there's also another
one that you've heard 24. That's what movies use.
Why do they use it? It's because it allows
camera to add motion blur. You know, it's this very kind of interesting looking blur in the videos that the
lower the frame rate, the more the blur
is going to be. I always work in 30 because
kind of it's the average. It's really consistent,
it's really good. And you also have to understand
that if you put it to 60, it's going to eat more
powerful your computer because you have
double the framer. It's than 30. So thing. In terms of frame size, this is ful h D. This
is really good quality. This is more than enough
for social media. If you want incredibly
sharp image, you can certainly do it. You can put four K. So if you going into the
sequence presets, then let's open this up, and
let's say four k, 25 frames. So it's going to be 38 40
by 21 60, big resolution. It's important to
understand that it's not just double
the resolution. It's four times the resolution
because if we do the math, then that's basically how it
works. This is how I work. I put it to 30 and I said
1920 by 1080 or 1080 by 1920. So this one is horizontal,
but we can put vertical, so we can do 1080 by 1920, and literally just press K.
This is if we do it manually. If we don't want
to do it manually, there's another way to do it. So I'm going to
delete the sequence. And I'm going to literally
just drag this video down, drop it here and going
to create a sequence the same size as our footage and the same
frame rates as our footage, so that if I go into
sequence settings, it's going to be 1080 by 1920, and then this weird frame rate. That's because that was
recorded on an iPhone. That's why we have
this weird frame. There's another way to do it. We can go into file.
Here's what you'll see. You'll see that we have a
number of different shortcuts. So in my case, it's Command N. And if I click on Command N, I don't have to go into
File New sequence. So let's say I'm here
and a person command N, it's going to create
new sequence. This will be super useful if
you want to learn shortcuts, which we'll have another video about because it will save you dozens and hundreds of hours of editing just
because of the shortcuts. We have number of ways to do it. But for this video,
I'm just going to drag and drop it,
and we have a sequence. So if you have a
questions, let me know, a let's jump into
the next video.
4. Essential Editing Tools: Razor, Selection, Slip & Slide: Now that we've
added our footage, let's talk about the
essential editing tools. In the bottom left screen, we have a lot of
different tools. But we're not going to talk
about every single tool. We'll learn them as we go. But for now, let's talk
about the essentials. So first of all, we have
the selection tool. You'll see that at
the end, we have a shortcut called
V, really useful. Then we have this other
tool called Razor. The shortcut is C, as
you can see at the end. So if I get my curs a
little bit to the right, I'll still be able to
switch between them by pressing C or just
using the keys. Now, the razor tool is really useful because we
can cut our clip. So if I get to the video, we
have this blue highlight on the clip it click on CAT, it's
just going to make a cut. And I can cut this video to
as many pieces as I want. Then if I click on V to
select the selection tool, select a few videos and
then move them to the right or I can move just one video
or I can move two videos, and I can move them in proportion to each
other like that. Really, really useful.
Another useful tool is a Track select forward tool. The shortcut is A,
if I click on it. What it does is it
selects everything to the right of our cursor or
to the left of our cursor. So if I click, it's going
to select everything to the right or if I click here
or here or here or here, even if we had 1,000 layers to the right,
it would still select. In person Shift A, and it's going to do
the opposite thing. So we can select everything that's to the left
of a certain point. Another tool that's super
useful is the pen tool. So we can draw something
on the screen. If I start drawing, it's
just going to draw it. But I'm going to click on V, selected, click onto it. Then we have the shape
tool that allows us to draw interesting
shapes with it. So if I come to an empty space, it's a little bit easy to see. Then we have the hand tool that allows us to just kind of take everything and move
in the timeline or we can move our
program monitor. But then if we want to put
it back to the center, we just click on Fit and will
fit it back to the screen. We have the slip tool as well. The slip tool allows us to move the clip under certain
time in the sequence. So for example, this
clip starts at 32 53, and it ends at 36 17. If I selected,
click on Command R, it will tell us that the
duration of this clip is 3 seconds and
24 milliseconds. So we have clip that's 324. By clicking on Y and
selecting the slip tool, I'm able to move which part of the clip is presented
within this time frame. So I can move it, for example,
if I scroll to the right. Going to be the equivalent of me just, for example,
for this clip, moving to the right
and then making it like that so that we get
to the beginning of the clip. So this one starts at
the very beginning and this one starts at
the very beginning, just like we have
in the beginning. Now, once again, don't have to remember every single
tool all the time. If I forget
something, can always ask AI, what the tool does. But most of the tools are
pretty straightforward. The selection tool
selects thing. Lecting forward to backwards, pretty straightforward as well. We have this ripple
tool as well, it allows us to, like, move certain
things here and there. And I just recommend
to come here and spend 5 minutes
playing around with it, like, clicking around,
making mistakes, you know, closing some
panels and things like that. It's going to be
much, much better than just watching me do stuff. So come here, play around, click on the buttons, and if you have any
questions, let me know. And that, let's jump
into the next video.
5. Organizing Bins & Project Structure: In this video, I'll share how to structure and
organize a project. First of all, when
we create a project, I'm going to press
on option command to create a new project, and I will not put it into
the default location, and I will not give
it a default name. Reason is because
if we set it to the default location, this
is where it'll be saved. It will be saved to Adobe
Premiere Pro, autosave. A number of different
auto saves here. Now, at some point, when I was starting
out, I had, I believe, like three or 4,000
auto saves and it was a headache to find
anything in these folders. So that's why I recommend you to create specific folders
for specific projects. By the way, it will also
save your project here, which is also not
really convenient. So here's how to do it.
I'm going to create a folder somewhere in the
desktop and give it a name. Let's call it like
Premiere Pro project. Then I'll create a folder
with the name of the project. In this case, it's
going to be like project number 13, right? Or you can give it specific
the realtor video. Then I would create a number of different other folders,
like for example, downloads in order to save all
the downloads the exports, which we'll talk about in
one of the future videos, put the raw files here, and then we have the project files. And then we have Premiere
Pro and after effects because that's where I'll
be saving the project. So in this case, I have to
give it a specific name, let's call it test video, and I will choose location. I can click on Browse,
click on specific location, and click on Select and
then create a project. Now our project is going to be saved through that
specific folder. In this case, it
also does the auto saves so that things are a
little bit more organized. You don't have to
break your head when searching for a specific auto
save. This is really great. Now, when we come to
the premiere itself, and let's say we drop
some of the videos here, here's how I organize things. First of all, I'm
going to create a sequence and we'll have
another file for the sequence. So the first files going
to be the rough footage. The sec one is the sequence. Let's make it cut so that
this video is shorter. You can see it's 938. This one is 25.
So now we need to create folders here
and organize them. There's a couple of
ways to do it. We can either create a folder by
clicking on this button or you can press
Command set and then drag our file to the folder, and it will be put folder. Well, there's a way
to do shortcuts, which I will show you
how to do in the future. In this case, let's just drag it here or we can select
multiple files. By the way, we can select them and put them into one folder. But in this case, let's put it into the folder and
call it sequence. For this file, I'm going
to drag it, call it raw. Then I would create
another folder and call it files or call it Ban whatever so that
whatever files you d you download something
from the Internet, you can just put
us in the folder, organize it, and it's
going to be great. Next, there's a couple of ways that we can view
this information. Can click on the List view,
and it's going to be a list, so we can open each folder
and see what's inside of it, or we can click on this button, which is what I prefer, or we can click
on the free form, which we can move
around however we want. But honestly, I
really don't like. This is really messy. This is a little bit too small. We don't have the
visual representation. But here, if I take a double
click, I can also preview. If I want to go back to
the previous folder, I just click here and I can increase or decrease
things inside. So if we go backwards, that's
how I organize my files. If you have any
questions, let me know. Then let's jump into
the next video.
6. Adding & Styling Text in Premiere Pro: Welcome. In this
video, we can talk about adding and styling text. So I'm going to
come into Premiere, click on Command and to
create new composition, go into the settings,
and I'm going to put 1920 by 108030
frames per second. Click on Okay. Now,
in order to add text, we need to click on Textol and start typing text.
Let's type it. Text. And in order
to customize text, we need to go into
the Properties panel. If you have it go into
Window and properties, we need to select
our text. Zoom in. Click on the text in
the Properties panel, and here we can customize it. We can add a different font. Like, for example,
one of my favorite fonts, it's called Inter. It's a very similar font
to what Apple uses, which is SFP, and I'm
going to put it to bold. Now we can customize
the color of the text. We can add a stroke to
it. Let's do like this. I'm going to create
a new color mat. It's basically like
background color. So I'm going to put it like so, and I'm going to drag the text above it so that we
can see the text. So there you go. Now we have it. Let me click on text, and if I change the
stroke to another color, increase it, you'll
see what we get. There you go. Next, we can
add a background to the text. So if I disable the stroke
and add a background, let's make it black, make it to 100% in
terms of the opacity. Then increase it a little bit and round the edges, there good. This is the text effect that you oftentimes see
on social media. Then we can add a
shadow to the text. So if I disable the background, this is the shadow that we
have disable enable it. There we go. Critical here to fit the screen back to 100%, and we can align the
text to the middle. We can change its position. And if we go to the
effet Control panel, we'll see that we have
the customization that we can do here and we can change the position of the text here. But then we can change the
position of the motion. Then we can change if we
go into vector motion, there's another
like we can change the position. So what
does this all mean? The difference between this
is that this is the text, and this is the position
of the text itself. If we scroll down to the motion, this is the motion
of the whole layer. So actually, what we can do is we can add another text here. So if I click on the
textol or just press on T, and by selecting
this text layer, I'm going to start
typing text two, for example, we'll have
two texts. So here we go. If I change the motion, both of them are going
to move because I control the motion
of the whole layer. But if I change the text
position specifically, so this is the text
one, for example, I can change it separately. And then for the vector motion, again, both of them
are going to move together because
it's the graphic. Now, all this means for
you is just there's ways to move the text
around and customize it, and we'll talk about it in
the next videos as well. But you don't
necessarily have to know every single thing in
order to work with text. Now, if I go back to properties, and I'm going to
click on text two and click Delete to delete it, I'm going to scroll down. Here we have a couple of things. So we have linked style. We have it set to non because
we have no linked style, but you can actually
save certain styles. So in the beginning,
remember our text look completely differently. And if I click on
this button here, I'm going to create a style. I can give it to name.
I can save it to the project and save
it to local styles. I don't like saving
it to projects. I don't really see a value in that because if I save
it to local styles, it will kind of
automatically be saved to the project as well because
I'll be able to apply it. So let me call this
test example text. Remember this name and click on. If I click on the
open Styles browser, we'll have a number of texts. This is the test example text. You can add all sorts of styles. For example, you can
click on this style, and our text is going to
change or we can click here, and you don't have to customize
it every single time. It's going to be customized
easily by clicking a button. Now, if you want to get
rid of some of the texts, you cannot actually
get rid of it here. If I right click, there's
no way to delete it. So what you have to do
is to go into Finder, go to documents Adobe
Common Assets, textiles. And there you have
your textiles. So a look, this is the one that we had test example. Text. Perfect. Let's find it. So
this is the one test example. Text. I want to get rid of that, right click and going
to delete it from here. Once you delete from here,
when I come to Premiere Pro, as you saw, it just disappeared. So this is how you
customize text. If you have any
questions, let me know. Let's jump into the next video.
7. Text Animation with Keyframes: In this video, I'd like
to show you how you can animate your
text with keyframes. But first of all, what is the
keyframes? Well, keyframes. If I click on text, let me go to the
effect Control panel. Let me close the vector
motion, the text, let's animate the motion
of the whole text. Actually, before that, I'll
go into properties and I will center my text by
clicking on this button. So this is centered horizontally,
and this is vertically. Now, I'm going to go back
to the Effects control. And here we number
of stopwatches. Whenever you have a stopwatch, it means you can
animate that property. So for example, if I
click on a stopwatch, I'm going to create a keyframe. And we're just basically
telling at this time, this text effect has
these properties. Actually, let me move
this a little bit to the side so that we
can see it a little bit better because we
were not able to see the number 54 So we're
just telling at this time, we have these values, but if I scroll a
little bit further to, let's say, 1 second
and six milliseconds, I'm going to create
another keyframes. And I can change the position of the
text to let's say here. I go back, we're going
to change the position. Now, we don't necessarily have
to create a keyframe here, like click on this
button to you can just start changing the position and it's going to
change here as well, and if I go back, there you go. We have exactly the same thing. Now, this is really important because if you ever want to
animate text on a video, this is the foundation. A lot of videos and social
media movies are animated, and the way you animate text
is literally by doing this. But once again, remember,
you can go into the text or into the vector motion and
put keyframes here as well. The interesting thing
is that if let's say we animate the position to go,
let's say to the right, but then we create
a keyframe here, and then I will make sure
it goes back to the middle, it will kind of
stay almost like in the middle because this
keyframes is telling, Hey, go to the right, and this
keyframes is go to the left, so we'll kind of
stay in the middle. So this is just an interesting work that
we can work with. Now it's important
to note that we can animate anything like this, so it doesn't have
to be text only. We can animate, for example,
if we create a shape, Dergm we can put a
keyframes and then change the position of
the shape, for example. Or if you have a video, then we can dig the video here, drop it then click on
it, put keyframes in, go a little bit to the front, change the position,
and there you go. The video will change
the position as well. So you can animate a lot of things with it. So
that's how you do it. If you have any
questions that let's jump into the next video.
8. Text Behind Object Effect Tutorial: This video, also, you have to
put text behind an object. It's actually incredibly
simple to do. But if you jump into Premiere, you have to understand
how it works. Basically, we need to
have three layers. We have one layer where
it's going to be myself. Then we have the text that's going to be
linked behind me, and then we have a background. We have to put text
in between myself and the background so that the text appears behind me but in front of
the background. Video is an example that
I'm going to drop here, which you also have access to, and I'm going to drag it down. Now, we have only
video of myself. So let's write some
text on the screen, click so and then
put it in front of my head so that when we cut out my head, the text is
going to be behind me. So now we have two layers.
We have our text layer, and then we have
our video layer. And in order to put
text in front of me, we basically need to cut myself out from the background.
How do we do it? Well, I'm going to
click on option and click on the video and
then drag the video up, and I'm going to continue clicking option so
that we make a copy. So hold option, and I lift my finger up from the mouse
so that we make a copy. Now, I'm going to shorten this clip up by selecting
the razor tool, clicking cut and then deleting the second part because it
doesn't need to be this long. We can make it just the
length of the text. So I'm going to click on the
video and then I'm going to select the object mask tool, and it's going to automatically
select an object. And all I have to
do is to click on track the selected mask
forward and backwards. In this case, we can
do just forward. So I'm going to click
on this button. It's going to do the analysis. I'm not even cutting,
it's doing it that fast. And once it's done that, click
on the Object mask tool, right click and change
to opacity mask. And there you go. We have text behind my head. Now, we can put
anything behind there. Like, we can put, you
know, like a shape. So I just have to
zoom in a little bit, to put the video of
myself a little bit higher and then put the
graphic behind myself. And we can put
anything like logos or animations, not
the video there. This is basically how you do it. If you have any
questions, let me know, let's jump into the next video.
9. Motion Graphics Templates & Lower Thirds: In this video, we'll talk
about the central graphics, motion graphic templates,
and lower thirds. So once again, I'm
going to come into Premiere and I'm going to
create a new sequence. 1920 by 108030
frames per second. Then click on Okay. We're going to click
on fit the screen? Let's draw something on screen. Let's create some sort
of like a rectangle, and I'm going to put
it in the bottom left corner because
what is a lower third? A lower thirds is a
presentation of a person, of an object that just pops up in the bottom left
corner of the screen or in another corner that
helps us understand what the video is about or
what the object is about, or it just helps
us to understand something a little bit better. It's like a name tag or tag. Under the same shape,
I'm going to click on the Type tool and I'm
going to start tapping, and let's type lower third and just click
somewhere else to disable it. I'm going to click on VB and make it a little bit smaller, and I'm just going
to zoom in with my mouse and put it
roughly like this, make it a little bit bigger. Perfect. And click on fit. Now, the interesting
thing is that once again, as I told you before motion. And if I control the motion, both of them are going to move. And we can do a quick animation, so I can click on the
position keyframes. This is going to be
the final keyframes, so I'm going to move it a
little bit to the front. In the very beginning,
I'm going to lower it down so that it disappears from the screen
so that we have it going up, and then we can create
another keyframes, and then we can go to the
front and then lower it down. So let's take a look at
what we have, actually. Let's keep a bit more space
here so that's not fast. Now, what if you create
some sort of lower third, the graphic in animation, and you don't want to recreate it every single
time from scratch? Well, there's a way to save it. And it's a thing called MgartO in other words,
motion graphics template. So the way we do it
is when you select a Lower third or whatever
graphic you create, right click Export as
motion graphic template. Click on that. We
to give it a name. Let's call test and save it to the local templates
folder. Save it right there. You can set your own
space if you want to set, but the local template
folder is great. Set a check mark here because we do want to preview visually
how it's going to look. But then for these other two, I don't really need
to know about this. I mean, if you work with motion graphic
templates, pretty often, you change things
in your projects, change the phones,
things like that, yes, you can set that, but most of the time,
you don't really need that because if you
set projects yourself, you use kind of
the same project, the same fonts, it's not going to disappear all of a sudden. So I don't set these and click
now that it exported it, we need to go into
graphic templates. But if you don't
have it, remember, go into Window and
graphic templates. Now, we have these previews. We can decrease them
in size if you want. I prefer when it's very small, or we can increase so that we see what we
have. And there you go. This is the animation
that we created. And if I move the cursor, you'll see that it even shows the animation of how it goes. That's exactly what
we created here. So if I delete it, and then I can just drag it onto the screen,
see what we have. We have exactly the
same animation. But now we don't have
to create from scratch. We already have a tape. But now, if I click on the FX button, we'll see that it has
exactly the same keyframes. Then if we go into
the properties, now we can customize it. So instead of low
with art, let's say, I can say something like John if we want to give it a name. And then I can move John closer to the middle of the
screen, and there you go. Now John is going to
move with a graphic. There are websites
like motion array, artless infatu elements, where you can download these templates and then
put them in here, although those are paid or if you don't want
to download those, you can just create them,
save them, and use them. You don't have to pay.
That's how you do it. If you have any
questions, let me know at let's jump into
the next video.
10. Auto Captions in Premiere Pro: Welcome. In this video we can
talk about auto captions, specifically how to create them, sell them and customize
them in bulk. I'm going to drop a video of
me and going to drop it into the sequence is going to create the sequence of the
size of the video. I'm going to cut
it a little bit, and I'm going to go into
the window and text. It's going to automatically
transcribe the text, and we need to read
through the text to make sure that everything's
okay. So let's take a look. When I was starting
out as a video editor, I struggled a lot with what
to cut versus what to keep. So I'm going to click on the
three dots on this Burger, click on create captions
and we'll have this pop up. Now, for social media, usually you want to
have word by word. You don't want to
have longer phrases. So for the maximum
length and characters, I'm going to put these two
minimum, and for the lines, I'm going to keep
it to single so that we don't have two words
on two different lines, and as little characters as possible and you're
going to click on Crete. So let's take a look
at what we have. I'm going to Zoom in, and it added the captions
here at the bottom. Some of them do have two
words because, for example, out as, that's going to be
just like five characters. So that's why the minimum,
we have seven characters. Select the texts and go
into the property span, and once again, customize
just like we did before. We can set specific style, but this time the track el
is going to be at the top. So if I click on it,
put whatever I want, and then I can also make
it a little bit bigger. I really like this aligned
entrance form tool because I can just
click on this button. It's going to be
put in the middle. And then I can just lower it
down a little bit. Like so. So let's quickly take a look.
It's already pretty good. Now, this is how we can
customize them in bulk. But what if want to create some interesting animations and have many words
at the same time. So create animated typography
of many text layers. Well, you know to do that,
we just select our text, go into graphics and titles and upgrade captions
to graphics. And now our captions are
going to be as graphics. As captions because captions
go one after the other. But with graphics,
you can put them on top of each other.
So let's take a look. Let me zoom in a little bit. So we have one I starting and we have each word
go one after the other. But in this case,
I would like to put one I on the lower level, keep this one here, and this
one put a little bit higher. Now, for the voz, I'm going to make
it a little bit longer and make this
one a little bit. Ally, I'm going to keep them the same length, for example. All of them are going
to be on the screen, and now we can customize
each and every one. I'm going to disable these
tracks by clicking on the eye icon so that I can see
only this track and I can, let's say, put it a
little bit higher. We can make it big, put it like that so that we
can put it behind myself, then enable this track and, and then the word starting out. Let me enable the track as well, put it a little bit lower, and we can shorten
these up a little bit. And I when I was starting. Obviously, it doesn't
look pretty right now, but we have to play around
with it a little bit. We can add the animations like what we did
before with you, so we can put a keyframes in, for example, for the
position of the text, move it a little
bit to the front. We can put the keyframe here. This one, get out of the
screen and have the animation. So OT looks a lot more professional than if
we had zero text. And the great thing
about is that you can still select all the captions, go into the properties,
and then customize. If you don't like the style,
you can change the font. So we we can make it black and every single caption
is going to be updated. When we do it like this,
we're not able to change the track style because this
is not the track anymore. They're on different
tracks. There are captions. There are graphics at this time, but we can always just
pressing Command Z, for example, pressing
Command Z multiple times to go back even more. So now we can select it here, and then we can change the
style to, for example, this and then do the same thing, captions graphics,
update captions to graphics, and the go. So that's how we do it. If
you have any questions, let me know and that lease
jump into the next video.
11. Smooth Keyframes & Easing Curves: Welcome. In this video, we can talk about smooth keyframes. Specifically, I'm going to
draw a shape on the screen. I'm going to put it
right in the middle, and then let's go to
the essential step. And then in effect control, I'm going to put a keyframe in, go a little bit further,
and then just move it. And actually, in the
beginning, smooth like this. So if I let it play, the movement that we
have is extremely rigid. There's nothing
smooth about this. Personally, I don't like it, and in order to make
it more expansive, we have to be able to
control the smoothness. Well, it's actually
pretty easy to do. First of all, we
need to click on this button to open
up the position. We need to right click
temple on ranpllation. For the movement that starts, we need to click on I out
and on this movement, we need to click on Is in. And you'll see that the
graph changes quite a bit. Instead of it being,
like a square, which goes like that.
We make it smooth. If I let it play, it's going
to become better already, but it's not extremely smooth. It's pretty rigid still. So we can make it even
further if I click on the keyframes and let me make
this a little bit bigger. We can customize
the smoothness of each key frame by dragging
these handles like that. So let's see. The moment
becomes way much smoother. Let's tile. This looks
much, much better. Doesn't work like that
only with position, we can customize
basically anything we can keyframes, we
can make it smooth. So that works the
same for the scale. Although for the
scale, you'll see that if we increase in size, let's do the same thing is out
and then is in, opened up. There's a way to make
it a little bit lower, and then the graph
changes quite a bit, and that's what happens. So in order for
it not to happen, we just need to make
sure that we stay on the same level when
we do smoothness. So it is quite smooth. So let's cele.
Yes, this is good. Now, if I disabled is
completely circle, just grows for we can do
it with anything we want. We can go into the effects,
apply the effects, which we learned a little bit later, then we
can apply here. Everything's going to be
extremely, extremely smooth. So if you have any
questions, let me know. Other than that let's
jump into the next video.
12. How to Speed Ramp in Premiere Pro: In this video, we're going to
learn how to do speed ramp. Once again, let's
come to Premiere, and I will drop these files in. And you have these access
in the resources section. Now, these files all have the same resolution
and frame rate, so I'm just going to
select all of them and then drop them into
the composition, and I'm going to make
some space between them. So you know to do SpeedRm. Speed fam works with time, and we have to do
time remapping. Effect that we can easily apply by coming onto the footage, right clicking on the effects, and then time remapping,
click on speed. And there we have the effect. Then we just need to
make the strike a lot bigger and let's zoom
in a little bit. Now, we need to
create two keyframes. Let's create a keyframes here and a keyframes
here, for example. If I click between them, this line, we need to drag it up. We're basically saying that, let me mean a little bit more, and I'm going to
delete the audio, so I'm going to press on Option or Alt and clickon delete. So we are basically telling
you that, at this time, it's going to have a
speed of just 100%, but this time, what
do we have 16, 20. So we make the speed
16 times faster. Now, we have these
two handles which I'm going to smooth
out like that. And if I click on
one of these things, we can do this graph and make
it a little bit smoother. Basically, we're doing something
similar to what we did in the previous video
with smooth keyframes so that the movement
becomes super smooth. Now, let's take a look at
what we have. There you go. Now, let's take a look
at the second example. I'm going to do
exactly the same thing time remapping speed, put the two keyframes in, make it super fast, zoom in a little bit, delete this, make it smooth, and make it even smoother. And let's take a look. Great. Now we just need to increase the speed, and
let's see what we have. So it's much better
for this video, right? Great. And we can do the same
thing for the last video, but you get the idea you know
how to do it at this point. Now, for this video,
specifically, there's a very interesting
effect that we can do. If I click on Option or Alt and then start dragging the footage, it's going to make a copy. W to select this footage,
click on Command R, Control R, then click on reverse speed and put
the clips together. And let's take a
look at the effect. We're going to go
backwards and forward. Now, I also didn't cut, like, a small piece of this video. So if I make a cut here
and then make a cut here, and then we can make a
bit of the faster speed. Basically, we just
need to play around and see the effects that
we can get so we can cut this up a little
bit more and just play around to make the effect
super super smooth. I'm going to duplicate
this footage, go on or reverse speed, and let's take a look
at what we have. Now, these videos are not stabilized and we have a
separate video on how to stabilize footage after
which we'll be able to stabilize it to
make it even smoother. If you have any
questions, let me know that let's jump
into the next video.
13. Premiere Pro Transitions: Welcome. This video is
all about transitions. There are two ways that
we can apply transitions. There's native
transitions to Adobe, something that we can just go
into the effects and apply, and there's third
party transitions. I'd like to show you both. So for example, we
have two clips here, and we want to create
a transition because this video just looks a little bit too rigid. So
how do we do it? Can go into the Effects panel, and then we have
different presets. We can search for transitions, and we'll have a number
of different transitions. These are all native to Adobe. So if you want to
apply transition, you just need to drag
it from the left. So, for example, this animation, let's go for block motion. Let's apply it, and
let's see what we have. Boom. Now, in order
to delete it, we can just click on it
and then click on Delete. Let's search for some
lacrosse dissolve. It's going to be the simplest
transition there is, which you can also
apply if you're clicking between the two
cuts, B preson Command D, it's going to apply transition to the video pressing command and click Shift D is going
to apply just to the audio. By pressing Shift D is
going to apply to both. And you can explore. Honestly, I don't really
use these transitions because the transitions
that I use are third party. They're my opinion, much better. So there's a free
extension to Premiere Pro, which I would recommend
you to download. It's called Animation Composer. And if I go into
Window Extensions, click on Premiere
Composer, this is the one. I usually keep it here
in the top left corner. If I click on Started
pack and open this up and click
on transitions, these are the transitions
that they have. And in order to apply transition,
it's pretty easy to do. All you have to do is click
on, for example, in the pan. Let's go ahead and click
on Apply and there you go, it's going to add
the transition. Again, click on Command to
Undo and then click on, for example, What do we W? Let's do digital glitch. So click on it, click
on Add and let's see. Great. I'm going to
click on Command set. And the great thing
about Premiere Composer, which you will find very useful doesn't have
only transitions. It has text presets, a text boxes, social
media animations. So you can do, like, the
mouse click or all sorts of, you know, pop ups
animations here or there. Like, for example, the heart animation's going to
appear on the screen. There it is. You compare the shape element sounds
really, really useful. It's one of my favorite
extensions for Premiere, and I really recommend
you to install it. The link is going to be
below. Now, there's also a way to create
custom transitions. I can give you a
quick example by dragging this transition
here, cooking, okay, for example, this
flash transition, which is absolutely handmade. I did myself, but I feel like the best thing to
do is just to use something that's
already pre made the transition make it custom, yes, it can improve
the video by 0.1%, but it's not going to make
the video better overall. So if you want to make
custom transitions, you can certainly do it. But using three D parties that
specialize in transitions, is just going to be
much, much easier. And if you're ready to invest money into transitions,
you can buy transitions, and it's going to save
you so much time, and you'll be able to focus on things that will
actually matter, like making great video. So if you have any
questions, let me know, let's jump into the next.
14. Saving & Installing Presets: Welcome. In this video, we
can talk about presets. What are presets?
Well, presets are effects that already
have certain values. And instead of you reapplying that effect next time
you create new project, you can just save
that preset and then use those certain
values every single time. Especially useful with
things that are repeatable. So, for example, if you
work with screentots, I worked with lots of
screenshots, for example, instead of me creating
certain effects for those screentots,
certain Zooms, I'm just able to create
a preset and then reapply it and I don't
have to think about it. So here's how you
can create a preset. Let's apply a certain
effect, like, for example, Msaic stylized mosaic, I'm going to apply it. Everything is going
to become blurry, and there we have the mosaic. And let's say I want to animate
the angle of the mosaic. So I'm going to click here,
go a little bit to the front, then animate it to, let's say, 360 degrees. So like, one full rotation. And then if I play the
video, there you go. We'll have this very
interesting now, what if I don't want to
do it to search here, apply here, create
keyframes. How do I save it? Well, I need to click on
the Mosaic Right click, click on Save Preset,
give it a name, Mosaic preset. Let's click on. Okay. And then let's say
I do another screenshot, so I'm literally
just going to do screenshot right now,
drop it in here. So this is the
screenshot that we have. And if I disable
the search on up, there we have our
MazicPreset because all the new saved ones are
going to be under the preset. So I'm just going to apply
here, and there you go. It has exactly the same effect, and we can just do
exactly the same thing. Now, it's important to note
that when you save a preset, let me click on Save Preset, you have it to scale, anchor to in point
or to outpoint. So put it to scale. It means that the
video has to be exactly the same length in order for the effect to
work exactly the same. If we have keyframes,
for example. If you set it to the endpoint, it means that the keyframes
are going to move around. Like, if the clip is
going to be longer, the animation is going to
be proportionally longer. So let's take a look. Let me do another screenshot
and then drop it on top. So there we have the and if I make this
clip a lot longer, actually, let's make
it to 15 seconds. I'm going to put 15, zero, zero, click on a key it's going
to be 15 seconds long. Now, if I apply the same effect, mosaic preset, take a look, we will have this keyframes
exactly the same relative to the position of
this keyframes in exactly the same position
relative to the layer length. So if I come here, there you go. You'll see where it's located. It's located at 14 seconds. But then if I click here, it's located in exactly the same position relative
to the layer. But if I here. So the key frame is
actually at 8 seconds, not at 14 seconds. So that's what happens if you save the preset
to the scale. If we save the preset
to the ca point, it means that it's
only going to be based on the beginning
of the clip, which means it's always going
to have the same length. And even if the clip is short, it means that emission
will not be done in full. If you set it to the outpoint
means it's going to be based on the last
frame of our clip. So it's just the nuance that it has. So let's click on Okay. Now, it's also important
to note that you can save many effects or many presets, many motions, many keyframes. So if let's say I want to
decrease the scale a little bit here and I want to save the motion and the mosaic efect. I just need to select both
of them by person command. So if I click on Mosaic and then by person
command or control, I click on the motion, both of them are going
to be selected. If I click on the save preset, both of them are going to
be saved in this preset. You can also import and export presets you
can buy them online. So if you going into the effects and you right click
on the effects, you can click on import
presets, export presets, and you can also create new
bins like new custom bean, preset bean and you can organize presets
the way you want. For example, I have a couple
of ones for the slow Zoom. So have slow zoom in and zoom out for 15
seconds, and I have, the position in and out, which means that if
I get rid of this and apply the position
in, just drop it in. It's going to but it's
based on layer size. That's why it looks
like the movement is very have the same thing for the screenshots and all sorts of other presets that are used
on a daily basis here. So if you want to
add something in, click Import presets and just like the certain presets
that you'd like to add, and then just click on Open
and they'll be open here. And same thing if you
want to export and share your presets,
you can just export, give it a name and where
you want it to be exported, click on Save and
you'd be ready to go. So if you have any
questions, let me know. At that let's jump
into the next video.
15. Congratulations!: Congratulations. If
you're watching this, it means you made it halfway
through the course content. I know we've covered
lots of congratulations to you for making to this point. And there's a lot more
valuable content coming soon, but before we get
to the next video, I want to simply ask you if
the scores gave you value, could it take 60 seconds
to leave a quick review? Your feedback helps
the next student decide whether the
scores will help them, too, and it helps me continue creating better lessons for you. So leave the feedback now. And of course, if there's
anything I can help you with, please let me know on
the QN section below. You're doing great. Keep going. With that being said, let's
get to the next video.
16. Color Correction with Lumetri Color: In this video, we're
going to learn how to do color correction. So the way you do it
in premiere is you have to open lumetri color. If you don't have
lumetric color, you can go into Window and
click on ometric color. Alternatively, you can go into Workspaces and click on color. This graph is going
to be pretty helpful, so we can actually come here. We need to select our clip,
select the vectorscope. So these two graphs
are pretty useful because they represent information that we
have on our screen. If I move within the video, the information changes
here because it's just the same representation of what we have on the screen. L on the right, this is
the representation of me, just in terms of the colors
in terms of the brightness. So couple of important things. First of all, in terms
of the color correction, I think people
overcomplicate that, but it's actually pretty simple. You just want to make
sure that the colors are pretty correct to what
they are in real life. And if you are going
for something specific, we'll talk about that
in the next video. But in this video, let's
just make sure that we have pretty good colors
that's well saturated, that it's not super dark or super bright, and
we'll go from there. So I'm going to
close the creative. And at the metric color, which once again, we have,
if you go into Window, loometric color,
that's all you need to know will have the same metro
color in any workspace. We have the basic correction, and to the basic correction, we need to understand what
we have in front of us. So before we customize it in the basic correction, I'd
like to create a mask. I'm going to click on
the object mask tool and then click on Ellipse mask tool. Click on the clip and then start drawing a mask when
I go to the effects, have the Ellipse
mask and I'm going to change it to opacity mask, which means that the information that we're going to have
in the emetroscopes, are going to be
represented over here. If I click in
Commands and disable, we're going to have everything back, but I'm going to click. So this line that
you see between the yellow and red
is the skin color. So when we have the skin
color in this line, it means that we have
the correct skin colors. Now, if we didn't have that, we need to select our
video and then customize and play around with the temperature
and the tint. Oftentimes, you can
also click on the auto and you're going to do
a slight adjustment, and oftentimes it's a
pretty good adjustment. And then also does all
sorts of other adjustments. So if I click on Command
and get rid of the mask, so let's go to the effects, click on the mask and click
on if I click on Auto, it's going to do a few ajustons which
it does pretty well. Now, if you'd like to
customize it further, we can change the temperature
to make it colder and, you know, add a little
bit of pink or green. This is done in order to set
the correct white balance. The way you said
a white balance, is you have to find
something white on the background and then
click on the sweep and, you know, set something
like we have here. It's pretty good already, so we don't necessarily have
to customize it too much. In terms of the
brightness and darkness, we have to take a look at
this graph on the left. At 100, it's all the highlights. It's everything that's bright. At zero, it's
everything that's dark. So, for example, this
part of it here, it's black and
something on my arm, it's pretty bright, so
it's like at the top, and everything that we have
in between is in between. So it's just the way
information is presented. Now, we want to
make sure that the blacks don't really
hit the blacks. Otherwise, we lose
the information. So for the automatic correction, did too good of a job. So, for example, if I drag the blacks to a
little bit higher, we'll see that the
information actually became a little bit better because it's not touching the blacks now. But if you put it to zero, it's like it's barely
touching that. So actually, we can put a zero. The automatic selection
dig it to minus eight. So let's click on auto again, which I think is a little bit
too much because we start to lose information like
the dark spots like here, here, and in the shadows. But if I bring it back to zero, we do have a bit of the
information in the black. Now, the same for the whites, let's see what it did. So we need to go for highlights, and for the highlights, I think it pushed it
a little bit too far. So I actually wouldn't push it, and I keep it at something
like zero because it did push it a
little bit higher. Click on auto puts it to 20. It's great because it creates more contrast, but
at the same time, we lose information
when we get to 100. So really, you don't want it to hit the 100, as
well as the zeros. So put this one to zero
and this one to zero. It's a bit less contrasty
but we keep the information. We can add something
like vignette. If we go to the bottom, we can make it white or we
can make it dark. We can change the midpoint, the roundness of it,
and the feather of it. If you like the style, you
can definitely go for it. And then another
thing is that we can just if we don't
want the effect, we don't necessarily
have to press and command to know to undo, put everything to zero, we can just click on this button here, it's going to completely dis L secondary allows us to
customize specific colors. So if let's say I don't
like the orange color here, I can click on set color. I can choose that color,
click on the gray scale, and it's going to
select just that color. We can do slightly
bigger selection, for example, like that. And then if we want, we
can just desaturate that completely or change its
look to a different color. Like we can make it blue or
we can make it very orange. So if I make it
blue and I disable the gray scale, this is
what we're going to have. So we can customize
specific color. So nothing else is
going to be changed. So if I put this to zero, you'll see that the only thing that changes is the
color that we select. Can customize the color of
the skin by this way as well. The color wheels allow us to change specific
tones of the image. So we can change, for example, just the shadows and put
them to red or we can do the same with the mid
tones or with highlights, and it's going to be
different effect every time. Or we can put all
of that to red, and it's all going to be red. So it's just a way to customize and isolate specific
colors and tones. With curves, it's
just another way to move the information around. I can make it super
white or super dark, or I can make it a
little bit more contrast if I put the three dots here, put this one a
little bit higher. This one a little bit lower. It's going to be more contrasty, or if we do it this way, it's going to be less
contrast, just like that. I'm going to press
on Comanche to undo. In the hue and saturation,
we can set specific color. So let's say I want
to desaturate orange. So I'll select the orange. It's going to create
these selection dots, and then I can drag
the orange down, and so we're going to
desaturate orange, or we can desaturate red, for example, if the image
was a little bit too red. For the versus hue, it's just we can change the hue. So once again, we can
change the orange and we can make the orange
to different colors. Hue versus luma, it means just how bright
it's going to be, so I can make the orange
really bright or really dark. For desaturation,
we can once again, desaturate something
so if I select something like blue and
then desaturate that. So that's mostly how you
do the color correction. You just want to
make sure that the white balance is set correctly, and you want to make
sure that it's not super gray or too saturated. Like, this video may be a
little bit too saturated. So I'd go into basic
correction and then decrease saturation
definitely not to 108. So I'll put it back to, let's say, something like 100. So that's a little bit less. Actually, maybe a
little bit more. So let's put it to, like, 104, 105, and there you go. That's how we do it. If you have any
questions, let me know. Other than that let's
jump into the next video.
17. Cinematic Color Grading & Custom LUTs: Now in this video,
let's talk about creating a cinematic
look with color grid. Now, cinematic oftentimes
starts with the lights. So if you take a look
at the image that we have in front of us,
what do we have here? We have the light on the right. We have the light on the left, we have light in the background. So we have three sources
of light in this image. And that's what creates this
kind of cinematic look, but we can advance it even
further by customizing it, something we discussed
in the previous videos. Then there's also a
way to apply a lot. So if I go into the creative
and select our video, we can apply a number
of different lots. Now, you can download
lots online. You can literally search and Google download free lots and you'll be able
to download them. You can purchase
them. And lots are basically a specific
look that you can apply. So if I click, for example,
on something like this, it adds a little bit
of the filter on top, and then we can customize
the intensity of that lots. We can make it super intensive
or not intensive at all, and then we can select
something else. And these are some of the ones that are installed
on my computer. I'm not sure if you have
the on your computer, but you can give it a choice. So there's going
to be a number of lots you get a number of different lots that you
can play around with, and then you can customize
it even further. So if we go for this
kind of black and white, then we can customize a a bit of the faded look so that we
make the blacks a little bit lighter and we get this
kind of faded effect and we can play around
with a couple of settings like sharp and
vibrant saturation, but we want to make sure the
saturation is set to zero so that we don't have anything on the screen for the vibrant. It's more about the saturation
of the certain colors and then the sharpness if I zoom in or see the
difference in the sharpness. So if I decrease or increase
it or if I put it to zero, it's going to become a little bit less sharp, just like that. Where you can create
cinematic looks, and then once again, cinematic,
it's all subjective. It's really important
to understand that, with all the video
stuff and with all the creative stuff,
it's all subjective. It's cinematic for one person, not cinematic for
the other person. So it's important to understand what exactly you're looking for and trying to understand the kind of
things that you like, the kind of styles
that you enjoy. And then once you
create those styles, it will be cinematic for you, or it will be good for you, pleasant it may not necessarily
be for other people. And if you download
something from the Internet, you can just open this up
and then click on Browse. Just find the file that
you downloaded, like, a lot from the Internet, and then you can
apply, give it a try. I don't use lots at
all, to be honest. It's just a way to do it. I don't think it's any good at this point because it's just for professionals who are really trying to do something
super, super specific. So if you have any
questions, let me know, than that let's jump
into the next video.
18. How to Remove Green Screen in Premiere Pro: In this video, we can
talk about green screens. We have a very good example on the screen of a green screen, and in order to get rid
of any green screen, we have to go into the
effects panel and search for infect gold color key, and then apply that
effect onto our footage. Now, we need to go into
the Effects Control panel, and in the color key, we need to select which
color we need to key out. So I'm going to click on green. And here we need to
increase something like the color tolerance or actually, let's increase the tolerance, and then increase the edge
thin a little bit more. We're getting a little bit too. This is actually pretty
good this point. And you'll see
that we still have green on the other side, but we don't necessarily
have to get rid of that because we can
also create a mask. So if I click on this button on the mask to slip the ellipse, then create a mask around
our person, for example, O, then let's click on change to a paste mask,
and there you go. We have our person
in the middle, but then we have
no green screen. I mean, at this point, yes,
we do cut him a little bit, but then we can customize it a little bit so
that, you know, we don't cut as much
like that because we don't have green in
those areas at all, so we can make it even bigger. Oh, so let's go from the very beginning,
what do we have here? Yes, very good. So that's
basically how you do it. You just apply this effect,
and depends on the footage, you have to play
around with setting, so it's not like these settings work for every single footage. You do have to customize
the color tolerance, the edge thin, the feather, and something like we did with the text where we can
cut out certain subject. Yes, we can try to cut out certain subject and then
try to analyze the forward. It's definitely a way to do it. It takes a bit more
power of your computer and depends on the type
of work that you do. There are different ways
that you can approach this. So here are a couple of ways
that you can approach this. If you have your
questions, let me know, then that jump into
the next video.
19. Audio Editing in Premiere Pro: Welcome. In this video,
we can talk about audio. Most of the time when
we need to customize audio and premiere is when
a person is speaking. So we need to change
how the voice sounds, make it a little bit better
or a little bit louder, a little bit quieter,
things like that. So I'm going to use
this example video, and I'll just drag it to a
timeline and then make a cut. Let's listen to this audio. How do you make a boring topic feel engaging in the video? The audio is pretty good, so we don't have to change
it dramatically. But some of the things
that I do is I go into the effect and I have a preset that you'll be able to save. So if I apply it to
the audio and then I go into the effects control,
here's what we have. We have a hard limter and
parametric equalizer. In the parametric equalizer, that's the effect that
you can search here. So parametric equalizer, not simple parametric Q,
but parametric equalizer. That's two different things.
We need the one at the top. So just drag it onto your audio
and it's going to appear. And then for the hard
limiter, same thing. Search for hard limiter and then just apply
it, and that's it. So what should we do here?
In the parametric equalizer, I click on E and I click
on the vocal enhancer, and I click on the preset, and this is the default, and this is the vocal enhancer. Basically, it changes kind of the lows and the
highs of the audio that makes it sound just that
much a little bit better. And then for the hard
limiter, click on add, I limit it to minus three, which means it makes the
audio louder to -3 decibels. The way it works with audio
in premiere is on the right, we have, you know,
this decibel meter. And when we reach zero, it means that the audio is going to crack. We
don't want that. So this hard limeter allows
us to get to minus three, to the maximum, so it's
going to be pretty loud. It's going to be like you will be able to hear
the audio really well, but at the same time,
it's not going to crack. And for the permit cure, it's going to make the
sound a little bit more basy and just better. So let's listen to
what we have now. How do you make a boring topic feel engaging in the video? Now, you might hear that we have a little bit of some sort
of noise in the background, some sort of grain noise in the background, is
how we describe it. Something that we
can do as well here is go into the essential sound. Then click on our clip and click on the dialog
in this case, because that's a dialogue. A couple of things
we can do here. So we can click on Enhance and it's going
to enhance the audio. This is done with AI, and I found that it's not
that good, to be honest. Like in the very
beginning, if you don't want to think about
this, you can set it. It's not something that's going to provide
really good quality. Go into loudness, you can
customize the loudness. You can click on Automatch
and it's going to automatch all the clips
to the same loudness. If you, let's say, had
ten different clips, it will do it on the same level. I don't use it anymore
because the hard limiter just does basically
the same thing. In the repair, there's
a way to do it. So for example, we
can reduce noise, and that's specifically
the noise that we can hear a little bit
in the background here. So if I drag the handle, it's going to be a lot quieter. We do not hear it in the
very beginning here. But if I disable, let's look. How do you? We can hear a
little bit of this grain. So here's how we can customize. The more we change
these handles, the more the audio is influenced and we have
to find good balance, and we shouldn't
customize it further. Like, if there's
something specific that you're going for,
you will know that, but if not, then just make the audio sound good,
understandable. That's not bad, it's not very
quiet. It's not too loud. It's not too crackly
or anything. And you can do it here. So we can reduce kind of
the rumble, the reverb. We can do the Ds. Igs is not going
to have this kind of sound when a person speaks. There are ways to do it. There's no one setting
that fits all videos, and you just have to play around with the settings a little bit. The way I do it most
of the time because I know my setup is I
got to the effects, and I apply this hardlmeter per meth calculizer
and then if I need, I can customize further
with essential sound. Essential Sound, once again, Window and then
essential sound is what we couple of other settings
that you can customize, but honestly, like,
don't worry about that. Like, most of the
time, you don't really need to customize that. And at the same time, if
you are looking to do professional work in terms of the audio in Premiere, there's
no really way to do it. You have to learn another
software by Adobe. It's called Adobe Audition, and yes, there you can really, really customize the
audio, but for premiere, it's just kind of the basic
editing at this point. So if you have any questions, let me know that let's
jump into the next video.
20. Adding Background Music the Right Way: Welcome. In this video,
I'm going to show you how to work with music
inside Premiere Pro. We're going to take
a look at the video, specifically at the intro of the video that at this point, generated 40,000 views, and
let's jump into Premiere. Now, let's take a
look at what we have. In this video, I'm going
to show you how to edit a complete viral realty
video from scratch, inside after effects,
head tracking, captions, roto brushing, speedrms, transitions, sound
design, everything. This is the most
complete tutorial I've ever made on this topic. Every technique in here is something I've
personally used to edit videos that generated millions of views. And you're
getting all of it. Completely free. No buy plugins, no shortcuts, no gaps. This is the full process. And the thing that
actually makes these videos look expensive
is not adding more, it's knowing what to take away. And I'll show exactly
what that means. Okay, so this is the
intro for the video, 30 seconds, and
here's what we do. First of all, when
to find music. The way I source music is
through epidemic sound. The reason being is
because I've used them for six or seven years, they have a big library of
music of sound effects, and then they're updating with AI stuff, you
know, adding voices. So we have music,
sound effects, voices. And what I do here
is I just search for and the second reason is because there's a
thing called copyright. If you use free sources
and free music, there's a good
chance that you need to either reference
the artist or you will get a
copyright strike on social media accounts, which
is something you don't want. So if you want to give
Epidemic Sound a try, there's going to be a
link somewhere around this player for a
30 day free trial. Now, what the real like about Epidemic Sound is
they have playlist. So if you go to music
and scroll down, we have different genres,
we have different moods, and if you scroll down even
further, there's themes. These are different playlists
for different themes. What the real like here
is if we search for it. Most of the videos I do
on YouTube are tutorials. So this is the playlist that
real because I do software, I click on software tutorials, and we can preview some of the music by just
clicking on playing it. Mm. I use a different
song for the intro, but this can actually work really well because
I really like the song. So you know to
download, I'll just go ahead and click and
download, and that's it. Now, I'll come to premiere, and I'll just drag the
song into our project. I'll double click on the song, and it's going to be open
in the separate window. Usually, I like to keep this
window here on the right. Now, I'm going to
zoom in a little bit, and based on the waveforms, this is what we see
in front of us. We can kind of tell where
the beat is going to start because most of the music follows kind of the same format. So it's going to be
roughly like here. I'm going to click on the
Mark Intol let it play a little bit. And then mark out. And then if I drag
just the audio, I'm going to drag it and let
me drag it here for now. The reason being is because I want to find the beat first. So we have the bit start here. So I'm going to cut
until this point, drag it down and drag it to
the beginning of the video. In this video, I'm going to it. So I usually put the
bits on the transitions. For example, we have the transition here where I'm just picking this kind
of the first phrase, and then we have the
transition and here the beat starts where we have the action or the
introduction of the video, and then at the
end, we're going to have almost like
an outtro phrase. Almost every single song follows the same format where we have
the beginning of the song, the middle of song, and
the end of the song. And when we do edits
for social media, it's very similar where we have the beginning
of the video, the middle of the video, and
then the end of the video. And this beginning,
middle, and end, it's called the content Unit, and long form videos consists
of small content unit. So we just have to do
it multiple times. This, what we have in front
of us is a content unit. For the beginning of
this content unit, we use the beginning. For the middle, we use
the middle of the song, for the end, we use
the end of the song. It's that simple. So I'm just going to make
this a little bit longer, make this a little bit longer, and then at the end.
Let's search for the end. So like that, so I'm
just going to drag it. Perfect. So let's
listen to what we have. In this video, I'm going
to show you complete vial real video for scratch
and so I don't forget. Captions speed This
is pretty good. Now, let's watch the end. So I show exactly what
that means inside. Okay, this is great. So I'm just shorten this
up a little bit. Now, for the audio, I'm
going to select all of it. Click on G. This is
the audio again. Here, we can set
certain decibels. So for example, I want
to adjust the gain by. And if I put -25, it's
going to be -25 decibels. This is roughly where I put the music. Let's click on Okay. So you'll see that the
waveforms became a lot lower, a lot smaller, and I just
listen, see if it's good. If not, then I can
just it further. If yes, then we're ready
to go. So let's listen. In this video, I'm going
to show you how to edit a complete viral realty video from scratch inside
after effects. Head tracking. Captions,
root of brushing. This is really good. It's
not competing with my voice. And another thing that
we can do is if we come to the transition
between the audio at the end, we can press on Search Command D to create a default transition. Let's listen to what we have. I'm also going to click on
just the S. So it means that we'll have only the solo
track of the audio. So of our music. If I set the two, it's going
to be two or I can just do the opposite thing of muting the one the top to
listen to the song. The transition to the end is very smooth, so this is great. So in the music,
there's highs and lows, and for the lows, it's okay. But then for the highs,
sometimes might compete with my voice because my
voice is not just the base. It has highs and has lows. So if it competes, I will
go into the effects, and I sometimes apply this effect called
lower music for voice. If I make this song louder by let's say 15, let's
listen to what we have. And if I apply it, you'll see that
it competes a lot less even with the voice that I'm speaking
with you right now. So the way to do this effect is, let's go into the
effect control. So this is the simple
parameter cube. We used parametric equalizer
before, but this time, it's simple parametriu so just apply it and then set
these settings in. By setting the
settings in, I mean, literally just type
these numbers in here. So center 13 60, cou four, and then post to -18. Then you can reclick,
save it as a preset, and just reuse it in the future. So that's how you do
in terms of the music. If you have any
questions, let me know. Other than that. I'll see
you in the next video.
21. Sound Effects (SFX) for Video Editing: In this video, we can
talk about sound effects. And sound effects is something I also source on epidemic sound. It has big library sounds. So if you're going
to sound effects, I think they have
something like 10,000, and I mean, you can definitely explore because they have
different categories. I really like the
user interface or the UI sounds when I
do the UI animations, or we can search for
something specific. So the way we do sound effects
is I come to Premiere Pro, and I'm going to mute both myself and the music because I
don't want to hear it. And I just take a look at
what's happening on screen. For fast movement like this, I would use something
like a woosh or a swoosh. So I'd literally search
for push. This is great. I'm going to download it, and I'm going to come to premiere. I'm going to go into the
project panel and then literally just drag
and drop the swooh. I'm going to double click on it. We can select just
one of these wooshes and then drop it
into the timeline. Let's see where we have the
most movement roughly here. So we have to put loudest
part of the Subwsh into the fastest movement of whatever we have
happening on the screen. Let's take a look. Maybe
it's a little bit too slow. Look. Sometimes the wooh can
be a little bit too fuzzy, for example, what we
have in this case, so I'd go and search
for another s wooh. Oh, this sounds much better. So let's download it, drop it in, select it. Drop it. So you'll see it's a lot longer because you
can see the length. I'm going to delete it,
and let's take a look. Yes, this is a lot better. And then we can put
another swoosh, for example, here because
we are zooming out a lot. What we can do here
is we can just copy this effect instead of
applying it from here. So I'm going to press option, click on this audio
and then start dragging it and just
going to copy it. So I'm going to
put roughly here. Let's take a look.
Great. Now, for the flash transition
that we have here, we can go and search for
something like a camera shutter. Okay, I like this
one, so I'm going to download it,
come to premiere. In this case, I'm just
going to drop it here, and I will drop it onto the transition. So
let's see what we have. And we can shorten this
up so that we don't hear the thing in
the very beginning. Great. Now, we have all sorts of things
happening on the screen, but nothing that
needs to be added. But then for some of
these things, you know, for the fast switches of
what we have on the screen, we can use something
like animation composer, like something we
already discussed with you in the transition. So if you're going to sound
effects to the sounds, I'm going to search
for some like a click. Okay. Actually, I
would like this one. So I'm going to copy
it and then click on arrow down in order to
go to the next cut. If it doesn't go
to the next cut, you just need to
enable a certain track with blue because if I
disable these tracks, I'll only go between this cut, this cut, this cut, like everything on just
Track one, as you see. But if I want to go between different tracks, like,
for example, here, and then pressing
Command V to paste it, and this is how fast to do it. Let's see. Great.
Simple as that. Then for another
flash transition, we can just use
the shutter efect. I'm just going to drop it from the left to here. Let's see. Great. So I just go back and forth and see what can
have certain sounds. Like, most movement has
some sort of sounds. I don't try to do it
for every single sound because it can be a
little bit too much, but I try to do it to as many as possible to make the video
a lot more engaging. And then if it's a
little bit too loud, I just select the press and G, make it a little bit lower
in terms of the loudness, and that's kind of the secret. So if you have any
questions, let me know, at that let's jump
into the next video.
22. Multicamera Editing & Audio Sync: Welcome. In this video,
we're going to learn multicam editing
and audio syncing. Might sound a little bit scary, but it's absolutely not. So in the resources section, you will find the
two files that you need to drag into premiere. This is kind of
the same recording just from the two sites. It's one clip of me just
sitting in front of the camera and then
there's another camera from the side,
recording everything. So we have two ways to do it. I'm going to show
you the two ways. We need to select our footage, right click and click on Create multi camera source
sequence. Couple of things. You can set specific
name here at the top. I'd go for something custom so we can set like a multicam. Then for the synchronized point, we need to use Audio
Track channel. In this case, we select one because that's the
only option we have. And I will show you
how to synchronize audio even without this
a little bit later. Then the sequence preset, if you want to set
something specific here, but we will keep it automatic. It's just kind of the sequence
settings that we need. And then the audio, for
the sequence settings, we are going to just keep everything the same
and click on the game. So here's what it does. It
puts our clips in the folder, and then we have a
multicap sequence. We can drag the sequence
to the bottom in order to actually
preview what we have. Welcome. This is a
multicPractice video. We have Camera one.
We have Camera two. Great. So when I switch
to another camera, I want to be able to actually switch. So here's how it works. In premiere below
your video player, you have a number
of different icons. These icons are useful buttons, and you can click on this
button to add more buttons. We need this button called Toggle multicomO there's
a shortcut of Shift zero. So we can either click
here and something will change or we can
just click on Shift zero, and exactly the same
thing will happen. I can just switch between
that by shortcut. Now, let me explain
what happened to our audio and videos. So if I click on the multicom, this is the multicup
sequence that was created. I go direct click and
open it in timeline, and it will open the sequence. So this is sequence final, and this is the
multicam sequence. So when we opened up, we have our two audio and video clips. So this is the one
from the side, and then if I disable it by
pressing Shift Command E, we'll have the video that
we have in front of me. Here we can decide what we
want in terms of the audio. For example, I can mute
this clip and we'll have only the top clip
because the top clip has better audio because I
have a better mic there. We can customize our clips here, and then whatever
changes we hear, it will be reflected
right over here. But let's close the multicom, come back to the multicomF
here's what we need to do. We need to click on this button to toggle the multicom view, and whenever we start playing, we can switch between
the two views. If I click on two, literally on number two, it's
going to switch here. But if you click on number
one, we'll be able to switch. Whenever I switch, it's going
to update it in real time. If I zoom in and
then just try to replay the video and
if I toggle this, it's going to switch
automatically the way I switched in real time. We don't have to do it with
button one and button two. We can do it in real time, just with pressing on the
screen and do it like this. Whenever I switch,
you'll see that we have these cuts in the timeline. There's another way
to do it. If let's say you don't want
to do it like this, I'm going to delete everything. I'll just delete everything
completely, click on a K, and I'm just going to track the two clips here
and then track them into the sequence to crit sequence below
into the timeline. So I'm going to put them
on two different layers. I'm going to select them, Right click and click on synchronize. I want to select
Audio Track channel, we'll keep one at this
point and click on a K. It's going to
synchronize the audio. So something the premier
do techmtically. Now we can select this, right
click and click on Nest. Click on K. Basically, what it does is it takes our video clips and it puts
it in another sequence. So we have a sequence
within a sequence. Do as many of these as we want. Like if let's say we did a
number of effects and we don't want those layers to be separate and those
efects to be separate, we can just nest it and going to create sequence
within a sequence. So if I double click, it's exactly the same thing
that we had before. And if you want to do
multico from here, we indirectly click on
multicom camera enable, and we'll be able to do the multicom the same
way we did it before. So if I play So if I start playing, we have exactly the
same thing, you know, we have different clips. It's really useful
for podcasting. And another great
thing is that then you can just
customize the clips. You can press on
command and, you know, move things around, like, so if you want to
customize it even further. So it's just going to move the cut between the different clips. It's really useful if
you do podcasting or some sort of long videos
where you do mult cams. And we can do it manually. If we come to this composition, we can make a cut, for
example, make a cut here. Let's say we don't
want this audio, we can press on Shift
Command E to hide it, and we'll be able to switch
Limit disable the multicom. So we'll be able to
switch from here to here, and I like that, but it's pretty manual, and there's better way to
do it with the multicom. So if you have any
questions, let me know. I think that let's jump
into the next video.
23. Masking & Mask Tracking: In this video, we're going
to talk about masking. This something we've
already talked before. This is something that
we've already done before, but I want to go a little
bit deeper because we can do some really
interesting things with masking. So I'm going to drag this
video and track it to Tameline and it's a video
of me just kind of walking. Now, I want to show one
interesting effect. If let's say I select the mask and go to
the ellipse mask, then I start and select the clip and start drawing a
mask around my face. Like so let's say
I want to track a mask around my face
in order to blur it. So I will track the mask
forwards and backwards, going to do it automatically. Let's see what it
does. Okay, great. It did the whole thing. Now,
if I go into the effect and I search for a mosaic
and I apply this effect, the mask is going to be
attributed to the effect, in this case, to mosaic, which is creating a blur. And in the mask, there's
a way to do mask opacity. Like we can control how
strong the effect is. Basically how visible
the effect is. You can do mask expansion
to make it really big. So if I click on it, we'll be able to see it a
little bit better. With the red, it's
the mask expansion, and then with the feather, we can control how smooth the transition is between
the mask and no mask. So we can really see it here because there's
this gradient. We can do a mask with a pencil. We can draw another
mask like or we can draw a mask with
the rectangle tool. It doesn't matter,
so we can draw masks in many different ways. We can track them. It's
really, really useful. And if we go for
the object mask, there's something
we've already did. So actually let me
delete all the masks because it's just a little
bit too much at this point. Let's delete this, delete this, and a mask going to delete this as well, and
delete the mosaic. So we can select our subject, right something we
did with you before, and then we can track it
forwards and backwards. Let's just wait a little bit
for it to do the tracking. For the tracking, we have
our mask, once again, if we apply some mosaic effect, we're just going to blur
myself out completely, and once again, we can increase the feather a little bit and the expansion so that we cannot identify what
kind of person that is. It's really useful
because sometimes we really need to blur something
out from the screen. This is the way to do it. So
if you have any questions, let me know at that, let's
jump into the next video.
24. Stabilizing Shaky Footage with Warp Stabilizer: In this video, we're going
to stabilize shaky footage. Remember, we had
these clips before, and when we drag them onto a timeline and tried to do
a speed ramp with them, they were a little
bit bumpy because it's not super smooth. Now, there's actually a
way to stabilize footage, and we don't have
to do it manually. We can do it automatically. So if I go to the defects
and search for a stabilizer, we need a warp stabilizer. So we just need to drag the
effect onto our footage. And it's going to do the job. It's going to do
everything automatically. It needs to analyze
every single frame, which you can see
the process here. It will tell you how
much time is left. So if I make this a
little bit bigger, the percentage and the frames. Once it finished
with processing, it needs to do stabilizing. This part is pretty
fast as well, and it finished took us
10 seconds to do it. So now, this video is a lot
smoother than it was before, and the speed ramp is going
to be much, much better. Can increase the smoothness
to, let's say, 100. It's going to zoom in a lot more and stabilize
it a lot more, so it's not going to be
like buttery smooth, but it also has to crop more. So we have to find balance of how much do we need
to crop versus how much do we need to keep in order to not crop that much. So if I disable the effect, you'll see that it
zooms in, in this case, not significantly, but in
some of the other cases, it can do more, depending on
how shaky the footage is. Usually I just work
with smoothness. I don't really touch
the other things. Sometimes it can also distort a little bit of the background. The image might look
a little bit weird. So you just need to
decrease the smoothness. It's going to be a bit less
smooth, but at the same time, it's not going to
completely distort the image if it's
super super shaky. If you have any
questions, let me know and let's jump into
the next video.
25. Customizing Your Timeline: In this video, let's talk
about timeline customization. Yes, you can customize
the timeline. So I'm going to attract
the video here. And finally, we get to this
video because honestly, I don't work with this timeline. The only reason I
use this timeline is because I want
to show it to you because you might be a little bit overwhelmed
with all this stuff. But now that we
get to this video, I'll show you how to
properly set this up. So you'll see that
we have you know, this pretty big height in
terms of the each truck. Like, there's a
lot of space here. We can minimize that by just dragging down and
making it a little bit smaller or we can drag this up or we can drag
this up to be huge, but I don't like
it when it's huge. You will also
notice that we have this very terrible line that
if you accidentally hit it, boom, you'll put the
opacity to zero. I have no idea why it exists. It's Honestly, I never use it. It's very annoying
for me, so that's why I like to show you how you can customize
your timeline. So if you press on, for example, Shift plus and shift minus, you'll be able to decrease and increase the size of each truck. If you're on Windows,
it's control, and then we can click
on Option plus, and if you're on
Windows, it's Alt plus. And this is the size
that I work with. This is my favoritize. There's no this line
that we have to move up and down in
terms of the opacity, so there's no this thing here,
which is really annoying. Once again, put it back to
100. What's wrong with that? No, I would also
recommend you to click on the clip and
then click on Option or Alt and then
arrow up and then move it down in order
to create more tracks, and then you click on Shift
minus to make it super small, make this on the same layer, and then just click on Command
plus and Option plus like that so that we have more tracks at the top and at the bottom. You can save this as a preset. So if you come here to the
timeline display settings, click on Save Preset, and let's call it like mine, for example, and
click on a K. Now, here's the interesting
thing that if we go into managed preset, we have mine and we have
no keyboard shortcut, but we can put the track
height preset one, click on. Now, if we go into
Option Command K to open the keyboard
shortcuts or Alt Control K, let's search for TRC height
preset, here we have one. So if I click on shortcut
and create a shortcut, we can put any shortcut in my case because I
don't really use a lot like the L and K because I create my
custom shortcut sometimes, or in this case, we don't
really use the hand tools. We can press on for example, and it's going to override
the hand shortcut. Click on K. So anytime
you open premiere, it's going to be
something like this, then you just press on H and
it's going to be small. Yes. Finally, we can.
Another thing is that if you make cuts
here, for example, like that, you can mark
things with different colors, so you can right click and you can set it with
different color. It's just going to allow you to understand that certain
things have certain colors, and once you create
your workflow, you'll be able to identify
which color means what, and it's just a way
to identify things a little bit easier
and it's going to be really useful in the future. I'll also mention that I do customize the look of the
program monitor quite a lot. So this is what my editing workspace usually looks like where I have
premiere capos left, the timeline and the project
here and the effects here, then I have a lot of stuff here. It's like properties, fire card, the audio tracks,
elemetr effects, text, blah, blah,
blah blah blah. A lot of stuff. So this is
what I usually work with. If you want to
have the same one, you just want to make sure that let's say the
program monitor, I have to drag it to the left until we get to the green
get to the green thing, it's going to be kind
of this big size. I'm going to put this back. Actually, let me
go to the starter. This is what we have
in the very beginning. So going to drag the project, put it to the left until
we get to the green thing, and then we just need to move it a little bit to the side. So we have to do it like so, but then we have to put
this stuff here as well. So that's how I
work. So this is in terms of the
horizontal workspace, in terms of the
vertical workspace. I'm not sure if you
have it by default, but this is what
mine looks like. So it's really
useful. Once again. Project effect and the
audio tracks are here, but then right over
here, I have more stuff, including premiere composer, although I might move
a little bit left. So I just play around sometimes, and I always change things
based on the workflow. Sometimes the
workspace needs to be slightly different depending
on the work that you do. So you just need to find
the thing that works really great for you and
customize it to your lking. If you have any
questions, let me know at that let's
jump into the next.
26. Premiere Pro Keyboard Shortcuts for Faster Editing: In this video, I want to
talk about shortcuts. Shortcuts will save an
unbelievable amount of time. And you've already
discovered some of the shortcuts and you know how to see some of the shortcuts, if we go into any of
the panels at the top, we'll see the shortcuts at
the end of a certain button, or we can click on
Option Command K, and here we'll have
custom shortcuts. Now, I do a lot of
custom shortcuts. It's because sometimes
I don't like the way Atobe does it or I don't use some of the
features that they have, and I'll be able to
overwrite shortcuts. So you can create your own, and you can search for the
ones that already exist. If something doesn't exist,
you can create your own one. Although that's not
always the case, but most of the time,
that's a possibility. It's just some of
the actions are not short cutable if
you know it's also important to know
that Adobe updates shortcuts with your updates. So if you watch
this in the future, they might do things
slightly differently, and some of the shortcuts might be slightly differently as well. Now, this is premiere for 2026, but because of some issues
that I have with this program, I actually still
use premiere 2025. I'd like to show
you the shortcuts that I use quite often here. Very similar thing
where, you know, we have a timeline, and I make it a little bit
smaller like that. That's the first thing I do
when I open the project. Then I have a couple
of shortcuts. You have Q and E in order
to do the ripple cut, but I really like another
shortcut in between them. So if we open the shortcuts
option command K, the ripple trim on the left, and then on the W, you have
the ripple trim right. But I also have add died. So what I have in
between here is if I use the playhead and I click on
W, I'm going to make a cut. It's not going to cut only to the right of the
play head like that, which is what you have or to the left, which
is what you have. So if you press Q to the
left or if you press W, it's going to cut to
the right for you. But my case for W, it's going to make a cut really, really useful because if let's say I want to cut it
from here to here, it's much better to be
able to have that option. Next, for the colors
for Command one, two, and Command plus, I
have different colors, so I can switch between the
different colors like so. If I select the footage
and press on Control A, I'm going to remove attributes, which means it's going to delete certain effects from
all the layers. If let's say the video is
a little bit too small, I can select the clip
press on Control V to make it fit the screen
vertically or horizontally. So if you going
into the setting, it's going to be Control V, it's going to be fit to
frame or fill the frame. These two shortcuts are
really, really useful. Shortcuts for different windows. So if a person four, it's
going to be properties, number five is going
to be the effects, six is going to be
graphic template, seven is going to
be elemetric color, eight is going to be text and nine's going to
be central sound. For one, two and three, I have shortcuts in order
to play the video. So if a plus on one is
going to be shuttle left for two shuttles of
a three shuttle right. And here you have
the properties, the effects control
graphic templates. So if I search for example, for properties, you need to scroll down a little bit
on Window properties. So we can search for window. We have different workspaces, and here we can set shortcuts. The effect control, I
told you what I have, the effects, the sound effects. By the way, the effects
is really useful. So if I'm here and if
I click on Option two, it will open the effect panel. If I click on option
one, it's going to open the shortcut
panel. So let's open. Let's see what we have. Option one is going
to be the project, and option two is going
to be the effect. Have small shortcuts here and there that I don't always use, for example, if I want
to synchronize clips, I just put them onto
different layers and I click on controls, and it's going to
synchronize the clips, something that we
discovered with you when we did the multicom video. Just click on Okay, but this is not going to synchronize
because the same clip. W you recommend you to
the action to do here is to understand what kind of
things you repeat often? Because those are
the things that you need to create shortcuts for. If you create shortcuts, the
ones that I set you, yes, some of them will
be useful certainly because there will be a lot of overlap in
the work that we do. But the same time, try to understand the patterns
of the work that you do. When you understand
your patterns, you'll be able to then say, Hey, I click five of the
same patterns all the time. Is there a way to
click just one button instead of five to
save me four clicks? And then if you find
that, it's going to be huge because
you will be able to save four button clicks every day or maybe multiple
times per day. And if you spend 10
minutes per day, it's going to be 70
minutes per week, so over an hour per week
or over 4 hours per month or what if you
do four times 50, over 200 hours per year? Is does a lot of the work. So try to understand
the patterns. Obviously, if you have any
questions, let me know. Better than that, I'll see
you in the next video.
27. Firecut: AI-Powered Editing Tool Overview: Welcome. In this video,
I want to talk about AI tools and how to use
them with Premiere. But I want to talk
about one specific tool that has a lot of tools built into it so that
you don't have to have ten different subscriptions.
It's called the Fire Cat. So I will drag a video
and create a sequence. And if you go into
Window extensions, I'm going to have a Frecad here. Now, we'll take a look at FRCat and if you like the Frecat, there's going to be a
link in description, that if you get subscription
through that link, you will get a 10% discount. I usually put fire cut
here on the right, and here's what it does. It does the removal of silences of filler words of
the repetition of profanity. You can add zooms, chapters,
captions, voiceovers, titles, find roles, music, do the multi track. Audio cutting automatically,
you can create highlights, and you can create
workflows if you want to workflows basically
like a preset. So here's how to do it. I would go into the cut silences and you can do it automatically, which is kind of the default. I would just make sure to
put it to the cut tight. It's going to do automatically. If you want to go advance,
there's a way to do it. You can go and click on Analyze, and there are specific
settings you can set. Like, I'm not going to
go into super details because you can go onto
the FRCAt website. You can click on
see documentation, and you can watch these videos
on how to do it in detail. But let's go for the
basic cut tight. Let's go and click on G. It's
going to quickly analyze that and then it's going to cut the silences
automatically. And again describe how
much time it saves. So it cut 53 seconds
of silences. Imagine doing that manually, that would take forever
for the short video. Then, for example,
for another thing, like remove repetition
because I do repeat a lot of
stuff quite a lot. So once again, actually, let's go for the full
sequence here because it just selects the in and out
points that we have the top. But if we were to do the in and out points, we
just need to come here, click on O so that we have
the in and outpoints, but in this case, we can do full sequence,
detect repetition. And let's see. Here can
also play with settings. You can set the
minimum free size, the tolerance, search radius. When you see this
for the first time, might be a little
bit overwhelming, but once you give it a try, it is extremely easy. I know, because I've
used them for you, since last year, basically, they're really good at this sub. So let's say you customize
some of the settings, then you preview and
choose the best takes. You can literally click and it's going to take you
to the repetition. So let's that's I feel like that's a feel like
that's absurd question. So, we have three repetitions
of the same thing, and I can just click
on the one that I want to select and it's just going to cut
the other stuff. It's like, it's that good. Then we can watch the next one. So if the video is ****,
so if the video is ****, then, so if the video is ****, nobits going to save that. Okay, great. So yeah, we can click checkmark. It's going to delete the
other ones and keep this one. It is so, so great. If I go back and then we can remove profanity,
we can add Zooms. Like, we can customize and tell it how zoomed in
we want it to be, like how smooth it can be. We can set specific graphs.
Then we can click and go. It's going to actually, here, we were not able to add Zoom because we had the in and
out points too small. So it's click on option X to disable the in
and out points. Let's again click and zoom,
and it's click and go. So it did add right here. So let me mute this track. Let's see what we have. So it
did add a couple of Zooms. You'll see that added in JMLre and within Just Mllir
there's this Zoom, and then we have the Zoom out, and then we have the
same thing at the end. So for short fm videos, it's amazing how
great job it does. Now, once again, I'm not going to go through
every single thing. If you want to give
it a trad, there's going to be billing
in description, and I'll be honest, I use this
tool in every single edit. Literally, every
single edit I do. So I know that these
guys are great. I know the person who
built the software. And if you want, like,
reassurance from me, you have the assurance
that this is something that's going to
save you a lot of time, a lot of effort, and a lot of even money in the future
because of how great this is. So if you have any
questions, let me know that let's jump
into the next video.
28. Export Settings for YouTube, Instagram & TikTok: Welcome. In this video, let's learn how to export the video. So let's say this
is our final video, want to export that. We need to mark where we
want to export that exactly. Like, which parts of the video? So do you want the whole video or do you want specific parts? And the way to do it is
with in and out points. So when you come to
the very beginning, for example, and click on I, it's going to create an in and if you come to the
end of the video, you can do it by also
clicking arrow down. Come to the very
end. Click on O. It's going to mark the outpoint. Now, if I zoom in,
you will see that we have this very
annoying last frame. So in order to get rid of that, it's just a quirk of premiere, have to click arrow to
the left and click on O, and it's going to get rid
of that annoying frame. Now, we are ready to
export the video. And by the way, if you don't want to
export the whole video, you can also mark
out, for example, here, and it's going to
export on this part, but we want to go
for the whole video. Also click here
and then click on arrow up left and click on O. Next, we need to go
into Export or click on Command M. We'll get
to the Export video. And a couple of things here. You can export with
match source settings. It's good to export with the same settings
that your video is, or you can create
your own settings and then save that as a preset. Use both depending on the
type of work that I do. For example, I have
this Vladislav or Vladislav with right colors. If we set it with right colors, it's going to be a little bit
better because it's going to export it with proper colors. There's an issue that
Adobe is aware of. They created this Gamma
compensation lot, which if you going
into the effects, there it is selected form. It's going to be linked somewhere around
the video player. So just click on it. It's going to be non for you. So click on Custom one, and then you just
need to select it. I always have it in a
folder on my desktop, so I just click on it, open and there you go it's applied. Basically, it makes the
colors more saturated because when you
exp Premiere Pro. Without that, the
video is going to be less saturated and
less contrasting. So when you go into
video, and here, I always try to match
the source settings. So even if I select, my presets with
the right colors, is going to be the match source. But the audio, these are
the settings that I have. And for the video, actually, if you go into more, here are a couple of things that
I recommend you do. So set the render
at maximum depth, use maximum render quality. Here, I recommend frame sampling the hardware coding
profile high level at 4.2 you don't necessarily have to put these settings it's just something that I have, and if you want to copy it, see if it is a preset,
you can always do so. And then for the Tar bitrate, the bit rate will really
influence how big or small your file is going to be when you
export the video. The higher you set it, the better the quality
is going to be. But at the same time, the size of the file is going to
increase dramatically. So if I set it very high 262, you will see that the
might file size is at 152. But if I set it back
to, let's say, 19, which is really
good quality still, it's going to be 46 megabytes. So that's a big difference. And once I put all the settings
in including the effects, click on this burger here, click on the safe
preset, give it a name, and then it will be
here in the favorites. Just make sure to give it a
name that you can identify. In my case, it's
either lattice love without the gum
compensation light, and then Vladislav with red colors is with gum
compensation light. Then after that, I click on location to set
specific location, set specific name, then I
can just click on Save, click on Export, Export
video, and that's it. If you have any
questions, let me know. At that let's jump
into the next video.
29. Final Project: Edit a Complete Video Start to Finish: Now, let's get to
the practice video. So you will have
access to these files, and I'm going to drag all
of them into premium. These are just eight
files that are recorded as doing head video just
for you to practice. Most likely you are going to do some sort of work
on social media, but that's going to be long term video or
short from video. In this case, just
as easy examples, I'm going to give you access
to short from videos. So I'm going to drag
it into a timeline, and here's what we introd into work with color
on this video. Just play around with settings. See what you like,
what you don't like. Add text, do the cuts, make sure you actually cut the video properly so that
it's not just, you know, the random takes that I did here that are not super perfect, but you cut the silences and make the video a
little bit better. Add captions, add graphics that you want to add on the
screen, do the Zooms. This video is yours to play or these videos
are yours to play. And if you have any
questions, let me know. That, let's jump
into the next video.
30. Last Step!: Congratulations to you. You are nearly 100% done with the
Adobe Premier course. There are just three small
steps you need to take. First, take action.
Every big result starts with small action. So if you haven't already,
take your first step by editing your first video. All the best information
in the world means nothing if you
don't act on it, and even small steps lead
to massive outcomes. Secondly, if you want to
continue learning with me, follow my profile
here on Skillshare. If this course gave you a value, could it take 60 seconds
to leave a quick review? Your feedback helps
the next person decide whether this course
will help them too, and helps me continue creating
better lessons for you. Although this
course is complete, your journey has just begun. I'm excited to see
Eddie's online, so be sure to keep me and
fellow students posted. Remember, I'm here
for your success. So if there's anything you need, don't hesitate to reach out
in the QNS section below. Thank you again for choosing
me as U instructor, wishing you all the
best and looking forward to seeing you
in future courses.
 Vladislav Sateev, Video Editor