Transcripts
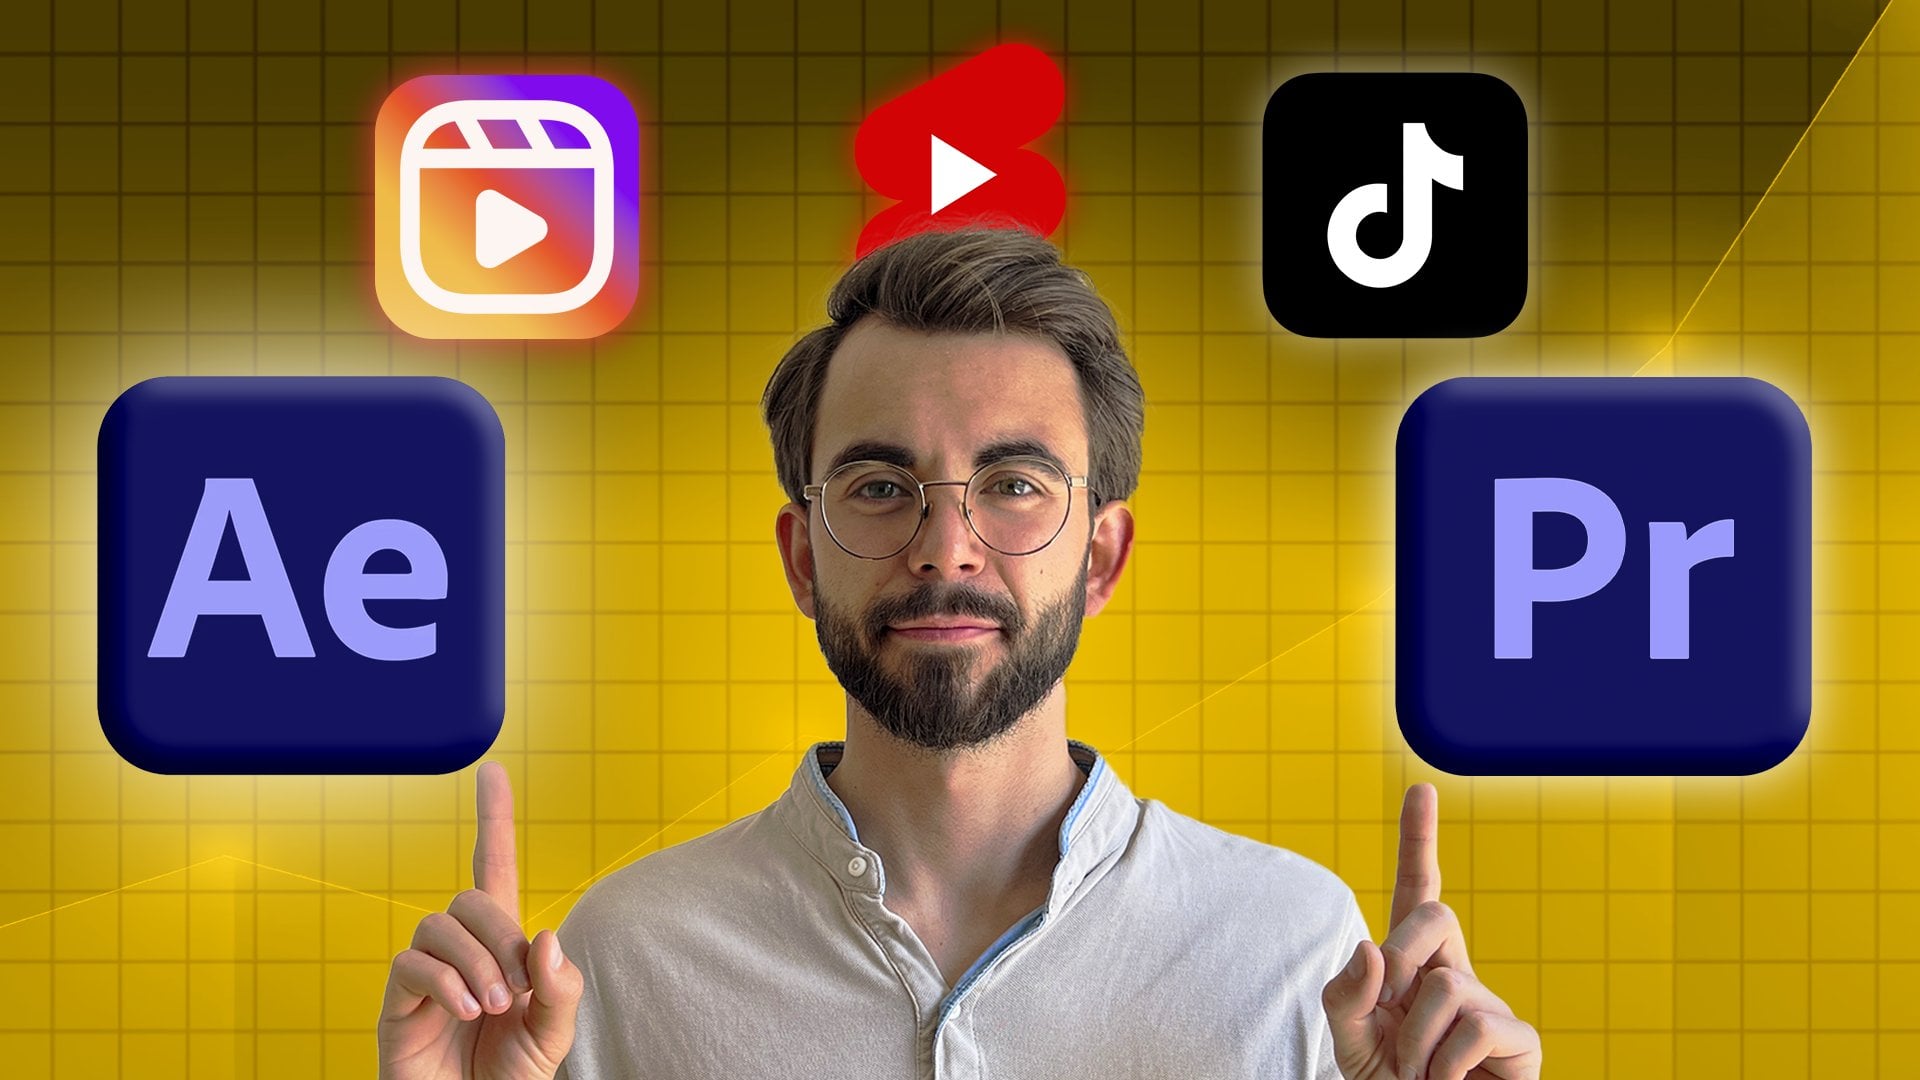
1. Welcome to Premiere Pro Short-Form Video Editing: Welcome to Premiere Pro Short fromom Video
Editing course. I'm glad, and I'll guide
you through creating videos designed for today's
most engaging platforms, TikTok, Instagram
and YouTube shorts. This course is for anyone who
wants to edit quickly and confidently without
getting stuck in les menus or technical jargon. Instead of overwhelming you with every feature
in Premiere Pro, we'll focus on the
exact steps you need to take to build real polish
sort from content. Fast. In this
course, you'll learn the clear step by step workflow for short from video editing. Cut engaging stories
and strong hooks, add captions and graphics
that pop on mobile. Clean and balanced audio so your videos
sound professional. Correct exposure,
fix skin tones, and add style with lots. Export with the right
settings for TikTok, Instagram reels and
YouTube shorts. Even breakdown real
client projects and top creators videos to see exactly how viral edits are built and know where to find
your first editing clients. Recommend watching
videos in order as every lesson builds
onto the previous one. You can control the volume and the playback speed to
learning at your own pace. If you get stuck or
have any questions, be sure to drop them in
the Q&A section below. Just make sure to
check the existing questions first because there's a good chance that the
question you want to ask has already been
answered in detail. At some point, you'll be asked to leave review the scores. Please wait until
you've had a really good chance to
experience the material. Your feedback helps
me improve the course and better serve you
and future students. By the end, you'll see
the entire process in clear practical way. So you can follow along,
build confidence, and finish with videos
you are proud to post. Thanks again for
joining this class. I'm genuinely excited
to help you create beautiful professional
short from content. Give you the confidence
to use it in real projects whether
personal or client based. Let's jump into the first video.
2. Installing Adobe Premiere Pro: Welcome. Let's quickly walk through how to
install Premiere Pro. First of all, you need
to go to adob.com. You can follow the link in the Resources section to get there. In to click on C A plants. There are a couple of
options that we can go for. There's individual business,
student teacher and schools, universities who
can work for you, individuals, business,
students and teachers. You should choose according
to your situation, but I will say that
if you are a student, you will get a big discount. So instead of paying $70 per month for the
whole creative cloud, you can get for $25 a month. If you're a business, it's a
little bit more expensive. And as an individual,
this is what you can do. So you can either get the
whole Creative Cloud, and that means it's including all the applications
that Adobe has to offer. So that would be light
room and Photoshop, that would be After Effects,
Illustrator, Premiere Pro. Adobe Express premium,
Firefly, and so on. So everything you
see on the screen, you will be able
to get for 69 99, and you need to decide what
makes more sense for you. So if you're using
both Premiere Pro and let's say you want to use Photoshop at the
same time and you want to use just these
two applications, then you would need
to pay $46 per month. Now, if you were to use
three applications, that would be 23 times three the same as
the Creative Cloud. So if you are using three,
you can as well get the whole Creative
Clouds and have other applications if
you want to use them. So depending on your situation, just go ahead and click on
whatever option works for you. Adobe made it so simple
to install all of this, so just go through
the process quickly. They'll walk you step by
step on how to do it. After you have it installed,
we'll launch Premiere. If you have any
questions, let me know. Other than that, I'll
see the next video.
3. Premiere Pro Interface Explained: After you've installed Premiere, let's talk about panels,
workspaces, layouts. Let's jump in. When you open Premiere for the first time, this is what you're
going to see. You're going to see a list of recent projects
that you worked on, and you'll be able to
create new project by clicking the blue button,
the top left corner. So click on the new project. Your location is going to be difault location,
something similar to this. The project name untitled. And for now, we're just going
to go ahead and create it. And when you open Premiere, this is what you're
going to see. Your layout might look
slightly different from mine. That's totally fine.
Because these layouts are highly customizable. So what you see in front
of you are many panels. You'll see a project panel
in the top left corner. This is going to be our preview, or in other words, we are
going to see the video. This is going to
be our properties where we'll be able to see the properties of
every single file that we import into premiere. And at the bottom, we
will have our timeline. This is the place
where we are going to customize video and audio files. Now, this is a default layout, and we are able to customize it. So, for example, if I put my cursor in
between two panels, you'll see that the
cursor changes, and now I'm able to
move the panels around, and I can click here,
move it around, like so do it with
every single panel. Now, let's say I don't like
the project panel that it's located here and
I want to move it to the right. This is
something that we can do. I can just go ahead and
drag it by the name, click on it, and
drag to the right. You can see we have
this blue highlight, and it shows where it's
going to be placed. So if I put it here, it's going to be
placed in between our program and in between the properties because
it's kind of in between. So if I click on here or here, it's going to be
put in the middle. Now, if we drag
it to the center, it's going to be in the center. So we will have a similar
situation where we'll have our effects and the project
panel kind of together. So I can go ahead and click on Effects and I can click
on the project bound. So if I put it here, it's going to be a
very similar story. And we can customize
our panels like this. We can drag and
drop them around, and that's how you do it. If it looks a little
bit weird like this, you're like, Okay,
I don't like it. Well, just go ahead and drag it, put it to the right,
customize it to your liking. Like, so if at
anytime at any point, one of the panels disappears,
don't worry about this. All you have to do is
go into Window and click on one of the
panels. And that's it. So, for example, our
program monitor, I can even click on
this Burgi button, right click, close the
panel, disappeared. If we were working in the video, we would not be able
to see the video. But all we have to do
is go into Window. Program monitor, and
it's as simple as that. Now, in one of the
future videos, I'll show you how to customize
it for the most efficiency and so that's the most convenient for different
types of videos. If we go into the
top right corner, click on this button,
we'll see workspaces. So if you click here, we have a number of
workspaces here, and this is the
place where we'll be able to customize them. Once again, super important just for efficiency and
for convenience. You will see that some of the ones that I have are
slightly different from yours. So I have long form, I have short form, vertical workspace, and it's the workspaces
that I've created because these are the
ones that I use the most, and I'll show you how to
do it a little bit later. We have a number
of workspace here, so we have the color workspace, and you will see that
when we click on it, it changes slightly. Why? Well, that's because it's just a little bit easier
to work on this way. And you can still customize
it so we can moved around, like so or even here. Or for example, if
we moved a couple of things like it just
looks chaotic, then we can go
ahead and click on the workspace and
reset to save layout, and it's just going to
go back to default. In the color workspace, the panels are
slightly different. There are new panels, for
example, glometroscopes, or if we go in, let's say, audio, it's going to look
even more different. So depending on what
we're working on, we'll be changing the workspaces because it's going to
speed up the process. Doesn't mean that if we
have to work on color, we can only work in
the color workspace. It also means that we can work in any workspace on anything. Even in color workspace,
we can work on the audio, vice versa, and we can customize
it to however we want. Premiere created these
default workspace just make things a
little bit easier. Now, it's important to know that Adobe does update Premiere, and it might look
slightly different to you depending whatever
update you have. 99% of the things are
going to be the same. Usually, updates
are something new that make life even easier. I'm working on Premiere 25, but let's say you watch
this in the future, and you are working on
Premiere 26 or 27, 28, or 35. And even if a few
buttons look slightly different or maybe even
they've been moved slightly. What really matters
are the results, how to get millions of views in as simple way as possible. If at any point you
have any questions, be sure to drop them below. But other than that, I'll
see you in the next video.
4. Downloading Practice Files: I just want to quickly
mention that you have access to downloadable
resources and recommend you to download the
files because those are the files that
I'll be working with and you'll be able
to just literally copy, paste everything I do to get
the practice done and to go through the whole process
from the very beginning to the very end so that
you get used to it. Then when you work with clients where you work with
your own videos, it's going to be just a
lot easier after you've gone through the whole process
instead of just watching. You can get access to that
below the video player. There's going to be link, so just go ahead
and click on that. If you have any
questions, let me know, but than that, I'll
see the next video.
5. Creating a Project & Sequence: This video, let's
properly create our project and the
first sequence. Now when we come to Premiere and click on the new project, instead of it being in
the default folder, let's create our own folder. The reason we are doing this is because let's take a look. This is the premiere pro
folder of Premiere 24, and I have let's take a look. Big number. So let's
select everything. 270 file projects. This is what's going to
happen if you're going to save it in the default space. That's something I used to do. It's not very efficient. And I do recommend
whenever you're working on a project to create
separate folder. So create on your desktop or in any other files
that is good for you. For example, let's say our
video will be Video one for social media and I'm going to press K. I'm also
going to just copy the name. Of the folder and I'm
going to open the folder, and I'm going to create
another folder called PR. If you're on Mac,
you can also add an emoji that's going to
be easier to identify. Now when we come to Premiere, I'm going to put the name
of the basically a project, Video one for social media, and I'm going to
choose the location. I'm going to go to desktop and I'm going to
search for our video. So this is going to be the one, and I'm just going to place it there and press and create. So now, whenever we are
finished with this project, we'll note that we have
the premiere project here. It's also going
to autosave here. This is an important
thing because if let's say Premiere crashes, you'll be able to
open a file that was automatically saved by Premiere. And if we were to
search for it here, it would take a long time, and then we have to file, which is like autosave. Then we have to go into the
autosave and search it here. And you can see I
have 3,000 autosaves. And that was just in 2024. It was after using seven months on this computer, Premiere. So 3,000 files, it's a headache to search
for auto saved files. So now that you have a folder, you will have your Premiere Pro, and you have your Premiere
Pro project file over here. Trust me, if you want to create a career or accelerate,
just become better. This is so important. You will eventually get here, so it's better to start it
from the very beginning. Later. Now, I'm going
to go into the start your workspace because this is the most convenient
one to begin with, and there are a couple of ways we can create our sequence. Sequence is basically where we are going to
work on our video. I'll click on the new item, and you can see here,
it's called sequence. So I can go ahead
and click on it, and a couple of things. Yes, we can create a sequence
preset, which is good, but I do prefer going into the settings and
customizing myself. We can give a name
here at the bottom, as you can see the
sequence name. So whatever we name it, it's
going to be named that way. We can change the name later, but we can do it right away. I mean, if you go
for social media, for example, we have
nine by 16, and yes, we can go ahead and
open it, create it, and it's just going to
work perfectly fine. If you want a little
bit more customization, you can go into settings. Long story short. If you are going for something
very specific, you will know that
and then you'll put the specific settings. If you don't have anything
specific going on, then you can just put
frame size 1080 by 1920, 30 frames a second, give it a name. At the bottom. So let's give it the same video, one for social
media, the same as our folder and the project file. By the way, the project name is going to be here at the top. Now, in terms of
the frame rates, I do recommend setting 30 frames a second if you're
getting started. Once again, unless you're
going for something specific, 30 frames a second is
going to be the best. 24 frames a second, in my opinion, even though
it's very cinematic, for example, on my phone, I have 120 hertz or
on a computer screen, I have 120 hertz. And then when I see 24
frames per second video, it's just it's a
bit too unsmooth. It's better to use 30 than 24, 25, because that's kind
of the industry averages. And then if we come to
60 frames a second, which is going to be very smooth and something
you might want, it's a little bit too smooth when it comes to
industry standards. And one important thing is that social media will compress
your video eventually, and it might do from
the very beginning. For example,
Instagram TikTok and YouTube compress
video immediately. That means the quality of the video drops and
the frame rates drop. And the reason for that is
because millions of videos are uploaded every day or every
month, billions of videos. And it's just a little bit
hard for social media to keep the same quality and
the same size of the file because these
files are going to be huge. And so they compress it so that it doesn't take that much space. And if we download videos
from social media, you know, it's going
to be absolutely tiny. So even if you put 60, social media is going
to compress it. And that's why 30 frame
second is the best option. And then in terms of
the other settings, once again, if you want
something specific, yes, you can go ahead
and click on it. But other than that, 1080, 1920 is better than four
K because four K is four times the size
and it's going to take a lot more power
for your computer. So 1080 by 1920, 13 frames a second
and press Okay. And there you go. We
have our sequence. Now that we have our
sequence created, let's get into the next video and import our first footage.
6. Importing & Organizing Footage in Adobe Premiere Pro: In this video, let's import our footage and organize media. You can find this file in the downloadable
resources section, and the way I'm going
to import it into our project is I'm just going
to drag and drop it, so. You can see it just
instantly imports it. Now, if a press
command, the other way that we can import this is we can just double click in this project panel.
So double click. This video is going to pop up and then I have to search
for this video again. This is the video, and
then I can go ahead and click on Import and it's
going to Import it. Now, another way you can do
this, you can go into file. Import, and then go ahead
and also import the footage. Now, in terms of the way it's usually done is I
just open the folder because it's easier to
find it in advance and then instead of even
dragging just one, I can go ahead and drag the
whole folder just like so, and it's going to
import 20 files. So now if I open the folder, it's going to open 20 files. I'm going to close this
panel by pressing Command Y, or if you're on Windows,
it's Control Y. Once again, remember, instead
of command, it's Control. Instead of option, it's old, and I can just select, delete, and we're good to go. It's important to
organize our media, and the way we can organize is, first of all, this
is our sequence. This is what was created when
we created our sequence. It's put in our
project because if, let's say we close this
part at the bottom, we can go ahead and double click on it and it's
going to open it. Once you have 100 files
here or 200, 300, 400 files, and it
happened to me, trust me, you want to make
sure things are organized. What I'm going to do
is I'm going to click on New Ben and it's
going to be a Bin. I can double click here
to change the name or I can press on Enter
to change the name, and I'm going to
call it sequences. And I'm going to drag and drop this there and drag
the sequence there. So now I have a folder
with our sequences, and it's important because we might have a
number of sequences. It's basically like
different versions. So we might have V
one, V two, V three. Sometimes with clients,
you can get up to, like, ten or even more Vs. And yeah, that's just how it's done. At the bottom here,
you can also change the way this project
panel is shown. So we can do it like this, and it's basically
the same thing. We have our sequence, and it's just kind of the
files themselves. This is a bit more interesting. So you can position
things like so, and you can kind of zoom out, zoom in, but I prefer
it to be visual. So it's the one in the middle
because it's organized, like I cannot just put it
over here, like, it's here. And I can also see the
visuals because over here, I cannot see the
visuals, but if you prefer other options,
this is the way to do it. Now, in order to get our
file into our sequence, we just literally go
ahead and drag it. And you will see
that it says that the clip doesn't match
the sequence settings. Why? Because we create
the vertical sequence, and this video is horizontal. So two options we can do. We can either keep
the existing settings or change the sequence settings. We are going to keep
the existing settings because we want to make
sure how final video, our final export is
going to be vertical. So we're going to keep
the existing settings. You'll see that it looks a little bit weird because
of the resolution. So if we were to select this clip and we would
go into properties, we can go ahead and
change the rotation to we can just click here
and type it -90. We can see it works perfectly because it's the
same resolution. We just change the
horizontal and the vertical resolution
slightly so that it fits, but this is the way it works. You can see that this clip
is kind of small here. So we can go ahead and
drag this thing over here. To really zoom in. And now this clip
became a lot bigger. So, this blue part that I'm dragging here
is called the playhead, and it shows where we are
in terms of our sequence. Now, instead of dragging
this thing all the time, we can press Option or on PC, and with our mouse scroll wheel, we can press Option and press on Zoom and it's
going to zoom in. So we zoomed in, and then we drag it a little bit to the left or we
can do it here. Right, we can zoom in them
out, Zoom in them out. It's a lot easier than
to just drop it like so. And for our file, we are also going to
create another bin. And instead of going
down to the bin, we can have our
project file selected and we can press Command Slash. So it's going to be Command and this button over here and
it's going to create the bin. So it's a shortcut, and we can drag and
drop our file there. I'm going to press
Command to go back and we can select our footage
and then press Command B, and it's going to create a bin with everything
that's been selected. For example, let's say you
have a number of clips here, I drop them in, and I wanted to drop them like so so that becomes
a longer video, and now I can select
all the files, press on Shift B, and it's going to create a
pin with all of our videos. So that's the way we
can organize things, but I'm going to
press Commandet undo. Now, in the download
resources section, you'll find the safe zones
for different social medias. So for example, we have
our YouTube zones. I'm going to select it
and drop it over here. And now I'm also going to select it and drop it to our sequence. And you will see we have this
interesting blue outline. If we zoom in, you will see that the length of this footage
is 5 seconds, exactly. If we want to make it a little bit longer,
so for example, we have it here and we
don't have it here, we just get our cursor to
the end of our footage. It turns red, and we just drag
and drop it until the end. And you can see we have
this little helper that kind of you can see the arrow heads like over
here next to the red cursor. And when we get
these arrowheads, like these ones, it means
it sticks like magnet. And this magnet is
activated over here. So if I disable it, it's not going to magnet, but if I enable it,
it's going to magnet, and it does help quite a lot. Now, the shortcut for this
magnet is going to be S, and I can press S to disable
it or S to enable it. Let's select our footage and
make sure it is straight. I'm going to press on I icon
to hide this whole track, and I'm going to scale it up
so that it is full screen. I'm also able to
move it a little bit to the left so that I'm in
the middle of the frame. Not all the time,
but more or less. I'm going to press
on the icon to enable the track where we have the save
zones for YouTube. What the save zone shows is everything you
want to be visible or that must be visible must be within the shape
cutout that's visible. Because social media crops
the video a little bit. On the right, there are, like
buttons, dislike buttons, comment share, and description, anything else that
might be there. Sometimes at the top, they
have, like on Instagram. They have some writing at the top here on YouTube as well. So that's why it does it. And if we were to select
all social media, if you were to create a
video for all social media, I'm going to just select the
YouTube shorts present it. And if I drag it
out, you can see, for all social media, you can also have one zone, and you create video
with one zone in mind. And yes, it cuts
a little bit out, a little bit extra because if we compare all social
media and YouTube, YouTube definitely
has more space. But usually, it's
not that strict. If something goes a little bit over the blue zone,
it's totally fine. It just you don't
want, for example, your captions to be
in the blue zone, and people will not
be able to see it. So this is how you do it.
If you have any questions, let me know, but than that, I'll see you in the next video.
7. Customizing Your Premiere Pro Workspace for Faster Editing: In this video, we'll customize the layout of our workspace. You might have
noticed that it's not very convenient
because we're editing a vertical video and the
video playback is so small. Like, we cannot really
see the details here. How do we make it better? I'll give you a couple
of recommendations. First of all, we'll drag
our program to the right until we get the green pop up and then we'll
just put it there. We'll customize it so that we get right before
it becomes small. So just right around here, it doesn't have to be
like 100% perfect. And then we'll dragon
drop it like so. And so now, whenever we
select our properties, we're able to customize
the properties over here. We see the whole thing
a little bit better. So if I delete the all
social media zones, you can see, Please perfectly. By the way you can start playing is you can press
on space and it's going to start playing or you
can press over here and it's going to stop
or start to play. And let's say in the future,
you want to add more panels, let me show you kind of
what I always work with. So if I go into the vertical workspace,
something I have saved, have my effect here, I have
premiere composer here, something we'll talk about
in one of the future videos. See, I have a lot of
panels have the effects, metric, source, text, graphic templates,
and special sound. So I have a lot of
panels in one workspace. The way I prefer to work is
if there's no need to go into one extra workspace to have to click here and then
search for it over here, if it's something quick, I can do most of the
changes over here. And basically, what this
is is, for example, the metric color is just
the color workspace. Essential Sound is
the audio workspace. Text and graphic templates is the same as the
captions in graphics. So you can see I have
kind of one workspace where I do most of the work. And if I have to go into another workspace to take
a look at more panels, then yes, I'll go there, but most of the time I
just have it here. Let's take a look
effect controls, effect essential sound, graphic templates, metric color, properties, source
monitor texts, and tools. This is everything I have
enabled for this one workspace. So let's say I want
to add something, I will go into Window and let's say I want to add
little metroscopes, for example, it's
going to just pop up. It might not pop up
exactly over there. So it might like it
might go flying, and I would just go
ahead and drop it there. And if I'm tired of having it, just again, right click, close the panel, and
it's good to go. Just a quick tip that will save you a lot of
time in the future. Go ahead and save your
workspace like this, and then go ahead and click on the workspaces and
save as new workspace. Give it a name, and it's
going to appear over here. And then you can
go ahead and edit the workspaces and you can
kind of move them around. So, for example, if I want, I can put the vertical
workspace at the very top, and it's going to be the
first one over here, as you can see, and I can edit and move it back
to where it was, and it's not going to be
at the top anymore, right? So you can save the preset, customize it, and it's just
always going to be there. If you have any
questions, let me know, better than that, I'll
see you next video.
8. Timeline Basics: Cutting, Trimming, and Editing Efficiently: In this video, we'll talk about the timeline fundamentals. The timeline is what we have at the bottom where
we have our clips. The way we work
with the timeline is we have our tool
bar here at the left. Let me introduce you to it. So we have our selection tool. This is the one that
we've been using. Then we have track
select forward tool, rolling edit tool, razor tool, slip tool, pen tool,
rectangle tool, or shape tool, hand
tool type tool. And you will see
that at the end, there is a shortcut,
for example, for the selection
tool at the very end. Like where it says
the selection tool, at the end, there's letter. For this one, there's letter A. N C Y P, rectangle tool doesn't
have a shortcut. Hand tool doesn't
have a shortcut. Type tool is If I
select the Type tool, and I can either click here, or while I have the
selection tool selected, I can press on T and it's
going to select the text tool. The type tool. Now, by
just clicking over here, I can write something
on the screen, and then you can press on V
to select the selection tool, and then I'm able to select our text and move
it around like so. If I select the track
select Forward tool, it's going to select everything to the right of the cursor. So, for example, if
I select it here, it's going to select
everything to the right, including the file that
is hovering above. But if I select it to the right, it's only going to select
everything that's to the right. And you can see our text is
a little bit to the left. So that's why it's not selected. The reason we're doing this
is because let's say we have 100 cuts like SO, and we want to move everything. That's, let's say,
just this part. But sometimes you are not able to select it easily like SO. And so you would press on A, and you would move
everything to the right. We have our rolling Ed tool
which helps us to kind of move the transition in between
to move between the cuts. So for example, we have
our cut over here, and we can just hold it and drag it and move it a
little bit to the right. Or let's select it. Actually, move it, move this go. Whenever we have an empty space like this, we can
just select it. It's going to
highlight in white, and then we can press
and delete and it's going to just move this clip to left and also going
to move everything that's to the right of the
clip also to the left. So let's take a look
I'm going to press Camand you can see everything
moved to the right. But now, if we delete it, everything moves a
little bit to the left. And now we can see there's a little bit of,
like, a cut here. So by pressing on N or
selecting the tool, we can select it and then move the transition
a little bit, and there you go. Now, the razor tool, we're able to cut
with the razor tool. So, for example, we
don't have a cut here. We can just cut like
1 million times, and we are going to
have these small cuts, and then we can move
it to another layer, like, a little bit up. Then we have the slip tool. To be honest, I never, never, never use the slip tool because
it's just we can kind of use it to slide footage a little bit to the front or
a little bit to the back. So the length of the
footage stays the same. But then we move the footage
that's inside this layer. It's a little bit confusing, to be honest, never,
never use it. With the pentol, we can draw something on
the screen, right? We can draw, like, a line. And then if we go
into properties, you'll see that we have
interesting properties. And if we disable the field, enable the stroke, you'll see
that we have a line lexo. And once again,
the line is going to be 5 seconds long as well, just the same as the
picture that you import. With the shape
tool, I'm going to draw a rectangle
by pressing shift, it's going to draw a rectangle. But if I don't press shift,
I can create rectangle. So let's create a square, and we can see the stroke, but if we disable the stroke and enable the fill, we are
going to have a fill. We can make it white, and
it's going to become white. The hand tool is
used to kind of just move around over here or
move around over here, to be honest,
never, ever use it. But it might be
useful sometimes. And let's say you move it
a little bit to the side. Like, so how do you make
it back to the middle? Well, you can just press
over here and press on feed, and it's going to
fit the screen. Sometimes you might also want to just kind of zoom in or
zoom out with your mouse. So, for example, with
the scroll wheel, I'm going to just zoom
out a little bit, and then I can press
on fed as well. Or if you want,
there's a shortcut. You just have to
select this view, and then you have to well, let's zoom in a little bit. And then you have to press
Option F or Alt F on Windows, and it's going to just
fit the screen instead of going over here and pressing the feed
every single time. So everything became
a bit of a mess. I'm going to select this part
and just press and delete, select this part, and
press and delete. Come to the very beginning,
whenever you zoom with Alt or with option
and with the scroll wheel, it's going to zoom into
whatever the cursor is. So if I zoom in to the right, it's going to zoom
in to the right. But if I place it there,
it's going to zoom in exactly over here, by the way, I just touched
this part a little bit. We can press on Shift minus, press on Command plus, and Option plus is going to
make it a little bit bigger, so you can customize
the way it looks. Now, you can also put different
markers by pressing on. So for example, I can
come let's come here. We have a bit of a hiccup. And let's say I come over here
and if you press on shift, it's going to stick to the cut, so it's going to be precise, and I'm going to press
on M. You can see we have this marker that
just appeared over here. And we also have our
marker appear over here. We can see the timing of it, and we're able to visually
just see it and know that, Okay, we have our marker there. Markers are useful,
many situations. To be honest, I rarely use them, but sometimes in specific
situations like once a year, it's going to become useful. And you can move things a little bit higher,
a little bit lower. The clip that's on top, it's going to have more power. In other words, if I
play something beneath, we are not going to see
the clip that's beneath. We're only going to see
the clip that's on top. So if I disable this clip, it's going to just show
the clip that's below it. But if I enable the top clip, it's going to show
the clip that's top. You can also create
multiple tracks. So you can create multiple tracks by just dragging
things over there like. And you will see that
looks slightly weird here a little bit because
we have smaller parts and we have bigger parts. I'll explain in 10 seconds. But you can create
more tracks like so, or you can just right click
and click on Add Tracks, and you can set the
number of tracks you want to add, a number
of video tracks, a number of audio tracks, or you can just drag and drop it a little bit
you can also press Option and use the arrow keys
to move clips up and down. It's going to be useful as well just to make sure
things are precise. Sometimes you might
lower it down, but then move it a little
bit to the right and it's going to, for example, here, it's going to cut a little bit and
it's going to cut our clip if we move it down. So to make sure it
doesn't happen, you can move it with option
and arrow keys up and down. Now let me walk you through the difference
in the sizes here. We have small layers
over here and we have, kind of, like, a big at the top. So whenever you open Premiere, it's going to be
big automatically. Everything is going to be big. And it's not very convenient because you
can see this line here. This is the opacity line. Opacity is just visibility or, like, how bright something is. So if I drag it down, the opacity is going
to go into zero, and I don't like it. I would prefer to
not have this line, and in order to not have it, you have to make
your truck smaller, like so, or the same size
as we have this one. So we can make it a
little bit bigger. Problem with Premiere
is that every single time you open Premiere
or open your project, it's going to be set to default. So something I recommend you
do is delete this for now, press on Shift plus Shift minus or just shift minus from
the very beginning, Presson Command plus and
Option plus or Old plus, and it's going to
become this size. And we are actually going
to save this as a preset. Now, make sure to just
add more tracks so that, you know, when you go
a little bit lower, there's more tracks and there's
more tracks at the top, O, so that if we go a little bit high,
it's a little bit bigger. And let's do exactly
the same thing. Shift minus and let's do Command
plus Alt or Option plus. Now we're going to
go into this icon, and we're going to
click on Save Preset. Just give it a name, and you
can assign a shortcut here. You can create, for
example, track height, preset ten and pressing ok. Just make sure
to give it a name. Now, we need to go into
Premiere and keyboard shortcut. And here's a shortcut
for keyboard shortcut. I know there might be a
little bit a lot for you. Just make sure to remember that keyboard
shortcuts are going to be super useful
and the way you can access them
is by going here. So let's click on this button, and let's search for
track height preset. I already have a number
of shortcuts over here, so I'm going to scroll
to let's say number ten, or for you, it's going
to be number one. Just click over here and select a shortcut that
you want there to be. So for example, K, J, or H. I probably had other
shortcuts over here, but those were not useful, so I just put these over here. Now, let me quickly
create another sequence. So that you can see.
Let me drop it here, keep the existing settings. So just like we had in
the very beginning, we have the opacity line, and we have the loudness line over here. Absolutely terrible. So now, because I
have shortcut K, that's going to decrease
the size of the tracks, I'm going to press
on K. Unfortunately, this mix at the bottom, we still have to drag
it up like so. But once you get used to that, just when you open Premiere, press on K, get this thing hire a little bit like so,
and you'd be good to go. It's going to save
you so much headache. Trust me, it was an eye opener, and I really recommend
you do this. So go to Premiere,
do this quickly. If you have any
questions, let me know. But than that, I'll see
you in the next video.
9. Cutting the Hook: Capture Attention in the First 3 Seconds: Welcome. In this
video, we're going to start creating
our first video, and specifically, we'll
focus on the hook. The hook is one of the most
important parts of the video because if your hook doesn't
grab people, you lost them. You can hook people in
many different ways. You can hook them with the idea. You can hook them visually. You can hook them with audio. You can hook them with
text on the screen. And these are the main ones
that you can hook people, and then you can break
them down into more. But overall, these are kind of the main ones
that we'll focus on. So let's jump to Premiere. I am going to click on
Create New Project, and let's give it a title. This one is going to
be called Marathon because I'll be telling a
story about my marathon story. I'm going to choose location, going to go to desktop, and I'm going to
create new folder, Marathon video. We have raw. This is going to be
the project files that you will have
access to as well. And I'm going to
create another folder, and we'll call it PR
and put in emoji. If you're on a MAC, you can press Control Command
space and it's going to open the emojis and you'll
be able to add them. If not, you can just
search for them in Google as well.
It's pretty fast. Let's create this and click going to go into
the vertical workspace. In the raw files, you will
find a couple of files. There's a recording,
and there's footage. In the footage is
everything I have from the marathon from running
the actual marathon, and the recording is the
audio that I've created. So we are going to select both, import both into our project. And I'm going to
create the sequence. So click here, create sequence. Nine by 16 30 FPS works
for us pretty well. And let's call the sequence Marathon Video and
press now game. Great. I'm also going to
press K right away so that the tracks become
the right size. So I'm going to
select our sequence, press on Shift B, and
call it sequences. Great. So this is going
to be the sequence. I'm going to select our
audio and drop it in, zoom in it, like so,
and let's listen. This is me finishing my
very first marathon, but it almost didn't happen. I drained for months, ran hundreds of kilometers
and thought I was ready. Press C to select
the razor tool, cut here and cut here because this is the
part that's good. I'm going to select
this, press on led. Like the empty part,
press and delete as well. Instead of just making a
cut here and deleting it, I can just grab
it where there is a cut when the cursor turns red, and I can drag it like this. You can see it shows with the red arrow which way I
can drag it or let's say, which clip I'm going to drag. So this is going to
be the right side, this is going to be
left side, where press commands at
and move everything. Or, once again, I can
just press and delete. It's ready. But at kilometer
34, my body shut down. I wanted to quit. Every
step felt impossible. Somehow I pushed through the
pain and crossed the line. Okay? Now I'm chasing Ns. Now I'm chasing SAP hours
in November. Let's go. Okay, great. And now we just need this very part at the end. And don't need this part, and we get play this part.
Okay, so let's listen. This is me finishing my
very first marathon, but it almost didn't happen. I trained for months, ran hundreds of kilometers
and thought I was ready. But at kilometer 34, my body shut down.
I wanted to quit. Every step felt impossible. Somehow I pushed through the
pain and crossed the line. Now I'm chasing SAP hours
in November. Let's go. Okay. So here, this is
going to be our Hook. And let me cut it. And by the way, we
can right click and label it with
some other colors. So, for example, with mango. This is going to be our hook. This is me finishing my
very first marathon, but it almost didn't happen. Great. You can see we have this, little pause in the
very beginning. I'm going to cut it
because in the beginning, it's super important
because we're trying to get the
attention to people. We don't want there to
be any just empty space. We can cut it even
a little bit more, so you can see we have, like there's some
sort of sound here. The like that, but we can cut it a little bit and
start from when I say this. This is me. This is me finishing
my very first marathon, but it almost didn't happen. We're trying to grab people and tell a
story at the same time because these two things are interconnected in order
to book the viewers. This is me finishing my
very first marathon, but it almost didn't happen. Let's go into our footage, and we want to find a file where I'm about
to finish the marathon. There's actually a
video of me running. So it's this clip, 8 seconds, 31 milliseconds, so I
can double click on it. And it's going to
appear in this pop up. And a couple of things
we can do here. So we can instead
of just dragging the whole video that's
going to be long like this, we can, first of all, drag only the video
or only the audio. Or we can drag both. If we click on the video, we can just drag both. Now, another thing
we can do here is we can set the in and out points. And instead of putting
the whole video in, we can only put a segment. So, for example, you can
only start seeing me here. This is me running. So I'm going to
select the in point and the outpoint, let's
say, around here. And so instead of
dragging the whole video, we're only going
to drag the part that's set by the
in and out point. So I'm going to drag the video like so. So
let's take a look. This is me finishing my
very first marathon, but it almost didn't have. Hmm. Actually, let's Okay. Let's start it like
this. Like so. This is me finishing my
very first marathon, but it only marathon. So one of the important
things is I'm trying to visually show whatever
I'm speaking about. Here's some very
important information. Some people say that,
yes, you have to do that. Some people say you
don't have to do it. And whatever information
you search for, whatever confirmation
you are searching for, you will find the
confirmation online. So if you search for
should the footage support the audio you will
find the confirmation. Or if you search for should the footage not
support the audio, you will find the
confirmation of that. There are many
approaches that work, and I'm just going to show you the best approaches that work that are the
most logical ones. And then after that, once you get more experience
and more practice, you will know what
kind of style you're going for or your client
style you're going for. I's going to become
a little bit easier. In the very beginning, what
matters is just practice. It's just so that you
get so used to it, it becomes easy and almost like boring because
if it's not easy, it's hard every single time. Probably also not going to be
enjoyable, not sustainable. And you will find that, yes, a lot of the stuff
is just so artistic, and this artistry is just it's so subjective
all the time. What matters is just
creating videos. Some of them will be better,
some of them will be worse. Anyway, let's continue
with our video. Just wanted to share
that couple of thoughts. This is me finishing my
very first marathon. Okay, so we can see me running. This is me finishing my
very first marathon, but it almost didn't happen. Let me just cut this
pose here, like so. And once again, select the Atol. Remember, everything that's to the right is going
to move to the left, so I'm just going to
drag it to the left. Happen. I dream for months. Right, hundreds of
almost didn't happen. I dream for also, I don't want there to be long
pauses people are just so hungry for their attention to be grabbed that we cannot
afford long pauses. That's why the pauses
are very short. It almost didn't happen. I drink for Smarthon, but it almost didn't happen. Let's take a look at
the footage and see if there's anything that
can support that. There's no footage
supporting that in a way. So it's always better to
have footage that supports, but we don't always
have the footage. And I think it's
going to be even it's going to play
to our advantage to keep the screen black, and we will have some text
later, like captions. I'm going to show you how to create those in a
couple of videos. You can see this
video is dynamic. Like, right away, we have some
movement, and it's super, super important because if
you don't have movement, it's just like static, doesn't really catch people. And we want to catch people in as many ways as
possible. Remember that. What I want to do now is I
want to create like a Zoom, and we can do a Zoom
in an in two ways, let me select our clip,
and let me show you. So if you're going into
the Effects Control, we can scale our
video up and down. We can move it around. And you will see that we
have these stopwatch icons. These are our keyframe. So if I click on it, it's
going to create a keyframe. Basically, if I move,
like, let's say, a little bit later
and I zoom in, it creates another keyframe
and it tells that, you know, at this time at zero, it's going to be at
100 and at, let's say, like 1 second or eight frames, it's going to be 158 the
Zoom, right? So let's go. This is me finish. It's like we are
zooming in here. This is basically how
the key frames work. So we can either do it
on the layer itself, on the footage itself, or we can use something like
an adjustment layer. An adjustment layer, we can do it by clicking on the new item and click on Adjustment
layer and press came. The adjustment layer is going to be the same size as
our composition. It's basically like
invisible layer where we can apply
different effects, and it's going
influence everything that's going to be below the adjustment layer.
Pressing okay. Actually, because I had
the folder selected, it created it in the folder. So I'm just going to drag
and drop it over here. This is the adjustment layer. I'm going to put it over here and let's make
it like this long. And then if I go into
the Effects control and I search for infect
called transform, let me apply the transform infect onto the
adjustment layer. And it's very similar, right? If I scale it's going to scale. You can see it scales
a little bit weirdly. It's a hiccup of Premiere 25. But in order to
avoid it, you know, scaling to, like, a
different location, you just need to select defect. And then if you scale, it's going to scale perfectly. I can press on the
scale keyframe and on the position keyframe, and we can be a little
bit smart about this. This is our final position of this footage that
we want to have, and I can move it a
little bit later. And in the very beginning, we can really zoom in, and then we can move
a little bit with the position to show me full
scale and really show my, just the face enjoying life. I wasn't enjoying life.
It was really painful. That's 42 kilometers
or 26 miles. Took me 4 hours to run that. If we take a look, we'll
see the Zoom. Happening. This is me finishing.
This is me finishing web. Although you can see that I'm getting almost out
of frame here, and something I
would do is I can basically create
another keyframe here either by pressing here, or if I start the movement, it's going to create a
keyframe automatically. So I want to keep
me in the center, and I'm going to do it like so. This is me finished. Okay, let's move me a
little bit to the right. This is me finishing my.
This is me finishing. It's a little bit jumpy, which
is something I don't like, but the footage itself is kind of moving very fast and jumpy. One of the things that we
can do is we can create lots of different
keyframes for every frame, and it's going to become smooth. But the same time,
it's going to take a lot of our time,
and we need to think, do we really want
to spend, like, 10 minutes animating
every single frame? If not, then we need to understand that if
we don't do it, it's going to make the
video like 1% worse. But if we do it, it's going to take us, like an
extra 10 minutes. Do we want that
or not? But, yes, we can do and go through
every single frame to do it. This is me finishing my This is me finishing my
very first marathon. Okay, so I just moved the
key frames a little bit. A lot of the times
with keyframes, you just have to
play around with it because it's not very
easy all the time. But I think now it's
kind of smooth. You can still see a bit of, like, movement, but nothing bad. This is me finishing my
very first marathon, but it almost didn't happen. One of the interesting
things you can do with the adjustment layer is if you click on this button, use composition shutter, and
we increase the shutter, we can maximally increase
it to 360 degrees. You see what will happen. It's going to become
a little bit blurry, but I don't want it
to be that much. So let's try 180. This is me finishing
my very first It works really well if we have just the Zoom because it keeps everything that's
in the center sharp, but everything that's
around it is going to become a little bit blurry
and also creates this, like, very interesting
motion blurry, so I can disable the effect. And you can see the kind of footage we have from
the very beginning, right, if we had it like this. This is me finishing my
very first marathon. Or if I enable this effect
by clicking this button. This is me finishing my
very first marathon. Because we're
zooming in, we kind of are changing the perspective. That's why I was talking
about that it's so subjective all the time because different people have different opinions, different views, like,
different things. And one of the ways
is done very well. And if you take a look,
for example, at Mr. Beast or at a lot of the
creators, in the very beginning, they're either zooming in or zooming out to really grab
the people's attention. At the top, I want to create a text like in the
very, very beginning. So I'm going to select our text. I'm going to disable the disec the adjustment layer
by just clicking here. Or let's say, if you
have something select, you can just press Shift
Command A or Shift Control A. And let me write a text here. I'm going to select
all the text, and I'm going to go
into properties. I want to put a
font called SF Pro, and we'll do it for now. I'll tell you more
about the fonts later. I'm going to create
background for it. I'm going to make the
background fully visible. This is the transparency,
as you can see. This is the size of it, and this is the roundness of it. Let me do it, like so and
make it. I mean, we'll see. I'm going to decrease the
phone size a little bit, make sure the text is
positioned in the middle and let's try something like this. Let's
actually change it. Let's make the text black
and the background white. People always prefer
bright rather than dark. Let me put it like so. This is me finishing my
very first marathon, but it almost didn't happen. And remember, we need to double check about
the save zones. So I'm going to
import the save zone, going to double click on
it and drag it like so. So you can see, we actually
don't see the whole text, and for that reason,
select our text, go to the properties, and let's make it let's make
it a little bit smaller. Okay. When I scroll
on Instagram, there's going to be like
I believe it's going to be a camera on the
top left corner. So in this corner,
it is transparent. And the fact that this text goes a little bit
beyond the save zone, it's okay in this case. So if I disable it,
this is what we have. This is me finishing my
very first marathon, but it almost didn't happen. So currently we have three ways that we are catching the viewer. We have the footage. We have the audio, and or we have
kind of the story, and we have the text. And the very last one will be
sort of like sound effect. So it's not the audio story, but it's like swoosh
in the very beginning because we're zooming out
this is me finishing. We could add something
like a swoosh or wei. We can add, like
a familiar sound, give a little bit extra
in the very beginning. And on top of that, we'll also add captions a little
bit later to this video, to the center of the screen. But for now, this is
great for the hook. Although one thing
I can probably do is make the text
instead of regular. Let's make it like medium
so that it's a little bit, like, more pronounced
because it's, like, too thin here, so we just make it a little
bit more pronounced. Other than that, great. Let's get into the next video, continue with the main part of the video and continue
developing this video. If you have any
questions, let me know, but add on that. I'll see
you in the next video.
10. Building a Short-Form Story Step by Step: Let's continue
editing our video. This time, we're going to
focus on the middle part. We finished with the hook,
and now we need to build, let's say, 3-21 seconds. So we need to build 18
seconds of footage. Let's listen to
what we have next. I trained for months, ran hundreds of kilometers
and thought it was ready. I'm going to cut here
a little bit, like so. Thought it was ready. But at kilometer 34, my body shut down. Let me cut this part as well. So I just spat up the
video a little bit. Now, it's 19 seconds
instead of 21, so I just cut 2
seconds of silences. I have a lot of running rol, and we can use a lot of it. I like one video here. Okay, so I like this video. I will just drag and drop it. I will put this
video here as well. I ran for months, ran hundreds of kilometers
and thought it was ready. But at kilometer 34, my body shut down.
I wanted to quit. So let me select the
footage of me running. Let's select like
this part here. L et's make this
video full screen. Let's zoom in to it, like so, move it a little bit to the side
and see what we have. What happened? I
trained for months. Run hundreds of rain for months. I trained for months. So this is going to
be the first part. Then let me see about the
marathon if there's data of me running for
hundreds of kilometers. There's not, but, okay, we can say that Months. Run hundreds of kilometres. Cut it like so. Train for months. Run
hundreds of kilometers. This is data from
the marathon itself, and I think we can use it. We're going to use it
because it shows, like, a lot of the big distance, and once again, I don't have all the footage.
That's why we're using it. And let's add another
clip of me running, so it's going to be this one
Let's add it here like so. And one of the interesting
things is, for example, I already zoomed on this video, so I'm going to
click on Aft here. I'm going to click on Motion, and I'm going to press
Command C or Control C, and I'm going to
select this video, and I'm going to press
Command V. Basically, what I did is I copied
the motion of this video, the Zoom of this video, and I just pasted
it on this video. And let's see where I'm running. I thought I was ready. So I would like to change the position of it slightly,
keeping me in the middle. So I'm going to come
to the first frame. I'm going to press
shift to stick here. So you can see, once
again, this arrowhead, the gray arrowhead
that appears means that I'm sticking to it exactly. I'm going to set a
position keyframe. I'm going to come
forward in time. Actually, I'm going to come
here, press and shift, and I'm going to press
on the arrow key to the left so that I get
to this latest frame. And I'm going to create
another key frame around here. Let's see. Now we
have it following us. I thought it was
ready, but a kilometer 34 I think for the footage
where I'm describing, like, how hard it is, it's
going to be useful to use, like, the footage from people running
during the marathon. So, for example, like, this
clip here of people running, we can use a lot of it. Ready. But at kilometre
34, my body shut down. I wanted to quit every step. Let me see what else is there? I'm just selecting
footage and putting it to support the audio. Shut down. I wanted to quit. Every step felt impossible. I thought I was ready. But at kilometre 34, my body shut down. I wanted to quit. Every
step felt impossible. And then for the somehow, I pushed through the pain
and crossed the line. I would love to select
the actual results. So this is my information, and I'm able to just
drag and drop it here. Just show that I actually
finish the marathon, go to the effects control
or to the properties, and I'm just going to change the position of
it slightly like so. Impossible. Somehow. I pushed through the pain
and cross the line. And in the very end, I would love to just kind of get a picture of
me with the medal. Somehow? I push
through the pain. Mm. Actually, here,
I would love to get a picture of me like so. Me. Make it a little
bit smaller so that Oh, I push through the paint
and cross the line. Numb? Great. And here,
at the very end, I want to add a picture
of the marathon metal. So select it, go to
the effect controls, make it a little bit smaller. And let's see what we have. I trained for months, ran hundreds of kilometers
and thought I was ready. But at kilometre 34, my body shut down.
I wanted to quit. Every step felt impossible. Somehow I pushed through the
pain and crossed the line. Now I'm chasing Sap 4 hours
in November. Let's go. I'm going to create a position skill keyframe and put it to the
very beginning, and then I'm going to
zoom in and actually, that's zoom in on my face
because I look pretty tired. Somehow I pushed through the
pain and crossed the line. So you can somehow, now I'm chasing
stuff for hours in a position scale here as well, so that it becomes a
little bit more dynamic. Otherwise, it's not super dynamic and people will feel it. We want the video to be dynamic. It's always a good idea
to add a little bit of Zoom makes the video just a bit more
interesting to watch. Like, it adds that, like, 5% to 10% interest. It's really good, really good. So instead of it
being just stable, what you are seeing
here is just this video being stable all the time and you're just taking a look here. You don't want to repeat
that on social media. Because with online courses, you come here to learn, and so you are okay with watching something
just for a long time. This is why you are here. But with social
media, people don't come there to watch
me run a marathon. We are always fighting
for people's attention, and it's our job to try to
keep them watching for as long as possible
because that's how you are going to get
results and views. You want people to watch your videos for as
long as possible. And if you do that, your video will go stratospherically viral. Let's take a look from
the very beginning. This is me finishing my
very first marathon, but it almost didn't happen. I drained for months, ran hundreds of kilometers
and thought I was ready. But at kilometre 34, my body shut down.
I wanted to quit. Every step felt impossible. Somehow I pushed through the
pain and crossed the line. Now I'm chasing Sap 4 hours
in November. Let's go. While I'm walking
here a little bit, I want to use the video
of every step felt impossible. Where I'm walking. You shut down. I wanted to quit. Every stem felt impossible. Somehow I shut down. I wanted to quit. Every
step felt impossible. Yes, I think this is
a little bit better. I shut down. I wanted to quit. Every step felt impossible. Somehow I pushed through the
pain and crossed the line. Now I'm chasing stop 4 hours
in November. Let's go. I think the Zoom here is a
little bit too dramatic, so I'm going to click here,
select these key frames, move them a little
bit to the front, and decrease the Zoom a little bit so that
it's little bit less. Somehow I push through the
paint and cross the line. Now I'm chasing stuff for hours. Now, I would say it's
better to actually use videos instead of photos
videos are more dynamic. There is just more happening, so it's more
interesting to watch. But because I don't
have enough footage, I have to use the pictures. It's also like question
of whether do we want to have no video because
we don't have footage or whether
it's okay to use, for example, pictures
and get, for example, results that are a
little bit less, but we still get the video out. I think it's better to get
the video out than to have no video at all because we
don't have enough footage. I almost never finished
the video right away. After some time passes, I will know what to improve. Like, at this point, okay, I kind of worked on
it for a little bit. My eye got a little bit blurry. I cannot see like, very well. It's a good idea to
get some time off. And then in the future, when I come back to this
video, let's say, like an hour later or 24 hours later or even a week later, I'm going to have a fresh
eye, like a fresh mind. It's going to be
easier to identify things to improve,
things to change. That's what I think
we should do. Now, I recommend you going to
the downloadable resources, get all the footage, and then
have a practice yourself. In the next video,
we're going to work on the audio, on the color, on the text, and it's going to make our video a lot lot better. If you have any
questions, let me know. But other than that, I'll
see you in the next video.
11. Cleaning Dialogue Fast: Remove Noise & Improve Clarity: Video, we will clean
and improve our audio. When we come to Premiere,
and we select all of our audio and we come
to the sentral sound. And if you don't
have it once again, go to Window and then
Essential Sound. We are going to see this panel. It's basically the equivalent of going into the audio workspace. I rarely go into the
audio workspace, but it's the central sound
that's located over here. Basically, exactly
the same thing. I do prefer to have it in the vertical workspace because just basically the same thing, it's a little bit easier
for me to do it here. And there are a number
of ways we can do this. Let me walk you
through the options. First of all, you can
enhance your speech. I recommend using this option you tried everything
with the audio, everything we're going
to try in a second, and nothing worked, and you
just want something to work. Or if you want something
like super fast, you don't want to tweak
any of the settings, then yes, go ahead and click on that, but it's not the best. It's it's done with AI. So when you click on Enhance, it's going to take some
time to enhance it, and then you can control
the mixed amount. I found that seven is
a little bit too much. You don't want to go above
like five definitely. And when I used to use it, I would put it three and four. So if we take a look take a listen is me finishing
my very first marathon, but it almost didn't happen. I trained for months. Run hundreds of kilometers
and thought it was ready. But the kilometer 34, my body shut down.
I wanted to quit. Audio sounds like a lot different. Like,
it's not my voice. And if I click on this button, I can disable it and we can take a look at the
difference, at the same time. This is me finishing my
very first marathon, but it almost didn't happen.
I trained for months. Run hundreds of kilometers
and thought it was ready. But the kilometer 34, my body shut down.
I wanted to quit. Sounds a little bit robotic, so that's why I don't
really like it. At seven, it's a bit too much. If I put it at four or let's say three, becomes a
little bit better. This is me finishing my
very first marathon, but it almost didn't happen. Still doesn't sound good, and also you better
ways to do it. That's why I would
recommend disabling it. If we press on Automate, it's going to automag
all the audio to the same level. It is useful. I use it quite often
with my clients, especially because I
don't want to kind of go through every
single audio. And for example, if I click on the audio,
I can press on G, and I can see the audio again, you can see that the B
amplitude is at minus ten. So it means that in
order for our audio to be like at zero to be
like at the base level, we need to increase
it by ten, let's say. And the audio match kind of
works in some ways with that. So it makes the audio
a little bit louder. It doesn't always make it, like, very loud, very good. And sometimes you have
to select all the audio, press on G, and then add a little bit extra and
do the auto match. Let select our
audio, press on G, you'll see that the
peak amplitude is -6.8 across all the audio. So we can increase the
adjust gain by six. It means we're going to make
it louder by 6 decibels. If we make it minus six, it's going to make it quieter by 6 decibels. So I'm
going to press on six. I'm going to press
on ok. And now our audio is a
little bit louder, but it doesn't go over. These are the decibels that
we can take a look at. We don't want it to go over zero because it starts to
crack a little bit. So it can be very close
to and with voice, you want it to be as close
as possible to the zero, but make sure it doesn't go above zero because then starts
to crack, loses quality. We don't want that. My workflow with the loudness
and the automag, I press on automag
and then I select it again and customize it a little
bit further if I need to. A lot of the times I have
to listen to it as well, just because I got,
like, practice with thousands and
thousands of videos. I just got trained and
sometimes it's just a little bit easier for me to
understand even when I hear it rather than
seeing the data. The repair tab is really good
because a lot of the times, for example, when I receive
footage from my clients, they like to record
their videos outside in nature when there is
wind and reducing noise, if there is some sort of
noise, it really helps. So I usually put it at, like, let's say one because
if I go further, it becomes a little
bit too much. It changes the audio of
the client too much. And then they mentioned
to me a couple of times that they
don't sound themselves. Totally understandable,
and then I had to dial it back
down a little bit. Another great one is reverb. If there's an echo, you can reduce echo
by using this. Rumble reduces the
low frequency sounds. Honestly, never use it. Dham also never use it. So it reduces the hum sounds caused by electric interference. Yes, it can be done, but parents never have
problem with that. So if you ever have
problem, you can use it, Des reduces harsh
es like sounds. Clarity sometimes
is good to use it, but once again,
very rarely use it. In terms of the EQ
and these presets, I do not recommend using it. If you're going for
a specific effect, for example, like on a
telephone, if I select it. Possible. Somehow I
push through the pain. It's like an old radio. If you're going for an old
radio, you can use it, but I don't use it, and then you can customize a couple of things
here even further. But let me show you one very
good way to customize audio. So you can do it
here. It's okay. It's like the average. But if we want,
really good results, we need to go into the
Effects Control panel and search for parametric equalizer, not simple parametric Q,
but parametric equalizer. I'm going to put
it on our audio, and I'm going to come
to defect control, and I'm going to click
on custom setup. I'm going to click
on vocal enhancer, and it's going to enhance
my voice a little bit. This is me finishing my
very first marathon, but it almost didn't happen. I trained for months, ran
hundreds of kilometers. Makes it super crisp, adds a little bit of, like, buzz at certain points,
just enhances the audio. And then what you
can do is you can and I know it sounds it looks
like a little bit weird, but you can customize
it even further. So, for example, you
can customize to where some certain things
like go up or go down. You kind of move things around. A lot of the times, I just
apply it and I don't touch it. Like, that's the secret. Just
apply it. Don't touch it. And then if you want to
customize the audio, go into the essential sound if you really need to
customize the audio, reduce noise, reduce reverb, super useful enhancement,
don't touch it. It's for those times where I
have to work on the audio. But sometimes the
audio is so good. Like, if the audio was
recorded like indoors, for example, sometimes there
is no need to touch it. And the only way you will learn on when to touch the audience, when not to touch it is just with practice
and experimentation. If you are scared about working with clients and you feel like, What if I don't do it and they feel that I didn't do it, I
think in the very beginning, a lot of people get
a little bit, like, too self conscious about this, and then you have to
just ask yourself. Is the video, good? Can everybody hear
what I'm saying? If yes, then great. But if not, okay, customize a couple
of things, but this shouldn't feel
like a burden. We are creating a video.
It should be exciting. It may be stressful in a couple
of the very first videos, but other than that,
let's have some fun. Let's experiment, see what
works, see what doesn't work. The only way you can become
better is by practicing. So for this video, I'm actually not going to
touch it any further. It doesn't need any repair. It needs the parametric
equalizer, actually. So I'm going to go into
the effect control, and because I applied
just to this audio clip, it's important to copy it. So I'm going to press
Command C. Select all the other audio clips and press on Command V. And now, if I select it, these ones
are going to have it as well. I know there was quite
a lot of information. Let me just quickly recap. Once again. Let's go to
the essential sound. When you have your
audio, press on G and see the pick amplitude and make sure to set you again no more than
the Pi amplitude. But close to it so that
the audio is close. Like, I could have
said it to five. Won't be a problem, but I said to six because it's closer. So it will be a little bit louder.
That's the first thing. Second, if you need to repair
the audio, then repair it. If you don't need to
repair it, don't touch it. And if you want that
extra bit of improvement, set the parametric equalizer, go to the custom setup and
set the vocal enhancer, it's going to make your voice sound just a little bit better. If you have any
questions, let me know. But other than that, I'll
see you in the next video.
12. Adding Music & Sound Effects to Short-Form Videos: In this video, we'll talk
about music and sound effects. And specifically, we're going to talk about the two websites. One is Epidemic Sound, the other one is
called Pixi Bay. Epidemic Sound is paid version, and Pixi Bay is absolutely free. Long story short. Paid
option is definitely better. In my opinion, Epidemic Sound
is the best platform for music and sound
effects for creators or for anybody who wants
to get professional music. And sound effects. Why is that? Well, the first reason is
because Epidemic Sound focuses solely on music
and sound effects. There are other
platforms like Invato, Art list, motion array. Even though those are
still great websites because they are more
spread out into footage, into templates, motion graphics, all sorts of stuff,
those are really, really good at that thing. But if we're talking the best of the best in terms of the
music, that's Epidemic Sound. The second reason for
that is because let's compare it to Pixie Bay. Well, Pixi Bay is free.
Epidemic Sound is paid. They have the budget to work
with professional artists, where with Pixi Bay, even though there are still
some really good songs, still some really good sounds, there's also a lot
more just trash. A lot of the stuff
is created with AI. A lot of the stuff is
created by amateurs. And even though there's, like, a really, really good person,
which let me show you. It's Lexing music really
recommend unbelievable songs. You can come to this
page and explore. Even though it's
great, there's still, like, a lot of stuff
which is just not good. While with Epidemic Sound, whatever song you click on, it's going to be great
quality, no doubt. In terms of the sound
effects, as well, so let me walk you through
quickly through both websites. First of all, let's
start with Pixabay. So when you come
to this website, it's going to look like this. By the way, all the links are
in the resources section, and you can search
for, for example, like, a search for violin. And let's search for it. Then you can change
what do you search for? So, for example, we
search for music, violin. I'll search for music,
and then we have violin. Let's take a listen. And then you can change
whatever you want. The most relevant editor's
choice trending latest, if we put latest, I'm sure there's going to be
a lot of AI, and there is. So this one says that was created by artificial
intelligence. And even though sometimes it's great, sometimes it's not great. You get the idea, then we
can go into sound effects, and, for example, we
can search for UI. Lots of interesting sounds. And this is what you
get with Pixel Bay. Now, when it comes
to epidemic sound, you have your homepage, but one of the best
important things I like about Epidemic
Sound is the music tab, because you have your genres here at the top, you
have your moods. And my favorite, if
you scroll down, you have your themes
here at the bottom. So, for example, if we
let's go for comedy, I'm going to open the New
Tab reality TV pranks. Listen. Really good. For example, for my clients, because they
are in the travel niche, I can just come to the
Travel, for example. And then from the travel, I can select
whatever works best. So, for example, like, exploring or, like, let's
do festival season. Let's click on it. And you can see I've downloaded some
of the songs from here. I feel like music
is very important, not just for the viewers
and for the clients, but it's also important
for the editors, because if you work with
the music that you really, really enjoy, it's just
you enjoy it a lot more. And oftentimes when I
work with Epidemic Sound, I'm just, you know,
I start dancing, even though I'm just
alone in my room and with my headphones and
editing free clients, and I'm just I start dancing, and I think it's so interesting. For example, like, I
absolutely love the song. I use it quite a lot
with my clients. Yeah, so that's in
terms of the music. Really recommend you
exploring the themes. I mean, you can still explore
artists and take a look. Just explore the whole website. By the way, there's
also plug in. So, for example, for
premiere for After Effects, for audition for DaVinci, there's also an
app, as you can see here, IRS and Android. I really recommend you to just go ahead and give it a try. In the resources
section, there's going to be a 30 day free trial. If you want to give it a try, once again, if you don't want, you can just cancel 29 days
after and I just really, really recommend it
to give it a try and to get some
professional tools started. If you don't like it, you
can use the free option, but trust me, it's so worth
it, I really recommend it. Now, in terms of
the sound effects, because they already have
it, like, sorted out. But if you want to search for
something specific, like, for example, let's search
for, like, door open. Right. Sure. Or let's search
for, like, Swoosh. I downloaded so many swooshes from this webs
It's unbelievable. So swoosh is actually
something we need to use in the very
beginning of our video. So since I've
downloaded this one, let's give it a try.
Let's download this one. When it comes to
sound effects and editing the video
with sound effects, you just want to support
the video with the audio. If there's something that
appears on the screen, you want to support
that with the sound. If it's, like, a lot of
the back to back cuts, you might want to support
that with some sort of, like, clicks so that's like, it's
fast. People really enjoy it. So whatever's happening
on the screen, you want to make sure it
has some sort of sound. Now, if in one
moment in 1 second, you need to use like 20
sounds, it's a bit too much, so you want to cut
some of the sounds and prioritize what's
the most important. But oftentimes that
doesn't happen. There's also no specific way on how often you want
the sounds to be. For example, for this
video, let's take a look. We have our Zoom here in
the very beginning and then then we have this part. Then what else do we have? Then there's When we
have the pictures, we can add, like,
sound effects here, but other than that, throughout the whole
video, I don't think we need to add any sounds. Actually, let's search
for, like, maybe riser. Okay, I'm going to
use this riser. This one is pretty
good. It's just to add a bit of tension
at the very beginning. So we're going to put it
here at exactly this cut. So let's come to the project. Let's import two of
our sounds here. Let's do this one, and
let's do this one. So we have our riser. And I'm going to cut come
exactly at this part. And I'm going to press on
out. Why am I doing this? It's Because when I drag it, I said, Look, instead
of me having to, like, search for this part
and cut it here, what I can do is I
can just drag and drop it and then
drop it, like here. But it almost didn't happen. But it almost and I'm going
to select it and press on G, press to let's say -20, just to make it a little
bit lower, less loud. This is me finishing my
very first marathon, but it almost didn't happen.
I trained for months. I'm going to mute the
audio by pressing here, mute this whole track, the one that has audio here. Or what I can do is instead
of muting this one, I can select this
solo track here. So it's basically
the same thing. But let's say we have a
couple of audios and I want to listen to just this one, then I need to press on solo. But if we have, let's say two, I can just mute the top one, and I'm going to hear
just the bottom one. Pretty good. Now, let's see. What else do we have? Swoosh
in the beginning. Okay. So let's use the third one, come to the very
beginning, drop it in. This'll be finishing my.
This I'll be finishing. This push is a lot faster than our Zoom. Let's
give it a try. I'm going to select the
adjustment layer and press Shift Command E
or Shift Control E, and I'm going to disable
this adjustment layer. And I'm going to put another adjustment layer on
top and enable it. Basically, by pressing
Shift Command E, I'm just making it
invisible and I'm making the one at
the top visible. What I want to do is I
want to try and experiment and really zoom out in
the very beginning. Potentially increase this as
well to something like this. Let's do 180 and
see what happens. This is me finishing my This is me finishing my
very first marathon, but it almost didn't happen. Let's see what we
prefer. Do we prefer the very fast zoom with the
switch or do we prefer, like, a slower Zoom? This is me finishing my
very first marathon, but it almost didn't happen. Let's disable the adjuster and disable the audio and
enable this adjuster. This is me finishing my
very first marathon, but it almost didn't happen. Mm. Interesting. Actually, I think I prefer the adjustment
layer with the ssh. This is me finishing my
very first marathon, but it almost didn't happen. And then for music, actually, let's go to traveling
to the festival and download the song that
we listen to this one. Okay, so let's download it. Come to Premiere, and I'm
going to drop it here as well. You can see the audio forms, and you can kind of see at different points what kind of sounds you're going to have. So for example,
here, we're going to have lots of different sounds, and it's going to
be like the mix of the mix, it's
going to be, like, a lot of instruments
or everything put together with the most
active part of the song. But, for example, here, it's going to be a little bit less. So I can kind of go with the playhead and put it
to different places. Once again, it comes
with experience, but something I would like to do in the very
beginning is this bit here because there is no melody, and it kind of adds a little bit of that kind of pressure, which is what we're
trying to build in the very beginning
of the video, doesn't always have to be, but it's an interesting
place to start with. Another way that we can approach this is we can use, for example, like this part over here, a part that goes from
kind of the beginning of the song to the full mix. So let's listen here. We go from less active
to more active. And usually when
there's this cut, this point here, I like to
put it at a cut somewhere. So, for example, what we
can do is we can put it. Let's find the place where it starts. I'm
going to press on I. Come a little bit to
the front, press on O. Basically, the in
and out points. This is going to be the
shortcut I on the keyboard, and at the end, it's going
to be O. Drag and drop it. The reason I select
just a small portion is so that let's say, it's going to be
until the very end. Let's say, like so. And
then the drag and drop, and then it becomes,
like, very long. That's why I don't want that. I want there to be, like,
a point of the cut, and then I can drag and
drop it and extend it. You can hear it's very loud and obviously you
cannot hear me. One thing that we will do
is we will go to presets. I'm going through how to
save presets in second, and I'm going to apply this
lower music for voice. And it's very useful because it's a simple
parametric cue that lowers the highs of
the music so that it doesn't compete with my voice or with your client's voice. And the way you do this is you apply a simple parametric cue. Let's search for it. It's this simple parametric cue. What you do is you just
drop it over here. Or you drop it on our
audio file at the bottom. And then just go ahead
and copy these settings, 13604, and -18. And then when you
apply these settings, right click Save
Preset, give it a name. In my case, it's lower
music for voice so that I can easily identify it
and then press on Okay. And it's going to save your preset into the
presets panel over here. And then you'll be able
to just find it here, drag and drop it, and apply it. And that's how you
can save presets. If you have a couple
of different changes, for example, on the
video, you might add like black and white filter. You might add like transition
at the very beginning, you can select all the effects, that would be
selecting, for example, opacity, motion, once again, right click Save preset, you're going to save it and
it's going to be saved there. It's going to save you a
lot of time in the future. Now that I applied it, it's still going to be
very loud. Let's listen. Thought I was ready. But we can already hear myself a little bit so that the
highs are not as high. Now, I'm still going
to lower the loudness. I'm going to press in G,
and let's press to -20. It's the equivalent of
going to the level and just decreasing the level over
here or increasing the level, but I just get used
to pressing G, and that's why I'm pressing
G to lower the music. O M 34, my body shut down. I wanted to quit. Every
step felt impossible. Somehow I pushed through the
pain and crossed the line. Now I'm chasing stop for
hours in November. Let's go. Let's add music in
the very beginning. So I'm going to come
to the project. I'm going to select our song, and like I told you, I'd like to explore this part. Let's listen. I'm gonna select it and put it. This is finishing a first month, but it almost didn't happen. I drained for months, ran
hundreds of kilometers. A lot of different
stuff happening here. This has been finishing
my very first marathon but it almost didn't happen. I drew for months, right? When we have this riser end, I'm going to end
the music as well. The reason I'm doing this is because I want there to be like, quiet, like a bit of pressure. If you think about the video, you want it to be sort of, like, in waves where, yes, sometimes there's
pressure, but then you decrease that pressure. And actually, we
have this sort of pressure in the very beginning
where we have the riser, we have the swish,
we have this sort of beat like pump pom
pom, pom, pom. And then for this part, for a second, it's
going to be just quiet. And once again, comes just with experience
with experimentation, and you want to give people
not pressure all the time. You want to give them
waves so that they are like a roller coaster. Now, I'm going to
select this one, and I'm going to actually, let's select this audio clip, come to the Effects
Control panel, copy the lower music for voice,
and we can apply it here. So instead of going to the
Effects Control panel, we can just copy it
from the effects from the other music clip. Let's lower it by, let's say, minus ten,
and let's listen. This has been finishing
my very first marathon, but it almost didn't happen. I trained for months, run
hundreds of kilometers. Too quiet, actually, let's
let's give it ten, and listen. This is me finishing my
very first marathon, but it almost didn't happen. I trained for months, ran hundreds of kilometers
and thought I was ready. But at kilometer 34, my body shut down.
I wanted to quit. Every step felt impossible. Somehow, I pushed through the
pain and crossed the line. I'm going to apply this transition in a way here
so that it doesn't create, like, this loud
transition sound. So sometimes, when the
audio clip is just cut, when there's some
sort of loud point, it's going to make like this, like, and I don't like it. That's why if we create, like, this little transition is
going to get rid of that. So let me give you an example. I'm going to copy this, and I'm going to cut it and
Now I'm Chase is in November. I cannot really hear
it, but let's imagine these are two audio clips
that we put together. And because they transition
not on a quiet sound, but on the loud sound,
there's going to be a very annoying noise. And if I click in between those, apply
default transition, it's basically transition
between different audio files, and then I make it super small. I can also just double click
on it and set the duration. It's going to become
super super small. Now I'm Chases in November. It's going to be
absolutely smooth, but I'm going to delete it. At the end of the video or at the end of the
segment of the video, I like to use, like, the end of the song,
for example, here. Sounds beautiful. Let's take this part. I'm
going to press on. Oh, the end part, like,
the very, very end, doesn't really matter
because usually, like, becomes quiet. And we just need to find the
part that's before the end. And here, I wouldn't
want to take, like, the part that's the high. I would like to take the part
that's sort of, like, low, so sort of like a valley
and going to mark it out. And we'll see maybe
we need to use it here after the very
loud sounds are gone, and then there's just like
relaxation at the end. So let's try with this part, go to the Effects
Control panel, copy it, copy the simple parametric Q, paste it here, press on
G -20. Let's listen. I cross the line.
Now I'm chasing Stub for hours in
November. Let's go. Let's apply a
default transition. We can also press Shift
Command D to apply it. It's shortcut, make it
super small. Let's listen. Make it a little bit bigger. You can see the sounds
start repeating, and so that's why I'm
not going to make the transition long like here. Sounds weird. So we need
to make it super small. What if we cut it basically to this point
over here and listen. I just made the transition
a little bit smoother. What I did here
is, if you listen, you can kind of hear
that the song is rising. There's like three
beats tune, tune, tune. Let's listen again. And again, after the third one or
after the fourth one, I just lower it down, create
the small transition, and that's how you
mix the audio. There's no, like, secret
ingredient that you have to use. It's just experimentation, making sure it doesn't
sound like weird. The audio doesn't compete. The way you can do this
is literally by just moving the audio
around slightly, then you'll be able to do it. So let's listen to
the whole video. This is me finishing my
very first marathon, but it almost didn't happen. I trained for months, ran hundreds of kilometers
and thought I was ready. But at kilometre 34, my body shut down.
I wanted to quit. Every step felt impossible. Somehow I pushed through the
pain and crossed the line. Now I'm chasing stop for
hours in November. Let's go. Now, one thing I
will say, sometimes I send the video to my phone, make sure it sounds
properly because in different devices
it sounds different. And in headphones or earphones, it will sound different
compared to well, two headphones or
earphones compared to each other or compared to a
laptop, compared to a phone. And so sometimes I try to
hear it in different devices. Oftentimes, when you
create a system and you know the amount of loudness
or the kind of sounds to use, then you don't necessarily
have to do it. But sometimes you do have to do especially when
you're getting started. When you are getting
started, it's a little bit
overwhelming because you have to do extra because you don't
know how to do stuff. You don't have enough experience or you don't have
enough knowledge, and then you have to experiment. And yes, I know it's a little bit too much
in the very beginning. That's why I'm trying to make it as simple as possible.
I know that's a lot. It's just something
we have to go through if we want
to become great. Let's do a quick recap. If you are just getting started or you have very little budget, I do recommend pixie B. If you have a bit of a budget, take a look at Epidemic
Sound or just give it a try. Once again, 30 days for trial
in the resources section. Then when it comes to premiere, you want to make sure
that whatever happens is supported by the sound. If there's something appearing on the screen, or there's, like, text or transitions, you want to support it
with the audio. And then for the music, you want to follow a
progression of the story. So usually in the
beginning of the songs, there's, like, a beginning part. So that's something you can use in the
beginning of the video. In this case, this
video is slightly different because our
intro is so short, we couldn't necessarily use
the beginning of the song. We had to use middle, which is kind of similar
to the beginning, because if we just
take a look at this highlighted part
kind of resembles the how this phone is created. It starts slow and then
grows up to be fast. So sort of similar. Instead
of using this beginning, we used this
beginning in the way. For the middle part, you want to use the most exciting part, and then for the end,
you want to use the end. Something I recommend you to do now is go ahead and
try it and do a video. But actually, before we do that, remember I told you
that for the pictures, we can add a specific
sound effect. Well, let's search for actually, let me show you how
Pixie By works. Let's search for, like,
photo sound effect. Let's search for
camera sound effect. Okay, one of the
disadvantages of Pixi Bay, sometimes it doesn't
play the audio, like what's happening currently. So we have like camera shutter. I'm pretty sure
this will be okay. So I'm going to
click on Download. By the way, you can
read the licensing of the Pixabay over here. You want to make sure you
adhere to these licensing. It's free to use. You don't
have to attribute the author. You can modify it
however you want. Recommending you to
double check it. Now that we've downloaded
the sound effect, let's drop it in. Okay. The whole sound is a
little bit too long, so I'm going to
use just a part of that sound. Let's
use, like this part. And let's drop it here, here. I'm going to copy it,
paste it here and here. Somehow I push through the
pain. I cross the line. Now I'm chasing sub and I would make it just a lot quieter
to, like, say, -20. Well, it's impossible. Somehow.
I push through the pain. I cross the line. Now I'm chasing sub for
hours in November. Great. Simple. But the
audio supports the video, making it a little
bit more engaging. Now it's time for
you to practice. So go ahead and do that. If you have any
questions, let me know better than that.
I'll see you next video.
13. Auto-Captions Made Easy in Adobe Premiere Pro: In this video, let's
talk about captions, specifically
Auto-Captions and how to make your life a
little bit easier. Something you've
previously seen is we have the text panel and we
have our transcript here. And before we create
our captions, it's great to take a
look at the transcript. And one thing I recommend
you do is to just go ahead and start
playing the video and check the captions.
Let's go ahead and do that. This is me finishing my
very first marathon, but it almost didn't happen. I trained for months, run
hundreds of kilometers. And here, instead of running, ran hundreds of kilometers. Run hundreds of kilometers. You can just double
click and it's going to select a specific word
that you're selecting. Kilometers and
thought I was ready. And thought I was ready. I was ready. But
at kilometre 34, my body shut down.
I wanted to quit. Every step felt impossible. Somehow I pushed through the
pain, and crossed the line. Now I'm chasing sub
for hours and above. Now I'm chasing sub
4 hours in November. Now I'm chasing stuff for
hours in November. Let's go. Great. Now, in order
to create captions, we need to go to the
top right corner, click on the three dots
here and create captions. And let me give you a
couple of settings. First of all, you have lines. You have either single
lines or double lines. Basically, if caption
is going to be like, on one line or on
two different lines, so a little bit higher,
a little bit lower. It depends on the kind of
style that you're going for. I would say if chill. You can use two lines and,
like, long sentences, but something that
works really well on social media has been working
for the last five years, or even more short from
content specifically. It's going to be
the single line. And then you can customize
the number of characters. The number of
characters is how long how many characters are going
to have like on one line. If you want to have
multiple words, you can leave it at
roughly like 42, or you can make it even
more to, like, maximum. But if you want to have, like, one word per line, so that it's just one
word after the other, you need to minimize this to
the minimum, which is seven. And then when you create the maximum length
in characters, Simon is just going to be
one word after the other. So something I do
recommend you do. So let's create captions,
and let's take a look. And you can see at the bottom, I have one word after the other. Sometimes I'm going
to press Command Zt and create captions again. Let's do single line, and
let's do, let's say, 42. You see that we have
longer sentences. And it's also broken down here. You can see
it here at the top. We have these sentences, so I can select one sentence and then just either customize here by pressing T
and customize it. But I'm going to
press and Commands, create captions from transcript, minimum single create captions. And we are going to
have word after word. You can see we have a lot
more of these captions. These captions are specifically like the timing is
absolutely perfect. So **** listen. This has been finishing
my very first marathon, but it almost didn't happen. Now, I'm going to
select all the captions and I'm going to go
into properties. And here we are going
to customize our text. In terms of the funds, there
are two types of funds. There's personal funds, and
there's corporative funds. So, for example, one of my
favorite fonts ever is Tasca, and you are free to
download this font online. This is what this
font looks like. I just I looks great,
in my opinion. Now, there's also
something like SF Pro, which is a font by Apple. And if I use it, it
looks different. It doesn't look corporative. It looks more personal. It
looks more just human like. Before, I used to
prefer corporative, but now I prefer
the personal fonts. This something I would use. Now, something we can do as well is if we go back into text. You can see that we
have punctuation here. And if we don't want
to have punctuation, we can easily get rid of that. So in the captions,
this is the transcript. This is the transcript
of our audio and the captions is what
we have created here. So if I delete this, you can
see it's going to disappear. Sometimes people confuse this. So transcript is
basically transcript of the audio and captions is exactly what you
have over here. Now, if we search
for, let's say, comma, we can replace
it with nothing. And we replace comma with nothing, it's
going to disappear. Take a look. We have two commas. I'm going to say replace all and it's going to replace
all commas with nothing. So it just disappeared. The same we can do with period. We have nine periods, and I'm going to replace all. And so now I'm going to have captions with no
commas. Next thing. I'm going to go into
properties again and we can select the zone
of where it's located. It's at the top, at the
bottom, in the middle. Usually, it's good to
put it in the middle, but you want to make
sure it doesn't obstruct the main things of whatever
you have on the screen. Let's take a look. I would actually lower it
down a little bit, maybe like here so
that first of all, here it doesn't like
abstract my face. So Okay, great. Then we can customize
the words themselves. So we have shadow at the moment. If I disable it, the words are a little bit harder to see. So I do recommend shadow. But one thing I recommend
about the shadow is, first of all, move
this thing to zero. Basically, it's like the
place of the shadow. It's going to be right
behind our text. The angle doesn't matter, the opacity to 100. And then here at the end, this one is going
to be the size. We can leave it roughly as is. And then we need to increase this part a little bit
so that our shadow, let me zoom in here so that instead of our shadow
being like this, we can make it like this so that there's
shadow around our text or it's like a dark glow
around our text. Press option. Actually, maybe we need
to just a little bit more so that we don't
really see the shadow. The text is just better visible. Let's see before, basically without
shadow and with shadow. It's better with
shadow because we can see the text a
little bit easier. And then we can customize
the text even more. So for example, if we
want only to have caps, we can set this and it's
only going to have caps, but I do not prefer that. And from what I've seen, working best is to have
regular sentences. You can customize
it even further. You can even create a
background for your text. So something we can do is
just increase the background, something we did in
the very beginning here with this text here. We can do it here as well
with the background, increase it, increase
the roundness, and it's going to be like this. The stroke, usually, I
prefer not to use it. It's like having
almost like a shadow. In my opinion doesn't
look professional and I like to disable it, but some people like it, so
it's not a problem at all. And then you can save stiles. The way you can save
stiles is by pressing here on the plus sign
and create a style. And you can save it
to the locals style. You can give it a name. Basically, the style that
you save here is going to be you click here in
the style browser, here you will have
different styles. This is a style for my clients, another style for my clients. This is style for myself something I used
to do in the past, and once again, client,
client and client. So a lot of different
options for my clients. So this is the way you
can save it over here. Press on plus and
create a style. You can save it to your
project. It's going to be saved in your project here, but I don't like to save it. I like to just save it over
here so that you know, why would I want
to keep it here? I want to just keep it
there to keep it organized. Next thing, we can increase
the font size a little bit. I don't like to make it huge. And that's how you do it. This is me finishing
my very first mark, but it almost didn't happen. I dreamed for months, ran hundreds of kilometers
and thought I was ready. But at kilometer 34, my body shut down.
I wanted to quit. Every step felt impossible. Somehow I pushed through the
paint and crossed the line. Now I'm chasing sup
for hours in November. This is how you do
captions. Super easy. If let's quickly go
through it again, first of all, go into the text. Go through the transcript, make sure the transcript is great. Click on three dots,
create captions. Then we go into captions, search for commas, search
for periods, delete those. If you want to get
rid of that, if you want to keep it,
you can keep it, go into properties, customize
it, click on the plus, save it as you style, and then anytime you
want to apply it, just select it and click
on the style and apply it. Right now, we have our
captions as captions, but we can turn
them into graphics, and it's a subtle change,
but sometimes useful. So for example, here
in the very beginning, we have our jasmine layer, and you can see that text is not affected by the adjustment
layer because it's captions, it's on top of everything, and you can see it over here. Like it's on top. There's nothing above it. But something we can
do is we can come to captions graphics after
we select our captions, upgrade captions to graphics. Let me so and put the adjustment
layer on top of that. And you can see that we actually don't see the texts over here. And now the text, because it's acting
as a graphic, basically text on the screen, but it's below the
adjustment layer. It is affected by the
adjustment layer. And one advantage of
that is you can use the adjustment layer
to influence it. We can still select it,
go into properties, and we can still kind
of customize it. But it's an extra step you have to do to go into the graphics, upgrading to source graphic. Instead of doing that,
I just always leave it as captions, like
here at the top. It's okay that it's not affected
by the adjustment layer. That's kind of the
only reason that I know of to upgrade
captions to graphics, or if you want to do
some other effects, that's totally fine, as well. If you want the easy route keep it at the top.
Don't upgrade it. If you want to make
sure you can adjust it, yes, sometimes there
is a need for that. Go ahead and upgrade
it. Other than that, just keep it there at the top. Now it's your time to do it. Open up the project, go ahead
and create the captions. If you have any
questions, let me know, but add than that, I'll
see you in the next video.
14. Essential Graphics & Branding Elements for Social Videos: In this video we'll
explore essential graphics and branding elements. When it comes to
branding in videos, you just want to make sure
that things are repeatable. You don't want to reinvent
the wheel every single time. So it means you
use the same font, you use the same graphics, you use the same style, the same pacing, the same
kind of theme, idea. You don't want your videos to be dramatically different
from each other. You want your videos
to be similar. And how people can
easily identify that it's you by
that consistency, if in the beginning
of the video, you always have like
some sort of text, where you have some
sort of sound in the very beginning
or if you have your face in the very
beginning, right? So if you take a look at Mr. Beast, it's always
him in his videos. And you know his face,
they use the same phones, they use similar music,
similar effects. That is branding, and
that is consistency. And Essential Graphics
or graphic templates are closely connected to branding because oftentimes
the way it's done is, for example, with text. And I want to show you how
to use the graphic template. So for example, in
the very beginning, I have this text
here at the top. Instead of me having to create this text every single time, customize it so that
it looks like this, changing the position,
so that it goes there, can actually save
it as a template. So what we have to do is we have to go to the graphic templates, and here we will
have our templates. Now, in order to save our
graphic as a template, we need to select our text or we need to
select our graphic. Basically, this
layer is a graphic. And we can have more
than just text there. I'll show it to you in a second. So, for example, I'm
going to right click Export as Motion
graphic template. If you ever heard
the word Mgurd, that's motion graphic template. So if you select
your graphic, right click Export as Motion
graphic template, you need to change the destination where
you want there to be. By default, you're going to have the local
template folder, so you can save it
there and I'll show you in second how to
customize that later. Include o preview good idea because it's going to preview, like you can see
in the background, have some other template there. Let's call it like
text at the top, and we'll save it to
local Graphics template. Okay, and I'm going
to press Okay. If I go into the local
Graphics template, we will see that there's
this text at the top, and I can drag and drop it, and you can see that it's just
going to be on the screen. Now, I don't have
to press on text, create it, and go through
the whole process. And then we can go ahead and right click Revealing Finder, and I'm going to see
where it is. Yes. So text at the top Mgort the way we can delete them is we can delete them from here. Times it crashes premiere
if you do it like this, or you can right click and
then delete it as well. Let's copy this text
by selecting it, pressing option, and dragging
it to the new location. So if you go into
the properties, you see that this is our
kind of graphic layer, and we can actually
add more here. So we can have a
couple of texts. So second text. You can see it edited as another layer in
the graphic layer. So if I was to save this, Export, it would have two texts. If you want to delete
this one, just select it, press and delete, and
it's going to delete it. Now, one interesting
thing that you can do here is come to the new layer, and we can add from file. And if we were to search for, let's choose it
like a checkmark. It's going to add a checkmark,
and if we select it, it's going to be
here as well, right, as another layer
within the layer. We can have custom graphics. We can actually save, like, full screentots which is somewhat useful as
well sometimes. We can save animations as well. Let me delete this one. And let's say we were to
animate the position. So let's put a keyframe here. Come to the very beginning and let's get it out of the screen. So let's have it like this. It's going to appear. And
actually, one thing as well, I'll tell you is
with the keyframes, you can see the
movement is rigid. Like it's not smooth at all. So if you want smooth
movement with key frames, right click, temporal
interpolation. The first one needs
to be is out, and the second key frame
always needs to be is in. And you will see
that the movement in the end became just a little bit smoother. It's not as rigid. Now, if we want to
customize it even further, we can open this graph and
we can drag it like so, and you'll see what happens. Like, it became
super, super smooth. We can either do it from here from the graphics or we can add, like an effect, transform. And then something
we did over here, we have, like, a little
bit of motion blur, so we can add motion
blur here if we were to do it with
the transform effect. Now, let's say I save it as
a motion graphic template. Once again, I'm going to save it too the local template folder. For this example, it's going
to be marathon, person okay. Now, if you're going
into the graphic templates, here's our marathon, so I can drag and drop it, and you'll see it's going
to be exactly the same. Like it's going to
have the animation. So instead of having to
create it every single time or remembering the exact font, the exact customizations, this is the way you
can do it. Super easy. Now, there's another type of mogard which is
also called mogard, but it's done in After Effects. Even if you don't
have After Effects, but you have mogard from
After Effects, for example, like you downloaded
from the Internet, you can still use it and you would just put it in
the folder somewhere. By the way, let me show
you how to add a folder, so you can just add
additional folder. Find the folder
on your computer. For example, I have
a specific folder called Motion Graphics PR. And then within that, I
have different folders. So, for example, I can select a folder and I can choose it but I
already have it chosen, and it's just going to appear
here as an extra folder. So this is the way
you can do this, or if you have just
motion graphic you want to add it here
without the folder, you can just select it
from your downloads, dragon drop it there and
just going to appear there. So about after effect, if you have a mogart
from after effect, it goes exactly the same way. You either put it in
a folder and then add a folder or just
drag and drop it there. And let's delete this one because we're not
going to need it here. Some of the useful graphic
templates that I used, for example, with my client
is like a rectangle stroke. So instead of me having to
add it every single time, just create it once,
and that's it. Like a black arrow, which is actually a
video that's animated. Like, so now, I added an effect, like, probably, like,
a white shadow. Yeah, so it's an effect called drop shadow.
You can add a shadow. Because the arrow is black, I needed to add it so that
I can see the arrow itself. Then we have different the
bigger arrows, circle icons, for example, like icons that are appearing on
the screen to the left. So we have a couple
of lists here, for example,
something like this. Let me just move it a
little bit to the side. This was created After Effects, and something you can
do is you can kind of customize it if you go
into the properties. And if you want to learn how to work with Premiere
and After Effects, actually have another course, just click on my profile and you'll be able to
find another course. If you want to take that course, it shows how to
create short from content in both Premiere
and After Effects, how to work in these
applications at the same time because there are
many ways to do this. After Effects is used also
in some interesting way. So if you want you can just go ahead and
take that course. There's no limit in terms
of what you can add here. The only limit is
your creativity. If you don't know what
kind of motion graphics you want to create or
you need to create, then just don't create them. Like, it's not necessary. It's just a way for us to create something
repeatable easily, something that people will
recognize and that will make our life as video
editors a little bit easier. If you have any
questions, let me know, but add than that, I'll
see you in the next video.
15. Congratulations!: Congratulations. If
you're watching this, it means you've made it halfway through the
course content. I know we've covered a lot, so congratulations to you for
making it to this point. There's a lot more valuable
content coming soon, but before we get
to the next video, I want to simply ask you if I found value in this program
up until this point, to take 60 seconds to
leave you honest feedback. Of course, I will
immensely appreciate this, and this will also
help hundreds of future students in deciding
the best program for them. So leave your feedback now. And of course, if there's
anything I can help you with, let me know in the
Q&A section below. You're doing great. Keep going. And without being said,
let's get to the next video.
16. Color Correction & Skin Tone Fixes in Premiere Pro: In this video we can talk
about color correction and skin tone fixes. Let's jump in. Once again, there are a couple of
ways we can do this. We can either add the emtri
color from the window, so you can just add it here, and then we can
customize our clips. We just select one of the clips, and then we can customize it. But sometimes it's useful to
go into the color workspace. Let's go to the color workspace. You can see it's very similar. There's the ometri
color controls exactly the same
as I had before, so it's just window
loometri color. But then we also have
these two scopes, graphs. You can customize
them by clicking here and it's going to be the
vectorscope and the waveforms. Let me give you a couple
of explanations here. First of all, this one shows the color and it's going
to be super useful for us. This one shows the brightness, just the image itself. It's a little bit confusing. This one, at first,
is totally fine, but this one is going to
be super useful for us. So for example, let's find a clip that's a
little bit darker. Okay. And you can actually
see when I move the playhead, it kind of moves with it. You can see that I am darker. Like, I'm in the
middle of the video, and you can see that
this is actually like me moving because
I'm the darkest point. So this is me moving at zero. It's super dark at 100, it's like, almost white. You can see like, we have a very white line here and it's actually
this part over here. And then when I cover this
tree a little bit here, it disappears here a little bit. Okay, so a couple of
things about this. The first thing we can
do the first kind of basic correction adjustment we can do is we can select or clip, and we can press on Auto, and it Premiere will automatically
do some changes to it. So you can see it bumped
the saturation to one oh five exposure to 0.3
contrast -14, and so on. Now, if you were to
do it on your own, what I would recommend
you do is what you want is you don't want there to be like parts at zero because at zero, it
means it's just black. Like, you cannot see anything. It's black, and you
don't want anything to be at 100 because it's
going to be too bright. Like, it's white.
There's no detail. And we do want to get a
little bit of detail. Let's zoom in. The
first thing I would do if I was to do it
by hand is I would increase the blacks a
little bit so that it's not just a zero,
just a little bit. And it's like it's a
subtle difference, but now if we were
to bump shadows, for example, we would
have the details because if we were to
keep the blacks at, let's say, a zero,
very little detail. But if we were to put it at
what did we have it at 2.7, already a little bit better. We can see more
details. But then if we increase the shadows, like, everything
goes a little bit up and then becomes too bright. And so we just have to play
around with this where Okay, we don't want the shadows
to be like that much. Okay, maybe we can bump
them up a little bit. But then let's take a look at the highlights
and the whites. We need to decrease the
whites a little bit, like the whitest part so that those are not just,
like, super white. We want a little bit of detail. So that's why we're decreasing
a little bit of white. And then we can decrease the highlights a
little bit as well, potentially increase the shadow. Just a little bit. And
then we can do contrast. So we can decrease contrast
or we can increase contrast. Depending on what kind of
style you're going for, you can do different things. I would just leave it like this, and I would definitely increase the saturation a little bit. But social media, you
do want to almost exaggerate the color a little bit and just with social media, you want to exaggerate
everything a little bit, sote audio distorts themselves. It's not always easy to identify the white balance in premiere. And the auto
correction is actually really good at identifying
the temperature in the tint. Basically, what this does
is, let's say our video was, like, this blue and we
don't want to be this blue. We want it to be like, it is in real life, and it's done with
white balance. Basically, we have
to find, like, a part that's white, and then based on that, it
will do the adjustment. And I absolutely
hate doing that. It's for some reason for
me, it's not natural. I do struggle with
this a little bit, and so the best way that I found is just do the autolance. Let's take a look at
some of the other clips. Well, these clips are done well, actually, maybe this one. I think it looks a
little bit blueish, so let's take a
look at this one. Let's click on this
clip and press on Auto. Yeah, you can see it did just a little bit of the adjustment. So it made it a
little bit warmer and then the tint a little bit
more towards the purple. Like a subtle difference, but it does make a bit
of a difference. I'll be honest. Oftentimes,
especially on social media, first of all, the colors
are all subjective. And then when you
go on social media, you will find so many
clips that just so badly balanced in terms of the color that it's just it's like an extra step that
you don't have to do. If there's a specific need for you to make the
colors perfect, or if the video is just really, really bad, then yes, go ahead and do it. But if the videos, like, pretty good, you
don't have to do it. I don't do it every single time. I do it when either
clients request it, or I just see it's really bad. If there's no need to
do it, I don't do it. If the video looks
good to my eye. Okay, let's compare what Premier did in the
very beginning. So let's do the auto. So this is what Premiere
did, and this is what I did. Mine is a little
bit less contrasty, but I think it's more balanced, and with Premiere is just
very contrasty and yeah. I don't really like what it did. I like mine a lot more. Press option F to
fit the screen. And by the way,
you can also just reset to the basic over here, and we can either
hide the effects by pressing here or we can
just disable it completely. Now, they're also creative, and we will take a look at
that a little bit later. There are curves. But to
be honest with curves, I think they are overvalued. People customize the
curves, but honestly, in my over ten plus years of editing videos and doing
the color adjustments, I do not find them very useful. So some of the things
you can do is let you do you can drag this
point and drag it like so, or you can drag
this part like so. So basically, if you do
it from the bottom, like, so you are decreasing the shadows and increasing
the hides here. And you might have
seen people do it like this where they will
put like three dots, they'll bump this
one up and this one down so that it adds a little
bit more of the contrast. Honestly, I never found
that to be really useful. What's more useful for me is
to go into basic adjustment, make sure that this
graph looks great. Other than that, like,
I wouldn't worry about. Now, when it comes
to these graphs, so hue saturation curves, hue and hue, hue and
Luma, these are useful. Why are these useful
and this one isn't? Well, this one, I
think is overvalued, and these ones are useful because we can
work with the color. We can work with the color
in other ways as well. But here we can isolate
specific colors. So I'm going to click on it, and then let's select like blue. And so I can drag down the blue, and I'm going to make sure that the blue is not blue.
The blue is dark. So I take away all
the saturation from the this is great because we can isolate
every single color. So saturation is how
saturated the image is. If it's not saturated, it's
going to be black and white. If it's super saturated, the colors are
going to pop a lot. In terms of the hue, hue is, let me select blue here as well. So hue is we can change basically the color
so we can make it either green or
yellow or red or pink. Basically, we change the
blue to a different color. Luma is just how
bright something is. So if I make it bright, it's going to make
the blue brighter. But if I put it to the bottom, it's going to make
the blue super dark. Now, when it comes to the skin, my skin looks pretty good. Why? Because the skin is done through this
line over here. So this is the skin line, and I can see it's
more or less okay. One thing we can do
and something that's super useful is to create let's go to the
defects control panel, and let's create a mask. We are going to go to defect
control of just this layer, and this Effects control panel, we have in the other workspaces
as well. Nothing new. And instead of selecting
it on the luma, we need to select it over
here in the opacity. So I'm going to
select it, make it super small by
pressing on shift, I can create like a super precise and super
rounded circle. If I don't press and shift, it's just going to
do it like this, but I'm going to
press and shift, and I'm just going to
isolate my face over here. Then when I go into
the metroscopes, we want to make sure that
whatever line we have, our skin line is
going to be like so, and you can isolate
it by doing this. But let's say our skin
color was a little bit off, and we would be able to
select our skin color. So for example, we would go
into Hue, we would select it, and we would click on
my face and you can see it added automatically
these points. And I would be able
to, for example, it was a little bit green, actually, we can do this. So let's go to the
basic correction and let's put the tint a
little bit to the left. And you'll see that our
line changes here as well. So if I go back to the curves
and I go back to the hue, let me select it. L so great. And I would change the hue
so that it's more like me. I would have to bump
it a little bit, like, up And I would take a look at this line to
make sure it is perfect. I think if we put it up, it becomes a little bit better, but it doesn't become
better everywhere because the background
became super blue. Let's make it a
little bit smaller. Put it exactly on the face. So you can see it
kind of went back to the same line, and
that's how you can do it. We can either do it even a
little bit more, actually. That much. Okay, so
round here is perfect. And if we go to the effect control panel
and we delete the mask, we just have to select
and press and delete. Even though everything around
is a very weird color, the skin of my face is the right color because it was following this
line over here. So this is the way you can
customize the skin color. Oftentimes, what I have
to do is I have to select the skin and then
make it less red, disable this one, go to the basic erection and put
this one to it was 0.4. So now we have the
skin perfect and then the background perfect as well. These are the curves. You just have to select it, click on the skin, and then move it a little
bit up and down. You can also work
with saturation. For example, if it's
still very red, you can change the
saturation slightly, change the luma a little
bit, one hug for you. If you want to
illuminate redness, sometimes you can bump up
luma, a little bit of the red. And let me show
you how to do it. So I'm going to select the skin, then make it a
little bit brighter. You can see it actually,
it becomes white. So instead of it being kind
of dark, becomes white, and if it's white, it's less red, but you can
also do it with the hue. And we can once again, customize things here a
little bit pretty similar. In terms of the color
wheel and match, you can customize
every single part of the video with
specific shades. So, for example, we can
make it brighter or darker. And these are
specifically the shadows. And then we can also
in the shadows, we can make it red, and everything that's in the shadow
is going to make it red. If we do it the same
with the mid tones, it's not going to change the shadow's going to only
change the mid tones. And if we do it with
the highlights, it will only change
the highlights. So we can do it, for example, in the highlights, make it red, here, make it red, and
here, make it red. You can see it makes it
red in different ways. If you're going for something
specific, it's useful. Other than that, don't
break your head with this. HSL secondary somewhat
similar to the curves. Basically, you can
select the color. So for example, let's
select the skin color, and I'm going to click here
to show the color slash gray. And here we can select more. So I'm going to
just select more of the skin select select the legs. So this is pretty good. We can also add a bit, just a little bit of blur
so that the edges are not super sharp and then
denoise it a little bit. What this does is we
select one color, and then we customize the color so we can change
the temperature of the color, and then if I disable, you'll see everything
stays the same, aside from the color
that is selected because we made it we made the temperature super
cold so it became cold. Everything that's roughly
this color became just blue. But if we press and command that we can increase
the contrast. Let me disable it and enable it. So by selecting specific color, increasing the contrast, we only increase the contrast
of those colors. So we don't touch anything
else aside from this color. It is useful once again when
you work with the skin, so you want to isolate
the skin somewhat similar to the curve I found that it's a little
bit better with the curves. When you do it with
HSL secondary, it's a little bit harder, especially if you work
with grainy footage. If you don't have
the grainy footage, you can work with it just
whatever works better for you, either HSL secondary or curves, somewhat similar, whichever
works best for you, give it a try experiment,
and you'll find out. And then the vignette, we
can increase the amount, the midpoint, the roundness
of it, and the feather. Yes, this is how you do it. So this is going to be like in the beginning, it's
going to be zero. You can either make it
darker or brighter, whichever one you prefer. Let's say you have a lot of
clips with the same lighting. For example, a person is sitting and speaking like what
you are seeing right now, and you had lots of cuts. Instead of you having to
do it every single time, you can select your clip,
go into the effect control, copy the loometric color by
pressing Command C and then paste it onto another video and going to paste
the same effect. The only times I go into
the color workspace is to see the metros coops
because it is sometimes unbelievably useful to see
exactly the skin line and see which parts
are super dark and super bright when it
needs to be precise. Other than that, I have it
in the editing workspace, so I go into Lumetri color. I selected basic
erection, press on auto, maybe increase the
saturation a little bit, put the shadows a
little bit higher. If you put the shadows higher, it becomes less contrasty, so I'll put a bit more of the contrast,
increase the shadows. Actually, let's go into the vertical workspace so that
we can see things better. So it was let's see, before and after,
before and after. By the way, on
social media, people prefer brighter videos. So if you ever wonder
which way should I go? I always recommend
going brighter. Mr. Best mentioned this
like 8 million times. Go for something a
little bit brighter. And then if you don't
like it, once again, you can just press on reset and it's going to
reset everything, or you can go into
the FX Control Panel, solid DL metric color, and just delete
it, and that's it. It's like, as easy as that. If you have any
questions, let me know. But than that, let's get into the next video and
talk about lot
17. Add Style with LUTs & Adjustment Layers (Color Grading): Welcome. In this
video, let's talk about adjustment
layers and lots. We already know the
adjustment layer affects everything
that's below it. And if we apply the
adjustment layer, let's put it here, go
to lemetric color, select our adjustment layer, and then we can customize the elemetric color based
on the adjustment layer. Now, I don't recommend
you to do this because if you reset
and press on auto, it always will give
you these values. Like, it doesn't work on
the clip that's below it. So if you want to
customize specific clip and press on auto so that
it does automatically, like so, it's important to do it in the clips themselves and not on the adjustment layer. Although you can apply it to the adjustment layer.
Like it depends. Do you want everything that's below the adjustment
layer to be adjusted, or do you want every single
clip to be a specific color? Oftentimes, the
adjustment layers are used the best with lots. So let's apply the
adjustment layer shorten it a little
bit so that it fits, and then we need to go into emetroclor and go into creative. And in the creative, you
can find different lots. Now, lots are used
for different things. First of all, your footage is not always the same
in terms of the color because sometimes your
camera records in Rec 709. That's just the standard
color workspace. It looks like this, but
you can record in log, and that means your footage
is going to look almost gray. What log is is it's
a different type of color workspace that has
a lot more information. In terms of the
information, I just mean that you can customize it a lot. You can customize the colors
a lot more because here, it's like it's already
set, like the way it is. And so there's a bit
less customization, but if we were to work with Log, let me show you
how it looks, yes. So this is log. Some of the lots that
you can select here will be to turn the log
footage into Reg 709. Once again, when
people work with Log, I think it's super creative professionals,
like for example, if you think Peter McKinnon, people who record
with big DSLRs, who worked with big brands, the colors need to
be super specific. But then you think about
someone like Ryan Trahan, who just records on his
iPhone, and he gets, like, billions and
billions of views, even though he records
on his iPhone. There are different
ways to approach this. Some people use very
expensive cameras. Other people use iPhones. By the way, if you want to know, I record on an iPhone. Like, my phone is currently recording me speaking
to the camera. And even though log
is very customizable, it takes a lot more power
for your computer because every single file has to
have so many effects. On it and to it, and it has
to render it in real time, and it takes a lot more
powerful computer. I do not recommend it. I
don't think it's great. I think the way to do this is to record it in just the
simplest way possible. If you have to go
for it, then okay. But if you don't have to
go for it, don't do it. Now, in terms of the lots, usually you download
them online. Like, I can search for
something super fast, like, for example, lot
download for free, and we can just quickly
download one of the lots, shutter Okay, we
can download them. To be honest, I never use
any lots in my footage. I think it just makes the
footage a little bit worse. So I'm going to open it. Okay, and we have a
lot of different lots. Well, let's select it, browse, go to
Downloads, select it. And then, for example, Arabica. What lot is its basic
Lucky filter on top. And you can either apply it to the adjustment layer once
again to the footage itself. But if you want the lot or this sort of filter to be
applied to everything, you just put it to
the adjustment layer and then spread it across. Like, so you can
see everything has now this sort of
interesting look. I would recommend if you
were to use it, like, definitely not use
100% of it, like, dial it down a little bit, it doesn't have to be
100% all the time. And then you can customize
it even further, like faded, look, sharpen vibrant
customize it to Ready. You're king, in my opinion, it just it breaks the
footage a little bit, and I don't like
it, so I would just always delete it and leave
the footage like this. If you're a creative who works with cameras,
who wants, like, super specific looks, yes,
go ahead and go for it, but in my opinion, it's just a little bit
of a waste of time. If we're trying
to make it, like, super fast, don't use it. Just want to show you
because it is kind of relatively popular known and you might have
questions about this. That's why I'm showing
you. But honestly, don't break your head with this. Always ask the question,
if I was to do it, would it give more
to the viewers? Would they like the video more?
Would they share it more? Would they like,
watch it more times, or if I didn't do it, it wouldn't have any effect. It probably wouldn't do
any effect with lots. So that's why I don't
recommend using it. So, that's in terms
of the colors. If you have any
questions, let me know, but other than that, I'll
see you in the next video.
18. Export Settings for TikTok, Reels & YouTube Shorts: In this video, I'd
like to walk you through the exporting settings. In order to export the video, once we have created it, first of all, we need to
set the in and out points. The reason we are doing this is because if we don't set it and let's say you have
some clip over here, Premiere is going
to automatically include a clip that's over here, and this whole part
is going to be black. So if we were to have
an image over here, it would export it
until this point, and this part would be black. We don't want that. Come to the very beginning,
and you need to press on I. And then you have to
come to the very end. What I like to do is I
like to press around here, then press up on the arrowhead, so the arrow key up. And this way you can go here. If you press up again, you are going to go basically
here in between the cuts. So if we take a look here. So we have a cut here.
That's why I went here. If I press on arrowhead again, it's going to come here, again, here, again, here. So if I come, press on arrow hub head up, you need to press O here
to set the end point. Now, you will notice
that Premiere, when you press the O point, it takes one extra frame, which is a little bit annoying. Whatever command you do is when you come here
to the very end, let's say you press here,
press on arrow head up, just press on arrow
left, like so. And then when you press on O, it's going to be
exactly perfect. Just the easiest way for
us to go about this. Now, in order to
export the video, we need to go into the export, and we have our
exporting settings here. Instead of you having to put these settings
every single time, we will create a preset, and I'm going to show
you one of my presets, which is going to be this one. First of all, for the video, it's going to match the source, or if you want here to
be anything specific, just you can click here and then put whatever resolution
you want to have. But I'm going to press
and match source more. Person render at
maximum quality, use maximum render quality, frame sampling, set it here, hardware encoding, then we need to go into bitrate settings. Bitrate settings are
really important. Basically, it's how
crispy your video is. If a video from
the very beginning isn't crispy, don't set it high. And if you have a crispy video
from the very beginning, like, it's very high quality. I still do not recommend
you to set it high. Why? Because if you increase
the target bit rate, take a look at the
estimated file size. This video, which
is 19 seconds long, right now, it's 46 megabytes. But if I increase this one, going to increase the
estimated file size. And social media is going to make the video smaller
in terms of the size. So they are going to decrease
the bitrate of the video. When there's a lot of
bitrate jumps, basically, exporting a lot of the times, the quality becomes super bad. And something I
recommend you do is put the bitrate to something
like it was like 19. It was 19 here. You
can put it to 15. Sometimes I can
even export videos if I need them to be
under specific weight. So let's say I need
the video to be under 2 gigabytes or
under 4 gigabytes. I would put here
sometimes even like six, and the file size is
going to be super small, and the quality is going to
be a bit worse, yes, indeed. But at the same time, we're
going to save the size. So 19 then we need
to enable the audio. If you want the captions,
you want to make sure to enable the captions
here as well. And one super imprint thing
is recommend you to go into effects and set the
lumetri look slash lot. Now, we're not putting some
sort of like lot here. We are putting T
Gamma compensation. If I disable it, you will see that the colors become
a little bit faded, and that's the problem
with Premiere. Adobe is aware of that. This lot was created by Adobe. So let me once
again, click on it. Take a look at the right
side. So I'm going to click. It becomes less saturated,
less contrasty. This one is more saturated,
more contrasting. With Premiere, when you export, your colors are going
to be a little bit faded unless you put
this thing here. This makes it the way
it's supposed to be. And you can find this file
in the resources section. All you have to do
is just click here, select download it and select it in the downloads
of your computer. Just click on it and select. Now, once you have
leave that in place. Just go ahead and click here on the three dots save the preset, give it tick name,
whatever works for you. Mine, you've seen mine's
Vladislav with right colors. And if I don't have
this telemetry thing, I use Vladislav just
regular Vladislav. But this one is Vladislav
with right colors. If you ever want to delete
one of your presets, you just need to select it. Click here and
delete the preset. Now, in terms of the location, you need to click on
the location here. Choose a folder wherever
you want to save it. My case is going to
be Marthon video. I'm going to create new
folder, call it Exports. And I'm going to press on Save. And I'm just going
to press on Export, and it's going to
export the video. Now that we have the
export, this is our video. This has been finishing
my very first Marth but it almost didn't
happen. I dream. Sometimes you will find that the captions are not
exported right away, and you would need to just
export it once again. So just click on hit,
save, replace, and Export. Now, let's take a
look at our export. This finishing my first Marth almost didn't happen.
Everything is great. We are ready to post
it to social media. So if you have any questions, let me know, but ad than that, I'll see you in the next video.
19. Uploading & Testing Your Videos on Each Platform: Before I upload the
video to social media, I would actually
send it to my phone to double check that
everything's okay. I want to make sure that
the colors are okay, potentially double check the
captions, check the voice, check the music and see if it's loud enough or if it's just
a little bit too loud, and I should lower it down. There are two ways I
can do this on MacBook, I can use AirDrop or
if you're on Windows, you can use Google Drive. Google Drive gives you
15 gigabytes for free. So you're able to use
the 15 gigabytes. Just upload it there,
download it to your phone, and then you'll be
able to see the video. And it's also
important because I actually post all my
videos from my phone. I post videos from my computer unless it's
long from YouTube video. If it's a vertical video, then I will always post it from my phone. A couple
of reasons for that. First of all, is
because in order to select a thumbnail
on YouTube, you can only select
it on your phone. They update it so that you can select the thumbnails
a long time ago, but you can still only
select it from your phone. That's one of the
reasons I secondly, on Instagram, there
are some limitations when you upload it
from your computer. I don't remember all the
limitations, but for example, you are not even able to change the bio of your
Instagram profile. If you want to change
it from your computer, you have to change
it from your phone. I don't remember the
details about the TikTok. I never use the computer. I always post from my phone. Something I recommend
you do as well. If you have any
questions, let me know. Better than that. I'll see
you in the next video.
20. Breaking Down Real Client Workflows in Premiere Pro: Welcome. In this
video, we're going to break down my client's video. I'm also going to
share the workflow of how it works with clients. Before I share the workflow, this is the video that
we're going to breakdown. This video got 2.4
million views. It was posted like last week. So it got 2.4 on TikTok and like a couple hundred thousand on other social media platforms. This is just a new account they created like
super, super recently. And it's been doing great. So we're going to break down. This video is very
similar format. It's this video here, 650,000, this one,
200 sorry, 328,000. These videos are
getting good results, and I'm going to break
down these videos for you. But before we get to it, and this is this video, I want to share a little bit
about the client workflow. The way it works with
clients is they usually send me footage via Google. I just download it
on my computer. I have a Google Drive, where I just go
into Google Drive. I have the shortcuts,
and then we have, for example, new Reels, and then I go ahead and download the videos.
It's an extension. Google Drive, you can get this extension or
the application, both the MacBook and Windows, and it's just easier
because I don't have to go into Google Drive and then
download it from the web. It's a lot easier
to do it this way. If you do it from the web, you have to download each
file like one by one, because if you
download in Batch, it zips the files and then
you lose some of the files. So it's a lot better
to use it this way. This workflow is like then I download the
files to my computer, put it in specific folders. So I have a folder
for each video. And for example, for this video, this is SE Asia Country Rank. Then I have the PR
folder exports raw, and I usually also have
the Download folder. So it's this one, everything I download from the
Internet is there. But in this case,
I didn't have it. I just put it in other folder and because we work
in so many projects, sometimes things get
lost a little bit. So I have the premiere
pro exports and raw. So I edit the video, then I do the exports. I send them the first export. This one was the first one. Then I upload it
to frame dot IO. ClansC look, it's a
great application where clients can
leave feedback, and I can easily take a
look at the feedback. Let me just search for
it and quickly show you. I can show you the
client workflow, but the way it
works is like this. So, for example, they leave a comment at specific
time during the video, and then I can take a look at their comment and as the way it looks where I need to make a change. They
can draw there as well. So super super good. After they give me
feedback, I do changes, and then I create V two, and then I create V V three. And yeah, we just go back and forth until
the video is good, and then I upload the video
back to Google Drive. And then the social
media assistant downloads the video and then
post it to social media. So in terms of this video, the organization here was
a little bit terrible. The reason for
that is because we had we had most of the stuff, most of the overlay
from other videos. Let me zoom in a little bit. Okay, so Bali, it's
this one, yes. If you go into properties, text and then for each
text, I have a flag. Actually, I did it with Cha GPT. I just asked ChIPT.
I gave it a list. So Bangkok, Bali, Ching Mai, Bangkok, and so on. And then I went to Cha
Ji PT and to give me the flag to each one of
the cities and gave me, and it was good to go. And then we did it
for many videos, so I just copied this
from the other video. And then you can see
I have this like white separator, white line. It's actually this graphic. And if I select it, we can see it's just two different shapes. So one of the shape
is horizontal, the other one is vertical. It was created
with the pen tool, and if I select it, we can see that it's
just the stroke. If I enable disable it, it's like, super super easy. And then we have two
pictures at the bottom. So one picture is on the left, one picture is on the right. If we take a look
at the properties, how did I fit the pictures
in these little frames? Well, the way I did this is
I did it with the crop tool. Can search for the crop
tool in the Effects panel. So it's crop here
in the transform. With the latest update
in Premiere 25, you have your crop
in the properties before you didn't even
have the properties panel, so you had to apply it manually. And the crop is not always
available for all the files. So sometimes you do have
to put it manually. And the way I do
this is I put it roughly and then
actually, let's see. So you can say I had to move the picture a
little bit to the left, and then I had to crop it from the right because the
original was like this, and I was at 23. For the arrow, the arrow was downloaded from
Infatu elements. So if I go to Invatu and there's going to be a separate video
explaining everything, I just search for
the check mark. I probably just search
for, like, one of these. And don't remember which
one I used exactly, but probably just
used one of these. Yeah, so you just
download it, put it, and it's good to go. And so it just goes
back and forth, back and forth, the
same process, right? Every single image is cut a
little bit from the right, from the left,
positioned to the frame. Like, so you will also
notice that the white lines, actually, if we select here
in a present command R, I'm going to open rulers. And with the rulers,
I'm able to put rulers. Let me put it in the
middle of the frame. So we need to divide
1080 by half, and it's going to be 540. So this is exactly the
middle of the frame. You can see it goes
0-1080 because the frame size is 1080
and the horizontal is 1920, 0-1920 over here. So this is going to be
exactly the middle, but you can see this line is
not exactly in the middle. Why? Well, that's because
that's the example video that they sent me actually
had it like this. And the reason for that is because remember, on the right, there's always going to be like comment like share or whatever
other buttons there are. It had to be moved a
little bit to the left so that the center is not
actually in the center. It's a little bit,
like, to the left. Sometimes you have to do
it with social media. Sometimes, some people
actually even put captions a little
bit to the left so that they're not in the center. But I found that
I find that to be a little bit weird because
if you do it word by word, you can still put
it in the middle. It's not going to
abstract anything. Let me select this track For the check Mark,
it's just a sound. Let's see what kind of sound
this is. Let's open it. Okay, so success Reward Bride, I was downloaded
from Epidemic Sound. And then I just repeat
the sound whenever we have the checkmark appear. For this part, while
they're thinking, there's like a little Zoom. Ooh. Mi. Cheng Mi? Actually, it's not something
that I thought about. That's what the client proposed. Then in the very beginning,
I want to show you this. This text, it was actually
created in After Effects, and it's a mogurt that I use. So if I go into the graphic
templates, once again, instead of me having to
do it every single time, I just have a mogurd
and for example, like Neon text, this is the one. So this is the text,
and then I can go ahead and customize
it all I want. I can customize the
font, the boldness, the font size, make it
small, make it big. And yeah, it's just a mogard. Comment list Okay, comment list. Once again, this is a
mogard from After Effects, and we have, like, a PDF. 33 cheapest, safest, and most beautiful
cities for digital nomads, including Visa
info, safety info, best time to visit
and cost of living. So for this part,
for these overlays, it's just something
that they have. It's a PDF, and then
I overlay it on top. We had to go back and forth
a little bit with this. We have the same overlay
for many of the videos. So for these videos, there are many videos like this. So we have like
world DN city rank, world DN city compare. So it's rank and compare. We had many videos like this, and we used exactly the
same overlay at the end. Instead of redoing and renting the wheel every single
time, this is how we do it. You can also notice the
captions here at the top. Let me select it. These ones. So these captions here, once again, as I told you
before, it's their style. This is one of their styles
that they're going for. And the way I create
captions for them is when I let's
go into the text. Whenever I create
captions, for them, I always do the double line, and then I just leave
this one as is. So I don't change anything, and then you can see sometimes
it's like two lines. It's just the style
that they wanted to do, and we did it, but before when we were creating other type of videos with them, we would actually do
like word by word, either one line or
one word at a time. The video is just 47
seconds, and that's it. And in terms of the
music, let's take a look. I'm going to select
this one solo. Let's open the music. When we have this change when we have the first
check mark and we have the first selection
of the countries. I have the beat at
the same second. Take listen or listen. So it's exactly this point. I just find a point
where we have this first bit, like this one. And then I put it
exactly the cut. So you can see I
have the selection, and I put it here, like so, and then I just extend it
here in the very beginning so that I have,
like, the beginning. And then right after 1 second, we have some sort
of action going on. We're experimenting
with different kind of styles in the very beginning, as I told you before
the Zoom works. So we started implementing
Zoom a lot more. We started changing
this nuance style text to we started doing something I showed during the marathon
video where we have text, and then we have a white
background around the text. So the text is dark or black, and we have the white
line around it. We started doing that with them. Actually, I forgot to show you that the way they
sent me the video, this is the original
video, right? It was 44 seconds, and I also had to cut it because there were
a lot of pauses. So this is the original video. The video here in terms
of the lumetri color, let's see the basic correction. Yes. So if I disabled
the correction, this is what it was.
This is what it is now. Once again, something
they requested to make the video a lot brighter so that it's not as dark because in the very beginning was,
like, superb dark. So we made it look brighter,
added more saturation. We're just going a little
bit back and forth with this experimenting and
working together on this. It's not just the
video editors job to just make the video
perfect in a way. It's back and forth
with the client and making sure that first of all, they're
enjoying the process. They're getting what they want. But then at the same time, we want the video to perform. And so just experiment with different things,
seeing what performs. With the videos that
we did in the past for another of their accounts
for the business account, things didn't work as good. Like, for this, it's
going pretty well. And if you take a look
at their Instagram page, it's also doing pretty well. So that's how it is. If there's anything specific
you're looking for, lemon on the Q&A section below, but other than that, I'll
see you in the next video.
21. Analyzing Top Creators’ Short-Form Videos (MrBeast, Jenny Hoyos): This video, we're going
to break down content of big creators. We
have two videos. One video of Mr. Beast, the other
one is of Jenny. Let me quickly show
you these videos. So if I go to Mr. Beast page, popular, this
video got 1.6 billion views. And with Jenny, this video
got 103 million views. By the way, Hug, if you want to download videos
from YouTube for free, you can go to this
website, t oned.com. Then just literally go ahead and copy the link of the video, past link here, and you'll be
able to download the video. First, let's take a
look at the video of Jenny and then take a look
at the video of Mr. Beast. You cook faster than fast food? Can I have a burger? Yeah, can you put cheese,
lettuce and tomatoes? It's not hot enough.
Yes, please. And cheese. There's smoke here. This thing is still raw. I think there's a
line. Oh, my goodness. What's happening? Who are
you doing back there? You're gonna burn that gar. Okay, I'm gonna cut the
tomatoes while this cooks. I'll have to eat that. Oh, no, that tomato looks weird. Time to slow down. P this once, you gonna
make a mess in the car. But ketchup on the
buns. One person away. We just eat the burger to cook faster, faster. We're moving. We're moving. No. My
burger is not done yet. Oh, you're driving too crazy. He needs to cook faster.
Cook. We're pulling up to the window.
And, oh my goodness. We go faster. I better. A very interesting video. And
now, you might be thinking, Okay, why did this video
get like 100 million views? Well, something a lot
of people don't know is that the idea is
actually so much more important than just the editing or the way you record the video. Because if you take a look
at a lot of this stuff, it's not recorded with a professional camera
or maybe it is, but it's not recorded
professionally. The quality is not very good. I mean, if you take a
look at the captions, the captions are super simple, something like the
basic font in premiere. And then to be honest, I didn't even notice this
part at the top here, super, super simple and easy. So the idea is very important, and good way to
think about this is, can a video go viral
without editing? Yes, can editing go
viral without the video? That doesn't even
make sense, right? The video can oftentimes go viral without any
kind of editing. And editing really helps
the video go viral. So it's kind of interconnected. The video can still go
viral without the editing. It's important to
understand that. Let's break down this
video a little bit more. First of all, you can see
the font, super simple. And instead of
being word by word, she uses a couple of phrases two lines,
which was interesting. Oh, okay, so this
is where the cheese came onto the screen. Okay. And then when she completes it, she puts an emoji and makes
something black. Okay, great. First of all, the
ID is interesting. Nobody's ever done
that. So that's unique. Secondly, there's
so much pressure, and third thing that's super, super important is the fact that the video is progressing. So we have one, two, and three. Basically steps, tomato,
lettuce, and cheese. And whenever she progresses, there's a check
mark, which helps the people understand the
progression of the video. So this video is the third
way through roughly. And if we take a look at the timing, roughly,
that's true. I really helps people because
people hate not knowing. It's the same idea with Uber. Why was Uber super successful? It wasn't just because you
could order it from the phone, but because you could see where the taxi
was on your phone. You would see the taxi.
You would see that, you know, if it's
5 minutes late, that's because of the traffic, not just because it's like, I don't know, it's
doing something weird, and that really helps. So whenever you can throw the timing, really, really good. Always, always, really good. Then if you take a look at
how Jenny edits her videos, it's like a slide
zoom all the way. So we have slide Zoom
in the very beginning. The second shot slide Zoom here. Then we have third shot, slide Zoom, fourth shot, Zoom. Zoom. Zoom out. Zoom. Zoom. Zoom. Zoom,
Zoom. Interesting. Every single shot has a slide Zoom to make the video a little
bit more engaging. If you take a look
at the video of Mr. Beast, a little bit later,
we'll see what he does. Some people use it, some
people don't use it. Once again, if I
think about this, will I watch the
video just because there is a Zoom? Probably not. So it's not like the
Zoom plays a huge role, but it's probably one of the 100 things that
are important. So 1% improvement. And this video, it can be done
completely with Premiere. Now, in order to identify
different person, they're using the
different color font, which is a good idea. So I used that in
the past, as well, just to make sure we can easily understand that it's
not Jenny speaking. It's somebody else. And then if we take a
look at the sounds. Can you cook that in fast food?
Can I have a burger? Yes. Okay, so here in
the very beginning, this is called an
LCAT or JCOT and it's when we have previous
video still playing, but in the background,
we already have the new audio start
of the next clip. And this is something
she's doing here, which is oftentimes used in
movies and in videos online. So it's still the first
clip here, right? But then you can see, we have a text up here. And at the same
time, if we hear it, she will speak in
the background here. Did I have a burger? It's an interesting way
to put clips together. Oftentimes, you just
really recommended. Basically, all you have to do is to overlap it a little bit. So this is the way you
can do it in premiere. So just drag one of the clips and overlay
it on top of the other. Or if you don't like
it to be this way, you can just put it
on different tracks. But overall, yes, this
is how it's done. And another important thing, there's no silence
almost with Jenny. She's just it's constant
and constant action. She doesn't let you relax. She keeps you in the video. She keeps you hooked
throughout the video. Yeah, can you put cheese,
lettuce and tomatoes? It's not hot enough.
Yes, please. And cheese. Smoke here. This thing is still raw.
Good thing there's line. Oh, my goodness.
What's happening? What are you doing back there? You're gonna burn that car. Okay, I'm gonna cut the
tomatoes while there's cooked. I hope I don't have to eat that. Oh, no, that tomato looks
weird. Time to slow down. You mope this one
once it spread, you gonna make a
mess in the car. But the ketchup on the
buns. One person away. We just need the burger to cook faster, faster. We're moving. We're moving. No. B is not done. Oh, you're driving too crazy. You need to cook faster.
Cook faster. Hey. Actually this change in the
music, it was really good. Action in the very beginning. Then it's like staying
more or less the same, but then it speeds up by the end even
more, like around here. You're gonna make
a mess in the car. Catch up on the bun.
One person away. Eat the burger to
cook faster, faster. We're moving. We're moving. No. My burger is not done yet. Oh, you're trying too crazy.
I need to cook faster. Book faster. Way back next role. In order to add
even more pressure, she also speeds up the cuts. So if you take a look
at the very beginning, or not necessarily in the
very beginning, but, like, here, she does have
fast cuts in a way, but then when we
come to the end or, like, here, it's even more. Oh, my boy is not done yet. Oh, you tronic too crazy.
I need to cook faster. Cook faster. WaynexRex. We're
pulling up to the window. Oh my god. And then here, it's kind of slowing
down a little bit. Another interesting
technique is that when she's putting the
burger here at the very end, like she's about to put it, she doesn't actually show
the way she puts it. A very interesting technique
from movies is where a person is about to say something or something
bad is about to happen, and you don't actually see it, the camera cuts, keeps the
pressure a little bit. So a lot of the techniques
she uses are from movies. I really do recommend Jenny, if you want to learn
video editing, she's just absolutely amazing. I remember that about
two to three years ago, I actually learned from Jenny directly when I was a
part of the cohort. It was the creator club or something that you will see
on the screen right now. Jenny was amazing.
If you want to learn how to create
really catchy videos, go ahead and break
her videos down. Now, let's take a
look, Mr. Beast. If I give you $100, would you go to Paris to give me a Magete If I give you $300, would you fly to Paris to
bring me back Miguet Yeah, do, actually. Yeah,
fly included? Yes. I can't believe she's actually
getting 12, but yes. Right home, Mr. Brees is home. I cannot believe I'm here. Final stretch, Mr.
Bees. I'm ready. Quiz. Oh, my big. I honestly just one. Yeah, you can just
this, whatever that is. Let's start from
the very beginning. If you remember, one of
the first videos when I started editing
the marathon video is this very fast zoom in the very beginning with motion
blur or with this blur. Exactly. This is
exactly how it's done with the transform
effect that we did. By the way, very similar font. Actually, I thought Mr. Beast had different font, but probably for
long form videos has one font, and then this one. Let's double check
what he has now. Are you subscribe to Mr. Beast? Never mind then. Are you subscribe to Mr. Beast? Of course I am. Let very similar. And you can see Jenny has
something very similar as well. So, potentially, you can go ahead and experiment
with this font. $100 green to make sure
it's associated with money. Things are happening
on the screen. So once again, the idea
is incredibly important. Paris Biget, it's
highlighted in yellow, $300. Hm. Interesting. So Jenny uses exactly the same
technique as Mr. Best. Whenever the other
people are speaking, it's in yellow. And with Mr. Beast, because the
camera is stable, they're really zooming
in on the people. So like here, Zoom Zoom out. And the way you do this is you just cut the different clips, you select one of the cut clips, literally just zoom in and make sure to keep the eyes
on the same level. If the eyes are not
on the same level, it just confuses people a lot. So if we take a
look at the videos, the eyes are roughly
on the same level. Like it is here, and then
if I go back a little bit. So it's not super perfect, but it's more or less like
in this range over here. But if the eyes were to
go from here to here, it would be a little bit worse. If you want to make
it super smooth, try to keep the eyes
on the same level, like, roughly exactly
on the same level. Don't even jump, like, from here to here. It would
be even better. So a fast start and then
they are getting ready, just lots of fast cuts. What they're doing in
terms of the cuts, they're just
progressing the story. Literally, he's going home, picking and then flying. No second is wasted here. I'm pretty sure they had to
cut this video, like a lot. And, you would agree, right? Yes. This montage was,
like, how long? Like, 6 seconds.
So in 6 seconds, he went from going home to packing his stuff and
then being on the airplane. This could have been created
in so many applications. Something you can
do in Premiere, as well takes a little bit more. Time. So the way
this can be done is you can animate the plane
popping up on the screen. And then you would move the
background to the left, keeping the plane in
the same location. And move the background, so it seems like the planes flying, but the plane is actually staying like exactly
in the middle, right? Planes in the middle. You just animate the rotation a little bit and move
the background, and then do these
little animation. So it can be done
easily in premiere. Lots and lots of Zooms. If you pay attention
to the quality, the quality is pretty bad
on a lot of the shots. And still this video got the
amount of use is insane. And one of the
specific techniques that they use here
is showing him running here to add
a little bit more of that pressure to
add the time limit, but I'm not sure what
the time limit is here. And then he's rushing
Zoom and I mean, if you were to give
in this video, you could probably
edit this video. Even if you learned
premiere yesterday, you could do this
video in, like, a day. Very easy. Once again, the idea is
unbelievably important. Would you fly to
Paris for a beget? The idea is so crazy, so new, and that's why
I get so many views. If you have any specific people you'd like me to break down, please let me know the
Q&A section below. Other than that, let's remember, editing supports the video, and you want to keep things
as simple as possible, try to hook people in the very beginning
give them this wave of being very fast and being slow so that you give them a little
bit of room to breathe. Use captions, Zooms, fast cuts, music, sound effects, and
just learn and practice. The only way to become better
and good at this is to have so many practice sessions
that it would be unreasonable for you
not to become great. It's like one of my favorite
quotes, volume negates lock. If you want to become great, you have to put in the volume. Volume here is just practice,
practice, practicing. So if you have any questions, let me know better than that. I'll see you in the next video.
22. Premiere Composer & MotionDock: Fast Effects & Transitions: In this video, I want to talk about third party extensions, specifically about Mr. Horse and about MotionDock. You can find the links to these websites in the
resources section, and let me quickly
walk you through. Scroll a little up down, press on please log in to
download or just click here. It's going to get
you to this page. Click on please log
in to download, and then just go
ahead and register. It's absolutely for free. Go ahead and install it
super quickly to install. They made it as simple
as possible to do it. And when we come to Mr. Horse, very similar thing
get started for free. Both of these are for premiere
pro and for After Effects. You can use it just for premiere if you don't have After Effects, or if you do have perfect,
you'll have it for both. What do you get
with Motion Duck? 100 free After Effects
and Premiere templates. Everything you see on the
screen, you'll get it. And instead, these are
oftentimes like Motion Graphics. These are really good
animation presets. Many different animations
with text with Mr. Horse or Premiere Composer. Also, lots of different stuff, lots of animations,
unbelievable things. And let me just go ahead and come to Premiere and
show you how it's done. So when you install
it's going to be in the window and extensions, you'll have both Motion
Duck and Premiere Composer. When it comes to
Motion Duck, honestly, I don't use it because
premiere composer is unbelievable good and it's
enough for my workflow. But if you do want
to use Motion Duck, you just get it like this. So you get it in the
window, put the window. I would recommend
it to put it here. And you have all
sorts of stuff here. So first of all, let's come to, for example, the titles. We have interesting titles. All we have to do is
double click on it, and it's going to add it, and then we have the title. So this is actually for
the horizontal video, but we can also use it
for the vertical video. So I'm just going to press
Command set to do it. We have different
transitions, targets, glitch. You can preview by
hovering over it, and then yeah, just go ahead, select it double click on it
and it's going to appear. Lots of different things
that you can customize. So, for example, if
I select the titles, click on it, I can go into the properties and then
in the properties, there are lots of
customizations that you can do, for example, like
changing the colors, the fonts, that's
come here effects, make it a little bit smaller. Okay. And then, yeah, you can just customize here. If you want a little bit
extra, if you want, like, a library of free assets, I recommend Motion
Duck pretty good guys. And then if you
want, by the way, you can get like paid version, if you want even more, I don't use the paid
versions with them. The free versions are
unbelievably good, honestly. And by the way, I have no
affiliation with them. So I'm just hearing because these are
really, really good. If you go into a
Premiere Composer, I'm also going to put it here and I'm going to
close Motion Duck by person Command W or Control
W. With Premiere Composer, you need to open
the starter pack, and you have text boxes, text presets, transitions,
social media, shape elements, and sounds. Do recommend Premiere Composer more just because it's
better for my workflow. Like, I'm not
training Motion Duck, also unbelievable guys, saying that they are
different people and focus on different things or different
companies, I should say. What you can do here
is, like, select one of the things, press on add. It's going to dt, and you
will have motion graphic. And you can go into properties, customize it even further. You can customize this
in the properties, or you can customize it
on the premier composer. All you have to do
is just select it, and then you'll be
able to customize it. Some of the best things that
I use here are transitions. I absolutely love
their transitions. You can take a look. There are how many 11 transitions total. I use their transitions
probably at least once a week. Really, really good transitions. Social media stuff, some things are appearing like Facebook, Instagram, we can edit Mr. Horse, once again, go into
properties and customize it. Shape elements, don't use them, to be honest, but the one thing that I use
the most are the sounds. Come to the sounds instead of just this is the preview
of all of the sounds, but you can also, open the folder and take a look at specific sounds. Click on it. And you are going to preview it. Some of the best
ones, by the way, you can also search here
at the top, for example, like transition or like swoosh, for example, for the sounds. Super great. These,
so for example, instead of having
to search dispooh online or come to
Premiere Composer, search for it, super
easy, super fast. Text boxes, used to use them
in the past. It's okay. Like, these text presets are
super smooth, super good. So sometimes I use them not
all the time, but sometimes. Then you can also add
your own library. So you can open this. You can add a folder and you
can search for a folder. I'm not going to do it because I don't want it to be added there, but you can search for a folder, and then if you have a
folder, for example, with Motion Graphics,
you can add it there. And then if you want
specific details, you can come to their website and learn here a
little bit more. For the workflow that
I've been using that I recommend is use the
sounds really good. Come here, explore every single sound, click
on every single sound. Try to think of where
you can use them. Make yourself familiar with the sounds, transitions as well. By the way, with transitions. Okay, for example,
like, I don't know, let's use Rotate here. I train I trained for months. This might look a little
bit weird because we are in the vertical composition. But if we were to, let's say, add it to the
horizontal composition, then just scale it up. It's going to probably
work pretty well. But let's try this transition. I train for months.
Yeah. Pretty good. Just train for months. Covers the whole screen. We can move it a little bit. Happen. I train for months. But it almost didn't happen.
I train for months. By the way, if you
want this text to be affected by the transition or hidden by the transition, you want to once again, update captions graphics
and then place below the transition and it's going to be affected by the
transition, as well. Just one of the tools that I use super useful, once again, no affiliation with them, an
incredible incredible tool. If you have any
questions, let me know Pete on that. I'll see
you in the next video.
23. Best Creative Assets for Editors (Artlist, Envato, Motion Array): In this video, I want to talk
about creative assets for video editors and specifically three websites Motion Array, Artlist, and Infatu elements. You've probably at some point heard of one of these websites, or even if not, I'm going
to walk you through them. So these are websites where you can download
video templates, presets, Motion Graphics, slots, footage, voice over music, sound efects, graphics,
photos, plugins, probably even more stuff that's hidden within
these websites. I've used all three
of these websites. I actually got started
with Motion Array. This is the very first website that I used, and then
with my clients, I use Infatu elements, and for my personal use, sometimes I use Artlist. Ong story short, these websites are so similar to one another. They solve the same problem. So if you're looking for assets and you choose one of
them and not the other, you're not going to regret it. Basically, for example, let me show you the Envato elements. You can search at the
top for different stuff. So you can search for
footage, for example, let's search for Front and
it's going to give us photos, stock videos, fonts,
music, graphics. And then literally you just
go ahead and download it. So these websites do cost
a little bit of money. They're under subscriptions. With Artlist very
similar, let's say, you can go just
straight into footage, and then you can go
into lots templates. I will say that if you're
looking for a combination, I think Artlist is going
to be the best in terms of the music and footage. I have never
downloaded templates from Artlist and haven't
used Artlist that much, although I used Art grid. Art grid is Artlist
sister company or something similar
with just footage. If you're looking
just for footage, this is Argrid When
it comes to Artlist, I would say it's
the most cinematic one if I was able
to describe it. In terms of Iwatu
elements, it's just, like, very reliable, a
very good reliable friend. Terms of the motion array, I think it's great, and I think it's the
most artistic one. Depending on the description
that I just gave you, you can choose whatever
works best for you if this is something
that you're looking for. You don't have to use it. Like, you can still
create videos and edit videos for
clients without it. And by the way, if you
are working with clients, they should be the
ones getting this. And if you are
working with clients, they should be the ones
getting Epidemic Sound. And by the way, if you want your clients to check
the Epidemic Sound, you can also send them the
link so that they can get 30 days free trial and
try for themselves. Again, Motion ray, the most
artistic one, Artlist, the most cinematic one, and Invato I would say is
the most reliable one, just like a good
reliable friend. I've been using Invato the most, I would say, just
because of my clients. Argrid also used a lot. If you are looking for footage, I would say Invato
has more choice. Like, Artlist is
super cinematic, but Invato has just more. They don't allow probably
90% of the footage. And so they don't
have a huge library, but the library that they
have is very cinematic. Whereas with Invato if I
let's search for, like, a car, let's I'll give you, like, a very quick
example. So stop video. This is not even real footage. So it just doesn't look
very, very professional. The videos that they
have look scripted, and the videos for rgrid
don't look scripted. So if I search for, let's search for a car. Okay, yeah. I mean, this is so cinematic. This also, like how cinematic is this? Looks
really, really good. So anyway, if you
have any specific questions about these websites, let me know, but
other than that, I will see you in the next video.
24. Premiere Pro Shortcuts to Edit 2× Faster: In this video, I'd
like to dedicate specifically to shortcuts
in Premiere Pro. Shortcuts can save
you a ton of time, but especially in
the very beginning, it can be a little
bit confusing. So I'd like to create custom
shortcuts with you today, as well as share about some of the shortcuts that
are super useful. First of all, you
already know about creating a shortcut
for the track heights. You set the right heights,
and then you create shortcut, and then by pricing a shortcut, you are able to customize
the different tracks. Then the shortcut for the
shortcuts is in my case, option command K, but
if you're on Windows, it's old Control K. So a couple of specific
shortcuts I'd like to give you. For one, I would like you
to put the shuttle left. So we would search
for shuttle left, and we would put
number one here. For shuttle stop,
we're going to put two and for shuttle right to
search for the right one, we're going to put
shortcut number three. Then for ripple trim, ripple trim, next
edit to play head, we're going to put E.
Previous Edit to play head Q, add Edit, we're going to put
W. Then for Command one, we are going to put purple. So let's search for purple. This is going to be Command one. Then Command two,
we can put mango. Command five for me is white. Command three and four, for me, our keyframe temporal
interpolation is in Command four,
is out Command three. Now, let me walk you
through what this means. Now, if we press on two, it's going to be pause. If you press on
three, it's going to be play, just a regular play. If you press one, it's
going to be reverse play. So instead of you
having to just go back, you can press on one and
it's going to go back. And basically two is the
same as pressing space, but it's pretty
useful if we just use these three and
we just click those. You press three twice, this is going to
double the speed. If you press, three times, it's going to triple the speed. And the same works in reverse. If I press on one,
it's going to go back just at regular speed. One again, faster. One again, one again, one again,
it becomes super fast. Three, three, three,
three, three. Become supervised. Really
great way to speed up. And if you want to quickly
watch the whole video, it really helps in terms of
the W. So if I press on if I select the video or if I don't select it in a press on W, it's going to make a cut. If I press W, again, it's going to make another cut. It's the same
equivalent of pressing on razor and just making cut. But instead of pressing a razor, you can just cut where
the playhead is. Now, if I press on
E, it's going to cut everything from the playhead
until the end of our clip. It's going to cut
everything like so. Or if I press on Q, it's going to cut
everything from the playhead to
the left. Like so. Now, important thing
is, let's say we do cut like I'm going to cut here and I'm
going to press on es. I'm going to cut everything from the right of the playhead. Actually let's do it over here. So it's going to cut
everything from here to here, here, here. And everything that's to the right of the end of the clip is going to move
a little bit to the left. There you go. The same is going to happen
if a person cue. Everything is going
to move to the left. So it doesn't just
kind of make a cut, but it actually moves everything so that it's super, super great. In terms of the
colors, for example, Command one, it's going
to become purple. Command two is going
to become orange. Command five is going
to become white. Actually, you might not have
white in the very beginning, so we should search
for a settings label, and then we can create our own colors here
and customize it. We can make everything
white if we want to. It just helps us to put mark something in terms of the
color easily and very fast. I can select, for example, I would say that this
is an intro and I would put it with one color,
and it would be an intro. Can easily do that and sometimes it's really,
really useful. In terms of the Command
three and four, it works with keyframes. So instead of me having to
right click, selecting it, right clicking
temporal interpolation is out and then is in, all I have to do is either
select keyframes like SO or click on one keyframe or the second keyframe
selected to shift. The ones that are easing
out is Command three. These are Command four. And so now we're going
to have a smooth Zoom. By the way, if you want
to learn shortcuts for premiere for After Effects and all the
interesting workflows, you can once again, take
a look at my profile, and I'm going a lot more in detail in terms
of the shortcuts. But some of the other
useful ones are just, for example, option one is
going to the project panel. Let's say, like in
the marathon folder, and then I press on option one and going to go to
just the main folder. Command W is to close something. And if we go into the shortcuts, and let's say we search for
search for graphic Templates. For the window of the
graphic templates, which is going to be
this one at the top, I have a shortcut option six, and I have it for every single
window that I have here. So for the properties,
it's option three. For effect controls,
it's option four. Four, five have text, four graphic templates have six, seven for essential sound, and eight for metric color. Just instead of me having to search for it, clicking here, I can just press one of those and it's going to be
super super fast. You can always learn
shortcuts once again by going here
and searching for some specific tools and double checking if it's
available, if it's not available. Unfortunately, you can't
do anything about this. But if it is available, you
can definitely use it here. You can also create
custom shortcuts and you can overwrite,
so for example, if you don't use the pen tool
or you use it very rarely. If you use it like once a year, then you can put
something better for P or for the other ones. You can just customize
it to your liking. The only way you will learn
this is by just practicing, learning the workflows that
work really well for you. And then over time, if you repeat something like ten times and you do it
pretty often, you know, you'll save time by
creating a shortcut, that's the time to
create shortcut for it. If there are any
specific questions, you can always reach
out and let me know. But other than that, I'll
see you in the next video.
25. Edit Your Own Short-Form Video from Start to Finish: Welcome in this video, I want to walk you through your
capstone project. This is the project that you
need to create on your own. You've gone through all
the material, you know, all the steps, and
now, once again, just to get that
very good practice in to go ahead and
create your own video. There are a couple of
ways you can do this. You can record a
video of yourself or you can record an
audio of yourself, or if you don't
want that, you can just download videos
from the Internet, put them together, and that's
going to be your practice. Whichever option works for you, please, there's no pressure. It's just for you to practice. Like, the more you practice,
the better you'll become, and the faster you'll
become better. And if you don't believe
me, just trust me. So once again, let's quickly
go through everything into. Create your premiere
pro project, organize everything in
terms of the folders, get all the files into Premiere, organize all the
files in Premiere, create the seconds and
cut all the files. Work on the audio to
make sure it's good. Work with the text,
add captions, work with the color to make sure the skin colors are correct, then export and post the video to social
media and make sure to also below the video player
to submit your project. I would love to
see your project. I'd love to give you feedback and see what you've created. If you don't want me
to give you feedback, then just write no feedback. But it would be such an incredible opportunity
to see what you create because I'm sure you'll create something if you have
anything to share, just one or two sentences, it would also mean the
world to me. Here's a hack. If you want to learn
something really well, you need to learn,
you need to practice, and then you need to teach it. The third thing, if you have a couple of thoughts to share, a couple of tips or something
you struggled with and you overcame in terms
of these videos, please share that because you will share it with
other students. Other students might learn from that because they might
experience the same things. They might not experience
whatever have experienced, they experience what you have
experienced and you will also learn a little bit better
because you taught them. It's a win win win
for everybody. Please go ahead and do that now. Last tip I would say, if you're struggling with choosing
the right format, you use social media and you have creators that you follow, whether that's big companies
or just small creators, go ahead and try to create a video that's similar to them. If some creators
are super advanced, super hard to replicate, maybe not choose them, creators that are a bit
easier to replicate, but the ones that
really inspire you and something that you would
really enjoy creating. If you have any
questions, let me know, but other than that, I'll
see you in the next video.
26. Building a Portfolio & Finding Your First Clients: In this video, I like to share how you can find
your first clients, and I'll share exactly how
I found my first clients. My first recommendation
when it comes to finding clients is
always IT jobs. Why? Because it's the
biggest website in terms of the creative jobs in terms of
video editing jobs online. And even though it
says tT like YouTube, it's not only about YouTube. Like, it says Discover the
best YouTube professionals, but it's not only about YouTube. And this is how I actually
found my very first client. I was really struggling. I was very depressive, a lot of things
didn't work for me, and I just had to do something. And so it jobs was, like, the last thing that I decided to start with and turned
out to be really great. Like, I found really good
people to work with, and it's been great after that. So I really recommend you
to take a look into this. All you have to do
is you have to log in and then login as talent. If you growing up, you can
also log in as lawyer, and then you can sign
in, either create an account with your email
or login with Google. Now, an important thing about
WIT Jobs is I believe it requires at least six videos in order for you to
create your profile. All you have to do is to upload six videos to your
YouTube account. If you don't have it created,
create like Google account, YouTube account, super simple, you can easily find it online. So go ahead and create
that upload six videos. It would best if it was
your own portfolio videos. In terms of portfolio,
some people think that's scary word, that's not scary at all, just some sort of work
that you've created. Just go ahead and upload it so that other people
can see it as well. Then if you want, you can
take a look at how it works, but what I recommend
you do is go into your profile in
the top right corner, video editor, click there. I stopped using this
platform some time ago, so I have not updated
the way it looks, but what I recommend
you do is you can go to the top and here you have this pop up and you can go ahead and click on Start, fill in as much
information as possible. If you work with
somebody previously, that channel can confirm it. When you go into portfolio, you can add your videos here. You can quickly add
your videos like in bulk or you can add
one video at a time. And then if you work
with other channels, they will be able to confirm that, yes, you worked with them. They will appear in your
client section over here, and then they can also
leave you a review. Reviews are super important because other people can
take a look at the review. So, for example, some of the reviews I had
some time before, try to fill in as much
information as possible, give all your social media
links, give you a role, give you a story about yourself, and a quick hack. You can give your information to HGPT and ask it to fill
in this information, going to do it very
fast, going to do it professionally,
make sure to ask it. Hey, it's for IT job, give it as much information
as possible so that JAPT understands the context, and when it doesn't
understand it, it creates super good results. For example, for me, as
I all the categories, I had experience editing with all these styles, skills, tools. By the way, AI
tools is something new. They didn't have it before. So if you have that Great. Once you have your
profile setup, you can go to the jobs page, and here you can click
on all the categories, and you can set
for video editor. And you have other skills, go ahead and explore
those as well. So video editor, and you can see what people are offering. Let's take a look at
this one, for example. So this is 6,000
$18,000 per year. Depending on the country
that you live in, it can be a lot of
money or can be like absolutely nothing for you.
Totally understandable. Now, we can take a
look at this project, for example, $300 per video. I would say it's okay. Like, I when I got started, I got paid $225 for
a long form video. So they're looking
for a video editor who can take the raw footage. And turn it into
engaging retention, focused YouTube content, focus on pacing storytelling, not heavy flashy edits. Okay, so take a look
at their description, and I do recommend reading
the whole description because sometimes people leave a
specific message there. Like write me a
specific word, like, write me the word techie or crew or I'm just
looking their name. The reason for that
is because there are so many people that apply
through these websites, and you can make yourself
better than 99% of people just because
you will send that because people
do not do that. You can see that what the requirement proficiency
in Premiere Pro. When you want to apply, just click on Apply at
the top right cording. Click on Apply. Make sure that you read the description. Is
everything okay? If so, click on Next. And then here, I would recommend also using HAPT to create this. At this point, I'm
just using JTPT for every text that
I need to create, long messages,
anything like that. I do recommend saying that,
Hey, I read the description. I think it would be a good fit, and something I'd
recommend as well, is going to the YouTube channel, searching for their name, for the name of the actual person. Personalization is
super important because it will show them you really read
the description, you really try to apply. You really want
this job. You know all the details,
things like that. You know, because I had some people reach out to
me to start working with me, I also know how important it is. And when it's a generic message, nobody wants to see that. Everyone wants personalization. So try to find their name,
go to their website, go to other social accounts, and try to find their name just anywhere on their account. Create a message with AGBT, once again, explain
the whole situation. If you want to learn how to
create the best outreach, you can also explore Alex Ramzi. So you can go to
acquisition.com. Has free courses. It's
more about business, but it's really
really good as well. So if we search for courses, leads courses, called
outreach playbook. Yeah, you can watch this video. It will explain how
to call reach out. Basically, that's exactly the same thing as you
are doing here. And then at the
very end, it will ask you to send a video that best represents kind of what
this person is looking for. So if they're looking for long form video or short
from video, doesn't matter. You can just upload the link, and they'll take a
look at that video. Let's say you want the short from video, so you
can click on that. And then when you apply include link of the
short from video. So this one does require after effect, Photoshop
or equivalent. Oh, okay, this is like
really underpriced $30. Come on, for efficiency with premiere pro
After effet Photoshop. And I will say that if you're struggling to get
started with this, I would recommend
potentially reaching out to some people and doing stuff for free in
the very beginning, at least for let's say for for
a week or maybe a month or a couple of months until
you get some experience and proficiency and then
you get some portfolio. And it will be a little
bit easier with that. Something else that
I would recommend is exploring platforms
like Upwork and fiber. I know that some people
get paid here as well. I never tried these platforms, and I don't have
experienced that. I just know that people use it. It's becoming more
and more popular, both fiber and Upwork. So just go ahead and take
a look at that, as well. I'm sure you've heard
of these companies. So start low and then try to build step by
step, bit by bit, and then you'll become
a little bit better, you'll increase your prices, and over time, that's
just how it works. If there are any questions,
please let me know, but other than that, I will
see you in the next video.
27. Why Every Video Editor Needs a Contract: Hi, love from the future. Something big happened last week and I want to give
you a quick update, specifically to caution
you about something because things might happen. Anyway. So last week, I stopped working with
my very big client. I worked with them
for 1.5 years. Things seemed to be going well, but then all of a
sudden, one day, it just everything ended. And the reason why I'm
recording this video is there was kind of one
big important aspect. We did not have any
contracts with them. So it was just kind of like
on a virtual handshake. We never even seen each
other and we worked for 18 months and working
on some big projects, created hundreds and
hundreds of videos together, and things were relatively good. And then one day because
we didn't have a contract, they were able to just say, something happened in our lives, and from this day on, we're
closing our companies. We're not going to
work with you anymore. So on one hand, yes,
things can happen. On the other hand, if
I did have a contract, we'd be able to extend it, let's say, if we had it
written contract that we would have to work for
another two weeks or a month. So they would have
to tell me two weeks prior or a month prior
ending the work with me. Technically, if we think about
the contracts, then okay, if they did not fulfill
their responsibilities and then they didn't tell me two weeks before
or a month before, whatever we would have
written in the contract, then I'd have to go
to the court and we'd have to write
in the contract, which court that I have
to go for and, you know, it's still kind of like I probably still wouldn't
go to the court and I would still leave things
as is, even if I wanted to. But basically, what I'm trying to say is if you
have a contract, they have responsibility and
you have responsibility and you have that written
responsibility signed by both parties. So if something goes wrong, you'd be able to literally
show it to them. Or not necessarily show to
them to the court to whatever. I still think because most of
the video editors work with clients in other countries and we wouldn't sue them
or anything like that, but it's still a
good psychological practice to sign the contract because you have this
mental responsibility and because you have that, you are less likely
to do something the contract because you
literally just sign that. It's a little bit of the
pressure that you have and the more confirmations
you have from different sides from that
would be verbal, contractual, or some other people
listening to that, that puts mental pressure on them fulfilling their duties and you fulfilling your duties. Was a bit of a rumble in anyway, how do you get the contract? Well, GP can really
help with that. You can put the
whole contract in. I so recommend you
take a look at that. I'm not a legal adviser, I cannot advise you on that. Some of the people
do have contracts, so they will provide it to you if they don't
provide it to you, then you can ask HGPT the workflow I would recommend
here is in the short term, when you're just getting
sorry, let's say, for the first two
weeks or a month, you don't necessarily have
to sign the contract. It's just something
in the long term. If you start working with
people for a long time, you start depending on
them and if you depend on the people and then they all
of a sudden can just vanish, then that's not really good. In the short term, while you're still searching
for the clients, you are just getting
used to each other, doesn't necessarily
have to be done. But in the long term,
something I recommend. Either they have the contract, if they don't have a contract, you can get the
contract through GPT, and if they're really
against the contracts, once again, something
for you to consider. From my side, we just
never brought that up. I signed contracts before
and then once again, it can be ended that easily one day and
something that did happen to me with the
contract similar a story here where it just ended in
one day but without contract. I anyway when you
have a contract, I think you sleep better because there's less stress and
less anxiety around that. So that's what I
really recommend. If you have any
questions, let me know, but other than that, I'll
see you in the next video.
28. What’s Next: Growing as an Editor & Leveling Up: Next? You learned Premiere Pro, you found your first client. What's after that? Well, there are many ways you can take this. Something I would
recommend is just continue developing
yourself, continue learning. Every day become just
a little bit better. 1% better, it's so simple yet it's so important because
if you become better by 1%, you will be 37 times better
by the end of the year. If you become worse by 1%, you will be almost
equal to zero. It's important to
become just 1% better. And trust me, even
if you plateau, you don't become
better or worse, you still become worse
because the world is moving forward and
compared it to the world, you will be moving backwards. So it's extremely important to become just a
little bit better, just a little bit, learn the new technique,
learn the new shortcut, learn just something
learn add a new font, add a new graphic,
add a new song, add a new effect, just
something to the video. Take a look at the
retention graphs. Explore just how the
videos are doing, explore other
creators, things like just try to become just a little bit better
every single day. Trust me, if you become,
let's say, not 1%, but let's say two, three, 4% better every day, which is totally doable. In one year, you will not even remember
who you used to be. Unfortunately, it
does take time. It's super boring and it's
what people don't like to do. If you don't want to do it,
totally understandable, but then just don't
expect huge results. People who get the best results, who get paid the most, who just get the most
out of this life, those people are the ones who
just do the boring stuff, who have the patience
or at least the will to put themselves and to
just sit down for hours, days, and years
and just becoming better a little bit by a little bit doing
the boring stuff. Then if you do that for years, there's still no guarantee. I absolutely hated this
phrase when I got started, but there's no guarantee,
even if you do that. But if you don't do it, that guarantees that you will
stay in the same position, that guarantees that you
will not achieve results. If you want to achieve
results, give it a try, give it your best, improve a
little bit by a little bit. Okay. That was a bit of motivational just
explosion through me. But now let's talk
about After Effects. A number of people think
about learning After Effects after they've learned
Premiere Pro. I think that's a good idea. That's one of the ways that
you can become better. With After Effects, if
you learn that skill, you definitely can
get paid a lot more. You can create a lot
more advanced videos and the videos that are just more pleasant to watch
that even get more views, although that's not
always guaranteed. After Effects, absolutely. If you want to learn
After Effects, once again, you can
click on my profile. I teach After effect as well. Get in contact with
like minded people. You can always reach out to people who also
take this course. You can support each other. You can reach out to me,
which is always an option. To recap, get better, get better every single day. Try to get better. If you have no idea
how to get better, ask RDPT how to get better. I also gave you 20
different ideas right now. Become a little bit better. After effect, if you want to get into After Effects, sure,
it's going to be great. I don't see any disadvantages
in learning After Effects. I only see advantages. Explore After Effects.
By becoming better, you'll increase your prices. By increasing your prices, you'll attract better clients, by attracting better clients,
you'll get paid more. You'll get your
skills even better. It's just like it's
like a snowball. It starts small, but then
after year becomes huge. I recommend you becoming a snowball of just
improvement and betterment. And as always, if you
have any questions, let me know better than that. I'll see you in the next video.
29. Last Step!: Congratulations. You're
nearly 100% done with the Premiere Pro short
from video editing course. There are just two small
steps you need to take. First, take action. As Kafuch said, a journey of 1,000 miles begins
with a single step. So if you haven't already, take your first step by
editing your first video. All the best information
in the world means nothing if you
don't act on it, and even small steps lead
to massive outcomes. You found value in this program, I would really appreciate
if you can take 60 seconds to leave
you honest feedback. I will be immensely grateful to you and your feedback will massively help future students in deciding the best
program for them. Although this
course is complete, your journey has just begun. I'm excited to see
you edit online, so be sure to keep me and
your fellow students posted. Remember, I'm here
for your success. If there's anything
you need, don't hesitate to reach out in
the Q&A section below. Wishing you all the
best and looking forward to seeing you
in future courses.
 Vladislav Sateev, Video Editor