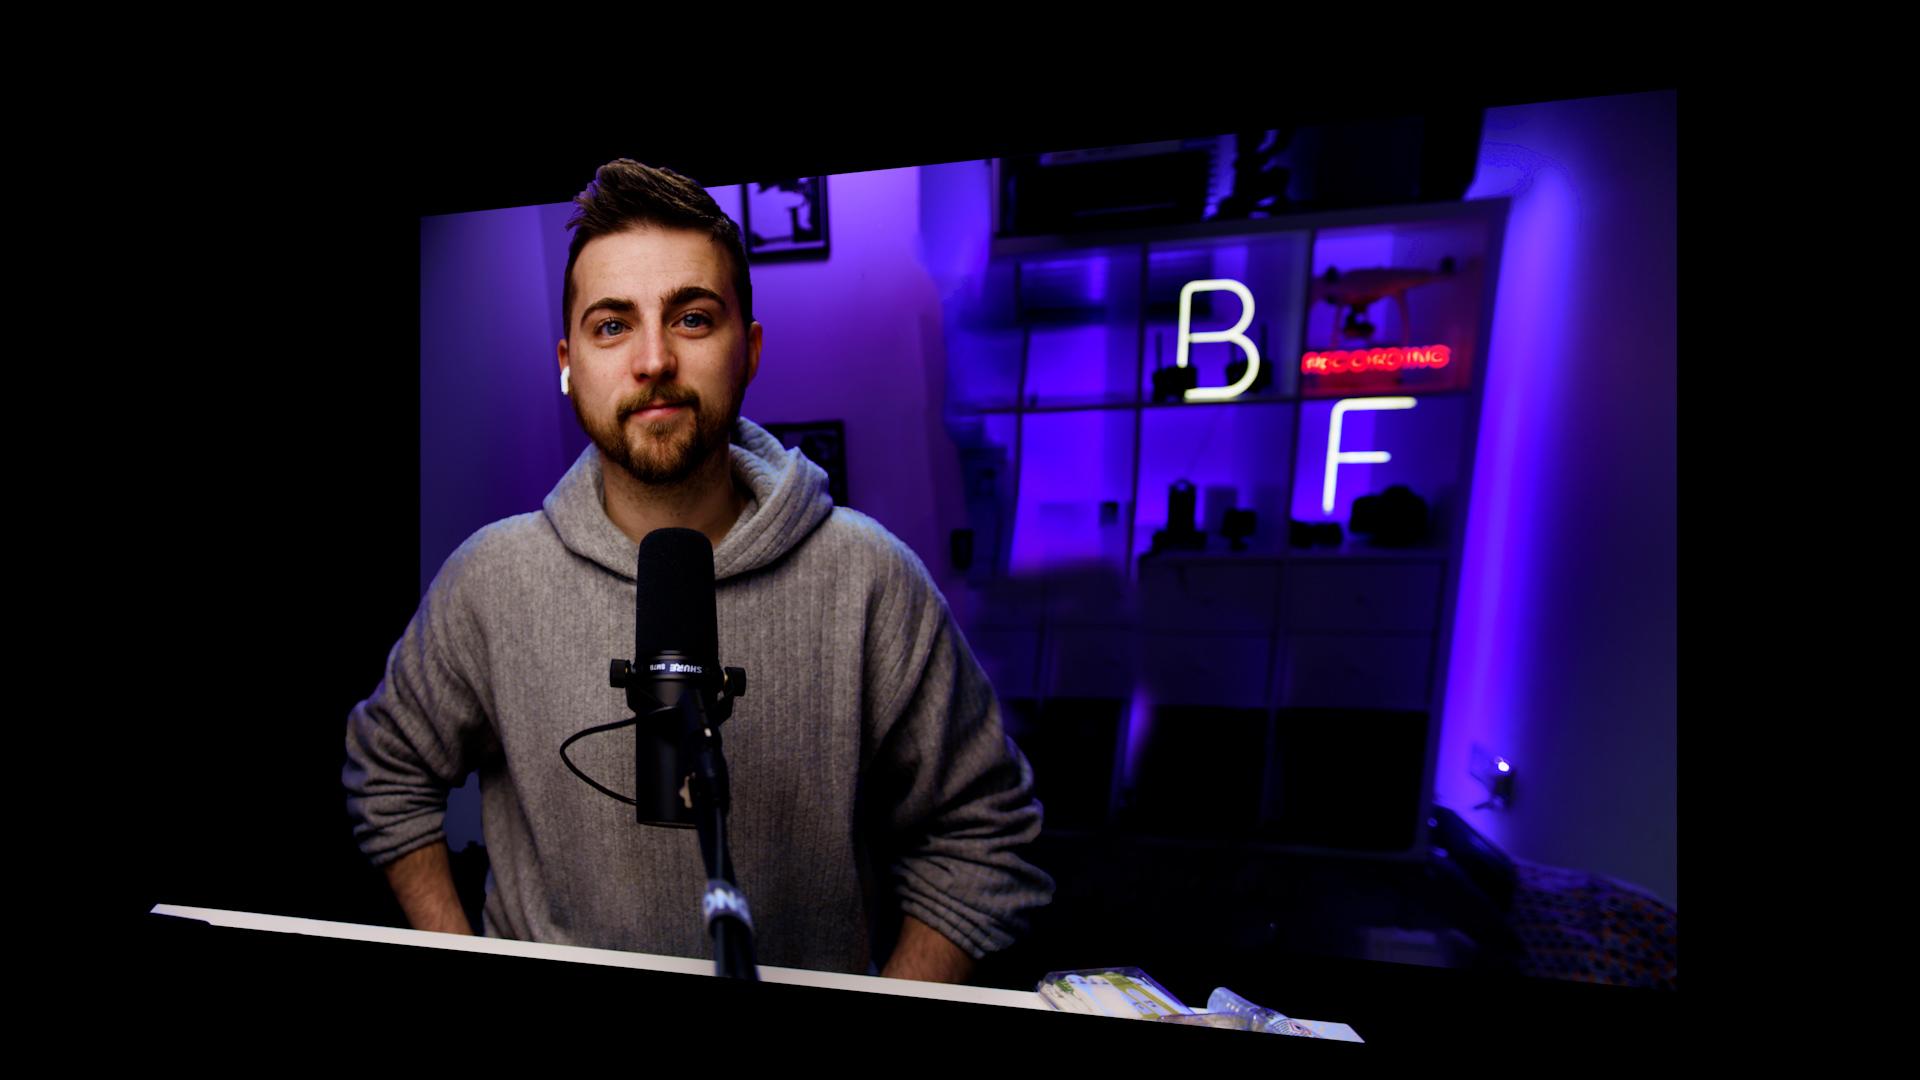
Transcripts
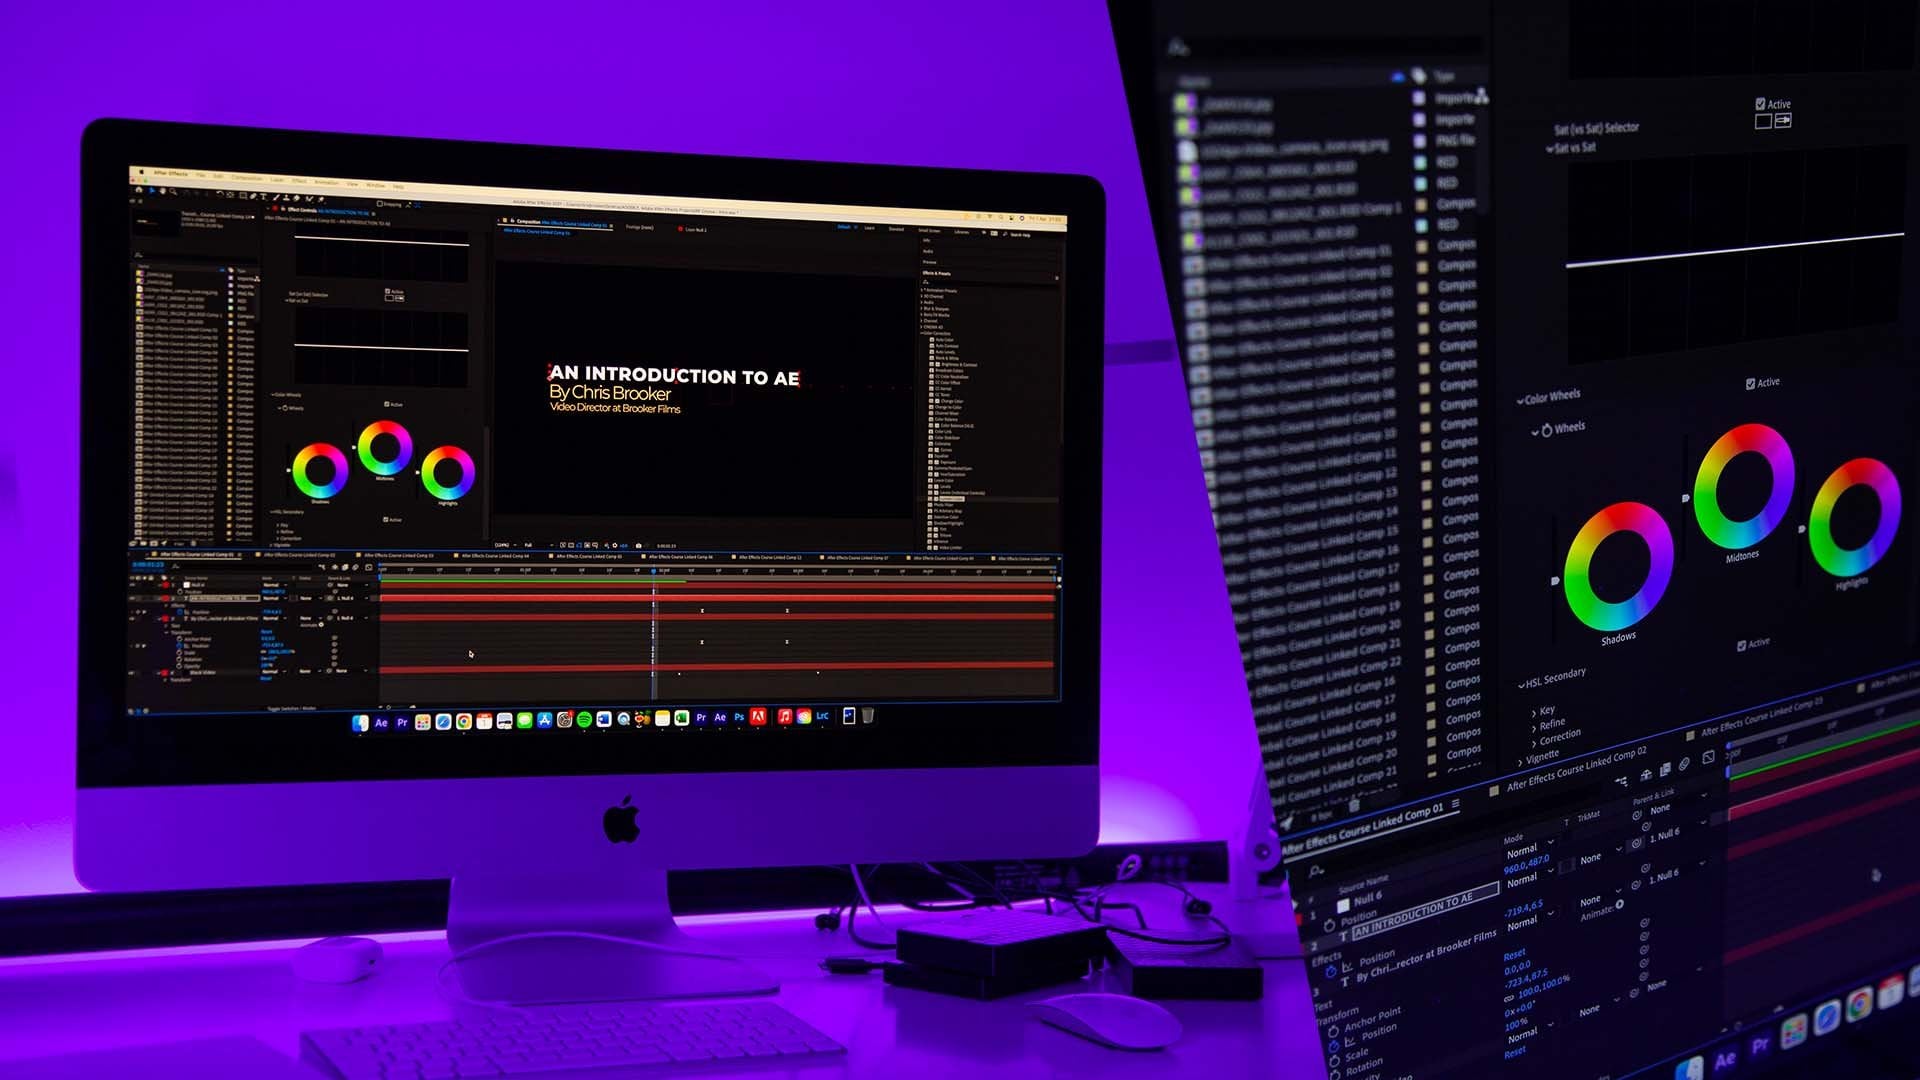
1. Introduction: Hi, my name is Chris. I'm a full-time at filmmaker and photographer from England. And in this course I'm going to be talking all about how you can bring your still photos to life through video using
Adobe Photoshop, Premier, and After Effects. Now there's two different
parts of this process. There's the photo
manipulation and that's all done inside
of Adobe Photoshop. And it's really
important that you have Adobe Photoshop installed on your computer in order to
do this part of the process. But the animation
palettes can be done in either Premier
or After Effects. I'll show you how
to do it in both. But you don't need premiere
and after effects you can do It's in Premiere
all Adobe After Effects. It doesn't matter
which one you choose, but I will show you
the process on how you do it in Premier
and after effects. So this is all about
the Adobe suite. So Adobe Photoshop,
Adobe Premiere, and Adobe After Effects. So let's begin animating. I'll still images and
bring them to life through video with this course,
Let's get into it.
2. Setup: Now before we jump into
Adobe Photoshop and we start animating and stop
completing this process. It's really important
that we have the correct image in place before we actually
start editing gets. So, first of all, you want to make
sure that there is a clear foreground
and background. So it makes sure there is a
subject in the foreground. So this is the part
closest to the camera. And then make sure you
have a clear background. If there's anything
in-between that could be distracting than these could
potentially ruin the effect. So if you have a picture
of somebody and there was somebody else standing
right behind them, this could be a little bit distracting and it could
derail your efforts. So it's really important
that there is nothing distracting getting in
the way of your subjects. And then of course, it's
really important as well, but this is a
high-quality image, so it makes sure that
it is not pixelated. Make sure that it is not blurry. Make sure it's in-focus, it's sharp and it's
a good frame size. So I'm not saying
you have to take a picture on a
digital SLR camera. This can work for your
phone photography. Just make sure that
the subject is in focus and the image
is nice and clear. Now it's also worth
noting as well that the background should have some level of interest if this is just a plain
photography background, so just a white screen or a blank screen or a blue screen. Then this effect is kind of
going to be lost a little bit because we'd go into lose
that elements of movements. So makes sure there is something interesting in the background of your photo in order for you to maximize the results
of this effect. So make sure that
the subject and the background are nice
and clear and there's no one or nothing distracting immediately behind the subject. Makes sure that the photo
is sharp and in focus. And then make sure that the
background of the photo is interesting and isn't
just a plain wall or something really boring. So with those three
boxes and now ticked, Let's get our image file into
Adobe Photoshop and we can separate the foreground from the background.
Let's get into it.
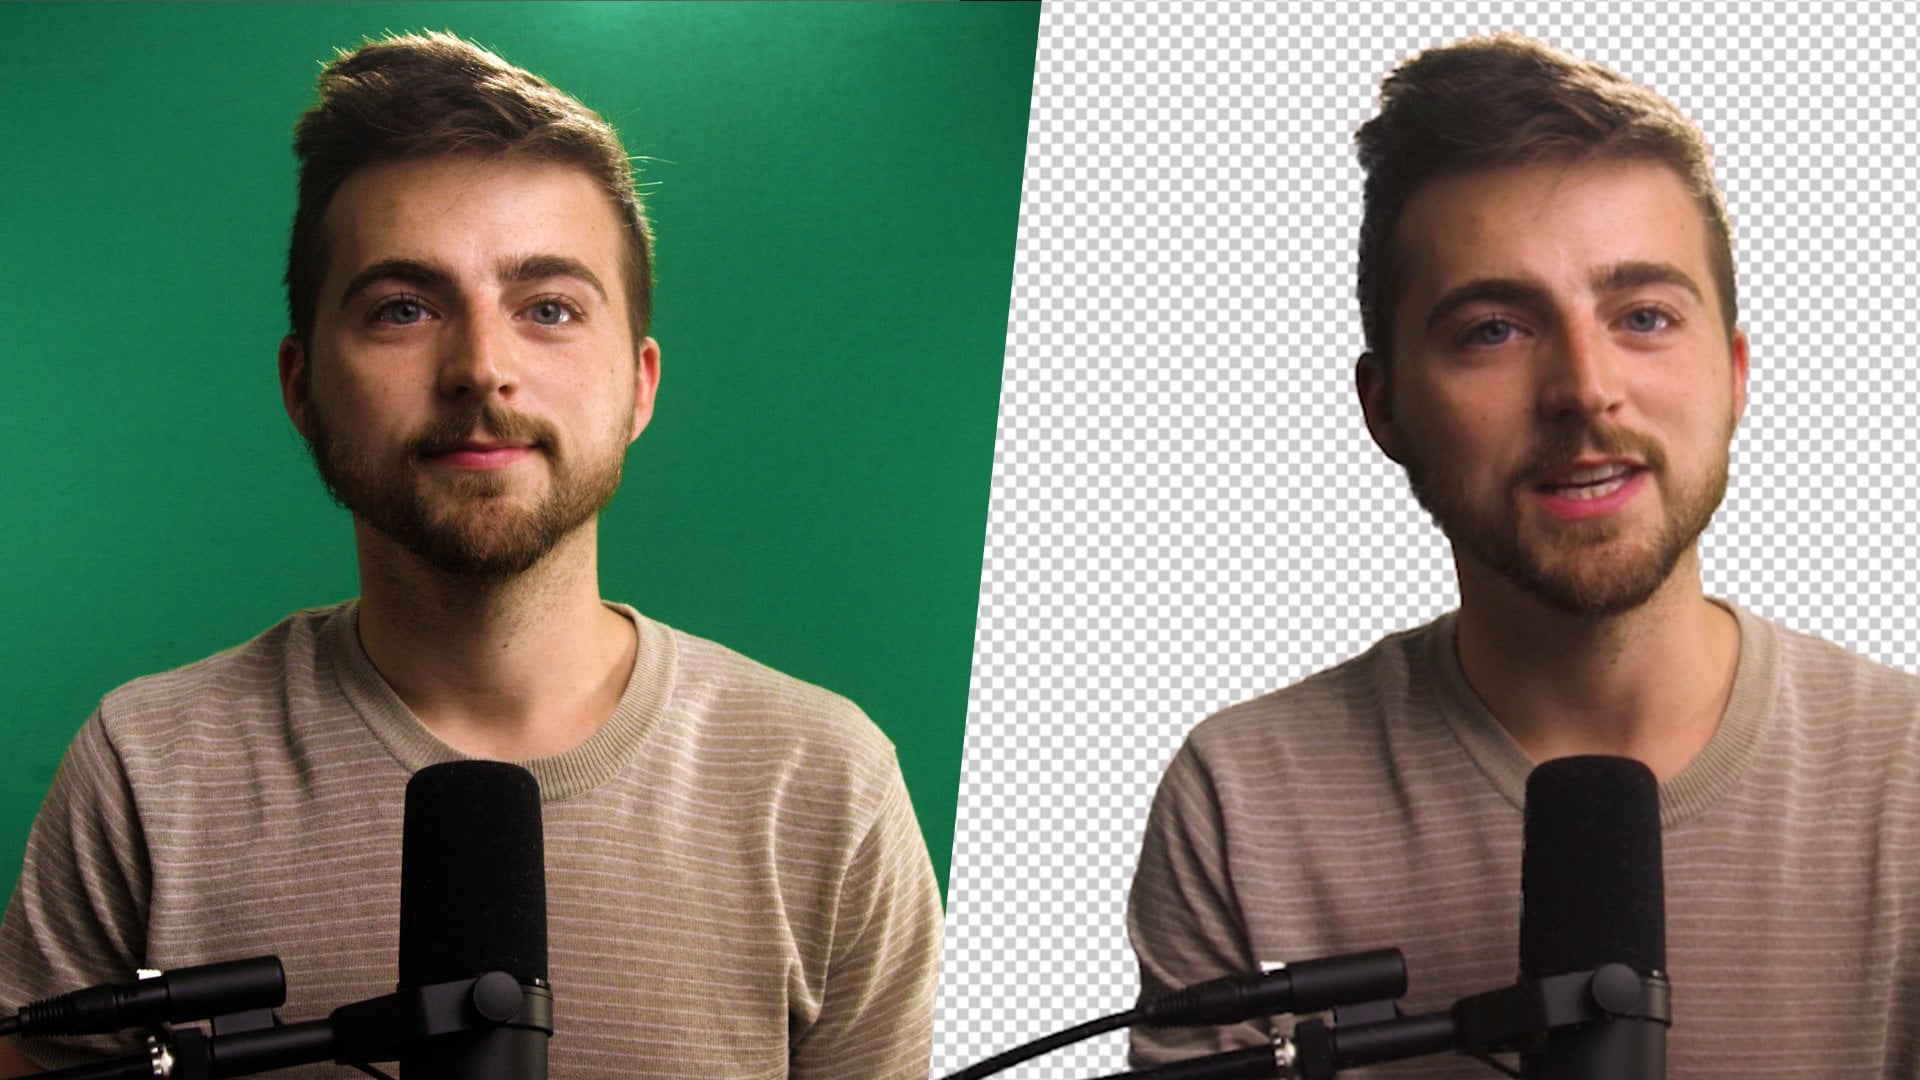
3. Separating your Layers in Adobe Photoshop: So now that you've got
your photo selected, we now need to get this
into Adobe Photoshop so that we can separate the
foreground from the background. So once you're on your computer, you just want to navigate
through to that picture. Then we'll right-click. So let's open with and
select Adobe Photoshop. Now the reason why I've done
it this way is because if you open Adobe Photoshop
and then import it, you could actually set the
wrong composition settings. So if you just open it
with Adobe Photoshop from your finder or your
documents that you know, it's going to be the
correct dimensions. So once that as being imported, you can see down here in the bottom right there
is these padlock icon. You first just want
to uncheck that, so we're just going to
get rid of that lock. So this means we can actually
make changes to the image. Now from here, we just
need to go ahead and draw a mask around the subject. So that is me in this example. So to do that, I'm
just gonna go over to the left of Photoshop, hover over the Quick
Selection Tool. Hold that down and go
to Quick Selection. Done from that, you can see
if we go into the top-left, you can see you've
got this option here. So this is the size and
the hardness of the brush. So if you pull the
size all the way up, you'll see the brush
is going to expand. And if you pull that down,
the brush will shrink. So go to a suitable number. So I'm going to go for
somewhere around 150, 160. And then I'll keep the
hardness at 100 for now. They just want to draw a
mask with a, your subjects. I'm just staying within
myself here as you can see. And that is drawing this
mosque around myself. Now as you can see, this table is also part of the foreground, so I'm just going to have to
extend that mass to include this table and the
objects on that table. And they get, you can now see once we've done our first pass, that is definitely not perfect. As you can see down here
in the bottom left, I've chopped off
parts of my arm. So I'm just going to go back in and I'm just going
to add those parts. But as you can see, I've included the
background now. So in order to get rid of that, you just want to hold
option on the keyboard. If you're on Mac, if
you're on Windows, the keyboard shortcut
is on the screen now, hold down Option on Mac or
the Windows alternative. And then just draw over the
part that shouldn't be there. So we're just
getting rid of that. And they just want to go
through and you just want to fill in any sections that
should be filled in. So this airport
should be n omega, this bit is not included, so I'm just going to add this n. And then you go, we're
pretty much there. So now I just need to go
through and remove parts. But in order to do that, I have to shrink the brush
down to fit into this gap. Then we'll go option again. And we'll just
remove those parts. As you can see, there's
a gap between my arm, so I'm just going
to hold Option and we'll remove this bit as well. And again, we're just going
to shrink that brush down. And we'll just fill in
that gap like this. So as you can see, that's
looking pretty good. Although you can see, if I zoom in next to my ear, I've included this part here, so I'm just going
to get rid of this. There we go. And that's looking pretty good. Now as you can see,
once you've done that, you'll notice that
you've got this mass perfectly around your subject. So from here you just want to copy and paste this
into its own layer. So in order to do that,
we're just going to go Command C on Mac Windows, that is control and say, and then Command V or
Command V. And that will copy and paste that into its
own layer, as you can see. Now if you wanted to, you could actually go into
this and you could clean up the mask if it's
not looking perfect. As you can see, a
pair in my hair, There's some purple that
which I do need to fill in. So you could go through and
make those fine adjustments. But now we need to go and
fill in the background. So if we turn the
background layer back on and we turn
this layer off, then we're going to
hold Command on screen. If you're a Mac, the keyboard
shortcut is on the screen. If you're on Windows, then we'll just select Layer 1. So select the thumbnail, not the word, not over. Hey, I select the
thumbnail and lay a one. And that will load
at that mask again. And now with Layer 0 selected,
so the bottom layer, and we'll just go
to the top bar of Photoshop and we'll select the select option,
got onto modify. And we'll just select Expand. And we're just going to
expand this by 20 pixels. And we'll press Okay. And as you can see, that
mosque has now been expanded. You can take that a little
bit further if you wanted to, but I think 20 would
do the trick here. Then we'll go back into Select. We'll get on to modify. And you can feather this off a little bit if you
wanted to as well. So you can go feather, Let's add five pixels of feathering just to soften
it off a little bit. And now we can actually
fill in this mosque. So we're gonna go up into Edit. We'll get down to Fill. Then from that you want
to select Content Aware, color adaption to be selective
blending normal capacity, 100% transparency, that
should all be fine. Then we'll press OK
and Photoshop will take a moment to
generate a fill layer. They go so as you can see, if we deselect that mass, so that is Command and D, or Control D, you can see that background has
now been filled in. Of course, it's
definitely not perfect. So in order to clean this up,
I'm just going to zoom in. We'll go up to the
Clone Stamp Tool, which is this
button on the left, will decrease the size of this a little bit and we'll make sure the hardness is at 0. And then from there
you just want to hold option on the keyboard. And that will change the brush
to the smaller brush head. We're just going to
select this over here. So options select. Then we'll move over and
we'll just start painting. So as you can see, we've
got this crosshair on the left and the
circle on the right. Essentially, the crosser is the reference and the
circle is the brush. So it cloning what's at that crosshair and putting
it where the circle is. So as you can see, if
I go all the way over, then I start to add
this wall back in. You can say I'm
copying this plug. So just go to Option and then just paint pots of
that in God back. And just keep repeating
this process and fill in your background as
best as possible. And they just want to go
through this process of just adding a and in
cleaning up this background, it doesn't need to be
perfect because we are going to be adding our subjects
back in over the top. But if you clean this
up a little bit, then that would really help. So this is our subject on top, and then this is the background. So as you can see, these two layers are now
completely separated. So now from here, we just
need to get these two layers into Adobe Premiere Pro
or Adobe After Effects. So we need to export
this from Photoshop. So in order to export, we're just going to go file. We'll get down to Save As so ignore exports
will go to Save as well places on the
desktop and we'll call this separated layers. Then you want to make sure
that the format is Photoshop. Then we'll press, Save, Press Okay, on this menu. And that has now been
exported from Photoshop. And now we can import
these layers into Premiere or Adobe After Effects.
4. Adding Movement in Premiere: So now that we've separated
the foreground and the background from our image
inside of Adobe Photoshop, we can get this into
Adobe Premiere Pro. And once you've
opened up Premiere and you've created
a new projects, the first job that you need to do is to create a new sequence. So we'll go up into File, New and select sequence. And from Hey, just wanna go
straight over into settings. We want to change the
editing mode to custom. The time-based can be your
frame rates of your projects. So I'm going to go for 25 frames per second
in my example, but feel free to
go for 24 or 30. It's completely up to you. Then this is the most
important parts. We want to set the frame size. So this is why you want to
look at your reference image. I look at your image and
if it's a square image, then you want to go for a
frame size of 1080 and 1080. Or if it was a
white screen image, then we'll go 1920 by 1080. Or if it is a vertical image, then set that correct
aspect ratio. But in my example, it was
a white screen image. It was a screenshot from a video which was
filmed in widescreen. So my frame size is going
to be 1920 by 1080. That you just want to make sure all your settings
here are matched. So square pixels 1, no fields, timecode of 25 FPS, or that would change if you
have a different frame rates, Rec 709 color space, everything else is fine, so we'll just press Okay. And then from hey,
it, we just need to import that Photoshop file. So there's two ways
that you could do this. You could either just go into the Finder and you
can drag it in, or we could go
right-click Import, go through two error is on
your finder and we'll just press Import and then will be presented
with this menu here. And it's really
important that you don't just ignore this and carry on. We need to make sure that
image is not selected. We want this to come
as individual layers. So layer one is going to
be imported on its own. Layer 0 is going to be
imported on its own press. Okay, and let's,
and as you can see, you've got a separated layers
folder now creates it. So we'll go into this
folder or this Ben, and we'll just drag these
two layers into a sequence. And as you can see, you've got the foreground and
you've got the background. At the moment though, you can
see these away too large, so we're just going to
select the background, will go up into effect
controls motion scale, and we'll pull the
scale all the way down so that it fits the screen. So 50 in this example. Then we'll do the same with the other last of the
foreground layer. We'll pull that
down to 50 as well. Then we'll put the foreground
layer on video layer to the background layer
on video layout one. And now you can see our
original image is there. Now that we've got our
original image back together inside of
Adobe Premiere Pro, the foreground and
the background, and now living with
each other again. Because these enough
separated layers, we can animate the position, we can animate the scale, we could animate the rotation. And you can see
only one layer is going to be affected at a time. So I'm going to go all
the way to the beginning. I'm going to increase
the scale of the foreground layer and
I'll move the position down. Then I'm just going to
select this arrow so that we can see
this section here. We'll create a new key frame
on position and scale. And then we'll go to
the bottom layer, creates a new key frame
on position scale. Then we go to the very
end minus one frame. So select the back arrow button. And then we'll go to
the foreground layer, and we'll pull this back down to 50 and we'll pull up position
but to where it was. So that was 960 by 540. And then on the
background we'll get it go the opposite way. So the full ground we
scaled down the background, we're going to scale up. So increase the scale 255. And now when we play this back, you can see we've got this nice parallax effects now happening. So the foreground is shrinking
and ground is increasing. She can see instantly
straight away, I've got this really nice
moving photo effect. And if you wanted to,
you could actually add a layer of blood
onto the background. So if you search for
blur in the Effects tab, and we'll draw Gaussian blur
onto the background layer. You can see you can
increase the blurriness to make them stand out from
each other even more. So maybe at the very beginning you've got a decent bit of blur. So GFA 44 percent credit, new keyframe on blurriness. Then at the end we can
pull that down to 0. So you can see that's
going to give us a nice soft focus
effect over time. You will notice at
the start there, we're getting this black
border around the background. And that is because
we need to select Repeat Edge Pixels and that
will get rid of that for us. So if we play this back
from the beginning, you can see this is
what we have and it's really bought that photo to life if you wanted to as well, that you could also
animate the rotation. You could animate the position. Alternatively, you could
actually drop some effects onto an individual layer so that you can control each
layer on its own. Or alternatively, you
could even add some texts behind the foreground
and the background. But let's go with some
rotation animation first. Let's not get ahead of
ourselves for the time being. So I'm just going to
increase the rotation on that foreground
layer so that a seven. Then we'll go to the end and
we'll pull that down to 0. So as you can see,
that's now rotating back into position as well. Of course you could
do the same thing with the background as well. So at the start will
keep the rotation at 0. But as we go towards the end, we'll pull that too. Let's go negative 3. And we'll play this back. There you go. You can see that he's
not rotating around. Or alternatively, we can rotate the rotation
the other way. So a go for, so we'll go for maybe plus 3, plus 4 somewhere around there. Let's play that back. Now. Iga luxury vehicle. Now let's get on
to some effects. So let's go for a color
correction effects may be. So let's go for curves. Curves onto the bottom layer. And you can see, if I just
adjust some of these curves, you can see the background
is going to be adjusted, but the foreground
will not be adjusted. However, the best way
to control the curves is to put this onto
an adjustment layer. So we'll delete curves for now. Then we'll go onto a
timeline and we'll move off foreground up to
video layer three. Then we'll go into a project tab and we'll create a
new adjustment last. So we'll go to the
new item button. So that's adjustment
layer and press Okay. And then we'll drop that
onto video layer two. Now we can go back
into effects and drop the curves on to the
adjustment layer. And as you can see, if I
move some of these around, I can change the background
and knots myself. So basically the
way that Cubs work is the top-right
is the highlights. The bottom left is the shadows. The middle is the midtones. And if you want to
make an area brighter, you move it to the top left and if you want
to make it delta, you move it to the
bottom rights. So if I go into the red channel, if I want to make the highlights of the
red less red or darker, I'll just pull those down here. Then if I go on to the blue, if I wanted to make the shadows on the blue pop a bit more, I can pull that up or I can
do something like this. And that's going to
enhance the greens because I'm pulling
that blew away. Whatever you decide to
do that, I just get this to a point that
you're happy with. And then we'll scroll through
to the very beginning. We'll create a brand new
keyframe on the opacity, on the adjustment layer. Then we'll scroll
through to the end. We'll pull it down to 0%. And as you can
see, we're getting this nice color change effects over time, of course
there as well, because these all
separate layers, we can add that text between the foreground and
the background. So again, we'll just
move the top layer, the foreground layer,
up onto video F4. We'll go to the T icon. The type tool will
select the video. And we'll just type out
a word or a phrase. I'm just going to type out my business name, broker films. Then I'll go into that text
and we'll change the font. So I'm going to graph
a monster at bold. I'll increase the size of this. Place, this in the middle using the center align text buttons. Then I'll just reset
the position down here. And then I'll just move the text down onto video layer three. So that is now under
the foreground layer. And as you can say, foreground layer is now
on top of the text. So if you wanted to,
you could animate the text to bounce
in on the scale, or it could move up as well. You could animate that to
do something over time. But essentially
because we've got a foreground and a
background separated, you could add anything
behind the subject. And that's going to
really help to add that separation between
those two layers. So now that you've
actually gone through the process of animating,
you're still photo. This is now a video. How do you actually convert
this into a video file? Well, this is why
we want to export. So we can either go to
the Quick Export feature in the top right. As you can see, you can put this wherever you
want this to go. So I'll put this
onto the desktop. Then you can set a preset so
you can go for high-quality, for k, high-quality
1080, high-quality 720. I'm going to go for
high quality 1080. And as you can say, it's going
to be Haidt point to 64, 1920 by 1080, 25
frames per second, 20 megabits per second targets. And then it's going to
be 5 second long video, and that should be 12 megabytes. Cipher press Export. That's just going to
take a second for Premiere to export that. And then as you will
see on the desktop, we've got our video
now exported. Alternatively though,
you could go up into File Export Media. So load at the Export Media tab. So from here, what
I would recommend doing is selecting H.264. Then you can just go down to
output name and you can put this onto the desktop and you can rename this
if you wanted to. Then we'll get on
to video and simply just select Match Source. And then from there
you can get onto VB. So the bitrate settings and just pull this
up to around 20. Essentially, the
higher that number is, the higher the file
size is going to be. So as you can see,
all the way to 50, that is 31 megabytes. But if we pull that
to nought point 19, that is 320 kilobytes. So just pull that up to
where you want that to go. Time interpolation. You can just select frame
sampling, press export, and that's just going to
take another second to export and that he's
now on moving photo. So that is how you would go through the process of animating this still photo and
bringing it to life and video inside of
Adobe Premiere Pro. In the next episode, I'll talk
all about how you would do the same process inside
of Adobe After Effects.
5. Adding Movement in After Effects: Importing your Photoshop file
into Adobe After Effects is a very similar process to how it was done in Adobe Premiere. So let's jump into
After Effects, and I'll show you
exactly how to do that. So with After Effects now open, you first just wanted
to go new composition. And again, we need to match the frame size to
the image size. So in my example
it was widescreen. So here we're just
going to go at 1920 by 1080 square pixels,
frame rates of 25. And we'll make the
duration five seconds. Then from that we'll
just press OK. And now we need to import
that Photoshop file. So again, we can either drag and drop or we can
right-click import file. Once that has been
important though, you'll be given this window. And again, it's similar to
what we saw in Premiere. It's either going
to merge that into one image file or
it's going to give us the option to get this
in separate layers, and that's what we want here. So import kind, you
can either go footage, composition, composition,
retain layer sizes. Let's just go for composition. And you can either put
editable layer styles are merged layer
styles into footage. Let's go editable layer styles. Press. Okay. And as you can see, we've now got a composition with two individual is imported. So I'm just going to select both of those will go Command C, go into comp one command
V. So Control Paste, as you can see at
the moment though, that is way too large. So again, we just need to
go to this bottom layer, will turn off the
top layer for now. We'll just pull the
scale down to 50. And then we could just
move this into the center. So if you press pay, that'll be 960 by 540. Then we'll just go into
this drop-down arrow. We'll just copy that transform. So Command C or Control
C if you're on Windows, and we'll just paste
that onto the top layer, so Command V. So as you can see, we've got our two
layers now imported. And if we solo them, you can see these again are separated. So again, we can go through that same process of
going into transform. And we can animate the position, we can animate the scale, we can animate the rotation, and we can create new keyframes. At the start, go
towards the end. You can move the Position,
increase the scale. And you'll say it
will play back and do that motion over time. But the reason why you
would choose aftereffects over premier isn't because of this basic keyframe animation, it's because of the
puppet pin tool. So the puppet pin tool is a great way of bringing
life to a still image. So Let's just go through the process of doing a
basic animation first. So we'll just
increase the scale. So we'll increase
that to around 55. And we're bringing the
position down and we'll create a new key frame on
position and scale. Then we'll go into transform on the background
layer and we'll create a new keyframe on
position and scale again. Then we'll just go halfway
through the action, will increase the scale
and the background. So 55 will decrease the
scale on the foreground. So 50 and we'll bring the
position but to 960, to 540. So as you can see,
once we've added the keyframe animation
onto both of those layers, you can see we've got this
really nice animation. To take that one step
further, like I mentioned, we're going to add a
new type of animation, and that is the puppet pin tool. So we're going to use the
Puppet Pin tool to add an extra layer of animation
onto this foreground layer. So rather than it
being quite flat, and now we're going to get
quite a dynamic movements. So select your foreground layer, will go through to
the point where it settles at its lowest point. Then we're just going
to go up to this icon, which is the Puppet
Position Pin tool. Double-click this layer. And as you can see, that's put a yellow points in the
middle of my face. I'm just going to
undo that Command Z. And then from that I'm
just going to go ahead and I'm just going to
create a few points. I'm just going to put
a point on my neck. I'll put a point at
the top of my head. Then I'll put a
point here, here. Here, here, and
roughly hair as well. So you can see you've got all
of these different points. And if I move one
of these points, you can see this is how we
can now affect this layer. So all of a sudden
there's an element of elasticity to this movement. So this is starting to look
a little bit more natural. However, as you can see, if I move certain points around, it's going to move the table. So let's just add
a few more points onto the table so that the table does not move
when we animate ourself. So let's see how that looks. There we go a lot better. So from here, in order to
create this animation, we're just going to
go into effects, puppet, Mesh, one, deform. And as you can see,
we've got all of these different
puppet pin points. So highlight them all,
open them all up. And as you can see that all
gotten new keyframes created. So this means if we go back to the beginning and we move
these points around, they'll animate from
one keyframe to another over the course
of our animation. So if I move my head over
to the left, like this, I move my arm up, this arm up, and then I can move my
neck over lift sorbet, shoulder can go up. Shoulder can go up as well. And as you can see over time, that's just going to animate back over into its
normal position. Of course, though, if you really wanted to take this
to the next level, you could even move
those mid animation. So it looks like the head is going to move from side to side. Now this is a little bit more
strenuous on the computer, so they still take a little
bit longer to render out. But you will say once that has rendered and
we play this back, you can see we've got even
more movement in this image. So this is really bought
this photo to life. Now the movement can be
really subtle like this, or you can be quite
dramatic with the movement and go for
something really over the top. But of course, if you are adding the puppet pin tool
onto images of people, then it can get quite
noticeable if you start to move these
points around too much. So as you can see, just
playing that back, you can see that starting
to look really nice. My head's not
deforming too much. But there is this
nice little bit of movement which feels
a bit more natural. You can see it looks
like my shoulders and my arms a sinking into position. And that looks really good. The last thing that I
want to do to this, to really finish this off, is just to highlight all
of the keyframes that we have selected and
created so far. So everything, So all of
the position scale and the puppet pin points will
right-click on one of them. Go to keyframe assistant
and select Easy, Ease. So this is essentially
changing our keyframes from linear keyframes to an
Easy, Ease keyframe. And essentially
that means rather than suddenly
starting the movement when the keyframe
starts and ending when the next key
frame comes in. Just going to ease in and
out of each one of those. So this just makes it feel
a little bit more natural. So we'll just render this out
and we'll play this back. And you can see that
looks really nice. You can see as it
comes to the end, rather than being abrupt
ending like it was before, it's now easing into
position and it just looks a little bit softer and
a little bit more natural. So there you go, using the position transform
and rotation, basic keyframe animation,
and then adding in the puppet pin tool to add the extra elements
of animation. We've created this really
awesome still photo animation inside of Adobe After Effects. And we've really built
the still photo to life, of course, like we did
in Adobe Premiere, because these are
two separate layers, we can animate the background
and the foreground or at different effects
on individually. So that means if
you wanted to add that nice blurring effect, we can search for
blur and effects. Drop camera lens blur
onto the bottom layer. And you can see you can increase the blur radius all the
way up to a high number. So let's go for 40 percent. At the beginning creates
a brand new keyframe on blur radius and at
around the NMAC. So somewhere around, hey, we'll
pull that back down to 0. And then if we render this
out and we play this back, you'll notice you've
got this really nice focus blur effect
on the background. Of course again, we could
use some colors so we can go into color correction
and we could go full, any one of these. Go for exposure curves,
color gamma attempt, we can add an effect onto the background layer
and that won't affect our foreground layer. And again, of course,
if we go to the T icon and we add some text
underneath that top layer. So we'll direct that
between those two layers. You can see you can
have text between your foreground and
your background. So now that we've gone
through the process of animating this, how do we export this? Well, the easiest
way to export from Adobe aftereffects is
to go composition, add to render queue. And then in the
render queue option, we've got Render Settings and you want to select
best settings. All of these are fine. Then we go to Output
Module select lossless. Make sure the format
is QuickTime. Post friend action
is non channels, RGB, press Okay, then we can output to
our desktop, so comp 1. And we can just press Render, and that's just going to
take a second to render this from Adobe After Effects. As you can see, it
should now be complete. However, when we go to play
this back from our desktop, he can't be opened. It will open in After Effects or Premiere if you
import it into those, but it doesn't play
from a finder. So alternatively, you
could go to composition, add to Adobe Media
Encoder Queue. And as you can see,
this is going to load up Adobe Media Encoder 22. And this means rather than exporting directly
from After Effects, we're now exporting from
Adobe Media Encoder. And as you can see, this
is Adobe Media Encoder. And we've got our
composition now waiting to export in encoder. And this looks a lot closer to Adobe Premiere rather
than Adobe After Effects. So we can go into H.264. And that's going to load at
the Dynamic Link connection, which basically
means it's linking from aftereffects to encoder. And then once that has loaded, you can see you've got
this Export window, which is basically
identical to premia as. So this means we can go through the process of selecting H.264. We can select the outputs. So I'm just going to put
this on the desktop. We'll call this P2 dash T2, that you can just match
the source on video. We'll go to our bit rate
and pull that all the way up to get a nice
high-quality exports. And then time interpolation
can be framed sampling. Okay, press that Play button. And Adobe encoder is just
going to take a minute or two to export this from
After Effects. And now because we've
exported this in a hate point to 64 format, similar to how we would
do from Adobe Premier. This will play back directly in QuickTime VOC or whatever media play it that
you have installed. So rather than exporting
through After Effects, you can export through
Media Encoder instead, and that would give you a
lower file size as well. By the way, however, encoder is a different
piece of software though. So if you've only got
After Effects installed, then rather than going
through Encoder, you can just go to
the render queue. So there you go. That is how
you would animate an export. You'll still photo inside
of Adobe After Effects.
6. Outro: And there you go. That is the end of the course. So at this moment in time, you should be able to
separate your full ground and your background in your
cell images and then animate those layers inside of Adobe Premiere and slash
all Adobe After Effects. So my challenge to
you now is to go ahead and animate your
own style images, bring your images to
life through video. And if you do, I would
love to see your work. So please do consider
uploading your work to the student's project section on the Skillshare students
project page and a premise, if you do, I will call it my thoughts and opinions
on your work. So thank you once again
for watching this course. I've really do
appreciate your support. If you're interested in filmmaking than I do
have a whole world, of course is on my
Skillshare page. So consider checking those out. But if not, thank
you for watching. I appreciate your support and hopefully I will see
you on the next course. See you there.
 Chris Brooker, Filmmaker & YouTuber