Transcripts
1. Introduction: Looking up at the
sky full of stars, since bars are in, leads us to ask what else
might live beyond the world? As we dredging of the vastness
of the star filled sky. We get to feel the
connection to nature. We get to learn that we
are small in a good way, part of a larger infinity. This view might not be available
to ask all the time and certainly not well your
endurance, but Celestial. Or it can remind us of just how beautiful
the night sky with the night sky is one way for us to discover how to appreciate the
wonder of this guy. And it is one of the most
rewarding artistic and the voice. Hi everyone. I'm Christina,
self-taught artist, and in this class, I will demonstrate a
step-by-step process to eat the night Skyping, list of supplies
that you'll need and pick some tips to make
your painting is here. Alright, in any form whether
a while to eating are observing reduces the stress
hormone called cortisol. It also releases the feel-good hormones
called endorphins, which help you combat stress
and be letting a joy, a sense of fulfillment. It transforms you into a more positive,
well-rounded human. So enjoy this class
and had been doing.
2. Materials: In this class we need
acrylic paper or canvas. Acrylic paint with watercolor. But I prefer acrylic for
this project as it dries quickly and has brighter pm spend compared
to watercolors. Water painting,
brush set, painting, *******, masking tape,
toothbrush or splatter brush.
3. How to Paint Blended Night Skies: Blending acrylic paint
is the process of having two colors mesh together
to blend into each other, creating a new color. It is a technique to
create stunning results that we can be using
paint the night sky. We will use wet
and wet technique as this is the
quickest way to blend. And basically means
we will be blending the colors together
while they're still wet. I'm going to show you now a simple way to do a
night sky background. You can use any flat
wash with a round brush. In this demonstration
and use the colors gray, Prussian blue, and white. Take note that
we'll have to work quickly as acrylic is
not reasonable when dry. Squeeze and an even amount of three colors you've
chosen in the Canvas. Wet your brush and
start applying white tubes of paint
from side-to-side. You can go from top to bottom. You the first color
in dip the brush into the second color without
crossing to brush off. And can you get
me to the bottom? Tried to go with straight
lines from one side to another and evenly
pressing on the brush, but not too much pressure. You may add extra
layers achieved nice intensity of
the color equation, or indeed with more transparent. Now let's try with
different colors. Let's use violence. Most read and chill, peak. Wet your brush and then
from top to bottom. Blending to get a
smooth, soft edges.
4. How To Paint Moon: The brightest and the largest object in the night sky
paintings the moon. In this lesson, I
will teach you the step-by-step process
of painting a moon. And we will use the sponging
technique to give it an interesting texture
and perfect appearance. Let's first create
the circle stencil that will serve as
an outline form one, using around lead, draw three common of paper then
cut out the center. Using masking tape,
connect the circle. Then cut the excess paper. You state being white
for the moon and Prussian blue and violet for
a little bit of texture. First, grab the sponge, damper dry, we'll do. Then please your moon
stencil on the middle. Put the paint on your palette
and using your sponge, dop the moon stem cell until
the entire moon is covered. We will beat of brushing need
to have a little texture. Once the center is covered
and looks nice and textured, you can gently peel off the paper stencil to reveal
a nice mountain sheep. You can do this
while paint is still wet or wait until it dries. Here's another illustration. We'll still be using
the team in white for the moon and violet for
a little bit. Texture.
5. How to Paint Stars: In this lesson, I'm
going to teach you a fast and easy way
to paint stars. We'll be using
splattering painting. This is a technique
that uses brushes to flick through or drip
paint embedded canvas, rather than brushing paint
directly onto that surface. It is also known as cheap
painting or action painting. So be ready because things are about to get a little bit messy. Preparing your materials,
we need water, brushes, palette toothbrush,
and titanium white bean. First, dilute your acrylic paint with the level of water
in the mix black. Easier. We have two options to splatter. First, we will use to brush filled up results of toothbrush
with the new data can be, hold the brush at
a downward angle. So the bristles are pointed
towards the ground. And run your fingers along
the edge of the brush. Go slowly and pull the pieces back to the bunch
beam onto the canvas. Second option, we can use
two brushes, splatter. Feel the resource
of a paintbrush means diluted paint and jumpy. Top it with a second paint. You can also see sticks
or even your fingers. This will give the paint enough force to travel
across regardless.
6. How to Paint Mountains: Claiming melody might be hard, but learning how to
paint it is easy-peasy. For this lesson, we'll show
you how to pick mountain on the nighttime mountains and that street angular triangles like most of us withdraw one. Instead, they are
wobbly lines that form speaks and as
different shapes to. First put a medium
gray in your palette. You can use any size of brush dented the mountain
shapes with that gray by stroking upwards
and downwards and just try to avoid heights and
widths of this mountain peaks. Fill in the entire area of the mountains with
this medium gray and then add some white brushing and the side of the
mountains to have next. Sure.
7. How to Paint Pine Trees: Please give structure
to a pinky. In this lesson, I
will show you how to paint pine trees
that easy to follow. Using a very tiny round brush. Beeping vertical lines represent
the trunk of the tree. I suggest watering down the page just to
be to help the flu start at the top of that
vertical line and stop. Just like be to create
a thin set of branches. As you work your way down. Keeps dumping the brush left and right in a zigzag motion. Work your way down to
Chile in sections, making each series of branches a little longer than
the ones above, leave some space between
sections of pine trees look more realistic if they're not the
branches all the way down. You can also simply dotted and
daub Leto march downwards. And as you keep
zigzagging the way down, make your key for him a wider
sheet on the button and try varying the heights of the feast for a
more natural look. And that's it. Just
keep practicing and you will be an expert
at it in the syllabus.
8. Night Sky Painting 1 : Moon and Stars: Now it's time to apply
what we have learned in the previous lessons.
For this project. We will be the
Morningstar's in acrylics. For our sky background, squeeze an even amount of black, Prussian blue, and
white on your canvas. What's your brush
and start applying white socks off paint
from side-to-side. You may need extra layers to achieve nice intensity
of the color green. Now, let's do this
plug-in for stores. First, delete the
white acrylic paint with water to make
splattering is here. Feel the bristles of a toothbrush
with the muted acrylic. Hold the brush at
a downward angle so the bristles are pointed towards the ground and run your fingers along the
edge of the brush. Go slowly and pull the bristles back to the launch
beam onto the canvas. Once dry gets removed, stencil, bunch and
titanium white acrylic. And let's start
painting the morning. Darby white acrylic paint and killed entire
moon is covered. Once the centers cover it
and looks nice and textured, you can gently peel off
the paper stencil to reveal a nice motion.
And we're done.
9. Night Sky Painting 2 : Pine Trees Under Starry Night Sky: For this project, we will paint pine trees Under
starry night sky. Using gray, Prussian blue, and white acrylic, apply straight lines from
one side to another. Dip the brush into the second
column without glycine your brush off until we
fill the whole canvas with take some time to blend
the columns together. Continued to blend until you're
satisfied with your sky. Now, let's add the stars. First, the mute your
white paint with a little water and fuel the results of your toothbrush
with that thing you did. Picking finger and rub
the bristles above the canvas into page
each week of the brush. Using gray acrylic paint, the base of your trees. Using a very tiny round brush, beat the vertical lines, represent the trunk of the tree. And recommend watering down the black UCB to
help with the flow. God little marks
and keeps dumping the brush left and right
in a zigzag motion. And as you work your way down, make your T form a Whiting
sheep on the bottom. Be different height of trees
for a more natural look. Feed this many trees
as you want and don't bother trying to beat
them in a straight line. It's really an
osmosis army seems most GI transit
nature or incomplete. Okay.
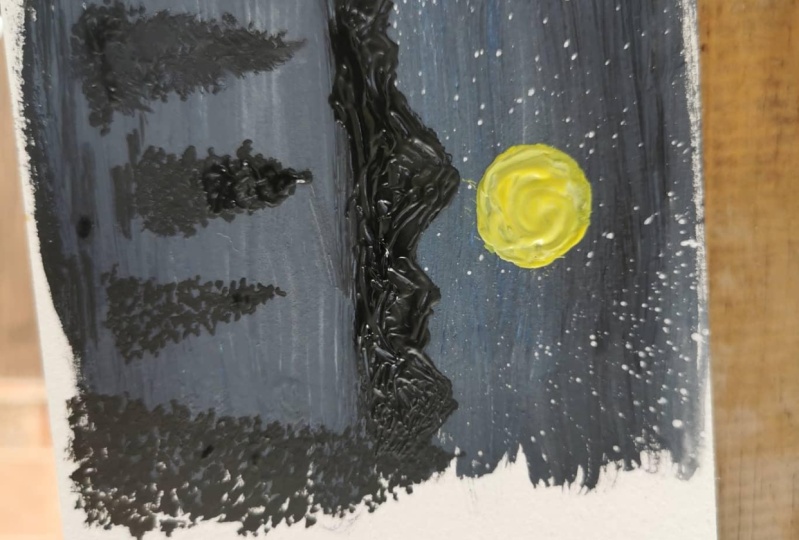
10. Night Sky Painting 3 : Full Moon Rising Over Mountain: For the last project, we will paint full moon
rising over a mountain. Let's paint the night
sky using black, violet, most read,
and shell pink. Then blend the colors
together while you still wet. From the top, dip the
brush into the next color. We don't crazy until
you reach the bottom. The stars using this
splattering technique, load up your brush with white
beef in using your thumb. Rob the B-cell to create tons of little speckles in your painting that will serve as stars. Once dry, getting more
stance, heel, spine, chin, think anymore with
acrylic and next part, bead wider. And Gilgamesh. Dab a little amount of
violet for texture. Once you are satisfied with
the color of your moon, you can gently peel off the paper stencil to reveal
a nice mountain sheep. Now we'll get ready to
paint your mountains. The mountains shapes with black acrylic based
talking downwards and just tried to worry the heights and beads of the mountain peaks in the entire area of the
mountains with the black.
11. Night Sky Painting: Final Output: Your night Skype meeting may not turn out like you
thought it would be, but somehow, just by
contemplating it, you feel lifted bytes it. Because the biggest benefit of this project is that it makes us go down and separate
the results from the stresses and strains
of everyday life. So I hope through this class you feel the charge and refresh.
 Kristine TS, Jill of All Trades