Transcripts
1. Introduction: This is a complete and structured
acoustic guitar basics course where we're going to
lay a solid foundation and then keep building on it
as the class progresses so that there's an organized and progressive flow to this course. Hello, thank you so
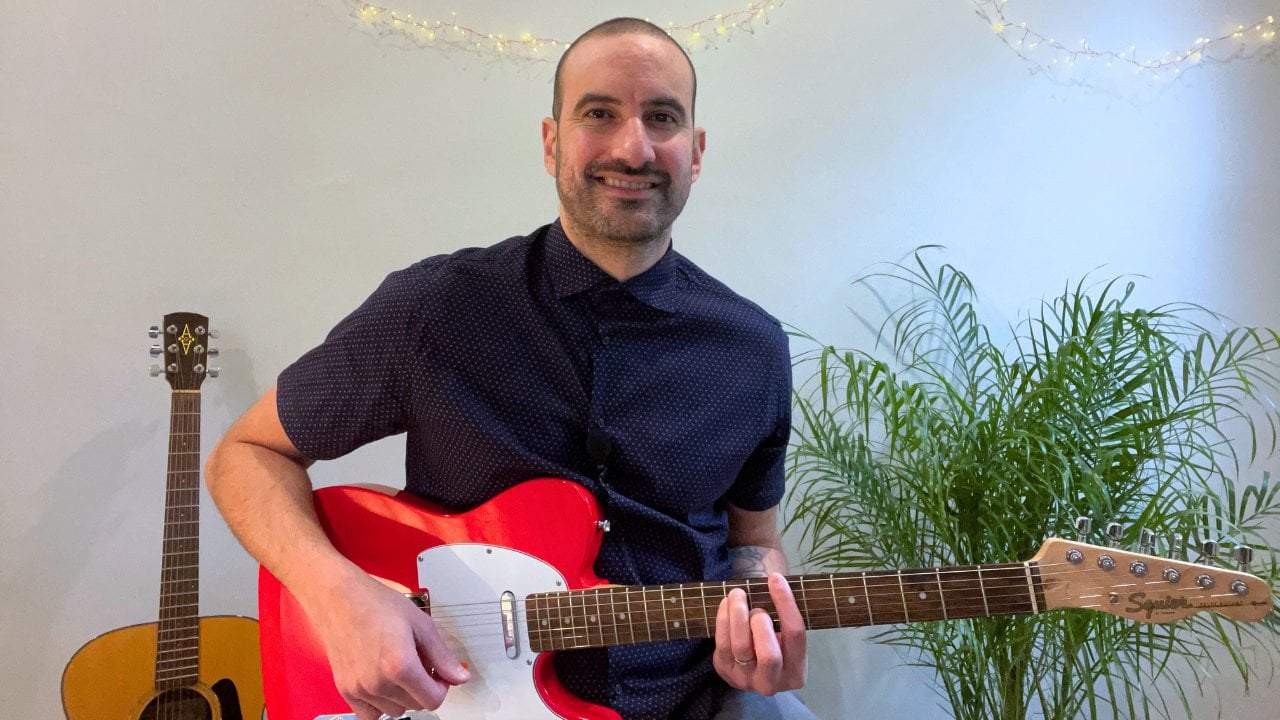
much for joining me. I'm Jason Rivera and
I'll be taking you through this acoustic
guitar basics class. In this class, I'll be covering
acoustic guitar anatomy. How to hold your
acoustic guitar and pick how to tune your
acoustic guitar. How to fret notes. How to read tablature,
warm up exercises. How to play five
acoustic guitar riffs. How pitch works on the guitar. To read chord diagrams. Seven open chords,
four power chords, strumming beats, and rhythm. How to play six songs. What 44 time means, your first scale and tips,
tricks and resources. The class will
give you plenty of opportunity to play
along with me. You'll have the
visual of me playing the various techniques, rifts, and songs in this class and I encourage you to play along
with me in the video lessons. I'm also going to
provide you with chord diagrams and sheep music. I've been playing and writing music since I was a small kid, and I've been teaching music to students ages five and up, including private guitar
lessons since 2012. I'm a full time
musician and composer. I've written music
for films, trailers, and E learning courses, and I've played in
bands and toured the US since I was a teenager. My goal with this
course is to teach you the beginner
acoustic guitar player, the basics of the instrument, including how to play several
essential guitar chords. So that you can move forward and learn your favorite
songs and rips. My hope is to make this
process fun and easy for you. I want you to start playing your acoustic guitar
as soon as possible. Thank you for
watching this intro. Now grab your acoustic guitar and I'll see you on
our first lesson.
2. Class Project: Hi. I'm so thrilled that
you join me for this class. I want to quickly explain
the project for this course. Throughout this class, we're
going to be learning some of the most essential acoustic
guitar chords and techniques. Once you've started to watch the video lessons
in this course, I'd like you to record
yourself playing any riff song exercise or technique that's
covered in this class. To record yourself playing, you can use an app
on your phone, such as voice memos or
something similar to that. Or you can try
recording yourself with music software such
as Garage Band, Logic Pro, or Cue Base. It really just depends on how comfortable you are
with computers and whether or not you want
to learn how to use music software if you
don't know how to already. One of the nice things about
dedicated music software is that you can record
multiple layers on top of one another. But even if you just use a
simple app like voice memos, please record yourself playing. Recording yourself
playing is a great tool, not only to capture
your creative ideas, but also to hear yourself
playing objectively. So that you can listen back to your recording and
make mental notes. Which things you need to focus on during your guitar practice. Please don't be intimidated
by this project. This is meant to be a fun project where you get to explore the acoustic guitar while you're developing
your skills with it. I can't stress enough just how
helpful recording yourself playing the guitar is for your own development
as a guitarist. Hopefully after watching
several lessons in this class, you'll feel confident enough
in the skills that you're developing to take part
in this class project. That's the intro to
our class project. I hope that you're
excited about it. In the next lesson,
we're going to talk about acoustic guitar anatomy.
3. Acoustic Guitar Anatomy: This lesson is about
the different parts of your acoustic guitar. The acoustic guitar
has three main parts, the body, the neck,
and the head stock. I like to think of it as a person with a body,
a neck and a head. The body can be broken
up into three areas. Upper bout, the waist,
and the lower bout. Usually the lower bout is
wider than the upper bout. The combination of these curves contributes to the overall
sound of the, your guitar. The lighter wood here is
the top or the sound board. The top, along with the back
of the guitar and the sides, contributes to the
tone of your guitar. When you pluck a string, the top actually
vibrates this way. The air moving both inside
and outside of the guitar is what hits our ears and what we interpret as the sound
of an acoustic guitar. Here we have the sound hole. The sound hole allows
the air from inside the body to escape while
the top is vibrating. Inside of the sound hole
is where there's usually information on the make and
the model of your guitar. You can see inside of
my sound hole here, there's a label with
info on this guitar. This is also where you can see the inside construction
of the guitar. Around the sound hole is this design element
called a rosette. Down here on the body,
we have the bridge. Sometimes you rest your hand
there for more stability, especially when working with
certain picking techniques. And sometimes you want
to rest your hand there to change the tone
of what you're playing. On the bridge, we
have the saddle and we have the bridge pins. Many acoustic guitars also have a pick card
like this one here. It's fixed to the
top of the body and it protects the wood
from pick scrapes. While you're playing here, where the top meets the sides
is what's known as binding. Binding usually has some
decorative element to it. At the end of the
guitar is the end pin. If you want to stand up
while you're playing, you hook one end of your
guitar strap onto the end pin. And then the other end of the strap loops around the
heads stock right here. On some modern acoustic guitars, there's also a strap
button back here at the heel and you can
hook your strap onto it. Next, let's talk about the neck. We have the fret board
or the finger board, which is the top surface of the neck and it's where we
press down on the strings. These pieces of
wire here that are embedded into the wood or the fretboard are
the fret wires, the spaces in between
the fret wires. These here are the
frets, this is fret one, this is fret two, fret three, fret four, fret five, and so on. Guitars usually have dots or some shape or design
on the fretboard. These are called
position markers, fret markers, or inlays. These shapes help us to find our place on
the neck quicker. I think of them as
landmarks on the fretboard. You'll see these
markers on frets 3,579.12 When you hit fret 12, there's usually two dots and then that pattern
repeats up the neck. At the end of the neck, on the back is the heel
or the neck joint. This is where the
neck meets the body. Over here we have the nut. The nut is the start
of the fretboard. You can think of
it as fret zero. Strings pass through the nut to attach to this piece
of the guitar. Here the heads stock, there
are six notches in the nut, one for each string
to pass through. Last but not least, we
have the headstock. Heads stocks come in a variety of different
shapes and sizes. These are the tuners, Each tuner has a post, These guys up here. The strings go through the post and then wind around the post. Then we use these tuning keys to change the pitch of
the string up or down. Those are the parts of
the acoustic guitar. Our next lesson, we're
going to look at how to hold your
guitar and your pick.
4. Hold Your Guitar and Pick: This lesson is about how to hold a guitar while
sitting down, and how to hold a guitar pick. First, let's talk a
little bit about posture. The most important thing
is that you stay relaxed. You want to sit up nice and straight at the
edge of your chair. Your feet firmly on the ground. We want to be relaxed, but also sitting up straight. You want to keep your
shoulders nice and loose. You want to make
sure that your seat doesn't have arm rests, so that you're free to move your arms and your
guitar around. There are some designs
of guitars that can be a little bit
awkward to hold. Hopefully your guitar has
a nice curve right here. This way it'll rest
nicely on your leg. Rest your guitar
on your right leg, and then hug your guitar
close to your torso. Then you want to
drape your right arm over the guitar and that will give you some
extra support. When I'm teaching
private lessons, I often see students doing
this with their guitars. They're holding it away
from their torso so they could see the fret board and
what they're playing easier. While it can be
tempting to do that, it's not a great habit when your guitar
is flat like this, your tone is just not as good. You can't project as well
because your sound is actually pointing
towards the ceiling instead of pointing
at the audience. It puts your left hand in
a really awkward position. Over time, it actually could
injure your left hand. Always try to remember
to keep your guitar hugged into your
torso, just like this. Then you want to
aim the guitar neck out on an angle
just a little bit. You want to make sure your
head stock is just a tiny bit higher than parallel
to the ground like this. Your left elbow should be
below your left wrist. Next we're going to look at
how to hold a guitar pick. Sometimes you'll hear these
referred to as a plectrum. To hold a pick properly, we're going to use our thumb in our index finger
of our right hand. We take our index finger and we bend the
knuckle like that. Then we take the pointed
side of the pick and you want to have it pointing
away from your right hand. You place your pick
on the side of your index finger and then
grip it with your thumb. You want to have some
flexibility in the pick, but also some control. Don't put too much
pressure on the pick, just the medium amount of pressure so that
you don't drop it. Then you want to keep your
wrists nice and loose. There are other ways to hold a pick to achieve
certain techniques, but this is the main way that I want you to learn
how to hold a pick. One of the main reasons
being that this will help you to avoid
dropping the pick. There are different
thicknesses of picks. Thicker picks allow
you to dig into the strings and are
great for lead guitar. Really. Picks are more flimsy but they're great
for playing chords. I like to use a 60
millimeter pick. This is a medium thickness pick, It's a great pick to start out with, it's really versatile. When you're strumming, aim to strum down the middle
of the guitar. On my guitar here,
that's about right here. You can experiment with different tones by
playing closer to the bridge or closer
to the fretboard. Hopefully you can
hear that there's quite a difference between
playing in those two areas. In this lesson,
we covered how to hold a guitar while
sitting down, how to hold the pick,
and where to strum. In our next lesson, we're going to learn how to
tune your guitar.
5. How to Tune Your Guitar: In this lesson, I'm
going to show you how to tune your guitar
using an app. Tuning, especially for beginners can be a little bit confusing, but it's really easy once you
get the hang of it and it's really essential to sounding
good. Let's get into it. Make sure to always tune
your guitar before playing. The first step is
to get a tuner. There are many types of tuners
and tuning apps out there. I recommend the Fender Tune app, which is free and available for IOS and Android for
your phone or tablet. I like Fender tune because I find that it's really
straightforward to use. And it also has a
nice design to it. Also, most digital audio
workstations such as Base or Logic Pro have built
in tuners that you can use. I also recommend that you get
yourself a headstock tuner. It clips right onto the
headstock of your guitar. When you turn the tuner on, you can see which
notes you're playing. One nice thing about a
headstock tuner is that it operates by picking up the vibrations of the string
that you're plucking. Even if you're in a really
noisy room or at a gig, you can still tune accurately. A standard guitar has six strings and each one is
tuned to their own pitch. There are many different tunings that we can tune our guitar to, but in this class we're going to be looking
at standard tuning. If we start with
the thickest string closest to the ceiling, which is the sixth string, that's the next one. The fifth string is A.
The fourth string is D. The third string is A. The second string is
the first string is. We can use a really
simple phrase to help us remember what note each string is supposed to be tuned to. If we start from the
thinnest string, you can use the phrase, Easter bunnies get
dizzy at Easter. You can also come up
with your own phrase to help you remember
the string names. The more ridiculous
the phrase is, the more likely you
are to remember it. Something worth mentioning at this point because it's
relevant to tuning are the term sharp and flat
when it comes to tuning. If something is too sharp, it means you've
gone too high and pitch and pass the note that
we're trying to tune to. If a note is flat, we haven't
tuned high or tight enough, or we've tuned the
string too far down, or you could also say that
the string is too slack. Before we start tuning, let me give you a really quick
tour of the Fender tuna. I want to do this to make sure you have the right
settings to tune with. I've opened up the app and I click on Auto Tuner at the top. Then in the top right corner, there's a little icon
with three sliders. I click on that and it
opens up the tune settings. Then down below I
select acoustic. You can also use
the chromatic mode setting up here if you'd like, But to avoid confusion
for beginners, I recommend just selecting the acoustic setting down below. If I scroll down a little bit, you'll notice that the
tuning is set to standard. That's what you'll
want to set it to. I had done in the
top right corner, and I'm all set as a heads up. I've purposely
detuned a few strings here so that you can watch
me dial the tuning in. We're going to use
the fender tune app, and we're going to start
with the lowest string. We can see that this string
is too loose or flat. What you want to do here is
follow that low string up the neck so that
we can see which tuning peg the string
is connected to. Just follow it all the way up. This way you can make
sure that you're turning the correct tuning peg. It's this one right
here for the low E, so I'm going to tighten it
up since the note is flat. And I'm going to turn
the tuning peg towards, this way towards the head stock. And eventually we'll get to, I'll just pluck the
string, let it ring out. While I'm gently turning the tuning peg. There we go. If you're using fender tune, it will tell you when you're
in tune by flashing green. When you're tightening a string, be sure not to tighten too much or you could
snap the string. The next string is A. This one's also flat. So we're going to
do the same thing. We're just going to follow the fifth string all the
way up past the nut. And then that's the
tuning peg right there. We're going to turn that one. So again to sharpen it, I'm turning the tuning peg
this way towards the head doc. I'm making very slight turns. There we go. The next
string is D. Let's check it out that one's actually in tune so we don't have
to do anything to it. The next string is, again, just as a reminder, follow that third string all
the way past the nut. This way you can figure out
which tuning key you need to turn for the G. It's
this one up here. Now I need to mention
that on acoustic guitars, you usually have three
tuning pegs on this side of the headstock and three tuning pegs on this
side of the headstock. If the strings on your
guitar were put on properly, that means that for
the three strings, 45.6 you turn the tuning peg to the headstock
to tighten them. For strings 12.3 on this
side of the headstock, you turn the tuning pegs
towards the bridge, this way to tighten them, since this string is flat, I'm going to turn the
tuning peg towards the bridge of the guitar to tighten it and to
bring it into tune. When you get really
close to being in tune, then your turns on the tuning keys need
to be really subtle. There we go. The
next string is now, with this one, it's too sharp, so that means that
it's tuned too tight. So we want to flatten the note by turning
the second string tuning peg towards the head
stock of the guitar this way. Oh, there we go again. If your notes are close
to being in tuned, then your turns on the tuning pegs need to be
really small and subtle. The last string is the high, this one's also too sharp. There we go. I use the
fender tune app here, but you can also use
a headstock tuner. Now our guitar sounds beautiful
and in tune over time. The more that you tune, the more sensitive your ears
will become and you'll be able to hear when your guitar is even
slightly out of tune. In this lesson, we
covered how to tune our acoustic guitar
using a tuning app. And we learned a simple phrase to remember our string names. At this point in the class, I want you to make sure that
you get yourself a tuner. And then use this lesson
to tune your guitar. And the next lesson,
we're going to learn how to fret
notes properly.
6. How to Fret Notes: This lesson is about how to fret notes properly on
your acoustic guitar. This is an important topic because it affects
your tone so much. In this lesson,
we're going to be focusing on our fretting hand. We need to know where to press down on the fret
board when playing, whether you're playing a
chord or single notes. You want to press your fingers down right behind the fret wire. That'll give you a
nice clean sound. And it actually makes it
easier to play the guitar. Let's try it on a chord. If you're pressing down too far, back away from the fret wire, the string starts to buzz. If you're pressing down
on top of the fret, you're going to actually
be muting the string. You just want to slide
your finger back a bit until you're right
behind the fret wire. You can hear how the tone
cleared up as I moved my hand towards the
headstock. Give this a try. Place your index finger
on the first fret of the thinnest string closest
to the ground string. Number one, the high E string, just strum down and make sure that you have a nice clear tone. Here are some tips. In order
to get a nice clear tone, you want to squeeze
your index finger and your thumb together. Your thumb should be
pointed up behind the neck, like this, like you're
giving someone a thumbs up. Then you want to fret the note right behind the fret wire. Also, when you fret notes, you want to try to
use your fingertips to press down on the strings. This brings me to another tip. If you have long fingernails
in your left hand, you're going to want to cut them back as short as possible. If you have long nails,
they're going to get in the way of
fretting notes. For those of you that
like to have long nails, I'm, there's no way around it really long nails
on your left hand. They'll just get in the
way whenever I have a private guitar student
and they're having trouble either holding down chords or
playing melodies or riffs. I go through those four tips because it's usually any one or a combination of those
tips that will get them playing clearer notes
with less effort. In this lesson, we
covered how to fret notes properly on
your acoustic guitar, and we went over specific
tips to help us with this. The next lesson we're going to learn how to read tablature.
7. How to Read Tablature: This lesson is an introduction
to tablature, or tabs. You can think of tab as a shorthand form
of reading music. Once we learn how to read tabs, we can unlock how to
play different rifts, melodies, and chords
on the guitar. Tab is a number system and it tells us where to place our
hands on the fret board. When you look at Tab on paper, the first line represents
the first, the high string. Second line down represents the second string, the B string. Then we have the third
string, the string. Then we have the fourth
string, the string. Then we have the fifth
string, the string, and then finally
the sixth string, the low E string is
down at the bottom. It's as if you laid your guitar in your lap and you're
looking down at it. Each line on the tab represents
a string on the guitar. The numbers you see going across the tab represent a fret. We read these numbers
from left to right. For example, zero means
to play a string open. If you saw a zero on
the fifth line down, you'd play the A string open. If you saw a three on
the fourth line down, you'd play the third
fret of the D string. If you then saw 22 on
the second line down, then you'd play the string
twice on the second fret, you'll notice that there's also a line going down
the middle here, that's called a bar line. The music between
the bar lines is called either a
bar or a measure. Now let's read and play a
couple of tab examples. This is example one. Let's play bar one. So we're
going to play a string six, then a zero string five, then a zero string four, and then a zero on
string three, okay? Pretty simple. Now,
on to bar two. We're going to play
the second string, first fret, and then the
second string, second fret. Then we play the first
string first fret, and the first string third fret. Now let's look at
an example where we play more than
one node at a time. When you're playing two or
more strings at the same time, the fret numbers are stacked
on top of each other. This is how you'll see
chords written tablture. Let's check out our second
example here, and bar one, we're playing the fifth and
sixth string together open. Then in the next measure, we have the third and the fourth strings
played together open. Then in the last measure, we have strings one and
strings two together open. In this lesson, we
covered how to read tabs. I hope that this intro to
tabs is making sense for you. The more that you read tabs, the easier it'll
be to read them. And we'll use tabs
throughout this course. It'll get easier and easier
for you to read them as we progress through the
material in this class. The next lesson,
we're going to play a couple of warm up exercises.
8. Warm Up Exercises 1 & 2: Okay, in this lesson, we're
going to get into a couple of really nice warm up
exercises to get us loose and more comfortable with the fret board and
with picking notes. So I'm going to remind
you here about what I mentioned in an earlier lesson
about finger placement. You want to place your
fingers down on the fret, right behind the fret wire. Also, I recommend tapping your foot while you
play these exercises. And this will help you to
keep a nice and even rhythm. Just like this, I'm just
tapping my right foot. With this first exercise, we'll be playing on the first
string, the high string. We're going to play the first
string open four times, then press on the first fret with finger one or index finger, and you want to play
that four times. Then we're going to
use our second finger, our middle finger, and we're going to press down
on the second fret. So far we've got open first fret and then second fret. Then we're going
to add our third, our ring finger onto
the third fret. Finally, we'll put our fourth, our pinky onto the
fourth threat. Now I should mention here that it's quite a stretch
to put your pinky onto the fourth threat while keeping the first three fingers on
the first three threats. Like I am here, I
have pretty big hands and it's easy for me to stretch my pinky to
reach the fourth threat. If you have to
lift three fingers off the fretboard to reach
your onto that four, that, that is totally okay. I want you to make sure that you use your pinky
for this exercise. Because the pink tends to be the weakest finger
for most people. You need to develop strength
and flexibility in it, and the only way to do
that is by working it. So this is the whole warm
up exercise put together. If you notice, there's a repeat
sign surrounding measures 1.5 So you want to play the entire exercise
at least four times. Why don't you try playing
this along with me. I'll count us in 1234. With your strumming hand,
you can keep it simple and use all down,
just like this. Also you want to make sure that your thumb is pointing
up towards the ceiling, just like you're giving
a thumbs up to somebody. Placing your thumb on
the neck like this makes it easier to stretch
your fingers across the board. So with this exercise, you
want to take it really slow, as slow, and even as possible. If you're using a metronome, you can try setting
it to around 60 beats per minute If this
exercise is feeling good, you can also try extending
it by ascending up the fretboard from the open
string up to fret four, like we did in our
first exercise. And then descending down the fretboard starting from
the fourth fret, we go. So this second exercise in its
entirety sounds like this. Now I want you to
try this with me. I'll count us in 1234. There are two great warm
up exercises to stretch your fingers and to build flexibility and strength
in your fretting hand. I recommend playing these
exercises at the start of your practice session for
a couple of minutes each. In this lesson, we learn two great warm up exercises
to help our hand. The next lesson, we're
going to learn our
9. Riff 1: Okay, in this lesson,
we're going to learn how to play
our first riff. Here's what it sounds like. This riff is played entirely on the low E string
and we're going to use all down strums
in our right hand. We're going to start by
pressing on the sixth string on the fifth fret with our
first the index finger. We're going to play
that four times. Then we move up to
the seventh fret with our third finger,
our ring finger. We play that four times. Then we move to the
third fret and press down with finger one, our index. We play that four times. Then in the last measure, we stay on the third
fret for two beats, and then release
our first finger to play the opening for two beats. If we put that together,
it sounds like this. Once you've got that down, then you want to
play it four times. Let's try that together. I'm goning to speed
it up a bit, 1234. So there's your first riff. Congratulations. In this lesson
we learned our very first F. And the next
lesson we're going to learn about how pitch
works on the guitar.
10. How Pitch Works: In this lesson,
we're going to learn how pitch works on the guitar. A pitch is the sound of a note. On the guitar, we have a
range of high pitches and low pitches in Music Pitch can move down, or
it can move up. Let's start to look
at how this works on the guitar by exploring
one string, the A string. When we're playing
notes that are moving towards the headstock, they're going lower in pitch. They're descending. Let's
take a listen to that. Notes moving towards
the bridge of the guitar are ascending. They're moving up and pitch and getting higher. Let's
listen to that. As you move on the fretboard
towards the bridge, notes are going higher. As you move on the fretboard
towards the heads, notes are descending
and getting lower. Now we also have to look at
the other way that pitches move up on the fretboard. Now we're looking at playing across the strings
in this direction. The notes on the low
string, the sixth string, moving towards the high string, are moving up and pitch. I'm here on the six
fret and I'm just going to walk across from the sixth string to
the first string, one string at a time. Hopefully you can hear that the notes are going up and pitch and getting higher as I change
strings towards the high. If we play notes from the
first string, the high string, towards the sixth string, the low string, we're moving down and pitch
we're descending. Now let's explore one note A in different places
on the fretboard. First we'll find an A on
the string seventh fret. Now we're going to move
and we're going to find a higher up in pitch. We're going to move
to the 14th fret. This second A is
higher in pitch. We've moved towards the bridge, but we've also moved higher
towards the first string. Let's play the A on the
string Seventh Threat again. From there, let's find a lower pitched a note on
the six string. Fifth threat, right here. I've moved down towards the
head stock in this direction, but I've also moved down
towards the sixth string. A is lower pitched
on the six string. In this lesson, we learned a broad overview of how
pitch works on the guitar. If you're a beginner player, please spend some time
with this lesson. It will help you to
better understand the fret board and it will
free up your playing. Our next lesson, we're going
to learn another riff.
11. Riff 2: In this lesson, we're
going to learn how to play another rif
on the low string. Here's what it sounds like for this riff, we're only
playing on the low string. We play the open A
string three times. Then on beat four
of measure one, we play the third fret of the low string with our first
finger, our index finger. Then in the next measure, we play the open low E string again and let that bring
out for four beats. Then in measure three, we play the third fret of the low string again and let that ring
out for three beats. Then on beat four
of measure three, we play the sixth
string third fret again and let that ring out for
an additional four beats. If we put those four measures together, it sounds like this. With your strumming,
you should be using all downs strums in the rhythm. We have whole dotted, half, and quarter notes. We'll get into more
detail later on in the class in terms
of rhythm and counting, but let's go measure
by measure and just quickly talk about
the rhythm of this Th. Measure one we have
four quarter notes. And measure two, we
have one whole note. Measure three, we have
a dotted half note, which is equal to three beats, followed by a quarter
note on beat four. Measure four, we just hold the quarter note
from beat four of measure three and let
it continue to ring out for all four beats
of measure four. This rhythm is a whole note tied to beat four
of measure three. Let me play measure
three into measure four. Use your ears and
read the tab that I've created as a
reference for the rhythm. Okay, so now that we've gone through this F
measure by measure, let's play through it four
times together. Here we go. 1234, Nice job. You can probably hear me tapping my foot to help keep
a nice, steady pace. I'm just with my right foot. As I play, I encourage you to tap your foot while
playing this riff as well. I think you'll find
that it helps you to keep a nice, steady rhythm. Okay, I hope that this is all
starting to click for you. You can always go back and rewatch any parts of this
lesson that you need to. In this lesson, we
learned another riff, and we started to learn about
different types of rhythms. Our next lesson,
we're going to learn how to read or diagrams.
12. Reading Chord Diagrams: In this lesson,
I'm going to show you how to read chord diagrams. When we're learning
chords and songs, we're going to be
using chord diagrams, sometimes these are
referred to as chord boxes. A chord diagram is a
representation of the fret board, and they're drawn as if the
guitar is held up like this. The vertical line on
the left hand side of the core diagram is
the thickest string. The six string. The
vertical line on the right side is the thinnest
string, the first string. There are six vertical
lines on the diagram, and each of those lines
represents a guitar string. The thick line at the top of the diagram represents
the nut of the guitar. The horizontal lines beneath the nut represent
each of the frets. We have fret one, fret two, fret three, fret four, fret five, and so on. The notes that are fretted are represented by circles
with numbers in them. These circles are placed on a specific fret and
a specific string. The numbers inside of
the circles represent the suggested finger that you should use to fret the note. The fingers are numbered
one through four. Your index finger is one, the middle finger is two, the ring finger is three, and your pinky is four. The finger numbers on the
diagrams are recommendations. Sometimes I'll use different
fingers for a chord if it's more efficient or it's
more comfortable for me. Also, sometimes
you want to adjust the fingers that you're
using because it just makes more sense moving from one particular cord to another. But the red diagrams that
I'll be showing you in this course will have the
recommended fingerings on them. And it's best to try and
stick with those at first. With many chords, you'll see these Xs and Os above the nut. X means don't play that string, and O means to play that string
open without fretting it. Here's an example,
the A minor chord. The X above the six string
means don't play that string, the O above the fifth string. And the first string
means to play those strings open and
let them ring out. In other words,
play that string, but don't fret that string, just let it ring out
and resonate open. You'll see these Xs and Os, almost every chord diagram. When it comes to the Xs, that symbol is telling us
not to play that string. And you can do that
in a couple of ways. You can avoid playing
that string altogether. Or you could use your thumb or one of your fingers
to mute that string. Muting with your
thumb or fingers gives you a bit more freedom
with your strumming. For example, with
an A minor chord, I use my left hand thumb
to mute the six string, that six string
with the X above, it won't ring out when I'm
playing that a minor chord. It just gives me more
freedom with my strumming. In this lesson, we
covered how to read core diagrams and we learned the finger numbers of
your fretting hand. Make sure that you download the supplemental materials for this class where I've included core diagrams for you to review. Have a little patience with yourself through this process. Once you get the hang of
reading core diagrams, it will become second
nature for you. Our next on, we're going
to start learning about.
13. Introduction to Chords: In the next several lessons, we're going to focus on
learning our first chords. These chords are
going to be played in the first position covering
the first three frets, and these will be open chords. In this class, the
goal of learning these chords is to be able
to play songs with them. We'll learn these
chords and then apply them to learning
several new songs. These are some of
the most essential chords that we need to know to be able to play lots of
songs moving forward as well. The upcoming lessons will
focus on these chords. I highly encourage
you to Google search these chords and
you'll be able to find more songs that use them, including ones by your
favorite artists. This way, you'll be
applying the chords to learn songs that you
know and that you love. Our next lesson,
we're going to start learning your first
chord, E minor.
14. E Minor Chord: In the next handful of lessons, we're going to start
learning our first chords. A chord is a combination of different notes played
at the same time. In order to do this
on the guitar, you strum more than
one string at a time while forming various shapes
in your fretting hand. You might be asking yourself, why is it useful to
learn these open chords? The chords that
I'm going to teach you in this class will help you to start to build your
vocabulary of chords. Learning chords will
open up hundreds, if not thousands, of
songs for you to learn. In this lesson,
we're going to learn our first chord, E minor. Here's what it sounds like.
To make the minor cord, we only need two fingers, which is why this is
a great first cord. To learn, we put
finger number one, our index finger, on the
second fret of the A string. Our second our middle finger on the second fret of the D string, we strum all six strings. Make sure your fingers are arched off of the open strings, and that your thumb is
pointed up behind the neck. You want to bend your knuckles and press down with the tips of your fingers right behind the fret wire as
best as you can. Just apply enough pressure with your fingers to have
the sound ring out. This chord uses a
lot of open strings. That also is why it's a
good first chord to learn. Let's practice this chord by taking our left hand
off of the guitar, and then try building
the E minor again. Your first finger goes to the second fret of the A string, then your second finger goes to the second fret of the D string. That's how you play the minor. As I mentioned, you
want to press down on the strings with the
tips of your fingers. This can be painful at first. Just make sure to take
breaks from playing. Eventually, you'll build
up calluses like I have right here
on my fingertips. Once you have calluses, it'll be easier to hold
down your cord shapes. Also, you don't want
to accidentally mute strings that you're
not pressing down. This usually happens when
your fingers are flattened, which I'm doing on purpose here. If you try to just focus on
pressing on your fingertips, this will help if you're
having this issue. You can hear how that
very small change makes a big difference
in the sound. Also, you want to make sure
that you have some space between the palm of your hand and the fret board right here. If you're playing
on your fingertips, that'll happen automatically. You also need to build up
strength in your fretting hand, and it will probably
be uncomfortable to hold down chords
in the beginning. Like I mentioned, just
take breaks from playing and you can even try shaking
your hand out and just rest, take breaks if your chord
is not ringing out clearly. You can also cross check that each string is sounding
properly one by one. In this case, you want to start
with the sixth string and work your way to the first
string one at a time. After practicing for a while, each string should
ring out nice and clear if your chord is
not sounding clear. Also double check that
you're fretting the notes right behind the frat
wire as best as you can. In this lesson, we learned
our first chord minor. I want you to practice
this chord by taking your left hand
off of the guitar. And then try building
the E minor again, exactly how we did
in this lesson. What we're doing with this
little exercise is building up our muscle memory to be able to eventually form the chord
shape really quick. As a reminder, don't
forget to download the core diagrams that I've included with this class
for your reference. The next lesson we're
going to learn the decord.
15. D Chord: In this lesson,
we're going to learn how to play the D major chord. This is another open chord and it's a really important
one to learn, since it's used
in so many songs. Here's what it sounds like. The D chord uses three fingers. It's a chord where
your fretting fingers are bunched up a little bit. You'll have to get used to
playing it to play this chord. You put finger one on the
second fret of the G string. Finger two is going to go on the second fret
of the high string. Then finger three is going to go onto the third fret
of the B string. And then you strum down
from your open D string. The forward string, your cord. Probably won't sound clear
when you're first trying it, but there are some
things to look out for to help you with this. Remember to place your
fingers right behind the fret wire as
best as you can. Also be sure to arch your
fingers and play with your fingertips so that you're not accidentally muting strings. When you arch your
fingers like this, it would also help you to apply
just enough pressure with your fretting hand so that
the strings ring out nice and clear without
straining your left hand. As a reminder, just like with the first core
that we learned, you can always self diagnose any problems by picking
each string individually. And then you can look
at your fretting hand and see where any
problems might be. Maybe you're pressing down on the fret wire and that'll
of course cause muting. You want to press the string down right behind the fret wire. So I'm just going to slide
all three of my fingers, just the hair towards the
headstock there it is, nice and clear, just like we
did with our first chord. Let's practice this cord by taking our left hand
away from the guitar, and then try building
the D again. Practice this cord to
get comfortable with it. We're going to be
linking it with other chords in the
upcoming video lessons. In this lesson, we
learned the cord, and now we've
learned two chords. And we're building up
our chord vocabulary. The next lesson we're going
to learn our third chord, C. Let's jump right
into that now.
16. C Chord: In this lesson,
we're going to learn how to play another open cord, the C major cord.
Here's how it sounds. We'll use three fingers
to play this cord. And you have to stretch
your fretting hand quite a bit across three frets
in this direction. To build a C cord, add finger one to the first fret
of the B string, then add your second finger to the second fret of the D string. Then we add our third finger to the third fret of the A string. Then from the string towards
the first string, the high. Make sure all of your strings are ringing out nice and clear. If not, remember to arch your fingers and play
in your fingertips and make sure your
thumb is straight up behind the neck.
Let's drum it again. Now let's take our
left hand away from the guitar and
build the C again. Finger one goes onto the
first fret of the B string, F two goes onto the second
fret of the D string. Then finger three goes onto the third fret of the A string. And we're going to strum from the A string towards the
first string, the high. Make sure you're patient with yourself when you're
learning these chords. This C chord in particular takes some time to
get used to playing. You're stretching your fretting
hand across three frets. Just build the chord one
finger at a time and be patient as you build up your fretting hand
strength and flexibility. Once you've been playing
guitar for a while, you'll start to discover that
you don't actually need to apply too much pressure with
your left hand to get nice, clear notes out of the guitar. But again, that comes with
time and with practice. In this lesson, we learned
another new chord, C. Remember to download the core diagrams that I've attached to this class
for your reference. The next lesson
we're going to learn our fourth chord.
Let's jump right in.
17. G Chord: In this lesson, we're
going to learn how to play another open
chord, the chord. There are some variations as to how you can play the chord, but in this lesson, we're
going to focus on learning the most standard version.
Here's how it sounds. To make the chord shape, we place finger one on the
second fret of the A string. Then we take finger
two and place it on the third fret of
the low string. Then you place finger three on the third fret
of the high string. Then you want to strum
all six strings. That's the most common
way to fret the cord. I'm going to give you
an alternative way of creating the cord. You place finger one on the
second fret of the A string. Finger two goes onto the third
fret of the low E string. Then you place finger four, you're pinky on the third
fret of the high string, then you still all six strings. This alternative way of creating the cord is a version that I often use switch back and forth between these
two different versions. Feel free to learn both
versions if you'd like, but first I want you to learn the first version that
I just taught you, the version that
uses finger three. The reason for that is that
using finger three for this cord is helpful for
stretching your fretting hand, especially when you're
just getting started. This cord is also a little
tricky because it requires you to stretch your hand across the fretboard in this direction. If you stick with it over time, your left hand will become
more flexible and stronger. Remember to play on
your fingertips so you don't unintentionally mute strings and apply
just enough pressure with your left hand to have the strings ring
out nice and clear. Let's practice this by taking our left hand off
of the guitar and then try building
the again finger one goes onto the second
fret of the A string. Your second finger goes to the third fret of
the low string. Your third finger goes on the third fret of
the high string. Then you want to
all six strings, practice taking
your hand away from the fret board and then forming the G as
quickly as you can. Just like with our other
chords that we've learned, we're building muscle memory in our fretting hand and getting comfortable with this
G chord will also allow you to play many
of your favorite songs. As a reminder, if you're having problems
with the G chord, you can always self diagnose the chord by picking
each string one at a time when first
learning the cord. Because your hand is
stretching across the neck, you'll probably be muting
strings unintentionally. As a reminder to help with this, just try to play on
your fingertips. Be sure to practice this cord
to get comfortable with it. In this lesson, we learned
another essential open cord, the D. In the next lesson, we're going to learn about
strumming beats and rhythm.
18. Strumming and Rhythm: We're almost ready to
play our first song, but first we're going
to cover strumming. To do this, I'm
going to introduce just a tiny bit of music theory. But don't worry, I'm
only going to touch on enough music theory to enable
us to play popular songs. At the foundation of
strumming is posture. Earlier in this class, I talked about posture when
playing the guitar. Please refer back to that
lesson if you need to, And make sure that you're using good posture when you're holding the guitar
and strumming. And also in that
same video lesson, I demonstrated how to
hold a guitar pick. Definitely, go back and
rewatch that lesson. If you need a refresher, once you're in a good posture, you're relaxed and you've got
a good grip on your pick. Let's try strumming with all down strums in
the right hand. We'll just let the
fretting hand relax, or we can use it to mute the strings by gently
touching all six strings. We're just moving
our strumming hand down towards the floor. Most of this movement is
actually coming from your elbow, and your wrist is just
nice and relaxed. This is called a downstrmow. Let's try strumming in
the opposite direction. That is called an upstrow. Let's try combining the downstrm
and the upstrm together. We're just alternating up, up. While strumming this pattern, you can count 1.2
and 3.4 and 1.2 and 3.4 And this down up pattern is one of the most useful
strumming patterns to learn when you're
starting out. Now let's talk a
bit about beats. You might have heard musicians count each other in with 1234. These counts or
beats are references that allow us to play
with other musicians. These beats are
grouped together and what are called
bars or measures. Usually these beats
are in groups of four. In most songs, you
count 12341234. Another way of saying
that is that in most popular music there
are four beats per bar. We make note of
that with something called the time signature. The most common time
signature is 44. There are many other time
signatures out there, such as 142-434-5468, et cetera. For now, we're going to focus on 44 times because it's so
common in popular music. Let's count some beats
together in 44 time. Here we go. 1, 2, 3, 4, 1, 1, 2, 3, 4, 1, 2, 3, 4, 1, 2, 3, 4. Now let's dive a little
bit deeper into rhythm. Let's talk about different types of rhythms that we might play. Let's start with whole notes. A whole note is equal to
four beats in 44 time. That takes up all
the beats in 1 bar. To play a whole note,
we strum on beat one, and then let the note ring out, while we count 1234. Let's try this out. Let's form the minor chord that we've already
learned in this class. Remember to play minor. Our first finger goes to the
second fret of the A string. Then finger two goes to the
second fret of the D string. And then you want
to strum all six strings to play a whole note. You want to strum
down on beat one of the bar and then let
it ring out while you're counting the
rest of the beats of the measure, like this, 1234. Now let's try this together. I strongly suggest counting out loud while you
do this exercise. Okay, here we go. Grab your E minor chord,
and I'll count us in. 12341234. Great job on whole notes. Now let's play some half notes. Half notes are equal to
two beats, or two counts. To complete a measure,
you need two half notes. You need to strum down
two times per measure. For example, 1234. Okay, let's play
half notes together. We'll play the minor
chord count out loud, and play a downstrm on beat one and beat
three of the measure. Here we go, 1234234. Okay, Now let's play
some quarter notes. Quarter notes are
equal to one beat. 1 bar has four quarter notes
to it, It sounds like this. 1234. Okay, try this with me. Grab the minor chord, and we're going to strum
down 44 notes per bar. Don't forget to count
out that with me. 1234234. Okay, now let's play
some eighth notes. If we break a four note in half, we get an eighth note. Eighth notes are equal
to half of a beat, so there are two eighth
notes in one beat. So 1 bar has eight eighth notes to
it, It sounds like this. 1.2 3.4 Okay, try this with me. Find your minor chord, and then we're going to strum
eight eighth notes per bar. Don't forget to count out loud, when you strum eighth notes, you're going to want
to use the 1.2 and 3.4 And counting that
I mentioned earlier, even though here
we're going to be strumming all downs
strums. Here we go. 1.2 and 3.4 and 123.4 Great job. What we're doing in
this lesson is we're practicing finding
and feeling the beat. And we're becoming aware of how the beats are
organized into bars. This skill is essential
when learning songs and when playing
with other musicians. It tells you how long you
should stay on a chord and how many times to strum
each of those chords. You'll be really glad that
you're taking the time to learn about these rhythms
and to practice them. These rhythms are at the heart
of playing so many songs. In this lesson, we learned about strumming
beats and rhythm. In the next lesson, we're
going to learn our first song.
19. Song 1: In this lesson, we're going to learn how to play
our first song. It's a song that I've written specifically for us in this. And we're going to
use four chords that we've already learned in
our previous video lessons. Here's what the
song sounds like, make sure you're tuned up
and let's get started. First, we're going to play
E minor for this song. We're going to keep
it very simple and just use all downstrums. We're going to play
eight eighth notes per, except for the last measure where we're going to
play a whole note. So we start on a minor chord, then the next chord is C, and the same rhythm
we're going to play eighth notes on
using all downstrms. The third chord is, again, we're going to play
eight eighth notes on. Then we play eight
eighth notes on D. Let's hear that entire
pattern played together. Then we start that
entire pattern starting on E minor
all over again. And then we end on the
whole note on E minor. Remember, you want to
stay nice and relaxed in your shoulders and also
in both of your wrists. I suggest that you tap
quarter notes with your foot while playing,
like I've been doing here. Again, this will help you
to keep a steady rhythm. 1234, Okay. Now we're going to play through the whole song together
without stopping. We'll go nice and slow, and I want you to try and play
along with me. Here we go. 1.2, 3.4, Congratulations on
learning your first song on the acoustic guitar. And the next lesson we're
going to learn about 44 times.
20. 4/4 Time: In this video lesson,
we're going to cover 44 times 44 is a time signature. You'll find a time signature at the beginning of any
written sheet music or tab. A time signature is two numbers stacked
on top of each other. Like this, it looks
like a fraction. A time signature helps us to
organize beats into bars. The bar lines here
help us to know where 1 bar ends and the
next bar starts. 44 is extremely common
in popular music. The top number tells us how
many beats are in a bar. The bottom number
tells us what type of note is equal to one beat in 44. The top number tells us we
have four beats in the bar, and the bottom number
stands for a quarter note. In other words, the
quarter note is equal to one beat in 44. We can have different
note types, such as eighth notes, quarter notes, half notes, and whole notes for example. But they'll always add up
to four beats per measure. In this lesson, we
learned about 44 times. I'll see you in the next lesson, where we're going
to learn how to read tablature with rhythm.
21. Reading Tab with Rhythm: In this lesson, we're
going to learn how to read a form of tablature
that includes rhythm. Tabwith rhythm is really helpful because it's a more
specific form of tab and it includes more
detailed information on how to play the song or
riff you're trying to learn. Tabwith rhythm is
a combination of tab with different types
of rhythmic notation. We're going to take
what we learned in a previous lesson
about whole notes, half notes, quarter
notes, and eighth notes. And we're going to
put that information into the context of tabs. Let's check out how to read
each of these rhythms. In tab, a, whole note is a
note with a circle around it, and it lasts for
a count of four. A half note is a circle
note with a stem, and each note lasts
for two beats. Quarter notes have a
stem without a circle, and each quarter note
lasts for one beat. And eighth notes have
stems with either a flag attached or a beam that connects two or
more eighth notes. Each eighth note lasts
for half of a beat, and you count multiple
eighth notes as 1.2 and 3.4 And we learned all about how to
count eighth notes in our previous video lessons. These four types
of rhythms can be written on any string
and on any fret. Let's take a look at this
rhythmic, tab and action. Here we have a four bar example, we're only playing
on one string. For this entire example, the open third string. Each measure has four beats. Let's play this
exercise together. It's all on the third
string, the string. Please notice that this sheet
has repeat symbols in it. This tells us to repeat
these four measures. We'll play through these four
measures, two times total. Try to count out
loud while playing this and use all down strums
in your strumming head. I'll count us in 1234. Nice job. Please
make sure you try to play through this exercise
with me at least one time through a lot of sheep music publishers use this rhythmic tab
notation style. When you see this style of tab, you'll know how to count and how to play what's on the sheet. In this lesson, we learn how to read tablature with rhythm. In the next lesson, we're
going to learn another riff.
22. Riff 3: In this lesson, we're going to learn how to play another riff. This riff is on the string
and the low E string. Here's what it sounds like. So for this, we
start on the string. On this string we're going
to play free fret four, then we jump down to the low
string and we play frets 2.4 If you don't have a lot
of experience playing guitar, you can play this riff with your first finger to
get your bearings. That looks and it
sounds like this. You start on the first
fret of the A string, you jump up to the fourth fret, you go back down
to the first fret, then you jump to the low
string on the fourth fret. Then you stay in the low E and move down to
the second fret. Then you jump up to
the fourth fret, then the riff starts over. You can see how using finger one really requires
you to jump around A. It's not really the most efficient way of
playing this riff. If you're a bit more of
an experienced player, I would recommend using three different
fingers to play this. You assign one
finger to each fret. This just makes it easier
or more efficient to play, but whatever fingers you
use to fret the notes you're going to be
using all downs strums in your right hand. Every time you play
the first threat, you use your first finger. Whenever you play
the fourth fret, you use your fourth finger. Whenever you play
the second fret, use your second finger. Let's play this rift
four times together. I'm going to pick up
the tempo and I'm going to count us in 1234. In this lesson, we
learned our third riff. Have fun playing this one. And our next lesson, we're
going to learn another song.
23. Song 2: In this lesson, we're going to learn how to play another song. It's another song
that I've written specifically for
us in this class. And again, we're going to
use the four chords that we've already learned in
our previous video lessons. Here's what it sounds like, make sure you're tuned up
and let's get started. The main point of this
song is to give us more practice with playing the four chords that
we've learned so far. The timing of the
song is different than the previous
song that we learned. The first song we
played was in 44 time. Now we're counting beats
in groups of three, but don't get too
hung up on that. I mostly want you to listen
to and feel the rhythm instead of trying to get deep into the math of
it for right now. Let's check this rhythm out. The first chord is,
it sounds like this. Now let's play it in the rhythm. Hopefully you can hear
the groups of 3123123. Make note that there's
a very slight accent on the first beat of each
set of three strums. Our second chord is minor, then we play to minor again, Then we play our C chord, and then we go back to
the E minor chord again, then back to our chord, and then we play a chord, and we play that
for two measures, then we go back to the
beginning and start the whole pattern
over on the G chord. We end the song with
one downst on G. Okay, Now let's try this together. I want you to play
along with me. So go ahead and
find the G chord, and then we're going
to get started, and I'll count us in. 123123. Like I mentioned, after we play the whole progression two times, we end on one down of G. So there's a second song that uses the four chords
that we've learned. Have fun playing this song. And I'll see you in
our next lesson, where we're going to
learn our first scale.
24. G Major Scale: In this lesson, we're going to learn how to play
our first scale. A scale is an order of notes
that come one after another. Either ascending
from low to high, or descending from high to low. What notes are used to determine the key that
we're playing in? At this point in the class, we're not going
to get too bogged down with the theory
side of scales. Instead we're going to focus on the many benefits of scales. Scales are great for
warming up your fingers, and they formed the foundation
of many popular songs, rifts, phrases, and solos. In this lesson, I'm
going to show you how to play the major scale. We can play this scale, A sending, or we can play this scale sending. Let's start by learning
this scale, A sending. So we're going to play
from the lowest node of the scale to the highest
node of the scale. Here's what it looks like for this scale. We're going to be playing
on three strings. The string, the string
and the high string. We start on this
note on the string, we end up on the high string, also on a G. But one octave on the G string
will be playing open. Then fret two with finger two. Then we move to the
string and play it open. Then the string first fret
with your first finger, and then the third fret
with finger three. Then we move to the high
string and play it open. And then the second fret with F, then the third fret with finger three, that's the pattern. Let's try this major scale, ascending together. Here we go. 1234. Nice work. Now let's learn this
scale, descending. We start on the high string, third fret with finger three, then we move to the
second fret with finger two to the open string. Then we move to the string. Third fret with finger three to the first fret with finger
one to the open string. Then we switch to the string and play the second fret
with finger two. Then we play the open string. Let's play this scale,
descending together. Here we go, 1234. Now let's play this scale, ascending and
descending together. If you'll notice on the sheet that I've provided
for this scale, there's a repeat symbol
surrounding bars 1.4 So that means we'll play this
whole pattern two times. Here we go, 1234. Hopefully you notice
there that I was using all down strums
in my right hand. As you progress as a guitarist,
when you play scales, eventually you'll want to start playing them with
alternate picking, which is down, up,
down, up, down, up. But for right now, you could
just use downs strums, and that'll be totally fine. Congratulations on
learning your first scale. In this lesson, we
learned the major scale. In our next lesson, we're
going to learn another riff.
25. Riff 4: Hello. In this lesson, I'm going to show
you how to play another riff that
I created for you. This riff comes out of the
E minor pentatonic scale. We haven't covered that
scale in this class, but I thought it would be interesting for you
to know that you can build a riff using notes
from a specific scale. Okay, let's jump in. Here's what the
riff sounds like. For this riff, we'll be only
playing on two strings. We'll be playing on the
string and on the low string. We start the riff on
the open A string, playing it one time. The second note is on
the string, second fret, and you want to press down on that fret with
your first finger. Then you want to play
the open A string again. Then the next two notes
are on the low string. Here we play the third fret
to the open string like this. I'm just using my second finger to press down on the third fret. Let's put those first
five notes together. We start with the open A, to the second fret of the
A string, to the open A. Then to the sixth string. Third fret, then the open
E. Let's play it again. That's the first
measure of the rif. For measure two,
we'll go back to the open A string
and play that twice. Then back to the third fret of the low string and
play that two times. Let's put measures 1.2 together. Now for the third measure, it's an exact repeat
of measure one. Measure four, we
play the third fret of the six string two times, and then let it ring out. Then play the third fret
and another two times. Then we play the
open six string and the second fret of the A
string together one time. Again, I'm using
my first finger to play the second fret
of the A string. If we put it all together, that fourth measure
sounds like this. Let's put measures 3.4 together. After measure four, we go back and repeat
the entire riff. So let's try and play the
entire four measure riff one time through at
a slow tempo, right? Now try it with me, 1234, So that's the riff. Now we're
gonna pick up the tempo and play through the entire
rift two times 1234. Congratulations on
learning another riff. In this lesson, we
learned our fourth riff. In our next lesson, we're going to learn
another new chord.
26. A Minor Chord: In this lesson, we're
going to learn how to play the A minor cord. This is another open
cord in first position. Here's what it sounds
like for this cord, we'll be using three fingers. We'll put our first finger on the first fret
of the B string. Our second finger goes on the second fret of the D string, and then our third finger goes on the second fret
of the G string. And then we'll five strings
down from the open A string. Don't forget to arch
your fingers and make sure your thumb is pointed
up behind the neck. Let's practice this chord by taking our left hand
off of the guitar, and then try building
the A minor again. The first finger goes to the
first fret of the B string, the second finger goes to the second fret of the D string. Then the third finger goes to the second fret of the G string. Remember to place
your fingers right behind the fret wire as best as you can and do from
the open A string. If your chord isn't
sounding clear, you can check for a few possible problems
that could come up. Remember to place your
fingers right behind the fret wire when
you're fretting notes. Try to use the tips of your fingers to press
down on the strings. You can always self
diagnose any problems with your cord by picking each
string individually. If the notes aren't all
ringing out clearly you can easily figure out
which fingers in your left hand need
some adjustments. In this lesson, we
learned the A minor cord. In our next lesson, we're
going to learn another song.
27. Song 3: In this video lesson, we're going to learn our
third song for this class. So let's jump right into it. Let's listen to a
shortened version of what this sounds like. This song uses an
all downs pattern throughout the entire song. And it features five chords that we've already
learned in this class. Also, I want you to pay
attention to how long I'm staying each chord before
I change to the next one, since that's such a big part
of how this song works. For the first section,
which is the verse, I'm playing each chord for four beats and I'm using an eighth note
strumming pattern. Remember to count
eighth notes as 1.2 and 3.4 And we start
with an E minor, we go to A, then we
go to an A minor, then we switch to a C. Then we repeat that
entire section, then we move into
the chorus section. Here I'm playing each chord for two beats and then switching
to the next chord. Keep playing the eighth
node pattern and continue to use all downs
strums in the chorus. We start with D, then
we switched to G, then we switched to A minor, and then we switch to C. Then we played that entire
section three more times. Then from there we
play C for 1 bar, and then we play D for 1 bar. So those are the two main
sections of this song, the verse and the chorus
to complete the song. After we play the chorus
that I just played, we play the verse section again, then the chorus section again. Then we play the verse
section for a third time, and then the chorus
section for a third time. Then we end the whole song
on one downstrm of E minor. Let's try to play
this song together. We'll play the verse a
total of three times, and the chorus a
total of three times. We'll keep a nice, steady
rhythm at an easy going tempo. I'll count us in 1234. Great job on that.
I want to mention one last thing before
we wrap this lesson up. I'm not sure if
you could hear it, but when I played the verses, I played them a little
bit softer in volume. I played the choruses
a little bit louder. Even though this
is a little bit of an advanced technique
and you're at the beginning of your
acoustic guitar journey, I just wanted to
point that out to you just so that you
have an awareness of it. Changing how soft and how loud you play from
section to section within a song is something that gives your playing more
character and dimension. In this lesson, we
learned our third song. In our next lesson,
we're going to learn another riff.
I'll see you there.
28. Riff 5: All right, in this
lesson I'm going to show you how to play another
riff that I wrote for you. This will be the last
rif for this course. I think it's a really fun one, so let's get started. Here's how this rif sounds. Okay, let's cover how
to play this riff. With this riff, we'll always be playing two strings at a time. And bar one, we're playing the D string and A
strings together. We play the second fret of the D string and
the open A string. We'll use finger one
to play the D string. Second fret, we play the open
A string at the same time. We play those two notes
together two times. Then we keep our first finger down on the second
fret of the D string, and bring our second finger down onto the string, third fret. And then we play those two
notes together two times. That entire first bar
sounds like this. You'll notice that I'm using all down strums
in my right hand. Now onto bar two, right here we go back to
playing the exact same strings and frets from the first
two strums of bar one. Then we quickly move our first finger onto the
second fret of the A string, and bring our second finger down onto the string. Third fret. Then we strum those two notes
together at the same time. For two strums,
the second measure sounds like this, okay? So this is a two bar riff, and those are all the notes. So let's play through this
riff two times, slowly, 1234, okay, hopefully you
have that down. And now let's play
through this two bar riff four times and at
a faster tempo. Here we go, 1234. In this lesson, we
learned our fifth riff. And our next lesson
we're going to learn a new warm up exercise.
29. Warm Up on 2 Strings: In this lesson, I'm
going to teach you a new warm up exercise
that uses two strings. What we're doing with
this exercise is we're practicing switching
from different strings, which gets us more familiar with the fret board and
with the strings also, we're stretching the left
hand and we're learning to keep our fingers close to
the fret board as we play. All of these aspects are
helping us to play with more efficiency,
accuracy, and speed. In this exercise,
we're going to use the string and the high string. We start on the string and we play the open string four times. Then we play the first
fret with finger 14 times. Then finger two plays the
second fret four times. As you add the next finger
down on the fretboard, keep the previous finger
down on the fretboard. Finger one stays down as finger two presses on the
second fret, and so on. Next finger three goes
onto the third fret, then F four goes on
the fourth fret. The pinky is usually the
weakest finger for most people, so you have to be patient
with yourself here. Now we start this same
sequence on the high string. Play the open R times F. One goes onto the first fret, then add the second finger
onto the second fret. Then finger three goes
onto the third threat. Then finger four goes
onto the fourth threat. Remember to keep each finger on the fret as you add
the next finger. This will help you to get a nice stretch in your left hand. From here, we're going to
play this exercise backwards. We keep finger four down on the fourth threat and
play it four times. Then we release
the fourth finger, finger three on the
third threat four times, then release finger
three and play finger two on fret 24 times. Then release finger two and play finger one on the first
threat four times, then play the open
string four times. Then we go back to the string fourth threat with finger four. When you make that change, you
want to set up all four of your left hand fingers so that each one is dedicated
to a threat. This way your left
hand fingers are in place as the exercise continues. So the fourth threat
four times, third fret. Then the second threat, then the first threat, then
the open string four times. So that's the entire
warm up exercise. Let's play it together
and we'll play the entire thing two times. Here we go. 1234. Nice job. So, in this lesson, we learned a warm up exercise that
covers two strings. In our next lesson, we're
going to learn another new D.
30. E Chord: In this lesson, we're
going to learn how to play the major chord. Let's
get right into it. To play the major chord, we take finger one and we place it on the third
string, first fret. Then we take finger two and put it on the fifth
string, second fret. Then we take finger three and we place it on the fourth
string, second fret. And then we play the
first, the second, and the six strings open
to play this chord. We strum all six strings to check if we're getting a nice clear tone for this chord. We should play each
string one at a time. This way we can check if any of our fingers are causing
problems with this cord. All right, let's practice this major chord
by taking our hand away from the fretboard and then building
the major again. So first finger onto the first
fret of the third string. Second finger presses on the second fret of
the fifth string. Then the third finger presses on the second fret of
the fourth string. Remember we play the first, the second, and the
sixth strings open. Let's play the whole
chord. Now you want to play on your fingertips, and you want to keep a
nice curve in your wrist. In your left hand.
Again, you want to have a nice space between the palm
of your hand and the neck. Don't forget to use
your left hand thumb to press on the
back of the neck. You want to stay nice
and loose everywhere. That will help you to create a nice full sounding
major chord. As an extra tip, when
I'm tuning my guitar, after I've tuned each string, I'll actually play
an E major chord. And make sure that
the chord sounds good and that all the notes
sound and tune to each other. Remember to be patient
with yourself. You've got to build
up the muscle memory and the strength
in your left hand. In this lesson, we
learn the major chord. In our next lesson,
we're going to learn another new
chord, a major.
31. A Chord: In this lesson, we're going to learn how to play the A major. Let's take a look at it. To play the A chord,
we take finger one and place it on the fourth
string, second fret. Then we place finger two on the third string, second fret. And then we add finger three to the second fret of
the second string. Then we five strings down, starting from the fifth string. Something you might notice
here is that my first finger is not pressing down right
behind the fret wire here. I'm pointing this out because
with some chord shapes, there just isn't enough
room on the fret board to press down right behind the
fret wi, with each finger. It's not something
to stress out about, it just means that you might
have to apply a little bit of extra pressure with
that first finger. In this case, when you're
starting to play this cord, remember to press with
your fingertips and that will help you to
achieve a nice, clear tone. And it'll keep your fingers
from muting adjacent strings. With this chord, we want the first the fifth
strings to ring out. You also want to keep
that nice gap between the palm of your hand and
your left hand and the neck. You'll see on this chord diagram that there's an X above
the sixth string. That means you don't want
to play that string. Try to start your strum
from the fifth string. Let's try to strum
one string at a time. Starting from the fifth string, we have a nice clear sound. There's a variety of different ways that we can form this. A major chord in the
left hand probably come across chord charts that use different fingering,
that's totally fine. For example, sometimes
I'll bar the second, the third, and the
fourth strings with finger one like this. It just depends on the
song that you're learning. You're welcome to try out different ways to
form this chord, but I personally feel that the fingering that
I've given you in this lesson makes the most
sense to get started with. Don't forget to be
patient with yourself. Learning guitar is a process, and slow and steady practice
is the best practice. In this lesson, we learned
the A major chord. In our next lesson, we're going to learn another new song.
32. Song 4: In this lesson, we're going to learn how to play another song. In this song, we get to use the two chords that
we've just learned. Major and a major. So let's jump right into it. In this song, we
have two sections, a verse and a chorus. Let's start with the verse. Here's what the
verse sounds like. We start with a major. For a major, we don't
play the sixth string. We play the open fifth string. Finger one goes on the second
fret of the fourth string, F two goes onto the second
fret of the third string. Then F three goes onto the second fret of
the second string. We play the first string open. Then when we, from the fifth string through
the first string, our second chord
for the verse is D. As a review to
play the D chord, we avoid playing the
fifth and sixth strings. You play the fourth string, open finger one goes on the second fret
of the third string, F, three goes on the third
fret of the second string. Then F two goes on the second
fret of the first string. Then you from string
four through one. Those are the two
chords for the verse. For our strumming,
we strum each chord one time and then
switch to the next one. We start with the A
chord and strum down, then switch to the D chord, also with the downstrm. For the rhythm, we're playing
a whole note on each chord. We start with a 234, then we switch to D1234, and we play A to D four
times total for the verse. Let's try that together. 1234, So that's the verse section. Let's move on to
the chorus section. For the chorus, we
add in one new chord, and we use a different
rhythm pattern. Here's what the
chorus sounds like. The new chord in the
chorus is to play, we play the open sixth string, Finger two goes on
the fifth string, second fret finger three
goes onto the fourth string. Second fret, finger one goes onto the first fret
of the third string. Then we play the second
and the first string open, remember free major,
we all six strings. Let's go over the
chorus progression. We start with A,
then we switch to, then we play for the chorus. We're playing quarter notes. We start on A and play
two downstro notes, then switch to D for two
downstm quarter notes. Then we switch to for four
dostro quarter notes. And we repeat that entire
pattern four times. So let's try out this
chorus together. Here we go, 1234, then we end with a
whole note on A. So let's try to play the verse
and the chorus together. And after we play the chorus, we end on a whole note on A. Here we go, 1234. Great job. This song
is really good for practicing our major
and major chords. I hope that you
have fun with this. So in this lesson, we
learned another new song. In our next lesson,
we're going to learn our fifth song
for this class.
33. Song 5: In this lesson, we're going to learn how to play another song. In this song, we have
another chance to use the two newest chords
that we've learned, major and a major. And we get to play them
in new combinations. So let's jump right into it. So we start with a verse,
here's what it sounds like. We start out with our D from C, we switch to an A major chord, then we move to an major chord. Finally we switch to a chord. That's the order of the chords. For the verse we play to a to, we're going to play each
chord for two beats. The verse is 2
bars and we repeat those 2 bars four
times for the rhythm. It's two quarter notes per, and we're going to use all down strums that looks and
it sounds like this. We've got the chords and we've got the strumming
for the verse. Let's try and play this
verse together. Here we go. 1234. Nice job. Let's
learn the chorus. Now, for the chorus,
we're going to use two chords that we have already played in the first section. Here's what the
chorus sounds like. For the chorus, we start
on and then we switch to E for the rhythm. Now we play 44 notes per chord and then switch
to the next chord. And you want to continue
to use all Do strums. This section is repeated
four times as well. Let's play this chorus
section together. I'll count us in 1234. Now let's play the verse
and the chorus together. We'll start with the verse
and play that four times. Then we'll move into
the chorus section and play that
section four times. After the chorus, we'll strum one downstr on C
to end the song. Okay, here we go. 1234. Awesome job. This is a great song for
practicing switching between very common chords
that are in tons of songs. And we get to use our
two newest chords that we've learned, E and A. In this lesson, we
learned another new song. In our next lesson,
we're going to cover an introduction
to power chords.
34. Power Chords: In this lesson,
we're going to cover an introduction to power cords. Power cords are built using two notes and they have
their own unique sound. There are a few different ways
you can play power cords. Some utilize two fingers in the fretting hand
to form the chord, and others utilize three
fingers in the fretting hand. But this video
lesson is meant to be an introduction
to power cords. We're going to focus on playing
power cords that utilize one finger in our left hand
along with an open string. The chords we're
going to focus on are called open position
power cords. Power chords are very
versatile chords and they're used in many genres. They are different from
major or minor chords and they're often referred to as five chord Power chords
have the letter name of the chord with a number five
to the right of the letter. For example, five is
an E power chord. Let's start with
the power chord. We play this top low E string, then we add finger one to the second fret of
the fifth string. We're only going to play the sixth and the fifth
strings together. One tip here is that you can
use your index finger to gently touch the fourth string so that the fourth
string is muted. Muting adjacent
strings like this allows you to be more
free with your strumming. Our next power cord is
G. To play this one, you put finger two on the third
fret of the sixth string. While you're pressing this down, your second finger
will be muting the fifth string just by
gently touching that string. And then you want
to try and catch the fourth string open
as you're strumming. Do you have a muted string in between the sixth
and the fourth strings? The next power chord is a. For this one we play
the open fifth string, then we add finger one onto the second fret
of the fourth string. So you want to strum
the open fifth string and fourth strings together, you want to avoid playing
the sixth string. And here you can use the
first finger to mute the third string by lightly
touching the third string. Okay, let's play that one. Now we're going to learn
one more power chord. Let's take that
five chord shape. One string set down to
play a D power chord. For D five, you want to avoid playing the sixth and
the fifth strings. And you play the fourth string open and then finger one
is on the third string. Second fret. And you want to
try to only strum strings 4.3 We've learned
four power chords now let's try to practice them. Let's play a whole note
on each power chord. We'll play 555, and then D five. And we'll play this
entire pattern two times. Here we go, 1234, Great job. As an
additional exercise, you can also mix the order
of those power chords. So in this lesson we
learn four power chords. In our next lesson,
we're going to learn a song that uses these chords.
35. Song 6: In this lesson,
we're going to learn our final song for this class. It's a song that puts our four
power chords into action. So let's jump right into it. We're going to start
off with the verse, and here's what that sounds like for the verse. We're playing the five chord. As a review, we play
the open six string, then we place finger one on the second fret of
the fifth string. Only strum the sixth and the fifth strings
for this chord, then we quickly
play a five chord. Now since this five is only played for one really
quick eighth note, we can just play
the sixth string, Third fret with finger two. This is an abbreviated
five power chord. It's one that a
lot of bands use. In particular, it
reminds me of the band CDC and how they use this technique in
their riffs and songs. Let's check out the
verse progression, strumming one time per chord. Measure one we have five with a quick and
abbreviated five. Then we repeat this
first bar three times. In the measure two,
we play just five. Let's go back to measure one. By the way, we're
going to be using all down strums for this song. We start on 5.7 eighth notes, then on the last eighth
note of measure one, we play that not, so let's hear the
entire measure, then we play that first
bar three times total. Then in bar two, we play the
five for eight eighth notes. All right, let's play
this verse together. Here we go, 1234. All right, now we're going
to move into the chorus. Let's listen to what
the chorus sounds like. For the first measure
of the chorus, we have the D five
again to play D five. We have the open fourth string, then we take F one and place it on the second fret
of string three. We're only going to strum the third and the fourth strings together. That's the D five. Then for the next
measure of the chorus, we have the G five power chord. For this one, you put finger two on the third fret of
the sixth string. While you're pressing this down, your second finger is going to be muting the fifth string. Then you want to try and
catch the fourth string open while you're strumming down for the last two
measures of the chorus, we have the five chord. And again, to play five, we play the open fifth string. Then we take finger
one and place it on the second fret of
the fourth string. Then we strum the fourth and
the fifth strings together. Let's check out this
chorus progression. Strumming one time per chord. We start the chorus
with a D five. We play that for one measure. Then the next measure
we play the five. Then for the last two
measures we play five. So we're going to continue with all downs strums in the chorus. And here's what the
chorus sounds like. We repeat the entire
chorus four times. Let's play the chorus together. Here we go. 1234. Nice job. All right, let's put the verse and
the chorus together. We'll play the verse,
then the chorus, and then we're going to end on a whole note on
the D five chord. Here we go, 1234. This is a great song to practice your open position power chords. I hope that you
have fun with this. In this lesson, we learned our
sixth song for this class. In our next lesson,
we're going to wrap up the class with some more
tips and resources.
36. Final Thoughts: Okay, that wraps up our
acoustic guitar basics course. Thank you so much
for joining me here. I hope that you've found this
class fun and have gained a really solid footing
for your acoustic guitar. Playing some final notes about
learning acoustic guitar. First of all, be patient
with yourself throughout the process. There's
a lot to learn. So take your time, get
to know your gear, get to know the
sounds that you like, and get familiar
with the chords and the scale we worked on
during this course. Just do your best and
most importantly, have fun learning
acoustic guitar. Also, try to pick up the
guitar every day if you can. This will help with
building up strength, especially in your
fretting hand. It will help you to build up the calluses on the
fingertips of your left hand. Regular playing
and practice will help to build up your
muscle memory as well. As far as an approach
to practice goes, I think it's a good idea
to mix your practice up. What I mean by that is to rotate between
practicing scales, chords, learning from
tabs and chord sheets. Learning your favorite
rifts and songs, playing with other people, and recording yourself playing. If you can spend about
an even amount of time with all of these aspects of playing acoustic guitar, you'll be well on your
way to developing and growing as a guitarist,
as a musician. When it comes to this class, you can always come back to any particular
lesson and review it as many times as you need to until the material
really sinks in. And definitely take
advantage of all of the opportunities to jam along with me in
the video lessons. Also, don't forget to download the supplemental materials that I've created for this class. I hope you enjoyed this course. I have other classes on guitar,
ukulele, and songwriting. And if you enjoyed this class, I recommend that you check
out my other courses as well. Music is an infinite subject, and there's always
more that we can learn about playing guitar
and creating music. Thank you so much
for joining me. Have fun, and I hope to see
you in another class soon.
 Jason Rivera, Music Instructor