Transcripts
1. Introduction: Are you overwhelmed
with life, work, kids, chores, politics,
relationships? It sounds like you need a creative gateway that
will take you to a length where your mind can relax and the watercolors flow. In this class, we
will have fun, relax, and create something
beautiful while feeling a little guilty at how easy
and enjoyable it was. Wasn't creating art
supposed to be painful? Hi. My name is Fab, a watercolor artist and
online teacher from Warsaw. And today, I'm going
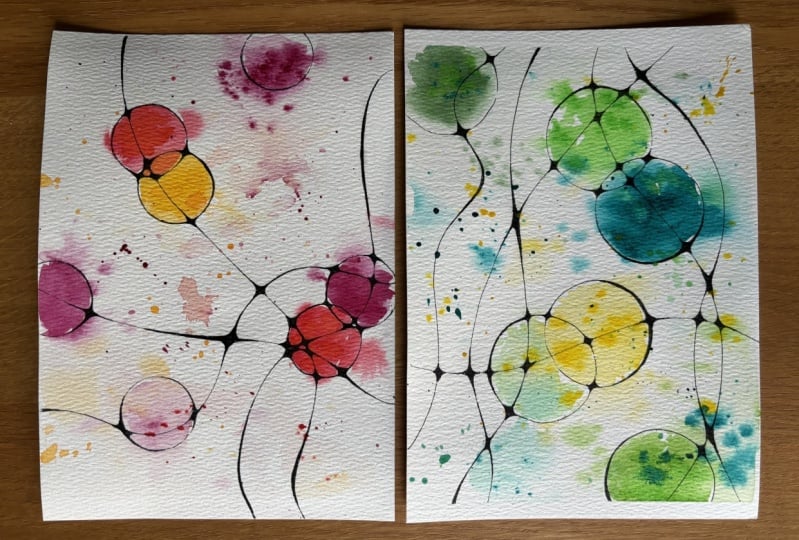
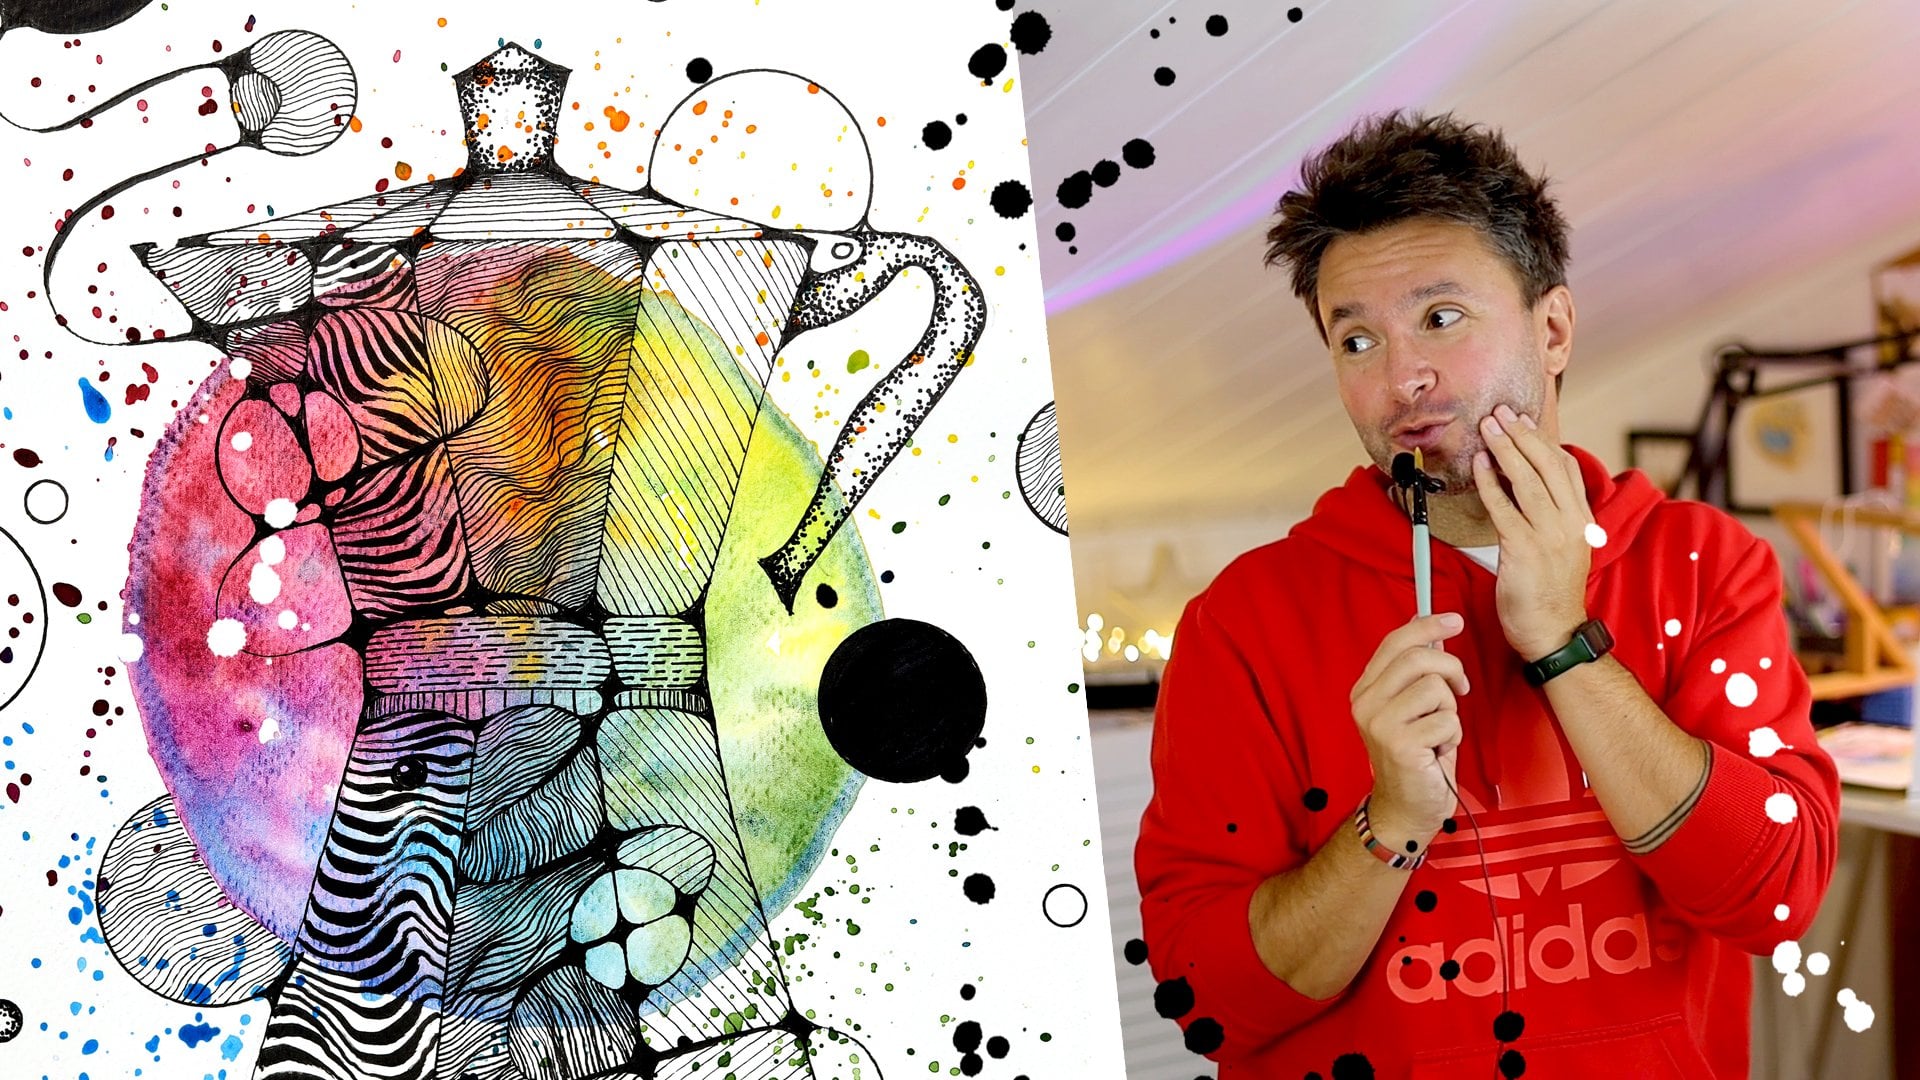
to show you how I create watercolor abstract paintings with neurographic art. This is the painting we
are going to create. Isn't the beauty? I've been experimenting with these
abstract paintings for a long time, and now I decided it's time
to bring you into the fun. In this brand new class, I will show you how
to create flowing organic lines and then bring them to life with
watercolor washes. It's a relaxing,
creative escape, no pressure, no perfect lines, you and your imagination. In this class, you will learn creating neurographic
art using pens, practice hand drawing skills
with a meditative touch, learn wet on wet
watercolor techniques to bring your drawing to life. If you are looking for a
creative and calming way to unwind at the end of a hectic
day, this class is for you. Neurographic art helps you
put into a flow state while watercolor techniques give you space to express your emotions. The end result is both
therapeutic and delightful. This class is for anyone who's looking for a
relaxing art practice, those unsure about where to
go in their art journey, people in need of creative relaxation at the
end of the day, anyone curious about abstract painting but don't know where to start and the fans of mine who can never
get enough of me. This class, we're going
to need watercolor paper, watercolors, waterproof
pen, waterproof brush pen, a brush, water, paper towel, a curious mind in
need of stimulation, and a little sense of humor. Optional but encouraged. At the beginning of the class, we will quickly talk
about my approach to these abstract
paintings and where we are going to go with
the following classes. After that, I will show
you what I mean by neurographic art and
we will draw one. Finally, we will paint our
creation with watercolors. So expect you to do the same. Nothing is sped up,
so you can definitely draw alongside me
and paint alongside me and end up with a painting of yours at the end of
just a 1 hour class. If you are ready to let
your creativity flow, join me on this fun
and relaxing journey, and let's make some art
because you know you want.
2. Class Project: Vary. Okay. We'll start
with class project. What do you think? Brand
new class, brand new Hodie. This is red. I think
I'm almost done with completing the
completing my rainbow. I need to check
after this class. Okay. Class project. I'm expecting an
abstract watercolor painting from each
and every one of you. Don't top to yourself.
Don't overthink it. Just start. Step one, create a urographic
art drawing by focusing on flowing lines
and organic shapes. Step two, once your
drawing is done, paint it with watercolors. Step three, wait for
your painting to drive. While you're painting, you
can go and leave me a review. Step four, take a
photo of your artwork. One from the top and
a few close ups. Step five, share
your final artwork in the class project gallery. Step six, include
a description of your creative process and the feelings you
experience while painting. And that's you see,
what's a hard? In the next video,
we will quickly discuss the materials I have, and after that, we will start
drawing, I think, Jack? Yeah, probably. See
you in the next video.
3. Materials: And this the t so quickly, let's go through
what I'm going to use for this class materials. That's a tradition. I'm going to use watercolor paper from Tiger. This is not even an art shop. This is like kind of everything shops from
Denmark, I think. Yeah. You might not have it over United
States. I don't know. But I'm just trying to say
that this is nothing special. It says here, it's 200 gram. Mm no, 300 grams. Sorry, 300 gram acid
free watercolor paper. It's 18 to 24 centimeters. I don't know what
that makes in inches, but it is smaller than A four, because this fits better
into the video format. Because usually I
make my paintings this way, not this way. Not horizontal, not vertical. It looks more pleasing
to me for some reason. So I'm going to use
this watercolor paper. Oh, this is for fend painting, and it is a bit of a
texture. And I like that. And usually this comes
with glued edges. So it helps with not helping the paper down.
You don't have to tape it. But for this class, I'm
going to take one page off and we're going to
just use the page here. And my watercolors are here. This can stay here maybe. My watercolors,
Kartake can say Tambi. I'm going to use my set. These are all the colors
from Kara take I have. And we're going to
use I'm going to tell these later with
cherry blossom pink, purple, and cadmium yellow, and cadmium scarlet and
a bit of cadmium orange. I'm actually recording this
after I did the painting, so I know what I'm going to use. I'm saying these
colors because one of my students told me that when
I'm saying in the classes, of whatever color. I
don't know the name. I don't know how
to pronounce it. It doesn't look
very professional. And I told her, I'm actually trying to convey a message here that
doesn't really matter. Just use what you
have. And that, yes, maybe some of the things
I don't know how to pronounce exactly because
I just read them, I never heard anyone telling
this to me because I'm a self taught artist like Aulin
Is it Aulin I don't know. At the end, I was
telling her Hi Bianca. I was telling her that do you know Bob Ross, famous Bob Ross, that he would say what colors
he was using and just let's imagine there's a tree
here and I'm going to use something something green
and he would do it. I love Bob Ross, but I'm not like
him in this sense. I'm just trying to
encourage all of you to use whatever you have, use whatever you can get your
hands on to be creative and do something at the
end of the day, if you don't have lemon
yellow, use something else. Just yellow is yellow,
orange is orange. If you don't have
yellow and orange, you use Bu and pink,
it doesn't matter. Just don't stop yourself because you don't have
the same things as I do. That's why I try not
to use not to put too much emphasis
on what I'm using. Like, what I'm using is
just because I have them. I have this set because my wife bought it for me as a present. Before that, there was
another set I was using so just use what you have to be creative.
That's what I wanted to say. And again, hi Bianca. I hope I did better this time saying the color of the names. I'm going to use
Old that I'm going to use this brush pen. I think this is the brand Pigma, this is also waterproof. It has to be because
we're going to draw first and then
paint with waters. I'm going to use this
Fabri Castel 0.5. It's not too thin, not too thick, it's
good for this project. I have other ones that I use, but I find this 0.5 is the idea. I'm going to use this
brush number 12, Renaissance brand, I don't know. I just like the color and
both of the Internet ones. And I have my water jars here, one for clean, one
for dirty water, and a bit of a kitchen towel, paper towel always useful
in case of messes, some mess and mistakes. What else? Is there anything
else? I think that's it. So other than that, I use the spray bottle
to spray my paints and this eyedropper to drop some extra water on
them before I use them. I'm looking. Did I
use anything else? I use my hands, but
you can't have them. Use your own. And, of course, Jack was very helpful
to me with everything. Everything that went wrong, I blame on him. So
thank you, Jack. And if you don't have a
Jack, you should have one. I totally recommend
it. And this is all. So I'm gonna see you with the
drawing part of the lesson. See you later. No,
not see later. See you in a moment, after this, the other video will
start. See you next there. Don't go anywhere. We're
gonna draw and paint it. I will be awesome. Sea.
4. What is Neurographic Art and Where Will We Go From Here: Hello, D. Welcome to my
abstract watercolor class. I've been making
these watercolor abstracts for a while now, and I was kind of, like, waiting for a good moment
right moment like to a level. I was trying to reach to share
what I have with you guys. And I think I'm there. I have a more there are more things that I
want to explore, but I feel like I can't hold it any longer and I want
to share this with you. When I'm sharing my
latest paintings, I can also refer to
one of my classes, so you can go and make your own. I need something out there and I want to share
what I have so far. I just want to say
that this will be a longer journey
because there are few different ways
I'm approaching to this. And we will tackle, let's say, Chapter one in this class because we can't do
everything at once, then the classes
come out too long, and then the ski share
is asking me, Hey, if halfway is the 6 hours,
people don't have time. So to avoid this, not to make six to
eight hour classes, I will make this
into at the moment, I'm thinking four parts, but there will be more
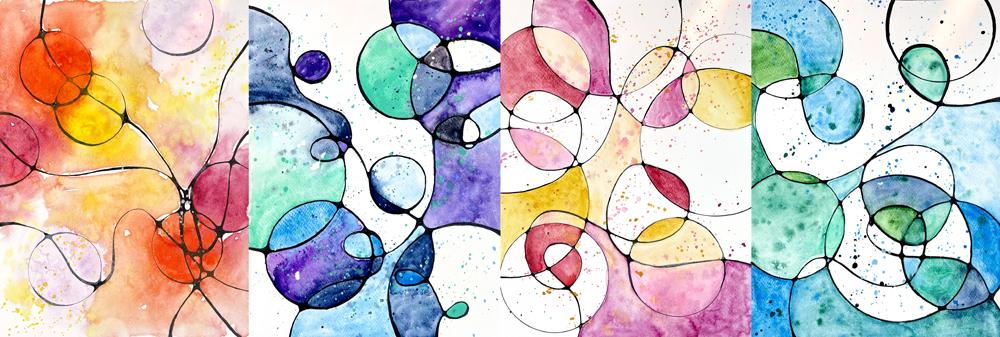
in the future, for sure. So what we will do, we will start with Neurographical art and
neurographical art that when you have lines going through and you
connect them with these natural almost
organic looking shapes, basically, you don't leave any hard corners
in your painting. That's what you call
neurographical art, and it gives a very
organic and flowing look. I can show you one
without it to see. For example, in this one, I haven't made corners yet, that it's pretty in some way that the geometrical
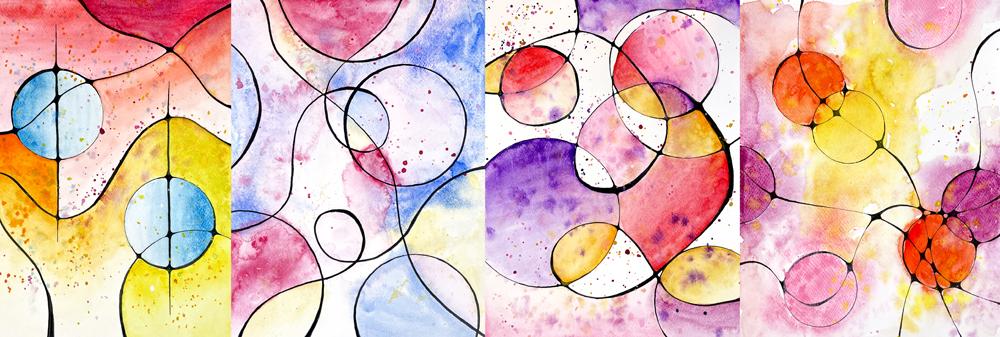
shapes and so on. But when you have this, it has a very different look. This is neurographical art. That's what we will do
today and later as well. But it's not going to be only this that I
started making this. Today, we're going to do this, one of my favorites
from this type, let's say, and we will try to recreate this painting as an
example and for you to try. But later on, well, for example, bring
masking tapes. Let's take these and make
different versions of them. I think I was splashing paint on them while I was doing
other painting, anyway. So there will be different
versions of them or like, we will apply masking
tape and paint one part and then remove
the masking tapes and paint the other parts so
it will have more layers. This will also come. But you
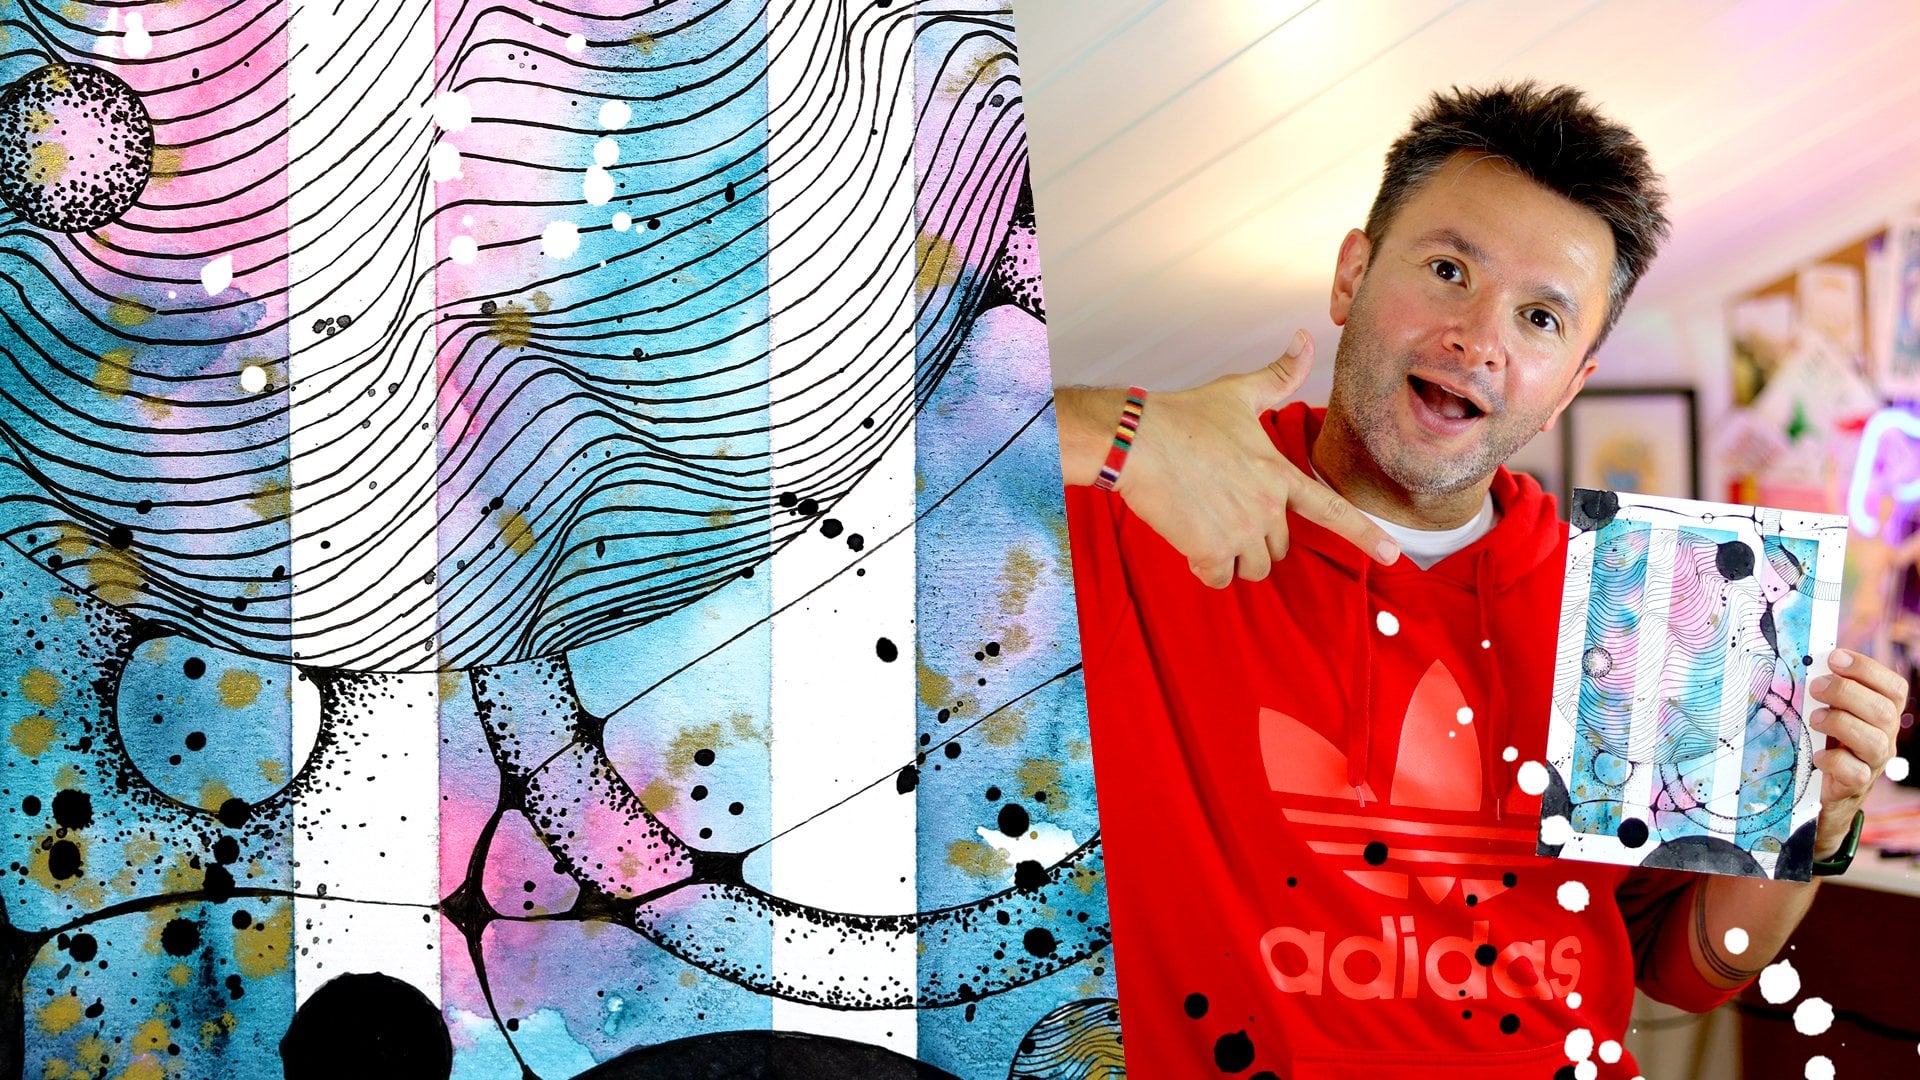
can see this is still in the no graphical art era. But later on, we will
move on to patterns, and this will be again
in the future classes. But I want to show you this to say that I want you to have a similar
progress progression. And as you are doing, probably like I'm doing, you will be experimenting
with your paintings. You will think, Oh, what if I use this pattern with this type of neurographic
art with these shapes, maybe in sort of circles,
I will try triangles. You will be also experimenting. I encourage you to experiment. And that's how I keep
going to different places. Then I find I usually
enjoy these things. And these patterns, for example, later, we
will get to that, and I love making them, and it's very relaxing, just like the
neurographical art. Or like this is something
I just did two nights ago, and I love making this pattern, and I love the end result, and we will get
to that, as well. And we will go all the
way to even we will leave the neurographical
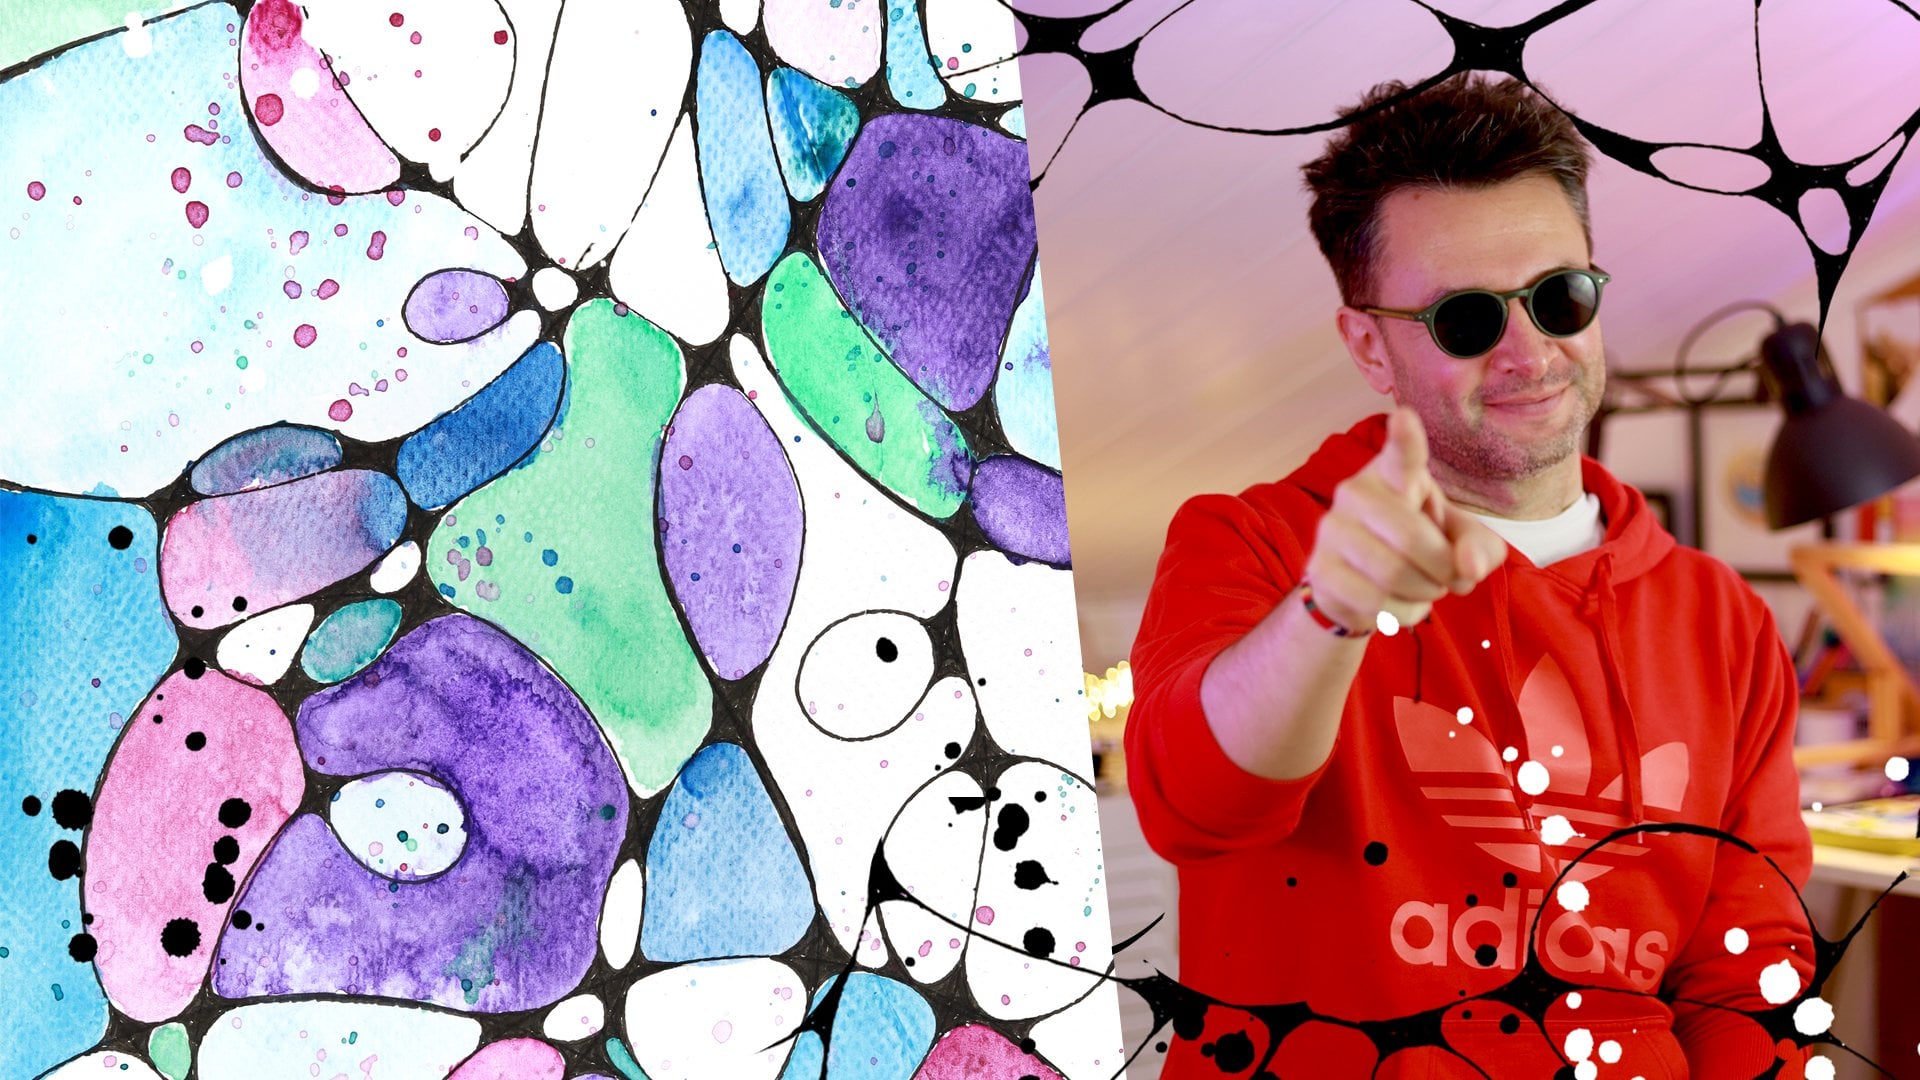
art behind and make these kind of
abstracts as well. You can put whichever
way you like. It's abstract. It
doesn't have up or down. And I'm just picking a
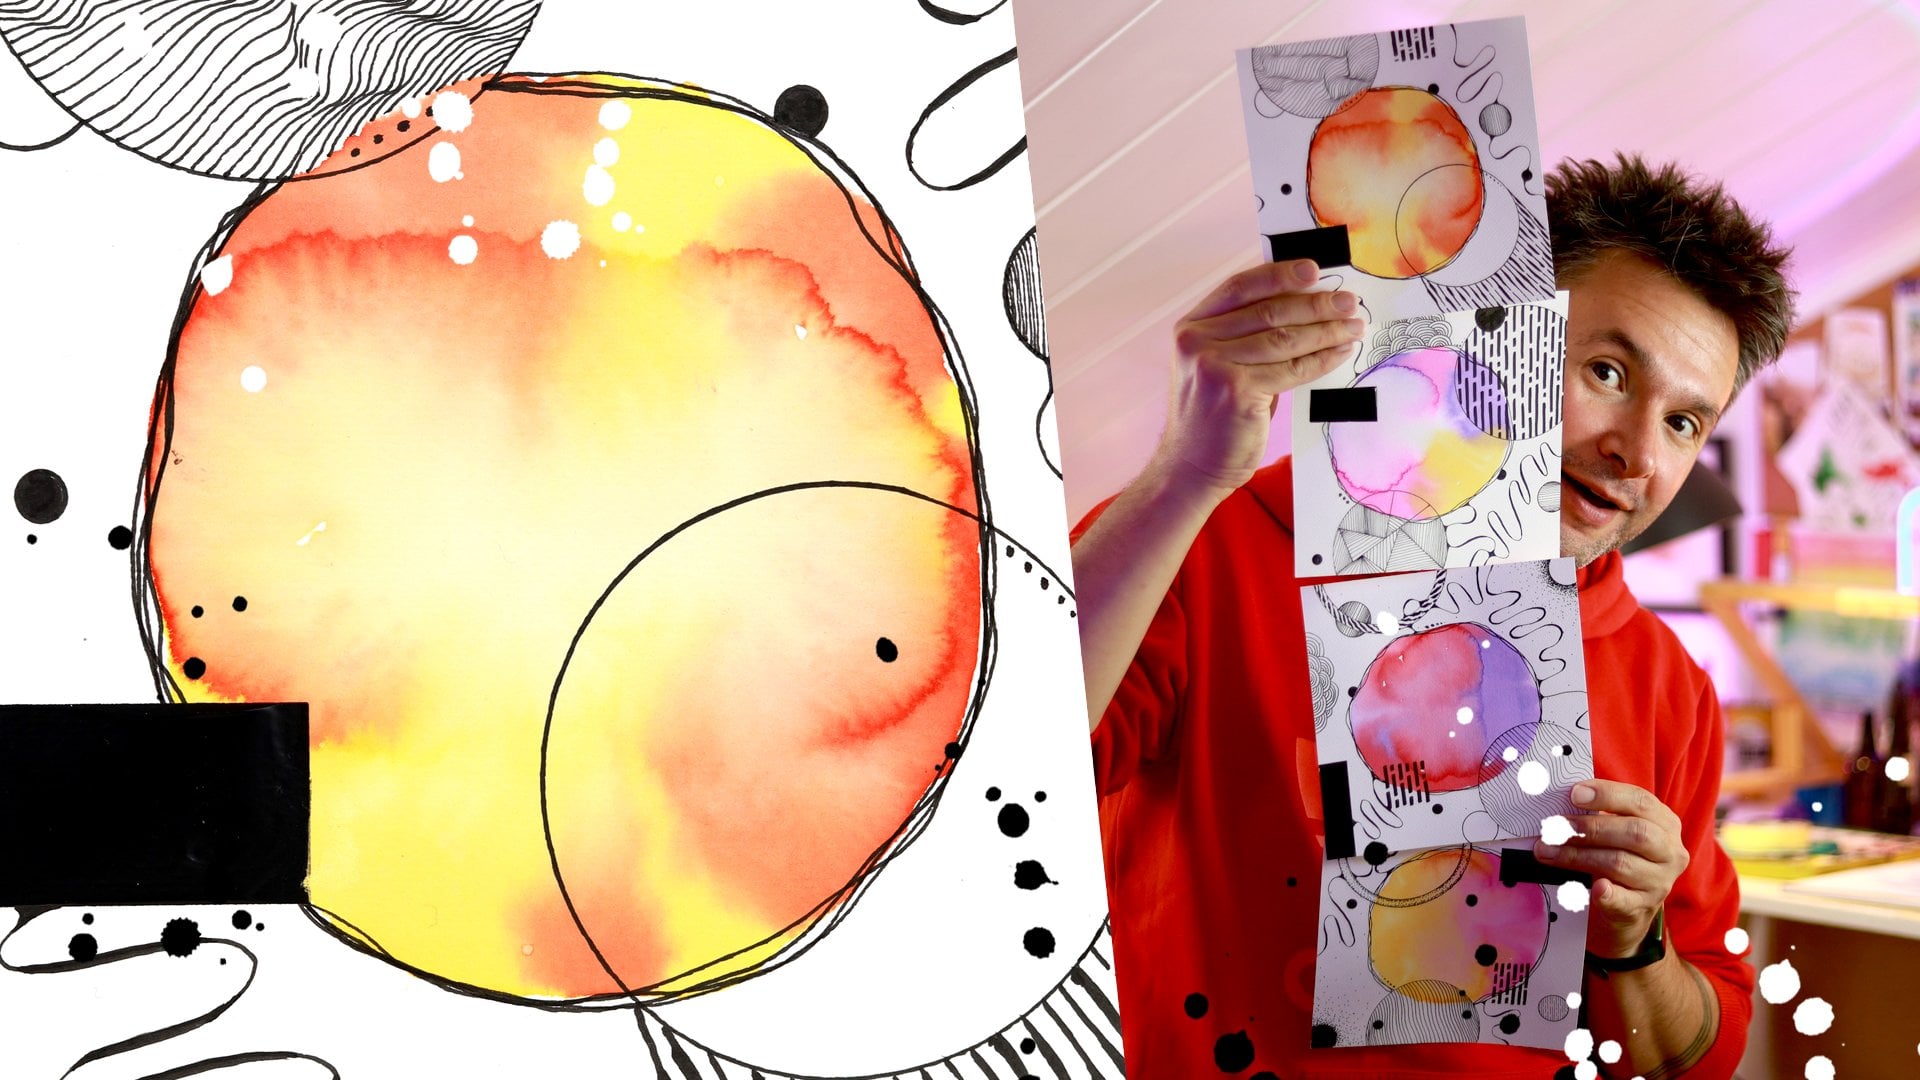
painting or even at the end, we will go to incorporating
actually real shapes. This is one of my favorite
buildings in or so by Pavace. This is palace of culture and science,
culture and science. We will also do these
kind of paintings later. And even this is one of
my favorites, by the way, something like this that we will bring in everything we
are doing together, the watercolor, the
neurographical art, the connecting them. In that way and
also the patterns, we use the patterns to create actually the whole thing,
like a physical thing. So it's still abstract, but it is also real. So we will combine both worlds, and I think this is
the way I want to go. At the moment, I love this one. I wanted to do this class, and I want you to have
similar progression starting from where we are
starting today and in the future classes,
we will go towards this. And you will do
lots of paintings, you will do lots of practice, and it will be great. And I'm sure you
will come up with combinations I haven't
thought of before, and I'm looking forward
to seeing them. But in the meantime, I will try to show how I do everything, so maybe you won't have as many mistakes as I
do because believe me, not all of them works. So with that, we can we
can start our class. We will start with the up I kicked out my microphone.
Let's find it here. We're going to today create this painting that I really
like how warm this is. When I made this, I thought, actually this looks like these fade lights
that on the strings and it gives very warm light and it's radiating out of them. We're going to try
to create this. We will start with the
drawing first and after that, we'll move on to painting
and that will be for today. In the future, like I said, we will go different places. It will be very relaxing. Perfect for unwinding
after a long day. I find it super meditative. I go into flow and
totally forget about time while I'm
doing these paintings, and I hope it will
be the same for you. So without further ado, let's go with the drawing.
5. Drawing Our Design Using Waterproof Pen and Brush Pen: And this here's watercolor paper. Sorry for the waiting. I lost my Terribly sorry. I lost my painting
that this is what we are going to create
today. Let's have a look. First of all, how do I make these perfect circles that
I'm so good at drawing? That's how? No, that's not true. I'm using old broken
ruler for that. And, in fact, it's
not just this. I use whatever is
in front of me, whatever I can put my hands on. I go to a coffee shop,
I drink my coffee, wipe the coffee inside, and then put the mg down and
use it for round shapes. I did that, too. So whatever you can find that don't worry that you can't do a perfect circle in
your hands that I can show you at my table, I have, like, bowls and
plates that I'm using for round shapes for bigger pages that
these are a bit big. Most often, I use where is it? My tape is perfect This is perfect because you
can do it from the inside. That's much easier
than doing outside. When you do outside, you
have to keep the pen at a certain level all the time. Otherwise, when you
come to the other end, two lines might not meet. But when you do it
from the inside, it's much easier to do that,
it's the same with this. But now I'm thinking
if this is too small, I'm going to find something else is this and this
is a bit too big. Now I'm thinking, I should
have figured it out earlier. Yes, I just came to my mind actually how
I did this painting. I had my little jar
that I take it with me when I'm going
outside to paint, and this is actually
what I used to make this circus it looks
the exact same size. So that's what
we're going to use. In my other paintings,
like I showed you some examples that I use, I use bigger circles, smaller circles, I combine them. But today, this is
the first class. We are starting simple. So we're going to do I'm going
to put this aside for now. And we're going to
start with justice. And for this, when I
started making this first, I was doing thin pan, and the lines were more, let's say, unified
that same thickness. But now, like in this one, I like making them
thick in some places, and this comes into play later that we're going to use
a brush pan for this. So I think this 0.5
is ideal for this. I'm going to use this to
make the lines and later on, that this is still thick enough to be visible and have enough
weight, but not too thick. When you want to
make them thicker, this time we can still
use the brush pen. So I'm starting. And now, as I was saying
that it is difficult to draw the circles
from outside. Sometimes they might not meet, and you're going to see that
mine didn't over there. Don't worry about
that at the moment. No, not at the moment. Don't worry about that at all, because I will show you that
any mistake you can make, we can actually hide it
and it will be fine. After all, it's abstract, no one will be able to tell you this wasn't supposed to be, it can be whichever
way you like. Drawing another circle here. When I'm doing this normally, I'm just looking at
page and putting a few circles down and
then think, do I need? Do I need more? Do I need
less and go bit by bit. But for this class, I want to create this painting I already made and
I'm happy with it. Let's say this thinking part
was done for this class. And one last one. Usually, I try to do
not symmetrical shapes that In my opinion, asymmetrical works much better and looks much more interesting. Let's put this away now. And so we created some circles. This is how it starts. After that, this part
is totally up to you. You don't have to follow
the same way I'm doing. But I'm going to add some
lines they are going to go through these circles. With these circles, I'm
trying to not trying. I'm not trying to keep
it exactly as the original one, more or less. And does it need more? I think it looks
okay at the moment. So now as we did this, next part, we're going to
combine all the lines. That's what we're going
to do. What we're going to do, as you can see, these lines are crossing
each other very harsh, like this almost
ninth degree here. The goal of this
neurographic art, making the goal of making
neurographical art, not to keep any sharp edges. So you're going to round
them up like this. And when you round them
up on all four corners, you end up with
shapes like this. And then what you do
is you fill them. But of course, you can
use this pen to do this. And there. But it is much easier
if you use a brush pen. That brush pen has a
very pointy end so you can get to tiny places
and be accurate. But in the meantime,
you can cover bigger areas when you
press down a bit, then it covers
much bigger space. In here, you can see I didn't
do it perfectly for this, I again, use the brush pen. This is something I like doing anyway that making one edge of the circles thicker. And just like that, you're done. That in the edges here, you can make them
even more perfect. But when you do everything and even at
the end at the paint, none of these tiny
details will be visible, but you need to look at
the painting as a whole. I was saying that if you
have a mistake like this, you can again, use a brush pen or with a
normal pen as well. Just make this line
thicker like this. And I think I need to get
a new brush ban because I think the tip is not as good as it was. Yeah. Then when you make these kind of shapes like I have in
this painting as well, you can see it
actually looks more interesting and more organic because not everything
is perfect, and it actually adds
to the picture. So don't worry about
your mistakes. You can always hide
them like this. So I think I'm going
to go ahead and do the connections with the brush. Okay. You can make these connections as big
or as small as you like. I think they work a bit better when they
are a little bit, like in the middle, not
too small, not too big. Okay, and this is the part that is actually time consuming, but I would like to call it meditative because then you
know what you're doing. This is your goal now. You don't have to worry about
anything else. If you have a bit of
time for yourself, just start connecting the lines. And everything will be fine. When you finish, you will see that the world is
still spinning. Nothing happened,
nothing exploded. Unless you have something in the oven or something time specific, then maybe don't do this first. Like, put an alarm or something. So you can try to
change kind of how you see these because one way to look at them is to
look at the lines, or you can actually look
at the white space. It's leaving them. When
you complete this, as you can see the middle
shape is very rounded. That's what we are
trying to achieve. Another one is done. Look, my perfectionism
is trying to take over and wants me
to make this perfectly, but I'm trying to let go of that and move on
because like I said, at the end, it won't matter. The whole look will prevail and that will be what people will be looking at what you will be looking at, not this, if every single
connection is perfect. Let's do here As you can see, once you draw them, it's much easier to fill
them in with the brush pen. Makes it really easier. And of course, this has to be waterproof like the other pens because later on, we
can paint on this. That's all done. Let's
take care of these two, then they will get
into this mess. When they are not um but
what is the right word? Like this line is crossing the circle
almost perpendicular, almost 90 degree, but sometimes the angle is much narrower. In that case, that
when they are narrow, that you make very
concave shape. And when they are
white, the angle, it's almost like
you almost can't see so you kind of try
to In that moment, it makes sense to look at the shape you are
creating inside the lines that you just try to get
rid of the sharp corners. So you end up with
something like this. Maybe as an example,
this is how I do, but I will show you
another example of doing it that you use this 0.5. We used for making the
lines, the initial lines. And then you can go ahead and just make these lines
for all of them. Because for some of you, it might be you might be doing work do
one thing like a series, and then move on to next thing. Maybe it's more it
makes more sense. So you can also just do all the connections first
and then fill them inside. That's also fine. So for the second part of it, I'm
going to do it like that. Another one. And another one. I like it when they
are very close. It just leaves a little
circle in between, and it looks really cute. And there's the
under circle here. When they come very close,
sometimes these connection, they just merge and
make a bigger one, like you can see here as M. Okay. And here is left. Almost there. Having left. One, two, three,
four. That's it. Two more. And the last one. So you can do like this the whole page and then
just go into coloring it. And it's totally fine
to do this as well. If you don't have brush pen, don't walk out of my class saying that I don't have a
brush pad so I can't do this. You can just continue
with your pen. That's also totally doable. So let's do the rest this path. I like how many lines connected here and merged into one
big connection point. And I'm able to do these things
like from left to right. So sometimes I twist
my paper for that, and you might want
to do the same too. Don't feel shy about it. That's okay. Whatever you need
to do to get to the end result you are
looking for, do it. If you don't need to use
a ruler, use a ruler. If you need a brush
pan, use a brush pan. If you need to put
the page upside down, put it upside down.
There's no shame in that. Once the drawing starts
and I have my connections, then I go into, like, a weird flow that I just I can't stop
until they are done. And if I take a break, I can't wait to get
back. It's captivating. And this part for me
is very meditative. I don't know if I can say
medically it's therapeutic, but I think this is the
effect it has on me. And that's what I was very excited to
share with you guys. We're almost there, I
think, just to left. Everything is recording good. I'm gonna fix this
line a little bit. But we're going to work
on the lines in a moment. Anyway. This is totally fine, by the way, that you can move on to the next
at this point. But that's why I want
to do the connections first because it's actually
enough on its own. But as you can see, in here, my lines have a bit more weight, and that comes from how
I was showing you here that by making some of the
lines in certain angles, I'm going to tell you
in a second, thicker. And then this gives also this helps with this organic
look because it feels like imagine you
are looking at this line that instead of this is being totally two
dimensional and flat, when one part gets thicker, imagine that this is actually
how perspective works. When something
comes towards you, it gets bigger, and
then when it goes away, it gets thinner again. So imagine these
lines are instead of sitting flat on the
same distance from you. They are a bit close to you
and then going away and then coming closer again
because that's what this is the effect it creates. So how I do that, I use a brush pan for that. Again, this is doable
with the normal pen too. Just draw the line and fill it inside because it's
easier with brush pen, but it's easier
to make a mistake as well, and I do them often. The way I do it is that usually on the way
out of the page, I make them a bit thicker. I think someone is cutting the
tree outside or something. So this looks good. Or other than that, not or other than that, you can see that
this has curves. When there's a curve, I find where the peak of that
curve is like it's here. So from here, I make it
a little bit thicker. And now the next one is here. This is where the curve is. So I'm going to add from here. And as you saw, I made a mistake there it
went a bit too much. I just made it kept making it ticker until I covered my
mistake, and that's it. And just like that. I know I'm saying
just like that, and it is not just like that. It takes some practice, but this is how I'm doing okay. And here, again, there's a tooth a curve,
so I'm going to try to Add some weight to it. Like that. This
way, immediately, you can see the
difference between now this line and this line, that it just has more weight and it's not so two
dimensional anymore. Now let's do it for the rest. That in here, this is the peak now because the peak happened very
close to the edge, I'm not going to make
this park thicker. This part, I'm
going to help with 0.5 to make the end kind of meet nicely with the rest. So it's like I say,
sharper ending, and now this was
going like that, and there's another peak here. I like that. And now this part, I'm gonna leave it
and towards the end, I'm going to make
it a bit thicker. And just like that,
another line is done. How many lines we have we have one and two. So
we're almost done. So this one I started
straightaway, thick line that I'm imagining this line
was coming like this, so that this part, this is the peak of the curve. And again, to do this, I find it much
easier because it's the natural hand movement to it like this rather than
doing other way around. So I turn my paper
and do it this way. Sometimes I use this to
correct some lines as well, because I try to do this as naturally
as I can with the pen, but sometimes it
feels I don't know, I hesitate and the curve
wasn't perfectly done. So in that case, I put thickness in the outside or outside to
balance the data as well. So this is also a way
to fix your mistakes. Okay. And this one, I think, can get thicker
on the way out like this. I hope you can see
the difference now how much more weight
and impact lines has on the page now after making
these tiny tiny differences, making it a little bit thicker and totally different scenario. And we have the last one here. Like, for example, there, I have my water jar here and I
couldn't go any further, and that's why I made a mistake, so give yourself
enough space, maybe. Would be my advice. Okay, this one like that, I guess on the flip side, it should end up
here, the thickness. And this one, I think I
will keep it as it is. And on the way out, we
can make it ticker. And just like that,
this part is. Again, from this point forward, you can move on to the painting
part. That's also fine. But I like making this
thick and thin play, making it more dimensional, bringing out of the two
D and more into three D. I like to do this trick
to the circles as well. For this end of it, again, I use 0.5. As you can see, this
looks like I know it's dislocated or turning
towards you a little bit, or there's a shadow on one side. I just breaks this two the image into more three dimensional. Like this This is also done. So now two more. And for this
let's put it on this side, because there is a bit
of a mistake here, so I can use this
opportunity to hide it. This is the part why I want to do this
actually first before the connections because I
noticed when I do this, sometimes my connections aren't as rounded as they were
before because now I thicken. So then I need to make
some corrections to this. That's why when I'm
doing normally, I make the lines sticker
first and then go into the connections to
not to redo them. But I want to do this way so you can see that you can choose which parts you're gonna do and which parts
you're not gonna do. That was my dilemma. So this is also done
just like that. And now, for me, our images, de drawing part is over, and we can move on to
the painting part.
6. Painting Our Design With Watercolors Using Wet On Wet Technique: Okay, so now we are
back. What did I do? I sprayed my paints with
water to saturate them. And now, in here, I used lilac, and I think this is maroon
and cadmium yellow, and I think this is cadmium
scarlet that I used. In this one, like, to make
it a little bit different, but very much in
the same filling. Instead of this, I'm going
to use errblosom pink, which you can see here. So instead of lilac, right here, I'm going
to use erblosom pink. Instead of maroon, I'm
going to use purple. So instead of this combo, it will be this combo. And for the yellow and orange, I want to keep the
yellow definitely. And I feel like the
yellow and orange, if I just do yellow and orange, I'm going to keep the same I think yellow and
cadmium scarlet. I think these were
the ones I used. And this combo, I
think is the kind of warmth where the warm is
coming from this painting. And I'm going to I
want to keep that. So let's see. I'm putting that aside, and here's my number 12 brush. So let's start. The way I do these paintings, again, just realize working. I like them this
is, as you can see, wet on wet technique because so much mixing of colors
going on very naturally. So the way I do this, I paint. So I want the colors
coming out of the circles. Like I was saying that
these are the light bulbs. But to be able to
do that, first, I'm going to paint
everything other than the circles with just water. And then when I put paints, they will start coming outside. And this part, let's see how it's going to go
that you never know which directions they go to go and which way they will mix. But first, water outside, then paint inside circles, and then they just
do their own thing. Okay. Let's see how it goes. In the meantime, if it
needs help, we will help. Now I'm putting water with my brush
outside the circles. This, again, I need to do fairly quickly because while
I'm working with paints, I want this to be wet. Every now and then, if you realize some parts
are getting dry, you can help and add more water. Before I go further, I'm going to put
these tapes behind. I'm not going to tape
the whole thing down, but just in the middle parts to, like, hold the middle down. Okay? Back to watering or paper. In the meantime, if you
can't see perfectly, if you miss a spot and then it stays white, that's
totally fine. That becomes part
of the painting. And actually, I quite
like it in here, you can see some parts
were just left white, and that's totally fine. Okay, now I think I did enough. Now we can move on to
the painting part. We're going to start with
let's start with yellow. What I'm doing now, I'm
taking my water this eye drop and dropping some I
already wet my paints, but I'm just getting a touch more water there and
I mix it there and then it becomes a very nice
and thick paint with lots of pigments
and then I just pick up from there directly
and apply it to pH. Okay. Let's start
with the yellow. That I just splashed around
a bit because why not? That's not radiating outside
as much as I wanted, so I'm helping a bit
to come outside. Come on, come play. That this can happen
to you as well when the painting just dries, like the parts you put water
if it dries too quickly. I can see, for example, in
here, it's already dried. Because of recording conditions, I can't quite see where it's
wet and where it's not, and this is a bit of a
problem because normally, I have a light just overhead. And for recording, it's better to do it from
both sides like this, and this doesn't give
me any reflection of the water and this
makes it difficult to see. Okay, now I'm going to
add the cadmium red. As you can see, it's happening. It's coming out
outwards like that. In here, it looks like
I will need to help a bit 'cause I want these colors to come
out and meet outside. Now, let's make
sure that here is nice and wet because
I'm going to paint here next. And here. Yeah, I'm trying
not to fiddle with the rest of the paint too much. I want them to mix
more naturally. But we will get there. Now it's time for purple
for here and here. Yeah, purple came
out to play nicely. Perfect. And let's slush a bit. Because why not? And now here. Do you see how it's
radiating outwards? I love this. This effect. I'm splashing a bit more. And let's bring the
cherry blossom pink. I'm gonna make sure
that it's wet outside. You can see these
parts, I splash that already. They
wanted to paint. It's not very visible as splashes because this is wet on wet because
the paper is wet. It just gets blending. But in parts that sorry drying, you can see it's
not going anywhere. This pink is, like, opaque and very heavy paint, so it usually goes into other paints territory
very aggressively, and I really like that
about this paint. Cherry blossom pink. And I think what it needs, that it needs more. To me, this yellow
looks too raw, a bit like too bright. I want to break that little bit of orange, but not too much. And that's around here. Let's
add some orange as well. As you can see, orange
wasn't in the original plan, but I decided to bring it in because I felt like it
needed this warmth. T. Okay. Now I think we need to help a little bit here
to bring them together. A little bit here. This part stayed a bit
white and splashes. But actually, I like it that
this space stayed here. I think in there we can use at Yellow splashes And when you do more splashes on where the paint
is already that it creates beautiful
mixtures of them, and you can totally use them. But in here, it's
already getting dry. So I'm going to add some more
splashes that will stay. But here is wet, so
it's going to blend. And let's see. I feel like I'm going to help a little bit here that I want. This needs to mix a little bit. But I don't want to disturb this white and splashes.
It looks nice. And this yellow could also
come a bit down here, but overall, I think I'm pretty happy what you can do and
what I'm going to do now. You can pick up your painting and let them swirl around a bit. To make the colors go
where you want them to go if you think it's needed. I felt like this yellow needed
to come down here a bit. That's why I did that
and I'm happy with that. Now I think I need a
bit more pink here. I will do that with
some splashes. And I think we are done here. We just now let it dry
and do its own thing. But other than that,
our painting is done. Here is the original I made. Side by side, I'm happy that I changed
a little bit so we can see the difference
between the two. Even though same drawings, slightly different use of paints can change the feeling of
the painting entirely. It's good to see that too. But overall, I think that's it. What I want to do I
think now looking at the original and now I'm happy how the paintings came out to play in
outside the circles. But like I want the circles to be the
source of these colors. So I want to add more into here. So they kind of stand out from the outside a bit like this. Same I'm going to do here. Because we made them
bleed outwards, but I felt like looking at the other image that maybe
it bleeded a bit too much. And I'm going to do the same
I'm happy with the yellow, but I'm going to do the
same for these ones. So they are a bit
more distinctive. Don't worry about the splashes
that are already in place because I'm going to pick
some of that nice yellow. I'm going to still splash on
them to keep that feeling. And so this way, they are a bit more saturated than separate from the rest. So this was it from my first
watercolor abstract class. I hope you enjoyed it. I'm looking forward to
seeing your class projects, and I will see you
in the conclusion. Thank you for joining me.
See you on the next one.
7. Conclusion: Art Can Be Just For Fun: Okay. This is the class. No. This is the
conclusion video. Jack, this is the
conclusion video. Write it down. Cut. Jack, I can hear you
breathing from here. Thank you for painting with me. I can't wait to see
your creations. What? Jack, how can you say
that? They won't be awful. Bad assistant. I'm sure
they will be all beautiful. And those paintings
didn't quite work out. They still brought you one
step closer to your goals. Let's summarize what we did in this class and ignore
Jack, shall we? We learned about neurographic
art and how it can be meditative and a place for you to escape from the
stress of the day. We went ahead and drew our neurographic scene
with a pen and brush pen. Connected to joints, didn't
leave any sharp corners. Gave more weight to our lines. And finally, we painted our
scene with watercolors. First, we made the paper wet, and then we brought
in the paints to achieve this
outward flowing look, a good exercise for
wet on wet technique. The key takeaway
from this class is that art can be just
for fun and relaxing. And the pretty visual remains are just a beautiful
side effect. I hope you enjoy this
little painting session. Like I said at the beginning,
this is just the beginning. We will go to many other places. This is like reading
a good book while the author is still alive
and actively writing. Who knows where you'll end up? Jack, not another word from you. Yes, I know how Game
of thrones ended, and George R Martin
is still alive. Still, it was really
good for nine seasons. Please remember to leave a review and tell everyone
how much you enjoy the class and other things. You can say other things, too. And your class projects, I'm
looking forward to those. Don't be shy, ignore Jack, and take a photo and share it
in the class project Cale. For every class project, I'm going to do ten push ups
and post it on Instagram. Let's see if you can beat
me with your paintings. Speaking of Instagram, follow me everywhere. Let's
just stay in touch. I'm waiting for you to
follow me everywhere. The video won't continue
until you press follow in all the social media. Once again, thank you for making it to the end of
another class of mine, and I will see you
on the next one. Until then, stay creative. Bye. Bye, bye, papa. Okay, let's do it.
Class number 17, who thought I would come so
far? I certainly didn't. But with the classes in mind, we should easily reach 20, like at the end of May. 2025. It sounds like you
need a creative gateway that will take you to a land where
your mama, no, mama, mama. Oh, mama. Oh, mama. Your mind. That's what
I was trying to say. Your mind can relax. Okay. In this class,
we will have fun. Relax. Why can't I remember
relax? Just relax. Okay? The word is relax. Just relax. Okay. While feeling a
little guilty at at. This is the Polish word
all of you can learn. CorvaV useful word.
In this class, we will I don't know now. Relax. Take it the I think I said it not exactly
like how I wrote it, but it made sense.
Was it coherent? I've been experimenting with these abstract paintings
for a long time, and now I decided
it's time for you to, it's time for me to bring you into this ban,
not for you to bring me. You can also bring me,
but that's not baa. This is not This is
not what's that. This is me bringing you the fan. Me bringing you the fan. Yes. How is the
battery running low? ****. Yes. But apt. But auth but huh, uh huh. If you are looking for a
creative and what calming way? Again, after a calming
way to unwind. Again. Again, I don't know. I wonder how many times I said again in this class
or any class, 'cause I'm my own
director and I'm like, again, again, I don't say
cut, but I say again. That's my cut. Again, again, if you are looking for a come on, the battery will run out. If you are ready to let
your creativity flow, join me on this fun
and relaxing journey, and let's make some art. Let's make some art.
Let's make some art. You know you want to Step one, create a urographic art. Don't rush it. Again,
this is a bit bull ****. I'm okay with that.
Let's move on. Step six, include
a description of your creative process and
the feelings you experience, not the experience you felt. The key takeaway from
this class is that art can be and the
beautiful, no, pretty. I rolled it too much. Again,
is everything recording? I hope I hope I don't
know how to do my hands. Like I said at the
beginning, this is just a. And this was the class project. I'm stopping the VDO, and this is it. This is it? This was the fastest
production ever, I think. Is everything recording
still? Yes, I'm here. My camera can can't find me. So what do you think
about the new jumper? Do you know that I actually
borrowed it from my wife? I need the red one,
but at the beginning, this sounds like a good
idea that I'm going to have a different color
hoodie for every class. I thought visually it will
be easier to separate. Oh, this is like this
color, I know this class. And then when I'm doing other classes under
the same title, I can use the same color and I thought it would be
visually easier to follow. But at some point, I realized, I'm just keep buying hoodies. I don't have a place to
put them even at home. And I'm starting to see
the downside of this idea. Of course, it was Jack's
idea, like every bit idea. So I'm approaching
this a bit more on a sustainability level now that I don't want
to create waste. I I don't want to
keep buying hoodies, but in the meantime, I want to complete this
rainbow of classes of mine, and red is a color
I was missing, and she just happened
to buy red hoodie. Normally, I don't wear
one with a log on, but for this occasion,
you're welcome Editas. I think in the color
scheme, what's left? I'm not sure. I need to
check and send you guys an update on that where
we are on the rainbow. Okay, so I will sign out. I'm going to go and
get some coffee because I think I deserved it. And after that, I will
transfer the files and start editing because
this class is supposed to be out
in, like, five days. And but painting is
done, everything's done. I haven't shown me this. Maybe I will squeeze
this in somewhere. This is the painting we
are going to create. Oh, we will still take photos. Okay, I got to go. Bye.
 Fatih (fab) Mistacoglu, watercolor storyteller