Transcripts
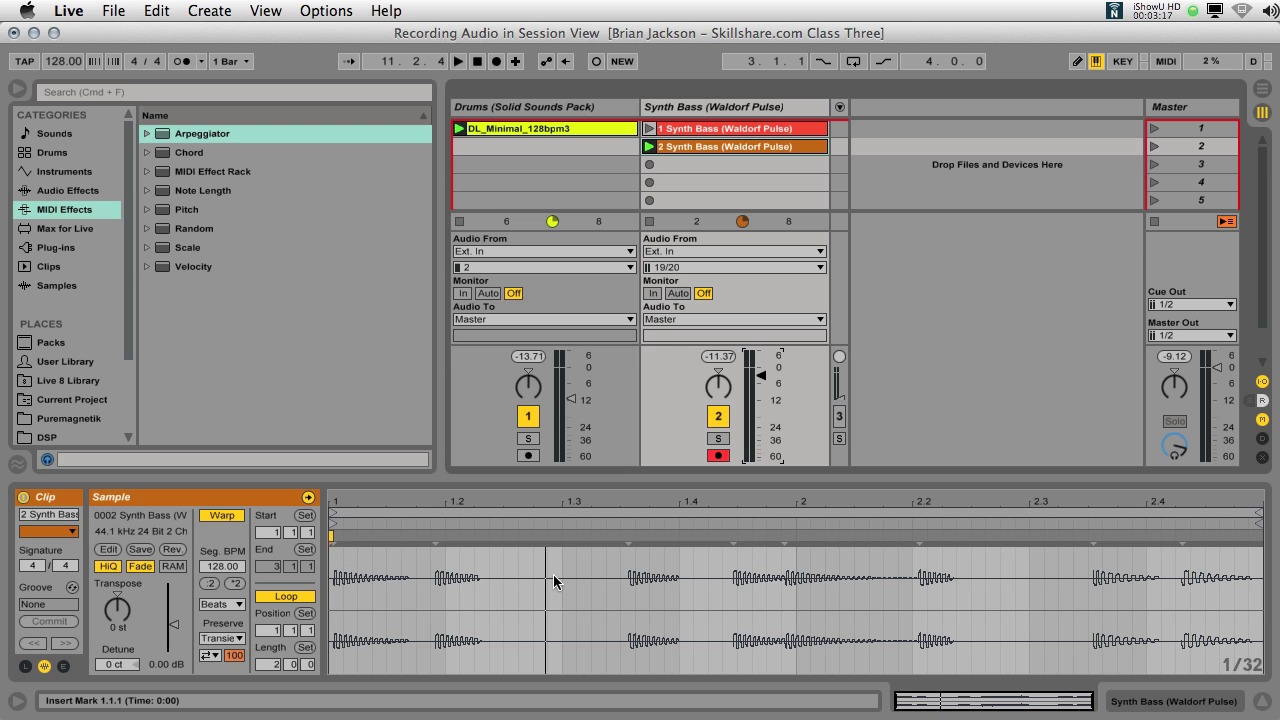
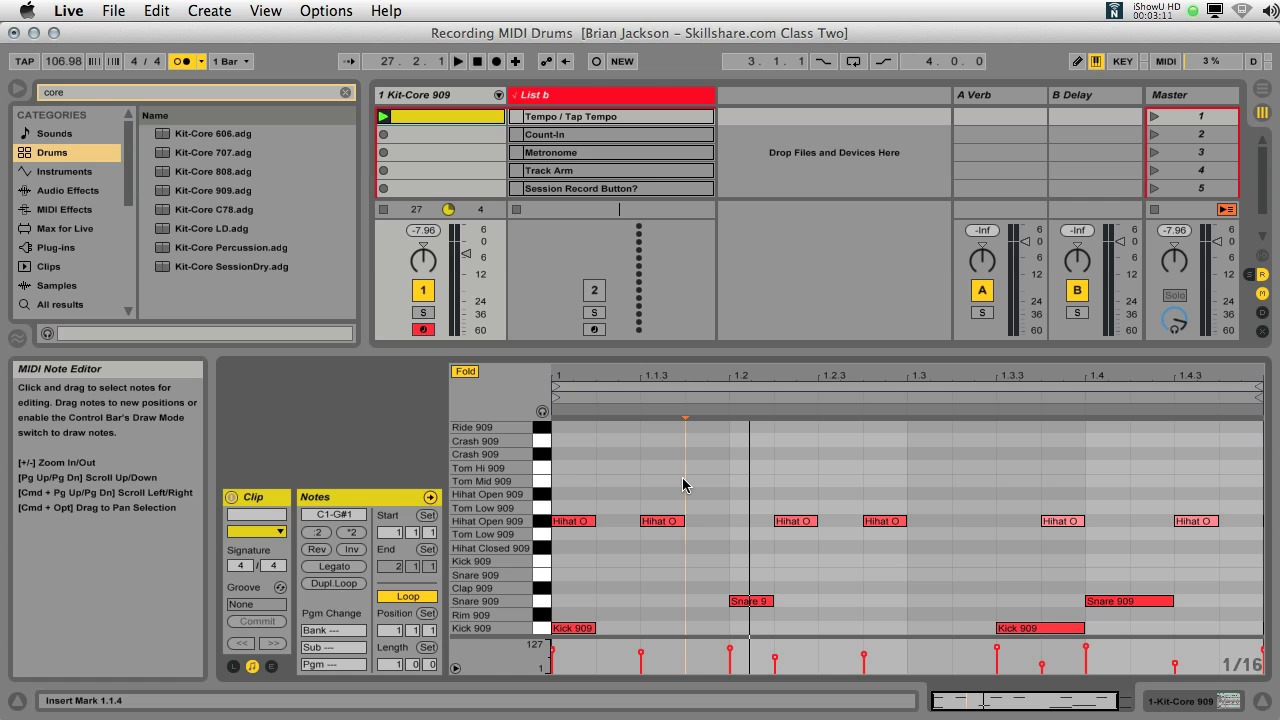
1. Trailer: Ableton Live is uniquely powerful audio software, because it's equally strong in three areas. Helping you to create, produce, and also perform music. Though other software is useful for one or two of these. Nothing comes close to being as good at all three. This class, part of my Ableton Series here on Skillshare, is perfect for getting started and learning the fundamentals of Ableton Live nine. Whether you're a producer, musician, sound designer, DJ, or just interested in working with audio or media, in a computer. In this first class, I'm going tell you why I love working with Live. I'll walk you around the interface and demonstrate the basic ways to organize musical ideas with clips, scenes, and tracks. I'll also introduce Ableton's core concept of warping which allows you to match up the tempo of different audio files that were recorded at different tempos. My name is Brian Jackson, and I'm an Electronic Musician, Audio Engineer, Author and Educator based here in Brooklyn New York. I've been around music my whole life, and had been making music with computers since the mid 90s. I was one of the very first Ableton certified trainers, and I'm the author of the music producer survival guide, chaos creativity and career and independent and electronic music, and its companion book full of interviews the music producers survival stories. For well over a decade they've taught every level of student from true beginners to Grammy winners. Music and music production is my passion, and I love teaching people how to do what I do for a living. Let's get started.
2. Why Live?: This is Ableton certified trainer Brian Jackson and we are going to talk about Ableton Live. Before we even get started, why Live? Why not something else? Well, just so you know, I'm also a Pro Tools expert and I'm actually using Pro Tools to create this project in the background. I also teach Logic, but Ableton Live is my personal DA of choice when I'm working on my own creative projects. Looking here on Ableton site, of course, you can go look at this anytime you want, you can see the three main points. You can create, produce, and perform, and the last one there is really what makes Live different than the other ones. You're probably used to looking at audio software. If you've been using any other DA that plays from left to right and you can drop in files and edit and record and do all the things that you'd want to do as a musician or a music producer. Of course, Live can do all of that. We're going to spend a good amount of time on Arrangement View in class four, but the first three classes, we're really going to focus on Session View. Session View is the main thing that makes Live different in that it's a nonlinear way of working. Here, you can see a stripped down version of a remix I did a few years ago for the UK based Bombay Dub Orchestra, and I'm just going to play you a few things to give you an idea of why not only would this be great for remixes as it is, but also for producing original material and for going onstage. So, let's see here. See, I'm clicking on some stuff. Now, what if I didn't want to use my mouse at all. Notice there's a bunch of stuff happening in the background here and my mouse is not moving at all. Part of the reason that's possible is that Ableton has worked with a large number of companies to create control surfaces which is something we're going to get into in class two. What they mean by natively supported control surfaces, if you have anything in this list, it's already programmed to do control for Live. So for example, I was just using the launchpad here to launch clips and launch scenes, and those terms we're going to get into in detail. So, I could start out with my intro, figure out which parts go well together in here, then figure out what would go on maybe a little bit later in the song. You can see this is actually a pretty involved project, but I was able to organize it really clearly and neatly for myself just by using all their different features that are meant for making your life easier while you're making music. Of course, we can do traditional arranging. This is something, like I said, we're going to get into much more detail in future classes, but you can work in the traditional way too and just hit play and go from left to right. So, the way in which all this content was created, both in terms of the audio and the mini clips, working with effects, getting things of different tempos to work together, those are reasons that people like to use Live. It's just really fast, it's really easy, it's a lot of fun, and it's super customizable, so you can get it to really do exactly what you want. Like all does, it does have a bit of a learning curve. Digital audio workstations are advanced, sophisticated pieces of software, but they are mature enough now that they've made a lot of common tasks much easier for us. So, in the coming classes and in the coming lessons and topics, we're going to go into almost everything that you've seen here and we're going to start out slow and start out small. But in a matter of time, you should be able to do something like you just saw I had set up here.
3. Finding Your Way Around: In this topic, we're going to take a look at how to find your way around in Live 9. When you first launch Live, you'll notice that the Help View is open on the right side of the interface. I do highly recommend taking a second to look through the different tutorials and lessons that they have built-in right into the application. If you don't want to see the Help View, you can just click on the X here to close it up. In the bottom left, you'll also see the Info View and this is open by default as well. This view will allow you to see information about any of the interface elements that are below your mouse. As you can see here as I put it over a clip, the Info View in the bottom left tells me about a clip. If I put it over something in the mixer, it'll tell me the name of that setting as well. If you don't want to see the Info View, just click on the little arrow right here. Now, across the top of the screen, you'll see what's known as the Control Bar. There's a whole bunch of different elements up here, and we will talk about each of these in relevant topics. The most basic ones, you'll notice right in the middle, is the transport, which is where you stop and start and record, and also things like the global tempo over here on the left. Again, we'll come back to these when it's relevant. The main view in Live that'll pull up when you first launch it is known as Session View. This is the view that you need to Live and one that you'll be unfamiliar with if you're coming from any other piece of audio software. If you press Tab, this will take you over to what's known as Arrangement View, which is more of your traditional linear timeline. In the upper right, you'll see that there are switches in case for some reason you forget the shortcut, but pretty much everyone that uses Live just uses the Tab key. Now, in the middle here of Session View, you see I have a couple clips. If I double-click on the name of the track, it'll switch the Detail View to what's known as Device View. This would be where I'd have any effects or instruments. To get back to the Clip View, I can press Shift tab or in the bottom right here, I can see the Miniclip overview and the name of the track. I can just single-click on either of these to switch my view. Again, a lot of people will just use Shift tab once they become comfortable with the interface. Over on the left, we have the browsers, and these are really heavily integrated into the software. So, we're going to spend a bunch of time on these in future topics. Basically, this is where you can search for sounds, presets, any of the types of elements you'd want to drop onto a track or anywhere into your set. If you have a second monitor, you can also choose to see both arrangement in Session View at the same time. You have to have Live version 9.1 to see the second window option. Here, I can see both Arrangement View and Session View at the same time. If you only have one monitor, you likely won't want to use this option. Now, another thing about Live that takes a little bit of getting used to is that a lot of the commands are in the context menus, which is also known as right-click. If I right-click on this clip, I'll see all of the relevant commands to that clip. If I right-click somewhere else, I'll see different commands and sometimes I'll see ones that are available everywhere. Now, most audio applications include a number of right-click options. The difference here is that those commands are not also going to be in the Traditional menus. You will see some in both, but we'll come back to ones where you'll only find certain things in the context menus. Now, if you ever want any help finding your way around the interface, make sure to check out the View menu, and you will also see all of the relevant shortcuts that it's going to make it a lot faster for you to show and hide different interface elements as you're working on more complex projects. In future topics, we will come back to talking about the different interface elements we've discussed as relevant.
4. Essential Preferences: In this topic, we're going to take a look at some of the preferences in Live that everyone should know about. We will come back to different ones as the relevant throughout different classes. First off, to find the preferences on a Mac you want to go to the Live menu and you can find the Preferences option right here. If you're on PC, you'll find that the Options menu is where you'll find the Preferences option, at the bottom. Once you open up the preferences, you'll see it's organized into tabs, which you can see here on the left. We'll start with the Look Feel tab. This is where you can set up how Live looks. For example, maybe I want to have a different skin. Or for whatever reason, you want to zoom the interface in, you can also set it up so it's bigger or smaller depending on the size of the screen you're working on. To get back to 100%, just click on the field and hit delete. The Audio tab is where you set up which driver you're using for your audio input and output. If you're on Windows, you'll see a couple of different options up here, potentially. On Mac, you'll only see CoreAudio. Then pick the input device and the output device and the sample rate. For most people, 44,100 samples per second is just fine. If you're working on a video project, you may want to work with 48, but the sound quality is basically the same. The buffer settings we'll come back to when we get to recording audio in later classes. At the bottom here, you can also use this to test if you're getting sound at all. The MIDI Sync tab is something that we'll come back to in much more detail in the next class, but for right now, it's good to know that this is where you set up any control surfaces or other midi-related hardware that you have set up on your computer. The File Folder tab is where you tell Live what other applications that you're using such as if you're using Max for Live. Where your Max application is loaded and then any other sort of folders such as the Temporary Folder, the Cache Folders, these items we will come back to as relevant. Then here, if you're using any third party plug-ins, Audio Units, or VST's on Mac, on Windows you'll just see a VST option. The Library tab is where you set up things related to the library. For example, anytime you're dragging files into the browser or over into the library, it'll ask you if you want to collect those, and also any other life packs that you want to install. Where should those get installed? If you do have Live 8 and you do want to see your old Live at library in the browser here on the left, then you tell Live where it's located. The Record Warp Launch tab, we'll come back to you in detail when it's relevant, but for right now, I do have a few recommendations. I highly recommend that you turn off Start Transport with Record. This is a feature that was added in Live 9 and it's on by default. I do recommend turning that off. Another one that I also recommend turning off is the Auto-Warp Long Samples. This is on by default as well. We will come back to warping long samples in future classes. For right now, just keep in mind that these are called preferences for a reason, and different people like to set them up in different ways depending on the type of project they're working on. The CPU tab is for when you have multiple processors. Nowadays, most everyone has multiple processors. So you will want to leave this on. Then finally, the Licenses tab. I do recommend that before you go ahead and authorize your copy of Live, that you go to Ableton's website, create your account and login. That'll just make things move a lot smoother. Like I said earlier, we will come back to the different preferences as relevant throughout different classes and topics.
5. Saving Your Work: In this topic, we're going to talk about saving your sets. So, let's say you have something you have been working on and you're really happy with it. You'll notice that this is still named untitled and what this means is that whatever I've done has not been saved anywhere. Live is pretty good about keeping track of everything in a temporary folder, and if you crash, it is pretty good about recovering work. But it's always a good idea to save whatever you're working on before you get too deep into the project. To do that, we'll just go to the Save Live Set option under the File menu or command S or, on Windows, control S. Let's call this Song 1 with the.als file extension, that means Ableton Live Set. You may think of this as a song and I wouldn't think of it as a project, there's a reason for that. So, let's go to my desktop, and I have a folder here called My Ableton Live Projects. Now, when I save this into here, not only is it going to create the set and give it the name Song 1, it's also created a folder. Inside of that folder name Song 1, I can keep other songs or other sets. If I look over here in the browser on the left under our Current Project, you can see I have the Song 1.als. Now, let's say I wanted to make some changes to this set, but I wanted to be able to go back to whatever I was working on right now. To do that, I want to go File, Save Live Set As, and now I do want it to go into this same project folder because I'm going to be using all of the same audio files and other things along those lines. So, I'm going to call this version two and now hit Save. You'll see within this project folder, I have song 1.als and Song 1 v2.als. Then across the top here, we can see the names of the song or the set and the project name. So, I'm going to go ahead and show you what this looks like in the finder. You can see here, I have my Song 1 project and an Ableton Project Info folder, leave that alone, that's just for Live to use. But notice there are no audio files or no samples in here. If I want to make sure that all of the samples I'm using or all of the audio files I'm using such as this funk drum loop, this shaker, this congas, or any of the other sounds that I have loaded in here. If I want to make sure that when I take that to another computer I have them with me, I want to do what's known as Collect All and Save. Now, when you do this, you'll be prompted with this dialog box. For right now, when you're getting started, anytime you want to move your set to a different computer, I highly recommend just leaving everything here checked. Now, if you're working with a lot of their large factory packs such as some of the multi-mode drums, you may want to turn this off. But for right now, I'm going to leave everything on here and hit OK. Now, you'll notice what it did is it created a folder here called Samples and I can see all of the audio files that I imported into my set. Again, anytime you want to move your sets to a different computer, I highly recommend doing this. Now, one other thing we'll look at here. Let's say that I wanted to make a backup copy of what I'm doing. Now, the Save Live Set As option here let me keep working on the newly named set. But save a copy is going to happen in the background and you can see here Song 1 v2 copy, and I do want to keep it in this project folder because I'm using the same samples. So, I'm just going to go ahead and hit Save. Now, notice that I'm still working on Song 1 v2. Let's say that I do want to create a new song. When I create a new set, it's going to be totally empty, and this is probably what you see when you pull up Live for the first time. Now, if I go ahead and save this, I do not want to put it in this same project folder. I wanted to create its own project folder because I'm working on a totally new song. So, again, I'll go to my desktop, open up my Ableton Live Projects and I'll call this Another Song. There you go, that's the basics of saving your work in Live 9.
6. Organizing Clips on Tracks and Scenes: In this topic, we're going to talk about clip, tracks, and scenes. Clips are the basic building blocks of any live set. There are how you get sounds to play, whether a mini clip on a mini track, or an audio clip on an audio track. There are four basic types of tracks and live. The master track which is always there. You cannot create it or delete it. It's always there. Then, as mentioned, we have what are known as mini tracks which you can create from the create menu, or audio tracks. Of course, you can create any of these from the context menu. Then, the fourth type are return tracks, and we're not actually going to talk about these right now. We're going to come back to these in class four. But these are primarily used for effects. Again, we'll return to those. So like I was saying, clips are the basic building blocks of any live set. On this mini track, I have this baseline, and on this audio track, I have this drumbeat. Now, only one clip can play at a time on a track. But if you want to hear a couple of things at the same time, you just put them on different tracks. In the next topic, we're going to talk about all of the different ways for controlling the starting and stopping of your clips. So for right now, we're just going to introduce ways of organizing them in session view. So the tracks are the vertical columns, and like I said, you can only play back one at a time. But you can have basically as many tracks as your computer can handle. Then, to organize ideas, say I wanted to have this whole row be my introduction, or my verse, or my chorus, I would put them all on the same scene and the scenes are over here on the master track. So if I launch this scene, I can hear all of the ideas I have organized on that scene. If I want to stop all of them. So, of course, right now, we're just talking about session view. If we hit tab, then we'll be going into arrangement view, and we are going to come back to this in detail in class four. Just keep in mind that it's the same mixer in both views. In here, there are no scenes but we do have tracks, and we will come back to this in detail in a later topic. So, for right now, just keep in mind that if you want to have multiple ideas playing at the same time, they need to be on different tracks.
7. Clip Launch and Quantize: In this topic, we're going to pick up where we left off in the last one, and talk a little bit more about the deeper control on how clip start and stop. So, I just hit play, and why am I not hearing anything? Well, let me hit Tab and go into Arrangement view. If you're working with a normal dar, your traditional dar, whenever you hit play, it'll start the time-like plane from left to right and you'll hear whatever you have arranged. Now, we've not talked about Arrangement view yet, we're going to come back to that in Class four. In the meantime, we're focusing on Session View, which is really one of the big things that makes Live unique and why you want to use Live, say, compared to something else. So, if I want to hear a clip, not only does the global transport have to be playing, but I need to launch that clip. As mentioned in the previous topic, only one clip can play at a time. In fact, only one thing can be launched at a time, and the concept of launching is really important. If I hit Stop, you'll notice that this clip is still launched, and what that means is that, if I hit Play, it will continue to play. We launch another one. So, spacebar will stop playback, but these clips are still launched. Now, not only can one clip play at a time, but only one thing can be launched at a time. So, what else could be launched? Well, the Stop buttons, notice these squares match the same shape and the global transport. To stop anything from playing, just launch a Stop button. So, in fact, we do launch stops. Now, if all of the clip slots are full, for some reason, if these were all full of clips, I have a stop for each track, and there's also a global stop over here on the master. So, let's say I have this idea organized on a scene, and then I launch another scene. Notice that I'll launch the Stop button on the scene here and stop the Shaker from playing. If I don't want that to happen, I can just right click or press command E and Windows Control E, and now watch what happens. Notice that this clip keeps playing on the Shaker track because there's no Stop button here. If I launch a different scene that has all stopped, notice I can also launch all of the stops, and stop all my clips at once. So, another thing you may have noticed is that, all of our clips are coming in on the beat. By default, all clips followed this setting here on the left. This is the Global Quantization chooser. Not to be confused with MIDI Quantizing or other types of quantizing. What this means is that clips can only start or stop in one bar increments. What if I went to none, then my timing would have to be pretty spot on. Yeah, not so good. Let me go back to one bar, and in fact, let's do two bars. Now, that means even my Stops can only happen every other bar. I'll set this back to one bar, which is probably the setting most people will use most of the time. Now, let's say that I did want to have some clips have different settings other than one bar. You can use the key commands here and switch them on the fly, but you can also just give your clips different settings. So, if we go down to the bottom left, you'll see that the little L switch is enabled, and that shows the launch box. In here, you'll see that there is a quantization setting. By default, all your clips will follow the global setting, which is the one on top on the control bar, but you can give every clip its own setting. Additionally, you can play around with the four different launch modes, and these are best worth playing around with small quantization settings. So, if you want to play around with them, make sure you set it to something like eighth node or a 16th node. Really briefly with repeat, if you hold it down, it repeats the first quantized value. Toggle, you click, it turns it on. You click, it turns it off, and gate, only why you hold it down. The default is trigger, and that's the one if you click on it, it starts, and you click on it, it starts again. So, that's a good introduction to the basics of starting and stopping clips using scenes and playing around with quantization and launch mode settings. In the next topic, we're going to talk about more of the settings in the Clip view that allow you to do things that you're probably wondering how I accomplished in this topic.
8. Clip View 101: In this topic, we're going to pick up right where we left off from the last one. So, I'm going to go ahead and launch this scene. We can see here I have one, two, three, four clips, three of which are audio and the last one here is MIDI. Again, we're going to get into MIDI in another class, but we are going to be talking about features that are the same for both audio and MIDI clips. So, we looked at the Launch Box last time. I'm going to hide that since we don't really need to look at that right now. The features we really want to look at in Clip View are on the right side of the sample box for audio clips, and if we look at our MIDI clip, we'll see that. Even though there's a lot of differences going on here, the section on the right of the notes box is exactly the same: the clip start, the clip end, the loop switch, the loop position, and the loop length. So, let's start by just looking at this one drum part here. So, we can edit the starts and loop point, all those sorts of features graphically or with the text boxes. The start is represented by this flag right here, and you can see when I dragged it to the right, it is the same as if I had typed in here. You can also just type in say, three, and that will now start this clip at bar three. If loop is turned off, you'll notice that the end field becomes active. I'm going to drag this over here to bar four, and then this is now what's known as a one-shot because the loop switch is off. So, to play from bar three to bar four and then stop. If I re-enable loop, you'll see that the end flag is still at bar four, but it's not active. Anytime loop is on, the end is not going to be active. Now, the loop is telling me it is starting at the beginning, and it is eight bars long. Let's make this loop four bars long. So, notice it will start halfway through, and then it'll catch the loop back at the beginning. We could also do something like this. I want the clip to start at bar one, but I want the loop to start at bar three. Let's bring that back over here, and let's make our loop only one bar long. So, you can see that the clip will still start at the beginning, but then it will catch the loop at the end here. Now, one of the things I'm going to make sure that everyone here is really good at is moving around this loop race without actually having to click down here. So, first of all, if you want to select a section to loop, along the top half of the waveform, you can select what you want. At the bottom, it's going to start to play from that location, just as if you click at the top where you also see the speaker, the Scrub Tool, it'll start from that spot as well. So, it's only right on the way form the top half that you can make a selection. Then, if you go to your Context Menu or you hit Command L on Mac or Control L on Windows, it will move the loop race right to that location and it'll move the start marker right to the start of the loop. If I want to move this around, you can drag it around. Just be careful, because it's easy to make a mess of things. So, here's what we're going to do. I'm going to use the up and down arrow keys on my keyboard. Up is going to move it to the right by the length of the loop, and down is going to move it to the left. If I want to double or half the loop, all that I do is hold command, that would be on Mac, control on Windows, and now command up doubles it and command down cut it in a half. So, let's look at that feature on a clip that has some more variation out of here. I'm going to go ahead and select this, Command L, and then I'm going to duplicate this and make a variation on it. Let's go ahead and make sure this snaps onto the grid. Now, notice here that this is orange. That means it rounded off. So, I actually didn't do a very good job making my selection here, and that is because the grid was set to 64th note. So, we're going to go to the options menu and you see I can widen the grid or narrow it. So, I'm going to hit command two a few times, and now I'm to an eighth note grid, which is a little bit more useful. So, now, if I select that command L, I should have a little bit more use of the part. I'm going to option drag to make a copy of this, and then I'm going to get my command up, I hit command down and up arrow, command up, and now I've given myself a few variations on this. Let's do one more here. Command down a few times, up arrow a few times, down arrow one more time. I could do the same thing with the MIDI part if I wanted to cut that in half or just use the first half for this. Option drag, or Alt drag on Windows, and then maybe I want to use just the second half. So, I click on the loop race. So, it's highlighted and hit the up arrow. Now, I have a couple different variations. I'll remove my stop buttons like we looked at in the last topic. Now, Scene One is this idea, Scene Two is this idea. So, we will look at more features here in Clip View in Class Two for the MIDI clips and Class Three, we'll dig back into more of the features down here for audio clips.
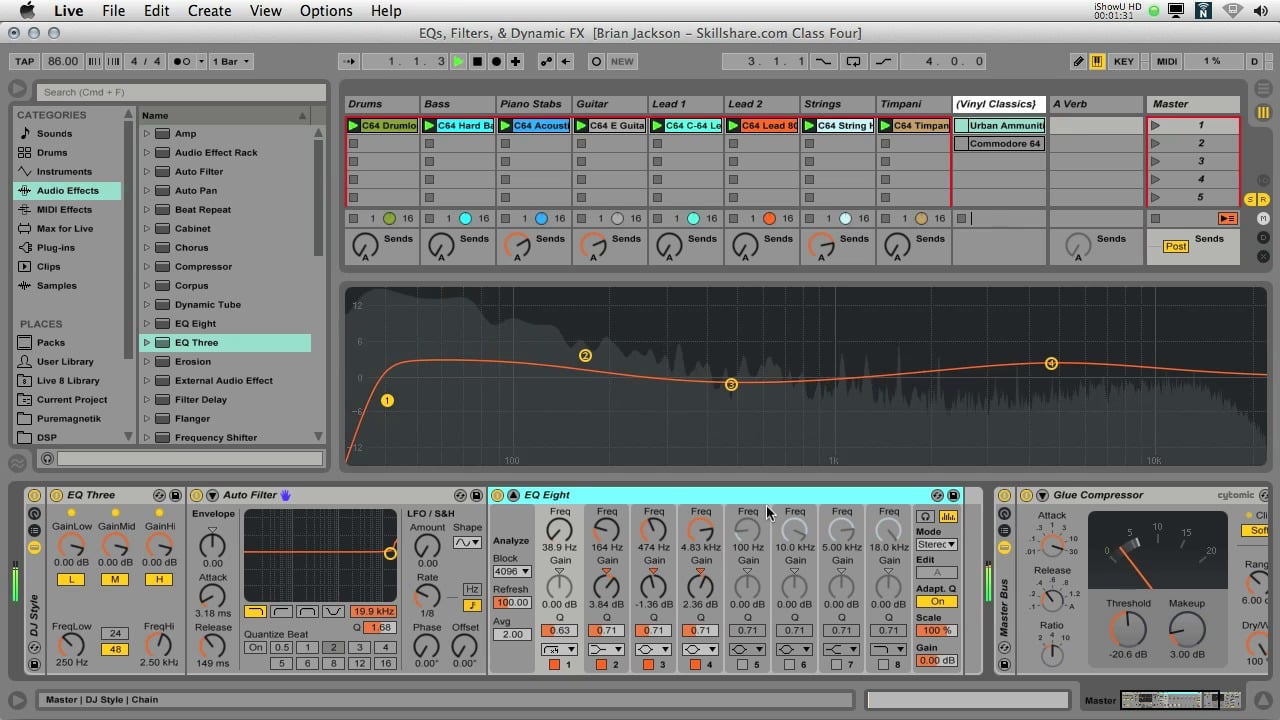
9. Live Browser 101 : This topic is the first of three that talks all about live browsers. In this one, we're going to do an overview of the categories and the places. Now, if you don't want to look at the browsers you can always hide them from this button up here, or you can also find that there are shortcuts for showing and hiding the browser. Now, before we dig in too much, I just want to say that it can take a little while for all of this to make sense since some of the material show up in a couple of different places. So, actually what I want to do is I want to start out with the instruments category. You'll see here, analog, collision, drum rack, electric. This is all of the built-in devices that come with live suite. If you just have live standard or live intro, you won't see the same list. But the concepts are the same. So right now, I'm looking at a device here called operator, and a preset here called acid-base. So, I'm going to go ahead and drag this onto this midi track, and let's check out this hit I have put together here already. Now, let's go look under the sounds category. Sounds are all of the presets from all of the instruments, but categorized by the type of instrument or type of tambour. So, you can see here I have the same acid-base preset under sounds. The advantage of this is that if you don't know which instrument that the sound was built with it doesn't matter. If I were to drag acid-base out here, you can see it's the exact same thing. So, in essence sound is really good when you don't know your way around all of lives instruments yet but you just want a certain instrument. So, the terminology can cause people a few problems. Their instruments are there built-in devices and sounds are essentially a collection of all of the presets made by all of their instruments. Now, the drums category is going to show you everything related to drums. For the most part, these are going to be presets for their drum racks or impulse which are instruments that are designed for drums, drum rack and also impulse. Now, let's go to the audio effects. Audio effects are processing devices that cover everything from EQs, to compressors, to delays, and all other very fun unique stuff as well. So, I'll just give you an example of one of their audio effects. This is the beat repeat. That's just one example of one of the audio effects that you will find over here, and of course in later classes we're going to talk about these a lot more in depth. Now, midi effects, are effects that go on midi tracks that happened before the actual instrument. Let me turn off the arpeggiator. So, that's just one example of a midi effect. There are all other ones in here that we'll come back to in later classes. Now, Max for live does come with live sweet and it's an add-on if you have live standard. Now, Max For Live is a version of Max which has been around since the 80's currently developed by a company called Cycling 74, and it's integrated into live and the really cool thing about it it can be something along these lines, such as the buffer shuffler. So, it can be something wacky like this that you can use to chop up beats in real time, or it can be something very utility oriented such as this oscilloscope. That doesn't even begin to get into the types of things that Max For Live can do for you. But you will find combinations of instruments audio effects and midi effects, and a lot of times the audio effects under Max are also utility such as this oscilloscope. Now, plugins is going to be for all of your third party plugins. If you may recall from the preferences topic, you can set this up in the file folder tab of the press on Windows of course you'll only CVST, and in the Mac you have the option of audio unit or VST. If I wanted to add some say reverb to this, I can just drag this effect out, and this is one by a company called Odeo damage. In future classes will talk more about using the VST and audio units. Now, the clips category is basically a collection of all of the different live clips. Which are mostly audio samples that have already been setup so they'll work properly in live right away. I'll talk a little bit more about where those come from in a second. Now, samples are going to be all of the individual audio files that are used in all of the presets for the sample based instruments, such as the drum racks, impulse, sampler, and simpler. We're going to come back to talk about search and a little bit which is going to make a little bit easier when you actually want to find. Some of these samples, this is a huge list. Now, packs has to do with the bundles of presets and samples that come with your version of live. Now, if you go to Ableton's website you can also buy one. There's a whole assortment of really cool stuff here from very practical, very functional, to really out there really fun stuff. Now, you do get an assortment of them when you buy live. If you only have the demo, you're pretty much only going see the core library. Actually that's where I've been getting a lot of the samples from, for using in some of these demos especially under this clips one here. Then other ones you'll see I have been making use, and we'll be making use of some of the loops from the solid sounds, samples under loop masters, and then also some of the vinyl classics. If you own live suite and also live standard you'll see you have lots of these. Now, the user library is really useful for keeping track of your own presets. So, whenever you make your own presets, you can keep track of them in here, and we're going to come back to that a little bit later. Live A Library would be if you owned Live 8, and you have a lot of packs and presets already in there, instead of trying to merge them together, essentially they allowed you in Live 9 should just link to the Live A Library, that is under the Library tab in the preferences. The current project is going to show you all of the sets that are in your project. As you may recall we talked about this, in the topic called saving your work. We are going to talk more about the places in the next topic, but for right now just want to show you a little bit about how you can find your way around using just the Arrow keys. So, once you click on one of the categories or places, you can use the Arrow keys to navigate up and down, if you're looking in say some samples, and you want to audition these, you'll see here in the bottom left, you can turn on the preview, and if at any point in time you want to stop, you can just hit Escape. So, if you end up with a really long loud sample, just hit the Escape key. Alternatively, if you have preview off, you can hit Shift Return to audition any single sample. If live is playing back, it is going to try to warp the audio to match the tempo. The preview volume over here on the master track, allows us to control the level of previewed samples coming out of the browser. Then perhaps I want to say, I have this not be warped. Raw means it will always play back in its natural tempo. Sometimes you'll notice the difference and sometimes you won't. So, that's a pretty good start for now. In the next few topics we're going to go more in depth and different ways you can find your way around in here, add your own folders, and some really cool ways of adding stuff to tracks very quickly
10. Search and User Folders: This topic picks up right where the last one left off, where we previously talked about the different categories and places that you find within Live's browser. In this one, we're gonna talk about searching and also about how to add your own custom folders to places. So, you'll notice up here in the search field, I can hit command F, of course on Windows that would be control F, and let's say that I was looking for a kick drum. So, this gives me more results than I think are actually usable right now. You can see at the bottom it, says all results. If I want to see just samples, I can click on samples right here and now it's showing me individually AIF away files, that would be kicks. I could also go to the clips category and this would show me Live clips, which would be usually some sort of a loop. If I went to audio effects, these would probably be presets that someone had built, where they think this might be usable on say a kick drum. If I go to sounds, this is now going to show me any sort of presets from the instruments that would be making kick drum sounds. So, let's try another one here. Let's say I'm looking for a limiter, and nothing shows up under instruments. Well, that's probably because I know it's an audio effect, but let's see what happens if I go back to all results. Not only do I see the limiter device, but also all the presets for the limiter. I also see I have the Max for Live limiter and an Audio Unit limiter. Let's do a search for reverb, and again this is all results, so I'm seeing all the samples that are in here in addition to any plug-ins and see I have an isotope reverb and of course under audio effects, I see a couple of different reverbs. So, basic idea there is that you can search and then sort your search by clicking on the appropriate category to see the results that are relevant to what you want to do. I'm going to hit command F and then delete to get out of there and you can see it cleared out my search field. Now one thing you'll want to keep in mind, let's say I had been searching, lets say I typed in base, and let's say I go ahead do some work over here somewhere, then I go back over to my instruments, and it may look like I'm missing some of my instruments. So, I just have to remember that if there is a search in here, it's going to keep the search filtered. The browser is going to be filtered, so just go ahead and clear out your search and then any of your seemingly missing devices or sounds will show back up. So, let's go down here to the bottom half of the browser where the places are. So, we talked a little bit about packs, user library, the Live 8 library in your current project. These four will always be here, assuming you've added the Live 8 library and user library setup in your preferences. Now these other folders here are ones that I've added and what this means is, I've either dragged them from a window in the Finder Explorer or from my desktop over to this area, or I clicked on the add folder link right here. What that does, is it's going to allow Live to scan all of the contents and make this searchable. So, let's go into this folder here I know that has a bunch of drum beats by some different studio drummers and I'll type in one of them and it's going to sort it down so I can see only the beats by that particular drummer. Remember if you want to a preview, just hit escape. You may have just noticed a little circle right next to places. So, what's going on there? Let's talk about that for a brief second because you're going to see that. What's happening when you see that is that the Ableton index is running in the background to create a catalog of all the files that have changed in any of your user folders. Now just keep in mind that this can take allow the first time you drag something over here. So, if you're in a big hurry and someone shows up with a one terabyte hard drive full of samples, it may be a little bit before you can search them over here. So, you could just use your finder or explore to do your searches until Live is finished indexing everything. Also, the first time you launch Live and the first time you add a lot of folders to places, it can seem a little slow or sluggish until it actually gets caught up. In the next topic, we're going to talk about a lot of the quick ways of adding content that you find over here in the browsers onto the tracks.
11. Browsers and Tracks: In the last topic, we talked about searching and adding your own user folders to places here in the browser. In this one we're going to talk a little bit about how to integrate the browsers with live. Like I said a few topics back, live's browsers are heavily integrated into the application. There are a lot more than just a convenience for finding files. So, let's take a look at some of the shortcuts for finding our way around. Once I click on a category, I can use the up and down arrow keys and then I can use the right arrow key to jump over, the down arrow keys and if I wanted to see what's inside of the base folder here, I'd hit the right arrow and then you can see here how I can use my down arrow keys to move up and down. You may recall if preview is off, I can do Shift returned to review the sound. Now, since this is not actually an audio file, the preview that we're going to see down here is just a waveform that was supplied by the manufacturer. Whoever made this preset, gave us a little file just so we can hear what this instrument will actually sound like when we put it on a track. So, the.adv file extension means ableton device. If I go over to say, samples then we're actually looking at audio files and so what we're hearing in the preview is the file itself here in the browser. So, if I wanted to add something to a track, we have a couple of different ways to do this. If it's a sound or an instrument and in most cases drum, always we have to do is, drag it over to a MIDI track and now this midi track is essentially what's known as an Instrument track in other pieces of software, MIDI from audio two. If I also want to create a new track, notice over here on the right it says, drop files and devices here. I don't actually have to create a new track first, I can just drag a file from the browser and it will create the appropriate type of track for me. So, in this case it created a MIDI track. If I go over to clips and I drag this out here, you can see it created an audio track for me. Now what if I wanted to add an effect to this track, I don't actually have to even move my mouse all the way over here on the left and find the effect, I'm going to leave my cursor here with this track selected command F, I'm going to type in comp for compressor, use my arrow key. When I want to add this compressor to the selected track, I just have to hit return and it added the glue compressor to this audio track. Now, let's say that I also wanted to do something similar. Command F and I'm going to look for piano and then I'm going to move my search by using the arrow keys and under sounds and let's say, I hit Return. Now, it will not add it to the audio track because a device cannot go on an audio track and notice it created the MIDI track for me and added the device with this preset in there. Now, there is one thing you do have to be careful with. Say, I go back in here and I'm looking for base and I go over to my sounds and I find a preset that I want to use. Let's go, let me go if I hit Return now, look what happens, it swapped out the instrument on this track I had selected. So, be really careful if you have a MIDI track selected and you already have a device on it. Make sure that you drag it out into the drop area or let's say, I needed to create a few tracks, I'll just delete some of these out of here and clean this up. I can use my key commands to create the appropriate type of track and then drag it out there. You'll also notice that at the bottom here in Device View, it says drop audio effects here. So, I can do the same thing, I can go over to my audio effects and I could drop it anywhere on the track or down here and the signal flow is from left to right. So, if I wanted a chorus after that auto pan I would drop that there. If I go back to my instrument track, let's say I wanted to add an EQ. If I want to add something to the master track, say, I wanted to add a limiter, same thing command F limiter, use my arrow keys, it return. If I wanted to swap out a preset, I can just click on the hot swap here and it will jump me to any of the relevant results. Let me actually clear this search out of here and now let's do that again. If I go to my audio effects, It'll show me anything related to limiter. So, we have a good combination of features and shortcuts for adding things from the browser quickly and efficiently.
12. What is Warping?: In this topic, we're going to talk about one of Live's core central features, warping. Now before I get into exactly what warping does, let's talk about how audio behave prior to a feature like warping. So whether we're talking about analog tape, vinyl or even digital samplers, usually what happens is, if you want to speed something up, you have to raise the pitch or if you want to raise the pitch, the speed gets faster. So, I'm going to go ahead and play for you some samples of me talking and demonstrate what I'm talking about. So now, if I turn "Transpose UP", you'll notice that I'm probably sounding a bit, so now, if i turn "Transpose UP", you'll notice that I'm probably sounding a bit like a chipmunk right [inaudible]. So, you'll notice that as I turn the "Transpose UP", the pitch went up and the speed went up. So, let's do another one here that's the opposite, if we turn "Transpose DOWN", I sound a little bit like Darth Vader. If we turn "Transpose DOWN", I sound a little bit like Darth Vader. Whether you're talking about vinyl or digital audio, without a feature like warping, you can't separate tempo from pitch. So, let's now go to something that is tempo-oriented such as this drum loop and I'm going to turn the metronome on and you can see I have the global tempo set to 85bpm. Now, this drum loop was 95 to get started and you can tell it's not really hitting with the metronome, so you can see that warp is not turned on down here in Clip view. So, let me now launch the exact same clip, but with warp enabled. So, you can see here that warp is on, this was originally a 95bpm, but it's playing at 85. What if I want it faster or even slower? So, let's launch this whole row here, this whole scene with nothing warped. Okay, that's a little bit of a problem. Let's do warp on now. So, the basic idea behind warping is that we can match tempos of audio that started out as a different tempo. This drum loop and this piano started out at 95bpm and this guitar part here was originally 85 and now everything is playing back at 85bpm. So, matching tempos is a big deal, but so is being able to transpose without actually changing the tempo. So, let's make sure we're looking at this one here, so see, I can change the pitch of this without it speeding up or slowing down. Now, we're going to talk about optimizing the warp modes in another topic for optimal sound quality, but we're going to come back to that in a little bit. So, one last thing here before we go on to the next topic and that is this feature down here in warp called "Seg. BPM" or segment BPM. Do not type in here, this can get you in a lot of trouble, but it is really useful. This is a drum and bass loop I dragged in from the browser, originally 175bpm and let's give it a listen. But it thinks it's a 87 and we're playing back at 85. So, what were to happen if I were to actually set my tempo to drum and bass tempo? It thinks it's too fast so underneath the segment BPM, we have these times two and divide by two. Now, this is an inverse relationship, it's going to seem backwards at first. This thinks that this is 87.5bpm and it's playing at 175 so it's playing it at double speed, to make it play slower, I will make Live think it's 175 and therefore, it's playing at its natural tempo. Now, if I set this to 85, it's going to play at half speed and that may sound cool, but if it's not what you're going for, then you just have to be aware that certain audio files only work well within a certain range of tempos. So, going from 175 to 85 usually doesn't sound so good, but we could trick it. So, we're going to come back to the warp modes and more about warp markers in the next two topics. So, if some of this isn't quite making sense yet, just hang in there, we're going to stay on this for a little bit longer.
13. Warp Modes: In this topic, we're going to pick up right where we left off in the last one. Instead of talking about warping at its most basic, we're going to go a step further and talk about how to optimize sound quality. So, first of all, if you're playing your audio back at its natural tempo, it doesn't really matter which warp mode you use. So, let's go ahead and launch our unwarped audio. That is the audio playing back without warping enabled. So, it's going to sound just fine. It's going to sound exactly the way it sounded when it was recorded. Now, I'm going to go ahead and launch some ones that were warped but with the wrong warp mode selected. Now, let's try it with the right warp mode selected. What do I mean by warp mode? If we go down into clip view here, you can see under the warps switch, under the segment BPM, we have this chooser here that let's us pick a couple of different options. These modes are optimized for different types of music or different types of audio. For example, let's go back to the wrong warp modes. Solo are drums, and since this drum loop is set to tones mode when it really, ideally, should be set to beats mode. Then, if we go to this piano part, this should be set to tones. Know if you can hear those extra vibrations in there. Let's go to tones now. So, sometimes with beats mode on long sort of sustained sounds, you may or may not notice a lot of extra beating. Sometimes it's really obvious, and sometimes it's pretty subtle. But as a general rule, anything that is note-based, you want to set to tones, and anything that is percussion or drum based, you want to set it to beats. So, what if I go ahead and set my tempo to 95 BPM, and I'm going to use a cool little feature they have in the scenes called Edit launch tempo, and I just named it 95. So, I'm going to play this back at the wrong warp modes but at its original tempo. Let's bring them all back in now. So, this is still on tones and the piano part is still on beats but it sounds totally okay because they're both playing back at the original tempo. Now, what happens if I go to 75 BPM? Really cal it doesn't sound so good. What about 85? A little bit better, but it sounds best if I just use the correct warp modes. I broaden its guitar part here. Let's hear this one now with the wrong warp mode. Using what's called re-pitch mode. Now, re-pitch mode is the only warp mode where the transpose gets disabled and that's because as you speed up the tempo, the pitch does go up. So the re-pitch warp mode will help you keep things in sync but the tempo is going to be connected to the pitch. If I were to go ahead and move the transpose here, nothing happens because it reset to re-pitch mode. Now, this is a pretty cool feature but if I was trying to stay in key with other sounds, that wouldn't be a good idea. So, let's go back to our right warp modes. You could hear that's what that guitar part should sound like. So, really briefly, let's go through the different warp modes. Now, here is another one that is set at the wrong mode. So, that's the drum and bass loop that we had in the previous topic and it's a 175 BPM playing at 85, and it's set to texture mode, and texture mode is really ideal for sounds that are textures, ambiances, atmospheres, anything that doesn't have a definite sense of pitch and occasionally things like orchestras and ensembles. So, let's go to beats. Now, the reason we're hearing the dropouts is because this is slowed way down. What happens if I go to re-pitch? Texture. So, I'm getting some really cool sounds out of this which is just a little clue that you can misuse warp modes for good effect. Then, finally, complex and complex pro are best on things like whole songs, or anything that has a combination of beats, tones and or textures. So they're way more CPU intensive. Don't use them unless you really have to. I can tell, this doesn't really sound much different than tones. Now, if I sped my tempo backup, we'll probably notice a little bit better results going from 175 to 137 compared to beats, tones, texture, re-pitch, complex pro or complex. In class three, we'll go into detail on all the various parameters found in the different warp modes. If you notice the warp markers that were here in this guitar part, this is going to be the subject of our next topic.
14. Warp Markers: Let's talk a little bit about warp markers and I'm going to explain what I'm doing here in once second after you see what I've done. So notice how I was able to manipulate this audio almost like it was a rubber band or it was elastic. To do that, all I did was double-click to create a new warp marker and then move it around by dragging it to the right, I'm essentially slowing this material down and then speeding up the material that's to the right of it. Let me double-click to "Delete all of these" and let's go back to where we started from. So remember in the last topic when we were talking about the warp modes, and the one before that we were talking about the segment BPM. You could see that this field is grayed out now where in the past it was available. Let me click on this warp marker and any clip that's work will have at least one warp marker and pretty much you're going to see at least two. So what this field is really telling me, what the segment BPM field is really saying is that from this warp marker to this warp marker, this is the BPM. Now I do have the correct work mode setup and we are playing back at our natural tempo. If I set this to the wrong work mode we shouldn't really hear much of a difference because it's playing back at its natural tempo. But now let's say I went in here and I created a few warp markers. So I'm going to attack down the audio here and as you may recall, our shortcuts command down twice to make the loop brace shorter. Now check this out. Everything sounds fine now but I'm going to drag this over. So while this is a cool effect, it does point out the importance of the correct warp mode even though you're playing back the audio in its original tempo, because we may choose to change the tempo of a piece of the audio. So let me go back to beats mode here and let me zoom in and if I right-click on this, you can see we have a couple options. These little gray triangles are called transients and essentially a transient is pronounced attack. This is where Ableton has detected an event. When we put our cursor over these, you see what's called a pseudo warp marker and right now the pseudo warp markers not doing anything, and the transients are active but we haven't talked about what they're doing right now. So at the moment let's just forget that these are doing anything but they are good suggestions on where you can double-click to create your own warp marker. Notice how I've tacked down the audio so I can drag this piece left or right without it moving the audio on either side. If I had not put these other warp markers here over on the right, notice what happens when I drag this warp marker everything to the left moves and everything to the right moves and this can sound pretty cool maybe what I wanted to do. But if I only want to move one piece, I want to create three warp markers. There's a shortcut if you hold Command or Control on Windows. It will create three warp markers for you at once with a double-click or maybe I want to try this. I'll do a couple more. So the key points here are; double-click to create and delete warp markers and to peg down your audio if you don't want it moving around in the spots where you don't want it to move. Now one more thing, notice how it is snapping to the grid. To change your grid value, you can right-click and set it to a fixed grid or to an adaptive grid which means that as you zoom in or zoom out the grid value will change. Right now am on a eighth note grids. So maybe I want to be able to do smaller increments. I'll go to 16th note and now that means that these lines represents 16th notes. We'd looked at some options in previous tutorials on narrowing and widening the grid with keyboard shortcuts, but the right-click is also a really good option. In future lessons, we are going to come back and talk about warping long songs and dealing with those issues. But for right now, you should have all the fundamentals you need to warp audio, to add warp markers and set up the correct modes for both practical and creative uses.
 Brian Jackson, Ableton Certified Trainer