Transcripts
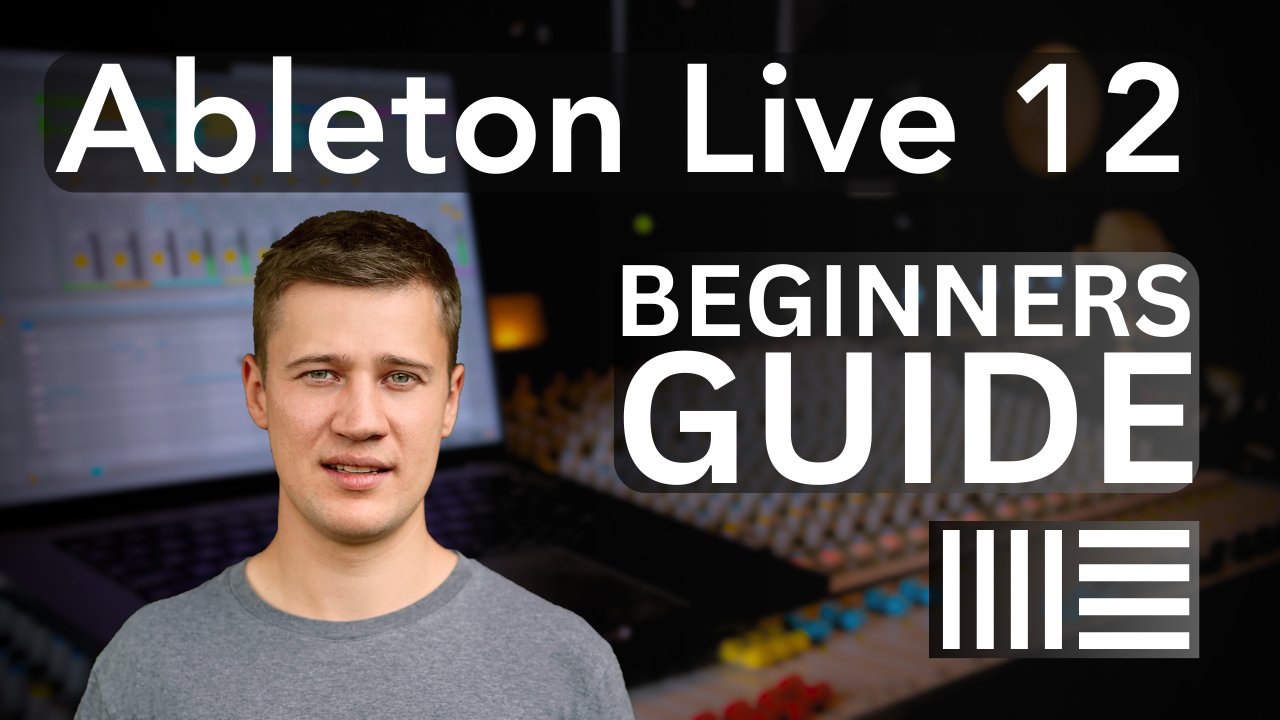
1. Introduction to the Class: Hi, there is Ian Alexander here and welcome to this Ableton Live 11 Skillshare class. This class will teach you everything you need to know to get started creating music and able to live 11. It's an extremely powerful piece of software that enables you to make music in a fun and creative way. So the class begins by going over the very basics. So even if you're a complete beginner to music production, you'll be able to follow along. I start off by going over the differences between session and arrangement views. And I'll show you the main interface of able to live. And then move on and show you some more of the basics, such as the difference between midi and audio tracks. I'll also show you how to create clips, but then go over all of the fundamentals of Ableton Live, showing you examples throughout so you can get started making music as quickly as possible. I look at things such as setting up your midi controller and microphone, recording audio and midi, editing audio and midi shortcuts, quantizing a many tricks and tips to save you time while creating music. Once we have a backbone of a track, I'll show you how to turn these ideas into a song in the Arrangement view. Later in this class, once we have made our first song, I'll show you a number of advanced recording methods, such as punching in loop recording and compete. Next, I have a section dedicated to Mexico. I'll show you how to get bounced track by adjusting levels and panning. Then I'll take you through how EQ and compression works. So this course has been designed in a way that allows you to follow along step-by-step. So you can use what you're learning in a practical way. By the end of this course, you will create your first song and they build confidently use, able to live. I'll see you in the first video.
2. Overview Of Ableton Live 11 Part 1 : Hi there. In this video I'm going to go if the very basics of how Ableton Live works. So you have some understanding of the interface and workflow before we begin creating music. If you already have a decent idea of how life works and you would like to move straight on to creating music. Feel free to skip these next three videos. So this is why able to live should look like when you open up a new session or set as it is code. The first thing I want to mention is the Ableton Live has a hint panel called the Info view. To access it. Go down this triangle at the bottom left. So you can show and hide it by clicking on this icon. This is a very useful feature that I'd recommend you keep open if you're a beginner. When you hover your cursor over something in Ableton Live. This info box will give you a brief description of the feature or area. For example, if I hover over some of the icons at the top, the Info view will give a brief description. This is really useful if you ever get stuck. So I'd recommend leaving it open while you're learning the software. Right now let's start looking at the main interface of Ableton Live. As you can see, it's split up into a number of different areas. Each of these areas have different uses in the music production process. The first area wants talk about is a browser. And that is this area over here. If you cannot see your browser, click on the triangle at the top left here. This area is used to access all of your instrument sounds and effects. These could be things such as software instrument presets. For example, a bass synth or keyboard sound to use on a midi track. We also have audio samples, for example, drum loops or melodies to use on audio tracks. As you can see, we've got loads of different samples in here. We also have things such as audio effects to use when mixing. So the different items in the browser can be loaded onto different tracks and able to live while you're creating music. The browser makes able to in really quick and easy to use as you can access files and plug-ins very quickly. Right? The next thing, What's talk about is the Session View. I'm just going to open up a project that I've already been working on so I can explain this. So this area in the middle here is the Session View. So there are two main views in Ableton Live, Session View and Arrangement view. Right now we're looking at a session view. If you're not currently looking the same views me, you can swap between the two views by pressing the Tab button on your computer's keyboard, or by clicking on the two little icons at the top right here. This top one will open up the arrangement view and the bottom one will open up the session view. So I'm going to focus on the Session View first, which is this area here. Here we can see our different tracks listed across the Session View. So each of these columns is a different track. For example, we've got drums track, bass track, melody track, etc. Each of these playback different musical parts. We have both midi and audio tracks here. So midi and audio tracks are slightly different, but they both use crate musical Pops. Simply put, Midea is used digitally, right in or court musical information, which is then turned into audio using a software instrument. What do your tracks a slightly different. They used the playback audio samples, for example, drum loops or coated vesicles. Now on each four tracks, you'll notice that they have a number of these little rectangles. The gray ones are empty clip slots, and the colored ones are clips which had been placed into a clip slot. So we create clips which hold Midea or audio information. And these can be used to store your different musical ideas. So if I click on this drums clip here and open up the clip view selector with this little tab at the bottom here. We'll be able to see the midi information that is in this club. If I click on another midi clip, we can see here this is a midi information that we have stored. If I click on an audio clip, you'll see this display is different. We are now seeing the audio file which is stored in this clip. So clips can be played back to Jama, different ideas to help you build a song. You can loop clips of play them back at different times to help me come up with musical arrangements. To playback clip, simply press the little play icon. You can pause the clip by pressing the space bar, or stop a clip by pressing on the Stop button on the track, or the stop Eclipse button over on the right here. So you can play back different clips are different times. I'll just show an example. You can also play back multiple clips at the same time by pressing the Play button on the scene. The scene is this area over here under the master track. So you can start and stop clips at different times during playback to start structuring your ideas. Right? I'll just quickly skim over high concrete clips now. First of all, a look at an audio track. So this Tricare base audio is an audio track. I'll explain how you can distinguish between an audio and midi track later on in this class. So the easiest way to create audio clip is by dragging in an audio sample. So I'll go to my browser, got out samples. Then I can click and drag a sample onto an empty clip slot. Now, in this clip, we have this audio sample. Alternatively, you can record audio into a clip. So for example, if you have a microphone, you can record your voice or an instrument. Again, I'll be showing you how to do this later on in the class. Now, Miniclip secreted in a slightly different way. The most simple way to create a midi clip is by double-clicking on an empty clip slot. So I'll just choose this one here on this arpeggio track. This will open up the midi note editor. In here we can write in musical information using midi. Again, the other alternative is you can record in Midea today, so you can use a midi controller, but you can even use your computer's QWERTY keyboard to play in musical information. The information in the meeting note editor will then be played back by the instrument that is loaded onto the truck. Again, I'll be showing you how to do all of this in detail in later videos. I just want to give you a quick overview of how the software works before we get into making music. And the next video, I'm going show you the arrangement view. Thanks, watching.
3. Overview of Ableton Live 11 Part 2: So in the last video, I skimmed over how you can play back clips in Session View. So that's a really intuitive way of creating music. However, you will need a way of storing these ideas so you can turn them into a song. You can do so by structuring them in the arrangement view. So again, to access the Arrangement View, click on the icon at the top right here. Here is our arrangement view. So in this view, you'll be able to see a more traditional timeline. If you've used other digital audio workstations in the past, such as Logic Pro or Pro Tools. You'll notice that they look more similar to the sphere. Now you'll be able to see our tracks and no longer listed across the top of the page. They've been flipped down the right-hand side of the screen. Along the top of the arrangement view, we have our timeline measured emboss. And along the bottom, our timeline is measured in minutes and seconds. Now as you can see here, we already have a number of clips arranged our timeline. This is something I've previously created. You can play back your arrangement by pressing on the Play button the other top. One thing to note, however, if your tracks are grayed out like this, you'll first have to press the Back to Arrangement View button. That is this icon over here. Once you press this button, you'll be able to play back your song. So if I press Play now, you'll notice that our play head is moving along the timeline, but we're not actually hearing anything. Once I press it back to Arrangement View button will build here are arrangement playing back. You can also access the Back to Arrangement View button from within the session view. It's down at the bottom here. Notice it's grayed out at the moment. But if I play some clips in Session View, it goes orange again. So that's just reminding us we need press it to listen to our arrangement. So I'll just stop playing this track back for a moment. And you'll notice how the clip starts playback when the play had reaches them on the timeline. You can pause playback with either the spacebar or the stop icon at the top here. You can move the position of the playhead by clicking somewhere in the arrangement. So wherever you have selected is where you'll start playback from. So just a reminder. When you're in the arrangement view, you organize your clips into a specific order on the timeline to structure some. This is different to the Session View, where clips can be played back or looped in any order. So the Session View Jose musical ideas, whereas the arrangement view is used to structure your ideas into a sum. One thing to note, you do not have to use the Session View and able to live. Just like other digital audio workstations, you can't simply come up with all of your ideas in the arrangement view if you like. However, in my opinion, if you don't use the Session View, you're really missing out on one of the best features of Ableton Live. Creating clips in Session View allows you to test our ideas and can help you to come up with interesting musical arrangements quickly. Right? Don't worry if you're a little bit intimidated at the moment. I'll be going over all of this again in lots more detail in future videos. I just wanted to k familiar with workflow before we get started. Thanks for watching.
4. Overview Of Ableton Live 11 Part 3: Hi there. In this video I'm going to quickly go over some of the main track controls. Just say, you know what the essentials day. So if you ever want to listen to a track on its own, you simply need to press the Solo button that says this icon over here. You can adjust the volume of a track by clicking and dragging on this slider here. You can just panning so where it appears in stereo image. So that means how far left or right a sound is. And you can deactivate track by clicking on this orange icon here. This effectively meets the track. Now something else to note, you can also access these controls from within the session view. So if I look at my drums track here, we'll see it's displayed slightly differently. This fader here is our volume, and this one here is our pattern. We've also got Track Activator button and the Solo button here. It's important to realize whatever changes you make to these in the session view will also affect what's happening in the arrangement view and vice versa. So if you look at the panning here, I'll move her all the way up to the left, then go back to the session view. And we can see that the dial is now all the way over to the left. Write this all may seem quite complicated at the moment. Just needed to give you an overview of how the software works before we actually get to make music. In the following videos against take through the steps involved to get you creating music in Ableton Live as quickly as possible. I'll start off with a real basics. So creating trucks, then go over how to use midi and audio. I'll show you how to use a midi note editor to write in and edit midi. And later in this class, I'll show you, I can setup, record your own Midea and audio clips. I'll show you a number of different features of functions that ableton has to help you start building up a son. I'll see you in the next video.
5. Starting a new Set - Setting the Tempo: Hi there. If you haven't already watched the introduction to Ableton Live video, I'd recommend doing so. Now, if you're a complete beginner, this will give you a good idea of the software. So first of all, I'm going to show you how to open up a new set so we can start from scratch. So just go to File and down to New Life set. You can also use the shortcut Command N on Mac or Control and N on Windows. Okay, So this is what a new set looks like. Now, the first thing we want to do is set the tempo of my project. The tempo is the speed or beats per minute of the music. The genre of music I'm going to create is trap. So I've got a good idea of the tempo that I would like to use. Different styles and genres of music will often have different tempos. So you don't need to use the same as me. However, if you don't follow along and make same song that I recommend choosing the same. So to change the tempo. Doctoral top here we can see these numbers. This is 120, so 120 beats per minute. To change it, you can just click and drag up or down. So if I pull it down, will be slowing down the tempo. If I increase, it, will be increasing it. You can also click on this box and type in a number and then hit Enter, and this will save it as your tempo. Now to hear the speed of your tempo, you'll need to turn on the metronome. To do so. Go to this icon here, click on it once, and it lights up orange. Now, when you press the space-bar, you can hear the metronome at 300 beats per minute. To stop the metronome press space bar. Once again, I'm just going to click on this and bring down the tempo. Now when I press Space-bar again, you can hear the tempo is much slower. You can also start and stop playback with the play and stop buttons here. Right? Another way to change tempo is by using the tap tempo. This is really handy feature which allows you to click a button and the speed you'd like your song to be at. So for example, you could listen to a reference track and tap in time with it to match the tempo. So if I click on this tab icon here. So as you can see there, when it's clicking on this top tempo icon, the tempo of my project has actually changed. So that's two ways change the tempo of your project. I'm just going to click here and type in 170, as I mentioned before, faster tempo that I want to use for my son. And then hit Enter. So it's not essentially you change your tempo before you start creating your song. But as I say, it does make it a little bit easier to get vide for the Sonya creating. In the next video, we're going to start looking at midi and audio tracks. How you found this video useful.
6. Audio Tracks: Hi there. In this video, I'm going to start showing you the differences between audio and midi tracks. This will be very basic Kate for beginners, but gradually go into more detail as the lectures progress. The first thing I'm going to look at is the Session View, which is this area here. So notice these columns. These are different tracks. We have both midi and audio tracks. These are slightly different circular talk about these over the next couple of lectures. If you don't have any trucks open at the moment, you can go up to create and select, Insert Audio Track. This would just add a new track to the set, right? First of all, let's look at audio tracks as these ones here. So audio tracks hold audio files. These can be prerecorded samples of sounds that come with Ableton Live, or even recordings created by you. So we have to do is add an audio file to one of these clips, lots, and you'll be able to play it back. Audio is in some ways more simple. The Midea. As you don't have to load a software instrument onto the track. As I say, you simply disrupt the file onto the track and you'll be able to play it back. I'll quickly show you an example. So I'm going to go to my browser, which is this area here. And we're going to select samples. Samples are audio files. Now you can listen to a couple of these and find one that I like. If you want, stop the sample preview, hit the spacebar. If you can actually hear the preview, make sure this little headphone icon is illuminated. You can do so by clicking on it. Priam's going to find an audio loop. So I'm just going to search my browser and type in loop. It's that one's fine. Now, only have to do is click and drag over to your audio track and drop it into one of the empty clip slots. This is now created an audio clip. You can play it back by clicking on this Play button here, and stop it by pressing the stop button down here. You can also pose a loop by pressing the space bar. You can open up your clip by double-clicking on it. And this will open up the sample display in the clip view, which is this area down here. Here we can see the audio waveform. Well, this is, is a visual representation of the audio signal. If I play my clip back now, you can see the play head moving along, sharing how far through the clip we are. Priam's going to go into the browser and find another loop. This time I'm going to search for a percussive loop. So I'm looking for tambourine sound. So I'll go into the browser and start typing in tambourine. Okay, I'll choose that one. I'm just going to drag this into a new clip. So as you can see, you can have multiple different clips on the same audio track. And these will both playback the individual audio files. One thing you may notice when I played back the preview in the browser is actually a different speed to the clip in our session. This is because able to automatically Time stretches loops so it fit in time with yourself. This is because of something called warping. If you loop is not entirely teal project, just open up the clip by double-clicking and then the sample editor, just make sure this Warp button is illuminated. For play it back without Warp selected is going to play back at its original tempo. Right? So adding audio clips is as simple as up. Once you've loaded clip onto a track, you can move around into any other empty clip slot. You can even move clips between different audio tracks. To delete your clips, you can simply select them and press backspace or right-click and select Delete. This absolutely loads of different samples come with Ableton Live. And this can be a really quick and easy way of making music. Something else that you can do in Ableton is record in your own audio clips. This is very useful feature. I'm not going to cover that gesture as he won't go over Midea first. So just to reiterate, audio tracks contain audio files. You can simply drag samples from within the browser to create an audio clip. Then you can play them back. And the next video, I'm going to start looking at midi tracks and tell you why they're different. Thanks for watching.
7. MIDI Tracks: Hi there. In this video, I'm going to start talking about midi tracks. So midi tracks is slightly different to audio tracks. And this because they contain midi information. Midi tracks allow it to create music using virtual instruments. You can write in record midi information which can be manipulated or edited or anytime in the Medina editor. This information is then played back with virtual or software instrument, which creates the sound. For example, you can use drum kits, synthesizes, or any third party instruments you may have. So an audio file is a pre-recorded sample which is simply played back on the audio track. Many trucks have software instruments loaded onto them and sounds then triggered using midi. So of the moment, we've got audio clip opened up and we can see the audio file. If I double-click on an empty clip slot on a midi track, you'll see here the meeting or editor has opened up. This is where we can write in or Medina information. Committee notes that we now draw N will be stored in this clip. So in the midi editor, you'll notice we can see a piano keyboard flipped vertically. This is where you can write in musical notes to be played back by a software instrument. The pitch of the notes is represented vertically, and the timing is represented horizontally. The numbers along the top shows the beats of the bar. So this is bar one, B1, B1, B2, B3, and B4. The numbers in-between show a smaller beat divisions. This is very important as this is how we write music and keep it in time. I'll go over this in more detail later on. So I'm just going to draw in a couple of minutes now. You can draw or no, by double-clicking. You change the length of it by hovering over the ends and clicking and dragging when this icon appears. And to delete them, you click on the note selector and then press Backspace. You can change the notes position by clicking and dragging and the center of it. So it can change its position in time by moving left or right, or pitch by going up and down. I'm going to go for the Medina editor in a lot of detail in future lectures. But right now I just want to show you how to load on a software instrument. I'm going to create a basic chord with the notes C, E, and G. The select them all by clicking and dragging over them. And extend the length so it's a full length of the bar. To play back a midi clip. Just like an audio clip, you simply press the play button. You'll notice that my audio clip also started playing back at the same time. Thus because I hadn't press the stop button on the audio track first. Now if I play this little clip once again, you notice we can't actually hear anything. If you look down here, you'll be able to see these yellow dots illuminating. So that's just showing us that midi signal is being received. But you'll notice we couldn't hear anything. And that's because a midi track, which has not been assigned a software instrument, will make no sound. Midea is simply musical note information and each midi track needs to convert this information into sound using a software instrument. So this is where we need to look at the browser once again. So I'm going to go into the instrument category in a browser. I'm just going to press Close could be done actually have a tambourine instrument available to us. So we weren't able to see all the options available to us. The list down here is displaying all the instruments that we have available and able to live. You may have less instruments if you're using a basic version of Ableton, this version is sweet. It's going to go with the simpler existence front is available on all versions of able to live. So to look at the presets, click on the little arrow to open the drop-down box. Here we can see some different sounds. I'm just going to carry the piano and keys and choose simplest piano. So we can hear the preview of it being played back there. Right now I need to do is click and drag this onto my midi track. This weren't actually going to clip slot. It just needs to be dropped anywhere onto the track. And although this instrument onto the military, who build c Now, this window is opened up and this is displaying a software instrument. Now if I play this clip back once again, we can hear that the cord is being played back. So looking back down this window at the software instrument, this is where we can make changes to our sound. The area that we can see our software instrument in called the device view. If you want to swap between the device view and the midi note editor, go down to the bottom right and click on this tab here. This will open up the midi note editor once again. You can also use the keyboard shortcut, Shift and Tab to swap between these two views. Now suddenly I also mentioned quickly is if we look our two different midi tracks now, you'll be able to tell that the palm with an instrument loaded onto looks different. One without, if I go back to the device few down here, click on my instrument and press backspace. This will delete her. Watch what happens to my midi track now, you can see there are Meta and dials have disappeared. Now when I play the clip back once again, we're just seeing these yellow dots light up and we're not getting any sound for permanent instrument. Back on again. You'll see that the meters reappeared when I play the clip. You can hear a chord being played back. So just be aware if you're midi track ever looks like this, you won't get any sound. So just to clarify, an audio track will always build playback it's audio clips. Whereas a midi track needs a software instrument. Audio tracks will always have the meter and dials displaying down here. Whatever sample you load onto your audio track will be exactly what you hear. So if you're a complete beginner, now hopefully understand the differences between midi and audio. Thanks for watching.
8. Using the Computer MIDI Keyboard: Hi there. In this video, I'm going to show you how it's setup a midi controller or use the computer midi keyboard. So just like in other digital audio workstations, you don't have to write in midi notes. You can also play them in. I'm not going to show you how to record midi gesture by one's show you how you can set up your midi keyboard and the really handy feature, which is the computer midi keyboard. So if you don't have a midi controller, you can actually play in notes using a computers QWERTY keyboard. So all you need to do is click on this little icon at the top right here. So it's illuminated orange. This shows that a computer midi keyboard is now activated. Now what you need to do is select the track that you'd like to trigger note some. And then make sure this icon down here, which is the record Arm button, make sure that it's lit up red. Just do so by clicking on it. Now this track is armed and ready to receive information. So the main keys worry about the moment is the middle row of keys on a computer keyboard. So that is a all the way up to L. For plays a letter a on my keyboard now is playing the note C on my midi keyboard. I'm just going to open up the meeting or editor by double-clicking on this clip. So you can see which note with playing C. Now we're playing C3. You can change the octave by pressing Z or X to move down or up. Safer press set once. And then play the a on my keyboard. Playing C an octave down, press X. We go off an octave and we can go back down. So with this clay courts or notes on your midi track, you can toggle the computer midi keyboard on and off by using the shortcut M on your keyboard. See what a pressing M, the icon at the top right is turning off and on. So just like a real piano keyboard, we have a row of white notes. Then we also have the black notes just above. Black notes start from the letter W. Right? So that's the computer midi keyboard. It's really useful feature for auditioning sounds coming up with ideas. And it's great for anyone to record midi in later on. How you found this video useful.
9. Setting up a MIDI Controller: Hi there. In this video, I'm going show you how to setup your midi keyboard or multi-device and Ableton Live. So let me first mention what a midi controller, actually as a midi controller is a hardware device that allows you to transmit midi notes or metadata. Some midi devices also have buttons, sliders, or dials that you can control other premises with. For example, pitch bend or modulation, right? So if you have a midi keyboard or midi device, will need to make sure is setup correctly enabled in life. So to do this, we need to go to Preferences. On Windows, go up to Options and choose Preferences. And on a Mac does life, and then select preferences. Right? In your preferences, you need to navigate to the link tempo midi tab here. And it should look something like this. I'm not going to go over everything in detail now. I'm just going show you what you need to know to use your midi controller. Once you're at this screen, make sure your midi controller is plugged in. I'm going to put mine in now, right? I've got an axiom, M&E 32. And as you can see, it's automatically recognize that enabled him. So all you need to do is make sure that these track buttons are selected. Him as well, select them all. But most important is the Midea n. So that's already sorted. Now, if I go back to my track and make sure my track is selected, record armed and has a software instrument loaded onto. Then when a place in case my keyboard, we should be able to hire somebody else to check. If you can't hear anything, make sure monitor is set to auto mode. Okay, great. That's working straight away. Now whenever you select a different midi track, if it has an instrument loaded onto your Belle Terre sounds. So I'm going to drag software instrument onto this other truck. Now it's selected and record armed if I play some notes. So we can control either the midi tracks. Right? So that was very easy. Actually set it up automatically. Now I'm just going to unplug this device and show you how it's setup in a slightly different way. So if we go back to Preferences again, so there's options, preferences on Windows or life than preferences on a Mac. Now we can see this control surface is no longer active. Sounds can set it back to its default. Now I'm just going to plug in my other midi controller. This time it's an impact gx 61. And this isn't actually recognized by Ableton. See it's not popped up in the control surface box. It's also not listed down here. So don't worry if this is the case with your midi controller, you'll still be able to use it. Just make sure you've got track selected on, in Midea one, right? Once you've got track selected, you should be able to play midi notes back. So I'm just going to close preferences and try out. Make sure my track selected. And we can see our new midi controller is working. So it's really easy to do this in Ableton. I just wanted to go over this quickly early on SEO setup. I just want to show you one thing quickly. So I'm gonna go back to my preferences. If you're a more experienced able to news and you have an advanced midi controller. I'd recommend going back to preferences and checking a few more boxes. I won't go into the settings in detail now, but these settings will enable you to utilize more features of your midi controller. You can do things such as starter, stop playback in Ableton, using your controller. Also map different faders or tiles, two parameters within Ableton Live, or even tricky clips in Ableton with buttons on the controller. So you may as well select all of these buttons here. If you have an advanced controller, this will just enable all of its features. Okay, your midi controller should now be setup to follow along with the rest of the class. If you do not have a midi controller, you can always use a computer midi keyboard. And this will allow you to play notes on your computers QWERTY keyboard. Thanks for watching.
10. Writing MIDI: Hi there. In this video, I'm going to start showing you how you can write music with Midea. So first of all, I'm going to delete the medical app that we created on the piano part as we just don't need it, the sun. And also going to delete these two audio tracks as we don't need those other moment. So to delete track, select it by clicking on the name at the top, and then press Backspace. You can also attract by right-clicking and going to delayed. Okay, I'm going to add a bass sound to this track here. So it's going to go to instruments. Okay, simpler base, and then find a bass sound. Okay, This one seems fine. So we're going to do is click and drag it onto this track. You'll notice we already have an instrument there. So when I drag over this new instrument, it will replace it. See, we've now got the B base on this track. Right? I'm just going to create a new clip by double-clicking on an empty clip slot on this track. Medina editor should then open up. I'll just quickly go over some of the features of the Medina editor. I've already mentioned this before. I've mentioned again at the top we have our timeline. So over on the left by number one, we have beat one of the first bar. Here's two, here's three, here's four. And we have other divisions in-between. Over on the left we see our keyboard which is flipped vertically representing our PECC. If you want to hear the pitch of these notes, you just need to activate this headphone icon here by clicking on it. When it is blue, if you click on a note, your belt here, the patch. You can move down to a lower octave by scrolling on the Medina editor. So the most simple way to draw note is by double-clicking. So we can edit our notes in a variety of different ways. Clicking dragging the central node allows us to move it either in time or patch. So to change the timing of the note, clicking drag left or right, and change pitch. Click and drag up or down. Hovering over the start or end of the note allows us to change length by clicking and dragging. You can either make it longer or shorter. Right? Now I've got this note, the full length of the bar, and it's going to play back this clip. So I'll click on this Play icon next to the clip. You can stop it by clicking on the stop icon here, or pressing the space bar to pause. So when playing it back, you'll notice that this clip is one bar in length and it continues to loop. When making music is common to use four or eight bar loops. So I'm going to change his clip so it's eight bars in length. So already have an idea of the bass part. I'm going to write the change in length if you clap. You can simply click and drag this little arrow on the right-hand side. Make it shorter by dragging left or longer by dragging to the right. One thing that is important to know is be very careful of where your clip ends. If it's too long or too short or not loop correctly. And in music Olga of time. So we'd need to drag this over. So ends exactly a bar nine. As you can see, this might take quite a while as it doesn't do it very quickly. So a better way to do this is going off to the left-hand side here and see where it says length. Click on this number and type in length. They would like, I want it to be eight bars long. So I'll just type in eight and hit Enter. You see now our clip is a buzz. You can adjust the horizontal zoom meeting or editor by using the key commands plus a minus on your keyboard. So if I press plus and minus will zoom out. You can also hover the mouse at the top here until this magnifying glass icon appears. If he then click and drag up or down, it will zoom in and zoom out. To see vertically. Hold Alt on Windows or Option on Mac and scroll. Again, you can also see vertically, if you hover the mouse over the left-hand side here, when magnifying glass appears, you can click and drag left and right. Okay, I'm going to zoom in a tiny bit more and start drawing in my notes. So the first thing I want is an F. So it's going to drag this down to F1. The letter on the note dictates a PECC, and the number dictates the octave. Nouns going to click and drag. The end of this note says two bars in length. So you want to go to the end of the second bar, right? If I play this clip back now, we can see there we're slowly moving through the clip. And it's looped back to the start again. Right? So let's draw in some more notes. This time against draw N a G. So okay, it's double-click here at the start of our three. And then I'll extend this out. So it's again two bars in length. Now this handy feature to speed up the process of drawing notes. You can actually copy notes. So if you click and drag and it will move. But if you hold down the Control key on Windows or the Option key on Mac while dragging. You'll see here this little plus icon has appeared. Now if I let go of the mouse before I release the option key is copied notation. Now again, to change the pitch of this service in a another way to quickly duplicate note is right-click and select Duplicate. Now we just have the same note starting with this one ends since click and drag this up to the right patch now. Okay, Let's play that back. Okay, great. Now something else to be aware of if you ever make mistake when working with midi note editor. So for example, if you accidentally duplicated and out, you can just press Command Z on a Mac or Control Z on Windows. To undo your last step. If you continue to press Control Z or Command Z, undo the previous steps. If you've pressed undo too many times, you can actually use the redo function. If you want to redo, you can use the key command, shift, Command Z on a Mac or Shift Control Z on Windows. This will redo the previous step. Okay, so that's an absolute basics of writing and ready and able to live. We're going to look at this in a lot more detail in future videos. But for this one, I just want to show you the absolute basics in case you're a complete beginner, say, you know, overwhelmed. Hope you found this video useful.
11. Writing in a New Part - Adjusting Velocity and The Scale Feature: Hi there. In the previous video, I created this simple baseline. If you already have some music theory knowledge, you can come up with the OEM parts. However, if you're a complete beginner, feel free to copy mine, right? I'm now going to create another new part. So I'm going to close my Dino editor by clicking on this arrow in the bottom right here. Now, I'm going to go into my browser and choose a new preset for another track. So this time I'm going to access an instrument from the core library. I'm going to use the core library as this has lots of sounds that are available in most traditions of Ableton Live. To access it, go down to places and click on pacs. Then click on the drop-down box on core library and go down to racks. Here, I'm going to choose Instrument Racks. And I'm going to open up this folder here, mallets prior to scroll through a couple of days and see if this one I like. That one sounds quite good. So what we're going to do now is low this onto our other track. Another way of loading and instrument onto a truck rather than clicking dragging is select the track they'd like slowed the instrument on tape. And then just double-click on the instrument. It's now loaded on this truck. Okay, so if this part, I want an arpeggio cell part, something like this. Okay, so I'm going to draw this median once again. So I'm going to create a new clip by double-clicking on an empty clip saw. And now we can see the midi note editor. Now we already have our baseline. And suddenly you need to be aware of when writing music is a key that you're in. For this song. To keep things simple, I'm going to be using the key C major. This is often considered the easiest key to understand, as it does not use any sharps or flats, which are the black notes on the keyboard. So in C major, we only use the white notes. Now, one feature that's new for Ableton Live London, which are really like is a scale feature in the Medina editor. So if we go over to the left here, you can see this box. It says scale. If you click on this, you can choose a scale that you'd like to be in. Here. It's already set to C major. Now, any notes that are in the scale that we will be highlighted. So as we can see here, all of the white nodes have been highlighted blue. It was changes to a different key. For example, G-sharp major. We can see now different notes being highlighted. Lots of the sharps and flats. So this is a really great feature for beginners, which helps you understand which notes to use. One of the thing I mentioned real quickly, what we're looking at this feature is if you click on the scale button up here, it actually removes any notes that are not in the scale. So now we're only seeing the white notes. Personally, I wouldn't recommend using this as its goods. Have the whole piano roll open to help you understand where all the different notes are. So I'm just going to disable it for now. Feel free to use it if you like. The music theory will improve quicker if you get used to looking at piano roll like this. If I look in my bass part, we can just check to make sure we're using the correct nodes. So I'll activate the scale feature in this clip. And now we can see we've only used the white notes here. Okay, Let's start writing in a new part. So these footnotes I wanted to play. As you can see there, when it's playing notes on my keyboard, there are lighting up and the midi note editor. This also works when using the computer midi keyboard if you don't have a midi controller. So now I know the first note and to write in is this f. So I'm going to double-click store it in here. Next, I want to join as a C against draw this in 1 eighth note away from this F. So the F is the first eighth note of the bar. The second eighth note starts here. To 16th notes of a length of 1 eighth note. Other moment are great as set 16th notes. We know this because it's 16 beat divisions in this bar against two other. See here. The d on beat two of the above. I'm going to draw g. Just tear. Right? Let's head on back. Okay, great. Thanks. Join a few more notes now. Right, Let's listen to this back. Okay, that sounds fine. One thing you may notice, each of these nodes are exactly the same volume, so enabled to life, you can actually adjust the velocity of each note. The velocity determines how hard a note is played. So with high-velocity, the note will be played very hard and will therefore be louder. With the low-velocity notes we played back more quietly. So to adjust velocity, we need to go down this little window here. If you can't see it, just make sure this arrow is pointing out to the right. And that there's top icon here is illuminated orange. Now, if you hover the mouse over, we'll get this icon and we can make the velocity windows slightly larger. So these bars here represent the velocity for each note. As we can see, they're all exactly the same. Now, I'm just going to just velocity if some of these slightly so we can hear the difference. Alright, let's head up back. See it just sounds a little bit more natural. Now the notes on all being played back at the exact same velocity. Little changes like this can make a big difference to your son. So far, I've only shown you how to play back one clip at a time. But we could actually play back both clips at the same time. If we press the Play button over on the right-hand side here, this is the scene play button, seen as the row of clips. So we can see the numbers on the side here, our numbering, each scene. So when I play this back, it's going to play both of these. Let's have a listen. Notice when you're playing it back, this part seemed clashed with the basics. So we're going to do is turn this Miniclip into an eight-bar clip. So we can add some more notes and very them slightly. So it's due, so it's going to go to length there. Click, and then type in. When hit Enter. We now have an eight bar loop. Now I'm just going to select these six notes here. Then hold Option on a Mac or Control on Windows and click and drag them over. This will copy all of the notes. Now let's have a listen back. I'm going to press the Master Stop button now to stop all clips so I can listen back to this clip on its own once more. Okay, great. That sounds fine. Now you may have noticed when I copy those over, it didn't just copy the notes. It also copied the velocity information. So duplicating notes can be quick than drawing them in individually as it saves your Justin velocity once again, right. I'm just going to show you another way that you can copy your notes. So I'm going to press Command a on Mac or Control a on Windows to select all of my notes. Now I'm going to press Command C or Control C on Windows. Now I'm going to go and click on the top of the bar here in this gray area to set the marker to this point. Now when I press Command V on a Mac or Control V on Windows, it will paste them to this new position. All right, so this isn't about Cosmo. Now we've got the exact same part. Once again, I'm just going to change the pitch of this note here so it fits with the bass part a little better. So I'm going to move it up to a G. I'm going to paste the scan once more above five. So I'm going to click this dark gray area here to set the marker and press paste once again, which is Command V on a Mac or Control V on Windows. And this time I'm just going to move that first note once again up to an a. Let's go to bar 7 and paste again. So click here and press Command V. This time we're going to move this first note to be. And now we've got eight bar loop. So let's listen to this back with a base by clicking on the play button on the scene. All right, that sounds much better. We've now got an arpeggiated part in time with our base. In the next video, again, start looking at midi recording. Thanks for watching.
12. Recording MIDI: Okay, so now if we're in a couple of musical parts, you should have a basic understanding of mid-90s. Now we can move on some more advanced features. So a huge part of music production is recording. In this video, I'm going to show you how you can record midi into clips. So first of all, let's create a new track. So I'm going to go to create and select, insert midi track. I'm going to add a new instrument, and this time I want to choose a pad sound. So this going to be playing back some long-held chords. So I'm going to go to packs, cool library devices, instruments. And now I'm going to choose simpler. In here we have some pad sounds. So it's going to play a couple of days back and see which ones are like. Okay, that one sounds fine. So I'm just going to select the track that I once loaded onto and double-click on the instrument. Now, this instrument is loaded onto this track. Now to record in, we're going to need to use the computer midi keyboard or midi controller. So make sure you compute midi keyboard is activated by clicking on this icon up here, so it's illuminated. Or alternatively, make sure your midi controller is setup. If you haven't yet, make sure you watch the setting up a midi controller video and then come back to this lecture. Right? So the first thing we do is make sure we've got the track selected that we'd like to record onto and make sure it is record armed. So this icon here should be lit up red. Now if you play some notes on your computer midi keyboard, you should be getting signal. Alternatively, if you're using a midi keyboard, just double-check with this. Right. One thing you may notice, on this truck, we actually have little circles on the left-hand side. So when recording midi into a clip, you don't actually need to create a new clip first. We've got to do is hit this record icon and now record midi information into a new clip. If these are still stop buttons, you track is not record enabled. Notice when I hit Record Enable button on the other tracks, these squares turning circles. So that is the track that is ready to record. When I press this record button, will hear the metronome clicking four times. Right now, I don't want to hear these two clips being played back when I hit record. So I'm just going to go and click on the stop all clips button over here. Okay, so now when I hit this record icon, we're going to hear a one-bar count in from metronome, and then it will start recording. You'll notice that when accountants stopped, the clip, started recording, I didn't actually play anything to offer three bows in. So something you'll probably want to do when recording is activate the metronome so you can keep in time. To turn the metronome on. Simply click on this icon here, and this will glow orange. Metronome will now continue while recording. One thing to note. So if you didn't have any time for the clip started recording, make sure you go into your name settings by clicking on the little drop-down arrow here. We can select different options for the metronome. Here we have accounting. So you can have none, one bar, two bars or four boss. We can also change the sound and the rhythm of the metronome. There's also a handy feature here which says Enable only while recording. So this means you'll only hear the metronome when you're recording. You weren't here at during normal playback. Priam's going to delete this clip because I recorded the part in very badly. So I'll click on the clip and press Backspace. If you do want to hear your other clips while you are quoting, just press play on the scene on the right-hand side, and then press the space-bar to stop playback. These clips will now be activated. So when I hit record, that will also apply. This is often vital when recording. Okay, I'm now going to record in a chord for eight bars. Okay, let's hit Record. Okay, great. We can see the notes here that we've recorded in. One thing to mention, if you do make a mistake when recording, you can press Command Z on a Mac or Control Z on Windows to undo the recording. Right? So let's look at the midi that we've recorded. First thing you may notice is I haven't actually played it back on in time. It's not starting right at the beginning. You'll also notice at the end, we've gone past the eight bomb. Ok. So this clip is now too long. So fast play this alongside my base and arpeggio pods. As this loop is one bar longer, they would not be looping in sync with each other. So I'm just going to correct the timing of these notes. So I'm just going to click and drag these all to the start. Sometimes it's worth zooming in to make sure you're accurate with this. The shortcut to do so is a plus button on your keyboard. I want these notes to all end right at the end if this bar. Now what we need to do is change the loop length. So again, it's exactly eight bars. This time, instead of typing in number, I'm simply going to click and drag this back. All right, Let's pile them all back together. Okay, we've got another eight bar loop which fits with the other parts. So it's the easiest way to record midi into able to life. Thanks for watching.
13. Grid Settings: Hi there. In this video, I'm going to go for grid settings. So if you open up the meeting notes editor by double-clicking on a clip, then right-click and the midi note editor and go down to this section here, we'll be able to see adaptive grid and fixed grid with a number of different options. At the moment, we're using an adaptive grid setting, narrower. This is the default. So if you notice, as we zoom right in, we get finer increments where we can snap knows the grid. If I zoom back out again, we'll see that we have less and less incurrence. So right now, this is the smallest note-taking drawer in. But if I zoom in on that, I can actually split up over 16 times. So this can be useful as when you're writing in Midea, you can make finer adjustments to note positioning. So we do have other adaptive grid settings. And the mountains notes increments throughout vary depending on the Zoom. Once again, right, let's look at something else. Let's look at fixed grid. If I select 132nd note on the fixed grid, no matter how much resumed, we're always going to have the options to join notes. Very fine increments. No matter how much resume. If I choose a different one, for example, half a bar. You can see there we've only got two great markers in each bar. So if I double-click for now, here, is going to make a note that is half bar length. Now for show you another example, quarter note. Then we can draw it for notes in each bar. Again, it doesn't matter how much we zoom in. That's a fine is increment we have you can position to be in different points. However, it won't snap into the right position like it would if it was on a finer increment c. Now we can have each node snap perfectly to 1 eighth of a bar. In this midi clip, I could just set it to four bars or even eight bars, because this is an eight bar clip and each node is being held the whole time. So f has to double-click to draw a new note, and now it'll be eight bars in length. If I went over to this arpeggiated part here, you'll see that if we chose fixed grid on a large amount, we just wouldn't build, draw the notes in as finally is, we need to. So depending on what type are you writing in, will determine which grid setting you should choose. This is why adaptive grid is often a good option. So I hope you now understand how you can adjust the correct settings enable to life. I wanted to show you this before I go over quantizing as it should help you understand how this feature works a little better. Thanks for watching.
14. Quantizing MIDI: Hi there. In this video, I'm going to show you how you can correct the timing of meeting notes using quantizing. So first of all, I'm going to record in one more new part. I quite like the sound which we had on this track. So I'm going to duplicate it. To do so, right-click on the track and go to Duplicate. You can also use the shortcut Command D on a Mac or Control D on Windows. This new track will have the same sound as this last one. I'm just going to delete this clip as I don't need it. Okay. So we just need to set up the recording once again. So if you're using a midi controller, make sure it's plugged in setup in your preferences. Or if you're using a computer midi keyboard, make sure it's activated up here. Now, select the track that you'd like to record onto. That's this one. And I'm going to press the record button. Now these are turned into little circles, so you should be ready to record. Again, just make sure monitor is set to auto. Now if you place a notes from the keyboard, We can hear there that we're ready to record, right? I'm just going to go to a metronomes settings and make little change. I feel like I'd rather have a two-bar count in rather than just the single bar. This will give me a bit of time to get ready to stop playing. I'm also going to turn to click on so here while recording. Okay. I'm just going to record this to the click. And I'm not going to bother having the other parts playing. So I'm just going to hit Record now and we should start recording. Remember this time, as we've chosen two-bar count in, we're going to have eight clicks before we start recording. Okay, Let's have a look at our Midea. Now if for some reason it's really zoomed in SMS, going to zoom out a little bit by using the microphone icon. Now I wanna show you quantization. I'm going to change my grid setting. So I'm going to right-click and go down to fixed grid, and I'm going to choose eighth note. So these are the closest notes to what I played. As you can see here, I didn't actually get it bang on, on any of these notes other than this one. So let's just listen to that back. It's not terribly out of time, but it's not bang on. So what we're going to do now is quantized these notes. Quantizing is a quick way of correcting mistakes in timing when recording. So to actually quantize these notes are going to select them all by pressing Command a on Mac or Control a on Windows. Right-click on one of the notes and select Quantize. We see there the notes have now snapped into position. This is work very well due to the settings I already have set up. I'll show you these now. Firstly, I'll press Undo so these notes are no longer quantized. Okay, let's right-click on this note again and go it's quantized settings. We can change our settings to make them more appropriate depending on the part that has been played. So if we go to quantize too, we'll see it says current grid. I'll go over that in a moment. Beneath this, we've got a number of different quantize options. So if I was to choose 132nd note, for example, these notes are going to be quantized to the closest 32nd note. So if I press OK once more, It's worked for most of the notes. But this note here hasn't been snapped to the position that I wanted it. Let's press undo once again. I'll right-click on the node and goes quantize settings or use the shortcut Command Shift and U, or Control Shift U on Windows. Now if I choose a different value, for example, quarter notes, then press Okay. We'll see here, our notes have jumped quite a long way. This is because they're no longer snapping to the eighth note that there are meant to be apt. So for this melody, That's just not appropriate, I've just pressed undo once again. Let's go back to quantize settings and look at something else. I'm going to select eighth note once again as a no, I wouldn't East snap to nearest eighth notes. So if I press OK, see that they've snapped to these possessions. Now I'm going to use a shortcut this time command shift in U or Control shift in you. Now if I select end, Let's see what happens. We'll see there the ends of the notes have been cut or stretched to the nearest eighth note. Each of these nodes is now a multiple of an eighth note. So this is 2 eighth notes, exactly. So as this, this one is three, and this one is three. So this is really handy if you want your notes to be an exact length. I'm just going to press undo and show you the last setting. Then I'll press command shift in you to open up my quantize settings or Control Shift E on Windows again. Now we've got the amount. So a 100 percent is going to snap exactly to the point that you've set with quantized to amount. If our juices, however, it won't quantize the notes as aggressively. You can see these three notes here haven't actually snapped all the way to the beat. This can be useful if you want your quantizing to be a bit less aggressive and sound more natural. But if this part, I want it to be exact. So I'm going to set this to a 100 percent. Okay, The last thing I want to show you is the current grid setting. If you remember, just for we started quantizing, we change the setting to fix grid eighth notes. If I change this to one Barner for example, and then I quantize these notes. Just double-check. We've got current creates selected. Then I'll press Okay. Now each far notes has been snapped to the nearest bar and they're all exactly one bar in length. If I press Undo and change great setting to eighth notes once again, that we quantize them. The now snapped to the eighth notes. So this current grid setting is really useful. So are generally leave my Quantize Settings on current grid. This means whenever I change my grid setting, I can have a look, see what's gonna be most appropriate for my part. And then I simply hit Quantize. And it will snap to this point. Now, rather than opening up my quantize settings every time I want to correct the time and if apart, all have to do is change the correct setting. See what looks like skinny most appropriate for the pilot. And then I can simply hit Command or Control E on Windows. And that will quickly quantize it. Just clarify, these quantized settings will now be stored. So next time you want to quantize something with the same settings. You can simply press Command U or Control U, and these settings will be applied. So as I say, are generally leaves the quantize setting on current grid. Then I can simply select all the notes that I want to quantize. And then use the shortcut command you to quickly quantizes to that grid setting. Great. Let's have a listen back with a click and compare the quantized and unquantified notes. So that was quantized. And this is quantized. It all just sounds a bit tidyr, want surprise quantized. Right? I'm just going to listen back to this part with the rest of the song. Firstly, I'll telephone metronome as I don't need it anymore. I just wanted to quickly draw in one more note here. And also, if you look at the velocity, this note here is way lower than the rest. So I'm going to increase this quite a bit. Okay? So this, So now has some decent harmonic ideas. As then we've got a bass part, some chords and arpeggio and Melody. Next thing we need to do is add a drum part and then we can start structuring our song. Hope you found this video useful.
15. Writing Drums with the Draw Tool: Hi there. In this video, we're going to continue working on the song. One thing which I should do now, which I should have done before is save this project. It's really important to just keep saving your project in case your computer crashes and you lose all your work. So I'm just going to go to File, Save lysate as I'm going to name it traps on. I'm just going to save this on my desktop. Then press Save. Right now project is saved. So if it crashes, we're not going to lose anything. Somebody else wants to quickly is just turn down the volume of some of the tracks as if you look over to the right here. When I play it back, this is going red, showing me getting clipping. So I'll just show an example. You might build here, the distortion there when it was clipping it as loud as point. So there's two ways to combat this. You can either just turn down the volume or the mast output. Or what recommend doing is just turn down the volume of each of your tracks. So you can do that individually by telling down these faders or the altogether at once, by selecting multiple tracks. To select multiple tracks, click on the top few trach care on the name, then hold shift, and do the same on the other tracks. All these tracks now selected. So if I pull down the volume of one, the old come down the same amount. Now if a playback once again, we won't be clapping. Okay, I just turned them all up a tiny bit more again. Say, well I'm too quiet. Just so you understand signal flow a little more. All of these tracks, we'll be summed together and come out of this master channel. That's why adjusting volume with this one. We'll change volume for all the tracks. So if I turn this all the way down, we weren't hair anything. So the next thing I want to do for the song is created drum part. Honestly, I'd usually do this earlier on, maybe even before he created the bass part. I just want to show you the basics of midi before I went into a little more detailed writing drums. Again, some people prefer recording drums in so they can get a good feel for a track. I've noticed a lot of beginners do find it easier to program the drums in first, right? So I'm going to create a new track. And it's going to right-click on this gray space here and select, insert midi track. Now I'm going to go over to my browser, go to packs, cool library racks, drum racks, and down under drum machines, I'm going to choose 800 eight core kit. This drum kit should be available in most additions of Ableton Live. He don't have to use the same one by just quite like the sound of the 80 aid kit. There are a number of different drum kits you can use which tests have different sounds. Feel free to use these if you wish. Right? So it's going to drag this over onto my midi track. The instrument Xc down here is the drum rack. For now, just like we've done on the previous trucks. I'm not going to edit any of the parameters within instrument. Let's just leave that on its default settings. K. Next I'm going to create a new midi clip. So I'm gonna go to my drum kit, double-click, and it's created a new clip. I'm going to make the Medina editor, little beggar for the moment. Hover my mouse over here and click and drag upwards. Now we've just got a better view. So you notice how the meeting or editor looks very similar when programming and drums as it would to a harmonic part. The main difference, however, is we have the different drum sounds listed on the keyboard on the left here. So this makes it really easy to know where to program your notes. So foreign, a bass drum on owed, go down here and draw note down here. You can audition the sounds by clicking on the case. But again, make sure this headphone icon is illuminated blue, otherwise you weren't built here, the preview. So when I'm programming, drums are usually start off with the kick drum, then at the snare, then the high hats, and then other percussion afterwards. So just like writing and other meaty parts, you double-click to join a midi note. But there's another way to draw it notes, which can be very useful when writing drums. And that is using the draw tool. So to access the draw tool, to simply use the keyboard shortcut B, so that's letter B on your QWERTY keyboard. Alternatively, you'd go to this icon up here, which will turn the draw tool on and off. Again. When it's orange, it's active. So you'll see instead of normal cursor, we've got this pencil. So we have to do to draw a note with this tool is click once again, you can edit the start and endpoints of your note. You'll notice if you click on the middle, will actually delete or no, rather than allowing you to move it. So there are pros and cons of using this tool and just depends which you prefer. And it's all down to personal preference, whichever you find easier to use. Something is really useful about the draw tool, however, is you can click and drag to draw multiple notes in. So if I click and drag on this high hotpot here, you'll see that I've drawn in note for every increment of the grid. And again, to delete, you can click and drag. This can be particularly useful for high hats as you can join the hi-hat part really quickly. It's going to stop all of my clips and play this clip back on Assign. See there we've already got hi-hat part drawn in or is delete all the various quickly. Now I'm going to change the grid setting. So I'm going to right-click and choose different grid setting. This time, I'll choose quarter notes. Now if I click and drag, you'll notice we have a kick drum on each B of S bar. So depending on what grid setting you have, will determine the length of the note that the draw tool writes In. Just going to draw a snare drum on beats 2 and 4. And can change my grid to eighth notes and during some hi-hats. So as you can see, the draw tool in combination with changing the grid settings, is a very quick way to draw an ideas. Suddenly are so much now bye. If you go back to normal cursor, you notice we can click and drag over multiple meeting notes to make selection. When using the draw tool, however, you will not be able to do this as when you click, it will simply draw in a note. So just bear this in mind when working with the draw tool. I'm just going to delete everything in this clip as one to create a new drumbeat from scratch. We'll continue in the next video. Thanks for watching.
16. Writing Drums Part 2 - Creating a Trap style Beat: Now we've had a look at another way to draw in midi notes. Are now going to move on to start creating my trap style drumbeat on. I want to start off with a two bar loop. So I'm going to change the length to two bars. So you can either click and drag out from the side here to get two bars, SU-8 for the bracket icon to pair, or just go to length and type into. Right? So this is now two bars in length. That's going to set my grid to eighth notes the moment. As for now, I don't need anything smaller than an eighth note. All right, let's start drawing in our kick drum. We're going to access the draw tool once again by pressing B. Now we can start drawing in my drum pattern. So I'll make some music styles attract kick pattern is a little more interesting than a straight fall to the floor. Drumbeat. Solace, build this over the two bars. Again, feel free to use your own drumbeat, but you can copy mine if you want. Sorry, I can draw an acute-care draw another one in just before the halfway point of this bar. And not one here. Right? Let's play that back. See how it sounding. Okay, can draw in a couple more kicks in B2. All right, this isn't a strong beat back. Okay, Great, that sounds appropriate for the style. I'm just going to draw a snare in on beat three of each bar. So that's on 1.32.3 and it's less than back once again. Okay, great. Now somebody who wants do is increase the velocity of my snare drum a little bit. And it's going to go back to my normal cursor by pressing the shortcut B. Now we can change the velocity of my snare and it's going to increase it very slightly as wanted to be a nice hard hitting snare sound. Getting increase the velocity of this one a little bit, but not quite as much as this one. Okay, Let's say that back. Now it's just a tiny bit of variation between those two snare hits. Also want to increase the velocity of the bass drum throughout this two-bar loop. So I'm going to select all the bass drums by clicking on the note to the left here. Now they're all highlighted. If I click and drag one of them, they all come up the same amount. So I want to keep my bass drum the same velocity at the moment by just wanted it to be a bit more powerful. A handy shortcut for adjusting velocity or what's shown is simply hold Command on Mac or Alt on Windows. Then when this icon appears, when you hover the cursor over the notes, you'll be able to simply click and drag up or down. So if I pull it down, we've reduced velocity. And if you go up, we can increase velocity. You can also see the velocity number hovering above the note there. So we know exactly what it is. You can also see the velocity and the status bar below. Okay, so we've kept the velocity or the kick and snare is pretty consistent. But when drawing in hi-hats, I'd recommend varying a little more. So we can start drawing in my hi-hats. I'm going to use a closed hi-hat on every eighth notes of the bar. So again, just double-check here and fixed grade and eighth note mode. Then get the draw tool and click and drag. I'm only going to draw two notes in first. Okay? So what I want to do is vary the velocity from the first second note, I want to reduce the velocity of the second hi-hat. So I'm gonna hold command again and click and drag to bring it down. Just be careful. See there, I accidentally had both note selected. So it's pulling down velocity of both. So it's going to press undo by pressing Command Z or Control Z. Then I'm going to press escaped to de-select both of these. Once again, I'll hover over the note that I'd like to change the velocity of hold Command on a Mac or Alt on Windows. And I'm going to pull it down. It's going to bring this down a touch more so the effect is more obvious. Right? So good code through drawing, oh my notes. And then just the velocity one by one. But there's a slightly quick way of doing this. Can delete those notes by hitting backspace. Now, I'm going to go back to our normal cursor tool by pressing B. Then I'm going to click and drag over these two notes to select them. Now, I'm going to hold Option on a Mac or Control on Windows, and click and drag these notes to copy them. You should be able to see this little plus icon appears when you're holding option. If I let go of it, you'll see the little plus icon disappears, indicating the notes will simply be moved rather than copied. So just make sure to hold down option until you let go of your mouse. Or items can do that again. And then highlight all of them and do it once more. So now we've quickly drawn in those hi-hats with slightly different velocity. You may be able to notice the color of these notes, a slightly different, that's just displaying they've got varied velocities. Right? Let's have listened back. Okay, that sounds good, but soon to add little variation or the envelope. So I'm just going to delete my last hi-hat. So click on it and press Backspace. Now I want to draw in to 16th note hi-hats. As our grid is set to eighth notes in the moment, it'll be really difficult to draw in 16th notes perfectly in time with the grid. So I can change my grid back 16th notes. Now I can simply double-click and draw N2O habits. Not going to change velocity, but it's just less than back. I just want the snare drum to have a bit more impact in that loop. So again, stub blow up this part with the hand clap. So I'm just gonna go back to the eighth note graded once again, I'm drawing a hand clap at the same time as the snare drum heads. Great, We now have a simple drumbeat. Let's listen to it with the rest of the track. Okay, that's a good start. In the next video, I'm going show you how you can build upon your drumbeat. Thanks for watching.
17. MIDI Overdub Recording: Okay, now I've got a very basic drumbeat. We need to build upon it and come up with some new ideas. So what I would recommend you do is keep playing the loop back and try adding in some more percussive parts. There's no right or wrong. Once you got basic beat going, try to make things interesting. So what recommend you do is start playing your clip and then try some things out on your keyboard. Or by drawing parts in. You can always delete them at anytime. Someone's going to do something like that. Okay, quite like the idea. And I could try and work out why played there. But there's another handy feature that I'd like to show you, and that is midi overdub. Again, sometimes it may be too difficult to play in multiple parts at once. For example, playing multiple different because if parts can be hard to gain time. So what we can do is set able to interloop the clip and to continue recording. This is called midi overdub and allows you to build upon ideas. So all you have to do setup midi overdub is engaged the session record button, which is this icon here. So once I press this button, able to and will begin recording. So just ensure the correct track is selected and you have the record icon selected. Then just have a look, see what accounting is going to be. Here. We're going to have one-bar count in the full recording begins. So let's give this a go. Remember, it will continue recording until we press stop. You can press undo any point to delete the last note you played it in. Okay, So it's going to go to this button now and they'll start recording. Right? So I didn't play that in very well. So it's going to press undo and try again. It's not bad, but it's not perfectly in time. Somebody also show you quickly is if you continue to record over the same part, it will actually override the midi notes that were in its way. So if you can see there, one is landing at the same point as the previous meeting notes. It was overwriting that note with the new one. So now if going over the process few times, I'm just going to delete all these notes and record the men one final time. So I'm going to select all of those notes by clicking on America's note here on the left and press backspace. Right. Let's give it one more go. Okay, we've got those notes in there. They're not perfectly in time. So I'm going to quickly quantize them. Just gonna make sure all these notes are selected once again by clicking on note on the left-hand side. Now I'm going to right-click on one of these notes and go to quantize settings. I will need to be quantized to eighth notes, which is actually the current grid setting. So I'm going to leave on current grid or choose eighth note. I want to quantize the start and end time, and I want them to be perfectly in time. So I'm going to leave that a 100 percent. Then press Okay. All right. Let's listen back. That sounds fine. But listening back, I think I want to move all of these 1 eighth note over to the left. So again, delete the one at the very start because we don't need it. Then highlight the rest of the notes. So I'm gonna click and drag with the normal cursor tool to select them all and drag them over 1 eighth note. You may notice we've got this one extra note after the end of B2. So I'm just going to drag that back in. Right? Let's hear this. Okay. That sounds better to me. Right before I move on, I'm just going to mention something. One thing you'll notice is I've actually left on scale mode in the midi note editor. I just don't need that when I'm working on drums, so I'm going to remove it. So could get a bit confusing. I might think I can only use the notes which highlights the pink, but that's not the case with this drum part. Okay, let's move on. Thanks for watching.
18. Recording Quantization: Hi there. In this video, I want to show you another really useful Midea feature. And that is record quantization is absolutely great when playing in parts, especially if you're a beginner. So what we can do is set Ableton to automatically quantize anything you've played them. So let's set this up or we have to do is go up to Edit and scroll down to record containerization. He can choose which no increment you'd like to be quantized too. For this part, I'm just going to choose eighth note quantization. I'm going to use the midi overdub feature once again, as I want to play this in, I have my drum part. So it's going to go up and press the session record button once again. So did you notice there I played that in really badly. But now when I listen back, it's all contexts to eighth notes on the grid. Could oppress, undo and try and play in something more similar to what I wanted. As I'm using screen recording software to record this video, I'm actually getting a lot of latency. This can be quite difficult. So please bear with me. Okay, that was always right, but these notes haven't quite been quantized to note. So I tried to play out as a plate them closer to the next eighth note. So I'm just going to drag these two notes back. Right? Let's listen back. Okay, gray or drum beats, a little more interesting. So as you can see, the automatic quantized is super-useful. Hope you found this video useful, and I'll see you in the next one.
19. The MIDI Legato Feature: We've been looking at Midea and lots of detail in the past few videos by just one, share a couple more handy features for we move on to turning ideas into a song. So we're getting close now. We have a two-bar drumbeat, but really I want it to be a four-bar loop so I can add a bit more variation. So I could extend the end of the loop to drag out, then select all of my notes and copy them over. But there's a quick way of doing this. We've got to do is go over to the left-hand side of your clip here and click on duplicate. What this is going to do is duplicate the clip, so it's twice the length. All right, so now we've got four bar loop. The first few bars are exactly the same as the second two bars, which are going to make a little change to the hi-hats now, just so we've got that extra variation. So I'm just going to delete these last six notes. So I'm going to select those ones and press Backspace. Now, I want to store in some 16th notes here. So I'm going to change my grid sets on 16th note once again, that can double-click store in a couple of notes. I'm just going to bring down the velocity of the second one very slightly. So I'm going to hold Command on a Mac or Alt on Windows, and then click and drag. Now I'm just going to select these two notes. Hold Option on a Mac or Control on Windows and copy them over. The last two notes. I just want to more eighth notes. So I'm going to copy these two notes over to there. So again, I'm going to hold Option or Control on Windows and drag. As HVAC. I just added the symbol in there because I wanted that every four bars. Now something else I want to do is match the kick pattern to our bass part. So in this style of music is often common to have a kick and bass part playing the same rhythm in certain sections of the song. So I'm going to do is select my kick drum notes. So I'll click on the note on the left-hand side and I'll select all of them. Then I'm going to press Command C on a Mac or Control C on Windows to copy them. All right, now I'm going to open up my base clip. Here. We can say a different base notes. Now it's going to press Command V or Control V on Windows to paste the kick drum pattern into this base clip. One thing that you notice, this actually pasted from bar 7. She may have realized I had a selection made over here. So I'm just going to press undo. Now, I'm going to click at the very start of this bar. Now we know a notes are going to be pasted at this point. You may just build, see that white bar. See this one here. You just see that it's right at the start. So let's paste those in once more. So Command V. Now I'm going to do is drag our kick pattern up to the note of F1 because that's where our bass notes should be. So I'm going to select all of these notes and click and drag upwards. Great. Now they've overwritten the note that was there and we've got this pattern on the base. I'll do the same for the next three notes. This time I'm going to hold option and then drag them over to the a. And finally up to the C. Right? Now I kick and base should be the same rhythm. Let's listen to it back. So one thing you may notice is a bass part sounds pretty weird Now because the notes aren't being held. So I just need to go in and extend the length of each of these notes. So I could do this manually and click and drag individual notes. But this will take quite a while. So there's another feature that we can use and that is legato. So what legato will do is extend each note to the following note. So I'm just going to press Command a to select all of my notes. Then I'm going to hit this button over here which says legato. See there all of the notes now filled out the gaps up until the next note. Let's listen to it back once more. Sounds much better. One of the thing I just want to clarify, let's press on day. If I select individual notes such as these, I can use legato and it'll just do it to those notes. If I actually don't have any notes selected in the clip. And then press legato. It'll apply this function to all of the notes. Alright, great. We've now got a drumbeat and is matching our bass part nicely. So you've got good backbone for the track.
20. Set Organisation: So we've now got a good start to a song. It's time to do a bit of housekeeping. A previously turn down the volume of all my tracks. But if I play this ONE back again now, you'll notice that we're getting a bit of clipping again. Clipping is digital distortion and it can sound quite unpleasant. So this isn't essential, but it's just good practice. So I can turn down the volume of all of my tracks very slightly once again. So click on the top of one of the trucks, then hold shift and do the same on these other trucks. Now let's pull down the volume very slightly. Let's play it back one small. You'll see that the meters and now no longer turning red. All right, so as you can see, we've only got five trucks so far, but we'll be adding some more quiet soon. It's probably time that we start organizing our session. Otherwise, it can become a bit overwhelming in the future. So I'm just going to start renaming my trucks and my clips to rename it track, simply right-click. Then you can go down to rename. I'm just going to call this base. Now I'm going to change the name of this truck. First of all, I'm going to solo it with this button down here to make sure I know which part is the playback. So that's my arpeggio pop. So I'm going to right-click, rename this. Arpeggio. Can do the same for this truck. So I'll solo this and play again. That's this melody pub. Another way it's renamed is simply using the shortcut Command or Control a on Windows, then you can simply type in. You just have to make sure the correct track is selected. Something else I'm going to do is change the color of this truck because it's the same as my arpeggio part and this will just make things easier to say. So you can right-click and then go down to one of these colors. Just click on one of these, and I'll change the color of your track. You could also do the same on the clips, so it can right-click and choose different color. Going to rename velocity trucks, right? I'm now going to give names to my different clips. Just help me remember what these parts are. I feel like the idea that I've come up with feels like a chorus. So I'm just going to rename this clip core space. He renamed clips in the exact same way as renaming tracks. I can rename schools are patriot. What's cool it up for short. Now assertions little bit more organized. So let's start looking at how you can use clips to arrange your song ideas. So clips can be moved to a different clip slots on the same trucks or even moved to different tracks. So if I click and drag this path clip, I could drag over to my arpeggio track. Again, you can drop in any clip slot that's available. Careful if you drag over another clip slot as you will delete the clip that's already there. So I'm going to press undo. Weaving clips around can be a good way to try out different ideas on different sounds. So clips can also be duplicated. Sometimes you may want to use a very similar part in two sections of your song. So that's when duplicating is useful. To do so, right-click and go to Duplicate or use the shortcut Command D on a Mac or Control D on Windows. C. Now we have two of the exact same clips on this arpeggio track. Another way to duplicate is holding Option on a Mac or Control on Windows and clicking and dragging to new clip slot. See that little plus icon has appeared. I'll just press on day. I can start coming up with a bit of an arrangement. So I've already duplicated my arpeggio, now going to duplicate this melody. Right? So the idea, I've got to play these two parts before I play the whole course section. I'm just going to order this slightly differently. So I've got my interests section at the top and my course section just below. Sounds gonna move all these other clips down to the second scene. I could play this first scene back with just these two clips and then play the second scene back, which has the rest. I'll just hit stop quickly first to disengage all of our clips and then play the first scene. Okay, a set is a little better organized. Now, in the next video, I'm going show you a useful feature for when playing clips back.
21. The Global Quantization Menu: The next thing I need to talk about is a quantization menu, as this will determine how your clips are played back. So the quantization menu is this box over here. As you can see, it's set to one bar at the moment. This is the default setting. Whenever I play a clip or seen, there'll be triggered on the downbeat of the next bar. So if I play this first scene, and then the second one, you'll notice it'll start playing at the start of the next bar. Again, if I stop all of these and show you another example, like stop playing my base back. See there, I press play on the drums partway through a bar and they started playing at the next bar. Again, if I were to press the Stop button during playback, a wait till the start of the next bar to stop all the clips. Serious flushing there for a moment. Now if I go to my global quantization menu and choose none, Let's see what happens. The clips will start and stop exactly when you press the Start and Stop buttons. They're not going to wait until the next bar. So if we're trying to build up an arrangement, such as bringing the drums first, then the base, the part and the melody. It be extremely difficult to get the loops going together in time with each other. Say that was all out of time. If I was to change the global quantization menu to a different number. Let's try four bars or to stop all the clips once more and start playing these back individually. See whenever it triggered a new clip, it waited until the start of the next four bar loop. This makes it a lot easier to add new clips in to keep them in time with each other. Again, if I press play on this now and then hit the stop button, our arrangement won't stop until the end is the four-bar loop. Exceed the Stop button was flushing, displaying it being pressed, and that was going stop at the start of the next four bar loop. Generally, I'd recommend setting the global quantization to two or four bars. As this gives you a little bit more time to press your clips, say start playing back at the correct point. He can't shorten it to one bar few on. As this way you can bring clips in at different times. However, as I say, if you're a beginner, it can be easier to do everything in four bar loops. There are a number of different options here. So you can have half a quarter an eighth of a bar, et cetera. But it's going to get a lot more difficult. I would recommend using one of the longest settings until you are more advanced user. I'm going to leave a four bars for the moment. Something else I want to mention quickly is clip lengths. So you'll notice all of our clips loop continuously. But if you remember, some of these clips are different lengths. So if we look at the melody part, this is only two bars in length, whereas the drums are four bars, and the base is eight bars. I'm just going to play this back quickly. I've now pause playback. Have a look at the track status display where you can see these little pie charts. I'll play it back again and have a look at the melody. The pie chart is going round way quicker for the part or base part. Notice how the melody pie chart has completed two rotations in the time the core space part has completed half rotation. So we can see the amount of rotations with this figure on the left. The figure on the right dictates length of the clip in beads. So this melody part is eight beats, and this one is 32-bits, is eight beats into bars. And this 32-bits in eight bars. I just wanted to go over that quickly as it can be really useful. See how far through the rotation your clips are.
22. Building an Arrangement with Clips: Hi there. In this video, I'm going to start turning these ideas into a bit more of an arrangement. As I mentioned before, this is going to be my core section. So I'm actually going to rename this over in the scene. So I'll right-click on the scene. Go down to rename. I'm going to call this course. Again. I'm just going to give this a color to make it even easier to say. Right? Let's just play back what we've got so far. Remember I've got microbial colonization set to four bars now. We'll start. So that sounds fine, but one must be a bit more variation between the intro and the chorus section. So suddenly I thought about doing is just changing the pitch of the arpeggio part. So I'm going to open up this arpeggio clip. So now I'm going to select all of my notes in this clip. So I'm going to make sure that I've selected the meeting or area. So it's gonna click on a blank space here. Now I'm going to press Command a or Control a on Windows to select all of the notes. Now I want to move all of these down one octave so I could click and drag them down. So there are F3. I could drag all the way down to F2. But a quick shortcut to do so is holding Shift and pressing the down arrow on your keyboard. See that they've jumped down a whole octave. If you want to move notes up or down individual semitones, you can do so with arrow keys. But here I want to jump a whole octave. Right now this is different. My other arpeggio part, I'm just going to rename this and change the color. So I'm just gonna give it a yellow color and then rename it arpeggio low. So low. All right, let's hear it now. Okay, that's little bit more interesting. So any slight change, but it can help. All right, so we've got to have an introduction and a bit of a course part. Now I'm going to create a vast part. Let's just first rename the scene. So it says introduction. It's kinda intro, right? So the first thing I want to do is duplicate the drum part. So I'm going to go to this clip here, right-click on it and select Duplicate. Now I'm going to change color again. I'm going to rename it thus drums. Then hit Enter. As the course is going to be the biggest section of the song. I'm just going to simplify this drum part. So I'm just going to delete all my hi-hats. So I'm going to select that note, press backspace, and also my clubs and my snares. Think I'll delete the rim shots to. Let's just listen to that back on its own so we can stop or clips and press play. Sounds a little bit better at the moment. So I'm just going to add a print shop where the snail was some b3 of each bar. It's going to access my tour tool as it can be a bit quicker. Right? Let's play that back again. Now I'm going to add apart for the base and now actually go into cheap k. This clip, as once made quite a different baseline. This time is going to play some long-held notes. So you can double click, Create New Clip and start drawing them in. Okay, I'm contain points again. So I'll go to the left-hand side here and change length to eight bars. So I'll click and type in eight and hit Enter. I'm going to change my grid setting as well as I know I want quite long notes. So it's going to change it to half bar. First. Now I want is C1. So I'm just going to double-click here to door and say, I'm going to stretch it out, says one bar length. Can you draw a G and a T? And then F here? Something else I'm going to do is just turn on scale mode. I know that meeting notes that are in the correct key, gray. Now this f Now I'm going to pull it out all the way to the star of bar 5. Just for a few more notes in here. Again, feel free to copy these if you want to follow along. So I wanted quite different base pair to give the variation compared to the chorus. It's going to rename this now, right-click and then rename it and change color. All right, let's listen back to the same for the drums and bass together. That sounds fine. But I just wanted to let the simple part. Now I'm just going to add a new instrument, circle harmonic or caudal part in this first section of the song. So I can right-click here, select, insert midi track. And then I'm going to go and choose an instrument. Circuits the browser to integrate packs, core library. Again, you can use any instrument in your browser. I'm just trying to use the core library. So most people could follow along, can go down to racks in the core library. Instrument Racks. I don't want to choose a guitar sound. Okay, I like this one here, oscillation guitar. So I'm going to drag it over to my new midi track. Right? I want to play this long with my first parts. So I'm going to hit play on this scene and then pause it. Now when I hit Record, I'll have a bar counting. I'll start recording in my part. One thing you're going to do though, is just going to edit and make sure I've got record quantization on. As it just makes it a bit easier. This time, I'm going to use quarter note quantization. Okay? So I didn't play the end very well. A tool for the automatic containerization has good at most of the way there. On each of these notes start half a bar later. So I'm going to select them all and drag them over. One thing you can do if you don't want to hear the midi notes being triggered when if you click on them, just disengage the headphone icon. As this will mean you can move the notes without hearing anything. Right now I've got my idea and it's going to copy these notes down to create harmony. So I can select these ones. Then I'll use the copy drag feature. So that's Option and drag or Control and drag on Windows. It's going to copy this now as well. Right? Let's just listen to this back. Listening back. I think as you move these notes up an octave. So I'm going to press Command 8, select all of the notes, then use the shortcut Shift and up arrow to move them up an octave. Just going to tidy up the length of some of these notes. Now let's listen back once more. Listening back. I've just noticed I've got a very wrong note there. Going to 10 scale mode back on and see which NO is out. This note here isn't in the correct scale. Second, move up to the right note. Play it back once more. Okay, That sounds better. I'm just going to add a couple more notes to this part. So I'm going to draw a G in here and the C up here, right? We can have this repeating twice every bar. So I was gonna make it a bit longer and duplicate it. So hold down Option to copy that note over. Now I'm going to do the same again with these two notes. Highlight all these notes and do the same. And then do it once more. Now I've got the full eight bar loop. One thing to note, when you record, make sure your loop is exactly eight bars. I got lucky there an end to the right point. But just type in eight here. And you know it's correct length k. Let's essences back once more. All right, I quite like that, but what these notes to be a touch shorter and I'm going to reduce velocity. So when all of them is selected, I'll just pull a velocity down and one of them, and they'll all do the same. Okay, great. We've now gone intro a chorus and verse section. Again, these are just ideas for the moment. Times can play this back in a vague arrangement. So I'm going to stop for Eclipse and then play through. I'm just going to turn down the guitar volume. It was very loud. Hello. Okay, there we have a vague arrangement. We had an introduction course, averse, another course. And then the intro I used as an outro. So as you can see that it's really easy to start coming up with some ideas when working with clips in scenes. I didn't just have to use the same buttons. But we'll keep things simple for now. If you like, you can try bringing in other parts in different sections of your song. So partway through the verse section, I could have brought the course drums in to make the verse lift up a little. But it's completely up to you. That's one of the great things about playing with clips in Ableton. So really fun way of creating music. So we've been looking at Midea for quite a long time now. It can be a little bit more complicated to get your head around and audio. But I'm going to move back to audio now. And we're going to start looking using ordinary loops and then later recording audio. Thanks for watching.
23. Audio Recording Settings: Hi there. In this video, I'm going to go over the steps involved to setup for an audio recording. So if you have an audio interface and an XLR microphone, you can set these up to record in Ableton Live. You can also use a USB microphone or even the built-in microphone on your computer. However, I would not recommend using this last option as the audio quality will be poor. So just keep going quickly. I'm going to skim over how it gets set up. So what we need to do is go into our preferences. So a Windows go to options, preferences, or on a Mac, go to life and select preferences. Now navigate to the Audio tab as this second tab down here. If you currently do not have an audio device selected, you'll only see these options at the top. Under audio device. The rest of them may not be here. Now, what we need to do is choose our audio input device. So this going to be the Emperor able to live. So if you're using an audio interface and an XLR microphone in here, you need to choose your audio interface as the input. So for example, I could choose audience ID 22. This is my interface. If your interface isn't appearing in this list, go to the audio interfaces official website, and download any appropriate drivers. Now if you're using a USB microphone, it'll also appear in this audio input device list. At the moment, I've USB microphone plugged in and that says here Blue Snowball. Again, if this isn't showing up, you'll need to download the relevant driver from the manufacturer's website. If you want, you can use your computer's built-in microphone. If your computer has one, it should appear in this list. If you're using an audio interface and you have studio monitors or headphones plugged into the interface. You can choose your audio output device where you can have your headphones plugged straight into computer. But if you're using an audio interface, you may as well select that as the audio output device in this list. Right now I need to leave on tele stream Audio Capture. As this is recording the audio for this tutorial normally, or choose my audio interface, which is ID 22. Again, if you're using a USB mike or your built-in microphone on your computer. Choose built-in output or Mac, or if you're using Windows, choose your appropriate output. This could be an SEO device, your built-in, or Windows audit Advice. If it was already working fine, temple the changing this. Okay. Say audio interface or USB microphone should now be set up. I'm just going to add my MPA as the ID 22. Okay, so that's a bare essentials to set up your microphone so you can record within able to live. In the next video, I'm going to start showing you how we can record audio into Eclipse. Thanks for watching.
24. Recording Audio: Okay. Now we have a microphone setup. We're almost ready to record. So let's just guess session setup firstly at new audio track. So I'm just going to right-click on this blank space here and select Insert Audio Track. Now, I'm just going to set up the input. If you use an external interface, plug your microphone into input 1 and 10 again, dial up about halfway. If you're using condensed microphone, make sure phantom power is turned on, on your interface. There's usually a button with a plus 48 V icon near the input gain dial. That's the phantom power. If you want to record a guitar or an external instruments, such as a synthesizer, plug this in instead. Again, if you're using USB mike, make sure the gain dial is turned up. Or using the built-in my canoe computer. Go into your sound settings and make sure that Mike's input volume is turned up. Now, I'd recommend using headphones rather than speakers to avoid getting any feedback. So what you need to do next is record enable your track. You may notice here I'm getting some movement when I speak. Thus because my microphone is plugged into input one, I'm actually going to use a synthesizer for this recording rather than the microphone, just so it's easier to distinguish between my voice. So if using input 2 or another emperor in your audio interface, just choose it from this drop-down box here. Now when I play a note on my external instrument, you'll see that's lighting up. Okay, so now we've got setup. Let's just hit record on button down here. Notice my monitor is set to off at the moment. Firms can play back a note quickly. And we can see there these gray bars are indicating this truck is receiving signal. Now what you need to do is set the input signal for your microphone. So upper moment, when I play a note, see this meter is reaching around minus 12. And that's actually quite good starting point. If I turn up too much, you'll see there is reaching the top, It's going red and it's clipping. When clipping occurs, the audio signal will distort and damage the quality of your audio. So if at any point you signal is clipping, you need to turn down your microphone's input. That allows this point in the signal was around minus six, which is going to turn it down a tiny bit more. And sometimes when you're performing, your signal may increase slightly. All right, This should be fine. Now, I'm just going to turn monitor to auto and we should be able to hear one playing in. So the sound you're hearing there is a sound of a synthesizer being plugged into my audio interface. It is set up in exactly the same way is using microphone. I've gone into one of the input, so my interface and adjusted the input gain just as I would if I was using a microphone. If I swap this over to input number 1, you'll now be able to see signal whenever I'm speaking. And it's going to put that back to input two as I don't want to record my voice at the moment. Now if you're quoting a voice with microphone or even another instrument, and you don't want hear it back in your headphones, then just turn monitor to off. It will still record, but you won't actually hear it being played back in your headphones. This is down to personal preference. Some people like recording, being able to hear what's going into the computer, whereas other people do not. Something else I mentioned quickly now, if you've got monitor on auto and you can hear your voice being played back in your headphones. If there's a slight delay, you may need to reduce the buffer size on your computer. So to access that, we need to go back. So audio settings once again. So on Windows go to options, preferences or a Mac. Live preferences. Now go to the Audio tab. And you should be able to see this buffer size. So the shorter the buffer size, the less latency you'll have when recording. So if I have a shorter buff size, there'll be less of a delay between my source going into the microphone and I was actually hearing it back through Ableton. One problem with doing this, if you reduce the buffer size too much, it could cause your computer to crash or glitch. So just try out different settings. The lower you go, the less latency or get, the higher you are, the less strain your computer will be per tundra. However, there will be more latency. I'm just going to leave mine at 12 eight for the moment. Generally, when recording, I'd recommend having the buffer size as long as your computer can handle. But when you're mixing, you may as well increase the buffer size to its max as it will allow you to use more plug-ins, right? What I'm going to do now is recording a bass part. So gonna make sure my truck is record enabled. I'm just going to turn monitor to auto mode now, so can hear it back while recording. I want to record this part along with the other clips in the track. It's going to make sure that active by pressing the scene button here and then pausing. Now, when I hit record, these will play along with the recording, is going to check what my counting is correctly, right? We've got one bar. And I don't really need a metronome anymore as I've got my drum part. Right, let's record. Okay, I recorded in a simple bass part, just doubling the base that we've already got. Let's have a listen back to it. Okay, that sounds fine, but the timing is a little off. In the next video, I'll look at quantizing this piece of audio. Something that wants to quickly first. So it's just double-check that leg for my loop is correct. Here I want it to be 16 bars in length. So let's double-check That's exactly 16. So it's the same as our original base part. Right? As you can see, once you're all set up, recording audio is just as easy as recording midi. Editing audio is a little more difficult, but we'll start looking at that next. Thanks for watching.
25. Basic Audio Editing Part 1: All right, the next thing I want to look at is some very basic audio editing. I'm not going to go over audio editing in lots of detail at the moment, as there is a lot you can do. For now. I just want to show you the basics, right? Just show you some extreme examples of audio editing. I'm going to record in a different bit of audio. So I'm going to record in some clicks and clubs. I'm going to stop all my clips and just record this into a new clip and my audio track. I want to use my microphone for this recording. So I'm going to change my input to the input and my microphone is plugged into my interface, which is input 11 thing I didn't mention in the previous video. If you can see input one slash two, That's a stereo input. So you can use both inputs, 12 at the same time. Don't worry about this for the moment. As if you've only got one microphone, you'll be recording in mono. Recording mono requires you to use one input. For example, input one. If you record in stereo with one microphone, you'll only hear the audio signal coming out of one side. So you'll hear either in the left or the right, depending on which input your microphone is plugged into. Right. So I'm just going to turn my metronome on, changes to input one and then start recording. As you can see the clipping quite a lot. So I was going to try once again. So just press undo to get rid of that recording. Okay, so just record it in some clubs or listen to his back. Friday, you'll notice they're not quite in time with a click. Now sometimes when you're recording into a clip, you might want to try out a few different ideas. And that's what I did here. I was just changing the rhythm as a club. I've decided I don't want anything up to this point in here. So I can change the length of my clip. So it starting a boss six now, and it's only three bars in length. But zoom in a little bit. Right? So this is the part that wants work on. Let's hear that back. Okay, It's very out of time with a click. Now suddenly I want show you quickly. See at the moment, our clip is starting at bar six. What you can do is actually change where beat one of bar 1 is within your clip. So just zoom in to around where you want P1. So I'm going to right-click and go up to set 1.1.1 here. Now we can see this is beat one of bar 1. Anything before or minus numbers. It's going to drag this some eclipse starts at the same point. So now I can have a two-bar clip starting a bar 1. In this situation, it wasn't vital, but it can become quite confusing if you start your clip at strange point. Now something else you can do is delete any audio before your clip stops. Or you have to do is right-click in the sample editor and select Crop sample. Now it's cut out the other audio and just left us with a shorter clip. Let's try this down says toolbars and length as well. So now it's ending up star of battery, right? So that's how you can start tidying up your coding. Let's listen back to it now. Okay, It's still have time, but I'm going to look at quantizing audio in the next video. Thanks for watching.
26. Basic Audio Editing Part 2 - Quantizing Audio: Hi there. In this video, I'm going to show you how you can quantize your audience. So like Midea, we can quantize audio. Just be aware, it's not quite as flexible as quantizing midi. I'm just going to open up this base part that we recorded recently. And now I'm going to use the quick quantize option to quantize my audio. So I'm going to zoom in a bit. Here we can see our grid is on the adaptive setting. And it's going to change this to quarter note. This way when we quantize them. The best chance of each of these notes starting on the bar. Right? Now, I'm just going to press Quick quantized shortcut, which is Command U on a Mac or Control U on Windows. We can see that these notes have all been moved in time. Something else you notice is these little orange markers if appeared. These what we call warp markers. These basically points Ableton has assigned where it's noticed there is a transient. Transient is a spike in audio. So the transients here of start of each of our nodes. We can actually click and drag these and move them around if we like. So we can even change the rhythm with this part. Let's listen back to it. See those notes that all starting on beat one of each bar. I'll just press Undo so we can listen to it and quantized. And I'll press redo now. So in this situation is done a really good job. Right? Let's look at the other piece of audio we recoded. Now, I'm just going to press Command G once again to quit contests. Now we listen back. So the last three notes have been quantized perfectly in time, but this first one hasn't. That's because you may notice this warp marker isn't actually in time with this transient. I'll zoom in a bit more so you can say, see there the warp marker is at the very start of this clip and isn't actually on this note. So what we can do is actually draw in transient markers. There's a couple of ways of doing so. I can right-click on this little gray area here and select Insert warp marker. Now is added a new warp marker. We can delete them by right-clicking and going up to delete. It's now a warp marker is gone. Alternatively, you can double-click up here and the other new warp marker. One thing to note, since I've added that new warp marker are still need concise. And also when I think what markers are always recommend zooming right in to make sure the warp marker starts at the point where the OTA crosses this line in the middle. So that is about there. I could even delete that one and move it over very slightly. I might draw in here. So I'm going to double-click. If you double-click, it will just draw in one warp marker. Whereas if you right-click, you'll add more warp markers wherever it thinks it needs them. Okay, I'm just going to try quantizing again. So one can use keyboard shortcut command J. That one is being quantized correctly. You'll notice this one still has an SMS going to select this warp marker. I'm actually going to click and drag it to the position I would like. C. They snap back to the start of the bar. Let's listen back once more. Has perfectly in time with our grid. Now a couple of more things I want to mention quickly. If you're unable to store it warp markers, you just need to make sure that this icon here which says warp is active. So you want to take that off of a warp markers have gone and this clip will now be out of time. So make sure this is enabled. Something else you need to do if you have to click on the war Python is make sure you re-engage loop. Because right now this clip is no longer going to be looping. So the clip will only play through ones. Sometimes you may want to do this. Right now, I don't want to, so I'm just going to select loop. Now when I play it back again. Now, nothing I mentioned very briefly is what mode? So Ableton will do its best to try and quantize your audio and the most subtle way possible. But there are a couple of different settings you can try depending on the type of audio. Now, when working on percussive parts, you want to have warp mode set to beads. This is the most appropriate setting for I'm working with percussive sounds. However, if as quantizing something harmonic, for example, this base part, if it starts to sound a bit strange, you may want to try using a different setting. For example, tones. Now I'll just open up the quick help for a moment. If you ever unsure of what type to use, She's hover your mouse over this box and it'll give you a brief description of the different warp modes is not always essential to do this. But if you've noticed the audio starts have some strange artefacts. Try out a couple of these different types. I would recommend looking at beats, tones, and texture. First, somebody else I mentioned is you can actually walk any audio file. So if you've chosen a sample from the browser, you can use these warp modes to actually quantize a set matches with your project. You can even move notes around, change a, read them. Right? So that's a very basics of audio editing and that should be enough to get you started. I hope you found this video useful.
27. Walkthrough of Adding New Parts: Hi there. In this video, I'm just going to add in a couple more parts to this sudden. If you're not following along creating the same songs me, then feel free to skip this video as we won't actually be showing you any new techniques. I'll just be adding in a couple more musical parts. So first of all, I'm just going to delete this clip. This was the copying clip, and I just don't need that in the song. Now the next thing I want to do is create a new track. I quite like this oscillation guitar that you used previously. And I want to have another doubling this up. So it's going to duplicate this track by right-clicking on it and selecting Duplicate. I'm just going to delete this clip as I'd like new one. I'm also going to change the color and rename the track. So use the shortcut Command or Control on Windows trade name. I'll call this lead guitar. I might change the name of this as well. Right now, one thing I want to do is change the sound of this instrument very slightly. I'm just going to go to the Device View so I can adjust some of the parameters of my instrument. So I'm going to click on this box and button right here or use the shortcut Shift and Tab. So older ones do is increase the amount of reverb for this guitar pop. So I'm going to change the reverb amount to a 100 percent. And I'm also going to increase a reverb decay. I'm not going to talk about instruments settings for the moment, but increasing the reverb amount would just make the guitar sounds like it's in a bigger space, right? That start drawing in some notes. Let's double-click and create a new clip. So I want my grid to be set to eighth notes, as I'm going to draw in repeating eighth-note pattern for the guitar. So I'm just going to click on eighth note here on the fixed grid. I'm also going to zoom in vertically, very slightly. So click and drag on the left here when the magnifying glass icon appears. This time I want to join multiple notes quickly, so I'm going to use the draw tool. So we'll use the shortcut B. Now I'll click and drag. Right. Let's just listen to that back. Okay, sounds pretty good. I'm just going to adjust the velocity of a couple of these nodes. I need to make sure I don't have all of the notes selected or else as I just did there, you'll see the velocity goes down for them all. So I'll press Control Z at Presby and I'll click off and not just philosophy of some notes. So I'm just going to use the shortcut Command on a Mac or Alt on Windows, while I'm hovering the mouse over the note, then I can click and drag to pull down the velocity. I'm just going to do is for every other note, like it did with the hi-hat cell Iran. Now, I want to duplicate these notes and have them an octave down as well. So I'm going to highlight them all. Hold Control on Windows or Option on a Mac and drag them down. All right, let's hit that back. I'm going to increase the length is eclipses eight bars long. So go to the left here and under length, change it to eight. All right, I'm just going to copy these notes and drag them over to B2. This time after the third note AND gate to move the rest of them down to a C. Also, delete this one here. I'm going to have the note C repeating for quite awhile. So I'm going to use Option and drag again. This is my preferred way to copy notes, but you can do it however you like. Some people like copying and pasting and some people like using the chat feature. I'm going to go back up to an E again at this 0.1 thing. You'll notice here I've actually missed the note I was aiming for. So I'm going to slightly ease and bringing down one to do so slight mole and just press the down arrow key. After the E, I'm going to go up to G. Can delete one note here. I'm now going to go down to D. Can delete one note here. Then at 6.3, I'm gonna go back to say. So I'm going to select all of these ones here and drag them over. I'm just going to fill out this last bar with the same note once again. Alright, let's listen to this. All right. I'm with rest of the truck. I've just turned down the volume quite Tibet using the fader here as a guitar part was far too loud. Right? Now I'm going to try one more part to add to the course. So again, create a new track this time. So right-click, insert midi track as a one, a midi track. And the sounder want to use was basic brushed bells. I believe this may have been the same as my melody part. You're going to click on my melody here and go to the device, Fear higher. It is the same as this part here. So instead, I'm actually going to duplicate that part. I can call this courts. So rename it quotes, give it another color. I'm going to delete these clips. Right? So what store this Court's power over the course? So I'm just going to double-click to create new clip here. And I will start writing it in. Once again, I'm not going to be explaining why I am writing in these notes. I'm just going to draw the men. So feel free to skip if you're not interested. All right, so again, quickly tour in some parts. First we will again make sure my grade is on eighth notes. So I'll select this here. Fixed grid eighth note. Now start drawing in my notes. Hello, Just philosophy of a couple of these. I can do it for all of them. Again, change length my clip to eight bars once again. Let's listen back so far. Okay, great. Well this note to be a bit longer to this next book. Again, varying the velocity of my notes every now and then. Sometimes our coffee patterns over to speed up this process and then change the pitch of the note. Okay, great. If you'd like to copy exactly, feel free to pause this video. Alternatively, if you wish, you can create your own palettes. Okay, we now have a few more ideas to help us complete our sun. Next video, I'll show you how to record these ideas onto the timeline to start finalizing your son. That's just have listened to what we've got so far. All right. So this is that we've got so far. Once we record these into the Arrangement View, will be able to start finalizing are some. Thanks for watching.
28. Recording your Clips into the Arrangement View: Okay, so now we've got our ideas. We need finally turn them into a song. So we need to do this using the arrangement view. That is this view over here. You can access it by clicking on this button or by pressing Tab on your keyboard. Some people prefer to just use the arrangement view to write music. This is how many other digital audio stations work. However, using clips is a great way of writing music and a big part of Ableton Live. So generally I would recommend coming up with your ideas in the session view, then putting them into the Arrangement View. So just like in the session view, we can record or edit midi and audio. We just go about in a slightly different way. So the way I'd recommend you get your clips into the Arrangement View is by recording the men. This can save you time, allows you to perform your clips in the order that you'd like them to be in your song structure. So quickly show you how you can record into the Arrangement view. First of all, have a lucky a global launch quantization menu. I'd recommend choosing one to four or eight bars. I'm going to leave a four bars for the moment, as this can make it easier to play by q clips at the right time. Now, make sure none of you tracks are record enabled. So if any of the tracks have the record Arm button let up. So it's disengaged. Now the last thing we need to do is hit record. So if I hit record now, it will start recording straightaway. If you have accounting, it'll go through accounting first. But the way I'd recommend you recording is holding Shift and then clicking on this button. So what will happen now is ableton Live will wait until you play your first clip or scene back and you're recording will commends. This means you'll always spelled start your coding in time with the timeline. One thing to note, you don't have to play back your clips are scenes in any particular order. Experiment playing different clips back at different times. To come up with an interesting arrangement. I'm going to record some by clips into the arrangement now. Everything is set up, so all left to do now is play a clip or a scene. Hello. Okay, once you've stopped to your clips, stop recording by pressing the stop button at the top or the space bar. Now let's have a look at our Arrangement view. As you can see here, our clips have been recorded into the Arrangement View in the order that we played them back. Now one thing to note, if I try and play this back now. Well, no actually go in here. Anything else? Because we need press the Back to Arrangement View button so we can see the timeline cursor moving along the timeline. However, we're not hearing anything. Once you press this button, you should be able to play this arrangement back and it won't be grayed out anymore. That's hub lesson. Okay, great. We can hear arrangement. So as you've probably guessed, the timeline is this top here. We can see the bar numbers running along the top. And at the bottom down here, we can see the time. We can zoom just like in the midi note editor, by hovering over the top to get the magnifying glass icon. Then you can click and drag. You can also zoom using keyboard shortcuts plus or minus. The tracks are listed down on the side here. So they're just the same as in the session view, but flipped sideways. Now somebody's mentioned, if we go back to the session view and play some of our clips back. When we go to the Arrangement View again, you'll notice that the tracks that were played back have been grayed out. So when I try and play my arrangement, you'll notice is just playing back the clips that are activated in the session view. So again, you'll need to press the Back to Arrangement View button. You can also access this button down here on the master channel. See how it's lit up orange at the moment. Once I press it, it goes gray. And now we'll be able to play back our arrangement. Playback the arrangement from the start. Press the Stop button at the top here. If you want, select another place to play back the arrangement from, simply click somewhere on the timeline. Now when I press play, we'll start playback from this point. Again, you can play and pause by using the space bar. Okay, So that's my favorite way of getting my ideas from the session view into the Arrangement view, the recoverable ways that you can do so, which I'll show you shortly. Thanks for watching.
29. Copying Clips into the Arrangement View: Hi there. In the last video, I showed you how you can record your clips into the Arrangement view. That's my favorite way to build an arrangement, but it's not the only way you can do so. The next way we want Shea is by simply dragging and dropping clips in. So what you can do is simply click and drag a clip from the session view over into the Arrangement View. So just click clip, drag over and hover over the Arrangement View icon. You can now drop that clip into the arrangement. You can actually drop it onto the track. So make sure you choose the right track. Another very similar way of doing so is by clicking, holding on a clip. I'm pressing the Tab button. So this just jumps over to the Arrangement View. Now when I move my mouse, I can select bright lights tropic lab. You can also do this with multiple clips. So to select multiple clips, click and hold Control on Windows or Command on Mac, and select any clips he liked to copy over. Then you can either drag them over to the icon and drop them in. Or you do the same by clicking, holding and pressing Tab. It's going to select all of these moving down to the correct tracks. Another quick way to move clips into the Arrangement View. So I click on the one that you'd like to move over and press Copy. So that's Command C on Mac or Control C on Windows. Then go to the arrangement, select weighed like to paste it just by clicking on the timeline and press paste. So Command V or Mac or Control V on Windows. You can see here the clip has been copied over. Another really handy feature, using the scenes to copy clips over. So if I click and drag a scene of t arrangement view, when doing so, scroll up to the top instrument. So you make sure you copy all the clips are in the scene and then drop it in. See now it's copied everything that was in that scene into the Arrangement View. And all these ones I've just copied over as I've already gotten arrangement here on the left. So that's how to get your ideas into the Arrangement View. Now what we need to do is start working on our song structure in the arrangement. This load stuff I need to teach you about editing. So look at that in the next video. Thanks for watching.
30. Editing Features in the Arrangement View: Hi there. In this video, I'm going to look at some editing features in the arrangement view. So we've previously looked at the very basics, playing, pausing and navigating around the timeline. So just quick reminder. You can play and pause with the space bar or the buttons at the top here, and choose wavelets play back in the timeline. Either click on the clip and press space, or hover over the timeline. So this icon appears then when you collect. Playback will start from this point. Now suddenly us won't show you is a loop feature. This is really handy if you want to listen back to a part of your song to make edits, for example. So it selects an error if you attract, create a loop, just make selection. For example, I can make a selection by clicking one of my clips. Then all I need to do is press Command and L on a Mac or Control L on Windows. Now this section we'll loop over and over. I'll just play it back. Turn the loop off again, simply press Command L or Control L. Once again, you'll notice how this loop area is grayed out. So I'll just make a small selection. This time I'm just going to click and drag on a blank space of the timeline. So now this section here has been selected. I'll press Command and L, and it's now jump to this point. If I play the track back now, it'll loop this section over and over. But if I press Command L Once again, it will no longer loop. Something else you might want to do is just loop you hold track. If you want to loop the whole length of your track, simply click and drag from the start to the end, or vice versa. Then once again, Command L or Control L. And now we wholesome will be looped over and over. Okay, Next I'm going to look at moving clips around. So right now, not really going to structure Sung. I'll do that in a later video. I just want to show you a number of different features. So to move clips is hover your mouse over the top section of the clip. Then when this hand icon appears, you can click and drag the clip. See here I can click and drag over to the right or move it back to the left. You can also drag clips on the other tracks. So if I wanted to hear this part on the bass track, for example, I'll just drag it up to the bass track. Now for solo this track and play back this part. So I'm going to select this clip, then press Command L or Control L. So loop this section. So that's the arpeggio part and our bass track. I'll just move it back down to where it was. Something else I mentioned quickly, if you want to duplicate a track, you can do so by dragging a clip down to this area at the bottom which has dropped files and devices here. So if I was to click and drag this lead guitar part down to the area, it will just duplicate the lead guitar track. Now we have all the exact same settings, so we've got the same instrument. And if you had any plugins, these would also be loaded on this track. So this can be handy if you want a duplicate of the same track. I'm just going to press undo to get rid of this. All right, So back to moving clips around. If I click and drag and clips, as you can see, they'll move forwards or backwards in time. You'll notice here they're actually jumping and conforming with the great increments. So another way to quickly move them is using left and right arrow keys. Again, the clip we'll jump back and forth on these great increments. If you want, you can move the clip and find increments by holding Command on a Mac or Control on Windows. And then using Iraqis. See there it's moving back and forth very slightly. Again, if you were to move a clip with a mouse, if you hold Command on Mac or Control on Windows, it'll do the same and you'll be able to move the clip and much finer increments. Generally, I wouldn't really need to do it in small increments as what my clipped be snapped in time with the grid. It's going to press undo a few times. It's going to zoom in a touch again by using the plus key on the keyboard. As you can see, what I'm zooming in, my credit amount is changing. That's because we're on an adaptive grid setting. So if you wanted to jump clips back and forth in small increments, you can zoom in. And then when you use the arrow keys is going to jump and he's fine increments. If you want to do this slightly quick way, you could actually change the grid setting. So here I can click on one of the fixed grid or adaptive grid modes. Let's just choose fixed squared for the moment. And here we're an eighth notes. So as a zoom out, we can still see those eighth notes increments. A handy shortcut that allows you to change the grading comments quickly is by holding Command on a Mac or Control on Windows. And then pressing one or two. Right now I'm holding Command and pressing too. And we can see that the grid increments are getting larger. So now we're in half nodes. If I was to hold command and then press 1 or Control 1. I've got much finer increments on the grid. I'm just gonna go back to the adaptive grid and choose narrower. So I've shown you how to move individual clips. But if you want, move multiple clips at the same time, it's very easy to do so click on one of the clips I'd like to move, then hold shift and select another clip that you'd like to move. Now selections be made and I can move all of these clips at the same time. Again, this works with mouse or the arrow keys on your keyboard. You could do this with clips are multiple tracks as well. This times make selection. I'm going to click and drag over the clips I'd like to select. Now want to move these eclipse on all three tracks will move. Okay, so that's a very basics. Now let's look at copying. So this works in a similar way to copying meeting notes in the midi note editor. My preferred way of copying is using the old key on my keyboard when dragging so far as to move this clip, but hold the Alt key at the same time, we'll see that plus icon appears. Again, just like copying midi notes that has now been duplicated. I'll just press on day. You can also use the copy and paste feature using Command C or Control C. So I'll press Command C now and click where I'd like to paste my clip and press Command V or Control V on Windows. Now this clip has been pasted at this point. So just remember, you need slacked where on the timeline, if you'd like the click-through pasted. This can also be on other tracks. So I've now selected this pad track. When a paste this clip is now on this track. And even quick way of doing so is duplicating. So instead of copying and pasting, you can simply press Command D or Control D. The clip will be duplicated at the end of the selection that we made. One thing to note, be careful when making a selection as if I highlight these clips here and then press Duplicate as a selection ended at this point here. When we duplicate them, That's where we pasted. So for wanted them to be pasted right at the end, make sure your selection ends are the pointed like your clip to be pasted. So now for press Command D, We've got a pasted directly after the clip. Again, you can do this with multiple clips. So I'm going to select all of these clips here and then press Duplicate. But notice my selection ends at this point. So this is well be pasted from so Command D or Control D. And there we are. They've been pasted from this point here. Let's just press undo and try that again. This time I'll make sure my selection ends at the correct point. Now when I press Command D, they've been pasted right at this point, the star of boss 73 just pressed onto again. Another handy editing features talk about is making selections of clubs. So as I showed you before, if you hover your mouse over the top section of a clip, this hand icon with a pair, and you'll be able to move the clip. If you hover the mouse further down and click and drag, you'll see here you actually get a selection made on your clip. This can be useful if you want the tube, just one section of the clip. So now when I press Command D, we'll just duplicate this end section of the clip. If I keep pressing Command D, it's going to keep duplicating that same clip. Now it's been selected. If I click and drag, you'll see there is actually separated that portion of the clip. I could do this unless one here. So I've made my selection. Then I'll have my mouse over the top part and click and drag. And now separated into another clip. If you would separate a clip without clicking, dragging, clicked Make selection. This time I won't drag. I'll just click where I'd like to make the cut. Then press Command E on a Mac or control E on Windows. See that clip is now been cut into two. Again, this works for midi tracks as well as audio Cells command E to split a clip. A great feature for joining clips together. If you've got a number of clips that you want to consult with a into. One is using the shortcut Command J. So I'm going to quickly cut up this course drums here into a number of different clips. So I'm going to press Command E, Make selection Command E, and not the selection Command a, and so on. So now here we've actually got a number of different clips. We can tell a different clips as a name has been repeated at the start to beat clip. You can also see the black line showing they've been cut. I'll zoom in a little better. See these black lines here. If I wanted these clips to be one single clip again, we have to do is make selection. So I'm going to select all the clips I'd like to join and use the shortcut Command J or Control J on Windows. Now that being consolidated into one clip, I'll just press on day. Another way you can access a lot of these features I've spoken about simply by right-clicking. So don't worry if you ever forget the shortcuts. Just right-click and you build, see the options available. See here we've got cut, copy, paste, duplicate, and further down here we've got consolidate. So let's just press Command J now and the joint back together. Somebody else, you may have noticed that drop-down box then was deactivate clip. So this is basically a way to mute clips. The shortcut is simply pressing 0 on your keyboard. I'm going to click on here. Now it says Clip deactivated. So this clip will no longer playback audio or solo this track. And we can now no longer hear anything. I'll just re-engage it by pressing the shortcut 0. And our drums continue. There's a lot of information to be given in one video by just wanted to take you through most of the different editing features we can use on audio and midi clips. Again, if you get any of the shortcuts for these features, just right-click on the clip and these drop-down options will appear as I've seen, this is just reminded me of one more feature that I want to talk about. And that's the loop feature. So instead of duplicating or copying pasting, we can just loop clips. So we've got to do is hover the mouse over the top corner of one of your clubs. And when this bracket icon appears, click and drag it. See now this is looping, clip and extending the length. If I do it at the other end, we can also use a sleep feature. One thing to note, you can actually shorten eclipse well, if you like using this feature. So I could trim it down. Okay, so as most of the main editing features you can use on audio and midi clips in the arrangement view. There were, if you feel like you've been overloaded with information in this video, I just wanted to get across the main editing features before I go through and actually edit this track. In the next video, I'll be taking you through the steps involved, ranging a song. And I'll be using almost all of these features I've spoken about in this video. I'm going to actually go through, make some changes this arrangement have finalized these ideas into a song. Thanks for watching.
31. Audio Editing in the Arrangement View - Fades, Time-Stretching and Reversing: Hi there. In this video, I'm going to share a few features that are specific to audio editing in the arrangement view. First of all, let's look at fades and cross fades. So this is something you can use on audio clips in the arrangement view. They can be used to blend between two ordinary claps, or they can be used just to remove any clicks or pops at the end of your audio clip. So if we look this audio clip we have down here, he may be able to notice when I hover the mouse over it, we get these boxes in each corner. Now you may also be able to tell there's a slight grayed out section at the beginning and end of the clip. And this is just showing us that that's where our faders. So by default, fades are automatically added to audio clips on your timeline. This is just stopped them clicking or popping. Right? If I play this back, will be able to hear this note. Something gets cut off. Now if I hover my mouse over this box in the top corner and click and drag over the audio clip. You'll see there we've changed the length of the fade. Now for playback, you'd hear that it was more gradually fading out. If you want to change the shape of the fade, you can do so using this little note in the center. So it can have a very gradually fade and then dropped down suddenly. Or the upset. So you can just click and drag this around and find the shape that you like. Now if you want to change the end point of your fade, you can do so using the box in the bottom corner. So if I click and drag on this little box, we can have the fade ending earlier or later. One thing to note, this is different to changing the length of your clip when this bracket icon has appeared. If I were to click and drag and change the length of the clip. Now, you can see there the fate was actually moving with the clip. I'll just press on day. Whereas if I do it with a little box at the bottom, you'll see that the start point and the fade hasn't actually moved. So depending on what you're doing, having the flexibility to be able to do both of these can be very useful. Now if you go to the star of this audio clip, you'll be able to say we have the exact same options. So if you want to increase the length of the Fade, click and drag the top box. You can change the shape by using this node in the center. Or choose a starting point, your fade with the box at the bottom. I'll just press on day. Next. I just want to show you how to use a cross-fade. So I'm going to cut this clip into two. And can you click to make selection on my clip and press Command E or Control E on Windows. And it's cut this clip into two. Now it's going to change the length of that and drag these two parts near to each other. So if we play this back with jumping suddenly between the two different notes. A crossfade allows you to do this more gradually. A quick way to create crossfade is select the clips that you'd like to make a crossfade between. So I'll click on one to make a selection. Then hold shift and click on the next clip. Then if I right-click on the clip, I can select create cross fades on clip edges. Or you can use the shortcut Command Option F on a Mac or Control Alt and F on Windows. Now this has created a crossfade. It's only a very short crossfade at the moment. You can change the length of your crossfade just like a normal fade. So I'll to acquire long cross-fade this time and play this back. So we can hear it gradually blending between the two notes. Isn't how different that sounds. 20th, really short cross-fade. So these can be really useful if you want seamlessly blend between two clips. You can also create crossfade in a different way. If your clips are right next to each other like this. See here we've got the fade out and fade and the two separate clips. If I click and drag this fade out over to the next clip, that also creates a crossfade. This lonely work with Eclipse right up next to each other. Again, I could do it the other way by clicking on the fade in and dragging it back over to the previous clip. Also, don't forget, you can change the shape you're fade by clicking and dragging on the node in the center. Okay, so that's a handy at distinctive. It's going to press undo a few times, says clip goes back to how it was. Now something else won't show you is how to time stretch and audio clip on the timeline. Now first thing you need to do is open up your sample editor and make sure warp is selected. If it is LB, let up orange. Now all you have to do is hover your mouse over the top corner of one of your clips. And now when you click and drag, you'll actually time stretch the audio. So if I click and drag it all the way over here, this clip for playback at twice the speed. So if I press under, you can see there is homestretch debt and it still sounds pretty good. He may need to play around with the different warp mode depending on the type of audio you're working with. However, for now, that sounded fine. Again, if you want it to slow something down, hover. If one of the top corners, hold Shift, then click and drag. So it's really handy creative editing feature that you can use in arrangement view enabled to life. Now one final editing feature that you can use in the arrangement view is reversing audio clips. Sounds can show it in this clip. Once again, I can make it really fast this time. Right? So to reverse an audio clip, simply select the clip that you'd like to reverse, then hit the letter R on your computer keyboard. We can reverse it back again. If you like. You can reverse just a small section of no audio clip. So just click and drag of the lower half of an audio clip. Then use the shortcut and it reverse justice section. You'll see there's actually cut this up into two different clips. It doesn't sound particularly interesting on this simple bass note. However, if you have recorded a guitar or a vocal reversing, it can sound really good. So that was just a few quick audio editing features that you can use in the arrangement view in Ableton Live 11. In the next video, I'll be taking you through the steps involved in arranging a song. And I'll be using many of the features that have spoken about in the past couple of videos. I'm going to go through, make some changes to this arrangement and finalize these ideas into a song. If you already feel comfortable with the arrangement, view editing features that have spoken about, and you're not following along creating the same song is me. Then feel free to skip the next video as we will not actually be covering any new features of Ableton Live 11, R2P arranging this song using some of the features that I've shown you in the past couple of videos. Thanks for watching.
32. Finalyzing the Song Arrangement: In this video, I'm going show you a few examples of the features I mentioned in the previous videos and how I use them to finalize the song structure. If you already understand the features I've taught in the previous videos. And you don't want to follow along creating the same zone as this. And feel free to skip this video. I'll upload this Ableton set in the resources folder attached to the next video. So the first thing we want to do is change the structure slightly. I'd like to extend the length of this last chorus. As if you look at the top here, we can see we've got a 16, then 24 bars of the last course. I'd like it to be eight more balls. So it's double the length of the first course. So there's a number of different ways we can do this. Firstly, I'll show you the loop function. So I'm going to do is move these two parts here. So the arc blow and Melody. I'm going to move them over eight bars. So I'm going to click on one, hold shift and click on the other one, and click and drag them to the right. They've now been moved eight bars. Now I won't select all of these tracks here. So I'm gonna make a selection by clicking and dragging down. Now they're all selected. If I hover over one of these clips, you'll see this bracket icon appears. Now when I click and drag that out to the right, it's going to loop each and every one of these tracks. So now of course is the right length. Can I might do the same for outro just to make that twice as long. So I'm going to click and drag the hour eight bars. So I could have used a number of different features to do this. I could have used copy and paste or duplicate, but sometimes using the loop feature is just a bit quicker. Right? Now let's make some more changes to the song. If we were to listen back to this first course, you'd notice that all of the parts are exactly the same for the first eight bars as they are in the second APRs. But just make some little more interesting, I'm going to add some more variation. So first of all, I'm going to change the drum part here. Now what I'm going to do, this drum clip. So we have two separate clips of the moon. It's the same clip which has been looped four times. So I'm going to click on the lower half of this clip here. So the selection marker appears. Then I'll press Command E on a Mac or control E on Windows to cut it. Now these are two separate clips. Let's open this one up. So it's going to double-click on the top part of this clip. Great, so we now have opened up in our midi note editor. One thing you may notice, this is a four-bar clip. I want it to be an eight bar clip so I can do all the editing in one clip. So I'm just going to join these two together. To do that, I'll click on this clip here. You can see the marker in the middle there, which is showing it's actually two clips loops. I'll zoom in a touch using the plus key on my keyboard. See that little black marker at the top there that is showing us that this clip is looped. So to join these together, I'm going to use the shortcut Command J or Control J on Windows. That marker is now disappeared. Now when you open up this clip, we can see here it's eight bars. I'm just going to zoom in on the first couple of bars. The ones delete a kick drum. So this kick drum here, I'm going to delete. So select it and press Backspace. Now I'm going to scroll over a little. I'm just going to duplicate this kick drum. So I'll hold Option and click and drag. I'm just going to kick drums in bar 7 and 8. Okay, crimes going to close my minor edits now. Now I've made a change to this part. I'm going to rename and color this clip. So it's going to right-click on the clip. Go to Rename. I'm going to call this course drums to then hit Enter. Now a right-click and give this a different color. Just so we know is definitely. Now something else I should mention here is he can't copy clips from the arrangement view back into the session view. So the easiest way to do this is click on the clip. They'd like to copy over to the Session View icon at the top right. Then you can drop in on to any track you like. So I'm just going to drop in on this empty clip on the drums track here. So now if we want to experiment again and change the structure, so later we've got our new clip idea here. So let's just listen back to this section. Okay, great. Now I'm going to make a change to another part. This time I've installed the bass part. So once again, I'm going to split this eight bar loop into two. So I'm going to select her. I'd like to make the cut. Then press Command E on Mac or Control E on Windows, and it's cut. We now have a second clip. I'll just rename the color this differently now. So let's right-click choose color, then right-click and rename. I'm going to call it corresponds to. So I'll just double-click on the top of this clip to open up midi note editor. You can delete a couple of notes in bar 7 and stretch yourselves as one long-held note. And then just have one quick note at the start of bar 8 and delete the rest. Right. There's a couple more parts of ans change. This time. I want to change the second half of the verse so we can do it on the drums first again. So I'm going to click, we'd like to cut my clip, press Command a, and then renaming color. Thus drums to. Once again, I'll join these clips together as if we zoomed in again, you'll see this little marker there indicating there is a clip that's been looped. So now I've got it selected. I'll press Command J or Control J disappears, and now it's one long clip. Crimes going to draw a symbol in on beats 13 of each bar. So I'm going to open up the draw tool by pressing B and draw these in. It's going to do this whole way through. And again store the snap up this section. So I'm going to start this above seven. Also want to make sure I'm drawing in 16th notes. So I'm going to change a great setting to 1 16th. Okay, great. Now before I forget, I'm going to copy these clips over to the Session View. So this time I'm going to click and hold on the clip I'd like to copy. Then press Tab button. Now I can drop this into the session view. I'll do the same with drums. I'm not putting these in any particular order the moment I just want to copy them over quickly. Next part I want to change is this base here. So let's cut this clip into two once again. So click Command a or Control a. I'm going to use the shortcut Command R to rename this clip, that space fill. And I'll give it a color. I'm just going to change my crit settings quarter notes in the moment so I could draw it some quick notes. It was on half. So in bar 4, I'm going to shorten this note and join another shorter note. Notice here the velocity is different. It's going to bring it down six more similar to the other bass notes. I'm just going to show next node here. And I'm going to copy this one up to a C and shorten it down so it doesn't overlap with the next note. I'm just doing that so I don't have to change velocity again. I'm just adding some variation to these parts to make it sound a bit more interesting. If it was the exact same base part in both sections of the verse, the soul might be a bit dull. Now we're going to add one more node at the end here. So ending on a G rather than on the f. One scan or copy this over to this session view. I click to press tab and I can paste in where I'd like. Again, you don't need to do this, but sometimes I like to make a copy of these clips in Session View so I can play with ideas in the future. Also going to change these guitars code slightly. So again, I'll cut this clip, give it a new color and a new name. And I'm going to change apart. This time. It's going to change the last two notes, so the match with the bass part. So I'm going to draw a G here. And I'm going to bring the velocity up slightly this time just in velocity window down here. And it's going to copy this up by holding Option and dragging. And now we've got a B. Once again, I'll copy this over. This one more. Lights change. I'm just going to do this in the drums once again. This time is just going to be the exact same four-bar loop playing over and over. So I'm not going to join these clips together. It's going to open up and make the change in this one four-bar loop. It's going to duplicate this mark as part. So we've got the same on cow bell here and copy this over. So it's repeating once each bar. Again, just a bit more variation can make you so more interesting. Finally, I'll make sure I've renamed this and given a new color to make it easy to distinguish. So click and hold that press tab, and I'll paste this on the drums track. Finally, I'll just like strolling one more part in the verse. So to draw in a new midi clip, we have to do is double-click. Now we've got a new clip. Let's go and stretch yourselves as eight bars in length and press Command J to make it one single clip. Now double-click on this to open up in the midi note editor. Now I can draw in midi notes just like in the session view. It's going to make sure my grids on eighth note. And during this part, again can turn on the scale mode so I can see which notes to use. I'm just going to have this part here repeating up until n to the fourth power. So a copy over using option drag once again. And now I'll change the last note so it jumps up an octave. To be honest, this is just going to be a 4 bar clip. So I could either copy all of these notes to fill out this space in the clip, or I could just shorten the length of the clip in the arrangement view. One thing you need to mention, if you draw an a midi clip on the arrangement view like this, make sure that you enable loop. Flip is not enabled. This clip will not loop. As you can see here, this loop is now active. So if I turn loop mode off short-term S and then bring out again, it's not actually looping, the clip is just changing the length of AB. So what I recommend you do is turn loop mode on, then change length, length you'd like. So I'm going to change this to four bars, then hit Enter. Now you can see that it's looped in this blank space. Now when I click and drag this out, it continues to loop. All right, so let's just give this name. So right-click and rename and call this verse melody. I'm going to click on n hold, press tab and copy over into my session view. Great. So we've made a number of different changes the song now, and I feel like is going to be a more interesting arrangement. I haven't gone into the musical reasons why I made these changes. I'm not covering music theory at the moment. I just want to get through this as quickly as possible just for a play the song back so you can hear the changes. I've mentioned two more things. If you want, anytime, you can click and drag samples from the browser. So if you wanted to add a sample to attract, you can simply drag and drop it in like you would in the session view. I'd recommend bringing it down to the bottom here where it says drop files and devices here. This will create a new track that sample. Again, if you want to make a new track with an instrument, you can't do so. So just open up whatever instrument pre-sale like to use and drag and drop that into the same area at the bottom here. You see here we've got a new track. I don't need it, so I'm going to press undo. Okay, Great. I'll just play through the song second hertz sounds now. Okay. Hello. Okay. What is playing it back? I just had a couple of things. I wanted to change. This audio-based part has cut short, so finishes at the same time as midi notes. Lucky more carefully, I've cut a bit too short, so I'm going to extend our tiny bit again. Math notes or change the velocity of the symbol in the verse, and also the cow bell in the final chorus. Some have just noticed now some point I've made a mistake. And this clip is now looping longer than I wanted. This one is starting later. So I'm going to change the length of this clip and bring this one back. Again the same on the guitar pop. I'll just play the spit back to make sure it sounds correct now. Okay, great, That's much better. The song enough has more variation, so it's a bit more interesting. It's a good idea when making music to try your ideas using Session View and make tweaks in the arrangement view. Some of the features I'd like to look at two, such as recording audio and midi into the Arrangement View. Now you should have a good understanding of how to use Ableton Live. We've taught you how to write, hitting record, midi and audio in the session view. And also how to get your ideas from the session view into the Arrangement View and then make changes. Thanks for watching.
33. Exporting Your Song from Ableton Live: Hi there. In this video I'm gonna show you how you can export a file out of Ableton Live. So once you've finished your song will lead to export or bounce it. So you can listen to a elsewhere. Exporting. We'll sum your project down into a single stereo file, which could then be uploaded onto the internet or listen to you on a different device. So to export your song, you first need to make selection of the area that you'd like to export. So in the arrangement view, press Command a on a, on a Mac or Control a on Windows, and then set your loop with Control L or Command 0. Now one thing you should do, you'll notice that the loop starts at the very beginning here. But it also ends at the very end of our last clip. If I play back the very end of this song, which term? A loop of quickly. You'll notice that there was a couple of seconds with a final note was ringing out. So if we were to end there, this point here, it actually cut off the very end of your track. So just stretch out the end of the loop so it doesn't cut your song short. Now let's play this back and see if that's far enough. Okay, that's plenty. I'm just going to bring that back one bar. Okay, now I'm going to make sure my loop is active once again. And then I'm going to go up to File Export Audio, Video. And now this menu will open up. By default, this is the settings that you'll be given. I would recommend copying these exact settings. So here I'm just going to change the file type. So that's a WAV file. This just the most common type of audio file. The other thing can do is enable MP3. So this way, you'll have a high-quality audio file, which is the web file. And they can also have the lower quality MP3 file. If you wanted a smaller file send around. Okay, that's it. I'd recommend copying these settings and then press Export. Now you can give your audio file a name. Sounds going to call this trap song. And you can choose where you'd like it to be saved. And it's going to leave it as desktop for now. So Ableton will take couple of minutes to bounces or audio. Once this is done, you will find the audio file in your selected destination. Okay, So it's the simplest app that's how to export song and fabled to life. Thanks for watching.
34. Recording Audio into the Arrangement View - Audio Setup Recap: Hi there. Before I move on to the different recording methods in the Arrangement View, and I'm going to quickly skim over how to set up to record audio. This video is just a quick recap of how to setup your audio device to record in Ableton. If you already set up to record audio, feel free to skip this video. So first of all, create a new audio track. So I'm going to right-click on this gray space over here and select Insert Audio Track. Now I'm just going to go into my audio preferences. A quick way of doing it is clicking on this drop-down box at the top here. I'm going to configure audio. Now just make sure your audio input device is setup correctly. Here minus the audience ID 22. Again, if you're using USB mike, select that here and just double-check output is correct. Okay, now next we need to make sure the correct image is selected on your track. At the moment, you can see this meter here moving when I'm speaking. So setup to record my voice. But in this situation, I want to use input two of my interface, which is an analog synthesizer. So I'm going to select input two. Just remember, one slash two is if you have a stereo input, we've only got a mono input the moment. And that's why I only getting signal on the left. If I select input to. Now when I apply note on my synthesizer, you can see that T2 is lighting up instead. All right, next thing needs to do is just make sure monitor mode is set correctly. If you weren't here, the sources being recorded while you're actually recording, make sure auto or n is selected. If you're an auto mode and our code arm icon is off, you won't actually hear anything. Whereas n will always be active. Generally, I prefer to use auto mode. Then make sure your track is ready to record. Hit record arm icon here. Now, once it's all set up, just make sure your impulse signal is a suitable level. I'm just going to go back to the session view so we can say this more accurately. Generally, you want your input gain to be peeking around minus 6. You never wanted to reach 0, otherwise, the audio signal will clap. Three, set your meter, click here, and your belt see the highest peak that's been played. So my signal is actually a fine level. But if it's too loud or too quiet, just justice with a gain dial on your audio interface or your USB microphone. One thing I mentioned quickly, this synthesized that I'm recording is actually creating an audio signal is not a midi keyboard is just like using a guitar or recording with a microphone. The signal is being recorded is an audio waveform. Okay, so it's just quick recap on how you can set up to record audio in case you haven't watched the previous video. And the next video, I'm going to be moving on to the different ways that you can record audio into the Arrangement View. Thanks, watching.
35. Recording Audio and MIDI into the Arrangement View: In this video, I'm going to go over both recording audio and midi into the Arrangement View. So as you can see, I've already got midi part loaded into this track. I'm going to build quick song idea around this flower. I'm going to assume you've already set up your audio device, a midi controller. Remember if you are recording midi, you can't simply use a computer midi keyboard if you do not have midi controller. Okay, Let's check couple of things before we start recording. If you want take a metronome, make sure it is selected. If SLB lit up orange. And if you'd like to count in, click on the drop down box and choose your counting. I'm going to choose one bar. Now suddenly else, it's quite important. You may notice that both of these tracks are grayed out. That's because a minute ago I played some ideas in the session view. So if you want to record into the Arrangement View in each, make sure you press the Back to Arrangement View button here. Okay, Now I've pressed that neither of the tracks are grayed out and we're ready for a court strange arrangement. Again, start recording here above 13. Now when I hit the record button, it'll start coding and the arrangement. Okay, so it's as simple as that. We've now recorded some audio into the Arrangement View. Because of the screen recording software I'm using, there's actually a lot of latency introduced SMS going to quickly quantize this audio. So to double-click on the audio clip that I'm going to press command shift in U or Control Shift E on Windows and quantize each of these notes to A-bar. So again, choose current grid, change the grid to one bar, and then press Command and U, or Control U on Windows. Everything's fine except this last note here. So it's going to zoom in. Delete this what market by double-clicking and draw new one to him by double-clicking the star of S here. All right, let's have a listen to that back. Okay, that seems fine. Now I'll just trim this down so that's correct length. And we've got an eight bar loop of the base. Right? Next thing I'm going to show you is recording midi into Arrangement view. And again, this is very easy. Serves going to quickly create a midi track. So I'll right-click here, go to insert midi track. Now the south I've used in the past, crews as strings. So I'm just going to drag and drop this one onto this track. Okay, great, I'm going to use that sound. So two recorded, it's exactly the same. Just make sure the Back to Arrangement View button has been pressed if necessary. So let's click it here. Make sure my tracks record armed. I've got my midi controller 0 plugged in. Or you can use a computer midi keyboard if you like. Now we've got the same counting of one bar. I'm just going to record in this code. I'm just going to stop the recording there and stretch these notes out. So the eight bars in length has, I'm not going to change that chord throughout this section. So I'll just open this up and drag these out. And I'm also quantize them as well. So I'll press Command or Control U on Windows. Great, So we've now recorded in an audio part and a meaty part. So basic recording into a rage review is a simplest up in the following videos and going show you some other ways you can record into the Arrangement View. Thanks for watching.
36. Punch Recording: Hi there. In this video, I'm going to show you a really handy recording feature you can use in the arrangement view. So this is pumped recording. Punch recording is gray if you want to record over a specific section of your track during playback. So for example, if you're recording vocals and the singer had already recorded apart. And he just wanted to rerecord one line. You can set point where you'd like to begin recording during playback. Another point, I'd like to end the recording to copy these parts over to the start with song so I can show you what I mean. So we've got a rough arrangement here. We've got the first course and we got a break. I've got a second course. Now, I want to record a bass part in this section here, but I don't want your coat over either this part or this part. So we can use a punch record feature to do this. So to setup punch recording, we use our loop to create the punch endpoint. So to set the loop had appointed like to punch in, click and drag and create a selection on your timeline. Then press Command L on a Mac or Control L on Windows. You can see here this loop is now active over this section. Now what we want to do is actually turn this loop off. So we're just using it setup punch in and punch out points. So total ripoff again, either use the shortcut Control or Command and L, or click on this icon at the top here. Now the next thing you need to do is click on this icon here, which is a punch in switch. And this one here is a punch out. Now when we start playback, able to and will only record over this section here. Right? So I'm just going to make sure my track is ready to record. So I'm going to hit the Record button here. Let's play now it to make sure it's coming through. Okay, great. We're pretty much ready to go. So I'm going to click where it liked stop playback. That's good lesson to the last few bars here before we go into the brake section. Now, when he hit record, it'll stop playing back and will only record of this section here. Okay, so as you can see that we're playing back before this point recorded and then playback continued. But we didn't actually record over either of these two audio clips. Once again, I'm going quickly quantizes as a very a time. So just try and quit quantize. So set the grid to one bar. All right. Now let's listen to that back. Okay, That's all recorded. Fine. I'll just quickly show you an example in a midi track as well. So I'm going to record enable this track here. Now just like punch recording audio, make sure your loop is set but not active. Then check that with punch in and punch out points are selected. And now you're ready to record. So just choose weighed like stop playback and hit record. Gray. As we can see there, we've got a new clip in this section. I'll just quantize these or quickly. So again, select all the notes, changed my great setting to one bar. Then press Quit quantize, which is Command U or Control U. And now I've got them all in time. Now, next thing I want to show you is using the pump chin and pumped out icons by themselves. So in this section here, we had it punching in a West Point and punching out at this point. But if you disable the punch out icon, it'll start recording of a punch endpoint and continue recording from that point. Again, we can do the opposite by using just the punch out. So able to record all the way up until the punch out point. I'll just show a quick example. Rhymes going set my loop sounds can choose these two bars here that are press Command L on a Mac or Control L on Windows, and press it once more to deactivate the loop. Right, let's hit record. Now she said That able to continue recording past this point here. At the end of the loop. I'll just press undo and show you with punch out. So as you can see, they're able to recording straightway, but ended our best point here. So the punch in and punch out features are very useful when working in the Arrangement View and able to live. I hope you found this video useful.
37. Loop Recording MIDI: Hi there. In this video, I'm going show you how we can use loop recording on a midi track in the Arrangement View. So this can be a really useful feature to try ideas when recording. In the arrangement view. You can set able to inter record constantly over the loop section and try out a number of different ideas. So far I move on. I'm just going to tidy up this session a little bit. So I'm going to cut this midi part recorded in the last video. So as two-bar loop. And I'm going to quantize it. So I'm going to go to my quantize setting against choose eighth notes. And then press Okay. Now these will be quantized eighth notes. And now we'll just duplicate there. So it continues through the section. The shortcut is Command D or Control D on Windows. Also just going to turn down the volume of some of these trucks. As I wanted to make it a little bit easier to his new part that I'm going to record it. Okay, Great. And now again to add a new track. So I'm going to right-click down here on the right and select insert midi track. Now I actually want to use the same sound that you use last time, basic brush bells. Okay, fine. I'll just turn off a bit more so I can hear if the other parts when I'm recording. Now to set up to loop record, we once again have to set up our loop. So I want to loop record over this section of the track here. So I'll click and drag to make selection, and then I'll press Command and L. Now a loop is setup over this region. I don't need the punch in and out features anymore. Sms games, make sure they're turned off. And this time I do want the loop icon to be illuminated. This way, a loop round and round during playback. I want to have one-bar count in from a metronome. So it's going to go to a metronomes settings and choose one bar. And again, leave the metronome on to make easier to play in time. So now when I hit record, it's going to give me a one-bar count in. And then it's going to record throughout this section on jump back to the beginning and start recording again. So let's see how this goes. Hey snouts, make sure my truck is record armed. Then I'll hit the record button up here. Hi. So as you may have noticed there, each time we've reached the end of the loop, the play had jumped back to the start of the loop and began recording over the previous take. So what we're left with here on the timeline is our final take. So what we can do now is open this up and have a look at our different takes. So if I zoom out of this clip now, you'll be able to see the clip start and endpoints are over here. And that is the last four bars. So if I have to play this back, will be able to see the play head moving through this section of our recording. But we have our two different ideas here. Where this first idea, which is the first four bars, and the second idea, which was these next four bars. So we just need to change the start and end position of our clip. Now it's due so we need to move our start and end markers. One thing to note, you can't actually bring the start marker back in time unless the loop icon is activated. So just make sure a loop here is selected. Now we can move the start marker. One thing to note, however, there's a quick way of moving the start and end markers at the same time. We have to do is hold down option on a Mac or Alt on Windows, and then click and drag. See now when I click and drag saver, I can bring it back to the start of bar 5. And if I bring it back to the start again, so hold Alt and then click and drag on the start or the end marker. And now we can listen to these first four bars. So as you can see, there is a really quick way of trying out some different ideas. I think I prefer this first idea. So I'm just going to use this my clip. So I'm just going to quickly quantized these notes. I'm also going to move the loop so it starts and finishes at the same time as our clip. This would save any confusion if we were to use a clip in Session View. All right, Now I'm going to select all my notes. I press Command at new to quickly quantize them. And now if I play it back, it will be in time with the rest of the zone. Okay, so it's as simple as that. But just want to show you one thing that can cause confusion when loop recording. I'll quickly show you what I mean. I'll just do this over one bar section and now play in a couple of different ideas. So I'll create my loop by pressing Command L or Control L on Windows. Now going to hit Record and let the loop go round a few times. Now, if you notice there, if we zoom in a bit, you'll be able to see that I didn't stop the recording at the very end of this loop. You'd see because about halfway through its bar before I hit Stop. Now what this has done is started overwriting this last take. So if I open it up and zoom out a little, you see the first, second, third bar here. But you can see the clip start point is over here partway through the bar. And that is at this point here. So if I was to click on this clip, we see there's actually nothing in it. So just be aware when you're recording a loop mode. If you go past the end of the loop, you'll start to record over the last take. You can still access the whole of the last take by clicking, dragging this marker over here. He also built noticed is moved it over. So it's now not starting at the point wanted to, I'm just going to press undo quickly. Right? So the easiest way to solve this, either stop recording, bang on at the end of the loop. But sometimes it's not always that easy. So we have to do is press undo once after you stop recording. And it will get rid of that final take. If I was to press undo once more, it gets rid of the final take, and so on. So if you ever record past the end of the loop, just press undo. And I'll make things a lot more simple to navigate. So that's how it's set up and use the loop recording feature when recording midi in the arrangement view. I hope you found this video useful.
38. Loop Recording Audio: Hi there. In the previous video shows you all the steps involved to loop record with midi. Loop recording, audio works in the same way. I'll just show you a quick example on an audio track. So I'll create a new track down here. So right-click and so audio track. Now again choose emperor tube because that's where my synthesizes, plugged into our code, our map and said monitoring to alter. It can turn the volume down a bit as I know, it's quite loud. Right? So to set up a loop record, once again, make selection of areas like setup the loop. Instead of clicking and dragging. To make selection, you can simply click on a clip that's the right length. Then hit Command L or Control L on Windows. Okay, so now we'll loop is setup. It's going to add a bit of reverb to this track using the sent here as it'll just make this instrument sound little nicer. Okay, So once again, I'm going to do three different takes with three different ideas. So I'm just going to make sure I've got metronome turned on and check that I've got one bar counting. Okay, Let's give it a go. Okay. This time, I think I preferred the final take. I'll just open up to have a look. So if I zoom out once again, we see that we have these three different 4-bar loops. I don't actually have to activate this loop icon to change a clip start and end positions when I'm working with an audio clip. So now it's going to hold Alt and click and drag to change the start and end positions. Yeah, I definitely don't like the idea. So I'll try the next one. Again. I'm not a fan of this one. Says lessens the last stake. Okay, that one sounds fine. So just remember when he loop record video, actually stop the recording just after the lips come back to the beginning. Press undo once and it will delete the final take. It just keeps things nice and organized. So as you can see, this loop recording feature can be really useful. It's a quick way of trying out a number of different ideas when recording. He may notice, however, that this feature does have some limitations when working with both audio and midi. Sometimes you might want combination of a few of your different takes. With Midea, it's not too difficult as he can copy and paste the different sections of the tape that you like. And it doesn't take long. But with ordinary, uh, can be slightly more difficult. Fortunately, able to live added a new feature to live London, which makes it really easy to combine different takes. So in the next video, I'm going show you how to use the take lanes feature that has been added for Ableton Live 11.
39. Take Lanes (Comping): Hi there. In this video I'm going show you how to take lanes feature works in able to live. Many digital audio workstations have been using similar features for a long time, but take lanes has just been added to Ableton on the release of live 11. So this feature allows you to create compilations of takes or comps, as they're often called. If you're not particularly confident player or if you're trying out some new ideas, you can record a number of takes, then go through and choose a bit set you like out of each take. So for example, if you're coding some vocals, like the first third line from the first stake, but you prefer the second fourth line from the second take. You can actually go through and make a compilation and take the best bits out of each. Take. One thing to know. This works in the same way for midi and audio tracks. But I do find myself using an ordinary farmer often. So I'm going to show this example on an audio track. So it's going to create a new track setup with my interface. I'm going to add some reverb and delay on to this truck. Just soften abet. I'll turn down the volume so it's not much louder than the rest of the track. Okay, that sounds fine. For this recording. I don't want my loop active, so I'm going to turn it off. I do want my match. Nope. So I'm going to make sure it's turned on and I don't want any counting. I'm just going to start playback a couple of bars before the course where I'll be playing in this new part. Okay, I'm just going to record in a few different ideas. Well, a whole lot on now I'm going to do is just go back and record from the same place. Once again, I'm just going to float will go for recruiting some more ideas. Okay, we've recorded a few different ideas. Now. If you look at this track, you'll notice we only have one visible kit. So what we need to do now is open up the take lanes. To do so, right-click on the track over here and select Show take lanes. You can also use the shortcut Command Option U or Control U on Windows. Now, you're able to see down here, we've got our different takes. So on the main track is the last take query recorded. Then in the first lane is our first take, the second is our second take, and third is our third topic, which is the same recording as the main track. We can see that in the audio files name Audi A3. So just want to explain how this all works. I'm going to delete the clip off our main track. So as you can see that we still have our three different takes. We just have non-active on a track. So if we were to play the song back, we can't actually hear anything on this track. To listen back to the different takes, click on the audition take icon on the take LN. So to listen to the first one, I'll select the icon and play it back. Simply click on the audition icon on another take to Lesson 2. Now what I'm going to do is listen back to these different takes and choose my favorite bits from each one. I'd like this first bit here if I didn't particularly like second minute. So I'm just going to select this section here to put on to the main take. The easiest way of doing this is by using the draw tool. So if I just use the standard points tool and select it, all it does is highlight it. I could hold Option and drag it up to the main take and that would work. However, if I just press B to activate the draw tool, I can click and drag to make selection. And it will automatically be copied up onto the main take. Now let's listen to the second bet. If this take this third one here. I think I'm going to go for the second Take. Again, just click and drag. Now let's listen back to this end section. Unlike the second half, but not particularly fast. So again, let's make selection. You may have noticed when I was going to create a selection, the draw tool is conforming with the grid setting. Will just press on day. If you don't want your selection to snap to the grid, hold down command on a Mac or Alt on Windows while making a selection. You can then make finer adjustments. And we'll just listen to this section. Okay, I'm sorry, I'll just make selection up to around this point here. So this is the main take disable little addition icon. Okay, We've now chosen the best bits out these three takes. Something else you might notice is it take lanes, feature ads fades to the clips which are moved onto the main track. And if the overlap slightly, you get a cross-fade. So if you want, you can adjust this to make it sound more seamless. If any point you decide you want to use this section from different take, he can simply make a new selection. Well, I have is on the main take will be replaced. If you decide you want to create a completely new come, you can't just delete whatever is on the main take, or you can add a new take claim. So I can just drag these ideas onto my knee, take ln and create a new take. You can also rename, just say you know what, Swap. Something else to note is you can copy any of these, take lanes on turn off the track. So for example, if I decided I wanted to use as first take on a different track, I can just drag and drop it onto the new track. I'm just going to press undo to move my comp icon to the main track. Now once you've finished creating income, he can simply close the take lanes. Now if you wanted, you could also consolidate these takes into a new file. So I'll select them. All right-click and select Consolidate. Now we've just got one single audio file. You'll take lanes will however still remain. Now if you remember from previous videos, I recorded a few different ideas using a loop record feature. So if I open up this clip, you'll be able to see the three takes that we recorded. But something else that's really handy is it will have also recorded these into take lanes. So if I wanted, I could go back and create a calm out these recordings which I made before. As mentioned previously, the tape claims feature does also work on midi tracks. Now something else I want to mention, if you took record a few different ideas from your session view into your arrangement view. These different recordings of your arrangement will also be saved into take lanes. So this can be a really great way to take ideas from different recordings. So that's a number of really handy recording features that you can use enable to life. Thanks for watching.
40. Introduction to the Mixing Section: Hi there. In this section of the class, I'm going to be going over the very basics of mixing. I've recorded some vocals into this project, and I've added a link to the Ableton Live sat in the resources section of this class. If you'd like to download the project, to follow along. As it's just going to be a quick overview of mixing. I'm not going to be able to go into a lot of detail, but I'm going to try and show you the essentials so you can improve how your song sound quickly. So there's number of things that you can do to audio where mixing. So in this section I'll look at the first main concepts that you need to understand. So be looking at things such as levels, panning, EQ and compression. And I strongly recommend that you wear headphones or use a Paris speakers to listen to these videos. Some of the changes that we'll be making will be quite subtle. So I would not recommend listing on your phone or built-in laptop speakers. If you do, you may struggle to hear the differences. Learning how to mix effectively doesn't happen overnight. There's number of tricks and tips I'll give you. However, this just a star. If you train your ears. Over time, mixing becomes easier as you'll have a better understanding of the processes and your belt here, the difference is that these make more easily, say in the first video.
41. Levels: Hi there. In this video, I'm going to start looking at levels. So as simple as it may seem, getting the volumes you are different tracks to a suitable level is one of the most important things you can do for your mix. Even if you perfect the art of compression EQ, if your levels aren't quite right, your mixes never going sound great. So I have been adjusting levels as I've added in new parts. So I've got very rough mix. There's still a lot that could be improved. So first thing I'm going to work on is my drums. And it's going to create a loop. And one of the busiest sections of this track. So this part over here. So I'll highlight here and press Command Alt credit loop. And now I'm actually going to go to the session view. If I press play with the space bar, it will start playing back my loop section on the track. So we can start with the drums. But one thing you may notice, if you look over here, our drums track, we only have one tracks, the drums. So if like me, you've used the drum rack for your project. You can actually separate out the drums and mix the different parts of your kit individually. To do so, click on this little drop-down arrow here in the Session View. Actually do this in the arrangement view unfortunately. So you want to click an error here. It just makes it look smaller. So as you can see, we've got loads of different tracks for our drums. We haven't actually used all of these sums going to organize these slightly off top my head, I know use the kick. So this one here, the snare sounds kinda drag this now over to the second slot. We definitely have the high hats says closed hi-hat part here. And we had a few more parts such as assemble. Sums can stop playback and see which of these tracks light up. So I can organize a says easier to mix. And you're going to press solo on the drums track, so be able to hear all of the drums together. Okay, It says all of our drums over here, right? So now I'm trying to get a good balance between the different parts. I can start off with the kick, snare and hat. So the cake I'm going to leave as is for the moment and blend other parts in to work with the keg. Say, well, I like doing this, is soloing the papa at liked here. So I want to hear the Keck. Now when I want to add in another part, was going to hold down command on a Mac or Control on Windows to also solo this next track. So the kick and snare seem to be at suitable level together. That high has just a bit too loud. Okay, that sounds better. The way I like to blend in parts is by pulling the volume all the way down and then increasing it till it sounds about right. If you're unsure of how loud different parts should be, try listening to a song in the same genre as the track is you're creating. This gives you a good idea of appropriate levels. Can start blending in the next parts. Again, this rim shot seems a bit too loud, so I can pull volume all the way down and blend in with the rest. Can hold down command and press the Solo button once again. Okay, that sounds about right. I just made the Hancock over as his doublings step-up most of the track. Now it's at, in the next part, these markers. Okay, so once you've got what you think is a decent starting point with the drums, I would recommend moving on to the next parts. So I'm going to un-solo these tracks just by clicking solo on one of the tracks. And I'm going to close down this folder as I don't want to see all of these drum parts in the session view at the moment. So the next thing I would recommend you do is blend in your base with your drums. So this time I'm going to solo all of the drums and the bass. See here we've got the base audio and midi bass track. So I'll start with one and then blend in the next. So again, I'll hold down command on a Mac or Control on Windows so I can solo another track along with the drums and the bass track all the way down, then blend it back in gradually. Okay, So it sounds appropriate. So the next thing recommended to start blending in the rest of your parts that work with the harmonic thoughts, such as the court and pad next, named blend in the guitars, the arpeggio and the melody. And it can do this really quickly. I'm going to blend in the vocals last. But somebody who wants to talk about quickly is if you've already got automation or one of your tracks. So here on the arpeggiate track, if you look down at this little red dot that's showing us that we actually have volume automation on this track. So if I was to adjust the volume of this track, let's do say now will be able to see that the little red dot has been grayed out. But as the toy is still there, we know automation has been applied to this perimeter on his truck. So what recommend you do now is go into the Arrangement View. So if we look at our arpeggio track now, we see that the little dot is grayed out. I'm just going to open up the automation view by pressing a on my keyboard. So as we can see here, we have some automation, but it is grayed out. Now for just the volume of this track will be able to see this dotted line. So this dotted line is the level of track is ceta the moment? Now in this situation, I've got fade in and start the song and fade out at the end of the song. And I want to keep this. So to keep my automation and it's going to re-enable it. To do so, just right-click on the perimeter and go down to re-enable automation. Now if we hover my mouse underneath this automation line and click and drag, I'll be able to adjust it across the whole length of the track. Sounds kinda play my song back and adjust the level of this track in this way. So just bear this in mind whenever you're adjusting levels here tracks. If you've got any automation, it will be overwritten, Right? So off-camera I'm to go and spend a couple more minutes adjusting the levels of the rest of my tracks. I would recommend spending a good amount of time getting your volumes to suitable level as it's the foundation of your mix. Thanks for watching.
42. Panning: So another basic principle of mixing that's extremely important is panning. So what panning allows us to do is choose where in the stereo image each of our part set. So in a mix, you will want certain parts, such as the kick, snare and vocals, to be in the center of the stereo image. But you may want other parts, such as a shaker or other percussion to be left or right-hand side. It's important to get nice stereo spread in your songs as it can make them sound wider and also make different parts of the song somewhere interesting. So adjusting panning is very easy. We can't do it in the arrangement view with this slider here. But again, I find it easier to go back to the Session View. So again, I'm going to start with the drums. So I'm going to open up the drums and solo them. So as I mentioned a minute ago, there are a few pots they should generally leave in the center of your mix. So the kick and the snare, I'm going to leave in the center. Very occasionally you may want to pan these parts to different positions. But in almost all commercial music that kick and snare will stay central. One of the thing to note in a lots of genres of music, I would usually power in the hi-hats to one side. However, entrap hi-hats, a very important part of the music. So I'd recommend leaving it in the center. Now we've narrowed down a few pots. I'm just going to pan some of the other percussion. One thing to note, the pan control goes from 0 to 50. So 50 is all the way to the right. 50 L is all the way to the left. If you double-click, you can set it back to Central once again. Okay, so having this part's panned out to the sides can help give a bit more interest and leave a bit more space in the middle for the central parts, such as less than, but could the rest of the track. When you got it. One thing you may notice, see how Morocco part seems to stick out of the mix quite a lot. Now, this can sometimes happen when you apply panning. So if this is the case, just go back and adjust your levels once again. You gotta, you gotta, you gotta, you gotta, you gotta. Okay, I think that sounds bit more appropriate now. Now another tip for when panning, what can work quite well is panning things in pairs. So if you have two paths that take up similar areas in the frequency spectrum, he could pan those left and right. For example, we have these two different guitar parts in the brakes section here. And it might sound nice panning them slightly left and slightly right. So let's give that a go. I'm just gonna do it from within the arrangement view this time. So why lookup data? While you got two after O of n and m. So as these parts of vaguely similar, having one pan to the left and one pan to the right doesn't make the mix seem unbalanced. If one of these was way louder than the other, or one was much base year and the other was much brighter. This might not work so well. If I say similar parts in the left and right speaker, it doesn't draw your attention to one side too much. So I've just started them both there. You got to see how the mix sounded quite a lot wider when we have those parts panned left and right. Again, I'm going to put these back to 25 left and 25 right. Now you may have noticed that I didn't pan these all way to the left, all the way to the right. This because I want to make the course the widest section of the song. This is a common trick that we use when making coerce the biggest section of the track. So again, against fine two parts are similar in terms of frequency. So these two parts here, the arpeggio and the melody, are both quite high parts. So I feel like these will probably be a good pair to pan left and right. As I said before, I want to make the course is the widest sections of the track. So it can append these all the way to the left and all the way to the right. Okay. That sounds pretty good to me. Again, the truck doesn't sound off balance. Now something else we've not looked at yet is the vocals. So we've got a lead vocals for the course section here, but then we've got a number of backing vocals. So these two parts here are very similar. And so these two, Let's just have listened to them. I just want to know. So these are pretty much a perfect pair. So I can pan these to the left and to the right. And these two vocals at the button. Again, these are the same part sang twice. So I'm going to pan them to left and right. Now if we listen to this section that I see there, we've got a lead vocal in the center, keeping our focus in the middle. But then when we've got these harmonies that panned left and right, given the track of why the stereo image. Now some have recommended day is listened through the whole track of these made these parenting decisions. Because at some point there may be a section if your track, which sounds unbalanced. So remember I panned the Apache a melody left and right earlier. Because in the course is that both paying the same time. If we go to this section here less than back, the melody is playing on its own and it's panned all the way to the right. So this could be pushing the mics off balance. So in these situations, I'd recommend using automation. Sounds kinda open up my automation lanes by pressing a and we're going to click on the pan control. Now I can adjust the panning with automation. So I'm gonna click and drag to make selection of the area I'd like to change. And I'm going to pull down this automation line, bring it close to the center. Let's have listened to that. By you got to ask. Oh, yeah. That's why. Yeah. I think I prefer it in the center like this. You can right-click to edit the value to set it back to 0 if you wish. So it's going to be central to the brakes section and then plan for the rest of the truck. Okay. We now have a good foundation for our mix. Most of the levels and panning seem appropriate. You can always go in and make changes to the volume and panning decisions anytime if you feel it's necessary. Sometimes when you start hearing, it may make certain parts stick out the mix, so you may need to adjust levels. Thanks for watching.
43. Adding Audio Effect Plugins: Hi there. In this video I'm going show you how you can add an audio effect plugin onto a track in Ableton Live. So when mixing, you often want to use plugins, which needs to be loaded onto a track. Plugins the audio effects that can be many different things. For example, we have EQs, compressors, reverbs, distortion or delay. So each of these plugins or audio effects, the audio signal from the truck goes through any audio effect they've placed on a track. And this would change the sound depending on the type of plug-in you've chosen. So it's really easy to add an audio effect to attract an Ableton. We just go to our browser and select Audio Effects. We've got a list of the different types of effects that are available. So these folders contain different types of effects. In dynamics, we've got things such as compresses AND gates. In driving color, we've got saturation or distortion. We've got delays and delay and loop. And we've got reverbs down in this photo here. So to choose one, simplifying the top fact you'd like to use and drag and drop it onto a track. So if I listen to this track now with the auto pan plug-in loaded onto her. We can hear that the effect it's having on the signal. So you can load multiple plugins onto a track. So we can find the compressed less time and drag it on. And as he may belt tell, you can actually change the order of the effects that you have loaded onto a track. One other thing to note, we cannot actually put an audio effects plugin before an instrument. This is because instrument is telling a midi signal into audio. Primes can delete one of these. So you can do so by clicking on a plugin and pressing Backspace. Or you can right-click and go down to delete. Now one thing to note, you'll build see in the browser here, we have our folders with the different types of effects listed. And you may be able to see that we have a number of different presets for each of these effects. So occasionally you may want to use a preset rather than a plug-in on its default setting. There's loads of different plugins that come with Ableton. So I'd recommend going away and having a look at some of the ones that are available to you. I'm using able to live Sway. So I may have more audio effect plugins new, but don't worry, some of the plug-ins come with some of the more basic conditions of Ableton are really good. And I'll be focusing on those for this section. See you in the next video.
44. Using Groups: Hi there. In this video I'm going to show you a handy feature before we start applying processing to our tracks. So what we can to be looking at is using groups. Groups are really great way of organizing your tracks and speeding up your workflow we're mixing. So I'm just going to show you this example on the backing vocal tracks. So what we can do is create a group for a number of different tracks. So I'm going to select all the tracks that I'd like to create group for. So I'm going to click on this first backing vocal track here, hold Shift, and then click on the last one. Now these four tracks are selected. I need to right-click over here and go down to Group Tracks. You can also use the shortcut Command J. Now, notice this new track is appeared called group. So having trucks and grapes allows us to a number of things. Firstly, it keeps session more organized as we can close down the different tracks into the group. So just by clicking on the group. But it also allows us to process these tracks together. So for example, I could solo this group now. So the audio signal is now coming out of these tracks. And instead of going straight to the master, like cool, if the other tracks, they are now going into this group before going to the master. So what this means is you can now apply processing to all of these trucks at once. So you could apply plug-ins such as EQ or compression to the group, which means all of the tracks will be processed together. So if I wanted to, I could just grab an EQ, drag and drop this onto the group. Now any EQ changes I make will process these four tracks. You can rename and call your group just like other tracks. So I'm going to right-click, go down to rename and call this backing vocals. I'll just give it a different color. So this is an easy way to k is Session nice and organized and can really help speed up the mixing process. I'd recommend doing this to similar parts. So for example, I might want to group all of my harmonic parts together. So the lead guitar, all the way up to this arpeggio. So I've held Shift, clicked on the top and bottom track. Now when I right-click go Dance Group Tracks. Now we can close all of these harmonic parts down into our group. So I'm just going to rename this one synths. So foreign to two now, like solely just these parts. Okay, So it's just a handy feature I wanted to stay. In the next video again, start looking at EQ. Thanks for watching.
45. Introduction to EQ: Hi there. In this video, I'm going to start looking at EQ. So in case any of you have never used an EQ before. And it's going to go over the very basics of what an EQ or equalizer does. So first of all, I'm going to go to my browser and select an EQ. So okay, to audio effects, EQ and filters. I'm going to choose Channel EQ. The other more advanced AQ such as EQ Eight. But Channel EQ is available in all versions. More simple for beginners to understand. I'm not going to open up a preset and it's going to track this plugin and its default state. It just going to put it on my drum strike for now. So this down here is the channel EQ plugin. So on EQ allows you to do is increase or decrease the volume of certain frequency areas within an audio signal. So an example of an EQ that you've probably already used before would be the base or treble dial on a hi-fi or home sound system. So the EQ and hi-fi, you could either boost or cut set frequencies within your sound system. You probably know these as Treble bass and made controls. So Ableton Live EQ acts in a similar way because he more control of the frequencies you're boosting or cutting. Sounds going asylum, my drums. Now on a playlist track back, you'll be able to see a visual representation of the audio that's going through the plug-in. So the grayed-out area was displaying the frequency range that we're hearing. Now let's have a look at some of the controls. You'll be able to see down here we've got a low, mid, and high band control. You can use these to increase or decrease again of these frequency bands. So telling one of them down to the left will decrease. Turning to the right will increase. Double-clicking will set it back 0. So just play something back and make some changes. Notice how it sounds a lot brighter now if boosted the highs and a lot darker where we've cut them. Now, let's look at the low band mates. When a turn down the low band, the base of the kick drum is really being cut out. The notes there when I increase it, the bass drum becomes very powerful. So low and high bands. And that's the only controls we have for those. You may notice above the mid band, we have a frequency control. So if I increase the mids now and click and drag this number, we can change the area that we're cutting or boosting. So it's play it back so you can hear the difference. So as you can see there, you can really change the sound using this EQ plugin. Now another control we have is this one here. And what this is is a high pass filter. It's going to set that back to 0. So all high-pass filter does is cut out the very lowest frequencies. So it's allowing the highest pass and it's cutting the lows. The difference might be quite subtle here. B, maybe I'll tear in the kick drum. If you're listening on headphones or set of speakers, you should be able to hear the kick drum has lost some of its power. Now the final control we have in this EQ plugin is this output dial. All this does, is it just the volume coming out of the plugin? So sometimes if you're adding lots of big boosts, the volume of a signal may increase quite a lot. So you can just bring down overall level with the output dial. Again, if you had lots of cuts, you might need to increase the output. So that's the channel EQ plugin. In a future video, I'll be showing you how you can use this to improve the sound. Few tracks. Thanks for watching.
46. Introduction to Compression Part 1: Hi there. In this video I'm going show you how the compressor works in Ableton Live. If you already understand how compression works, feel free to skip this video. Right? Sms going to load in the compressor plugin. You can find it under Audio Effects, dynamics. And then it says top one here, compressor, that some of the different types of compressors, this one is available on all editions of Ableton Live. So I'll be demonstrating with this. So I'm not going to choose the eraser. I'm just going to click and drag this onto my vocal track. So compression is used to reduce the dynamic range of an audio signal. So for example, in this song we have some phrases in the lead vocal that acquire other sections. So it's playback this little section here. Yeah. When you gotta dream, you've got a key goal for when you got a dream, You got it. You may notice a couple of words aloud than others. If you look at the waveform, we can see that this word here is quite a lot louder than this word over here. So what we can do with compressor is reduced the amount of dynamic range and make the audio signal more consistent. So the first thing I'd recommend you do is change the view of the compressor to the collapse. Few ties with this icon here. This just a good way to start getting your head around how a compressor works. So the first control that lights talk about is the threshold. So the threshold determines the point at which the compressor will start to compress the signal. Moment the threshold is set to 0 dB. This means audio signal only be compressed if it reaches 0 db. All right, I'll just play back this phrase. Yeah. When you gotta dream, you gotta go for when you got a drink. So you may have noticed we're not actually getting any gain reduction. A reduction is displayed on this meter down here. So the audio signal was never actually reaching the threshold. I'll pull this threshold down to about minus 30 and play it back once again. So to adjust the threshold, to simply click on this little arrow and drag it down. All right, I'll play it back once more. Yeah. When you got a dream, you've got a key Go for it. So as you may have noticed there, you could actually see we're getting good few decibels of gain reduction in this meter here. The number at the bottom shows us how much gain reduction we're actually getting. Yeah. When you gotta dream, you gotta go for it. So we're getting up to around eight or nine decibels of gain reduction there. So the threshold is being reached almost all times. You may have also noticed the audio signal is now quieter. Yeah. When you gotta do. Yeah. When you gotta dream. So that's because this compressor is turning down the volume of the vocal bipolar threshold all the way down to minus infinity. Absolutely. Every bit of this audio signal is exceeding the threshold, so it getting gain reduction at all times. Now, the next thing I want to talk about is the ratio. So what the ratio does it determine how much gain reduction is applied once the threshold has been reached? So other moment with a ratio of four to one, for every four decibels that exceeds the threshold. One will be allowed three. If we change this to a ratio of two to one. For every two decimals I exceed the threshold. Only one will be allowed through. So the higher the ratio, the more extreme the compression is. If it went down to a ratio of one-to-one, we wouldn't actually get any gain reduction. As for every desk bell, they exceeds the threshold. One will be allowed through. So even the threshold all the way down to minus infinity. Yeah. When you got a dream, you guys, we know actually getting any gain reduction. Now if I increase the ratio, you'll start see, we're getting more gain reduction. Yeah. When you got a dream, you've got a key goal for it. When you got a dream, You got it. So we could barely hear anything there with a really extreme ratio and really extreme threshold. I'll just set this back to the default. So just to reiterate, the threshold determines the point at which compression is applied, and the ratio determines how severe the compression is going to be. Now the next thing I'd like to look at is the output gain. So that's this control here. So what this does is allows his compensate for the gain reduction that the compressor has applied the audio signal. So cell is to about minus 30 to one again. And play this section back. Yeah. When you got a dream, you've got a key. Go for it. When you got a dream, you got to keep pushing forward even when the roadblocks. If I bypass the compressor with this orange icon here, yeah. When you gotta dream, you gotta key Go for it. When you got a dream, you got to keep pushing. You'll notice that the audio signal is quite a lot quieter when the compressor is active mass because all it's done so far is reduced the volume of the loudest peaks. So what we can do with the output gain is bounced back out. So the loudest points will become quieter. Then when we turn up the volume, the volume of everything will come up, reducing the dynamic range and increasing the volume as the quieter sections. Yeah. When you got a dream, you've got a key goal for. When you got a dream, you got to keep pushing forward even when the roadblocks com yeah. May notice now the audio signal seems a lot more consistent. Yeah. When you gotta dream, you've got a key Go for it. When you got a dream, you got to keep pushing for it. Yeah. When you gotta dream, you've got to keep going for when you got a dream you get when applying gain, we want the track to be around the same volume as it was before the compression was applied. If you look here, gain reduction meter IQ work out roughly how much output gain to add. So the general rule of thumb I like to use is look at the maximum amount of gain reduction that's being applied than half this number and increase the output gain by that amount. Yeah. When you gotta dream, you gotta key Go for it. Think about 13 decibels of gain reduction at most. So I'll try increasing it by around six or seven dB. Yeah. When you gotta dream, you've got a key goal for. When you get a dream, you got to keep pushing forward, even when the roadblocks come, even when they get that's when your presser, yeah, you gotta level LA. You gotta keep clam and say, Hey, I want to play that back. The vocal sounds a lot more consistent. The quieter sections had been brought up and allow these words and no longer sticking out as much. We listen to that with the mix as well. A key role for him. What did he had a dream? You gotta keep posing for real people with a broad class can remove when they get. That's when your breath. Yeah. You've gathered level level. You gotta keep lab that Jocelyn Bell metrology, it turns out because the view be afraid because we'll get through. So that's the main controls you need to get your head round and working with compressor at first. In the next video, I'm going to look at some of the other controls we have in this compressor plugin. Thanks for watching.
47. Introduction to Compression Part 2: Hi there. In this video I'm going to continue looking at some of the controls we have on this compressor. So the next two important controls and going to look at the attack and the release. And it's going to load a compressor on my drums track. Now for this example, serves can delete this plug-in or my vocal track by selecting it and pressing Backspace. And now against drag and drops the compressor onto this drums track. So first of all, let's look at the attack. The attack is how long it takes the compressor to compress the audio signal. Once it has exceeded the threshold. It's going to go back to this original view and pull down the threshold. So we're getting a lot of gain reduction. I'll just solo the drums tail. Okay, So as you can see that we can infer amount of gain reduction by 11 decibels. Now if I change the attack time, so it's much slower. Let's go all the way round to 1 second and playback. You'll be able to see that we're getting far less gain reduction. Also listen to how different it sounds. So with a very slow attack time, we hardly getting any gain reduction because the drum hits and not over the threshold for long enough to be compressed. So at the fast attack time, as soon as the drum head reaches the threshold, the compression is applied. But with a slower attack time, the audio signal isn't over the threshold for long enough to really get any gain reduction. Now I'm just going to swap over to the activity view to show you another example. So this is just another way to view the compressor. Instead of seeing a gain reduction as the gain reduction will be displayed with this orange line here. So I'll set the attack back to default and play some audio. So as we can see that the downward spikes are showing the gain reduction we are getting on each drum head. So we're getting quite sharp spikes here. Now, I'll adjust the attack time while playing back. So at a much slower attack time, we're not really clamping down on any of those transients that being allowed to pass through the compressor unaffected. And it's going to load the compressor onto the vocal track. Once again, show you another example. This time we're going to pull down the threshold from this control here. So you see that blue line there displays our threshold. Which can certainly the vocal once again. And reduce the attack time. So it's really fast. Yeah. When you gotta dream, you gotta key goal for when you got a dream, you got to keep pushing for it. Notice how the gain reduction appears quite spiky. Now if I slow it down, when you got a dream, you've got a key goal for. When you got a dream, you got a key person for ICSI, there was still getting some compression. There's quite a big delay on how long it takes us to reach maximum gain reduction. So the faster the attack, the more the transients we clamped down by the compressor. Right? The next thing Let's talk about is released. So I can go back to my drum track once again and show you some examples in this display. So the release is how long it takes to stop compressing the audio signal once it's fallen below the threshold. So I'm going to set my taxes reasonably first and then just play back this audio. Yeah. I'll just make sure I've solved my drums again. So as we can see that the line is moving up quite quickly until we have no gain reduction once again. Now if I slow down the release time, see that the orange line was never actually reaching 0 dB. So there was compression being applied at all times. This is because the release time is so slow that the still gain reduction when the next transient place. Listen to how different sounds with slow and fast release. With a really slow release, the audio signal to save as much quieter. Now the next thing Let's talk about is this auto control here. So this disables the release style and will automatically adjust the release time depending on the audio signal that's going through the compressor. So if you're a complete beginner, I would recommend just leaving the auto release on until you get your head round the other controls. So no matter what the release time is, if auto reset, the compressor will determine its release time automatically. So that's a brief introduction into how a compressor works. It can be quite overwhelming at first. So for this reason, are not going to go into any of the other controls at the moment. You'll still be able to greatly improve how you track sound by just using a threshold ratio attack and release controls. In later video, I'll be showing how to use compressor inaction, seek learned how to use appropriate settings when using compressor. Thanks for watching.
48. EQ and Compression in Practice Part 1: Hi there. In this video, I'm going to show you how you can start improving the sound via track using EQ and compression. So the first thing we're going to do is apply some EQ to the lead vocal. So I'm gonna go to EQ and filters, Channel EQ, and drag and drop this onto this track. Now the first thing I recommend you do when you're mixing your vocals is applied the high pass filter. So this just cut out the lowest frequencies, which we don't need for a voice. Now let's have listened back and see what else is vocal might need. Now one thing you might notice is this focal doesn't sound particularly present, as in it's not really poking out the mixer tool and it's little bit hard to understand. Something we can do to fix this is boost the high frequencies. Sound can play back and increase the high-frequency band. When you gotta, you gotta keep going for it. When you got a dream, you've got to keep pushing forward. People. When they get. That's when you may be able to notice that the vocal is now a lot more present and is cutting through the mix. I'm just going to solo it for a second. See how it sounds. Yeah. When you gotta dream, you gotta go for it. When you got a dream, you got to keep pushing for R3. Okay, so now we've boosted the treble vehicle actually sounds quite thin. So I might boost the low frequencies just a little bit. Yeah. When you got a dream, you've got a key goal for. When you get a dream, you got to keep pushing for R3, even when the roadblocks come, even when they get hot. That's when your professor. So I'm just bypassing the plugin now to listen to the different savvy EQ is making. Yeah. When you gotta dream, you got to keep going for when you got a dream, you got to keep pushing forward even when the roadblocks come, even when it gets hot. That's when you press. So yeah, you gotta you gotta keep climbing. Get to hustle, love. I'm trying to get to the top because they'll say now the voice sounds a bit more powerful and Salome upfront with a high frequency based. Again, let's check this, see how it sounds in the mix. When you got a dream, you gotta, you gotta, you gotta keep people when they get. That's when you press. You got it. Okay. That sounds pretty good to me. But we've still got one more band of AQ, this mid-band. What I'm going to do this time is this boost and cut in different areas of the frequency spectrum. See if anything makes the vocal sound a bit better. When you got a dream, you got a key for it. When you get a dream, you got to keep pushing forward. Even when the roadblocks count people when they get that's when you when you got it. A key role for when you've got a dream, you got to keep pushing forward even when the rope laps count people when they get. That's when you print. Yeah, you gotta, you gotta keep clap. That two of us that love of tronic get to something custom made up postal rate because a built before. I've put a very slight cart in the high frequencies, 7.5 kilohertz. So as I've made the voice quite a lot brighter, it was sounding a little bit harsh. And the subtle cut here has helped to balance out. The voice still sounds nice and present, but it doesn't have that same harshness. You got it. You got it. Yeah. Okay. It's a subtle difference, but it's certainly a good stop. Next, I'm going to look at using compression. Sounds, going to open up my dynamics and choose compressor. Again, I like to use the collapse view when looking at this compressor as it's the most simple view. Now as I mentioned before, if you're a complete beginner, I would recommend just using the auto feature for the release. This just helps see mountains decisions that you have to make at first. When choosing a ratio. I'll look at how dynamic the parties, if it's really, really dynamic, I'll tend to use a high ratio. But if there's not a huge amount of dynamic variation, I'll use low ratio. So a high ratio, or consider anything from about five upwards and a low ratio, anything below three. So this focal isn't extremely dynamic. So ratio of four to one should be fine. Generally, your belt get waves using ratio of about four to one for vocals almost all of the time. Now let's start playing back the vocal and reduce the threshold. So we're getting some gain reduction with the lead vocal like this. I'd never really want to get more than about 10 decibels of gain reduction, because that's quite heavy compression. Somewhere up to around six to eight decimals should be optimum. When you got a dream, you got a key. Don't chlorine. When you got a dream, you gotta keep going deeper with the probe flux current, EPA when they get psi. That's when your breath Yeah. You got it. You got a pea plant that you're less than Metronic made up. So once again, our vocal is much quieter. Now, let's increase the output gain to level it out. When you got a dream, you got a key for it. Would you gotta dream you got a key person for risk deeper when the flux come April when they get high. That's when your print solder. Yeah. You gotta, you gotta keep clap. The two of us. That lump of tronic get something custom. Few different menopause, so named because appeal differs. When you got a dream, you've got a key goal for it. When you got a dream, you got a key person for richer, deeper with them. Roblox commonly for when they get psi. That's when your print solder. Yeah. So there's fine tuning the threshold. So an average we getting around six decibels of gain reduction. This is usually a good starting point when mixing vocal. Again, I was just adjusting the output gain and bypassing the plugin to make sure we are a similar level to before. Yeah. When you got a dream, you got a ketone for it. Would you got a dream? You got to keep pushing forward, keep up with the wrong blood count. People would listen to the difference it makes when a bypass and reengage these two plug-ins. When you gotta, you gotta keep going for it. When you got a dream, you got to keep pushing forward, keep up with them, roll plucks come people when they get. That's when you print. Yeah. You gotta you gotta keep lab that too. See within just a few minutes, we've managed to get the focal sounding a lot more upfront and clear. So I've only done this very quickly is not a perfect mix and vocal, but it's a good starting point. Next is start doing this. Some of the other tracks. This time, I want to apply some processing to the backing vocal group. So I'm going to apply compressor and drag it onto this group. You notice, hey, I already had an EQ which had added previously. I'll just delete this and share it again from scratch. So I'm gonna go to audio effects, EQ and filters and choose Channel EQ. All right, Let's listen to a section where all of these backing vocals are playing. I just want to know. I just, I just want to add everything in life every day. So first of all, I'm going to work with the compressor. So let's go back to the collapse view and pull down our threshold. I just want to know. I just wanna, I just wanna add everything in life every day. These vocals are quite quiet in comparison to the lead vocal. So I'm having to pull threshold a lot lower. I just want to know. I just wanna I just want to add everything in life, everyday life. I just want to know. You want to know? I just want to blow up. I just want everything in life, everything. Okay, it might be a touch too much output gain, but these vocals now sounds a lot more consistent. Again, the ratio I'm going to use is 4, 2, 1 and against change the release time to auto. I just want to know some of you might want to do with, oh cool. It's actually slow down the attack time slightly. So a try something around 10 milliseconds. If the takt times to shore, it can clamp down on the transient and take the life out of a vocal. I just wanted to know. I just want to add everything in life it see there the vocal sounds a little bit more natural with a slower attack time. Again, this is something I could do with my lead vocal. So I'm going to solo this and see if it makes positive difference, changing the attack time of day. When you got a dream, you got a key goal for. When you get a dream, you got to keep pushing forward, even when the roadblocks come, even when they get that's when you press. So yeah, you gotta you gotta keep clam, gets your hostel love. I'm trying to get to the top because the view different menopause, so day because I'm built different. If you're just learning about compression, it may struggled here the subtle differences between fast, medium attack time. So if you're not sure where to start, I would recommend staying between about five and 10 milliseconds. This will work most audio sources. As you train it is new skills improve. You want to fine tune the attack and release times more carefully. But as I say, as beginner, stick something between five and 10 milliseconds, right? Let's go back to the backing vocals and apply some AQ. I just want to know once again, we can cut out some of the low frequencies. And we're also going to give them a bit of a boost in the highs. I just want to know. I just I just want everything in life every day. Now, you see here I've made a cut at around 200 hertz. So what this is doing is clearing out some of the low mid-frequencies to allow more space for the lead vocal in the course. Again, I can even reduce the low frequencies bet to make these backing vocals sand bit thinner. At the moment, we've got four different vocals. So the low frequencies are radio going to build up and start making the mix sound a bit messy? I just want to know. I just want to add anything. Now listening back with the rest of the mix, I feel like these vocal sound a bit too thin. So I'm going to reduce that low frequency cut. And I'm going to reduce the boost inner thighs a little bit. All right. Let's listen back again. That's why yeah. Okay. The sounding of it better. I'm just going to turn up the volume of all the vocals just a little bit. So this time I'm just going to turn up the volume of the backing vocals group. Well, it's tennis up by about 20 decibels. That's why, yeah. Okay, great. Now I'm going to do is just copy the settings that we had on our lead vocals from the first onto your course vocals. Doing so it's really easy. It's going to right-click on the Channel EQ and select Copy. Then go to this other vocal part. Right-click and select Paste. And we'll do the same with the compressor. So right-click copy. And then paste does have listened to this section. Now. I just want I didn't want to know. When you got a dream. You got it. Okay, the tracks now starting to sound quite a bit better. I've only applied basic EQ compression to the vocals. There's still a lot more that can be done. So in the next video I'm going to apply some processing, some of the other parts. Thanks for watching.
49. EQ and Compression in Practice Part 2: Hi there. In this video, I'm just going to give you a couple more examples of using EQ and compression antiemetics. So the next thing I'm going to do is apply some EQ to some of our synths. One thing you may notice when we listen back to this song is still sounds a bit messy. So there's quite a lot of low mid-frequency energy, which is making a sound a bit muddy. When you got a dream, you got what you got. So what I'm going do now is playing EQ to the synth group to try and get a bit more clarity in the mix. So okay, it's EQ and filters and drag and drop Channel EQ on the synth square shape. So once again, this group is the output for all of these different synth instruments. So if we look at all the instruments in the group, you can see the track output is going to synths. Whereas the bass and drums, for example, are going straight to the master. So this means the audio signal is going from these tracks into this and then to the master. So any processing apply to this group will affect each of the tracks in the group. So to add a bit of clarity, one gains day is reduced. Some of the low frequencies are bass parts are not in the synth group, so we don't need to worry about cutting out the low frequencies of our base. So first thing gains day is that this high pass filter. So that's just going to cut out the really low frequencies. When you got a dream, you gotta, you gotta, you gotta. There's not a massive amount of Rayleigh low-frequency content in these parts. So next we're going to do is make a bit more of a cup with this low band. When you got a dream, you got a ketone for what you gotta, you gotta person for deeper when people get. So right now we're reducing those low frequencies. For me, listen to the whole mix. We can barely hear a difference. Let's solo them for a moment. It's subtly cleaning up these parts. But again, it's not made it sound too thin. So I'm going to reduce the lows even more. Next I'm going to do is reduce the low mid area with this mid dial. So I'm going to find the frequency area, which I think sounds messy. Okay, That does seem to be a lot of energy around here. So it's going to cut it by a few deaths spells. So as you can probably hear there, the difference is quite subtle, but it's just helping clear up these tracks. I'm going to add a high boost, just a couple of decimals there to make them sound little brighter. I don't want to be boosting the highest too much. As otherwise, we'll start to bury the vocals behind the other parts. Right? Let's listen to the whole mix. When you got a dream, you gotta, you gotta, you gotta keep up with them. Okay, the difference is subtle, but it's starting to sound a bit clearer. Let's now apply some compression to this group. So this helped bring up the quietest parts of our different instruments. So again, it can reduce the threshold. This time only one, a few decibels of gain reduction. When you've got a dream, you gotta go for it. What you gotta, you gotta keep pushing forward. Keep up with them. Roblox, calm people. And something else I'm going to do this time is ease off on the attack slightly. So I'm gonna have a slower attack around 30 milliseconds. I just want to apply gentle compression to all of these parts. Nothing's really sticking out of the mix is just going to help glue them together. Again, I'll put release on auto mode so we don't have to worry about that for the moment. With a ratio, I'm going to bring it down to about three to one. As I said, we just went quite subtle compression. When you've got a dream, you gotta go for it. What you gotta, you gotta keep up with the black people when they get. I was running. I feel it's lead guitar part sticking of mix bit too much. It's quite loud. So I'm going to turn down the volume by coupled decimals. Yeah. When you gotta dream, you've got a key, DO fluorine. Would you get a dream? You got to keep pushing forward, keep up with the wrong class com e-book when they get. So now after I've started making some changes, I've realized certain parts need the volumes adjusting. So it's perfectly normal to go back and make changes to the levels of your different tracks. The lead vocal just seem far too loud now. So this is by no means a perfect mix. But as you can see, you can quickly start making it sound better by just using EQ and compression. There are many other processes that we can use when mixing, but I would recommend going away and practice using compressors and EQs to build your confidence. Hope you found this video useful.
50. Using The Default Reverb Send: Hi there. In this video, I'm going to very quickly show you how to use reverb enable to live. So earlier in this class, you may have seen me adjusting one of these sense. So this sand on the left by default is a reverb send. And this one here on the right is a delay. So let me just explain what ascenders, I'll go back to the session view. If we look at one of our tracks here, for example, the lead vocal. We can see here we've got two sets, a and B. So the represented as dials in session view, and they're just little boxes in the Arrangement view. What we can do is actually send some of this audio signal to one of our sense. So here we have our reverb send and our delays. And so at the moment we've got reverb plugin on this channel and a delay on this channel. So if I send some of my vocal to this channel, would just be blending in some reverb with this track. Or cellular LacI. Start off with no reverb. When you got a dream, you've got a key Go for it. When you got a dream, you got to keep pushing forward even when the roadblocks come, even when it gets hot. That's when you press so yeah, you gotta level. So as he clear that, as I increased it, the vocal seem to have a sense of space. This is really important when mixing. So we can really quickly send some of our tracks to a reverb. This will just help to mix sound little bit more exciting. You don't want to go crazy with this and apply loads of reverb to every part. But little bit on certain paths can make them sound much nicer. Firstly, I'll start with the vocals. When you got a dream, you've got a key goal for. When you get a dream, you got to keep pushing for every epoch when people, when they get yeah, you gotta, you gotta clap. So general rule of thumb when applying reverb is Tony up until you can hear the reverb and it starts to sound quite nice. And then turn it down a bit. It's very easy to get carried away as adding reverb to a part tends to make sound nicer. But as you add reverb to more and more parts, your song will start sound messier and messier. I'm just going to add some reverb to the chorus vocals. This time AND gate to use ascend in the Arrangement View. And turn it up to around the same point as the other one says about minus 15. And it's going to add some reverb to the backing vocals. But this time I'll use the group. So this will be applying reverb to offer these channels at once. While you have c out vocals seem to be sitting in the mix a little better. Okay, now I'm going to quickly have a look at our reverb. So I'm going to click on our reverb track down here. And down at the bottom we have this reverb plugin. So as you can see, this reverb plugin can be a bit intimidating. I'm only going to go over one of the main controls the moment. See here we have our decay time. So with this, we can control how long our reverb is. So I'll just solo lead vocal. Now when I play it back, That's why you have file in. You can hear the reverb bringing on for a little while after the vehicle stops. That's why you have file in. If I increase this, That's why your file in. Here are reverb bringing out for ages. That can be great as a creative effect. But if you try and sit the vocals within a mix, I would recommend using a reasonably short decay time, around 1.5 seconds. That's why you have file in. You can often get away with adding a touch more reverb if the decay time is quite short, right? Let's just have less than two Omics as it is. When you got a dream, You got it. Alex, come when they get psi. That's why Chris. Yeah. You gotta. You gotta. Okay, great. It's not finished mics, please definitely starting sound a little better. As you can see, they're just taking the simple steps. You can really start to improve how you song sound. Thanks for watching.
51. Class Project / Outro: Hi there. I hope you've enjoyed this class and you now have a good understanding of how to create music enabled in life. There is still a lot to learn. We should now be comfortable navigating your way around the software. For this class project, I'd like you to create song using the techniques that I've taught you. If you feel confident, please go away and create your own song. However, if you like, just try to recreate the sum that we created in this class and do a mix of urine. When you're finished, upload the link to your song in the resources page of this class. Thanks for watching.
 Ian Alexander