Transcripts
1. Introduction: My favorite part of what I
do is the creation process. I do love to perform, I love to be on stage but the very reason I
got into all of this, I think is dreaming something up and
turning it materiality. Hey, what's up everybody?
It's Martin Miller here. I'm a professional
guitar player, YouTuber, singer, producer,
all things music. You may have seen me on
platforms such as YouTube. I have a cover band named the
Martin Miller Session Band and I am a bestselling
book author with my book, Modern Rock Guitar Soloing. I'm so excited to
teach you about rock guitar because rock guitar is my absolute passion and it's made my life so much better and I want
you guys to be able to have the same positive
experience that I had with it. What makes this
class really special is that it's extremely
practically minded. You will have played a
lot of rhythm guitar, a lot of lead guitar. You will have a better
grasp on rhythm, a better grasp on what
it is like to play rock guitar and it'll make learning songs in the
future so much easier. If you want to take
this class and you're a beginning
guitar player, it is advised that you do
have some basic knowledge, such as tuning your guitar, reading tablature and
counting rhythms, as well as strumming a
few basic open chords like E minor or G
major, et cetera. I hope you leave this
course feeling like you had a ton of fun
exploring the world of rock guitar and
experience what it is like to be in a rock band and to feel like
a real rock star. I'm so excited that you're here joining me on this class,
let's get started.
2. Getting Started: Hey, guys, what's
up? I'm so happy you're here taking
this course with me. Now, in order to be able
to play rock guitar, we need to understand the role of the guitar in rock music. Basically, the whole thing is divided into two main elements. The first one being
rhythm guitar and the second one
being lead guitar. Now, rhythm guitar is the
bedrock of a rock song. It provides groove, sonic
texture, and harmony, lays the foundation for
a soloist or a singer, and it's something that
you're going to be playing the majority of the time
as a rock guitar player. There are certain players
that are so well known for their rhythm guitar
playing that they never even play lead and
they're still world famous. Think of guys like
Malcolm Young, James Hetfield, or The Edge, absolute legends, never
play lead guitar. They're just famous for
their rhythm guitar playing. Now lead guitar playing
on the other hand is melodic single-note playing that turns the guitar into a voice, often replacing the singer while you take a solo as
a guitar player. That can be very melodic
if you think about players such as Brian
May or Gary Moore, but it can also be really
exciting and flashy if you think of people like
Steve Vai or Eddie Van Halen. There's a lot of variety within the world of
lead guitar alone. In this course,
we're going to be looking at both of
these elements, as I've written two pieces
of music that require you to play rhythm guitar and lead guitar separately
from one another. You can learn them
at your own pace and then stack them on top of
each other like I did. If you want to be
playing rock guitar, you need a rock
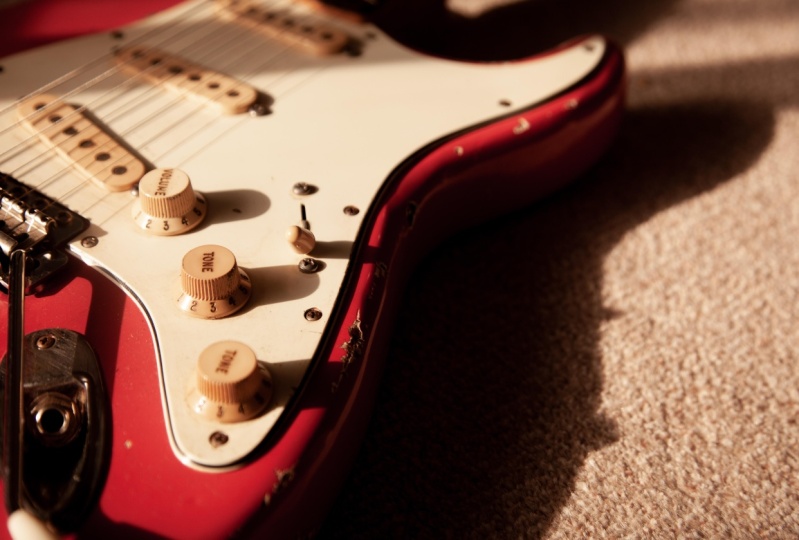
sound to play with, and the key to a rock sound
really is the distortion. Now, my distortion comes from
the amplifier that I use, which is this Laney amplifier, but you can also use floor
units for that effects pedals. There are a lot of
practice amps out there that do distortion, there are plug-ins that do amazing jobs these days
with these kinds of things. I've written a document. You can access this in the
resources of this lesson, where I wrote down a
few recommendations of entry-level pieces of gear that provide you a really good
sound to start off with. Don't worry too much
about gear for now. First of all, that's
a matter of taste. Anyway, and second of
all, nothing is more important than the guitar player operating the instrument. Tone is in the
fingers as they say, and gear is just secondary. You're going to get the
most out of this course if you really learn
at your own pace. The awesome thing about
an online course like this is that you can
rewind as often as possible so whenever you
catch something and you didn't 100% grasp it and
it gets you curious, don't hesitate to rewind. If you're going to
have to do it 100 times over, that's fine. If something you think
should take you 10 minutes to learn takes you 2 hours
to learn, that's fine too. Everybody learns
at their own pace. It's everybody's
personal journey. I really recommend you to be patient with yourself
and study as long and as thoroughly as you need to get to the
mastery of this material. The first thing I
recommend you do is to learn the songs really slowly. If at any point in this course, you feel like you
want to check out a slowed-down version
of these tracks, feel free to check out
the bonus content, there, I've recorded some
bonus performances for you where I play the
tracks at a slower pace. Once you feel comfortable, then you can take the
full-speed tracks that I'm playing and play along
with me and the last stage of mastery is when you take
one of the backing tracks at full speed that has the guitars removed and you play
along to those. When you can do that, you
know you have it down. In the next lesson,
we're going to introduce the first track. I'm going to play
through the rhythm and lead guitar part
and then moving on, I'm going to dissect it note
by note and teach it to you.
3. ‘High Voltage’ Full Performance : Hey guys, welcome
back. In this lesson I'm going to be playing
through Track 1, it's called High Voltage
and it's inspired by the great ACDC
and also artists like Tom Petty and they inspired me for the open strummed chords. Chords that you may be very
familiar with at this point. Chords like E minor
G major, etc. and then in the second section, you're going to be
playing power chords. Strum power chords, that is it for the
rhythm guitar part. Then we're going to be looking
at the lead guitar part, which is really inspired
by the great blues rock guitar players such as
Jimmy Page and Gary Moore. May seem fairly simple at first, but there are a
few subtleties and variations in there that
require a bit of attention. Let's hear what that
sounds like when I play both guitar parts,
the rhythm and the lead, at the same time. That is what high
voltage sounds like. In the next lesson, we're
going to be looking at the strummed open chords of the first verse rhythm guitar part and
I'll see you there.
4. Strumming & Open Chords: Everyone, it's time to tackle the rhythm guitar part of
the verse of high voltage. Within this lesson, we're
going to be looking at strummed open chords, campfire chords
that you probably know and are familiar with, but they're played more
aggressively using down strokes. Also we're going to
be using muting in the right hand to get a really
aggressive, tight sound. Next up we're going to have
a full speed performance, we're going to have tablature on screen so you can read along. At any point that you feel
like you want to revisit this, feel free to refer back to it. Let's break this
down. I'm going to be playing the first
two bars of this very slowly. Repeat that. Things here start off with
an open E minor cord. If you're not familiar
with this cord, it is fretted by
placing fingers 2 and 3 on the D and A strings. Now if you're not 100% sure about what those
fingers are by the way, I'm going to be referring to the index finger as finger 1, the middle finger as finger 2, the ring finger as finger 3, and the pinky as finger 4. Take two and three that's your middle
finger and ring finger, and put it on the A
string and D string. Then all the other
strings are not fretted, but you're going to
strum all of them with your pick anyway,
using a downstroke. They're all going to
ring out like this. That's your first
cord. If you're not too familiar with this, it's totally fine if that
takes you a couple hours, a couple days, or even weeks
to master, to play cleanly, where all the
strings ring out and all the fretted notes
are fretted cleanly. There's your minor cord, what it should
ideally sound like. We're going to be strumming this three times in
the following rhythm, it goes something like this. If you're unsure
about the rhythm, you can always
listen to the track. Also listen to the
slowed down versions of the track and match the
rhythm with your ear. I want to not get too much into the theory of rhythm here. It goes something like this with just the minor cords strummed, three, four, and that's all down strokes
in the right hand. That means you start from above
the guitar and reach into the strings with a downward
motion three times that is. That is one thing
I want to mention quick before we move
to the next cord. It is not only important
when you hit the notes, but also when you
stop the notes. When you play this E minor cord, in order to make it
sound really clean, and tight, and aggressive, you want to do the following. Do you see there how
I use my right hand and put it on the strings to mute the strings
from ringing out. It's not this but instead we tighten up the sound by taking
away all the clutter. We do that in rhythm. Everything in music
happens in rhythm, and so does the
stopping of the notes, and all people think a lot about where they
start the nodes, but not too much about
where they stop. Be conscious of that as well. It's a very simple trick,
and freeze up your sound. Once you got that
down, we're going to move on to the next cord, and that is an
open G major cord. We're going to get
this by placing our second finger on the
third fret, low A string. first finger, second
fret A string. Then we have two open strings, D and G. Then we take
the third finger, put it on the third
fret B string. Lastly, the fourth
finger goes on the third fret high E string. Now make sure all those
nodes ring out beautifully. If they don't, you
might want to have to make subtle adjustments to
get the nodes just right, both the fretted nodes
and the open noes. When you've got that, you're ready to strum the cords
and you're going to strum this one twice in
this song like this. Then you're going
to stop it with your right hand by placing
the hand on the strings. You can do that in a
repeated rhythm like this. Now, the next challenge
would be to put the E minor cord and the
G major cord together. It's going to be like
this. Have a look. This can be quite
tricky at first as it requires huge adjustments
in the left hand. If your tempo is
something like this, that is completely fine. If that twists your
fingers for a while, do not worry, if you keep doing this, you're
going to get it. When you got that
down, you're ready to move on to the last
cord of the section, which is an A major cord. It goes something like this. Now the challenge here is that you're going
to have to bar your first finger over the second fret of the
D, G, and B strings. You're going to have
an open A string, then take your first finger
and place it on the D string, the G string and the B string. You get those three nodes, all of them together
sound like this. You're going to have
to try a lot around maybe if you don't get the
nodes to ring out fully. A tip I can give you
is you really want to place your finger very
close to the fret wire. The sound gets created when
the string touches the fret. Closer you can get your
finger to the fret, the more precise
the sound will be. Something like this. Let's play those three cords together.
Go something like this. As you can see that A
cord gets two strokes, but it's syncopated, which means it's a
little bit offbeat. It's something like this. One, two, three, four. That may throw you a
little bit at first, so listen very
precisely to the track, tap your foot if you
need to and try to get that exact
placement of that cord. In context one more
time sounds like this. Slower. Lastly, we're going to introduce a little
variation that comes up every time after
you've played this riff. It's variation 1 and
then variation 2. It's based around
this A major cord. The name is complicated
sounds D major over A, which just means it's this
cord but the string still out. The way to get this is you take that bar from
the A major cord. Now take your second finger and put it on the third fret string. Take your third finger and put it on the fourth
fret D string, while the first
finger still presses down on the second
threat of the G string. It gets you open A, fourth fret on the D string, second fret on the G string, third fret on the B string. It's a very beautiful
sounding cord. You may have heard it in
songs like All Right Now, or tons of Queen songs
like Hammer To Fall. Basically any Rolling Stone
song ever has this in it. That kind of thing. That comes around
the second time you play that whole riff. First repetition is
this, second repetition, and you bounce back
and forth between the D major over A and the A. I'm going to play the whole thing one
more time the whole section. When you get that down, you
have the section mastered. You can move on to
the next lesson. Within that lesson, I'm going
to teach you power cords.
5. Playing Power Chords: Hi everyone. Welcome back. Welcome to the lesson
about power chords. Power chords are
a mandatory tool in the tool bag of a
rock guitar player. They are the most common
chord types in rock music. They're used by
legendary players such as Ritchie Blackmore, Tony Iommi, think of the song
Iron Man by Black Sabbath. They're extremely
simple to learn, they're extremely flexible and you can learn one shape and move it around the
entire neck and get basically any chord
you could dream of. Let's have a listen to how they sound within a performance. Now that we've heard
that, let's dig right in what is
actually happening here. A power chord without getting too technical consists
of two or three notes, and the third note is actually
the same as the first. The first power chord in this
song is an E power chord, also referred to as
E5 in the tablature. You're going to get it by
taking your first finger. We're going to move
up the fretboard now up to the seventh fret. That would be the third
marker on your guitar. That's the seventh
fret on the A string. Put that down, and then
take your third finger, go two frets up to the ninth fret on the D
string with the third finger. That is already
considered a power chord. You could just make do
with these two notes and move them around the
neck at your free will. Now for this song, I added a third note on top, which I'm going to fret with my fourth finger
on the G string, and that gives it a
little more impact. Likewise, you can move that
around in the same way. You can move it across the A or the E string
on any fret you like. I suggest you just take a little bit of time,
move it around, see what happens, see
which combinations of power chords you like
and which one you don't. Now within this song, we're going to be looking only
at the root note, really, of each chord, meaning the lowest note and we're going
to apply that same shape, that same template,
to all of them. The first is an E5, starting on the
seventh fret A string. Then we're going
to have a D5 next. You achieve that by taking the E5 and moving
it down two frets. Same shape yet again, so E5, D5. Let's apply your
little rhythm to it. Let's do three strikes on the E, two strikes on the D, like this. That's the same rhythm as
in the verse, actually, so you should be fairly
comfortable with it by now. Let's do that very
slow, one more time, 1, 2, 3, 4. With the third chord
we're going to get is an A5 and
we achieve it by taking the D5 and moving
it down a set of strings. We're staying at the same
fret, so still fret 5, 7 and 7 but starting
on the low E string. So first finger, low E
fifth fret, third finger, seventh fret A string, fourth finger, seventh
fret D string. We get the same rhythm as before with the
two strikes where the first note is pushed 3, 4, 3, 4, 3, 4, etc. Let's play all three
chords in context, 1, 2, 3, 4. We've almost made it. For the second bar, we're going to stay
on the A chord and hit it a couple more
times like this, 1, 2, 3, 4. A couple more strikes there. Let me do it again, 1, 2, 3, 4. In context with all
the other chords, 1, 2, 3, 4. When you got that
whole rhyth down, you're going to repeat
it three times and then we're going to go into a
slightly different section. Let me lead you into that
by playing it three times, 1, 2, 3, 4. Last time. Now we go
into a C power chord. That's a chord we haven't
used yet and we're going to get it by placing
our first finger on the third fret A
string and place the other fingers accordingly
on the fifth fret, D and G string. You're going to play
strict eighth note, so just keep hitting
the strings, 1, 2, and 3 and 4, 8. Eight times, so 1, 2, 3 and 4, 1, 2, and 3, and 4, 8. You're going to do
the same thing by moving up to the D and
playing the same rhythm. So 1, and 2, and 3, and 4, 8 and 1, and 2, and 3, and 4, 8. In context, that's 1, and 2, and 3, and 4. And 1, 2 and 3, and 4. And 1, 2, and 3, and 4, 8. Then the whole section repeats. Now let me play
the whole section minus the very last bar. So 1, 2, 3, 4. Before we finish,
we have to look at one more bar that uses
the E power chord, which you already know from
the seventh fret A string, and the D power chord
from the fifth fret A string and goes in
between the two like this. Two strikes on the
E, one on the D, and back to the E, so like this. Then you go all the way down to the second fret and bar with your first
finger with the frets, two and two on the A and D string and
play the open E string. That gives you an
open E power chord. It's a really beautiful, punchy, gritty sound like this. The whole rhyth, 1, 2, 3, 4. If you have that, you have the whole piece down as far
as the rhythm guitar goes, we can move on to
the lead guitar.
6. Learning Melodic Lead Guitar: Welcome back to the
lead guitar lesson for the track high voltage. On this track, really
the purpose of the lead guitar is to
substitute for a vocal melody. We do not have a singer on, but we do have a guitar on
our hands and we can do a damn cool job of
replacing a singer. Think of a song like Smells
Like Teen Spirit by Nirvana. There's a verse where
the vocals drop out and the lead guitar
takes over the vocal melody. That's what we're doing
and we're going to be employing some new techniques
such as sliding vibrato, but first, let's have a
listen to the full track. Let's dig right in.
We're dealing with a melodic motif here. A motif being a
melodic structure that repeats over and over and maybe adds a few
variations here and there. The first note we're going
to play sits on A string. We're going to fret it
with our first finger on the seventh fret. That would be where the third
marker on your guitar is. Play that with a downstroke, as we know from the strumming, except this time we're
just going to be hitting a single note instead of all the other notes. That's
all you're going to pick. When you got that, you
take your fourth finger, the pinky is the first time you're using it
actually I think, and put it on the 10th
fret, same string. Those are our first two notes. You really want them
to be ringing out. Don't chop them up like this
like we did with the rhythm. This time we want legato, meaning the notes to be
beautifully connected. Like that. Next note is on
the seventh fret, D string. When you found that you can play all the three notes
in conjunction, then you bounce back
and forth between the ninth thread on the D
string and back to the seventh. Like in a this. Play
what get we far. As you can hear and also
see in the tablature, is that the first note is a
bit longer than the others. So we're going to count to three and then play
the other notes. So 1, 2, 3, 4, end. Like this. We have one more note to add
before the phrase ends. This note here on the 10th fret, A string concludes the phrase. It goes like this, 1, 2, 3, 4, and you sustain
that note as well. Now the next phrase starts
with the same set of notes, but the rhythm is quite a bit different. It
goes like this. Also it ends on that seventh
fret on the A string. So let me play the whole first four blocks
extremely slowly. Try to read along and
possibly play along. 1, 2, 3, 4. We're going to play those
two phrases twice in a row, and then we're going to
move on to the next thing. Let me do that one more
time, very slowly, 1, 2, 3, 4. That concludes the first part
of the verse lead guitar. For the next part, we're going
to play the same melody, but play it up an octave. Up an octave, meaning it's in a higher register while still being the same melody and
goes something like this. I'm going to play it
for you first and then break it down. Do you hear how that's
the same melody? But the fingering and the strings that we use
is completely different. You're starting on
the ninth fret, G string and I'm starting
with my second finger here. Why am I not starting
with my first finger? That's because I'm going to
play threats that are lower. I'm going to have to reserve that first finger to
play the lower frets. I'm starting with
my second finger, middle finger on the
ninth fret G string. That's your fourth fret
marker. Rhythm is the same. Then we're moving to the
B string first finger, 10th fret, third finger on the B. Let's just repeat that. That alone may be a little bit unusual because
you're starting the phrase on the
second finger and then you're using fingers 1 and 3. So if you're
uncomfortable with that, do it until it feels
second nature. Next up we're going to
take the first finger, put it on the high E string, seventh fret, and then we're going to come back down the same way we came up. Like this. Then the second phrase
is extremely similar. It's the same set of notes with a different rhythm and
that is the whole phrase. Let's play it in time 1, 2, 3, 4, 3, 4. For the last melodic
phrase of this verse, we're going to repeat
the same section but end it on a different note.
Here's how that goes. I'm going to play it first, 1, 2, 3, 4. Everything is the same
except the very last note. Instead of going back
down, we're going up. I'm taking my third finger, putting it on the 10th fret, high E string, but I'm not going to let it
sit there for long. I'm going to strike
the string with a downstroke and then move
it up two frets like this, while keeping the pressure
on the string and keeping the notes pressed down. That is what we call sliding. I'm sliding into the note. That is yet another one of those small techniques that you can use to make your
playing more interesting, more colorful, and more unique. It goes like this slide
by itself one more time, 10th-12th fret, high
string with third finger. It's a quick slide too.
It's not like this. You have to do it really quickly in context with the phrase. Then I'm putting vibrato on
it as well. That is optional. If you can do it naturally,
that's fantastic. By all means, do it. Now let's play the
entire section by itself and I'm going to count in and you can
try to follow me along, 1, 2, 3, 4, 2, 3, 4, go up 3, 4, 3, 4, 3, 4 and there's the slide. That is it for the lead guitar of the verse. Let's
move on to the course. We're going to climb up
even higher on the neck. We're going to start out
with the 12th fret on the B string with
our first finger. But instead of picking
it just like that, we're also going to
slide like previously, like this from the
10th fret like this. Then if you look
at the tablature, you're going to see that it's only 12th and 15th
from here on out. So 12th fret, B string, 15th fret, B string, 12th fret, E string, 15th fret, E string. Those are all the
notes we're going to be using for now.
It goes like this. Then you're going to
climb back the way you came up, so the 12 fret, E string, 15th fret, B string, and back up to
the 12 fret, E string. It gives you this. The
phrase ends up with a G, which is the 15th fret on the high E string,
third finger. That is the whole thing.
Let me play it for you. The next phrase is very similar, just end slightly differently.
Let me play it for you. It's the very same thing minus the high node on the 15th
fret, high E string. Both phrases together, 1, 2, 3, 4, 3, 4, 2, 3, 4. Then you're going to
repeat the first phrase one more time, and then we have a completely different melodic
conclusion here. I'm going to play
it for you first, 1, 2, 3. That sounds really
beautiful and melodic. It starts on the 12th fret, high E string, then goes 14, 15, then back down to 14 and 12. So what we play on
the E string here with fingers 1, 2, 3 is. Then we play the 15th
fret on the B string, and then go back up to the 12th fret and 14th fret
high E string, back to the 15th fret, B string. Be sure to read along
the screen tablature. It goes like this. I think it's time to play the whole section up to
where we got it. Let's try that out, 1, 2, 3, 4. Repeat the entire melody
that we had so far, and then we're just going to add a little bit of a tag to it. One extra bar that is a little bit different
from the rest. It goes something like this. I'm going to play it for you,1, 2, 3, 4. Again, start on the 12 fret, B string with the first finger. Then put your third finger on the 15th fret, same string. Then first finger 12th thread, E string twice, 15 on the B, 12 on the E, and
then reach down to the D string and put your
third finger on the 14th fret, and that's the final
note of the track. The whole bar goes like this,1, 2, 3,4. Let me play the entire chorus
for you one more time,1, 2, 3, 4, 2, 3, 4, 2, 3, 4. That is the whole
course lead guitar. It's time to move on
to the next track.
7. ‘Amped Up’ Full Performance: Welcome back. Splendid
job on the first track. We're going to get right
into the next track. This one is called Amped Up
and unlike the first track, which just consisted
of two sections, this one consists
of three sections. An intro with a
clean guitar tone. That's the first that
is inspired by tracks such as Don't Fear the
Reaper or Paradise City. Then we have a full on
tracking rhythm B section, which is the verse
with rhythm guitar and the melodic
lead guitar on top. For the last section, I have a more Ozzy
Osbourne Crazy Train inspired riff with
single notes in the rhythm guitar and a more traditional free form flowing rock guitar
solo on top of that, it's going to feature a lot of new techniques such as string
bending and palm muting. There's a lot to sink
your teeth into. We're going to tackle it one by one, and at the end of this, you're going to be a truly
soaring rock guitar player. Let's first check out
how it sounds with a full speed performance of both the rhythm and lead guitar. Then we're going to
break it all down. That's how Amped Up
sounds at full speed. In the next lesson,
we're going to look at arpeggiation and
advanced open chords.
8. Understanding Arpeggiation & Advanced Open Chords: Welcome back to this lesson on arpeggiation and
advanced open chords. Now, rock music is primarily known for
its distorted guitars. But every once in
a while you want to contrast this by using clean guitars for a bit of more variety in the
sonic characteristics. What we're going to be
doing is we're going to be taking open chords and we're going to be arpeggiating them. That means we're not going to
strum them like previously where all the notes ring
out at the same time, but we're going to be picking the notes one after another, and then let them
ring into each other. That creates a
beautiful, lush sound, it's something you
surely don't want to miss in your rock repertoire. We're going to also be using some more advanced chords that go a little bit beyond the
typical camp fire chords, although they're not much
harder to play at all. With all that said and done, let's dig right into the
full speed performance. Let's dig into this clean intro. First of all, as I
mentioned, you're going to need a clean tone. I have a clean tone with
a little bit of course, and it sounds very
much like this. Try to dial in a similar sound, the chorus is
completely optional. What we're going to do
is we're going to take something that is similar
to an open A chord, but we're going to remove
some of the notes actually, and we're going to only be using the note on the G
string second fret, and you can use your first
finger to fret that. The notes we're going to
be picking are the open A, the G string with the
second fret fretted, the open B string,
and open A string. And that is our Asus2 chord. Do not worry about that name
or whatever that means, just know that
sounds really nice. Now we're going to apply a so called picking pattern
to all of these chords. The pattern goes
something like this, and I really suggest
you try to follow along with the tablature to
get the order of notes. It starts with A string, G string, B string, high E string, B
string, G string. That is it. Let's
play that on repeat. I want to mention one
thing, technique-wise. In order for these notes to be able to ring
out like this, and not be stopped and muted
like we had previously, it is not possible to keep the picking hand on
the guitar like this. Yeah, that's not the
sound we're after. We're trying to have the notes as ringy and sustaining
as possible, so we're going to use a
free floating right hand. I'm taking the right hand
off the body of the guitar. By the way, if you're
a left handed person, that would be your
left hand, obviously. I'm going to say picking hand
in this instance actually. Have your picking
hand free floating. As you pick the
notes, you're not stopping the strings
from ringing. That's what makes this
playing sound really magical. We're going to pick
the first note A, and let it ring, and let all the other notes
ring out as well. The way you're going
to want to pick this is either with all down strokes, or with alternating strokes, meaning down, up, down, up. Or you do it like
I do, I do down, down, down, and then up, up, up. Now let me play that
very slowly for you so you can really
observe the right hand, the left hand, et cetera, 1, 2, 3, 4. Now the only challenge hereafter will be to switch between
different chords, and keeping that same
picking pattern going. Let's look at Part 2. Here we have a G 69 chord. It starts with the second finger on the third fret of
the low E string, the first finger on the
second fret of the G string, the third finger on the
third fret of the B string, and then the open E
string, high E string. We apply the same
basic pattern where we play the bass note down here, and then play up and down
the top three strings. That's the same as
the first chord, only the bass note is different, as far as the picking
pattern goes. Now, you want to play that on its own for a while until
you're comfortable with it. I'm going to do that
very slowly for you, 1, 2, 3, 4. The next step in
mastering this would be to go from the first
chord to the second chord. I've arranged these chords in a way that is fairly easy to do when you play the
first chord with just the first finger on
the second fret G string, what you can do after
you've apetiated it, you can leave that
finger on there, take the second
finger down here onto the E string and the third
finger on the B string, and just use that first finger as a pivot so that stays down. You don't have to look for the correct fret,
you're already on it. So that makes the transition
relatively smooth. Another thing I also do, it's a subtle technique that
is pretty tricky to master, is I mute the strings right before I go to the
next chord. Check this out. The chords don't blur
together too much. Like that. That leads us to
the third chord, which is a D with
an added ninth, or a Dsus2 to be more exact. Now that we're going to
play with an open D string, first finger remains on A, on the second fret
of the G string. The third finger remains as well on the B string third fret. The only difference really,
between this chord, and the next chord
is the lowest note, it's an open D, instead
of the G down here. The transition is
relatively smooth, we're going from this, to this. Now let's put all
three chords together. That's the first repetition, and on the second repetition, I'm going to add
yet another chord. We're keeping that basic, same structure here with the first finger on the
second fret. G string, third finger on the
third fret, B string, and high open E
string, these three. Instead of playing an open D, we're playing a Fret at C, third fret second
finger A string. Yet the right hand picking
pattern stays the same. We have this chord
structure right here with these top three notes that remains intact for
three chords in a row. Check this out; G, D, C. All you're doing is
change that lowest note. It's very efficient, but it sounds very colorful and pretty. Now let's play the whole
thing up to where we have it, 1, 2, 3, 4. Now, the last time around, you're going to repeat
that whole thing in the very last time around. Instead of playing
the full C chord, you'll notice that
the band stops. The bass drops out, the
lead guitar drops out, and we're just going to play
the C down here third fret, A string, and that'll
be the break. It goes like this, the very
last repetition of this leaf. Then you have one bar to switch to the distortion
and play the next section, and that we're going to
tackle in the next lesson.
9. Palm Muting & Single-Note Riffs: Welcome back to this lesson on palm-muting and
single-note riffs. Palm-muting is a technique
we haven't looked at yet. It is a way of
articulating and attacking your notes that adds
interest to your riffs. A riff in this context is a single-note or
chordal phrase that gets repeated in some capacity and contributes to the
rhythm of your song. A famous single-note riff would be Whole Lotta Love
by Led Zeppelin, and a famous chordal
power chord riff would be Smoke on the Water
by Deep Purple. I'm going to perform now
the rhythm guitar part of the verse and chorus of our
track amped up at full speed. Let's have a look
at the verse here. We're starting off with a
power chord on the note A. Take your first finger, put it on the fifth thread,
low east string. Put your third and
fourth finger on the seventh threat of the A and D string and you
have your A power chord, hit all those notes at
once with a downstroke. Now, next up we're introducing this new
technique called palm-muting. It sounds something like this. I'm playing three notes here
with downstrokes and I'm using the palm of
my right hand and I'm slamming that
against the bridge. And I'm picking the note at the same time, and it
gets me this sound. This is without palm-muting.
With palm-muting. Let's hear that in context
with the open power chord. Notice how I'm going from
a floating right hand when I hit the power chord to
an anchored right hand, play the little slower, 1, 2, 3, 4. Next up would be
the G power chord, which is down here and then
the D power chord up here. Start the power chord
on the third threat hit string and then start the power chord on the
fifth threat A string. We have A, G, and D. I'm going to play
you the whole thing. You're going to have to
look at the tablature to understand how often exactly you're going to have
to strike the strings, especially towards the end where the fourth bar where
you have a couple of notes muted and then the
open power chord. The best way to do
this is to just listen to it over and over again
and try to play along. Also, use the slow
examples and also, I'm going to play
it for you right now really slowly so you really get the rhythm and you can imitate it to the
best of your knowledge. All right, let's have a look. 1, 2, 3, 4. Once you got that, you're going to repeat the
same riff over, but it is slightly different towards the end as
we're introducing another power chord which is the C power chord down here
on the third fret A string. Let me play the riff.
It's the same riff essentially with one chord
A. It goes like this. If you have problems
separating these notes, like getting a clean power chord and then clean single notes, I recommend you slightly lift the third and fourth finger from the power chord like this. If you leave them on there, chances are the power chord
is going to bleed into the muted notes
something like that. You don't want that, you
want those neatly separated. So lift those third and
fourth fingers slightly off the strings like that. That is the whole
verse section, really. We can move on to the chorus. Next up for the chorus, we have an Ozzy Osbourne inspired riff. It starts off with
an A power chord. Now, power chords as you
know can be fretted like this but they can also be fretted with open
strings like this. That is also considered
a power chord because you have the same set of nodes just fret it differently. So we're going to start
with an open A string, and the first finger barred over the D and G string
on the second fret. That's how the riff starts
and then we're going into this single node riff. It goes something like this. That is once again palm-mute. I'm going to show you
what the notes are. You start off with
your second finger on the third fret of the low east string and
go to the fifth fret. Keep that nice and muted. Then you're going to 2, 3, 2 on the A string. Yeah,
it goes like this. Then 5, 3, 5 on the low east string all
nicely muted downstrokes. Then you have a 2 with
the first finger on the A string and you
released that back into the power chord
with the little bar here on frets 2 and 3
with the first finger. If you're not sure about the fingering
that I'm using here, I'm using the second
finger first, then fourth, the first, the second finger, and on the way back down, it's the exact same fingers. Up into this power
chord. Let me play this whole phrase
for you very slowly. 1, 2, 3, 4,1, 2, 3, 4. Palm-muting is not an on and
off switch. It's a gradient. You can be very non-muted, very open but you can be also extremely muted,
almost choked. But there's a lot of
gradient in between, like this, when you open
up the note gradually. That's what I'm doing
during this riff here. I have a little bit
of variety in the way I pick these nodes in
the way the mute them as well to give it a
bit of liveliness. For example, on the third
fret of the A string, I open up the sound a little
bit more here as well. Yeah, so experiment a
little bit with that. It's very much about your personal expression and what you want to make
out of this riff. After this initial riff, we end in this power
chord and then we go into a mix of open power chord
with muted single notes, similar to what we had before. It goes something like this, 1, 2, 3, 4. Once again, that rhythm can be a little bit
tricky to understand. Key is listening here and reading the tablature
along at the same time. Let me play the whole thing
extremely slowly for you, so you can do just that, 1, 2, 3, 4. A little bit faster, 1, 2, 3, 4. For the last time we're
going to start over with the A power chord yet again down here, play the same riff. But then instead of going
back to the A power chord, we're going to play the
F power chord down here. First fret and third and third. Move that up two frets and then we conclude in a little single note riff that
goes something like this. Palm-muting single
notes, down strokes and the notes are on
the low E string, 5, 5, 3, 5, 3, 2 on the A string, and 3, 5 on the low E string, and that is the end
of that section. Let me play the
whole thing for you, 1, 2, 3, 4. That concludes the rhythm
guitar for the track. Empt up next up we're
going to be looking at some lead guitar techniques
that are a bit more advanced.
10. Discovering Lead Guitar Techniques: Welcome back. Now we're going to be doing a little
technique module here. The reason I put this here is because some of these techniques
are quite challenging and a little bit more
advanced but you're going to be requiring them to be able to play the lead guitar to the full track of empt up. Some of these techniques
are so essential that they're associated
with really famous players. Like if you talk
about string bending, you will automatically
think of a player like Gary Moore or Brian May or
David Gilmour, for instance. In the same way that when you think of hammer-ons
and pull-offs, you think of somebody
like Joe Satriani, so these are absolute essentials for any rock guitar lead player. We're going to be
looking at them a little bit in isolation to really understand how they work and how you can
practice them as well. Let's start off with
string bending. Now, string bending is
one of those things that brings the guitar closer
to the human voice. What we're going to be doing
here is we're going to grab a pitch by fretting a
note and picking it, and then we're going to bend
it to create another pitch. Let me just demonstrate
this real quick. I'm going to the 10th
fret on my B string. With my third finger,
I'm going to strike that note and then I'm
going to bend it up, a whole step, goes like this. Isn't that the
coolest thing ever? Let's do it again. Whole blues and rock guitar player careers have been made through
this technique. If you want to learn
how to do this, there's a couple of things
you have to keep in mind. First of all, the thumb over the fret board is a
necessity for this. I know a lot of guitar
players will tell you not to use the thumb
over the fret board. For string bending, it's an absolute must. Also, you're going
to have to anchor and lock in the finger
that you're fretting with, as well as the other
fingers that support it. The third thing you're going to have to keep in mind
is that you want to lock in this joint right here
underneath the fret board. You really have
three spots where the hand is really locked
in with fret board. The first one being the thumb, the joint down here, and the note you're
fretting with these joints locked up as well. With that set up,
you're going to rotate your forearm like this. Think as if you were to
unlock a door with a key. It's like that except
that you're locked in in these specific
points and that'll make your hand do this thing. That pushes the string
up and down and it causes the string to change
pitch, such as this. Now this is not coming
from the fingers. It may look like it's coming
from the fingers and maybe the fingers support
it a little bit by stretching out more. But the core of this whole thing is really coming from the form. If I pull my jumper back a little bit, you'll
see it better. Do you see that
rotation right there? Try to follow that. When I
do vibrato on top of that, you're going to see it even more because my arm is
wiggling like this. Now, with a bend you
can obviously bend up, but you can also release down. It goes both ways, or it can
do both at the same time. If you want to come up with
some exercises for this, just take the same
note you've played before but now use
the fourth finger instead of the third. Whole different feeling,
use the second finger. If you're really good at it, you can even do it with
your first finger. That is very hard
though. I want you to go to different frets
on different strings. Next up, go to the fifth fret of the G string, third finger. Let's go to the
12th fret G string. Let's go to the 13th
fret high E string. Not only can you bend
whole notes as we did now, you can also bend half notes, which means you
do smaller bends. For example, when you want
to go from F sharp here on the 14th fret high
E to the 15th fret, you bend only half steps as opposed to a whole
step, which is this. That is basically
jumping two notes ahead, whereas a half step bend
is equal to one fret. That is a little introduction
into string bending. Spend a lot of time on this. Listen to great players
who do string bending, immerse yourself in
it and you'll get it. Let's move on to
hammer-ons and pull-offs. Hammer-ons and pull-offs
are a great way to add a sense of smoothness
to your lead lines. Let's assume you have two
notes on the same string, fifth fret G string, seventh fret G string. Instead of picking both
notes such as this, as you go from low to high, you can also hammer-on
to that note like this. Look at my right hand here.
I'm going to pick once with a down stroke and
then it's gone. I can still make
that note happen by slamming the third
finger against the fret. You need a little bit
of precision for that. If you're going
to miss the fret, nothing's going to
come out or it's going to be very
quiet and very messy. But that is your hammer-on. The pull-off is the
reverse of that. You're going from a higher
note to a lower note, such as seventh to fifth fret. But once again, instead
of picking both notes, you only pick the first, and then as the name suggests, you pull your fingers down
and in pulling it down, you give energy into the string so the
note below comes out. The name pull-off is a
little bit misleading. It's not just going down, think down in a
way a little bit. Think of as if you're
picking the note with your ring finger in
this case, like that. Only one pick necessary. Now, you can combine
hammer-ons and pull-offs as well and that gives
you a-so-called trill, where you hammer-on
to the first note and pull off to the next one, and then hammer, pull. It sounds like this. If you want to make this
really efficient, I suggest you use
a little bit of fore motion in the mix here. It's not just the fingers
because they tend to be a little bit weak compared to the forearm. It's a little
something like this. That's hammer-ons and
pull-off. Of course, you can do this on all strings with all combinations
of fingers. Let's do it down here on
the low E string frets, three and four and we're going to use the first
and second finger. You can also do it across
strings doing only hammer-ons. You can also do only
pull-offs across the strings. Let's use the fourth finger
on the 13th fret high E, first finger on the
10 fret high E, and go down all the strings. Any combination of
notes, fingers, and strings, use them
to your advantage, and practice those
hammer-ons and pull-offs. Once you're comfortable
with these techniques, feel free to move on to the next lesson
where we're going to be covering the solo
of the track, empt up.
11. Excelling at Lead Guitar: In this next lesson,
we're going to be covering the lead guitar part of the intro and verse
for our track and top. It is once again based
around a very simple, very clear melodic
motif that repeats and has a few variations thrown in as well as some of
our new techniques. Let's check that out in
the full play through. Let's dig right into this. We're going to start
with the intro section of the lead guitar
part of Ent Up, and it starts with
this beautiful little melody played
with a clean tone. I'm going to play it
for you first and then I'm going to tell you
what the notes are. Here it goes, 1, 2, 3, 4. That is pretty much
all there is to it. Everything in this intro and
verse is based around this, with some minor variations. Now, the first note
you're going to pick is the 7th fret on the D string, and this time we're
going to start out with our pinky finger, the hardest finger to master, the least trained finger,
the weakest of all. We're going to start the
phrase with this one on the D string 7th fret like this, and then you're going to go 4, 5, 7 on the G string, 5 on the B, 7, 5, 4 on the G string, 5, 7 on the D string, and that's the whole phrase. You can do all down strokes once again at a little
vibrato at the end. All these things we've
done and learned so far. I'll play that for
you very slowly. 1, 2, 3, 4, 1, 2, 3, 4, 1, 2, 3, 4. Now it's really
important that you count those rests and
those long notes. What a lot of people
tend to do is they underestimate the
importance of held notes, sustained notes, and rests, but the rests are just as important as
the notes you play. It is important because
the music around you keeps going and you want to stay in sync with
your bass player, your other guitar player, your
drummer, your singer, etc. Now let's tackle
the second phrase. It starts off just
like the first phrase, but it ends a little
bit differently. You going to play it for
you first goes like this. There's two different
notes at the end here, just copy the first phrase up until that 4th
fret on the G string. Then instead of going, you go, which is the 8th fret on the B string with
your fourth finger, and then use your third finger to fret the 7th thread
on the G string, and it gives you
the second phrase. It goes like this. Let's play both
phrases together, 1, 2, 3, 4, 1, 2, 3, 4, 1, 2, 3, 4. Then you're going to repeat the first phrase one
more time exactly as is, and that leads us to
the fourth phrase, which is yet again, a
little bit different. It goes like this. Only the last two notes
are different really. You start off with the 7th fret on the D string fourth finger, yet again make your
way up and back down. Then you fret the 8th fret on the B string with your
fourth finger and move up with your
first finger to the A on the 5th
fret high stream. That whole last phrase goes. Let me play all four phrases
in conjunction for you, 1, 2, 3, 4, 1, 2, 3, 4, 1, 2, 3, 4, 1, 2, 3, 4, 1, 2, 3, 4, and the next section kicks in. That covers the
intro. For the verse, I'm going to use that little
rest that is in there, hit the distortion pedal and
play the very same thing, the first two phrases
using distortion. Goes like this,1, 2, 3, 4. Now those are the exact same
notes you've played before. I might even switch the pick up, I just played it with one
of my Position 2 settings, but you can also use
the bridge pick up for a more aggressive sound, or even the neck pick
up for a warmer sound. Whatever you want to use, it's down to your own
personal preference. With those two phrases
out of the way, let's move to phrases 3 and 4. Those are very similar, yet very different to play. Once again, we're taking
things up an octave, which means it's
really the same notes, but they're in a different
register, a higher register. We're going to start
off by playing the 14th fret of the G string with your
third finger right up here. You're going to do 12, 13, 15 on the B string
with your first, second and fourth finger. Then go up with your first finger to the
12th fret on the E string. Go back down, 15, 13, 12 on B, 12 and 14 on G. I'll
play that one more time. That's the same phrase really, and then I do what many
people call a fill, which is a little at
lip improvised thrown in lick that ****** up the space between
two of those phrases. Goes something like this. Play that one more
time, 1, 2, 3. That's how that goes.
Now, this thing may be the hardest
thing we've played so far because there's a lot of these advanced new
techniques at use here. But we're going
to take it slowly and note for a note and
you're going to get it. We're going to
start off with a 13 fret B string, second finger. Then you're going to take the first finger on the
12th fret and hammer it onto the 14th fret really
quickly, like this. That is what's
called a grace note. A grace note is a hammer
on that is really quick. Instead of being very
rhythmic like this, it's just really quick. It's almost so quickly that you can barely
notice it, like this. After that you pull off back
to the 12th fret like this. Then you slide from the 14th
fret to the 12th fret on the D string with
your third finger and pull off to the10th fret. Now, this is quite a lot
and you need to really dissect node for node and
practice it node for node, do it very slowly
until you get it. I'll play it slow for you one more time up
until that point. Once you got that, you finish
off with the 12th fret, third finger on the A string, and that concludes
the little fill. Now, let me show you the context of which this comes up in after that third phrase of
the first section, 3,4. Notice how these
grace notes despite the tempo being so slow
are still so quick. That little hammer
on it. Is still quick even if you play the song, slow, that slide as
well, that slide down. Is the first time
we're sliding down, so far we've only done this.
But we haven't done this. This phrase alone can keep you occupied for a couple
of weeks, no problem. Let's play the fourth phrase of this verse and it goes a
little, something like this. This is the exact
same thing as before, but we're using yet
another ending. Start on the 14th fret, 12, 13, 15 on the B, 12
on the high E,15, 13, 12 on the B. Then grab the 15th fret on the high E string with
your pinky and bend it up a whole step. In context. Now, the vibrato here
is completely optional. You can do that it's very
difficult to do that on this string in this
register with the bend node, so it's completely optional, you can keep the tone
straight as well. That concludes the intro
and verse lead guitar parts for the track and up. I hope this was a cool
little challenge for you once you feel like you're ready for
the next challenge. I'll see you in the next lesson.
12. Mastering a Guitar Solo: You've made it this far. This is the Mount Everest of
this guitar lesson. This is the guitar solo under
core section of Amped Up. It utilizes all the things we've learned so far from string
bending, to pull offs, to hammer ons, to
different rhythms, different notes all over
the fretboard, etc. It's going to be
a true challenge. Be sure to tackle this one slow, one by one, lick by lick, and
you're going to get this. Let's have a listen to the
full speed performance. We're going to dissect it after. This solo is a little
bit more freeform and lick-based in the style of
Jimmy Page, for instance. It is less melodic
and less repetitive, but it's also a lot
harder because of that. Now, we're going to start with the seven thread on the D
string with our third finger, and we're going to wander up the G string on five and seven with our first and third finger, then go five and eight
on the B string, I use my first and
third finger for that. Let's play those first
five notes again. Once you have that down, you go back down to
where you came from, fifth thread on the B string. Seven and five on the G string using the same fingers
you climbed up with, so let's do that one
more time from start. Then you do seven
on the G string, five on the B string. Then you do five
on the G string, and in order to get that smooth, that transition from five
on the B to five on G, you're going to have to roll off your first finger like this. You don't want this. You don't want them to ring
into each other, but you also don't want this. You don't want that
hole in there. You want it nice and smooth
and elegant like this. Let me play what we got so far. You're going to play
it even more slowly. Then you have two notes on
the D string, seventh thread, third finger, 5, 7, 5, all on the D string, then 7, 5 on the A string. Eight and five on the low E
string with Fingers 4 and 1. Let me play that
second half for you. One more time slowly. Let's do the whole phrase. That is Phrase number 1. Let me play it a little bit
faster and count you in 1, 2, 3, 4. In the tableture, you'll find these little quarter
note bends like these. I'm just bending the
string up not to actually reach a different
pitch like this, but just to give the
note a little bit of life like this and
down here as well. That is, of course,
totally optional. If you're not comfortable
with that yet. You can just skip
that and play it with a straight tone.
Phrase number 2. We're going to start on
the lower octave with the fifth thread D
string first finger. We're moving to the seventh
thread with the third finger. Then fifth thread, first
finger on the G string. Third finger seventh thread on the G string and then slide up to the ninth
thread like this. That's the whole
first bit. Let me play that very slowly for you. One more time. This time, the slide in
this case, is very slow. It's not as quick as we used
to do before, like this, but it's very slow and
deliberate, and with the beat. Let me play the whole
phrase for you very slowly, and even more slowly. As you can see, sometimes
I'll incorporate some hammer ons
and pull offs that are not written
in the tableture. That's the improvised
nature of the rock guitar. These are the things I
sometimes do spontaneously, but I urge you for now to
keep it exactly as it is, so I'm going to
play it exactly as it's written one more time, and then we move on to the
next part of this phrase, which starts on the
eighth thread B string, eight and ten, first and third finger,
eight and 10 on the high E, same fingers, and then
slide up to 12 from 10. It's the same phrase as this just in a
different position. Let's do both of them
together slowly, 1, 2, 3, 4. Like that. In order to complete that second bar,
we need a few more notes. The first one being
the tenth thread on the high E string, 13th thread on the B string, third finger, and then the
tenth thread on the B string. Let's play that
whole second half. We're going to add two notes as a call and response thing. That was the question
and the answer is 13 and 10 on the B. The whole thing
goes like this, 1, 2, 3, 4. More slowly, 1, 2, 3, 4, and that is the whole second phrase. Let's move on to
Phrase number 3. Phrase number 3 uses
a technique that is super common in rock music, if you want to build tension. It's called a repeating lick. We have a set of three
notes and it repeats over again and builds
tension that way. Think of the solo
in Free Bird as a good example of a ton of
repeated licks thrown in. This one starts on the eighth
thread on the B string with the first finger and you
hammer on to the tenth threat. Next up, you're going to pick the eighth thread on
the high E string, and that is the third note
you need for a repeated lick, and the whole repeated
lick goes like this. Now, you can do that
as often as you want. Obviously, for the
sake of the solo. We're going to be
doing it five times. You're going to
have to count 1,, 2, 3, 4, 5, and then we go
into the next bit. But first, let me play that slow for you one more time, 3, 4, like that. Then you conclude this
phrase by bending up from the tenth thread
on the high string. As you hold that bend, you're going to pick
it one more time and release it and go to the eighth thread with
your first finger, and then tenth thread B string
with your third finger. That whole bend goes like this. That's really cool
when you get it right. Let's play the whole thing. That is the whole phrase.
I'm going to play it slowly for you one more time, 1, 2, 3, 4. Put some broader
on that last note, and everybody will be smiling. Let's move on to
Phrase number 4. For this one, we're
going to move all the way up on the neck. We're going to be starting on
the 17 thread high E string with our first finger. Pick that note, then move to 20 and 17 on the B string
with Fingers 3 and 1, and pull off right there. You're going to do
that twice like this. Then 19th on the G with
your third finger, 17th on the B, 19th on the G pull off
to 17. Do that twice. I'm going to play
what we have so far. That alone is quite
a bit of work and I'm going to do it
very slowly for you. Then go to 19 on the D string, 17 on the G string, 19, 17 on the D string. Tons of pull offs in this one. I'm going to play it
for you very slowly, one more time, 1, 2, 3, 4, and once you got that, you go to the 20th
thread on the A string. Hold that for an entire bar. Go to 17 on the D string, hold that for an entire bar. And then we have a
whole another lick. But let me repeat
what we got so far. We count in full tempo, 1, 2, 3, 4. Slower, 1, 2, 3, 4, and that leads us to
the very last lick that concludes the track. It starts on the 19th thread on the D string with
your third finger. You play that twice. Go to 17, then back to 19, 17 on the G, and then 19, 17, 19 on the D. Whole
thing goes like this, 1, 2, 3, 4. Do that slow. I'm going to play it in context with
the lick right before, 1, 2, 3, 4. That is it. Let's play the
entire solo really slowly, 1, 2, 3, 4. That is the entire solo section of the course of Amped Up. If you've mastered
this challenge, you're truly ready to go out
there and rock the world.
13. Final Thoughts: Congratulations, you've made
it to the end of this course. You've learned so much
about rock guitar, you've learned so much
about techniques, learned to play two
songs, and so much more. Remember to keep practicing, be patient. Rhythm is king. Practice slowly and
learn a lot of songs, but most importantly,
enjoy yourself. Now with that said,
I want to see you play these
tracks so film them, upload them to the
project gallery, and I'm going to check them out. That is it, thank
you so very much. Martin Miller,
signing out. Bye bye.
14. ‘High Voltage’ Slow Playthrough: I hope that was helpful to you, feel free to dip back in here at any time that you
feel you need to.
15. ‘Amped Up’ Slow Playthrough: I hope that was helpful to you. Feel free to dip back in here at any time that you
feel you need to.
16. Extreme Solo of ‘Amped Up’: Welcome to this bonus lesson. In this bonus lesson I
basically took the track Amped Up and I just shredded
over the chorus violently, so I put in a bunch of
really advanced licks. For those of you who
want to challenge yourself truly this is
the lesson for you. That was the lesson on the
advanced version of Amped Up, feel free to come back here at any time that you feel
you're ready for this one.
 Martin Miller, Performer and Educator