Transcripts
1. Lesson 1: Intro: Lesson one in truck. Hi, I'm Melissa Susan. Oh, I'm a freelance writer, editor and content marketer. I've been running my freelance business since October 2017. Fun fact. When I attended Lincoln's Talent Connect conference a few years ago and participated in the workshop they were offering, they told me there was nothing to teach me. I was already doing it all. Since launching my freelance business, I've gotten a number of clients and a ton of prospects through Lincoln, and I want to show you how to do the same. In this course, we're going to walk through each step of building out your linked in profile. We'll start with the basics and move on to more advanced features. This course can help you stand out, showcase your work, connect with potential customers and build your network. Thanks for joining my skill share class. Please take a moment to follow me on skill share. Be sure to upload your project to the gallery along the way. Don't worry. I'll be reminding you whenever there's something new to upload. A quick note and disclaimer is linked in right for you. Before you decide to do this course, I recommend thinking about your ideal customer. What do they dio? Where do they spend their time online? For example, The work I do is largely marketing for HR. Tech companies, marketing people and HR. People tend to spend a lot of time on linked in. If your audience is marketers, sales people or HR people, Lincoln is probably a great platform for you. However, if you're targeting personal trainers or designers, for example, Lincoln might not be the ideal platform. There's no harm in building out your presidents, but you might find another channel is a better fit. Clinton, like any social media platform, is always changing its features and algorithms. Everything I'm going to discuss today is accurate at the time of filming. Just be aware that things might look a little different in the future. Michael is to teach you some good habits and behaviors that should continue to be relevant . Even if some of the future has changed. Ready, Let's get started
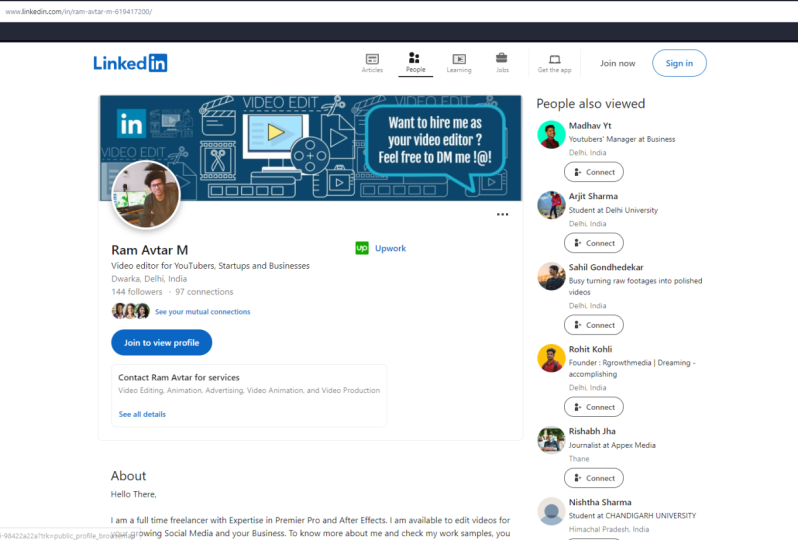
2. Lesson 2: Lights, Camera, Action! Upload a Professional Headshot: Lesson two. Lights, camera action Upload a professional headshots. Humans are visual creatures. Arlington Profile Image is an opportunity to make a positive first impression to show that we are warm, trustworthy and professional, according to Lincoln's own research profiles that have photos get 21 times more profile views and nine times more connection requests. This is especially important if one you have a common name and you want people to know which one is you to your reaching out to people after networking in person and want to help assure them you're the right person. Three. You're trying to build a consistent brand for yourself across the Internet. People really do want to put a face to a name. Points to keep in mind, dressed in a way that's appropriate to your role. If you're a freelancer or have your own business, you can probably be a bit more creative, but you still wanna look professional and approachable. Use natural lighting if possible. Your photo can include your head and shoulders, but not too much more of your body or it will be too small. Use a photo that's a square shape and about 400 by 400 pixels. The file size limit is eight megabytes. Here's how to update yours. Go to the linked in website. Find your photo in the top right corner and the word meat. Click on the drop down menu, then click on the View Profile link in the top right corner of your profile. You'll see a little pencil icon. Click on this to edit the top section of your profile page, upload your image center and zoom in or out as necessary. Click save and you're done for your project. Upload a photo to your profile. Choose from one you already have, or ask a friend to do a mini photo session with you. Extra credit. Upload a background photo as well. Make sure it's not too complicated or hard to read. The image size for this is 15 84 by 396 pixels.
3. Lesson 3: Create a Compelling Headline: Lesson three create a compelling headline. Your headline is the sentence that appear is right below your name on LinkedIn. Many people use their current job title, but this is an untapped opportunity to differentiate and brand yourself. Any time you show up in someone's feed, your headline comes with you a few pointers To keep in mind, your headline has to be 120 characters or fewer. Issue the attention grabbing think newsstand tabloid but not too trashy. It should convey something meaningful while also encouraging people to click on your profile to learn more. For example, mine is freelance content marketer writer, an Oxford comma enforcer. I chose this because I think it's more entertaining than just saying editor, and it shows a little peek into my nerdy sense of humor and my editing style. This is one of the things that people comment on the most whenever they reach out to me on LinkedIn. Here's how you update yours. Go to the Lincoln website, find your photo on the top right corner and the word me click on the drop down menu. Then click on the View profile link in the top right corner of your profile, you'll see a little pencil icon. Click on this to edit the top section of your page. Add your copy to the headline box and click Save You're Done for your project. Come up with a clever headline and uploaded to share with the group.
4. Lesson 4: Perfect Your Elevator Pitch with a Succinct Summary: lesson for Perfect your elevator pitch with a succinct summary. Your summary is another prime piece of linked in real estate. It gives you the chance to provide a bit more context than your headline and at a little more personality than your experience section. Think of the summary as the opportunity to tell your story. How do your various experiences and interests weave together? What opportunities are you looking for? Who do you hope to connect with? I recommend writing your summary in the first person. E g I. Me, My. This will keep it conversational and compelling. Keep in mind that it's OK to talk a little bit about your outside interests. It doesn't have to be all business. Note that the maximum character count is 2000. Here's mine. I'm a creative professional who's slightly obsessed with the written word. I'll happily expound on apostrophes and em dashes if given the chance. I have educational qualifications in copyrighting editing and proofreading, and my work experience includes content marketing, social media, management, journalism and curriculum development. I spent a significant portion of my career in Tokyo, and I'm always happy to chat in Japanese or about Japanese topics in English. As a freelance writer, editor and content marketer, I love to help people and companies to tell their stories in clear, compelling and creative ways. I tend to focus on the intersection of people and work, and the majority of my clients are B two b HR tech companies. But even if that doesn't sound like you feel free to get in touch, if you like my style and we can see if working together would be a good fit, here's how you update yours. Good as a linked in website, find your photo on the top right corner and the word me. Click on the drop down menu, Then click on the View Profile link. In the about section, click on the pencil icon on the top, right? Make any changes you like, then hit save and you're done. For your project. Write a summary that share something about your background, interests and personality. Consider who you want to connect with and what steps you'd like them to take. Upload your work to share with others
5. Lesson 5: Mix it up with Multimedia Additions: Lesson five. Mix it up with multimedia editions. The past few lessons We've been word nerds focusing on filling out the written parts of your profile. Now it's time to mix it up a bit with some other media. Depending on the type of work you do, you probably have some examples. You can share photographs. You've taken mock ups. You've designed videos of you speaking or presentations you've put together. The media section of your profile allows you to add or link to external documents, photos, sites, videos and presentations. This is a great way to showcase your work and might make your profile more dynamic and visually compelling. Here's how you update yours. Go to the Lincoln website, find your photo on the top right corner and the word meat. Click on the drop down menu, then click on the View Profile link. In the about section of your profile, you'll see a little pencil icon. Click on this and then click on upload selector media files and make any changes you'd like to the title or description and then click. Apply for your project. Include at least one media link or file on your profile. Take a screenshot and upload it to share with everyone
6. High-five Break!: High five break. This is just a quick interlude to say congratulations. You've now completed the intrasection of your linked in profile virtual high fives all around who it's now going to be so much easier for people to find you and learn the essentials about what you have to offer. This is an amazing first step for your project. Review everything you've done so far. Are you happy with it? Make any changes you'd like to really help your intro section shine.
7. Lesson 6: Build out Your Background Section: Lesson six. Build out your background section. Your background section includes a few subsections experience, education licenses and certifications and volunteer experience. A quick note. The background section is more important when you're looking for a full time role. It's not a significant when you're looking for freelance work, so we won't go into too much depth on this as we will for other sections. But it's generally a good idea to fill out as much of your profile as possible, so I'll give you a few quick pointers. Education licenses and certification and volunteer work are pretty self explanatory. Fill out the relevant information for these sections or skip them if they're not relevant to you. The experience section gives you the opportunity to talk about your past roles and companies when you worked there and what some of your main responsibilities and accomplishments work. A general best practice is to talk about what you achieved or what tangible results you had . For example, maybe you boosted Blawg traffic by 20% over a three month period, or reduced the number of customer complaints whenever you can give specific examples and share the impact your work hat, how to update your background section on your profile page, click the blue box that says Add profile section. You'll get a drop down menu where the second option is background. Click on that, then select which part of your background you want to fill out by clicking on the plus sign next to it. Make whichever additions or edits you'd like, then click. Save for your project. Fill out your experience section using the pointers we've discussed, upload an image to share with the group.
8. Lesson 7: Show off Your Skills: Lesson seven. Show off your skills. The skills section allows you to list out your top skills. People you've connected to can endorse you, which is a quick way of indicating that they vouch for your competence in these areas. A quick note. I don't think this section is as important as others, because it's all about telling rather than showing. But there's nothing wrong with identifying your top 10 or 15 skills, especially if you're trying to get noticed. For these abilities. How to update your skills section on your profile page, Click the blue box that says Add Profile section. You'll get a drop down menu where the third option is skills. Click on that, then add up to 50 skills. Lincoln will make recommendations to you based on your profile, but again, you can be strategic based on what you'd like. People to potentially find or hire you for for your project, choose 10 to 15 skills and add them to your profile. Upload a screenshot to share it with the group extra credit. I believe one of the most important aspect of using LinkedIn is treating it like a community. You're not just there to share your own perspective or voice. You're there to support others. That's why it's a great practice to endorse people in your network. You don't need to go overboard, but try to spend about 5 to 10 minutes endorsing the people in your network for their skills. It's a really simple way to help out your network.
9. Lesson 8: Own Your Accomplishments: Lesson eight. Own your accomplishments. This is your time to shine. Accomplishments is the section where you can really build out your portfolio and show off your work. Ideally, you'll be using the section to show the work you've done for previous clients or employers . You can also show off work you've done for your own blawg, a school project or through a course that you've taken. The important thing is to give potential clients a clear idea of what you can do. Accomplishments is divided into the following subsections publication. Patent course project, honor or award, test score, language or organization. Personally, I find publication and project are the section that I update the most. I try to make a habit of updating my publication section about once a month. This way. If anyone contacts me and wants to see recent samples of my work, I can easily pull them or just direct people to my LinkedIn profile. How to update your skill section on your profile page. Click the blue box that says Add profile section. You'll get a drop down menu where accomplishments is the fourth item on the list. Select it, then choose which type of accomplishment you'd like to add. Lincoln will prompt you to add in relevant information such as you RL's dates and descriptions for your project. Update your accomplishments section, take a screenshot and share it with the group Extra credit. Create a recurring calendar reminder for yourself so that you remember to keep your accomplishments section up to date.
10. Lesson 9: A Brief Interlude about Building Habits: Lesson nine A brief interlude about building habits. We're now done with the basics of building out your profile. Great job. I want to take a moment to encourage you to build some good habits on Lincoln to get the most out of the platform. This means periodically reviewing your profile to make sure it's up to date, adding a new information and projects frequently engaging with other people by endorsing their skills, liking and commenting on their posts and connecting with new contacts. Soon after you've met them, you might find it helpful to create a recurring calendar event. Set aside 10 minutes every Monday or one hour on the last Friday of the month. Whatever works for you, just remember that you want to make a regular habit of using LinkedIn. The more you use it, the more you'll get out of it.
11. Lesson 10: Wow 'Em with Your Words: Blogging on the LinkedIn Platform: wasn't 10. Wow, I'm with your words. Blogging on the Link 10 platform. You may have noticed that a few years ago, Lincoln made it possible to publish wow posts through their platform. Thes block posts will show up in your linked in profile as well as in Google search results . So it's a great way to share your thoughts and get your name out there. If you're a writer creating a few block posts, Burlington is a no brainer. It helps share your work with a wider audience. Even if writing isn't the mean service you're offering, you can still use Blob post to educate your audience about your service. For example, let's say you're a photographer and you take professional headshots. You could write a block post that explains the benefits of having a professional head shop , mentioning some statistics about how Lincoln profiles with photos, get mawr engagement and connections than those that don't. And if you've already worked with clients, you can include some of their anecdotes or testimonials. Another way to use the blogging platform is to share case studies. You could talk about a specific project you worked on. What was the problem, how did you solve it? What were the results? Note that if you're going to use a specific person or company's name, you'll want to get their permission before publishing it. Even if you're not a professional writer, you want to make sure you're writing comes across as thoughtful and professional. Here are a few tips to help you with your blog's post writing. Start with an outline. Think about what you want to say in the intro. The main points you want to cover and the conclusion. Use subheadings to help break up the text and make it easier to read. If possible, use images to illustrate your points. Choose a few pull quotes that will capture people's attention and make it easier to scan your piece. Ask someone to review your draft for clarity. If you don't trust your own editing skills, try using a service like Graham early to check your spelling and grammar. How to upload a block post on Lincoln. Open up, linked in in a browser window in the box where you go to share status Update. Click on the link that reads. Write an article on Lincoln Copy and paste your draft onto this page, you can upload a covered image. If you do this, make sure you're using an image that you took or one that's available under the Creative Commons license for your project. Write and publish a block post through Lincoln. Share the link and or a screenshot with the group. Once you've done that, don't forget to share with your other social networks to extra credit. Plan out your next few block posts. What other topics will you cover and when do you plan to write and publish them?
12. Lesson 11: Stay Top of Mind with Status Updates: Lesson 11. Stay top of mind with status updates. You've done a ton of work so far, so let's take a moment to celebrate who Now? Let's talk about a few strategies to help you continue to the make the most out of Lincoln , even if you don't need to overhaul your entire profile. One of the easiest ways you can stay on people's radars is by updating your status as a writer. I always try to share my latest projects and make a habit of adding them to my publications at the same time, you can do the same any time you complete a new project. As long as it's not confidential, you can also get very creative with your status updates. Some people like to tell stories that help showcase how they think about their work. Take a photo that shows you working with a client or that shows off the end result. If you like to make videos, you can create a short video preview of your blog's post or share what you've been working on lately. Decide on a schedule you feel comfortable with. Update once a week, a few times a week or every weekday It's okay if you miss a bit here and there. But the idea is to try to keep a steady stream of content. So you're on people's minds for your project. Update your status, take a screenshot and share it with the group.
13. Lesson 12: Let's Put the Social Back in Social Media: Lesson 12. Let's put the social back in social media. It can be easy to focus on the technology and forget that at its heart, social media is all about helping you connect with other people. Here are a few of my tips for how to go about this Don't be shy about connecting with people as long as there is some sort of actual connection. For example, if I've met someone at a conference or event or we've collaborated via email, I will send them an invitation to connect, always personalize it and mentioned how you know them personally. I don't recommend sending invitations to someone if you've never interacted with them at all. I don't tend to accept this type of request unless the person has a compelling reason that they've explained. Don't just use lengthen as a platform for blasting out your content. Share interesting content that you find from various sources, especially if it's something you know your clients or potential clients would find useful. Spend some time looking through your feet like and comment on other people's posts. If someone is looking for help with something, share their post with your network fun fact. We ended up hiring an intern at one of my previous companies because I shared the job posting with my network. My friend shared it with her network, and my friend's brother in law ended up seeing the posts and getting the job. Like any community, it's not just about taking. It's about giving end taking. So try to adopt the mindset of how you can be helpful and contribute to your community. For your project. Spend 15 to 20 minutes getting social on Lincoln. Send a personalized connection request to someone you met recently like comment or share a status update from one of your connections. Or spend some time endorsing or writing a recommendation for one of your contacts, Then share your update with the group. Extra credit. Commit to a regular schedule of getting social, for example, decides you'll spend 20 minutes a week on these types of activities.
14. Lesson 13: Recap: Listen 13 recap. Congratulations. You've made it to the final lesson in this course. Here's what we've covered the essentials of completing your linked in profile, especially to show off your work and capture potential clients attention. We talked about how to fill out your introduction, background and accomplishments. We explored how to use Lincoln's blogging platform to share your work and get noticed. We considered how to get creative with your status updates. We looked at ways to think beyond broadcasting your own agenda and put the social back in social media. You should now have a kick butt linked in profile and presence. Be sure to share some screenshots with the rest of the group so we can see your completed project. Thank you so much for your time and attention. Did you enjoy this course? If so, I'd be grateful if you could take a moment to review it to help get the word out there toe other skill share students
 Melissa Suzuno, Writer, Editor, Content Marketer