Transcripts
1. Class Introduction: If you've been struggling
to draw flowers, then you come to
the right class. I designed this class to
teach you how to draw the most common flower
shapes step-by-step. Whether you are a beginner or
a more experienced artists. And maybe trying during
flowers for the first time. In this class, I will show
you how to approach drawing flowers from the basic shape all the way to the
finish flowers. I will show you how
to do the flowers from different angles as well. Hi, I'm Catia, I'm an
artist and online teacher, and I'm based in Sicily, Italy. So let's have a look at what you will learn in this class. I will start by giving you an introduction
on flower shapes. Then we will start with
the simplest shape, the plate shaped flowers. And we will draw them viewed
from different angles. Then we will go on to draw
a funnel shaped flowers. Bell-shaped flowers,
cup-shaped and urn shaped. Will show you pictures of
real flowers as examples. For each flower we will drop. As a bonus, I have included cheat sheets for
each flower shape, a flower shape template. And there is a video where
I show you how to make the 3D shapes and photos of different flowers for
you to use as practice. This class is for you
if you're struggling to draw flowers in a
more realistic way. By the end of the class,
you will have learned a simple method to draw flowers. And you can apply
this skill to draw different types of flowers
and maybe even a composition, and then paint it and make
a nice print or a cat. So if you're ready,
let's get started.
2. Class Project: The project for this class is
of course, to draw flowers. I have provided you with some cheat sheets for
each of the flower shape. And what I would like you to do is to watch the lessons for the particular flower shape
and then go on to practice with the cheatsheet or even on your sketchbook
if you prefer. Don't be frustrated. If you don't get the results
they want straightaway. It would take practice if
you've never done this before. But just keep practicing
and you will get there. Don't forget to post
pictures of your flowers in the project section so I
can give you feedback. And also if you
have any questions, don't hesitate to ask
because I'm here for you.
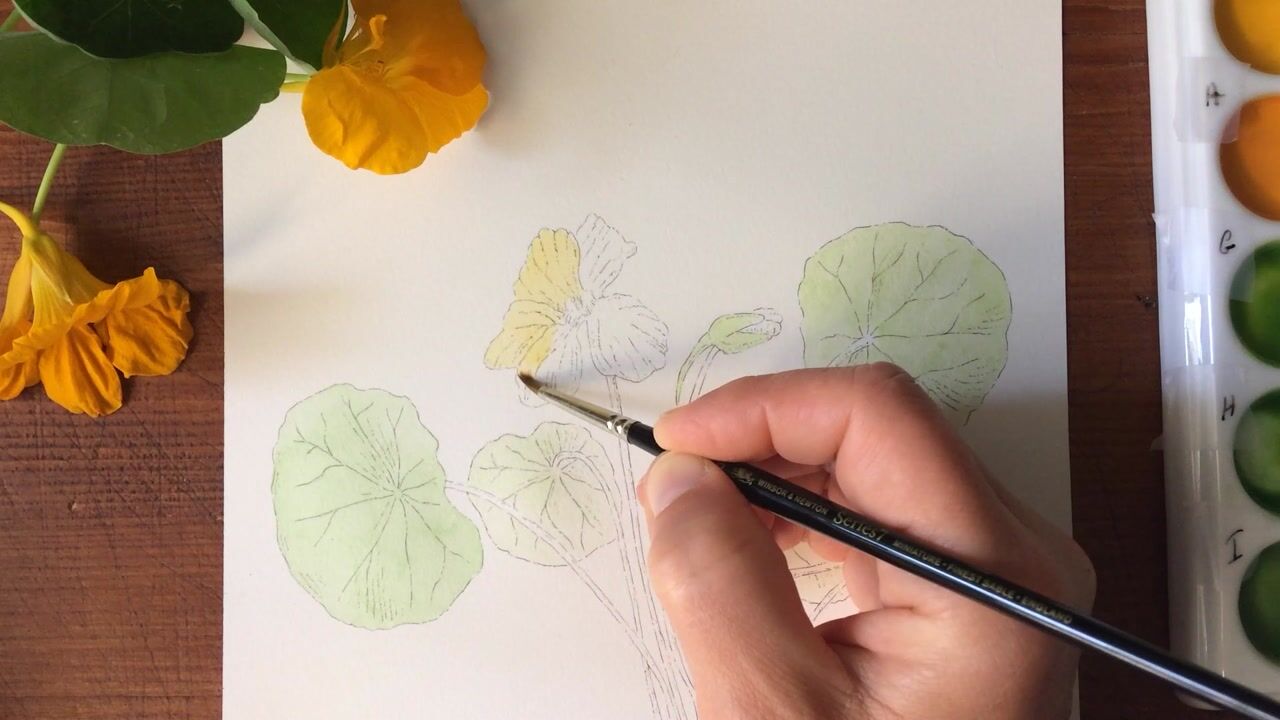
3. Materials: The materials for this class, I really just some paper. You can use a sketchbook
like this one, or you can use just some
loose sheets of paper. It doesn't have to
be expensive paper just some printer
paper will be fine. Then you will need some
pencils and erasers. So either mechanical
or normal pencil and the plastic
eraser will be fine. Or if you are one of these, but just know my eraser
and pencil will be great. And then you can use a template to do the
circles if you want, or you can just do them by hand. And actually I advise you to try and practice doing
the circles by hand. And then I have some
downloads for you. So this first one is a template to make some flower shapes. So of course they
are quite, you know, you have to use
your imagination, but the shape, the
main shape, e.g. this is for the cup shape. And it's just for you to see how it differs from different, you can look at it from different angles and see
how the light falls on it. This is for the
funnel shape flowers, and this is for the
urn shaped flowers, which you will see during
the lessons what they are. But you don't have to do this. Of course, if you'd like to. And they will be a lesson showing you how to put these together, but
they're very simple. And then I also put
added to your downloads, these cheat sheets,
where I show you the different shapes that I'm going to talk about
during the lessons. And there would be an
example of the flower and an example of the actual
the shape of the flower. And then if I put
it a bit closer, you will see very faintly. There is an example of this
shape where you can draw over it and you can practice
drawing the shapes. And then there's
some blank space. So you will have one of
these for each shape. And you can download them if you want and practice with this. And if you want to
do the flower shapes that I showed you
before, these ones, you will need also some tape and scissors to cut the shapes. And I think that's all you
need to take this class. I'll see you in the next lesson.
4. Introduction to Flower Shapes: Before I start to show you
how to draw the flowers, I wanted to give you a
little introduction just to show you basically when
you're drawing flowers, like with anything else, really, the most important thing to
do is to look at the shapes. So for a flower like this, see, the main shape is a circle for
the outside of the flower. Then another circle for
the center of the flower. And that's all you need. But if we look at the
flower from the side, then the shape changes and we have more of a
triangular type sheep. So some delayed this with a line may be
here for the calyx. Then you add your petals. And if we have a
cup-shaped a flower, then the shape is
like a cup or bowl. Um, I've heard both
ways to define this. And this is more, so if I turn off this layer, this is more like a bowl shape. And then we have these flowers, which are the bell-shaped. And of course, like
the name suggest the, the main shape is like a belt. So if I turn this off,
you have a belly here. And then we have the
funnel shape flowers. There should be a viewer
Chile from the side, which shows you better. So this shape, which is like
a funnel, which this off. So its final shape. And then if we see this the
other side of the flower, again, it will be an
elliptical shape here. So we're going to use
lots of ellipses. And then in here, this type of flowers or shape. So you have this shape here. And again, if it's a closed flower
like the one that was just in the
picture, is like this. More or less like a nick really. But usually you always see a little bit a
list of the flower. That's why it's called an n
shape rather than an egg. Very often, It's more
something like that. So there are different flowers
that come under this type of firm classification
like n shape. And the glucose is e.g. so the shape, the main shape is like the
one we saw for the tulip, but then here they
go much narrower. And again you have an
ellipse here for the petals. And I will show you how
to use these shapes. But yes, that was the
main thing I wanted to, um, to tell you really. And there's another shape
talking about ellipses. And this one here, I already have the shape here. If you want to draw
the flat type flowers, the plate shaped flowers seen from an angle
or from behind. Very often you would
need an ellipse shape. Okay, so I think we're
ready now to start drawing.
5. The Plate Shaped Flowers: In this lesson,
we're going to draw a disk or plate shaped flowers, which are the flowers like the marigold or the
daisies like these ones. And if you want to draw
a flower like this, seeing from the front. So I have some examples here. So seeing this view here, you need to draw a
circle first and I will keep my fingers and
my wrist still. We'll move my arm to do that. And don't worry if it doesn't
come a perfect circle. That was Giotto used to do that. But for us, normal human beings, you might have to go over
the circle a few times. And I'm going to do this
quite dark so you can see it. And of course, the
more you press down, the easier it is,
the disabled doesn't actually come very round. But I'm making it like this so you can see
properly on camera. So you do a circle. You know, different sizes depending on how big
you want your flower. And you do a smaller
circle in the middle, more or less the center
of the bigger circle. And then you usually do a little sort of
placeholders for the petals. Again, always do this slightly. So I did for, to start with a sort of marking the center of the
circle, the smallest circle. And then I divide this space. You can do another
tool. You can do more. But I would do maybe
one here, like this. Alright? And then you can start
drawing the petals. And the petals are
always different. So in this case, in this picture here, the petals, so the little
dip in the middle. If you can see that. But some of these flowers, some of these like
plate-like flowers, they have a pedal
that ends pointy. So sometimes his sake
of sort of zigzag. So it depends on your flower. So I'm just gonna do a
little dip for this one. And then just followed. You can actually do lines, always very light lines. I'm going to do it
stronger to follow for your petal, something like that. And it will be,
you will have even more of a guideline
to do your petal. So you could do a little
movement like this. And of course you can
always turn the page. So if I put it this way in a I'm going
to move this out of the way. And I turned the page like this. So it might be easier for you to draw the petal going towards one direction
rather than another. So you can, if it's
easier for you to work going away from you, then you can put it this way
and you can keep turning it. I quite like to work towards me that this one is not
as good as that one. So it's a matter of
personal preference. You can never be afraid to turn your page and never be afraid to erase if you don't
like something. Because it's rare that
you're going to like something first time
that you do it. Or at least that's
what happens with me. I always go over and you can do this with very sort
of light sketchy lines. I'm pressing down
because otherwise you won't see it on camera. And then once you have
the first row Pinto's, you can add a second
row of petals. And this will show like,
like these flowers, they have more than
one layer of petals. So you can add some that you
can see a bit more of them. Some you can be, you
can see a bit less. Okay? So that's the main flower. And then you can do the center. And for the center, I just do, if it's not botanical painting, I just do little
squiggles like this. So to show you, on a larger scale, what I do is just little squiggles like this. You can practice on
another piece of paper. So just do all over first. And then in the case
of these flowers, e.g. the center is not
completely flat, is a little bit dumped. So if you want to
give the impression of light and shadow, you can make this side darker, either with a pencil or
when you use the color. And of course you
will have to do that with these petals as well. So make it like a little
shadow on this side.
6. The Plate Shaped Flowers Side View: Alright, and then if you
want to see this flowers, this type of flower from us, from an angle, from
one slight angle. Sometimes they are tilted
like somebody's are. Then you need to draw. You need to start with this. Light up again. You need to start with an oval
shape is the other way. Round shape. So again, when is a big shape? Try not to move your wrist, but move the entire arm. Okay. So I'm gonna make it
darker so you can see it. If you keep these
lines light enough, then you will be
able to erase them. And then for the center, again, we have around the
middle of this, we have a shape here which is also I usually tend to do
it above the middle line. And he's also an
ellipse as well. Maybe a bit bigger. Then you can erase
the extra lines. And again, I will mark the first four lines which are
the center of the ellipse. And I will divide this Into, I can know the two petals. And in this case, it
depends how your petals, you want to represent
your petals. So the petals can go this way. So make it darker. And basically that way it will be something like like this. So it looks like the
petals are folding towards the stem,
towards the outside. Or if it's a more
of a cup shaped, more a bit like a,
like these flowers. Then the petals will go
like that this direction. Because they are curling
upwards like this petals. And as long as you
follow the shapes, then you would give
the impression that the pedals are moving
towards one way or another. So this one here, we just carry on like this. So these are the back are
going towards this side. And you can find the
real flower like these different orientations of the petals and
really observe it. And then we can start
drawing the petals. So as you can see, I am following the center line. And that gives the
impression that the petal is folding this way,
like opening up. And for the back petals
you can do the same. So something like this. And then here maybe
you see a bit less. And this one here there is maybe one
petal like this, and then we can do
another one here. And you get the idea,
basically like that. And then of course, these center lines, if
you don't need them, you can just erase them. And for the center
you can do the same. So little squiggly lines. First Oliver, and
then you can go back here and do a bit darker. On this side.
7. The Plate Shaped Flowers Back View: So far we've seen how to draw this flat or plates shaped flowers from the
front and from the side. But now wanted to
show you how to do this type of flower
seen from the back. So something like this
or like these flowers. It's black and white
picture but you can see here, the flower is seen. From the back. You might want to add this
to your composition, e.g. so to do this, you will need again
an elliptical shape. I'll just show you here. So as you can see, is an elliptical shape. And we do that here. Slightly more rounded. So something like this. Move it a little bit. And then we need another
around the center, we need another
elliptical shape. But this time, I'm
going to do it more. Underneath the central line. If you see here, these petals here are
shorter than the top ones. So this petals here would be
shorter than the top ones. And then again, I
will divide this into four first and divided
the space in-between. And then you proceed like
with the other flowers. You can leave this little
marks as they are, or you can do longer mark to know where the
petal should go. And I'm going to do them
slightly curved because they are sort of curving upwards. Of course, it depends on the
flower that you are drawing. But generally select that. And actually on these flowers, this bottom petals
are curving a little bit the other side. So we're going to
do it that way. And then these are curving
towards the right. Always observe you
flower when you, when you during appending. Then we can just do the petals. Alright? So we've
done all the petals, you can do the ones in-between. And then here, I've
drawn these petals here. And again, always try to keep
your pencil lines light. And now we need to draw
the back of the flower. So different depending on
which flower you're drawing. But some just going
to add the stems. And then you can erase the pencil that
you see at the back. So append this, sometimes it's a little there's a little
movement like this, so it's not straight. And of course this will
look better when you refined your, um, your drawing. And so that's the flower
seen from the back. They have another version here. This one here, where the
head was tilted a bit more. So we'll see that
in a different way. So the top petals, they looked shorter
than the bottom petals. And then you have the
calyx here and the stem. Alright, so this is how you draw the flower
from the back. And in the next lesson I'm
going to show you how to draw a side view of the
same type of flowers. And see you in the next lesson.
8. The Plate Shaped Flowers Unopened: In this lesson, I'm going
to show you how to do a plate shaped flower when it's actually
not completely open. So it looks a bit like
this from the side. Or you can have
visions like that. You can see a little bit of
the back petals as well. So it will be your picture,
something like this. So to do that, I start
with a rounded shape, almost like a circle, but not very big and
not a closed circle. And then you will
have sides that come out more or less curved, but they're not straight, so they're curved lines,
something like that. Then you have, if you don't
see the petals at the back, it's almost like a
triangular shape, but rounded at the bottom. And then you will
have around here, depending on the
flowers, always a calyx. So you will only do
the little symbols. I think they're
called these ones. And again, it depends on the
type of flower you have, more or less of these. And then you have the petals. That's the word I
was looking for. The petals are coming
up and turning. These lines should be
always quite faint, but you won't be able
to see it otherwise. Then you just draw your petals. The center one is a
bit more straight and then the other ones are kind of curving to the side. And then you can do maybe a
couple of more like this. And maybe you can see a
little bit of the petals. And then you can just erase your construction lines
and then add the stem. And this can be
shorter, of course, uh, or can be even like
narrower and taller. So it depends on the flower. And if you want to
do this view here, so what you do is you
do the same thing. So you start with a circle, semicircle type shape like that. And then the sides are
not going out as much, so they are straighter. And here there is the
line for the calyx. So you have your, your calyx here and
then you actually see the back, the back petals. So you will have to drain
another elliptical shape. And then you do the petals, which are straighter
than we had before. And then we see these
petals going round. And when your construction
lines are fainter, you can erase them very easily. And you're left with a
side view of the flower. So we've seen how to draw the plates shaped flowers
from different angles. So the front-facing, the side, different directions of the
side of the petals from the back and from the side. But when the flower is
not completely open. In the next lesson, we're going to see how to
draw a funnel shaped flowers, which are flowers
like these ones. So like they come volvulus,
the morning glory, even the Frazier or the dura, which is called Brodmann's area. Now, It's a bit faint, but I will show you how
to do these flowers. I'm starting from
the next lesson.
9. The Funnel Shaped Flowers Side View: In this lesson, we're
going to see how to draw the funnel shaped flowers. So I showed you this before, but is this flowers
like the morning glory, the cobol blues, the Tura, flowers like this one, e.g. and if you look at the shape
is shaped a bit like a, like a funnel because they have this long calyx and normally this type of flowers don't
have separate petals. If you think about it. Most. I think all of
these flowers, the flat, funnel shaped flowers,
they have entire coronas. The debaters are
all fused together. To show how to draw
a flower like this. From the side view,
you need to do first the funnel shape. So it's like a V shape. And then at the
bottom is kind of rounded and maybe a bit larger. And then the flower's petals are usually sort of this movement. This end, because we see a little bit of the
other side of the flower. You will need to have this
elliptical shape here as well. So I'm going to make
it a bit darker. And if you look at the pathos, they have this movement. So they're not
completely straight. So you can do a little
bit of a movement there, and then same thing here. And then just with the lines, you will give the
impression of the debt. Because with this
type of flowers, you can only give a
real impression of debt when you add the
shadows and light. At least when it's
this sort of shape. And then generally
five little staples, but you don't normally see all of them because they're
the ones at the back. So then the little stem here. So that's the funnel shaped
flower seen from the side. And of course it can
be larger as well. So these are, if I remember, well, petunia is,
these are much larger. For this, you can do a larger
start with a ledger funnel. And then again do the elliptical
shape here to help you. So we have our funnel
here, the starting point. And then look at the general
shape of the petals. So these ones are more straight so you don't need
to do around here. You don't need to do the, the wavy lines,
something like this. And then we have this petal. This petal here arrives. Basically it's always finishing almost where the center is here. I'm pressing quite hard, but you can use a sketch
lines to do this. And then the other petal
is quite rounded again. And then the calyx, in this case it's sort of
coming down a little bit. So the disciples
are not straight. So we have the
foreshortening here. This is a very quick
sketch, so perfect. But just to show you how
this should be approached. And then you can do any
little detail afterwards and you can get rid of
the construction lines. In the next lesson, we're going to see how
to draw them with a view that you see more of the
inside of the flower.
10. The Funnel Shaped Flowers: In this lesson, I'm
going to show you how to draw this funnel shaped flowers where you see a little bit
more of the Corolla. So when you have flowers like these that you can see
a bit more of the inside. Again, what you do is
you start with your, with your funnel shape. So let's say the
flower goes this side. So depending on the flowery, it would be more or less
open here, more or less big. And you will need, in this case, your 0 shape. Because you can see the
inside of the flower. I'm going to make it
a bit darker. Then. Usually there is. You can see a little bit here because there is a
space here going, you can go inside the flower. And then the petals
are again all united. So they're not single petals. And you can again use some
directional lines from the petals to help you
with a general direction. So we have maybe a petal here, and here can be with
the petals separate. These petals are usually quite
large from these flowers. And sometimes there is
a little dip there. Like that, depending
on which flower. Okay. So and this can be, again, depending on the flower,
can be large like this, or it can be much more narrow. Some of these funny
shaped flowers, I have very narrow. And colleagues, I
think this is called, it depends on your flower. So it's either narrowly,
these are large, going, opening up like that. Then you will have your
symbols here. You're stuck. So always start with the shapes and you will be fine to
do this type of flowers.
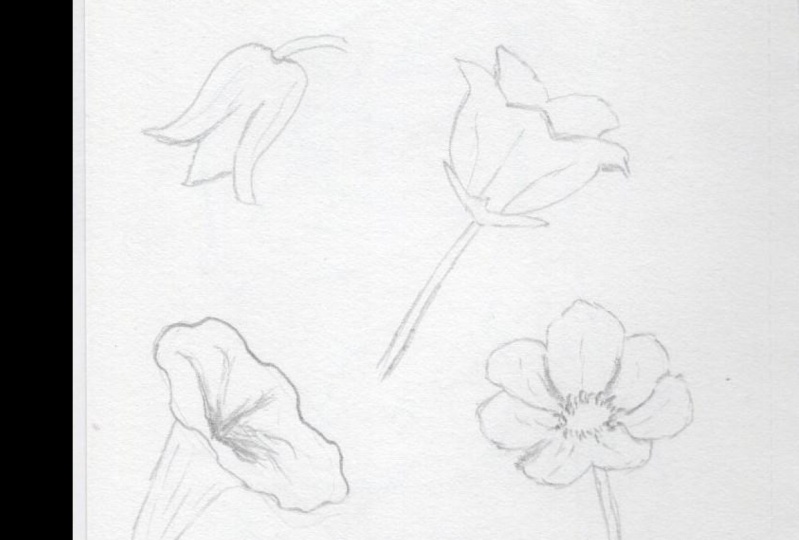
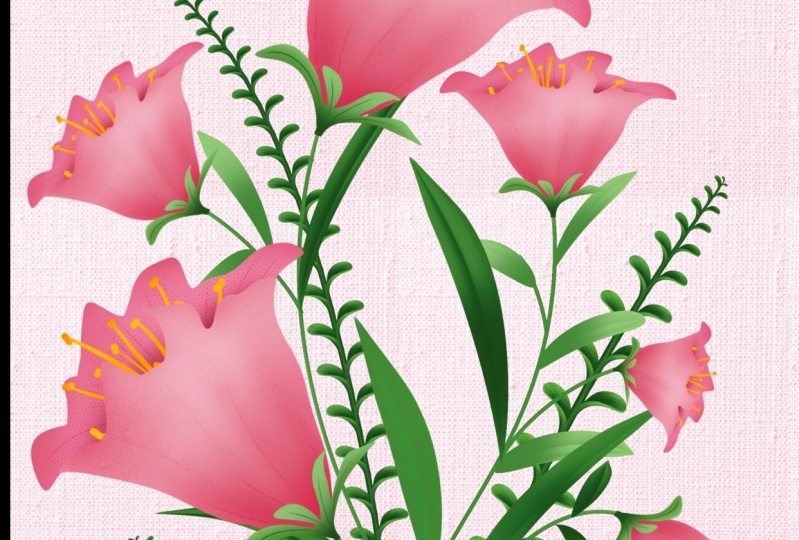
11. The Bell Shaped Flowers: In this lesson, I'm
going to show you how to draw the bell
shaped flowers. This can be the blue bells, the hair bell or compound ruler, lily of the valley. This type of flowers
like this one here, e.g. so as you can see, it's
got this bell shape. And to do that, you can draw these flowers. Let's see if I can show
you from this side view. And again where you can see a bit of the inside
of the flower. And these are the small
lily of the valley flowers. So we start again
with the shape. And of course it was gonna
be the shape of a bell. It's going to be
rounded at the top. And it goes out the
side like this. And you have your bell-shaped. Then you look up the petals. These ones here,
they are separated, but they are in dire up to a certain point and then
the separate afterwards. So you can start e.g. with this petal here. So round here. This is a petal. And these lines are a bit dark, but you won't see other ways. Then we have this
sort of center. And then on this side, more or less the same thing like that. And then we have the
center petal that comes out from underneath. And then here you
have the little stem. Then you can get
rid of your lines. And of course you can make all
the adjustments afterwards to the shape. Okay? And then the hair belt
or the combined ruler. It's a similar shape, is a bit larger. You can do the bell-shaped
the other way round. And it's going to
be a bit larger. And if you want to show the petals from the
other side as well. So if you want to
share a little bit of the inside, again, you just draw your ellipse and then you do
your, your petals. So these are kind of a point t. So this is seen from the
side and then you can see the ones on this side. And these petals are
actually entire as well. They separated. Okay, and then you
have newly do staples. And if you want to
do something like a lily of the valley
type of flower, then you bail is
quite fat in short. You have, I'm going to do it quite big
here. So you can see. But it's a short
and larger bell. And the lily of the valid, they have various
more sort of did. The entire Corolla
is just one piece, is not divided into
different petals. But you can see
the little petals. So Delta point the petals. So you can see like this
shape is triangular shape, which is a, more or
less this one here. And then a little stem. And these are the
bell shaped flowers.
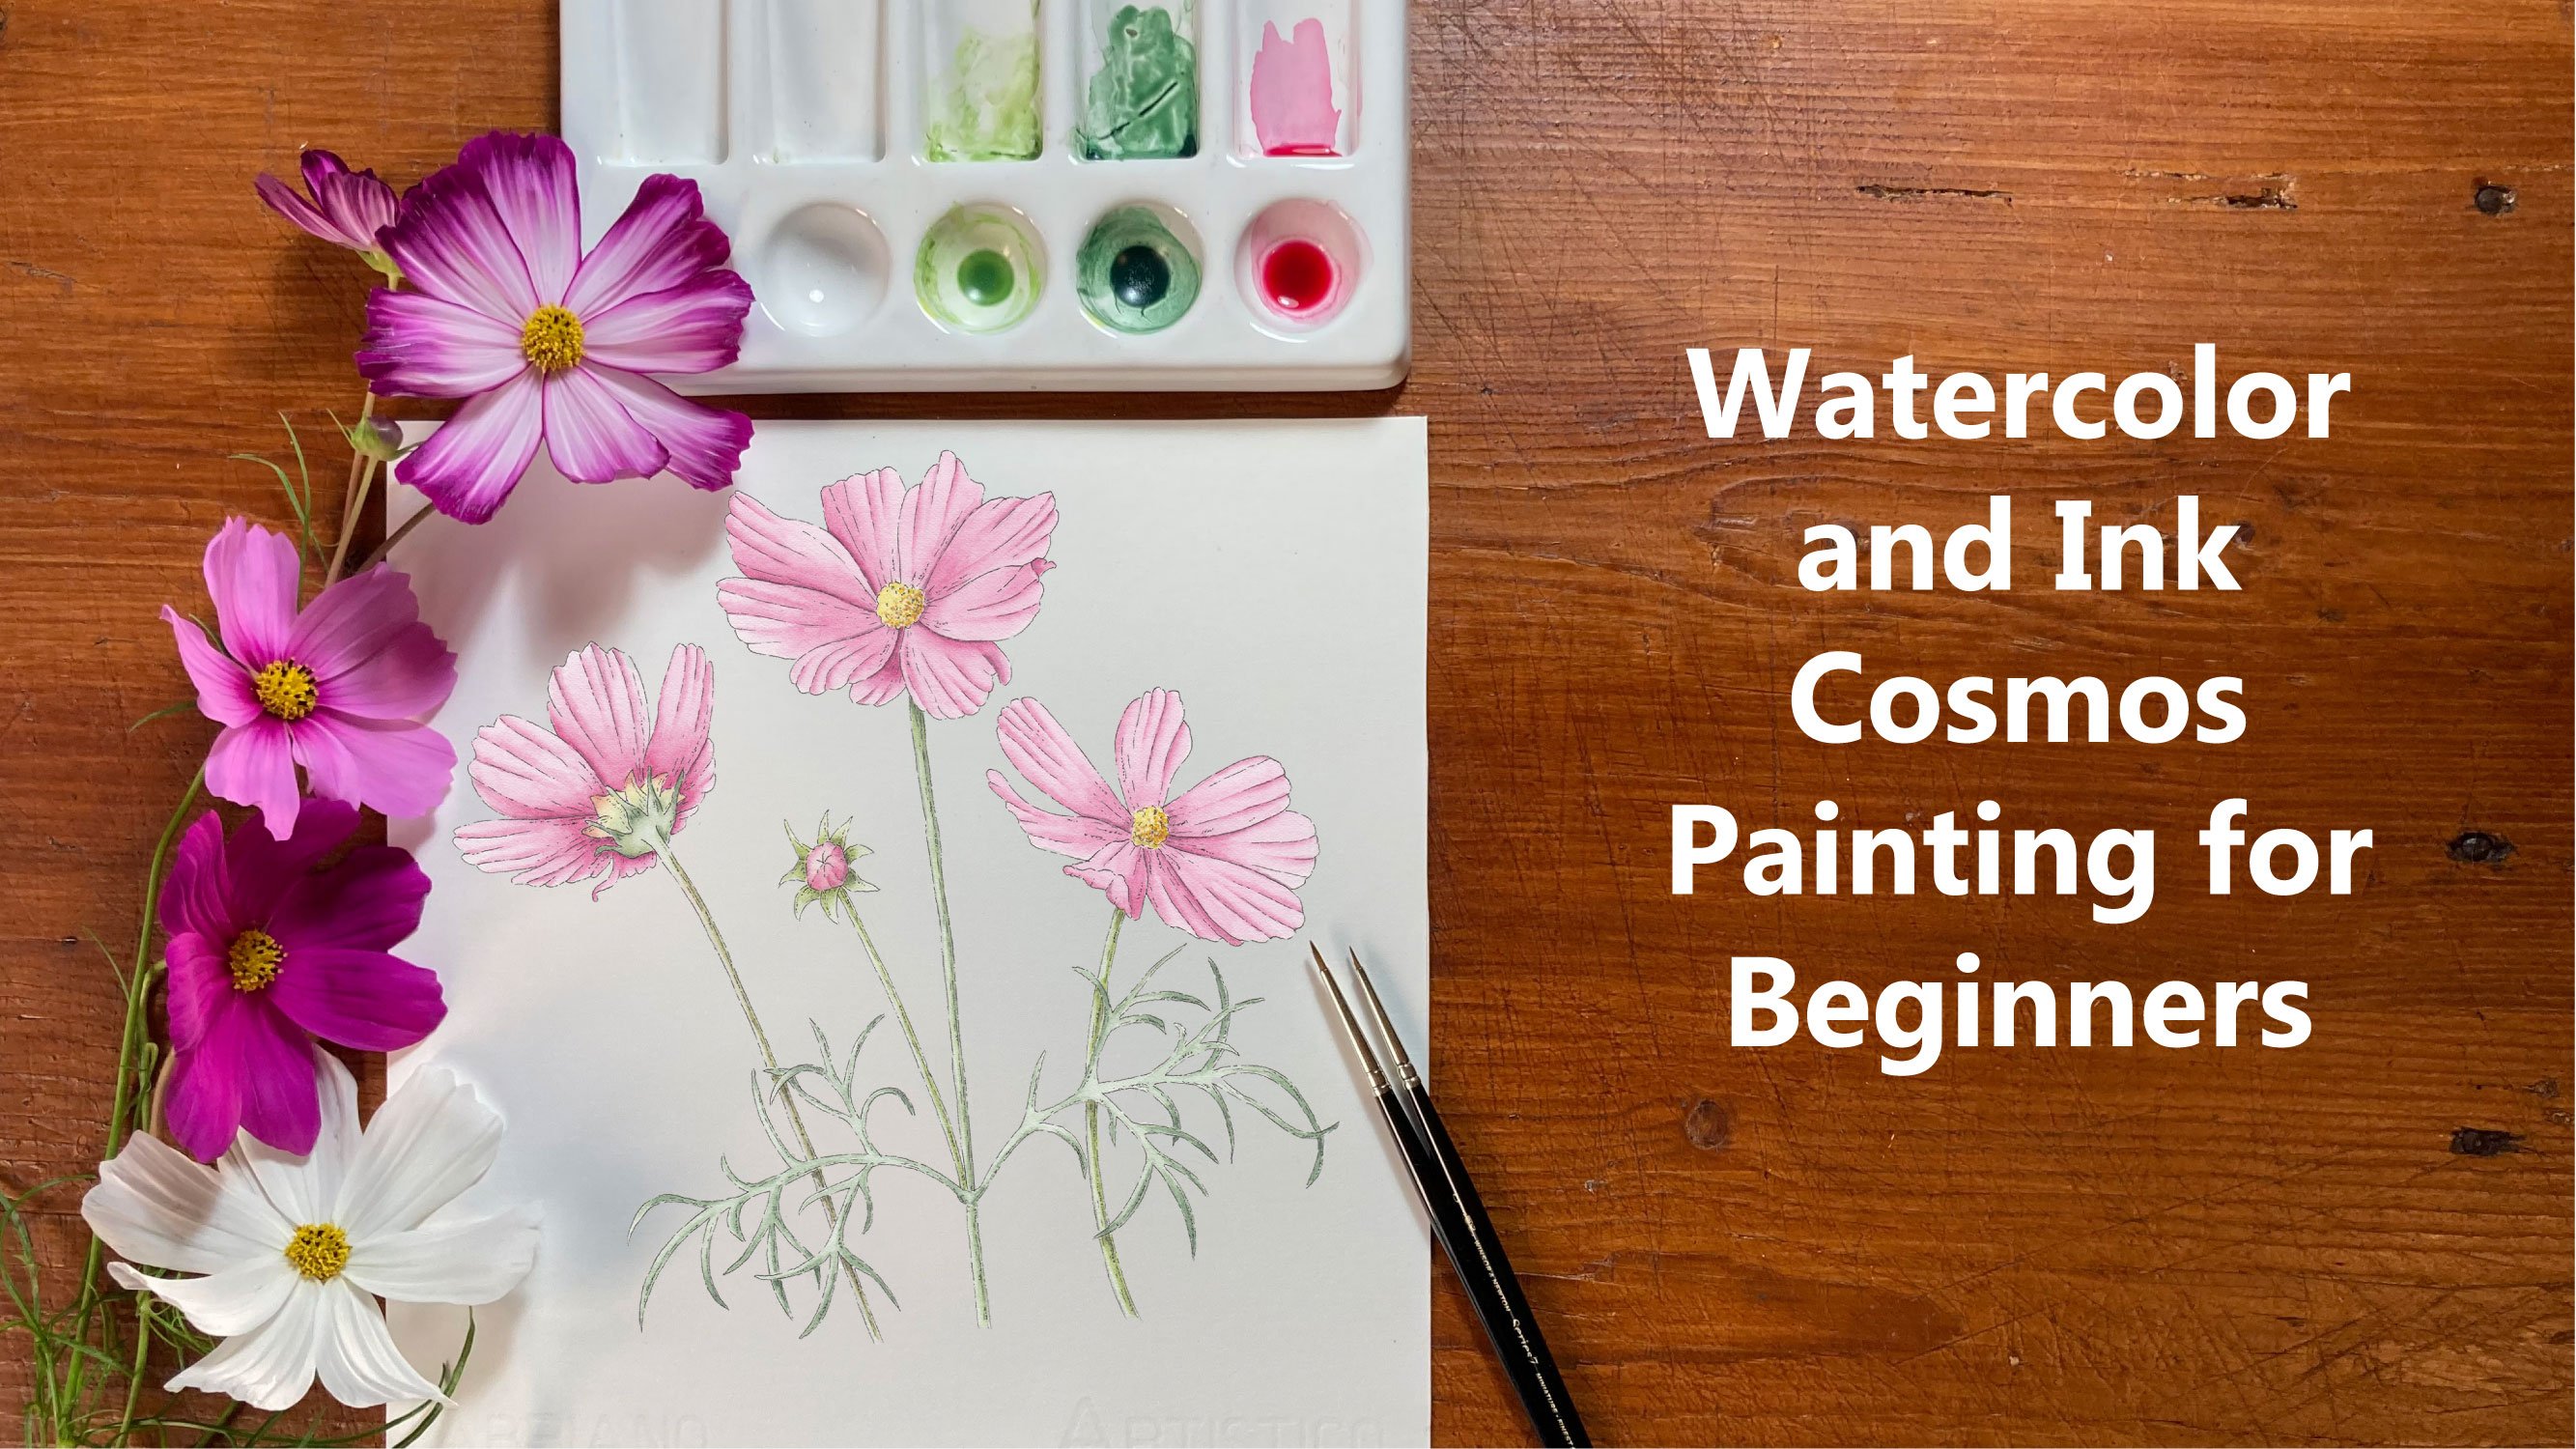
12. The Cup Shaped Flowers: In this lesson,
we're going to draw the cup or bowl shaped flowers. These are vowels like the puppy, the day, money, the cosmos. So something like this, where the shape, the general shape of the flower
resembles a cup. And this is more open, the Pope is more close. We have another one here. So these are different
cup-shaped flowers. And the general shape
can be, as I was saying, more close like this, narrow, a bit
narrower and taller. And the petals go like that. Or it can be, let
me see if you can see this actually darker. Or it can be shorter and larger. Like Cosmos. The petals like this, that could be a puppy, e.g. or even the anemone is
sometimes like this. So to draw this type of
flower, you guessed it. We start with that shape,
with a bowl shape. And we do bowl shape like this. And if you can, if you see
it straight from the side, then the petals will
be only visible light. But this may be. So maybe you consider just a little bit. But depending on what flower is, this could be like a puppy, e.g. and then you have the stem. But if you see it
from even like, sort of like this type of view, then you will need to do
the bowl-shaped first. Then you need to do the
usual elliptical shape. So you can see the other petals. And let's see, a puppy
is quite big petals. So we do these ones by that. And then you will
have better in here. And here, maybe one here. And then maybe sometimes
you can see a little bit of the center of the papilla. And then of course you will
have all the little lines. And this time. And if you have a larger
flower like an anemone, e.g. that is sort of
opening up a bit more. Of course, the bowl would
be larger like this one. So you start it will be
larger in shallower. So you start with a shape
more or less like this one. And then your elliptical
shape will be bigger as well. And then you can start
adding the petals. Maybe it goes a bit
up on the side. Then it will be something like that. And then you can refine
your, your flower. These are the
cup-shaped flowers.
13. The Urn Shaped Flowers: Okay, so in this lesson
we're going to see how to draw shaped flowers. Whichever I was like the crocus, the tulip for sample. So as you can see, the shape like this, the crocus and actually
the muscarinic as well. This is a, I think it's
called the composite flower, but basically it's made
of many little flowers. But if you take the
single shape or which of these flowers they're
shaped like an urn as well. And the rosebuds are
also shaped like an end. And we have the tulips here. So it's all this general shape. And the general shape, I can show you here. Something like this. Which can be seen from, directly from the
side or you can see a little bit of
the back as well. So that's the shape and
the Betas go like this. So if we want to draw e.g. a. Crocus flower, so you start, and depending on the flower
is more or less open, the end, you start with
this general shape. The critical CISC is going
quite small, narrowing here. Let's see this shape and
then Neuron ellipse. And then you start
during the the petals. So they go down towards the calyx. And then you have maybe
another one here. And in the center petal, which is underneath the tube. And then you have the
petals at the back. And this one probably should
be a little bit taller. And sometimes you can see the stamen. Okay? This can be more or
less open, of course. And if you want to
draw the tulip, I'm, again, we have
the starting shape. So quite nicely
round at the bottom. Well, the crocus was
going to narrow. The tulip is quite round. And you can have a view like this where you don't really see the petals
at the back much. So maybe some play
that video for new, this little opening here. And then maybe they can see a little bit of this
petal on the side. And then maybe some of
that petal as well. And then you have the statement. But you can do this view. We can see a bit more,
maybe a bit tilted. So we are again the shape. And then we are a
bit more of a tilde. And then the petals like this center petal. And then you can see
the petals at the back. This is the end shaped flowers.
14. The Urn Shaped Flowers Muscari: If you want to do a more
complex flower like, like the muscarinic, e.g. then what you have to
do is you do the shape, the general shape, which is
the triangular shape, a code. So just down the general
shape of the entire flower. And then you start doing
these smaller flowers. So then if you look at them, we're not going to do them all. But they are little
miniature N shaped flowers. If you look at the shape. And then of course you will
need to do the refining, but they're all lamb. This general small,
miniature earn like that. And then you can see the
inside and the row like this. So just observe the flower will, I will start from the top and then you can work your way down. So there are different, different shapes
when they're closed. But the rest of the flowers, they are the Sacre
and shape flower.
15. Flower Shapes Templates: In this lesson, I'm just
going to show you quickly how to do the templates,
how to use them. And basically you
just need to cut the template and then
cut where there's the little scissor symbol
all the way around. And then you overlap with
the way you cut the shape. You can overlap it just
slightly or a bit more depending on how you want the
shape to look at the end. More or less closed. Then you just tape
where the opening is. So the petals, Let's call them. So just put the
tape all around and then you will have a cup shape. And you can add a
little bit of tape. This is little bits like sort of sticking out if you want
to close them completely. And then for the second
shape is the same thing. You just cut the shape
out from the paper. And again, you will need to cut the little scissors
or just the line. With a tape. You do the
same thing as before. Your overlap a little bit. The paper. And you can put the tape either from the
inside or from the outside, like I'm doing with
these last two petals. And then you close the shape, just adding the tape. And this would be
the shape flower.
16. Final Thoughts: Congratulations on
completing the class. I hope you've enjoyed
it and find it useful. Next step is to do lots
and lots of flowers. Of course, keep drawing, keep practicing, and you can build that way a flower library. You can also watch my other
class on during leaves. So you will be able to put these two knowledge together and draw a complete
flower composition with flowers and
leaves together. Don't forget to post pictures of your drawings in
the project section. And also don't forget to hit the Follow button somewhere up there so that you can be notified when I
post a new class. You can also check out my
profile here on Skillshare. For more classes. If
you'd like to connect, you can find the social
links down here. If you have enjoyed the class, I will be really
grateful if you lift a good review because there
will be really helpful. Thanks again for taking the class and I'll see
you in the next class. Bye.
 Katia Galante, Botanical Artist and Illustrator