Transcripts
1. Introduction: As a former lawyer turned
full time creative, I know how hard it can be to learn drawing
foundations on your own. Even though I learned
from books and classes taught by great artists, it wasn't always obvious how to connect the dots and
evolve into my own style. It took a lot of
practice, study, and experimentation to
get to where I am today. I'm grateful to have
worked with clients like Disney, Adobe, and Samsung. Now I get to create
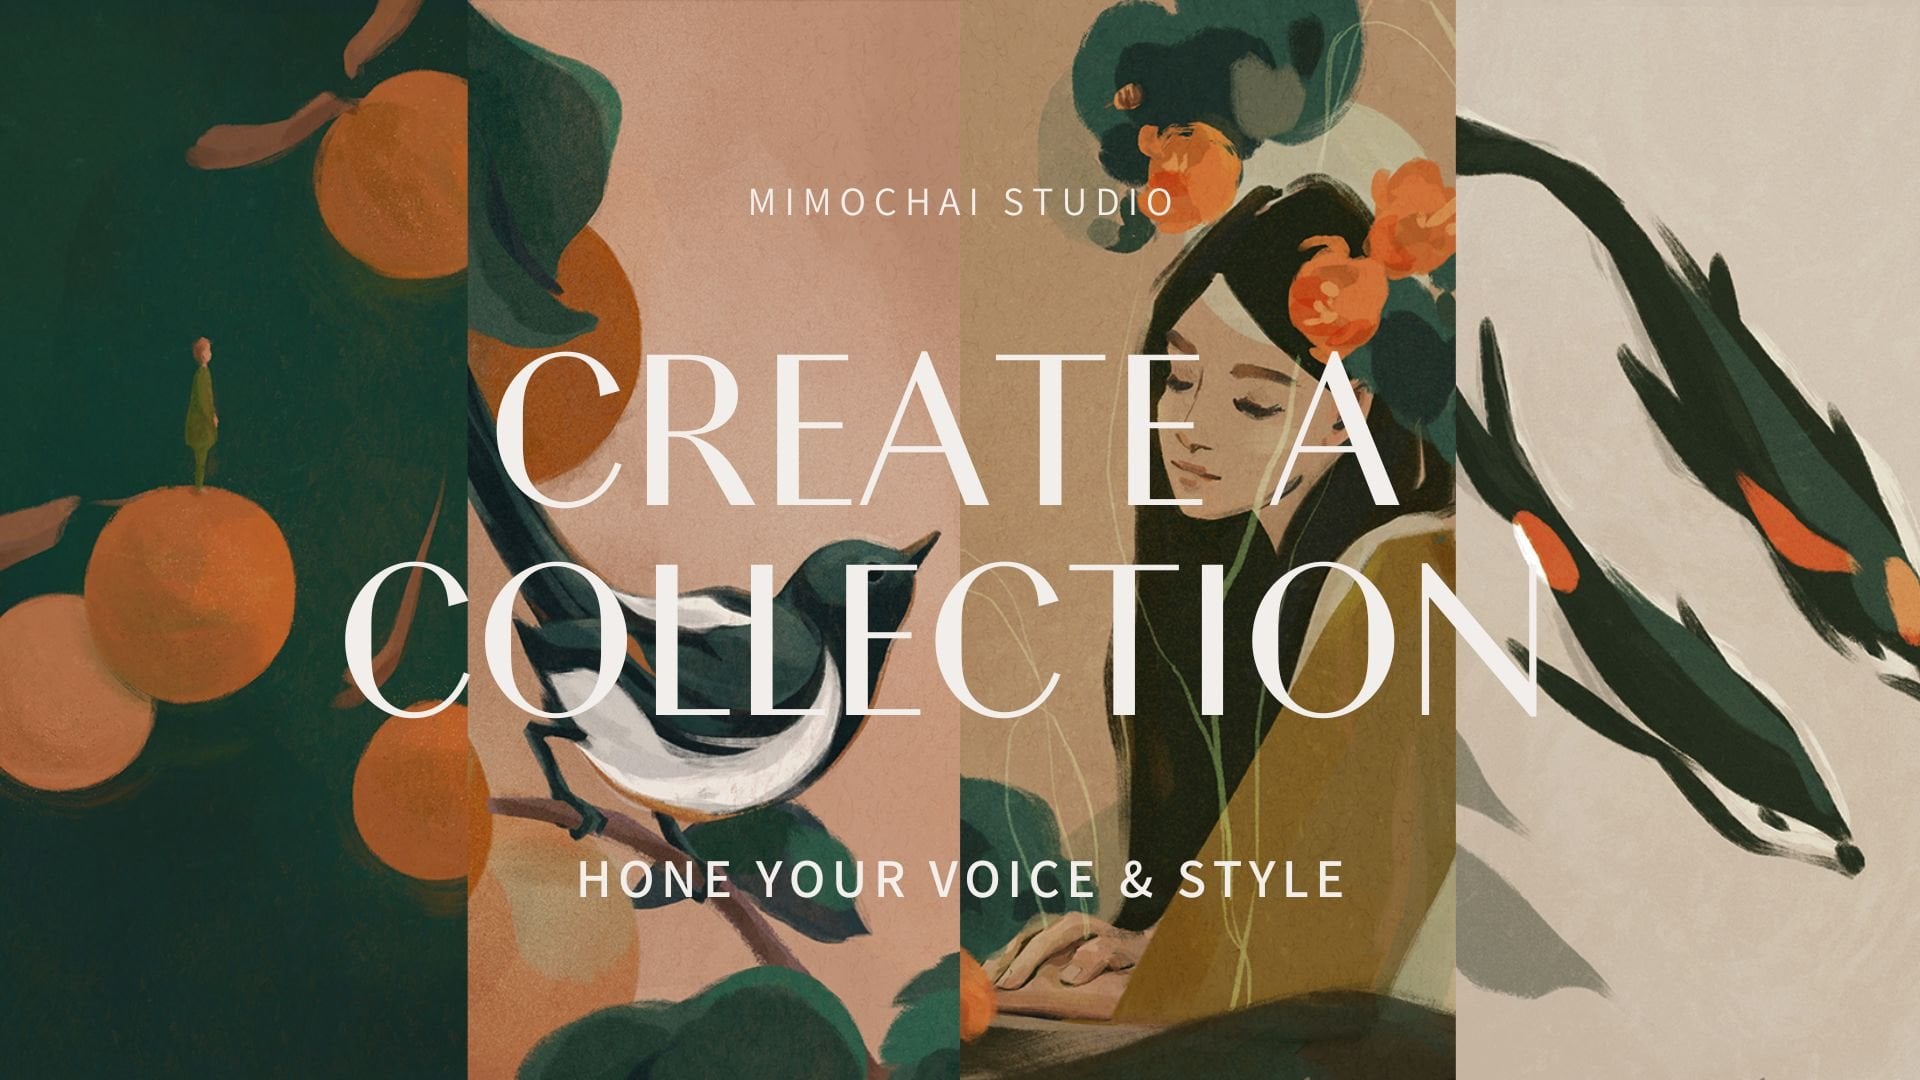
primarily for my studio, Mimo hai, where I make my own illustrated
products, do fun collabs, and host an international
drawing community that helps people overcome their creative obstacles and discover creative well being
through the art of drawing. It was this community that
actually made me realize I want to teach a class on drawing foundations in my own way. I remember what
it's like to think, maybe it's too late to start drawing or maybe I'll
never get good at this. Or even I got pretty far
without drawing foundations, but now I'm stuck and I don't
know how to keep growing. I know drawing foundations can be really dry and
boring to learn. It can feel uninspiring, especially for those
of us who want to draw in a modern
illustration style. Running a realistic ball in a shadow might not be
that interesting to us. Most beginning artists
I encounter want one thing to draw beautifully
in their own style. I totally get it. I
was the same way. I mean, we get interested
in drawing because we see other artists
works that we admire, and we want to jump
straight to that. Unfortunately, that's
usually putting the cart before the horse. What I've realized over and over again on my own
journey is that, well, you can skip over
the drawing foundations. Eventually, you'll find that you're limited in
how much you can really evolve into
your own style and truly express yourself. Okay, so what are the
drawing foundations? At a basic level, these
foundational techniques are what drawings and
paintings are built on. Think of them like
tools in your artists toolkit or ingredients
in your artist pantry. I group them into observation, line, shape, value, composition. Form, color, and light. Learning these
skills are important both for observing art, so you can break
down your favorite artists work and understand the choices they made and
for making your own art. So you can be intentional
about how you use each as you develop
your own unique style. So what I found missing in this drawing journey when I
was learning from books and classes was how and the
why to the what when it came to bridging how to draw with how I want to
draw in my own style. The problem for me was
that most of what I was learning from was
focused on just a few of the tools and
didn't really explain how it all comes together in a
really stylized drawing. The focus was almost entirely on realistic drawing
studies and ends there. Or, on the opposite side, an artist's tutorial
might teach me a drawing in their
specific style, but not explain all of the underlying
considerations that would help me apply
it to my own style. There is a big
difference between knowing what the
skills and steps are versus how they came together and why the artist
made the choices they did. So I decided to create a
drawing foundations class using my own approach because
I really wish that I had something like this when I
first learned how to draw. A class that gives
a clear overview of not just what the
drawing foundations are, but how to connect these dots to help me draw how I want to draw. I combed through all
of the hours I spent learning drawing
foundations and used an 80 20 approach
to put together a comprehensive yet
digestible class that covers the parts that make
the biggest difference for my own growth
and improvement. Use one main class project as an anchor for all
of the sections and included lots of
additional exercises to reinforce each step. I explain how to see like an artist through
line and shape, value and form, color and light, portraits, and depth
and composition. Most importantly, I
explain how all of these tools and skills
connect and come together. This class is, of course,
not a replacement for years of art school. Instead, this is going to give you a really strong
foundation and starting point to learn all of the skills and have
a path forward. I like to think of
it as providing a map or guide for your
own drawing journey. So if that sounds
like what you've been looking for, let's get started.
2. Getting Started: Artist Toolkit: Over the years, I've experimented a lot and
streamlined my go to tools and drawing process into an efficient flow
that works well for me. I also developed a
few perspectives that have helped me a lot
on my creative journey, where we often deal with challenges like inner
critic and fear. Here's an overview of what's
in my artists toolkit. I've broken it out
into three parts. Although I started almost exclusively as a
digital painter, I felt something was missing and started to experiment
with traditional tools. Now I love using both traditional
and digital mediums as each has its
strengths and benefits. The tactile feeling of
traditional mediums just feels so great and
good for the spirit, while the flexibility of digital mediums are so
efficient and powerful. I also find that learning one
helps me improve the other. I've condensed my go
to drawing tools into a simple set that can fit
into this little case. I have some graphite pencils, charcoals, brush
pens, and ink pens. I share how to use these
in my daily pages class, which I'll link to in
the description below. Right now, I actually do most of my drawing with prisma
color colored pencils. I color with these as well, and also like Holbeins acrylic wash or
golden acrylic paint. And, of course, I love digital painting with
Percrey on the iPad. Each of these tools
has its pros and cons. Pencils are a great
and easy way to start. They don't require much cleanup and are easy to carry around. The professional ones
blend beautifully, and I also like
the texture a lot. On the downside, they can
tire the hand easily, and you can't really
lighten colors. So if you go too dark,
there's no turning back. Acrylic gouache paint has a lovely matte finish that looks like my
digital paintings, and painting just feels like a joy once you
know how to do it. The paint itself is very
opaque and can also layer easily and make corrections
or paint over entirely. On the downside, they
require more prep and cleanup and are not
easy to carry around. Digital painting is like having hundreds of
tools and paints with you in a super thin pad
with no cleanup necessary. The undo button, time
laps seatures and myriad of effects and
adjustments are all awesome. On the downside,
you often have to create your own textures
more as an illusion rather than how it is with traditional mediums where it's a natural organic occurrence. And in terms of
tactile experience, it just feels a little
less satisfying to me than traditional mediums
on paper or canvas. I've compiled a list
of all of the tools I like to use on a
shared notion page. It's nice because I can
keep this updated as I'm always experimenting
with new tools and evolving my practice. You can find a link to it in
the video description below. Remember that you can always just start with the
tools you have. Don't let waiting
for the perfect tool prevent you from
getting started. A pencil and paper is just fine. Even the best tools do not
make up for a lack of skill, so let's talk about the technical
skills in our tool kit. At a basic level, these
foundational techniques are what drawings and
paintings are built on. Observation, the
ability to see like an artist accurately and
without preconceived notions. Line, the ability to draw with artful lines that reflect what is observed or
imagined accurately. Shape. The ability to
construct drawings with building blocks and
familiar shapes. Value. The ability to see and group lights and darks with
intention and clarity. Form, the ability to communicate the form of
an object using values, including texture and mass. Color. The ability to see, understand, and use color for both
accuracy and expression. Light. The ability to render light and harness
illusions in color. And composition,
the ability to lead the eye and frame an
image to your intention, including the use of
depth and perspective. Learning these
skills are important both for observing art, so you can break
down your favorite artists work and understand the choices they made
and for making art. So you can be intentional
about how you use each as you develop
your own unique style. So for example, in
my illustration, you can observe that I use
mostly shapes and no linework, use a planar perspective, have relatively flat color, but bring in a two to
three value system to communicate form and use a high major and minor key to invoke a bright and
energetic atmosphere. Practicing and studying these
skills is really important to improving our fundamental
skills and our own style. To find a healthy
balance as a creative, I found that it's really
important to have the right mental tools
more than anything else. The main reason I
find people stop being creative or
never get started at all is because of their own inner critic and
unhealthy expectations. Many of us can relate to having imposture syndrome, self doubt, or just plain fear,
fear of failure, fear of looking stupid, or fear of the blank page. Even great artists
suffer from these. For beginners, I'll
also add that there is a strong immediate
gratification syndrome that can cause a lot of grief. By being aware of
these hurdles from the outset and learn
how to manage them, we can learn to overcome
them and keep going. I find it really important
to bring a sense of mindfulness into
one's artist toolkit. Mindfulness is defined as the kind non judgmental
awareness of what is happening in and around
you in the present moment. When I talk about
mindful drawing, I mean bringing that kind, non judgmental attitude towards
yourself and your work. Observe with curiosity
and open awareness. It's natural and helpful to
see room for improvement, but don't let your self
critical voice become so loud and so unreasonable that it prevents
you from creating. When these harsh voices
do inevitably come up, you can just notice them with care and gently let them pass. I think that these
mental perspectives are just as important as any other tool or skill
in my artistic toolkit, if not the most important. I personally have found
mindfulness to be an incredible tool for creatives and the
process of art making, and I really believe
that mindfulness and creativity go hand in hand. I hope you'll give
these tools a try as you build out your
own artistic toolkit. It's all an exploration.
3. Lines & Shapes 1: Learning to See: Let's get started with
our first few tools. This section is all
about lines and shapes, but actually the
first tool that we need to talk about
is observation. Learning to draw is really
about learning how to see. As you gradually train
your artist's eye, you'll start to notice details that you've
never seen before, even in things
that you see every day that you think
you know very well. You're also going to
start to see new colors, understand what value is, and how light affects everything that we
see and experience. Gradually, as you start to
understand what you're seeing, you're going to then
be able to parrot with your art skills and
other tools to start to express your personal unique
experience of this world. That's what's really exciting. I wanted to start with that
because I know that some of these drills can start to
feel very dry or very boring. And although I've tried to
make them as fun as possible, it's also just so helpful to understand why you're
learning these things. So you can keep in
mind that as you're doing all of these
technical exercises, you're honing this superpower
basically of being able to see the world in this new and much
more vivid way, then each step is going to
be so much more enjoyable. So with that said, let's get
started with our exercises. Okay, so before we dive into the drills
and the exercises, I want to explain how
this all comes together in the drawing that
we're going to be creating for
our class project. So when you look at
this illustration, what do you think about
drawing first if I were to ask you to
recreate this drawing? Usually for beginners,
they're going to be thinking about
starting with a detail that they see or starting with something that isn't
necessarily a shape. For artists who
have been trained to look at
observational drawing, they will start to break
this down into shapes. And so I want you to take a moment right now before moving on to just initially identify
any shapes that you see. Alright, so let me show you
how I would break this down. Some really obvious shapes are, of course, this
circle right here. And then let's say, there's this oval right here, and there's an oval right here. There is this cylinder
shape back here. And then there is oval
shape of her head. There's also a triangle
shape with her hair, and there is another
triangle shape here that might be a
little less obvious. And then a truncated
triangle shape here. And, of course, all these
little items are also small rectangles and
small cylinders. There is a cylinder back
here in the face behind. Each of these flowers, you could say, is
one big circle. Or comprised of a few
smaller ellipses. And then there's, of course, this arched doorway in the back, which is a semicircle. Her arms can be broken down into these trapezoid
shapes or triangles, and then same thing
on her other hand. And I'm just kind of imagining it going all the way through, which is another
important aspect of observational
drawing as you are initially starting to compose or understand the construction of how a drawing is put together. Her whole body kind of
has this trapezoid shape. And then the book is this sort of rectangle
in perspective, and the pencil is
a little cylinder. And you can even
finally bring out the cylinders of the
legs of the telescope. And even her little features, you can say this is a triangle. This is another sort of
leaf shape, leaf shape. And then, of course, all these
little leaf shapes here. And it's a shape
that I use a lot, so I almost count the
leaf shape as part of the circle square triangle
rectangle grouping. So that is one way to break this illustration
down into shapes. And then you can also start
to think about big picture, what are the overall
shape patterns that you're seeing in an image? So, for example, in this image, there's this kind of overall
triangle composition here. And then the arched
doorway does create this larger shape and frame
behind our character. And then I'm also looking
at the overall gesture of how things are placed and seeing how they're
framing our character. And then over here kind
of would simplify this into a circle and a rectangle. And those are the major shapes that I'm looking at
in this illustration.
4. Lines & Shapes 2: Exercise : So now that we know
what we're looking for, we can go back and start to work on some warm up drills on just regular
pencil and paper. So our first exercise is going to just be drawing
straight lines, and a dotted paper is nice for providing some
guidelines for that. But honestly, blank paper works just as well,
in my opinion. The point of this drill is just to get your
hand used to drawing straight lines because
it's something that's just so useful
throughout drawing. And again, you'll
be able to bring in some of that movement
with your elbow and shoulder and get a feel for that so that you
can try to recreate the naturalness of
some of those drawings when you're drawing really
tight with the wrist, which is kind of how you have to draw with a lot
of digital tools. So with that said, let's just start
with some lines. And with these, I'm
pivoting from my elbow. And it definitely feels
different than if I just try to draw from my wrist, which right now I'm trying
to do, and it feels tight. And what's more important
than them being perfectly straight
lines is that they feel natural and they give
me that freedom of movement, and it prevents the kind of really tight scratching type of drawing that beginners
tend to work with. After you draw lots
of straight lines, and I recommend doing
pages and pages of bees, I know it might sound boring, but you can do them while you're talking on the phone or when you're watching TV or when you're just waiting
around for somebody, so carrying a sketchbook is
really helpful for that. So after straight lines is also really great to
practice curb lines. Again, some people practice
these to make them as perfect and evenly
spaced as possible. I personally find that 80
20 l means that I want to just get a natural feel and be able to create the
overall shape that I want, but it doesn't need to be
exactly perfect, to the dot. So now let's move on to shapes. So after lines,
next best thing to practice are circles
and ellipses, because they make up so
much of our drawings. So many people are very
impressed when someone can just draw free hand
a perfect circle, and that just comes
from muscle memory and doing it over
and over again. And what's nice about the dotted paper is that
if you want to, you can practice
training your arm or your eye and hand coordination to fit it within a
particular measurement. And you can kind of just
feel the difference between kind of
these tight little circles with your
wrists and then, like, a bigger one with
your elbow and shoulder. And then another great exercise is draw ellipses,
which are just ovals. Maybe do them in different
directions, different sizes. And that's how simple
your circle and ellips exercise warm ups can be. Again, syncing with the
lines and recommend doing pages and
pages of these so your arm gets that
muscle memory of how it draws smooth lines
and smooth circles. So now I'm personally
going to move back to the iPad and Procreate
because that way, I can screen record and so clear demos of what I'm drawing. But you are totally
welcome to continue using traditional
mediums to follow along. Okay, so we have our
circle square triangle, and rectangle, and, of course, the rectangle is just a
squished or elongated square. But those then need to
turn into the sphere, the cube, the cone, and the cylinder, which is why we include the
rectangle at the end. So for a sphere, we start
with the circle and then you can create these lines
that suggest the sphere. And then again, another curve over the face
of the circle. And if you want, you can continue that
all the way around. So you can get a sense of
the back of the sphere. You can start to see
how that already comes together to suggest
some of that form. With the box, again, you
start with the square. And then you extend it and can just create these parallel
lines coming out sideways, draw the back of the box, close it off at the bottom, and then closing it
off in the back, and then you can create
the dotted lines. These two form a
square in the back, and then you can
create this line to create the bottom
face of our cube. With a cone, you want to
create the first two legs of the triangle and then create an ellipse at the bottom instead
of a straight line. And you can also
draw a dotted line through the middle
ending in the middle of the bottom of the
circle of the cone to suggest the interior
volume of that cone. Now, with the cylinder, it's a similar concept. You want to imagine
two circles on the top and the bottom
of the cylinder and then a rectangle
shape if you're looking straight on
to the cylinder. So like the cone, you're going to start with
the two straight sides, but then you're going
to draw a curved bottom and a curve top to
suggest that ellipse. And again, you can draw a
line through the middle, ending in the middle
of the bottom to suggest that volume inside. And I suggest you practice drawing those just like
the lines and the ellipses over and over again so that
you can start to get familiar with stretching them or showing
them at different angles. I actually bought
these wooden toys that are technically for kids, but they are great models for doing some
studies of your own. What's great about that
is that you can just look at them from different
angles and draw them, you know, facing forward. We would look like if
you're looking at them from below or from above, coming towards you,
going away from you, and they have basically
every shape that you need. So I think that these
are really great because you can create some
still lives of your own, use them with lighting exercises that we'll
talk about later. And to get the whole set
was not too expensive, and you can use them forever. So the next thing that
I want to talk about is how you can do some quick warm
up exercises in a fun way. Sino drawing circles and lines, and these shapes aren't necessarily the most
exciting thing in the world. And so I came up with
this exercise that will hopefully be a way for you to just quickly draw
something if you have, say, five to 15 minutes
in the morning. It's a great way
to be Bs mindful and get in your drawing exercise and practice these shapes. So the idea with this
exercise is that you are creating your own
flower arrangements using basic building shapes. So I began with this
ellipse at the bottom and another ellipse to create this shadow shape
beneath it or a plate. And then the opening hole. And then I drew in
my curved lines, and a very simple way
to approach this is just to draw two at an angle and then criss cross one
or two more going the other way and drawing some branches coming
out of those lines. And then just following
those lines and creating a bunch of different
flowers just through simple circles and then adding in leaves in
between those circles. So I've obviously variated
the shapes or the sizes, and then I added bigger and
smaller leaves in between. And we're going to stop here
for now, but, of course, you can continue this
with color and with rendering and practicing shading when we talk about that later. So it's really nice
because you can be in the flow and just
sort of express your current emotions or your current mental stage
through these different shapes. And you can, of course,
bring in triangles and bring in boxes
and add, you know, tea cups in the front to
create a daily arrangement, and maybe using color
or the way that you use value, which
we'll talk about later. Can indicate your current
mood or your favorite colors, whatever it is that you like. So very simple way
to not need to think about anything other than getting in those warm ups. And like I mentioned earlier, drawing straight lines is
really important of a practice, but I know that it
can get a little dry. This sketch is a great example
of something where you can start with just some
lines in the background, and I'll show you
a little bit of how that would look so that you can create some
interesting backgrounds and textures for your sketches.
5. Lines & Shapes 3: Observational Drawing Techniques: So that was an
example of drawing something from the imagination
or not any reference, but an important
place for beginners to start learning how to draw is through
observational practice. And so that's what a lot of this class is going
to be focused on. So I'm going to be using
this photo that I've taken of some little
Billy balls in a vase. What's great about this is build up from really simple shapes, but it's also something that's nice to look at
and nice to draw. And I'll be able to show you every single step of
observational drawing through this very simple photograph or seemingly simple
photograph so that you can then apply it to other
observational drawings. Before we get into the more
technically accurate methods of observational drawing, I want to talk first
about gesture drawing, which I think is really
fundamental and important. Gesture drawings are
really quick sketches that use loose line work that
we were just practicing, and the goal is to capture the gesture and movement
of your object. You can think of it as its
essence or even its spirit. Oftentimes, your role as
an artist is to bring out that gesture unless
your intention is to have a very rigid
or structural design. Either way, starting to train gesture as a natural instinct in your workflow will help bring more soul and energy
into your final work. While gesture drawing is most commonly taught in the
context of figure drawing, everything has a gesture. A curtain has a gesture
in the way it folds, a rock has a gesture in the direction it
sits and is angled. And I want to show
you that even this simple still life has a gesture. Look at how the balls are like little heads being tilted
in different directions. And, of course, the stems have this natural gesture
that you can exaggerate. This vase and how it curves
has a gesture as well. So here's how a quick gesture
sketch might look for me. I might do this very
lightly before I begin my blocking or just have as a warm up on
a separate layer. I want to keep this in mind and check back in
when I'm done with my drawing to see if I've lost some gesture
that I can bring back. I want to note that
gesture isn't just in the individual
objects of a drawing. Remember, I pointed
out earlier that the whole composition of our main illustration
has a gesture to it. A whole landscape
can have a gesture, but starting with noticing it in individual objects will help
hone your ability to see it in the big picture
and your ability to bring it out of your
future compositions. Okay, now that we
have an understanding of a basic gesture drawing, let's talk about more
technically accurate methods of observational drawing. We're going to be
talking through eight different approaches
to observational drawing. So we're gonna be talking
about the blocking then identifying the shapes. Landmarks, angles,
proportions, negative space, shadow shapes, and then checking your study with a
grid or a flip. Now, all of those
terms might sound very mysterious or
unfamiliar to you right now, but by the end of this sequence, you are going to understand
all of them and be able to use them in your
observational sketch study. A block in means to first
identify the overall frame of the object that
you were drawing and creating kind of the space
that it lives within. So I'm looking at basically
this overall shape. At the beginning,
drawing side by side with a drawing
reference photo or another illustration is
a great way to practice your ability to measure
with your eyes. And so it's a very
similar direct comparison versus having it on screen
somewhere or a different size. And this is also sometimes referred to as site
size measurement. So as I'm drawing, I'm constantly
looking back and forth between my sketch
and the photograph. And since this is even simpler, I can even start to put in
these lines that I'm seeing. And maybe even this back table so that can kind of
create the frame. And I would add the
frame to your drawing because the frame does help with a lot of
the measurements. So the next step is identifying the shapes that are
within your reference. So, this one is very
straightforward, but I think it's
important to start with something simple and
obvious because there are also gonna be details
that you might not have noticed in this thing
that seems very obvious. So of course, these
little Billy ball flowers have this circle shape. These are lines, but
also you can think of them as very, very
slender cylinders. And then there is, of course,
the shape right here, which is the opening
of the vase, its overall pebble shape. And maybe I even put in that shadow line there so that
I can start to imagine it. So those are the
things I'm looking at, and then maybe this
shadow down here as well. There's technically
opening on this surface. And then you can technically say there's a rectangle
shape back here. And one thing that I want to really emphasize is that
you want to start light. So start with a very
light pencil sketch, especially with the block in. If you're using
charcoal, for example, or graphite pencil, you want to start with the lightest
possible touch. And then you build in
darker and darker. So if you start with a really
heavy and dark block in, those aren't going to
be your final lines, and they're going
to stand out or be harder to cover up later
into your drawings. So always start
light and then move into darker and darker. Now, the next thing you want
to talk about are landmarks. So landmarks are any point
that you want to focus on on a object that you're looking at or something
in real life. So for me, the landmarks are this touching point right here. Where these intersect
on this face and maybe even the relation of where this ball ends
and this vase starts. So with this vase, of course, it's not important
that it's super accurate on how big
the vase opening is, for example, but it's great
to start to train your eye to see those things because
there are going to be things where it
is really important, such as somebody's face. And then from here,
landmarks, angles, proportions, and negative space kind of all work in
harmony together. So let me talk through
each of those. With angles, I'm talking
about things like that, kind of seeing how these
angles come together, even how this stem is bending
and then coming back, how this vase goes up a
little before coming down, how this angle right
here touches the table. Basically, angles are clues, and they help guide
how you're going to draw and a great way
to check for errors. So, for example, earlier when I was looking
at the landmark, I was noticing this landmark or this angle that
was a little off, and that kind of helped
me correct this stem. And there's also this
angle right here. Now it's already
looking a lot better. And then I'm kind of looking at the slope of this and
how this angle looks, how it connects to the table. So there's angles
all over the place, especially at tangents or
where objects meet each other. In addition to angles, you'll look at negative space. When we look at an
object, we tend to just look at the physical thing
that we're familiar with, but it's creating a lot of shapes within the
reference image or in real life that are just
as helpful to our drawing. So negative space are just
spaces like this that are created by the space
in between objects. And even these things
would count as negative space in this
shape right here. There's technically
this negative space created over here, so I'll add that in just to see a detail that might
have been missed earlier, a really good example of that. And then another thing we
can check our proportions. For extremely accurate
measuring of drawings, a lot of artists will
use their pencil, for example, held at this
or using their fingers. And that's a very common way to check how big something is. So say, this is one Billy ball. And I'm like, Okay, one,
two, three, four, five. About five little
balls of difference between where the flour is
and where the vase starts. And so my drawing should
have that as well. So I can count in
or eyeball, one, two, three, four, five. Okay, so that looks
pretty accurate. And I'm looking at maybe this circle compared
to this circle. And actually, I'm just
noticing it looks more narrow on this photo than
I have in this drawing, so I'm going to bring
that up a little bit. And lastly, one thing you can
look at are shadow shapes. So a lot of people
don't really pay attention in the beginning
to light and shadow, but those are
another great place to look for clues on how
to construct your drawing. It'll become even more
important when we start to talk about value in
the next section. But even right now,
you can start to place in those shadow shapes, and it will actually help create that sense of volume
in a lot of cases. So here I'm seeing this shadow shape at the
bottom of the Billy ball. And it can technically
get super detailed with the little pieces
inside the flower, but for now, I'm not going to. There's obviously this one. And then there's kind of
this big one over here. And so I am going
to place that one. And there is this
shadow up here. And then there's, of course,
this one at the bottom. The last thing that you
can do is to just flip your drawing or add a grid
onto both so you can check it. So I can use this as a
way to check my work, and I can see that
it's not perfect. I can start to see where I've miscalculated how far to
the side the vase goes and how much the
relation between the balls and the rest of the
image are correct or not. And it can also flip
this image just to kind of check that it looks overall
right and not distorted. I'll become even more handy when you're drawing things
such as human faces. So you can always
learn from them. In this case, it doesn't
really matter that the vase is a little bit longer than the
one in the reference photo. But if I was trying
to be super accurate, this is something that
I would go back and fix and be mindful of because those are the little
things that if you want to create a really accurate
observational drawing, are going to be
really important. So instead of tracing
what you can, I would recommend
just keeping it on the side and
correcting from there. This way, you can
really train your eye. So one way I should have checked is by looking at
this relationship. Here is obviously a lot smaller. And so that tells
me that this guy is sticking out a
little bit too far. Another way to check is
to check this angle. A pencil is a great way to
actually measure the angle and then bring it down to your paper to make sure that it matches. So if I'm going like
this edge to edge, I'm just moving it over here, this new line is looking
a lot more accurate. And then same thing
on this side, looking at this shape right
here in relation to this. So this is obviously
a little bit whiter. This one's a little bit shorter, but not that much shorter. So I'm gonna want to
extend this a little more so that looks a little bit more proportional to my reference. So this is my sketch study, and you wanted to clean
it up for line work, you just create another layer
or use tracing paper or a light box to create clean linework on
top of your sketch. And that's a great way to
practice having the ability to clean up line work to get those really straight
lines in one and done. And so I'll do a little
quick practice here and you can follow along or skip
onto the next section. So actually, I want to
film the block in again, using the grid overlay effect so that people can see
what that would be like. So when you're just
starting out, it's helpful to use a grid as an option
to kind of help you train your eye of
looking at landmarks and where things intersect and just how to do some
careful measuring. I personally don't
like to use this after some practice with it because
it can become a crutch. Like, you're not paying
as much attention to your natural awareness
of your ability to use your eye to just kind
of gauge it on your own without guidlines
because there are no guidelines out there
in the real world. So this can be a good way to start to train your
eye, but eventually, I would use it to
check your work instead of always relying on having it to create a
perfectly accurate drawing. And this time I've created
the frame to match exactly. So this is the midpoint
of the canvas. I have them exactly
taking up half the space so that I know that my proportions will
be exactly the same. And again, I wouldn't
necessarily be drawing with such thick lines or dark
lines as my blocking, but I want to make sure
that it's legible for you. When I'm doing it on my own, I really love using
a light peach color and much lighter
hand so that it's just a very sketchy
underlying drawing for my subsequent color on top. So the grid lines might be
a little bit hard to see, and I just want to show
you you turn them on by turning on drawing
guide on Canvas, and you can edit the drawing
guide for many things, like how thick the lines are. How big, so you can
make it much bigger. I'm doing it with
about five boxes across to me that feels like the right amount of
enough information but not super tiny. And then you can change
the opacity and, of course, the color. So I like to have
them pretty light, but that is how you
would change it. And here, I'm just
going to show you putting it over how accurate
this method can be. And that's actually how
a lot of, you know, large murals, large paintings are done using this grid method. Okay, let's compare
this final line drawing with the gesture
drawing we did earlier. I'm noticing that I could angle the heads of the flowers
a little bit more to make them look even more like
they're leading into each other and exaggerate some of these curves to bring
more life into them. It's nice to start with quick gesture marks because
it can easily get lost when you get into the
detailed measuring work of an observational drawing.
6. Lines & Shapes 4: Class Project Part I: So I'll provide lots of
reference photos and recommendations
that I can continue to practice these
observational studies. For now, let's start working
on our class project to use that seam training to observe an illustration and
do the block in, the landmarks, the angles, and all of that to create our structural base drawing sketch. So I am looking to do
my block in first. So for my block in, I'm looking at the overall
shape around the outside. And then at the same time, I'm going to start looking at the overall shapes
and landmarks. So like I said, even though
I showed you each of the methods of measuring
as separate items, there, as you might
have noticed, something that starts to
all integrate together. So when you're looking
at negative space, you're also noticing angles. When you're checking
proportions, you're also seeing your
landmarks, so on and so forth. I'm here for the block,
and I'm already starting to look at relationships
of how far that line is from the edge of the borders and some
of these angles here between the telescope and the
flowers and the telescope and this back doorway archway. Same thing with this
vase at the bottom, seeing how far that
is from the bottom of my frame and then
coming back up. Noticing that this book is a lot higher than the
bottom of this vase. Same thing with the
bottom of this globe, a little higher than this space. And then this globe kind of
is getting to this edge right here and then coming a little
bit over this book area, so I'm just going to start to
place a little bit of that. And then I need
that point to start to sense where these
flowers start to come up. And then there's this
flower right here that's not quite
touching the door and has a little less space than the globe does from
the edge of the dry. So I'm kind of looking
at and then I'm going back to this and noticing this angle right here
and kind of the distance. So this initial
line that I put in is actually a little bit
too close to the edge. And that's why it
is like a puzzle. If you keep checking all
of your measurements, kind of can't go wrong because
you'll catch yourself. Okay, I don't want to
stop here as my block in, and I can start to do a
little bit of the girl. So her head starts a little
bit below the telescope. Her hair is a little bit
away from this flower here. This and I'm starting to check
angles at the same time, just looking at this
angle of the telescope. And then her hair
comes over here, and I'm starting to
look at this shape, this negative space shape
that is being created. And same thing right here. There's this little
negative space shape. So even though I
haven't technically gone to the negative
space check site, I'm already naturally noticing and observing those
things for my blocking. Okay, I'm gonna deal with all those little tiny
negative spaces later. I just need to
know kind of where her general thing her
general position is, and I want to check her
elbow and hands right now. So let's see. I'm going
to place them here. I'm noticing her
arm and the book, and then her hand comes out a little bit past the
globe, but not Okay. So next I'm starting to notice the shapes that make
up this drawing. So I'm going to start
to place some of those. I place the sphere over here. There's a shape down here. This kind of rectangular shape. For this part, I'm drawing
through a lot because I want to make sure that my
illustration lines up. Drawing this shape in
here, a little opening. Same thing with the pencil
holder on this side. And I can continue to
keep just checking that my lines match up. Okay. And then with
drawing this ruler, you can get very detailed. Here you can check the
angle and then notice the negative space
and angle that is created between the
pencil and the ruler. So this telescope has the cylindrical part
here for the lens, and it goes in a little
bit and then goes down to about here
past her shoulder. Let's see. I'm looking
at this distance between the two legs as
well as the angle here. So that leg actually needs
to be past this pencil. This pencil is more over here. And then there's this leg. And then I can see that
this leg on the back is starting from basically
the edge of this doorway. That's another reference
point, landmark. I can look at this
negative space right here and place the leg of that. And I can see that
the leg comes into the vase right around there
and has this little angle. Kina is looking good. So this leg seems to
you can't see it, but it ends right around this
side of the pencil case. And then I'm just
going to finish off this part since I'm
here with this leaf, which almost touches
her hair here. That's a good reference point. And then putting in this flower, and with the flower, there's a few ways I can
go about doing it. I can look very exactly
with where the line is. I can put in the
overall shape first. And so if you're constantly
measuring and checking, it'll come together
like a puzzle piece, and you'll just naturally
catch your mistakes. And it's natural to have a lot of those
mistakes in the beginning. And that's just part of the
process and the practice. Just be proud of
yourself, actually, when you do catch
those mistakes or just general inaccuracies
so that you can go ahead and correct them
and just train your eye to see more and more
clearly and accurately. And again, I'm just constantly
looking back and forth. This one, I can see this edge is right here in
relation to the doorway. There is a little leaf
coming out right here, and then this leaf is
within the doorway. There's this tiny little green corner of the
vase poking out. The leaves on this side are
like this in relation to. I'm looking at where does
this sit to this flower? Where does this sit to this vase and to this flower
and then to each other. And what angle is it at? And I'll definitely be double checking these flowers later
because there's a lot of measurements that I
can kind of go with her body and this flower, too, you know, I can see because the top of her head is going
to be right around here. And then this is
actually, let's see, only a little bit
higher than this one, which is all the way down here and definitely lower than
the top of her head. So I need to bring
that way down. Now let's get to the girl. What are some good
measuring points? So, this hair coming out to here her hair forming this kind of negative space here is what I'm
looking at right now. And then there's this nice
negative space there. And you can bring in
a hair like that. So again, trying to not
think of this as hair. What is that shape? I almost
looks like a fish, actually. A little black fish. And then this one right
here looks like a curtain. And then her face, well, I'm just gonna call
her face so we can reference the same thing
has this angle like this. And then her hand
comes out like this. And then there's
actually this tiny little negative space between her thumb and her back fingers. And now I'm looking at
her chin comes up a little bit above
her hair like that. Let me see if I grew
this line in correctly. Okay. And then you can see
this shape that is being created from her
Palm? Up to her neck. Drawing in her jacket, no. So I can see the
arm is about that far away from her telescope. And her jacket goes up here and then has this
negative space here. Let me put it in
this shadow shape. So with landmarks and angles, a lot of times I'm also
looking forward to seeing the line all the way through, and that's
really helpful. You wouldn't
necessarily think to associate the opening of
her jacket with the pencil, but you'll see that that is actually a really
helpful reference point. And that's going
to help me place my pencil later on, too. Alright, I'm starting to
get into fine details now, so I'm looking at this
negative space here. Actually, find that
I use negative space a lot as a measuring tool. And I'm starting to see that all of these items are actually sitting a little too tall, which is an easy fix. But if I didn't notice that, that could become a
big problem later on. And maybe this globe
is actually too big. That's what's throwing
a lot of things off. Get the top of the
globe in there. Okay? That means this goes
a little bit more in. That's probably what
was throwing a lot of these flower measurements
off earlier. And these are actually
perfect examples of things to look out
for, so I'm glad. Okay. Now that's looking much better. I have the little
cutout right here. So I've seen this as a cutout. It's the space between
her arm and her body. And then you can kind of
see this connection between the head of the pencil on
the top of her underarm. So drawing that in. And
that's going to help me place my hand her drawing hand, looking at this little
shape that's being created. And we're not going
to get into the details of the
fingers right now. We will do that later, for sure. But for now, I'm just looking at the overall shape, which is, like, a little sort
of box, like a rock. So it's really starting
to come together. I just have a few more details. Left in her face. Faces are super tricky but so fun to draw. I am going to just
put in the kind of basic lines so that I can
give myself a measuring tool. And then from there, I
can put in her eyes. And it is starting to
look really close. And remember you can check
by flipping this image. So it looks pretty good.
And then let's see the overlay. Pretty close. I can see that the globe
still needs some work, but a lot of the
elements are right. The telescope up here needs
a little bit more work. And if I were to take the
times to double check, I could have remembered
that it should have set a little bit further above
her head than it is here. But overall, this is a great example of how
you can use all of the tools that it showed
you for measuring and looking to create
observational sketches.
7. Lines & Shapes 5: Summary & Further Practice: Oh. We learned a lot
in this section, so let's go over a quick summary of key points we covered. Learning to draw is
learning to see. Letting go of
preconceived notions allows us to see
what's really there. Drawings are built out
of lines and shapes, so we need to practice
drawing these well and practice seeing them
in everything we observe. Besides the shape and
structure of an object, it's important to
see its gesture. Everything has a gesture.
Everything has a spirit. And lastly, we went over the eight observational drawing techniques that you can use to hone your hand
eye coordination and improve the accuracy
of your drawings. So to continue your practice, just keep at it. Do the drills and the pages of lines and shapes,
do them again. Try other images when it comes
to observational drawings. I recommend practicing
a drawing flow using the gesture drawing, and then the eight observational
drawing techniques. You can use my curated
drawing references that I've provided or find your
own or draw from life. These are really easy ways to fill up your
sketchbook pages, build your muscle memory, and help practice
mindfulness while creating. For deeper studies
on these topics, see my recommendations
in the class resources. Alright, when you're
feeling ready, let's move on to
the next section.
8. Value & Form 1: Intro to Value: Welcome to part two of my
drawing foundations class. In the first part, we
covered lines and shapes and saw how they're
the building blocks of all of our drawings. In most art training,
the drawing process is broken down
into three stages. There's line, shape, and form. You can think of
it as going from one dimensional linework to two dimensional
flattened shapes, and finally to three
dimensional forms. In this section, we'll
be moving from lines and shapes and on
to value and form. We need to start with value because that's what's
going to lead to an understanding of how to
give a tout shape its form. So what is value? Value is how light
or dark a color or object is on a scale
from white to black. For every color, there's
a corresponding value on a gray scale with white
being at one end of the spectrum and black
being on the other end of the spectrum and all of the
shades of gray in between. If you turn a photograph or
painting into gray scale, you're seeing all of its values. Value is also called tone. In digital painting tools
such as Procre and Photoshop, you'll see the value scale
on the color selector. So that's a simple way to
understand that value is a measure of how much white or black is in a
particular color. When studying value, we're
looking at both the color of objects such as a white
ball on a black table, as well as the
lights and shadows, such as the many shades
of white to black that is cast onto the white
ball by a light source. So value refers to
lights and darks, both in terms of the amount of white and black in a color, as well as lights and shadows. Here's a standard value scale. The grading at the top shows the full spectrum of
hundreds of shades of gray. Below it is a nine value scale. This can be broken down
into labels of shadows, mid tones, and highlights. So I've noticed that
throughout this section, we're not going to be
dealing with any color, just working in black and white. In fact, most
formal art training starts with charcoal
and pencil studies, and it stays in
gray scale drawing long before getting
into any color at all. This is because color can be distracting from
understanding value. Color mixes in hue
and saturation, and so it can be hard
for a beginner to see the underlying
value of color. By focusing on value first and really getting an
understanding of it on its own, we'll have a much
deeper understanding of color later on and
be able to use value to lead the eye it's a
critical tool for designing skillful illustrations and
artwork and for seeing your reference photos or real
life examples accurately. Okay, now let's do some
value exercises together so that you can get a real understanding of
how this all works.
9. Value & Form 2: Value Study Exercises: U the first thing I want to do to start our demo
drawing exercises is to actually take a look at
our main illustration and explain how value is the
next step of our analysis. So here is our final
finished piece, and then I just go
into adjustments, hue saturation, just bring
saturation all the way down, and that gives me the
values that I want to see. So what I'm looking at here is, is this image legible? Is my eye drawn to
where I want it to be? So here, the first thing I see is obviously
the character. We look at her first
because she has the highest contrast between
her face and her hair. Also have kind of this
highest contrast as an object overall compared
to the rest of the items. And then I've added
these darker values, one to distinguish the shapes between these different objects. And then two, it just
starts to gradually bring your eye around
the illustration. As for the objects on the side, I have chosen this middle value to still make sure that the
objects are distinguished so you can see that the
flowers don't disappear into the telescope or
the pencil case. But of course, I
could have created a lot stronger
contrast, as well. So here I want to
show you a version where I made the flowers
a little bit darker. And while that technically is
a little bit more legible, it actually goes against
what I want to do, which is to keep the focus on the character because
it starts to get a little bit too competing in terms of what our eye wants
to be drawn to first. So I like that actually there's a lower contrast
amongst these items, and then there a
higher contrast with a few smaller things that
lead your eye around. That is what I'm thinking
about when I check value, and I'll talk more about
that later in this section. For now, hopefully,
we understand how value plays into our
illustration and artwork design. So we can get into some of the drills to get
familiar with values, how we control it
with our tools, and then build up from there. Okay, so I've set up this paper with these boxes
already to save us some time. But if you'd like, you
can go ahead and make some squares for
yourself, five squares. And then I'm going to demo three different types of tools. You don't have to
do all three, but if you're unsure which one you feel most intuitive with or which one
you like to use the most, it could be a great
way to just test out different things while
also learning about value. So let's start with charcoal. Charcoal is one of the
most traditional mediums and amazing for
learning about value because it produces a true black versus the gray that a
graphite pencil can do. So I feel like this is
a really good place to start and just understand
and have a very simple, very affordable tool
to kind of help you understand the
range of values. So let's start with
actually the darkest dark. So I'm just going to
make this as black as possible and pressing down as hard as I can to create
a very dark square here. And I want to point out here
that in a two value study, you're just looking
at black and white. So literally it
could just be this. I'm using the white of the
paper as the first value. And then this, which
is the darkest dark. And if you're just using two, you don't have to
press down so hard. The black will already
provide such a contrast, but those would be
a two value study. So for a three value system, you just want to create
something that's 50% between the two of these. So one way you can do that is, of course, just kind of
sketching back in here. And it's just a matter
of practice and feeling the weight of your hand and how the charcoal or whatever toy you're using responds
to you to kind of know how heavy or hard to push and how to achieve
that middle value. And with things like graphite
pencil and charcoal, you can always erase
and lift some of the color you put down if it's
getting a little too dark. So this is a chamois, and it's also called a chamois
an artist's Chami. And with this chamois, you can actually draw
with it as well, using your finger,
and that's actually really helpful for big studies. And so just using this, I'm going to actually
start to put in my second value here. That looks pretty good. I'm just actually gonna lift
some of this charcoal that I have spilling over on this one
to create my fourth value. So the fourth value, of course, wants to be 50% between
the third and fifth value. So I really like charcoal 'cause it almost feels like
being a kid again, it's getting to finger paint. And then when you do
charcoal studies, you're just amazed by
actually Good it looks when you're doing value studies without having to
be super exact. And that looks
pretty even to me. And so let's move on to the pen. You might not be working with something like
a charcoal that can create different levels depending on how hard
you're pressing. So instead, what you
can do is use hatching or linework to convey
the different values. So let me stick again
with the fifth value. Filled all the way in is
going to be my fifth value. Now, again, I'm going
to leave this first one blank as my first value. And then I'm trying
to create something in the middle between these. So I'm just going
to use diagonal Shmart for this example. And right now I'm not trying to make the line super perfect, but just to give you the idea, it's better with Penn to start
lighter and then move into a darker hatch should I feel that I need to create
that difference. So I'm gonna move into
the fourth one now, and I'm just basically going to double this amount
of hatch work. Okay. And then let's go
over to the second value. And actually, what I
think might work is just keeping the line weight
very thin and spread out. It was actually kind of nice about doing the
charcoal version first, is that it's a good way to
compare and kind of eyeball if your other versions are kind of feeling generally
the same as those. Even with all this hashing, it still looks
significantly lighter than this totally dark one. So I'm going to go with these as my five valleys with a pen. Now, finally, I want to
show you colored pencils. And what's nice about colored pencils is that
with Prison color, which is my favorite
brand of colored pencils, you can basically get
them pre made for you, and they have warm gray, cool gray, and french gray, and you can just pick your five values and do studies with that. Of course, you can just use
the black color, for example, and do lighter and
lighter strokes, like how I demonstrated
with the charcoal. But I just wanted to show you
what it could look like if you just use these pencils
that are ready to go. And that's actually how I enjoy using colored
pencils usually with color, but the same idea of
having a dark value, a mid value, and a light value. So I'm going to start
with this black one here. And I'm not going to do a
standard graphite pencil or mechanical pencil because it's a really similar idea
to the charcoal. You just won't get as dark of a black as a charcoal can do, but it's the same idea
just kind of starting with the absolute darkest mark you can make as your
fifth value and then keep splitting
it into kind of the midway for your
third value and then your second value
and your fourth value. So what I really like
about colored pencils is that you can get this
pretty dark black, and it doesn't smear. And these particular more
waxy colored pencils, the artist's grade ones
blend really well together. So it kind of brings in
a lot of the best of pencils and paints in
a way and charcoal. So it's kind of a
happy medium for me. So I am going to do the middle value next just to
continue with our pattern. This is the 50% warm gray. These pencils are broken down. There's a 10%, 20%, 30%, 40, 50, and then it
goes to 70 and 90. So let me go into the 20 next. So this is the 20% warm gray. And I chose warm gray because I like the tone more than cool. But again, each
one has its place. There's no reason
why you can only use warm gray for
these exercises. You can use cool gray or
French gray, as well. And if you're trying to convey
different temperatures, you might mix the two together. So, this is the
five value studies. Go ahead and take
some time to finish yours up if you need a
little bit more time, and then we'll move on
to the next exercise. Okay, so we're going to continue with this reference photo
that I've provided because it'll help you understand
by reinforcing something you're familiar with and seeing how each step layers
on top of each other. And let's start by creating a little value system for ourselves using
these digital tools. And I am going to just quickly swatch out a
five value system. So that is my darkest dark. Let's go here. My fourth value. I'm just kind of moving
it up the scale here. And then the white of our background can be
our lightest light. Or what we can try to do
is to use a tonal color. So that's kind of around my two. And then bring in the white so we can really see any
highlights that we want to add. So I actually prefer to work
like that for value studies, and you're welcome to do the same using tone
paper or adjusting the background of your tablet if you're following
along digitally. So at this point, I am going to take a
moment to really look at this image and start to plan ahead of what are the
different values that we see? So some obvious things
are the shadow area and the opening of the
vase are very dark. So those would be
our fifth value. And then my brightest brights are going to be definitely
on the edge of this flower. The yellow looks
very light to me. And then coming down the stem, there's definitely
some darkness there. When you're doing
valley studies, a big part of the task is
to group valleys together. So, of course, again,
like we mentioned before, photograph has, you know,
hundreds of values in it. But to make a really
clear value study, you just need to make
some decisions sometimes where things are often
in the gray area, and then you need to
decide one way or another which value is the closest
that you want to put in there. Okay, so let's just get into it. We can always adjust
as we go along I create a new layer to
start my value study. I'm going to start
with my middle value. So I recommend when
doing value study, starting with the middle
value and then going into your darkest dark
and then putting in the range of the mid tones and then
ending with the highlights. The beauty of working
digitally is, of course, you can undo and
create new layers. But as much as you can, I recommend following
the limitations of the traditional
methods so that you can train your hand
to really make good decisions
instead of relying on the undo or delete button. So I'm also seeing this
shadow shape right here. That's really
important to delineate the table from the wall. So I'm going to put a
little bit of that there. With valley studies, you're
not really trying to be super accurate, I
mean, unless you want to, but the purpose is not
necessarily to be super accurate, it's just to convey the overall forms and
shapes that you're seeing. And here, the object basically
blends into its shadow. So we treat that
all as one shape. So again, I'm squinting, 'cause the Billy ball itself is quite a complex thing if you
look at all the details, but if I squint and just look at the shadows
that I'm seeing, I can definitely
see the sphere that encompasses or makes
up the Billy ball. So I'm going to put
in the shadow shape. And here's a good area where
I'm making a judgment call. So I could see that this
stem is on the darker side, but it definitely pops against the back of the belly ball. And so I'm going to say that
the stem is lighter there. And back here, for now
I'm using the four, I might need to add
a little bit of the five just to make
that even more clear. And so I can bring that four in starting a little bit below
so that I still get that pop of the stem to show
that it's going into the ball in the
front of our view. So now I am going
to start working on the top of this vase because that to me is
not looking like that. So I think this
three is going to be kind of the highlight, for sure. Maybe just like little
specs that are coming in to indicate that there's
a light bouncing off there. And I'm noticing that
it's coming down here, and that's really nice to
indicate the shape of the vase. And I'm just doing kind
of lighter strokes to start to get into
that transition. I can definitely see that
there is a lighter part on the outside of this vase where the light
is reflecting in. We'll learn more
about that in a bit. And having that
knowledge will help you catch it in your
observation, as well. I'm going to add a little bit of the fourth value here just to
make that even more clear. Okay, and that's
looking pretty good. Maybe I can add a little
bit of the wood grain in. This very fine detail, but I want to try it
so that you guys can see how much of a difference just subtle value shifts and communicating our
forms and our volumes. These are little things
that most people are not going to notice
the first time they look at an image like this. But once you start to draw it, you appreciate that a lot more. Okay. And then I'm going to go back in here because I'm feeling like the top of this Billy ball
deserves more contrast. So I'm going to cover
up my base block in lines that we created
earlier and look at this. So I'm going to just add a few pieces of my
third value on top. You can just see
how that starts to look like the texture
of the Billy ball. And, of course, I can get into
even more detail on that, but I want to save that
for later in this section. And notice, the more I put them together, the
lighter the area is. And if I keep them
spread out, the fourth v, you can
still dominate. Bringing in a little touch
of the black certain areas. And let's just add a
little bit of highlight. It's mostly around the edge of this Billy ball
that I'm seeing. And then maybe we can add
a little bit to the vase, too, just to make it pop. Can you see how powerful the white highlight is
because of the contrast. And having this
highlight here really clarifies that this belly ball is in front of the left one. And also, what I like about
this is I can think about, you know, how much I
want this flower to pop. So that is my five value
study of the Billy Balls. Take some time to
create your own, and then let's meet with a slightly more advanced
exercise with the same concept. Now that we've done a basic
valley study exercise with Billy Balls, which
we're familiar with, I want to show you a more
complicated image and demonstrate how the
same concepts apply no matter how complicated the image might appear at first. So this is a great
example to start with. And you can use drawing guides if you'd like to the
whole block in exercise. I want to go a little more
quickly through this one and show you how fast valley
thumbnails can actually be. And so here's the horizon line. Here is kind of the
shapes down here. And then I'm looking
at shadow shapes now. So here's this one. This big
one right here. Let's see. So that's my basic blocking, and I'm bringing in that same five values
that I was using earlier. This time about bringing
the background down a little bit so that you can
kind of see the white more. Okay. So again, I'm going to
start with my middle value, and I'm going to put
in my big shapes. I'm going to squint,
and I'm going to see where my darkest darks are where I think
the third value is the truck or the van, and then the sky and parts of the road are definitely the
lightest lights I'm seeing. And everything else is
kind of in between. So let me just start to place in some of these big shapes,
and we'll go from there. Okay. And remember that
values are relative. So although it might seem like it's a little bit
too much in contrast, it's because we haven't put the rest of our values in right now. I am going to put in the
fourth value in next. I'll work into the darkest dark for this particular image. So when I'm looking at
this, I'm really feeling the flow of the overall image. I really love kind
of this sweep. And as I'm staring
at the values, I'm definitely considering
what I'm seeing in the photo, but I'm also starting
to think about how to exaggerate maybe some of these shapes to emphasize
that flow even more. So maybe I'll bring
this one up a bit and that's where a lot of kind of design
considerations can come in, which you don't have to worry
about in the beginning, but I want to show you that it would be part of this
step as you start to get more comfortable
with observing and identifying
different values. So everything has a gesture, even these shadow shapes, and that's a really
nice thing to learn when you're developing
your artist's eye. That really helps
to define the edge. And then I'm just
going to keep putting in some of these
shapes back here. This is a really nice gesture
of the hill coming down. And so far, you
can see that I've only been working
with two values, three plus the background, and it already pretty much looks very much like the image. It could stop here is
actually a good value study. And I'm just going
to now go in with a few more details to
show you the difference between a three ish
value to a five value. So let me go in with
my second value now. So, like I said, the more
values that you have, the more realistic it will look. And so you can start to see the forms being pulled out as
I add in this second value. I'm not trying to match the image exactly for
these rough studies. But I am starting to, again, go back to thinking about the overall feeling that I want to give through different gestures and how I put in the values. Which ones I want to
emphasize and which ones maybe I want to
play down a little bit. So this area is kind of actually one bigger shape when I squint. So let me try to put that in. Yeah, I think that looks better. And that kind of has this flow with this back shape like that. And let's start putting
in my darkest darks. I like the hazy
feeling of this image. So I'll only really bring it in in a very few select areas. Draw the eye to the car a bit. Okay. See how just that little
bit of black really helps make this become even
more clear and pops. And when we add some white,
it'll be even more so. You can see how I'm really
choosing where to place my values to emphasize or not
emphasize certain things. And that's just starts to
become an artistic choice that you can practice by doing many different
value studies, ideally of the same image. So hopefully, you can see now how these five value studies can be applied to very
simple drawings and then worked up to even
very complicated drawings. They're a beautiful way
to study photos that you enjoy and to start to practice learning to
see lights and darks.
10. Value & Form 3: Intro to Form: Now that we have an
understanding of value, let's go back to
what we were talking about at the beginning
of this section, which is how value
relates to form. So remember in the three
stages of our drawing process, going from lines to
shape and then form. So we have our lines
and shapes in place, how do we then render it
to communicate its form? So it's mass or its
depth or its textures? It all comes down to
skillfully placed values. Let's start by
talking about value in the two D versus
three D world. So in a TD world, value helps communicate
in images big shapes. It can also be used to create
a value pattern which helps us use the distribution of lights and shadows
to guide the eye. In a three D world, value is
what communicates the form, texture, and volume of an object by using
lights and shadows. The more values there are, the more realistic it will look. Okay, so let's talk
about rendering form. Remember the shapes that we drew together in part one
of this section. Let's talk about how we can shade those so we can
make them look three D. It's helpful to learn about the classical order of light for this purpose. Understanding this across all of the basic three D shapes will help you render
many other things. So this is the classical
order of light, but you really only need
to know three major areas, the light side, the form shadow, and then the cast shadow. But knowing these additional
terms will help you understand and talk about
the full range of light. So doing highly
rendered value studies might seem tedious, especially if you want to
draw in a modern flat style, but doing at least a few will
help you understand how to adjust your style to be more
flat or more realistic. So studying a range of value and maybe doing a scale
like this so you can see where along
this spectrum of flat to realistic that you personally like
can be really helpful. And finally, an
important aspect of communicating form to learn about is texture and hatching. To communicate that
something is fuzzy, bumpy, wooden or whatever else is actually a matter
of value variation. So try practicing, creating a sheet of different
textures and hatches so that
you can experiment with what you would want
to use in your work. Some basics to start with
are stippling, scribbling, grass hatching, crosshatching,
and contour hatching.
11. Value & Form 4: Form Rendering Exercises: So let's do a few exercises
together now on form so we can start to get a hang of how to render three D shapes. Alright, so now let's render a sphere so we can
really focus on understanding how much of a render we enjoy and
also how to achieve it. And I'm going to
start by drawing in the core shadow line and then putting in
the darkest dark. I won't go all the way yet, but just kind of
having it so that I can start to see the form
of my sphere already. And I'm using charcoal, so I can more quickly demo the shading I can blend it
easily with my chamois. I'm just following the shape
of the ball right now. Oh. Oh I'm also going to think about the
highlight being right here. So I'm going to give myself
some charcoal to work with. I'm going to put it all
the way around here. Now I'm going to take my shale. I'm going to start to blend
in this core shadow area. And it's okay if it's, you know, not a super sharp edge. So it's perfect
because, you know, obviously, the
more I'm blending, the more I'm losing kind
of the charcoal piece, so I'm just going to carry
it all the way up and over. And you can get very, very detailed and technical, especially in a tile training. I want to render, like, a perfect sphere and create
very, very gentle marks. But for our two purposes, I think that this is a
great starting point, and you can dive into more
detail if you would like. This is already
looking pretty good. I'm just going to
start to darken certain areas to bring
the form out even more. And with the charcoal,
you know, I'm not working in just straightforward
five values. I'm starting to bring in all of the different tones available. The shifts in value really
communicate the shape, the light, strong that light is. And the shadows also have their sharp edges
and blurry edges, depending on how strong
the light source is, where it's positioned above it. So that's why studying from real life is really helpful
because you'll start to get a sense of how that
behaves in real life. If you want to sharpen
your edges with charcoal, your eraser is
absolutely a tool. Actually eraser you can
pretty much draw with, especially when it
comes to charcoal. And let me just show you really quickly how adding a little
bit of white would look. Like I said, the
white also blends. Just like the dark. Okay, so now that we have some experience
rendering a sphere, let's move back to our Billy bull reference image so that we can practice
adding texture. With this study, we're going
to focus on adding texture. Studying texture is a great way to kind of observe
many different things. So one exercise you
can do is just create a whole sheet of
different textures, studying natural things just
plants and wood and rocks, but also studying maybe
some synthetic things such as how to render stainless steel or how to render plastic. So I'm going to start with
actually a dark color. I'm putting in my shapes, and I'm not trying to
be super accurate here. And starting with your
darkest value or maybe your second darkest value is a nice way to approach rendering these types of detailed textures or anything like leaves and foliage because bringing
it out is more intuitive. And actually, it's
kind of how the object is structured, if you
think about it right. Like, the darkest dark is kind
of within the Billy ball, and then the lightest lights are the pieces that
are coming out. So, this is the sphere, if
you think about it, right? There's this sphere or ellipse kind of
comes out like that. The core shadow is around here. And then the light area is
this whole area up here. There's light coming
in from above, and then reflected off
the floor from below, but this would be
our shadow area. So that's kind of how to think about this sphere as
a general matter. And it's something
to really keep in mind throughout the whole
process because it's easy to lose yourself in
the little details and then not pay attention to the overall shadow
structure and how the value plays out on this object
that you're observing. And especially because
it's in color, it's easy to get distracted
with all the little details, and then eventually almost forget to kind of keep
checking your values. So even though when you
first started this class, you probably looked at this Billy ball and
was like, Okay, that's a yellow Billy ball, yellow flower, one color. You can see there's an
infinite number of colors infinite number of
values that you will now learn to group together into your limited value
palette and to see how few you need to really
communicate that texture. You can see that the darkest parts definitely get thicker, so that's something I
want to keep in mind to maybe extend these
parts out a little bit more and then keep these parts pretty
clean and tight. And then if you think about
each of these are a cone, and so I'm also seeing them is where the light is
hitting them at the top. So even your little
main shapes can be broken down further into
tinier and tinier shapes. White highlights. I'm gonna keep it just
focused to this area and maybe the edge a little bit. I think with highlights,
you want to be really selective where you
want to draw the eye, even if you technically see
the same highlight elsewhere. The highlight is just
really powerful. Alright, so now you know how
to render these textures, and I would just keep
practicing if this is something that you want to incorporate into your style, you can draw bark,
you can draw leaves, you can draw flowers, of course. And if you can really get this
down with just grayscale, is going to help so much more
when you get into color.
12. Value & Form 5: Value for Artists & Class Project Part II: So now that we have a basic
understanding of value, let's dive a little
bit deeper and talk about how it
helps us as artists. Value helps in many
ways, but to me, the most important
ways it helps is one, allowing us to see
the essence of an image behind all the details, which you saw as
helped by squinting. Two, setting up a strong base
structure for a drawing. Remembering how we work from
big picture to details. Three, it helps us
pick the right colors, which we'll talk about in more detail in the next section. And finally, it helps us menage our color and
light relationships. An easy way to check
the legibility of your drawing is to
check its values, which you can do by
turning it into grayscale. So if it's still
legible without color, that's a strong value setup. When I'm working
with my own artwork and coming up with something
original and different, I tend to start
with color first, and then I check it
with values afterwards. I can adjust the
colors as needed, and this is just for
me, a more natural way for me to think
about my process. So, for you, I recommend starting with these
foundational value studies, getting an understanding
of it first, and then trying it both ways
and just seeing which is the most helpful
for you in terms of getting the
best final result. I also want to talk
about describing value in terms of
major and minor keys. So I learned this concept from teacher Bill Perkins at
New Masters Academy, and I find it really helpful to think about value this way. Major key refers to
the proportions of lights to darks within
the entire image. High major key means the image
has mostly light values, while low major key means the image has
mostly dark values. Minor key, on the other hand, refers to the range of contrast between the
values themselves. So a high minor key means
there's a lot of contrast, while low minor key means
there is not much contrast. You can see how the
different pairings of the keyse creates
these different moods, which makes sense because
these combinations have a lot to do with
lighting and atmosphere, so how bright or hazy
a setting is or isn't. Another aspect to
keep in mind as you're doing value
studies or value thumbs, is that a value can
appear light or dark, depending on what values
it is surrounded by. So the same shade
of gray can appear totally different depending
on its surroundings. You can try this for yourself
by recreating this image. Training your eyes to
be able to perceive these visual illusions
is really helpful. Okay, now it's your turn. You're going to
take everything we learned in this
section about value and form and bring it into
our main class project. So we started this section
with a discussion of how value follows aligns
and shapes exercise, and now it's your turn to do a value study of
the illustration, and you can check it by simply turning the provided
illustration to gray scale. Also just provide that as an
image so you can compare. For this one, I'm
not going to do an example live just so we can keep this class at a
more manageable length, and this is something that
you can just practice on your own and compare with
the provided images. The same concepts that I've been demonstrating to you with the Billy Balls and the landscape studies are
the same in this situation. The few additional exercises
that you can incorporate include after you finish putting in the
values that you see, you can play with adjusting
them so that you can create different moods based on the major and minor keys
that you learned about. And then from there, consider potentially rendering some of the objects based on the three
D shapes that they take. So, for example, you can render the globe a little
bit more and see if you like that as a
more realistic style. Okay, I know that was a lot, but I hope it was
helpful and interesting. Let's go over a summary of what we learned together
in this section. In this section we learned, value is the study
of lights and darks. Understanding values
helps us design art that is clear and easy to read, or if it's not, that's
intentional on our part. Planning the value is
a critical tool in creating a mood and
directing the viewer's eye. A painting can still
work if the colors are wrong, but the
values are right. It's generally not
true, vice versa. When studying the
values in an image, one way to see more
clearly is to squint. Squinting is a legit
tool that's taught in art schools and
professional art books. When doing value studies, the fewer values, the better. A black and white photo has the full spectrum of
hundreds of values, but you really only
need three to five to do an effective study. It's all about grouping
related values together, which squinting helps with. Before you start drawing, really study the values
and find a pattern you want to intentionally
depict to focus the eye. And finally, the
most important thing is just to keep practicing. Do lots of value studies
from photographs, real life and other artwork, it'll naturally start to hone your sense of light and dark. Okay, when you feel ready, let's meet in the next section. We'll finally talk about color and light.
I'll see you there.
13. Color & Light 1: Seeing Color: Okay, we've finally
reached color and light, which I know is many
people's favorite part. So in this section, we're going to be talking about
basic color theory, color relationships, how
to pick a color palette, and seeing how it all comes together by doing
guided studies. So grab your tools, and let's start exploring the
world of color. Color is one of the first
things we learn about as kids. We learn about the
colors of the rainbow, our blue ocean, our green trees. But understanding color as
artists is much more complex. For some, picking colors and working with
color is intuitive, while for others, the whole
process is very challenging. Either way, don't worry. Understanding basic
color theory can help you regardless of
which camp you are, and it will bring a
whole new appreciation to how you see the world. So color is beautiful
and complicated, and you can spend your
whole life learning about the science and the
art behind color. Again, here, I'm approaching
it with my 80 20 principle, and I'll provide resources
for you if you would like to dive deeper into
any of these topics. As for what tools we'll use, you can follow along
this class with digital or traditional tools. But I do want to note
that I personally find learning color theory is best
with traditional mediums. This is because with
traditional tools, you're really forced to
think about how colors are made and really feel what it means to mix colors together. Digital tools, on
the other hand, are really great for
experimenting with color palettes because you can use
all those great adjustments to your advantage. That's why I'll be
using a combination of both traditional and digital
tools in this section. So what should we tackle first? Most schools would start with basic color theory when
talking about color. But I personally
found it helpful to start with studying color and understanding some
nuances to get my feet wet before diving
into the technicalities. This way, I was understanding
why I was learning color theory so that I could see color better in practice. So instead of the color wheel, let's start with nature. So here's a picture of
some beautiful leaves. At first, we see objects
just as the obvious color. As a kid, we think
about a red apple, a yellow lemon, and
even as adults, we still think of the world
generally in these terms. But as you really study objects, especially for
artistic purposes, you start to see all these beautiful subtleties
in everything. So here in this
photo, you might say, Okay, there's a green, yellow, red, red orange, orange, and darker green leaf,
which is all true. But take a closer look and see how many colors each
leaf actually has. So feel free to take
a pause here if you would like some time to
study it on your own first. Okay, let's talk through some of the colors
that I'm seeing. So starting with this
green leaf at the top, I can see many shades of
green, yellow green, yellow, brown, dark green, and shades of gray and maybe even some hints of
blue in the shadow areas. In this yellow leaf, I'm seeing some browns, some dark browns, maybe some purples, red violets, and hints of green as well. In this red leaf, it has this really beautiful,
deep wine color. And in the shadows, you could say almost
gets to black. There's definitely
some pops of yellow, some magenta, red, and
maybe even hints of green. In this red orange
leaf, similarly, there's a lot of yellow
around the edges, some reds, and then some browns and some black spots that
are covering the leaf. Moving over to this
dark green leaf, I'm seeing definitely some
browns and yellows, some reds. So in this yellow
leaf over here, there's predominantly
yellows and yellow oranges, but also a lot of browns. I can even see some hints
of green at the tip, and I would bring in some reds
and some of the detailing. So what were some of the
colors that you picked? Were there even more that
you saw that I didn't? This is a great way to start to exercise your eye and
start to think about what colors you would
be using in order to create this type of image. We'll get into more
of that later, but first, I want
to show you this quote by Winston Churchill. Gradually, the veil over my eyes was lifted
and I could stare at an object and see
what my instructors saw an ephemeral
mingling of color. So a great way to hone
our ability to see true colors is by doing
still life paintings. But doing observational
color studies is important, even if you don't want to
paint super realistically. Developing an understanding of how real life works
is square one. From there, you can
interpret and stylize. Without it, your
drawings and paintings will be built on
weak foundations.
14. Color & Light 2: Plant Study: So let's bring these
concepts together by doing a color study
of this photograph. It's a great reference
for our class because it's a step
up in terms of complexity from our
billy balls and also moves us towards our initial
benchmark drawing photo. It has these great lines, shapes, values, and colors. We can bring all of what
we've been learning together. First I want to talk about our different coloring mediums and the pros and cons of each. I want to spend a
little bit of time just talking through the three
materials that I tend to use the most and the benefits and drawbacks of each one. Starting with colored pencil, because I think it's just
the easiest to access and most familiar
because we've all used colored pencils as kids. I love these colored pencils for just having something
quick and easy on the go. It leads to a lot of
happy accidents and just feels great to have
pencil put to paper. It gives me these
great textures and I love how a lot of the
pages turned out. This is when I started to use colored pencils a lot more
in my sketchbook pages. They just have this really
nice quality to them. They're able to blend really well and I'm able
to experiment and then carry these pages into my digital practice and create prints or
anything else with them. The downside is that it's
hard to go back sometimes. There's a certain point
and color pencils, if you go too dark or
too deep into one hue, you can't really fix it. Sometimes having those
limitations is a good thing. But to address that, we can then bring
in our next friend. This is done with gouache, it's actually acrylic gouache. It's both acrylic and gouache, which I like more than
just plain gouache. These are really
great for having this extremely matte finish. It's almost like a digital painting and that's
why I like it, because it really can emulate my digital style very
well or vice versa. But it's still also has
these limitations that helps me work out
problems traditionally. And I was able to go
back over it with these dark colors
and highlights. I can't pull this off
with just colored pencil. That's what I really
like about gouache. Gouache, on the other hand, does not give me that pencil texture that
I really love from colored pencils and
of course it's not as easy to carry around
and use anywhere. I tend to like to do
that more at home and then colored
pencils outside. Then lastly, we have digital. Digital is amazing
for being able to experiment with these
different colors. Also be able to bring in my traditional keep those
textures and then create new colors or textures and experimentations
on top of that. You have big layers, of course, and you can clean things
up very nicely and so keep it looking very traditional or make it really abstract. Digital has so
much potential and power to it and I really think
it's such an amazing tool. I still use digital
most of the time. Bringing these two together
has been really helpful to my own practice and I really think that there
are pros and cons of each. I was at the
downside of digital, is that it just feels different. It doesn't feel like
you're in the flow as much as when you're working
with paper and pencil. Sometimes the fact
that there are hardly any limitations makes it really complicated in terms of picking the right
color palette or coming up with the
right textures. All the textures
that come really naturally and beautifully with paper and pencil and
paint have to be created manually in digital. Those are the pros and cons of the three materials that
I like to use the most. I encourage you to
experiment with all sorts of things and just see what
feels best for you. Now, I'm going to start the
demo from the beginning. This gives me a chance to bring together everything we've
been learning so far, starting with the blocking and doing an observational drawing. I'm starting with my
peach colored pencil because it's great for lightly laying and guidelines for my coloring and painting. If I need to make adjustments, I just draw over it so
that trains myself not to erase and also notice where
I didn't observe accurately. As I'm laying this in, I'm going over the observational
drawing techniques that we learned earlier. I'm really paying attention to the gesture of the
overall branch, the overall triangle shape of this object and then the
individual leaf shapes, landmarks of how the leaves
are overlapping each other and where they line up
with the leaves around it, directly the below
or to the side. I'm also noticing the angles of the edges and how
they meet the branch, the overall proportion
of how big and small the leaves are to each
other and the branches, and of course the negative
space between the leaves. Once we have our observational
drawing line work put in, next I'm going to
show you a bit of my colored pencil
coloring process and bring in some of our
learnings about value. At first, we might look at
this photo and just think, a green plant, you might
think of it as one color. But now you'll
notice that there's so many different colors
that make up this study. In this stage, I'm
paying attention to the values and starting to
notice the color shifts. I'm starting with a
medium green coloring in at about 50% of
my hand weight. But I'm also going
to need to add dark green, dark brown, and even indigo and
black colors to get those shadow shapes
and value changes. The value shifts are how
we can see the form of the leaf where it gets folded
and where it casts shadows. I also need to add in yellow
and blue-green hues to shift the temperature as a light reflects on the different
angles of the leaves. I can really see here how
the different warm greens versus a cool greens look very different once I
take a closer look. You can experiment here with seeing what other
colors you notice. Colored pencil is
intuitive and familiar. But you'll also notice that once I put down a darker color, I'm not going to be
able to lighten it again with colored pencil alone. There's definitely
pros and cons, which hopefully is obvious
through this demo. That brings us to gouache. First I'm just
laying out some of the basic paints that I know
I'm going to need to use. If you don't have any of these particular
hues, don't worry. As long as you have
the basic colors, you'll be able to mix a
close approximation of them. For example, with blue-green, you don't necessarily
need to have that color. You can mix blue
and green together. I'm using the Princeton
velvet touch brush line, which is really great for
acrylic and acrylic wash. I'm just coloring directly
over my colored pencil study, starting with this
yellow green color because it's the biggest
color shape that I can see. I'm just placing
that wherever I feel like I notice that color
in my photo reference. I'm looking at the
photo reference a lot going back and forth. This is just my
first bottom layer. I don't have to be super exact. Trying to place it in as many
places as I can notice it. Colored pencils and gouache actually work really
beautifully together. Gouache can cover up
layers completely. You cover up any mistakes and colored pencils
or just adjust things that you want
to change that you can't do through
colored pencil alone. You can be selective
about having the parts with that
lovely pencil texture showing through while leaving other parts with the flat
matte of the gouache. Now, I don't normally cover up my colored pencil studies
with gouache like this but this demo will
help demonstrate the same exercise
with this new medium. Now I'm mixing color
green by bringing in the blue into my green color, adding a little bit of
white to lighten that up. Another tip is that
you can mix colors with these little
palette knives. What's nice about
this is soon as you mix with your brush, your brush gets really
fat with lots of paint and it's hard to really scrape it out and get a nice delicate touch
with the paint again. And so these palette knives, one can be really
great at mixing paints because it has
this broad surface, and two keeps your paint brushes for painting instead
of color mixing. I'm going to start to put
this color down wherever I see that cooler green hue. With gouache, there
is a little bit of time where you can blend the colors together but
it does dry quickly, so a lot of times
it ends up feeling a little bit more like
separate colors which can be a challenge if you're trying to get a very blended look or a great benefit if you like that really clean
and more digital look. Now that you've
started to notice the lights and shadows of objects from our
value and form class, you can think about
the main colors you see and how they are shifting from lighter
values to darker values. Keep an eye out for that
suddenly changing color. Even without knowing
any color theory or the science of
light and shadow, you can simply observe what
you literally see before you. As much as you can try to isolate a color
you're observing. So many times we think a color is different
because of what it's surrounded by such
as a gray that looks really green because it's surrounded by
really potent reds. And swatching out some of the colors at the top
here so that you can see the difference and the
shifting temperatures of each hue that I'm using and creating this little
palette up here. It's also nice about
trying little swatches, either directly on
your study or it can have a little scratch
paper next to you, is that you can preview a color before putting it
down onto your study. So when you're mixing, I really recommend
mixing in small amounts first to see this getting
to the right temperature. I'm just putting
in my dark color in where I see my shadow shapes. Something so organic like a
leaf is a little trickier because there's not like
that really hard edge, clear shadow shape
that you can often get with man-made objects, but I think this is
a great exercise. Just start to really see how these little changes can really make such a
huge difference, and it's going to be a little
bit delicate about how you put down different
colors and how you can go back and color on top of them to create the
effect that you want. So knowing we're starting to see three different values
at this point, overall, we have this really
dark shadow color, the lighter yellow-green color, and this middle
cool green color. Just with three values, like we've talked about
in our value form class, can I create so much
definition and form? Of course, it's flat,
but it really makes a huge difference going
from one value to three. So now I'm just
going to mix in some of my highlight colors. Can already see just
what a huge difference that added value creates. Now, because gouache is really
opaque and dries quickly, I can add back in lighter
colors and highlights or fix colors that didn't
turn out the way I imagined. This is really helpful and feels a bit like digital
painting actually. I love how opaque and vibrant
the paint it turns out. Now I'm adding in some yellow, creating this warmer highlight. So adding in this yellow to this mane yellow-green
that I had earlier, it's interesting to see
the slight shift that it creates making it a little
bit more warm in the center. Now just adding even more
warm and brighter highlight. I'm starting to notice
that the contrast between the cool and warm parts of these leaves are going to feel a little bit too different, so I know I'm going to
need to harmonize that a little bit more
moving forward. This is really amazing to
observe how these shifts and color temperature and
value really start to bring out how this
form is angled, where the light source is and making this whole painting
look more dimensional. That's also where you
can really start to get the sense that color is so relative and it depends on the colors
that it's next to. This green that
looks really cool. Next to this warm
green can look a lot warmer if it's next to
say a blue or a purple. And even though these two greens you probably thought were
really similar when you started to mix them
can feel so different if those were the
only two things you're trying to compare. Now I've created this slightly less saturated shadow color and I'm placing it
anywhere I see some of that shift and the shadow
shapes of the photo reference. Even within these really
dark parts of an object, there are shifts that might be hard to notice at first but do make this big difference in terms of how the
form is rendered. You'll notice that doing the
colored pencil study plus a gouache study also helped
reinforce observing color. For me, I catch things
the second time around that I didn't
notice the first time. And because I've already blocked in the drawing with pencil, I can focus entirely on studying value and color it with
my gouache painting. I'm really getting
into the details, defining the branch
more and putting in some of those little
kinks in the leaves, trying to really
pay attention to how the different leaves
are angled to the branch, making sure that I'm
showing the right overlaps, right tilting towards and away. All right so that's
looking pretty good. I decided to add
some clean up around the whole image is putting in this really light green shade, covering up all of
my pencil marks, but that's not necessary. I actually think it
looks cool with some of the pencil marks
showing up underneath. This is also helping
me really clarify my negative spaces and
crisping up the edge. So now I'm using this filbert greener three-eighth inch brush, which is really cool. It has basically
this thinned out brush head and it creates
these little hatch marks. So I'm just going in with
my highlight colors. Now that you've seen
a full demo with both colored pencil
and gouache paint, encourage you to try this for yourself if you haven't already. See how you like using each and maybe see how you
like using them together. Keep in mind that it
takes practice to start to get into the flow
with these materials. My colored pencils
set on my desk for years before I found out
how I like to use them, and my first few attempts
with gouache look so flat and lifeless and sad that
I put them aside for a while before picking
them back up again. For both gouache and
colored pencils, I found that the key was
understanding values, layering, and color mixing
to get the most out of them. That's why we went over
valued form first, and now we're going to move on to discussing color theory. When you're ready, let's
meet in the next class.
15. Color & Light 3: Understanding Color: Alright. Now that we've gotten a taste of seeing the
subtleties and color, let's talk about
basic color theory. As we dive into color theory, I want us to keep in mind
that at the end of the day, we're really talking
about nature. Color is a part of our
natural experience. It's in everything around us and everything
that we perceive. So even though these topics
have been broken down into these diagrams and these
charts and these theories, keep in mind the big
picture context, which is that we're
talking about nature and our ability to better
see the world around us. Alright, so let's start with this basic color wheel that you're probably
all familiar with. It captures the colors we see in the visible light spectrum made most clear to us when
we see a rainbow. We have the primary
colors of red, yellow, and blue, then the secondary colors of orange,
green and purple. And finally, the tertiary
colors in between produced by mixing the primary and secondary colors together. Some of you probably already know that the colors opposite of each other on the color wheel are considered complimentary, such as red and green, blue and orange, yellow and purple. By being on the opposite
ends of the circle, they cause each other
to pop when placed next to each other, making
them complimentary. Also note that when
we mix them together, we produce a neutral color. I think that's a really
beautiful aspect of both art and life. So we understand that in theory, but to get that into
our own experience, let's actually make a
color wheel together. Okay, now let's talk about these colored pencils
and how we're going to do the color wheel
exercise with them. So I've selected the
12 hues that are in our color wheel
as close as I can with what the prisma
colored pencils offer. So let's actually start by just penciling really quick
little circles for us to do. So we have 12 hues in our wheel. So what you can do is
just start with kind of a north south east west they
don't have to be perfect, but they just kind
of, like, will be for you to fill in later on. And then you just create
two equally spaced circles between each one to get your 12. And what we're going
to do is we are going to put one of these hues
into each one of these, and then we're going to
pick a lighter hue and then a darker hue to place
inside and around it. And then we'll kind
of start to see how the color
palette is reflected in our palette and
then also be able to mix them together on
this side of the page. So let's get started
with our red. Just go in and fill
in your circle. And we can always
make them bigger or smaller after let's
just move along. So next I'm having
the red orange, which is pale vermilion 921. And then next up
having orange, 918. That goes here. And the reason why I'm not starting
with red, yellow, blue, and then mixing it into the secondary green,
orange, purple, and then the tertiary colors is because with these
colored pencils, they aren't going to mix
perfectly like that. And so this exercise is
now that we understand the basic color theory of
how the color wheel works, now let's see it in practice
with their actual materials. And then yellow orange, which is the sunburst
yellow, 917. Alright. Now we
move on to yellow. So I've picked this canner
yellow, which is 916. And then this yellow green, which is chartreuse 989. Then our true green, which is going to
be a little more blue than you're going to expect or at least the expected. You see that they're
on the opposite side from its complimentary
color red. Okay. And then blue green is
going to be aquamarine 905. And then here we have
blue, true blue 903. And if you can put the little numbers
next to each circle, if you want to remind
yourself which ones they are. Then we have cobalt
blue hue 133. Now I have Violet 932. And then finally,
we have red violet, which I picked up
as Mulberry 995. Alright. The next
exercise is to pick the light version and the
dark version of each. So if you were to get a scratch paper and just add
white and black to these, you're going to get
something like this. And that's not exactly the
colors that we want to have. Some of them work
in the darker ones, but especially up here, this is just not like
the dark oranges that we're going to want
to use our illustrations. So good exercise is then to
just go through your pack and pick the closest that you see to be the dark and light
version of each one. And even if you don't
have the exact same hues that I'm using, just
use the closest ones, and this is part of
the experiment so that you can see what
colors you have. For red, I've picked
blush pink for my lighter color and then crimson red for my darker color. So I'm just going to put
a smaller circle here. And then with the crimson red, I'll put this darker
circle outside of here. Just make it a
little bit bigger. It doesn't really matter. It's just you find you
pick one that you're like, actually, that
doesn't really turn out the way I expected. You can always mix in a
closer adjacent color, like something deeper
or something lighter to try to get closer
to what you want. But this is a good way to kind of get to know your palett. Okay, so for red orange, I've picked salmon pink
as my lighter one, one, 001, and poppy red
as my darker hue. So 922. Continuing
in my little circle, doing my big circle. You can really just
start to compare and see how much
more orange it is, whereas on its own, you might
just think it's pure red. So next for orange, I've picked this
cadmium orange hue, 118, and then this Spanish
orange 103 for my lighter one. Again, feel free to take your
time, enjoy this process. You're learning about all of your tools and
how to use color, but at the same time, creating something that's very beautiful. And then I will use
Spanish orange. That's my darker yellow orange. And then so for this light one. Go to try this Jasmine color. 1012. Alright, next up. So the light yellow, I've picked Deco yellow, which is 1011. And then for the darker
one, I've picked Golden Ron, which is 1034. So I'm gonna put in this
deco yellow, 10, one, one. And then the golden rod. It's darker color. Oof. That's a little too dark
for my preference. So what I'm gonna do is actually bring in the yellow orange. Bring in the sun burst
yellow because actually, I do feel like that's a darker
colour version of that. So that's yellow Ochre 942. Okay. It's finally
getting closer to what I would imagine
a darker yellow city. Okay, now moving
on to chartreuse. I've picked up this
yellow chartreuse. It's number 1004. So you can start
to see chartreuse. And in yellow Sharrue sometimes when you want
to lighten something, you don't necessarily
need to add white. You might need to add it's
adjacent brighter color. And then for the darker color, I've picked up the
spring green 913. It's not going to
be a perfect match, so I'm going to go in a little lighter and then see if I
can adjust it from there. It's a little more green than
I feel like it should be. So let me actually bring
in the chartreuse itself. That looks a lot more like
a darker version of that. So you see mixing
just the darker or kind of the adjacent hue into it will be better
than adding a black. So for light green, I've
picked this light green 920. Okay. And then for dark green, I've picked grass green, 909. Now let's move on
to this blue green. So I've picked the light aqua. And then for the darker version, I picked this cobalt
turquoise 105. And then we get into the blue. So I'm going to do
pick the sky blue. Actually, so for the dark blue, I'm going to use this
blue denim 1101. And then I actually
do want to try adding a little bit of blue
into the sky blue light. Maybe a little bit
into here, too. When they were adding
your original hue into whatever color you're
trying to mix it into, is that, of course, it
starts to harmonize it more. So that's looking nicer already. And then let's move on
to this blue violet. So I have picked
blue lake color, kind of like a periwinkle. And then for our dark
version of that. Ultra vain. Yeah,
that looks nice. Getting into our violet. So I've chosen lavender
as our light violet. 934. And I'm adding imperial violet 1007
as my dark color. And then for the red violet, I picked out this
pink rose 1018. And then for the
dark red violet, I picked out this
Dahlia purple, 1009. Okay, so that was
hopefully relax. It's like doing a
mandala. Now, you have your nice little com wheel. If you like, you can go
in and clean it up a bit or move on to the next section. Okay, so for this next
section on this side, we're going to talk
about blending with these neutral grays
and blacks and browns. So you can pick any hue, but just pick one out
of these main ones. And I'm gonna be using grass green because it's
a color that I use a lot and would be
really helpful for me to see how they interact
with all these colors. Would recommend picking
whichever hue that you like. It's best to start with one
that has room to be blended. So maybe not something that's
super dark like these. If you're going to
pick one of these, I would pick one of
the middle colors. So I'm going to start
with grass green, but you are, of course, welcome to start with
whatever you like. So what I'm going to
do is I'm going to draw eight rows of five circles, they're all going to start
with this green hue. And then I have
collected here a group of four of each of the neutrals
that I want to mix with. So starting with these browns. I have beige, light umber, dark umber and black. Then I have basically the 30%, 50%, 70%, and 90% of
each of the grades. So if you have all
of these hues, go ahead and collect them. If not, you can just watch the demonstration and see how they interact
with each other. And then actually, you can use that and decide which ones you like the most and maybe just get those specific colors,
if not all of them. So let me just start
with the five circles. All of our circle and line
part this will come in handy. So there's going to be
eight rows of each, and you can add a label
here on the side later, which is why it's a little
bit leaning that way. Okay. Let's start by actually just filling all of
these in with your green. And I wouldn't go
as hard as that, but maybe, like, about
50 to 60% filled in. So it gives us some
room to blend. So feel free to
put on some music or an audio book and
fill out your circles. When you're ready, let's
move on to blending. And the goal is to basically have a light to dark version, and we want to see
how we can achieve the different colors
that we actually want. So with this top one, we're actually going
to start with green. And then I want to
see how it works with putting in an
adjacent warmer color. So I will put in yellow, and then an adjacent
cooler color. Blue. And then what it
looks like to put in, actually the
complimentary color, so it neutralizes it, but how? After that, we're going
to put in our umbers, so I'm going to put in our just U for umber
and blacks and beiges. And then we'll do our 3 grays. So we're going to
do French gray, warm gray, and cool gray. So, starting with green is going to be similar
to this exercise. So this is why colored
pencils do have a limitation. Obviously, with, like,
paint or on digital, if you mix in more
and more white, you could get very,
very light color. But with colored pencils, there's kind of a limit to
how much you can go back. And so what I like to
do is to start with a medium weight hand and
then blend in as needed. So next I'm putting
in a light green. Just kind of noticing
how those two interact. This one is going to
be my true green. And then I'm going to
mixing in a dark green. And first, I'm going to
just do maybe like half. So maybe about 50, 50. And then for this one over here, I'm going to go very hard so I can get as much of a
dark green as possible. Okay. So those are
my top five for now, mixing in just different
versions of green. Okay, next one, I'm
going to try yellow. So I can actually try
these different yellow, yellow oranges and see
how they affect my color. I'm going to start
with this cream color. It's one of my
lightest yellows, 914. Okay. And then let's see if
I can try this deco yellow. Okay. So that was the 1011. Let's put in yellow yellow. So that's going to be
our cannery yellow here. I can see how that really starts to bring it more into
this yellow green color. And then Let's try yellow ochre. And again, you can add the
little numbers at the bottom, if you would like to keep track. Let's try Spanish orange next. Then lastly, I'm going
to try golden rod. It's a pretty dark
yellow orange. We just start to see
the difference between these darker greens
and what kind of effects we're
trying to achieve. So now let's move
on to the blue. So this is going to
cool down our greens. So I'm going to start
with this sky blue. It definitely gives a
little a mintier feel. So this is blue slate, one, 024. And then I'm going
to do true blue. You start to see how
different just those two are. And then let's try this
darker denim blue. Definitely looking like
a pretty blue green now. And then let's try ultramarine. Just kind of get that range of blue and seeing
how they all affect. So ultramarine obviously is a lot darker than
these yellow colors, so it's able to,
like, bring it closer to its color than
the yellows are. So you can start to
learn how much you can push a color pencil to its lighter hue
versus a darker hue. So I added in the red. I started with the pink and
then moved into poppy red, and then true red, crimson red, and tuscan red. You can see how much that
muddied it up right away and turned it into this really
deep ox blood color. And then I moved
into the umbers. So I did beige, light umber, dark umber and black, and then the three
different grays. So these are all 30%, 50%, 70%, and 90%. You can just kind of see they're very subtle shifts,
but definitely, like, one is a warmer gray and
one is a cooler gray, and then French gray kind of has this other
different tint to it. And what's good about this is
when I want to do a study, I can refer to this of how I get to the
shadows that I want. And it can really depend on whether you
want to do something a little bit more
realistic or something that's a little
bit more stylized. I'll pick work more
in this realm, but it's good to know how to
bring in the blacks and the grays should I want to get
colors closer to this range. Okay, so this is
straightforward enough, but this only covers
the most basic hues. So what do I mean by hue? Every color has three
properties that we can measure it by Hue value and saturation. Hue is probably what most
people think of as color. In the color wheel
we just looked at, the names we gave
each color is more accurately thought of
as the name of its hue. So now recall how
we learned that each color has a
corresponding value. And remember that there's
that full spectrum with hundreds of values. So what about all of those
corresponding values to any one particular hue? That's where we
start to see lighter and darker versions of each hue. You add black and
white or values to lighten or darker than a hue. So by adding white
to lighten a hue, it's called a tint,
and by adding black to darken a hue,
it's called a shade. Finally, we can consider our
third property saturation. So think about how
any given hue can be more intense or more
muted or pastel. So that's saturation.
We're talking about the brilliance or
intensity of a color. So 100% saturation
will be a pure hue, while adding any value, whether it's white or black, will desaturate that color. So now that we know about
hue saturation and value, let's look at a more
thorough color wheel. I like using the color
disc in Procreate, which is the digital
app that I draw with because hue is
on the outer ring, and then the saturation
and value controls for each of the hues
is on the inner ring. Compare this to a more traditional
gradiented color wheel where you might think all
of the colors are present, but actually value is measured on a separate scale
in these cases. The procreate disc is
very intuitive to me. Also compare this to the
classic color selector in digital painting tools, which has the three
control sliders for hue, saturation and value. This might be a better way for
you to start to understand the levels of hue
saturation value in each color that you pick. All right, so we've
talked about basic hue saturation and value. But one aspect of color that is really important that isn't included in that
traditional conversation is colored temperature. So color temperature isn't an exact measure
like it is with hue, sat and value, but you
can definitely feel it. So even to an untrained eye, you can kind of
feel when something feels warm or feels cool. Looking at these two famous
haystack paintings by Monet, which would you say feels cool
and which one feels warm? This probably seems
pretty obvious to you, but really think
about why and how an artist needs to
convey these feelings. At a high level, we
think of the reds, yellows and oranges
as warm colors, and then the blues, purples and greens as the cool colors. But think about how within
each of these hues, there are also cool and warm
versions of each of those. This is where it gets
really interesting. So think about how you can
have a really warm green. Those tend to be a
little bit more yellow, and then a really cool green, which tends to be a little
bit more blue green. And then see how
Mine uses a blend of pinks and blues for
this haystack painting. If you look at this one,
does this feel cool or warm? On the one hand, it
looks like winry, but there's also pink in it. So, traditionally, you would say it should be a warm color. But overall, it
feels pretty cool. Being able to mix these different hues together
with different values, different temperatures,
can help you achieve the right atmosphere that you're trying to go for. Note that temperature
is found even within whites, grays and blacks. The same idea applies about
making them warmer or cooler. So by adding a little bit
of yellows and oranges, you get this warmer white. And if you add some
more blues and purples, you get these cooler whites. The same is true for
grays and blacks. Now that we're color masters, let's talk about
color and light. Scientifically speaking,
color is the part of the spectrum of a
ray of light that does not get absorbed
by the object. We're seeing the part
that is being reflected. Understanding this helps
us process what we're seeing when we're doing
a photo or life study. We can start to understand why a color is most clear where a light hits an object and darker and less
saturated in the shadow. Or why things get lighter and more muted in
color when it's farther away or covered by atmospheres because less light is
getting to our perception. This knowledge will
also help us create believable color
without reference. Alright, now that we've covered the basics of color theory, let's bring all of that together
in our next color study.
16. Color & Light 4: Color Theory Exercise: Now we're going
to do an exercise together that I call
the colored garden. By creating these florals, we'll be learning about mixing different color
temperatures and how to vary our hue,
saturation, and value. So here are the materials
that I'm going to be using for this
color garden study. I have my Holbein
acrylic gouache here in red, orange,
deep yellow, green, light blue,
ultramarine deep, violet, titanium white, burnt
sienna, and primary black. Next, I have this small
Masterson stay wet palette, which is really
great for keeping your paints wet for longer, especially something like guash, which tends to dry
really quickly. As for brushes, I'm using these Princeton velvet touch mixed media brushes,
which I really like. I have a Filbert in size eight, an angular shader and
a three eighth inch, and then this little
tight spot liner, but any kind of small thin liner in about a size
zero would be good. We're going to be doing
this exercise where we experiment with different
temperatures of green for the leaves
and the stems, and then experiment with our different hues of the color wheel in
the flowers above. We can begin with our
basic green color, and then I put in
the deep yellow on one side and the
ultramarine on the other. So this is going to give me my warm green tones and
on the other side, my cool green tones. I'm also going to have
a bit of white to work with if I want to
lighten any of the colors. And, let's just go
in and start to mix that warm green color that's gonna be our first
leaf and stem. So there's no exact
measurement of how much yellow and
how much green to use. It's really actually
your preference to see what kind of warm yellow
green you want to have. I've had quite a
bit of yellow with my green to have this really
nice warm yellow green. I'm actually going to start with my peach colored
pencil to just put in a line at the bottom so that I can make sure everything
is nicely spaced out, and I'm just putting
in Roy G Biv, so ROY G BIV to keep track of which hue I'm going to
put on which stem. Red, orange, yellow,
green, blue indigo violet. Now I'm just going to start putting in the leaves and stems. So this might take a little
bit of getting used to, but it really is quite natural just with the
flow of the brush. So I'm using the
angle cheater here where you can achieve a very
similar effect with the filbert to starting
with the edge tapered and then pushing down to create the thicker
part of a leaf. And then for the longer stems, just not pushing down as much
to get the fatter parts, but still getting
a little bit of that variation of line
thickness and weight. I like to overlap the stems and the leaves a little bit to create
a natural look. You can stagger the leaves, so some are higher
and some are lower. There's really no
wrong way to do this. It's supposed to be something that's just enjoyable, relaxing. It's just beautiful
to start to see the leaves and the
stems come together. You don't necessarily
have to have a plan of exactly how
it's going to look, but something that just feels organic and you can start to just fill in some
of the empty spaces with additional leaves, a little branching
off of the stems, and just kind of making
sure that you have enough to place all your
different hues on top. So if you want, you can start on a scratch piece of paper first. You can get the feel of tapering that angle going over a few
just to get the right shape. But it's something that
should really feel natural. If you notice any
spots that you feel like feel a little blank or
you want to thicken up a bit, you can just add a little
bit more paint to it. So as I'm going down the line, I'm just lowering the
amount of yellow. In the middle, I'm
getting pretty much just pure green hue. And then from there, I'm going to be mixing in
more of the blues. You notice that
so far, I haven't done any straight lines. So in some ways, a little less challenging by creating
a more natural look. It's already starting to
look and feel like there's this warm sunlight on the
stems and leaves on the left. We're getting into this
cooler shaded area of our forest garden
over here on the right. What I like about
this exercise is that puts it in this
real life context. So green is a great
way to observe nature, and it looks like something that kind of has the light
and shadows affecting it just by experimenting and exploring color
temperature within green. So we don't need to noodle
too much with this. We can always go back and add some more color after
we put in our flowers. So at this point, let's move on to adding our colored flowers. Okay, so I'm going to start
with this pure red color. Now I'm using the Filbert
brush and I really like this brush for creating these
nice little petal shapes. So again, just using the
natural curve of the brush, pressing down, and then lifting up to create
the petal shape. And as I'm thinking
about the flowers, I'm just varying the
thickness of certain petals, adding in a thinner petal on
the side to kind of convey, like, the edge of a petal. And what I'm doing
here is starting with just the pure hue out
of the paint tube. So just this red flower. And then I'm adding in white
to see how that affects it. It gives me this nice
rosy pink color. And then I want to
see what happens if I add in its
complimentary color, and also what happens
when I add in black. And so just what's
the difference of darkening that red through
these two different hues. So this is giving me this
really kind of, like, ox blood color, practically. And then this is really dark and last almost
all of the red hue. So that might be a
color I want to use, say if I have a really
dark shaded area of a red object or red flower, and I'm just going
to experiment with placing that a little bit on my flowers to seeing that contrast and whether
that works as a shadow color. Alright, so now let's
move on to orange. So again, I'm just putting in the pure hue out of the paint
tube to see how that looks. And I'm thinking of
poppies at this point. So I'm just doing these
really nice little petals with kind of a thicker
one in the middle. And then I'm going
to mix it with my red to get my red oranges. And I'm mixing in some white, getting this nice
light orange color. Could be a great peach, apricot. Then trying some black. That gives me this brown color that kind of matches
the table, actually. Then I try complimentary color just getting that really
dark, muddy color. Alright, so now let's
move on to our yellows. So again, we're going to
bring in our yellow hues and then mix it in with orange
to get our yellow orange. So first I'm just
mixing together this yellow oranges really more dominated by the
orange right now. Mixing in some black. Mixing in some
complimentary colors to see how it
darkens this color. Now let's try the pure yellow just straight out of the tube. My paintbrush still
has a little bit of color that didn't
get washed off, so it's looking a little
muddy, but also kind of nice. Those are some of the happy accidents that can
happen when you're painting something that you didn't intend for
it to be that way, but actually creates
a nice effect. Like, this one looks
like it has a bit of nice shading and
value to it, now. So that's how a lightened
yellow with some white looks. Now, mixing in some
complimentary colors. Now let's start moving
towards yellow green. Again, I'm going to try
some different shapes here, but still keeping it all
within the same idea. Because I started
with a deep yellow, it's gonna give me a
darker yellow green. I can also add in some
white to lighten it up. Then from there, we can
move into our green green. And for this one, I'm going
to make it a little fern. Now we can move onto
our blue greens. I'm starting with this
light blue that I have. Us out of the tube, it has this really
rich sky blue, kind of creating lily
and iris shapes. Now I want to see and kind
of go backwards a little bit of what that blue mixed
with green would look like. As this really beautiful
blue, green color. I love that teal color. Now we're going to go into our deeper blues as we move
into our indigo and violets. So I'm going to put out some
of my ultramarine deep. As this really nice,
rich medium blue. Now I'm just doing
the ultramarine. And again, Guash is
pretty forgiving. So it turns out to be a
shape that you don't love. You can always add a little
bit more or paint around it. And now we're finally
at our final hue. So I've brought in the violet, and I'm going to be
mixing it in first with the ultramarine and
adding some white in it, because with violet, more
so than any other color, I find that it needs
a little bit of white to bring out
more of its color. Let's just see how
the pure paint looks. So this is the violet
to straight out of the tube compared
to a violet that's been mixed with blue and some
red and white on top of it. So you just really see how
much it desaturates it. So let's try to bring in some
of that saturation back. Now I'm just going
to mix a red violet, see how it looks so we
can close at our loop. Now, I'm just experimenting with adding some
pinks at the end. I've gone in and added
some white to my red, but also added a little bit more purple to see how that affects things because
the first time I did it, I did it only with
red and white. So you can see the
difference between the pink all the way on the far
left and that rosy, deeper pink that I did at first. Right. So now we can just kind
of do some final cleanups, if you want to fill
in any blanks with maybe your favorite colors or experiment with
a little bit more. But now you have
an idea of how to do this color garden exercise, and you can do it anytime. It's a really relaxing exercise. You're just experimenting
and playing with color. You don't even have
to use all of them. Maybe you want to do one that
is just focusing on, say, reds and oranges and yellows or all of the cool tones and
experimenting within there. Can mix them up and
not have them in the specific order and just start to experiment
with relationships. There's so many potentials, but at the end of the day, just wanting it to be
something that's relaxing and enjoyable to do while
learning about color theory.
17. Color & Light 5: Using Color: So doing all these
observational color studies is a great way to hone your ability to see color and understand how to render
it according to real life. But of course, there are going to be times
where you're going to want to come up with
your own color palette. Maybe you're doing an
original imaginative painting or you're doing a study, but you want to abstract the colors and do your
own interpretation of it. Either way, how do you
pick a good color palette? Here are some tips on
how to approach that. So to start, I recommend
keeping it simple. Focus on complimentary
color families and keep your values clear. You can do a lot even with
just a three color palette. So when I say complimentary, I'm referring to what we
were talking about earlier, there are actually many other traditional relationships
in color theory. So let's talk about
each one of those here. So there's a monochromatic
relationship. So having one hue with
different shades and tints within that hue,
there's complimentary, so the hues that are opposite each other
on the color wheel, such as red and green, which
we've talked about earlier, then there's split
complimentary. So one hue plus the
two others that are equally spaced apart from
its opposite complement. There's also double
complimentary, so similar to the
split complimentary, but with two on each side. And then there's analogous, which is a grouping of
adjacent hues together, such as red, orange and yellow. And finally, there's
triadic relationships, three hues that are equidistant from each other on
the color wheel. As for me, I actually
very rarely think about my color palettes in these traditional color
relationship terms. I tend to find color very intuitive when it comes to
picking colour palettes, not necessarily rendering color. But when I'm thinking
about palettes, I'm really more thinking about the emotion and the moods of
what I'm trying to convey. I very rarely use primary colors and very
basic relationships of say, like, blue, yellow and red, but try to find more nuanced
versions of each hue and match them accordingly
to a general compliment, such as warm, cool
relationships. And I'm talking about the
emotion and mood of colors, there actually really
is a whole study of emotion and
psychology of colors. And while it's
subjective and often dependent on culture, but still, there are a lot of
patterns that emerge in these studies of how
people perceive color. But think about how within
each of these hues, depending on which
version it is, it can indicate something
very different. So even though green
tends to indicate nature, it can also be used
to convey feelings of envy or maybe money or maybe even something
cky and gross. So something quite
different than nature. What I recommend
is just to study these general color psychology
concepts and then observe your own gut reaction to
colors and use that to guide how you select
colors depending on what it is you want
your image to convey. And with all of this
knowledge in mind, the next step is
just to experiment. So a lot of happy accidents happen while using
traditional mediums, especially paints,
and digital tools are a great way to experiment
with color palettes. So for example, you
can flatten your image and just use the hue and
saturation adjustments to experiment with how
it might look like in totally different shades and also just go out and explore. There really is just
inspiration everywhere. Nature is a great
place to start, but I find a lot of color palette inspiration
and things like fashion and in man made
objects and architecture. Literally everywhere
has inspiration, even covers of magazines
and book design. And, I mean, I could
just name pretty much everything food,
interior design. There's so many ways to get
inspired with color palettes. If you'd like to start
with an existing palette, some resources that you can
use are, of course, pintrist. There's also Adobe color and
Procreate's color picker. Procreate has this cool
option where you can upload a photograph or
image with colors you like, and it will generate a
color palette for you. As for me, I very
rarely start with a set color palette
from an outside source. Usually when I'm
creating a drawing, I have a general
color palette in mind because I have
a mood in mind. So that's what I lead with. Usually, there's
a dominant color, whether it's a darker
one or a lighter one, and then I complement it
with a warm or cool color. So I use a lot of
navies and peaches or darker greens and lighter
oranges and corals and peaches, and I personally
really like those color combinations right now. That said, let yourself evolve when it comes
to color palettes. I used to work so much in this really blue and
purple fantasy world. Recently, I've been liking to
work in more of these warm, natural colors, but I'm sure I'm going to evolve
beyond that as well. It's all about experimenting
and playing and just really feeling into what
it is you want to communicate through
your artistic voice. Okay, I want to show
you some quick demos of how I come up with
color palettes. I tend to personally have a color that I
like to start with. It's usually like
this peachy orange. And then I usually like to have a few different
shades of that color. So, let's say, a darker color. And then I complement
that with a cool color, usually a blue or green. So this is a color that I've
been enjoying a lot lately. And then from there, I would usually have
a color that is, like, a dark version of that. So almost black. And then oftentimes I will have a highlight color that I feel like just,
like, adds a punch. And so lately, I've been
loving a really bright yellow and kind of have
that as the accent color. And even with this one, you can adjust it to
kind of see whether there's another accent
color that you like, maybe a little warmer,
maybe a little bit more bold, try a
little brighter. Like, I like kind of how
this is feeling right now. So but keeping them
on different layers, you can use the adjustments to kind of play
around with them. And then you can also group
them together, flatten it, and then keep these same value and saturation relationships, and then try different hues. See if there's
anything in there that piques your interest or
desaturate it and say, Oh, do I want something that's
a little bit more muted or something that's
super bold and poppy? And then also, do I want something that's a
little bit more blown out, something a little darker? I will see in general, if
you're going to go lighter, then you can also adjust the
hue and saturation to match. Usually, it's not going to work to just only change
the brightness. Another cool thing
is that you can import a new palette
from a photo. So say you take this photo of some flowers that you
think are very beautiful. Then it will create a color
palette from that image. Then it's created this
color palette for me. And you can see, like,
it's not perfect. So it's maybe a good
starting point. But what I would say is like, Okay, why don't you start to pick up the colors
that you really love. But remember that a photo has, you know, tons of little pixels. So depending on where you place your eye drop or even if it seems like all
the same color, you're getting many
different colors. And sometimes what I'll do
is I'll pick the color, but then I'll adjust it based on what I perceive the color to be. So this might be technically
the right color, but it's not giving me the color that I feel
like I'm seeing. So I'll just go in
and adjust it a bit. So this is how I feel like it looks. Same thing
with this yellow. This yellow might be
technically correct, but it looks a little bit dull, so I'm just going
to bring that up. And now that looks a lot
closer to what I have in mind. And then you kind of
keep going like that. Picking this color.
That looks pretty nice. Picking up this color. And see, you thought
this was a white flower, but this color inside is
this mint, practically. Let's see what this color
is. This is like a gray. And I'm sure this looks
like a yellow flower, but actually has this
really, really dark red. It's a little too dark for
me. I like that color. And then kind of just
going around and pulling out what it is that
you like about this photo. So it's interesting if you
just look at this palette, I don't know that
I'd be like, Oh, that's such a beautiful palette. But looking at them
together in this photo, I can really see how
you can make it work. So having these two complement each other
in your process is a great way to figure
out the kinds of colors and color palettes
that you enjoy, as well. So take some time and start to collect color palettes
that you like. You can look at
actual color palette, say on Pinterest or
finding them online, collect artists
work that you like, where the color
palette speaks you. You can also look at
magazine clippings or find inspiration in photographs that you
have on your phone, to start to build
up your library of which combinations
of colors you like. And maybe it's an exercise you'd never really
thought about before, but you just have a
photo you know you like. You haven't thought
about looking at it on why those
colors work together. So this is a great time
to start to do that, and it can be a
lifelong practice. But now, just start
to get your feet wet of thinking about the
color palette that you like. And then when you're
ready, let's meet. In the next section,
we'll bring all of this together in
our class project.
18. Color & Light 6: Class Project Part III: So now let's work together
on our class project. I'm going to first do a demo of coloring in the image
exactly as it's shown. And that exercise is going to help us think about
the color palette, why the complimentary
colors work together, how we did some
adjustments to create some different variations and some interest and the choices
that I made along the way. For this one, you're
welcome to try to mix the colors by eyeballing
them first and then checking with
the color picker. For the sake of time,
I'm going to be using the color picker directly
so we can focus on discussion of color selection and technique of
digital painting. So in general, I'm
thinking about putting on the big layers of color, so large shapes and then working into
detailing at the end. At this point, I'm not trying
to make perfect edges, but I will go in afterwards
to clean up all of the edges. So for this section, I recommend keeping
your colors on separate layers so that
in the next section, you'll be able to
adjust each layer and experiment with different
color palettes easily. Now, this bright orange
color for the flowers is worth talking about because you'll remember in
the value section, I talked about how I
purposely chose this kind of more middle value that was
close to the other colors, so it wouldn't be as distracting
from our main character. We didn't think
about the values. You would just think,
Well, this orange is extremely distracting, and maybe you would
not have guessed that the values of
the different colors were actually so close together. Also could have considered
different shades or tints of the orange
in the flowers, that's definitely an option. I could have considered
rendering them more. But this is starting to
become more stylistic choice of having these really
flat graphic flowers, keeping them all one color, and just having them be this nice frame around
her instead of drawing a lot of attention
to them by adding more detail and more
value shifts within them. So already, you can start to see the contrast between
this cool green that I've used compared to these warm yellows and
peaches around her. So even though technically
in color theory, we learn that red and green
are the complimentary colors. I find that using the adjacent
colors can be really nice. Here, I am mixing warms
and cools together, instead of red and green
or orange and blue, I'm using a shaded
blue green and then bringing in some deep yellows
and a bit of red orange. So I didn't just start out
with this palette right away. I knew I wanted it to be green and have some warm
colors around it. But within those
hues and the range, I would do some adjustments
of maybe making a little bit more blue
or a little darker, making the orange, a little
bit more saturated until I just got that relationship
that I'm looking for. Okay, so we have kind of our
basic color layers in place, and I'm just going in and put in the detailing
of her face, which can be really challenging. In the portrait section,
we'll talk more about the human typical
face proportions. But even without knowing the
typical face proportions, you can just observe and use the same observational
drawing techniques that we learned earlier of how
does everything align? Where is her mouth
in relationship, say to the bottom of her
shirt or the V intersex or where is it aligned next to her fingers or the
flower next to her face? From there where
her eyes placed. How much spaces
between those eyes, how much spaces between
her eyes and her lips? All of those measurements
that we learned in the first class apply just
as much to human face, and that's actually how
people came up with the measurements and
the proportions just by observing and
noticing patterns. So here are a couple tips on finessing your coloring
and your colored palettes. So what I find really
brings a piece together and harmonizes a palette is when you mix them
together in subtle ways. So this is based on
the real life science of reflected color and light and also just something I personally found through
experimentation. So, for example, I added this orange highlight
to her hair. There's something
some orange being created in her
skin and her face. That's echoing the orange in
the colors of the flowers. These are all things
that people might not notice in your illustration, but they can definitely feel it, even if they can't explain it. Another tip is to remember
that color is relative. So peak can look more red if
it's surrounded by green, more pale, if it's
surrounded by reds. There's this great book
on this topic called The Interaction of
color by Joseph Albers. I'm sure you've seen those
images where a color looks totally different
depending on what it's next to, and you swear they
are different colors, but when you place
them next to each other, they're truly the same. And it's interesting as flat of an illustration as this is. There really is still a lot of consideration of the highlights
and the shadows to bring a little bit of that
form in that really makes a difference between
a super flat drawing and something that has this
little almost barely noticeable but really important
sense of form and depth. Alright, so we can clean up all of our details
of this image. It's looking good. We learned a lot about observing
color choices. And when you look at
other artists' work now, you can really think about
the different palettes that they're using
and why they work together and start to observe how they are doing their
coloring techniques as well. You also notice that
this illustration is likely set in the daytime
or in a well lit area. One experiment that
you can do is to bring in those major and minor keys that we
talked about earlier, and also all of the
different moods we talked about with
different colors, combine those and think
about how you can create different atmospheres
within this image. So, for example, if I wanted her to feel
more like she was working in the twilight
evening hours. And so she is working and there is this
really magical feeling. Then I might experiment with
lots more blues and purples. So just think about different variations along those lines, coming up with different
color palettes, just playing around. A great way to do this if you're working digitally is just to save out each layer and then
adjust the color from there. Alright, so I hope that that was super interesting and
fun to experiment with, and you learned a lot about
color through that exercise. When you're feeling ready, let's meet in the final
summary section.
19. Color & Light 7: Summary: Alright, we learned so much
together in this class, and now you have a really
great starting point of understanding this
really important aspect of drawing foundations. I encourage you to
continue to explore and experiment and see how you
like to work with color. For now, here's a summary of everything that
we learn together. We started off by talking
about seeing color. Seeing color like
an artist reveals all these nuanced
interminglings of color. Color is composed of hue,
saturation and value. Temperature is another
important aspect of color. As a general matter,
we can think of it as when you're moving more towards the reds on a color
wheel, it becomes warmer. If you're moving
more towards blue, it becomes more cool, regardless of which hue you're
talking about. Color is reflected light, and without light,
there is no color. This helps us understand
why we are seeing all of the shifts that we do when we're looking at different
objects in the light. Studying color helps us notice the subtle shifts
in human value, as well as reflected light
and illusions of color. And finally, when
picking color palettes, start by keeping it simple, harmonious, and
mood appropriate. There are lots of
emotions and psychologies associated with colors
that one can study. Alright, when you're ready, let's move on to the next part. We're going to be
talking about portraits.
20. Portraits 1: Head & Face Basics: Welcome to our portraits class. Drawing portraits is
something that's really personal and most people want to find their
own style for. In this section, I am
going to be introducing you to the basic
understandings that I found to be the
most important to approaching how to
draw portraits and also the things that I'm
thinking about these days as I do drawing portrait
studies myself. Drawing the human face and figure encompasses everything that we've
been learning so far, observational drawing skills, how to communicate
form through value, and really starting to see and understand how to apply color. This section, we're also
going to be introducing a basic understanding
of anatomy and the standard human measurements
so that we can complement our observational
drawing skills with an understanding of the
construction underneath. This is also going to help us learn to draw from
the imagination. Drawing portraits is a great way to hone all of your
drawing skills. It is also something
that most people enjoy because it's so immediate
to our human experience. Having the understandings
that you'll learn in this class will take you
to the next step to be able to better draw
what you see so that this process can
be even more enjoyable. I'm going to cover
basic face proportions, upper body landmarks, and
basic construction of hands. I'll also give you
resources if you want to take a deeper dive
into any of these. So we're going to start with our heads and our
faces because that tends to be the most
interesting for people to learn first and also is one
of the most challenging. When people first start to draw faces, they really
focus on, like, drawing an eye and they draw this really big face
usually on a tiny head. But really starting
to think about our head in terms of those shapes that we've
been learning about, the sphere, the
cylinder, the cones. It's going to really
help us think about our heads as a three form and also better see
the proportions and how things shift
as we tilt our heads. Thinking of all
of these in terms of these shapes is
really going to help because oftentimes when people just draw a circle
to represent the face, it's going to be a little harder to communicate
what you really want. So starting with that
basic circle and then some sort of V
or triangle shape, jaw shape that's attached
to that is going to help as a foundational spot. We're going to take that
head measure and then measure in our
individual features. So let's talk about constructing the head and the face
at a very basic level. I'm sure you've seen
these mannequins before, and they are handy for drawing the different proportions
of the human face. But I want to talk
a little bit about what I personally
found really helpful when studying anatomy and how I think about
drawing the face. So one thing that I find
really important is just thinking about shapes in space. So you can think of the head as, you know, a sphere, basically. And there's this shield that is our jaw and our
front of the mouth. And of course, these are
not quite proportional, but you can think of
it as this shield covering this sphere or egg
shaped part of your skull. And then you can think of
our neck as this cylinder. So this shield and this sphere sitting on top of a cylinder. So in terms of
actual construction, I'm sure you've
seen many different ways of constructing the head. I think of it more or less
as an oval shape that's made out of this upper circle
with the jaw line built in, and thinner jaws tend to depict feminine features
while wider jaws tend to depict more
masculine features. But it's really a matter
of starting to observe different people and seeing
how you like to draw jaws. But you can think of
it as coming out of the temples and then meeting either in a pointed
shape at the bottom or a wider set shape, a
little bit rounded. You can play with all these
different shapes for the jaw. Now, I'm just going
to start to fill in these shapes with some color now that you've seen the kind of basic construction lines. So I have my head shape, and the neck comes out
from underneath the skull, but it's important to make
sure it's not too thin. For females, it tends
to come in a little bit in between the chin and
the outer part of the jaw, and for men, it's a little bit closer to the
outsets of the jaw. Then in terms of how to start to place the
facial features, the head measurement
is the most common way to measure the
figure proportions. So this is one head measure, and within this head measure, there are several
important landmarks, so you can start to
have a starting point. So we have this halfway
point for your eyes, and then that's just the
halfway point between the very tip or the crown of your head all
the way down to your chin. Then the halfway mark
in between your eyes and your chin is going to
be the bottom of your nose. So I put that as a quarter, but you can also think it just
another half of the half. And then in between
the nose and the chin, another half or an eighth is going to be the
bottom of your mouth. Another helpful measure is to keep in mind that the
ears tend to fall in between the bottom of the
nose to the top of the eyes. And then to place a
few more features, we started to look
at the hair line. So think about the top
of the face instead of the top of the head and then
break that into thirds. So the top third is going to
be about where your brow is, and the bottom third is going to be where the bottom
of your nose is. And that perfectly aligns with that quarter mark that we made for the bottom of the nose. So it's a nice way
to double check around where the bottom
of your nose tends to be. So those are the
horizontal measures, but there are also
some good vertical standard measurements that are helpful to place some of these features from a
vertical point of view. So the eyes tend to be spaced about another
eye width apart. So I'm just drawing in
an eye width measure. The edges of the
nose tend to fall right around where the
corners of the eyes are. Some pupils are a
little bit more narrow, some people are a
little bit more wide. And then the edge of the mouth
tends to fall in between the corner of your eyes and then the inside
edge of your pupil, so a little bit further
out from your nose. I find all of these measurements to be really helpful
to keep in mind. Just to review, we have
the eye width that we're spacing out the
face measurements into. The nose bridge at
the very top of the nose tends to fall in
between the eye and the brow. The middle point
is a safe place, but sometimes I find
that some bridges are right in between the eyes. The nose width, again, is about the size or
the width of an eye. The mouth width is just
a little bit longer. That again is something
that you can play with because different people
have different sized mouths. But I find a comfortable measure tends to be right in between the inside corner and the
inside part of the pupil. Those are your
basic measurements when you're looking
straight on at a face. Now let's talk about those
exact same measurements from a profile view. So from a profile, again, it's helpful to start
with the circle. I tend to find that actually, our skulls are a little bit more egg shaped or like oval shape. So if you want, you
can add a little bit of a bump outside of the circle, but the circles a
great place to start. And then you have the jaw, which connects right in front
at the bottom of the ear. And of course, our
faces are not so flat. So this is just
measuring, kind of, if you imagine the straight line that's going down your face, not considering your
nose and your mouth, but we can place in those
shapes sticking out. So again, we see the
halfway mark with the eyes, the ears, in between the eyes
and the bottom of the nose, which is halfway between the eyes and the bottom of the chin, and then the bottom
of the mouth in between the quarter
mark and the chin. So again, I'm just
going to color in those shapes so that we
can start to visualize it in terms of our oval sitting on top of our
cylinder of a neck. And then here, I
started to just play some very basic shapes to indicate where
all the features go. And this is already a
really helpful map. So I have this bar basically for my eyebrows and then these little oval
shapes for my eyes, a triangular shape for
the nose coming out, and then a heart
shape for the lips. And it's just important to study people from real
life or from photographs, and you'll start
to see how there's that rhythm of the face. So that's the head and profile. Now let's talk quickly
about the head at a tilt. So again, we want to think
about our forms in space, and that's why it was so
helpful for us to think about the sphere and
the cone and the cube, all in space in our
first class together. So it's also really helpful
to draw all of those in perspective because then you can start to really
think about, okay, if my face was here
on this sphere, and then I tilt that sphere, how is that going
to affect all of those different
features that I've placed onto the sphere? So, of course,
they get distorted at the right perspective angle. And so you just want to
start to visualize, like, if that sphere is turning
in space and looking down, then you're going
to want to tilt all of those features
along with it. So here I kind of placed in
my cross hairs again for my basic eyeline and center of the head just so I can start
to visualize that tilt. And then let's put in those same measurements
on top of the tilt. So here our top of
the head to the chin. So again, think about where that top of the
head is on that sphere. It's not at the edge of
the circle we've drawn, it's going to be in
the middle, right? And then the chin is
still at the bottom, but now it's at an angle. So when we start to place
in our eye measure, our nose measure, and
our mouth measure, those need to be a little
bit more skewed on the vertical axes so
that it's kind of starting to go more down
as the head is tilting. So obviously, if we just drew
it as it looks straight on, then it won't look like
the head is looking down. Here I've placed
in these features again based on this measurement. So the eyes are along this
curve with looking down, and then we have the nose, which if you think about
it as a cone that's pointing downwards
or as this pyramid, it's covering actually where the bottom of the nose is
sitting on the face, right? The tip of your nose is
going to be covering that. So the bottom of your nose
is actually going to be a little bit underneath where you might see the
tip of your nose. And kind of similarly
for the mouth, like the chin is going to
look smaller because now it's tilting away and
down from your view. So all of this is to just really emphasize that we want
to think about our face as this form that's in
space and that it's tilting down or up depending on which direction your
character is looking. So here I started to place in some of the features
without the measurements, and I'm really
thinking about how it's sitting on top of a shape. So I've put in this hair line, and it's really kind of wrapping around the sphere of the head. And when I start to
think about hair, I'm still thinking again
about wrapping a form. So even though my
style is very flat, you can still convey how things wrap around form just
like a simple curve, like how her hair is
going around her ears, and this is the back
part of her hair. And you can see it in our class
demonstration image, too, because the way that
hair curves around her forehead really indicates how it's wrapping
around her form. Then you can play with
different hairstyles and try adding a
layer in the front, and you can start to see how this affects the
feeling of death. Here I have just this
lighter value brown, where it's showing
that it's in front of her face and I'm
covering her ears, and you can just experi with different hairstyles from here. On a profile view,
it's a similar idea, kind of having this hair piece in the back that's in shadow, so it's a little bit darker. And then the piece in the front where now I've
put it over here ear, that's a little bit lighter, so we can start to feel that depth again from the side view. So with hair, you really
want to think of it as this piece of cloth
almost or a shape that's wrapping around the form
of the sphere of the head and not like drawing little
strands of actual hair. Another helpful piece of anatomy to know is that a lot
of times we tend to draw the neck as either like these
swooped curves or just, like, a straight up
and down cylinder, when it's kind of a
combination of both. So the way our anatomy
is is we have our neck. It's more like a cylinder, and then we have these trapezius muscles that are coming out in this triangle shape that form the beginnings of
our neck shoulders. Here I'm just doing
a really quick demo of what the basic
skeletal structure looks like for the head. We have our skull,
which is really more of an egg shape,
like I mentioned. We have our jawbone that connects right underneath
the ear canal, which is kind of in
the middle of it all. And then finally, the
spinal cord which connects in through the skull at
the base in the back. So just this very simple
knowledge can start to help you visualize the
underworkings of a head. And what's beneficial about
that is more when you want to construct your own pose
in your own head or just understand why
certain things are at an angle or how to see
things in perspective. If you're studying
purely from, say, a real life study
or a photograph, it's not as critical
that you know the underlying
skeletal structure, but it's still helpful to have that knowledge because
it'll actually fill in some of those visual gaps and illusions that we've been
talking about this whole time. Okay? So that is the head and the face
at a very basic level, looking at it straight on and in profile at different angles. So I recommend taking some time to practice out some of
these measures yourself, maybe create your own chart, and then we can move
on to the upper body.
21. Portraits 2: Upper Body & Hands Basics: Now let's talk about the basic proportions of the upper body. Of course, we have the full
figure and that can be broken out into our
typical head measurements. And at a very high level, I just want to show you
what that looks like. The average person tends to
fall in 7-8 head measures. And, of course, we have these mannequins that can show you these proportions as well. For this particular class, I want to focus on portraits and just focusing on the upper body. So we're looking at the first three head measures
starting from the crown down to the chin
and to the chest and waist. So using the head
as a measure is a very common way to
do human proportions, and there are other
ways to do as well, but I find the head
to be one of the most useful and the one that
I think about the most. So let's take a closer
look at the upper body. I've kind of configured her
pose to somewhat mirror our hero illustration
so that you can kind of see a one
for one example. Another helpful measure is that the waist is right around
where your elbow is, and even if you want to take a moment to kind of squeeze in your elbows and see where
it falls along your body, you'll see that
those two landmarks are another nice,
helpful measure. Now, when we start to
think about the shapes of our torsos, for females, we tend to think about
them maybe as, like, oval or, like, a slightly
more narrow rectangle. And then for men, we tend
to have wider shoulders. I'm going to stick here
with the female figure, and we tend to measure
the shoulder at about 1.5 head length wide. I don't always do
this at a very, you know, specific like, I
actually measure out 1.5, but just kind of
making sure I keep that overall silhouette of how the angle from the head goes
out down to its shoulders. Just keep in mind that
above the shoulders, we can think of the
shoulder joints as these two oval shapes. We have our neck and then the trispesius muscles coming out almost like a coat hanger. So it's not a straight up
and down 90 degree angle from our neck over
to our shoulders. From our shoulders, it's
helpful to think of our torso and this
trapezoid shape. And then the head
is a good measure for a few more important
body parts here. So our upper arm and our
lower arm tends to be about one head length long. And then from
behind our wrist to the tip of our hands tends to be another head length long. And you can actually
check all these measurements on
yourself as well. It's helpful to think of all of these basic landmarks of
the upper body in terms of kind of these joint ovals
that are connected by cylinders and wedges
and trapezoids. So those are the basics
of our upper body, but let's take a closer
look at the hands. So here I've created a
really simple template to start to think
about the hands. So again, we're using
the head as a measure. And what's really helpful
in terms of proportions is that we can think of our hand being about the
height of our face. So not the top of the
head to the chin, but our hairline to the chin. And again, of course, everyone
has different sized hands, and this is just
a starting point. It's a great way to have a measuring tool to get them to look at least
generally correct. Now let's think about the back
and the front of our hand. So here I've kind of used
three different values so that we can see each
major part clearly. And I've laid it out
with a back view showing where the knuckles are and showing a little
bit of the finger tips. There's that swoop from our
index finger to our thumbs. And then on the
fingers themselves, you can also break that
down into two measures. So about half of
your middle finger, and then you can notice
that your pinky starts kind of close to the middle
of your middle finger. So that's a good
way to kind of keep track of what the natural
arch tends to look like. And another thing that I
find important to keep in eye is our knuckles are kind of further down in our palm than a lot of times
people think. So some people tend to
draw their knuckles at the very edge of the palm, but it's a little deeper if
you look at your hand itself. And then on the other side, there's this kind
of oval shaped, or I think almost like
an egg shaped muscle that we have in
front of the palm. We have three major sections. We have the fingers, the palm,
and then the thumb area. We can also break this
down into two measures. So one is the length of fingers, has to be about the length of your palm, so
that's one and two. In terms of the
shapes of our hands, you can really think
about the palm as this kind of bendable,
rectangular wedge shape. So when you look at
it from the profile, you can really think of almost like platform doorstop shape. And then this very
bendy thumb shape, like this egg that can wrap in the front or
go out to the side, and then this muscle
of going down the thumb can be a really
good landmark to put in. So starting to break our
hands down into shapes is really helpful if we start
to think about it in space. So just like I was talking
about with the head and the sphere and the
cylinder and the jaw, our hand can also be broken down into these
constructive shapes. And so I have basically that wedge shape I was
talking about for the pump, and we have one
piece for the thumb, at the joint at
our thumb knuckle, and then the three sections
of the individual fingers. So two joints that
bend into three. And just kind of keeping
this in mind is going to help you think about the
hand a lot more clearly. Okay, well, if I want to
turn my hand to the side, what would that look
like and start to visualize how those
shapes start to overlap, how that wedge shape
can start to bend, and how we do a little bit
of overlap of the fingers. And then with a fist, you kind of think of it almost like a rock at first, right? You have these sides of your fist that are
a lot like a rock. But then also thinking about in terms of the shapes
we discussed. So you have this
wedge shape and then your three cylinders from
your fingers kind of dig into that and then your
fist wraps around that. So I kind of mirrored the pencil holding fist
that I have in our illustration
and just starting to break that down into
how that looks like. So if we looked
through the fingers, we see the edge of the
wedge of the palm, we would see the thumb
egg shape in the back, and then we see the tops of our fingers and then
having them curve in. Lastly, I just want to quickly talk about clothing on the body. When you're drawing
clothes, you want to think about wrapping the
form of the body. That's really critical,
even if you're drawing in a really
flat style like mine. So when you have clothing, I think, but going
around the neck. So it's very similar to what I was talking
about with the hair. You want to think
of it as this shape that's wrapping the
sphere of the head. You want to think
about clothing as really wrapping
the three D shape, even if you're only
conveying a very flat look. So if you think about, for
example, this sleeve here, it wraps around the lower arm and really conveys that form. Same thing with the
elbow on the other side. These very subtle differences, you know, compared to just
drawing a very straight line, are really important
to start to move your drawing skills from
something that is based in reality and then stylized
versus something that doesn't have the root
understanding of basic anatomy. In terms of conveying some form, bringing it into
very simple values can make a huge difference. Even here I have
only two values, but there's a highlight
and a shadow, and that helps bring a
little bit more realism into the illustration. So if you would like,
I recommend that you take some time right
now to create your own map of the basic landmarks
and measurements of the upper body and combine it with the head ones
that we did earlier. And then when you're ready, let's move on into
the next section. We'll demonstrate how I like
to do a portrait study.
22. Portraits 3: Portrait Study Demo: So I've actually found this reference photo
on Unsplash that is really close to
the pose that I created for our class
project illustration. So I think this
is a good example to demonstrate to
you how I like to do photo studies for
portraits and figure drawing, and what I'm thinking
about as I'm doing them and how I
tend to stylize them. So let's get into it. So I have the grid on here
just to kind of go back to our first class
and demo what it's like to be able to
draw with a grid. So I've just split this
photo right in half and have my photo reference on the
side and drawing right next to it so that I can do a
direct measure one to one. And that's going to be
helpful to just start to place the general landmarks. So again, we're doing our blocking and our
observational drawing techniques. We're starting to bring in some of that constructive drawing that we've been
talking about with our shapes and our forms. So I'm going to start with just the oval shape for her face and coming
down into her chin. Then starting to block
in her hair shape. You can go in and
start to just put a very basic cross
for her face to start to place her
eyeline in the center of her face and how her head
is tilting in space. I'm also thinking about the
shape of her head in space. You can think about the sphere and her jaw resting inside of a box and how that box is floating in space
and taking up space. You can see that she's tilting over to our right, her left, and then her face is not
quite straight on the camera, but a little bit
off to the side. Next, she has her hand
resting on her face. So I'm just going
to start putting just that very basic
rectangular wedge block shape that I was talking
about earlier, and also that cylinder that
attaches as her upper arm. What's helpful
about this approach compared to just looking purely at observational landmarks and all the angles that we
talked about earlier, is that for some
people, it's still really hard to see
what's really there because we just have
such a bias towards what we want to see and what
we think should be there. So that's why sometimes when people try to draw a
hand in perspective, it's so hard because they just really want to draw
what they think a hand should look like and
not what is actually there. When you just start
to think about it as shapes and forms and space and really break that down into the different
perspectives, it can really help us start to really see more accurately. So they really go hand in hand and help each other,
these two approaches. And so here I'm looking at
both the landmarks and where her fingers and her hands
are in relation to the grid, but also drawing in
the shape so that I can really think about how
this is being constructed. So I have the wet
sheep of her hand, the little cylinders
for her fingers, the cylinders for her upper arm, a little bit of her clothing
put in just as landmarks. Now I'm going to look at the cylinder shape of her neck and start
to place that in. I'm looking at the lines and where they land for
her clothing now, putting in that shoulder, kind of trying to keep
gesture in mind, as well. At the very beginning, you
want to think about, like, what is the pose here, and what about it is
something that you like? And how do you kind
of continue to keep that sense of gesture
in your study? Then of course,
for her other arm, another cylindrical
shape, and then going back into the details
of her clothing a bit. And really, these
types of photos are great to study folds of fabric, how much and how little you want to include to
be able to convey what's there without getting into the tiny details unless you prefer a really
highly rendered look, and then just filling in the other side of
her jacket here. So with that, we
actually already had the basic blocking of
our portrait here. I'm going to just
put in a little bit of value to show her hair shape. And then just going in
and trying to be more careful about the ins
and outs of her face. Like I mentioned in the face measurements and
landmark section, your face has kind
of this wave that goes in and out from your
forehead into your eye sockets, over your nose and
your cheekbones and back down over your
lips and your chin. And just subtle
variations really makes such a huge difference
in conveying a person's facial structures. So here, I don't always do this in my drawing studies, but I do think it's
really helpful, especially for a
beginner to start to place in the measurements
that we've been learning and talking about
and thinking about how they sit on this plane of our
portrait studies face. So I've put in the half
mark for her eyeline. I'm measuring the thirds
from her face so I know her brow and her general
nose and mouth placement. And then I'm just going to block in these really simple shapes to see where her eyes and
her nose and her mouth go. So the face has so
many details on it, but the exact same observational drawing skills apply here. Right now, I can see
that the inner edge of her pupil lines up with that
inside part of her mouth and kind of the top
of her lapel and her wrist of her left arm looks like the right side to us. And then how far
away from the palm that is and how far away that is from the other
side of her face. So this is a constant
going back and forth of noting your
different landmarks, noting your proportions, and how everything sits in
relation to each other. Start to put in a little bit
of detail on her features just to start to give
some of that form of her nose coming out, continuing to think of that
kind of pyramid, cone shape. So we have kind of
the plane at the top, that's a little
bit more in light and the two sides
that are in shadow. With lips, you can get really into kind of the
structure of it. But for our purposes,
I like to keep it more or less about two values,
maybe three with, like, kind of the middle darker
part of the mouth, but just starting
with, you know, a heart shape, kind of, like, wide heart shape is a
good starting place of putting in the mouth. Really like her strong brows, so I'm going to keep that in. And then for eyes, I personally like to
do a simplified eye. I don't personally prefer
really realistic portraits. So when I do portrait studies, this is kind of the level of detail of eyes
that I like to do. And when I do portrait studies, they're usually a little
bit more complicated than the way that I end up drawing
characters in my own work. I like the more
simplified look because I tend to draw on these
really simple graphic shapes. And if I have this
highly rendered person, it just doesn't
quite feel right. But by doing these studies, I really find that
knowing where I want to add and subtract
detail is really helpful for being able to get
my style to match where I want it to be and not just be constrained by what I
can and can't draw. I would say at this
stage, for me, the most important
elements to get in are the hair shape because
that really kind of conveys the shape of the
head and often kind of pries a strong contrast with the
jaws and the forehead. And then, of course,
the facial features, but really important
is that shadow underneath the head
and onto the neck. I find that really defines and clarifies kind of
where the forms sit in relation to each other. So at this point, we're
still purely in the line, shape, and volume section of what we've been
learning in class so far. And this is why I think
learning value and form is so important
because it's really just kind of this
invisible underlying foundation of good drawings that is really hard to see if you just
go straight into color. So even though I know
it's not as interesting, it really is so important. So here, I'm just
focusing on kind of how the shadows and all
of the form changes that wrap around her
body and then indicate her clothing folds are really helpful to kind of
communicate what's going on. Again, it's a really good moment to check in on your gesture. So a lot of times when I'm doing these studies and kind
of doing the block in, I find that it's starting
to get a little bit stiff. And so just kind of adding a few arrows will
help me keep in mind that I want to maintain what I like about
the gesture of this pose. For now, I am going to start
to bring in some color. I'm going to be working
with five values. And what I like
about starting with these five values is
that it kind of gives me a starting point to
put in my darkest darks, my half tones, and
then my highlights. And what usually
ends up happening is that within each
of these values, I'll then pick another
kind of, like, lighter version and
darker version of that color so that it
starts to become more and more realistic and I
can kind of control how much I want to be flat versus
a little bit more rendered. So I have my base
drawing kind of around the four value
color right now, and I'm going to go in
with the third color and just start to put in
a little bit more form. So I'm going to start with
her chin because I find that the shading and the
form conveyance of the outside of the
face is really important, even in a flat style. So, of course, in
our reference photo, she has a lot of different light and shadows from
her environment, but I'm really focusing on what is actually communicating
the form of her face. So I'm not going
to be copying or studying the light in
this particular photo. I'm just looking at how
she might look like with this normal surrounded light. See as you start to put in
the values of the face, it really makes such
a huge difference. The more values you add, the more realistic it's
going to look, as we've talked about in
the value and form class, and just putting in
the second value is already making such a huge
difference in terms of seeing how that eye underneath
the eyebrow space dips in, how the nose starts to come out and it goes
back into the face. And I am thinking again about the tilt of her head
and how to convey that way that your
face starts to then tilt away from your view, just like a sphere going into
the backs of the space and just being able to
convey that so that the face can remain
flat in color, but still have that
more realistic form. I'm adjusting it a little bit because it turned out
to be a little pink. I made it a little
bit more orange. And then I'm picking
this green color, which one complements
her skin color well, but also is like our
class project drawing, so it's a nice
kind of reference. And I'm just going in with
one flat tone right now. You can colour both above
or behind your lines. I definitely recommend
keeping it on a separate layer so you can
move it around as you like. For this type of study,
it's nice to keep it behind because then I can
use the lines as needed. If I were trying to
finalize this for, say, a print, then I would
definitely clean it up. I was gonna put a little
bit of this looks like a trunk that she's resting on to ground this
portrait a bit. Let's start to go in
with our darker value so that we can define
our form even more. So you can see in
the reference photo, there's a really high contrast between the dark color of
her hair and her skin. So even though we're
not doing a one for one study in terms of exactly
how this portrait looks, we can bring in
some of that here. As you get more comfortable
doing these kind of studies, you can start to experiment on the go as you do these studies. You can, for example, change her hair completely, maybe give her very
different facial features, and just keep the pose. For now, I'm trying to show
kind of a middle wave. Like, I'm not
copying the portrait exactly like a realistic, highly rendered portrait, and I'm able to practice
my style more, but I'm also still sticking, more or less to kind of
the main elements of the drawing so that we can kind of make sure that that's
the focus of our study. Now I can also go in and start to detail some
of our features. So I'm using both
the dark color, but also bringing
in a lighter value to start to pull out
the whites of her eyes. And you'll really notice
that for most people, the whites of her eyes
are not really white. It's actually just a little bit lighter than our
skin color, usually. And you can bring in a lot of
shadow because, of course, your lids are casting these
shadows onto the eyeballs. And rendering out the face
can be really tedious work, but it's also really beautiful. So take your time to
enjoy the practice. It's going to start off
a little bit junky, but you will be able to get closer and closer to
how you want to draw people the more you practice
and just keep all of these different
techniques and anatomy, construction, shapes and space that we've been talking
about together. Now I'm just playing
out a more pink color to give her some cheek color. This is a good example
of where I start to stray from the
photo reference. This is how I like
to draw people. And it's something that
you can experiment with. A lot of times it's
a matter of kind of observing other artists that you like and how
they render people, and you end up picking and selecting different things from different artists or
just different styles and bringing them together
in your own unique take. I'm going to lighten the
lips a little bit here. And here's a good
example of, you know, a very subtle shift
in the values of this peachy rose color that I've selected and kind of starting
to show that form of the so adding a little shadow to the bottom of each portion, really thinking
about these little pillow shapes can really help to start to convey
that movement of the lips, even if it's a flat style. And I can bring
this third value in to indicate the
middle of the mouth, and then having the
shadow underneath the bottom lip to kind of
show that form as well. Now I'm just going to
start to pull in some of those values that I've been
creating into the arm, continuing to think about
it as a cylindrical shape. And my fingers, of course,
are also tiny cylinders, and we can really start to bring in some of those
details even more. These very subtle shifts that you might not
notice at first glance, like putting in this
slightly darker peach color on her face on the side of her
face that's further away from us and
more cast in shadow. Just adding that
does make, to me, a significant difference, even if it's not noticeable
right away. There's a lot of things
I feel in drawing that you might not technically notice and
be able to pull out, but without it, you really
feel it's difference. And that's where I
really think a lot of drawing foundations comes in
in terms of being able to advance your drawing
technique from a beginner to a more established and
strong foundation style. So now we're just
going in and putting some finishing touches
using the darkest dark, and it's kind of like linework, but really thinking about where to place the linework based on where our shadows are
to convey that form. And this was something
that took me a long time to figure out because I knew I liked that
style where the lines aren't, you know, just a
complete outline around the object
or the character. But I had to really understand drawing foundations
to be able to appreciate or understand how artists knew where to put
the lines to begin with. And so that's another
great example of how you might think that,
Oh, well, of course, that seems like a very
simple line, and, you know, maybe the artist just
intuited it, but no, it's always based on the
foundational knowledge. And in this last step, I'm really just starting to think about the gesture again, as I start to put in
these highlights, I'm trying to exaggerate
some of the movement. So I love the way that the shoulder is popping
up on the right side here and maybe using even the Lapel to convey a
little bit of that gesture. And it's a highlight, but it's also having some gesture to it. You put a little
bit more dark green in if I want to render
out the clothing more, but I also like the super
flat style for the clothing. A few more tips is by
bringing in some of your colors to areas that
you might not expect, such as adding this
green into some of the details and some of
the peach into her hair, that really helps to unify your color palette
and your drawing. I'm going to put a
little bit of this peach onto your green jacket. And then I'm going to
put a little bit of the green into her face. And these very subtle details, again, just really help
bring everything together. Even if you don't notice it, you notice it subconsciously. Alright, so I'm going to do some final cleanup and detailing, and that's pretty much done
with my portrait drawing. If you'd like, you
can put in some of the surroundings, as well. And I just want to quickly
show you with this shale brush how quick it can be
to create some of these really beautiful
leaf shapes. Of course, you want to add
a little bit more value, but I'm just tapering
it and using the pen pressure to create
these palm leaf shapes. So that is our finished
portrait study, a stylized study,
but still really faithful to a lot of
elements of this photograph. And so you can start to
really see how you can take a photograph
and use it to study all of the concepts
that we've learned from lines and shapes and
value all the way to color. Anatomy, and then now we are going to start to get
into composition. But first, let's meet
in our next section, where we're going to talk
a little bit more about how to practice this
in our class project.
23. Portraits 4: Class Project Part IV: We're finally at the class
projects part of this section, and we're returning to
our hero illustration that has been anchoring everything that we've
been learning so far. So, of course,
we've already done the line observational
drawing and our color study of our
character and the scene. So for this section, we're
really going to focus on one observing the construction
of how this is created, combining the anatomy and
measurements that we've just learned with our observational
drawing techniques. I'm then going to
encourage you to come up with your own version
to start to see how you can draw from
imagination and use those standard measurements to create your own characters. So as a starting exercise, I encourage you to
place the landmarks on the character's face and
body and compare this with your benchmark drawing
now that you have a foundational understanding of standard measurements
and anatomy. So you can start with the
circle shape for our skull and attach the triangular
shape for our face, place in some of the
measurements we've learned about the halfway
mark for our eyeline, and then the thirds for
the facial features from the hair line to the
brow to the nose to the chin, and then check that with our quarter and one
eighth marks for the nose and the
bottom of our mouths. We can also place in the
cylindrical shape of our necks and then the
shoulder and elbow joints. And of course, the cylindrical
shapes for our arms, both the upper and lower parts. Just having that as
a reinforcement. And then I'm just
going to go into a quick free hand
draw of how I am thinking about
constructing my characters when I'm drawing
them from scratch. So just like how we
learned in the class, I start with the
sphere for the head, thinking about the
tilt as I place in the triangular
shape for the face. And I sometimes tend to put in body parts that you
can't necessarily see. So in this final drawing, you can't see her
ears, but I will place them in just in case. I'll then also put
in the hair shape and then start to block
in her upper body. I tend to then put in
some very basic wedge and cylindric shapes
for the hands. Now, I don't always do this, but I think it's
a good practice, especially in the beginning
to check your measurements. So here I'm just doing a
measurement of the head. I remember to start a little bit lower since her head
is being tilted, and that looks good in
terms of the placement of where our chest line and
our waistline would be. I also have the basic
face measurements marked off so I can start to put
in some very basic eyes, nose and mouth shapes. Again, keeping in mind the tilt. Now I'm just putting in a
little bit more details of the eyes, the eyebrows, and then doing my vertical
measurement check to see that my eyes are correctly spaced
in relation to each other, the nose and the
edges of the mouth. And what you can do with
portrait studies is first do a constructive drawing such as this based on a pose
that you're looking at, and then go in and do some of the detailing with observational
drawing techniques. This is, of course, easier when working with a photograph, so someone's not moving around. But working from a live model or just observing in
real life is also really great
practice to start to play some of these
measurements really quickly. It's also a good challenge
if you're starting a pose and someone
you're observing moves, are you able to fill the
rest of the information in based on the anatomy
that you have learned? Normally, next what
I do once I have the upper body in place, I'll start to put in some of the forms and the wrapping of the clothing and start to clarify some of the
shapes and the details. And for this exercise,
you're welcome to take it to as finished a
completion as you'd like, or stop at just the
sketch stage so that you can just practice
observing and constructing. Going to do another
quick check using the head measurement to check our upper body and our
arms and our lower arms. Another challenge
that you can try in this exercise is to start drawing your own
character based on this pose. So just changing some of the characteristics such
as the hairstyle or the eyes and the nose and the mouth shapes and maybe trying on a slightly
different piece of clothing, based on, for example,
your favorite outfit or something that you're
pulling from a reference photo. You might also try challenging
yourself by taking a self portrait reference photo and then drawing yourself
into this scene. So here I've given her
a different hairstyle. Now you can see her ears, so placing in those
sketch points is helpful. And then changing the
shape of her face slightly is giving her a
different top and outfit. Similarly simplifying
the nose and trying one of many different
ways you can draw eyes. If you really want to have
fun, you can start to add different accessories such as glasses or headphones
or jewelry. And again, thinking about even these accessories in terms
of shapes and then having them wrap around the
form of her head and her body are really
going to help you think about how to construct
that from imagination. So, have fun with
this experiment. And when you're ready, let's share the project
and then go over a summary of everything that
we've learned together.
24. Portraits 5: Summary & Further Study: Now that you have a
foundational understanding of drawing portraits, I really encourage
you to continue to draw, practice, observe, and deepen your understanding of anatomy and the basic
measurements as you see fit. First, let's go
over a summary of everything that we learn
together in this section. We learned the
basic measurements of the human head and face, starting with a
constructive circle shape connected to a triangular shape, placing the eyes at
about the halfway mark, and then finding the brow line, nose and mouth at the
thirds of the face. We learned how to
connect that with the cylindrical shape of
our necks and how to use the head as a measure
to approximate the size of our upper torsos
and place the chest, waist, arms and hands. We know that the hands require
some special attention, and learning to construct
them with the wedge, egg, and cylinder shapes will
help us draw better hands. We also learned the basics
of wrapping hair, shapes, and clothes around the
form of the body and why thinking of our figures in three D shapes is important, even in a flat style. Finally, we learn that we can experiment with our
understanding of values and color to draw people and portraits in different
levels of realism and stylization and that it's
a matter of practice and continued observation to
find our own people style. For further study, besides
Julie Aristid' books, which I have recommended
in previous classes, you can also look at books
specifically about drawing the human figure and anatomy
by Andrew Lumis and Morpho. I also recommend the lessons
on New Masters Academy for more classical
figure studies and Skillshare classes on how to draw cute stylized characters. When you're ready, let's meet in the final section where we're
going to talk about depth, composition, and how
this all comes together.
25. Depth & Composition 1: Intro to Perspectives: Welcome to our depth
and composition class. I'm going to share
my approach to perspective and how
I communicate depth, and then we'll work on creating
a composition together. My personal experience with perspective is that I've never wanted to draw realistic
linear perspective drawing. While I spent the
time to practice one, two, and three point
perspective exercises, I used only the bare
minimum in my drawings, such as the book in our
class project Illustration. For a long time, I
thought learning the intricacies of
mathematical perspective was the right way to learn
how to draw because that's how it's emphasized in
most teachings these days. However, as I came to understand what style
of art I was drawn to, over time, I've come to see a different perspective
on perspective. In this class, I'm going
to provide an overview of different approaches
to perspective and composition techniques. Then I'm going to show
you how I like to put together an illustration
like the class project. To better understand
perspective, I found it helpful to learn
a bit about the history of perspective and how it has
evolved in art and culture. I promise that this is not
a boring history lesson, but something that is
really relevant and will help you understand how to study art that you
admire and how to translate it into
your own expression. At a basic level, when we
think of learning perspective, we think of linear perspective. Linear perspective is a
mathematical approach to constructing objects where all parallel lines
disappear into a single or multiple vanishing
points on a horizon line. This is especially useful with man made objects such
as buildings and roads. There is one point, two point, and three point perspective. Linear perspective,
as we know it today, did not always exist in art. In fact, it wasn't established
until the Renaissance by architects Filippo Brunelli
and Leon Battista Alberti. This technique arose out of a desire and need
to convincingly convey space and buildings and depict structures from a
viewer's point of view. It was a truly remarkable feat that changed how many artists, especially in the West,
depicted scenes in their work. This was especially important
before the time of film and cameras when the need to
convey realism was a priority. Historic paintings
from other cultures, including China, Japan, India, and Egypt had different artistic priorities than their Western counterparts. In many Eastern
paintings, for example, the goal of art was to convey the spirit
of the subject and the artist's personal
experience of the subject rather than an observationally
accurate depiction of it. Furthermore, since
many paintings were on long scrolls meant to be experienced as a whole and by viewing individual parts, a single vanishing point simply would not have
served its purpose. With planar perspective, Eastern art communicates
depth via overlaps, basically laying
the subject matter on three separate planes. First, the foreground plane, then the middle plane, and
finally, the background plane. The distance between
each plane was accentuated by the
level of detail, hue, and value, all concepts that we've been learning throughout this course. Buildings and geometric
objects that were suited for linear perspective were instead drawn in parallel perspective, which avoids vanishing
points while still achieving a sense of space in relation
to the subjects around it. Large groups of people in many different spaces were thus able to be depicted
with this perspective, which couldn't be achieved
in linear perspective. These paintings communicate
artistically and effectively, even if not technically
realistically. So you can see how linear
perspective can be limiting, including sometimes
rigid placement of subjects and not
being able to convey space relations outside of the standard individual
human's viewpoint. Planar perspective,
on the other hand, also has limitations in that it does not
accurately depict space, especially the view from a person's standpoint inside a structure or outside of it. So each really serves its own purpose and is
needed at different times. Having an understanding of the different approaches
to perspective will allow you to mix and match to your needs and your
artistic vision. As a beginner, I recommend that you start to
really identify, observe, and study what your
favorite artists are using. Having an understanding of the perspective
approach that they employ and then practicing and exploring those on your own
will allow you to come to an understanding of
how you would like to communicate your
expression and views.
26. Depth & Composition 2: Creating Depth in Planar Perspective: Most of the modern
illustration that I like uses some form of
plan art perspective, and that's the
illustration style that I like to draw in as well. This started as just my
personal aesthetic taste that I couldn't really explain. But after coming to a
better understanding of the history of
plan art perspective, I realized that I
really relate to that priority of
expressing the spirit of a subject and my own
personal experience of it over a technically
accurate depiction. I think for me, it
really boils down to, I like to draw things
in a way that you can't take a picture
of in real life. I also like to combine different approaches to
perspective and continue to experiment with ways
of mixing together views that you don't expect
to go well together yet work. For example, in
this illustration I made called the courtyard, it has a layered
planar perspective, but also includes a sort of top down linework on the
ground that depicts tiles. I preferred this over a
one point perspective view of the tiles because for me, it creates a subtle
feeling of surrealism, which of course is
a compliment to the very large giant flowers that are surrounding
our character. I want to emphasize
that a flat style of illustration doesn't mean
that it can't have depth. To create a simple feeling of depth in a flat illustration, I typically think of having the character in the middle or foreground and
placing objects in the foreground while having
a simple background. This can apply in more
intimate settings such as the vases and the gate in
the courtyard illustration, as well as in larger
landscape settings. Here in my illustration,
the reflection. The character is
in the foreground, but there is an added
depth created by adding rocks even
closer to the viewer. The middle plane then becomes the reflection and
the mountains, which is also a
major focal point, the background is the
sky and the clouds. It's all very simple but communicates depth by aploying
the three separate planes. So take a moment here to break down what's
in the foreground, middle plane, and background of our class project
illustration. What sense of depth is
created in your view? Where does it feel like you're standing in relation
to the character, and how far away does
she feel from you? Think about how this
was achieved by layering depth despite the fact that this is a flat
style of illustration. Can you think of ways to make the character look
closer or further away? Now that you're
beginning to understand how depth is achieved
in a flat style, really observe and think about
the choices that were made in order to communicate this
in artwork that you admire.
27. Depth & Composition 3: Intro to Composition Techniques: Now, let's talk a
little bit about composition techniques
because that's a question that a lot of
people have at this point. You have an understanding
of observational drawing, but how do you come up
with your own designs? Let's explore some basic
composition techniques that can help you get started. For me, the most popular
and frequently used rule is the rule of thirds often
used in photography and film. The rule of thirds
just means that if you place a tick tack
toe grid on a frame, the focal points fall around the intersections of the lines or at the thirds of the images. You'll see many examples
using this technique if you just start to
place this type of grid over images that you see. Another common approach that
I use to composition is simply centering a character and then creating
environment around them. Many teachings will recommend avoiding centering
a composition, but I do it all
the time and so in many illustrators that I admire. It's really about what
you're trying to achieve, and I can see why in
certain situations, you won't want to
center a composition. I personally find it
very effective for portraits and character
centered narrative art. Studying the composition of your favorite photos,
movie scenes, and, of course, artwork is a great way to start to hone
your eye for composition. Ask yourself when you're
observing something you like, why does that composition
work for you? Even if you don't have a
clear answer right away, as you continue to
observe and reflect, patterns will emerge
and you'll start to understand how you like to incorporate it
into your own work. Remember that your favorite
artwork was a result of many different thumbnails and concepts before the artists
reach their final design. Exploring and experimenting
is all part of the process. The basic tips are, think
about leading the eye. Use focal points and different
rhythms and patterns in your artwork to draw the eye and be intentional about
where the viewer looks. Always keep the overall flow and gesture of the
piece in mind. As you really start
to observe artwork that is masterful or just
stuff that you like, you'll notice that
there are a lot of connecting points that might
have been unintentional but work because these are the lines and patterns and rhythms
in a drawing that an artist use to their advantage to communicate and control
where the viewer looks. Another helpful tip is to
think in groups of threes. Three is often considered a
magic number in composition. It's active and avoids
feelings of pairings that come up with twos or too much
symmetry with groups of four. Any more than that,
and your mind starts to think in groups again. This can also apply
to focal areas or the shape of your flow. Triangles, a three
pointed shape, convey a feeling of
balanced activeness. In our hero drawing, although there are technically
seven flowers, they're grouped into
three clusters. There are also three
golden objects around her forming a triangle. There are also three green
objects including her jacket, and they are all spaced apart
in a triangular format. Of course, you can see
that the rule doesn't apply to everything
strictly everywhere. For example, I have
pairs of leaves, but you can begin to play
with your own patterns with this starting place
and decide if you want to break the rule where
it doesn't feel awkward. Other common issues to be aware of are to avoid
awkward tangents, where the edges of
different objects are barely touching or just
overlapping in an awkward way, usually where you can't tell where something begins or ends. You also want to avoid
unclear plane hierarchies, such as not being clear
what is in the foreground, what's in the middle ground, and what's in the background. Usually, this is
just a matter of overlapping your objects
in a clear way and again, making sure you don't have
any awkward tangents. Avoid to perfect symmetry if
that's not your intention. Having a little bit
more of an organic flow to your illustration will help make it feel more balanced. And finally, make sure your values support
your structure. It's one thing to intend to lead the eye with an interesting
subject or action. But if your values
do not support it, your viewer may become
confused where to look. Values can incorporate
color as well. So for example, you don't want a bystander in
the background to be wearing a very bright red
and a very dark composition. Instead, you want them
to look somewhere else. Think about where the artists
might have intended you to look and then consider whether they were
successful at it. Did you look at different
details as your eyes float around in a natural
and organic way? Are your eyes drawn
to the places where it seems like that
should be the focal point? If so, think about
why that worked, and if not, think about
what could have changed. Just starting to notice
and observe is already a big start and starting to hone your ability to think
about strong compositions.
28. Depth & Composition 4: Class Project Part V: Now let's return to our
anchoring class project. We started this entire series
with observational drawing. But actually, the
very first step of your own original drawing is
going to be thumbnailing. It's concepting different ideas, doing really quick sketches, and then refining those thoughts
and ideas with the line, value, color, and portrait
skills that we've learned. So that's where this class brings things into full circle. We're going back
to the beginning but with a fresh perspective. Together, we are
going to come up with a concept, create
many thumbnails, and then refine our chosen
thumbnail and finish them off with all
of the skills that we've been building
throughout this class. So we're going to work with the prompt of
designing a cover for a drawing foundations
class that incorporates everything that we've covered
in terms of line and shape, value and form, color and light, portraits, and then
putting it all together. This was literally what I
was thinking about as I was designing the hero Illustration or class project for this class. And so I'm going to walk through a very realistic example of
what that process is like. So you can work
digitally or on paper. I personally find that I think best on just scratch, notebook, sketch paper, and I
personally like to use this blue coal erase
pencil by Prismacolor. You can of course, do the
same thing on the iPad, and the iPad's really
great for being able to easily move
things around. But when I just want to
get some quick ideas out, I find a piece of paper is best. So let's
start with that. If you'd like, you can start off by creating little boxes. If you have a piece of paper about the size of
mine, I'll do six. If you have larger ones or smaller ones, just
adjust accordingly. So when you're working on, say, a client brief or even coming up with your
own illustration, there's some initial
parameters that you're going to want to know or at least know that you're
going to need to know, such as how big is this illustration and
where is it going to be used so you can keep all of these considerations
in mind as you design. So first, let's just come
up with different ideas. Obviously, it's a drawing
foundations class, and so having someone drawing seems to make a lot of sense. So let's start with
some ideas around that. So this is a very
basic starting point. I have someone drawing
at their desk. As I'm going along,
I need to really start to think about whether
it's checking all the boxes. How can I best express
thinking about line and shape, value and form, color and light? I can start to see
those in my mind because even though this
is a sketch drawing, I can imagine what it
might look like in color. You'll notice I'm starting
with very simple shapes, not quite a stick figure, but basically like their
little drying mannequins, and that's more than
enough to kind of get a sense of the
overall composition. So at the thumbnail stage, we're really focusing on what
content we're going to be including at a very high level and what's the
overall composition? So with this second idea, I have been thinking about
maybe just showing a notebook. Maybe there's no person in it, and it's depicting these flowers and just objects around it. So this is top down
view of a desk, more or less, but with
some skewed perspective. And, of course, I'm
realizing that now I don't have the portraits
section included. So maybe I can add a
little portrait here. So now, it's not a
character drawing, but the drawing is
of a character, but it still gets the
element of having all of the aspects of the
class included covered. So again, don't need
to detail it just enough so that you know
what is going there. So that's a little bit more
of a graphic approach. I think of something maybe
a little bit more abstract. Alright, so my ideas here is almost maybe like
a stack of books, and then there's
this pencil going through that has the
lines and shapes. And then maybe this part would
have some value and form. And then this part of the
pencil would be colored. This is definitely
not the strongest in terms of showing portraits. Even though this doesn't hit
all of the requirements, it's good to have these kinds of explorations that are
just really different than what you've been
doing so that you can kind of test the limits and see what makes you feel like
is the strongest contender. I'm gonna try just a scene, like an outdoor scene, maybe. Maybe this person isn't drawing. Doesn't necessarily
need to be so literal. Let's see. Maybe they're in
a world of drawing somehow. Maybe instead of a tree
actually should be a mountain. That makes more sense. Building a foundation
and working your way up. That does help emphasize the drawing journey
aspect as well. Maybe the pond on the floor
looks like a color palette. It's an interesting idea, but one, I don't think it
communicates portraits enough. Two, I think this
might be a little bit too abstract. Not
be clear enough. This is a drawing
foundations class. I do think the hand is maybe a good example of something
like the hand holding the leaf communicate that
there is this branch here. And maybe the branch is what has the different aspects that
actually could be really cool. You can write little
notes to yourself, too. So this has line,
shape, obviously. This one would be in
value showing its form. This part would be in color. This would represent
the portrait class we talked about hands as well. And then there's the
whole composition. So that's an option. And that's a nice way to kind of anchor our whole class in an illustration
and kind of what I was trying to get with
our final design. So let me talk about
our final design. And, of course, you can continue make as many thumbnails
as you'd like. The more that you come
up with, I think, the better your outcome will
be because you've thought through all of your weaker ideas and then come out with
something strong. And usually, by the end,
when you're really like, I just can't think
of another idea, that's when you'll come up with an idea you really
didn't expect. But that said, I also
sometimes just have an idea, and I just go with
that right away, and I don't do a ton of
different thumbnails. So each drawing is
its own experience. So let me go into
this concept of someone sitting at
a desk drawing. Let's think about kind
of mood she is in. I've already decided as a girl. Is she Is it, like, a super
exciting environment? Is she calm and relaxed? Is she frustrated? Is it very active or is it
kind of a balance? And, like I've mentioned, I wanted it to feel
peaceful but engaging. So active, yet calming. Play around with
different poses. I thought it would
be nice to kind of show her hand
resting on her face, both contemplative and also
just a little more active. And also so we can
see both hands. And then I thought
about, what do I want to surround her with? And this can be an
exploration in and of itself. You can say so much about a character by what you
surround them with, what you dress them with, and just every single
aspect of them. So I had the idea that this would be like
a drawing journey, and so I wanted to give
her an explorer vibe. That's why I put
in this telescope, and then I had the
globe and I'm here working with the knowledge of what the class
illustration look like, but realistically, I wouldn't necessarily know exactly
where all of these things go. Maybe the globe started over here or maybe the telescope
wasn't this tall. But eventually, I
would move things around until I feel like
the composition felt right. And I want things to overlap, so it feels like she is immersed in all of these
things around her, and we're looking at her through the objects standing basically
at the front of her desk. I wanted to bring in a sense of nature and maybe a little
bit more surrealism, like imagining you're in a dream or the flow state
when you're drawing. That's why I had these
flowers surrounding her. I knew I wanted them
to give her a frame. And this is where
something like not having it too symmetrical
comes into play. So of course, the
flowers could be exactly symmetrical
and that's one look. But for me, I like
things to feel a little bit more
flowy and organic, so that's why there's
this frame that is not symmetrical but instead
has a nice flow to it. Was starting to think
about different shapes I wanted to incorporate. So that's how I decided the
rest of the objects here. So I had this kind of egg shaped flat tinned ellipse
sphere for this vase. And then I had a cylinder
for the pencil case, and I overlapped those two. The ruler was a rectangle and the pencils were smaller
cylinders still. And over here, I had a
tall cylindrical vase. And the globe, of
course, is an obvious, big sphere, and then the
telescope is also a nice cone. So those are all
considerations as I started to think about what I wanted
to place here on her desk. Now, to finish this off, I knew I didn't want to create a full scene because then it would be difficult for
me to place it on, say, a horizontal image or
just different aspect ratios. So having it be something
that is more of a spot illustration was
going to be helpful for me. So I finished it off with
this archway in the back. It could be seen as a door, but I thought of it
more like a window. Her desk is positioned where
her back is facing a window. So that is my little thumbnail. Let's now move this into
our iPad and go from there. So we've talked
about our prompt. We've done our
thumbnail sketching and thinking about the framing
and the overall composition. And now let's start to
clean that up a little bit. All I've done is taken a photo of this
literally with my phone, air dropped it to my iPad. Doesn't look like much, and I could obviously recreate it. But there are times
when actually your very rough sketch is going to be a great guide
to your finished piece. So I like to just have
it there on a layer, and you can always just hide it and just reference
it later on. But I'm going to demonstrate how I would think about cleaning
up some of the linework, how I organize my layers to
really take advantage of the digital tools when it comes to working on composition. So now let's really start to go back and think about line, shape, structure,
leading the eye, and all of those things, but now from a design
point of view. You might be following
along to recreate the class project again
with that new perspective, or you might be working on your own design
based on the prompt. Whichever one it is, let's
just go through each step with the same goals and
focuses in mind together. There's a few ways
to approach this. You can do it all
on one layer and then just select things
and move them around or try to draw each object on a separate layer and then have that be easier
for you to move around. This might just
become a matter of experimenting what works
best for you and your flow. And around this
stage, I'll start to pull up reference images. In this sketch stage. I'm not looking at
energy references. I'm just kind of drawing from imagination what I
think things look like. But around here, I'll start
to actually look up what a globe looks like and where
those important details are. Starting to think about gesture. So one considering how
her head is tilting. I kind of this kind of
gesture of her body, this overall triangle shape. And now with the sphere, there could be just
a straight up and down aspect to the sphere. But if I tilt it, it kind of
echoes the tilt of her head. With the telescope, that
was a little tricky because I could have it pointing
in many different ways. I kind of want to have a rhythm. So this globe is down here. That's why I thought
maybe it'd be good to have the
telescope on this side, pointing in another
direction, but again, tilted. Even things like the legs, how far apart
they're spread out, are all design decisions and can affect things in
a very subtle way. Having this leg here in
front of the book clearly communicates where in relation to the book the telescope sits. If I kind of kept it here, you wouldn't really be sure
where exactly it sits, is it behind the book? Next to the book, further away, maybe it's a very
tiny skelescope or a very huge telescope. So having it on a separate layer allows
me to play with that. So this has a slightly
different oval shape, more of an ellipse. And that's why I wanted
to place it here, but this is a good
little object where I could really move it around
all sorts of places. So if it was back here, it
would look like it's behind. At first, I think I had a
more on even plane with the globe and then realized by moving it just
a little bit down, it just creates more
of this kind of, like, rhythm hopping back and forth. Now, with the things
inside the pencil folder, I could have made it
very complicated. So maybe she has a ton
of things in here. But I decided that this
is a more minimal space. I don't want to
distract with a ton of things in this tin because
that's not the point. Just enough to be able to communicate that she has some
drawing tools at her table. And you'll see I like
to draw all the way through oftentimes because
I'm not sure where things are going to
end up and you can easily do the final line
work without these later on. But this way, you'll really ensure that you have
some accurate lines. So a lot of times
with beginners, if they don't draw
all the way through, say this was an elbow, then the shoulder will be here, and then they might forget
that it needs to connect, and then the elbow will
be a little bit off. So those are good reasons
to draw all the way through and just do
checks for yourself. And then start to put
in those flowers. Just overall thinking
about the shapes. Here definitely a
group of three. So I could have the
option to put two up here and one down
here or vice versa. I ended up with having two at the bottom and one
bigger one up here, but let's just leave that
in place for a while. You can look here. Are there any strange
tangents happening? I think this part's feeling
a little confusing. So maybe what I do is bring this more clearly in
front of the book closer to us and then maybe arrange the globe and the vase a little bit more
clearly that way. And now the globe is covering
the top of the vase. To make sure that's sticking
out, I'll have this. And then now this little part of the globe is touching
that edge of the vase, which causes this
strange tangent. So I can just go into my
globe and tilt it some more. To add a little bit more detail, I added these very
simple leaf shapes. This was just
putting whatever it felt like some space
needed to be filled in. You can also keep these on separate layers so that you can move them
around as needed. Again, you can say
that this technically breaks those rules of threes that I mentioned earlier and I could have included
another one here. There's no right or wrong here. For me, the leaves are
more like compliments, and so it almost becomes a
pairing with the flower. So there's a grouping of three here instead and the
grouping of three here. And when I was thinking
about her clothing, that's part of the design, too. Again, what does it say about this person? What
is she wearing? Is she wearing a
cozy sweater and all snuggled up with
a mug by her side? Or is she wearing something
more professional? Maybe she's getting
ready to work. And you can try many
different approaches. But just remember that clothing is part of the storytelling. It's part of the visual design. I ended up giving her
this nice green outfit, and it's a little
bit like a blazer, so definitely feeling
very structured. And also, it give
me the opportunity to talk about things like having this V kind of points to our
other focal areas as well. So we of course are
looking at her, but also subtly
thinking about drawing. In terms of her hairstyle, I kept it very simple and clean. But I was, again, thinking
about the shape language. So I thought it'd be
cool to talk about kind of the sphere
and then her face and then this triangular shape of both her hair and then the
rest of her upper body. I took a reference
photo of myself in a similar pose to make sure that my anatomy
was looking accurate. You put in a little bit of
the details of her face. Me to think about the
expression that she has. So is she looking with
her eyes open and looking at you or looking off in the distance 'cause she's
thinking about something. I decided that she
was going to look calm and contemplative
as she was working on her drawing and
then have a slight smile. Okay. So let's turn off my sketch layer in the back and see how that's coming along. You'll see it's going
to be very similar to, of course, the observational drawing that we did together. But now think about
it in terms of this drawing didn't
exist before. So there was nothing to observe. And now we've put together this original drawing
from our imagination and our understanding of various foundational
skills all combined. So as you are working on yours, think about all of these
concepts together, and you can even have a list of the tools at your disposal or the different aspects at every stage of what
to keep in mind. So feel free to continue to experiment with
your composition. And when you're
ready, let's move on. After we have our basic
sketch composition in place, you can either clean
up the linework here or do a quick value thumbnail
so that you can make sure that you have a little map
for yourself as you move into selecting a color palette and refining your linework. So keeping everything
that we've learned in mind, including
avoiding tangents, making sure that the
separate planes are clear and drawing the eye
to important focal points, let's start to use
our five value system to start to think about how we might want to sign and group different values
into our sketch. I'm going to start with my
fourth value on her hair and just know that
I want to create a high contrast between
her face and her hair. Then using my lightest
value for her skin, it could also be vice versa. And then working my way
around the illustration. By using these values and all of the concepts
that we've learned, I can make sure that there's
clear differentiation that's supporting my drawing,
composition and structure. So even if I've
overlapped objects, which is already one clear way to define different planes, I can also use
contrasting values to make that even more clear. I can use stronger values where it's more closer
to the viewer and then lighter values
in places where I don't necessarily need the
viewer to look right away. I'm also using the contrast of the darker values in the
vases and the leaves, so it draws your
attention all around the artwork after first
looking at the character, and then a lighter value for the background because
I want that to be more in the background and also not necessarily draw
attention to it right away. You'll find as you work through the five values that you may
need to adjust it sometimes. So for example, on her jacket, I wanted to have two
values that clearly showed a difference between the shirt underneath her jacket
and the jacket itself, but not a super huge difference. And so I just slightly
lightened the jacket color and slightly darkened
the shirt color from my three and four values. So this is a good moment to pause and consider
the difference between a value study and then doing a value thumbnail
for your own work. Here, there's nothing I'm
observing and copying from, but the value studies help me really learn to appreciate how others use value to make a really strong structure
for their drawings. And so when it comes
time for me to do value thumbnails
for my own pieces, can really start to pay
attention of how to group values together and also how to have a good balance between all
of my different values. So I'm thinking about
the major and minor key that I wanted to feel
very bright and lively, so I'm using a
high major key and also a pretty high minor key in terms of the
level of contrast. And so I have my darkest darks. I have some whitest whites. I make sure a lot of the
contrast is here in her face, but also here around her
writing and then just kind of the overall balance of
having it feel like a bright setting,
but also calming. And I've started with
the five basic values, but you saw that I'd made some adjustments here and there. So I'm probably
working almost more with a nine value or
almost ten value scale because there are some
areas where I wanted to just have a little bit more
subtle of a difference. And so, with this, I already have kind of a
roadmap for my color palette when it comes time to think
about how to pick colors. Where in the range of value do I want to be
collecting the hues from? So even if I know I
want it to be green and orange and peach, what kind of oranges and what kind of greens
am I looking for? Now, I don't want to
repeat too much of what I talked about in the
color class in terms of the emotions I was trying
to convey and what the color psychology
was and how I ended up with my green
and orange palette. So in this stage, I'm
just going to talk a little bit more about creating depth and what I
was thinking about in a composition viewpoint. So as you learned in the
planar perspective section, there's a few aspects of color
that we can think about, such as making her
a little bit more desaturated and brighter
because she's further away. But for me, because I wanted to keep the
attention on her, so I decided to keep her just as vivid as the
rest of the image. I wouldn't say that the
greens that I used on her or the reds and
the oranges that I used in the details are
really that much more desaturated or kind of further away than the
things in the foreground. We don't really experience
that distance or that shift in values and hues
anyway when things are in such close approximation
to each other. But I did choose a
more neutral and toned down background color
for the archway in the back. And when I was thinking
about rendering and how much value to put into
the objects around there, I decided to keep
things very simple, more flat, and a little
bit more subdued. If you came up with your
own drawing or recreated this one now with your
own understanding of how everything
comes together, I would love to see
how it all turned out. O.
29. Depth & Composition 5: Summary: I hope you learned so much in
seeing how everything we've been learning comes together
in this final class project. I can't wait to see
what you've made. First, let's go over a quick
summary of what we learned together in this depth
and composition section. In this section,
we learned about the evolution of different
approaches to perspective, including classical
linear perspective and planar and parallel perspective and why
they might be used for different purposes
and artistic expressions. We learned how to create
depth and planar or flat perspective by
utilizing the foreground, middle ground, and background and varying the
details and tones. We learned classic
composition techniques such as the rule of
thirds and groups of threes and how to
lead the eye with focal points and different
rhythms and lines. Put it all together by going
full circle and learning the first step of an
original drawing, dating and thumbnailing. For further study, I encourage you to
continue to practice, especially with
little thumbnails and just sketching and coming
up with different ideas, and of course, observing
the artworks, pictures, and movies that you
enjoy to better understand what kind of
compositions feel strong for you. Can also check out
books that have composition techniques that are relevant to your interests. For example, I have these really great
detailed books on Hokusai and Mukas work, which really helps me study their approach to composition. Okay, so spend some
time exploring and going through the composition
exercises for yourself. And when you're ready, let's meet in the final
part of this class.
30. Final Thoughts & Tips: Congratulations on
reaching the end of this drawing
foundations course. We've learned so much together, and I hope you're proud of
what you've accomplished. We now have a solid
foundation and understanding of how our
tools of line, shape, value, form, color,
and light can come together to start strengthening our
observational drawings. From there, we know how we can use those same tools and add in perspective and composition and grow into our own
artistic expression. Continue to practice the
exercises from this class, and you will improve. For your convenience, I've
compiled the key concepts and exercises into a workbook that
you can refer to anytime. If you enjoyed this class and want more support on
your drawing journey, I welcome you to join my drawing studio
for guided prompts, more classes and live sessions
with me and a friendly, intimate community
in Mimo Chai Studio. Either way, practicing with the knowledge of the
tools you've learned in this class is going
to be way more effective than just
practicing blindly. And as you continue to practice, remember to keep your explorers mindset and draw what you love. That way, you'll stay
motivated to keep going on this journey and see this
as a drawing adventure. I also invite you to leave a review and a comment
for this class, as it's super helpful
for both me as a teacher and for other students considering taking this class. Thanks so much for joining me. Until next time, take care and keep creating. He
 Mimi Chao, Owner & Illustrator | Mimochai