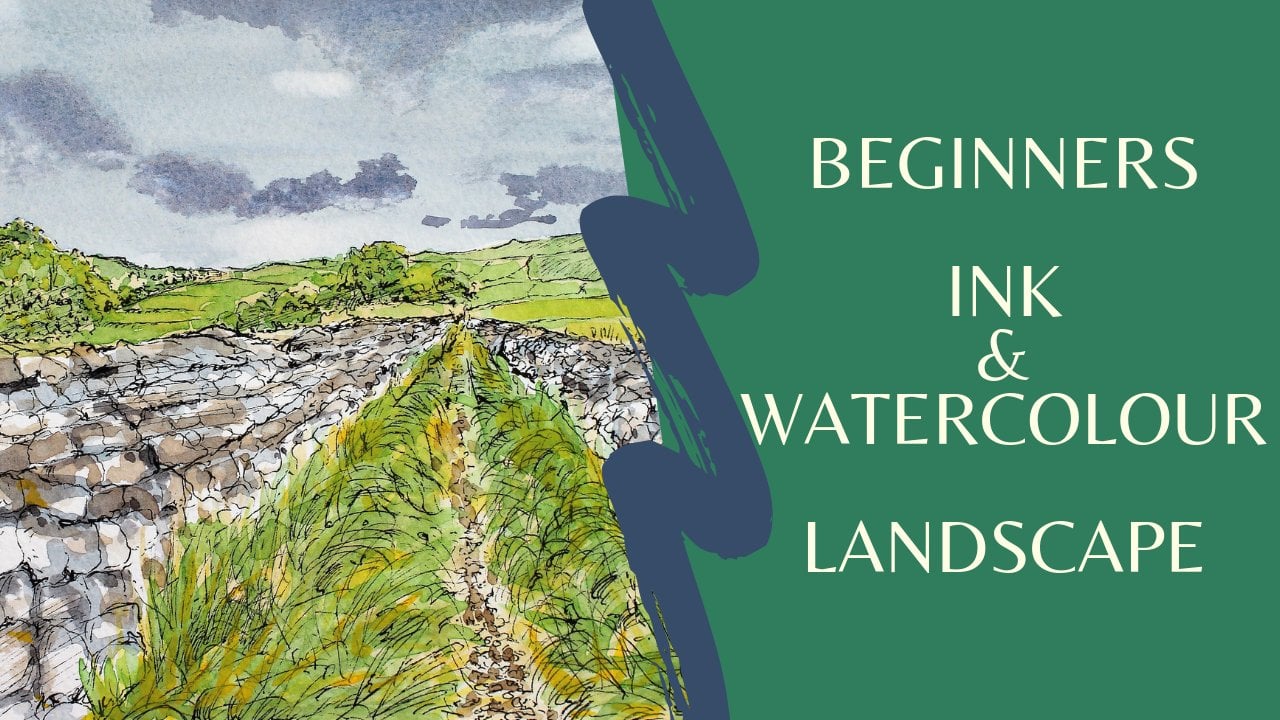
Transcripts
1. Introdution: Hello. I mean that Welcome to my boss and expressive eat is older power without these are focused on Joey needs another hours. I just think the grossest I will show you my weight of jumping on that I share keeps chicks some basic technique jumping in other powers. The Quest Project will make the second drugs. First. We'll be using you'll decide when it used for and take a glowing review what their cars next, little and see very different, so don't need to squat.
2. Materials: the materials for discourse are quite flexible. For this project will need two sheets of paper, 1 40 in throwing and one for the water. Coward drawing 40 ink drawing. You can use any paper. It is good to be thick enough. About 200 deism. There are Bristol paper like this sketchbook corner, which are great for ink. It is very small surface, and it is very bright white, which gives great contrast. But you can use any paper that you care, even if you prefer more rough looking clients. You can use water Cower paper for the ink drawing toe for the water cower drawing. I will use Kinston paper, which thickness is 300 GSM. It is gold breast and placed great texture. If you prefer more smooth surface, you can try court pressed paper. There are a lot of brands, but keep in mind when choosing kit. To be thick enough tow. Avoid wrinkles. You need a protector. Berg, you pencil and Tereza. I prefer this needed a razor because it doesn't make garbage. If you prefer, you can bring the template, which you can find in the down world section. I have a few different names, but I like most lunar number 41. It is quite flexible. So if you don't like the few off drawing quick nips, try to find a flexible one. There are quite cheap, and you can experiment with them for the ink. I will use both Whizzer in Newton, and they were Rony, which are waterproof. But you can choose water soluble ink to receive even more interesting results. If you find it is difficult to you to work with Nibs, anything you can use black pens. What do you give? I use different brands, and they have different sizes. Just try a couple of sizes and types in. Decide which one you feel best for the brushes. You need one big round brush and the smaller one for details. I have these two small brushes from next. Hippolyta. They're great. For smaller details, I will use one big brush. DaVinci, which holds a large amount of water, which makes it excellent for a mop and wash techniques for the water cower our use white nights. These pains give very vibrant colors, and my favorite liquid water cowers equine, but you can use what water cowers you cave and I'm sure there will be great results again. You can use water. Cower brush went like this. If you have, you only eat the cower palette. Toe makes the pains big jar of water on both suit brush drinking, Stroh and any brushes that can make interesting effects. Some tape and a piece of cardboard to fix the water. Cower paper and rubbing Coco. If you have, you'll find a list off the materials for this course in a pdf in the Down World section. There you find in the template for the ink drawing. We have a lot to cover, so let's get started.
3. Warm up: first we'll start with warming up. I hold the neep holder is a pen. I deep the neep. So the ink covers the whole on the nape and I take the existing on the rim off the ink bottle. I made one straight line and do with variation off the thickness of the wine. Now I will compare how ink behaves on the different papers. This is one of Bristol paper, which is very smooth, and it is easy to draw on it. My name is very flexible and it allows me to make easy curved lines and decide hedges. This is cancel water, cower paper. The lines are more alive and texture, and I actually preferred this. Look, this is offset paper with thickness. About 200 Judaism. But I use they were our own ink and it makes bleeds. When they used wizard and you turn on offset paper, it doesn't make bleeding's. So you see that the ink his matter to for the look off the throwing. Now I will show you some drawing elements that you can use in human does. You can use strike wise, dashed and dotted wise our combination of them. You can make barrel. Oh wise with embellishments between them, a hitches, its exact lies to give more life drawings. - You can use more barrel otherwise, and it different elements between them. The possibilities are endless. - You can it scallops in different sizes to leave a space between them and to feel them different . And they will give finished work off your mind our experiment with thoughts, geometric figures and inverse of black and white. Here I will show you some basic figures that you can get the Yeoman Dawa. I use a lot leaves. They can be more narrow or thick or to have more natural and curvy look. You can use drop shape or low to sleeve shape or toe ed some organic shapes. I love using feathers here. I will show you some examples off, placing an element between two other shapes. It could be circle shape or to be a group off circle shapes one behind another. You can add a few toe make front shapes to stand out. You can use simple life shape, and it embellishments for more interesting cook. You can hide health or more off the leaf, and you have different elements. You can use water sleeve, which is one of my favorite elements, and to make a bunch of leaves one behind another. In this part of the lesson, I will show you some ways to fuel your mind. Our elements. You can use dots, circles and so on. You can use Servicos or any other shape with feud background. It gives a really interesting cook off the drawing. - You can use hedges spread evenly or to give shade the talk. You can divide your shapes and it hatches, dots and solid fuse. You can make leaf inside the leaf. There are so many ways to embellish your mind. Our I can't wait to see what your imagination can dio.
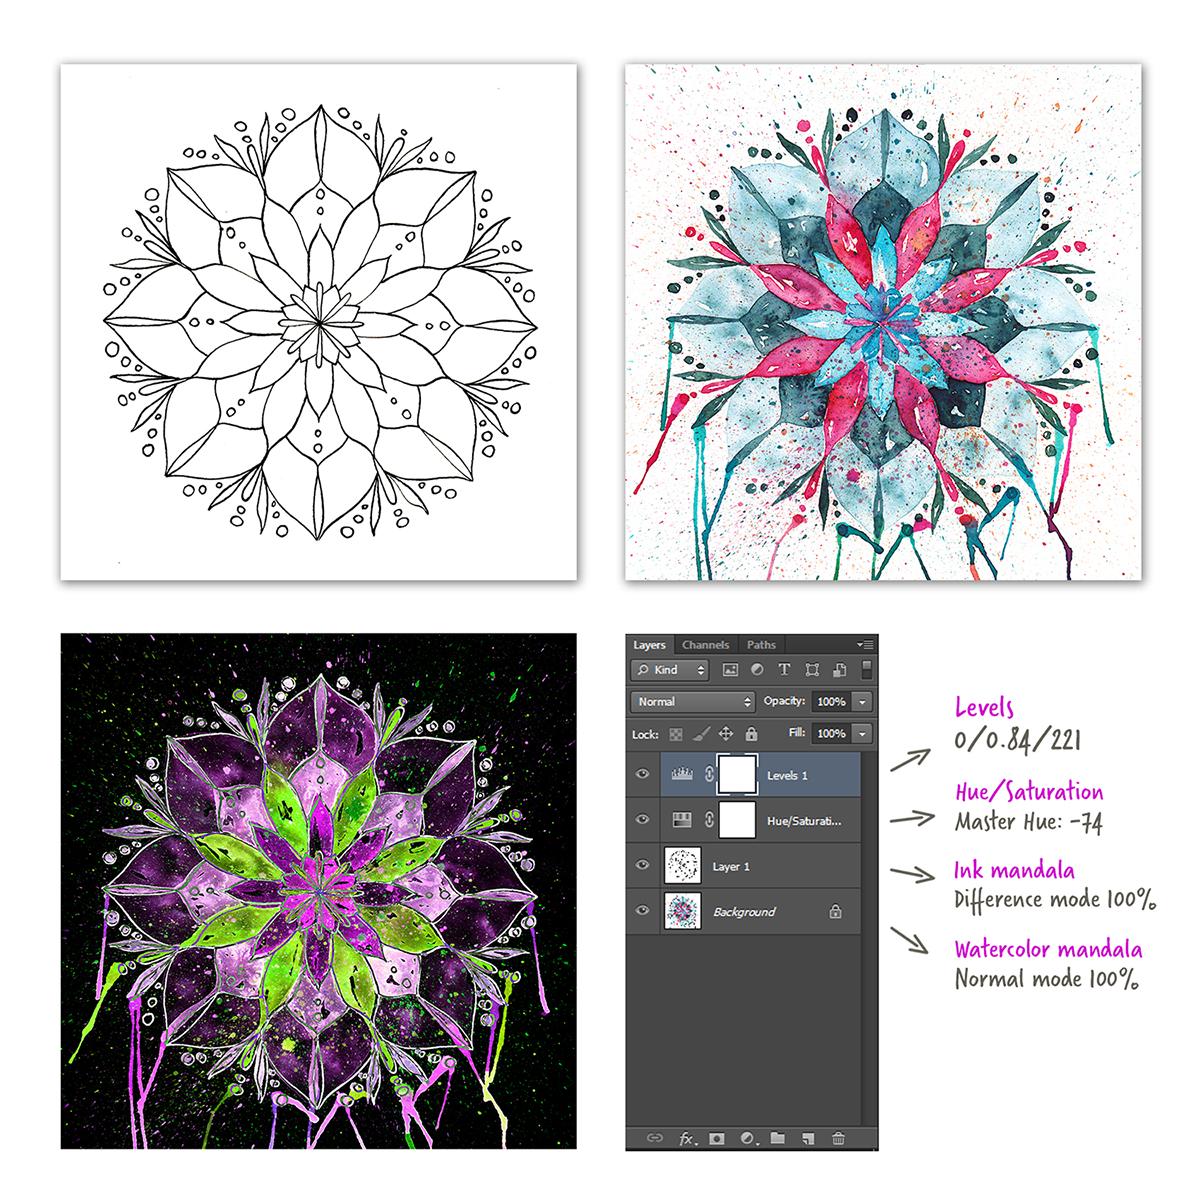
4. Ink Drawing: First of all, we have to make a circle great onto ink paper. You can use protector to make the template. Ah, use graduation by 15 degrees. How you show you my easy method of doing the great. I used this template and make hosts and put dots in them. And after that, I connect them to receive discreet. - Now we are ready to start throwing our Mandela if you're using a deep V with with ink until the ink reaches the whole. After that, pick up the excessive ink on the rim of the ink bottle. Start with a simple shape. I usually make a circle to guide me for the size of the other elements. Repeat the shape over 45 degrees. After that. Start with the 2nd 1 This class is for drawing expressively. So you're drawing shouldn't be perfect. Actually, we are searching for in perfect working Mandela. I really make projects for them and our I start drawing shapes and I leave myself to the flow. You can start with simple geometric figures or floral elements in depends on you. You can add more embellishments if you like. You can use thoughts, catches circles, spear owes florals and so on. You can add more life to the drawing by inverting black and white. I usually try to repeat some elements. This gives more cohesive look. It is good to it, the ink dry because it could be easily smudged for this project. I will keep the drawing simple. I will speed up the video so you don't have to watch me for so long now. We are finished with our black medium and our and we're ready to move forward issue in the next lesson.
5. Watercolor Techniques: in this lesson, I will show you some basic techniques for drawing. With water cowers, you start with wet on wet technique. You have to wait your paper very well, and it pains do it is to do it. You'll see beautiful mixing of colors. You have to work quickly before it is right. You can prepare mixed pains before starting. With this technique. You don't have much control, but it is great for bigger elements or as a background. Why don't dry? Is the technique that you kept most control over the shape? I use it a lot in my mint. Our drawings, - when using dry on dry technique, used dry brush with minimal amount paint on it. You can hold the brush more horizontal and work with the site of the bristles. You can receive very interesting textures. You can use some old brushes to achieve rough work. Now I will show you the technique coat glaring. I will put some random colors and leave them to dry after complete trying. I will make second layer that blends with the lower one. Making courses is one of my favorite techniques. I will make to color spots. I have to wait a few seconds through the pigment loses its closeness. Then I put drops of water and the water pushes the paint aside and great beautiful blooms. This technique is gold charges. I make a color sport and it another cower. Do The bank is what with this technique, you can receive a very interesting effect here. I will show you splashes. You can make drops using brush with bloated bank, or you can get really messy and use an old suit brush. Maybe just good to have gloves. But I really like to feel the paint using sold. It's really fun. Make a color spot, wait a little too dry and puts himself. You have great effect. Using is a prop. Your alcohol or rubbing alcohol is grateful. Wait a little too dry and sprayed or splash it with the food brush. You can have great spots. You can use drinking stroh or to use gravity to make spider effect. Try some unusual does like spatula or so to speak and have fun
6. Watercolor Mandala: after we have finished our England, our we have to transfer it on the water cover paper. I use let white that I have in my studio, but you can use light box or the trace your drawing on the window. I use HB Paseo to make a life drawing. I drove the most important elements. When I'm finished with tracing, I erase a little bit more, so I barely see the drawing to prepare water. Cara Pains. I sprayed them with water. I will use the wet on dry taken here because they hip most control over the shape I started from inside out and from the lighter cower when I'm covering my manda was, ah, usually tooth cowers. That's they will want to another. If it is difficult to you to true scours, you can search Inp interest for our palates. Inspiration between elements. I leave the drawing to dry. You can use here dryer to speed up the process, but keep in mind that it could make the pains less vibrant when you stop working or take a break from growing. Be sure not to leave the brushes in the jar. Raise them well in Clearwater and reshape bristles this way. They could last for a long time. As you know, Mandela is a spiritualist symbol in Hinduism and Buddhism, representing Universe Mandela. Drawing is used for therapy and helps to represent our unconscious self. The shapes in the cowers you create inhuman our art reflect from your in herself at the time of creation. When drawing Amanda was, it is good to let go your goes yourself and leave the easing to guide you through the process of creation. I love drawing Mandela's because a few calm and relaxed drawing when that was take me to another place and killed my mind to take a rest After a busy day here, I will use wet on wet technique to achieve more free looking view in these leaves. When drawing, Yolanda was feel free to experiment and try different our combination and techniques. I usually skunk the drawing before get messy. So if I don't like the result, I will have this version of the Mandela to first. I start with making little spots with loaded brush, and I ate splashes with food brush. As you can see here, I try to make spider effect, but I'm not very happy of the result. I had to load more water in the drops and leave the gravity to do the job. But I will leave it this way. So see you in the next lesson.
7. Scanning: now we already with our man does and he have to scan them. If your water cower. Paper is wrinkled. You can fix it this way, just with the big side of the paper and put over it. Harry, book. Leave it for a few hours to It is right. If you don't hear for Skinner, you can take a picture with your phone, put the phone on a big pile of books and make sure it is fixed. Well, try to put the two drawings on the same place with the same settings of shooting. You can help yourself by using tape to mark the place of the previous throwing I use. Can a leader Skinner and I make my skirts at 600 d p. I, which is good for my art. I care. Enough. Oh, automatic correction of the scanner are you? Scan the drawings now and save them on my desktop and we are ready to edit them in fourth shop. See you in the next lesson.
8. Editing in Photoshop: way have to get our Mandela's. I opened them in fourth shop. First, I will crop the 1st 1 and they choose Squire scaling and die. Position the Mandela at the center of the document when a zooming I use control, space and drug addict thank you are I make a new adjustment layer levels and take the eye dropper for the white point I choose usually the most that quite. And after that, I take the eye dropper for the black point and click on a dark, great toe. Make it black. This gives contrast and makes the background white. You can take the value into evil panel. After that, I flatten image. You can right click on the background layer or to go to the menu, layer forth an image. I made a shortcut for the flatten image comment because I use it a lot. You can make a customization in agent. My new keyboard shortcuts. I clean some spots using the brush door presby on the keyboard. I press D on the key part to be sure. I used the default cowers for foreground and background, and I press X on the keyboard to switch between them. now. I saved the image outside the skin folder and it to the name Black. It is a good practice. Tow it in the name keywords that will help you Organizing files. I saved the file like TIF and leave it without compression. Now I will do almost the same with the cower file. I ate adjustment layer levels and I think the white point again and they make the middle toes a little bit darker. This will give contrast to damage again. I fought in the image and saving 18 cower in the name. It is a good practice to save your image first. This will help you to avoid over writing off important images. I copied e ink image by pressing control A to select all and control. See to copy the layer and placed it in the water cower document By pressing control V I lower your capacity off. The in clear to see is its own place. Sometimes I don't move it a little bit on purpose to receive misprint effect. I begged you positive toe 100% and start with experimenting with blending modes with active my new off blending modes, you can switch between them, You think the arrow keys I like overly blending mode and the simplicity that I received blending modes are very white seem I will make separate lessons soon, but I want to give you some basic knowledge about it. There were six groups in the pilot. Normal moat is in the 1st 1 and it is the default blending mark. The second group is called Shadow Active. Layer casts shadow on the layer below. The theater group is like that shines light on the layer below each of these cases on opposite one in the darkened group, the fourth group is contrast, birds the shadow and highlight the light part of the image increase The contrast of the image. The fifth group is inversion consolation first toe. Use active layer to invert the layer below next toe substructure or divide active from background, and the 61 is called component. These modes mix the ingredients, hue, saturation and cower independently. Next month in our Iot, start again from opening the doors. Can't images and save it with another name again. I will put the in clear over the water, Cower one. And they said, the blending quote off the England to difference. After that, I had an adjustment layer hue saturation, and with Master General selected, I start to move the hue slider. I think I like it this way. I ate in the level adjustment layer to make the image more contrast. So let's start with our third experiment. I start again with the same layers, but this time I will make the contour coward with in clear selected. I take the magic wantedto I said the dollars to 20 and d select the contiguous and click somewhere in the white de Select only the white areas I breath control shift I to invert the selection. Now everything except white is selected. I make a solid cower layer and choose a dark cower. The change disk. Our I double click on the layer, some new. I select the coward from the image, and I make it a little bit darker. After that, I taken image to experiment. If the Mandela has a background, I took this one. Maybe it is more busy than I want, but I will try with this one. I scare it. Withholding shift key to constrain the proportions. I double click on the big ground player. Don't work it anti drug, This background image below the cower version of the Monday our you can see that changing the blending modes doesn't help much to make a good looking Mandela. So I leave the Blaney Moto normal and take the Magic Juan toe. This time, I will select contiguous, and they start to select white areas outside them, and our you can click it to selection button on the property bar or to hold shift key toe to selection. Now we have to divert the selection by pressing control Shift I. After that, click on his bottom damask the layer. Now white areas are hidden from the mosque. Now I select the layer with the green background and click Dwight adjustment layer curves. I bend the curve to make the layer beneath darker, I said the blending mode off the government, our to scream I at hue saturation adjustment layer and start tow experiment. But this time I won't make correction on the master General. I click on the button to remove changes. I right click on the layer. In truth, make clipping mask. This way changes will make effect on Lee on the layer below. I choose science from the menu and move the slider on the left side. This way I made science a little bit greenish I still like the top layer and at levels adjustment layer to give more contrast of the finished image. For this experiment, I will use the image that I made with the Water Sellable Inc and the Cower version off Mandela. Before my sync it up, I copied the in clear above the cow Armand our I chose substructure, blending both for the in glare, and I want to change this black cower to another. So I had sold cower, layer some kind of purple and change the blending boat to linear thought I changed the purple a little bit by double clicking on the layer thump. Now I ate hue, saturation adjustment layer and play with master Hugh Vallas. I had some contrast with levels for this image. Oh, at the counter image to I have scanned it before wash it with water. I have the three images in the document. I turn off the counter, Claire. I make the water cowardly. We divide blending mode and there enough. It's visibility by the I icon. I double click on the background layer to unlock it. I used the Magic Juan toe to select the white areas outside. The Mandela continues should be turned on. I press control shift I to invert the selection. I click on this icon toe, make a layer mask, then a ho control key and click on the layer mask to make a selection. With this election, I make a solid cower player in juice purple cower, and they wore the capacity to about 50% and leave the blending mark to normal. I turned on the visibility off the cower layer and create you cower lair with yolk our and make the blending mode to mount a point eight contrast with levels. I turn on the visibility off the counter layer and move it above oh, other less in the palate I changed its blending both to divide and move it a little bit. Now I have a poster looking command. Our okay,
9. Class Project: projects to drop what make me about and what we do on their cars. You can use this drawings and that made I can't wait to see your works. So don't forget holding digitization and right what you want You can use this way
10. Thank you!: Jenny. I hope you learn something new. I look forward to your project and your extended, so don't give building. And they set me on the ground. So he works there. Great.
 Zornitsa Statkova, Graphic designer | Artist