Transcripts
1. Intro Character creation Making a tree stump come alive: Hi, My name is Richard, and I'm an artist and illustrator from Sweden and welcome to my course on character creation. For as long as I can remember, I've been intrigued and fascinated by animation, cartoons and comic books. It's all because of the characters and these cool and crazy and fun worlds that they live in. And I love to create my own. And that's exactly what this course is all about. Creating this cool, new character and bring it to life on the paper, using your own unique style and creativity to come up with something that you know doesn't exist. We will begin the adventure by making rough sketches. Then I will talk to you about finding those sketches and using reference to. Then we will start to create the final draw. You will be able to follow along with me as I create my character, and I will give you tips and tricks and tell you about my techniques and how I build up this drawing. And in this way I will be your teacher on drawing, and together we will make some really cool, nice price. Hopefully you will learn a lot and you will have fun, so let's get started
2. How to get the most out of this course: how to get the most out of this course. As I see it, you can take this course in a number of ways. Um, if you're a beginner, it can be great to use my sketch, use my final drawing as reference and then recreate that drawing together with me. So you watch my videos, you go through that step by step and you implement my techniques, my tricks and tips. And then you will develop. You will. You will really, really learn a lot doing it that way. And after you've done that, you can redo the course. But this time you you're more sure of yourself. So you create your own character. You will use what you've learned and you follow along with me. But you create your own. You have your own style, your own ideas on how to create it. And if you're more advanced than if you already have pretty good abilities, you follow along with me and you create your own character from the start. So you just look at my videos, you get inspiration, and you can use the stuff that I'm teaching you and just incorporate that in your own unique style. Eso yes, let's do it. Let's get started
3. Materials and how to use them: Okay, so now I'm gonna show you what materials I will be using in this course, there is not so much of it, which is good. So let's go. First of all, I'm using only one pencil. It's an HB pencil. It's sort of in between not too soft, not too hard. I'm using a kneaded eraser, which is a very, very good tool to use when it comes to not on Lee erasing. But, um, you can use it in many different ways. And also white regular racer can be good. Also a sharpener if that's needed. I usually like to use a knife like this because I can. You do a very, very sharp point on my pencil if I like, and also the last tool, which is a brush watercolor brush, ink brush. This is for brushing off any extra stuff on your drawing from maybe when you have used to eraser so you don't brush with your hand and smudge the whole paint and the whole drawing. This is a good one. Ah, yes. So when it comes to paper, you can use regular the cheap copying paper if you like. I don't like that so much. I like a bigger sketchbook like this. I like Mawr more space to, ah, to draw the bigger paper. And also, I like this type of paper that it's made for sketching. So this is what I use, Um, when I do my initial sketches. Ah, when I'm playing around when I'm doing When I'm trying to just figure out, um, ideas much like we're doing in this, uh, course. So this is what I'm going to use. And then when it comes to the final drawing Ah, I like to use this paper from Daler Rooney. Heavyweight acid free paper, 220 grams, £135. Paper. It is a creamy paper. You see, it's much as, ah, cream your tone and this really white one. I prefer this. I really like it. And also it's ah, it's a very good paper to draw on. You can find other papers that are really, really good. So go out and buy what you find and try it out. Okay, so I'm going to, uh, show you also how I, uh, use my, um, at pencil how I hold it regularly. Or usually I'm holding it like this when I'm writing or when I'm doing details. Small stuff, tiny stuff. But for this, um, sketching and doing this type of drawing, I like to hold the pencil more like this because it it it handles much looser. And I can be much lighter in my touch when I have it like this. You know, it's very hard to do a soft lines when I'm doing it like this. Also, it's hard for me to see what I'm doing when I'm having my hold my grip like this. So here you I'm much freer. I can see what I'm doing. And I can also do much softer, nicer um, sketching. Also, a good thing is that I can cover an area, uh, with even tone like this in a good, good way very fast. This is very hard to do when I'm doing it like this. Almost impossible. It's hard to see to. So in this way I can cover it up very, very quickly and likely another way to hold your pencil, which I found can be good is to have it between the fingers like this. In this way, you can rest your hand on the paper on the site. You have a very, very good control over, um, over your pencil when you having it like this. So try out thes different ways of ah, of gripping your pencil and see what you like. See what grip you prefer. So try it out in just experiment. And another good thing I'm going to show you is with the kneaded eraser. You conform this. It's like Clay, if you haven't used it's sort of like Clay. You can make a very fine point. You can go and easily pick up, um, areas you want to lighten up. You can also actually sort of draw with this if you want to do something that stands out from this, uh, darker background and then you can go back in and fill these things out, right? Like leaves, maybe, or something. It is harder to do with this because you can get, um, you can erase some things, but you see, it leaves. It leaves all this small stuff that you have to use the brush to get rid of. This doesn't leave anything like this at all, which is super good. Ah, and also, when you erase with one of these. You want to clean this off before you use it again, which you don't have to do with this. It's ready to go whenever you need it. Okay, so that's that. Let's carry on and start drawing.
4. Reference One way to find great images: Okay, let's talk about, um, how to find reference material. And for me, I've found that Ah, Pinterest is a very good ah site to ah, look for reference. Because I like that search engine that they have. And if you, um, put a started an account there, you can have at boards. So, for instance, here you see mine and I have down here I have different types of boards cartoon characters , trees, animation, art, concept, art, everything and some of my own stuff. And, uh, this is very good, because I can, uh, easily. And I put my stuff in categories eso I can find it. So, for instance, when it comes to this course s so I go into trees Oh, here, I got some nice trees, some tree stumps, both, uh, photographs and drawings and then the stuff that I really like ISS that if I let's say I enjoy this one, I click on it. I get it up here and then I can go to the home page where the images from, but I can also view it here. You see, it's pretty nice, uh, image to look at them and use as reference if I like. But the cool thing with interest is that now, when I got this one up underneath here, it's gonna show me all different types of trees that are related to this first search. So the search engine is gonna show me no lots of different varieties and ideas for me to, uh, to look at. Sometimes it's not, you know, not perfect match, but, um, usually you can find something good, and then you can you can go in and, um, and continue to click on, Let's say this. I like that. So I go in and click on that and I get up because there's mushrooms in this image. I'm going to get more images of of mushrooms on trees and enforced. This is what I really, really like. And I can even go in with this one. Um, I click on that little, uh, close up thing there and I can go in and I can really assume in on the mushrooms, for instance, like that because I'm so close to the mushrooms. Now it's gonna show me basically just mushrooms. And this is something that you can't do anywhere else, which I I really like eso. Now I just get tons of mushroom pictures. So if I go back again to my profile so what you can do if you want, you can go and search. Uh, however you want you or you can go into my I'm gonna link from the one I have my Pinterest account. You could go in and check that out, because here I have lots of reference that you might find. Ah, interesting. Eso this waas Uh, yeah, that's it. Um So I really hope you try this out. You go to Pinterest and maybe you You ah, put your get your own account and you can start saving your own pins and your own boards for future projects. Okay, that was it.
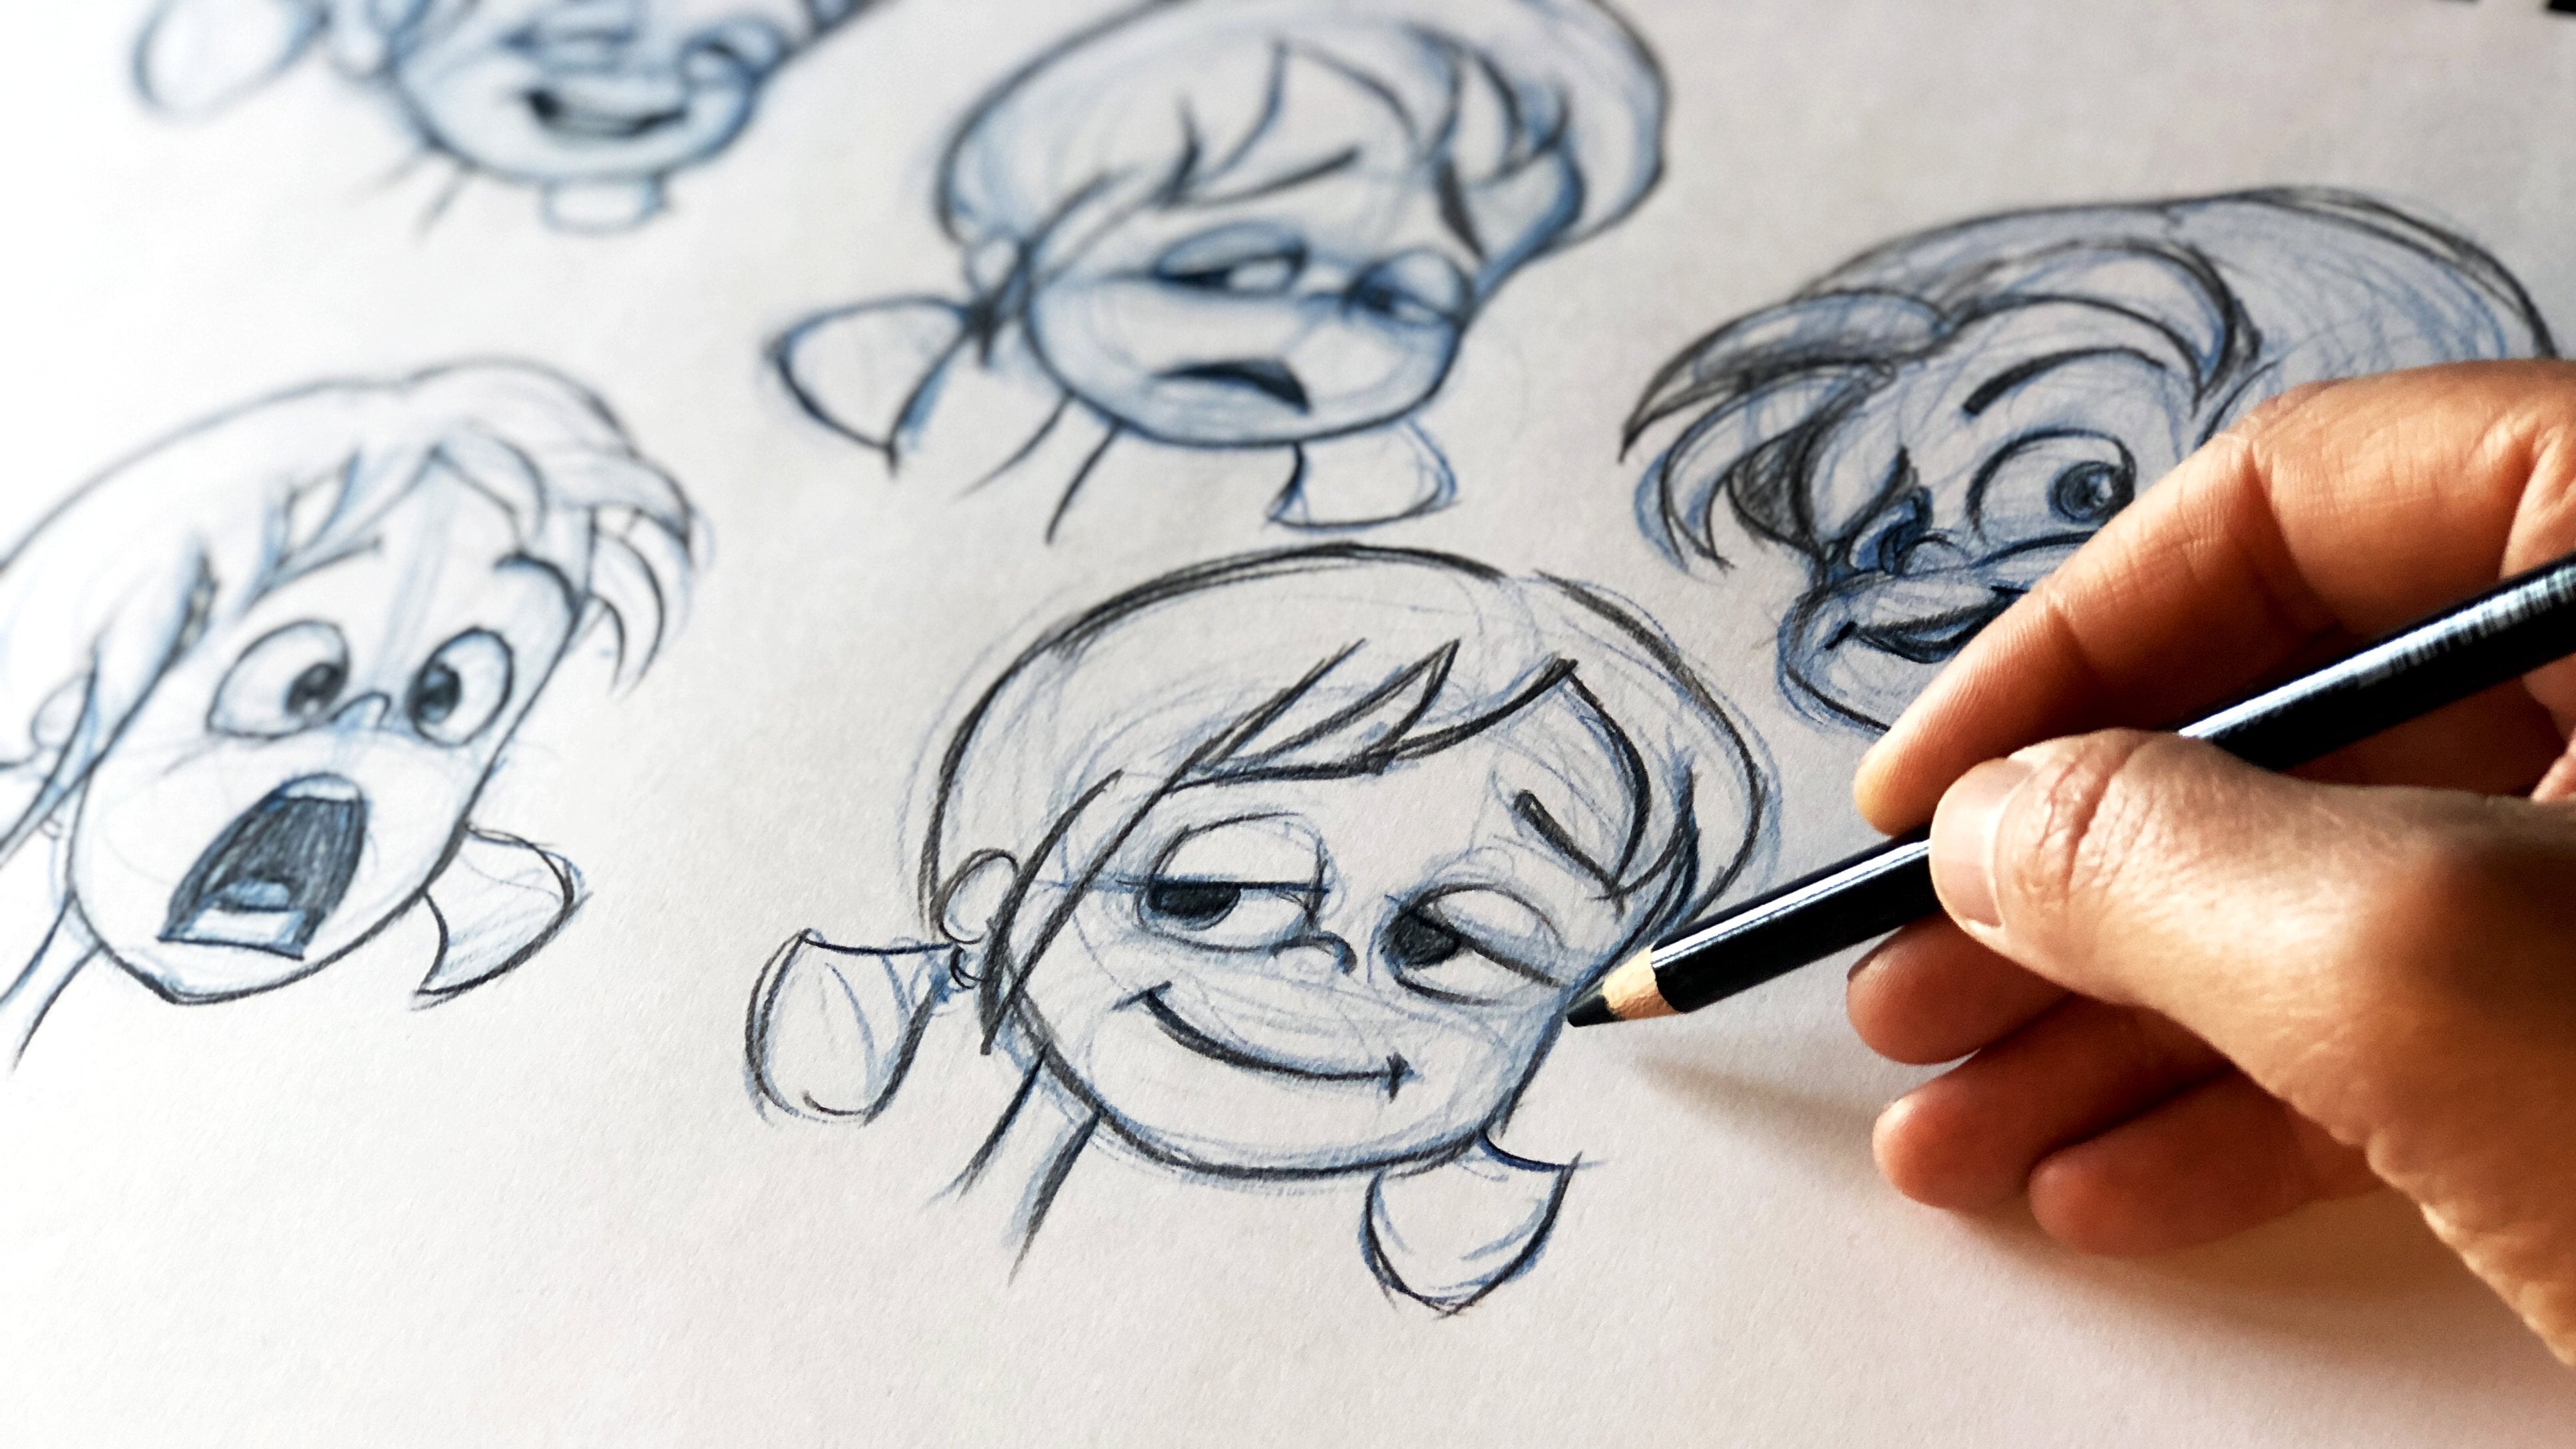
5. Sketching Stage 1 Initial ideas: okay, it's time to start sketch. It's time to get our ideas for my mind flowing onto the paper. And in this process we're just doodling. There's nothing. There's no boundaries, no limitations. It's just moving the pen flowing with your own imagination. So this is a fun and relaxed part of the process. I think, um, it's exciting to see what I can come up with and also here I want to work on what's gonna happen in here. There needs to be something intriguing happening, you know, we need to have some sort of action or feeling, or there was a certain mood. There was something that's going to trawl, um, the viewer into the picture that's gonna make them fascinated by your character. So let's get started. Many people do thumbnails, you know, like these tiny ones and, um, and they draw some little tiny image in here, um, to to to get their ideas out. But for me, I don't really like this because it's it's, too. It's too much like a like a box with barriers on da limitations. For me, I I want that's why I want to have the bigger space, the bigger okay, The bigger paper. Because I like to just start to draw freely like this without any boundaries. So now we're building a character. We're gonna We're going to do this. Ah, tree stump. And, uh, and we're gonna find some different ideas for this tree stump. So it's a character. So it's free. Doesn't you know, it doesn't Doesn't need any boundaries like this. I rather have a free piece of paper, uh, to get my ideas out. So, you know, I just start to sketch lightly, and, you know, this is the shape of a tree stump. Usually it's like a triangle. So here it's it's grounded and goes up like this. So I just find some flow flow in it. And, uh, and also we want to In this process, we want to see if we can create some something in some emotions or some some action. Something happening. Ah, And in this one, maybe, You know, maybe he's worried. Maybe he's a little scared. Maybe there is. Ah, spider here or something coming down from this branch. Um, so, you know, I build it up like this, Um, just getting my ideas down. Or maybe it's a little. Maybe it's, uh, really thin one. You can use the branches like arms, you know, needs to have some sort of reactions from some expressions of feelings, something it's doing that's interesting. That's gonna get the viewer to be interested in our character. Maybe he's He's fascinated by this this flower or this butterfly sitting here. Maybe, you know, he's he's watching this. He likes that, um, and he's happy. So you can work with that some some kind of feelings, right? So now I don't get into so much a detail around it. You know, you can put some things around it just to see how it is, but and also, I'm not doing any, you know, specific details on it. I just want to see if I can, uh, I can capture some sort of idea. You know, maybe there's two of them. Maybe that, um maybe it's ah, a parent and a child, you know, could be could be interesting. Whatever comes to you when you sit and sketch, just just get it down on paper. So something like this, you know, you just, uh, sketch around, let it flow
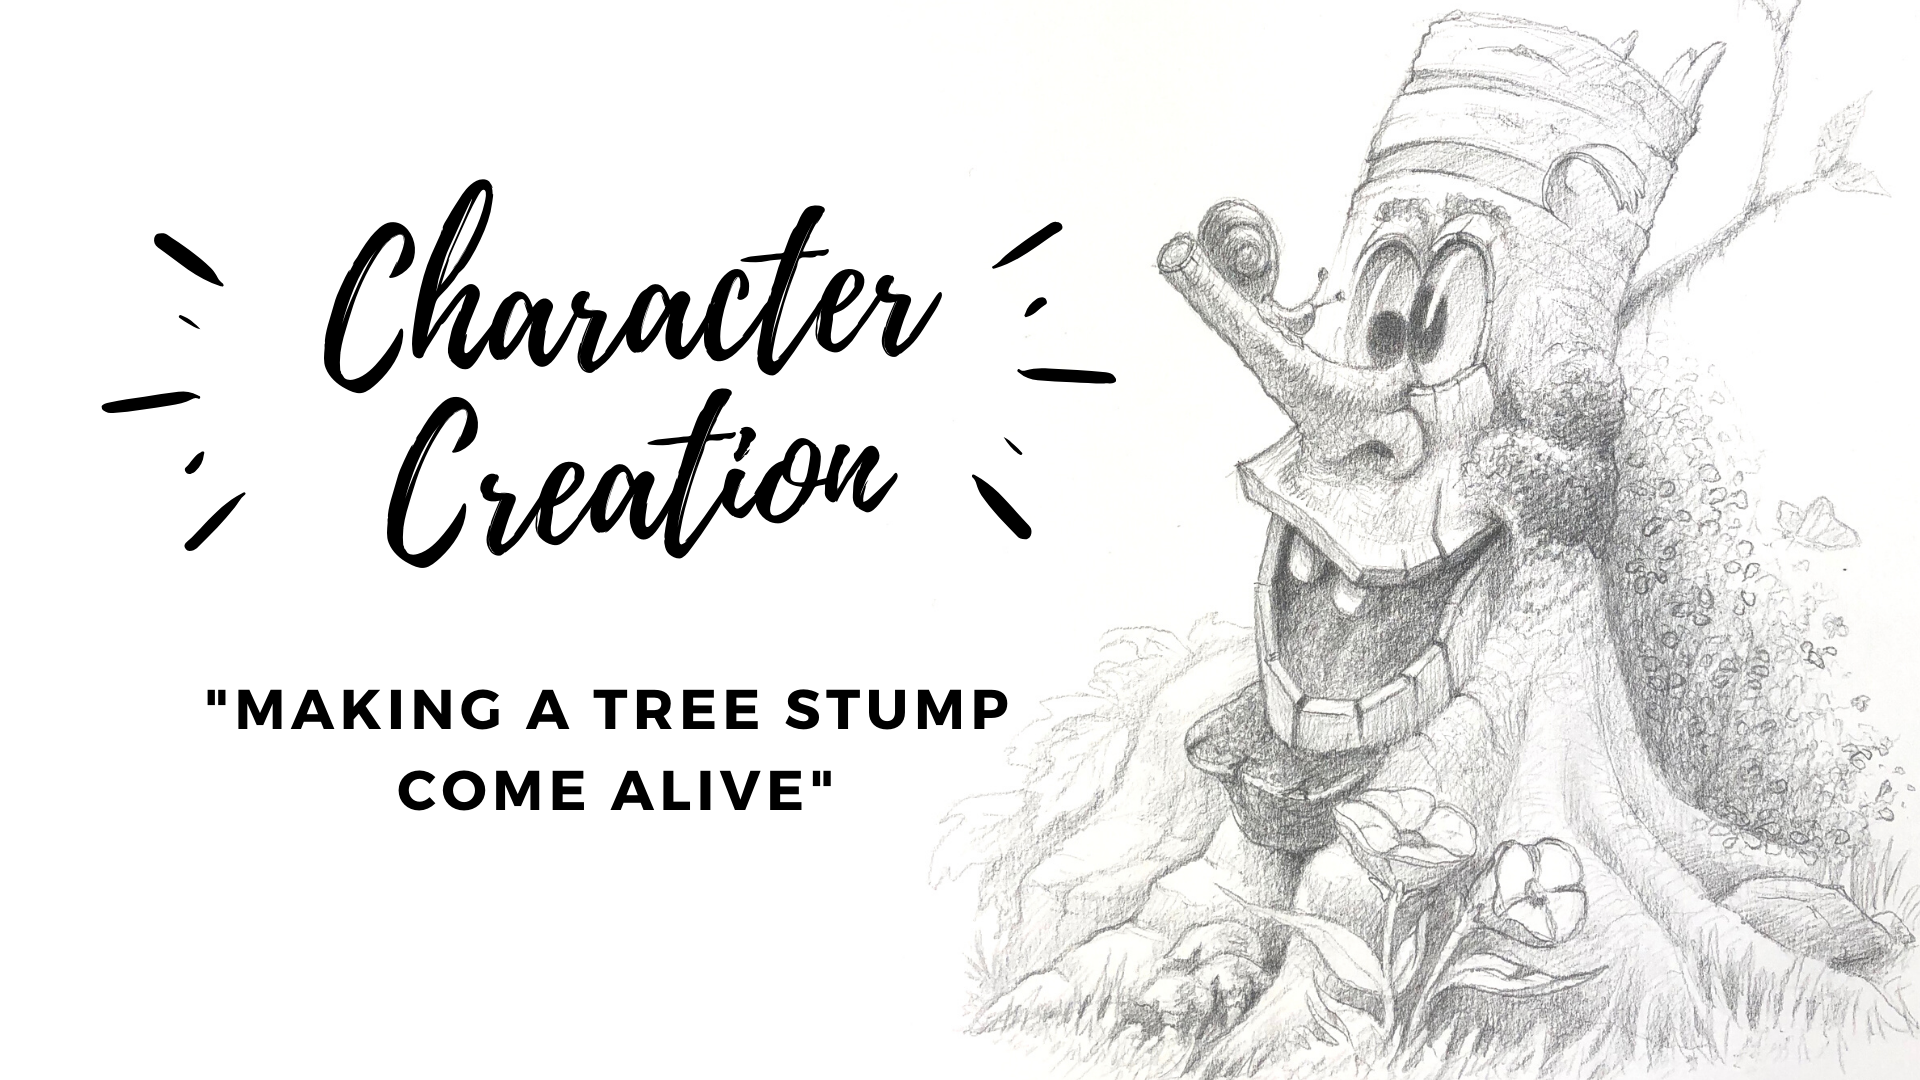
6. Sketching Stage 2 Refining the sketch: way. Okay, so this is the second face. Once I've done a few sketches, rough ones that we made. I want to go and I want to refine it. So I want to work with it a little more. And in this stage, I want to put the things in place. What's really the feeling of the character? What's the mood? Where is the character looking? What's the focal point? What type of Ah, what type of ah tree stump is This was what type of character is this? And what's the emotion? Is he scared? Is she happy? What's going on here? So I really want to take the first sketch and then start to to really define everything and define the form and and placing the objects where they're gonna be so in. When I when I then develop it, it's gonna be much more easy for me to do my final drawing because I'm gonna have something to look at. And here it's also a good place to look at reference. You know, if you don't know what a certain tree looks like, just go and search for it online. Pick a few a few photos a few images that you like and start to use elements from them into your own creation. And when it comes to expressions, you can go in search for all kinds of cartoons and animation expressions and all kinds of characters that already exist, as you know, Or maybe there's an actor or actress or a certain movie that you want to base your character on. So at this point, just going collects in some some cool stuff that you like. Or some objects mushrooms, flowers, butterflies. Um, whatever else do you might want to have in your final drawing? Let's do it. Okay, so when I have something that I'm that interests me, that I get excited about some sketch and some idea that I want to ah, develop mawr, I usually go to the second stage of sketching, and that is to do a more detailed version. So here you can see two of them that I've developed a lot more than the initial sketches. Three initial ideas. The free flowing ones here. I've taken one of the 42 of the forms and two of the characters and started to develop in them more. For instance, I worked on Theo expression here on his face, and you know exactly what he's looking at. That he's happy, excited about this character here might be a branch that looks like a little tiny hand. He wants to touch the butterfly and some details in the background. And here the mushrooms and also details like this plane changes and cuts and stuff that's been broken off and working on the form of the tree, the thickness of the bark, etcetera. So really working it out and also here, you know, really developing. This is how the mouth it's gonna look he has He's sort of goofy and super happy, and he looks at this snail over here, and there was two flowers here in a stone. So in this stage, I, um I just take my time. I take my time to develop it. And I really enjoy this stage because it's not the finished drawing and it's still play time, you know, it's still fun. You can still change stuff around. So, uh, this is just more developed doodle, and, um, it's like meditation for me. I just sit and play with it. So this is something that you can do, and I'm not gonna go into this so much because, you know, it's basically drawing. So that's what you're going to see when I do the finished the finished drawing. But just try to develop it, develop your idea more so And also this is good now because now I can reference back to these. So in the drawing that we're going to do, I'm going to focus on this character. So I already have him here, and I already have. You know, everything in place. So when I do the final drawing, I can I can check back on this, I can have it as a support, and that's really nice. Okay, so let's move on to the final.
7. Drawing Stage 1 Basic outline: So let's start this drawing. So first I want to just have the basic you know where where is the basic form for it? We want to create some room in here so we don't We don't cover the whole paper withdrawing and also, you know, just a basic shape of it. I wanted maybe to go up here and now I draw very lightly not to make any, um, dark lines or it should be easy to erase it. Too busy to correct. I just wanted to have ah, the basic shape, the basic outline of it. So it has a curve, right? So that curb and then has a curve here, and I want to have it a little bit on on this side, right, Because the nose is gonna it is gonna be you here somewhere. So I want this to be able to go out here, and then the mouth shape will be here. This guy's very happy. So big smile for me. I think that's that's really fun to do. Ah, to define the character with ease. Organic things like mushrooms and bulges. And, um, you know, branches and sticks and cuts and everything, like that Because you can really make the character come to life when you use thes already organic, um, shapes forms. The eyes are out here. One of them is a little higher. This one, this one's a little lower. But there sort of all the way together. Let's make makes for a funny character. And his eyes are, you know, there in there in the center, because they're looking at this snail that's here on the tip. So we find stands very fascinating that there was a snail wandering there. And so this is the focal point of the drawing. This is what we want to emphasize and have, um, the most focus on everything else. All these other shapes is supporting, uh, this area, this branch coming out that was just too Put it in there and see, You know, where is it gonna be about here and here on the side at a stone? Flowers. So this is basically here. We might want to have some form of bush or something that's behind him here. Maybe we want this to go out a little bit more growths on the tree that makes a good smiling cheek here. So we want to have the basic shapes down. So it's I like this way of transferring a skitch to the original. You know, we we have the sketch, and in my case, I have a It's pretty detailed sketch. So it's nice to because I want that sketchy feeling in the finished drawing. I really like that. The looseness of it. So that's why I don't want to sit in trays shapes like this. Instead, I want to Troy out again, playing with the forms, finding maybe new shapes, new forms. Um Okay, so I'm pretty happy with this. I'm I'm satisfied with this, as in as an outline, as a starting point for my drawing. So Ah, yes. So this was the first step. We just put the shapes down. Um, nothing is, um, is detailed at all. It's just the basics of it. And, um, it makes for a great starting point to this droid
8. Drawing Stage 2 Building form: let's continue to the next stage. So here we will start to defined a shapes more. Now we want to really start to put the objects where there was supposed to be. Um, and also we want to think about light and dark. Where do we want our shadows, where they will want our light. So in this one, I'm thinking, you know, it's it's daylight. There was gonna be shadow. The sun is coming from from this angle on up. So it's gonna be darker on this side. It's gonna be darker underneath and inside of these things and here between, uh, the roots here. But, you know, there was an overall light, so we don't want to go into much. But we want to use the shadow on DLA Light to define his shape. To use that to help us define the shapes. And also something that's important to do is to, uh, look at shapes. So, for instance, the nose here. So if we put another line here, you can see that this is the This is the plane that's underneath that's underneath the nose . This one and this goes rounds up like this. So here we want me nowhere to put our our shadow. So here again, I'm just going along lightly, but refining the shapes, making them or, you know, really where they are going to to be. So this is a nice big smile. And so here in the mouth there was another area which we will really be able to show mass. And, um uh, and the thickness of the bark, for example, And to really get some some volume to this guy. So here is the plane shifting here, right. This is where it's connected to this before. So this plane has broken up. This section here has been, has been broken up, and also here we can use this method of going in different planes. You see no going up and down. And so this way of drawing is also very good. Do not get everything rounded off. We need some, uh, even though it's a smooth and organic, um, forms to this. Um, it really helps us to to make the drawing even better if we use the's straight lines too, because there is there is thes straight, um, lines also in nature. And then we can round everything off if we want, But we want the contrast from the, uh, shapes like this and the rounded shapes like this. We need both of them to really make this drawing work. So here in the teeth, for instance, they don't have to be It can be pretty soft, right? Because they're not really teeth. They should be. Something has to do with the tree, but and then, you know, there's the tongue in here somewhere very loosely defined. So here, unjust. Helping me to see, uh, how the final peace is gonna be right here. So I'm just doing a little darkness there to just see, you know, is this is this good? Is this justice look all right. And I think it does for me because this part here is very much in shadow because the sun is coming here. So this part should be dark. And also this here part should be also be dark because it's inside of that mouth area. So what I'm doing here also is just lightly going over it like this. Not thinking so much about any specific, you know? Take me. I'm just It's going with the form and making it a little dark turkey. So I'll continue with, uh, this shape here. Here is a very nice, um, nice part of the drawing. I think it's this here where the you might call this the upper lip goes in with with the chin on these things. Tree mushroom here. So this stump is a birch. It's a birch tree, which we have a lot in Sweden. And I, you know, I've grown up with these trees. I really, really like them. There are so beautiful trees and they're kind of thin like this. So it makes for a nice character, makes this goofy, crazy kind of character. And also these areas where the bark has there was a tear. It also makes it also really defines the tree in the shape. Really well, you can You can use thes lines to to show where the shape is is going. For instance, Here it's going here, but then it's going up. So here is a plane shift. It was a plane shift here. This is the lip here, going up. What shifting directions. This is going up is going a little about so just working along like this, going from place to place. But I think it's nice to start here where the most focuses because this is what we want to be. This is what we want to have. Ah, really correct the other things we can shift around and, you know, play around with a bit. But this is very important for us. And also, of course, as we talked about before, use reference. If you don't know how to draw something and you want it really accurate use reference, go to the computer. So, for for me here I'm just using my imagination on duh and sort of thinking how this should look not so super duper important in this drawing is not like it has to be exact. This is a bit like Pinocchio's nose when it's ah when he's lying and it's growing. So what we also want to do is follow the shapes. This makes for, um, the best drawing because this is rounded. So if we followed a shape with our pencil, we will really, really see start to see the volume of this right shall will really, really makes it easy to see. Just how the shape is is moving on the shape is what? The thickness and what's happening with the shape. If you can see that here you can see the roundness of this. You can see the roundness of this shape, and here we have a more straight shape. And then we have this shape that's going this way. It's the same here. This is going this way. This is going up like this so we can use that. So these lumps here that makes the cheeks they are like these dark out the growths on the the tree. So here you can just move your pen around. You know, we just want to make some irregular shapes and forms here. This is something that will work on more as it goes. But, you know, we want this to be somewhat a regular and ah, rough. It should be rough. This is very smooth. These parts here, this kind of smooth. This is rough. It's nice to be able to work with those contrasts. So something rough, something darker, something straighter wouldn't edge something smooth. And then the the eyes. And then we have this focal point here. We have some flowers, and we have ah, overall. Nice design. Okay, so this was, uh, Stage two
9. Drawing Stage 3 Building up lights and darks: Okay, so let's move on to stage three. Or, you know, let's go into the drawing even more. And some parts you might want to leave or not Drawer not defined so much. And other parts you want to really put in detail. And you put in detail generally where the focus is. And if you see this is that this is the main focus here. The eyes are always the focus. If there's eyes, they're usually always focused on a character, at least so we want this snail here to be visible and his eyes to be really visible. He's looking at this, But you see this here behind. I don't want to put in any details. I don't even want to, um, you know, draw anything here, really want to keep this error area? Ah, you know, undefined in the background because I want all the focus to be on these two. The play of, uh, these two characters that's into drawing. So that's why this is gonna have the focus. And that on this here is gonna gonna leave that justice down here. We can use this here, uh, think I and render this here part. Even darker. So this piece goes Ford. You know, when you do when you use shadow and light, it's usually light goes, um, back. And this, uh, light area goes forward. Um, so here we can use that and define this year area here really dark and behind and goes in there. It's tucked in underneath this part here and underneath this part, making this year, you see, leaving at little shadow here, little shadow underneath. And then this is sticking out like this. So here we can really see that there is something missing. This piece has been tourney off on here it comes in like this. So on this piece here, we also want to have some as some thickness to the to the edge. I want the same as their over here. So something like this. Maybe, of course, this is going to be a shadow. So because it's organic shape who don't want to be too precious with all the lines. And, um, I don't want to be it should be organic, so it should be somewhat loose also. Or that's how I how I think it's the best. So I like this sort of a sketchy look to my to my drawings. Also, this doesn't have to have the amount of detail that this has. So we want maybe here, I'm going to go back to the ice so the eyes are focal points. So? So we want to have some nice highlights in here. - Okay ? Yes, that we can work with. And then here, this guy, the eyes a little bit. I don't have to go into that too much. Okay, so I want to make this part of the tree shaded. Maybe about half the tree go over it lightly. This'd is just too. Just so I know where where the light hits and it doesn't. So these guys, they are in shadow a little bit, right? But the sun is here, and these guys are round. So around here, it's gonna be a little lighter on them. So we'll define that here by working with the shadows underneath it and then leaving this area in this area a little lighter, and then underneath this is gonna be really shadow. And I finish about there because I don't want to touch this down here so much. So now I'm going over this. I'm going over it like this, and I'm just going to go over it in another direction, which will blend it a bit and make it even more darker. And I don't wanna have this. Want to have this real irregularity, right? Little darker here lighter here because it's organic and shapes different things sticking out. And some things are smooth and some some some things are a little rough. Okay, so this is starting to look really nice. It's so much fun to now be working on here is a plane here. Plain shift. This is going up, and it has to be a little bit defined like this, right? So here we really see this upper lip, but then it can be This can be a shape like this. This is a shape like this goes in this direction like a like offence, Almost like a fence or a wall. So it goes like this, and it's also gonna be in shadow. And here he's gonna be more light here. So these are gonna be different values. Darker, middle and lighter on then. These guys are about the same. So can you see now? Really? How? This really defines Um the form a lot better. And here is this part going up from this one here and then here is another one. And here in between these guys here is one like this, maybe. Okay, so that was, um I was playing with the forms and finding lights and darks, building up some highlights here, defining some shapes, making some depth into the drawing, making these plain changes that really defines the form and following along with the form to make it really shape, uh, itself. Okay, so that's, um how was, uh, this part?
10. Drawing Stage 4A Enhancing shapes and forms: Okay, so let's continue. So let's continue with with details show. This is, um um focus area. So let's go on and focus some more on is bringing out some of the the details here so that we can see it more clear. So making this part darker makes it, you know, it was a crease here that I goes underneath this part so it becomes one that's one of the darkest areas in a drawing. That's when areas like this and here and here where things go underneath forms, it's a good way. Thio Thio, emphasize that drawing. You see how the eyes gets? Ah, nicely defined. Just by doing that, we can keep this light down here. Doesn't matter. As long as we've been making it the strong up here, you know, that's that's enough. So and I'm not gonna go super duper into, because now I'm actually don't. I'm not looking at any reference of this, so it has to be all from my mind. And this is I think this is one of the nice things about drawing and drawing character like this. Drawing this this style is that you do not have to abide by any los at all. It can be whatever creature crawling on him. It can be. You know, it doesn't matter as long as you find it, um, to be appealing. You know, something that's nice is if it's if it's we just want to make it sort of believable. You know, it's believable. It's This is it is a tree, but it zee it's ah, character. It's crazies. He's Ah, he's having fun here is looking at this, and, uh, nobody's gonna question that, you know? Oh, this can't happen. This is This is unreal. This is not gonna, um, this week. We don't believe this. No, this is believable. It's believable. Well, we buy it, you know? We buy it, it's it's ah, character. So that's what we want, who want people to buy in to our story if we want to create characters. There was usually a bit of a story, so and and we want them to buy into that story, we want to make it our world into a believable world, even if it's all made up. Even if it's all made up in our heads, That's basically you know, our way of being a magician. a magician with the pen. We make it believable. Even if it's not. We make it a pair. You make this illusion, you make an illusion and people believe it. They believe what they see. That's for me. It's the fun part, you know. How can I make something that's that's believable but made up? You know, somebody goes since issue. No. Wow. Yes, I really I really believe that It's dis character. His character is, you know it exists. So this also has different ways of moving. So this here is broken up moving, you know, this way. That way. Then this stuff is going this way. So we use all these planes to define form here. We really want to define the roundness of this. This is a around tree stump, so we used thes lines. These guys here to show that so you always have a purpose for where you're Ah, your lines defining shape goes, you know, and you can add on to this. You know as much as you want. You can put moss growing on it or, um, different spots. Mushrooms. Maybelle gonna put some mushrooms in here later. You can have insects crawling everywhere. You can do whatever you want. That's the fun part. You can use the branch to be like a arm. You know, you can put a branch here that goes up and tries to grab this guy, for instance, or something. You know, it's all it's all free for for us to to do whatever we like with. So you see here how I high very lightly go over it. It's so light. I don't want to bring any, uh, too much, um, shadow him right now. And also, I'm going to say that if you when you're doing this drawing its if you have a nice drawing paper like this you're drawing is gonna look much better. It's gonna be much better. The paper is gonna, um, be much better to draw with than a regular at copying paper. For instance, they don't They're not You're not gonna get a drawing like this on one of those. So, uh, think of that. Think of your material and use really nice. Ah, nice material, because that's gonna pay off in the end. You gonna You gonna think this looks so much better? Uh, if you use a fine piece of paper, and they don't have to cost that much. Okay, so here, building up this form, it's also underneath. Um, so do you see here how effective this is to not render anything in here, because this is the focus. Okay, so I think I'm gonna move down to this part here. So this was a rock, and it's also in the background, so we don't want this to be to being too visible. Either it's you don't just be there as that is it Back up. It's a supporting character. This is the main character, and this is the This is the second character in line. You know, this is the main character, the 2nd 1 and then you have these guys thes are maybe the third of flowers here in this mushroom here on this guy. And he's just an extra, so it has to be treated like an extras. Nuts is there is a very important job to support the main characters
11. Drawing Stage 4B Enhancing shapes and forms: and let's define the flowers also. Let's just make them come to life again. It's a supporting actress. No, it doesn't need to be really rendered out if we don't want Teoh. You know everything you can. You can render us much as you want. I'm just giving you suggestions. I just you know, this is what I like. And again just doing this. Just having the the top here and then adding some shapes and some shades to it. You really define it Where it's one 1234 pedals in this one. You could do these seem to ah ah, character. Of course, that could be eyes and they could be coming alive, but it would, I think, compete with the main character. So that's why I don't, um I only used him s support. Should be nice. Should be a nice A nice support. Okay, so now we see a little bit of the little dimension here. These guys are in front of this guy. What? They're not stealing the whole show, but still they're here. They're beautiful. Nice to look at. And here's some grass. It is also, you know, it's all up to you to look at nature to make it the way you want it to be. Okay, so I'm gonna go into this guy here. It also has thes planes. You see, I could do this to define the planes. You see how nice that became just by defining those? Ah, there's planes and shading this a little bit on this and having this more just want to get it down there so I can see how it looks. Mm. Looks really good. That way out of this one. Coming here. This is where it goes down into the ground. This one also here. One has straws that come up and this area here. I think it would be nice to have some small mushrooms or something. This is the one in the back. Here is one show . This I'm I'm I'm beginning to really enjoy this. And also I'm beginning Teoh really like it a lot. This is fun. Also, I think sometimes you know, you you use a different numbers. So here I have three, usually good number, um, to use in compositions three. But lately I've been using two's a lot pairs. So this is a pair here. These is this'll guy in this camp and then to back it up. We have this, uh, these these two here. So it's to here, and it's too here that I like. I like that a lot. Something that appeals to me. Oh.
12. Drawing Stage 5 The importance of value: Okay, so here I want to have some some leaves. Just have something happening here and here when you're doing stuff like this here amusing outlines a bit here. You don't want to use outlines here. You just want to shade it soft the on like this. You don't wanna have too much outlines going on as you can see, this soft part here and this outline here makes this pop right. Makes this area just popped forward. This mushroom guy here, I want this to be dark from here from the inside and being lighter as it comes out. And you see, I'm only using a one pen. I don't even know. It's a HB pen. HB pen It works, Works great too much. And also here you see, I'm just not doing any direct outlining. Just define light and dark. All right, value here. That's what's important. That's what's gonna make these things separate from each other. It's a separation the life in the dark. And you want to keep that this area soft is very nice when it's like this very, very nice. This I really enjoy this. Really enjoy having these soft areas. Yes, this is looking very, very nice. Very organic, very soft, Very appealing to me at least. I hope you find it appealing. So we just keep on rendering shapes, lights and dark. You see now how this area goes, bank. Even though this is quite dark, this is even darker here. I want to have this a little lighter. This part here it's the edge of the mushroom, and it's going to define the shape of it. The edge of it. Okay, it's looking good. This branch here doesn't have to be, you know too much either We want to have maybe some again I'm not thinking about, you know, it is the exact correct leave. I'm just more interested in getting there. Shape down and on. You know, it looks like leaves. That's enough. Okay, So making these guys here a little stuff here, a little lighter or a darker here, I'm just I'm having the pen on the paper, not lifting up the pen from having it on the paper. But I'm just moving is rapidly around putting more pressure at some points and then losing it up and then going back and forth like this. This creates, you know, nice texture? No, just, uh, moving along and not not over analysing it. So much. Not thinking about is this riotous this wrong? As I said before, we just want to make it sort of believable. People will buy into our story here that it's actually, um, you know, credible. And it's it can happen even though it's imagined. We're gonna put some of this like this. Yeah, is gonna catch light. So this is more in shadow. This court, these guys, Here's Manus. I like that. Maybe one more here. Eso here. Very soft sort of transition. And then, you know, we have some areas that are more defined, and it should be that play a play of planes, play of values, a play of line quality roughness, smoothness, That's what that's what gets thes organic shapes, life, you know. Okay, so this is pretty nice here, leaving it sort of ah, mid tone here. Well, we can see this year. Maybe this would be should be a little more defined. And then this is gonna be light areas. And there was not really gonna be, you know, so much white on the tree. I mean, these trees, the birch tree is a white or it has a lot of white in it. But still white is not paperwhites. It's Gracia. So we can't have too much of this super duper white. And this is a creamy paper if you compared to this and which I also enjoy creamy paper. And when you're drawing this lightly when you start like that, you don't You know you don't have to correct so much. You don't have to go in in a race that much because you're doing it very thinly so you can change it around as you go along. Okay, maybe if you really needs in darkness to really make this planes, Uh oh, and to find a the tongue, it should be a sort of a tongue here, but still, it's a tree. It's organic. It's it's, uh yeah, they don't really have tongue, so we just have to make it believable. Yes, it is a tree, and it has a tongue. Yes, that's I believe it. This is so much fun. I enjoy this so much I can you know, I could sit here all day working on this Also, this lip goes here, but then it turns so this should also be sort of a little darker
13. Drawing Stage 6 Adding more value to create volume: all right. So continuing on. And we have a nice, um, nice face going on here. And we have some soft background stuff here, some grass, and then the flowers are a little bit more defined in this area. And Andi, we have thes things that support that it is a a tree stump to broken off. And we have this little branch here that is not to defined, is just there. It's just as a support. Eso the focus is here, so maybe some more details in here working on the lights and shadows in this. So continuing here, then, um here I was thinking, Could be nice with some, you know, like maybe it's moss hanging a little bit from the from the truth from the branch here. Maybe we want to have this be a bit more darker on this, uh, you know, having sort of Ah, highlight. It is shape here because this is a little slimy. You with some darkness here on a little darker over here, light and shadow up a bit more. And I was thinking also here to do some form of eye lids at the same thing that we're doing here could do up here and here. We're using these cracks too, to find the form and also putting this part underneath this form here and then doing the same for this I and then the eyebrows can be a little more, you know, bushy. It's something I don't know if this is moss or whatever it is, but it's It can be a little more here that a more visible makes it more fun and said darker , darker people now, so it makes it pop even more so we really want to define these these forms. This this part is in light. This part is semi lit up because of all the ambient light. And then this is dark in here because it behind and then this part also, um, it's sort of semi lit up. But this part here might be shadow because of this upper lip. Then this is more life than this lighter, and this is even more light and also with it with the teeth Here they go underneath the lip , so they should also be in shadow. And definitely this part should be in shadow. You see, here I'm making it very soft. I'm not I'm not using any line work as much here. I'm just making it with, um I'm just playing with soft areas of light and dark and this part of the lip it's darker than this part because this is more and, uh in the lighter area. So keeping in mind the value of things and we're life in shadow hits, it's ah, it's very important for the for a drawing that's, you know, that's that is what makes it really, really stand out as a drawing. If the the light and the shapes on the shadow, um, is believable people, I think that, yes, this looks nice this, you know, they don't have to think about it so much. They just feel it. Yes, it's believable. This is how shadow and light play on form. So even if they haven't seen this sort of thing before, they feel it's believable because we've used, um, the loss of light and shadow on and shapes and planes. So you know, you don't have to be a master at this. It's nice if if we can become masters of it. But just the simplest things like this we're working on now just helps helps everything out . So so much in making this unbelievable drawing, believable character, believable atmosphere. Maybe this crack here can be carried on to this form here. So if you can see how clearly this also starts to define this form when I'm, I'm taking help of this crack. And then I can just use my pencil to go around it a bit. Good way to do random textures, as I did in this is to keep the pen pencil on the paper. Don't move it up and down. Just keep it on the paper, but use your pressure so you pressure a little bit more, uh, and then lighting it up like the pressure up. And you just keep on doing that randomly. So it's pressure and then moving, you're pencil around randomly like this, and that will create a irregular pattern, which is good for organic shapes. So this is somewhat more like this, right? And also it's more believable. It looks a bit like a tongue, but also it looks a bit like it's something they're inside, growing as a tree tree thing. Maybe also, this needs to be a little bit darker. Do this random patterns on this one too. But I want to leave this brim here a little lighter on underneath, even a little bit more dark. Okay? And I want these mushrooms to be a little more defined because I like them so they can you know, this is more most focused this year on. Then these guys come in, and then the mushrooms I'm thinking, and then this so this could be can be a little more visible, but not going in with with line work. Just ah, shading the parts here in between. You see, you see how much that helps bringing them out. It's to be used. The negative space we work around him, going with a little bit of line here, here, we can use, you know, our fingers to smudge things. I will make it, um, go back because it's gonna be a little blurry, but I don't know if I'm gonna use it. Um, maybe I'm gonna going and soft. And it did a little bit here. Just a tiny bit making it look like tiny leaves, but nuts to define
14. Drawing Stage 7 Background and foreground: so continuing off here in the background, making this this Bush here much like the stone and the leaves here, want to make it a a soft shape that's goes into the background. That's still I think it's gonna be a little more dark than this. So maybe it's gonna be he's tiny leaves. So I'm not too careful with these. I'm just sort of making it look like there is a bunch of leaves in this bush, but I'm not focusing on any details for it. This is very nice and effective over here, because still, the focus is here. So this we just want to blend into something nice and we don't want it to catch our eye. We want this to catch our first and then move down the image. This here is just a supporting actress again. So, um, doesn't need so much attention. So maybe I will want to put in a few, you know, like a bit of branches that there is something in here making some of the leaves just floating a little bit here makes it nice and soft and again, some irritable irregularities, random beauty. So we want to create that as much as we can here again. I'm just swirling my pencil around so these lines make up sort of leaf looking leave looking pattern in here. And, you know, when it comes to drawing, it takes time to build this randomness. This volume, um, that's just the way it is with withdrawing, just takes takes time. But now you can see that it's it's there, it's ah, believable the bush behind him. So I'm gonna leave that for now. The leaves are defined by by the background being a little darker. The Samos this stem of it here too. This way. We defined form again by making something behind another form darker. And it makes that stand out. So here, this is gonna be darker. Makes this leave Stand out. And here it would be a nice detail. Maybe to do something like this. Jazz Go on, make it tearing the leave here and then make this as he has twisted itself a little bit Samos this year. So in here, I don't want anything in here in the background either. Just want that to be sort of dark so that it will, uh, support um, the flowers we don't need anything else being in the background. So maybe maybe that's taking a little bit too much attention. I don't know, but you could use needed a razor here too lightly. Pick up by dabbing it. You see how easy that is? It just dab it like this and it picks it up and it makes it lighter. And then he can go back and redefine some things here. So they needed a racer is a very good tool to Teoh not only a race, but to define Forman to pick up light and shadow. So, for instance, here, um, because I'm drawing so lightly, it's very easy to pick it up with this. So these areas are gonna be in light so we can use the A razor to effectively pick up grass straws coming covering this route up as it goes down into the ground. Same here, covering this up and also here. Maybe here can be a stone. A little bit of a stone, maybe, - and they're only supporting actors and actresses in this scene, so they don't want don't want to render them fully just like this. They recede into the background. So this shape here is he Route Branch and it's also having this kind of roundness to it, as does this one. So we want to define the shape a bit like this. And also it's darkest at the bottom here on flowers. Also here on stuff, making shadow on it and then going in between the grass cross. So it's always thes put this play of of light and dark and shapes and on dumb under planes . You really think about that and keep that in mind when you're drawing it will make your drawing much better. It will make it much easier for you. Uh, also because you you you have a tool. You have a tour you can use or different different tools, different way of thinking about form following the form, light and dark and the planes of the form. And you can use that very effectively. Uh, in your toys make it come alive
15. Drawing Stage 8 Finishing touches: wait here. We could spend, you know, a lot of time during all these straws of grass and stuff. But for this lesson or this drawing, that's not the amount of detail that I'm I'm looking for. I'm just looking for, um, doing this nice character in the center and then having this other stuff just fade, fade in the background. You see here just to make it dark in between the grass straws, how much they they pop out and makes for a really nice growing. It's also following that I shape here a bit. So here, maybe here, I want this to be more visible. Bill month is to be coming. Ford not being so buried by the bush is in between or behind. I want this to have a more to find shape right here on become darker. Yes, like that. Okay, now you see now the trees coming forward and that bush here is going to go into the background. Let's put some tiny leaves here, coming over on here on the under a tree of it. I said a little more interesting down here and then some dark between these guys. So defining some of the leaves a little more than others here just to pick up the randomness, make it more of a believable bush. You see all these things sticking out, your your eyes gonna, um I believe that it is a bush because it sees some of these leaves. Ah, more than others. And, ah, it's gonna build its own instant image in the mind from these, um, small. These details here, these little details and it's just gonna make, uh, makes the whole bush more believable, But it doesn't have to be too much, you know, Just this and what I now see here is that it would be nice with the butterfly, but I don't know, but maybe I can put in some very, very discreet and, um, soft, uh, butterflies here. - Wait . Just likely following the shaves and it becomes more visible like that. Yes, maybe one. Maybe one is nice. I don't know. And here, neither this congee like, uh, like, uh, Bumble Bee or something here. Just some wings and something. So I don't know. You don't really know what it is, but our mind can think that it's it's a B or a fly or all right by making these tiny, tiny shapes here. Okay. Yes, This looks really nice. And now when you have no. When I've been drawn here, I should you some protection. So I don't smudged this part. Yes, you're done. And I'm super excited. This has been, uh this has been so much fun for me. Um, and I hope it's been really fun for you on that. You, um that you really can learn something here. And I love love to see your, um your stumps, your projects post them so everybody can see them. And then we can all, you know, look at them together and, uh, yeah, super fun. So I'm gonna in a sign my name. You okay? Super. Thank you all for watching by
 Richard Lindström, Artist, Coach & Meditation Teacher