Transcripts
1. Introduction: Welcome to the Primoris Arts C Sharp Course
for beginners. If you are here,
you are probably interested in learning to code, but feel a bit lost
in where to start. I get it. I was there, too. When I first tried
learning to code, I spent more time searching
for a complete course, follow up content to what
I had already learned and or answers to basic questions
than actually learning. It felt like I was
just being taught how to go through the
motions when what I really needed and wanted was to know how
things worked and when to use them so that I could get started on my own projects. That right there is why we created this course so
that you wouldn't have to deal with those
same struggles on your journey to
becoming a programmer, where everything you need to get started is right here
in one place from beginner to advanced topics with real support available
when you need it most. So why should you learn
C Sharp specifically? C Sharp is a powerful versatile language used
in game development, mobile apps, websites, and more. With it, you'll have
the foundation to start creating your
own projects on a scale that is highly valued in the ever growing
tech industry. Is also considered to be a very beginner
friendly language based on the C language, making it easy to pick up and a great launching off point
if you ever decide to transition to other
C based languages like Java or C plus plus. So what are we going to cover in this course? Well,
let me tell you. This course starts with
the absolute basics. So if you've never written a single line of
code, don't worry. We'll dive into fundamentals like variables, loops
and conditionals, and gradually build up
to more advanced topics like classes or
objects, abstraction, encapsulation, polymorphism, inheritance, and from
Chapter three onward, you'll be given
the opportunity to get hands on with
coding challenges specifically designed
to help you solidify your understanding
of the concepts taught throughout the course. So why should you choose
this course specifically? Because rather than just showing you how to go through
the motions and having you end up with
some project that you have no idea how to
recreate on your own, I'll be teaching you not
only how to write the code, but more importantly,
when to use it and why. By teaching you to think
like a programmer, you'll actually gain a
much deeper understanding of each concept taught so that
by the end of the course, you'll be ready to tackle your own projects
with confidence. And to make things even better, everything we use in
this course is free, meaning there are no free trials or hidden fees to worry about. Now, who is this course for? This course is perfect for absolute beginners
looking to get started, experienced programmers
looking to refresh or expand upon their skills
and everyone in between. And remember, there's no rush. Feel free to go at your
own pace and to come back and revisit specific
lessons when needed. Here at Primoris Arts, we are committed to helping you succeed every step of the way. So if you are ready to
begin your coding journey, then there's no better
time than right now. Invite you to join us today
in the next video as we dive into programming
step by step with clear, concise and easy
to follow lessons. Thanks for watching, and I'll
see you in the next one.
2. Chapter 1 (Setup): Install Visual Studio: In this video, I'm going to
be showing you how to install Visual Studio is a free program available on both
MacOS and Windows. So the first thing you're
going to want to do is look up Visual Studio on Google, and it should look
something like this. Now for those of you on MacOS, you're going to want to
click the button here that says Visual Studio for Mac. And then click on this
download button here. For the rest of you. While you're gonna wanna do is click here where
it says downloads. Find the one that
says Community, and click on the Free
Download button below. Once you do this,
it should start to install the program
automatically. So the next thing
you're going to want to do is go ahead and open that up. Hit Yes and or continue
on any prompts that pop up and then wait for
it to finish downloading. Once it is installed, it's going to ask you what workloads you want to download. If you're on MacOS, the one you want to
download as dotnet Core. Otherwise, for those
of you on Windows, you're going to want to
click on the one that says dotnet desktop development. Now, if you're interested in any of the other
workloads available, feel free to download them now. Otherwise, you can always
download them later by using the Visual
Studio Installer. Then once it is selected, go ahead and click Install and wait for it to
finish downloading. Once it has finished installing, go ahead and open it up. And then what you
wanna do is go ahead and create a new project. This portion of the video
has been updated for 2022. Now, after hitting
Create a new project, you should end up at a
screen that looks like this. And the easiest way to find the project type that we're
looking for this to go up here to the top where it says all languages and
click on C-sharp. Then we're gonna go with
the one that will run on Linux, MacOS, and Windows. So after you select that, go ahead and hit Next. Then we're going to want to
give our project a name. And you can name this
whatever you want. However, you'll want to use a Pascal Case naming convention. And to do that, all
you need to do is help the very first
letter is capitalized, and then every subsequent word, we'll start with a
capital letter as well. And you're going to have
no spaces in between. Now, if it's easier
for you to read and you would like spaces
between the words, then you'll want to use an
underscore because you don't want any actual spaces
in your project name. Anyways, go ahead and name
that whatever you want. Then go ahead and choose the location where you
want those to be saved. And you can leave it out
the default location, or you can click on these
three dots here to browse your files and choose a
location of your own. Then we're gonna
go ahead and leave the solution named the same. And if I mouse over this
information simply here, you can see that a solution
is a container for one or more projects
in Visual Studio. Now, because we are just
creating the one project, we're going to
keep things simple and leave the name the same. However, in the future, if you ever creating
a library of code, oftentimes you'll want these
to be different names. Then we'll also
want to make sure that this box here is unchecked. This as play solution
and project in the same directory as this is generally considered
good practice. Then we'll go ahead
and hit Next. And you should end up at a
screen that looks like this. Then we'll want to make
sure to check this box here that says do not use
top-level statements. Because if you do not do this, your code will not match mine throughout the
rest of the course. Then we'll go ahead
and hit Create. Once your project has been
created and has launched, it should look
something like this. So we've now installed
Visual Studio and created our very first
console application. So once you've
reached this point, you are ready for
the next video. Anyways. Thanks for watching, and I'll see you
in the next one.
3. Chapter 1 (Setup): Get Everyone On The Same Page: So before we get started with any actual programming, I just wanted to make sure that you are at the same starting fans I am. So what I'd like for you to do is start the program by either pressing livelier, keep hard, going up to the toolbar here at the top and clicking this button. Or by going to the debug drop-down menu at the top and clicking start debugging. This should launch the console application I want you to do is say Hello, welcome to the top. If it did, great, go ahead and press any button to close out this window or click the X at the top. Now think did work. Great, you don't do anything, just sit back and follow along. If it did not work. What I would like you to do is go to the debug menu again and click options. And under the debugging general settings all the way at the bottom, there should be a checkbox that says automatically close the console one P by being stops, make sure that as unchecked and then click OK. Now if you are using Visual Studio and you run the console application, it should stay open and he should be good to go. If you're not using Reginald studio, which I highly recommend that as a free program, this may not have worked and will explain well. So what is happening is computers written three lines of code from top to bottom, reaching the end and then thinking it must be done. So like I was heading closest down. This happens in Sydney and which is why you may or may not know this, the complexification popping up at all. So to prevent this, we are going to add our first line of code. And I'd like for you all to follow along here as this may be useful information for you at some point in the future. It's just good practice. So what you wanna do is create a new line on your console dot write line. You're gonna wanna type console with a capital C. So as you see in the lineup of the capital R, C, capital K, open and close parenthesis, semicolon at the end. What this line does is it basically tells our programs that we wanted to wait for any key on my keyboard. So now when we run our program, it should stay open. Remember you can do this by pressing f phi when your keyboard going up here and clicking this button at the top, or going to debug, drop down menu and clicking Start Debugging. Now what it is doing is printing hello world and waiting for any t and put before a closing. For now, just realize that for any who weren't experiencing problems, but you'll have to press any key twice instead of once to close out of this. Or you can always press the accepted time. Now if you are still happening and you're using Visual Studio, you'll want to check over your code and make sure it looks exactly like mine. Helium line gnomic, nor is this one here, this namespace as every unions your program and should not be changed. Then you'll want to make sure it's also the latest version. And I've promised at Albert. Otherwise, if you are not using Visual Studio, I can do suggest that you check your code and then check the trainee further issues you might be happening. Now, I'd like for all of you to go ahead and save something you wanna make sure you do at the end of each and every video. Well, you have to do is file here at the top and click Save All. Anyways to the zip for this video. And the next one we're going to look at our program. It go over exactly what it is we're looking at. Does what it does. So thanks for watching and I'll see you in the next one.
4. Chapter 2 (Hello World): Explaining The Program: And thus video we are going to go over all the code we have here in front of us. Now this stuff is a bit more advanced. So don't worry if you don't understand all of that right now, I just want to provide you with a bit of insight as to what is going on here. So that as you continue through the course, you can start to piece things together. So the very top here we have the text using system. What the states in a nutshell is that we are using code from the namespace system. A namespace as just what it sounds like. It's a named space in which our application resides. Below this, you can see that our application has its own namespace. This is based on whatever you named your project when you originally created it. This is something Visual Studio does by default. Basically all I want you to get from that as let a namespace is a way of organizing code. You can think of this as being the equivalent of a last name. Just those people whose last names as another way to distinguish one another. A namespace allows the computer and us another way to distinguish various groups of code by using this using system Director here at the top. We no longer have to use the full name when using code from this namespace, which I'll show you here in a bit. So back to my last name example, destructive at the top would be like starting a conversation about a family. Once I tell you their last name, I don't need to repeat who I am talking about as their first names are now going to be associated with the family and of which I am referring to. Next, we have a class called program. This is made for us by default when we make a new console application. Real quick, C-sharp as an object oriented programming language. And an object is an instance of the class. Now a class is something modeled after real-world object, and it is made up of variables and methods, which we'll get into later. So let's use a light bulb as an example. Imagine we wanted to make a light bulb class. It might contain a single variable that tells us whether it is on or off, as well as a single method for turning it on and off. Now, if we have a box of light bulbs, each one would be a different object or an instance of our light bulb class. Hopefully that analogy works for you. Anyways, back to our program here, we also have a single method called main. Every program needs is allowed, one main method, and this is where our program begins its execution. So when our program runs and runs the lines of code and our main method from top to bottom. Our first line here basically tells a program to print out the text between quotation marks onto a single line and our console application. And as you can see, when we run our program, that does exactly what it does. Now we also have this line of code here that we added in the last video. This tells our program that we want it to wait for some sort of key input before continuing. How does it know to do this? You may ask, well, let me tell you, just as we have our namespace with the class called program and a method called main. There is also a library of code with a namespace called system and a class called console, which contains both the right line and the red key methods. Now how do we not use this system here at the top? And like I said, you can think of this as sort of like a last name. We would have had to type system, console dot write, line, and then the rest of the text here. However, since we already have it here at the top, we no longer need to write it down here as it already understands where this console class is coming from. Now there's only really a few things I want you to really understand for right now so that you can continue throughout the course. One as that 99% of the code that we'll be writing is going to take place between these two curly brackets. And that this line at the bottom tells her program to wait for some sort of key input before continuing. I realize not all of you need this line of code, but it isn't going to hurt anything and it will be leaving it here and every program for those who do just to simplify things. In the next video will be both editing and writing new code in order to print whatever we want to the console. So thanks for watching and I'll see you in the next one.
5. Chapter 2 (Hello World): Writing To Console: In this video, we're going to be learning how to print text to the console. Now if you remember, I had mentioned that our console dot write line here, prints whatever is between these two quotation marks to the console on a single line. Now this is one of the two main ways you'll print text to the console. So let's start there. As we already know, this will print Hello World on a single line. And as essentially the equivalent of typing hello world exclamation point and a word document, and then pressing enter or return at the end. To prove this, let's go ahead and copy this line of code. Creates a new line below it, and paste it again. Then let's go ahead and run our console application. Remember you can do this by pressing F5, clicking this button here at the top, and we go into the debugger drop-down menu and clicking Start Debugging. Now as we predicted, you can see that it printed hello world on two separate lines and the cursor is at the bottom. Next thing we're going to do is edit this code. So let's go ahead and delete one of these lines of code. Then what you'll wanna do is delete the text here between the quotation marks and write whatever you want. I haven't run the console application again. And as you can see at us, printed but we typed on a single line. Now, what if you didn't want to print on a different line? At the moment, you might not see a reason for this, as you can always just add more text to the previous line of code. But later on when we start getting into user input, you'll see why this is useful. So let's go ahead and write a brand new line of code. So we'll create a new line on our console dot write line. Then we're going to type console with a capital C dot, right? With a capital W, open parenthesis, two quotation marks, and then close parentheses, and lastly, a semicolon. Every statement, also known as an action in c-sharp, either ends with a semicolon or a closed curly bracket. Depending on the weather is made up of a single line or a block of code containing multiple lines. If he worked forgot the semicolon at the end, you would get an error and your program wouldn't run. So let me go ahead and show you what that looks like. So as you can see, a says there were built errors and asked if I would like to revert back to the last successful build. I'm gonna go ahead and click now. Now at the bottom here is going to pop up any error codes and backup here, you can see that there's a red squiggly line where the code was detected. Now, there's a million different errors and C sharp, so I'd never be able to go over all of them with you. But if you ever do get an error, you can go ahead and copy and paste this Eric code until Google and look it up. And you shouldn't be able to find out what it means. Most of the time though it is probably because you misspelled something, didn't capitalize it properly or forgot to endless statement where you shadow. So I'm gonna go ahead and paste the semicolon back in. Anyways, enough about errors, let's go ahead and move on with the lesson. Now, as it stands, if I were to run my program and it's gonna print the very first line and then a blank line because I don't have any text between microbes. Now, let's go ahead and put some text between these codes and our console dot write statement. So forget to put whatever you want here. Then let's go ahead and run our console application. So as you may notice, or cursors setting out the end of our second line of code. Whereas before it was dropping to the bottom. This is because whereas the console dot write line method was equivalent to us typing text up in a Word document and hitting Enter at the end. A right method simply prints the text, leaving our cursor at the end. So let's go ahead and close that out. Next, let's go ahead and copy our console dot write method, create a new line below and paste it. Then we'll run our console application again. And as you may have expected at presented the same exact text right after the last. Notice that it doesn't help you out by adding any spaces or punctuation or showing you any problems with your text. It just does what it's told. So that is something you'll want to be mindful of. Anyways, let's go ahead and close this back out. And I'm gonna go ahead and erase our copied line. The console dot write line method and the console dot write method are the two main ways you'll be printing to console and C-Sharp. Lastly, when I'm working with a string in C sharp, which you can just think of as text. The backslash as a special escape character that basically tells her program that the next character is a special character where it should be taken literally. So let me give you an example of how this might be useful. So something you may not have thought about as typing a quotation mark, as it normally signifies the end of our text here. But by using the backslash and then a quotation mark, we can actually type a quotation mark, as you can see here. Notice that the backslash is not printed the console. Next, let's go for a female characters that you can put in here. First off, you can put two backslashes because the backslash is considered a special escape character. You need to type two. The second one tells our program that we actually want to print a backslash. And as you can see when I run the program, that's exactly what it does. Next, we have backslash, lowercase t. This tells our program that we want to insert a tap and or the equivalent of five spaces. And lastly, we have backslash, lowercase n, which says that we want to make a new line. If you are in macOS instead of Windows, this will be backslash r. Keep in mind that using the backslash or the special escape character only tells our program to check the very next character for another meeting. So when creating a new line in this way, putting a space after the end would cause your program to put a space on the brand new line, which is why I do not have a space between the N and the S on the word second. And either you can see when I run our program, it works just like a solid. Now I do understand that we could have just created a new console dot write line statement instead of using the backslash and to create a new line of code. But that could eventually get messy in terms of readability, especially when we start to work with bigger programs. And you always want to do everything you can to make your code is easy to read and as understandable as possible. So that you can not only understand and easily read it now, so that you could do the same tomorrow a week from now, a month, or even a year. And hopefully so that someone else could take a look at your code and understand it as well. This is a core concept in programming and something I want you to remember in practice as we continue throughout this course. Now, though, I do believe the following me along exactly will help when it comes to any mistakes you may have. I also understand we had type things might not always be the easiest for you to understand or visualize properly. So feel free to change things to your preferences a bit. But if it becomes an issue, I recommend just following along exactly for now. But later on when you create your own code that you can go ahead and change it up a bit. And the next couple of videos we'll be going over ways to help achieve readability by using comments and by utilizing whitespace. So thanks for watching, and I'll see you in the next one.
6. Chapter 2 (Hello World): White Space: In this video, we're going to be talking about whitespace now and the C sharp language spaces, tabs and new lines are all considered to be whitespace. And it is generally ignored when the program runs because the compiler or the thing that turns our code into the console application doesn't really care about whitespace. And this simply use to make the code more readable to you, the programmer. However, there are some exceptions to this case. Two of the main ones being names in strings of text. First things first, let's go ahead and erase this backslash n here. Then to show you an example of where whitespace does matter, go ahead and put a space between the NMDA as I'm a name console here. And as you can see, when I try and run the program, it gives me an error. Then the other is strings o texts. So like up here, all these spaces are going to be printed to the console. However, like I said, in most cases, spaces, tabs, and new lines are considered whitespace and are generally ignored when the program runs. So, for example, we can go ahead and create as many new lines as we would like in between our lines of code. And the program will run just fine. And just to prove what I was saying before, spaces and tabs are oscillating in art as you can see here. Like I said, the way space is just for your convenience to make your code as readable as possible for you. Now I'm gonna go ahead and show you a kind of ridiculous example of using whitespace just to show you that it does not make a difference. And as you can see, the program still runs just fine. Anyways, throughout the course, I encourage you to use whitespace here advantage and make your code as readable as possible. However, and assess becomes an issue. I encourage you to copy my text exactly until you become a little more comfortable with programming. Or just wait until after the course when you start to go on your own and make your own programs. And the next video we're going to go over another way to make your code more readable by using comments. So thanks for watching, and I'll see you in the next one.
7. Chapter 2 (Hello World): Comments: In this video, we'll be talking about comments, what they're for, and the syntax for them and how to write them. However, before we get started, I'd like you to go ahead and erase all the lines of code above our console.log statement. Then above our console.log statement. You're gonna go ahead and type console with a capital C, right line with a capital W and L. Open parenthesis. Quotation marks, close parentheses, and a semicolon at the end. Then, in between our quotation marks, I would like you to type hello with a capital H, space, world with a capital W. And I'll exclamation point at the end. Now though I encourage you to type out console dot write line for awhile just to get some practice in, I am going to show you a little trick. So go ahead and create a new line under our console dot write line statement. Go ahead and type C, W, and then press the tab button twice. And as you can see, it automatically puts in our console dot write line statement for us. And all we have to do is either quotation marks. This can save you a tremendous amount of time in the future. Anyways, let's go ahead and erase that. Anyways, back to comments. So a comment and programming is a section of code that has completely ignored when the program runs, sort of like whitespace. This was extremely helpful for explaining your code and for testing purposes. To turn a line into a comment, you simply want to put two forward slashes. So let's go ahead and do that. Let's create a new line above our console dot write line statement and forward slash, forward slash. This tells her program to ignore the rest of the code in front of it on this line. So for example, let's say we wanted to make with this line of code here does more obvious at a glance. You might type something like this. Print hello, world to console. As you may have noticed, this line of code here is a different color than the rest of the program, in this case being green in order to show that it is a comment. Another way to create a comment as the highlight, all of the lines of code you would like to come out. And then to go to the top and click this button here. You can also click on the button next to it to un-comment this selected lines. The last method I have for you is forward slash Asterisk, asterisk for its Lash. And this will ignore all the lines of code between the two asterisks symbols, allowing you to start an NDA comment wherever you would like, either on a single line or across multiple lines. To demonstrate this, let's go ahead and type a forward slash and an asterisk before our console dot write line statement. And as you can see, although the lines of code in front of it happening commented out. To end this, we will put another asterisk and afford slash. Let's go ahead and do this after console.log statement. And as you can see, all of the code after it is not commented out. Anyways, let's go ahead and undo that. So let me go ahead and show you how it is useful for testing purposes. So let's say that I wanted to see how my program would run without a line of code or if you were to run at all. Although I would have to do as comment it out instead of deleting it entirely. So for example, we had comment out our console dot write line statement here, and then run our program. And as you can see, when we run our program, there is no longer anything being printed to the console. And I'm going to go ahead and undo that. Anyways, what I'd like you to do is to make sure that code looks exactly like mine. And then when you're done, go ahead and save your program by going to file at the top and clicking Save. All remembered that day this after each and every video. And the next video, we're going to be going over what exactly variables are in programming and how to write them. So thanks for watching, and I'll see you in the next one.
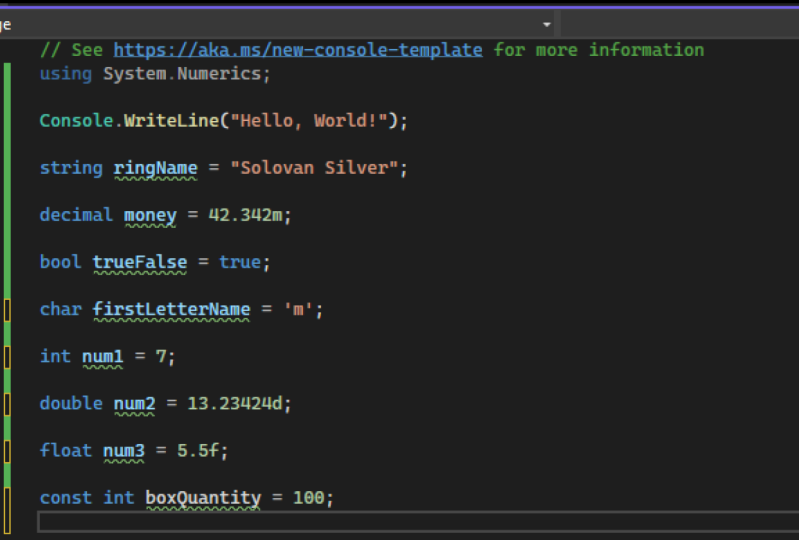
8. Chapter 3 (Variables): Intro To Variables & Var Data Type: In this video, we'll be talking about variables, a variable and C-sharp as a name given to a storage area. So it stores data of a various type. In other words, it has a name we give to some type of data so that we can both referred to it and manipulate it in the future. So for example, let's say we are making a pinball game. We might want to store a whole number and call it score. The syntax for creating a new variable is as follows. It is the data type by the name. And lastly, a semicolon at the end. Now, there are multiple data types for storing all sorts of things, such as whole numbers, floating point numbers, single characters, strings of characters, and our text, true or false values and Mark will be going over all the basic ones individually in the upcoming videos. Next, let us get into some more examples and break down the syntax for declaring and initializing variables in different ways. For right now, we are going to use VAR for our data type. Var is short for variable And just means that we want the compiler to figure out what type of variable we need. For those of you who don't know what a compiler is. It is what turns our code here into binary so that the computer can understand it. As a computer only understands ones and zeros. Anyways, back to variables. So let's start by simply declaring a variable. To-do lists. Remember, we need to type the data type followed by the name. And lastly, a semicolon. So let's say we wanted to make a variable to hold our ammo count in an FPS, we might type something like this. Far space ammo count, and then a semicolon at the end. Now when you name your variables, there are some things you need to keep in mind. First, you want to make sure that you give it a descriptive name, not something generic like x. That will make your code harder to read. And when you start working with larger programs, you aren't going to remember what x means. So don't do it. You can't have any spaces in your variable names. However, you can use underscores as a decent substitute. Also, notice how he typed out ammo count. This way of typing is called CamelCase. This snake case are both accepted naming conventions and programming. Camelcase is where you have 0 spaces or punctuation. The first where it begins with a lowercase or uppercase. And any subsequent words begin with a capital letter. Snake cases similar, except you separate the words without underscore instead. Let me comment this out quick and show you what that would have looked like if her to use snake case. Here would look something like this. Anyways, I'm gonna go ahead and undo that. So you can use whatever you prefer, either chemical or snake case. But in this series, I'll be using CamelCase. And that's because it is more common. Then next thing to know about naming variables in C sharp is that there are special keywords that you can not use as names. Here's a list of them now. Now, don't get too overwhelmed by that as I've never run into an issue with any of them. And you shouldn't either as long as you are using descriptive themes. Plus, you'd get an error if you try to use any of them. Anyways, as we continue through the course, I will provide you with more proper naming conventions so that you'll learn to code properly. Now, back to our ammo variable. Let's go ahead and initialize it and are given a value to do this, all we have to do is put an equals sign the after the name followed by a value. Unless case, let's say RAM account to 30. Now, there is another way to declare and initialize variables, which I'll show you in the next lesson when we work with our very first datatype. Next, let's test and see that we actually created a variable called ammo count and set it equal to 30. Now, if you remember, one way to print the console is to use the console dot write line method. Also real quick, I'm gonna go ahead and move the console dot read keyed method down to the bottom of my program. Before we had used the console dot write line method to print text, as you can see above. But we can also use it to print out the value of our variable. So let's go ahead and do that. So under our new variable, will type console dot, write line, open parentheses, and then close parentheses. And lastly, semicolon. Now instead of putting quotation marks in here to signify that we are working with text, we can simply answer our variable name. Now what this plan will do is print the value of our ammo count variable on a single line. And as you can tell, when we run our program and doesn't need print 30. So let me quickly go of her is all happening here. So first we created a variable which sets aside a certain amount of memory based on the data type. Then we gave it a name so that we can access and modify it later. Next, we initialized it by saying that we want our variable or the name. We gave a storage area and memory to hold the value 30. Because we used fire hazard data type, the compiler automatically figured out what type of data type we actually needed based on this value, which is why it says it represents a 32-bit signed integer. We will get into integers more in the next video. Then, lastly, we went ahead and printed that value onto a single line in the console. Now, because we only implicitly told the compiler what data type to use, we had to initialize our variable on the same line. How do we explicitly told the compiler what data type we need IT? There would have been multiple ways to define and initialize our variable. We'll go over these other options in the next video when we talk about integers, a data type for storing whole numbers. Anyways, thanks for watching, and I'll see you in the next one.
9. Chapter 3 (Variables): Integers: In this video, we're going to be talking about integers. And integer is a data type for storing whole numbers. The two main ones you'll be using our Signed and Unsigned 32-bit integers. A 32-bit integer is abbreviated to end in C-sharp and will be referred to as such from here on out. Now to start things off, I want all of you to erase all of the code and your main method, except for our console dot read line. You guys don't have to write down the rest of those text here. I'm just going to leave it here as a reference for you guys. Now the difference between us signed and unsigned int as whether or not it can store a negative number or it go below 0. A signed int can go below 0. And an unsigned int cannot. You can think of it like this. If they were asking for permission and needed you to sign something, for it to go below 0. And you send now and didn't sign it, it would not be able to do so. So unsigned ints don't have permission to go below 0. And signed ends have permission to go below 0. And Sir signed by default and can normally store any whole number in this range here. And then unsigned and consider any number in this range. Which for those curious, is the same as adding the two numbers together from the signed end, assuming they're both positive. Now if you didn't need to store a larger hole number or only needed a smaller one. There's other integer types which I'll show you now. As you can see, there are multiple integer types that take up different amounts of memory, as well as have the ability to hold a various range of whole numbers. However, since they are less common and unnecessary in most cases, we aren't going to dive into them. And of course, I just wanted to make sure that you are aware that they exist just in case you were to ever see or meet them in the future. But most of the time, and it will work just fine. They are awesome, more efficient. Anyways, let's go over some examples of using ends. So in the last video, we worked solely withhold number variables. However, we left it up to the compiler to figure out what type we need it by implicitly saying what data type we needed by using the keyword var. Now we're going to explicitly do it. And this is what I'd recommend doing most of the time if able. So now that we are explicitly typing our variables, we can go ahead and declare them on one line and initialize them on another. So let's do that now by making it into a variable called score. So if you remember to declare a variable, all you have to do is type the datatype being int, followed by the name being score. Then lastly, a semicolon at the end to end our statement. Now you may have noticed this green squiggly line here on our variable name. And basically all these are just kind of a heads up. If we mouse over it, you can see that it says that the variable score as declared but never used. Now that your program will run just fine as is. Those are just letting you know that as of right now you don't technically need this variable. But as soon as we use the variable score for something, this will go away. Next, let's go ahead and initialize our variable on a separate line. To do this, all we have to do is type the name, followed by the equal sign or the assignment operator. Then a value. Let's go ahead and make this 20 followed by a semicolon at the end. Next, let's declare and initialize a variable on the same line, just as we did in the last video. So on a separate line, let's go ahead and create an int variable called Health and set it equal to a 100. Now, I just want you to be aware that both of these are technically correct and will lead to the same result as far as declaring and initializing a variable. Though, I recommend initializing your variables before using them. And as soon as you can, just to avoid any potential errors. And it is just good practice. Now, if you know an integer variable isn't going to go below 0, you might as well make it unsigned. So let's say we were making a game and we know our health friable was never going to be negative. We can make this an unsigned int by putting the letter you in front of the word. And, and now that it is an unsigned integer variable, it will no longer allow us to make this a negative number. So let me go ahead and show you that far to set this to negative 100 out immediately getting air. Basically saying that I cannot set an unsigned int to a negative value next to. Let's go ahead and print both of these variables the console, just to show that they both work on a new line, we'll type console dot write line. And I do recommend new type this out just to get some practice in. And inside our parenthesis, we'll type the variable score. Then we'll do the same thing for our health. Then when we run our program, it should put the value of score being 20 on one line and the value of health being on another. And as you can see when we run our program that does exactly what it does. Then throw out things up. I wanted to show you how we can declare multiple variables of the same type in a single statement and even initialize them if we so chose to. The syntax for this is the data type followed by the name of her first variable, comma, then the name of our second variable, comma, and so on. And you can keep doing this for as long as you want it. Then when you create the name of your last variable, you put a semicolon at the end. So for example, let's say we were making a soccer game. I wanted to make two separate score variables. We could do that like so. We can say n score Team Red, comma, score Team Blue. And then lastly if semicolon at the end. And then if we wanted to initialize any of these variables, we could do so by putting the assignment operator after the name, followed by the value. And you could do that on all of them. None of them are just one or the other. Now in our case, we'd probably want to initialize them both to 0. So let's go ahead and do so. As you can see, our program will run just fine. Now just to show you something, because code is read from top to bottom, we would not be able to put score Team Red and this line of code lattice because it has not yet been declared. So if we did when I print out any of these two variables, we would have to put the code down below. Then I'll go ahead and run a program. And you can see that they were both initialized and print out just fine. Anyways, that does it for this video, we'll be working with ends again here soon when we get into arithmetic. And we'll also be working with them quite often throughout the course. This was just a brief introduction to them and their uses. And the next video we'll be going on for floating point types are numbers with a decimal point. So thanks for watching, and I'll see you in the next one.
10. Chapter 3 (Variables): Floating Points: In this video, we're going to be talking about floating point types. Now before we get started, go ahead and erase all over the code inside of your main method except for a read a key line. This is something we are going to start doing from here on out, unless otherwise stated. Anyways, floating point types are for storing numbers with a decimal point. Though they can store whole numbers, integers are more efficient at doing so. Now, in c-sharp, there are three different floating point types, which I have listed for you here. As you can see, each one has a varying range of numbers that they can store, just totally integer types. They also provide different levels of precision and take up various amounts of memory. Now the flow and the double types serve roughly the same purpose, and you will likely use and see both quite often when working with floating point numbers. The main difference being that doubles take up twice the space and memory as a float. And that they are more precise. That being said on numerous systems, doubles should run better and therefore, I'd recommend using them as your default for floating point type. Now, the decimal type, on the other hand, is mainly used for finances and by scientists and stuff like that, where they need everything to be extremely precise. For most other applications though, they are just slower and take up more memory. Unless you really need the extra precision. I'd go with a float or a double. Next, let's go over how to properly declare and initialize each one. So let's start by creating a new flow variable called Walk speed that holds the value 2.5. So today that will type flow space walk speed equals to 0.5. Then the last thing we have to do as out of suffix based on what floating-point type we're using, which for a float type is enough. So at the end of our value, we simply put an app to indicate that this value, we just typed. This in fact a flow for sluts or compiler. Now the way when I work with a float, not a double or a decimal, a float. Then just put a semicolon at the end. Next we'll create a new line and we'll create a double called run speed and set that equal to 10.2. And just for the hell of that, let's go ahead and declare that and initialize lists one on two different lines. Just to show that we can remember you can do this with any variable type, soil type double space, running speed, semicolon. Then on a new line will say that we want to set R1 speed equal to 10.2. And remember to do that, we just type the name of the variable that we're referring to, followed by an equals sign. And lastly the value. Then the suffix for a double is a d. Though this was not technically necessary as the default floating point type as a double. And lastly, to end our statement, we'll put a semicolon. Lastly, let's go ahead and create a decimal variable called Money and set that equal to 5.004 for school. And so you got And we'll take our data type, followed by the name. Then an equal sign, or the assignment operator, followed by the value, or 5.2004, then decimals or soft. And lastly, a semicolon at the end. Now, another thing I wanted to show you is that let say you are working with a very large number, whether it be an integer or a floating type, there is a way to separate out the numbers to make them more readable. So to demonstrate this, I'm going to go ahead and create a double called bank balance and set it equal to 10 thousand. Then I'm going to go ahead and separate the thousands places from the hundreds with an underscore. There's this creatively called a digit separator when used to separate numbers. This will help them making your numbers easier to read and it will not affect your code in any other way. Then let's go ahead and print all for variables to console on separate lines just to see that they are all working as we expected. Saturday This will take console dot write line, followed by an open parenthesis, our variable name, close parentheses, and a semicolon at the end. And then we'll go ahead and repeat this process for the rest of our variables. And as you can see when we run our program and it prints all four values to console on a separate line. Notice that the underscore from our bank balance variable did not show up in console. So you now know how to declare and initialize the different floating point types. Anyways, that does it for this video, we'll be talking about floating point types more here, sin when we get into operators. And the next video, we're going to talk about Boolean types, which are her storing true or false values. So thanks for watching, and I'll see you on the next one.
11. Chapter 3 (Variables): Booleans: In this video, we're going to talk about Booleans, data type for storing true false values. So for example, let's say that we were creating a game and we wanted to store a variable that would tell us whether or not it was game over. We could create a Boolean or a bool for short colleague game over and then set it equal to false. So let's go ahead and do that by writing. Gameover equals false. And then a semicolon at the end. Then down below, what's there on some texts to roughly similarly gameplay. Suppose say console dot write line. And in quotation marks will print data variable. So say console dot write line, GameOver. Let's print out x i equal to true. And lastly, let's print out our variable again. Now when we run our program, it should print out start pulse. You're a shot. And lastly, trim. And as you can see when we run our program, that does exactly what it does. Now, I'm sure you can think of a million examples of where it'd be useful to know whether or not something was true or false. Like whether a button was pressed, if our character was in the air, and if we were reloading, etc. And you can do all of that by simply creating a bool and then having all sorts of logic to determine what state your bool isn't. Anyways, that is it for this video. And the next one will be going over the char data type, which is used to store a single character. So thanks for watching, and I'll see you on the next one.
12. Chapter 3 (Variables): Chars: In this video, we'll be talking about the char data type. This is used to store a single character. So let's go and create a char variable called the single butter and set it equal to a to D two, this will simply type char when they met single letter, followed by the assignment operator. Then when working with chars, you need a surround the value with single quotation marks. Then we'll put in the letter a, followed by another single HCO and a semicolon at the end. Then we'll go ahead and print out our variable to console using the console dot write line method. And when we run our program, you can see that it prints out the letter. By the way, one thing to know is that when working with chars or strings, which we'll get into in the next video. As your values are case sensitive. So for example, we could change the value of our single letter variable to a capital a. And when we run the program, you can see that it was capitalized. Another thing you should know about chars is that behind the hood, a chart is actually a numerical value as each character has a specific number set and the Unicode alphabet. Now, the useless for chars will become more apparent later on down the line. But for now, I just wanted to make you aware of their existence. Anyways, that is it for this video. And the next one will be going over strings, which has a data type for storing multiple characters. So thanks for watching, and I'll see you in the next one.
13. Chapter 3 (Variables): Strings: In this video, we'll be talking about shrinks. Shrinks are a data type for storing text or a collection of characters or chars. Now, I'm sure you can already think up a 100 reasons why you might want to store some text for using and manipulating in the future. For example, you could use a string distort character dialogue, error messages, someone's name, item names, etc. So let's jump right into how to declare and initialize a string. Now, in the past, we've actually worked with strings every time we've printed text to the console. However, we've never actually stored it anywhere. We've just simply printed it. So let's create a string called name and then go ahead and set it equal to whatever your name is. So today that will type string name equals. And then in quotation marks, you'll type your name. And lastly, we'll put a semicolon at the end. Now, one thing to note is that we could technically store a single character in our string or even no characters and just put the quotes. If we had wanted to, for whatever reason, then let's go ahead and print our string to the console. But this time let's use the console dot write method. We're simply using the console dot write method. Just the show that you can print out variables with this method as well. Anyways, as you can see when you run your program and will print out your name. You've now learned all of the basic predefined data types. In the next video, we'll be going over multiple ways in which to print out variables to the console. So thanks for watching, and I'll see you in the next one.
14. Chapter 3 (Variables): Printing Variables To Console: And in this video, we'll be going over multiple waves to penetrate boast to the console. First, let's create a few variables that describe ourselves. So to start off, let's create a string called name. Then go ahead and set it equal to your name. Then we'll create an int variable called age and go ahead and set that equal to how old you are. And lastly, we will create a double called the hay, and we'll set that we're having. Next. We're going to go over a few ways to print all of at least to console and describe what it is that we're printing. So first we'll type console dot write line. Then in quotation marks, we're going to type a colon and a space, followed by the plus symbol and then the variable name. Then don't forget your close parentheses and a semicolon at the end. Then let's say the same thing for our height. What I'd like you to do is go ahead and run the application to make sure it works. By your name, your age, your next. Let's go ahead and print out the exact same thing in a single statement. But before we do so, let's go ahead and print out a blank lines. To do this, we'll type console dot write line twice, and we won't have anything in-between our parentheses. Now, to print all of this single statement, you have to do is type console dot write line, followed by an open parenthesis. And then a quotation mark will say name. Colon space. Quotation mark, the plus symbol, name. Then we'll do the plus symbol again caused by quotation marks. And inside the quotation marks were gonna tape backslash. And remember that the backslash is a special escape character. And that the lowercase n signifies that we wanna create a new line. Then we'll simply add another plus sign quotation marks, followed by the word age, and so on until we're finished. Then we run our program. And see that we printed the exact same thing twice. Now one thing that I'd like to go over with you, which we're going to start adding to our code in order to make it more readable as a concept called pseudocode. Pseudocode as basically a way of writing your code in plain English. This is something you want to start doing before, during and after writing code to make your code more readable. At-a-glance, though, for example, here at the top, we might write in a comment variables to store our name, age and height. And down here we can say something like print our name, age, and height to console. And down here we can say print to blink lines. In here, we can say that we want to print our name, age, and height in the console again. From here on out, we're going to start writing pseudo-code one viable. So let's go ahead and do that. And another comment line. Let's go ahead and say print blank lines. And then on the next line which create another comment and write and our name and height to consult again. Then just go ahead and copy and paste that. So now that we can easily see what we plan to do with our program, all we have left to do is to write in the code. So below this line here, we'll type console dot write line twice. Then what we're gonna do is we're going to print out our name, age, and height again, except we're gonna be using a process called composite formatting. To do this, you have to do is write console dot, write line, and Len inside of your parentheses, you're gonna wanna put quotation marks, followed by a name and a colon, followed by an open curly bracket. The number 0 and a closed curly bracket. Well, if this number is 0 here is as an index. And you always want to be sure to start at 0. Then after the close curly bracket will simply write backslash n H colon space, open curly bracket to number one and a closed curly bracket then, and we'll just do the same thing. Height. Then after your last close curly bracket, you wanna put in your quotation mark, followed by a comma. And after the comma, you want to write your name variable or the variable that will take up index 0, comma, comma, height, close parenthesis, and then a semicolon at the end. So what this will do is it will automatically insert each variable into the corresponding index run. When you run your program, you should see that you have now printed the same thing three times, but in three different ways. Then it will print another two blank lines. And then the last method I have for you is called the strain interpolation. To do this, all you have to do is write console dot, write line once again. Then setup parentheses way you wanna do, and it's pretty pen your string with the dollar sign symbol. With this does was a teller program that we want to use string interpolation for the following string. Then you want to enter your quotation marks. And inside of those, you're pretty much going to follow the same exact syntax that you've heard about. So we'll say name, colon space, followed by an open curly bracket, except this time, instead of inserting an index, all you have to do is insert the variable name, then a close curly bracket, followed by backslash n, age, and so on. And lastly, don't forget to end with a quotation mark followed by a closed parenthesis and a semicolon at the end. And notice that we didn't put a space before or after our backslash n, as it would have printed to the console. Then when we run our program again, you can see that we have now printed the same thing four times, but in four different ways. Remember that this method here is called string interpolation. But this one here is called composite format. You've now learned multiple ways to print variables to the console and how to print multiple variables using the same statement. In the next video, we'll be talking about constants. So thanks for watching, and I'll see you in the next one.
15. Chapter 3 (Variables): Constants: And in this video we're going to talk about constants. Constants can be numbers, boolean values, strings, or a null reference. Will again No, no oscillator. A consonant is used when you have a value that you don't want to change ever. So for example, you might want to make your max health and again, a constant. Keep in mind that a constant is not technically a variable because it cannot be modified. So let's go ahead and create a constant integer called Max Health and set it equal to a 100. And all we have to do is use the const keyword before our variable. The credit or max held constant. Const. And Max house equals a 100. And as you can see, if we were to try and change our max, how we would get in there. Because like I said, constant cannot change. Then let's go ahead and print max health the console, just to see that it worked. And as you can see when we run our program had done. And in the next video, we'll be going over collecting chars and strings from user input. So thanks for watching, and I'll see you in the next one.
16. Chapter 4 (User Input): ReadLine & ReadKey Methods: In this video, we'll be talking about getting user input using the console dot read line method and the console dot read CKY method. Now, what the readline method does essentially is record a string from the time it is called until the user hits Enter or Return. Then one to those done recording the string, it returns the string value and the read method obtains the next character or function key pressed by the user. But before we begin, we're going to start off by writing some pseudocode. So first we're going to ask the user for a name. Then we're gonna save the name as a string. And lastly, we're going to print the name. And the top part here. Let's start by saying console dot, write line, then water for their name. So I'll say What is your name? Colon space. Then we need to save the user's reply and a string. To do this, we're going to use the console dot read line method. So, and we'll say console with a capital C, just like above. Then we're gonna say diarrhea line with a capital R. And don't forget your open and close parentheses and a semicolon at the end. And like I said, this line here is going to record a string from the time it is called until the user hits enter or return. But we still need to store the string value inside of a variable. Otherwise we'll leave it. So write buffer method, we're gonna create a new string and set it equal to whatever this method here returns, which is going to be a string as well. So we'll say string. Let's just call this name and set it equal to this method. And lastly, we need to print the name back to the user. So once again, we're going to say console dot write line. And quotation marks will say your name is colon space. Then we'll just add on their name using the plus sign. Like so. Then let's go ahead and run our program. So as you can see, it asks for a name, can type whatever you want, and hit Enter. Then it's going to print that back to us on a new line. The reason it is on a new line as because we've had a hit enter or return at the end. Then I just want to show you that something else will work as well. And that is that we can change this top line here to console dot write instead of console dot write line. And this will work just fine as well. The only difference being is that world type her name on the same exact line as less. And you can see how that plays out if we run our program here. So it says what is your name? We type it out on the same exact line. Via Enter and it prints it out for us down below. And lastly, let's quickly go over how we can do something similar. Except this time we'll be storing a char value using the console.log method. And to keep things simple, we'll just leave everything the same. I just want to show you how this is done. So instead of saving the name as a string, we're going to save it as a char value. Then we're going to say console dot read key with a capital K instead of console dot read line. And notice how we got an error. And this says that we cannot implicitly confer from type System.out console key info to HR. Now, don't worry about this too much right now, as we'll be going over how to explicitly convert values later on in this course. For right now, I'm just going to show you another way that we can get a char value using this console dot read CKY method. And we're going to do this by accessing a property within the method. And we'll be going over properties later on as well. For right now, just follow along with means. So you can see the syntax that we are using to access the property that we need in order to get the right data type for HR using this method. So right after our console dot read key method here, make sure this is before the semicolon. We're gonna be using the member access operator or the period symbol. So will say dy. And then we're just gonna say key char with a capital K and C. Like I said, this here is just a property inside this method that holds the proper value we need for HR. Just like we access this read method inside of the conflict class using the member access operator. We were able to do the same thing with this key char property inside of our read CKY method using the member access operator as well. So let's go ahead and run our program. Right now. It's gonna ask for our name. Then as soon as we type one letter. And so I'm actually going to print that back to us. And that's because console.log key only obtains the next character type. And because we don't have to enter or return, it didn't print that on a new line. So if we wanted to clean this up a bit, so we could say console dot write line below here, create a new line when our program again. And as you can see, it now works a lot better. And obviously if we wanted to clean this up a bit, we can say what is the first letter of your name? And say the first letter of her name is, et cetera. So you now know how to get user input as a string and as a char value using either the console dot read line method or the console dot read method. And just remember when storing a char value using the console direct key method. You'll also need to access this char property. Or you could explicitly convert the value from this to a char. And we'll be going over how to do explicit conversions a little bit later on in this course. Anyways, that does it for this video. And the next video, we'll be collecting userInput again, except this time, we'll be getting a number instead of a string value. So thanks for watching, and I'll see you on the next one.
17. Chapter 4 (User Input): Convert.To Method: In this video, we're going to be going over a way to collect a numbers through user input will be doing this using the convert to method. So essentially what we're going to want to do is we're going to want to ask for a number. Then we're going to want to save that number. And lastly, Well one and print it out. So an example of what we might ask her as someone's age. So we can say console direct line, vendor start things off, will have to collect the string that they just type them. String. We'll call it numbered type. And we'll set it equal to console dot read line. Then we're going to use the convert TO method to turn whatever they typed in into an integer value. So we'll say int number, say convert with a capital C dot two with a capital T And with a capital I, the number 32, and then open parentheses. And inside of here we're going to enter our string. So say number types. Then we'll end our statement with a close parentheses and the semicolon. Now, just to clarify things were not technically using that convert to method. Where we're actually doing is accessing a class called convert that has multiple methods for converting from one data type to another. And because these methods start with a word too, for example, here we're using the two N32 method. I'm simply going to refer to it as the convert to method for simplicity. So just keep in mind that when I say that convert to method, I'm simply referring to a method of doing things, not the actual name of the method itself. And lastly, we will just want to print out the number to show that it worked. So you might say something like you are space on our number. They'll add an another Schengen, say, space years old. And then make sure you don't forget the plus symbols in between your different data types. Real quick, let's just go for code here from top to bottom. So first, we are asking the user to type in a number being that age. Then we have a string called number type, which is going to store the value that our console dot read line method returns, which is of the type string. Then I'm recruiting an nth column number that is going to store the integer value. That list method here returns or convert to a method, takes the string being number of tape and attempts to turn it into an integer value. Once that is done, it will return that integer value. And then we are storing it int number. Then we are printing out you are the number the user typed in, years old. Then we'll just run our program to make sure it works. Now this was only going to work if you type in an integer value and make sure there's no space, those are commas or anything like that. So it's going to ask how old we are. We'll type in a number, hit Enter, and then I will print out you are your age, years old, by the way, but you could use those convert to method to convert it to all sorts of different variable types. So for example, we could turn this into a double by saying convert to a double or a float by saying can route to single, and many others. When you're originally typing the method after you type in the word to, you can scroll down in this little drop-down menu and see all the different types that they have available. Keep in mind that if we were to change this type here, we would also have to change the type that we're storing in as well. Anyways, let's look for this video and the next video we are going to be doing the exact same thing, except we're going to be using the parse method and settled a convert to method. And we'll also talk about the differences. So what I'd like for you to do is save what we have here and we'll use it in the next video. Anyways, thanks for watching, and I'll see you in the next one.
18. Chapter 4 (User Input): Parse Method: In this video, we'll be collecting a number value from the user. Except this time we'll be using the parse method instead of the Convert to method. First things first, let's go ahead and just copy and paste all of this code we have up top here. Next, let's highlight our original code and comment it out. Remember you can do that by hitting this button here at the top. Then the only thing that we have to do differently here is change this method. So what we're going to change this to is 32 dot parse open parenthesis. Then we'll insert our string once again, followed by a closed parentheses and a semicolon at the end. Now where I'm getting this N32 from, as from this here. So if you mouse over your integer variable, you can see that it so System.out.print 32. And it represents a 32-bit signed integer, which is where this N32 comes from originally. Now if I were to change this to a float type, you can see that so System.out single and therefore, you just have to change this to single. Anyways, I'm gonna go ahead and undo that and run our program. As you can see, just like it did with it can hurt to method and asked how old we are. Once again, you'll need to insert a valid number and make sure there's no spaces are commas. Otherwise you will get an error and then hit Enter. It prints out our edge and said the string here. Now the difference between our parse method and our Convert to method, as that first string was equal to null, which we'll get into later on. Basically if our string was equal to null, it would essentially be the same as saying that our string wasn't referring to anything. And the difference being, is that if our number typed variable was equal to null or convert to method would return the number 0, whereas our parse method would return an error. So the main way to decide on what method to use is to determine what you would like to happen if the string were to be equal to null. Now I don't fully expect you to understand that now, let's, let's just something to keep in mind for the future. There is a method for determining whether or not your string is equal to null before using your parse method. The method for doing so is called the parse method. We will go over this method a little later on when we learn if statements. Anyways, that's it for this video. And the next video, we'll be going over some basic arithmetic in programming being addition, subtraction, multiplication, and division. So thanks for watching and I'll see you in the next one.
19. Chapter 5 (Operators): Basic Arithmetic: In this video, we'll be going over some basic arithmetic operators, being multiplication, division, addition, and subtraction. I have them all listed here at the top, followed by their symbols. So first thing we're gonna do is write some pseudocode. So we'll want to create two number of variables. Then we'll want to create a result variable. Then we want to do some math. And lastly, we're going to print out theories all. Let's create two integer variables. Will just come number one, number two, number equal to ten. And let's take a number equal to five. I don't just create an int and initialize it to 0. And go ahead and clean this up. Now at the bottom, let's just go ahead and go to console dot write line statement inside of our parentheses, we'll just insert the variable result. Then all we have to do and articulate the result of these two numbers being multiplied, divided, added, or subtracted together. And say result equals number one plus number two. And then a semicolon at the end. And then all we would have to do is change the symbol according to what we want to detail. So now if we run our program, we can see that it prints out 15. Now let's say I wanted to add five to number two here. But I would have to do is say number two. Number two again, Hive. And then let's go ahead and change where we're printing out here at the end to number two. And the reason we have to do that is because our assignment operator is going to take the result of everything on the right and assign it to a variable on the left. So basically, just now says that we wanna take five plus five, which is ten. So when we run our program, you can see that it will now print out ten. How do we forgotten to re-enter a variable name here? It just would have set number two equal to five. And just remember you can change this operator to whatever you wanted to be. Another thing you can do as a sign-up variable directly equal to another. And say number one, number two. Then if we remove this line above, number one would now be set equal to five. Then if we change the sign here and run our program, you can see that it prints out class. Anyways, let's go ahead and change this back tourism. And then in this line here, let's say result equals. And then one thing I wanted to know is that you can have as much math on the site as you weren't an l work just the same way it did as when you were taking math in school. So your president is going to be multiplication, division, addition, and subtraction. Anything in parentheses will happen first. So if we were to say in parentheses, one, flash number two, and then multiply this by five and put a semicolon at the end. We would now get the result of 15 times five. When we run our program. We can see that that's what happens. Anyways, I'd like her, I love you to go ahead and save the code that you have here, cuz we're gonna use it in the next video. And the next video we'll be going over the increment and decrement operators. So thanks for watching. I'll see you on the next one.
20. Chapter 5 (Operators): Increment & Decrement: In this video, we are going to be going over the increment and decrement operators, which are as follows. So your increment operator is two plus symbols and your decrement operator as two minus equals. What this is is basically an easier way of adding one or subtracting one from a variable. They made this possible just because of how often people add and subtract one from variables will be using these a lot, especially when we get into loops and going through collections. So for example, let's say we wanted to add one to our number one variable. All we would have to do is say number one and put a semicolon at the end. And now are number one is equal to 11. So this is the exact same as the method we used in the last video where we said, number one, number one plus1. Anyways, I go ahead and comment that I'll send down here and let's go ahead and change for us all to number one, just to show that it worked. And it will go ahead and run our program. And as you can see, it printed out 11. And if we were to change this to minus, minus or the decrement operator, you can see that it would print out nine. Ok. Now another thing I want to show you is that this operator can be used in different ways. And what I mean by that is this. So let's go ahead and delete this line of code. And we'll say result equals number one plus, plus and i semicolon. And then we're going to basically recreate this line except with a slave. So were gonna say result equals plus, plus, then number one. And then after each of these lines, what's go ahead and print out the result. I'm going to also comment out this line down here at the bottom. And then inside that both of these, let's just go ahead and add some text to make it more obvious which operation we did. So in here we'll add a string and we'll say number plus, plus colon space. We'll put in our quotation marks, and don't forget to add a plus symbol in between your string and your variable. And then we're gonna go ahead and do the same thing for down here. Then in between both of these, let's go ahead and set result back equal to 0. Now, the difference between these two lines as this. So I'm just gonna go ahead and add a comma here. Basically this one here at the top is going to set result equal to number one. Then it's going to add one to number one. While the bottom one here is going to add one to number one. Then it's going to cite result equal to number one. I'll so we're going to add one more line of code here after a result equals 0 and say number one equals ten. This way we have the completely fresh start between these two sections of code. So just sign here, and this one here will both add one to our number one variable. However, result is going to be different. And as because like I said, this one is going to first set result equal to number one, and then it's going to do the addition later. This is signified by the fact that our increment operator is after the variable. Well, this one is gonna do the addition first, and then it's gonna set result equal to the result of that. And once again, let us signify it by the increment operator being before it, the variable sum math first done the assignment, whereas this one was the assignment first than the map. So what's going to happen when we run our program, as a result is going to be set equal to ten. And then number one is going to equal 11. Then on our first line and will be printing out ten. Then we're going to set result back equal to 0 and number one back equal to ten. And then on a separate line, and it's going to print out the value 11. And as you can see when we run our program, that's what happens. That our number one variable was in fact incremented. Let's go ahead and print out number one after each of these as well. So I'll say console dot write line number one. And we'll just copy and paste that down below. As you can see, it printed 11 twice. Anyways, let's up for this video and the next video we're gonna go over them modulus operator. So thanks for watching, and I'll see you on the next one.
21. Chapter 5 (Operators): Modulus: In this video, we'll be going over the modulus operator, which as you can see is this lip percentage sign as the symbol. And what this does is return the remainder of dividing two numbers. So let's go ahead and start off with some pseudocode. First we're going to create two double variables. Latin woman, I create a result variable. W1 will wanna do some math. And lastly, we want to print out our result. So we'll start off by creating two doubles call number one and number two. Equal to 0 will create a double result variable. And then down here at the bottom, let's go ahead and print out our result. Then let's go ahead and number one. And lastly we'll say result equals number one, modulus number two, and a semicolon at the end. What this was going to do is take a number one being divided by number two being five. And then it's going to excite result equal to the remainder. If there is no remainder, result would equal 0. Then when we run our program, because six divided by five has a remainder of fun. That is what it's going to print out on a separate line. One way to find out if a number is odd or even is by using the modulus operator. So for example, if we wanted to know if number one was odd or even, we can say number one modulus and then two. And now if we had a remainder, we would know it was odd and if we didn't, we would know as even. Anyways, that's it for this video. And the next video we'll be going over assignment operators. So thanks for watching, and I'll see you in the next one.
22. Chapter 5 (Operators): Assignment: In this video, we'll be going over assignment operators. First, let us go ahead and create an integer. Call it number. And we'll go ahead and set that equal to tn. Now before if we wanted to do any kind of operation to our number variable, we would either use the increment or decrement operators, or we'd say some length is number equals number five, for example. Now the assignment operators basically make this operation much easier. So if we wanted to create this exact operation about, oh, we'd have to do essay number plus. And these two lines of code are exactly the same. So just to prove less, let's go ahead and in-between these lines, let's say number equals ten. Just send it back to the original value. And then below each one of these, let's go ahead and print out number. And then when we run our program, you'll see that it prints out twice. And one thing to know is that you could change this operator here to be any of the operators we've gone over in thus far. Anyways, let us up for this video. And the next video we're gonna talk about concatenation. So thanks for watching, and I'll see you in the next one.
23. Chapter 5 (Operators): Concatenation: In this video, we're gonna talk about concatenation, which is a way of combining multiple strings together. So first off, let's create a string variable. And we'll just call it string one. Then set it equal to Hello space, then will create another string called shrink to equal world. And lastly, and we'll create another string called combined shrinks. And we'll set x1 equal to a blank string. Now to concatenate string one, and we'll say combine shrink equals string one, shrinks. Then we'll go ahead and print out combining shrinks. And as you can see, that the two together and print to the console. We could even add a string n here without it being a veritable. So for example, we could, I'm an exclamation point. And if we run our program again, you can see that it has now added. We could've also used the addition assignment operator like so. We could have such string one, string tail, and then printed out string1. And as you can see that the exact same thing. And the next video we're gonna be talking about casting. So thanks for watching and I'll see you in the next one.
24. Chapter 5 (Operators): Casting: In this video, we're gonna talk about casting. So first let's start by creating two integer variables. And we'll say int num one equals five. And we'll say num two equals four. Then let's go ahead and create a flow called Herzl and set it equal to numb one plus num to us right now what we're doing is setting our float called result equal to the value of number one and number two, both being integers being added together. So in this operation we are converting an integer data type to a flow. Casting is when you turn one data type into another. And the reason this is okay, is because of float can hold an integer value with more precision. However, you can not do this the other way around. So because our float can hold any value that our integer Ken and more, it will implicitly casted over. So if we print out the result and run our programs, you can see that it'll print out nine. However, this wouldn't work the other way around. So if we were to, for example, change those to a byte, you can see that when we run our program, we get an error. And as you can see, this arrow says that you can not implicitly convert type ent to type by an explicit conversion exist. Are you missing I cast. Now anytime you're converting over to a type where you'll potentially lose information, you need to explicitly cast it. So what we have to do as explicitly turn the result of this operation into a bite. To do that, all we have to do as n parentheses, put the data type that we want. So in this case we put by it. And then because we are working with this whole operation, we need to also put this inside the parentheses. And now when we run our program and I'll print out nine. Keep in mind that the datatype byte can hold the value nine normally. However, because it holds less than the data type and it will not implicitly converted. Now these parentheses here, we're only necessary because we were working with an operation. How do you done something like this? Like say result equals num one. And then explicitly casted this tool. We would not have needed the extra set of parenthesis. So if I go ahead and comment out this line above and run our program, you can say that result was equal to numb one. Anyways, go ahead and save what you have because we are going to use it in the next video. And in the next video we're gonna talk about truncating. So thanks for watching, and I'll see you in the next one.
25. Chapter 5 (Operators): Truncating: In this video, we're gonna talk about truncating, which means to cut off the end or something. So to show you an example of this, let's go ahead and erase. So Sina code. Then much change num to overflow. And we'll set it equal to 4.5. And then don't hurry or F at the end. And lastly we'll say int result equals n1 plus n2. Then we'll explicitly cast this operation to an end. Now because an integer cannot hold the floating number, instead of this being equal to 9.5. That's just going to equal nine that us because it truncates everything after the decimal point. It does not round up or down, it just gets rid of it. And as you can see, when we run our program and print out the result, and it will simply print nine. Even if we were to change this to 4.9, we would still get the same answer. In the next video, we'll be talking about scope. Anyways, that's it for this video. So thanks for watching and I'll see you in the next one.
26. Chapter 6 (Conditionals): Scope: In this video, we are going to be talking about variable scope. So I have some notes here and in this episode you guys don't have to type anything. I just kinda wanna go over some stuff with you. So first off, variables must be made within a class. Thus far, we've been making all of our variables within our class program, which begins here at this open curly bracket, and then here at this close to him. And as you can see, Visual Studio add-in unless dotted line to show us that these two curly brackets are associated with one another. Next, there are three different levels of variable scope. You have class or object, method or function, and then block, leap or statement. These are just different names for the same thing. So class and object are the exact same thing and the name has just used interchangeably. Same goes for these ones as well. So if you were to declare a variable right here within our class, and it is now available anywhere below within the class. Now, variables declared within the class are called fields or a class members. And like I said, they can be accessed anywhere within after declaration. They can also be accessed outside of a class by using access modifiers, which we'll get into later. There are also available to any non-static method or function. Note that our main method as a static method, and we'll get into static and non-static later on. Next, if we were to declare a variable within a method, it would be available anywhere within the method after declaration. So it'd be available from this point onward until this closed curly bracket, which signifies the end of our method. These variables are normally called local variables. And like I said, they're accessible anywhere within the method after declaration. Also, Method variables cannot be declared twice, meaning you cannot have two with the same name. Now, the same does apply for class variables as well. However, you can have a class variable and a method variable. How does the exact same name? But within their individual scopes, they can not have the same name. Which is why you've seen me comment out certain lines of code that we've copied, because you can't declare two variables with the same exact name within a method. And they, you can't have two class variables with the same name. A class variable could share a variable name with one of its methods. Method variables also no longer exist as soon as the method is done executing. Meaning once we hit this close bracket here, any variables declared within the method no longer exist. Lastly, we'll go over variables declared at the or block level. We'll be going over loops and shortly. However, I just wanted to give you some insight as to how variables declared within a loop work. So once a variable is declared within a loop and it is now available anywhere below, these are normally called Looper statement variables and are only accessible anywhere within the loop. Meaning as soon as we hit this close bracket here, any variable we declared inside would no longer exist. Anyways, that's it for this video. And the next video we'll be going over exactly what conditional statements are. So thanks for watching and I'll see you in the next one.
27. Chapter 6 (Conditionals): Intro To Conditional Statements: Unless video we're gonna be talking about conditional statements. A conditional statement is a statement that checks per a certain condition and then flight condition that it will run a specified section of code. So just to give you an example of how this works, you'd have the condition and then normally some block of code. So as our main method was being executed, as soon as I came across this condition, it would check to see if it was true, if the condition was true, and it would run all over the code inside. However, if the condition was false, all this code would be skipped entirely and it would continue on down here. Anyways, this was just the basics of how a conditional statement works. So things you might want to do is check if a button is pressed. If a number equals a certain amount, if a string, so something specific, NFL player characters reloading if a certain event has taken place, make cetera. Anyways, that is it for this video. And the next video, we'll be talking about relational Andy, equality operators, which are used in a condition to check for various things. Anyways, thanks for watching and I'll see you in the next one.
28. Chapter 6 (Conditionals): Relational & Equality Operators: In this video, we'll be talking about relational and equality operators, which helped you to check for a certain conditions. So first off, we have the equality operator, which checks if t values of two operands are equal or not. If they are equal, that condition will become trail. The equality operator is two equal signs. So for example, if I had the number ten on both sides of the equality operator, the condition would be true. Next, we have an operator that's checks if two things are not equal to one another. This operator as an exclamation point and then an equal sign. So once again, for example, if we had the value ten on both sides. This is because in order for this condition to be true, these two things need to be. In another. Next, we have some more basic operators that you've probably seen before. And you have a greater than, which is just the greater than symbol. Less than, greater than or equal to. And then we have the less than or equal to. So in order for this one to be true, the value of the operand on the left has to be greater than the one on the right. The opposite can be said for the less than and what's the value of the operand on the left has to be less than the value of the operand on the right than the greater than or equal to. Check if the value of the operand on the left is either greater than or equal the value of the operand on the right, then it is the exact opposite for the less than or equal to. Write checks to see if the value of the operand on the left is less than or equal to the value of the operand and the right anyways, but does that for this. And the next video we're gonna talk about logical operators. So thanks for watching, and I'll see you in the next one.
29. Chapter 6 (Conditionals): Logical Operators: In this video, we're gonna be talking about some logical operators which helped you to check if certain conditions are true. So when working with conditional statements, you're gonna have something like this. In which the purpose of is to find out whether this condition is true or not. So it knows whether or not to run a specific section of code. The first logical operator we're gonna go over is the operator which checks to see if both operands are true. The operator for this as symbols. So for example, we could say if a is true and if b, then we want it to run a certain section of code. Next we have the or operator, which is two vertical lines. So for example, we can say if a or B is true, then we want to run a certain block. Okay? And lastly, we have the not operator, which he kinda saw in the last video, which checks to see if a condition is not true. The operator for this as an exclamation point and go for the condition. So it looks something like this. So if we had a bool called a and it was false, this condition would now be true because we wanted to check if that was not true. So if condition a were false, then we run this block of code because now are not true condition would be true. Anyways, that does it for this video. And the next video, we're gonna be going over f statements, which was our first conditional statement, which checks to see if a condition is true and then runs homeland block of code. Anyways, thanks for watching and I'll see you in the next one.
30. Chapter 6 (Conditionals): If Statements: Unless video we're going to be talking about if statements. The syntax for this is as follows. We would say if parentheses, and inside those parentheses would be our condition. And afterwards we wouldn't have that block of code that we run a run if her condition was met. So let's go ahead and try this out. First will create an integer variable called number and x i equal to ten. Then we'll say open parentheses. Number is equal. Remember the operator for that as T0 equals signs to ten. Then we want to run the following block of code. And then here we'll say console dot write line. And then inside of quotation marks will say condition was true. Now when we run our code and it should print out condition was true. And as you can see that that's exactly what it did. However, if we were to change our variable number to five, for example, it will now print out nothing. And this is because this condition would no longer have been met and therefore, this block of code would have been skipped entirely. Now you can see when we run our code and print out nothing. Now just to show you something that you can do for readability if you only have a single line of code that you want to run inside of an if statement. The curly brackets are technically unnecessary and your code can just look like those. Some people find this to be more readable. Feel free to use whichever you prefer. Also, we can swap this operator out with whatever we wanted. So we could say If number is greater than or equal to ten, for example. And now if we set this to ten, our code would run. If your condition was met. Once this block of code is done executing, and it will continue running code from here on out. So for example, if I were to say console dot write lines, end up if statement. You can see that that would be printed outright nothing. Anyway as I'm gonna go ahead and erase that. And I'd like for you to save the code that we have here because we're going to use it in the next video. And the next video, we're gonna be talking about nesting if statements. So thanks for watching and I'll see you in the next one.
31. Chapter 6 (Conditionals): Nesting If Statements: In this video, we're gonna be talking about nesting and if statements. The nested IF statement as an If statement inside of another if statement. To test this out, let's change the name of our number variable to number one. Now, one way to do this in Visual Studio would obviously be the genes, the name here and here. However, one thing Visual Studio allows you to do is to highlight the name, right-click on it. And then I have renamed. And now when we edit the name, it'll edit all instances out those names variable. So you can say number one. And as you can see, a change both of them and then just had applied. Then we'll create another variable called number ten. Well, I'll set this one equal to five. And our if statement condition, let's just say if number one is equal to ten, and then etc. Console dot write line. Let's have the word first before either the word condition. Then right below that, let's go ahead and create a new if statement and check if number two as equal to HIV. And we'll say console dot write line. And we'll say second condition was true. So now if number one is equal to ten, then this block of code will run. If this condition is false, then I will skip all the way to the end down here and continue reading code, meaning in which kept everything in here entirely, including this f statement. However, if this condition is true, so if number one is equal to ten, then it's going to run this line of code pressure. And then it's going to check if this condition is true. To determine whether or not I should run this block of code. If this condition were false, it's kept till the end of this and continue on to the next line. If it were true, then I'm going to read all of this code and then continue on. So if we were to run a program now, we can see that it would have print out both of these lines. If we were to put the not symbol before our second condition, and then put this whole thing inside the parentheses to avoid getting an error. Now, I would want to know if number two not equal to five because it wouldn't want those condition did not be true. So if we were to run our program now, only the first condition would have been that also you guys can have a much longer operation on this. So I could say if number one was equal to ten or if number one plus phi, for example, was equal to 20. Then let's go ahead and change number two to six. So now if we were to run our code, both of these would print out. However, if we were to change our number one variable to something like 13 and run our code only the second conditional would be true. However, it would not run because those conditions that would have been false. So therefore we would print out nothing. But if we were to change this to 15, when this condition ran, it would check to see if it was equal to ten, which it is not. But because we have the or operator here, but also check to see if this condition was true. And as long as one of these is true, our program would run. Now, I would take number one being 15 plus five, which is 20, and then see if 20 is equal to 20. And because of this condition would be true and thus would run as well. Because number two is not equal to five. And you could keep this going for as long as you wanted. You could even thrown an and operator and have another section of code similar to this one. And then just simply put these in parenthesis. Now, obviously in this case this machos, but if these were different era now check to make sure either one of these two is true because we have the source symbol here. And at least one of these would have to be true. Anyway is I'm gonna go ahead and undo that. Basically, you want to use f statements anytime you want to check if the condition is true. And then effort as you want to run a certain section of code. Anyways, that is it for this video. And the next video we'll be talking about if else statements. So thanks for watching and I'll see you in the next one.
32. Chapter 6 (Conditionals): If-Else Statements: In this video, we're going to talk about statements. So how they work as, as follows. Condition. Then you'd have a block of code that would run m psi conditional is true. Afterwards, you would say else. And then having another block of code to run EFSA condition was false. So for example, we could say any number higher than, let's say number is equal to five. We want to print out number is equal to five. Then we can say print out number was not equal to one. And then the lower if-else statement, let's print out and of f statement. So right now, if we were to run a program that would check if number is equal to five. Because let us trail, it's going to go ahead and run this code here. Now our else statement only runs if the if statement was false. So because in this case it would not be SAS code here would be skipped entirely, and then the rest of the code would be executed. So if we run a program and it's gonna say number is equal to HIV and the above statement. Now, if we were to change this to, let's say two, and run our program again. You can see that this block of code did not run. However, this one did. Because an else statement basically says, otherwise, I want to do this. The reason this is useful as because obviously in our case, if number was equal to five or if this condition was true, we would not also want to print out the number was not equal to five because that wouldn't make any sense. Also, one last thing I wanted to show you is the inside of an if statement. You can say if and then you can just type in false high in. So we can say f true. Run this block of code. Now, obviously this is always going to be true, and therefore this one always print. And we can also do the same by saying false. And now this code, and here, whenever, right? I just wanted to show you that this was possible. However, I doubt you will ever meet it. Anyways, that is up for this video. And the next video we're going to be talking about Else statements. So thanks for watching, and I'll see you in the next one.
33. Chapter 6 (Conditionals): Else-If Statements: In this video, we're gonna be talking about and if statements, which basically work as follows, where you'd say if a condition is true, run this block of code. Then we would say else. Another condition was true. We want to run this block of code. However, listen only runs if no previous condition work true. And lastly, you can put in an optional statement at the end, which only runs a block of code if none of the previous conditions were true. Making it a catchall. So for example, let's say count equals 30. Then we'll say Emma count is equal to 30. And we want to print out as last trend five. And we want to print out low. We can either here or we can even put another else. And we'll say if m is equal to 0, then we'll print out empty. And then like I said, you can have a catch-all statement here at the end, being an else statement to run anything in this block of code if all of these are false. Anyways, I'm gonna go ahead and remove them. Now at the bottom here, I'm going to print out and Novo statement. So how this else-if statement works, and let's see if ammo count is equal to 30. If it is, it is going to run this block of code and then it's going to skip to the end of her else-if statement and continue running. However, if this condition is false, then it's going to check if ammo count was less than five. If it is, it would run this block of code and then skip to the end. However, if this condition was false, then I would check this block of code. And if that were true, it would run the code within this block. Or if that was false, then I would run this. Just note that as soon as one as true, and it's only going to run that block of code amongst skip to the end. So if we were to run our code now, it's gonna see if AMA countless equal to 30. And right now ammo count is 30. So because 30 is equal to 30, so this condition will be true. And we're going to print out full. Then because our else statement here only checks for one condition to be true and we'll skip to the end and print out a statement. So let's go ahead and check that. Now as you can see, that's what happened. Now, what if we were to change this to something like 20? If we were to run our code all over, these would be false. And that's because our ammo count will not be equal to 30. It would not be less than five into it not be equal to 0. So all it's gonna do is print out endo statement. Now, if we wanted to catch something like time, we could add an another else-if statement and check if ammo count was greater than or equal to five to catch everything else. Or we could just simply create an else statement. And inside of here, we could print out none torture. Obviously, this isn't a great example of excuses, but I just wanted to show you that it's basically a catch-all. And now this will only run if all of these were false. Because we're basically saying if this condition a shoe run this, run this, etcetera, and then saying otherwise run length k. So if you ran and now I'm going to say none or true, and eventually anyway, so that's it for this video. In the next video, we're gonna be talking about switch statements. So thanks for watching, and I'll see you in the next one.
34. Chapter 6 (Conditionals): Switch Statements: In this video, we're going to be talking about switch statements. Now, there's a couple of differentials between also statements into a switch. So if you have more than three else condition checks and an else-if statement, and you are only checking for a specific value, then you'll want to use a switch. The syntax is as follows. The switch and then parentheses. You want an expression, then an open curly bracket. And then inside you wanna say case, run code. And then at the end of your section of code, you want to say break semicolon being can do this as many times as you'd like. Case phi u, one, run code break, case by U2, U3, etcetera. And then you'll have a closed curly bracket at the end. Now, optionally, you can enter a catch-all, which would have basically serve the same purpose as our else statement did and our MFLs and our else-if statements, we would say default colon, run code. Right? Okay, so let's go ahead and try this out. Let's create an income number and set it equal to five. Then we'll say switch. And inside parentheses will insert a number variable. And I'll go open and close curly bracket. And inside, let's say case one, colon, console dot write line. And let's just go ahead and insert our variable in here. And then we'll say break. Now if you want, you can answer all over this inside of open and close curly brackets like so. However the associate necessary. But you can do whatever is more readable for you. And then I'm gonna go ahead and create these. Then lastly, go had a default which remember is optional. Colon, console dot, write, line. And then I'm going to go ahead and print out none were true. And lastly, outside of this switch, switch. So remember you want to use a switch statement anytime you have three MR. elsif conditions, the check and an else-if statement, and you only need to check for a specific value. The reason I say that as you can not put any logic in here, so I cannot say case less than four, for example. Now when we run our program, that's going to go ahead and it's going to check number, and it's going to say f, it is equal to one. I want to run this. Otherwise it's going to check if it's equal to two and so on until it gets to here. And then it's going to go ahead and print that number being fine. Otherwise, if none of these were true, thus here would be printed out. Then it's also going to print out and dosage. I printed out five inside the endoscope. And example of why we might wanna do this is let's say we had a bunch of different dialogue options and the game. We could ask a question and then have multiple options, each equal to a different value. And we can say if option one was pegged, say this, or run this animation case to do this one. Thanks Sandra. Anyways, that's it for this video. And the next video we're gonna talk about the ternary slash conditional operator. So thanks for watching and I'll see you in the next one.
35. Chapter 6 (Conditionals): Ternary Operator: In this video, we'll be talking about the ternary or conditional operator, which the syntax for those homes. We basically wanna say condition, question mark, colon value if false. And then set this equal to something. So for example, let's create an end number equal to four. Then we'll create a bool called Less than five. Afterwards, we're gonna wanna say less than five. I'll say number less than five. Question mark, true, colon false. So now less than five is going to be set equal to trail. If this condition is true, or I'll be set equal to false. And with this condition is false. Now, this doesn't only work for a bulls to show those, let's create another integer called number two. Then let's say number two. Number less than question mark, colon. And then let's go ahead and print out less than five. And on a new line. Let's also print out number two. So I run a program, what's going to happen as our bull less than five is going to be equal to true or false. Depending on whether this condition is true or false, then our number two variable is going to be equal to 50 or a 100, depending on whether or not number is less than five. So it's going to happen when we run our program has less than five psi equal to true. And number two, there's going to be set equal to 50. So I run our program, we're going to be printing out true and then 50 on two separate lines. And let's go ahead and change our number five here TO three. So now when we run our program, that's going to say true and then 100. So basically you're saying, I want you to check this condition. Then based on whether it's true or false, I want you to set whatever's over here on the left there were assignment operator equal to one of these items. Anyways, that does it for this video. And the next video, we're gonna be going over the try parse method, which I said we'd be going over once we had learned if statements. Anyways, thanks for watching and I'll see you in the next one.
36. Chapter 6 (Conditionals): TryParse Method: In this video, we're gonna be going over the parse method. Most of the time when working with conditional statements, you're going to want to get some kind of user input. Personally, we're kinda wanna do is create a number variable. Then Bergen, I wanna get some user input. Then we'll set number equal to the input. So we're going to say int number. Let's just go ahead and set this equal to 0 for now. Then, let's say console dot write line type number. Then let's create a string called user input and SQL to console dot read line. Next we're going to say int tri-party. And then inside of parentheses we're going to insert our string being userInput comma out number. I'm going to semicolon at the end. Then down here, we're gonna say a number equals in dot parse userInput. Now, this isn't technically necessary because our tripe parse method is going to automatically parse user input into number if it returns true. However, we're gonna leave this here for some future examples in this video. However, we only wanna do this if this method up here was equal to true. So we're gonna say f worked. And because it, let's us live bool. This was just going to check if work is currently equal to true or false, which is going to depend on whether or not it was able to come in where our string user input into an integer and put it into number. So we're gonna say f worked is true. Then we want to go ahead and change number equal to n dot parse userInput. And lastly in southern risk statement, let's go ahead and print out numbers. So now when we run our program, it's gonna ask us for a number and a higher to insert 20, let's say and hit Enter. It's gonna go ahead and print out 20. Now we had done something similar to this in the past by just using our parse method, have R. By using the try parse method, we can now make sure that we're without causing any errors. Show to show you what I mean. Let's go ahead and comment that out and also comment how our if statement. Now when we run our program, if I were to insert something like 5x plus four and hit enter, how would immediately get an error? Because our input was not in the correct format. For same thing would happen if I were to try and insert letters. However, if I go ahead and uncomment, those are try parse method. And it's going to make sure that our input can in fact be converted into an integer and inserted into our number variable and f. So this will return a boolean value being true. If it did not work, it will return false. And it would still change the value of number. But because the conversion didn't work and it returned false, it is simply going to change it to 0. So if for whatever reason are try parse method returns, false. Number will be set equal to 0. If it returns true, then it's going to be set equal to whatever we typed in prey user input and takes us from the top. So for us we created an insert call number and set that equal to 0. Then we ask the user to type a number and then save that with a typed into a string called user input. And user input was saving any input tight until the Enter key was hit. Then you have a book called The Work, which saves the result of our try parse method, which checks to see if I can take this string and convert it into an integer and then NPA into or variable number. Then if that did work and our bull work was equal to true, then we want to have them parsed that by calibrating our user input string into an integer value and then setting our number variable equal to that light. Once again, remember that this was unnecessary because this was already done for us in the tripe parse method. If and when it returned trail. Wherever we have this here to kind of signify the tribe parsed methods use. And for another example, I have for you here using the parse method. And lastly, we went ahead and printed to the console. So just to show you what would happen if we were to type something else like we did before? Let's go ahead and run our program and type Hello. Now because this wasn't in your format, meaning we didn't type in an integer number. What happened was worked, was Landsat equal to false because this method returned false and this here and never ran. Then just to show you something. And let's go ahead and create a flow called number two and set that equal to 0. And then we'll do a float try parse. And then we need to make sure that we're changing what we're attempting to output a two to number two. As this now needs to accept the float. Then down here, we'll say float parse. And we'll explicitly convert this whole method and turn it. Now, I know we've explicitly turned floats into N2O4. I just wanted to show you that you could do the same thing with an entire method output. So let's go ahead and run our program and type something like 8.9. Now prints out eight. So because we type then a float value, our float dot try parse method, return true, which means that this code here ran. Then we took our input, convert it to a flow, and then converted that whole thing to an end. Now because an integer only holds whole numbers and truncated the 0.9 and just made it eight. Anyways, let's look for this video. And the next video, we're gonna be talking about loops. So thanks for watching, and I'll see you in the next one.
37. Chapter 7 (Loops): Intro To Loops: In this video, we're going to be talking about loops. Loops are a way to iterate through a section of code multiple times. The general syntax is as follows. You're gonna say while a condition is true, run this code. Now, I'm sure you can think of multiple reasons why you might want to use a loop, but I'm just gonna go over a few examples. You might want to print out a number a 100 times. Let's say you're making a shooting game and have the three round burst gun. You could have run three times. You might want to run some code continuously while a button being pressed. Now there are multiple types of loops that have their key differences. And you'll want to use whichever one is best for your situation. And you'll be learning about the different types in the upcoming videos. Anyways, in the next video, we're gonna be going over our very first loop, the while loop. So thanks for watching, and I'll see you in the next one.
38. Chapter 7 (Loops): While Loops: In this video, we're going to be talking about the while loop. The syntax for a while loop is as follows. You're gonna say while. In parenthesis, you put the condition that you want to check. And then you'll have the code that you want to run. So to test this out, let us go ahead and create an nth column number and set it equal to 0. Then let's say we wanted to print out the numbers 0 through ten. We could say, well, open parentheses, number is less than 11. Close parenthesis, opened and closed curly bracket. So the first thing you wanna do anytime you create a loop is get in the habit of making sure that this condition will eventually become false. Otherwise, this code is going to run indefinitely and crash your program. What you wanna do, but say number plus plus semicolon. So now that our numbers going to slowly increase every time this code is ran, I know that numbers eventually you're going to be greater or equal to 11, making this code false so that my program can continue forward above our number plus, plus. And I go ahead and print out number. And the reason I like to make sure that I'm gonna make this condition false before I do anything else is because if you forget this and you crash your program, let's say you didn't save and you just did an hour or two worth of work and your program crashes. Now what you're gonna have to do all that work again, he's like did just make sure I'm preventing that immediately. So now it's going to happen is when our program runs and it's gonna create an integer variable called number and set that equal to 0. Then it's gonna go to this while loop and it's going to check this condition. So it's gonna say is number less than 110, less than 11. Yup. So it's going to go ahead and print out 0. Then it's going to add one to a number. Now number equals one. Then once it reaches the end of my while loop, it's going to go ahead and check this condition all over again. So it's gonna say is one less than 11? Yep, go ahead and print out one. And we're going to add another one to number. And that number is two, is two less than 11, yup, all the way until it gets to 11, then it's gonna say as 11, less than 11. No. And then it's gonna continue forward. So I'm gonna go ahead and print out and wildlife. So whenever you run our program, it should print out 0 through ten. And then it's going to say and the while loop. The reason this happens is because once it sees that this condition is true and begins running our loop, it's going to continue running with this loop until this condition is false. So let's go ahead and run our program. Make sure we're now, as you can see, it printed out 012345678910. And early. And just like an if statement, you can put whatever kind of operations you want inside of here. And it's just going to check if it's true. And if not, this code just isn't going to run. So let's go ahead and start this at 11 and run our program. As you can see, it just printed out and a wildly. Anyways, that is it for this video. And the next video, we're going to be going over a do-while loop. Now what I'd like for you to do is go ahead and save this code, because we're gonna go ahead and use it again in the next video. Thanks for watching, and I'll see you in the next one.
39. Chapter 7 (Loops): Do While Loops: In this video, we're going to be talking about a do while loop. Now, the difference in syntax for a do-while loop is as follows. You're going to say do. And then the code you want to run is gonna go right after. So it's gonna be do code to run. And then while condition is true. And the difference between how this works and how our previous code ran is that we're going to tell it where we want it to do, no matter what. So what it's gonna do it. So it's gonna go ahead and run this code once. Then it's going to say while this condition is true, I want you to keep running this code over and over and over. And let's go ahead and see this in action. Let's go ahead and remove our while loop here. And then we're going to say do console dot write line number. And under that, we're going to say while. And M parentheses will say number less than 11. And then a semicolon at the end. I'll read condition. Then, like I said before, immediately, as soon as I created a loop and a condition, I like to make sure that that condition is going to equal false at some point because I don't want to crash my program and I doubt you do either. So I'm gonna go ahead and enter number plus, plus. As you notice, we got an error. And that's because now that we are working with multiple lines of code, we need to go ahead and define our code block. So let's put an open and a closed curly bracket. Then let's go ahead and set number back equal to 0. So now when this code runs, what's going to happen? Say, OK, we're creating an engineer called number and setting it equal to 0, then I can tell you for me to do something. So I'm gonna go ahead and do it. It's going to go ahead and print out number. Then it's going to add one to number. Then it's going to say, oh, I see you have a condition here that omega check. So it's gonna say number one at this point. Is that less than 11? If it is. Okay, I'm gonna go ahead and run this code again. Otherwise, if this was false, I know we're done here and I'm gonna continue forward. So if we were to run our program now, we're going to print out 0 through ten, just like we did before. Except the difference here is that this is running once, no matter what. So what's going to run our program? As you can see, we print out 0 through ten and then end a while loop, just like we did before. Now, to show you the difference here, let's go ahead and change this to 20, right off the bat. Now, notice that our condition checks of numbers less than 11. But because we're using a do while loop instead of a while loop, we're telling it we want it to do this, at least one. So let me go ahead and run our program again. And notice that we're gonna go ahead and print out number. And we're going to add one to number no matter what. And then we're going to stand up while it. So when we run our program, it's gonna say 20 and a wild loop. All right? And that's the difference between a while and a do-while loop. We want it to do something at least once and then check if the condition is true before running it again. Anyways, that does it for this video and the next video, we're gonna go over a for-loop. And just like we did before, I want you to go ahead and save what you have here so that we can use it in the next video. So thanks for watching, and I'll see you in the next one.
40. Chapter 7 (Loops): For Loops: In this video, we're going to be talking about for loops. So the syntax for a for loop, as those fellows were gonna say for open parentheses. And then we're going to have an initializer semicolon, followed by a condition, semicolon followed by an iterator. And lastly, we're going to have the body of her foreloop. So let's go ahead and print out the numbers one through ten, just like we did before. Except this time we'll be using a for loop. So let's go ahead and remove our do-while loop. And I'm gonna go ahead and remove the syntax for that as well. And we can even remove our int number entirely. And I'll show you why here in a second. So to create our for loop, we're going to say for open and close parentheses. And then below that, we're going to have open and close curly bracket done inside of our parentheses. We're gonna go ahead and create an initializer, which is basically just the variable that we want to work with. So let's go ahead and say int i equals 0 semicolon. Now you can make those variable whatever you want. But traditionally, when working with a for-loop, people use the letter i as sort of an abbreviation for index. Next, we need our condition. So what do we want to check for? What see if i is less than 11, just like we did before. And lastly, we need an iterator. So remember how before we were increasing our number by one just to make sure that our condition, would it be true forever. We can put that right here. Say I plus, plus. And then notice that you don't need a semicolon at the end of your iterator. Now, we'll just go ahead and print out. So now what's going to happen when it comes to this for loop is it's going to create the integer i. And just remember, loop variables are only available within this block of code. Same what a held true for any variables. We wouldn't create it in our while loops are do-while loops, then it's gonna check if i is less than ten. And yes and 0 is less than ten. So it's going to go ahead and run this code. Then once this code is done running and it's going to iterate through and increase i by one and then check this code again. If it is still true, it's going to continue running once this condition is false. And we'll go ahead and break out of this forum. So I'm gonna go ahead and change the wording done here in just a little bit and then run our code. And as you can see, just as we did before, we printed out 0 through ten, and then it says n-doped. Now the stuff up here, you don't technically have to have it. And they'll show you that now. So I could have created an Int i up here. And then as long as they leave that semicolon there, I can just get rid of this and run my code and it'll work just fine. The only difference is now that my variable is declared that the method level, instead of inside my loop, I can go ahead and use eye down here if I wanted. And as you can see, my program runs just fine. Same goes for this one here on the end. If I wanted to go ahead and get rid of that entirely, I could actually just put that inside of my loop. And now that's going to work the exact same way as it did before. Now though, you can delete the condition here. I wouldn't recommend it is now because there is no condition, it's essentially just going to always be true. And this is going to run forever. So I'm not gonna do that. Anyways, let us up for this video. And the next video, we're gonna talk about nesting loops. So thanks for watching, and I'll see you in the next one.
41. Chapter 7 (Loops): Nesting Loops: In this video, we're gonna talk about nesting of loops. Now just like you can nest FL and else-if statements inside of one another. You can do the same with loops. And you can even use both interchangeably to show those. So let's go ahead and create two integer variables. Let's say int num one equals 0. And now I'm to ecosystem. Then we'll say, wow, num one is less than 11. Console dot write line num one. However, read before I'm one, let's go ahead and add a string and just say num one colon space. And then don't forget the plus sign in between the string and the variable. Then below this, let's go ahead and say if num one is equal to five. And then inside of our if statement, let's create another wildly. And we'll say, well, none p2 is less than 11. Console dot write line. And then we'll just copy what we had before. And we'll just change are shrinking variable accordingly. Now remember, we want to make sure that both of our conditions are going to equal fossil at some point. So down here, let's say num one plus, plus and plus one, and we'll say num two. So it's going to happen when we're in our program. We're gonna print out num 1011, etc. Until we get to five. We're going to print out num 20 through ten, and then we'll print out the rest of them won six through ten. And we run a program. And you can see that that's what happened. Anyway, is that does it for this video. Go ahead and save this code because we're going to use it in the next video. And the next video, we're gonna talk about break statement. Anyways, thanks for watching and I'll see you in the next one.
42. Chapter 7 (Loops): Break Statements: And this video, we're gonna talk about break statement. So what a break statement is, is that it is a statement that breaks you out of a loop. So if n here, we were to say break semicolon, what's going to happen is once we print out num 15 and this condition here becomes true, we're going to start this loop. Then after we print out num to 0, this break is going to break us out of this loop immediately, and we'll go back to this loop. Let's go ahead and run our program. And as you can see, we printed out num 10, 3-5 num to 0. And then because of our break statement, we broke out of this loop and immediately printed out 600 times. So you'll want to use a break statement anytime you want to break out of the loop early. Or if you had an infinite loop, you could use a break statement to break out of it at some point. In the next video, we'll be talking about the continuous statement. Anyways, thanks for watching and I'll see you in the next one.
43. Chapter 7 (Loops): Continue Statements: In this video, we're gonna go over the continue statement and continue statement as a way to immediately go through the next iteration of the loop. So to represent those, let's go ahead and create an nth column number and set it equal to 0. Then I'm going to show you how this works in two different loops. So let's say while number is less than 11. And then we'll say number of plus plus to make sure condition will eventually be false. And then we'll print out numbered then in-between these lines. So let's go ahead and create an if statement. Say If number is equal to five, we're going to print out. And then we'll say number plus equals two. And then below here, let's go ahead and put in a continue statement below our while loop. Let's go ahead and recreate those as a for loop. So we'll say for i equals 0, i less than 11, i plus, plus. Now one thing I want you to know is that this iteration here, it could be plus plus I, and it wouldn't really make a difference in this case, since we're not storing it anywhere. We can even say minus, minus i or i minus minus. Then we'll print out i, but the sound, let's just go ahead and do it on the same line. So we'll say console.log right eye. And I'll create a string and we'll just put a comma space and a semicolon at the end. Then we'll say if i is equal to five, we want to go ahead and print out i and then increase i by two. So say hi plus equals. And then we'll go ahead and use the continue. Also, one thing I want to let you know is there anything you can do with a for loop? You could do with a while loop. But most of the time this is a little easier to read, especially if you're going to be iterating through something anyways. And another way to determine which to use, as, let's say, you know, how many times you want to iterate through something, you should probably just use a for loop. And if you're not sure and you just want to check for a condition to see if it's true, and then continue running code until that condition is false, I'd use a while loop. Otherwise, just use what was most readable to you for your situation. So what's happening here is we have an integer called number and we have it equal to 0. Then we have a while loop that checks whether a number is less than 11. What's going to happen is it's going to print out number on a separate line. And then it's going to check if number is equal to five. If not, it's going to continue through and just increase number by one and check this condition again. Once it is true, it's going to print out number again. So essentially we are going to be printing out 0 through five. Then we're going to end up printing out five. Again. Then we're increasing number of I2. Number will then be equal to seven and then are continue statement says we want to go ahead and stop the loop, check for this condition again. And then, depending on whether or not that is true, run through our code. So basically what we're doing as stopping the lib here and then checking our condition to see if we're going to iterate through again. Then down here in our for loop, we're basically done the same thing except we created i and set it equal to 0. Then we check if i is less than 11. If it was, we went ahead and ran this code. Only differences here. We're not printing out i on a separate line. We're printing it on the same line, followed by a comma and a space. Then we're increasing i by one and checking this condition again. Afterwards we're running back through. Once i is equal to five, we're printing out I again, meaning will be printing out five twice. We're going to increase i by two, making it seven and then are continue statement. And a for-loop is actually going to run our iteration again. So instead of i being equal to seven, i is going to equal eight and then print out 910. And as you can see, when we run a program, that is what happens when we printed out 0 through five and another five through time. Then we printed out 0 through five and another five on the same line. Then because there were console dot write line, it brought us down to another line and we printed out the rest. So 8910. Notice that we skipped ahead by three and let us, because our for loop runs the iteration again, Monday you use a continue statement. Whereas our while loop doesn't have a built-in iterator and therefore at only skipped ahead and by the two that we specified. Now just to show you that doing plus, plus I would create the SIM result. Let's go ahead and do that and run the program again. And as you can see, it didn't change a thing. I wanted to show you that we are checking this condition again and not just running through our code blindly. Same goes for the wildlife. So let's just go ahead and set number equal to 11. And we'll do that for both of them. Now, when we run our program, once we had five and print five again on each one, it's going to go ahead and stop our loop. So as you can see, they both stopped half-life. And one more thing that I wanted to show you is that down here, I does not exist. And that is because the variable was created within our loop. The reason we didn't do the same with our while loop here, because how do we put int number equals 0 inside of our loop? Every time our code ran, we'd always be creating a new integer called number and setting it equal to 0, which would cause this to be stuck in the loop parameter. However, we can access number down here, and that is because it was defined with an r method. Anyways, let us up for this video. In the next video, we're going to be talking about random numbers and programming. So thanks for watching, and I'll see you on the next one.
44. Chapter 8 (Random Numbers): Random Numbers In Programming: In this video, we're gonna be talking about random programming. A computer to understand which represent on, because you can't technically get a random number from a computer. So what do I need a random number? You use a special equation to try and represent a random number as much as possible. This is done by inserting different numbers into this equation. And by inserting different numbers into the equation, you can get seemingly random result. That seems random is also known as a pseudo random number. However, to keep things simple, people just call it a random number. Now, I have no idea what this equation is. Fairly complex. And you don't need to either. What is important, however, is knowing how it works and that it works. So in the next video, we're gonna go ahead and create our first random number. So thanks for watching, and I'll see you in the next one.
45. Chapter 8 (Random Numbers): Getting A Random Number: In this video, we're going to be creating a random number, or at least seemingly random. To do this, we need to create a sense of the Random class. Just says right now they are working within a class called program. There's a class called random that has an equation for creating random numbers. So to use this class, the first thing we have to do is create an instance of it. To do that, we're gonna type random, which is the name of the class, followed by a name we wanna give our instance. Let's go ahead and call this diurnal. So, so far we specified the type we want, which is of type random or the class name. We gave it a name. And now we're gonna set it equal to a brand new instance i with a random class. And then you need open and close parentheses and a semicolon at the end. So like I said, what we've done is we've created a new random class instance called Tyrone. Remember this name here is just based on the name of the class that we're creating an incident up. Then we're setting it equal to a brand new random with open and closed parentheses. We'll get into this more later when we get into classes. Just know for right now and for those how we create a new instance of a class. Next, let's go ahead and ask the user how many times they would like to roll the die. So say console dot write. How many rolls, thrones Create a new collaterals and set that equal to 0. Let's also create a new string called input and set that equal to a blank string. Then we'll create a bool cold work and set that equal to try parse. And then end parenthesis. We're gonna say input comma out rules. Then assuming that worked, we want to go ahead and set it equal to whatever the user typed in. So we'll say it if we're, then we went to set rolls equal to nth dot parse. And then we wanna put our input. And then we'll create a while loop. And we'll say, well roles as greater than 0. Then inside of here, let's say int number equals. And then we're gonna say die roll, which isn't the instance of world-class dot and this dot or period, and this is the member access Operator, Sir accessing part of the Random class here. And we're gonna say next with a capital N, and then open and close parentheses and a semicolon at the end. Now inside of these parentheses, we need to insert the range of numbers we want to get out of our random result. So say one comma six, a six-sided die. Then below here, let's go ahead and print out numbers. Now, I'm gonna go ahead and add in some pseudo-code. So up here I'm gonna say Create Random class instance will say asks for row count. Then we'll say convert row count two integer. And lastly we'll say print out result of rules. And then one thing we wanna do is actually set our string and put the console dot read line. And after a console dot write line number, we're gonna wanna say gross minus, minus. And this way will eventually break out of our robot way. Then we'll go ahead and run a program. And it's gonna ask how many times we want to roll. I'm gonna go ahead and say ten. And as you can see, I printed out ten different numbers. And if I were to go ahead and run this again, you can see that they're all different numbers. So let's go ahead and say something like a 100. And you'll notice that for whatever reason we did not get the number six. The reason for this is because of the random classes. Next method takes the minimum value and then the maximum Kio, whoever the maximum value as exclusive. So what you actually want to do and change seven. And now if the school include numbers one through six. So if we ran it again and typed on a 100 and hit Enter, you can see that now we get various numbers from one to six. So real quick, I'm going to comment this out and just go over this with you one more time. So to get a random number, you don't honestly random. Give it a name. Equals new random, open and close parentheses and a semicolon. Then you'll want to store the number somewhere. So I'll say int number equals. And then we'll say die roll. As listeners are classroom since name dot next, open and close parenthesis felt by the minimum value comma, and then the maximum value we went plus one. So if I were to say one comma London, we could get any number from one to ten, followed by a semicolon at the end. Then we'll just go ahead and print out number and run our program and we'll get a random number between 110. And they go. Another way. We could have done this to the set of four int i equals 0 semicolon, i less than 11 semicolon I have plus ones. And then instead of her Farley, because it aside console dot write line gyro dot next comma 11. And now we will print out 11 random numbers between 110. And you go. Anyways, that's it for this video. And the next video we'll be talking about collections. So thanks for watching and I'll see you in the next one.
46. Chapter 9 (Collections): Intro To Collections: In this video, we are going to be talking about collections. Now, when I say collection, I'm just referring to grouping variables together. This is different than the actual definition. I like collection in C sharp, which we'll get into here in a minute. So you have two main ways of grouping variables. You have arrays and then you have collections. Now, the main difference between these two as arrays are best used when you know the exact amount of variables that you want to store and collections for storing the dynamic variables. Now let's talk about why you would want to encrypt tradables in the first place. So let's say I wanted to store three whole numbers. Now we can do what we've done in the past. And N1 equals 0, equals 0 and equals 0. Now this works fine, but what if I had ten, 50, or even a 100 of these? And as I'm sure you can guess, it would quickly get out of hand. For one, typing up a 100 variables would take forever. Then if I wanted to print these out, I have to type them all up again. Also, I just don't have a great way of working with all of them together in general. And this is where grouping variables comes in handy. This is because both arrays in collections have multiple methods which you can utilize to work with all of your variables. They also allow you to create multiple variables at the same time without having to go through and create each one individually. Anyways, that does it for this video. And the next video we're gonna go over a single dimension arrays. So thanks for watching, and I'll see you in the next one.
47. Chapter 9 (Collections): Arrays: In this video we're going to be talking about single dimension, alright? Or mark, commonly referred to as just an array. Now the syntax for an array as those fellows. And it's going to be the data type, followed by open and closed square brackets, then the name, then an equal sign or the assignment operator, followed by nu. The data type again, open square bracket, the size, close square bracket, and a semicolon. You may notice that this looks similar to when we worked with the Random class. And that is because we're working with the array class. Once again, we'll get into classes more in later on. But for now, just know that this is how you're going to create a new array. So to keep things simple, let's go ahead and create an array to store three full members. So we're gonna say an open square bracket, close square bracket, numbers equals new. And open square bracket, close square bracket, semicolon. And now we have an array, the whole three integer variables. By the way, the variable is created in your array are gonna automatically default or initialized to a value as close to 0 as possible. So right now we have three integer variables that you will 0. And to prove this, let's go ahead and print out all of these out. Now to access a variable within an array, all you have to do is you're going to need the name followed by open and closed square brackets. And then inside those square brackets, you're going to need the index. Now, array start there indexing at 0. So if we wanted to print these out, we can say console dot write line. Then we'll just say numbers. And then square brackets. We're going to say 0 in order to print out our first variable. Then we'll just do the same thing for the other two. So now when our program runs, we're gonna create a new integer array called numbers. And that's going to hold three integer variables. And then we're going to print out all three of those integer variables on separate lines. So let's run our program. But you can see that we printed out 03 times. Now what if we wanted to change whatever variables here were equal to? We will change them just like we would any other variable. First, we're going to write in what we're talking about. So let's say we wanted to change our first variable. We'd say numbers, open square bracket 0, close square bracket equals, let's say ten. And now our first variable and R into re is equal to ten. Let's go ahead and set the other to equal the numbers as well. So saying numbers one equals five and numbers two equals 27. Then let's go ahead and print them all out again. I'm just going to copy and paste this code above. And you can see they've printed out 03 times and then 10527. Now let me just show you what would happen if we tried to access a variable and r array that did not exist. So say console dot write line numbers three. So because our array only has three variables and their index at 012, then there is nothing index three. And as you can see when we run our program, we're gonna get an error here. And it says that the index was outside the bounds of the array. Now I'm gonna go ahead and show you another way we could have done this. So let's go ahead and comment all of this stuff. And this time we're going to create the same exact array and set the number is equal to the 10527. Again, have our, we're going to do this all on one line. To do this, we're going to say int opening, close square bracket numbers equals new int opened and closed square brackets again. And then instead of putting the size in there, we're just going to put two curly brackets afterwards, and then a semicolon at the end. Now inside of these curly brackets, we're just gonna go ahead and insert the values 10527. And what this was going to do is it's going to go ahead and create a variable for each value that we type in and then set it equal to the value that we type. And because we were working with an int array, they're all gonna be integer variables. So I can say ten comma five, comma 27. And now let's go ahead and copy this code above. And then I'm just going to uncomment these lines down here and run a program. And as you can see, it printed out 10527, just like before, except we created this on one line. This is another way of initializing arrays that you may find more useful depending on your situation. Now, like I mentioned in the last video, both arrays in collections have multiple method which you can utilize to work with your collection of data. Show you an example of this. Let's just go ahead and write console dot, write line, numbers, dot. And as you can see, a whole list pops up here. And let's just go ahead and click on this, the length of the capital L. And now when we run our program, it's going to print out these three numbers here. And that's going to print out three being the size of our array. Now, there is a bunch of different methods that you can use, both with arrays into collections. And then it would take forever for me to go over all over them with you. So I highly recommend you look him up and just kinda glance through them so that you're aware of what's out there in case you were to ever need it in the future. Because there are multiple methods which you can utilize. The check things like the size F0 value is already within your group of variables. There are methods for sorting and a lot more. Anyways, that does it for this video. And the next video we're gonna go over multidimensional arrays. So thanks for watching, and I'll see you in the next one.
48. Chapter 9 (Collections): Multi-Dimensional Arrays: In this video, we're going to be talking about multidimensional arrays. Now, I found these pretty confusing when I first started. So I'm gonna go ahead and just kinda show you how a multi-dimensional array is laid out, as well as the syntax for r one. So hopefully when we start working with it, you'll understand it a bit better. Now in this example, we're going to be working with two-dimensional arrays. The maximum amount of dimensions you can have as 32. Now, odds are, you'll probably never need that many dimensions. And as you can imagine, that would be pretty complicated anyways. So the syntax is as follows. We're gonna say datatype, followed by an open square bracket, comma close square bracket. Then we're going to say the name equals new. Datatype. Opens her bracket. How many rows? Comma, how many columns? Close square bracket and a semicolon at the end. Now, this can be visually represented like so. On the first row, you're going to have 0 comma 00 comma one, then 0 comma two. And then on the next row you're going to have one comma 01, comma one, one comma two. And finally, you're going to have two comma 02, comma 12, comma two. So let's go ahead and create a two-dimensional array, the whole three rows, just like we did up here. Now, we can have as many rows and columns as we want it. But this would just be easier to visualize and work with when starting out. So we'll say nth, open square bracket comma close square bracket will say numbers equals new. And open square bracket comma three, close bracket semicolon at the end. So now we have an array of integer variables that is indexed lake. So now let's say we wanted to access the variable at this middle index here. Oh, you'd have to do is say numbers. Open square bracket, one comma one being our index. And then we can set it equal to five, for example. Now, we could go through and initialize each one of these individually to whatever we wanted. Otherwise they will default to 0. Or we could initialize them originally when we created our array. So let me go ahead and show you how that's done. First, let's go ahead and comment this out. Then I'm gonna say open square bracket, close square bracket, numbers equals new int, open square bracket, comma close square bracket. Then just like we did in the last video, we're gonna go ahead and create a set of curly brackets. And then simply insert the values which we want to initialize our variables to at the various indexes. So let's say we wanted to create an array of this size here and give each one of these a value from one. Nine. First we create another set of curly brackets to represent our first row. Then inside I'm gonna say one comma two, comma three. And then I'm gonna put a comma after that set of curly brackets and create another set. This will represent our second row. Lingo, say four comma five, comma six. And then I'm going to do it one more time. And say 78 comma nine. Then make sure you have your final curly bracket, as well as the semicolon at the end. Now, we could have made this as big as we wanted. I just wanted to represent what I had up here to make it easier for you guys. So now 00 or this one here is going to be equal to 101, will be equal to 202, will be equal to three. Because let's say here represents our first row, and each one of these represents a different column. This one here represents our second row. So these will be 456, and this one are third row. So the Zotero 789. Notice that we once again started at index 0 for both the rows and the columns. Now, what if you wanted to print out each of these values and this type of format, let me go ahead and show you how you can do that using surely. We're going to say four. And then to make things easier to read what's go ahead and say int rows equals 0. And while rows as less than three, because that's how many rows are in our array. And almost say rhos plus plus. Then inside of the for loop, we're just going to create a, another for loop. So we'll say for n columns equals 0 and then walk columns as less than three columns plus, plus. Then inside that for loop, we're going to say console dot, write numbers, open square bracket, rows, comma columns. And then don't forget the semicolon at the end. Now, remember we couldn't name these variables, whatever we want it. I'm just naming them rows and columns to hopefully give you a better visual understanding of what we're doing here. Then below that for loop. And in our first for loop, we're going to say console dot write line. And just leave it at that. And now let's go ahead and run a program quick. And you can see that we've printed out 123 on one line, 456 and another, and 789 on the next. And if you're unsure why this happened, let me go ahead and go over this with you. So when our program ran and it created a new two-dimensional integer array called numbers. Then we give it three different rows, as well as three different columns. And then we set those values equal to 123. Okay, so this one equal to 123456789. Then in our for loop, we created a new integer called Rose and set equal to 0. And we said, Wow, Rouse is less than three. And then every time I ran through our upper lip, we wanted to increase, rose by one. Now we set this number equal to three and based on how many rows we had. Then inside of that for loop, we created another for loop with an integer called column my set that equal to 0. Then we said, well, cams is less than our total number of columns being three. And then every time I ran through, we wanted to add one to columns. Then inside of that Farley, If we wanted to just write out numbers being our array, rows, comma columns. So the first time through Rose was equal to 0. N columns was equal to 0. So it's going to print out one. Then this for loop isn't done. So it's going to run again. And when it runs again increases columns by one. So our Rose was still 0 in columns was now one. And now it's printing out this index here being the value two. And then it did the same thing, but increased columns again. So now we're printing out the index 02. Then once this was finished, we went down to a new line. Rose was increased by one. We did it all over again. So now our rows here, there's going to be one. So we're going to be printing out the value at index 10. Columns will increase, 1-1, cams increases again, 12, etc. And we do that one more time. Anyways. But does it for this video. And the next video, we're going to be talking about less, which is going to be our first collection. And it'll allow us to work with a group of variables and dynamically change the amount of variables within it. Thanks for watching, and I'll see you in the next one.
49. Chapter 9 (Collections): Lists: In this video, we're going to be working with our press collection being list. Now, unlike arrays, let's allow you to work with a dynamic amount of variables. So you want to use them when you are unsure of how many variables you'll need or when you'll need to add or remove variables. I, well, the syntax for list is as follows. You're gonna say list. The less than symbol, the datatype. The greater than symbol, followed by the name, an equal sign or the assignment operator. New list. The less than symbol again, followed by the data type. The greater than symbol, open and close parentheses and a semicolon at the end. Notice that we did not specify the size, and that is because there is no need to. So let's go ahead and create a less the whole three whole numbers. And I'm going to show you a few methods you can use in the list class to work with your group data. So we're gonna say list with a capital L less than and greater than. Numbers equals, new, list, less than and greater than, open and closed parentheses, and a semicolon at the end. Then all we have to do is add in three integer values that we want in our numbers list today. So we're gonna type the name of our less being numbers, followed by the member access operator for a period, followed by add with a capital a, as this is the name of the method. Open parenthesis, the value. And we want to answer, I'm gonna go ahead and say it 33. Close parentheses and a semicolon at the end. And we're gonna do the same tensor tumor numbers. Let's go ahead and enter at 6699. Then we can access these values the same way we did with our array. So let's say I wanted to print out all three of these on separate lines. And you can say console dot write line numbers, open square bracket 0 or the index and the very first variable, close square bracket. Then I can go ahead and copy this twice and just change the index here, 212. Now when I run my program, it's going to print out 33, 66, and 99. Then I just wanted to go ahead and show you a few more methods we can use with our lists. So let's go ahead and say console dot, write line numbers, dot count. And this is going to print out three as the size of our list. So I'm just gonna go ahead and add some pseudocode here. We'll say print sign. Then I'm going to create a blank line by just saying console dot write line. Then let's say I wanted to remove one of the values from my list. Well, I could say numbers dot mu, open parentheses, and then I can just type in the value that I want to review. So let's say I wanted this to look for the value 66 and our movement. 66, close parentheses and a semicolon at the end. Then I'm gonna go ahead and print down number is at index 01. Again. However, I'm not going to print out number is at index two because now there won't be a third index. So I'm going to say console dot, write line numbers, open square bracket, close square bracket, and do the same, print X1, and run our program. And as you can see, we've created a list called numbers that have integer values. We added the values 33, 6699, which are automatically sent to the indexes 012, is that is the order in which they were added. Then we printed them out on a different line. So he said thirty three, sixty six, ninety nine. Then we printed out how many values where NR list using the count method, which was three. Then we remove the value 66 from our list. So from the first occurrence of that value and remove it. Then we printed out number is at index 0 again and numbers and index one. We're now 33. And then because 99 was now the next value is 66 was removed and printed out 99. Now, another way of printing out values in a collection of variables like this would just be to use a for loop. We could say for i equals 0, i less than. And then we can just put in how many values are gonna be in the collection. And instead of putting in a static number, we can just based on whatever it is. So you'd say numbers, dot count, and that way, and we're always working with the correct size. And let's say I plus, plus. And then inside the for loop will say console dot write line numbers. And then inside of our square brackets, we're just going to answer, I am just going to go from 0 to one less than the max value. So in our case, so it's gonna go from 0 to one because there's only two values, which is perfect because those are the indexes in our collection. When I run a program, you can see that we're going to print out 3399 twice. And I'm just gonna go ahead and move this one here. And then to show you that this would work for up here, let's just go ahead and remove this as well, and copy our for loop. And then when we were in our program, you can see that that works just as it did before. Then I'm going to go ahead and add some pseudocode for may often statement here. And I'm going to say for mu first occurrence of value. Now we also have another way of removing values from our collection using the remove method. And what this does is it removes a value at a specified index. To do this, we're going to say numbers. Remove that with a capital RNA. Open and close parentheses and a semicolon at the end. And inside those parentheses we're gonna simply insert the index. So let's go ahead and insert the index one. And I'm gonna go ahead and comment out our numbers dot remove line up above. And now when we run our program, and it's going to print out thirty-three, sixty six and ninety nine. It's going to print out the count. Again being three. It's going to create a blank line. And then we're removing the value at index one, which is going to be 66 because we have 012. And just like before, if we copy and paste our for loop, it's going to print out 33 in 99. And as you can see, it does exactly what it does here at the end. Now once again, there are multiple methods you can utilize what's collections. And I'm just going over some of them with you. But they still highly encourage you to go and look at all of them for yourself, seeing what's out there. Then I'm gonna go ahead and remove everything except for our list and the three values we added, just to clean things up here. So let's quickly go over just a couple of more methods. First, give the clear method, which removes all of the values from your left. To do so, you simply type numbers clear, followed by open and close parentheses and the semicolon at the end. Then I'm gonna go ahead and add another value, two or less. So I'm gonna say numbers, add ten. And I'm gonna go ahead and print out all of the values and unless using a for loop. So I'm gonna say for int i equals 0, i less than numbers dot count I plus, plus. And then I want to print out numbers index i. Now when we run our program, you can see that it's only going to print out ten. And that is because it is the only value and our numbers list. Now what if I were to come out this value here is going to simply print out nothing. Notice that we did not get an error. This is because numbers was now equal to 0. Because 0 is not less than 0 are surely didn't even run. Making this a safe way to print out the values in your collection. Then the last month that I wanted to show you is the insert method, which inserts an element at the specified index in the list. First, let's go ahead and remove this code up here. Then T is they insert method. We're going to say numbers, dot insert, followed by an open parenthesis and the index we want to insert it at. Let's go ahead and say one comma, the value. I'm gonna go ahead and say 22. Close parentheses and a semicolon at the end. So currently we have the value of 33 and index 066 and index 199 and index two. And let me go ahead and add a few comments here just to help show that. And now when we add in the value of 22. And then next one, what's going to happen is 33 is going to stay at index 022, is going to become the new index1. And then 6699 where we pushed downwards, making 66 index 299 and X3. Then let's go ahead and run our program. And as you can see, we've printed out 3322 because this was an X1, 66. And then lastly, any night. Anyways, that's it for this video. And the next video we're going to be working with the collection class, which stores elements in a first-in, first-out style. Thanks for watching, and I'll see you in lecture one.
50. Chapter 9 (Collections): Queues: In this video, we're gonna be talking about the queue collection type, which stores variables and a first-in, first-out style. Now the syntax for a queue is as follows. You're gonna say Q, the less than symbol, followed by the datatype. The greater than symbol than the name, followed by an equal sign or the assignment operator. Q. The less than symbol, Q, less than our data type again. And the greater than symbol, open and close parentheses and a semicolon at the end. Then let's go ahead and create a queue, the stores three whole numbers. So say q, less than and greater than. Numbers equals Q, open and close parentheses and a semicolon at the end. And notice that this looks exactly like a list, except we say queue and instead alleged. Now let's go ahead and add in three numbers. And I just want to remind you that you can name your collections whatever you want, and you can have any data type as well. So I'm gonna go ahead and say numbers. Dot n q as this is how you add a file to a queue, open parentheses. And I'm just gonna give it the value, one, close parenthesis and a semicolon at the end. Plan and create another one and set that you will have a tail and another one equal to three. Now, remember that a queue stores variables and a first-in, first-out style. You may see this ran as FIFO, FIFO. So what does this mean exactly for us? Well, it means that when we access values from our queue, we're going to get the very first one we put in to show you this. We're gonna go ahead and print out the first value put into our queue, or the value at index 0. So I'm gonna say console dot write line numbers with a capital P and open and close parentheses. Now when we run our program, it's going to print out one as this was the first value inserted. So the peak method returns the object at the beginning of the queue without removing it. Then I'm gonna go over the dequeue method with you. This is the main way in which remove values from your queue. So I'm going to say console dot write line numbers, dot dq with capital D, open and close parentheses. So when our program runs, it's going to create a queue, which in our case is a collection that holds integer values. Then we are going to enter these three integer values into it. Or an enter one at index 02, at index 13, at index two. Then we're gonna go ahead and return the object of the beginning of the queue. But we don't want our movement. We just want to look at it. Alright, we just want to peek at it. So it's going to print out one. Then it's going to run this dequeue method. Now what the dequeue method does is it's going to not only returned the object at the beginning of the queue, but it's going to remove it. Well, then I'm gonna go ahead and comment that out. And I'm gonna go over another method with you, which is just the clear method which we've used before. So I can say numbers that clear with the capital C, open and close parentheses and a semicolon at the end, unless you remove all of the objects from the Q. K works just the same way as it did with the list. Anyway, singling out and comment that out and add some pseudocode here. Remove all objects from a. Then let's just go ahead and print out the rest of the values and our queue. To do this, I'm gonna go ahead and create an integer and set it equal to the total amount of values in the queue. And I'll explain why in a bit. It's going to say n objects in numbers. And set that equal to numbers dot count. Then I'm going to say for int i equals 0, i less than objects in number I plus, plus. And then I wanna print out numbers dot dq. Now, just to point something out, quake, technically this count here as a property and not a method. This was why it doesn't have parentheses at the end of it. Now, we will be going over properties later on. So right now, do not worry about it. I simply wanted to make you aware of why it looks different. Now the reason we did this is because how do we set our condition to be i less than numbers dot count. The problem is it would constantly changed every time our for loop brand because we're removing one from numbers. So let's say we went ahead and set a integer equal to the amount of values in our numbers Q. Yes, we could have just typed three here. However, if we ever wanted that change, our Q, and this would work dynamically. Then let's go ahead and run a program. And as you can see, it's going to print out one because we peak data here and then 123 as they were removed. And notice that this dequeue method doesn't take an index at all. It just simply returns and removes the object at the beginning of the queue. And that is one way you can tell that we are in fact removing these values as because we didn't insert an index. And that's just removing the first object. You can see that the first object subtly change from one to two to three as each of these was removed one of the time. Anyway, so that is it for this video. And the next video, we're gonna go over a similar collection. However, this one is called a stack and a stores values in a first in, last out style. Anyways, thanks for watching, and I'll see you in the next one.
51. Chapter 9 (Collections): Stacks: In this video, we're gonna be talking about the stack class. Now, a stat collection is used to store values in a last-in, first-out style. The syntax for a stack, as those fellows, you're gonna say stack less than symbol, datatype greater than symbol. How by the name. Then the equal sign or the assignment operator. New stat. Less than symbol, the datatype again, greater than symbol, open and close parentheses and a semicolon at the end. Let's go ahead and create a stack. The holds three whole numbers. We're gonna say stack less than, greater than numbers equals new stack less than, greater than open and close parentheses and a semicolon at the end. Notice that this looks exactly like a queue except this stack instead. And just remember that a stack stores values and a last-in, first-out style. Now to add values to our stack, we're gonna use the push method. So we're gonna see numbers, dot push, open and closed parentheses, and a semicolon at the end. Then in-between our parentheses, we're simply going to insert a value. So, so say 24. Then I'm going to copy this twice. Then for the second value, I'm going to say 67. And last one, I'm gonna say 98. Now, you can imagine a stack, a stack of cards, or a stack of blocks, whatever works for you. So I can say bottom card, middle card, top card. And this is where this last-in, first-out comes in play. So imagine if I had a stack of cards and I set down my first card, my second card, and my third card. Now I know these numbers aren't really in a deck of cards, but bear with me. Now when I pick up these cards, I'm a pick him up in a last-in, first-out style, right? Pick up the top card, then the middle card, done the bottom card. So the first method we're gonna go over again is the count method. So let's go ahead and print that out. Let's say console dot write line numbers, dot count. And this is just going to print out three because that's how many elements are objects in our collection. Here are our stack. We also have the clear method which removes all of her objects from the stack. So I can say numbers clear. And this would remove all of the objects. Now, just like we had in the queue, we also have the peek method. So I could say console dot write line numbers dot P. And now when I run my program and set up a printing out 24, like it did in the queue. It's going to print out 98. And that's because it stores things in a last-in, first-out style. So just like a deck of cards, if I wanted a peak, I'd be peaking at the top card or the last one I put down, which is going to be 98. Okay. So we printed out the size of our stack being 39, printed out 98 being the tab card. And we just peaked at it, right? So imagine if you're handling a deck of cards, any peak at the top card. If I peak as the top card, again, it's not going to change. So if I copy and paste this line here and run our program again, and it's gonna say 98 twice. But what if I populate card right out of the deck? I can do that using the pop method. I can say console dot write line. Remember is dot pop. And then search with a capital P with open and closed parentheses. Now at this method does here is it's going to return the object at the top of the stack and remove it. All right, so it's just going to pop it right off the top. So if I were to pop this top card off the deck, now, this is my top card right? So far to peak again. So it's a console dot write line PQ. What's going to happen is first we're going to peak at a card and it's going to print out 98. Then we're gonna peek at it again, and it's obviously going to be 98. Then we're going to pop the top card right off. So we'll pop unless when I'm 98 gone, we're also returning it. So we're printing that out for us because it's an R console dot write line method. And we just written this without the console dot write line and wanted a printed to the console, it just would've been removed. So we printed out 983 times and we finally got rid of it. And now when we peek at the top of the debt, we're actually going to be looking at this 67 cuz the next card in the stat. Go ahead and run a program. Printed out the count 3983 times. We got rid of that. 98. We picked up the top again, 67. Now let's go ahead and get rid of all this extra code here after our last push. And we'll say, and we'll say int objects in numbers, numbers, dot count. Then we're gonna create a for loop, just like we did before. And we're going to say int i equals 0, i less than objects and numbers. And once again, we're doing it this way. So this works dynamically. And because numbers dot count would constantly change as we use the pop method. So we're going to say i plus plus console dot write line numbers that pot, open and close parentheses. And when we run our program, and it's gonna say 98 because that's the top card. Get rid of it. 67, get rid of it. 24, get rid of it. And as you can see, exactly what it does. Ninety eight, sixty seven. Twenty four. Now, let's just say we wanted to peek at the top again, and there's nothing in there. Well, if I were to say numbers dot py and run our program, you can see that I get an error. And that's because the stack is empty. Lists just can't happen. Now, same type of deal. What happened with the Q? Now there are methods similar to our try parse method that we used in the past to a check whether r, q, r, stack, etc, is empty so that we know whether or not that method will run innocuous and error before using it. And once again, I highly encourage you to go through and look at all the different methods available for the different collections that we go over. Anyways, that does it for this video. And the next video we're going to be talking about for each loops, which is a loop specifically designed for working with collections. Anyways, thanks for watching, and I'll see you in the next one.
52. Chapter 10 (Foreach Loops): Intro To Foreach Loops: We're gonna be talking about for each element in a collection, a collection you are using. Now, mixing collections with loops really opens up the possibilities for you. We've already looked at printing things to console with the collection. Elliot. However, I'm gonna give you a few more examples of things you can do. For example, let's say you were making a game and you wanted a breakable glass window. When the object or the glass was shattered, you could swap it out with a similar object that is broken up into multiple pieces. Then if you have all of those pieces and a collection, you can iterate through them and not forced to them in the direction that you want. You can accordingly. And as you go through these next couple of videos, I highly encourage you to think of more ways. You can use loops and collections together. Anyways, that does it for this video. In the next video, we'll be creating a collection and working with it using a for each loop. And then I'll show you how we can do the exact same thing using a for loop. So thanks for watching, and I'll see you in the next one.
53. Chapter 10 (Foreach Loops): Foreach Loops & (Loops & Collections): In this video, we're going to be talking about mixing loops in collections and also creating our very first for each loop. So the first thing we're gonna do is create an integer array just like we have in the past, with threefold numbers. So we're going to say open and closed square brackets. Numbers equals new int, open square bracket, three, close square bracket, semicolon. Next we're going to set each one of our three integer values and our numbers array equal to 5. First, let's go ahead and do this with a for loop. So we're gonna say four, open parentheses, n i equals 0, semicolon i less than numbers dot length, semicolon i plus, plus. And then make sure you have a closed parenthesis at the end. And inside the body of our for loop, we're simply gonna say numbers. Open square bracket, I, close square bracket equals five semicolon. Then let's go ahead and print out all of the values in our array using a for loop as well. To do this, we'll just copy and paste our for loop. Down below. Then inside the body of our for loop, we're going to erase those code here and say console dot write line numbers, open square bracket, I close square bracket. Now when we run our program, it's going to print out 53 times. Then let's go ahead and comment out folkloric for-loops. And we're gonna do the same exact thing using a foreach loop. Now real quick, let's go ahead and go over the syntax for a foreach loop. The syntax for a, for each loop is as follows. You're gonna say for each open parentheses, the data type, you want to check for. The name. You want to work with. The name of the collection, followed by a closed parenthesis. And lastly at the body at the end. Then to set all the values and our numbers array equal the 5. First, we're going to have to go ahead and create a variable to iterate through the index of our array. So let's go ahead and say int i equals 0. Then we'll create our foreach loop. So we're gonna each. Then, because our array works with integer values, we want to say for each and then copy the element name. We'll simply say number in numbers. And then opened and closed curly brackets down below. So let me kinda go over how this works with you. We're basically saying sure, each integer in our numbers array, we want to create a variable called number and set that equal to the element which our loop is currently looking at. So. I'm going to say numbers. Open square bracket. I close square bracket equals five. Then on a separate line, I'm going to say i plus plus semicolon, then a for each loop as kinda run one time for each element it found of the data type that you wanted it to check for. So now our loop is basically going to say numbers indicate 0, set that equal to five. Then it's going to increase i by one. And do it again. And then it's gonna do it one more time. Because there's three total elements in our array, the integer data type. And it'll say numbers two equals five. Then let's go ahead and print out every single element in our array, just like we did before using a foreach loop. And we're gonna go ahead and do this in a separately again. So we're going to say for each open parenthesis. And what does say num in numbers? Close parentheses, open and close curly brackets. And then inside of here, we're simply gonna write console diary line num. And now when we run a program, it's going to print out three times just as it did before. Now, let's go ahead and look at the differences between our for-loop and a for-each loop. First, let's start with assigning each value equal to five. So in our for loop, we were easily able to create a temporary variable for us to work with for index. Also, we were able to run our code as many times as we want it based on a condition rather than for each element in the collection of the data type we specified. Then we bring it with either increase our index by one outside of our code. Which is why I find that a for-loop is much more readable and a better suited for assigning values to a collection. That's what they're for each leaf, we had a creative variable outside of our loop, in our case, making it available everywhere within our main method from its declaration done to this closing bracket down below. But other than that, the code is fairly similar. And also, if you remember, in the last video, I showed that a for each loop creates a copy of the collection and then uses that for its operation. Which is why we didn't simply set number equal to five as this one. I'm going to actually change the values of our collection. This only what a change that current value number. By the way, this name here can be whatever you want. Just realize that this is what you'll be using to work with the elements in your collection. Also, it is a local variable. Therefore, we could use the same name twice. How do we want to do? Now, let's look at the differences for when we printed out the values in our collection. In this case, I personally find that the for-each loop looks a lot cleaner. For one, a reader of your code can immediately tell. So we wanted to do something for every single element in our integer array as we have our entry here. And we said that we wanted to work with every integer value and our numbers array. Then we didn't have to bother. Creating a variable that work with for index or specifying the index at all. Because a for each loop simply created a copy of every single value in our numbers array and name that copy numb. For each iteration of our loop. We are simply able to say console dot, write line num and print out each of the values in our array. Whereas with our for loop, maybe create a variable to work with for index. Then we had to say that we went to doing crease this index value by one after each iteration. Basically setting our index equal to every value from 0, numbers dot length minus one. As our condition checks the i is less than numbers not win. Then we printed out members at index i. So whether or not you want to use a for loop or a for each loop is just going to depend on your situation. But when simply wanting to do something with your collection, other than changing the values directly. Normally, I use a for each loop. So if we now you have a bit of understanding between the differences of the using a for-loop and a for-each loop, as well as an understanding of how to create a for each loop of your own. Lastly, I just wanted to show you what I meant when I said a for each loop, clones a collection for its operation. To do this, I'm simply going to change those code here. So I'm gonna say number equals five. And as you can see, we get an error. And it says that I cannot assign to number because it is a four each iteration variable. Which is why for us to assign values to our collection. We have to do it this way and directly work with the value at a specified index in our collection. By the way, if we were just using an array as an example, we could have used a another datatype, such as a class or a float, or a double, etc. Now I know you guys don't know a whole lot about classes or objects yet, but we'll be getting into them in the last chapter coming up here shortly. And I just wanted you to be aware that it was possible for future reference. Now here's a few more differences between a for loop and a for each loop. Now a for each loop, really isn't it best when you want to modify the array itself? As you can see here, the for loop is much cleaner. Also, a foreach loop only iterates forward, whereas with the for loop, we could iterate backwards. For example, to do this, we could have said int i equals number dot length minus one. And then over here said I minus minus, and then change sir condition accordingly. Lastly, let's go ahead and create one more for each loop to determine the highest value in our collection. First things first, I'm gonna go ahead and delete this for each loop, index i integer. Then I'm going to change the size of the array to be a 100. And then I'm going to set each of the values in our array equal to random number. To do this, I'm going to create a new instance of the Random class. So I'll say random num value. Random. Then we'll create a for loop to say each of the values in our array equal random number. So we'll say for i equals 0, i less than numbers dot link i plus, plus. And then said earlier, we're simply going to say numbers equals num value. And actually let's go ahead and rename our random class instance to random value just to make it more clear what we're breaking one. So a right-click on it, click rename, and then we'll simply edit the name. So I'm gonna say random value and I enter. And as you can see, a change both instances. If you're not working in Visual Studio, you'll have to change them separately. Then we're going to create an integer variable called max value, Masada equal to 0. And lastly, we'll create a for each loop to check for the highest value in our array. So we'll say for each value in numbers. And then we want to check if a value is greater than our current max value. So we'll create an if statement and say, if value is greater than max value, then we simply want to change max value equal to value. So now when we run our program, we are going to be creating a new integer array called numbers that holds a 100 integer variables. Then we create a new instance of the Random class called random value and recite each of our values, our array equal to a random value. Then we create an integer called max value that we wanted to hold the highest value in our array. To check for this, we created a foreach loop called value. And we said for each integer and our numbers array, we wanted to check if the value or the current element we are working with an array is greater than max value. And remember r for each loop only iterate forward. So essentially what we're saying is if numbers at index 0 is greater than max value, then we're going to set max value equal to value. And then we do this again for index one through 99. Then we printed out all of the values in our array. Then just sorting out, working with insanely high numbers. Let's go ahead and inside of our parentheses here, um, our next method. And we'll go ahead and say 0 comma 101. And now we're only working with numbers between 0. And lastly, at the bottom, I'm gonna go ahead and print out maxval here. You're going to say console dot, write line. And then quotation marks. I'm going to say highest value colon with a space. And then I'm going to max value. Then when I run my program, we're going to print out a 100 numbers between 0. And we're going to print out our highest value, which in our case was a 100. And as you can see, we have a 100 right here. Now, if we run it again, you can see that our highest value this time was only 99, as it appeared here. Anyways, that is it for this video. And the next video, we're going to be talking about another collection being a dictionary. So thanks for watching, and I'll see you in the next one.
54. Chapter 10 (Foreach Loops): Dictionaries: In this video, we're going to be talking about another collection called The Dictionary collection. And then C sharp, it basically works the same as an English dictionary, where you have a collection of keys and values. The queue would be the word and the value would be the definition. And you can use these, restore all kinds of things. For example, you could use it to store items in the game where you have the name of the item ID, you can use it to create a phonebook where you could use their name as the key and their phone number has the value exedra. Anyways, let's first go over this syntax for a dictionary. So you're gonna say dictionary less than p, data type, value, greater than, followed by the name, the equals sign for the assignment operator. Then new dictionary, less than the key data type again. Comma the value data type again, greater than opening, close parenthesis, and a semicolon at the end. Then, for the sake of simplicity, let's go ahead and create a dictionary. And it works just like a phone book. So we're gonna say dictionary less than now and I'll say string comma lung, which has a larger version and an integer variable. The greater than symbol. And we'll call this fun but nail dictionary. Less than string again, con left long and again, the greater than symbol, open and close parentheses, and then semicolon at the end. So now that we have our phone book, let's go ahead and add three names and numbers to it. Now by the way, just so that there was with the rest of the collections, there are multiple methods that you can use what the dictionary, and I highly encourage you to look them up. See, you know, what is available to you. But let's go ahead and go over a few of them. So the first one we're going to use here is the add method. So one of the type in the name of our phone book, so it knows what we're referring to, which in our cases, phonebook dot or the member access operator. Then we're going to say Add, look a capital, a, open parenthesis. Say in quotations. John Glenn, after our quotation marks were gonna say comma. Then we'll say 555555555510 of them altogether. And go ahead and do the same thing again. So for this one's will say Jane comma, and then we'll do 107. Land-holding this one last time. Sally And we'll do 109. Now to access a value inside the heart dictionary. Instead of inserting an index, we simply want to give it the key. So for example, let's say console dot, write, line, phone, book, open square bracket. And then we'll say John. Then a close square bracket at the end. And now when we are in our program, it's going to actually print out 510 times because this is the value associated with a key. Jon. Now what if I wanted to print out every single item inside of our dictionary here? Well, the easiest way to do this would be to use a for each loop. So let's go over how to do that right now. We're going to say for H and M parentheses, we're gonna say key value pair with a capital at the beginning of each word there. The less than symbol. Then we're going to simply copy the data types that we used for the key and the value. So I'll say string comma lung, the greater than symbol item. And we'll say n number. Then in the sight of our foreach loop will simply say console dot write line. Then we'll say item value with a capital V. Now when we run our program and it's going to access the value inside of each of our key value pairs, which is what a dictionary's stored. So currently and we have a dictionary called fun bug. The stores key-value pairs, including a string and alone. So now we're saying for each key value pair and my string, and along in our phone book, we want to create a replica called item. So sorry we said console dot write line item, and then we got the value out of it. So now we're going to simply print out all three of these values. Notice that we've printed out high as ten times, twice, and that's because we also printed up here. You can also use item.quantity to print out the key, and I'll show you that now. So change lists the key with a capital K and run a program. And as you can see, we've printed out John Jane sound. Now, let's just make this look a little nicer here. So in quotation marks, and we'll say name, colon, open curly bracket, closed curly bracket, number, colon, open curly bracket, one, close curly bracket. And after a quote will say comma item.quantity, item.name. And I'm gonna go ahead and insert a backslash t just to create a little more space there so that it looks a little nicer. Then I'm gonna go ahead and go over three more methods with you. The first one we're gonna go over, isn't there a remove method? To remove an item? You're a dictionary. You're simply going to say the name removed. And then end parenthesis, just taped the key. So we can say John, for example. Then if we copy and paste our foreach loop. And what's delete this console dot write line up here. You can see that when we run our program, we printed out John, Jane and Sally. Then I'll meet Jane and Sally as John was removed. Then our last team methods are going to check whether a key exists or whether a value exists inside of our dictionary. Key exists equals false. And I'll say value equals false. Then we'll simply say contains key with a capital C and K. And then in parentheses, we're gonna type in the key that we want to look for. In our case. Let's go ahead and say Sally. Inside of her statement. Let's go ahead and print out key. So what's happening here is it's going to look in our dictionary called phone book. It's going to check if it contains a key using this contains key method. And it's going to check whether it contains the key. Sally. If it does contain the key, then we want to print out key access. But before we print out keys us, we want to change it to true. So I'll say kx equals true. Then let's just go ahead and copy and paste our IO statement down below. And instead of contains key, we're gonna say contains value. And in this one, we're gonna go ahead and check for 107. Now, as you can see, it automatically lets us know that value as a long, and therefore, we can't answer this string here because you cannot convert from a string to alone. So we go ahead and delete that. And then we'll insert ten 7s. Now to avoid any errors, I'm just gonna go ahead and copy and paste our value from up above. And we want to change our bull here to value exists. And set that equal to true. If the statement is true, then let's take one last look at our program. So first we created a dictionary called phonebook that holds a string for a key in a long, for a value. Then we added the three key value pairs, but using the add method. So you add the key Jon with a phone number of all fives. And we did the same with chain and Sally and gave them their own values. Then we said for each key-value pair of a string and along in our phone book or a dictionary, we wanted to write out name followed by the item's key. Then we wanted to print out number followed by the item's value. Remember that we only said item because that is the name we gave up here and our foreach loop. Then we use the remove method to remove the element with the key john fen, we copy and pasted our foreach loop. Notice that we were able to use the same name twice. This is because this is actually a temporary variable being used in reference to the copy and lard collection during our for-each loops operation. Then we created a bull called co-exist and set it to false. The another bull called devalue exist and set that to false. When we said if it contains the key Sally, We want to cite key exists equal to true and then print out key exists. Then lastly, we said if fun but contains those value of ten sevens. So we want to set value exists equal to true. And then we actually want to print out the value exists. Right? Now, when we run our program, we can see that we printed out all three of her elements in our dictionary. Then, because I removed John, we only printed out Jain and silent. Then we printed out true twice as both the key and the value of ten 7's also gives us, anyways, that's it for this video. In the next video, we're gonna be talking about enums. So thanks for watching, and I'll see you in the next one.
55. Chapter 11 (Enums): Intro To Enums: In this video, we're gonna be talking about enums are the enumeration. Not only is this a new datatype pressed to work with, but it is also our first user defined data type. And we'll go over how that works and how that comes into play in the next video. And this is basically a named constant. And if you remember, a constant is a variable that cannot be changed. So for example, we can't, and let's just call this number equals ten. Now, if I were to try and change number two, you can see that I get an error. And that's because this is not a regular variable. Meaning once it is defined, that cannot be changed. Also note that they must be given an initial value. So I couldn't declare it and then initialize it later. Now, personally, I found it extremely hard to understand when I first started, which is why I put them off till this point. So that hopefully there'll be easier for you to understand. And I can give you a good example of how and when they're useful. Anyways, that does it for this video. And the next video, we're gonna go ahead and create our very first. So thanks for watching. I'll see you in the next one.
56. Chapter 11 (Enums): Creating An Enum: And thus what we're gonna be creating our first the_num. Now the syntax for an ENM is as follows. You wanna say hello by the name, an open curly bracket. Then you're gonna have your first named constants, then your second named constant judgement. And each of your constants there's going to be separated by a comma. Then lastly, you're gonna have a close curly bracket at the end. So let's go ahead and create an ENM that holds a list of weapons. So we're gonna say enough. Weapons. Also note that the proper naming convention for an enum and C-sharp as pascal casing, meaning we're going to start the first word with an uppercase, as well as every subsequent word and the name. Then we'll have an open curly bracket. And just like we would with any other constant, you want to use pascal casing for the names of each one of these as well. Crystal, salt, sleeper, grenade. Also, notice how we'd have an area here. That's because you cannot define an enum inside of a method. Instead, we have to define it inside of our class. So let's go ahead and cut this and paste it in our class. Now, remember how I said that an enum is a list of unnamed constants. As you can see here, when we mouse over each one of our constants, you can see that it says weapons 0.9c equals 0. The next one, so there's 1234 and it would just keep going on LinkedIn. We had more of them. So it starts at 0 and it counts up by one. And this is using the integer type. Now if we wanted to use a another integral type, we could specify it like so. After a name, we could put a colon. Then the type we want to use. For example, I could say, right? So now we have an enum called Weapons, has a bunch of named constants of the byte tight. Now remember by default, this is of type int. Alright, so I'm gonna go ahead and remove that. Next. I wanted to show you that we can actually change the values in the background of our constants. To do this. And we have to do is say equals after the name of our continent and then give it a value. So let's say I wanted to sudden 95. And now each one that we didn't define, then it's just going to count up by one. So as you can see, 9P equals 55, SL equals six, sorry, equals 57. Thanks Sandra. Now, what if we assigned a sorry, hotel guy, you as well? Let's say, Sure. Well, we're gonna go from 5556 back down to four and then it's just going to keep coming up as the rest were not defined. So it just goes off the last defined constant and then adds one to each of the following. So we're going to go for sex. Next, I'm going to show you how that access any of them. So for example, let's say we wanted to print out sniper. I can say console dot write line. Then I simply type the name of my enum, followed by the member access operator or a period. And as you can see, a list of all of my constants. So there's just going to pop up for me. And I can just scroll through these using the arrow keys. And I can see those value associated with them as well. So I wanted to print sniper. I could either click on it or hit enter. And then just run my program. You can see printed out right there. So another thing to know as the Visual Studio automatically put all my constants in alphabetical order for me in this list. Next, I'm going to show you how we can go from an enum back to1 and has led us the data type that we're using to do this. Let's say int weapon equals. Then we want to do a cast. So we're gonna need to open and close parenthesis. Then we want to convert it to an int. So will simply type int inside of our parentheses, followed by weapons or the name of bringing them dot, then we simply select one. So let's say I wanted to get the value of assault rifle. And you can see right here this four. They're the semicolon here at the end. Then we'll just print out weapon. Now when we run a program. And you can see that we've printed out sniper four. Notice that when we indirectly accessed our enum, that we got the string value of rate constant. Next we're gonna go over how to go from an int to any of them. So first we want to create an instance of our enum. So I'll say weapons. We'll call this primary. And we'll set it equal to the cast weapons held by a value. In this case, we'll say for now we're going to pick this integer thing, the value for, cast it, the type weapons. Then it's gonna find assault rifle, is that as our constant with a value four. And it's going to put it inside of our instance of our enum called primary. Notice that we made this variable just like we would any other, started with a data type thing of type weapons, followed by the name. Then we can simply print out. And as you can see, we've printed out this. Alright, well, now what if I went to, went with a constant value that wasn't in our enum list. Well, let's try it. Let's go ahead and set our 47 and run the program. Now has you see, all it did was it actually just print it out. And that's because we made an instance of our enum called primary. And then we just set it equal to a constant value. However, it doesn't have a spring or a name associated with it. And therefore, it just printed out seven. Now, but if we tried to give it a value that it cannot hold like 7.2, for example. And ran our program, it would have just been casted to an integer type. That's another slip types that are in m holds. So as you can see, a truncated off the 0.2 and we simply printed out seven. You can see that that is what is happening by changing this to something like 7.9 and running the program again. And I will still print out seven. Anyways, I'm gonna go ahead and remove all over those code except enum itself. And we're gonna go ahead and create an array of our enum type. So we'll say buttons, open square bracket, close square brackets. We'll call this primary agains equals new weapons, open square bracket, and we'll say three to give it a size. Close square bracket, and I'll give it a semicolon at the end. Then we simply assign the weapons in our array to values just like we would any other array. So we'll say primary open square bracket 0, square bracket equals weapons dot a salary from, for example. Then what's going to print out all of the values in our weapons array. Just to show you what it would look like. We'll simply say for each weapons, for the type we want to work with. Then from my element clone name, I'm going to simply say weapon in primary. And all I wanna do is print out weapon. Then I'll run our program. And as you can see, we printed out a SHA rifle and then we print it out 0 twice. And that's because there is no constant are enough here. That has the value 0. But what if I were to change grenade equal to 0, giving our 0 constant a string to associate yourself with. Well, we can run our program again. Now you can see we not printed out assault rifle and Len grenade at twice. Anyways, does it for this video. And the next video, we'll be talking more about how enums are useful, as well as going over an example that shows us exactly why they're useful. So thanks for watching, and I'll see you in the next one.
57. Chapter 11 (Enums): Using Enums: In this video, we're gonna be going over an example that shows us exactly how the NY Times are useful, as well as talking about when you should be using any of them. Many times when you have a list of values and you only want to be able to set something equal to one of them and the values will be constant. You're going to want to use enums. This is because they're more readable than an actual list of constants. And because it protons, a lot of possible errors, which you'll see here in a bit. So let's go ahead and go over an example of this. First, let's create our Ina. So we're gonna say weapons, open curly bracket. And I'll say nine. Assault rifle, sniper, shotgun. And we'll put a close curly bracket. Now, let's say this was a list of weapons you have in your game. And you can use this for days of the week or a west of items, a set of dog breeds or whatever you wanted. But we're just going to use this as an example. Now, let's say you wanted to do different things based on what weapon character was holding. Now, you might be wondering, why can't we just use a string? Well, let me show you. So let's say I said string, my weapon. But a set of quotation marks and a semicolon at the end. And let's say I wanted to do different things based on what my current weapon was. Well, I can say if my weapon is equal to nine, then let's go ahead and throw in an integer value called Health and set it equal to a 100. And now let's just say I had this code on every enemy and my game. And I wanted the enemy to take a specific amount of damage based on what weapon my character was currently helping. Now this isn't actually how you would want to do it, but we're just going to use this as an example. Then I can say something like health minus equals. Then I could say else if my weapons, shotgun, how ins equals a 100, let's say, Well, here's the issue with us. Anytime my character picked up a weapon and have to make sure that I change my string variable here to this exact name. Keeping in mind the casing matters. So if I would accidentally typed it like this in one place or the other, then my code one and I ran properly. Or what if I just misspelled or something like that? Well, now I have an error in my code that I'm going to have to go through and look for. And right now, that might not seem like a huge deal. But once you have a ton of lines of code and you're working with bigger programs. Trust me, it's a huge deal. Also would have had code to check if my weapon was equal to shotgun in a 100 different places. Now I'm going to have to go check all a 100 of them to make sure that the spelling is perfect. But what if we were to just use our enum type? Well, I can just say weapons. My weapon to, for example, equals weapons diet. So now I know exactly what weapons I've already coded into my game. And I could say, well, I want to work with a shotgun. I don't have to worry about the spelling and I have to worry about the capitalization. Nothing. And when I did my statements, I could simply say if my weapon too. And I can say weapons. And now I can see a list of all of the weapons, the high half and my datatype exactly. And I know that a herd of select knife, for example, that this was going to run it exactly how I intended compared to you with my string here. I don't know if my spellings are, I don't know if I type this properly, everywhere else, etcetera. So this is just a lot easier to work with. Anyways, that's up for this video. And in the next video, we're finally going to be talking about methods. So thanks for watching, and I'll see you in the next one.
58. Chapter 12 (Methods): Intro To Methods: And we're going to be talking about method, a method section that will run when it is called upon. Most of our code inside the method which runs when our program starts. We have also called upon some other methods, such as you may have heard me refer to a method. Basically the same thing for our function. And an object-oriented programming language like C sharp. Functions associated with classes. And therefore, they're technically method and will be referred to for the rest of this course. However, just keep in mind interchangeably. Now, you'll probably want to use a method whenever it will make your code more readable. Section of code that you plan on using more than one. This isn't because you'll be able to call upon it, rather than retyping all of that code over and over. And you'll get a better understanding of how this all works in the upcoming videos. Anyways, that is up for this video. And the next video, we're gonna be creating a basic method. So thanks for watching, and I'll see you in the next one.
59. Chapter 12 (Methods): Creating A Basic Method: In this video, we're going to be creating a basic method, as well as going over the syntax for creating a method. So the syntax is as follows. You're going to have the access modifier. Then optionally, you're going to have the keyword static, then the return type, and the name. Open parenthesis, then optionally parameters, followed by a closed. And lastly at the body, which is enclosed in curly bracket. Now we're going to be going over the access modifier, the static keyword, return types, and parameters all in separate videos. That way you get a true understanding of what each one is, the hand of what it is for. Next, let's go ahead and create a very basic method that's just going to print some text to console. And this can be done either above or below your main method wherever you prefer. As long as that's inside of our class. Right now, just follow along and we'll go over everything means later. So for access modifier, we're gonna save private, followed by static. Then return type is going to be delayed, meaning we're not going to have a return type followed by the name. And we're just gonna go ahead and call our method print with a capital P. The reason we capitalize the name, because, because the proper naming convention for a method is to use pascal casing, followed by open and close parentheses, and then opening closed curly bracket. So we've now created a method called print. Then instead of our method body, and let's go ahead and write console dot write line. Then we're going to print out method ran. Now if we random program right now, nothing would happen. That is because we haven't called this method yet. And as you can tell, and there's kind of a darker color here. And if we mouse over that, it says that our program dot print method is unused. So just as you can see, it says Program in green and print in yellow, and is using the same color-coding as it were to here, where we call upon the console class and use the read method. Whereas down here, we're working with the class program and using the print method, which is the method we created. By the way, when you create a method, you want it to do only one thing. If you have a method that it's doing multiple things has multiple functions, you should probably just create another method. Now, let's say I was making a game and I have a method for shooting. This doesn't mean that I would want a method for subtracting a bullet. Another method for playing the sound, et cetera. Those two things could be thrown together easily and the same method. And I know exactly what it does when I call it. But I might want another method to actually do the calculation for the damage. So hopefully that makes sense. When creating a method, you wanna make sure you have a name that tells you exactly what it's going to be doing. And you want that method to have one main goal or function. So let's go ahead and go over how to call a method. You're simply going to say the name held by open parenthesis. Then you may have some arguments followed by a closed parenthesis. And lastly, you're gonna want a semicolon at the end. So let's go ahead and do that. We're going to say print with a capital P, followed by open and close parentheses and a semicolon at the end. Now, because we didn't have any parameters inside of our method, which you can tell by the fact that there is nothing in between our parentheses. We're not gonna need any arguments when we call upon it. And that's because they are directly associated with one another. Now when we run a program that's going to see that we called upon the print method. So we're going to go over to the print method and run the code in the body from top to bottom one time through, just like it does with our main method. So it's simply going to print out method run. And we run a program. You can see that that's what happened. Anyways, set us up for this video. In the next video, we're going to be talking about access modifiers. So thanks for watching, and I'll see you in the next one.
60. Chapter 12 (Methods): Access Modifiers: In this video, we're going to be talking about access modifiers. Now, as you can see here, I already have a list of all of them printed out here. Now you don't have to copy those. I just wanted it to be on screen for you guys to look at as I go over them. Now, an Access Modifier affects the accessibility of a type or a member. A member is something that represents data and behavior. I would like class or struct. And you'll learn what a class into struct is later on. But basically, members can be things such as methods, variables, constants, etcetera. Now some of the most common and as you'll see, will be public and private. So any type or member that has public access can be accessed by any other code in the same assembly or another assembly that reference. Now, assemblies are seen into farms. You have DLL files and executables, which is what runs anytime you run an application, basically as an EXE, as a standalone executable file, which means it can be executed directly. In a DLL, is a reusable component which cannot be executed directly, and it requires another program in order to run it. So basically, any xy is an executable program and a DLL is a file that can be loaded and executed by another program, Pena McLean. Then the next access modifier we're going to go for as private, which can be accessed only by code in the same class or struct. Now thus far we've just been working within one class and the class program. Now, a class and a struct are fairly similar. And we'll talk about the differences and the next chapter. Next year, protected. Anything with a Protected Access Modifier can only be accessed byte code in the same class, or in a class that is derived from my class. And we'll also be going over it derived classes and the next chapter as well. Next, you have internal which can be accessed by any code in the same assembly, but not from another assembly. Then you have protected internal, which means that the type or member can be accessed by any code in the same assembly in which it's declared, or from another derived class and another assembly. And lastly, we have private internal, which can be accessed only within each declaring assembly by code in the same class or an a type that is derived from my class. Now to keep things simple, unless course for just going to be working with public and private. However, as we continue throughout the course and as you start to write your own code, I recommend that you look over at these different access modifiers and decide which one is best for you. The way you decide this is that you want to pick the access modifier that allows the most limited access that you can afford to you. So for example, if I the type or a member that I only needed to be accessed within my class. And I didn't need it to be accessed anywhere else. I could go with private. That's because it can only be accessed by the code in the same class. And it can't be accessed anywhere else. And if that's all I needed, I wouldn't want to give any other code access to that member or a tape. Because like I said, you wanna go with the muscle limited access that you can afford to. By default, members have a private accessibility. So if he didn't specify the access that you wanted to give it, it would default private. Now, I know this was a lot to take in, but hopefully you'll understand it a bit more as we continue forward. It's just something that I wanted you to be aware of so that as we work with different access modifiers, You wouldn't know why we're doing it in what's going on. Anyways. That's it for this video. In the next video we're gonna be talking about the differences between static and non-static. Thanks for watching, and I'll see you in the next one.
61. Chapter 12 (Methods): Static vs Non-Static: We're gonna be talking about the difference between static and non-static class members. Static members of the class can be accessed directly from the class. Whereas non-static members can only be accessed from the instance it belongs to. Next, let's go over how this works. So first, we're gonna go ahead and recreate our print method. Say private, capital P, opening, close parentheses, and open and close curly brackets. Say console dot, write line. Then let's just go ahead and print. Now, because this was a static method, we can access it directly from the class. So inside our program class. And you have a method called print. So I'll say print, or the name of our method. And open and close parentheses and a semicolon at the end. So now when we run our program, that's going to simply print out print. Now, what if this was a non-static method? To make it non-static, all we have to do is remove the static keyword before a return type. Avoid number void just means that our method doesn't return anything. Now as you can see, we immediately got an error. And it says that an object reference is required for the non-static field method or a property program dot print. To fix this, we now need to work with an instance of our class program or create an object of it. Now, although the word object in class are often used interchangeably, and they are technically to different things that you may have remembered us talking about this earlier in the course. A class is sort of like the blueprint for an object, whereas the object is the instance of it. So for example, if I had a class four light bulbs, I might have another variable that told me whether my light bulb was on or off. Now, I've had two light bulbs. I would have two instances of that class. So hopefully that analogy works for you. But if not, don't worry, we'll be going over a class instances later on. Anyways, just like we've worked with class instances in the past, such as with the Random class or an array class, et cetera. We can do the same with our program class. So we simply type the class name, the program. Then we'll give it a name. And I'm just gonna go ahead and call this int short for instance. Then I'll say equals or the assignment operator. New program, open and close parentheses and a semicolon at the end. So now we have a new instance of our program class called int and access the print method. Because it is no longer a static method, we need to work with an instance of the class that has that method. So because print a method of the class program, we had to create an instance of it. So her instances right here, it's called n. And now to use this method, instead of accessing it by using a program footprint, we access with our incidence. So before the name will say print. Now to view the differences here, let's go ahead and copy and paste our method. We'll call this one print to land up here. Let's go ahead and say program print. Then we'll change it print to a static method. And as you can see when we run a program, it's going to print out to where to print twice. So because we were already working with them, the class called Program and this print method as part of the program class. We don't technically need to mention the class beforehand. And as you can see in this kinda dark and doubt. And if I mouse over it, it shows with the name can be simplified in to show potential fixes. And we have to do is all plus undo. So let's go ahead and do that. And as you can see here, that suggests that we just cut out the word Program in the dot. So I go ahead and hit enter and effects that for us. But if you mouse over it, you can see that it comes from the class program. So the only thing I want you to get from this video is that a static member of a class can be accessed directly from the class. So essentially, we're able to just say program and then access the method within it. So this is the same missing program footprint to. However, if it is a non-static member, it can only be accessed from the instance that belongs. Do so because our print method, because a non-static method, we had to create an instance of the class it belongs to. So we created a new instance of our class called program. Let me call this instance. And then we said N dot print as our print method can now only belong to a specific instance of the original class. Anyways, that's it for this video. And the next video, we're going to be talking about return tapes. So thanks for watching, and I'll see you in the next one.
62. Chapter 12 (Methods): Return Types: In this video, we're going to be talking about return types. To do this, let's go ahead and create a method that returns the number five. So I'm going to say private, static. Then I'm gonna say ent. As I want the number of HIV to be an integer. Then I'm gonna go ahead and call this method return five, followed by open and close parentheses and open and close curly brackets. Now, you'll notice that we have an error here, but just go ahead and ignore this. All this is telling us is that not all code paths return a value, but it will be adding the end. So first submicron an int called Type, and set it equal to the number five. Then we're simply going to use the keyword return, followed by the name of a variable being, then a semicolon at the end. So, so far we've created a method called return type, and it returns an integer value. Then inside of here, we create an integer called Hive and set it equal to five. Then we set a return five. So to collect those value from our method, I'm simply gonna say, I'm gonna call this returned value and set it equal to return. High thing our method. So now when a program runs, it's gonna create an integer called the returned value and set it equal to whatever this method returns. So it's going to go ahead and run through a method here. It's going to say I need to create an integer called five, set equal to five. Then I'm going to return five. So now our integer culture term phi u is going to be equal to the number time. To prove this, let's go ahead and print out returned value and run a program. And we could have made this whatever data type we want it. And as long as we returned that same datatype. Now just to show you something quick, let's go ahead and comment out our integer land here. Then this listening returned five. I'm just going to simply put in the number, hide them because this will default to an end. When I run our program, that's going to work the same exact way. I just did it the other way to help you understand what's going on. So let me go ahead and undo that. And lastly, I wanted to show you that this rainbow here only exists while this method is running. So if up here, if I were to type side thing, the name of our variable, you can see that it doesn't exist. Anyways. So for this video, now if these last few videos have been a little confusing for you, don't worry, we'll be tying it all together here. Going to give you a better understanding of what's going on. So that you can use everything you've been learning and your very own programmes. And the next video, we're going to be talking about parameters and arguments. So thanks for watching, and I'll see you in the next one.
63. Chapter 12 (Methods): Intro To Parameters & Arguments: In this video, we're going to be talking about perimeters and argument. Now, a perimeter basically acts as a variable inside of a method. And if you remember, these are specified after the method name inside of the parentheses. Now, just to show you this, I'm gonna go ahead and create a sample method. So your perimeters are gonna go right here in between your parenthesis and the syntax for a parameter is going to be as follows. You're going to have the data type followed by the name. And then for each subsequent parameter is simply going to add a comma and then the next parameter. So I can save data type again and whatever type I want to name two, etc. So anytime you want to get data set and tear method from the calling method, you're gonna create a perimeter and simply specify the data type of the information being sent then, as well as give it a name. And this name can be whatever you want. It's simply the name you're gonna use to work with this variable inside of your method. Also, another thing to note is that a perimeter coffee is whatever information is sent then. So working with this variable here is not going to directly affect my original variable. However, there is a catch to that, which we'll get into in the next video. Next, we're gonna talk about arguments. And argument is simply the information being passed in. So for example, if I'm in my calling method, which in this case as my main method, or to say my method, being the name of my method down here. Then open and close parentheses and a semicolon at the end. The information I passed him here would be the argument. Here's an argument and thus here as a parameter. Now, just to go over something with you, I'm gonna go ahead and remove this text here to make things more individually identifiable. And then I say parameter name. And up here I'm gonna say argument. But I wanted to go over with you. Because once you create a parameter for a method, that perimeter is now required to call upon just method. So I can no longer if say some milling thoughts because this wouldn't pass in the information required here. Anyways, the main thing I want you to take away from this video as a parameter, access a variable inside of a method. And you use a perimeter when you went information to be passed into a method from the calling method. And then an argument is simply the information that is being passed in. So that's it for this video. And the next video, we're gonna be talking about the differences between the value and reference types. So thanks for watching, and I'll see you in the next one.
64. Chapter 12 (Methods): Value vs Reference Types: And in this video, we're going to be talking about the difference between a value type and a reference type. Now, in value type stores a value directly. In example of a value type is an integer. So for example, if I said int number equals five, we have an integer here called number. The stores the value five reference type. On the other hand, str is a reference or an address to a location of Ohio. And example of this would be a string. So string name equals Jack. For example. As you know, we have a string variable here. Let's call it Name, and we assigned it the value Jack. However, there's a little mark going on under the hood year. Whereas our integer type directly stores the value five, our string type as a reference type. So it actually just stores an address location of a value. Meaning our string here stores an address, the location of the value chat. And when we start creating our very own parameters and arguments, you'll see exactly how this comes into play. And for those of you who are curious, Here is a list of some value and reference tapes. Anyways, all I want you to get from this video is that a value type stores the value directly and a reference type stores an address to the value. So that's it for this video. And the next video we're going to be talking about what exactly null means. So thanks for watching, and I'll see you in the next one.
65. Chapter 12 (Methods): Null: In this video, we're finally going to be talking about what exactly null means. The null keyword as a literal, The represent a null reference for something that does not refer to any object. It is also the default value of a reference type variable. So if you remember in the last video, a reference type variable is a variable that stores a reference for an address to a high. Oh, well, if there isn't a value there, then it would be equal to null. And C-Sharp allows you to also test if a value is equal to null as well. So let's go ahead and try this out. Let's say string name equals null. Now, the reason we set it equal to null, initialize it tunnel as because C-sharp does not allow you to work with variables that are uninitialized. And I'll show you the air that would come up. How do we try to do so here in a minute. Next, let's say n is equal to null. Then we want to print out as null. Else. We'll print out not null. Now to quickly show you what I was talking about. And my go ahead and remove this equals null here. And as you can see, I got an error saying I was trying to use an unassigned local variable being name, which is why we had to add that in. Now. And if we run our program, you can see that it prints out not. However, if I were to set this equal to something, even an empty string. You can see that when we run our program, that's going to say not null. So all I want you to take away from this is that as a keyword, meaning that a reference type isn't pointing to, the address, isn't pointing to. And lastly, the null and the default value for reference types. Now, just to show you one less thing in case whatever comes up, there is something called an empty string. How ever this is different than a string that is equal to null. And the difference is that this here is an empty string, as you can see it as holding a string signified by our two quotation marks. However, there's nothing in it. This is what you would call an empty string. And you can check to see if a string is empty. So N r f statement here. And instead of checking if name is equal to null, I'm going to say my name is equal to string dot empty looks at capital E. And now when we run our program, it's gonna say is null. And that's because our string and is currently empty. And when you mouse over this, you can see that it says field. And a field is just a variable declared inside a class or a struck, but she'll get until later. So basically, unless String class, there's a variable called The Empty. And that's what we're checking to see if name is equal to that variable. And because it is when we were in our program and printed out as null. Now if we were to type anything inside of our string here and run our program again, you can see that it says not null as the statement here was no enricher. Anyways, that is it for this video. In the next video, we'll be creating our very crisp set of parameters and arguments. So thanks for watching, and I'll see you in the next one.
66. Chapter 12 (Methods): Creating Parameters & Arguments: This video will be creating a set of parameters and arguments. So the first thing we're gonna do is create our method. And this example, we're going to create a method that adds to hold numbers together. So we're gonna say private, then static. As we only want one copy of this. And we don't care if it uses an instance of our program class, then our return type, and it's going to be an integer. The name will be add, followed by an open parenthesis. Then we're going to say int num one comma int num to Helen by open and close. Then inside we're gonna say num one as that, as the name of our first parameter, plus num two semicolon. Then terror ten, the answer of this equation, we're going to say return space. So now when we call it calmness method, we need to insert two integer values. There'll be added together and returned back to us. So how period, let's say n number one equals ten to 15. Then we'll say add the name of our method, open parentheses. Then we'd need to insert the perimeters. Now as you can see, it pops up here what parameters are required? However, when you insert parameters into a color, they are called arguments. So for our first argument, we're going to say number one comma. Then our second argument being number two, with a semicolon at the end. And lastly, we're gonna go ahead and print out the result with this method. So we could create a new integer and then set it equal to this here being the value of num one plus num to number one plus number two. Or we can just say console.log line and paste this inside. So we said console dot write line, AD. And then in parentheses we said number one, common number two. Now when we run the program, you can see that we are going to simply print out 25. And lastly, let's go ahead and run over R code here and talk about what exactly is happening here. So first we create a two entities. The first one we set equal to ten, and the second one we set equal to 15. And we named these number one and number two. Then we said console dot write line. What did we want to print? And we wanted to print the result of this method here. So method and instead of both of our arguments. So for the first parameter being int num one and inserted number one. Then for the second parameter being int num two, we inserted the argument number two. Now, back here, we said that we wanted to create a private method, making it only available to this class. Then we set the static so that we didn't have to create an instance of a class in order to use it. Next, we said that we wanted it to return an integer value. And once that is inserted here, you must return an integer value. Otherwise you'll get an error. Remember, and if we do not want to turn anything, we could simply say void. And then instead of her body, we said that we wanted to return the result of num1 plus num to notice that we used our parameter names, not the argument names. Now real quick, what's stuck about what's going on under the hood here? So when you send an argument into a perimeter, it is copying the value. So because an integer as a value type and it holds a value directly, meaning integer, number one holds the value ten. When we send number one and as an argument into our integer parameter num one is now equal. What this means for us is that if I were to say num one equals 30 semicolon and then run our program, it's going to print out 40 HIV because num one being 30 and M2 being 15 is 45. So if we run a program, you can see that that is what happens. However, if we were to go and print out number one again and run our program again, you can see that it is still equal to ten. And that's because num one, being our parameter, just copies the value and they are no longer directly associated with one another. So changing them one does not affect our argument being number one. Also note that our parameters here are local variables, meaning and hard to type num one appear. The computer would not know what I was referring to. Anyways, that is it for this video. In the next video, we're going to learn how to pass in an argument into a parameter as a reference. Also, go ahead and save what you have here because we're going to use it in the next video. Anyways, thanks for watching, and I'll see you in the next one.
67. Chapter 12 (Methods): Pass By Reference: In this video, we're going to learn how to pass an argument into a perimeter as a reference instead of a value. Now, there are multiple methods for doing this, which we're going to go over first. So first we have the keyword. And what it says is that we went to argument being passed in or the parameter being passed into the method to be passed by reference and shut a value. But we only want it to be able to be read by the called method. Next, we have ran what ramp says. We went the argument being passed into the perimeter to be once again passed by reference. And they can be called and are written to by the called method. And the last one and over out. What it says is that we want the argument being passed into the perimeter to be once again passed by reference. And it must be written to by the called method. So let's go ahead and create an example of all three of these. To do this, let's first add the number one after our add method name and added up here as well. Then we're going to copy and paste this method three more times. This tab to the US to add three, unless one down here to add for. Next, we're gonna go ahead and add some pseudo code for all of these. But instead of commenting on what this method does, I'm just gonna go ahead and talk about the differences that we're trying to portray and this example. So right here, I'm gonna say pass by value. And the second one, I'm going to say pass by reference using N. Then I'm just going to copy and paste that line on the rest of them and change those third method, tariff and this last one path. Then let's go ahead and look at the differences. So this one method is the one that we use the first time where we pass these arguments by value, meaning num one, was simply equal the ten at the beginning of our method. And when we change them one to 30, it did not change the value. I will number one. And I'm just going to show you this one last time. So we send num one equals 30 in our method here. But when we went back up here into the calling method and we said that we wanted to print out number one. Number one did not change. Printed out as ten. Now, what happens if we pass it by reference? Well, P is this end keyword, which means that we want the argument to be passed in as a reference. And we want it to be read only. And we're going to simply answer the keyword end before both Laura datatypes. As we're gonna do this for both of them. However, keep in mind that you could just do this to one or the other if you so chose. Also note than when using this end keyword, the argument must be already initialized. Now, notice that we got this area down here. And this says that we cannot assign to variable x because it is a read only variable. So because it has read only, we can read what this value is, but we cannot edit it. So I'm going to remove the sign here. So just note that when using n, There are passing and let's value by reference. And it is read only so that we can use it in our equation here. We cannot edit it at all. So use n when you want to make an argument. Read only. Also note that if we were to print out num one, and it would print out the value being ten. Next, we have passed by reference using breath, which is gonna take our argument and send in a reference to the value. And it can be read or written too. So let's go ahead and see this in action. So say era, int num one and rough. And then up here we're gonna change the method that were calling to add three. Then notice how he got an error. And that's because you have to use the ref keyword in both the called method and the color. So we'll say rough number one and number two. Now in this case, because num one is equal to a reference or an address, essentially that points to the value of number one. When we edit num one or the value two and set it equal to 30. It is also going to change the value at number one. So a run our program and notice how we print out 45, because 30 plus 15 is 45. Then we also print out 30 here. So they can see your printed out 4530. This is because we said num one, copying the value being ten. It copies the address that points to the value ten. So let's go ahead and break this down. We created an integer variable called number one. And if you remember an integer as a value type, meaning that holds a value directly. So number one holds the value ten. And we also have a parameter called num one, which holds the value of the argument that has passed and do it. So normally, when we pass in number one as an argument for num one, it just copies the value ten. So numb one when now hold the value ten. And when we change them one, we're just changing this value here. However, when we pass a number one by reference, what we are actually passing in as an argument is this address. Which also points to devalue pen. So now our parameter num one copies this address. So then when we change the value at numb one, we're actually changing this same exact value, allowing us to change the value at number one. Because number one holds this value right here. Num one holds an address to that same exact value. So when we say that we are passing a value by reference, we're essentially saying that we are passing it by its address. Now hopefully this has given you a better understanding of how arguments are passed by value and how they are passed by reference as well. So when I say num one equals 30, it's essentially the same as me saying number one equals 30. That's why when we were in our program, we printed out the new value of 30. And lastly, we're gonna go over passing by reference using out, which means that the argument is going to be passed in by reference instead of how you, and it must be written to the, you can think of this like this. When I say our, I mean, that I wanna get something out of this. I want something new, that city ethos, our num one. And notice that we immediately got an error. And that's because num two has not been changed. Even though we said that we wanted to get something out of this. Meaning we wanted this to be changed before it came back to us. So I can say something like num two equals 14. Then up here, we need to make sure we're calling the add method. Notice that we've got an arrow up here again that says that our argument one and also our argument to must be passed with the out keyword. So though we didn't have to do it with the end keyword, What's the ref and the out keyword, we must use it. And both are calling method and our color. So we'll say out number one and number two. Then let's also have print out number two, just for the hub. And now when we run our program, we are going to be passing in the value 1015 right here. However, instead of just passing in the value, we're actually going to pass in a reference or an address to the value signified by this out keyword. And we're also saying that we want to get something out of this. So both these values must be changed before they come back to us. So down here, we changed them wonder 30 nm two to 14. Then we return num one plus number two. So we're going to run our program. We are going to be printing out 44. Then we're going to print out the new value of number one being 30, and the new value of number two being 14. So let's run our program. We can see that we've printed out 443714. Now, just to show you this, we can remove the out keyword on our second parameter if we wanted to, or both, or just on our first parameter or whatever we wanted to do. But in this example, we're going to remove out from our second perimeter. Then I no longer have to change num to. To show you this. I'm gonna go ahead and comment out this line quick. And notice we didn't get an error. But I'm gonna go ahead and uncomment this. And I'm going to run our program again. But this time notice because we didn't use the out keyword here. And we'll have to take it out up here as well. That when we print out number two, we're going to print out the original value 15, because num T This time just copied the value directly and not an address to the value. So just like up here, when we change the value here, it's not going to affect the value here. Our program, we're gonna print out 44 again, then 30, and lastly 15. Anyways, that does it for this video. And the next video, we're gonna be going over optional and named arguments. So thanks for watching, and I'll see you in the next one.
68. Chapter 12 (Methods): Optional & Named Arguments: And thus video, we're gonna be talking about optional named arguments. Do this. The first thing we're gonna do is create a method. For this example. Let's say we wanted a method for a game that printed out a player's name, their player number, and their health amount. So we're gonna say private, static, void, print player. Then we'll say string, name, comma, N, player number comma. And lastly, we're going to say, then inside a method, we're simply going to say console dot write line. And in quotation marks will say name, colon space. Now side of reclose tool say plus names. Then let's just go ahead and copy and paste this line twice. Then on the second line will change the name to player number. And on the third line will change name to help me should I do this in both locations? So here, near quotes and outside of them. So now we have a method called print player that prints out the player's name, the player's number, and their health. Next, let's go ahead and create three different colors, our thus method. So say print player. Then we'll say John for the name, fell by one for the player number and a 100 for the help. Then let's just print out a blank line. So I'm just going to say console dot write line. Then let's copy and paste those two lines twice. On the second one, let's change the name. Player number two. And we'll leave the health either a 100. And on this third one will say Jane, player number three. And let's just set the Health to 90. And if we run our program, as you might have expected, you can see that we printed out all three players names and their player number and their health value. Now normally, when you create arguments for a method, you have to put them in the order that the parameter list down here is n, which is why we did the name first, then the player number than the players have. However, by using a named argument, you can avoid doing this, and it can make your code more readable. So, for example, let's go ahead and remove from these three values here for John. And let's write them a little differently. So I'm gonna say player number, colon, followed by one comma. Then we'll say name colon, John, comma colon a 100. As you can see, our program runs just fine. And some of you may find this more readable since you can see exactly why each value is associated with. So you know, John is for the name, we know this a 100 over here is for the health, and that one is for the player number. By the way, there are some caveats with using a mix of named arguments and unnamed arguments. And feel free to look these up if you so choose. But to avoid any issues, I would personally just use all unnamed arguments or all named arguments. And lastly, lets go over optional arguments. So to make an argument optional, but you have to do is down here in the parameter list, pick the ones that you want to be optional and set them equal to something. Also, they need to be at the end of the list. So if I wanted a name here to be optional, I'd want to put it at the end, or I could just make all over them optional and that behind as well. So let's go ahead and make our health perimeter here optional. To do this, all I have to do is after the name Health, say equals thumb, lush this default thus to a 100. And now if we wanted to, anytime we call thus method, we can just leave out the health variable at the end. So let's go ahead and do this with two of her colors on neck. I'm just gonna go ahead and remove us entirely. Then on our print player for John, I'm also going to remove that. Then I'll just go ahead and run our program. And as you can see, I ran just fine. And for John and neck, their health defaulted to a 100. And that you can do this for as many parameters as you would like. Just make sure that all your optional parameters or at the end. Then I quickly wanted to make you aware of one less thing if you have multiple optional parameters. So for example, let's just say I had planned number default, The one. I'm not sure why you would do this, but just bear with me here. And for our player Jane, I wanted to change the value of health and 90, but I didn't care, has set the value of our player number. You can't leave a blank space. This will give you an error. Do this and get the result. We are running. This use a named argument. So I can say health colon 90, and thus would run just fine. Anyways, that's up for those for you. In the next video, we're gonna be talking about overloaded methods. So thanks for watching, and I'll see you in the next one.
69. Chapter 12 (Methods): Overloaded Methods: In this video, we're gonna be talking about overloaded method. An overloaded method is when you have multiple methods with the same name but different parameters. This gives them to different segments, essentially changing how they are called the method signature. And C sharp is basically just the unique identification of a method. And you can not have two methods with the same signature. A method signature in c-sharp consists of the name and the parameters of the method. So let's go ahead and create an example of this. And for this example, we're going to create a method to add numbers together. But we're gonna do this in sort of a vague son. So I'll say private, static, void, add numbers. Then we'll say int, num one, comma two, comma three. And actually having no return type. We're gonna set our return type to end. Then let's go ahead and copy and paste this method. Now, you can't have two methods with the same name that have the same exact amount of parameters, but the same return type, because then their signatures would be exactly the same. The perimeter name does not matter. So if let us turn them 33, I'd still have an error. So we gotta change something here. In our case, we're going to simply remove one of the parameters. Then. And our first method here, we're gonna say return now m1 plus m2 plus m3. And down here, and we'll say return num1, num2. And now we have an overloaded method called add numbers. And those considered an overloaded method. Because we have two methods with the same name that take different parameters, which allows us to do something like this. First we'll say int number one and number two, and number three equals five. Then I'm going to say console dot write line and numbers. And for my arguments, I'm gonna say number one, number two, number three. Then I'm gonna do the same thing down below, except I'm only going to enter number one and number two. It make sure you have both parentheses. And our program is going to run just fine. And because our methods take different sets of parameters, it's going to figure out which method to use based on the parameters inserted. In another way, you can see that it is working properly, as we are saying, the method name, followed by an open parenthesis. And you can see that we have two options here. We have program dot add numbers that takes an integer called them one and an integer called them too. And then if I hit the down arrow key, I have another one with the same name that takes an integer Codename One and then caused them to become them three. And we can create as many of those we wanted as long as they had different sets of parameters. Or we could even have ONE with NO perimeters at all. So now when we run our program, we're going to print out 15 because that's what number one plus number two, number three. And Russia going to print out the number of ten. Because m1 plus m2 and our number one plus number two, he goes ten. Shows you can see we've printed out 1510. Anyways. That is it for this video. And the next video, we're going to be passing in an array as an argument. Meaning we'll also be using an array as a parameter. So thanks for watching, and I'll see you in the next one.
70. Chapter 12 (Methods): Arrays As Parameters: In this video, we're going to be using an array as a parameter. So first let's go ahead and create an array that holds three whole numbers. So we'll say open, close square brackets. We'll call this in theory and set it equal to a new array. And we're gonna set the size to three. Then down here, let's create a method that adds up all the numbers in our array. To do this, we'll say private, static and numbers in an array. And then try our perimeter. We're gonna stay in array and we'll call it array. Then what's haven't solicit method could take an array of any size. So we'll say for i equals 0, I less than array.length i plus plus. Now we could print out the value of all the integers and our array inside of our method. But in this example, what's go ahead and have it so I'm returning the total. So first, outside of our for loop, we're going to say and total equals 0. Then inside of her for-Loop, we'll say total plus equals array index i. Then outside of our for loop, we want to return total. Then up here, let's go ahead and call our method. So I'll say add numbers and array. Then we're going to insert our array. Now before we do, let's, let's go ahead and give each integer in our array of value. So I'll say int array 0 equals 20, for example. And I'll copy and paste list twice. I'm going to set this one to 40 and this one to 80 cleared or in our program now, this color would do absolutely nothing for us. That's because I'd run this code here, return the value total, but it's not being saved anywhere. So once again, we have a couple of options. Now in the past, we just printed out this value and I'm going to show you one of her other options. We're going to say int total equals this method. So now whenever you return the value total, it's going to come back here and set our new end called total equal to whatever this variable called total was. Note that a time for us to use the same name twice. And this occasion, because this is a local variable, meaning it is not up here in this method at all. Then let's print out total. Then let's not forget that changed the index on these other T lines. So you're gonna say enter a, a index1 equal to 40 and into array at index two equal to 80. So we'll run our program. And we now printed out 140, because 80 plus 40 is 120 plus 20 is 140. Now, an array happens to be a reference type, meaning and holds an address or a reference that points to these values, not the actual value itself. What this means is that this here has already passed in by reference. Meaning if I were to say something like array, and then that 0 equals ten. And then up here, if I were to print out into array at index 0, we're gonna be taking ten plus 40 plus 80. And it was going to give us the total 130, which we're going to print out first. Then we're printing out what's at index 0 and r array, which started at 20. Then, because we sent the address that points to this value to our method in this line here, when we adjusted array or a parameter name at index 0, we took the value at the address list was holding and change. Because when this took less value here and copy the entire method, a copy the reference, not the value. And once again, that's because an array is a reference type and a value t. So now when we run our program, we're gonna print out 130 and then ten. As you can see here. Anyways, puts up for this video. And the next video, we're going to be talking about mutable and immutable types and how that affects your code. So thanks for watching, and I'll see you in the next one.
71. Chapter 12 (Methods): Immutable vs Mutable: In this video, we're going to be talking about the difference between a mutable and immutable type. So first let's talk about what immutable means. We can change the value of a variable after it is created. Then we have immutable, which means that the value cannot be changed after creation. So let's go over an example of how this can affect your code. Now a string as an immutable type and also a reference type. So what's created an example here and talk about what's going on in the background. So first lets say string name equals John. Then let's say name equals Jack. Then let's go ahead and say change name with a capital C and a capital N. And then in parentheses we're gonna say name. Now let's go ahead and create this method. So I'll say private, static, change name. I'll say string, name. Inside of our method. Let's say name equals. Now, remember, like I said, string is a reference type and an immutable type. So let's first talk about it being an immutable type, which means that the value can't be changed after creation. Well, you might be thinking, oh, hey, we just change the value right here. Well, though it works the same way as some of our other types, and it appears that we can change the value just by saying name equals Jack. What is actually happening under the hood is that it is actually creating a brand new string variable and setting that equal to jack. The reason it is doing that as because it is an immutable type, and because of that, it must create a brand new string. When we say name equals Jack and set the new string equal to Jack, this name and our mu, the old one. Then why don't we sent name into our method here. We send a reference or an address to the value jot. That is because a string is a reference type, just like an array is also a reference type. So if you remember the last video where we used an array as a parameter, you might be wondering, well, if I change the name, the PAM here, then name up here must also equal pan, right? Well, not exactly heard if they console dot write line name. And then to make things less confusing, let's just go ahead and change this name to run our program TO chat. And that's because a string, though it is a reference type, is also amenable. Meaning when we said name two equals Pam, we actually created a brand new shrink and set that equal to Pam and our Milky old string so that we can use this name. Now though on the surface, it doesn't look like that. That's what's happening under the hood. And because we created a brand new string when we said named three equals PAM, it no longer is associated with the original name here. Which is why if you want to actually work with a reference to a String, you have to specify it just as you would with a value type. So we'll say string name. And now when we run our program, it's actually going to print out Pam. Because now our code knows that we're going to work with the same exact address. Whereas before we had this, when it created this new string and also essentially got a new address, and it was no longer associated about. Anyways, that does it for this video. In the next video, we're finally going to be talking about classes. And this next chapter is really going to tie everything together and give you the final building blocks you need to go out and create your own programs. So thanks for watching, and I'll see you in the next one.
72. Chapter 13 (Classes): Intro To Classes: In this video, we are going to be talking about classes now. And you can think of a class that is sort of being like a blueprint for a specific object. For example, let's say I was making a racing game. I might want to make a class called the vehicles for stores all over the different properties, fields, and methods, etcetera, that are going to be a part of every single vehicle in my game. Now, I just went over some stuff that a class can define. Now, we're not gonna go over everything that a class kinda fine in this course. We are going to go over and touch up on some of the more advanced stuff as well. But essentially the data functionality and the object that represents what. For example, some fields or variables declared at the level that I might want to have. It might be things such as color, Sandra, switching gears, accelerating, braking, and stuff like that. Define the different types of data and functionality. Every single vehicle. So essentially, what a class does is it enables us to create our own custom by grouping different sets of data functionality together. Anyway. In the next video, we're going to be talking about the difference between a class structure, also known as a structure. So thanks for watching, and I'll see you in the next one.
73. Chapter 13 (Classes): Classes vs Structs: In this video, we're going to be talking about the differences between a class and a struct. Short Chris structure. So that you know which one to use when the time comes based on your situation. First off, a class as a reference type. Whereas a struct is a value type. And because of this, they're stored in different places in memory. Now exactly how and where they are stored in memory is a bit more of an advanced topic. But I just wanted to make you aware of it. Also, because a structure is a value type, we can't assign null to it. Also, by default, struct members are public. Class members are private. A member is just something that represents the data and behavior. Lead class or struct. This can be a lot of different things, but a couple that you are familiar with are things such as a variable or a method. Also, a sharp doesn't support certain things that a class does. For example, it doesn't support inheritance or polymorphism. Whereas a class supports both. Also, a struct can not have a default constructor. We'll be going over inheritance, polymorphism, and constructors later on. Now when the time comes to choose between a class into shock, you wanna look at all the differences that you see here, as these are the main differences between the two types. And one of these will more than likely be the reason why you pick one over the other. Lastly, I'm just gonna go over a couple of examples of each that we have worked with. So for classes, we have the console class. We've been writing our code in the program class. And we've also worked with the Random class in the past. For structures, we have the N32, which represents a 32-bit signed integer, or an ent. And we have the boolean struct, which represent a boolean true or false value. Anyways, that's it for this video. And the next video, we're gonna be creating our very first class. So thanks for watching, and I'll see you in the next one.
74. Chapter 13 (Classes): Creating A Simple Class: And thus for there were gonna be creating our very first class. Now the syntax for class. You're going to have the access modifier, then the keyword class, followed by a unique identifier name. And lastly, you're gonna have some body and I was like class and curly brackets. This is where all your data and behavior for your classes can I go? Meaning this is where all your class members will be. So let's go ahead and create a class that represents a weapon in the game. So we're gonna say internal, as this is the default access modifier for a class. So although we could technically leave it out, I'm just going to leave it here to remind you. Then I'm gonna say class weapon. Notice that we capitalize the name here because just because you want to use passcode casing when working with the class name. Next, we'll create the body. Then let's go ahead and create a couple variables for our weapon class. To do this, we're going to want to think of things that are going to be a part of every single weapon and their game. Now, we're not going to necessarily go and list everything that you might want, but we're gonna go over a couple of examples. So a few examples of some variables or field I might want from my weapon class would be a value for the speed, the range, and the damage. So let's go ahead and create those now. Now the default access modifier for a class members is private. But once again, we're just gonna go ahead and write it out. Mostly private. Private int Damage. And private entry. Fields are variables declared a class level are going to default to a value as close to 0 as possible, which in this case for these three variables would just be 0. So you can go ahead and initialize to 0 if you would like. However, I'm going to leave them where they are. Then to make things simple, let's just create a single method that will print out the stats of our weapon. So we'll save public print stats. Then we're just going to say console dot write line. Then will put the dollar sign and then quotes. We're gonna say speed, colon. And then in curly brackets will say speed. Then we'll type backslash N to create a new line. And we'll say damage, colon, and then curly brackets. We'll print the damage. Do backslash n again, and we'll do the same per range. So we've now created a simple class. And instead of having our class inside this class, let's go ahead and move it outside of it entirely. So I'm just going to cut this and paste it down here. Lastly, let's go ahead and recap what we've done thus far. So we've created a class with internal access called weapon, and it has three private integer variables. And it has one called speed, one called damage, and one called range. And each of these will default to 0. Then we have a public method called print. And what this was going to do is print out speed, followed by the value of our speed variable, damage, by the value of our damage variable, and range followed by the value of her range, for example. And then we'll print those three things. I'll on separate lines. Anyways, I want you to go ahead and save what you have. As we are going to be using this in the following video. And the next video, we're going to be creating an instance of the class we just created. So thanks for watching, and I'll see you in the next one.
75. Chapter 13 (Classes): Instancing A Class: And let's put it, we're gonna be creating an instance of our weapon class. So we'll start with our datatype as usual thing, weapon in this case. Then we're going to call this one katana. And we'll say equals new weapon with open and close parentheses and a semicolon at the end. And then we'll run our print stats method. So I'm going to say katana dot print stamps. And as you can see, it's even listed down here. And run our program. And as you can see, we've printed out speed held by the numbers hero, damage and range and 0. Now, what if we wanted to set these values? Well, we have a few options. First off, we can set it right here. So I can say speed equals one. By default. Damage equals three. And we'll say range equals five. And now when we run our program, we're gonna say speed one, damage three, and range five. But I don't want to every single weapon in my game to initialize to these stats. So I'm going to undo that. Another option would be to change the accessibility out one or more of these variables. So let's go ahead and change all of their accessibility. The public, so say publican speed, public and damage and public int range. And now we can say katana dot damage mostly equals 20, will say katana dot range equals five. And we'll say katana does speed equals. Now, this might look like it works fine at all. But there's actually a few issues with this approach. First off, you don't really want to bunch up public members in a class. Instead, oftentimes what you wanna do is make them private and only allow them to be worked with through other things such as methods and properties, which we'll be getting into later on. This one shirt that the members of your class, those are worked with in a manner that you intended. So by making them public, not only are you opening up the possibility for their members to be worked with and a way you didn't intend. But you are also potentially making their accessibility higher than necessary. Then what's go over? Quick example of how our values could be used in a way that we didn't intend. For example, let's say one and every weapon in my game to new 0 damage or higher. Well, currently I can set this to negative 20 and my program isn't going to have a problem with that. Why? Because this is a public variable and it can access, it doesn't need a run through any logic at all. Anyway. Once again, I want you to go ahead and save what you have here. And then the next video, we're going to be creating a set of methods that will solve this issue. So thanks for watching, and I'll see you in the next one.
76. Chapter 13 (Classes): Class Methods: In this video, we'll be creating a new method to solve the issue with these variables being able to be changed here without running through any logic, allowing them to be used in a way that we did not intend. And currently, if we change these private, we can't access them at all. And this is the issue will be addressing. So let's go ahead and remove all these value changes. And what stuff is all back to private. Then let's create some methods. First, let's create a method, just get the value of our speed of variable. So we'll say public. And because our speed variable is of type n, Gatsby and then inside the body will say return speed. Threes unless works here as because a private variable is accessible anywhere within your class, then let's create another one to change our speed credible. So we'll say public void, set speed. And then we're going to accept an integer value. So I'll say int newsfeed, and I'll say speed. Speed. Then let's go ahead and copy and paste this for the other variables. Will say gal damage. Damage, and damage. Damage. Damage equals new damage. Finally, we'll say return range. We'll go with those new range. And range equals nearing. Now currently. And this basically works the same as if we were to just lump them public. But the difference here is we can also add in some extra logic. So for example, when someone wants to set one of our variables, we can make it so they can't set up below a value. O is 0. So we can say speed is less than 0, equals 0. And we can do the same for the other two variables. New damage is less than 0. New damage equals 0. And F near range is less than 0, neuron j equals 0. And remember, if you find this to be a little messy when you're just working with a single statement inside of an if statement, you don't need these curly brackets. So you do something like this, and that would work just fine as well. Then let's go ahead and test it to make sure it's working. So after pinched outline will say Cortana damage. And then parenthesis, we'll say negative ten. Then we'll print out our stats again. And let's go ahead and copy and paste that line. In the above at, let's say katana set range. And then parentheses, we'll say five. Before you're Unless. Let's go down here. And after this line, what's a console dot write line. We'll run our program. As you can see, we originally printed out three zeros as each of these values defaulted to 0. Then we did it again. Because even though we did katana dot-dot-dot damaged negative ten, our if statement was true. And I set new damage and damage equal to Newton. So we print out three zeros again. Then we tried setting our range, took five. And because of this if statement is false, this code never ran. And our range equal the new range that we typed in as an argument. Anyway, go ahead and say that you have so far because we're gonna be using less. And one of the upcoming videos. In the next video, we're gonna talk about another way that you could create a class and Visual Studio. So thanks for watching, and I'll see you next week.
77. Chapter 13 (Classes): Alternate Class Creation: In this video, we're going to be looking at another way that we can create a class and the Visual Studio, rather than just having a o right here on the same page. By the way, if you're not using Visual Studio as your IDE, just look up waves to create a class with your specific ID. Anyways, what we're gonna do is create this class and another section. Instead of down here. To simplify things, let's just go ahead and copy our current weapon class and commented out. And obviously we're gonna get some errors up here because it was class no longer exists. Then we're gonna right-click on our namespace and our solution explorer. This is gonna be right under this solution. Now if you don't see your solution explorer, you can come up here to view and click Solution Explorer. So like I said, we're gonna right-click on it. Add class, and then we can change the name here and leaves the dot cs. So the name of our class was called the weapon. And we'll say add. Then we'll just remove this as we've already typed that and paste what we had. So the alien defenses, we've written upper-class over here, then just hit save. Now if you accidentally X out of this, don't freak out or anything. You can simply go over here to your weapon dot cs, right-click and hit Open. Sim goes Faire program class. Now, if we go back to our program class and run our program, you can see that it works just fine. The only differences is that our class does not needed down here anymore. So I'm gonna go ahead and remove that. And to make things simpler, we are just going to work with our weapon class and the other window. Anyways, that's it for this video. And the next video, we're going to be talking about constructors, which are special methods that run when an instance of a class is created. Go ahead and save it you have again, because we're gonna be using it in the next video. Thanks for watching, and I'll see you in the next one.
78. Chapter 13 (Classes): Constructors: And in this video, we're going to be talking about constructors. Constructors are special methods that run when an instance of a class is created. By default, every class has a parameter list, Dr. which takes 0 arguments. And as you can see, when we created an instance of our weapon class or an object of our weapon class called Atana. And we set it equal to new weapon. We added these two parentheses. And some of you might be wondering why we've been adding them this whole time. And that's because this here actually works as a constructor call, sort of like a method call. Like I said, when you create a class and you don't create your own constructor, one has made by default. And this default constructor will automatically initialize all of the fields and your class to a value close to 0 as possible. Fees are a reference type shield, then they will be set to null. So let's go ahead and create a constructor over ONE. Also to clean some things up. I'm just gonna go ahead and minimize all of these methods here. And in Visual Studio you can do so by clicking on the plus minus button next to the method. And now we don't have to look at all that extra code. As you can see, it also puts this box here, allowing us to look at the code inside if we mouse over it. And it also lets us know that there's more code. There is just simply minimized. And we can anonymize it by clicking on this plan. A constructor is as follows. You're going to have the access modifier followed by the name of your class. Then you'll have a set of parentheses with the list of your parameters inside, just as you would with a method. And lastly, the body, which is in curly brackets. Then let's go ahead and create our very first constructed, which by the way, we'll remove the default constructor since we will have made one ourselves. So say public weapons as let us the name of our class. And then in parentheses, we're gonna say speed and damage range. Now some of you might be already wondering why this is an issue that we have a variable name here and the same variable name here. And even if we're not getting an error now, how do we let the computer know which one we're referring to? Well, let me show you how to access these fields, which will actually be a part of the instances of our class. We're going to use the keyword this, which you can think of as meaning this. And since the fields or variables, however you want to look at that speed. And now it knows when it runs through this constructor, there were a frame to the variables of this object. Now, these parameters, then we'll say speed will say this dot damage, damage. And this.radius equals range. Also the reason that this doesn't cause any errors as because C sharp allows for constructors, he used the same name as a variable in the class. For its parameters. Then make sure you hit save so that the code will work properly when going back to the other window here. And let's go back to our program class. Notice how we got an error, and that's because the only constructor in our class now as the default one that was removed requires three arguments and Fmax over this area, you can see the arguments right there at the top. So now an even integer for the speed, the damage, and the range, and allowing us to set these values right at the start. So first I'm going to remove all of these lines, picks up katana dot-product stats. Then let's say we wanted to set speed to five or damage the ten and arrange. And they'd say five comma. And as you can see, the nicely pop up here again, allowing me to see exactly what variables I'm working with next. So I'll say 510. Little things like that as why I personally find Visual Studio to be the best idea to work with. And now we have directly edited the variables in our instance of our weapon class called katana. And we did so very easily by just putting them right in here as arguments, by creating a constructor for it. And in our example, we have all this extra logic down here to make sure that when we set one of these values, we don't set it to a negative number. So alternatively, we could just erase all this and say set speed, speed, damage, damage, and set range range. And this way we're making sure that other classes, they create instances of our weapon class only work with the fields and the way that we want them to without knowing exactly what's going on under the hood there. So when working with the class, we can only see and work with relative information. The next thing I wanted to go over with you as just like we can overload methods, we can overload constructors. So let's say that I want to force a class to have to insert any arguments. We could save public, weapon, open and closed parentheses and open and close curly bracket. And now we have another constructor that has their parameters, which means I take 0 arguments either way. A constructor in C-sharp that takes 0 parameters is called a default constructor. And now I can say something like weapon. It's new. And not have to answer any arguments. As we now have a constructor that doesn't take any arguments. And then we'll say print stuff. By the way, makes sure that when we're done working in each window from here on out, that you hit the Save. And then let's just run our program so that you can see that this worked. And as you can see, we've printed out 5105. And notice that even though we didn't specify it in our user made constructor that I construct are still automatically initialized our values because close to 0 as possible, which in this case with just 0. Anyways, that's it for this video. And in the next video, we're going to be going over static fields and constructors. So thanks for watching, and I'll see you in the next one.
79. Chapter 13 (Classes): Static Fields, Methods, & Constructors: In this video, we're going to be talking about static fields and constructors. So let's go over to our weapon class. Then must go head and create a static shield. So what's a private static and weapons carried? Now we're just using this as an example. But normally, if you are actually creating a game, you'd probably want to handle this and another class. Then let's minimize our print stat method. And in-between these lines, let's say console dot write line. And then below that one will say it again. And then quotes will save weapons. Colon. And then we'll add weapons carried or concatenate on. And we'll hit Save. And now that we have the static end, this integer is going to be the same across all of the instances of our class. You might be wondering what exactly that means thrust. Well, let me show you. First off, we're gonna go ahead and set this initially this 0. Then anytime we have a another instance of our class created, let's go ahead and up this number by one. So say you weapons carried plus, plus. Now we'll copy that line and to our other construct as well. Then back in our program class, let's go ahead and cut this line here and paste it between these two lines. Then go ahead and run a program. And as you can see, the first time we printed our stats, we said weapons carried is one. And then the second time we said weapons carried this too. And also know that even though we were working with two different instances out of the method, they're using a static field, the various static variable, meaning that there isn't multiple instances of that variable. There is simply the one, meaning both. When we created one instance, an object of our class called katana, it ran, thus constructor back here, which added one to our weapons carried variable. And the reason I ran this constructor has because this constructor here takes three integer values and we inserted three integer arguments. Then when we created another instance of the class and inserted no argument, the second constructor ran that doesn't have any parameters, which also added one to this static radial. And because there is only one instance of this variable, instead of it printing one twice, it printed out one into. However, had this not been a static variable. So let me go ahead and remove like click and run our program. You can see that it said weapons carried is one twice. And that's because each instance of our weapon class had its own instance of the weapons carried a variable, and we simply added one to it and each instance. So I'm going to put that back and they're free of member. We can do the same thing with methods and allowing us to only have one instance of each method. However, if we were to say for example, public static, void, print stats, because this is a static method and there's only one instance of it. We can't simply use the right class. And that's because these are not also static fields. So we'd either have to create an instance of a class and then get the variables of that instance. And one way we could do that is by accepting a class here. So I can say weapon, most call it weapon. And then down here we can say weapon dot speed, weapon dot damage, and weapons range. And now we only have one instance of this method, and it will still use the variables out of this specific instance we're working with, which we would now need to answer as a argument. Anyways, I'm gonna go ahead and undo that. So a static constructor is a constructor you use to initialize the static members of your class. And it is also called implicitly before the creation of the first instance of a class. And even though we could initialize the static value instead of a regular constructor, every time we created an instance of a class that constructor would run. So for example, let's say I initialize weapons carried a 0 inside this constructor. And I also did it in this constructor when I create the first since, since Jacobi set to 0. But when I create another instance of my class, it's going to reset it back to again, which might not be what I want. So that's why we create the static constructor to make sure it runs before any instance has even created, and so that it only runs one day create a static constructor. We're simply going to say static. And then the name of our class, which in our case as weapons, followed by open and closed parentheses. By the way, just know that because of this implicitly ran, you cannot have any parameters in here. Then y would open and close curly brackets. And we can insert our code. So I can say weapons carried equals 0. And I will just remove that up here. Now, you might be wondering why we didn't leave it up here. And in our case we cut out. But by doing it like this, I can also include some logic in the initialization if I needed to. Anyways, that's it for this video. By the way, go ahead and save what you have, because we're going to use it in the next video. In the next video, we're going to be talking about properties. So thanks for watching, and I'll see you in the next one.
80. Chapter 13 (Classes): Properties: In this video, we're going to be talking about properties. First things first, let's go ahead and minimize our class members. You can think of property as a special member that allows you to work with private fields in your class outside of your class. Now, this may sound similar to what we did here, what these methods. And that's because, and that's essentially the same thing. So we're gonna do this, take this exact same thing here, and do it using properties. Now, because we basically have the same code that's right here, down here with our other shields. I'm just gonna go ahead and delete this. And also we can go ahead and remove this method from our constructor. By the way, the technique we used earlier of using a method to get our field in a, another method to set her field is perfectly viable. However, generally, if you're writing a method that just gets a value and such the value, and it only takes 0 to one perimeters. I'd recommend just using a property and I'll show you why. So right now, we want a way to edit and get our private and speed field. So to do this with properties, we simply need to do that. We're going to say public. Then we're going to copy the data type of the field we want to work with. So I'll say int. Then we're gonna use the same exact name of our field as well. Now, you don't have to do this, but this is generally the accepted way out creating a property. However, we're gonna capitalize the first letter. And right now, that's kinda looks like we just simply made another field called speed. But here's where things change. So after the name, I'm going to open and close curly brackets. Then I'm going to use the keyword get opened and closed curly brackets again. And inside of here, I'm gonna say return with a lowercase s. And below this line, I'm going to say set in curly brackets. We're gonna say that when you use the keyword and the value is less than the 0 value, 0 number, that will say speed value. So now what we have here is both a setter and a getter. So this getter here basically works the same way as the get method. They both just returned a field. And then the setter works the same way as our set method, where it's such a value equal to the new value that we wanted to change it to. If the new value that we wanted to change it to is less than 0, we set it to 0 first and then set the field equal to the new value. However, the differences here that instead of having a parameter and using that parameter name, we simply just say value. And it's going to automatically take whatever argument we put into the center and insert that into this value variable here. Now feel free to use whichever one you want. So you can use these methods here, or you can use a property like this. However, personally, I find properties a bit easier to work with when I'm just getting and setting a value. And I'm working with no more than one parameter. And I'll show you why I find properties easier to work with hearing now, to do this, we're gonna go ahead and re-look at how to get our field value and set their field's value back in our program class. And then we'll look at how to do the same thing using our properties. So let's go back to the program class. And I'm going to remove everything except for katana instance internationalizing statement. So I'm gonna say console dot write line, Cortana, get damage. And this will work just fine. And it's going to print out ten as that of the value. But our object here, called Cortana has for the field or the variable damage. Then I'm going to get another shelled, the tremor object here being the speed, which is the one that we hope property. So I'm going to say console dot write line, and then I'm simply going to type this basically just like I would a variable. I'm going to take Atana, that speed. However, notice that they use a capital S. So that is the name of our property. So back in our weapon class, we need to do one last thing over in our weapon constructor, where we had three different parameters. We want to get rid of that such speed method. And instead we're gonna say speed with a capital S equals speed with a lowercase. And then we'll run our program. And as you can see, we've printed about 105, just as you would expect. So back to our getter and setter. Once again, all we had to do was say the Access Modifier followed by the same type as our field appear. Then we just repeated the name with an uppercase letter at the beginning instead. Once again, you don't have to do this, but this is generally accepted as the proper naming convention for a property. Then we inserted these curly brackets here to signify that we're gonna be making a property and not just normal variable. Then we said get in, in curly brackets or the body here. We said return speed with a lowercase s. S. Let us our variable where our field appear. Then we use this site keyword to create a setter. And inside the body of that, we just repeated what we did here with a little bit of variants. We said f value is less than 0. The value is equal to 0. And my value is as whatever is passed in to a setter. And we'll take a look at how to pass something into a setter here in just a moment. Then we set speed equal to value or the argument being passed in. And I'll show you how that works. Now, to do this, let's go ahead and unmute these arguments here. Then below that was a katana. Set damage. Then to change our speed using our property will take Atana speed equals. So now print out 510 and just make sure I save that and run our program. And as you can see that we've printed out 510. Anyways, that's how you use properties. Now, go ahead and save what you have. Because once again, we're going to be using in the next video. And in the next video we're going to be going over automatic getters and setters. So thanks for watching and I'll see you in the next one.
81. Chapter 13 (Classes): Auto-Implemented Properties: And in this video, we're going to be talking about auto implemented properties per style. I'm going to remove all this code except for my weapon katana equals new weapon statement. Then what's head over to our weapon class? Then to clean things up, I'm gonna go ahead and copy our property from the last video and do the same thing for our other two shields. And just trace all the other code. Copy and pasted about twice. And we're going to create one for damage, one terrain. And also change here. Ranging plus range. Damage, it goes down. Make sure you capitalize the first one. Then we'll just change it down here. So change this damage. Damage. Makes sure this one here is lowercase. And then same thing over here. We'll say return range, lowercase, lowercase range down here. And as you can see, this looks a lot nicer. And it's a lot less code to scroll through. Next to show you an example of auto implemented properties, we're gonna go ahead and edit our speed property. We're gonna do is remove this if statement. And now our property called speed has a getter that simply returns the value of speed and a sudden speed equal to whatever we insert into it. By the way, one more thing I wanted to mention is that getters and setters are public by default. But you can make them private by adding the word private in front of them. Makes up. Now to make things easier to look at, I'm just going to minimize some list of OPM. Sorry, now we have a public integer called speed with a lowercase s. Then we have a property called speed with a capital S that allows us to return speed and set speed. However, there's a quicker way to do exactly this. And we're gonna do is comment out this line up here. And let's just go ahead and comment out this entire property as well. Then down below, we're gonna simply say public and speed with a capital S. And then in curly brackets will say gut semicolon, set semicolon. And now those works the exact same way as this edge. So stuff but of shorthand. And if we chose to do so, we can still set one or both of these to private, like so fun and sigma and go back to our program class. And let's double check that it were. So we'll say Tana speed equals ten. Then we'll print out katana speed. Then we just have to be one less thing. We'll go back over it or weapon class. And down here in our public stats method. And you can see that we have an error. And that's because variable speed with a lowercase s no longer exists. Now we could just un-comment this up here, and that would work too. But we're, we're actually gonna do is just change this to speed with a capital S will have save and run a program. Like I said, if we wanted to, we could uncomment out this top line would work just fine. But my point here is that we don't have to create this variable at all. And we can actually just use a property. Anyways, that's it for this video. And the next video we're going to be talking about inheritance. Thanks for watching, and I'll see you in the next one.
82. Chapter 13 (Classes): Inheritance: In this video, we're going to be talking about inheritance. But either way, we're starting completely over. So I just went ahead and erase everything. And then over here where you have your weapon class. Just right-click on that, then hit delete and okay. And what inheritance in allows us to do is have a base class and then have another class and inherit that data and behavior from it. So let's see how this works. First, let's create a brand new class. So I'm gonna go over here, right-click, go to Add class. And what's called this animal will add then and create another one called dog. And then we'll create one mark called cat. Then we'll start off and our animal class. So what we're gonna be doing is creating two properties. A method. So space Public, Color, capitals. And then in curly brackets, we're going to say get semicolon set. And we'll do the same thing. Plus one, there's going to be name. So every animal is going to have a color and a name. Then each one is also going to have a method called speak. So say public speak. And inside we'll say console dot write, line, animal speak. Now or we're gonna do is have our Duck class and our cat class inherit from our animal class. To do this after the name of our class, we're gonna say a Holon animal. By-the-way. Each class in C Sharp can only derive from one other class. The class that inherits from can also inherit from one class. And that class can inherit from another class and so on. Also, this class is called the base class, and there's also sometimes referred to as the parent class. And the class that is inheriting the members, sometimes called the derived class or the child class. So now our cat class has inherited all of the members of our animal class. Then we're gonna do the same thing and our Duck class say colon animal. Then what we wanna do is create a couple of constructors, one for the dog and one for the cat. So we'll say public dog. And then parentheses. We'll say string name, string collar. And we'll say name with a capital N equals name, color. Once a capital C equals colour, then we'll just copy and paste close her cat class. And all we have to do is change the word here from dog to cat. And less. They both share this name and color property. But though have their own instances. As lean aren't static. Men will go over to our program class and we'll say dog, spot equals new dog. And then inside her name, most say spot them outside the quotes comma space. We'll just say read for the color and the semicolon at the end. And we'll make one for the cat. So I'll say cat, Jasper, Jasper flat. Then let's go back to our animal class and add a method for printing out the name and color. We'll say public. And then we'll say console dot, write line. And then quotes will say name, colon space. And then we'll just copy and paste that down below for the color. Just change both of those there. And we'll put a blank line down. Blow this. Now, when we come back to our program class, will say spite, print, Jasper dot print our code. As you can see, a sudden name spot color red, named jasper, color black. Anyways, that's it for this video. In the next video, we're gonna go over polymorphism, which is where we'll also come back to this speak method. So be sure to save what you have. Thanks for watching, and I'll see you in the next one.
83. Chapter 13 (Classes): Polymorphism Pt. 1: And in this video, we're going to be talking about polymorphism. Now, there are two major parts to polymorphism, which is why I've decided to split it up into two separate videos. Now, polymorphism means many forums. And in this video what we're gonna do is create a method that can be overwritten so that we can have one method that takes the same exact parameters but has different forms of functionality. So first, let's head over to our animal class here. So what we're gonna do, instead of just having this basic method called Speak, which currently all of our animals have availability to. And we can see that this is true by saying like spot speed. And I'm going to go ahead and remove both of these print methods and run our programs. As you can see, this animal speaks. So by default, everything that derives from our animal class has that method as a inherits its members. But what if I wanted the dog and the cat to be able to say something else without having to change my parameter list here. Well, this is where a polymorphism comes in. We can say public virtual boyd speak. And what this virtual keyword allows us to do is to either use this method as is or override it in a class that derives from this one. So now we're going to copy and paste this into our dog class and our cat class. And as you can see, it has a problem with this, because this method is already in our animal class. Plus, you don't want the virtual keyword here anyways. But even without that, you can see that we still have like green squiggly line then, now this green warning we're getting is actually just letting us know that by creating a method with the same signature of the method and our base class, that will be essentially hiding the method inside of our base class. And technically speaking, although we could fix this issue by using the keyword new in front of our Access Modifier. The need for doing so is pretty specific. And the details of how that all works is a bit more advanced. You're not going to be getting into that unless course. So after this public word, we're actually gonna say override the wave speed. And thus override keyword here says that we're going to be overriding the virtual method from the base class. And now we have this virtual speak method in our base class. Then we'd have our override method and are derived class. So in here I'm gonna change this to bark. And for our cat, I'm gonna change it to me out. Don't forget, we've got to change this one to override that as well. You'll see that that square root goes away. And now if we go back to our program, when she had saved there, we can say spot dot speak, Jasper dot speak. And now when we run our program, you can see that it says park and tau. What if we still wanted to use something from our base class that we kinda hit here by using the same name. Well, let's just say instead of this method, we also wanted to print out animal speaks. First, let's just add a blank line down here just to clean things up and our code when it runs than right here at the top, we're going to use the keyword face dot. Then we'll say speak. What this base where it does as it tells her program that we want to use this method here. But we want to use the one from the base class and feel free to use those base word anytime you hadn't, method or a variable from your base class. And even if you haven't hit in a field or a method from the base class, you can still use it just to kinda specify where that member is coming from. So in case I haven't mentioned this before, even though a derived class inherits all of the members from a base class. In order to use them within your derived class, you need to put them inside something like a method or a property, or a constructor, for example. So now when I run my program and leaves for a spot, that's gonna say animal speaks. Mark. For this one. It just says, yeah. Anyways, that's it for this video. So what I'd like you to do is go ahead and save what you have, because we're gonna be using it in the next video. And in the next video, we're gonna go over the second major part of polymorphism, as well as how to create and work with an array of classes. So thanks for watching, and I'll see you in the next one.
84. Chapter 13 (Classes): Polymorphism Pt. 2 & Array Of Classes: In this video, we're not only going to go to the second part of polymorphism, but I'm also gonna show you how to use an array of classes. And what the second major part of polymorphism is about is the ability of an object or an instance of a derived class to be treated as an object of a base class. And this is in places like collections, arrays, and method parameters. And in this video we're going to be going over an example of how this is done. So let's go ahead and erase this code here. And we're gonna say dog opened and closed square brackets equals new Dog, open square bracket, close square bracket, semicolon then was implicitly dogs. Open square bracket, close square bracket equals new dog will give brow color black. Dogs, one spot, Brown. And lastly dunks Solomon. Then P is a method from one of these we can template dogs, for example, that speak. Because raising properties, we can also print out these different shields by saying console dot write line. We'll say is 0. Color. Program. Animal speaks. Ok. So that's how you make an array of classes. Anyways, I'm gonna go ahead and remove this. And we're gonna go over the second part of polymorphism. So to show you the second part here, we're gonna create a method inside of our program class. We're gonna say public, static, void. We'll call this print name. Then inside parentheses, we're gonna say animal as our parameter. And we'll just call this animal. Then inside the body plus the console dot write line, animal name. Then up here we're gonna say dog equals new dog spot. And we'll say color red. Then we're gonna call our print name method. So we'll say print name. And then parentheses. We're gonna enter spots. Now, this is what the second part of polymorphism is. Basically our method here asks for an animal. But because a dog is an animal, has it derives from the base class animal. What polymorphism basically says, as a dog is an animal, an animal isn't a dog. In other words, a derived class is a base class. Base class is not necessarily a derived class. What that means thrust is this. If we ask for a base class, we can actually enter a derived class. Because we know that this derived class must have every member that this base class, hats and lamps for our method will work just fine. So we'll run our program. As you can see, we've printed out spot. Anyways, that's it for this video. In the next video, we're going to be talking about interfaces. Thanks for watching, and I'll see you in the next one.
85. Chapter 13 (Classes): Interfaces: In this video, we're going to be talking about interfaces. Now. An interface because basically a contract that any class or struct implements it must follow. Now interfaces are fairly advanced topic, but I'm going to try and make this as simple as possible to understand. So first things first, we're gonna create a couple of classes and a couple of interfaces. Now, to do this, you can either go below your solution name here, right-click on your namespace, then go to Add and hey class. Or you can just scope the project and hit Add class. Once again, make sure you leave with the dots. Yes. And we're going to call our first-class small. Then we're going to create another one. And we're going to call this large health Potion. Then we're gonna create two interfaces today though. So you can either go over here again, good under add a new item, or you can just go to project and add a new item. Then click on interface. And we're gonna call this one breakable. And then we're gonna create one more. So gonna project and new item. And we'll call this potion ad. And if you take a look at the syntax, you'll notice that it is the same as a class. The only differences that we use the keyword interface instead of class. Now, what's quickly go over a couple of things about interfaces. First off, and interfaces default. Accessibility is internal. And, uh, once again, an interface is a contract for any class or struct the implemented it. Also, one more thing to note is that interfaces can't have fields, but they can have properties. By the way, has little C-sharp 8 and up interfaces can provide default implementation for their members. But to keep things simple, we're not going to be going over that. Anyways, let's go ahead and create our members. So let's say that we want every person to have a purchase price and ASL praise. So mostly public purchase price. Then a lot of getter and setter will do the same thing for the subprime. Then we want every person to have a method for purchasing, for selling, and for consuming. So we'll say public void purchase. Because we won't be implementing any code for this method. We're simply going to end it with a semicolon. Then we'll say public and public way. Then let's go over to our breakable in her face and create that as well. And for this one, we're just gonna create a break method by saying public void break and not taking any parameters. Then let's go over to our large health Potion class. And inside we're gonna implement our interfaces the same way we would a base class. So after the name will say colon ocean. And something you can do with interfaces that you can't do what the normal base class, as you can implement multiple interfaces. So after potion will say comma breakable. By the way, if you did want to implement from a base class and from one of our interfaces, you're simply going to put the name of your base class first, then your interfaces after. Now, you might be wondering how you're gonna differentiate the name of a base class and the name of an interface. And let me show you how to avoid this issue. Anytime that you name an interface, you're gonna enter a capital i before the name. So let's go over to our potion interface. And we'll say hi potion. And on our breakable interface will say I breakable. Then back in our large health Potion class, mostly I potion and I breakable. Also, notice that we have errors on both of our interface names here. And that's because we haven't provided any implementation of the required members. So let's go ahead and do this. We're going to say public purchase price set. Then we'll just copy those for the subprime thing. Should we change this to sell? Then ladder methods, mostly public cell. By the way, when implementing these methods, you need to make sure the name is the same, the return type is the same, and the parameters are the same. Inside must say console dye, right? We'll say sold for colon space. Then down below, we'll say console dot write line, and we'll just say Sol Price. Then let's copy and paste this method. And here we'll say purchase will save, but four. And we'll change the purchase price. Then we'll create our consumed method. So say public, Sam. And then here we'll say console dot write line, potion, being gained, a 1000. Then we're going to actually change a couple of things in our cell. And purchase methods will say sold large portion, but more education. And lastly, we'll create our break methods Jose Public School, sprayC, console dot write, line, broke OR depression. To make sure everything looks nice. Let's go ahead and add a blank line in each one of these methods. So I'll say console dot write line. And I'll paste this in Seidel. Then let's go ahead and add a constructor. So we'll say public large health pushing. We're not gonna take any parameters. And if we had wanted to, we could just set every potion needs a name and took that as a parameter or whatever. But because this is a lot to take in, I'm just trying to keep things as simple as possible for this video. Then n here, we're gonna say purchase price equals 200 equals a 100. To make things simple, let's just copy everything inside of our large health pushing class. And we're gonna paste it inside of our small health pushing class. Then we just need to change a few things. First, we're going to implement our potion interface. So lets say colon type Potion. Then we'll change our constructor here. Small Health potion. And we'll say the purchase price was a 100 and looks up price is 50. Next tool, say sold smog potion, but small potion. Consumed small potion. And we'll say gained 5000. Then because we're not going to be implementing from R, I break up an interface. Let's just go ahead and remove this break method entirely. Now, well Click Classes are ready to go. So let's go back to our program class. And we're gonna say large health question. And we'll just call this large health promotion. And we'll set it equal to a new large health promotion. By the way, if you're using Visual Studio and something highlights like this, you can just hit space and it should paste it in for you. Then don't forget your parenthesis and a semicolon at the end. And we'll do the same purse small question. I'll play small health promotion. And we'll call it smell help cushion equals new small health function. Then we'll say large health promotion thing, the name of our object. And I'll say purchase will do the same thing for a cell. And the same thing for break. Then let's create a blank line. So we'll say console dot write line. And down here we'll say small health promotion, purchase in small health Potion dot cell. And we know that each of these have these methods because they implemented these interfaces and therefore were required to have these methods and an implementation of them. So let's run our program. And as you can see, suddenly by the larger potion for 200, we sold 100 and then we broke it. Then we bought a small potion for a 150. Now, I'm sure some of you are wondering why you would use an interface. Base class. And let me tell you. So let's quickly go over tour I potion interface. And first off, and interface allowed us to create a method that didn't have any implementation at all. And it required anything that implemented it to create an implementation for this method. And also, you can implement multiple interfaces, whereas with a base class, you can only implement one. So let's go back to our program class. Then we're gonna go over just a couple more things that make interfaces extremely handy to work with. To do this, we're going to create a method. So we're going to say public, static, void, and we'll say break potion. And we're gonna say that this requires an eye breakable and our face. So I'll say I breakable. And we'll just call this potion. So inside will say potion that break. Then let's remove her code except for our two instance statements. Then we're gonna create an array of i quotient interfaces. So we're going to say I. If ocean opening, closed square brackets, then we'll call this inventory. And we'll set this equal to a new IPO ocean array. And we'll set the size to two. And we're gonna say inventory at index 0 equals large health Potion. By the way, if we hadn't done this up here, we could have said something length AS McKenna said, inventory at index 0 equals a new large health promotion. And the spatially works the same way classes did when we talked about polymorphism. So because any large health pushing class object has to have an implementation for everything in our eye potion interface. This will work just fine. But because we already created this up here, I'm just gonna go ahead and remove those. So we'll just change this back to large health question. Then we'll say inventory. Then dx1 equals o. And the reason we went with the potion on her face and not the breakable interface as because we know that all of her potions are going to implement our potion interface. But we didn't make all of them implement the breakable interface. Then we're gonna create a for loop. We're going to say for int i equals 0, i less than inventory dot link i plus, plus. And what we're gonna do is check if any items in our inventory implement the eye breakable interface. So let me show you how this was done. First, we're going to say I breakable. And we'll just call this potion equals. And we'll say inventory and index i. Then we're going to use the keyword as I breakup lumps. Now, before we go over this, let me show you something quick. So you can't create an instance of an interface, can set it equal to that interface. So let me show you what I mean by this. You can't say something like, I will just call this p real quick. Equals new I potion. And that's because this doesn't have any implementation. And the reason we're able to do it up here, because of you set it equal to something that implemented this interface. So I'm gonna go ahead and remove that. And let's talk about this line here. What we're doing is we're creating an instance of our eye breakable interface called Potion. Then we're setting equal to inventory at index i, which is either going to be large held potion here or a small potion which is just equal to the specified classes. So we're saying that the first time through our loop that we want to potion, which is of type II breakable, equal to essentially large health Potion. Because this was of type i potion. We're converting it or where to I breakable. And what this as keyword allows us to do is check if objects implement I breakable F. So we're going to convert this into R, this tau I breakable and set potion equal to it. Otherwise, this is just going to be equal to null. So let's go ahead and check for that. We're gonna say if potion is not equal to null, then we know that this conversion worked in whatever object we were looking at implemented I unbreakable interface. So let's go ahead and say potion dot break. And we're also going to implement it into this method down here. And I know currently, let's just does the same thing, but I just want to show you that it works. So we'll say break potion and we'll insert potion. And in case this doesn't work, let's say else. And I'll say console dot, write line, not breakable. Now if all of our patients had a name as well, we can put that down here if we wanted. But like I said, I'm just trying to keep things as simple as possible. I just wanted to mention that to get you guys thinking about the different possibilities here. Now, let's go ahead and run our program. So we printed out broke large portion because of this line here. Then we inserted potion into this method, and that just ran the same exact method. Then when we loop through our for loop again and I change to one, and we check to see if small health Potion implemented I breakable. This returned null. So because potion was equal to null, we said not breakable. Now, let me go ahead and show you something quite. Let's go back to a small held pushing class. Let's implement I breakable. So we'll say comma hi breakable. Then we need to implement our break method. So let's just copy that from our large health pushing class. We'll paste it over here. And we'll say broke, small potion. Done. We'll go back to our program class. Make sure you, I save and run your code. And when I wanted to show you here, is that we ran the break method from the specific class. So this one said broke large potion, unless one said broke small portion. Then I just wanted to quickly go over those code here. And our program class, once again. The two instances and we eat your classes, then created an array of R. I push an interface called inventory and set it equal to a new IPO ocean array that held two items. Then we said inventory at index 0 equals large Hulk potion in inventory at index one equals smuggled Potion. Then we created a for-loop. Those kinda run for as many items as we're N or inventory array. Then we create an instance of our eye breakable interface called potion. And this variable was only temporary as that was inside of our loop. And we set it equal to inventory I, which was going to be large health Potion or a small health version, which are both just equal to a new instance of their class. And we said we wanted to cast it to I breakable instead of having it as I potion. So we basically said large health promotion. But we want to as an AI breakable. And if for whatever reason this doesn't work, we just want to set potion equal to null. Got. So plus as keyword allows us to do. But instead of writing all that extra code, we are simply able to say the object as this interface. We just match the interface type here to this one here. Then we said if potion thing or I break of a variable is not equal to null, meaning that this conversion work we wanted to take potion in US it's break method. So the first time through, we said we wanted to create an instance of I breakable called potion. Said that equal DO large health portion as type I breakable. Then, because large health Potion implements that breakable interface, it was not equal to null. Then we're essentially just saying Arch Health potion dot break. The only difference here being that because it is a Type I break the bull, it can only use the break method and does not have access to anything else in the either broad classes or I potion interface. Then we also inserted potion into our break potion method, which just take something of type II breakable and runs the break method. So this method here just did the same thing we did here. Once again, I'm just showing you that we could use an interface as a parameter. Then we said out, meaning if potion was equal to null, we just wanted to print out not breakable. And once again, real quick, the reason we are able to make an instance of a potion and set it equal to large health promotion. That's because of polymorphism. And this works because we know that everything in our large pushing class implements all the members of our eye potion interface because it is required to them. Anyways, sets up for this video. And the next and final video of this course. We're gonna be talking about the four main principles, object oriented programming. So thanks for watching, and I'll see you in the next one.
86. Chapter 13 (Classes): Four Main Principles Of OOP: Video, we're going
to be going over the four main principles of
object oriented programming. Now, you don't
actually have to do any coding in this video, as you actually know how to do and have worked
with all four. I just wanted to give you a brief and simple explanation of each and show you an example of when we use this
in the course. So the first one we
have is encapsulation. And what this essentially
is is the hiding of data implementation by
encapsulting it in something else. And I have an example
here for you. Back when we were
creating classes that had private variables and encapsulated their use inside of public properties like I
have here or public methods, we were encapsulting
this variable inside of these
public properties. All right so we're
taking data and encapsulating it inside
of something else. Then our second of the four
principles is abstraction. And a brief definition
of this is making only the necessary things
visible to the user, and abstraction and encapsulation kind
of go hand in hand. So hopefully, when I
go over example here, you kind of understand
the difference. By the way, I just copied
the same exact example. So whereas we practice
encapsulation by taking this private variable here and encapsulating it in
this public property, also practice
abstraction by deciding what things were necessary
to be visible to the user, being the setter and the setter, we hid the information
that we didn't see necessary to
give to the user. We didn't find it necessary for the user to know this
calculation here. Or what was going on
in our getter either, and we didn't make
this variable public, as we didn't find that
necessary either. Instead, we only made the necessary things
visible to the user. So abstraction is making the necessary things
visible to the user, whereas encapsulation
is what's in the background where we hide the details inside
of something else. Next, we have inheritance, which simply put is the ability to inherit
members from something else. So for example, when we made our dog class that inherited the members
of our animal class, we were practicing inheritance. Now, I didn't make too
big of an example here, as this one's pretty
straightforward. Our last main principle of object oriented programming
is polymorphism, which essentially just means
to have multiple forms. And we practiced this
back when we made a base class with a virtual
method that did one thing, and then we created
a derived class that inherited the members
from the base class animal, and we overrated that method. So then we had two of the
same method signatures, but they did different things. And therefore, it
took multiple forms. This is an example
of polymorphism. So you now know the
four main principles of object oriented programming. Thanks for watching, and I'll
see you in the next one.
87. Congratulations!: Congratulations on
completing this course. You've taken a big step forward in your
programming journey, and you should be very proud of everything you've
achieved here. If you enjoyed the course or
found it helpful in any way, we'd greatly appreciate it. If you could leave us
a positive review. Your feedback not only
helps us to improve, but also encourages others to start their
journey here as well. Now, try and think back to
when you first started. The idea of coding likely
fell overwhelming. Now look how far you've come. You've mastered
the fundamentals, explored advanced
topics, and gain the skills to start
creating your own projects. Now that you've
completed this course, your next step is to put
those skills into practice. A great way to solidify
what you've learned is to tackle a small
manageable project, something that you
can complete in like two to four weeks. And I'd highly recommend
starting by cloning an existing simple application for non commercial
purposes, of course. And by creating something
that already exists, you can focus on learning
how each feature works and how to implement them yourself rather than
designing it from scratch. Once that's done, try adding your own unique twist or expanding on the concept
as a second project. This is a fantastic way
to both practice and flex your creativity while building confidence
in your skills. Then from there, you can start
branching out to bigger, better and more unique
projects of your own. And remember, it is
perfectly okay to come back and revisit the course material as you work on
your own projects. Programming is all about
learning as you go. Even season developers
constantly look things up, whether it's refreshing
their memory or solving a new problem. Using resources like this course or the Internet is
not a weakness. It's a part of being
a great programmer. Now, this is just the beginning. Whether you were working
on your first project, returning to refresh
your knowledge or diving into another
one of our courses, the knowledge you've
gained here will be your stepping stone for
even bigger achievements. Speaking of which,
be sure to check out our other content for more
learning opportunities. And if you haven't already, please consider leaving our view to share your experience. It really does
make a difference, and we'd love to hear from you. From all of us here
at Primoris Arts, congratulations again on
this amazing milestone. We can't wait to see
what you create next, keep learning, stay curious and remember the
sky's the limit. Well done, and best of luck
on your next adventure.
88. FAQ: Visual Studio License Expires?: Now if you've been getting a message saying that your license is about to expire on vegetable stadio. Don't worry, you're not going to have to pay any money or a type in any kind of private information. They simply want you to just make a Windows account and sign it. Now, for those of you on Windows ten, you probably already have one. So all you have to do is click up here at the top right where it says sign-in. Then if you already have a Microsoft or a Windows account, go ahead and sign in here. Otherwise, you can click on create one and make a new account and then sign-in, then well signed it and you'll have a permanent free license to Visual Studio.
89. FAQ: How To Properly Change Class Name? (Visual Studio): Now if you're working in Visual Studio and you have are being named the class. So for example, if I change this name here, class one, you'll notice that it doesn't change up here, and that's because it does not change the file name. Luckily, there's an easy fix for this. So instead of changing the name directly, what we're gonna do is highlight this, right-click and rename. Then just double-check the rename pile, this checkmark, name it what you want, and hit apply. And as you can see, it change books.
90. FAQ: C# vs .NET?: Now, C-sharp is I'm multipurpose object-oriented programming language. And it is obviously the language that we're learning in this course. So I'm not gonna go into too much detail about it unless it is also based on the C language. Like many other languages are, such as C plus plus and java.net, short for network enabled technology is made up of two major parts, being the common language runtime and the.net framework class library. And this is the framework on which the C-sharp language was built. And it was also created by Microsoft.net supports many different languages, such as C sharp, F sharp, and Visual Basic. And it also defines the rules and associated libraries for those languages. Now, the class library as packed with tens of thousands of pieces of code. And this is to provide you, the developers or programmers with common functionality. So you don't have to start from scratch every time. Also, the CLR, or the common language runtime, is the execution engine that handles the running of application. And it also provides multiple services such as exception handling, garbage collection, and type safety, just any mafia.
91. FAQ: How To Clear Console?: In this video, we're going to quickly go over how to clear the console window. So first let's go ahead and print something to the console. So say console dot write line. And we'll just say please believe me. Then declare the console window. You simply need to use the clear method. So we'll say console with a capital C, dot, clear with a capital C as well. Open and close parentheses and a semicolon at the end. And just so we can see this actually type out before the console window clears. Let's go ahead and call the read method before I let console dot clear method. So we'll say console.log key. We'll run our program. As you can see, it says please delete me. We press any button on your keyboard and it clears the window.
92. FAQ: How To Change Console Colors?: In this video, we're gonna go over the syntax for highlighting our text with a specific color. How to change the color of our text, and how to change the background color of our text as well. So I'm just going to put in some pseudocode here. So say background color, foreground color for the text color, and background-color again. Except this one will be for highlighting text. So to change the color of our background, we're gonna say console dot background color with a capital B and C. Then we're going to set this equal to a console color with a capital C on console and color. Then we're going to simply say dot and pick one of the colors and the following list. Now if you're not using Visual Studio this list and might not pop up for you. So you might need to look up a list of possible colors. So I'm just gonna pick the sand, for example, and put a semicolon at the end. Then down below this, we need to use the console dot queer methods. Then we'll make it so our console application except some text. So, so I console dot read line. Then we'll run our program. And as you can see, we now have less cyan colored background. But the collaborative text as pretty hard to see. So let's go ahead and change that to a black color, 2D LOS. We're gonna say console. That foreground color with a capital F and C. Set it equal to a constant color. And we'll say dot black. Notice that the first letter of our colors are capitalized. Don't treat your semicolon at the end. And lastly, we're just going to cut this console dot read line and paste it below this line that's done. Then we'll run our program. As you can see, our text has now black. And lastly, we're gonna go ahead and add in a highlight color for text. The only difference between making a highlight color and background color as light. You're not going to call the clear method afterwards. So we can just go ahead and copy and paste this console dot background-color statement. Paste it down here. And let's just change the color to red. Then once again, we need to move our console dot read line method can be down below. And we'll run our program. And now when we type, as you can see, we now have a red highlight. And just to show you this quick, on my console dot clear method and paste that blow our highlight color here. And as you can see, it does not change the background color to red. Anyways, I'm gonna go ahead and undo that. And lastly, let's go over how to reset our colors. Today lists we're simply going to say console recycling, which I capital RNC, open and close parentheses and a semicolon at the end. Then we also need to clear the console again afterwards. So we'll call our console dot clear methods. And lastly, we'll call upon our console dot read line method one last time to so we can really see the changes taking place. And we'll run them Program. So here's before we reset it. Then we hit Enter. It resets, that comes a colours and everything's back to normal.
 Primorous Arts, Course Instructor