Transcripts
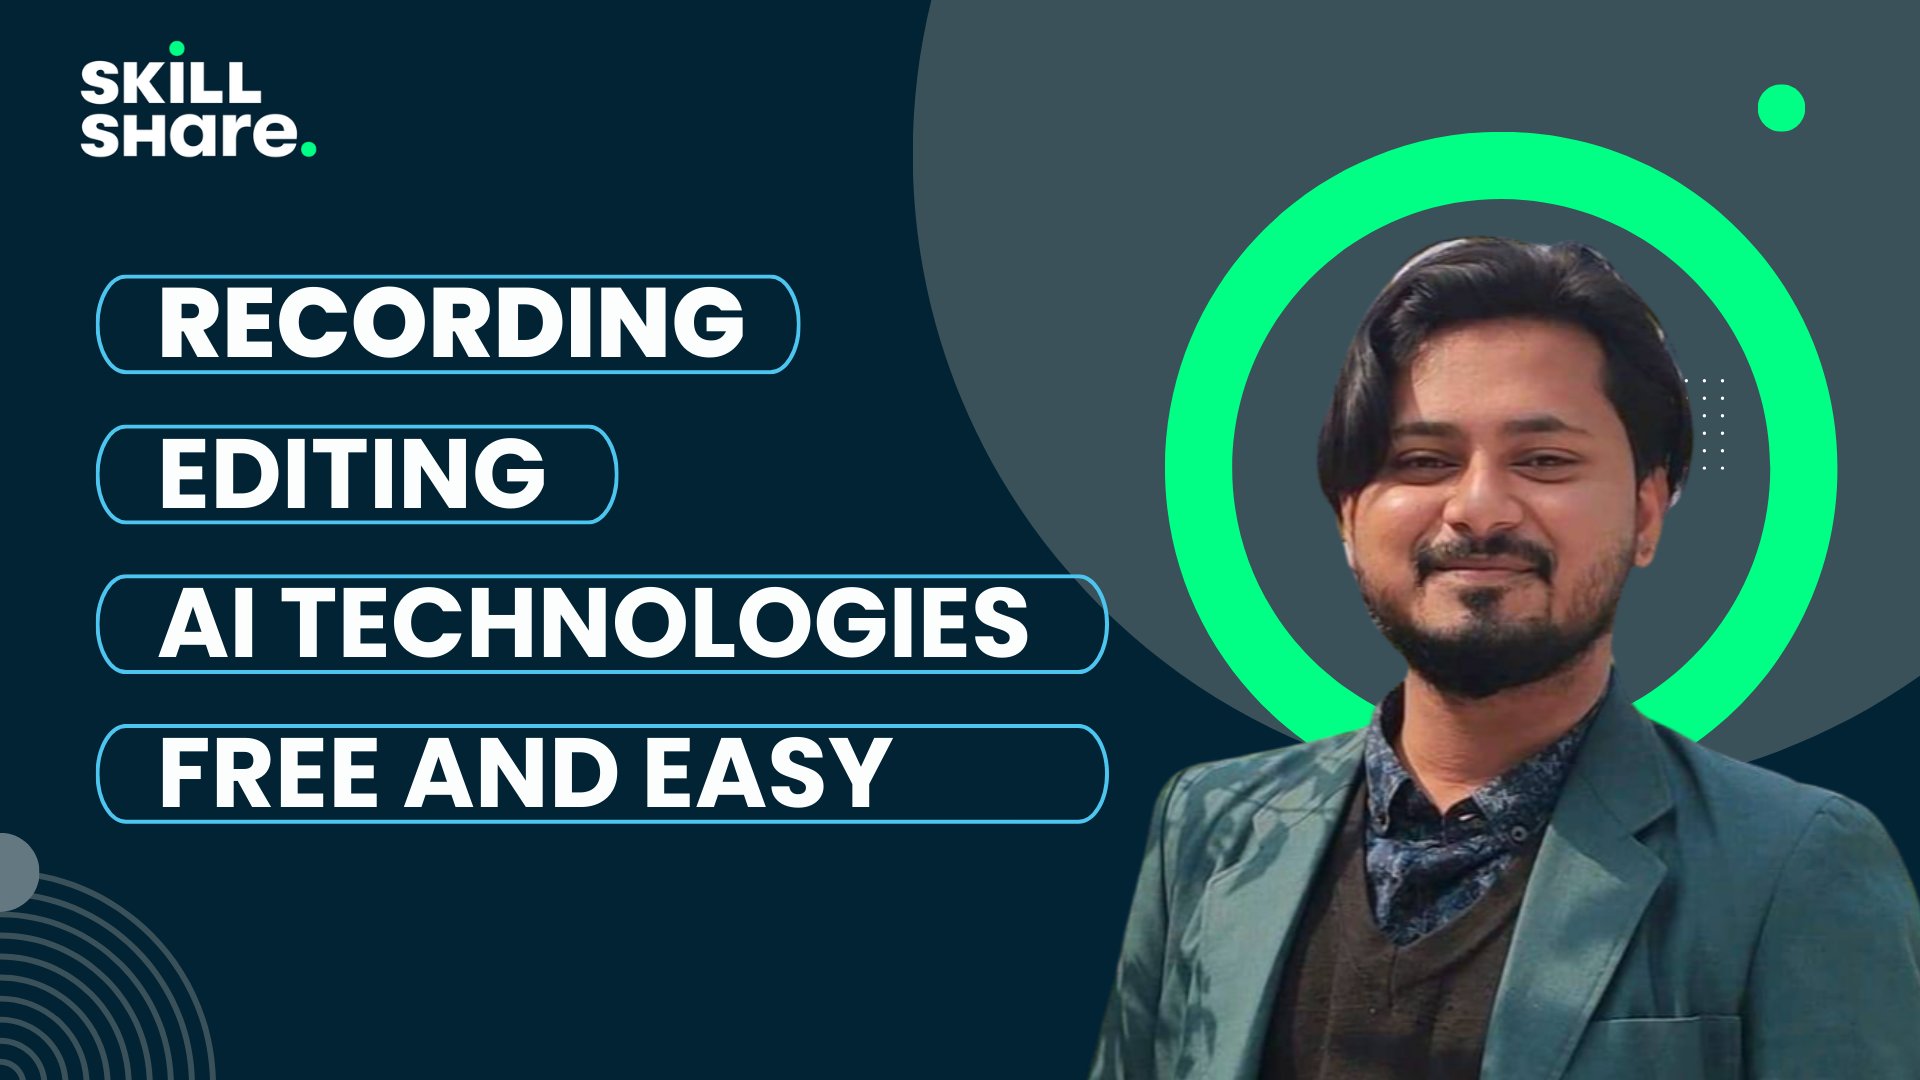
1. 9 fast ways to turn boring talking head videos into interesting content: The rules, you're
a creative person. Just go break the rules. Don't listen to me and
what I tell you to do, just getting
inspiration from me. And that'll allow you to go
make the best videos you can. Certainly in this
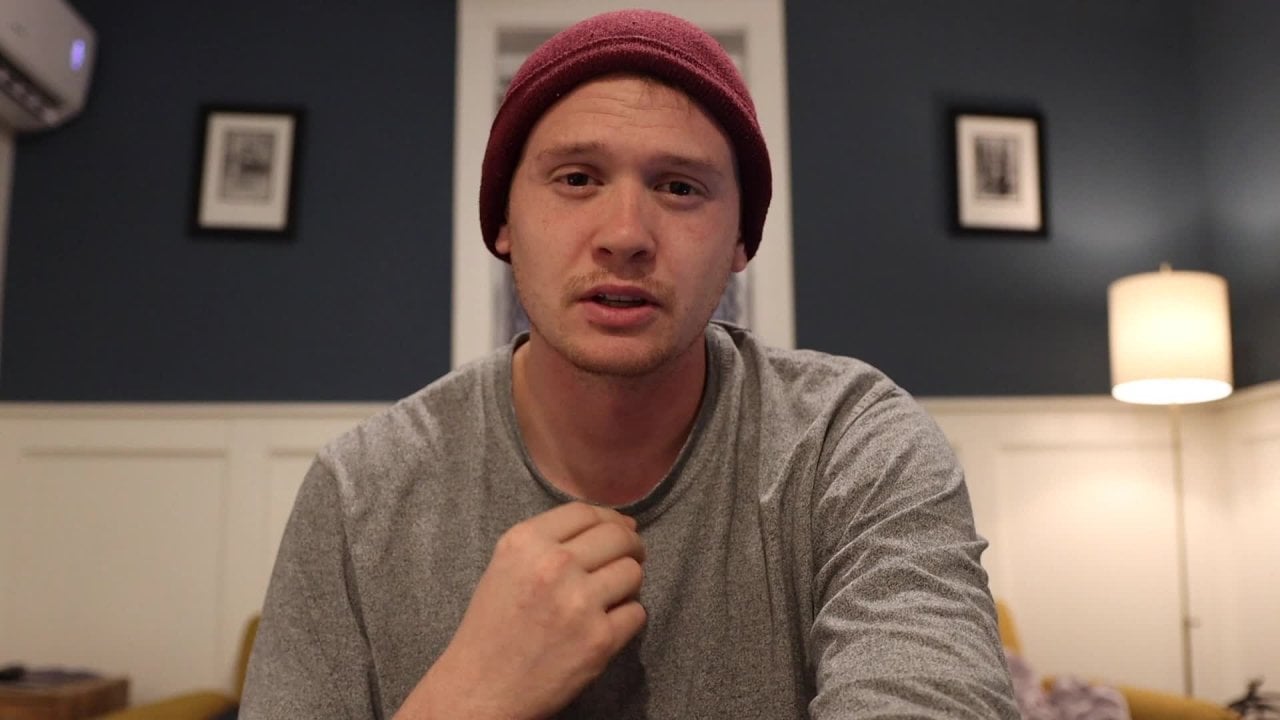
class I'm gonna do my best to not waste your time. My name is Karim amines. I've made over a 1000
internet videos, and these are the
lessons I've learned for so many talking
head videos and how to make them more interesting. First, we're going to go
over conceptual ideas, things to think about before
filming or before editing. There's three videos on that. Next, we're gonna go to
five tactical videos on how to actually implement these into
your videos to make your videos and much,
much more interesting. My goal in this course
is to spark ideas for you that way you can have inspiration, you can have ideas. You will not run out of ways to make something
super boring, even if you're a
boring talker or have footage of someone
who is super dull, maybe you can make that more
interesting and more fun. So let's get right
into the course.
2. See the movie in your mind: The first conceptual idea is to play the
movie in your mind. If you have a vision, you can create anything. The tactics aren't as hard. But if you've got the
skill to have the vision, if you're a person
who can see what you want made
before you make it. You've got what it takes
to be really good at this. So you need to know your vision, but you also need to
know the mission. What's the point of this? Are we trying to sell widgets, communicate a
message, tell story. What's the mission of this
talking head section? And how can we create
the vibe around that? If you shoot your own footage, definitely, you need to have some mind before
you start shooting. If you don't shoot
the on footage, but you're just an editor.
Once you get the footage. In that case, I like to play back on times two-speed
all the footage first, get the idea of what's
being said and also what's the mood but the
tone with the music, Let's coloring all those things. Start playing that
back in your mind. Turn on some cool music and get that vision for the whole
video and then dive into it. Buddy, I'm sorry, Fellman. Don't mind me. Once it does take away. If you can't see it
in your mind first, there's no way you're
gonna be able to make it come out
in the computer.
3. Be yourself everyone else is taken and video environment: Second idea before we
get to the tactics, match someone's
personality with the edit. So is this person goofy? Is this person more corporate? A good example of this is, I like to add a
goofy twist a lot of times to my personal content. And I might, It's
terrible humor, but I'm kind of dad
jokes, self-deprecating. I trip and fall, all that fun
stuff. I really enjoy that. Whereas my wife is more
corporate, choose an agent, and so she's going
to have a more professional look
right up front. I'm gonna be wearing
more casual clothes. I'm going to maybe
have some goofy music, sound effects, goofy graphics. She's going to be
more professional. Know which type of
edit you're gonna do. And it's not normally a good
idea to mix those edits. Because if you
start with one way and get real serious
and then go a different way and try to change your personality or try
to be like somebody else, you are definitely
going to fail. So this is pre
filming, pre editing. These are some ideas if you get the opportunity
to film and edit, take care of this first,
we're about to get to the tactics after one more idea. If I edit against the
character of the person, there's going to be
friction with the audience. They're going to feel like this person seems professional, but they're trying to be funny, but they're not really funny. This person seems goofy
and it sounds like they're just trying to reserve
themselves the whole time. You gotta go in line with the personality
and with the edit. They got to flow together. Sometimes you'll have
a super cool edit, a really good idea, and you just learned how
to do this new tactic. So you want to put
it in a video? Well, be careful
because it might not be the right video for it. You can practice it, but not all cool
edits go into video. You can over cool edit a video and try to do like all these transitions and
all have so much Susan, all sorts of crazy things
that could overdo it. And you don't want to do that. You don't want to
drive people crazy. It goes to the storyline. If it doesn't go to the
storyline, you cut it out. Save the cool edit
for another video. If you have the privilege of being in front of
the camera yourself, like I do a lot of times, here's a few tips that's
really going to help you out, especially in the
post processing to make this talking
head not so boring. Number one is to
look at the camera if you were just kind of talking and thinking in your mind
and not really sure. Well, maybe I should
go look at the camera, address the people's number two is to not cover your mouth, are not being secure or not. Have your hand on your face
and talk because that's not a good posture to come across as confident and come across as who you want to be. Plus competence is gonna
go up if you can sit up appropriately and talk
to the camera directly. And that's going to allow people to connect with
you better than if I'm over here looking this way trying to figure out
what I'm saying. Third tip is shoulders back, which I lean forward a lot, chin up. Look at the camera. Those two things are going to
build your confidence just because you're in a posture,
a competent posture. And that's going to
make you feel like you're gonna go get this. Lastly, breathing helps a ton and play some music
before you start. When you're going to
practice filming, you want to get to 100%. Most people just turn on
the cameras, start filming. I did this just few minutes ago. I filmed the first step in, I deleted it, but
I'll turn it on. And then you've got extra
excited and extra enthusiastic, Extra, go beyond
what you want to do. So, hey guys, welcome back
to this Skillshare course. Could do something crazy. Breathe in, breathe
deep lessons, some awesome music
that's gonna get your blood flowing
and you're gonna be able to talk at a pace
that's enjoyable to listen to. The one-sentence
takeaways to match your personality with
the environment. And you may have to
get uncomfortable, do some weird things in order to get comfortable on the camera.
4. Gaining confidence and getting your crap together.: Number three, this is one that videography doesn't
talk about much, but I think it's super real. Your videos are going to be
a product of who you are. You can't fake it forever. So what you're putting
into your life is what's going to come out on camera. And then you're able to be here for the long term
because you are who you are and you don't
have anything to hide when you're always
telling the truth. There's nothing to hide and
there's nothing to fear. So maybe if you're
looking to get on camera, maybe you don't feel confident. That could be two reasons. One, you need to practice
in front of the camera. The second thing is
you might need to get your crap together
a little bit and actually keep the promises to yourself that you are making. Once you start keeping those
promises consistently, you'll become more confident. Once you become more confident than you can address the camera. You can address the people
with full confidence rather than being wavering in and out and
being inconsistent. So take care of
yourself first and then everything can flow
out if you freely. The one-sentence takeaway is that if you are proud
of who you are, There's nothing to hide and
you can freely just be you.
5. Use b-roll...But not always: Alright, now to the fun
stuff onto the tactics. The first tactic is relative
B-roll to your videos can make a talking head videos
super, super interesting. Now the big most
important thing to this is relative footage. If I'm sitting here
talking about this is my favorite microphone
and this is how we plug it into
the wall or something, but the footage doesn't
match up correctly, like that doesn't make sense. It would be better just
to stay on the person. Then a would be to do bad
B-roll or bad footage. Secondly, I like to avoid stock footage as much
as possible because stock footage has
a stock footage look that just looks
fake and less authentic. And if you're trying
to make a video, if you're trying to make
a film or something. If you filming yourself,
that's more rods, more real. The audience can feel
that they don't maybe know it's a piece
of stock footage, but they can feel that. So a good tactical tip on that is to ruin
the stock footage, make it a lower-quality,
add some filters, do something to
it at a handheld, handheld shake to it that
way it might feel more raw and different than something
that's cartoonish. I don't think that's
the right word. One-sentence takeaway is to use B-Roll to enhance
your footage, but make sure it's relative
or else it'll be bad.
6. Cropping and zooming techniques: Next tip is to use
rule of thirds, so I can be on the side, I can be cropped to the center. Use the rule of thirds
to crop and crop out. For example, you could be
right up on my face and then crop out to the whole
area like it is now. And that can produce intrigue or if you're
getting really serious. And I don't know what's
going to happen next. But you can use the rule of thirds and zooms to make
them more interesting. So you've got nine really
quick ways to crop it. I could be on the
left of the screen, right of the screen, of
the center of the screen. I could be wide, I
could be in the middle, or it could be
extremely zoomed in. Now you have nine
different camera angles with one camera to choose from. On top of that, you can do a
slow zoom or a slow zoom out that adds two more to
each of those nine areas. That's a lot of ways to add
it using the rule of thirds. And Ken Burns is good
for all sorts of videos. I use them in all
types of videos. But there's another form of cropping that you
don't really want to use an all videos that's
gonna be in the next video. But the one-sentence takeaway
is used rule of thirds, use cropping, use Ken Burns to get as many angles as you need.
7. Crazy cropping techniques and short form content: Crazy cropping techniques. This might be more of my style. I might do this from the
type of videos I make. And I'm gonna do crazy
cropping techniques. So that means I might not
be in the rule of thirds. I might be on one side
or the other side, where on the side way zoomed in and zoomed out or
something with this, the idea is to promote intrigue. And so you can zoom
in really close on what you want somebody
to pay attention to. Where you can zoom
in really close for some comedic effect
and try to be silly. Now there are no rules
here, so just go crazy. But the one thing to keep
in mind as speed is king. So the quicker, quicker,
quicker and quicker, quicker, quicker you can edit and crop. Then their minds trying to process all of this
information super-quick. But the hilarious thing
is if you zoom out, you realize that I'm
just in front of one single camera right
now talking to you. But based upon how
you edit the film, how you edit your movie, how you edit your
video is going to change how people feel
when they watch it. If you create short form
content or Internet content, think about doing some
wild editing techniques like watch this, zoom out. It creates a different feel, a different look, and it depends on the
mood of the video. Back to the conceptual ideas. You can get that right. You have so many options to make a talking head
video like this. Super interesting. The one-sentence takeaway is, don't follow any rules, do some crazy cropping
techniques, try it. If it sucks. Command Z.
8. Use simple effects to enhance talking head videos: One of the interesting things
about making a talking head video interesting
is to experiment. So for example, what if I
wanted a different look? I could just flip
this right now. Yeah, just use an effect
and flip it all around. The problem with this can
come in is when there's a word or if direction
really matters. So keep that in mind. Use
effects for your benefit. You could try a
aged film effect. You could try a cartoon effect. Depending upon the
fill you want. You can use effects
and I would say short form Internet contexts. The primary place to do this, do a black and white effect for the past and then
come back to the present when you're
contradicting yourself. So you could say, it doesn't matter what you do. And then flashback to the past. It only matters what you do. And it shows that black
and white is the past, match the vibe of the
video with the effects, an experiment that's the way to figure out what
works for you. So the one sentence takeaway is, don't follow rules, use effects, try things, and it
might just work out.
9. My secret to using graphics correctly (it mostly works): Graphics, this is the one
you've been waiting for. This is the one some
people only do, just graphics, but
they don't crop. They don't use any effects. They don't flip the screen,
they don't do anything. They just use graphics,
which is fine. Because if you add what
I'm saying over here, it could be interesting or add points to what's going
on could be interesting. But you want to be
careful with this in a few different scenarios, three moments to avoid graphics, a super serious scenario. So if someone is addressing the camera directly and talking, you're not going to want emojis popping up over here and
words popping up over here. You want that seriousness to come through the
camera and you want that connection to be
between you and the audience rather than a graphic that
ruins the serious moment. Second is sad moment. So there's kind of
like a serious moment. But if something's really sad or the sad part of a storyline, let that weight sink and
let that weight hold. And that's going to
make it more impactful than popping up the **** emoji. Third, storytelling moments. Now, this is a middle
ground one here because if I'm telling the story to you about something
that happened, you can use B-Roll to enhance
their relative B-roll. But if I just start
to tell you a story right now about my neighbor Bob, who came over to me while
I was cutting some wood. And he was not very happy
and started yelling at me. And well, maybe I don't
want to put that out there. Anyway. If I let
your imagination go, then you get a picture of Bob. You get a picture of
the entire scenario by yourself rather than me, Joe on the fence
showing a random, angry guy in stock footage like that's not going to add to the story unless you're
comedic in a sense. So get that, you'll
get that via, know what you're trying to do. And be careful. Be careful to not add too
many graphics when you want people to pay attention because the pace of the
video goes like this. And when you change the pace, whether it's speed or slow, it's going to trigger
people to pay attention. So you could use graphics, you can be super, super fast, super interesting, and then slow it down, slow
your tone down, slow the pace down
to the video and just let it resonate and
people will pay attention. Or if you're just
a chill person. And then you start to get more energetic and tell people to start getting
their crap together, they're going to start paying attention once you pick that up. So you need to know
this flow with the edit and don't ruin the flow with some
random graphics. One sentence takeaway, graphics are the easiest and best way to enhance a talking head video when they're
appropriately placed. Do it.
10. Music and SFX and how not to ruin your video: Music and sound effects. You can use this to
enhance a video. You can also use this
to ruin a video. If I'm talking,
there's a couple of techniques I could
use for music. And lot of times
you want it to be quite a lot background music. But I could be going
really fast and really interested in
this specific topic. And then I'll lose
my train of thought. And if I'm making fun of myself, I might cut the music
right where I look off to the side and then really
bring the music in that way. It emphasizes what
I'm wanting to say. So again, changing the pace
emphasizes what you're doing and you can do
that with the music. You can also do that
with sound effects. And so when you guys do a super good job and
go make banger videos, I'm so excited for you. Yeah, you can have sound
effects, graphics, all these things
enhance the video and you should think about
using them appropriately, not overdoing it,
but appropriately. In the video, you've
probably seen those people who overdo
these sound effects. And there's a pup and
ocean, a whip, Anna. Anna. Every second. So yeah, just don't overuse it. Change the pace. Watched the video back that
you're making and think, what does this make me
feel and why and how can I change it to make it feel
the way I want it to? Another way to use music
to start at 0 and then slowly raise the music as
the intensities happening, as the intensity is growing, as you're getting more excited, as you are coming more
to the climactic moment, you can raise, raise that
intensity of the music slowly. And that's going to allow
the audience to feel this anticipation of
something's coming. What is coming? There was
this time when I went to the grocery store and as
I was walking inside, there was this homeless guy
next to the homeless guy. There's another guy
talking to them. And I overheard him say, Yeah, I'll go check the
truck right as I was going inside and I had
left my computer and my truck and there was literally no way
to lock my vehicle. The lock was literally broken. And so I was getting super
nervous at this guys. You can still talk and
he starts to be lining straight to my truck
and I get inside of the store and I turn
right back around to go look what is happening outside. And then when I
finally got outside, they had their own truck
they were looking at. That's an example of
raising the music with the intensity of the story. Don't just think about
using these effects. Think about not using
them to create a vibe. In this world where
everybody uses music, everybody uses sound effects, everybody uses graphics,
everybody uses cropping, everybody uses all these things. If you wanted to have a
super intimate conversation through the camera, maybe stripping more away would be more impactful if
you're trying to inspire. But also on the
other side of that. If you use it correctly, it can inspire as well. It can keep the
audience's attention. I can take a video
from a two to a 12th. When I first started
making videos, I started because
I was scared of talking in front of the camera. And because I wanted to
overcome that fear and I've gotten better at talking to the camera and
the past five years. But with that being said, the only way any of my
videos was watched at all in the beginning is because I
was able to add graphics. I was able to make myself
look 510 times better. And that's what we want
because you don't want to go watch somebody and
not be inspired. Like I don't even want to watch. Yeah, like I want
I know that's not how it is exactly in real life, but that's how I wanted to
feel the bees inspired for action to go out into
the world and crush it. Boom, that's all I got for you.
11. How I edit real time a talking head video: Alright, now let's jump
right into the computer. I'm going to show you a couple
of the edits I'm doing for this video because I'm basically
a boring head talking, but let's run through it
and we'll see what happens. Next tip is to use
rule of thirds. So I can be the first
thing I'm gonna do here. I use Final Cut Pro. I'm gonna do my art
tool for the range. And I'm just going to cut out by the audio clips
exactly what I know. I don't want. And this is just a big
time-saver right off the bat, where I'm looking at my notes, are trying to figure out how to say what I want to
say most effectively. This is the one I
misspoke the most I think or did not do a great job. And so we'll watch
this back here. I like to use a lot
of shortcuts to use brackets, rule of thirds. So I can be on the
side to the center. Use the rule of
thirds to crop in, crop out, for example. So that's pretty, pretty
slow right there. And you can see the audio
waveforms right here. There's just a big gap. So we want to just get
rid of that. Again. I can use the Arrange tool
and just get rid of it. But a good technique on top
of that is to do a L cut. So in order to do now, I'm going to drop the audio of this original clip underneath
the other clip here. If it were a j cut, I would drop it on top. So let's see what
that looks like. It can be on the side. It looks much better
there than this. So I can be on the side, and then it can be on the side. Another way to do
that, if you want to clean it up a little
bit more as you can, just detach the audio and
delete your foot edge. And there you go. Be on the side, I can be
cropped to the center. Use the rule of
thirds to crop it. Again, going to
take out the gaps right in and do interviews. And then right there, I think would be a good time
to go ahead and crop in. I'm talking about using
the rule of thirds. I'm basically on the
right there at the squad, crop me into the center here. That way it looks a
little bit more seamless. And I like to go just a little bit above
the head showing. So it can be on the side, I can be cropped to the center, use the rule of
thirds to crop in, crop out of thirds. So actually I say, use the rule of thirds
to crop in, crop out. I think it'd be a good
idea to crop in, right? When I say that center, use the, so the rule of thirds
or staple crop in. So we'll make this
one not as strong. Just a tiny crop. Let's go 110. And then this one will go all
the way in, yeah. And then this one, the rule of thirds
to crop in crop, where I say crop out, we're going to zoom back
out to the beginning. You can just go to 100% and then 0 out your x and y-axis and you're back to the
beginning crop out for next tip is
to use rule of third. So it can be on the side, I can be cropped to the center. Use the rule of thirds
to crop in, crop out. Okay, so there's
propping crop up. I remember I've got a graphic
of the rule of thirds. So for videos, logos, graphics, and rule of thirds. Let's see if that
does what I want. There we go. So now I've got this really cool rule of
thirds graphic here that I can overlay on myself
to see where I'm at and I can get myself even
more on the rule of thirds. So next tip is to
use rule of thirds. So it can be on the side, I can be, I can be on the side. So whereas I use rule of thirds, the rule of thirds
and use rules. And this is just a
graph that kinda shows what the rule of thirds is to either be in one of
these corners or dead center. That's not a technical thing, but that's all we
need to know for now. So let's fix me here. Zoom in slightly and put
me right at the top. Now ideally I would, I would be a little lower,
but that's alright. And so it can be on the side. I can be prompted to be cropped to the
center. To the center. This is just a good
example of doing it right? As we go. Right there. Use rule of thirds, so it can be on the side, I can be cropped to the center. Use the rule of thirds
to crop in, crop out. For example. It could be right up on my goal. So again, there's another
pause here and could be, for example, and I said you
could be buds just quickly. I don't like to
detach the audio, especially in a
scenario like this because I don't
need it that clean. I'm not making a super
complicated at it. There's very few timelines here. For example, you could be right up on my patient
and crop out to the right on my face and
crop out to the full area. I think I wanted myself to be cropped in when I
was saying that. So like this and then I'll
crop out, for example, you could be right
up on my patient and crop out to the
whole area where I go where I kinda do this
weird motion to crop out. That's where we
want to crop out. So I will make that back to
a 100 instead of 2000% 0. For example, you could be okay. And then another thing I do here is we're taking that
out to crop in, crop out for it. No. We don't want no Arrange tool and just drag and delete
thirds to crop in, crop out for example, you could be right up
on my face and in, for example, KCL, my
eyes drop right there. I don't like that. So I'm going to change it from my L cut to Jacob and crop out, for example, you could be
a little smoother crop in, crop out for example,
you could be. So now I need to
get this clip crop the same as this clip sins
and moved it to the top. So I'm just gonna
command copy it and I'm going to go
Command Shift V. It's gonna be able
to paste all of the cropping and we're good
to go out, for example, you could be right up
on my face and then try to look for areas
like it is now. And that can produce injury or they're
getting really serious. The audience was down. That can produce entry. Now pauses aren't
necessarily bad. I'm taking most of them out here where it's not important. I think there's a pause up
here that I might leave in pretty intrigued or they're
getting really serious. And the audience was down. Here. I said to him,
The audience slows down where I met and
the speaker slows down. So let's see if I can make
sense of this and take that out of the audience flows down. I don't know what's
going to happen next. Or they're getting
really serious. If you're getting really serious and I don't know what's
going to happen next, I think still makes
enough sense. Or if you're getting
really serious, what's going to happen next? But you can use the rule of thirds and zooms to make
it more interesting. So you got nine really in that can produce injury or they're
getting really serious. I think I wanted to
use a zoom here, so I'm going to transform or do a compound clip on
those two clips. And then we'll
come over here to, you could do this and transform. I'm gonna go and
do crop Ken Burns. It's going to be faster to do it and I am going to zoom in. It's used them indirectly,
it'll be more serious. It will zoom in directly to me. Injury or they're
getting really serious. And I don't know what's
going to happen next. But you can use the rule of thirds and zooms to make
it more interesting. So even there, like
I'm getting kind of serious or I'm trying
to pretend that I am. So something I
might want to do is go pluck a song
from the interwebs. That might be something a
little bit serious, I guess. Maybe sentimental, maybe sad, by the way I was talking. So let's go see
what we can find. Randoop, sad, smooth. Hey go a dramatic piano. Will download that. And we will drag and drop
it right onto our timeline. Boom. So now with my full Ken
Burns area like it is now, and that can produce injury or if you're
getting really serious. And I don't know what's
going to happen next. But you can use the rule of thirds and zooms to make
it more interesting. So I really don't like how I feel in that part. I think
we're going to make work. But I could've explained
that much better. Crop out to the whole
area like it is now. And that can produce intrigue or they're
getting really serious. And I don't know what's
going to happen next. But you can use the rule of thirds and zooms to make
it more interesting. So you got nine really
quick ways to crop it. So you got nine really
quick ways to crop it. I could be on the left. Okay, so now I'm gonna go
through all the nine ways. So we need to grab these
grid lines and show you visually as
well the nine ways. That way it's more interesting
and appealing to watch. Because I don't
have enough room. I shouldn't move the
camera away from me more. I don't have very
much room here. I'm going to have
to zoom in to crop and transform myself
to specific spots. See, I'm running out of room. In the center of the
screen. Crop it. I could be on the
left of the screen, right of the screen,
in the center of the screen, I could be why? I could be in the middle. I could be extremely zoomed in. Okay. See if we can give some
examples of all of those with the grid lines on
the left of the screen, right and left of this. So I don't think that
freeze-frame looked good. A lot of this is trial. And then when it doesn't
look good, just correct it. I could be on the left of the screen, right of the screen. So let's drag this down a little bit so it's more consistent
with the other one. Central center of the screen. Zoom in slightly moved to the center of the
screen, I get b y. On this one that says,
why is where I'm going to take this wide clip
and put it over top. And I move the camera around in the filming
for different things. So that's why I could
be in the middle. I can be extremely quick. There we go. Why? I could be in the attack, could be in the middle. So I'm matching the film. A matching the film with me, edit the edit with the words, I guess, ways to crop it. I could be on the
left of the screen, right of the screen, the center of the screen I could be why? I could be in the middle. I could be extremely zoomed in, may be extended or
I could be extreme. Please zoom. Okay, So I think I want
these to be the same. The new command copy
command Shift and B paste the attributes zoomed in and
then extremely zoomed in. Let's go to like what
What do you say? 400? Secondary. Terrible. Yeah. Let's bring that down
just a little to like. That's plenty for
this example. 200. I could be on the
left of the screen, right of the screen, that center of the screen I could be why? I could be in the middle. I could be extremely zoomed in nine different camera
angles when there we go. So that's a little sequence. How I would edit that make
it look so much better, more interesting than
what originally was. And look, we're
only Thirty-seven seconds and let's keep going. Now you have nine
different camera angles with one camera to choose from. On top of that, you
can do it slow zoo, or you can do a slow
zoo or slow zoom out. Okay, So on top. So I sat on top of
that you could do as well as Zoom slow zoom out. We'll hit the keyframe right
there where we want to start at the top that
you can do a slow x2. And so we'll go to 125 and then move two
key frames forward. And we'll add another
keyframe or slow zoom out. That adds to slow zoom in, zoom out. We'll go back to 100%. See how that works angles with
one camera to choose from. On top of that, you can do
a slow zoo or a slow zoom out that adds two more to
each of those nine areas. A lot of ways to edit. So I'm going to leave that
in there, right there. And I'm going to use this pause to zoom into
my face to add some more, little more spice,
little more flair to emphasize my pause of
what I'm thinking. And so we're going to
zoom in a fair amount here to Cramer
thinking nine areas. A lot of ways to edit. Now if you saw how
that kind of wavered, it's because these keyframes are on smooth instead
of on linear. Change this to linear
each of those nine areas. But straighten lot of ways to edit these methods I
just talked about. In this scenario, you
don't wanna do it. Jake had organelle
cut because I'm pausing after I'm talking
and it doesn't make sense. But if I'm, if I'm in
mid-sentence and I have to cut two sentences together
to make them make sense. That's where it works
out much better. So here you can see
how the pause is actually going to work
in this scenario. A one-on-one, a, j are
o cut this nine areas. A lot of ways to edit these methods I just talked
about and showed you right here are best for not necessarily
professional videos, but for outside that. I like to take that amount
right there on the scenario. Best for not necessarily
professional videos, you right here are best for not necessarily
professional video. Okay, so one of the
methods I like to do is start cropped in just maybe like 15% and then
it's going to pop out. Now these methods I
just talked about and showed you right
here are best for, not necessarily
professional, are best for. Move that got posted. It sounds better for not necessarily professional
videos, but for applied. That's what they're
good for all videos. But we say using the rule of thirds and Ken Burns is good for all sorts of video. So I just edited that clip and I wanted to
read you the whole code. Not necessarily
professional videos, but using the rule
of thirds and can burn through right here
are best for areas. A lot of ways to edit
using the rule of thirds. And Ken Burns has
been also committees. I use them in all
types of videos. But there's another form of probably doesn't even the video, but it wasn't sigma is used
to get as many as you want. Okay, so let's do
the rehab video, but a one-sentence takeaway. So right here, we're going
to use drop the opacity. Control T will grab the title. Go pick the font that
I've been using for this specific series of videos. What I say, use cropping, use Ken Burns to get usual thirds comma crop. Rabin. Ken Burns probably use Ken Burns to get
as many angles as. Now. Let's get her spelling right. To get as many
angles as you can. Okay, So the worst, my worst part of
editing is my spelling. My spelling. I think that's part
of my creativity, but I have dyslexia
fairly severely. So I think it helps
me think creatively, but at the same time, when I use words,
I normally have to go use a spell
checker is usable. Thirds, use cropping, used Ken Burns to get as many
angles as you need. As you need, as it
makes more sense. Doesn't can, because you don't need all the angles you can get. You just want the ones
that add to the story. Alright, let's go back
to the beginning. That was only a minute
and 12 second video, and we've been editing
for 24 minutes. Next tip is to use
rule of third. So it can be on the side, I can be cropped to the center. Use the rule of thirds
to crop in, crop out. For example, you could be
right up on my patient and for areas like it is now, that can produce injury or they're getting
really serious. And I don't know what's
going to happen next. But you can see over here, there's some different
effects you could lay on top of the romantic effect. I have no clue what
it looks like, but let's look, drop it on
here, see what it looks like. I'm really serious. Oh, it it blurs out all the background and makes me in-focus that could
actually work. So if I'm come here and I keyframe this and
make the amount of 0. And I don't know what's
going to happen. And then as I get more serious, keyframe it up to a 100%. Good luck, terrible,
let's try it. Or if you're getting
really serious, I don't know what's
going to happen next. Yeah, it's kinda dreamy. That's actually kind of cool. Zooms to make them
more interesting. So you got nine really quick. So that's something that
could be like edgy, That could be done, that could be considered like
What are you doing? But I like to go out and
trying new things sometimes, more often than not been
doing nothing at all. They're getting really serious. I don't know what's
going to happen next. So if I were to prepare
better on this specific part, I would've had a good, serious, sad story or something to put in there about a dog dying
or something terrible. And that would have enhanced the video because my storytelling
would have been better. I'm trying to fix bad storytelling with
good editing right now. Just keep that in mind to
make it more interesting. So you got nine really
quick ways to crop it. I could be on the
left of the screen, right of the screen, the center of the screen I could be why? I could be in the middle, but can be extremely zoomed in. Now you have nine
different camera angles with one camera to choose from. On top of that, you can do
a slow zoo or a slow zoom out that adds two more to
each of those nine areas. A lot of ways to edit
using the rule of thirds. And Ken Burns is good for
all sorts of videos I use in all types of videos. But there's another
form of cropping that you don't really want
to use it all videos, that's gonna be in
the next video. But One sentence takeaway
is usable thirds, use cropping, use Ken Burns to get as many angles as you need. So in less than 30 minutes, That's how I would edit
one of these videos and some of the
techniques I use. I hope that was useful to you. Stick around if you
want some more classes or courses or videos because I plan on making some more and going into
more of the techniques. I do have a couple of others on commercial making
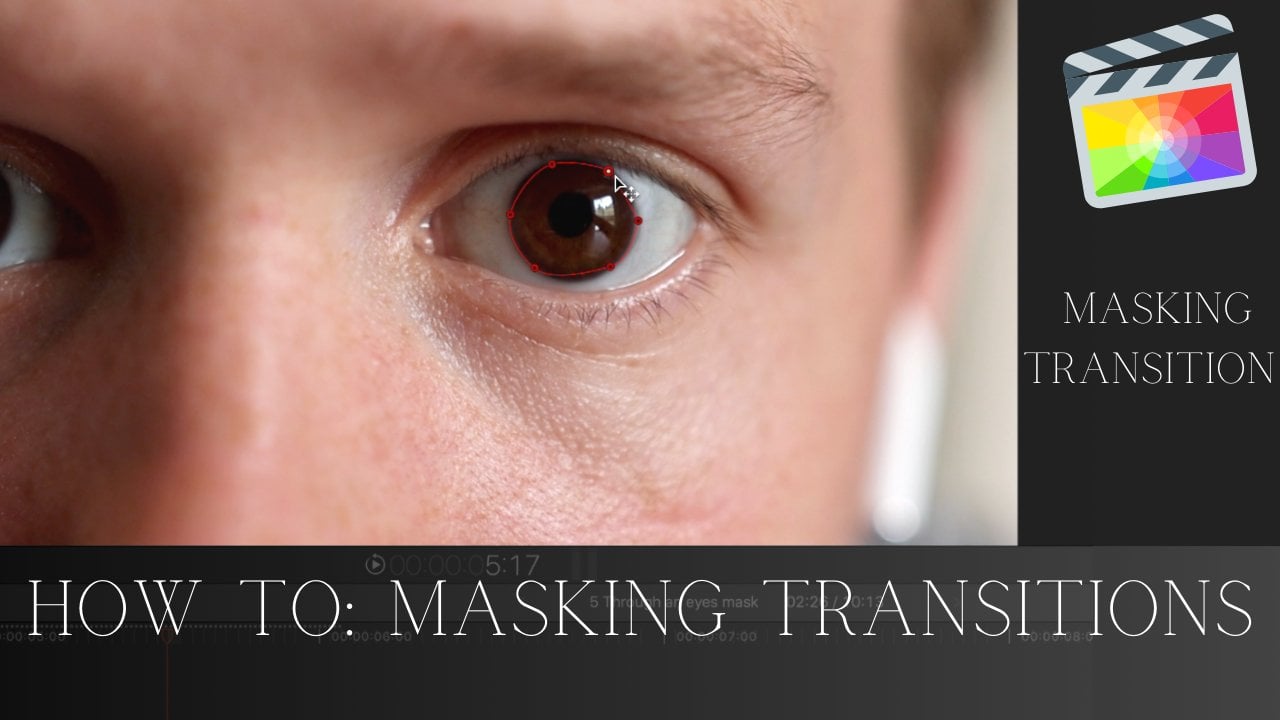
for small businesses. I have some on masking
tutorial and Final Cut Pro, and how to gain audience retention
and make it even greater than it is now. So I hope to see you guys there and otherwise
have a great day.
 Kramer Ammons, If you think you can your right!