Transcripts
1. 1. Class Introduction: Hi, I'm Shane, and
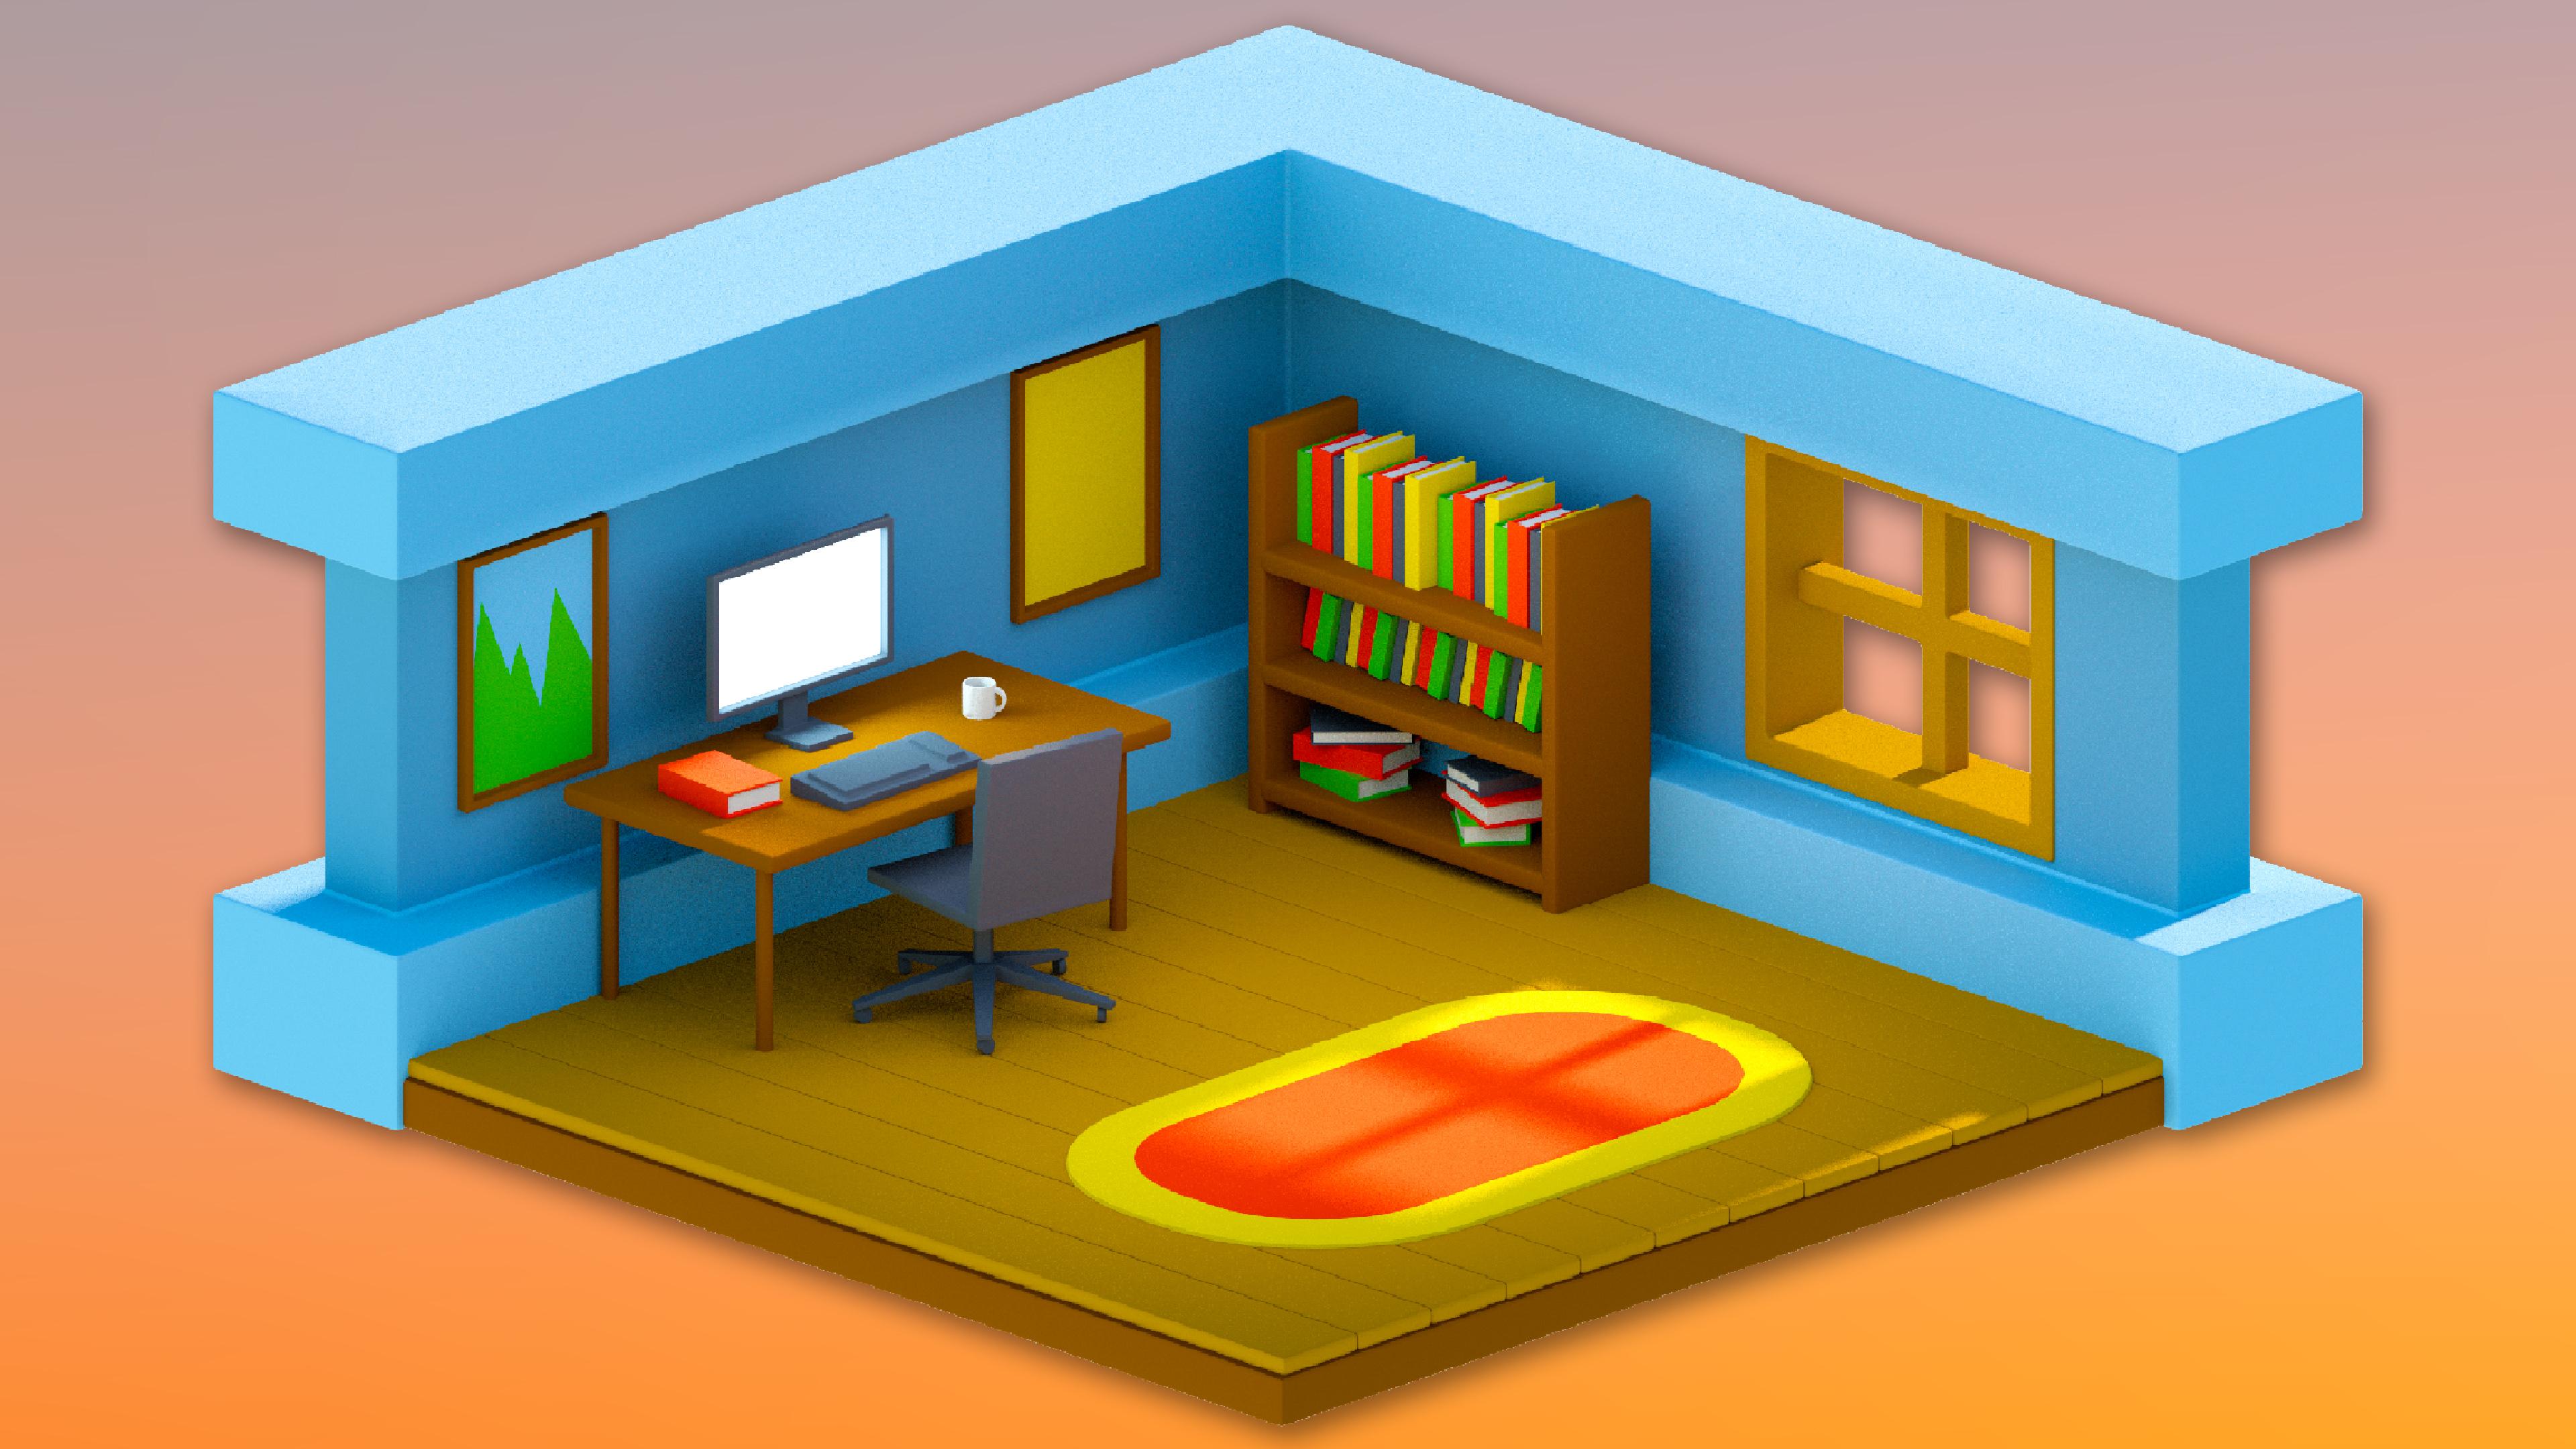
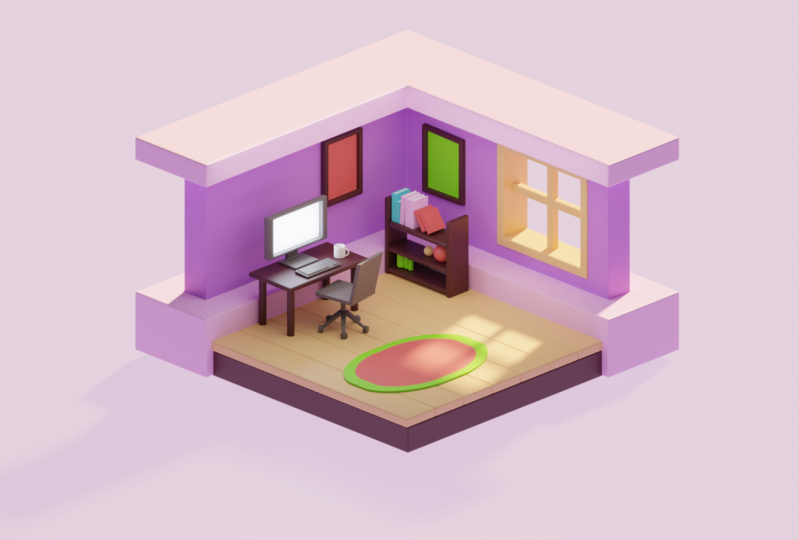
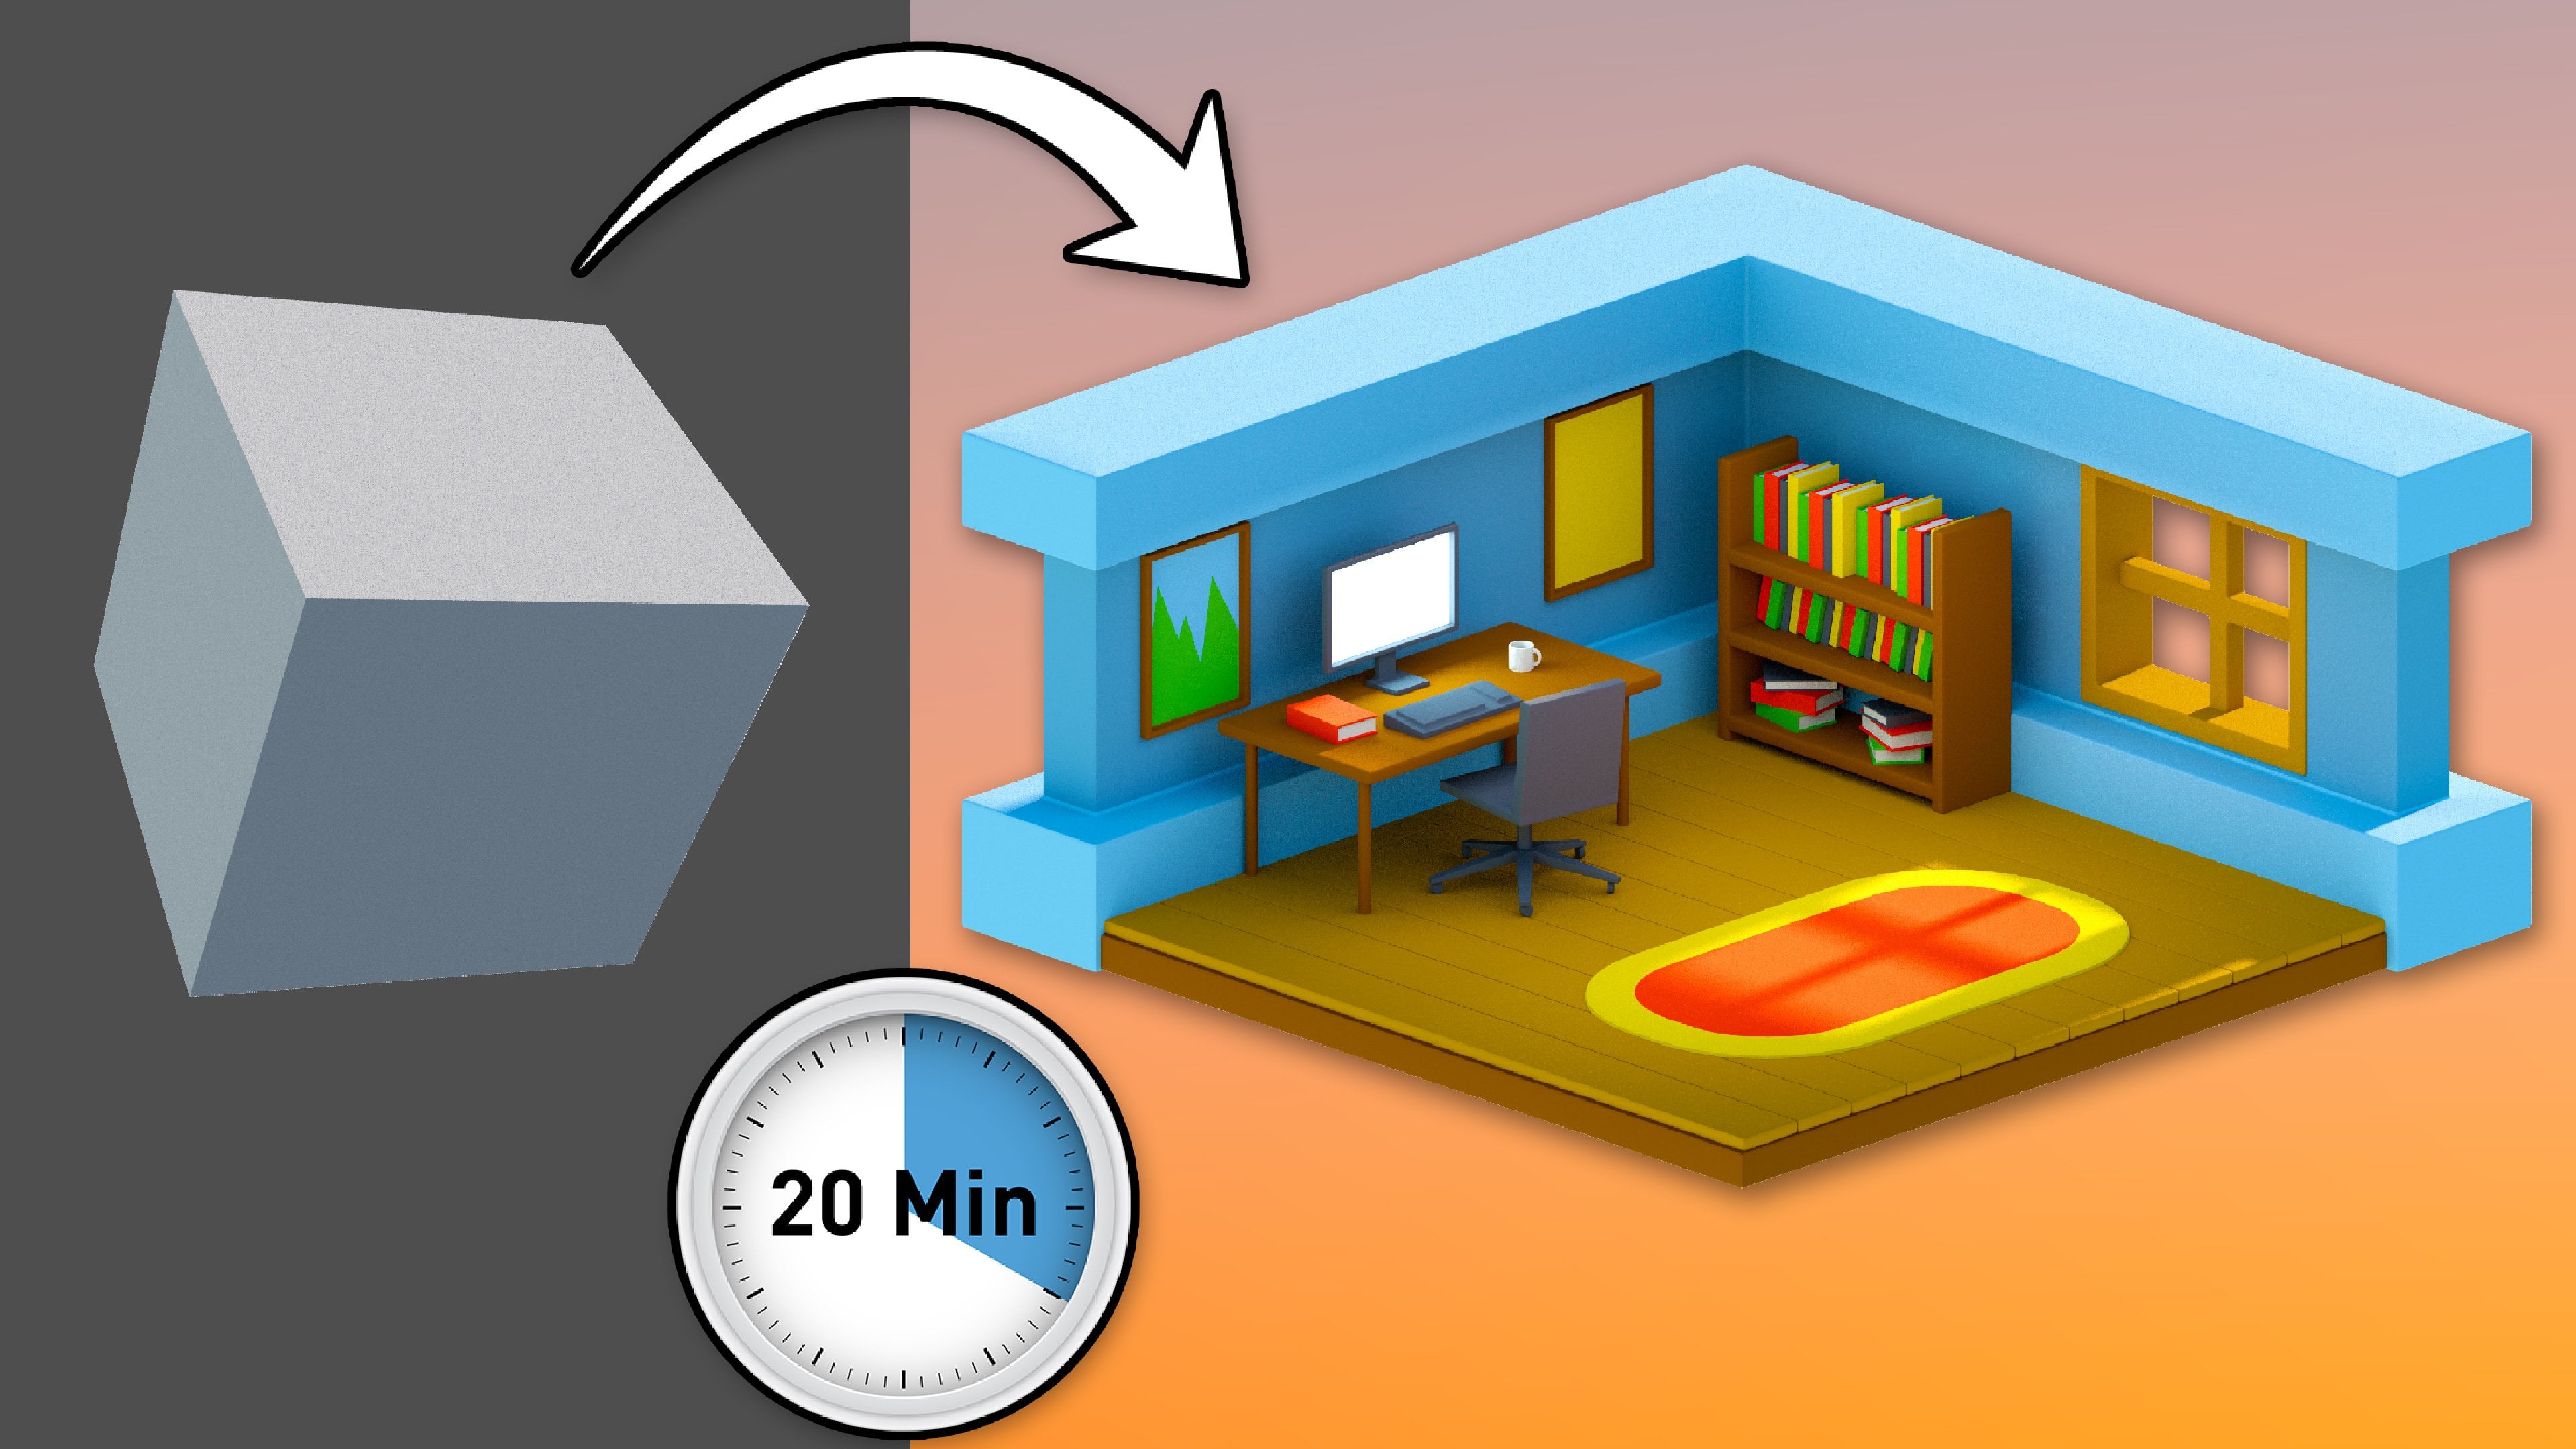
in this course, I'll get you up and running in Blender in under 30 minutes. This quick overview of blender, you will learn everything
you need to know to go from this to this, including the interface,
navigation important tools, modelling, creating materials,
lighting, and rendering. Blender is very high in 3D creation software
used in the movies, severe effects in game
development sectors. And if you're serious about
learning 3D content creation, but I've never used Blender or any other 3D package
for that matter. Then this is the class for you. I have been teaching 3D
out using a range of software to students
for almost 15 years. I'm a qualified
teacher at an apple. All of my experience
with students into the design of all of my courses. The first time something
new is introduced, our hold your hand through
the whole process. And that's the same
skills of reinforced further through the exercise, I'll take some of
that support a way to allow you to
move independently, put your learning into practice. I also believe that
educational content doesn't have to be
boring and dry. So hopefully you'll
have a little fun too. You don't need any resources to follow along
with this course, although you will need
access to Blender, are linked to blend during
the course description if you haven't got
it downloaded yet. Thanks for checking out
my course and I look forward to seeing you
in the next step.
2. 2. Blender Interface: Okay, So this is what blender looks like
when you first open it up and you can
just click anywhere to get rid of the
welcome splash screen. What you need to know
right away is that the interface is split
into three main parts. Will appear at the top,
you have the top bar, which includes your
standard menus, as well as allowing
you to choose and switch between workspaces. Here's the next part
of the interface, and this whole
section is made up of rectangles known as areas, and include the
3D Viewport here, the outliner over here, and the properties
area down below that. We also have the timeline
along the bottom, just here. The final part of the
interface is down here at the bottom and is
called the status bar. This is really useful as it
gives contextual information such as keyboard
shortcuts and warnings. Also worth noting that
there are a couple of other important
interface elements within the viewport area. Here's the toolbar,
which contains all of the basic tools you'll need
to manipulate your 3D shapes. And just above that
we have the header, which contains loads of important menus,
operations, and settings. We'll be using this quite
a lot as we go along.
3. 3. Creating your first shape: All right, To then, now that you know your way
around the blender, Let's get cracking on
creating your first 3D shape. Before we can do that though, every new scene in Blender
comes with a cube, a light, and a camera. We don't want these,
so let's delete them. We'll start by
going to select in the viewports header and
then clicking on all. Now that everything is selected, you can simply press
Delete on your keyboard. And as if by magic, we have a nice clean scene. Now we need a new cube, which will get by going into
the Add menu and then mesh, and then click on Cuba. Wow, would you look at that? We now have a cube. This new cube is going
to be the base VOC, and it's not really the
right shape for that. So we will resize it by
finding scales at in the properties area
and then changing it from one to 0.1, like so. Whilst we're in the
properties area, you should also change the
name of the cube to base by simply clicking here
and then typing base. When you press Enter,
you'll also notice that the name in the outliner
has also changed. And you have now created your
first 3D shape in Blender. You're doing great. Let's keep it going.
4. 4. Navigating 3D space in Blender: Now I want to reposition
the base in the viewport. So we'll take a look
at how you control the camera to navigate
your scene in blender, to get you a camera to
tumble or albeit the base, you can click and
drag on the gizmo in the top right to the
viewport like this. Or you can also
click and drag with your middle mouse button
to do the same thing. You can click on the
Hand icon to track the camera side-to-side
and up and down like this, all you can also hold
the Shift key and middle mouse button
to zoom the camera is simply click and drag on the magnifying glass icon like this. Or you can use the scroll
wheel on your mouse. Now using a combination of
these three camera controls, I will just position
the base like this.
5. 5. Create Floorboards using modifiers: Still with me. Good, because now it's time
to kick it up a notch. Now we'll learn about
modifiers by creating some flaw bonds will
create end of the cube, but this time we'll
use the Shift and a keyboard shortcut and then go to Mesh and click on Cuba. It needs to be
moved up a little. So you need to select your move tool from
the toolbar like this, and then click and drag on the blue arrow to move
it up on the z-axis. I'll just move it
up about this far. Next we need to resize it and instead of typing the
size of this time, we will use the scale tool
and just kind of eyeball it. So I'll first scale
on these axis. And you'll see I
need to click and drag a couple of times
to achieve this. About this thickness looks good. Next I'll click on the
green manipulated to scale on the y-axis until
it's about the shape. Now I can change to the
Move tool and move it down. So it's, it's just
on top of the base. Then I'll move it over
on the y-axis like this. Perfect. Now I'll just rename this
to flow about because naming everything properly is
just the right thing to do. Now we need to apply the
change we have made to the scale so that the
next steps work properly. And we will do that by
clicking on object to appear and then going to
apply and then scale. Nice. Now we can hit this
with a modifier. To do that, we need to change from the object properties tab, which we are currently on to the modifier properties tab by clicking on the spanner
icon just here. Try to modify it. Click on the Add Modifier, drop down like
this, and I'm going to add a bevel modifier. You should be able to
save that the edges of the Flow bot of
now being beveled. You can then change the
properties of the bevel like the amount which I'll
just take down a little, and the number of segments
which I'll increase to two. And actually want
to take the amount right down to 0.1 like this. Yeah, that's pretty good. Now we want to cover the
whole base with floorboards, which we can do with
another modifier. So I'll just click
here to minimize the bevel properties and then click on Add Modifier again. This time I'm going to
choose the array modifier. It creates another floor board, but for me it's going
in the wrong direction. So I will change factor X in the properties to 0 and then
increase factor y to one. That's better. Now, I'll just
increase the account until the Flow bots
cover the whole base. It looks like six. We'll do it last, the flow of Boston then, but now we've learned
about the bevel modifier. We can go back and
add one to the base. Let's select it will set the
scale this time by pressing control and a to bring up the menu and then
choosing scale, we can now add a bevel modifier, set the amount to 0.01 and the
number of segments to two. Beautiful.
6. 6. Create the calls using extrusion: Next up we need to
create our walls. For this, we'll
create a new cube and move it up a little. Then what we size
it by clicking on the little blue squat
on the scale tool, manipulate it so that it
looks something like this. Skeletal down a little, move it up so it sits
on the floor and then move it over to the
far corner of the room. And I'm actually going
to just move it down. And let's also that it's
a bit below the floor. Then we can rename
this mesh two walls. Now, we need to edit
this mesh properly. And to do this, we can
change from object mode up here in the Viewport
header to edit mode. Now you see we have
a load more tools in the toolbar on the walls,
mesh changes color. The mesh is currently
in vertex select mode. But for this step we need to
change to face select mode, which can do by clicking
this icon up here. Now I'll just click
in some blank space in the viewport to
de-select everything. And now with my left
mouse button to click on this face to select it, then I will hold Shift
on my keyboard and left-click on this other face
to add it to my selection. Now we can turn this into our walls by extruding
these faces. To do this, click and
hold on this icon here and choose
Extrude individual. Now click on this big
yellow handle and drag up until the walls roughly
match the size of the floor. Awesome. Now we'll make the walls more interesting by adding
a little more detail, the top and bottom. For this, we will
need to turn on the loop cut tool
by clicking here, and then click on
the walls to add the edge loop just here. Now click on this icon
for the Bevel tool and click and drag on the handle to bevel the edge loop like this. Now use the move
tool to move a new faces up to just about here. Now we need to select the faces at the top and
bottom of the walls. So first moved to
face select mode, and now you Shift
and left-click to select all of the faces
like I'm doing here. You'll need to rotate
your camera as you go. Once you've got
them all selected, clicking hold on the
extrude tool and this time choose extrude
along normals. Now just click on the handle to extrude the faces out like this. One thing to look out for if we just looked at the
top of the mesh, is that the spacing of the new faces isn't consistent
all the way around. We can fix that by clicking
down here and then clicking offset
even much better. Okay, We're nearly
done with this step. We just need to
add a bevel first, we need to put the mesh
back into object mode, then bring up the
apply menu with controlling a and
apply the scale. Now open the
modifier properties, click Add Modifier
and choose Bevel. Now just the amount down to 0.01 and set the
segments to to Maxwell. Now you might want to just
adjust the position of the walls to take into account the new detail at the bottom. Once you're happy with
it, it's time to move on.
7. 7. Create window with inset, deleting faces and bridging edges: Now let's add a window to allow
some light into the room. Will start by putting the
walls into edit mode, making sure face
selected is enabled. And then select this
face on the inside and this corresponding
face on the outside. Using the inset tool
by clicking over here, we can then insert the face says that we'll use to
construct the window from. Then I'll move to the
Scale tool and scale on the x-axis to make the
shape a little more square. And I'll just make
it a little bigger to then using the Move tool, I'll move the phases
across like this. And then finally, remove
these faces by hitting the delete key and choosing faces from
the menu that appears. Next, we can get a
little closer to the window opening and then change to edge selection mode. To bridge the gap,
we need to select the two edge loops around the window opening to
get the first one, hold Alt on the keyboard
and left-click on one of the edges on the outside
of the opening like this, you'll notice all four of
the edges are selected, will do the same
for all the edges on the inside of the room. But this time, as
well as holding Alt, we will also have to hold
Shift to add to the selection. Then we can click like this. Now to bridge the gap, click on edge in
the Header Menu and click on bridge edge loops. And now we have our
window opening. To make these little better, we'll add a window frame with
these new faces selected, go to Mesh and then
select Duplicate. If you move your mouse around, you'll see that there are
some new faces stuck to it. Just right-click to stop
them moving around. Then you can go to Mesh Separate selection to make
them a new separate mesh. Now we can walk into
object mode and make sure we have
only the new mesh selected and then go to Object Properties and
rename it to window frame. If I try to move
the window frame, you'll see that the gizmo isn't in the center
of the shape. So to correct that,
click on Object, set origin and then
set origin to center of mass service. Last Matter. Now would also be a good time to set the scale for this mesh. Now we can do a little
more work on this. We'll start by scaling the frame to be within
the window opening a little will also scale it so that it protrudes a bit
on the front and back. Now at a solidify modifier and change the thickness
to something like 0.09. That's thick enough but the
bevel doesn't look right. To fix that click and drag
on the handle here to apply the bevel modifier
after the solidify. Beautiful. I'm actually going to go a little thicker with a solidify. Yeah, no, it's nice. Now for one final
detail with the window, we'll create a separator, start with a new queue, name it separator,
scale it right down until it's nice
and small like this, and then move it
out of the flaw. Then move it so
that it is pretty central in the window opening. Now, I'll focus my camera
on this new cube by clicking View and
then frame selected. Then I'll just zoom out a touch. To finish this piece,
let's move into Edit Mode. Choose face selection. All of the faces are
already selected for me, so I'll just hold shift and de-select the front
and back faces, leaving the other four selected. Now I can click on the extrude tool, choose
Extrude individual, and now click on the
handle and drag until the separate intersects
with the frame like this. To complete this step, just put it back
into object mode, apply the scale at the bevel modifier and make sure you're happy
with the position. When I went to, let us move on to creating some furniture.
8. 8. Create a bookcase & desk using duplication: Now that you've got a good
handle of the basics, we'll be able to
speed up a little and fill this room up
with cool stuff. Let's start with a bookcase. Make a new cube, move it up, scale it to a good
size for a shelf, and then move it so that
it's just above the floor. Now click on Object,
duplicate objects, so duplicate it and right-click
to cancel the movement. Move it up a bit to make another shelf and
then duplicate again. But this time I'll use shift in DEI Council the movement with right-click and
then move up again. Now select the middle shelf, duplicate it, and then
select the rotate tool. If you click and drag on
one of them manipulators, it will rotate
freely on that axis, like you can see me doing here. I want to rotate this
exactly 90 degrees though. I will hold the Control Kate, when I rotate so that it moves
in five degree increments. Once they saw bright move it over to the side of the shelves like this and adjust the height so that it
sits on the ground. Now you can simply duplicate
it over to the other side. It stands out bookcases made
up of five separate meshes, but I want it to
all be one mesh. To do that we can join them. So start by selecting
the sides and all of the shelves and then
go to Object and join. They are now all
acting as one mesh. Let's rename it to bookcase. Apply the scale and then
add a bevel modifier. Awesome. Now you can
position it in the room. Now for the desk, make a cube, move up and scale up to
be a nice desktop size. Apply the scale and
add a bevel modifier. Just going to move
mine up a little so that it's ready for
the legs to be valid. Create a cylinder for the light. Adjust the scale and get it to the right height like this. You can position it on
one corner of the desk. Once it's in place at duplicates it over
to the other corner, then you can select
both legs and duplicate them over to the
other side of the desk. Okay, now that's done. You'll want to select all five pieces and press Control and J to join them all
into one mesh. Then you can rename
it to desk and finally get it
positioned in your room. Well done, you would
clearly bond for this. Let's keep things
rolling by adding some more details to the room.
9. 9. Create a picture frame, a monitor and a rug with more advanced extrusion: Let's make a star on
the picture frame. Then we'll begin by
selecting the walls, move into edit mode and
then selecting this face. Then we'll duplicate it and separate it from the
rest of the mesh. Move into object mode, makes sure all of
the new mesh is selected and then
sent to the origin by right-clicking and choosing set origin to center of mass. Now you can scale it
to a good size for painting and move it into place. I'll just apply the scale
and then move to edit mode. In Face Selection
Mode, select the face, press E to extrude and then move the mouse to get
the thickness you want, and then left-click to apply it. Now press I to insert the face, move the mouse until
it looks like this, and then left-click to confirm, press a again to
extrude and then move the face N and
clicked confirm, just like this, perfect, you now have a picture frame. Let's stick it into object
mode and rename it to frame. Next, we're going to make a
monitor to go on the desk. The picture frame is actually a perfect starting
point for this. So we'll start by duplicating the picture frame
and then we can move it over him a little and
then rename it to monitor. Then I'll rotate it 90 degrees, move into the center of
the room so that I can see all around the mesh and
then adjust the scalar, touch it so that it looks like
a 16 by nine aspect ratio. I'll just scale it
down a bit as well. Now let's move
round the back and start turning this
into our monitor. Will move to edit mode and
select the face on the back, incident the face like this, and then use the scale
tool to square it off and then move the face
down to about here. Then we can extrude
the face out like this and then select the new face
we've created on the bottom. Extrude this down and
then do one mole, it'll extrude down like this. Now you can select these two
little faces on the sides. Just pressing E won't
work this time. So I'll change to extrude along normal is over
here in the extrude tool, and now I can extrude them out. Finally, slight
these phases along the front and extrude them
out to create the base. Now we can move back into
object mode and apply the scale and set the origin
to the center of the mesh. Lastly, for the monitor, it's time to position
it on the desk. Next one, Let's do the rope. We need a new cube,
name it rogue, make it a decent work size and puts it in a good
workplace like this. Then apply the scale, move to edit mode and make sure you are on edge selection. Slightly edges on each
of the four corners like this and hit Control
and Bei to bevel. Move the mouse to preview the bevel and then
left-click to confirm. The settings for the bevel
will appear down here. Let's edit them,
increase the segments. Experiment with adjusting
the width and maybe try changing the shape value
to once you're happy, move to face selection and
select this big one on top. At an insect like this. This is how we're going to apply different colors to
the rogue later. To finish it off, move
to object mode at the bevel modifier and make sure you're happy
with the position. Next, we'll create a
chat to go without desk.
10. 10. Create a chair with some cool extrusion tricks: The trickiest part of
the chair is the base, but I have a cool
trick to make it easy. First we need a cylinder, then we need to change
the vertices to five and then scale it down so it's
nice and small like this. Bring it up above the floor and then take some of
the high off of E2. Now we need to be an edit
mode and have all of the faces selected except the
ones on the top and bottom. Now extrude
individual like this. Now I want to taper
the ends off. But if I tried to just
use the scale tool, it only gives this effect, which isn't what I want to
make it work the way I want. I'll go up here to transform pivot point and choose
individual origins. Now when I scale them,
they stay in place. I'll just scale them like this and then move them
down a little too. Now we need this
face on top in sets. It'll, it'll then extrude
it up. That's looking good. So now we can move back into object mode and apply the scale. Now for the seat will add a new cube scale and
move it like this, and then move into edit mode, select the face on the back
and extrude it out a little. Then we can get this new face
on top and extrude the top. Now I'll just move it back a touch to make the shape
looks a little better. Then I can move to object mode, apply the scale and just move it forward so it lines
up a little better. Now to finish this off,
we need some wheels, creates a cylinder, increase
the vertices to 12, rotating 90 degrees,
and then use the scale and move tools
to make a wheel like this. Once you're happy
with your whale, duplicated four times
to add the others. Once they've added,
apply the scale, select all of them meshes, join them and rename to chair. Then you can add a bevel
modifier if you'd like. I'll finish us off by just getting the scalar
position, right? Wonderful. Okay, We're almost done
with the modelling now. Just a few more details to add.
11. 11. Final modelling touches - keyboard, book & mug: Okay, let's start with creating a simple
keyboard for our PC. Select the desk and
go to Edit Mode. Select the top face, duplicate it, and then
separate it from the desk. Go back into object mode
and select the new mesh, and then delete the
bevel modifier, rename it to keyboard night and scale it into a good size
for a keyboard and move it into roughly the
correct place are the solidify modifier and use this to add some
thickness to it. Now we want to make the effects
of this modify permanent. So click on this little
downward facing arrow here and choose Apply. Now head back into edit mode
and move to Edge Selection. Select this front edge here
and move it down a little. Next we'll use the loop
cut tool, enable it, and then click and drag
it to add an edge loop over to one side of the
keyboard like this. Now changed to face selection and select
the two top faces. Instead the faces like this. And then click individual
down here to make the faces have
individual insets. Now you can just
extrude the faces up a smidge and scale them down slightly and showing individual origins
is still enabled. Complete the keyboard by
going into object mode, applying this scale and
adding a bevel modifier. Nice warm. Next up we need a book
for the bookcase. Make a cube, scale it into a generally bookies shape and then make it
smaller like this. Apply the scale and
move into edit mode, select these faces and then
insert them like this. You'll also need to de-select
individual in the settings. I can extrude by going to the extrude tool and
changing it to extrude along normals and drag on
the handle to move the faces into represent
the pages of the book. That's the book
pretty much done. Put it back into object
mode and put it into place. Now let's create a
multiple on the desk. We'll start by
creating a cylinder, changed the vertices to 24, move it up and make it smaller. Now goes to edit mode and select the top face in
sets it like this, and then extrude it down, put it into object mode, and apply the scale. Now we need to handle, let's create one more cylinder, set the vertices to 16, and then we'll also change
the cap fill type to nothing. Then you can rotate it 90
degrees on the x-axis, scale it down, and move it up to be close to the
rest of the mug. Now, just further
refined the size and position so that it's about
right for a mock handle. Once you're happy, just move
it out to the side like this and make it a little thinner by scaling
on the y-axis. Perfect. Now apply the scale and
add a solidify modifier. Set the thickness to be
something like this, and then apply the modifier. Now go into edit mode and delete the faces on
this side of the shape. Once the face is
gone and put it into object mode and stick it on
the side of the Maglite list. Now you can join the two
pieces and the bevel modifier, rename it to milk and then
move and scale it into place. Now we'll just go
back and rename the book as I forgot
to do that earlier. That's the modelling done, well done for making it this far. Next up, we'll start
adding some color.
12. 12. Add coloured materials to your models: Okay, then he's now
time to make this look a little less Fifty
Shades of Grey by adding some
colored materials. We'll start by changing
the viewport shading to material preview by
clicking this icon up here. And then we'll set about adding some color to the floorboards. So start by selecting
them and then we'll click on this icon here to open
the material properties tab. Click the New button to
add a material slot and you can give it a name
by typing in this box, I'll call this one likes brown. Then click on this
little box here next to base color to set the
color for this material, I'll set it to a nice
light brown and thus you can see the floor boards
are now call it in. We can also have this material to other objects in the scene. Let's add it to the window
frame by selecting it. And then we can click
this little drop-down here to choose from all
the materials available. I'll select light brown and then the window frame will also
have the material applied. Let's add it to the
separator as well. Nice. Now let's create another new
material for the bookcase. Select the bookcase, click on the New button and rename
this one too dark brown, and then choose a nice
dark brown color for it. The bookcase now
looks much better, and we'll add this
one to the base mesh to now repeat this
process to create a dark gray material for
the chair monitor and keyboard and other white
material to the mug. Leave everything else
for now as we'll be adding multiple
materials to these, which is a slightly
different workflow. Once you've gotten
to this stage, you're ready to move on.
13. 13. Add more than one material to a 3D model: Okay, Now we need to
work on the objects that will have more than
one material applied. We'll start with the
rock, select it, click on the New button and
call the new material yellow. Then choose a shade of
yellow that you like. Now for the second material, pull the rug into edit mode and make sure Face
Selection is enabled. Select the big face in the center of the ROCC
and then click on this plus icon here to add
a second material slot. Nine-eighths click on this
Assign button here to assign the second material
slot to the selected face. And you can now click
on the New button. I make a new material, call it red, and then
choose a red that you like. Now you can go back
into object mode. Let's do that again
on the book to make sure you've got
the process down, select the book at a
new material slot, name it green, and
then set the cola. Now go into edit mode, select the three phases
that make up the pages. They're actually still
selected for me from earlier. Click the plus button
and then click Assign. Now I can click on
New and just use the white material you
created for the mug. Awesome stuff. All that's left to do
now is make an apply the following
materials to the rest of the room,
including the walls. Once you've got
everything, call it in, you'll be ready to move on and we'll get the lighting setup.
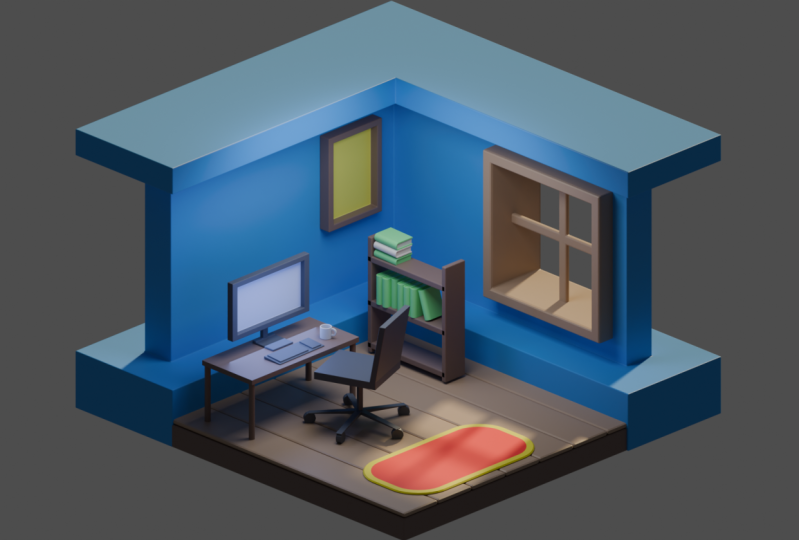
14. 14. Lighting your scene in Blender: This thing is currently stand. The lighting for our
room is very flat. We can do better than that. So let's set up some super
sexy lighting for us in. The first step is to change the viewport shading to render. Everything will go a bit dark, but that's good because we are gonna hit it with some light. So click on Add, go to
light and choose Sung. I want the sunlight to stream
in through the window. So I'll turn on the rotate tool and rotate the light around like this until I can
see it coming in through the window and giving
us this nice shadow. Yeah, that looks nice. Well now change some of the
properties of the light. And you might've noticed that the light properties
tab has rather helpfully opened up for us. Let's make this a
little stronger by changing the
intensity to ten. Then click on the
color to give it a warmer, yellowy orange tint. I also want a softer shadow so I will change the angle to fall. That's looking sexy were already the rest of the room
now it looks too dark, so we'll add another
light this time by pressing shift and a
to bring up the menu. And then we'll go to light
and choose area light. I need to move this
new lights OK, to see as effects. Then I'll scale it up to make sure it floods
the whole room. And then make it a
little brighter by setting the power to 15. Now I'll do for that one. Now let's add some
light coming from the monitor at another
area light, move it up, rotate it 90 degrees like this, and then scale and move
it into place just in front of the monitor
screen as I'm doing here. Once you're happy with
the size and position, change the power to
two so it isn't too bright and give it a
bit of a blue tint. For one final touch, you can duplicate it, rotate it around 180
degrees on the z-axis, and then move it
away from the motto a bit so that the light
doesn't hit the wall. And that will make the monitor
look at touch brighter. Now that's all seen,
looks suitably sexy. I think we can call
the Latinx a success. Let's move on to
setting up the camera.
15. 15. Adding and setting up a camera in Blender: Now we're getting close to
rendering out our final image. We need to get a camera setup. I want to have an
isometric or 2.5 D view. So I'll need to set up
our camera accordingly. First we need to add a camera by clicking on ads and then camera. Now we need to be able to
look through the camera. And to do that, you need
to click on View up here and then Align View, and then choose a line
active camera to view. Awesome. Now we need to adjust some settings and you
should be able to see that blend that has helpfully opened the camera
properties tab. The first thing we
need to do to get the isometric low ACE to change
the type to orthographic. Now you'll want to change the
orthographic scale so that the room just about
fills the render region. I'll also move the camera
to get it lined up, but you need to press G on the keyboard to do this and
then left-click one-year don't get the ethnographic scale and position dialed in and
then we can move them. Yeah, that looks good to me. Now to make sure it looks right, I will go to the Object
Properties tab and just adjust rotation of
the camera a little bit. I won't rotation x to be 66.6. I'll set rotation y to 0, and then I'll set
rotations at 245. That gives me the
look I want and make sure it's all
lined up nicely. Now, I'll just
press G once more. I move my mouse
until I'm happy with the framing and
left-click to confirm. Now just make sure I'm still happy with the
ethnographic scale. And yeah, I think we've
done all this stuff to do now is get this
bad boy rendered out.
16. 16. Rendering a scene in Blender: For the final part of the quick introduction to the
wonderful world of Blender, we will render out a
sexy nasa image of our beautiful room
that we've created. We'll start by going to the
rendering Properties tab, and then we'll change the
render from EV two cycles. The scene will start rendering with this higher-quality
renderer. Now to make this look
a little better, we can expand the column
management section and increase the exposure to make the colors brighter and more eye-catching. To stop the completed
image looking noisy, we also need to
enable denoising, which we can do by
scrolling back up, expanding the denoising
section and then enabling denoising for render
by checking this box. There are some options for this, but we'll stick with
the default NLM. Now we're ready to render. Click on Render from the top of the interface and choose
around the image. Blend will now begin rendering the final image using
the Cycles render. It might take a little
while to complete depending on how powerful
your hardware is. This image took about 34
seconds to complete for me. Once it's complete,
you can choose to save the rendered
image by clicking on image from within the
Blender Render Window and then choosing Save As. Now you can give it a name
I'm calling mine office. You can change the image
type if you'd like, but I'm going to
leave mine as a PNG. Then you can click on Save Image As and you don't print it
off and show it to you. I bet she sticks it
up on the fridge.
17. 17. Conclusion :): That's everything while going
for making it to the end. If you want to, you can add some more details like filling the bookshelf or adding
another painting. Or you can even create
some models of your own. This was only intended to be a quick introduction
to blend this. So if you feel like you want a more thorough and detailed
class to work through that, let me know and I'll see if
I can whip something up. If you enjoyed this course
and they found that useful, then I will be eternally grateful if you could leave
a review of the class. Is positive reviews like
yours that tell Skillshare, that are courses I'm creating a God that will make it easier for other
beginners to find them. Thanks so much for taking
my class and I really hope to see you in another
class in the future.
 Shane Whittington, 3D Artist, Educator & Entrepreneur